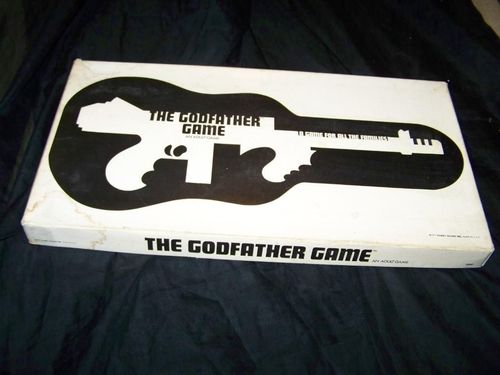
The Godfather Game
The Godfather Game Rulebook
Table of Contents
Table of Contents
The Object
The object of the game is to take control of a racket in as many of the Neighborhoods on the board as possible. Control of a racket in a Neighborhood increases a Player's monetary worth. When all Neighborhoods on the board are controlled, that Player with the highest total of money in cash and Racket Control Value wins the game.
Preparation
The game may be played by two, three, or four Players. The board is placed on a flat surface. Each Player has in front of him a bag of playing pieces (in the color of his choice) which will represent his rackets during the game.
The three decks of cards are shuffled and placed on the board in the designated areas.
One Player is selected as Banker, which he remains for the duration of the game. The Banker distributes $3,000 to each Player.
Equipment
- Four sets of playing pieces, each of a different color, representing units of the five rackets in the game.
- A playing board showing a map of Manhattan, divided into eight Neighborhoods.
- Three decks of cards: the playing deck, backed by a machine gun, and two other decks; the Breaks of the Game cards, GOOD and BAD.
- One RACKET CONTROL VALUE CARD.
- Playing money in $500, $100, $50 and $10 denominations.
- A pair of playing dice.
- A set of Racket Indicator Circles used to designate which racket has been chosen for each Neighborhood.
The Cards
The cards in the playing deck consist of:
MONEY CARDS — imprinted with numbers from 1 to 9, denoting money value in hundreds to be received from the Bank.
RACKET FIGURE CARDS — representing a given number of playing pieces in one of the five rackets: BOOKIES, BOOTLEGGERS, HI-JACKERS, LOAN SHARKS and STRONGARMS. The Player who draws a RACKET FIGURE CARD receives and positions immediately the number of pieces of the racket indicated.
BREAKS OF THE GAME CARDS — indicated by a question mark, requiring the Player who draws one to roll the dice; if he rolls an even number, he draws a card from the GOOD BREAK pack; if odd, from the BAD BREAK pack.
-
GOOD BREAK cards — The Player receives the amount of money or number of racket pieces indicated by the card.
-
BAD BREAK cards — The Player is penalized for the amount of money or number of racket pieces indicated. If he has no pieces on the board of the racket stipulated, that part of the penalty is void.
If a Player has insufficient funds in hand to pay the penalty indicated by the Bad Break card, he must remove certain of his racket pieces from their positions on the board. From the Bank he receives ½ their cost value, with which he may pay the penalty. This is the only situation in which previously positioned pieces may be converted to cash.
FINGERMAN CARDS — The Player who draws this card may remove any three of his opponents' pieces from the board (a total of three).
The Board
The board is divided into eight Neighborhoods. Each Neighborhood comprises a different number of positions.
To Start
Players roll the dice to see who will go first. The first Player then purchases from the Bank the right to position one, two, or three pieces of any one racket in any two Neighborhoods of his choosing (for instance: 2 BOOKIES in MIDTOWN, 3 LOAN SHARKS in HARLEM; Cost: $1,050). He thereby determines which racket will be played in those two territories for the duration of the game and places a Racket Indicator Circle in the circle color-coded to correspond to the Neighborhood he has entered. Neither he nor any other Player may position a playing piece of any other racket in those territories whose rackets have been determined.
Once positioned, a racket playing piece may not be moved or removed from the board, except:
- when eliminated by an opponent in the FIGHT FOR CONTROL;
- when converted to cash (½ cost value) to pay a BAD BREAK CARD penalty.
Value of Racket Pieces
In all Neighborhoods:
| Piece | Cost |
|---|---|
| a BOOKIE | $300 |
| a STRONGMAN | $250 |
| a BOOTLEGGER | $200 |
| a LOAN SHARK | $150 |
| a HIJACKER | $100 |
The first Player then draws one card from the playing deck but does not play the card until his next turn. He has then completed his turn.
The second Player may elect to fight the first for racket control in one or both of the Neighborhoods already chosen, or he may start other rackets in new Neighborhoods, always remembering to place a Racket Indicator Circle in the color-coded circle to remind Players that only one racket may be played in each territory.
The Play
After each Player has taken his first turn, four things happen each time a Player has his turn, in this order:
- He plays the card in his hand.
- He has the option to purchase playing pieces.
- He positions his pieces on the board.
- He draws a card from the playing deck, to be played at the beginning of his next turn.
Explanation:
A. Playing the card — if the card is a RACKET FIGURE card, the Player is required to place the playing piece(s) it denotes in any available Neighborhood he chooses, free of charge. A RACKET FIGURE card may not be converted to cash, and the racket pieces must be positioned immediately.
If the card is a MONEY card, he receives its value ($100 x the number on the card) in cash from the Bank.
If the card is a BREAKS OF THE GAME card, he must roll the dice. If he throws an even number, he draws a card from the GOOD BREAK deck; if odd, from the BAD BREAK deck, and follows instructions. He then places all cards at the bottom of their respective decks.
B. Purchasing playing pieces — the Player is now free to buy from the Bank as many racket pieces as he wishes to position this turn. The pieces bought must be positioned immediately.
C. Positioning pieces on the board — the pieces the Player has received or purchased he places strategically on unoccupied positions on the board, subject to the following restrictions: No Player may position a piece in a Neighborhood unless that Neighborhood is completely unplayed upon or the piece he wishes to play is in the same racket already being fought for there (see FIGHTING FOR CONTROL). He may play in as many Neighborhoods as he wishes, but he may position no more than three men in any one Neighborhood in a single turn.
D. He draws a card from the playing deck and holds it to begin his next turn, not permitting the other Players to see it.
Fighting for Control
Control of a racket in a Neighborhood occurs when a majority of its positions are occupied or controlled by one Player's pieces.
In the FIGHT FOR CONTROL of a Neighborhood, the object is to occupy as much territory (positions) with as few pieces as possible, and to prevent your opponent(s) from doing the same.
A Player occupies a position by placing a piece on it. He controls a position by encircling it, i.e., fencing it off with adjacent occupied positions. The fence may be of straight or diagonal lines, or both.
Likewise, a Player eliminates an opponent's positioned pieces by surrounding them with his own men; he fences off his opponent's pieces with his own adjacent occupied positions, and thus controls his opponent's men. If one Player's pieces can surround an opponent's piece or pieces, or enclose them against the border of a Neighborhood, the surrounded pieces are lost and are removed from the board.
N.B. The line of surrounding pieces must be continuous and contiguous to the surrounded pieces:
a. continuous: straight or diagonal line uninterrupted except by the border of a Neighborhood.
b. contiguous: the line formed by the surrounding pieces must be immediately adjacent (touching) the surrounded pieces.
Illustration (diagrams omitted): PLUS (+) surrounds MINUS (−). Three examples show a three-piece surround of minus pieces on a small grid, which are then removed from the board.
Illustration (diagram omitted): PLUS (+) surrounds MINUS (−) on a larger board. In each case, (−)'s pieces would be removed from the board. Though the situation can become much more complex, the principle remains the same.
Thus FIGHTING FOR CONTROL is a constant battle to surround an opponent's pieces, and to avoid having your own men surrounded. Obviously, care must be taken in the number of racket pieces purchased and their positioning on the board. Each lost piece means a total loss of the money invested to buy it and a setback to the Player's chances for Racket Control in that Neighborhood.
In FIGHTING FOR CONTROL, two further rules must be noted:
- One Player may surround 2 (or 3) separate opponents' pieces with his own, but 2 opponents may not together surround a Player's pieces. Surrounding pieces must be of the same color.
- No piece may be positioned in such a way that it will immediately be taken, unless such positioning is itself part of a taking move.
Illustration (diagrams omitted): (−) cannot move into (+)'s center except as part of a taking move. (−) plays three pieces to surround a (+) piece (1a), which is then removed from the board (1b). The move is legal, but unwise, since (+) can retaliate devastatingly.
Illustration (diagrams omitted): the retaliation to the move above is shown in a further set of diagrams, numbered 2, 2a and 2b, captioned: "(+) plays three pieces to surround three (−) pieces (2a), which are then removed from the board (2b).")
Since each Player will generally be involved in a FIGHT FOR CONTROL simultaneously in two or more Neighborhoods, he will not be able to meet every threat as it develops. Each must use his resources in cards and cash to forestall the most dangerous and attack the most vulnerable. The way in which each positions the pieces available to him through the fall of the cards is crucial in the FIGHT FOR CONTROL.
Control
A Player wins the FIGHT FOR CONTROL when his pieces occupy or control a majority (over ½) of the positions in a Neighborhood, and his majority control cannot be reduced by any of his opponents in their first move following his achievement. Thus each opponent must take one turn before CONTROL is conceded.
Once CONTROL is established, the Player receives credit for RACKET CONTROL in that Neighborhood (see RACKET CONTROL VALUE CARDS), to be added to his total at the end of the game. He also receives a cash BONUS (10% of RACKET CONTROL VALUE) on each of his next three turns.
Example: A Player achieves CONTROL of EXTORTION on the LOWER EAST SIDE. He thereby receives a credit of $6,800 and a cash BONUS of $680 (rounded off to $700) on his next three turns.
CONTROL must be definite, not merely implicit. A dominant position, however superior, is not sufficient for CONTROL until a majority of the positions are directly controlled and/or occupied.
Illustration: (+) does not yet have CONTROL. (Diagrams 1 and 2 omitted.)
In Diagram 1, though (+) occupies 11 positions and directly controls 3 others, his control of the 15th and 16th positions (majority) is merely implicit. If (−) can play 3 pieces on the X'ed positions, (+) will lose 2 pieces. If it is (+'s) turn, however, he can achieve CONTROL by playing 1 piece on any of the X'ed positions.
Diagram 2: though (+) occupies 15 positions and implicitly controls all the rest, an opponent could play 3 to surround any of the edge pieces.
Illustration: (+) does have CONTROL. (Diagrams omitted.)
In both Diagrams, (+) occupies or controls 16 of the Neighborhood's 30 positions, and (−) cannot affect this situation in one turn (3 pieces). (+) controls.
N.B. Another version of CONTROL may be played. As soon as a Player achieves implicit control of a majority of the positions in a Neighborhood, he may declare CONTROL. Unless his declaration of CONTROL is challenged by the play of one of his opponents on their next move, CONTROL is conceded to him.
If an opponent positions a piece or pieces within the territory declared controlled, then CONTROL is withheld and the declaring Player is penalized 1 racket piece in that Neighborhood.
If CONTROL is achieved by no Player in a Neighborhood, RACKET CONTROL VALUE is not assigned. All pieces remain positioned on the board as stalemated, and may not be redeemed for cash except as previously described.
Once CONTROL is established in a Neighborhood it is closed for the remainder of the game. All pieces except one of the controlling Player's are removed from the board. No more play can occur on it, and all cards pertaining to it are void. Play continues in the remaining Neighborhoods until CONTROL is established in each. Each Player then adds the values of the rackets he controls to his cash holdings.
The Player with the highest total wins the game, and becomes . . .
The Godfather
At several stages in its development THE GODFATHER GAME confronts each Player with an important decision. He must decide for himself an answer to each of the following questions.
- The first turn — Which rackets should be played, and in which Neighborhoods?
- After the first turn — Which and/or how many of the rackets on the board when controlled will make a sufficient combination to win? (see RACKET CONTROL VALUE CARD) What form should such a combination take? 2 high cost high value rackets? 3 medium rackets? A HI-LO combination?
- Should an attempt be made to CONTROL the smaller Neighborhoods first, in order to use the BONUS in the FIGHT FOR CONTROL of the larger, more expensive Neighborhoods?
- During play — Given a limited amount of cash each turn, how may it best be used? To defend or to attack? Should some cash be conserved to pay a possible BAD BREAK penalty, thus avoiding the loss of positioned pieces at ½ their cost value?
- How are the racket pieces to be positioned?
- When should a losing or tenuous position in the FIGHT FOR CONTROL be abandoned?
- When should racket pieces be positioned in a Neighborhood, not in an attempt to CONTROL, but rather to prevent an opponent from achieving CONTROL?
- General — Who is your most dangerous enemy?
Note: A shorter version of THE GODFATHER can be played by eliminating the desired number of Neighborhoods from competition, playing only on the remainder.
We will be glad to answer any questions concerning these rules.
Racket Control Value Card
The printed RACKET CONTROL VALUE CARD, a separate insert listed under Equipment. Its values and costs are part of the rules.
| Neighborhood | Bookmaking | Extortion | Bootlegging | Loan Sharking | Hijacking |
|---|---|---|---|---|---|
| Harlem | $10,000 | $8,000 | $6,400 | $5,000 | $3,200 |
| Wall Street | 9,000 | 7,200 | 5,800 | 4,500 | 2,800 |
| Lower East Side | 8,500 | 6,800 | 5,400 | 4,300 | 2,700 |
| Park West | 5,500 | 4,400 | 3,500 | 2,700 | 1,800 |
BONUS: When a Player achieves Racket Control in a Neighborhood, he receives 10% of its Racket Control Value in cash on each of his three next turns.
Cost per racket piece: Bookie $300 · Strongarm $250 · Bootlegger $200 · Loan Shark $150 · Hijacker $100