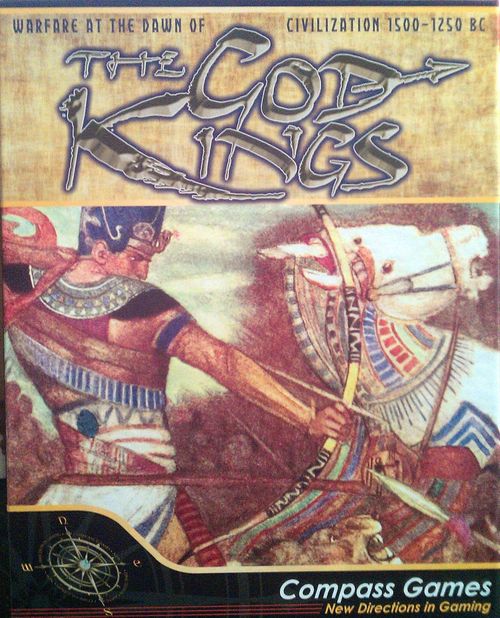
The God Kings: Warfare at the Dawn of Civilization, 1500 – 1260BC
The God Kings: Warfare at the Dawn of Civilization, 1500 – 1260BC Rulebook
Table of Contents
Table of Contents
- The Map
- The Player Mats
- 1.0 Introduction
- 2.0 Game Components
- 3.0 Glossary
- 4.0 Setting Up the Game
- 5.0 Sequence of Play
- 6.0 Turn Order & Initiative
- 7.0 Reinforcements
- 8.0 The Strategy Phase
- 9.0 Strategy Cards
- 10.0 Stacking & Subordination
- 11.0 Movement
- 12.0 Naval Movement
- 13.0 Reaction A: Interception
- 13.1 In General
- 13.2 When Can Interception Occur?
- 13.3 Interception Restrictions
- 13.4 Interception Procedure
- 13.5 Backing Up One Space
- 13.6 Multiple Interceptions
- 13.7 Subordinates and Interceptions
- 13.8 Interceptions and Walled-Cities
- 13.9 Interceptions and Overruns
- 13.10 Failed Interceptions and Avoid Battle
- 14.0 Reaction B: Avoid Battle & Pursuit
- 15.0 Battles
- 16.0 Retreats
- 17.0 Walled-Cities & Sieges
- 18.0 Political Control
- 19.0 Kings & Successors
- 20.0 Diplomacy & Neutrals
- 21.0 Barbarian Invasions
- 22.0 Revolts
- 23.0 From Mitanni to Assyria
- 24.0 Victory Phase
- 25.0 Displacement Summary
- Sequence of Play (Summary)
The Map
The movement of armies, the military battles, and the ebb and flow of the players' empires takes place on the God Kings map. The map is divided into spaces (the smaller shapes) and provinces (the larger areas, each containing multiple spaces). Lines between the spaces are connectors; players move their units along the connectors from one space to the next. Most lines are by land, but a few are over sea. Around the map, from left to right, are a series of information boxes. The Battle Table and Siege Table control battles and sieges as they occur. The Battle DRM table helps you keep track of your die-roll modifiers for battles. The Map Key tells you what each shape on the map represents. The Succession Chart determines when the Kings and their Successors enter (or may enter) the game. The Turn Order record lets you keep track of the order in which players take their turns.
The Player Mats
In The God Kings, each player uses a player mat to keep track of a variety of game tasks. During the progress of a typical game, the boxes on the player mats will contain a frequently changing selection of counters, while the tracks will have counters in positions that will show all players how many of each item that player possesses.
- Neutrals Under Control: In this box, place one control marker for each Neutral Nation (see 20.2) you currently control.
- Available Divisions for the Military Reform Event: In this box, place the counters for the divisions not currently on the map. You will be able to add at least some of these counters to your on-map forces when you play an Army Reforms event card. See 7.2. [Please Note: This box should actually read "Available divisions for Army Reforms Event".]
- You Can Keep a Card This Turn: Usually, all cards in your hand will be played during the turn. In some cases, however, you may retain a card from one turn to the next. See 8.4 for details.
- General Chart: These boxes track your Victory Points, Tribute Points, and Wood Points throughout the game, as outlined in the rules for each type of point.
- Generals Holding Boxes: These boxes are optional, but useful in that they allow you to keep your combat units off the map. Place the combat units for your King and your two warlords in the corresponding boxes on the player mat. They are considered to be with those generals on the map.
- Available Chariot Units: This box contains chariot units purchased during the current Reinforcement Phase.
- Destroyed Warrior Units: As you lose warrior units during the turn, place them in this box. They return at half-strength the following turn.
1.0 Introduction
The God Kings is a card-driven game for two, three, or four players based on the wars of the Ancient Near East. Players can control either the Egyptians, the Hittites (Hatti), the Mitannians or the Kassites. The Assyrians appear in various scenarios, either as a mid-game replacement for the Kassites or as a player power from the beginning.
Scale: Each unit represents between 1000 and 1500 men. Leader counters represent the leader and his retinue. Turns are 25 years long, with one card activation representing roughly one campaign of an army.
2.0 Game Components
2.1 Inventory
A complete game of The God Kings includes:
- 1 Map
- 5 Player Mats
- 3 Counter Sheets
- 110 Strategy Cards
- 1 Rulebook
- 1 Playbook
- 2 Dice
2.2 The Playing Pieces
Counter Colors
- Hatti: Orange
- Assyria: Maroon
- Egypt: Green
- Mitanni: Blue
- Kassites: Purple
- Mercenaries: Red
- Barbarians: Brown
Combat Units
This game portrays four types of units: Warriors, Chariots, Royal Guard and Mercenaries (Garrisons are not combat units).
The number supplied with the game is an intentional limit, players may not create more pieces.
Each unit shows: Unit Type, Division Name, Unit's Nation, Combat Strength, Loss Factor, Movement Points. Units have a Full Strength side and a Reduced Strength side (diagonal indicator).
Generals
Generals represent the rulers and warlords of the era. There are two types of generals: the Kings (the pieces with a name and a turn of arrival) and the warlords (generic leaders). Each player can have only ONE King at any given time. Each player always has two warlords. The Kings either begin the scenario already in the game or enter into play, on the turn (or one of the turns) shown on their respective counters, according to the Successors rules (Section 19). Each general possesses a Strategy Rating and a Battle Rating.
Political Control (PC) Markers
The playing pieces containing Mitanni, Egyptian, Hittite, Kassite, and Assyrian symbols are used to signify which Power has Political Control of a space or Walled-City space. Throughout the rest of these rules, the term Political Control Marker will be abbreviated as "PC marker". See Section 18 for details on the use of PC markers.
Garrison Markers
On the reverse of the PC markers are the garrison markers, which are used to garrison the Walled-Cities, forcing the other players to besiege it in order to take control of it. To create a garrison, a player spends the requisite number of Operations Points (9.2G) and flips the PC marker to the garrison side.
3.0 Glossary
The following are important game terms and abbreviations you should be familiar with before reading the rules:
Action Cards: Cards whose event is played immediately as the result of another action (such as cards that affect battle).
Active Army: The currently activated army.
Active General: The currently activated general.
Active Player: The player currently conducting a Round.
Army: An army consists of a general and any number of friendly combat units stacked together in a space.
Attrition: Some events call for an Attrition Roll. See 11.13 for details.
Battle Advantage: In battle, the difference between the Attacker and Defender DRMs (die-roll modifiers), with the Battle Advantage going to the player with the larger total of DRMs.
Capital: The Capital Cities are: Assur for the Assyrian player, Hattusha for the Hatti player, Dur-Kurigalzu for the Kassite player, Washukanni for the Mitannian player, and Memphis for the Egyptian player. Capitals affect the game in a variety of ways.
City: All circular or square spaces on the map are called Cities or spaces (the term is interchangeable). The square spaces are called Walled-Cities.
Combat Unit: A game piece representing military fighters. Combat units include warrior units, chariot units, royal guard units, and mercenary units.
Control: See Political Control.
Conquered HomeCountries: Only a HomeCountry can be conquered. It is considered conquered if, at the start of the Victory Phase, the originally owning Power does not control at least half of the HC's spaces—it does not matter whether the other spaces are controlled at that instant by one or more other Powers. HCs are automatically un-conquered at the end of the Victory Phase, when all other players' units are removed from his HC (24.3). HCs can be conquered multiple times during the game.
Displacement: Placing armies and/or generals in specific locations after specific events (often losing a battle). A displaced general is placed back in his HomeCountry in a friendly-controlled space of his owner's choice. Displaced units are placed in any friendly-controlled space in their HomeCountry. A displaced Neutral Nation army is placed in its Capital space. A displaced Barbarian army is placed on its Tribal space. See 25.0, Displacement Summary, for details.
Division: 3 warrior units bearing the same division name. See 7.2. Once in play, they can be used freely by the players (e. g. separated from each others).
DRM: Die-roll modifier—the number added to or subtracted from the die-roll result. DRMs apply in numerous game situations.
Event: The descriptive text on the card, outlining an action that either enhances a player's action, affects another player's action, or takes the place of using the Operations points on that card for that particular card-play.
Force: Generic term referring to both armies (which have generals) and units without generals.
Garrison Marker: The garrison markers are not combat units and serve only to indicate Walled-City space that non-owning players will need to be besieged in order to control. They have no combat potential. Garrison markers are on the reverse side of Political Control (PC) markers.
Garrisoned Walled-City Space: A Walled-City space containing a garrison marker and/or up to two combat units.
General: Generic term designing the King, the warlords, and the various leaders of the minor powers (revolt armies or Barbarian). A general is not a combat unit. All generals have a Movement allowance of 6 though this rating is not printed on the counters. Generals are used to activate several units at once. Generals, by themselves, are not capable of battle or gaining control of a City.
Holding Box: The square boxes on the map (or on the player mats) where you can put the units commanded by a general.
Homecountry (HC): A Homecountry is Egypt for the Egyptian player; Hatti, for the Hatti; Durkurigalzu for the Kassites; Assyria for the Assyrian and Mitanni for the Mitannian. Homecountries are denoted on the map by a parenthesized (H) beside the name.
Impulse: The part of the round during which a Player is active.
Invading Tribes space: Diamond-shaped spaces in which Tribes are placed on the play of their respective event cards.
King: A King is any counter with a name and a turn arrival date. He is the supreme commander of the army of a player. Each power can have only one King on the map at any given time. A King can move with 10 combat units during any time of his activation, although he may, in addition, command one or two warlords, each of whom may command 5 combat units.
King's Army: An army commanded by a King.
Loss Factor: The middle number along the bottom of combat units. When a unit takes a step loss in battle, it contributes its loss factor towards the total loss number that the player is required to fulfill.
Loss Number: The number on the Battle Table showing the result of the modified die-roll by a player. The loss number must be satisfied as closely as possible by the removal of steps from units, with each unit's loss factor contributing towards the total loss number.
Mercenary: Mercenaries are combat units. When they are recruited by a Major Power, they must at all times be stacked with a general or unit(s) of the controlling Power. If they remain in a space without a general or alone, they become a Barbarian unit (21.0).
MP: Movement Points expended while an army or a general is moving. MPs may be used to place PC markers by a moving army.
Neutral Nation: Any of the four Powers—Egypt, Kassites, Hatti, or Mitanni/Assyria—that is not being played by a player in the current scenario.
Operations Number (Ops): The number between 1 and 3 on the upper-left-hand corner of each strategy card. The Operations value of cards is used to conduct a variety of actions (9.2).
Path: The connecting line between two spaces. Blue connecting lines are called sea lanes.
Player Power: A Power controlled by a Player.
Political Control (PC): A player controls a space if he has a PC marker in it. A player controls a province if he controls the majority of the spaces in the province (having the majority of the PC markers in a province is not by itself sufficient for Political Control) and all its Walled-City spaces. A space containing a PC marker remains under the control of the owning player even if an enemy general and/or units are also present.
Port Space: A space connected to a sea lane.
Power: General term for nation or kingdom. There are numerous Powers in the game, of which four (Egyptians, Hatti, Mitanni/Assyrians, and Kassites) may be Player Powers. Others are Neutral Powers or Barbarian Powers.
Province: A grouping of spaces within a boundary-line on the map. Examples: Mari and Assyria. Each province contains a name, along with two numbers separated by an oblique. The number on the left is its Victory Point value, the number on the right its Tribute Point value. Provinces with a parenthesized (H) are Homecountries.
Round: Each turn is divided into a number of rounds, as dictated by the scenario. The standard number of rounds is five per turn. In each round, each player plays one strategy card as his "go" (although in rare cases he may play more than one if the event text on the card allows it).
Royal Guard: A special unit that can be placed on the map only if the appropriate event is played. For the Mitanni, the royal guard is the Mariyannu and for Egypt, the Sherden.
Sea Lane: The blue line connecting two port spaces.
Sequence of Play: The procedure, covered in section 5 of rules, that governs the activities of a Turn.
Siege: The attempt to capture an enemy garrisoned Walled-City space.
Siege Die-Roll: A die-roll (which may be modified) conducted at the end of a current Activation or, if the army is already at the enemy garrisoned Walled-City space, at the instant of Activation, to attempt to capture the space. The Siege die-roll always ends the Activation.
Space (a.k.a. City Space): Any location on the map in which a unit, army, garrison marker, or PC marker may be placed. Round spaces are city spaces. Square spaces are Walled-City spaces. Spaces connected to a sea lane are called port spaces.
Successor: During certain turns, the player will have two Kings. The one on the map is the King, the other, placed on the player mat, is the Successor. The Successor might potentially replace the King during the course of the turn and become the new King, according to the Succession rules, or he might enter the game on the specified turn automatically.
Tribal Path: The connecting line projecting from an Invading Tribes space.
Tribute Point (TP): Points you earn when you control the province, and which allow you, during the reinforcement Phase, to recruit chariot (in conjunction with a Wood Point), mercenary units and garrisons. They can also be used to rebuilt reduced warrior units. Keep track of your power's Tribute Points on your player mat.
Turn: A full completion of the Sequence of Play (section 5 of the rules). Each turn represents roughly 25 years. The "God Kings" marker is used on the Succession Chart (on the map) to indicate the current Turn.
Unit: An abbreviation for combat unit. It can be a warriors unit, a chariot unit, a royal guard unit or a mercenary unit.
UnGarrisoned Walled-City Spaces: A Walled-City space containing neither a garrison marker nor a combat unit. It may contain a PC marker.
Un-led Units: Unit(s) not stacked with a general—such a force may not move, although it must retreat if it loses a battle.
Walled-City Spaces: A space containing one or more Wall outlines. Examples: Ugarit (one wall), Kadesh (two walls), Karkemish (three walls). Walled-Cities are Garrisoned or UnGarrisoned.
Warlord: Generic leaders. Each player has, at all times, two warlords on the map. A warlord can move with 5 units at any time during his activation. They are placed at leisure at the beginning of each turn. Kings can command warlords and thus augment the number of troops they can move with. e.g., an army led by a King and one of his warlords can move with up to 15 units.
Wood Point (WP): Wood points are obtained by trade or via spaces with a Wood symbol. They are spaces or towns rich in wood or important in trade. Wood points are used at the reinforcement Phase to recruit chariot units. Keep track of your power's Wood Points on your player mat.
4.0 Setting Up the Game
Set up the playing pieces and markers as indicated in the Playbook. Shuffle the deck of strategy Cards and place it off to the side. You are now ready to play.
5.0 Sequence of Play
The God Kings is played in turns, each of which must be played in the following order:
I. Deal Strategy Cards Phase
Each player is dealt 7 strategy cards, or 6 if the player kept a card from the previous turn (8.4).
II. Reinforcement Phase (Skip this phase on the first Turn of all scenarios)
- Each player places his reinforcements according to Turn Order (6.0).
- Replace Neutral units as specified in 20.4.
- If playing the campaign game, and it is the 6th turn, the Mitanni Player must change from Mitanni to Assyrian (see section 23).
III. Strategy Phase
This Phase consists of five Rounds. Use the "Round" marker, along with the Rounds track on the map, to keep track of which Round is currently being played. Each Round has a number of Impulses equal to the number of players in the game. During each Impulse, each player, according to the Turn Order (6.0), must do the following in the order listed:
- Make a Succession Roll if a Successor is possible (see 19.3).
- Play a strategy card (9.2, 9.3).
- Record Victory Points (if any), the instant he gains them, by adjusting the "Current Turn VP" marker on the VP Track on his player mat (24.2).
After all five Rounds have been completed, the Neutral Nations Round is conducted. Here, a card is drawn for each Neutral Nation in play this scenario. See 20.2 for details.
The full sequence for the Strategy Phase is as follows:
- Round #1
- i. 1st Player Impulse: a. 1st Player conducts succession roll if successor available this turn. b. 1st player plays a strategy card. c. 1st player records VP as he gains them.
- ii. 2nd Player Impulse: a. 2nd Player conducts succession roll if successor available this turn. b. 2nd player plays a strategy card. c. 2nd player records VP as he gains them.
- iii. 3rd Player Impulse: a. 3rd Player conducts succession roll if successor available this turn. b. 3rd player plays a strategy card. c. 3rd player records VP as he gains them.
- iv. 4th Player Impulse: a. 4th Player conducts succession roll if successor available this turn. b. 4th player plays a strategy card. c. 4th player records VP as he gains them.
- Round #2 through Round #5. Repeat above Impulse sequence.
- Neutral Nations Round
- i. Determine Neutral Nation order.
- ii. Determine ownership of Neutral Nations.
- iii. Owner of 1st Neutral Nation (if any) draws strategy card and conducts actions with that Nation or plays event.
- iv. Owner of 2nd Neutral Nation (if any) draws strategy card and conducts actions with that Nation or plays event.
- v. Owner of 3rd Neutral Nation (if any) draws strategy card and conducts actions with that Nation or plays event.
IV. Victory Phase
The Victory Phase is conducted in the following order of steps. Full details for each step are found in section 24.
- Calculate VP gains for Control of Provinces and adjust the "Current Turn VP" markers accordingly (24.1)
- Calculate VP losses for Enemy Control of HomeCountry spaces and adjust the "Current Turn VP" markers accordingly (24.1)
- Check for Sudden Death Victory, per 24.2. If yes, the game is over. If no, go to the next step.
- Determine Turn Order for Next Turn: The players determine the order of play of the following turn, as per 6.0
- Adjust VP Totals. All players add the VPs under their "Current Turn VP" markers to the number of VPs currently under their "Total VP" markers.
- Reset "Current Turn VP" Markers. All players move their "Current Turn VP" markers to the zero space on their Turn tracks.
- Remove enemy PC and units from all players' HomeCountry.
V. End of Turn Phase
First, each player discards all unplayed cards from his hand, although he may potentially retain one of them as per 8.4. Then, begin another turn by moving the "God Kings" marker to the next box on the Succession Chart on the map. Play continues until one side wins a Sudden Death Victory or all turns specified in the scenario instructions have been played to completion.
6.0 Turn Order & Initiative
Turn Order for the following turn is determined in step 4 of the Victory Phase. The player who scored the least number of VPs during the current turn has the initiative, which means he decides in which order he will play for the next turn. Then, the player who scored the next least VPs during the current turn decides—and so on. Place the Initiative markers for each player on the Turn Order Record on the map in their appropriate boxes, in order to help keep track of who's turn it currently is.
Example: During the current turn, the Egyptian player scored 10 points, the Mitannian player 13 and the Hatti player 8.
The Hatti player (8 VP) chooses first and decides to play last. Then, the Egyptian player (10 VP) decides to take the second place. The Hatti player has no choice, he will play first.
If there is a tie, the player with the least number of total VP—as determined after Step 5 of the Victory Phase of the current turn—decides first. In case of tie in the total number of VP, each tied player concerned rolls a die, with the player rolling the higher number deciding first.
7.0 Reinforcements
7.1 Reinforcements Procedure
Each player, in the order of play determined in the initiative phase, receives his reinforcements according to the following procedure:
- First, he flips the reduced warrior units to their full-strength side. Warrior units which have been destroyed are placed back on the board on their reduced side. He then removes the mercenary and chariots units he had the previous turn.
- Next, he calculates the Tribute Points (TPs) he receives from occupied provinces—the Tribute Point value is the second number for each province showing on the map. He also calculates the number of Wood Points (WPs) he receives—these come from spaces that he controls containing the Wood Point symbol (he receives the WPs even if the space is under siege and even if it has no PC path back to the HomeCountry). He also receives WPs and TPs if he played the Trade event (9.2H) during the previous turn.
- He now spends Tribute Points and Wood Points. One Tribute Point can be spent to acquire a garrison marker (placed in a Walled-City space containing a friendly PC marker) or a mercenary unit (placed as per the Mercenary rules); or to flip a reduced warrior unit back to full-strength; OR, by spending a Wood Point in addition to the TP, to build a chariot unit. Unused Tribute and Wood Points are lost.
- The player changes his King, if necessary, according to the Succession rules in section 19. Neutral Power kings are also changed at this time, if available. Replaced Kings are permanently removed from the game (they're dead).
- All units (divisions, mercenaries and chariots—but not garrisons) and generals, whether they started the Phase on the map or they were newly built, are placed anywhere in friendly-controlled spaces that can trace a line of friendly-controlled spaces (not just empty spaces) to their HomeCountry (sea lanes may not be used, nor may spaces controlled by currently allied Powers or currently controlled Neutral Powers). They need not all be placed in the same space. If such units are currently conducting a siege, the siege is lifted (it was unsuccessful) and the Continuing Siege marker (if there is one) is removed.
Example: It is the Reinforcement Phase of turn seven. Egypt controls Canaan, Amurru (except Arwad and Nahrin) and the Sinai. First, he removes the mercenaries and chariot units he controlled the turn before. He then flips to full strength the reduced warrior units and places, at reduced strength, the previously destroyed warrior units of the three divisions he already has in play: Amon, Râ and Seth. Then he calculates the TP he earns for the turn: 2 for Amurru, 2 for Canaan, 1 for the Upper Egypt and 2 for Egypt proper. The total is 7 TP. As he controls 6 Wood Points spaces (5 on the map and one from Upper Egypt) and played no Trade event during the previous turn, he can recruit 6 chariot units. He could also use some of his TP to rebuild to full strength his reduced warrior units, recruit mercenaries, or place garrisons markers.
Next, he removes Amenophis III from the board, replacing him with Amenophis IV. He then sets up his units on the board (his 3 divisions, his chariot units, and his mercenary units, anywhere in spaces controlled by Egypt, led by Amenophis IV and the two warlords. He decides to place the King, two divisions, his chariots and a warlord in an Egyptian-controlled Kadesh and leave a warlord and a division in Egypt itself to defend it in case of troubles by the Libyans.
7.2 Divisions
A division in The God Kings is a levee of approximately 5,000 troops. In game terms, each division is comprised of 3 warrior units with the same name. Having all 3 units of a division in a battle provides a +1 DRM for the owning player (15.55).
Each Nation begins the game with at least 2 divisions in play, and it can never have more than 4. In order to add more divisions to the ones already in play, a player must play an Army Reforms card as an event—this allows him to add the 3 warrior units of the division in one space of his Homecountry. This card cannot be played as an event if the Player already has his 4 divisions in play. In addition to this method of adding divisions, some Nations receive additional divisions on determined turns (e. g. Egypt in the Campaign Game scenario—see the Playbook for details).
Hatti Restrictions
For the Hatti player to play Army Reforms as an event, he must control either Walusa or Pitassa. If he does, he can play one such event: he then deploys the new division in either Walusa or Pitassa. The chosen province is thereafter considered as part of Hatti, and Hatti Homecountry for the rest of the game (and subject to 24.1); furthermore, its Tribute value is added to the Hatti empire. Once chosen, a province cannot be used again to bring another division into play.
Example: The Hatti player controls Pitassa and plays Army Reforms as an event to bring his third division into play. Pitassa is now considered Hatti Homecountry and the new division is set up in one of its spaces. If he wants to add the fourth division, he will have to control Walusa and play another Army Reforms event.
Note: This restriction also applies to the turn 6 automatic reinforcement the Hatti player receives in the Campaign Game scenario. If the Hatti player does not meet this condition the instant it is available, the automatic reinforcement is lost.
8.0 The Strategy Phase
8.1 Receiving Strategy Cards
Each player is dealt 7 cards from the Strategy deck each turn, 6 if the player kept a card from the previous turn.
8.2 Playing Strategy Cards
Each Strategy Phase consists of five player Rounds plus the Neutral Nations Round. Each player Round consists of a number of Impulses equal to the number of players in the game. Impulses are conducted according to Turn Order (6.0). Each player starts each of his Impulses by playing—i.e., placing face-up on the table—one strategy card, using the card either for the Operations Points (Ops) or the event printed on the card (see 9.1), or in some cases removing the card from the game (9.5). During his own or other player's Impulses, a player may also play the events on strategy cards if they permit such play (e.g., action cards—15.55).
8.3 Eight Options for Each Card
Each card played allows the player either to play the event on the card or to use the card's Operations (Ops) number to activate a general, place PC markers, place garrison marker(s), trade for Wood and Tribute points, activate a neutral army (see 20.2), recruit mercenary units, or modify the Succession Roll (19.3).
8.4 Ending the Strategy Phase
The players continue to alternate playing strategy cards, in Turn Order (6.0), until 5 Rounds have been played.
Players may keep one (and only one) card between turns, but if they do so, they receive one less card in the Deal Strategy Cards Phase of the next turn. A Player may retain a card only on alternate turns, not on every turn; if he retains a card in a turn, he may not retain any card at all the following turn. The player retaining a card places a "No Card This Turn" marker on his Player Mat, flipping it after the subsequent turn to the "Keep a Card This Turn" side as a reminder. In the End of Turn Phase, cards that have not been used and not retained are placed face-up on the table for all players to see and then placed in the Discard pile, where they are off-limits to all players.
9.0 Strategy Cards
9.1 Description
In The God Kings, the strategy cards are the soul of the game. Each strategy card has two primary elements, a number between 1 and 3 in the upper left corner (called the Operations number) and an event. This "Ops" number is used to perform actions as per 9.2. The event is available only if the Operations number is not used.
(Card anatomy: Operations Number, Card Title, Event Text, "Remove from Play" Card, Action Card.)
9.2 Using the Card's Operations Number
The Operations number allows a player to do one (and only one) of the following:
A. Activate a General (with or without units) whose Strategy Rating is less than or equal to the operation number. Therefore, a card with an Operations value of "1" (called a 1-Ops card) can only activate a general with a Strategy Rating of 1. A 2-Ops card can activate a general with a Strategy Rating of 1 or 2. A 3-Ops card can activate any general. The "Internal Unrest" event inflicts an increase in the Strategy Rating of a King for the duration of a turn, making him harder to activate.
B. Activate a General with an army of at least three combat units to perform a Siege die-roll (and do nothing else). Unlike 9.2A, the general's Strategy Rating is irrelevant for a Siege activation; a card of any Operations value may activate a general of any Strategy Rating.
C. Place a quantity of PC markers on the map equal to the Operations number (see 18.2).
D. Raise Troops: Playing a card in this way allows the player to place a number of face-up mercenary units, equal to the Operations number of the card, with any one general who is located in a friendly controlled space. You may not raise troops in a besieged Walled-City space (see 17.0).
E. Modify the Succession Roll: The player may, before the Succession die-roll is made, play a card to adjust it positively or negatively by the Operations number. This card is played in addition to the card played normally during the Strategy Phase and it does not replace the card the player must play during his normal turn.
F. Activate a Neutral General: This is only allowed with a 3-Ops card. Playing a 3-Ops card in this way allows the player to activate a Neutral general (King or warlord). He can then play the activated general as if it were one of his own (see 20.2).
G. Convert PC Markers to Garrisons: Playing a 1-Ops or 2-Ops card in this way allows the player to convert one of his PC markers currently on a Walled-City space to a garrison marker (by flipping the PC marker over). Playing a 3-Ops card allows the player to convert up to two such PC markers.
H. Trade: Playing a 1-Ops or 2-Ops card for trade immediately gives the player one additional Wood Point and one additional Tribute Point to be used in the next Reinforcement Phase. Playing a 3-Ops card gives two Wood Points and two Tribute Points.
9.3 Using the Card's Event
The player performs the event described on the card. The event takes the place of the Operations number for that particular card-play.
9.4 Using Action Events
Events with their title followed by "Action Card" in parentheses are action events. These can be played in the middle of a player's own Impulse or another player's Impulse, according to the instructions on the card. Playing an action event as a response to another player does not count as strategy card play for that player's Impulse; on his next Impulse, he play a strategy card normally.
9.5 "Remove FROM Play" Cards
If a strategy card with the "Remove from Play" designation is played as an event, it is permanently removed from the game after this Round. A card with an asterisk symbol is not removed if the card is played for its Operations number or discarded without performing the event.
9.6 Reshuffling
The entire strategy deck, including all current discards but excluding cards that have been permanently removed from play, is reshuffled before any cards are dealt.
9.7 Discard Pile
The Discard Pile may not be examined at any time, except for the most recent discard (which is at the top). All players get to see discards as they are discarded—including Neutral Hand discards and cards not retained between turns—but once in the Discard Pile, they are off-limits (again, except for the most recent one).
10.0 Stacking & Subordination
10.1 Stacking Units
There is no limit to the number of units that can be stacked in a space. There are, however, limits to how many units a general may move or command in battle, as outlined in 11.2.
10.2 Stacking Generals and Rank
There can be more than one general in a space. However, if two warlords occupy a space, one cannot command the other (although their armies defend together). The King can command either or both warlords stacked with him; here, the warlords are considered subordinates. In such cases, keep the King on the map and place the warlords in the King's Holding Box. A warlord in the King's Holding Box is considered stacked with the King for all purposes.
When a King stacked with a warlord (or both warlords) is activated, either or both warlords may activate with him. A warlord cannot command another warlord or the King. When activated, he cannot move with another warlord or the King.
11.0 Movement
11.1 Who May Move
Generals may move with or without units. Units cannot be moved, except to retreat after battle (16.1)—unless accompanied by a general. A general can be moved only when a strategy card is played that permits it. A general and the units stacked with him are collectively called an "army". Only one army moves with each strategy card unless a campaign card is played (11.12). An army may be only once per the play of any given strategy card.
11.2 Movement Procedure
A general may move into any space that is adjacent—i.e., connected by a line—to the space he currently occupies. Movement is conducted from space to adjacent space, with each space costing one Movement Point (MP), except mountainous terrain spaces, which cost two MP.
A general without units has a movement allowance of 6 Movement Points. Otherwise, an army when activated has Movement points (MP) equal to the MP allowance of the slowest unit (activated) in the army. Chariots have 5 MP while warriors, royal guards, and mercenaries have 4 MP. An army combining units with 5 MP and 4 MP has a MP of 4 MP.
Units move by being activated by their generals, according to the following rules:
- A King, a Barbarian general, or a Revolt general can move with up to 10 units.
- A warlord can move with up to 5 units.
- The total number of units that a general may activate for movement and/or combat is equal to the combined Leadership ratings of the stacked generals—therefore, a King may, at a maximum, activate 20 units (10 directly under his own command and 5 under the command of each of the two warlords stacked with him).
Note that leaders may be stacked with a number of units greater than their leadership ratings (and all units in such cases defend in battle), but may only Activate a number of units equal to or less than their combined leadership ratings.
A moving general may pick up and drop off units (and warlords if the King is moving) along the way, at no cost in Movement Points, so long as there are never more units than the combined leadership ratings of the stacked generals moving at any time. Picking up or dropping off units does not change the army's initial MP allowance, and units that are dropped off may not move further that activation. The sequence below must be observed when moving an army:
- Select the general you wish to activate. If activating a King, select up to 10 units plus 5 units for each warlord he will take with him. If activating a warlord on his own, select up to 5 units to accompany him. (Maximum number of units possible for activation: see above.)
- Play a strategy card with an Operations Number capable of activating that general (9.2A).
- Move the army, expending one MP per space entered (or two MP per mountainous terrain space). As the army enters each space it potentially triggers a Reaction for the non-active player (11.3), which is conducted before proceeding to step 4.
- If the non-active player succeeded with an Interception, the active army has the option to back up one space and end its move (13.5). If so, go to step 7.
- If the active army enters a space containing enemy units, the non-active force may attempt to Avoid Battle (14.1). If it succeeds, the active army may attempt Pursuit (14.4). If Pursuit succeeds, the army may continue its move; if it fails, its move is finished.
- The active army may conduct an Overrun at this time if it has a 10/1 or better ratio in combat strength points against enemy units in the space, and if the enemy units do not successfully Evade. Repeat steps 3–5 until the activated army has completed its move.
- The army may now conduct either a Siege roll (if in an enemy-controlled Walled-City space) or a battle (if in a non-Walled-City space occupied by an enemy force). An army may never conduct both a battle and a Siege on the play of a single strategy card.
11.3 Reaction
Each space an army enters may trigger a possible reaction by the non-Active Player. The two possible reactions are Interception (13.0) and Avoid Battle (14.0). The sequence for each reaction, as it occurs, is as follows:
-
The active army moves into a space.
-
If the space contains a Walled-City controlled by the non-active player, the non-active player declares each of his units inside or outside the city.
-
The non-active player declares all his Interceptions into the space and Avoid Battle attempts out of the space. All Interception and Avoid Battle attempts must be declared before any are carried out and the non-active player is required to attempt all those he designated.
Note: The last sentence means that in situations where Player A moves an army into a space already containing a force belonging to Player B units and adjacent to an army belonging to Player B, Player B must decide at that moment whether or not to have the force in the space attempt to Avoid Battle. He may not wait until his interception from the adjacent space succeeds or fails. If the interception does succeed, he must then attempt the Avoid Battle, and only if he fails that roll will his two forces be joined for the battle (but with a -1 DRM in that battle as per 14.1).
-
If any Interceptions were declared, the non-active player conducts them now (in any order he wishes). An army intercepting into a space may not duck into a Walled-City since non-phasing units can only enter Walled-Cities during step 2 above.
-
If an Avoid Battle was declared, the non-active player must now roll for its success and, if successful, move the army from the space.
11.4 Enemy-Occupied Spaces
When an army moves into a space containing an enemy Force it cannot overrun (11.5), and that enemy Force does not, cannot, or fails to Avoid Battle (14.1), the army must stop, end its movement and battle the enemy Force. An army or lone general may simply pass through a space a lone enemy general.
11.5 Overruns
An active army can overrun an opposing Force if that army has a 10:1 or better ratio in combat strength points against the Force upon entering the space. Interception and Avoid Battle attempts are conducted before overruns, but if these do not occur (or fail), the enemy Force is removed from play without a battle taking place. The active army may continue its movement.
11.6 Placing a PC marker
A moving army may expend one of its MP to place a PC marker in the space it currently occupies (replacing an enemy PC marker, if it exists, with his own), as long as that space is free of enemy units and is not an enemy-controlled Walled-City space with a garrison marker.
11.7 Mountainous terrain spaces
Movement into mountainous terrain spaces outside the active general's HomeCountry costs two MP instead of one. Inside an active general's Homecountry, mountainous terrain spaces costs only one MP. A force may not enter a mountainous terrain space if it does not have enough MP.
Effects: Battles in mountainous terrain spaces prohibit chariot charges (for both sides) and chariot units are used at half-strength during battle (i.e., they fight unmounted). Mountainous terrain spaces contribute also a defensive bonus during the resolution of battles.
11.8 Walled-Cities and Movement
Players should consider a Walled-City as a space within a space. Generals and units can be inside or outside of the city—however, a Walled-Cities can hold only two units (with any number of generals). Garrison markers do not count in this limitation; once placed, they are considered as part of the City and are considered inside the City at all times. Units that remain outside of the city stop enemy movement; units inside the city do not. You may move your units and generals from inside a Walled-City to outside of a Walled-City (and vice versa) in the following situations:
Active Player: Through normal movement (the play of a strategy card) during your player turn, at no additional cost in MP.
Non-Active Player: When an enemy army enters a non-besieged Walled-City spaces and the non-active player has units or generals there, he declares each of his units (up to the limit of two) and/or generals (any number) inside or outside. His decision may change each time an enemy force enters the space.
11.9 Combining Armies
An activated King may pick up other warlords (with or without units) at no cost in MP and keep moving. A warlord may not pick up another general, be it King or another warlord. If a warlord ends its move in a space containing the King, then the activating warlord becomes a subordinate.
11.10 Dividing Armies
A King's army may drop off subordinate warlords (with or without units) at any time and at no cost in MP—but a dropped off warlord and his army may not continue to move as part of that activation. A warlord in the King's Holding Box may be activated and moved away with as many units from the King's army as the controlling player wishes (up to five). Bring the subordinate warlord back onto the map and use the space occupied by the King as his starting space. The subordinate warlord becomes the commanding general of this new army. An activated warlord that detaches and moves off counts as moving one general (i.e. activating a warlord does not also allow the King to move).
11.11 Displaced Generals
A general becomes displaced if an enemy army enters the general's space and the general is not accompanied by friendly units. A general also becomes displaced if all units accompanying the general are eliminated due to battle losses. A general is not displaced if all units under his command are removed due to the Attrition Table. See the Displacement Summary (25.0).
A displaced general is placed back in his HomeCountry in a space of his owner's choice.
11.12 Campaign Card Limitations
When a campaign card is played each commanding general must complete all movement and battles before another general can be activated. A unit or general that has moved during a Campaign cannot be moved again by another general during the same Campaign card play.
One of the generals activated by a Campaign Card may be a Neutral one.
Campaign Cards and Sieges: A campaign card cannot be used to conduct more than one siege against the same Walled-City, but it could be used to battle the defenders from the space and then used again to conduct a siege against the site, as long as a different general performed each action.
11.13 Attrition Roll
Some events call for an Attrition Roll. If an army or units suffer from Attrition, roll a die by unit. If there are fewer than 10 units in the space targeted by the Attrition Roll, each 6 inflicts a Step Loss on the unit. If there are 10 units or more, then each 5 or 6 (instead of only a 6) inflicts a Step Loss on the unit.
12.0 Naval Movement
12.1 Procedure
A general (with or without units) may use Naval Movement to move, via a sea lane, from one port space to another port space. Units without a general may not use Naval Movement. Naval Movement is possible only when a 3-Ops card or a Campaign event is played. Naval Movement costs 3 MP. Note that a force may pass through a port in a naval move: the only ports that mater are the origin and destination ports (e.g., moving from Tyre through Enkomi to Ura).
Example: If your army has four MP, you can move one space to a port and then use Naval Movement; or you can start at a port, use Naval Movement and then move one space inland.
Example: An army in Tanis may move one space in Avaris and then conduct naval move to either Megiddo, Jaffa or Paphos.
12.2 Naval Movement Limitations
Only a 3-Ops or a Campaign event permits Naval Movement. Either type of card allows one army with up to five units to use sea movement. If a Campaign card is used, the Naval Move counts as one of the Campaign actions.
12.3 Enemy-Controlled Ports
Control of a port is not necessary for embarkation or debarkation. Naval Movement is allowed into any port space including a port that contains an enemy PC or units. A landing army may be subject to interception and must battle any enemy force it lands on except if the enemy force avoids battle or retreat into a Walled-City.
12.4 Naval Movement and Walled-Cities
Naval Movement directly into a Walled-City (as oppose to simply landing outside the city) is allowed if the Walled-City is friendly controlled and not currently under Siege (17.2). Naval Movement is prohibited into and out of besieged Walled-Cities. Note that this does not prevent Naval Movement into and out of a space containing a besieged Walled-City (in this case the troops are considered embarking or debarking outside the city walls).
13.0 Reaction A: Interception
13.1 In General
Interception is a special kind of movement that allows a non-active army to advance one space during an opposing force's move and interrupt the movement of that enemy force. Interception forces the moving force to fight a battle or back up one space (13.5) and end its move.
If a battle occurs, the intercepting force is still considered the Defender (the active force is always the Attacker in a battle—see 15.3.
13.2 When Can Interception Occur?
Any army (i.e., there must be a general) controlled by the non-active player may attempt interception whenever an enemy force (or lone general) enters—via land or naval movement—a space adjacent to the non-active army and the space does not already contain any currently non-moving enemy units. An army may attempt interception each time the above condition occurs—for example, if an enemy Force A tries to move around friendly Army B, Army B could attempt to intercept in each adjacent space that Force A enters which does not contain an enemy unit.
Example: Ramesses II enters Nahrin, which contains no Egyptian units. Muwatalli II in Ugarit can try to intercept him. The interception attempt fails and Ramesses then moves to Aleppo (again no Egyptian units there); Muwatalli attempts interception again and fails. Ramesses moves to Alalakh, Muwatalli attempts interception yet again, and this time it succeeds.
13.3 Interception Restrictions
An army may not attempt interception into a space that contains one or more non-moving enemy units.
Interceptions may only occur against movement. They may not occur against enemy forces avoiding battle (14.1), against forces backing up one space (13.5), against retreating forces (16.0), or against intercepting forces.
13.4 Interception Procedure
The intercepting player temporarily halts the enemy force's movement by declaring an interception. He then states which general and which units will make the attempt—this becomes the intercepting army (13.7). He rolls a die and modifies the result as follows:
- +1 if the destination space contains an enemy or neutral PC marker and no friendly units
- -1 if the intercepting army has more chariot units than the moving force
- -2 if the intercepting army consists solely of chariot units.
These modifiers are cumulative. As a result, if an intercepting army consists solely of chariot units, and the number of chariot units exceeds those of the moving force, the modifier would be -3.
If the modified roll is greater than the Battle Rating of the intercepting general, the interception fails and the moving force may continue with its activation.
If the modified roll is less than or equal to the Battle Rating of the intercepting general, the interception succeeds. A natural roll of 1 also results in a success and a natural Roll of 6 is always a failure. The Intercepting army must move into the intercepted force's space, and a battle takes place.
In a battle caused by a successful interception, the intercepting player receives a +1 DRM to simulate the effects of surprise. +1 is the maximum benefit for this purpose, even if two or more armies intercepted (see 13.6).
13.5 Backing Up One Space
An intercepted force is never required to give battle; it may instead back up to its last-occupied space and forfeit any remaining movement points. If an army using Naval Movement back up, it returns to its port of embarkation except for Walled-City spaces, in which case see 13.8. If an army backs up on to an enemy garrisoned Walled-City it may still conduct a siege in that same activation.
13.6 Multiple Interceptions
The intercepting player may conduct more than one interception attempt into the same space if he has more than one army in position (but allied player may never attempt this together—and see 13.7). In this case, the intercepting player must declare all interception attempts before any are resolved, and the intercepted force may wait until all are resolved before deciding to fight or back up. If both/all interceptions succeed, then the armies are combined (subject to command/stacking restrictions) in the space under the command of one general to fight the moving army.
13.7 Subordinates and Interceptions
The intercepting player may dispatch all or only a portion of his army (under a warlord or the King) for an interception. He must declare which general and how many units will make the attempt—this becomes the Intercepting army. No matter how many warlords an army has, only one interception can initiate from each space—an intercepting army in a single space may not attempt multiple interceptions from that space in hopes that at least one will make it. If a warlord intercepts, the commanding King must be left behind with at least one unit.
13.8 Interceptions and Walled-Cities
An army inside a Walled-City may intercept into an adjacent space if there are no enemy units at the Walled-City space. Conversely, if a force is intercepting while entering one of its own Walled-City spaces, the battle is resolved before it can enter the Walled-City itself. An army intercepted as it enters its own Walled-City space via naval movement has four options: accept battle, back up into the Walled-City (if the city can fit the army inside), back up to the port of embarkation, or split the army between the last two options. An army backing up one space may never leave behind units outside the Walled-City.
13.9 Interceptions and Overruns
Overruns occur after interceptions, so an intercepting army may prevent an overrun.
13.10 Failed Interceptions and Avoid Battle
If an army fails an interception attempt it is prohibited from attempting an avoid battle against that same army during the current card play. The army that failed the interception may still attempt other interceptions without restrictions, and may even attempt to avoid battle against other armies if the current card play is a campaign.
14.0 Reaction B: Avoid Battle & Pursuit
14.1 Avoid Battle
When an enemy army enters a space containing a non-active army or lone general, the non-active player may attempt to Avoid Battle. He rolls a die and modifies the result as follows:
- -1 if a lone general attempts to Avoid.
- -1 if the avoiding army has more chariot units than the moving army
- -2 if the avoiding army consists solely of chariot units.
These modifiers are cumulative. As a result, if an Avoiding army consists solely of chariot units, and the number of chariot units exceeds those of the moving force, the modifier would be -3.
If the modified roll is greater than the Avoiding general's Battle Rating, the attempt fails and battle is resolved (or, if a lone general, the general is displaced). For failing the avoidance and for the temporary reduction in morale this would cause, the army that tried to Avoid Battle receives a –1 DRM in the ensuing battle.
If the modified roll is less than or equal to the Avoiding general's Battle Rating, the attempt succeeds. A natural roll of 1 also results in a success and a natural Roll of 6 is always a failure. A successful Avoid Battle allows the non-active army or general to move into any adjacent space (see 14.2 for restrictions).
14.2 Restrictions on Avoiding Battle
- No more than the maximum number of units commanded by the generals in the space may avoid battle. An army containing more units than can be commanded must leave behind all units in excess.
- Units and generals that fail an interception attempt may not attempt to avoid battle against the same army in the current round (13.10).
- An army or general avoiding battle may leave units and/or generals behind.
- An Avoiding army/general may not enter a space containing an enemy unit or PC marker.
- An Avoiding army/general may not enter the space from which the enemy army is advancing.
- Un-led units may not Avoid Battle.
14.3 Subordinates and Avoid Battle
An army containing a King and one or more warlords in the same space may have one of the warlords attempt to Avoid separately. In this case the commanding King (and the second warlord, if he's there) must be left behind with at least one unit. Only one Avoid Battle attempt is allowed per Reaction Phase, so generals may not split up and avoid battle into different spaces, nor may one general attempt to Avoid after another in that army has failed.
14.4 Pursuit
After a successful Avoid Battle, the active army may (if it has any remaining MPs) attempt to continue moving, either to follow the Avoiding army or to move off in a different direction. To do so, the active player rolls a die, modifying as follows:
- -1 if the active army has more chariot units than the successfully Avoiding army
- -2 if the active army consists solely of chariot units.
These modifiers are cumulative. As a result, if an Avoiding army consists solely of chariot units, and the number of chariot units exceeds those of the moving force, the modifier would be -3.
If the modified roll is greater than the active general's Battle Rating, he forfeits all remaining MPs.
If the modified roll is less than or equal to the active general's Battle Rating, his army may continue moving normally (up to the MP limit). If he enters the space that now contains the Avoiding army, it may try to Avoid Battle again, and the active army may attempt to pursue again, and so on until his opponent fails his Avoid Battle roll or runs out of MP.
14.5 Walled-Cities and Avoid Battle
A non-active army located at a Walled-City space but currently outside the city has two options when an active army enters the space. First, he may declare his army outside inside the city and attempt to Avoid Battle (or fight). Second, he may declare the army inside the Walled-City (as long as it can hold the army). In the latter case, the moving army may continue moving normally.
14.6 Sieges and Pursuit
An army that fails its pursuit die-roll but ends its move on a Walled-City space may still conduct a Siege against the site.
15.0 Battles
15.1 A battle may be initiated only by an activated army against enemy forces occupying the same space. Battle always expends the remainder of the army's movement points, whether or not the activated army wins or loses. That active player's Commander is the general he has activated. The inactive player's Commander is the King if present or one of the warlords in the space if not.
15.2 An activated army that moves into an enemy-occupied non-Walled-City space must declare battle against those enemy units. If the enemy units or army are inside a Walled-City, or if the enemy army succeeds in Avoiding Battle and retreats inside the Walled-City, battle does not take place (the force can be attacked only through Siege Resolution).
15.3 The active player is the Attacker and the non-active player is the Defender, even if the battle is initiated by the non-active player as a result of successful Interception (13.0).
15.4 Losses From Participating Units
Only the units that participated in the battle may take losses from the battle.
15.5 Battle Resolution
Battles are resolved according to the following sequence and rules.
15.5.1 The Battle Resolution Sequence
Each battle is resolved using the following sequence (for Sieges, see 17.3).
- Both players declare chariot charges (15.52) and perform the chariot charge die-roll, unless Wisdom of Horus (card #63) or Irresistible Charge (card #62) is played immediately before the die-roll. If the charge is successful, resolve the chariot attack, removing losses before step 2.
- Both players determine the combat strengths of the forces remaining after the chariot charge.
- Both players determine their battle die-roll modifiers (DRMs).
- All players—whether or not they are participating in the battle—may now play, as desired, action cards that affect battle. The Attacker plays cards first, followed by any other player (in Turn Order) whose action cards favor the Attacker. Then the Defender plays any action cards that work against the Attacker, after which each other player (in Turn Order) may do the same. There is no limit to the number of action cards that may be played to affect a battle.
- The players determine Battle Advantage (15.55). The player with Battle Advantage decides now whether he will adjust either his own roll or that of his opponent, or both.
- The Attacker determines the column to use on the Battle Table. He then rolls a die, modifies it according to his calculated DRMs, and notes the modified roll.
- The Defender determines the column to use on the Battle Table. He then rolls a die, modifies it according to his calculated DRMs, and notes the modified roll.
- Both players take the required losses. This step is considered simultaneous.
- The battle Winner is determined.
- The Loser's force retreats.
15.5.2 Chariot Charges
The army with the larger number of chariot units has the option of making a chariot charge prior to the battle if the battle is not in a Mountainous terrain space. If it declines or fails, the army with the lesser number of chariot units may then try a chariot charge. If both armies have the same number of chariot units, the general with the better Battle Rating decides first if he attempts a chariot charge. If still tied, the Active player decides first. Note that only armies can conduct chariot charges; un-led forces may not do so.
The Charge Roll: To succeed at the chariot charge attempt, the player must roll equal or less than the difference between the Battle Ratings of the two commanding generals (uncommanded forces have a Battle Rating of zero for this purpose), with the roll modified as follows. Charge Roll DRMs:
- -1 if the army attempting the roll has more chariot units than the enemy's force, or if the attempting army has one chariot unit and the enemy force none.
- -2 if the army attempting the roll has at least double (but less than three times) the number of chariot units in the enemy's force, or if the attempting army has two chariot units and the enemy force none.
- -3 if the army attempting the roll has at least three times the number of chariot units in the enemy's force, or if the attempting army has at least three chariot units and the enemy force none.
- -1 if the enemy army failed an Avoid Battle roll for this battle.
- +/-? as derived from action cards played for this battle.
In addition, an unmodified roll of 1 always results in a success and an unmodified roll of 6 is always a failure.
If the charge roll fails, or if the option to charge is declined, the enemy army may attempt his own charge roll (if he has chariot units), applying all DRMs as above. If this roll fails, or if this army has no chariot units, no chariot charges occur and the main battle procedure takes place.
If the charge roll succeeds, the charging player rolls once on the Casualty chart, using the column corresponding to the total combat strength of his chariot units. There are no modifiers, and chariot units may not be held back from this attack. Unlike main battles, the enemy player does not make a die-roll. Losses are taken as per 15.58. Once all losses from the chariot charge have been removed (if any), proceed to the main battle.
Whether the charge succeeds or not, in the ensuing main battle, half the losses (rounded down) suffered by the army who attempted the charge must be chariot unit losses. Note that, if both players attempted a charge, whether or not they succeeded, both players must extract half the losses from their chariot units. If the losses exceed the total steps available for the chariot, unsatisfied losses are dealt to the remaining units (owner's choice of which ones).
15.5.3 Determining Combat Strengths
After applying losses (if any) from chariot charges, each player totals the combat factors of his units involved in the battle to determine his combat strength. The strength of all chariot units involved in the battle are included (although the Attacker may hold some back), even if they conducted or attempted and failed at a charge. Each chariot unit has its combat strength divided by 2 (rounded up) if the battle takes place in a Mountainous terrain space.
The Attacker is not required to attack with every unit in the space; some may be held back, and these do not take losses. However, for the Attacker (only), chariot units that did not commit to a charge do not have to be included in the main battle. The Defender must defend with all units in the space (commanded or not, and including all chariot units).
15.5.4 Determining the Battle Table Column
The total combat strength for each player determines the column that player will use on the Battle Table (printed on the map and on p. 14 below). Most columns show a range of combat strengths (e.g., 5-6, 16-20, 37+); if the combat strength falls into that range, the player uses that column. (To help remember the column while calculating the DRMs, each player should put one of his control markers on the appropriate column.)
15.5.5 Battle Die Roll Modifiers (DRMs)
Each player determines what DRMs affect his battle roll. The DRMs are as follows:
Battle Rating DRM
The die-roll is modified by the general's Battle Rating (if any).
Action Card DRM(s)
The Attacker—or any Player wanting to play a card in the Attacker's favor if the event allows it—may play action cards whose event affect battle. See 15.1 for the timing of action cards in the Battle Resolution procedure. Note that not all action cards provide a DRM; some have other effects.
Local Allies DRM
Players receive additional DRM for having allies. A player gains allies by having Political Control of the province in which the battle takes place (determined at the moment of the battle). All provinces are worth a +1 DRM except for the Homecountry provinces, which are worth a +2 DRM for the initial controlling power (Egypt for the Egyptian player, Hatti for the Hatti player, Mitanni for the Mitannian player until he takes control of Assyria, Assyria thereafter and Karduniash for the Kassite player).
Restrictions on Allies: You may only receive the Local Allies DRM if you have a general in the battle. If multiple battles occur in the same province or country during the play of a campaign card, all battles receive the Local Allies DRM as long as the conditions are met.
Mountainous Terrain Space DRM
The defending army or units in a Mountainous terrain space receives a +1 DRM.
Divisional Integrity DRM
For each division whose 3 counters (full or reduced strength) participate in the battle, the Player receives a +1 DRM.
15.5.6 Battle Advantage
Total the DRMs for both the Attacker and the Defender, then subtracts the greater DRM from the smaller. This number is the Battle Advantage. The player with the Battle Advantage is known as the Advantage player, and he uses this number either to receive a positive DRM to his roll, or to inflict a negative DRM to the roll of his adversary, or to combine positive and negative DRM as long as applies and does not exceed his total Battle Advantage. In other words, he may use Battle Advantage either to increase his own roll or decrease his opponent's roll, or a combination of the two. The Advantage player determines the use of Battle Advantage before seeing the die-rolls.
Example: Thutmose III (Battle Rating 4) gives battle to Saushtatar (Battle Rating 2). The net difference is 2 in favor of Thutmose III. So, the Pharaoh has a Battle Advantage of 2. He may either receive a +2 DRM to his die roll in the oncoming battle, or inflict a -2 DRM to Saustatar Roll, or receive a +1 DRM to his roll and inflict a -1 DRM to Saushtatar roll.
15.5.7 The Battle Roll
The Battle Table controls the results of each Battle. Down the leftmost column (labelled D6) are the possible die-roll results for each player; these rolls can be modified according to the list in 15.55. The rest of the columns correspond to the combat strength of the player making the current roll; combat strengths can be modified according to 15.53. To use the Battle Table, determine your final combat strength, then roll the die and modify it (if applicable). Follow the row corresponding to the modified die-roll across to the column corresponding to the final combat strength—the result is the loss number. The loss number is the number your opponent uses to determine his losses in this Battle.
Battle Table (rows: modified die roll; columns: combat strength; result: loss number inflicted on the opponent; "See 15.53 for modifiers")
| D6 | 1 | 2 | 3 | 4 | 5-6 | 7-8 | 9-11 | 12-15 | 16-20 | 21-25 | 26-30 | 31-36 | 37+ |
|---|---|---|---|---|---|---|---|---|---|---|---|---|---|
| -3 | 0 | 0 | 0 | 0 | 0 | 0 | 0 | 0 | 3 | 5 | 5 | 7 | 8 |
| -2 | 0 | 0 | 0 |
Each player rolls a die and modifies it with the DRMs determined in 15.5.6. He locates the modified roll on the D6 column of the Battle Table and cross-references the corresponding row with the column determined in 15.5.4. The number where the row and column meet is the loss number to be applied against the opposing force.
The lowest possible modified roll is -3, and the highest possible is 10 (i.e., the lowest and highest rows on the Table); treat any modified roll of less than -3 as a -3, and any modified roll of more than 10 as a 10.
15.5.8 Battle Losses and Loss Numbers
Each player applies to his own units the battle losses required by the loss number resulting from the battle roll in 15.57. The loss number is satisfied by taking step losses from units—i.e., flipping them to their reduced side or, if already reduced, removing them from the map. When a step loss is taken, the affected unit contributes its loss factor (i.e., the number shown before the step loss is taken) towards the total loss number required.
Example: A 3-(3)-4 warrior unit contributes 3 towards the loss number, while a 4-(2)-5 chariot unit contributes 2, when step losses are taken from them. The two units together therefore contribute 5, a total that would fully satisfy a battle roll of 2 on the 9-11 column on the Battle Table.
The loss number must be fulfilled as closely as possible, but a player never loses more than the loss number—in some instances, a player will lose less than the loss number, but only once all possibilities to take equal to or as close to the loss number have been exhausted.
Example: A Kassite army consisting of six full-strength warrior units (each a 3-(3)-4), and the full-strength royal guard (5-(2)-4) suffers a loss number of 17 in a battle. The Kassite player could satisfy the loss number in any of the following ways:
- reduce five warrior units (15 loss points) and the royal guard (2 loss points);
- eliminate one warrior unit (3 loss points for each step,), reduce 3 more (9 loss points), and reduce the royal guard (2 loss points);
- eliminate two warrior units (12 loss points total), reduce another (3 loss points), and reduce the royal guard.
All the combinations meet the required loss number of 17 exactly; other combinations would come close, but not as close as exactly the number, so would not be satisfactory. Nor would exceeding the loss number.
A reduced unit may never be refitted to its full-strength side during the turn (exception: some events allow this). It remains on its reduced side until eliminated or until Reinforcement phase of the next turn. A general becomes displaced if all units accompanying him are eliminated due to battle losses. A displaced general is placed back in his HomeCountry in a space of his owner's choice.
Chariot Losses in the Main Battle
If chariots units were used to conduct a charge (successful or failed), then half the step losses (rounded down) must come from chariot units. This takes precedence over the necessity of fulfilling the loss number as close to the loss number as possible.
Example: The Mitanni player attempts a chariot charge in a battle. His army—one chariot unit (loss factor of 2 on both sides) and four warrior units (loss factor of 3 each on both sides)—suffers a loss number of 9 on the Battle Table, of which 4 must be satisfied by the loss factors of the chariot units. He reduces the chariot unit for 2 against the loss number, then eliminates it for 2 more. He then reduces one warrior unit to satisfy an additional 3 against the loss number, for a total of 7. No combination will allow him first to satisfy the chariot losses and also to get closer to the total loss number of 9.
15.5.9 Determine Battle Winner
The player who caused the highest loss number (ignoring the result of any chariot charge) wins the battle. If tied, the defender wins the combat. A player also wins the battle if his enemy is entirely destroyed. The winner of a battle gains control of the space, places a PC marker, or replaces an enemy PC marker with the winner's PC marker (except if the space was an enemy garrisoned Walled-City). If the winner defeats an enemy army of 6 or more units, the winner scores a VP. If the defeated army was a Barbarian one, the winner scores a VP (this is cumulative with VP awarded for the size of the defeated army).
15.5.10 Retreats
The loser of the battle must retreat (see 16.1) from the space. Furthermore, if the loser suffers a loss number greater than the winner's loss number by 5 or more, his army is displaced (see Displacement Summary, 25.0). Furthermore, if the displaced army had no legal retreat path within 4 spaces, it loses 50% of the total Steps of all his remaining units (displaced player's choice), rounded up. The Winner of the battle never retreats.
16.0 Retreats
16.1 Retreat Procedure
After battle casualties have been removed, the losing force must retreat to a space that both contains a friendly PC marker and is clear of enemy units, or to a space that contains more friendly units than the retreating force itself (whether or not friendly-controlled or free of enemy units). If more than one space is eligible, the retreat must be to the closest one (retreating player's choice if they are equidistant). However, a player may, at his option, choose a retreat path or destination which is not the closest if it will cause fewer UNIT losses (see 16.3) than the shortest path.
Note that a force of un-led units that loses a battle must retreat—the only instance in which un-led units may move.
In a retreat, units or generals may not be left behind, and any friendly units encountered along the retreat path, if they do not outnumber the retreating units, are swept up in the retreat and become part of the retreating force (if they do outnumber, the retreating force stops in that space). The command limits do not apply during retreats; all units in a losing force, commanded by a general or not, must retreat.
16.2 Restrictions on Retreats
- The length of the retreat may not be more than four spaces.
- The retreat may not use Naval Movement. If the losing army debarked in the battle space that round, it is eliminated and the general is displaced. However, if this space contains a Walled-City friendly to the retreating attacking army, it may retreat into the Walled-City; any units which cannot fit inside the Walled-City are eliminated, and the generals are displaced.
- If the battle's original attacking force retreats, the first space of its retreat must always be the one from which it entered the battle—if that space is enemy controlled, the attacking force loses an additional Step Loss. If the original defending force retreats, at no point during its retreat may it enter the space from which the attacker entered the battle.
- The retreating force may never re-enter the battle space during its retreat.
16.3 Penalties on Retreats
- A retreating force loses one additional Step Loss for each space it enters that contains an enemy PC marker.
- A force retreated into a space containing enemy units will lose an additional Step Loss for each enemy unit in the space. A retreating force may not remain in a space with enemy units. Enemy generals without units have no affect on retreats and cannot block retreat paths.
- A force that cannot retreat, has no place to retreat to or must retreat more than four spaces is instead displaced and loses 50% of the total Steps of all his units (displaced player's choice, rounded up).
A force can be voluntarily displaced instead of retreating. That force is placed on any space in its HomeCountry.
16.4 Retreats into Walled-Cities
A retreating force is never allowed to retreat into a besieged Walled-City, except for an army that sorties from the city—i.e., the army was under siege and, when activated, launched a battle against the besiegers. A retreating force may retreat into a friendly-controlled non-besieged Walled-City if the battle occurred in the Walled-City space. If there are more units in the retreating force than the city can hold, then the retreating force may split up into two forces; one into the city and the other retreating to a legal retreat space. The commanding general and subordinates may accompany either force or be split up in any fashion. This is the only way a retreating force may be split up.
17.0 Walled-Cities & Sieges
Walled-Cities are the locations on the map that are not simple spaces. They have their own distinctive graphical depiction, which shows not only the location of the Walled-City space but also its Siege modifier.
17.1 Walled-Cities and Garrisons
Walled-Cities are either garrisoned or ungarrisoned. A garrisoned Walled-City contains either a garrison marker or a combat unit, or both. An ungarrisoned Walled-City contains neither, but it may contain a PC marker.
A Player takes control of an ungarrisoned Walled-Cities as per 18.2. Ungarrisoned Walled-Cities are simply normal spaces for this purpose.
A Player takes control of garrisoned Walled-Cities only by conducting a successful Siege against it, as per 17.2.
Creating Garrisons
A Walled-City may become garrisoned only if that Power already has a PC marker on it. It becomes garrisoned in one or more of the following three ways:
- In the Reinforcement Phase and the Strategy Phase, move up to two combat units of the same Power to the Walled-City space and place the PC marker on top of them. These units are now considered inside the Walled-City and constitute its garrison.
- In the Strategy Phase, play a card for its Operations Number. Playing a 1-Ops or 2-Ops card in this way allows the player to convert one of his PC markers currently on a Walled-City space to a garrison marker (by flipping the PC marker over). Playing a 3-Ops card allows the player to convert up to two such PC markers (9.2G).
- In the Reinforcement Phase, pay a Tribute Point to flip a friendly PC marker currently on a Walled-City space to its garrison side (7.1 Step 3).
In all cases, the space is now a garrisoned Walled-City. Garrisoned Walled-Cities may only be captured via Siege.
17.2 Sieges
A siege is a potentially multi-round process in which a besieging army attempts to take control of a garrisoned Walled-City. Ungarrisoned Walled-Cities are captured via the normal placement of a PC marker, not via sieges.
Sieges are conducted by having Activated generals making Siege die-rolls. At the instant of the Siege die-roll, that general's army must contain at least three combat units. A siege may be conducted in one of two ways:
- Any activated general with a sufficiently large army which ends its move at an enemy garrisoned Walled-City may, as part of that same Activation and at no cost in movement points, make one Siege die-roll against that Walled-City—but only if no battle was fought during that general's activation in that Walled-City space. Overruns are permitted before a Siege attempt is made. The Siege die-roll ends that general's activation.
- Any activated general with a sufficiently large army which begins its activation at an enemy garrisoned Walled-City may Activate as if he were a general with a Strategy Rating of 1, but only for the purpose of conducting a Siege die-roll. That is, any general may activate using any Ops card (or event that allows an activation in addition to the event); the general conducts the Siege die-roll, which ends his activation.
In either case, place a "City Under Siege" marker on the space.
No Walled-City may be subjected to more than one Siege roll per strategy card played (i.e., a Major Campaign may not be used to direct three siege attempts against the same city).
17.3 Siege Resolution Sequence
Each Siege is resolved using the following sequence (explained in full immediately below):
- Calculate Siege Resolution DRM.
- Determine outcome.
- If unsuccessful, place a "Siege Continued" marker.
1. Calculate Siege Resolution DRM.
The Siege Resolution DRM is the total of any modifiers given by action cards plus the total number on any "Siege Continued" marker(s), minus the Walled-City's printed Siege Modifier. A basic Walled-City has no Siege modifier; others provide either a -1 or a -2 Siege modifier.
Example: The Hatti player besieges Karkemish, a Walled-City with a Mitanni garrison marker and a Siege Modifier of –2. One "Siege Continued" marker is present: it is the second round that the Hatti besiege Karkemish but they failed the first time. Determined to take the city, the Hatti player plays a Traitor action card, which gives him +1. The final DRM is 0.
2. Determine Outcome
Roll a die, modifying the roll per the Siege DRM, and consult the Siege Table for the result:
- If Successful, the Walled-City is captured by the besieging player—the besieging player gains control of the Walled-City, placing his PC marker (not a garrison marker) on the Walled-City space, and any enemy units or garrison marker inside the Fortress are immediately eliminated and the generals displaced.
- If Unsuccessful, the Walled-City does not fall. Place a "Siege Continued" Marker in the space.
3. Place "Siege Continued" Marker
If a Siege Resolution result is Unsuccessful, place a "Siege Continued" marker on the space. Each continued Marker gives a bonus of +1 on the following siege rolls.
With additional Unsuccessful results, continue to increase the number of "Siege Continued" markers, up to a maximum of 3 (i.e., the maximum DRM that "Siege Continued" markers can provide is +3, over and above any other applicable DRM for that siege). Remove "Siege Continued" markers from a Walled-City if the number of besieging units in the Walled-City is reduced below three for any reason.
17.4 Natural Rolls
Regardless of any modifiers, a natural (i.e., unmodified) roll of 6 always gives a Successful result.
Regardless of any modifiers, a natural (i.e., unmodified) roll of 1 always gives an Unsuccessful result.
17.5 Restrictions on Besieged Forces
A besieged city may not receive reinforcements and a besieged general may not raise troops. A besieged army or general may not leave the city via naval movement nor may an army or general debark directly into a besieged city (it may land outside the city walls). A besieged army may sally forth and initiate battle against the besieging army. If it does, the battle is resolved normally.
17.6 Lifting a Siege
A siege is lifted the instant there are no longer any enemy units in the space containing the Walled-City. If this happens remove any "Siege Continued" marker. Reducing the besieging army to below 3 units does not raise the siege but the besieger may not conduct additional Siege attempts as long as he doesn't have at least 3 units in the besieging army and he loses the "Siege Continued" siege marker (if any).
17.7 Relief Armies and Besieged Forces
If you send an army to attack an enemy army besieging one of your Walled-Cities, you may count the units inside the Walled-City during the battle. When besieged units are added to an attack or a besieged army attacks on its own, it is called a sortie. Battle losses can come from either the relief army or the units that sortie at the controlling player's option. If there is a King inside the city when a sortie occurs, he is considered in command for the battle. If no sortie occurs, the general inside the city is not used in the battle. Only the units and generals that sortie may be retreated back into the Walled-City.
18.0 Political Control
18.1 Political Control
Players gain control of a space and control of a province through placement of PC markers. A player controls a space if he has a PC marker in it. A player controls a province if he controls the majority (i.e., more than half) of the spaces in the province and all its Walled-City spaces. A space containing a PC marker remains under the control of the owning player even if an enemy general and/or units are also present.
18.2 Placing PC Markers
Strategy cards can be played to place PC markers on the map in provinces where you have at least one army (i.e. general plus combat units) present. The number of PC markers that can be placed is equal to the Operations number of the card. If no enemy army is present in the province, a player may place PC markers in any space that contains:
- no enemy or neutral units, or garrison markers; or
- an enemy PC marker but no enemy units or garrison markers
Note that, under (a), a player may capture ungarrisoned Walled-City in this manner (but you need to besiege garrisoned Walled-City). If an enemy army is present in the province, a player can place PC markers only in spaces (including ungarrisoned Walled-City spaces) occupied by his own units.
Another way to place PC markers is when an army is activated: an activated army may spend 1 MP to place a PC marker in the space (but not a garrisoned Walled-City) it currently occupies; if the space already contains an enemy PC marker but no enemy combat units, in which case the friendly army converts the marker to one of its own. Keep in mind that an army has the moving capabilities of its slowest unit.
Finally, PC markers may be placed as a result of winning a battle. See 15.5.9.
18.3 Characteristics of PC Markers
- PC markers do not stop or slow movement of units.
- Interception attempts into a space containing an enemy PC marker and no friendly units are more difficult (13.4).
- You may not Avoid Battle into a space containing an enemy PC marker (14.2). A retreat must end in a space containing a friendly PC marker (16.1).
- An army that Retreats through an enemy PC marker must take an additional Step Loss (16.2).
- The only way to remove a PC marker is by its being replaced by an enemy PC marker, by an event, or by the removal of enemy units from a player's HC in the Victory Phase.
Note: The God Kings has no concept of Isolated PC markers as games such as Hannibal: Rome versus Carthage.
19.0 Kings & Successors
19.1 Kings
Each player always has a King on the map. The King is always the supreme commander for his power. The King for each power for each turn is shown in the "King" row of the Succession Chart. During the Reinforcement Phase, simply replace the old King with the new King, unless the new King has already arrived via the Succession roll (see below) and is still showing as King for the new turn.
19.2 Successors
On certain turns—see the Successor rows on the Succession Chart—a Successor for the current King has the potential to enter the game, replacing the current King. Successors are noted on their counters by a white asterisk to the right of the icon. As the Succession Chart on the map shows, in some cases (e.g., the Kassite ruler Kurigalzu I), the Successor is replaced during the Reinforcement Phase of the very next turn by another ruler; in many cases, however, the Successor stays in play for the next turn and becomes the King (e.g., the Egyptian ruler Tutankhamun). As long as the Successor has not yet become the King, he is not placed on the map but, instead, is placed on the player mat, clearly visible to all players.
Example: The Egyptian Succession. The Egyptians begin the game with Hatshepsut as the King; this is noted by the T1 (Turn 1) notification on the counter, and no asterisk beside the icon. Thutmose III also has a T1 designation, but the white asterisk beside the icon indicates that he is the possible Successor in Turn 1—the Succession Chart shows that he begins Turn 2 as King even if he did not come into play during Turn 1. He remains King until at least Turn 3, when Amenhotep II becomes the Successor (noted by T3 and the white asterisk on the counter). Then, on Turn 4, Amenhotep III is the possible Successor. Amenhotep IV automatically becomes King at the beginning of Turn 6 (he is not a possible Successor in Turn 5), as indicated by the T6 on the counter and no white asterisk beside the icon.
19.3 Changing Kings
A power's King changes in any of the following ways:
- Reinforcement Phase: During the Reinforcement Phase, if a new King is scheduled to rule according to the Succession Chart, replace the current King with the new King. In some cases, the new King will already have arrived via the Succession roll.
- Succession Roll: At the beginning of each of his rounds, a player with a Successor showing on the Succession Chart for that turn must roll a die. If he rolls strictly less than the number of the current Round, he replaces the King on map by his Successor, in the space where the King's army is currently located; the new King may not be activated in that round. If no King's army was in play (which is rare), the new King is displaced instead. If the King's army is besieged at the instant of succession, then the new King is displaced, with the King's army remaining where it is. The player may, before the roll is made, play a card to adjust positively or negatively the die roll by its Operation Value. This card doesn't replace the card the player must play during his normal turn.
- The God King Card: This event can be used by any player to insure that a player replaces his King by his Successor. The King's army is displaced; if besieged, it stays in its current space. The "God King" Card cannot be played if a King has no Successor.
Important: Certain events, such as False Rumor, can cancel a Succession or the "God King" Card. This cancelling prevents the Successor from becoming the new King, but only during the round in which it is played; if that Successor is scheduled to become the King next turn, he does so anyway.
19.4 Neutral Powers
Neutral Powers may change Kings during the turn, if a Successor is available, but the Succession Roll is made only when a Neutral King is activated. The Player activating the Neutral King may play a card to influence the Succession Roll. Also, during the Reinforcement Phase of each turn, replace each Neutral Power's current King with its new King if a new King is scheduled to appear this turn.
Examples of Changing Kings
a) It is the start of Turn 3. The Hatti player had Muwatalli I on the map as his King on Turn 2. The Succession Chart shows Tudhaliya I scheduled to arrive on Turn 3 (as long as he did not arrive as a Successor in Turn 2). During the Reinforcement Phase of Turn 3, the Hatti player places Tudhaliya I in any Hatti-controlled space.
b) It is the start of the Strategy Phase of Turn 1. The Egyptian player has Hatchepsut on the map as his King. The Succession Chart shows Thutmose III available as a possible Successor. Thutmose III is a much more capable military leader (Strategy Rating of 1 and Battle Rating of 4), so the Egyptian player wants him to appear. At the beginning of the Strategy Phase, the Egyptian player rolls for Succession (he must roll, he has no choice) and, to improve his chances, he plays a 3-Ops card immediately to improve his chances. He rolls a 3, subtracting 3 because of the card, for a result of zero. Thutmose III is now King of Egypt. But before the Egyptian player can celebrate, the Mitanni player—who does not want to see Thutmose any earlier than he has to—plays a False Rumor card and cancels the succession for that Round (only). The Egyptian player will try again next Round.
20.0 Diplomacy & Neutrals
20.1 Between players
The players may verbally ally themselves with each other. But these alliances are informal. Allied players may attack each other anytime. Allied players may not stack units or generals in the same space. If units from different players are stacked together, they must battle each other, even if allied, at which point the alliance ends.
Even when non-allied, one player may always use event cards to help another player, at any time during the Strategy Phase even when it is not the helping player's impulse. Primarily this assistance will occur in the form of action cards, but is not restricted to those.
At the beginning of each Reinforcement Phase, players may do the following, in the listed order:
- A player may give control of any number of his own spaces to another player (or players). To do this, the space must be adjacent to a space that is in a province that the receiving player currently controls (the player giving the space up need not control the province it is in). Simply replace the PC of the giving Power with the PC of the receiving one. Garrisons are lost in the process.
- Players may also freely exchange Tribute Points and Wood Points with other Players, regardless of the locations of the Powers' forces on the map.
- Lastly, each player may give to one (and only one) other player one (and only one) card from his hand.
20.2 Between players and Neutral Nations
A Neutral Nation is a player power that is listed as a neutral in the current scenario—Egypt, Kassites, Hatti, or Mitanni/Assyria. Barbarian and Revolt forces are not considered Neutral Nations. At any time during the Strategy Phase, a Player can activate a general of a Neutral Nation as follows. Neutral Nations are determined by the Scenario chosen.
- He may play a 3-Ops card or a Campaign event card to activate a Neutral general and play that general as he wishes within the regular rules for activation. If he uses a Campaign card for this purpose, he may use only one of the card's activations for a Neutral general, with the other(s) usable for his own forces. He can then play the activated general as he wishes, respecting 20.3 and the regular activation rules. The instant he announces the activation, he places a control marker of that Neutral nation in the appropriate space on his player mat.
- After all players have completed all their Rounds for the current turn, the Neutral Nations Round is conducted. A strategy card is drawn from the deck for each Neutral Nation. The player currently possessing the control marker for a Neutral Nation draws the card for that nation. If there is only one Neutral Nation, and no player controls it, the player with the currently lowest VP level draws; if there are two Neutral Nations, the player with the lowest VP level draws for the first such Nation (his choice which one) and completes that Nation's impulse, after which each of the other players rolls a die to determine who will draw for the other Nation (high roll draws, ties are re-rolled). The player drawing the card now activates a general from that Nation (or more than one if a Campaign card), playing the card according to 20.3 and the regular activation rules, and places the control marker for that Nation in the appropriate spot on his player mat.
20.3 Neutral Power Restrictions
- A Player may not activate a Neutral general in his Impulse if he has activated a neutral general in his current or his immediately previous Impulse. A player may not activate a Neutral general two rounds in a row.
- A Player may not activate a Neutral general of a specific Neutral Nation or keep possession of that Neutral Nation's control marker if, during either this Round or the previous Round, he had battle with this Neutral Nation or he removed a PC marker or a garrison marker of this Neutral Nation.
- A Neutral general cannot be activated more than once per Round.
- All decisions concerning a Neutral army (Interception, Withdrawing before battle, chariot charge, Retreat, Succession Roll) are taken by the player that hold the Nation's Control marker. If nobody does, it's the player with the least total VP.
- Once a player controls a Neutral Nation, another player gains control of that Nation the instant he activates one of its generals. Until this happens, control of a Neutral Nation remains with the currently controlling player.
- At the end of each turn, neutral armies and units (except garrisons) are replaced in their Homecountry Capital: Hattusha for the Hatti, Assur for the Assyrian, Babylon for the Kassites, Washukanni for the Mitanni and Memphis for the Egyptian.
- If a Neutral army takes a Walled-City, immediately place a garrison marker of this Neutral Power in this Walled-City.
- A Neutral army may place only PC markers of its own Nation while moving—therefore, the player controlling the Neutral army may not place his own PC markers as a result of Neutral Nation activities. Neutral Nations may not use a card's Operations Number to place PC Markers.
- Victory Points earned by a Neutral army are not counted for the player controlling it.
Example: A Kassite army activated by the Egyptian player via a 3-Ops card may place Kassite PC markers while moving, not Egyptian ones, and if it wins a battle against an enemy army consisting of 6 or more units, the Egyptians do not get any VP.
20.4 Neutral Power Reinforcements
During the Reinforcement Phase, flip all reduced Neutral units to full strength and place any destroyed units back on the map, at reduced strength, in that Neutral Power's Capital.
Then, calculate the TP and WP of each Neutral Nation and, following the normal rules for reinforcement, perform the sequence for each Neutral Nation. At each step, continue to spend TP and WP until you run out:
- Flip reduced warrior units to full strength.
- Place chariot units in the Capital.
- Place mercenary units in the Capital.
- Replace the current King with the new King if a new King is scheduled to appear this turn (this does not cost TP/WP).
21.0 Barbarian Invasions
The Invasion events bring into play one of the Barbarian armies: Gasga, Libyan or Elamite. When the event is played, the player chooses a nationality and does one of the following:
- If not already in play, he places the Barbarian army in the diamond-shaped space corresponding to the name of that army. That Barbarian army cannot be activated until the next Round.
- If the chosen Barbarians are already in play, the player reinforces the Barbarian army led by their general. Their reduced or destroyed chariot units are restored to full strength. The reduced mercenaries are restored to full strength, plus roll 1d6: the die-roll result is the number of units of mercenaries that immediately join the Barbarian general.
Barbarian armies are played as Neutral armies (20.2) with the following exceptions:
- Barbarian armies cannot place or remove PC markers.
- Barbarian generals may activate and move with up to ten CU.
- If a Barbarian army, once activated, is moved by the controlling player into a space containing a Major Power army containing at least twice as much combat strength as the Barbarian force, roll a die. On a 1–3, the activated Barbarian army stops just before entering the space containing the Major Power army. Note: This could mean that the Barbarian army does not move at all, but it has been activated anyway, so the Player does not get the card back.
- A space occupied only by a Barbarian unit(s) is not considered controlled by the owning PC marker's player during the Victory Phase.
- At the beginning of the next Reinforcement Phase, remove from the map any and all Barbarian armies and units.
- The Invading Tribes spaces are impassable.
- Victory against a Barbarian army earns the victorious player one more VP.
The Invasion events cards are not placed in the discard pile when played. Instead, they are reshuffled with the remaining strategy deck at the end of the turn.
22.0 Revolts
Certain events bring into play the following Revolt armies: Karkemish, Megiddo, Sumer, Amurru. They are played as Neutral armies (20.2) with some exceptions:
- Revolt armies cannot place or remove PC markers.
- Revolt leaders may activate and move with up to ten CU.
- A space occupied only by a Revolt unit(s) is not considered as controlled by the owning PC marker's player during the Victory Phase.
- During the Reinforcement Phase, their units are not reinforced. They are simply placed back in any space in the province they are originating from (player with the fewest number of VPs chooses where).
23.0 From Mitanni to Assyria
The Mitannian Empire suffered from internal crises and gradually disappeared around 1350, its land grabbed by the Hatti and the new rising power, Assyria. A Deus ex Machina is required to simulate this change in the balance of power.
In the Campaign Game (the full 10-turn scenario), Mitannia begins as a Player Power and Assyria is a standard province. At the very beginning of Turn 6, the Mitanni player must make the following change.
Replace all PC markers and garrison markers in the province of Assyria with Assyrian PCs (not garrisons). Place Ashur-Uballit I with 3 divisions and 4 chariot units in Assur. Place a garrison marker in each of Assur and Nineveh. Remove all Mitanni counters from the game.
From this point on, Assyria is a player power controlled by the Mitanni player (who is now the Assyrian player). Mitanni is simply a standard province for the remainder of the game.
24.0 Victory Phase
24.1 Procedure
In The God Kings, each player has two Victory Point markers: "Current Turn VP" and "Total VP". Both markers are placed on the VP Track on the power's player mat. All VP are recorded first with the "Current Turn VP marker", then transferred to the "Total VP" marker in the Total VP Calculation segment of the Victory Phase. After that transfer, the "Current Turn VP" marker is returned to the "0" space on the VP track.
Note: In other words, there are two sharply distinguished VP calculations every turn. VPs for the current turn need to calculated and considered before these VPs are added to the number recorded by the Total VP marker.
The full sequence for the Victory Phase is as follows:
- Calculate VP gains for Control of Provinces: All players simultaneously calculate the VPs due to them for control of provinces and adjust their respective "Current Turn VP" markers accordingly (24.1). Each player scores VPs equal to the total of the VP Values of the provinces (as printed on the map) this player controls. In order to control a province, a player must control, as indicated with PC markers, the majority of the province's spaces and all its Walled-City spaces.
- Calculate VP losses for Control of HomeCountry spaces: All players simultaneously calculate the VPs lost (if any) from not controlling spaces within his HomeCountry and adjust their respective "Current Turn VP" markers accordingly. Each player loses 2 VP for each space of his HomeCountry that he does not control, unless his HC is not conquered. If a player's HC is conquered (he does not control the majority of its spaces), the player does not receive the VP of its HC and he receives only 50% (rounded up) of all other VP he is entitled to receive this turn. In other words, he loses all his HomeCountry's VP and half of his entire empire's VP.
- Check for Sudden Death Victory. In reverse Turn Order (as determined at the beginning of this turn), each player announces how many VPs he earned this turn, as indicated by the "Current Turn VP" marker on the VP track of his player mats. If the figure for any player is 20 or higher, a Sudden Death Victory has occurred (see 24.2).
- Adjust VP Totals. All players simultaneously add the VPs under their "Current Turn VP" markers to the number of VPs currently under their "Total VP" markers. The adjusted "Total VP" marker now shows the VP situation as the game moves to the next turn.
- Determine Turn Order for Next Turn: The players, according to 6.0, determine the order of play of the following turn. For Turn 1, the scenario instructions set the Turn Order.
- Reset "Current Turn VP" Markers. All players simultaneously move their "Current Turn VP" markers to the zero space on their Turn tracks.
- Remove enemy PCs and units from the HC of all Nations (Player Powers of Neutrals). Each player does this simultaneously, removing the PC markers from the map and placing the units and leaders back in their own HC. Neutral Nation units and leaders are placed in their respective HCs as if reinforcements (20.4). Thus, each Active Player controls all spaces of his HC at the end of each Victory Phase.
Players score Victory Points (VP) in The God Kings as follows:
- During the Campaign Phase, a player receives 1 VP if he wins a battle against an enemy army—including Neutral, Barbarian, and Revolt armies—consisting of at least 6 units. The player scores one additional VP if the defeated army was a Barbarian army (Gasga, Libyan or Elamite). He therefore scores 2 VP if he defeats a Barbarian army that consisted of at least 6 units.
- During the Campaign Phase, some events may reward a player with additional VP.
- During the Victory Phase, a player scores VP equal to the total of the VP Values of the provinces this player controls. In order to control a province, a player must control with PC markers the majority of the province's spaces and all its Walled-City spaces.
- During the Victory Phase, the player loses 2 VP for each space of his HomeCountry that he does not control, unless his HC is not conquered. If a player's HC is conquered (he does not control the majority of its spaces), the player does not receive the VP of its HC and he receives only 50% (rounded up) of all other VP he is entitled to receive this turn. In other words, he loses all his HomeCountry's VP and half of his entire empire's VP.
During the turn, each player notes the VP he earns for the turn on the VP display on his player mat, using the "Current Turn VP" marker. At the end of the Victory Phase, if a player has scored 20 points or more in one turn, he may have won a Sudden Death Victory (see 24.3).
If no player wins a Sudden Death Victory (24.2), each player adds the VP he won for the turn to his total VP count, accordingly adjusting his "Total VP" marker. He then sets his "Current Turn VP" marker to 0.
Example: It is the Victory Phase of turn 3. Egypt has won 2 battles during the turn (including one against a Libyan army with less than 6 units) for a total of 2 VP. The Egyptian player used an event (Royal Hunt) that gave him 1 VP. He controls the following provinces: Egypt, Sinai, Canaan, Amurru, Ugarit and Alasiya (total VP for the provinces: 14). His Current Turn VP marker is therefore placed on the 17 space on the General Records track, not enough to win a Sudden Death Victory. The game goes on, and the Egyptian player adds his 17 VP to his VP he already had from the first two turns.
At the end of the Victory Phase, remove from the HomeCountry of each Power all units and PC markers that do not belong to that Power (even those belonging to a currently allied Power), instantly regaining control of those spaces. The player to whom these units belong places these units on any space in his own HC. Thus, each player controls every space of his HomeCountry at the end of the Victory Phase of every Turn.
24.2 Sudden Death Victory
After calculating the "Current Turn VP" of all players, if any player's "Current Turn VP" marker shows that he has scored 20 VP in that turn, he wins a Sudden Death Victory, and the game is over. If two or more players are shown to have score 20 VP in that turn, the winner is the player with the highest number of total VP. Similarly, in case of a tie, the winner is the player with the greatest total number of VP. If there is still a tie, no Sudden Death Victory is awarded, the game goes on normally.
24.3 End of Scenario Victory
At the end of the Victory Phase of the final turn of the scenario, after converting "Current Turn VP" to "Total VP", the player with the highest Total VP number is declared the winner. If there is a tie, the game is a draw.
25.0 Displacement Summary
What Displacement Means
A displaced general is placed back in his HomeCountry in a friendly-controlled space of his owner's choice. Displaced units are placed in any friendly-controlled space in their HomeCountry. A displaced Neutral Nation army is placed in its Capital space. A displaced Barbarian army is placed on its Tribal space.
Displaced via Enemy Movement (11.11)
A general becomes displaced if an enemy army enters the general's space and the general is not accompanied by friendly units. A general also becomes displaced if all units accompanying the general are eliminated due to battle losses. A general is not displaced if all units under his command are removed due to the Attrition Table.
Displacement by Major Battle Loss (15.60)
If the loser of the battle suffers a loss number greater than the winner's loss number by 5 or more, his army is displaced.
Displacement via Retreats (16.2)
- If a losing army used naval movement and debarked in the battle space that round, it is eliminated and the general is displaced, as per 11.11. However, if this space contains a Walled-City friendly to the retreating attacking army, it may retreat into the Walled-City; any units which cannot fit inside the Walled-City are eliminated, and the generals are displaced.
- A force that cannot retreat, has no place to retreat to or must retreat more than four spaces is instead displaced and loses 50% of the total steps of all his units, rounded up (displaced player's choice of which steps of which units).
- A force can be voluntarily displaced instead of retreating. A displaced army is placed on any space in its HomeCountry.
Displaced via Succession Roll (19.3)
If a Successor roll succeeds but there is no King's army in play for the Successor to be placed with, the new King is displaced instead. Furthermore, if the King's army is besieged at the instant of succession, then the new King is displaced, with the King's army remaining where it is.
Displaced via The God King Event (19.3)
This event can be used by any player to insure that a player replaces his King by his Successor. The King's army is displaced, unless besieged, in which case the King's army stays in its current space.
Displaced via Siege (17.3)
If successful, the Walled City is captured by the besieging player—the besieging player gains control of the Walled City placing his PC marker (not a Garrison marker) on the Walled-City space, and any enemy units or Garrison marker inside the Fortress are immediately eliminated and the generals displaced.
Sequence of Play (Summary)
Each turn of The God Kings is played as follows:
I. Deal Strategy Cards Phase
Each player is dealt 7 strategy cards or 6 if the player kept a card from the previous turn (8.4).
II. Reinforcement Phase (Skip this phase on the first Turn of all scenarios)
- Each player places his reinforcements according to Turn Order (6.0).
- Replace Neutral units as specified in 20.4.
- If the 6th turn of the Campaign Game, the Mitanni Player must change from Mitanni to Assyria (see section 23).
III. Strategy Phase
This Phase consists of five Rounds. Each Round has a number of Impulses equal to the number of players in the game. During each Impulse, each player, according to the Turn Order (6.0), must do the following in the order listed:
- Make a Succession Roll if a Successor is possible (19.3).
- Play a strategy card (9.2, 9.3).
- Record Victory Points (if any), the instant he gains them, by adjusting the "Current Turn VP" marker on the VP Track on his player mat (24.2).
After all five Rounds have been completed, the Neutral Nations Round is conducted. Here, a card is drawn for each Neutral Nation in play this scenario. See 20.2 for details.
IV. Victory Phase
The Victory Phase is conducted in the following order of steps. Full details for each step are found in section 24.
- Calculate VP gains for Control of Provinces and adjust the "Current Turn VP" markers accordingly (24.1)
- Calculate VP losses for Enemy Control of HomeCountry spaces and adjust the "Current Turn VP" markers accordingly (24.1)
- Check for Sudden Death Victory, per 24.2. If yes, the game is over. If no, go to the next step.
- Determine Turn Order for Next Turn: The players determine the order of play of the following turn, as per 6.0.
- Adjust VP Totals. All players add the VPs under their "Current Turn VP" markers to the number of VPs currently under their "Total VP" markers.
- Reset "Current Turn VP" Markers. All players move their "Current Turn VP" markers to the zero space on their Turn tracks.
- Remove enemy PC and units from all players' HC.
V. End of Turn Phase
First, each player discards all unplayed cards from his hand, although he may potentially retain one of them as per 8.4. Then, begin another turn. Play continues until one side wins a Sudden Death Victory or all turns specified in the scenario instructions have been played to completion.