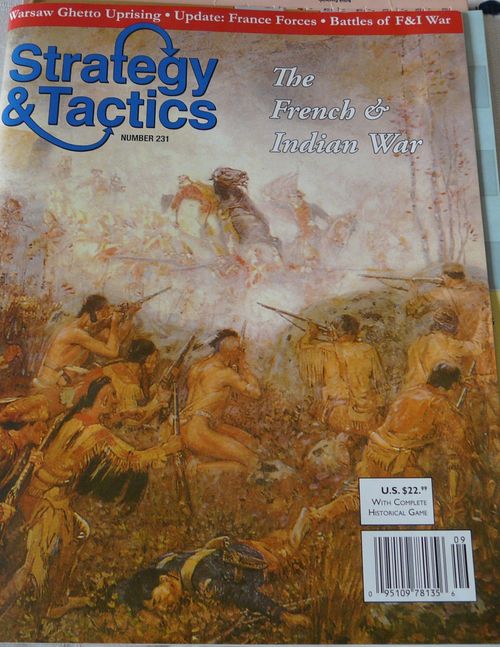
The French & Indian War: Struggle for the New World
The French & Indian War: Struggle for the New World Rulebook
Table of Contents
Table of Contents
- Map Errata and Clarifications
- 1.0 Introduction
- 2.0 Components
- 3.0 Sequence of Play
- 4.0 Balance of Power
- 5.0 Territories & Colony Status
- 6.0 Occupation
- 7.0 Initiative
- 8.0 Random Events
- 9.0 Income & Pounds
- 10.0 Recruits
- 11.0 Forces
- 12.0 Operations
- 13.0 Movement
- 14.0 Invasion Reaction
- 15.0 Combat
- 16.0 Negotiations
- 17.0 Leaders
- 18.0 Supply
- 19.0 Reorganization
- 20.0 Naval Operations
- 21.0 Base Areas
- 22.0 Civilization Markers
- 23.0 Forts & Fortresses
- 24.0 Militia
- 25.0 Indians
- 26.0 Legions
- 27.0 Fog o' War
- 28.0 Spain & Florida
- 29.0 Victory Conditions
- Optional Rules
- 30.0 Scouting
- 31.0 Massacre
- 32.0 Honors of War
- 33.0 Surrender
- 34.0 Prisoner Exchanges
- 35.0 Scenarios
- Designer's Notes
Map Errata and Clarifications
Map Errata. New Jersey consists of the square containing Perth Amboy. Delaware consists of the square containing Newcastle. (Those borders were inadvertently left off the map.)
Expenditure Table (clarification). The cost to recruit Leaders is listed at the bottom of the chart (obviously, this is not the cost to remove massacre markers from them).
Q. The distinction between provincial and militia units isn't clear.
A. Provincial units were regular units raised by the home power in the colonies. Militia are part time soldiers who went about their civilian life until called up for an emergency. The distinction was less in the French colonies than the British. British militia can't leave their colonies while French militia can. In the sequence of play, step "14" details effects on provincials and militia. See also rules 10.1 and 10.2 and 24.0.
Q. What double-side units actually have two steps?
A. There are no two-step units in the game. That is explained on page R3 under "Back printing."
Q. Siege appears to be missing from the rules. What happens at end of year if defender has no magazine? Logic says such defenders should die, but it seems one can use rule 18.3, but then that would mean sieges could go on forever. Perhaps that rule should state 18.3 can only be used for units that can trace a supply line, and that besieged units are automatically out of LOS?
A. 18.33 allows you to expend supply points. Bear in mind sieges often did go on for long periods in that era.
1.0 Introduction
F&IW is a two player game. The British player controls the forces of the British Empire and its American colonies. The French player controls the forces of the French Empire, its colonies and Indian allies in North America. Players must use a combination of military strength, economic management and diplomatic skill to seize control of the continent. F&IW is based on ASIA CROSSROADS (S&T 216), but there are several significant changes that apply to this game.
2.0 Components
2.1 The map shows eastern North America as it was during the mid-18th century. A square grid has been superimposed over it to regularize the position and movement of the playing pieces. When setting up and playing the game, the cardboard playing pieces are placed within the individual squares.
2.11 Colonies. The map is further divided into politico-geographic areas called colonies, delineated by borders. Each colony has a corresponding space on the Colony Control Chart, which indicates the control status of that colony. Certain colonies have corresponding "provincial" units. For example, New York colony has units marked "NY," which represent the forces of that colony.
2.12 Terrain. The game map has features on it called terrain. Terrain is explained on the Terrain Effects Chart.
2.13 Borders run along the sides of squares.
2.14 Colony Control Chart is used to record and show information about each colony. That information includes the following.
- Name: the historic name for the colony.
- Status: if the colony's support for the home country is passive or active.
2.15 Holding boxes are used as convenient places to store units that may come into play. They include the following.
- Leader: place leaders here who are available but aren't yet in play.
- British Home Base: place British units that are "off-map" in the British isles.
- French Home Base: place French units that are "off-map" in France.
2.2 Other Tables & Charts. These are used to conduct and record various game functions.
- Balance of Power Index. Indicates which side and to what degree the current diplomatic situation favors. Adjacent to it is a list of game actions that cause the Balance of Power Index to shift.
- Combat Results Tables (CRTs). Are used to resolve combat. There are two CRTs, Linear and Raid.
- Events Table. This is used to generate random events.
- Income/Expenditure. These generate the "pounds" players receive each turn, the number of pounds required to build units and to perform other functions.
- Negotiations Table. Is used to resolve attempts at takeovers of a colony by diplomacy and subversion.
- Treasury Record. Players need to keep track of their current treasury value (in pounds) on a separate piece of paper.
- Terrain Effects Chart. This shows the various terrain types and their effects on play.
- Turn Chart. This is used to determine the current turn.
2.3 Playing Pieces. There are several types of cardboard playing pieces: leaders, combat units and markers.
Unit Colors
- British Regulars: light red and red blocks.
- British Provincials: light red and red blocks with blue type.
- French Regulars: light blue and gold blocks.
- French Provincials: light blue and dark blue blocks.
- Spanish Regulars: light green and gold blocks.
- Spanish Provincials: light green and dark blue blocks.
- Indian: light blue and green blocks.
2.31 Leaders. Certain leaders represent historic persons and have a name. Others represent generic leaders and are indicated as "Brigadier" or "Chief."
2.31 Leaders (omission). The number on the left side of the counter is the Leader's Military rating; the number on the right side is the Leader's Diplomacy rating.
British Leaders
- Aber: Abercromby, Loudon
- Amherst, Moncton
- Bouquet, Monro
- Braddock, Rogers
- Brig: Brigadier, Shirley
- Dinw: Dinwiddie, Washing: Washington
- Howe, Wolfe
- Johnson
French Leaders
- Bougain: Bougainville, De Vill: De Villieres
- Brig: Brigadier, Druc: Drucour
- De Bour: De Bourlamaque, Lang: Langlade
- De Ker: De Kerlerec, Marin: Marin
- De Levis: De Levis, Mont: Moncalm
- De Vaud: De Vaudrielle, Picquet: Picquet
Indian Leaders
- Pontiac, Chief
2.32 Combat Units. Each combat unit has the following information on it.
Heavy/Light. "Light" units have a "+" between their combat and movement factors. All other units are considered to be "heavy." Light units have advantages in movement and combat.
2.33 Combat Unit Types
- Line Infantry: troops trained to fight using conventional tactics.
- Light Infantry: troops trained in skirmishing and frontier warfare.
- Grenadiers: elite infantry.
- Rangers: troops trained in long range independent operations.
- Militia: citizen soldiers.
- Dragoons: mounted infantry.
- Indians: native Americans.
- Siege Train: heavy artillery and sappers.
- Engineers: pioneers and artificers.
- Legion: combined arms formation.
- Fleets: ocean going warships plus transports.
- Riverine: vessels capable of operating on rivers, lakes and coasts.
Back printing. Units may be backprinted with different types of units. Unlike many other wargames, the reverse side doesn't represent a reduced state of the unit on the front; though under certain circumstances a unit may be converted from its front or reverse side.
Unit Sizes
- x = Brigade
- ||| = Regiment
- | = Detachment or Indian Warband
Naval units are squadrons.
British Unit Abbreviations
- BW: Black Watch
- Comb: Combined
- GR: Goreham's Rangers
- JR: Johnson's Rangers
- LG: Louisbourg Grenadiers
- QRAR: Queen's Royal American Rangers
- RM: Royal Marines
- RR: Rogers' Rangers
French Unit Abbreviations
- Ang: Angoumois
- Art: Artois
- Bearn: Bearn
- Ber: Berry
- Burg: Burgogne
- C Vol: Colonial Volunteers
- Camb: Cambis
- Cav C: Cavalry Corps
- CdB: Chasseurs de Bois
- FL: Fortress Louisbourg
- Guy: Guyenne
- Haiti: Haitian
- Irish: Irish Volunteers
- Kar: Karrer (Swiss mercenaries)
- L Vol: Louisiana Volunteers
- La R: La Reine
- La S: La Sarre
- Lang: Langeudoc
- M: Montreal
- Mar: Marine
- NO: New Orleans
- RR: Royal Roussilon
- NF: New France
- Q: Quebec
- Vol Et: Volontaire Etrangers
2.34 Civilization Markers. Markers represent installations that may be built on the map in the course of play.
- Fort: a defensive position.
- Fortress: a permanent defensive position more formidable than a fort.
- Magazine: logistics center.
- Trail: a road cut through the wilderness.
2.35 Other Game Markers
- Balance of Power: indicates which side the Balance of Power Index favors.
- Control: used on the Colony Control Chart to indicate which player controls a particular Colony (if any). They have a French flag on the front and a British flag on the reverse — use whichever side is needed. Players can also place the markers within the colonies themselves on the map.
- Massacre: indicates a square in which total personal and property destruction has occurred.
- Siege: indicates a fortress under siege.
- Supply Points (SP). Indicates the number of supply points a player has available. There is no Supply Point Track, but players can place them on the appropriately numbered space on the Balance of Power Index. For example, placing the British marker on the "5" space means the British have available five supply points. Alternatively, players can keep track of supply on a separate piece of paper.
- Turn: indicates the current turn. Use the front side of the marker prior to the Seven Years War breaking out (see Random Events), then flip it to the reverse after that event occurs.
2.4 Game Terms
- Belligerent. A power involved in military operations. Britain and France are always belligerents, along with their colonies. Spain (Florida) and various Indian forces may begin neutral and become belligerents in the course of the game.
- British Colony. British colonies are the thirteen colonies on the map: Massachusetts (includes Maine), Rhode Island, Connecticut, New Hampshire, New York, Pennsylvania, Maryland, New Jersey, Delaware, Virginia, North Carolina, South Carolina, Georgia, plus the territories of Hudson's Bay, Newfoundland and Nova Scotia.
- British Empire. All units and markers controlled by the British player, including British imperial units and British colonials (provincials).
- Colony. One of the geographically distinct areas on the map. Each colony has its own forces, as indicated by the colonial identifications on the units.
- Combat. An attempt to destroy enemy forces and seize terrain, executed using the Combat Results Tables.
- Combat Strength. A quantification of a force's ability to engage in combat, based on the unit's training, equipment and leadership.
- Combat Unit. A unit with a printed combat strength of "1" or more.
- Control. The overall allegiance of a colony. A colony may be in one of three states of control: British, French or Neutral (not controlled by any player).
- Enemy. All colonies and units controlled by the opposing player.
- European. "Regular" units raised in the British and French home bases, as well as Spanish regulars.
2.5 Game Scale. Each game turn represents one year, and each impulse one season of operations. Each square is about 150 kilometers across. Regiments represent 250-1,000 men. Each leader represents a single person plus his personal command staff.
2.6 Die. Players will need a six-sided die to play the game. The die is used to generate random numbers to resolve various game actions.
Die Roll Modifiers (DRM). Certain game charts include the use of DRMs. A positive die roll modifier is a number added to the result rolled on a die. For example, a die roll modifier of "+1" added to a rolled result of "3" would give a final outcome of "4." A negative die roll modifier is subtracted from the result rolled on a die. For example, a die roll modifier of "-1" subtracted from a rolled result of "3" would yield a final outcome of "2." If more than one die roll modifier applies to a game function, the cumulative total is applied.
2.7 Old Hands Note. There are no zones of control in this game.
3.0 Sequence of Play
Players set up their units and markers according to the scenario instructions. Each game will last a designated number of turns. Within each game turn each player will conduct a series of operations phases in which he will conduct various operations with his own units. Each player will have an opportunity to conduct operations up to four times each turn.
3.1 Each game turn consists of the following phases.
- Initiative Phase. Determine which player will be the "first player" [the player the Balance of Power Index favors is the first player].
- Random Events Phase. The players roll on the Random Events Table to determine which event(s) will occur this player turn.
- Negotiations Phase. The player who has the initiative conducts any negotiations he wishes using leaders in colonial capitals and Indian villages. The second player than does the same.
- Income/Expenditure Phase. Both players now simultaneously perform the following steps.
- a) Collect Income in pounds, based on the outcome of the Home Government Table and control of on-map squares and civilization markers.
- b) Recruit (and/or disband) units, supply points and civilization markers and place them on the map. Any remaining pounds are banked.
- First Player 1st Operations Phase.
- a) First Player Movement Sub-Phase. The first player moves any and all of his forces he desires on the map.
- b) Second Player Invasion Reaction Sub-Phase. The second player conducts any militia and Indian mobilization in response to invasions.
- c) First Player Combat Sub-Phase. The first player must attack with any forces occupying the same squares as belligerent units. At the end of the combat phase, check for any leader captures (rule 16.41) and massacres (rule 20.5).
- Second Player 1st Operations Phase.
- a) Second Player Movement Sub-Phase. The second player moves any and all of his forces he desires on the map. See rule 12.3 for winter attrition.
-
- Remove all magazines from fortresses under siege.
-
- Check each friendly Indian force on the map using the Indian Table.
-
- Change the status of any active British colony not currently under invasion to passive status.
-
- Remove from the map all British provincial units from passive colonies that are outside their own colony.
-
- Remove from the map all French and Spanish militia (but not provincial units) from passive colonies that are outside their own colony.
- Balance of Power Phase. Players make indicated adjustments to the Balance of Power Index for control of certain cities.
- End of Turn. Players mark the passage of a game turn on the Turn Record Track. Play continues until the end of the scenario or one side capitulates.
4.0 Balance of Power
The Balance of Power Index measures each side's relative military and diplomatic strength. That's indicated by the current position of the Balance of Power marker on the index. Certain game actions and events will cause the marker to move in one direction or the other. A side can be favored mildly, moderately or strongly, as indicated by the position of the marker on the Index. Note there is no "0" (zero) space on the index; shift directly from "+1" Pro-British to "-1" Pro-French and vice versa.
4.1 Changing the Index. Balance of power changes are described on the chart adjacent to the index.
4.11 Occupation. Players get balance of power shifts if they occupy certain cities during the balance of power phase. Only British, French and Spanish units (including provincials and militia) count for occupation; Indian units don't count.
4.2 Effects. A favorable balance of power will give the player the initiative (see 7.0), affect random events (see 8.0), provide a die roll modifier for home government income determination (see 9.0), and provide additional strength when conducting negotiations (see 15.0).
4.3 Extremes. If at any time the Balance of Power Index goes to +18 or -18, it may go no higher or lower, respectively. It still may shift back toward the center. The game doesn't end because the Balance of Power has gone to an extreme.
5.0 Territories & Colony Status
Generally, players control all forces assigned to them on the map; however, colonies may offer varying degrees of support for the war. Additionally, both sides can mobilize Indian units on Indian villages.
5.1 French Colonies (French Empire). There are two French colonies on the map: New France and Louisiana. The French always start in control of both French colonies on the map. The French may always tax and mobilize units in French colonies. French colonies may be in one of two statuses: passive or active. Once a French colony becomes active, it remains so for the remainder of the game unless negotiations cause it to become passive.
5.2 British Colonies (British Empire). The 13 Anglo-American colonies are each indicated on the map, along with Hudson's Bay, Newfoundland and Nova Scotia. The British always start in control of all British colonies on the map. The British may always tax in British colonies. Colonial borders define territory for mobilization of particular provincial units, and define the limit of movement for militia of each colony. Note that what is today the state of Maine is part of Massachusetts colony in the game.
5.21 British American colonies each have corresponding provincial units. They are indicated by the colony abbreviation. British militia may be used in any colony though they may not cross borders. French provincial units, unlike those of the British, may be used with any of their colonies.
5.22 When one of the 13 Colonies becomes active, it remains active only for the remainder of that game turn unless it is under invasion. During phase 14.3 they become passive. That is, unless under invasion, the British player must each turn negotiate with his own colonies in order to keep them active.
5.23 Hudson's Bay, Nova Scotia and Newfoundland, once active, remain active for the remainder of the game, unless negotiations cause them to become passive.
5.24 Activation. A passive colony becomes active owing to the following.
- Invasion. If at any time in a turn any enemy unit enters a colony, that colony immediately becomes active.
- Negotiations. If, during the Negotiation Phase, a player receives a result that shifts the colony to active status.
5.25 Return to Passive Status. An active colony becomes passive owing to the following.
- British 13 Colonies: if, during the end of turn phase, they are not under invasion, determined on a one-by-one basis.
- Any colony with which the enemy conducts negotiations that result in it becoming passive.
5.26 Effects of Passive Status.
- The player can collect only 50 percent of the normal taxes from the colony (round down all remainders).
- Units of the colony located outside of it are immediately removed from the map.
5.27 Effects of Active Status.
- The British can collect full taxes from the colony (round down).
- Provincial units of the colony may move anywhere on the map. Exception: British militia units may never leave their home colony regardless of its status.
5.3 Florida (Spanish Empire). Florida begins the game as neutral. Neither side may enter Florida or use Spanish units until the Spain Enters Seven Years War event occurs. The instant that occurs, Florida and all Spanish units are in the war. Once Spain is in the war, the French player controls all Spanish territories on the map. He may tax and mobilize new Spanish units in Spanish territories, assuming they control the mobilization squares. Florida is always in one of two states: neutral or active; it's never passive. Once Florida becomes active, it remains so for the remainder of the game.
5.4 Disputed. All other territory is "disputed," meaning it belongs to no one. All belligerent units may enter disputed territory.
5.5 Indians. Indian villages may be located in either the British or French Empires. Note there is no independent or separate Indian territory as such.
5.6 Within the restrictions described above, units may otherwise enter any squares on the map.
5.7 Capturing Objectives. A player may capture cities, etc., which were originally controlled by the enemy. If he does so, he may tax them at 50 percent of their income, gaining pounds. He may not recruit units in them. Unlike Asia Crossroads, which uses a similar system, there is no defection of colonies in this game.
6.0 Occupation
A player occupies a square by having one or more friendly units in it. Should a player abandon a square completely, he loses any benefits he would have gained from it. For example, he couldn't collect income from it.
6.1 Benefits for occupying a square are received regardless of whether or not the player controls the colony. It is important to understand the distinction between "occupation" and "control." Occupation means the player has units inside a square. Control means a player has the loyalties of the people or ruling elite of a colony. For example, the French player may occupy all squares in Virginia, but he may not mobilize Virginian provincial units because he doesn't "control" Virginia.
7.0 Initiative
During the initiative phase of each turn, determine which player will be the first player throughout that turn. The balance of power favors the British if the Balance of Power Index is "1" or more pro-British; it favors the French if it is "1" or more pro-French.
7.1 Check the Balance of Power Index. Whichever player the track favors determines who has the initiative.
7.2 The player who has the initiative can decide if he or the enemy player will be first player for the remainder of that turn; the other player is the second player. Player turn order remains in effect for the remainder of the turn regardless of shifts in the balance of power.
7.3 Various game functions will call for players to take actions simultaneously. In the event of a dispute, the player with the initiative goes first.
8.0 Random Events
The random event rule accounts for a range of political, economic and cultural factors that may affect the situation.
8.1 During the events phase, the players consult the Random Events Table. The British player should roll on odd numbered turns and the French on even; events may apply to ether or both players regardless of who rolled.
- The first die roll determines which columns on the event table will be used (A, B, C, D). Apply a die roll modifier depending on the current balance of power.
- Once the appropriate columns have been determined by the first die roll, the player rolls again on the designated columns. The second die roll isn't modified. The outcome of the second die roll determines which events actually occur.
For example, say the balance of power is moderately pro-French. The player rolls a 6 on the first die roll. That's modified to a 5 owing to the balance of power situation. That indicates the player rolls once on the B column and then once on the D column. The British player rolls a 4 on the B column ("Hurricane"), and applies that result. He then rolls a "2" on the "D" column (French Leader Relieved), and applies that result. Note there is only one random events phase per game turn, not once each impulse.
8.2 Unless otherwise specified, an event may occur more than once per game; however, if the same event is rolled more than once in the same turn, the second time is treated as "No Event."
8.3 Seven Years War. Players may agree the Seven Years War event happens in its historic year, 1756. In that case, don't make any other roll for random events in the 1756 turn. Also, Spain historically entered the war in 1761, and players (if using the Variable Scenario Length option) may have it automatically enter in 1761 (and not roll for any random events).
9.0 Income & Pounds
Players raise pounds via income, measured in pounds. Pounds are used to recruit units, purchase supplies and influence negotiations. Players should record their pounds on a separate sheet of paper. They may agree to keep their totals secret from each other.
9.1 Collecting Income. In the income/expenditure phase, the players gain income from the following.
- Home Government. Each player rolls a die on the Home Government Income Table, making any die roll modifiers as indicated, and receives the designated number of pounds. Note players use different columns on the table depending on whether the Seven Years War has broken out.
- Economic Squares. Each trading and manufacturing symbol on the map is worth one pound. In order to collect pounds for a square, the player must have at least one unit in it. That's true regardless of whether he controls the colony. That is, you can collect income from squares you capture; however, if you are occupying an enemy square, you get only half the normal value.
- Events. Players may receive additional income due to the Random Events Table.
9.2 Expending Pounds. Players expend pounds for the following (see also the Pounds Expenditure Table).
9.21 Recruiting leaders, combat units and civilization markers.
9.22 Pounds may be added to negotiation attempts (see 15.1).
9.3 Banking.
9.31 All of a player's pounds are kept track of in a single pool. So, for example, if the British player collects income from New York colony he may expend them building Virginian units.
9.32 A player may accumulate unexpended pounds from turn to turn. If a Random Event calls for losing more pounds than are currently in the treasury, the treasury is reduced to zero (0), but it can never go below zero. Neither player may ever engage in deficit spending.
10.0 Recruits
Recruits are new units paid for in pounds by the players. Recruiting occurs in the income/expenditure phase. Recruiting costs depend on the type of unit being recruited. Those costs are summarized on the Expenditure Table.
10.1 British Units.
- Regulars. The British player pays the cost in pounds and then places the units in the Great Britain holding box. They may then be moved to the colonies via sea movement. The British player may also recruit up to three regular regiments per turn on-map, in any British-occupied British city or town squares.
- Provincials. British provincial units are recruited in the colony of the same name on any British occupied city or town square.
- Invasion. In addition, the British player receives militia regiments per invasion per colony during the invasion check phase if a colony is under invasion (see 14.0).
10.2 French Units.
- Regulars. The French player pays the cost in pounds and then places the units in the France holding box. They may then be moved to the colonies via sea movement. The French player may also recruit one regular regiment per turn on-map, in any French occupied French city or town square.
- Provincials. French provincial units are recruited in the colony of the same name on any French occupied city or town square.
- Invasion. In addition, the French player receives militia regiments per invasion per colony during the invasion check phase if a colony is under invasion (see 14.0).
10.3 Spanish Units. Spanish units may be recruited only after Spain has entered the war.
- Regulars. The French player pays the cost in pounds and then places the units in the West Indies box. They may then be moved to the mainland via sea movement.
- Provincials. Spanish provincial units are recruited in the colony of the same name, on any Spanish occupied city or town square.
- Invasion. In addition, the French player receives Spanish militia regiments per invasion per colony during the invasion check phase if a colony is under invasion (see 14.0).
10.4 Indian Units.
- Recruiting. Indian units are received via negotiations.
- Invasion. In addition, new Indian units are received during the invasion check phase for each Indian village occupied by a non-Indian combat unit (see 14.0).
10.5 Events. Certain random events will allow units to be mobilized at no cost.
10.6 Recruit Costs are detailed on the Expenditure Table (see player aid charts). The player pays the appropriate cost for the units he wants to recruit.
10.61 There is no recruiting cost for units placed on the map as part of initial deployment.
10.7 Placement of Recruits. The squares of placement are shown on the Expenditure Chart.
10.71 A player may place any number of new combat regiments in a square, from one up to the square's forage value. That's in addition to any units already in that square. An unlimited number of leaders may be placed in a square, and an unlimited number of recruits may be placed in a home base.
10.72 The number of leaders and combat units in the counter mix is a design limit. Players may not recruit more of any type of units than are available. Players may, however, create additional civilization markers if they run out of them.
10.73 Units that have been eliminated for any reason may be reintroduced into play by recruiting. Exception: named leaders may not be replaced if killed.
10.8 Disbanding. Should a player desire, he may, during the income or expenditure phase, remove any friendly unit or marker on the map (not considered eliminated). Higher echelon units may be broken down into smaller units. There is no cost to do that.
11.0 Forces
When more than one unit is moving or fighting together, it is called a force.
11.1 Stacking. A player may have an unlimited number of units in a square. There may be friendly, neutral and enemy units in the same square within the restrictions of belligerency requirements and combat (see 5.4 & 14.0).
11.2 A player may combine units of different nationalities into the same force provided they are all under his control. For example, French units could be part of the same force as French controlled Indians.
11.3 Movement. Units moving together as a force must begin that movement phase in the same square or same home base area. A force may not pick up additional units in the course of an operation. A force may drop off units, but the dropped off units may not conduct any further movement in that sub-phase. A force always moves with the movement factor of the slowest unit in it. Even if the slowest unit is dropped off, the other units have their movement accordingly reduced. For example, a force with a light infantry (movement factor of six) and an infantry regiment (movement factor of five) would have a movement of five, even if the infantry regiment were dropped off in the first square entered. That is restrictive, but it's due to the inflexible command procedures of the 18th century. Note, too, there's nothing to stop a player from moving units separately except if it's a 2nd or later operations phase, it's more efficient in terms of supply to move together (see 12.22).
11.4 Combat. All friendly units in a square must participate in combat as one combined force, attacking or defending.
11.5 Due to the nature of the combat results, combat will always result in one side or the other being completely eliminated or retreated out of the square at the end of that combat. Therefore, by the end of each individual operations phase, there will usually be no instances of enemy units being stacked with each other. The one exception is siege; see rule 23.0.
12.0 Operations
During each friendly operations phase, the active player may do the following with any, all, or none of his qualified friendly units: move (see 13.0) and conduct combat (see 15.0). Additionally, the enemy player may make invasion checks to mobilize militia and place Indian units (see 14.0). Each unit may participate in up to four operations phases per turn, up to one per operations phase. That is, it may move-fight up to four times per game turn.
12.1 During each operations phase, the player first moves any, all, or none of his units, then makes invasion checks, then conducts all attacks according to the order designated in the sequence of play.
12.2 An individual unit or force may conduct up to four operations per turn within the following restrictions.
- Operations conducted during the 1st operations phase are done for free, that is, without the expenditure of supply points.
- In order for a unit or force of units to conduct operations in the 2nd, 3rd and 4th phases, the player must expend one supply point per force in each phase (see 17.0). That's true regardless of the number or type of units in a force, even if just a lone leader. Units conducting sieges must make such expenditures to attack even though technically they haven't moved. They don't have to expend supply, however, if they just sit passively in the siege square.
12.3 Winter Attrition. Any force that initiates an operation in a fourth impulse must do the following at the completion of that move: roll a die for each combat unit. If the result is one, that unit is eliminated; any other result is no effect. Winter attrition applies even if the force doesn't move but conducts other operations (for example, it reorganizes). Leaders are never affected by winter attrition.
12.4 Passing. A player doesn't have to conduct any operations in a particular operations phase. He may resume operations later in the same turn if other requirements are met.
Operations Example. A force consisting of a leader and three regiments moves up to its movement allowance and then conducts an attack in the 1st operations phase. That requires no supply expenditure. The player decides to conduct an operation with the same force in the 2nd operations phase. He therefore expends one supply point. The force moves again and enters a square containing an enemy force. In the 3rd operations phase the force does nothing, but in the 4th operations phase the player expends a supply point and the force moves again. At the end of that movement that owning must roll for winter attrition for each unit in that force.
13.0 Movement
Movement takes place in each player's movement phase.
13.1 A force moves from contiguous square to contiguous square. Each square entered costs the amount of movement points designated on the Terrain Effects Chart.
13.2 Light units (light leaders, light infantry, legions, militia and Indians) may move across both the vertices of squares (that is, they may move diagonally) and across the sides. Other unit types may only move across the sides of squares.
13.21 Diagonal movement costs the same number of movement points as movement across sides.
13.22 A force may move across a diagonal without stopping even if there are units on the two perpendicular sides.
13.3 Other Units.
13.31 Units may enter squares containing friendly units and continue moving at no penalty.
13.32 Units must stop when entering a square containing enemy combat units.
13.33 Leaders by themselves and civilization markers don't impede the movement of enemy leaders or combat units.
13.34 A force that begins its movement in the same square as an enemy unit or marker may always exit that square (or remain in place). If it subsequently enters another square containing enemy or neutral units, it must follow the instructions given above. Units may move directly from one enemy occupied square to another but must stop in the square entered.
13.4 Forces & Movement: see 11.3.
13.5 Enhanced Movement.
13.51 Roads. Units moving directly along roads pay one-half (0.5) movement point per square.
13.52 Rivers/Great Lakes. Units moving directly along rivers and Great Lake coasts pay one-half (0.5) movement point per square. (That's due to extensive use of river transport.)
13.53 Trails. Units moving directly along trails pay one movement point per square, regardless of other terrain in the square.
13.6 A force may combine any number of types of movement in a single move as long as it has sufficient movement points to expend.
13.7 Prohibited Terrain.
13.71 Units may not enter all-sea/lake squares or cross all-sea/lake square sides unless moving via naval movement.
13.72 Units may never enter Florida when it is neutral.
13.8 Militia. British militia may never leave their own particular colony. French and Spanish militia may do so.
13.9 Naval Movement. See rule 20.0 for movement of naval units and units transported by fleets.
14.0 Invasion Reaction
14.1 During each invasion reaction phase, the non-phasing player must check all of the following.
- British: each British colony that has one or more French combat units in it.
- French: each French colony that has one or more British combat units in it.
- Indian: each Indian village that has one or more British or French combat units in it.
If the condition above is met, then an "invasion" is taking place, and any invasion reinforcements are taken.
14.2 Frequency. This applies only to forces that actually moved in the immediately prior movement phase. That is, you don't check if a force didn't move during an impulse. Also, units that move through a colony or Indian village but don't end their move in it don't trigger invasion reaction. If the enemy skips an impulse altogether, there would be no invasion reaction.
14.3 Militia Reinforcements.
14.31 British: the British player receives the following number of militia regiments for each listed colony.
- Massachusetts, Connecticut, New York: two regiments plus two supply points.
- Hudson's Bay, Nova Scotia, Newfoundland: one militia detachment plus one supply point.
- All other British colonies: one regiment plus one supply point.
14.32 French: one militia regiment and one supply point per French occupied city in the colony. For example, if the British invade New France, capturing Trois Rivieres, while the French occupy Quebec and Montreal, the French player would receive two militia regiments in New France along with two supply points.
14.33 Spanish: one militia regiment and one supply point per Spanish-occupied city in Florida.
14.34 Indians. Roll a die. Results are as follows: 1-3 = no effect; 4-5 = place one Indian unit; 6 = place two Indian units.
14.4 Deployment. British, French and Spanish invasion reaction units are placed in any city, town or settlement squares in the colony up to each square's forage value (in addition to any units already in the square). Indian units are placed in the invaded village. Squares don't have to be friendly occupied. Squares may have enemy units in them and, if so, that will mandate combat in the immediately following combat phase.
15.0 Combat
Combat is used to eliminate enemy units and to seize objectives. Combat occurs during the combat phase between opposing combat units in the same square. The phasing player is the "attacker." The non-phasing player is the "defender."
15.1 Combat Procedure.
- All attacking and defending units in the square are revealed.
- The defender may attempt to withdraw before combat. If the defender succeeds (see below), that combat immediately comes to an end.
- The attacker chooses on which Combat Results Table the combat will be conducted: Linear or Raid.
- Determine the combat odds. Include terrain effects.
- Roll a die and apply die roll modifiers.
- Cross index the final die roll result with the appropriate odds column. That will give a "combat result." That result is applied immediately.
- Conduct any retreats of defeated units.
15.2 Attacking.
15.21 Combat is mandatory when a friendly force occupies a square containing an enemy force; the friendly force must attack. Combat is within a square; units in one square may not attack enemy units in a different square.
15.22 The attacker must combine all friendly units in a square into one attacking force, even if they moved into the square as separate forces. Only one attack per combat phase per square is allowed.
15.3 Defending. All defending units in a square must be attacked as one combined defense strength.
15.4 Revealing Units. Once an attack has been declared, it must go to its conclusion. The attacker can't cancel the attack if he finds the defender has greater strength than he first thought.
15.5 Withdrawal Before Combat. The defender may, at his option, declare a withdrawal if all his involved units have a higher movement factor than the single attacking combat unit with the highest movement factor. A withdrawal is conducted exactly as if it were a one square retreat, the direction determined by the withdrawing player. See the Player Aid Charts for an explanation of how to retreat. Withdrawal applies only to combat situations, not to leaders defending by themselves in a square, which would be covered by capture (17.41).
15.6 Choice of Combat Results Table. For each combat, the attacker determines which CRT will be used, Linear or Raid.
15.61 The attacker must choose the Linear CRT if at least 50 percent of the printed combat factors in his force are from heavy units (those without a "+" sign).
15.62 The attacker must choose the Raid CRT table if at least 50 percent of the printed combat factors in his force are from light units (those with a "+" sign).
15.63 If heavy and light units are each 50 percent, then the attacker can choose either CRT.
15.7 Determining Combat Odds.
15.71 Combat odds are determined as follows:
- Total the combat strengths of all attacking units.
- Total the combat strengths of all defending units.
- Apply any strength multiples to the defender's strength.
- Divide the attacker's total combat strength by the defender's total combat strength.
- 4a) If the attacker's strength is greater than the defender's, any remainders are rounded down, and that ratio determines which odds column will be used. For example, if the attacker has 14 combat strength points and the defender has 5, the combat odds would be 14 divided by 5, which equals 2.8:1. Drop the .8 and you get final odds of 2:1.
- 4b) If the defender's combat strength is greater than the attacker's, round up any remainder. For example, if the defender has 10 combat strength points and the attacker 6, the combat odds would be 1:1.67 which is rounded to 1:2.
15.72 Odds less than 1:3 are treated as 1:3. Odds greater than 4:1 are treated as 4:1.
15.73 The 1.5:1 column is used when the attacker has at least 50 percent more strength than the defender but less than twice as much. For example, if the attacker has 7 strength points and the defender 4, odds would be 1.75:1, which would round down to 1.5:1.
15.74 Terrain. The defender multiplies the strength of his force for terrain in the square (if any; see the Terrain Effects Chart). They may be either doubled or tripled. The defender may choose one (and only one) defense multiple, even if more are applicable. The defender may never be more than tripled. Only the defender (that is, the non-phasing force) gains the advantage of terrain.
15.75 Note the differences between multiples for heavy and light units. For example, suppose one heavy regiment (combat factor = 5) and one light regiment (combat factor = 4) were defending in a wilderness square. The defense value would be 13, since the heavy regiment is not doubled in wilderness, but the light regiment is doubled. Note, too, rivers don't increase the defender's strength, unlike in most other wargames.
15.8 CRT Die Roll Modifiers. The attacker adds the military value of any one (and only one) leader in his force to the number rolled on the die. The defender subtracts the military value of any one (and only one) leader in his force from the die roll. If both the attacker and defender have leaders involved, use the difference between the attacker's and defender's die roll modifier. For example, the attacker has a leader with a military value of "2;" the defender has a leader with a military value of "1." The final die roll modifier is +1 (since 2-1=1). The die is rolled and the result is "4," which is then modified +1 to become a "5".
15.9 Application of Combat Results. Combat results are applied immediately as they occur. Combat results are applied in the order given under the particular result. All results must be applied before moving on to the next combat.
16.0 Negotiations
Players conduct negotiations during the negotiation phase. A player must have at least one leader in a capital or an Indian village to conduct negotiations. Players conduct negotiations in colonial capitals in order to change the status of that colony or to recruit additional reinforcements. They conduct negotiations in Indian villages to mobilize Indian units. See the Negotiation Table for results.
16.1 Negotiation Procedures.
- The phasing player designates in which square (colonial capital or Indian village) he is conducting negotiations.
- The phasing player designates one (and only one) leader he has in the square. He may also expend any number of pounds from zero up to an amount equal to that designated leader's diplomacy value.
- The phasing player totals the following to determine his negotiation offensive total: the diplomacy value of the leader he's using; the number of pounds expended; other applicable offensive values listed below the Negotiation Table.
- The non-phasing player declares if he will attempt to counter the negotiation attempt. He may do so only if he has a leader in the square. If he does, he may also declare any number of pounds from zero up to an amount equal to that leader's diplomacy value.
- The non-phasing player totals the following to determine his negotiation defensive total: the diplomacy value of the leader he's using; the number of pounds expended; any other applicable defensive values listed below the Negotiation Table.
- Subtract the defensive negotiation total from the offensive negotiation total. This gives the negotiation differential.
- Find the column on the Negotiation Table corresponding to the negotiation differential.
- Roll a die and immediately apply that result.
- Players may agree to secretly write down the number of pounds expended on a piece of paper and reveal it only after all other values are determined.
16.2 While the French may not initiate negotiations in a British colonial capital, they may attempt to counter British negotiations should they have a leader in that capital.
16.3 Restrictions.
16.31 A player may make no more than one negotiations attempt against a particular square in a particular negotiation phase.
16.32 An leader with a "0" diplomacy value may still attempt negotiations (but not add in any pounds).
16.33 A player may not attempt negotiations in a square containing enemy combat units.
16.34 Players may not conduct negotiations in Florida until Spain is a belligerent.
17.0 Leaders
Each leader has diplomatic and military ratings used to conduct negotiations and enhance movement and combat.
17.1 Types of Leaders. There are two general types of leaders.
- Historic leaders, who represent major historic personages. Historic leaders are indicated by having their names on their counters.
- Brigadiers and Indian chiefs, who represent minor leaders who were always available for duty.
17.2 Military Rating. The military rating is used for the following game functions.
17.21 Movement Bonus. All units in a force may add one leader's military rating to their printed movement factors. A maximum of one leader per force may provide that bonus. The leader must move with the force in question and may not be dropped off anywhere along the route, though other units in the force may still be dropped off. Leaders may not add their movement bonus to their own movement factor or to the movement factors of other leaders. For example, British leader Washington (military value of "1") is stacked with a British infantry regiment (movement factor of "4"). That gives the British force a leader-enhanced movement factor of "5."
17.22 Combat Bonus. A player may use the military rating of one leader in a force as a die roll modifier for combat; see 15.8.
17.23 A friendly leader may apply his military value to all friendly units in his force, including friendly controlled Indians.
17.3 Diplomatic Rating. This is explained under the negotiations rule; see 16.0.
17.4 Leader Elimination. A leader may be eliminated by any of the following.
- Random Events. Certain events call for the removal of leaders. In that case, simply remove the leader from the map.
- Negotiation. Certain negotiation outcomes may cause the elimination of an leader.
- Combat. If a combat result calls for all leaders to be eliminated.
- Capture. If, at the end of a friendly combat phase, a friendly combat unit is in a square that contains one or more enemy leaders and no combat units friendly to those leaders, follow the capture procedure.
17.41 Capture Procedure. Roll a die. If the die roll is less than or equal to the leader's totaled military and diplomatic ratings, that leader escapes; place him on the nearest stack containing friendly units. If the die roll is greater than his totaled military and diplomatic ratings, a named leader is captured; a brigadier/chief is eliminated.
17.42 The capturing player has the following options for the leader, which he can exercise at any time.
- He may keep the leader a prisoner. Captured leaders are held off map by the capturing player. They may be returned to the owning player at the beginning of any subsequent turn by placing the leader in an agreed on square anywhere on the map. The capturing player may request whatever terms he desires, as long as they are within the limits of the player agreements rule.
- He may execute (permanently eliminate) the leader only if all the capturing units are Indians, and that decision must be made immediately upon capture. Execution causes the balance of power to shift one in favor of the side whose leader was executed.
17.43 Only belligerent combat units trigger a capture check; enemy leaders and neutral units don't affect friendly leaders. Capture attempts may not be made for neutral leaders.
17.44 Eliminated named leaders may never be replaced; they are permanently removed from play. Eliminated brigadiers and chiefs may be recruited again if eliminated.
17.5 New Leaders. Leaders enter play in one of several ways.
- Initial Set up. Each scenario will list the starting named leaders for the scenario.
- Recruiting. A player may recruit additional leaders in the course of a scenario by paying the listed recruiting cost.
- Events. Additional leaders may appear as a result of certain random events. The players don't pay recruiting costs for leaders who appear via events.
17.6 Provincial Leaders are treated as other leaders, with the following exception: British provincial leaders are removed from the map if outside their colony during an administration phase in which their colony is passive. They are not eliminated; they are returned to the pool of available leaders.
17.7 Indian Leaders may provide leadership only to forces containing only Indian units; they may not lead non-Indian units. Non-Indian leaders may lead Indian units.
17.8 Chiefs & Brigadiers function in the same way as other leaders except if eliminated for any reason they may be recruited again.
17.9 In general, a leader may use his values any number of times in a turn, as long as he uses them no more than once per sub-phase. Also, certain leaders are "light" and therefore use the light movement rates. They are otherwise treated as normal leaders.
18.0 Supply
Logistics are represented by supply points and magazines. Basically, a unit is in supply if it can trace a line of supply to a friendly magazine, or if the player expends supply points. Supply is used to support operations and provision units.
18.1 Supply Points (SP) are purchased in the income/expenditure phase. The first 10 SPs a player recruits in a turn cost two pounds each. The 11th and subsequent SP the player recruits in a turn cost three pounds each. Keep track of supply points on a separate piece of paper.
18.2 Supply Point Uses. A player expends SP to perform the following game functions.
- To allow a force to conduct operations in the 2nd, 3rd and/or 4th operations phases (see rule 12.0): expend one SP per force.
- To sustain units during the provisioning phase. Expend one SP per force that's not otherwise supplied.
18.21 When a supply point is expended, deduct the number used from the current total. Unused supply points may be accumulated from turn to turn. A player may never have fewer than zero supply points (no deficit supplying).
18.3 Provisioning. During the friendly provisioning phase, the player must check every square on the map containing a friendly force to see if it is "in supply." If a force isn't in supply, the player may expend an SP to provision it. Should the player fail to do so, units not in supply are eliminated.
18.31 Automatic Supply. The following units don't require supply and don't count against the forage capacity for the square: leaders, neutral units, units in their own home bases, and civilization markers.
18.32 Foraging. Units not in automatic supply must forage. Each square on the map has a forage value (as listed on the Terrain Effects Chart). It shows the number of regimental equivalents that may be supplied through foraging. The player determines which units he wants to forage. They're considered to be in supply and suffer no adverse effects. Additionally, one Indian unit or one light infantry detachment may gain forage for free in wilderness and rough squares.
18.33 Units not in automatic supply and that can't forage may be supplied by expending SP. One SP expended in a square can supply all friendly units in the square in excess of the forage value.
18.4 Out of Supply. In the provisioning phase, units not in automatic supply and in excess of their square's forage limit, and for which the player has not expended SP, are eliminated. If there is a choice, the owning player selects which units will be eliminated. A player may break down higher-echelon units to eliminate units due to lack of forage.
18.41 A player is never required to expend SP. Players may want to retain their SP even if it means their forces end up starving.
18.42 Note the difference between provisioning and supporting additional operations. Units in automatic supply during the provisioning phase, such as leaders, still require expenditure of supply to conduct second and subsequent movement.
18.5 Allies. A player may use his SP to support all types of friendly units, including Indians.
18.6 Magazines & Line of Supply Radius.
18.61 Units that can trace a "line of supply" to a magazine are in supply. They don't have to expend supply points to initiate operations and are in automatic supply during the provisioning phase. Supply radius is defined as a path of squares traced from the force being supplied back to a friendly magazine. The path is traced across square sides, never diagonals. The length and restrictions on each path are detailed on the Line of Supply Length Chart.
18.62 Magazines in cities or towns aren't expended by being used to provide supply. In other squares, magazines are expended if used for any function during a turn, but they may be used more than once in a turn before being removed. A magazine in a besieged fortress that's used to provision the units in its square is expended during the provisioning phase.
18.63 See rule 22.0 for details concerning the construction, capture and destruction of magazines.
19.0 Reorganization
A player may replace smaller units with larger units, and vice versa, in any turn in the game. That process is termed "reorganization." There are three echelons of organization: detachment (smallest); regiment; brigade (largest). Units may be reorganized at the start of any movement phase. It costs no movement points, but the player must initiate a movement phase in order to perform reorganization, and if this is a second, third or fourth phase, each force that reorganizes must expend the appropriate supply point. To reorganize, remove the units to be reorganized from the map and replace them with the equivalent units, within the following restrictions. Only the following units may be reorganized.
- One regiment = three detachments, all of the same type.
- One brigade = three regiments, all of the same type.
- One legion = two regular infantry regiments and one light infantry regiment.
19.1 Initial Set Up. The scenario setup instructions list units in terms of organization levels. Units may not be reorganized during initial setup, unless the scenario allows it.
20.0 Naval Operations
There are two types of naval units: fleets (ocean going) and flotillas (lakes and coastal squares). Naval units are treated like other combat units, with the following specifications.
20.1 Fleets may be placed in and move into only fleet-navigable squares. Those include port, coast and all-sea squares. They may also be placed in and move into or out of friendly home bases.
20.2 Flotillas may be placed in and move into and out of only flotilla-navigable squares. They include port, coast, great lake and river squares.
20.21 Movement. Naval units always pay one movement point for every navigable square entered. A naval unit may not be part of the same force for movement as land units, except for land units being transported.
20.22 Naval units block enemy movement. Enemy land units on a port or coastal square block movement into the square by riverine units but not fleets.
20.3 Naval Transport. Land units may be transported by naval units.
20.31 Embarking. Both the naval unit and the land unit must start the movement in the same square or home base. The fleet picks up the land unit(s) and then moves. Transport is indicated by placing the land units under the fleet units.
20.32 Capacity. A naval unit may transport the following number of units: 1) four regiments (or equivalent); 2) an unlimited number of leaders.
20.33 Costs to embark are as follows: 1) from a port or home base: zero movement points; 2) from a non-port coastal square: four movement points.
20.34 Units moving by naval transport move with the naval unit's movement factor.
20.4 Debarking. Land units disembark at the end of every naval move. They may not remain embarked on a naval unit. They may only debark on land squares (port or coastal) or a home base. If unable to debark, the land units are eliminated.
20.41 Costs to debark are as follows: 1) onto a home base or a port occupied by at least one friendly unit: zero movement points; 2) onto any other square: four movement points.
20.5 Restrictions.
20.51 Naval units may not transport other naval units.
20.52 A land unit that's naval transported may conduct no other movement in that same impulse.
20.53 A land unit may be transported only once per impulse, that is, there is no "bucket-brigading" of units across the map.
20.54 A unit may be naval transported more than once per turn if done in different impulses. Also note that since naval units must start the move in a square with a land unit to be transported, that means a naval unit may not pick up additional units once it has begun its move.
20.6 Naval Combat.
20.61 Naval units may attack enemy units in any squares they occupy. Combat is conducted exactly as land combat. They may be combined with friendly land units for combat. Naval units may attack land units, and land units may attack naval units. Remember though, due to withdrawal before combat, naval units can usually withdraw when attacked only by land units; see rule 15.5.
20.62 Land units that were naval transported may conduct combat at the end of that movement. Land units disembarked in enemy occupied squares must conduct combat.
20.63 Naval units never gain terrain advantages for defense. They always defend at their printed strength.
20.7 Provisioning. Naval units and the units they transport are provisioned in the same manner as land units. They count against a square's forage value.
20.8 Leaders don't provide any movement bonuses to fleets using sea movement. Leaders provide combat bonuses for naval units conducting combat in the same square as friendly land units, but not if friendly naval units alone are conducting combat.
21.0 Base Areas
Base areas represent British and French territories "off map" in Europe. Each base area has a port in it with an unlimited capacity.
21.1 Movement. Units may enter or leave home bases via sea movement via certain map edges. Movement onto or off of the map is done as normal movement.
21.11 British fleets may enter or exit Britain via any sea square on the east map edge. That costs the fleet 50 percent of its movement allowance.
21.12 French fleets may enter or exit France via any sea square on the east map edge. That costs the fleet 50 percent of its movement allowance.
21.13 A force may enter the map on a square containing enemy units, but that force must then stop and engage in combat normally.
21.2 Restrictions.
21.21 Only British units may enter the British base areas. Only French units may enter the French and French West Indies base areas.
21.22 A unit may not both enter and exit (or vice versa) a home base in the same phase.
21.3 Base areas have an unlimited forage value. A player may stack an unlimited number of units in a home base. A player always controls his own home base; he doesn't have to garrison it.
22.0 Civilization Markers
There are four types of civilization markers in the game: forts, fortresses, magazines and trails.
22.1 Civilization markers are created in the income/expenditure phase by expending the designated number of pounds (and sometimes supply points). Place the civilization marker as shown on the Expenditure Chart.
22.11 A player can place a maximum of one of each type of civilization marker in a square. Also, there may never be a fort and a fortress in the same square at the same time. If building a fortress in a square with a fort, the fort is removed when the fortress is placed.
22.12 Civilization markers may not be placed in a home base. They may not be placed in all-sea or all-Great Lake hexes.
22.13 A civilization marker may not be placed in a square containing an enemy unit or civilization marker.
22.2 Effects. See the Forts & Fortresses rule [23.0] and Magazines [18.6]. Trail markers function the same as trails printed on the map.
22.3 Civilization markers don't prevent enemy movement, retreat or any other game function, nor do they constitute invasions.
22.4 Abandonment. If a player moves all combat units out of a square, any civilization marker remains. If the enemy moves any combat unit into the square, he captures the marker automatically and may use it.
22.5 Destruction. A player may, at the end of any friendly combat phase, destroy any civilization marker in a square his combat units occupy. Remove the marker from the map. This may not be done in siege situations.
22.6 Capture. If a friendly force wins a battle and there are one or more combat units remaining in a square that contains civilization markers controlled by the enemy at the end of that combat phase, roll on the Capture Table for each such marker to determine what happens to it.
22.61 Capture and destruction also apply to printed forts and fortresses.
22.7 Engineers. Fortresses and trails require an engineer unit to be in the square of placement. A single engineer unit can build only one type of civilization marker in a turn.
23.0 Forts & Fortresses
Forts and fortresses are printed on the map, or may be built as civilization markers.
23.1 Printed forts and fortresses may be abandoned or destroyed in the same manner as described in 22.4, 22.4 and 22.6.
23.2 Fortresses & Siege.
23.21 Units defending in or attacking out of a fortress square ignore all retreat results. This means both sides may have units occupying a fortress square at the same time, an exception to the normal rules. In such a situation, a siege is said to be taking place.
23.22 Only the units that originally occupied the fortress square are considered to be inside the fortress. The besieging units are considered to be outside the fortress, though they are still within the square. They defend and forage as if they were in a settlement square.
23.23 Units in a besieged fortress don't have to attack the besieging units, and vice versa. They may co-exist in the same square; however, if either player decides to conduct combat there, it occurs normally.
23.24 Besieged units may not exit the fortress. Other units on the besieged player's side may not enter the fortress.
23.25 Relief Forces. Forces friendly to the besieged force may enter the square. They form a force separate from the besieged force. They may not enter the fortress unless all besieging forces are removed from the square. If conducting combat, all units are combined, but the relief force doesn't gain any advantage from the fortress.
23.26 A Siege remains in effect until: 1) all besieging units move out of the square or are eliminated; or 2) the besieging force captures the fortress.
23.27 Siege Trains. If a Siege Train is involved in an attack against a fortress or fort, the attacker's combat strength is doubled. However, the "no retreat" rule remains in effect for fortresses. If the defender has a siege train, that negates an attacking siege train for purposes of this rule, on a one for one basis.
24.0 Militia
24.1 British Militia may never leave their home colonies. If forced to retreat outside their own colony's borders, they are eliminated instead. So, for example, Virginian militia must always be inside Virginia.
24.2 French Militia may move anywhere, but any French militia outside of French territory in an end of turn phase are eliminated (their elimination doesn't count for balance of power).
24.3 Spanish Militia may never exit Florida.
24.4 Militia are an exception to the rule that units must be recruited as complete regiments. A player may flip a militia detachment to its regiment side, paying the full cost of the regiment.
25.0 Indians
25.1 Control. Indian units are backprinted. One side is French controlled; the other side is British controlled. Whenever Indian units are to be deployed, pick the units at random and place them on the side indicated. Once on the map, they never switch sides except via random event.
25.2 Indian Villages aren't controlled by players per se; however, if a player has a leader in an Indian village, he can attempt to mobilize Indian units there. That may be done by either player.
25.3 Indian Leaders may apply their combat values only to forces made up entirely of Indian units. They may use their diplomatic value only in Indian villages; otherwise those values are considered to be zero.
25.4 During the Indian phase, players check each square that contains Indian units and rolls for them on the Indian Table.
26.0 Legions
Legions may be created from two regular infantry regiments and one light infantry regiment. They function as either heavy or light units at the owning player's direction. That choice may be made and changed at any time in the turn.
27.0 Fog o' War
27.1 A player may examine enemy and neutral units only under the following circumstances: 1) if he has a friendly unit in the same square; 2) during combat; 3) if some random event allows it; and 4) when an enemy force is in the same square as a friendly city or town.
27.2 A player may always examine markers that have been placed on the map.
27.3 Leaders may be placed face down. They may be examined if any of the conditions of 27.1 pertain.
28.0 Spain & Florida
28.1 Florida is a Spanish colony. It begins the 1754 scenario neutral. Spain enters the war via random event or scenario instructions. Otherwise, no units may enter Florida nor attack Spanish units. Once Spain enters the war, Spanish units are French controlled.
28.2 When Spain enters the war, the French player rolls for Spanish income. Spanish and French income are combined. French and Spanish units also have a common supply point pool.
29.0 Victory Conditions
Victory is determined at the end of play. Each player totals the number of victory points his empire has accrued. That number is used to determine the winner.
29.1 Victory Points.
Both Players
- +10 for controlling Quebec.
- +8 for controlling New Orleans.
- +5 for controlling St. Augustine.
- +2 per British colonial capital friendly controlled.
- +2 for controlling Montreal.
- +1 per for each friendly controlled city not named above.
- +1 per trading symbol.
- +1 per manufacturing symbol.
Balance of Power Index Final Position
- +5 if the balance of power is mildly in your favor.
- +10 if the balance of power is moderately in your favor.
- +15 if the balance of power is strongly in your favor.
Pounds
-
- the total number of pounds in your treasury divided by 10 (round up remainders).
29.11 Only British, French and Spanish units (including colonials) count for occupation; Indians don't count. Massacred squares don't count for victory. If a fortress is under siege, neither player gains the points for any objective in it.
29.2 Levels of Victory.
29.21 Once each player's victory point total has been determined, subtract the lower total from the higher. That difference determines who won the game and by how much. In general, the player with the higher victory point total is the winner, though draws are possible (see below).
29.22 Victory Levels.
- 0-19: Draw. If the difference in victory points is within this range, the two colonial empires continue to snarl at each other across the wilderness.
- 20-59: Colonial Victory. If the difference in victory points is within this range, the player with the greater victory point total has a won a victory the significance of which doesn't extend outside the colonial area.
- 60-99: Continental Victory. If the difference in victory points is within this range, the player with the greater victory point total has gained ascendancy in North America.
- 100+: Imperial Victory (highest). If the difference in victory points is within this range, the player with the greater victory point total will, once the treaty's signed, control all of North America.
29.3 Concession. Players may agree to end the game under terms they find acceptable as gentlemen (and/or ladies), conceding victory or agreeing to a draw.
Optional Rules
30.0 Scouting
30.1 The following units can conduct scouting: all light infantry, militia and Indians. Additionally, dragoons can conduct scouting, but only if the scouted square contains a city or town, or is settled. Scouting may not take place across all-sea or all-lake squares.
30.2 Scouting takes place at any time during a movement phase. The scouting unit indicates any adjacent square. Roll a die and if the result is less than or equal to the combat strength of the scouting units, the square is scouted and the player may examine all units in it.
30.3 Any given unit may scout only once per movement phase. Scouting expends no movement points, but is considered part of movement.
31.0 Massacre
Players may use their combat units to conduct massacres. Massacre is conducted during the active player's operations phases after any combat in a square.
31.1 Procedure. A force must have at least one combat unit in a city, town or settled square to conduct a massacre there. The player simply declares a "massacre" and the square is "massacred." Place a "Massacre" marker in it.
31.2 Restrictions.
31.21 A force may not conduct a massacre if it is in: 1) a square containing any enemy combat units; or 2) a home base.
31.22 Massacres may not be conducted if a unit retreats after combat.
31.3 Massacre Effects.
31.31 Remove all enemy civilization markers from the square.
31.32 If it's a city or town square, the massacring player gains one pound (loot).
31.33 The forage and taxation values of the square are reduced to zero.
31.34 Shift the balance of power index two spaces in favor of the enemy.
31.35 No units may be deployed in massacred squares, either as reinforcements or invasion reaction.
31.4 Removal of Massacre Markers. A player must have a friendly unit in the square during any recruiting phase. Expend the listed number of supply points and remove the marker (see the Expenditure Chart).
31.5 Units may not massacre squares in friendly colonies (that is, British in British colonies, French in French colonies, etc.). Exceptions: Indians may massacre any squares.
32.0 Honors of War
32.1 When a player is attacking an enemy force defending in a fortress or fort, he may offer the "Honors of War" prior to attacking. The defender has a choice.
- Refuse the honors. In that case, combat is resolved normally, except treat any DD results as BB.
- Accept the honors. The defending player picks up all units in the defending force and places them on any friendly occupied or empty square within two squares.
32.2 Indians. Honors of war may not be offered if all attacking or defending combat units are Indian. Additionally, if there are any Indian combat units in a force offering the honors of war, and the defender accepts, roll a die after the completion of the movement of the force. On a 1-3, an atrocity has occurred. Eliminate one regiment in the defending force and shift the balance of power one in favor of the defender. On a 4-6, there is no effect.
33.0 Surrender
33.1 Prior to initiating any combat, either player may offer to surrender. If the surrender is accepted, the player's surrendered units are removed from the map and become prisoners. Units eliminated via surrender count only as 50 percent for balance of power purposes (round up).
33.2 Indians. If a force is composed entirely of Indians, it may not surrender or accept a surrender. Additionally, if a force that receives a surrender has any Indian combat units in it, roll a die. On a 1-3, an atrocity has taken place. Eliminate one of the surrendering units (instead of surrendering, picked randomly) and shift the balance of power one space in favor of the surrendering player.
34.0 Prisoner Exchanges
34.1 Non-Indian units eliminated because they have nowhere to retreat or because they have surrendered are taken prisoner. They are held off map by the capturing player. During the recruiting phase of any subsequent turn, players may exchange prisoner units on any terms they desire.
34.2 Indian units are never taken prisoner. Also, if all combat units in a force are Indians, it may not take any prisoners (refused prisoners are eliminated).
35.0 Scenarios
35.1 Scenario 1: Opening Rounds
This covers the French & Indian War from the opening rounds to the French capitulation in North America.
1.0 Scenario length. Seven game turns (1754-60).
2.0 Starting Balance of Power: -1 French.
3.0 British (set up first). Special: the British player may initially deploy provincial infantry regiments on either their heavy or light side. Once a unit has been deployed, it must remain on that side until removed from the map.
3.1 Initial Colony Status: Massachusetts Bay, Virginia, Hudson's Bay, Nova Scotia, Newfoundland are active. All other colonies are passive.
3.2 Treasury: five pounds.
3.3 British European Units.
- In Nova Scotia: two heavy infantry regiments; one siege train; one fleet.
- Fort Oswego: one heavy infantry detachment.
- In Massachusetts Bay, New York, Virginia, South Carolina: one heavy infantry detachment each (four total).
- Hudson's Bay: one heavy infantry detachment.
- Newfoundland: one heavy infantry detachment.
- British home base: one fleet.
3.4 British Provincial Units. These units may be broken down in initial deployment. All units are placed in the colony listed, unless otherwise noted.
- Hudson's Bay: one militia detachment.
- Halifax: one militia regiment.
- Massachusetts: leader Shirley; one heavy infantry regiment; three militia regiments (remember, Maine is part of Massachusetts); one light infantry regiment in Halifax.
- Rhode Island: one militia regiment.
- Connecticut: two militia regiments.
- New Hampshire: one militia regiment.
- New York: two militia regiments.
- Pennsylvania: one militia regiment.
- Maryland: one militia regiment.
- New Jersey: one militia regiment.
- Delaware: one militia regiment.
- Virginia: leaders Washington, Dinwiddy; one Virginia light infantry regiment; one militia regiment.
- North Carolina: one militia regiment.
- South Carolina: one militia regiment.
- Georgia: one militia regiment.
3.5 British Controlled Indians. None.
3.6 Supply Points: 1
3.7 British Markers. Magazine in Halifax.
4.0 French (set up second). Special: French must have at least one unit deployed per French city, town and fort.
4.1 Initial Status: New France and Louisiana are active.
4.2 Treasury: 10 pounds.
4.3 French European Units.
- In Louisbourg: leader Drucour; one heavy regiment; one siege train; one fleet.
- Quebec: leader de Vaudreil; one siege train.
- New Orleans: leader de Kerlerec; one heavy regiment; one siege train.
- Any French cities, towns, forts in New France: three heavy infantry detachments; six light infantry detachments.
- Any French cities, towns, forts in Louisiana: three heavy infantry detachments; six light infantry detachments.
- Fort Duquesne: leader de Villieres; one light infantry regiment.
- Any Indian village in New France: leader Picquet.
4.4 French Provincial Units.
- Louisbourg, Quebec, Trois Rivieres, Montreal, New Orleans, Mobile: one militia regiment each.
- Fort Duquesne: one light infantry regiment.
- Any towns, forts in New France: leader Langlade; four militia detachments.
- Any towns, forts in Louisiana: three militia detachments.
4.5 French Controlled Indians.
- Fort Duquesne: one "4-6" Indian unit.
4.6 Supply Points: 3
4.7 French Markers. Magazines in Louisbourg, Quebec and New Orleans.
5.0 Spanish (begin neutral, set up by French).
- St. Augustine: one heavy infantry regiment; one light infantry regiment; one militia regiment; one magazine.
- San Marcos: one militia regiment.
- Pensacola: one heavy infantry regiment; one militia regiment.
7.0 Special Rules.
7.1 There are no random events and negotiation phases on the first turn of the game.
7.2 On turn one the British may build European units only in their home base, which is an exception to 10.1(1). Other units are deployed normally.
35.2 Scenario 2: Seven Years War
This covers the war from the outbreak of the corresponding Seven Years War in Europe, with both sides committing major combat forces.
1.0 Scenario length: five game turns (1756-60).
2.0 Starting Balance of Power: -7 French.
3.0 British (set up first). Special: the British player may initially deploy provincial infantry regiments on either their heavy or light side. Once a unit has been deployed, it must remain on that side until removed from the map.
3.1 Initial Colony Status: Massachusetts Bay, New Hampshire, Rhode Island, Connecticut, New York, New Jersey, Hudson's Bay, Nova Scotia, Newfoundland are active. All others are passive.
3.2 Treasury: five pounds.
3.3 British European Units.
- In Nova Scotia: two heavy infantry regiments; one siege train; one fleet.
- Fort Oswego: two heavy infantry regiments.
- In Massachusetts Bay, Virginia, South Carolina: one heavy infantry detachment each (three total).
- Hudson's Bay: one heavy infantry detachment.
- Newfoundland: one heavy infantry detachment.
- Fort William Henry: leader Monro; one heavy infantry regiment.
- Fort Gaspereau: leader Moncton.
- New York City: leader Bouget.
- British home base: leader Loudon, one fleet.
3.4 British Provincial Units. These units may be broken down in initial deployment. All units are placed in the colony listed, unless otherwise noted.
- Fort Gaspereau: one Massachusetts heavy infantry regiment; one Massachusetts ranger regiment.
- Fort Saratoga (William Henry): Leader Johnson; one Connecticut heavy infantry regiment; one New York light infantry regiment.
- Oswego: one New York infantry regiment (either type); one New Jersey infantry regiment (either type).
- Hudson's Bay: one militia detachment.
- Halifax: one militia regiment.
- Massachusetts: Leader Shirley; one heavy infantry regiment; three militia regiments.
- Rhode Island: one militia regiment.
- Connecticut: one heavy infantry regiment; two militia regiments.
- New Hampshire: leader Rogers; one ranger regiment; one militia regiment.
- New York: one heavy infantry regiment; two militia regiments.
- Pennsylvania: one militia regiment.
- Maryland: one militia regiment.
- New Jersey: one militia regiment.
- Delaware: one militia regiment.
- Virginia: leaders Washington, Dinwiddy; one Virginia light infantry regiment; one militia regiment.
- North Carolina: one militia regiment.
- South Carolina: one militia regiment.
- Georgia: one militia regiment.
3.5 British Controlled Indians. None.
3.6 Supply Points: five
3.7 British Markers. Magazines in Halifax and New York City. Massacre on Fort Gaspereau.
3.8 Leader Braddock has been permanently eliminated.
4.0 French (set up second). Special: French must have at least one unit deployed per French city, town and fort. Fort Gaspereau is not French occupied; the British have captured it.
4.1 Initial Status: New France and Louisiana are active.
4.2 Treasury: 10 pounds.
4.3 French European Units.
- In Louisbourg: leader Drucor; two heavy infantry regiments; one siege train; one fleet.
- Quebec: leader de Vaudreil; one siege train.
- Montreal: one heavy infantry regiment.
- Fort Niagara: one heavy infantry regiment.
- Fort Frontenac: two heavy infantry regiments.
- Ticonderoga: three heavy infantry regiments; one light infantry regiment; one siege train; one engineer.
- Fort Duquesne: one light infantry regiment.
- Any Indian village in New France: leader Picquet.
- New Orleans: leader de Kerlerec; one heavy regiment; one siege train.
- Any French cities, towns, forts in New France: two heavy infantry regiments; one siege train; three heavy infantry detachments; six light infantry detachments.
- Any French cities, towns, forts in Louisiana: one light infantry regiment; three heavy infantry detachments; six light infantry detachments.
- Any French occupied squares: leaders Montcalm, De Bour, De Levis, de Villieres.
4.4 French Provincial Units.
- Louisbourg, Quebec, Trois Rivieres, Montreal, St. Jeans, New Orleans, Mobile: one militia regiment each.
- Ticonderoga: one heavy infantry regiment; one light infantry regiment.
- Any towns, forts in New France: leaders Langlade, Marin; two militia detachments.
- Any towns, forts in Louisiana: three militia detachments.
4.5 French Controlled Indians.
- Ticonderoga: one Indian combat unit, drawn at random.
- Fort Duquesne: one Indian combat unit, drawn at random.
- Any Indian village in French territory: one Indian combat unit, drawn at random.
4.6 Supply Points: 10
4.7 French Markers. Magazines in Louisbourg, Quebec, New Orleans and Ticonderoga.
5.0 Spanish (begin neutral, set up by French).
- St. Augustine: one heavy infantry regiment; one light infantry regiment; one militia regiment; one magazine.
- San Marcos: one militia regiment.
- Pensacola: one heavy infantry regiment; one militia regiment.
7.0 Special Rules.
7.1 There are no random events and negotiation phases on the first turn of the game.
7.2 The Seven Years War Breaks Out event is in effect.
35.3 Scenario 3: On to Quebec
This covers the decisive period of the war, with the British campaign that resulted in the capture of Quebec.
1.0 Scenario length. Two game turns (1759-60).
2.0 Starting Balance of Power: +3 British.
3.0 French (set up first). Special: French must have at least one unit deployed per French city, town and fort. Louisbourg, Fort Gaspereau and Fort Duquesne are not French occupied; the British have captured them. Fort Frontenac is not French occupied; neither player may place units in it.
3.1 Initial Status: New France and Louisiana are active.
3.2 Treasury: 5 pounds.
3.3 French European Units.
- Quebec: leaders de Vaudreil, Montcalm; six heavy regiments, one light regiment; one siege train.
- Montréal: leader De Levis; one heavy infantry regiment.
- Fort Niagara: one heavy infantry regiment.
- Ticonderoga: leader De Bour; two heavy infantry regiments; one light infantry regiment; one siege train; one engineer.
- In either Fort Niagara, Fort Detroit or Fort Vincennes: one light infantry regiment.
- Any Indian village in New France: leader Picquet.
- New Orleans: leader de Kerlerec; one heavy regiment; one siege train.
- Any French cities, towns, forts in New France: two heavy infantry regiments; three heavy infantry detachments; six light infantry detachments.
- Any French cities, towns, forts in Louisiana: one light infantry regiment; three heavy infantry detachments; six light infantry detachments.
- Any French occupied squares: leaders Bougainville, de Villieres.
3.4 French Provincial Units.
- Quebec, Trois Rivieres, Montreal, St. Jeans, New Orleans, Mobile: one militia regiment each.
- Ticonderoga: one light infantry regiment.
- Any city, town in New France: one cavalry regiment; one heavy infantry regiment.
- Any towns, forts in New France: leaders Langlade, Marin; one militia regiment, one militia detachment.
- Any towns, forts in Louisiana: one light infantry regiment; one militia regiment, three militia detachments.
3.5 French Controlled Indians.
- Ticonderoga: one Indian combat unit, drawn at random.
- Any Indian villages in French territory: two Indian combat units, drawn at random.
3.6 Supply Points: 5
3.7 French Markers. Magazines in Quebec, Montreal, New Orleans and Ticonderoga. Massacre in Oswego. Destroyed in Fort Frontenac.
3.8 French leader Drucour is a British prisoner; see rule 17.4.
4.0 British (set up second). Special: the British player may initially deploy provincial infantry regiments on either their heavy or light side. Once a unit has been deployed, it must remain on that side until removed from the map.
4.1 Initial Colony Status: Massachusetts Bay, New Hampshire, Rhode Island, Connecticut, New York, New Jersey, Pennsylvania; Hudson's Bay, Nova Scotia, Newfoundland are active. All others are passive.
4.2 Treasury: 10 pounds.
4.3 British European Units.
- Louisbourg: leaders Wolfe, Moncton; one grenadier regiment; eight heavy infantry regiments; two light infantry regiments; two siege trains; one engineer; two fleets.
- In Halifax: one heavy infantry regiment.
- Fort William Henry: leader Amherst; four heavy infantry regiments; one light infantry regiment; one siege train.
- Fort Schuyler: leader Brigadier (1-0); two heavy infantry regiments; one light infantry regiment; one siege train.
- Carlisle, Pennsylvania: leader Bouget; one light infantry regiment.
- Fort Duquesne: one light infantry regiment.
- New York City or Halifax: one fleet.
- In Massachusetts Bay, Virginia, South Carolina: one heavy infantry detachment each (three total).
- Hudson's Bay: one heavy infantry detachment.
- Newfoundland: one heavy infantry detachment.
4.4 British Provincial Units. These units may be broken down in initial deployment. All units are placed in the colony listed, unless otherwise noted.
- Louisbourg: one Massachusetts Ranger regiment; one Massachusetts engineer.
- Fort Gaspereau: one Massachusetts heavy infantry regiment.
- Fort Saratoga (William Henry): leader Rogers; two Connecticut infantry regiments (either type); one New York infantry regiment; one Massachusetts infantry regiment; one New Hampshire ranger regiment.
- Fort Schuyler: two New York infantry regiments.
- Carlisle (Pennsylvania): one Pennsylvania infantry regiment.
- Hudson's Bay: one militia detachment.
- Halifax: one militia regiment.
- Massachusetts: leader Shirley; one MA infantry regiment; three militia regiments.
- Rhode Island: one militia regiment.
- Connecticut: one heavy infantry regiment; two militia regiments.
- New Hampshire: one militia regiment.
- New York: Leader Johnson; one line infantry regiment; two militia regiments.
- Pennsylvania: one militia regiment.
- Maryland: one militia regiment.
- New Jersey: one militia regiment.
- Delaware: one militia regiment.
- Virginia: leaders Washington, Dinwiddy; one Virginia light infantry regiment; one militia regiment.
- North Carolina: one militia regiment.
- South Carolina: one militia regiment.
- Georgia: one militia regiment.
4.5 British Controlled Indians.
- Fort Schuyler: one combat unit, picked at random.
4.6 Supply Points: 10
4.7 British Markers. Magazines in Halifax, New York City, Fort Saratoga (William Henry) and Carlisle. Massacre on Fort Gaspereau. Fort on Carlisle, Pennsylvania.
4.8 Leaders Braddock, Monro have been permanently eliminated.
5.0 Spanish (begin neutral, set up by French).
- St. Augustine: one heavy infantry regiment; one light infantry regiment; one militia regiment; magazine.
- San Marcos: one militia regiment.
- Pensacola: one heavy infantry regiment; one militia regiment.
7.0 Special Rules.
7.1 There are no random events, negotiations and income/expenditure phases on the first turn of the game. Note this is different from Scenarios 1 and 2, which do include an income/expenditure phase in their first turns.
7.2 The Seven Years War Breaks Out event is in effect.
35.4 Variable Scenario Lengths
1.0 Short Scenarios. By mutual agreement, players may decide to end a scenario at the end of any year.
2.0 Extended Scenarios. The French and Indian War ended in 1760 with French capitulation. Players can agree to end a scenario in 1762 instead.
Designer's Notes
Simulating the French and Indian War meant modeling a conflict in which an entire continent was the theater of operations. Most histories concentrate on the struggle for Quebec, the Great Lakes and the Ohio River Valley, but both sides had other holdings throughout all of North America east of the Mississippi.
In many ways, the situation is similar to that in the wargame War of 1812, which we did a while back in S&T. Again, the histories mainly look at the Great Lakes and their littoral, with a couple of forays against Washington and New Orleans. What happened in the interior was, however, often just as critical and, in any event, there was always the possibility of the war spreading elsewhere.
The French & Indian War system is based on that of Asia Crossroads. It's a similar strategic situation: two empires facing each other across a wilderness. Both are fighting at some distance from their European homelands; both have to deal with a variety of political issues in addition to mobilizing expeditionary forces and advancing great distances. The multi-phase turn sequence reflects the tradeoff between periods of preparation and intense campaigning.
The British appear to have the long term advantage as, once the Royal Navy enters the picture, the French are effectively cut off from Europe. The British colonies aren't united, though; which prevents that side from mobilizing crushingly superior strength from among them. That potential will therefore rarely be translated into an offensive army. More, British militia is restricted in its movement. The French have a much more tightly controlled colonial system, so they can attain at least some local superiority. If the French are to win, then, they must win early. Failing that, they need to delay until the war ends in Europe. There is also the potential for Spanish Intervention, and that can also swing the course of events in favor of the French.
There's some negotiation in the game, in that the British have to get the support of colonial legislators. If they do, they can raise considerable contingents of provincial troops. If not, be prepared to ship in Redcoats from Britain. Also, both sides can mobilize Indians, but that can be a two-edged tomahawk (so to speak), in that the Indians have their own agenda.
The game's order of battle was easy to research. Translating it into game terms is where complexity came in. Distinctions had to be made between regulars, provincials and militia, reflecting the realities of colonial organization. Both sides had some colorful units, and in that era combined arms formations (legions) were in the making. You can see the British army evolving throughout the war, bringing in light infantry and rangers, for example.
The two combat results tables, Raid and Linear, reflect different tactical styles without having to fiddle with the unit combat factors. And there also had to be extensive rules for the naval war, as that was a major part of the conflict.
As usual, the random events table brings in a range of factors that would otherwise require extra rules. Probably the most critical event is the outbreak of the Seven Years War in Europe, which will start to tilt things in favor of the British. And, again, that means the French must grab as much as they can early on in the game.
There's less of an economic game in French & Indian War than was the case in Asia Crossroads. That's in part because the yearly turns don't lend themselves to major economic developments, especially in the middle of a war in which both sides are busy fighting all over the globe. You can, however, build up magazines and other military installations.
You need money to function, which means raising it from the home government, or by taxing the squares on the map (without representation). You get a favorable die roll modifier on the Home Government Income Table if the situation is strongly for or against you. The idea is, if you're winning, London or Paris decides to reinforce your success; if you're losing, they bail you out. If you conduct a lackluster campaign, back home they lose interest and fund fighting elsewhere. That also serves as a play balance mechanism, since, if you are losing you can get some extra cash.
There are considerable rules for logistics because campaigns were often determined by logistical requirements. A major strategic decision players must make is how many supply points they'll stockpile each turn since, among other things, you need to expend them to exploit second and subsequent impulses. And you don't want to be caught without supply points when an enemy column is moving into your heartland on a third or fourth impulse.
I used a square map grid because it gives more of an 18th century feel to game play. It's as if you're maneuvering your forces on a continent-sized Chess board. It also allows for the sneaky tactic of light troops being able to move diagonally.
Rivers were useful for shipping troops and supplies. That's different from the 21st century approach, which tends to define rivers as barriers. In the 18th century, rivers were primary transportation arteries. And that was all the more so in North America, where roads were few and far between. The Mississippi and Ohio River valleys were critical routes for transportation and trade. As you can see on the map, there is considerable European settlement along both those rivers. While there was no "Battle of New Orleans" in 1754-60, there was always the possibility of either side moving in that direction. And a viable player strategy is for the British to use their naval superiority to invade Louisiana. Conversely, the French might try pushing east from their Mississippi bases to raid the southern colonies.
Finally, there are rules for surrender, honors of war and prisoner exchanges because this is the Age of Enlightenment. Players need to keep it civilized, and that's not always easy.