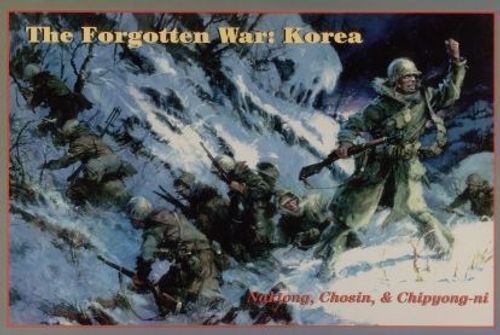
The Forgotten War: Korea
The Forgotten War: Korea Rulebook
Table of Contents
Table of Contents
- 1.0 Introduction
- 2.0 Components
- 3.0 Sequence of Play
- 4.0 General Notes
- 5.0 Fire Combat Procedure
- 6.0 Reinforcements and Replacements Phase
- 7.0 Weather Phase (Chosin only)
- 8.0 Artillery Ammunition Phase (Chosin only)
- 9.0 Prep Fire Phase
- 10.0 Movement Phase
- 11.0 Defensive Fire Phase
- 12.0 Offensive Fire Phase
- 13.0 Close Combat Phase
- 14.0 Turn Indication Phase
- 15.0 Determining Victory
- 16.0 Scenario One: Naktong, The Battle of the Bulge
- 17.0 Scenario Two: Chosin
- 18.0 Scenario Three: Hedgehog at Chipyong-ni
- 19.0 Extended Example of Play
- 20.0 Design Notes and Player Tips
- 21.0 Bibliography
1.0 Introduction
A. The Forgotten War: Korea simulates three battles of the Korean War.
B. This game includes three separate scenarios, each with its own map and combat units.
C. The battle of Naktong covers an attempt by onrushing North Korean forces to pierce the brittle Pusan Perimeter.
D. The battle of Chosin covers the near-disastrous retreat by the UN Forces from the Chosin Reservoir in the depths of winter.
E. The battle of Chipyong-ni pits a solitary UN regiment defending its firebase against massive Chinese human wave assaults.
NOTE: Players should read sections 2.0 through 4.0 before beginning the game. The fire combat procedure is used in three phases, and is discussed separately in section 5.0. Starting with section 6.0, the rules are organized sequentially according to the various phases listed in the Sequence of Play (3.0). Specific steps within each phase are listed in the order in which players perform them. Thus, starting with section 6.0, players can use these rules as a kind of "flow chart" and read them as they play the game. Each phase that uses fire combat has cross-references to section 5.0.
2.0 Components
A. The Forgotten War: Korea contains the following components:
- 980 playing pieces, consisting of both combat units and information markers,
- Three 34" by 22" game maps,
- The rules booklet,
- Player aid cards, and
- Two six-sided dice, one white, and one colored.
B. If any components are missing or damaged please send a postcard to Decision Games, PO Box 880, Ridgecrest CA 93556-0880.
C. If you have any rules questions please frame them in a yes or no format and send with an SASE to the above address attention: Forgotten War Rules Questions.
2.1 Playing Pieces
Before starting the game, players must punch (or, better yet, cut) out the cardboard playing pieces. There are two types of playing pieces: units, which represent the military formations that took part in the battles; and markers, which players use to record various aspects of the game mechanics.
2.1.1 Nationality
The various numbers and symbols on a unit convey the following information about the unit.
| Color | Nationality |
|---|---|
| White on red | People's Liberation Army/Communist Chinese Forces (CCF) |
| Light red | North Korean People's Army (NKPA) |
| White on medium green | Republic of Korea (ROK) |
| White on dark green | U.S. Marines |
| White on olive green | U.S. Army |
| White on blue | French |
| Black on tan | British Royal Marines |
| White on dark green | UN air units |
| White on blue | UN air units |
2.1.2 Unit Symbols
This indicates the type of unit. Vehicle units use silhouettes; leg and logistical (support) units use standard NATO symbology.
- Leg Units: Infantry; Marine Infantry; Reconnaissance; Headquarters; Engineer; Ranger.
- Logistical Units: Transportation; Supply; Ammo; Signal; Air Maintenance; Maintenance.
- Vehicles: M4; M26/46; M7/Priest; T34/85; M16; M24/Chafee; M19; Towed Gun; Truck.
M19 units have a dot in the upper left corner. This is a reminder that fire from such a unit is area fire and affects all enemy units in the target hex, not just one.
Sample Unit: The sample unit shown above is one platoon of Company A of the 5th U.S. Marine Regiment.
Other Units: Artillery Barrage; Air Unit; Chosin Artillery Unit.
2.1.3 Counter Explanations
| Attribute | Explanation |
|---|---|
| Arrival | Indicates the unit's setup location or turn of arrival if it does not begin the game on the map. A turn number in parentheses indicates the unit is optional. |
| Close Combat Strength | Indicates the value used when the unit performs close combat. |
| Fire Strength | Indicates the value used when the unit performs fire combat. |
| Movement Allowance (MA) | Indicates the value used when the unit performs movement. |
| Range* | Indicates the distance in hexes from the artillery unit that it can perform fire combat. |
| Size | Indicates the size of the unit. Platoon (●●●) Company (I) |
| Company ID and Regimental ID | Indicates the unit's parent formations. In Naktong, the numbers on the right side of a NKPA unit's symbol are the unit's battalion ID above its regimental ID. |
* Chosin artillery units only.
2.1.4 Markers
| Marker | Purpose |
|---|---|
| Improved Positions Marker (Front IP / Back IP) | Shows an improved position (10.1). |
| Air (Used) | Shows an air strike on a hex (5.1.7, 5.2.1). |
| Mortar (Fired) | Shows indirect mortar fire on a hex (5.1.6, 5.2.1). |
| Arty (Fired) | Shows indirect artillery fire on a hex (5.1.5, 5.2.1). |
| CC (Close Combat Marker) | Indicates a continuing close combat (13.6.2). |
| Game Turn | Indicates the current game turn (3.0, 14.3). |
| Target | Optional marker to track which unit is the target of the current fire combat. |
2.2 Map
Each map represents the area where the individual battle took place. The scale of each map is given in the general information for each scenario.
2.3 Charts and Tables
A. The following charts are printed on the maps or the player aid card: Terrain Effects Chart, Stacking Limits Chart, Fire Combat Table, Close Combat Table, Turn Record Track, Weather Table (Chosin only), and Aerial Resupply Table (Chosin only).
B. In addition, each map may have holding boxes that are appropriate for that scenario: Replacements, Permanently Eliminated, Indirect Fire Markers Available for Use, and Indirect Fire Markers Used This Turn.
2.4 Terminology
The following sections describe terms used in specific ways in these rules. These terms should not be new to veteran players, but they do help clarify which player undertakes an action, or which units are included in which categories.
2.4.1 Players/Sides
2.4.1.1 Phasing Player/Side
The player/side performing actions in a phase is called the phasing player/side.
Example: During a UN player-turn there is a Defensive Fire Phase. The CCF/NKPA player is the phasing player for that phase.
2.4.1.2 Non-Phasing Player/Side
The player who is not performing actions in a phase.
2.4.1.3 Attacker
The side whose units are initiating combat. This term may also be used for that side's units.
2.4.1.4 Defender
The side whose units are the target of combat. This term may also be used for that side's units.
2.4.2 Control
2.4.2.1 Friendly
Refers to those hexes or units belonging to the same side as another hex or unit referred to.
2.4.2.2 Enemy
Refers to those hexes or units belonging to the opposing side.
2.4.3 Types of Units
2.4.3.1 Vehicle
All units with silhouettes (not unit symbols) are vehicle units, such as M4, M24, M26/M46, M19, M16, trains, artillery, and T34/85 units.
2.4.3.2 Armored Vehicle
The vehicle units which were armored, such as M4, M24, M26/M46, M19, M16, and T34/85 units.
2.4.3.3 Non-Armored Vehicle
The vehicle units which had no or minimal armor such as trains and artillery.
2.4.3.4 Leg
Any non-vehicle unit (including a logistical support unit) is a leg unit.
2.4.3.5 Artillery
Artillery includes both individual artillery units and mortar markers unless a specific distinction is made. An AAAAW (anti-aircraft artillery, automatic weapons) unit is any unit of an AAAAW battalion, either M19 antiaircraft guns or M16 halftracks.
2.4.3.6 Trains
This term refers to trucks.
2.4.4 Types of Combat
A. Combat includes both close combat and fire combat.
B. Close combat occurs when an attacking unit enters an enemy hex in order to assault the enemy unit.
C. Fire combat occurs when an attacking unit uses its weapons to fire at an enemy unit at a distance, and is composed of several subtypes: indirect, direct, area, and point.
- Indirect fire indicates fire from air and artillery units.
- Direct fire indicates fire from any other type of unit. Exception: An artillery unit can fire direct fire at an adjacent unit.
- Area fire indicates fire from air, artillery, and M19 units, and is against all units in a hex.
- Point fire indicates fire from any other type of unit, and is against one unit in a hex.
Example: Fire from an M19 unit is direct area fire, while fire from an infantry unit is direct point fire.
Historical Note: M19s were tracked vehicles mounting twin 40mm AA guns. They were capable of accurately generating firepower worth hundreds of hand grenades per minute.
3.0 Sequence of Play
Players should select a scenario to play and set up the units per the instructions for that scenario. Place the game turn marker in the first box of the scenario's Turn Record track. Play then follows a strict sequence of activities. Section 4.1 indicates which player is the first player for each scenario.
During a player-turn, a player undertakes the certain activities in the order specified here.
3.1 First Player Turn
A. Reinforcements and Replacements Phase: The first player places reinforcements on the map (6.1), replaces eliminated units (6.2), and makes mortar marker assignments (6.3).
B. Weather Phase (Chosin only): The UN side checks the turn's weather (7.0).
C. Artillery Ammunition Phase (Chosin only): Starting with Turn 2, the UN side checks artillery ammo for certain artillery units (8.0).
D. Prep Fire Phase: The phasing side's units may fire at enemy units using indirect fire only (9.0 and 5.0).
E. Movement Phase: The phasing side undertakes the following activities:
- Designates units in improved positions (10.1).
- Moves units (10.2).
- Reconstitutes partially eliminated units (10.3).
- Checks stacking limitations (10.4).
F. Defensive Fire Phase: The non phasing side's units may fire at enemy units (11.0, 5.0).
G. Offensive Fire Phase: The phasing side's units may fire at enemy units (12.0, 5.0).
H. Close Combat Phase: The phasing side moves its attacking units into hexes containing defending enemy units and engages them in close combat, or continues close combats with any of its units under Close Combat markers placed in previous phases (13.0).
3.2 Second Player-Turn
After the players have completed the phases for the First Player Turn, they proceed to the Second Player Turn by reversing roles and undertaking the same list of activities.
3.3 Turn Indication Phase
Both sides conform indirect fire markers (14.1), mark victory points (VPs) accumulated for the turn (14.2), and advance the turn marker (14.3). If there are no more turns left in the game, they determine who won (15.0).
4.0 General Notes
4.1 Determining the First Player
A. In Naktong, the NKPA turn is first.
B. In Chosin and Chipyong-ni, the UN turn is first.
C. In Chasin [sic, printed as "Chasin"; Chosin is meant], however, skip the UN turn on Turn 1. Thus, Chasin begins with the CCF turn of Turn 1, followed by the UN turn of Turn 2.
D. In Chipyong-ni on Turn 1, the UN may perform artillery fire normally, but may not perform any other activities, including movement.
4.2 How to Handle Fractions
When a calculation results in a fraction, round the fraction down to the next whole number.
Example: If an air unit with a printed fire strength of 9 attacks a tank unit, halve the air unit's strength to 4.
4.3 How to Declare Combat
A. During any phase when combat is allowed, the phasing side declares and resolves each combat before proceeding to the next.
Example: Assume a stack of two friendly units is adjacent to two enemy units in different hexes. The first friendly unit could fire at either enemy unit. After resolving its combat, the second friendly unit could then decide to fire at that same unit or the other adjacent enemy unit.
B. This sequential resolution of combat also applies to the use of indirect fire markers; if one marker does not produce the desired results, a player can fire at the same hex with another marker in the same fire phase.
C. However, a player cannot sequentially resolve close combats. While close combats are resolved one at a time, a unit can be the target of no more than one close combat per close combat phase.
4.4 Notes to Experienced Players
A. Units do not exert zones of control.
B. In addition, except for improved and prepared positions, the type of terrain a unit occupies has no effect direct on combat.
C. Finally, only Chipyong-ni has ranged direct fire. Even though units in the other scenarios could potentially have fired at ranges of more than one hex, target acquisition was difficult given the roughness of the terrain and the weather. Also, excluding ranged fire helps keep the game's complexity at the desired level.
5.0 Fire Combat Procedure
See 2.2 for definitions of the terms used in this section.
5.1 Designate the Target
The attacker designates the target unit or stack.
5.1.1 Who Can Be a Target
For point fire, the attacker can designate as a target one enemy unit. If that unit is in a stack of units, it must designate which unit in the stack is the target. For area fire, it can designate either one enemy unit or one stack of enemy units.
5.1.2 General Target Restrictions
A. For either type of fire, a player can never select as a target an enemy unit in a continuing close combat with a friendly unit.
B. A hex containing an abandoned friendly artillery unit can be selected as a target. The abandoned unit is unaffected by any subsequent combat result.
C. A unit can fire across a hexside it cannot move across, and can fire into a hex it cannot move into. Thus, a unit in a rough hex with no road can be the target of a vehicle unit's fire, even though the vehicle unit cannot enter such a hex. In addition, a unit can fire across a lake hexside in the Naktong scenario.
5.1.3 Targets of Direct Fire
A. The target must be adjacent to the firing unit to conduct direct fire except for Chipyong-ni.
B. Chipyong-ni:
- The UN can designate as the target of an infantry unit's direct point fire any CCF unit either adjacent or two hexes away from the firing unit.
- The UN can designate as the target of a non-artillery vehicle unit's direct point fire any enemy unit up to four hexes away from the firing unit. (An artillery unit may still fire directly only at an adjacent target.)
- Nothing blocks the line-of-sight from the firing unit to the target. Either side can fire through all types of terrain, enemy units, or friendly units.
- CCF units may only use direct fire into adjacent hexes.
5.1.4 Targets of Indirect Fire
There are two basic conditions that must be met in order to conduct any form of indirect fire.
A. The target must be adjacent to a friendly unit acting as a spotter.
- The spotter can be, but does not have to be, the firing unit.
- A friendly unit in close combat can act as a spotter for another friendly unit, but cannot itself perform indirect fire.
- This condition does not apply to Chipyong-ni. In that scenario, an enemy unit can be the target of friendly indirect fire even if not adjacent to a friendly unit.
B. The target must be within range of the firing artillery unit.
- Count the target's hex, but not the firing unit's hex when calculating the range.
- There is no range requirement for an indirect fire marker that has no corresponding unit on the map (such as a mortar marker or an artillery marker in Naktong) other than the range from the spotter to the target.
5.1.5 Targets of Artillery Fire
In addition to the normal conditions for indirect fire, a target of artillery fire (including mortar fire) can be up to three hexes away from a friendly spotter if that spotter is in a hilltop hex. Nothing blocks the line-of-sight from the spotter to the target – it can see through all types of terrain or enemy or friendly units.
5.1.5.1 Chosin Special Rules
A. On Turn 1, an artillery unit cannot be a spotter for its own fire.
B. On Turn 1, the artillery units attached to TF Faith cannot fire at all.
Historical Note: The artillery units belonging to the TF Faith were in march mode during the initial CCF attack, and were overrun or scattered shortly thereafter. This rule simulates the time it would have taken the guns to get "into battery," assuming, of course, that nothing worse befalls them.
5.1.5.2 Chipyong-ni Special Rules
Again, no spotter is required for indirect fire. During a day turn, the target of artillery fire can be anywhere on the map. During a night turn, the target must be within 15 hexes of the firing unit.
Historical Note: UN forces made extensive use of flares from an orbiting USAF C-47 to illuminate the night sky during this battle.
5.1.6 Targets of Mortar Fire
A. In addition to the normal conditions for indirect fire, a target of mortar fire can be spotted only by a unit from the regiment that the mortar marker is assigned to.
B. Any unit in the regiment can call in fire from the mortar assigned to that regiment (6.3).
5.1.7 Targets of Air Strikes
A. Only the UN side can conduct air strikes.
B. In addition to the normal conditions for indirect fire, a target of an air strike can be up to three hexes away from a friendly spotter.
C. The spotter need not be in a hilltop hex.
D. Nothing blocks the line-of-sight from the spotter to the target – the spotter can see through all types of terrain or enemy or friendly units.
5.1.7.1 Naktong Special Rules
The UN can designate any NKPA unit anywhere on the map as the target of an air strike – no spotter is required for air strikes in this scenario.
Historical Note: The normal Forward Observer restrictions are lifted in this game due to the proximity of airfields at Pusan, generally good weather, and the fact that most of the airstrikes were some form of interdiction.
5.1.7.2 Chosin Special Rules
A. If a CCF division is wholly within its assembly area, no unit of that division can be the target of an air strike.
B. Once one unit of the division exits the assembly area, any unit of the division can be a target even if it is still in the assembly area.
Historical Note: The Chinese were masters at camouflage and deception. During the day, they would remain under cover, sometimes twenty to thirty soldiers to a small hut, to avoid UN air reconnaissance. Once on the move, however, they were much more easily detected and were punished accordingly.
5.1.7.3 Chipyong-ni Special Rules
A. There are no air strikes during a night turn.
B. The perimeter includes the prepared positions, but not the line of obstacles. Other than that restriction, the UN can designate any CCF unit anywhere on the map as the target of an air strike – no spotter is required.
C. The UN cannot designate as a target a CCF unit on or within the UN perimeter.
5.2 Determine Attacking Fire Value
The attacker determines the fire value of the firing unit(s).
5.2.1 Who Can Attack
A. All fire is voluntary; a unit is never required to fire.
B. Each unit fires individually and can fire only once in a phase.
C. If more than one friendly unit wants to fire at the same target, the fire from one unit is resolved before the next unit begins its fire.
D. If a stack of friendly units is overstacked, only the number of units that are normally allowed in the hex can fire (owner's choice as to which units).
E. A unit in a continuing close combat cannot perform any type of fire attack (See Close Combat, 13.0).
F. The attacker can place on the target hex air and mortar markers that are in the Indirect Fire Markers Available This Turn box on the map. It can also place on the target hex any artillery marker that is not on its "Fired" side and which is within range of the target.
5.2.2 How to Calculate Strength
Normally, the fire value is the fire strength of the firing unit as printed on its counter or indirect fire marker.
A. If the target unit is an armored vehicle, the fire value of leg, artillery, and non-armored vehicle units is reduced to 0, and the fire value of an air strike marker is halved.
B. An artillery unit whose artillery marker is not on its "Fired" side may fire direct area fire at an enemy stack adjacent to it using its fire strength, not the value on its marker. In section 5.5, this marker is flipped to "Fired" after the direct fire. Thus, unlike other units, an artillery unit can fire directly only once per turn, and cannot fire both directly and indirectly in the same turn.
5.3 Check Modifiers
A. The attacker checks to see whether any of the following die roll modifiers apply to the fire combat.
B. For each combat the attacker rolls one white die to determine losses. If the result of the white roll is 0-2, the attacker rolls one colored die to determine whether the defender stands or retreats.
C. There are different die roll modifiers (DRMs) for each roll. DRMs are cumulative.
5.3.1 White DRMs
| DRM | Condition |
|---|---|
| +1 | If the target's hex contains an improved position marker. (In Chipyong-ni, only UN units gain the benefit of the prepared positions printed on the map, and they gain this benefit regardless of the direction of the attack.) |
| +1 | If the fire is an air strike into a hex containing an abandoned UN artillery unit. |
| +1 | If a UN unit is firing and it is the first turn (Chosin only). |
5.3.2 Colored DRMs
| DRM | Condition |
|---|---|
| +1 | If the target is in an improved or prepared position. Chipyong-ni: UN units only. |
| +1 | If the target is a US Marine unit. |
| -1 | If the target is not an infantry, recon, rangers, or engineer unit. |
Player's Note: It is usually just easier to roll both dice at once, ignoring the colored die if the white die does not produce a result.
5.4 Determine Result
A. The attacker rolls both the white and the colored die.
- On the left side of the Fire Combat Table, locate the column containing the attacking unit's fire value.
- Apply the DRMs to the white die, locate the row corresponding to that modified roll, and read across the row until it intersects with the fire value column.
- That intersection contains the result of the fire combat.
B. For area fire, the attacker rolls the dice once for each unit in the target hex and applies any results individually to each unit.
Exception: The attacker does not roll for any unit in a hex that entered the hex involuntarily and caused the hex to be overstacked.
C. There are two possible results from the white die roll:
| Result | Explanation |
|---|---|
| "–" (no number) | Indicates that the fire was ineffective. Combat is over and the attacker now continues to other combats or to the next phase. |
| Number (includes 0) | Indicates the step losses that the target incurs. A "0" means that a unit has not suffered any step losses, but may have to retreat. |
D. If (and only if) the result was a number (0-2), then apply the colored DRMs to the number on the colored die. Using the table on the right side of the Fire Combat Table, determine whether the defender must retreat.
E. There are two possible results from the colored die roll.
| Result | Explanation |
|---|---|
| Continue mission | Target does not have to retreat. |
| Retreat one hex | Target must retreat one hex. |
5.5 Conform Indirect Fire Markers
A. Before applying losses, the attacker removes any indirect fire markers from the target.
B. Place air and mortar markers in the Indirect Fire Markers Used This Turn box on the map.
C. Place any artillery marker upside down on the owning artillery unit. This marker should now read "Fired."
D. Flip the markers on any artillery units that have fired directly.
5.6 Apply Step Losses
The defender subtracts any losses incurred in combat from the target and performs any voluntary or mandatory retreats.
5.6.1 Applying Step Losses
A. Most units have two steps. If a combat result calls for a unit to lose its first step, the defender flips the unit over. The defender must eliminate a unit if:
- the unit has to lose 2 steps;
- the unit has no reverse side and has to lose 1 or 2 steps; or
- the unit is already flipped, and it has to lose 1 or 2 steps.
5.6.2 Eliminating Units
The defender places eliminated units into its Replacements box or its Permanently Eliminated box. The exact box the defender uses depends on the scenario and side.
| Scenario | Side | Box |
|---|---|---|
| Naktong | UN | Replacement |
| Naktong | NKPA | Replacement |
| Chosin | UN | Permanently Eliminated |
| Chosin | CCF | Replacement |
| Chipyong-ni | UN | Permanently Eliminated |
| Chipyong-ni | CCF | Permanently Eliminated |
5.7 Retreating Units
The defender retreats units 1) forced to retreat by the colored die roll, or 2) which incurred a loss and the defender wants to retreat.
5.7.1 General Retreat Guidelines
A. When retreating a unit, the owning side must attempt to retreat the unit one hex according to the following guidelines, listed in order of priority. Whichever priority a retreat fulfills, it should also try to fulfill the lower priorities as well.
B. Eliminated units are placed in the appropriate box on the map per 5.6.2.
C. When a unit retreats, it must retreat:
- Into any hex that would keep it from being eliminated.
- Into any vacant hex that is away from the attacking unit (or, if close combat, away from the close combat hex) and not adjacent to any enemy units.
- Into any hex containing a friendly unit that is away from the attacking unit and not adjacent to any enemy units. Exception: In Chipyong-ni, a unit continues to retreat over friendly units until it reaches a vacant hex.
- Into any hex adjacent to an enemy unit.
- (UN units in Chosin) Into a hex that is no more than five hexes from a major road hex.
- Off map (Keep track of the hex where the unit exited; that unit can reenter the next turn; 6.1.3).
D. A unit is eliminated if:
- It cannot find a hex that meets the guidelines.
- The only available hex contains an enemy unit (even if in close combat with a friendly unit).
E. A vehicle unit is eliminated if:
- The only available hex is a rough hex with no road connecting it with the retreating unit's original hex.
- It is forced to retreat onto a friendly stack of units and after the retreat the stacking limit of the hex would be exceeded.
5.7.2 Special Retreat Conditions
A. A unit that incurs a loss (including a 0) may retreat even if not forced to do so by the colored die roll. Such voluntary retreats follow the same guidelines and restrictions as forced retreats.
B. If a stack of units exceeds the stacking limit and all units within the stacking limit retreat, units in excess of the stacking limit must also retreat.
C. If an artillery unit retreats, do not move the counter. Instead, flip the counter to its "abandoned" side, remove the unit's fire marker from the available box, and place it under the counter. An abandoned artillery unit cannot fire or move, but abandoned UN artillery may be recrewed per 10.2.1 G.
D. Chosin: For each full ice hex (not ice hexsides) a friendly unit enters during a retreat, the enemy player immediately receives one VP.
E. Chipyong-ni: If any unit (CCF or UN) retreats into an obstacle hex, the owning player rolls a die. On a 6, the retreating unit loses one step.
F. Chipyong-ni: A CCF unit must always attempt to retreat away from the UN perimeter. The CCF side cannot use a retreat result to advance through the UN line. If the CCF unit was already inside the perimeter and must retreat, normal retreat rules apply.
5.8 Advance after Combat
A. If the defender vacates its hex, the attacker may advance the attacking unit into that hex. Exception: A unit firing during the Defensive Fire Phase never advances, even if the enemy hex is vacated.
B. A unit that advances is eligible for close combat in the following close combat phase.
C. Combats are conducted sequentially, not simultaneously. Thus, if a stack of friendly units has fired on a stack of enemy units and forced them to retreat one by one, only the last attacking unit will be able to advance into the defenders' hex.
D. Chosin: If a CCF unit advances into a hex containing a UN supply dump, the CCF unit loses one step. (Party time!)
E. Chosin: A UN unit cannot advance into a hex that is more than five hexes from a major road hex.
6.0 Reinforcements and Replacements Phase
6.1 Place Reinforcements on Map
A. The phasing side:
- Checks for any new friendly units are due to arrive this turn, and, if so, where.
- Places arriving air strike or artillery markers (without corresponding artillery units) in the Indirect Fire Markers Available This Turn box.
- Places other arriving units on the edge of the map adjacent to the hex or hexes where they enter.
- Places an artillery unit's marker on any arriving artillery unit.
B. Units so placed can move normally this turn and pay terrain costs for the first hex they enter on the map.
6.1.1 Stacking Limitations; MP Costs
A. The phasing side may place the arriving units in stacks, but each stack must meet the stacking limitations for the entry hex.
B. More than one stack may enter at the same hex, but each stack pays an additional MP for every other stack that has entered ahead of it through the same hex. Thus, the first stack pays 1 MP to enter the map, the second pays 2 MPs, etc.
C. If a scenario calls for reinforcements to enter at a specific hex or "at any one hex," they must enter one behind the other.
D. Calculate the entry cost for a unit entering along a road using the road movement rate.
E. Units need not enter in the order in which they are listed.
6.1.2 Entry Hex Occupied by Enemy
If the hex where a reinforcement is scheduled to enter is occupied by an enemy unit, the reinforcements may enter the next turn anywhere on the same map edge, but no more than one stack may enter into any one hex on the map.
6.1.3 Reentry of Unit Retreated Off Map
If a friendly unit retreated off the map last turn, place it as if it were a reinforcement next to the closest available entry hex from where it exited the map. If more than one hex meets this restriction, the phasing side can chose where to place the unit.
6.1.4 Entry of Delayed Reinforcements
A player may voluntarily delay entry of a reinforcement for as long as desired, but it must still enter at its assigned entry hex (subject to 6.1.2) when it does arrive.
6.2 Replace Eliminated Units
In Naktong and Chosin (CCF only), the phasing side removes eliminated friendly units from the Replacements box and places them back on the map or into the Permanently Eliminated box. How this is done differs in the two scenarios.
6.2.1 Naktong
A. For every two friendly units of the same company in the phasing player's Replacements box, the phasing player must place one in the Permanently Eliminated box.
B. Place the other on the map in any hex that is within three hexes of another unit of the same regiment and is not adjacent to an enemy unit.
C. If there are no other units of the regiment still on the map, the unit may not be replaced.
D. If there are no eligible placement hexes on the map, place the unit that should have gone on the map in the Permanently Eliminated box also.
E. Eventually there will be just one unit in the Replacements Box for a company. At that time, move that unit to the Permanently Eliminated Box.
6.2.2 Chosin
A. For every three units in the phasing CCF player's Replacements box, place two in the Permanently Eliminated box.
B. Place the other on the map in any hex that is at least 8 hexes away from a road hex.
C. The three units need not match, either in formation or strengths.
6.3 Make Mortar Marker Assignments
A. The regiment to which a mortar marker is assigned affects how that marker can be used for fire (5.1.6).
B. When a mortar marker arrives as a reinforcement, it may be assigned to any regiment that has at least one unit arriving that turn, unless mentioned otherwise.
C. A mortar marker already on the map may be assigned to another regiment during this phase.
D. If a mortar marker has a specific regimental designation (such as HM/34 in Naktong), the owning side must attempt to assign it to the named regiment first. If all units in that regiment have been eliminated, it may be assigned to another regiment.
Players Note: If you have problems keeping track of mortar assignments, treat a mortar marker like an artillery marker and keep it on top of one of the units in the regiment.
7.0 Weather Phase (Chosin only)
A. The UN rolls one die and checks the Weather Table. The result indicates the maximum number of UN air units that can be used this turn.
B. The UN can choose which are available and which are not. Move any unavailable air units into the Indirect Fire Markers Used This Turn box on the map.
Historical Note: Historically, all turns were clear except for Turns 3 and 4, which were snow. If players agree before the scenario they may use the historical weather instead of rolling each turn.
8.0 Artillery Ammunition Phase (Chosin only)
A. There are no ammo markers; use two blank counters or a piece of paper.
B. Starting with Turn 2, the UN rolls for artillery ammo for the artillery units that start in the Yudam-ni area or with Task Force McLean/Faith.
C. There are no ammo restrictions on Turn 1.
Historical Note: The Far Eastern Air Force was generally able to keep UN ground forces supplied with food and small arms ammunition throughout the campaign. Artillery ammo was another story. Plenty of 105mm rounds were dropped accurately, but fully 70% were damaged on impact with the frozen ground. Not until they reached Hagaru were the Marines fully able to utilize their artillery.
8.1 Air Resupply
A. The UN rolls one die for each force and checks the Aerial Resupply Table. Use the column appropriate to each force.
B. The result is the number of ammo points received this turn for the indicated force. Increase the appropriate force's ammo marker by the number of ammo points received.
8.2 Available Artillery and Mortars
A. For each ammo point, one artillery unit or one mortar marker in that force can fire this turn. The UN can choose which units or markers are available this turn and which are not.
B. Subtract one ammo point from the appropriate track for each artillery unit or mortar marker made available this turn.
C. For any unavailable artillery unit, flip it to its "Fired" side.
D. Place any unavailable mortar markers into the Indirect Fire Markers Used This Turn box.
8.3 Accumulating Ammo Points
Ammo points may be accumulated from turn to turn, but a force cannot accumulate more points than it has artillery units and mortar markers available to it.
Historical Note: Transportation for carrying ammo to the front was limited.
8.4 Lifting of Restrictions
A. An artillery unit is freed from these supply restrictions when it can trace a line of road hexes free of enemy units to the Hagaru airstrip, and that airstrip is open and occupied by a UN engineer unit not in close combat.
B. Once all artillery units in a force can trace such a line, the UN side need no longer roll for mortar markers for that force either.
C. If the CCF captures the airstrip before a unit can trace a line to it, that unit must continue to roll for supply for the remainder of the scenario.
8.4 Exempt Units
[Printed as "8.4" in the source, a duplicate of the section above; retained as printed.]
The UN side does not check ammo for the artillery units or markers that start in Hagaru or Koto-ri.
9.0 Prep Fire Phase
During the Prep Fire Phase, units of the phasing side may fire at enemy units using indirect fire only. This includes air strikes, artillery fire, and mortar fire. Indirect fire follows the Fire Combat Procedure (5.0).
10.0 Movement Phase
During this phase, the phasing side may move its units, build improved positions, and recombine partially eliminated units.
10.1 Designate IPs
A. The phasing side may:
- Place a friendly improved position marker on any friendly non-vehicle unit that is not in a continuing close combat and
- Remove an IP marker from a friendly unit.
B. All improved positions, including prepared positions, are omnidirectional.
C. This does not apply to Chipyong-ni. Neither side can build improved positions in that scenario. The UN side, however, can use the prepared positions printed directly on the map (5.3). A prepared position is the same as an improved position except that PPs are never removed or destroyed, even if unoccupied, and they cost 2 MPs to enter.
10.2 Move Units
The phasing side may move its units across the map according to the provisions of this section.
10.2.1 General Movement Conditions and Restrictions
A. The phasing side selects one friendly unit on the map to move. Each hex on the map costs a certain number of MPs for a unit to enter. The MPs are indicated on the Terrain Effects Chart for each scenario.
B. A unit may move across the map, subtracting the MPs for each hex entered from its MA.
C. A unit must stop when it does not have enough remaining MPs to enter another hex. It does not have to move its full MA.
D. The phasing side may move a stack of units together. The MA of the stack is the MA of the slowest unit in the stack.
E. If a stack begins the Movement Phase overstacked, the phasing side must attempt to conform it to the stacking limits (10.4) during the Movement Phase.
F. The phasing side must complete the movement of one unit (or stack) before it can move another.
G. A unit may not skip over hexes, nor may it carry over any of its MA from one turn to the next.
H. A unit cannot enter a hex containing an enemy unit during the Movement Phase.
I. A unit in a friendly improved position cannot move.
Player's Note: You can freely remove IP markers before movement begins (10.1.).
J. Subject to stacking and movement restrictions, a friendly unit may enter a hex containing another friendly unit under an improved position and receive the benefit of that IP.
K. A unit may move through an abandoned enemy improved position marker as if the marker were not there.
L. The movement restriction does not apply to the prepared positions in Chipyong-ni, however; in that scenario, a unit can freely enter or leave a PP hex. Exception: It costs units 2 MPs to enter a prepared position marker in Chipyong-ni, even if abandoned.
M. A unit in a continuing close combat may move out of the close combat hex. In Chipyong-ni however, a CCF unit in a continuing close combat cannot move out of the hex in such a way as to advance through the UN line.
Example: If a CCF unit is in a continuing close combat with a UN unit in a prepared position hex, and an adjacent prepared position hex contains a UN unit, the CCF unit may not move out of the continuing close combat into a hex within the perimeter adjacent to the other prepared position hex.
N. An abandoned UN artillery unit cannot move. If a UN unit enters a hex containing an abandoned UN artillery unit, the UN may flip the artillery unit back to its non-abandoned side. It then places its artillery marker on top of it with the marker's "Fired" side up. The recrewed artillery unit cannot move this turn, and cannot fire because of the Fired marker. After this turn the artillery unit may be used normally.
10.2.2 Strategic Movement
A. A unit may move up to twice its MA if it does not start the turn in a continuing close combat and it does not move adjacent to an enemy unit during its move.
B. It may use strategic movement if it starts adjacent to an enemy unit as long as it does not move adjacent to an enemy unit at any other point during its movement.
C. Strategic movement is not allowed in the Chipyong-ni scenario.
10.2.3 Special Terrain Effects on Movement
A. A unit may always move one hex, even if entering that hex exceeds its MA. However, a unit can never enter a hex prohibited to it by the Terrain Effects Chart.
B. If a hex contains any amount of the color for rough terrain, it is a rough terrain hex.
C. When entering a thoroughfare (road or trail) hex, a unit may use the special movement rate for that type of thoroughfare only if it enters the hex from another thoroughfare hex.
D. Chipyong-ni: Railroad hexes are treated as road hexes for all purposes.
E. Chosin: Ice hexes are treated as clear hexes, except the enemy receives a VP when a friendly unit enters an ice hex (10.2.6.F).
10.2.4 Restrictions on Moving Vehicles
A. A vehicle unit can enter a rough hex only along a road. In addition, stacking limits on vehicle units (10.4) apply not only at the end of vehicle movement, but during vehicle movement as well. Thus, if a rough/road hex contains two friendly vehicle units, another vehicle unit can not pass through that hex.
B. An artillery unit cannot voluntarily enter a hex adjacent to an enemy unit. If it begins a Movement Phase adjacent to an enemy unit it need not withdraw, but if it does move it must move away from the enemy unit. In Chosin, this applies to train units as well.
10.2.5 Naktong: Special Movement Rules
A. UN units can never enter a river hex.
B. The NKPA tank unit can only cross the river at a river/road hex, and it costs 19 MPs to enter such a hex (it is being ferried across). In other words, it can enter the map and end its first movement phase in the river hex.
C. It costs other NKPA units 4 MPs to enter a river hex, even if it contains a road.
10.2.6 Chosin: Special Movement Rules
A. Any CCF unit that enters a hex containing a UN supply dump loses one step as in 5.8.D.
B. The CCF side may move its units off the map and back on again. It must calculate the number of hexes such a unit would have to traverse off map, and those hexes count against the unit's MA as if they were all rough terrain.
C. A UN unit cannot voluntarily move more than five hexes from a road hex. If a UN unit starts the turn more than five hexes from a road hex (due to a previous retreat), it must attempt to move within range during the Movement Phase.
Historical Note: The 1st Marine Division was wholly dependent upon the road running to Hungnam. The entire battle near the Chasin Reservoir revolved around this slightly improved, 78 mile dirt road. Had the CCF been able to effectively block this route, the 1st Marine Division would have been annihilated.
D. The UN side must remove the Dog 23 tank unit once it enters the Hagaru perimeter.
Historical Note: Dog 23 was the only tank (an M-26 Pershing) to make it to Yudam-ni. Other tanks had tried but either slid off the trail at the Toktong Pass or turned back because it was late in the day. A crew from C Company, 1st Marine Tank Battalion was airlifted by helicopter to man the tank. D23 was instrumental in assisting the Marine breakout from Yudam-ni. It crushed (often literally) a dozen roadblocks.
E. The UN side may remove any logistical (support) unit if the unit can trace a line of hexes free of enemy units to the Hagaru airstrip, and the airstrip is still open. Simply pick the unit up from the map and place it aside. The CCF side does not get VPs for a unit removed in this way. (See the note following 15.2.2).
F. If a unit of either side enters a whole ice hex, the other side immediately receives one VP. Increment that side's VP marker by one.
10.2.7 Chipyong-ni: Special Movement Rules
A. A CCF unit pays 4 MPs to enter an obstacle hex.
B. The CCF side rolls a die for each CCF unit that does so. On is a 6, the CCF unit loses one step.
C. A CCF unit that advances after combat into an Obstacle hex must also roll for loss.
D. A UN unit pays 2 MPs and does not check for losses.
E. Obstacle hexes can never be depleted or removed.
F. Both sides pay 2 MPs to enter a prepared position hex in this scenario.
Historical Note: The amount of mines and wire employed at Chipyong-ni by no means approached that used on the Western Front in World War I. There was a triple apron of wire encircling the perimeter that did slow the CCF down while they were in 1he [sic] kill ones. The obstacles are not depleted because the Chinese showed no desire to clear lanes through the minefields. Indeed, in front of C Company, every single mine had been set off by the end of the battle.
10.3 Reconstitute Partially Eliminated Units
A. The phasing side may remove one reduced unit and flip another reduced unit to its full strength side if the two units meet certain restrictions:
B. The units must be in the same hex sometime during the Movement Phase. That is, one reduced unit could move on top of another, reconstitute, and finish its movement phase. The reconstituted unit can move up to the number of MPs left for whichever reduced unit moved the furthest prior to the reconstitution.
C. The units must be of the same type. That is, their unit symbols or silhouettes must be the same.
Example: Two infantry units can reconstitute, but a marine infantry unit and a regular infantry unit cannot.
D. The units are in the lowest possible formation possible.
Example: If a side wants to reconstitute a specific unit, if another unit of that its platoon still exists on the map, it can only reconstitute with that unit. However, if no other units of that platoon remain, then it may reconstitute with any remaining unit of its company, and so on up the chain of command.
E. Treat any unit eliminated during reconstitution as if it were eliminated in combat (5.6.2).
F. Ignore this rule for Naktong; reconstitution is not possible in that scenario.
10.4 Check Stacking Limitations
10.4.1 Procedure
A. The phasing side checks to see if any of its stacks contain too many units. Only a certain number of units can exist in a hex for combat purposes.
B. A unit cannot voluntarily end its movement phase in violation of the stacking limits. Any unit over the allowed number is considered to be overstacked.
C. The number of units allowed in a hex depends on the unit type and the terrain type.
D. In addition, Chipyong-ni has its own stacking limits which supersede the regular ones.
10.4.2 Unit Types
Generally, each unit counts as one toward the stacking limit of a hex.
| Stacking Value | Unit Type |
|---|---|
| ½ | AAAAW |
| 2 | Train |
| 1 | Other |
| 0 | Abandoned Artillery |
10.4.3 Terrain Stacking Limits
A. The terrain stacking limits are:
| Hex Type | Limit | Leg Limit | Vehicle Limit |
|---|---|---|---|
| Clear | 4 | 3 | 4 |
| Rough | 3 | 3 | 0 |
| Rough/Road | 3 | 3 | 1 |
B. Other terrain features have no effect on stacking.
10.4.4 Chosin
The Dog 23 tank unit can stack for free in any clear or rough/road hex.
10.4.5 Chipyong-ni
A. The CCF side may stack no more than two units in any hex.
B. The UN side may stack one leg and one vehicle unit in any clear or rough/road hex.
11.0 Defensive Fire Phase
A. During the Defensive Fire Phase, units of the non-phasing side may fire at enemy units using the Fire Combat Procedure (5.0).
B. Naktong: The non-phasing side cannot fire indirect fire during a Defensive Fire Phase. This includes air strikes, artillery fire, and mortar fire.
12.0 Offensive Fire Phase
During the Offensive Fire Phase, units the phasing side may fire at enemy units using the Fire Combat Procedure (5.0).
13.0 Close Combat Phase
During this phase, the phasing side moves its attacking units into hexes containing defending enemy units and engages them in close combat. It may also continue close combats initiated by its units or by enemy units in previous phases.
13.1 Designate the Attacking Unit or Stack
A. The attacker designates one of its units or stacks as attackers.
B. The attacking unit or stack must have at least one enemy unit adjacent to it, or be under a Close Combat marker. Unlike fire combat, in close combat all units in a friendly stack can be designated as attackers.
C. If there are more units in the attacking hex than would be allowed in the defending hex, the attacker may only designate a number of attackers up to the stacking limit of the defending hex. The stacking limit for a hex applies to both sides' units individually, not together.
Example: If three CCF units were in a rough hex, the UN side could still advance up to three UN units into the hex.
D. Units may attack from more than one hex adjacent to the same target as long as the stacking restrictions for the target hex are not exceeded.
E. Close combat is voluntary, and a unit is never required to perform it. Even if a friendly unit is engaged in a continuing close combat, it need not continue that combat this phase. However, if it wishes to perform close combat it must do so with the enemy units in its hex.
F. A unit may attack into an adjacent hex that contains a continuing close combat, thus reinforcing friendly units in that hex.
G. A unit may attack out of an improved or prepared position. (If an IP marker remains unoccupied, it is removed at the end of the phase, 13.7.)
H. A unit cannot attack into a hex that it could not enter during movement.
13.2 Designate the Target
A. The attacker designates the target of the close combat.
B. A target of close combat is all enemy units in a hex adjacent to the attacking units, or all enemy units in a hex with a continuing close combat. Unlike fire combat, close combat affects all enemy units in a hex, not just one.
C. Any one hex can be the target of only one close combat per Close Combat Phase.
D. If the defending hex is overstacked, the defender must designate which units will defend. Any results affect all the units in the hex.
E. Chosin: UN units cannot attack hexes that are more than five hexes from a road hex.
13.3 Advance Attacking Units into Defender's Hex
A. The phasing side moves the attacking units into the target hex. Close combat is the only time that units from opposing sides can occupy the same hex.
B. This step does not apply to a continuing close combat that has no new attacking units entering the hex.
13.4 Subtract Defender's Strength from Attacker's
A. Total the close combat values of all attacking units and subtract from it the total of the close combat values of all defending units to obtain a combat differential.
B. Leg and non-armored vehicle units can perform close combat against vehicle units.
C. The close combat strength of a vehicle unit is halved if no friendly infantry unit is participating in the same close combat.
D. Chosin: A train unit is treated as a non-vehicle unit for purposes of close combat only; its close combat strength is not halved.
13.5 Determine Result
A. Roll one die and cross-index the result with the combat differential on the Close Combat Table.
B. Apply a +1 die roll modification (DRM) if the defender is in an improved or prepared position, and this is not a continuing close combat (that is, only if all the attackers moved into the hex this phase).
C. The number on the left indicates the result to the attacking units. The number on the right indicates the result to the defending units.
| Result | Explanation |
|---|---|
| - | Indicates that that side is not affected by the close combat. |
| Number | Indicates the step losses to that side. |
| R | Indicates that all units of that side must retreat one hex. |
13.6 Apply Results
A. Unless indicated otherwise, apply close combat results following the rules for fire combat results.
B. Apply results are applied simultaneously to both sides' units.
C. The owning side determines how to distribute step losses among its units.
D. Retreats are performed per section 5.7. A retreating defending unit may retreat into a hex from which an attacker entered the close combat provided that hex otherwise meets the restrictions of section 5.7.
E. If neither side retreats, the close combat continues. Place a Close Combat marker on top of the units to indicate this.
F. If a hex had a Close Combat marker on it before this phase, and only units of one side remain in the hex after the results are applied, remove the Close Combat marker.
G. Chosin: Each attacking CCF unit alone in a hex containing a UN supply dump after a close combat loses one step.
13.7 Remove Abandoned Improved Position Markers
A. The phasing side removes any improved position markers left unoccupied due to combat. Remove all IPs not occupied by the owning side during this step.
B. A friendly unit never gains a benefit for occupying an enemy improved position.
C. The prepared positions printed directly on the Chipyong-ni map are never removed or destroyed.
14.0 Turn Indication Phase
After the first side has completed its turn, the second side performs its turn. Once both sides have completed their turns for a given game turn, they then perform the activities in this phase.
14.1 Conform Indirect Fire Markers
A. Flip over any artillery markers that are on their "Fired" side.
B. Move any mortar and air strike markers from the Used This Turn box on the map to the Available This Turn box.
14.2 Mark Victory Points (VPs) for the Turn
Both sides check to see if they have accumulated VPs for certain activities during the turn. For every VP a side has accumulated, it increments the marker on the VP Track by one.
14.2.1 Naktong
14.2.1.1 In General
A. The UN receives VPs for withdrawing certain units from play before the scenario is over. To make a withdrawal, simply pick the unit up off the map during the Turn Indication Phase and place it aside.
B. A unit can be withdrawn from any where on the map except if it is in close combat.
C. If a unit is withdrawn according to its withdrawal conditions, the UN receives the indicated number of VPs.
14.2.1.2 27th Infantry Regiment and C Company, 73rd Tank Battalion
A. For each full strength unit withdrawn before the end of Turn 10, the UN receives 2 VPs.
B. For each full strength unit withdrawn after Turn 10 but before the end of Turn 12, the UN receives 1 VP. The UN receives no VPs if they are withdrawn later or at less than full strength.
14.2.1.3 A Company, 14th Engineers and A Company, 78th Tank Battalion
A. For each unit (full or reduced strength) withdrawn before the end of turn 13, the UN receives 1 VP.
B. The UN receives no VPs if they are withdrawn later.
14.2.1.4 23rd Infantry Regiment
A. For each full strength unit withdrawn before the end of turn 11, the UN receives 1 VP.
B. The UN receives no VPs if they are withdrawn later or at less than full strength.
Historical Note: The 27th Infantry Regiment (Wolfhounds) was the best army unit in Korea at the time of this battle. General Walker used it repeatedly as the 8th Army fire brigade and certainly did not want to see it chewed up in combat. It released it to the commander of the 24th Infantry Division only when the situation on the Naktong became critical, and he took it back shortly thereafter. In the game, the use of this unit is left up to the UN side, but it is heavily penalized for not withdrawing it off the map in reasonably good shape and on time. The 23rd Infantry Regiment was also released for a short time to the 24th Infantry Division. Once the situation along this sector was settled, the regiment went back into reserve. The engineers and tankers were needed for other pressing duties and used in an infantry role only because of the emergency.
14.2.2 Chosin: Closing the Hagaru Airstrip
A. The UN may close the Hagaru airstrip (hexes 1827 and 1828) if one full strength engineer platoon is on one of its hexes. To do so, merely state during the Turn Indication Phase that it is closed and places a "Closed" marker on the strip.
Historical Note: Possession of the airfield at Hagaru was of decisive importance to the continued survival of the 1st Marine Division. Tons of critical supplies were airlifted into Hagaru and thousands of casualties (many of which would not have made it otherwise) were flown out.
B. Once the airstrip is closed, the CCF cannot receive VPs for its capture or for the lack of a UN garrison.
C. When the UN closes the airstrip, it must check the supply situation of all units in the 5th and 7th Marine Regiments. All units in those regiments must be able to trace a supply line to the south edge of the map.
D. A line of supply is a series of hexes free of enemy units to a road hex, from which a continuous line of road hexes free of enemy units can be traced to hex 1801.
E. For each regiment that has at least one unit that cannot trace a line of supply, the UN rolls a die. The result is the number of steps that it must remove from out of supply units in that regiment. It can choose how to distribute the losses.
F. One die is rolled for each regiment, regardless of the number of units out of supply.
G. The UN makes this check only once, when the airstrip is closed. There is no penalty if the units go out of supply later.
14.2.3 Chosin
If the Hagaru airstrip is not closed, the UN checks to see who controls the airstrip and whether it is properly garrisoned. (The garrison must be a full company, not just a platoon, and that it must be engineers, not some other unit type.)
A. If the UN controls both hexes of the airstrip and there is at least one full strength Marine engineer company on either hex, neither side receives any VPs.
B. If the CCF controls at least one hex of the airstrip and has a full strength unit on it, the CCF receives 20 VPs.
C. If neither of these conditions are met, the CCF receives 10 VPs.
14.3 Advance Turn Marker
A. Move the Turn Marker into the next box on the Turn Track, if there is another such box.
B. Return to the beginning of the Sequence of Play and start the next turn.
C. If there are no more boxes, the scenario is over. Determine the victor (15.0).
15.0 Determining Victory
A. Both sides tally their VPs; the side with the higher total is the winner.
B. VP awards depend on the scenario.
C. Chosin also has levels of victory.
15.1 Naktong
Each side receives VPs for eliminating enemy units.
15.1.1 NKPA
A. The NKPA receives VPs for having any units remaining east of the Naktong River at the end of the scenario.
B. The NKPA also receives VPs for certain UN reinforcements (as listed in the scenario reinforcement list).
C. For each NKPA full strength unit that is east of or on a Naktong river hex at the end of the scenario, the NKPA receives 2 VPs. For each reduced strength unit, it receives 1 VP.
15.1.2 UN
The UN receives VPs for certain UN withdrawals (per 14.2.1).
15.1.3 VPs after Replacement Procedure
At the end of the scenario, both sides perform the replacement procedure per 6.2.1.
A. The UN receives 1 VP for each NKPA unit in the Permanently Eliminated box.
B. The NKPA receives 2 VPs for each UN unit in the Permanently Eliminated box.
15.2 Chosin
The Marines must withdraw as many units off the map as they can while inflicting as much punishment on the CCF forces as possible along the way.
15.2.1 UN VPs
A. At the end of the scenario, the CCF performs the replacement procedure per 6.2.2. The UN then receives 1/2 VP for every CCF unit in the Permanently Eliminated box.
B. The UN receives 2 VPs per train unit exited off the map at hex 1801.
C. The UN receives 1 VP per unit of every other type exited off the map at hex 180 I [sic].
15.2.2 CCF VPs
A. The CCF receives 5 VPs if the Marine Division HQ is in the Permanently Eliminated box.
B. The CCF receives 4 VPs for every UN tank, AAAAW, train, or support unit, or any unit of the 185th Engineer Battalion in the Permanently Eliminated box.
C. The CCF receives 3 VPs for every other UN unit in the Permanently Eliminated box.
D. The CCF also receives 3 VPs for any UN supply dump with a CCF unit on it at the end of the scenario.
Historical Note: By the time the Marines were getting ready to pull out of Hagaru, they had amassed a column of 1200 vehicles. Most of the wounded had been flown out of Hagaru, so the trucks carried the most important component of the division's heavy equipment. Also, a number of supporting troops were pressed into front line duty along the Hagaru and Koto-ri perimeters. Had the Marines lost these trains and support troops, the division would have taken far longer to reconstitute, and the Chinese might have advanced much further in January and February.
15.2.3 Determining Victory
A. Each side calculates its VPs.
B. The side with the greater number compares its total to the other side's total.
| Ratio | Victory Level |
|---|---|
| 1x - 2x | Tactical |
| 2x - 3x | Operational |
| 3x+ | Strategic |
15.2.4 What a Victory in Chosin Means
15.2.4.1 Tactical Victory
A. UN: Historical result.
B. CCF: A significant portion of the 1st Marine Division is destroyed. It will be a matter of months (instead of weeks) before the unit is again ready for combat. Also, the CCF IX Army Group recovers more quickly and is able to participate in the tail end of the CCF Winter Offensive.
15.2.4.2 Operational Victory
A. UN: The 1st Marine Division is pulled out largely intact. It is ready for combat just in time to save Seoul from the Chinese along the western coast.
B. CCF: A major portion of the 1st Marine Division is annihilated. It will never be committed again in Korea. News of the disaster hits the American press and public support for the war dwindles quickly. Ridgeway is barely able to stabilize the line south of Seoul which ends up permanently under the control of the North Koreans.
15.2.4.3 Strategic Victory
A. UN: The 1st Marine Division inflicts so much harm on the CCF in northeastern Korea that they are able to stay at the fortified port of Hungnam throughout the winter. The CCF facing the 8th Army send reinforcements to the east which prevents them from capturing Seoul. In the Spring, UN forces launch a counteroffensive that liberates ⅔ of the Korean peninsula before a ceasefire is called.
B. CCF: The Marine Division is destroyed lock, stock, and barrel. The 8th Army is forced back into the Pusan perimeter which, after much discussion, is evacuated. Korea remains Communist for 50 years.
15.3 Chipyong-ni
A. The sides are awarded VPs for enemy units in the Permanently Eliminated box at the end of the scenario.
B. The side with the most points wins.
15.3.1 UN VPs
The UN receives 1 VP for every CCF unit in the Permanently Eliminated box.
15.3.2 CCF VPs
A. The CCF receives 7 VPs for every tank, AAAAW, or artillery unit in Permanently Eliminated box or for every abandoned artillery unit on the map.
B. The CCF receives 6 VPs for every French unit in the Permanently Eliminated box.
C. The CCF receives 5 VPs for every other unit in the Permanently Eliminated box.
16.0 Scenario One: Naktong, The Battle of the Bulge
16.1 Scenario Information
16.1.1 Commentary
In August 1950, the North Korean Peoples' Army (NKPA) was pressing hard against what had come to be known as the Pusan Perimeter. Facing it was the 24th Infantry Division which had been in combat for several weeks and was in poor shape. Its Korean experience belied its title "Victory, " for it had been in combat longer than any other US division in Korea and had suffered a series of humiliating defeats. Lacking equipment in every category, the division was a victim of chronic "bug out" fever. It was deployed on an extended front along the Naktong River-the last major barrier short of Pusan. To its front was the veteran NKPA 4th Division. This division too had been in combat since late June and was a little worn around the edges. But its soldiers were skilled, tough, and confident of final victory. On the night of 5/6 August, one regiment crossed the Naktong and started a vicious fight that would last for two weeks until the Americans scraped up enough forces to finally throw them back across the river.
16.1.2 Scenario Scale
Each turn is one day. The first turn is August 5, 1950. Each hex is approximately 500 yards from side to side.
16.1.3 Scenario Length
The scenario lasts for a total of 16 turns.
16.2 Scenario Special Rules
These special rules apply to this scenario and include the heading that each falls under.
A. 4.1 Determining the First Player B. 5.1.7.1 Targets of Air Strike C. 5.6.2 Eliminating Units D. 6.2.1 Replace Eliminated Units E. 10.2.5 Special Movement Rules F. 10.3 Reconstitute Partially Eliminated Units G. 11.0.B Defensive Fire Phase H. 14.2.1 Marking VPs for the Turn I. 15.1 Determining Victory
16.3 Set Up
16.3.1 UN
A. Elements of the 34th Regiment (Companies A, B, C, I, K, L), 24th Infantry Division set up with improved position markers on them in the hexes printed on the map. These units are marked with an S. (Split the units of companies I, K, and L over their three hexes as desired. Stack all units of the other companies in the hex designated for that company.)
B. Place the B/13 artillery marker and one non-marine air strike marker in the Available This Turn box.
16.3.2 Counter Errata
A. A platoon of H/13/5th Marines is missing its regimental designation.
B. The c-11 artillery unit arrives on Turn 12, not Turn 8 as listed on the counter.
C. The 8/13 barrage marker is available at start, not Turn 3 as listed on the counter.
D. These counters are missing their turn entry numbers: the T34/85 (Turn 11), the USMC air unit (Turn 12) and A-1/USMC armor unit (Turn 13).
16.3.3 NKPA
No NKPA units begin on map in this scenario.
16.4 Reinforcements and Withdrawals
| Turn | Side | Units |
|---|---|---|
| 1 | NKPA | Two battalions of the 16th Regiment (18 platoons; the NKPA side may choose which ones) enter anywhere on the western edge of the map. |
| 2 | NKPA | Place 120mm mortar marker in the Available This Turn box. Nine plts (the rest of the 16th Regt) enter together any at any one hex on the western map edge. |
| 2 | UN | Place one non-marine air strike marker, the HM/19 mortar marker, and the 8/11 artillery marker in the Available This Turn box. Cos A, B, C, E, F, and G of the 19th Regt enter at hex 2039. |
| 4 | NKPA | Place one 120mm mortar marker in the Available This Turn box. Nine plts of the 5th Regt enter together at any one hex on the western map edge. |
| 4 | UN | Place the A/15 artillery marker in the Available This Turn box. Cos A, B, C, E, F, and G of the 9th Infantry Regt enter at hex 2039. |
| 5 | NKPA | Place one 120mm mortar marker in the Available This Turn box. Eighteen platoons of the 5th Regt enter together at any one hex on the western map edge. |
17.0 Scenario Two: Chosin
17.1 Scenario Information
17.1.1 Commentary
On to the Yalu River! The war was over. Or so the Headquarters of the UN X Corps believed. Despite repeated indications that the Chinese were out there in force, General Ned Almond proceeded to spread its American forces-the U.S. First Marine Division and the U.S. Army's 7th Infantry Division-all over the northeastern portion of Korea. The Marines were skeptical of the current intelligence estimate and proceeded deliberately. Yet when the Chinese Communist Forces (CCF) attacked in overwhelming numbers on 27 November 1950, the Marines were caught off balance at Yudam-ni and soon were fighting for their survival.
17.1.2 Scenario Scale
A. Each turn is one day. The first turn is 27 November 1950.
B. Each hex is approximately 800 yards from side to side.
17.1.3 Scenario Length
The scenario lasts for a total of 13 turns.
17.2 Scenario Special Rules
These special rules apply to this scenario and include the heading that each falls under.
A. 4.1 Determining the First Player B. 5.1.5.1 Targets of Artillery Fire C. 5.1.7.2 Targets of Air Strikes D. 5.3.1 White DRMs E. 5.6.2 Eliminating Units F. 5.7.1.C General Retreat Guidelines G. 5.7.2.D Special Retreat Conditions H. 5.8.D, 5.8.E Advance after Combat I. 6.2.2 Replace Eliminated Units J. 7.0 Weather Phase K. 8.0 Artillery Ammunition Phase L. 10.2.3.E Special Terrain Effects on Movement M. 10.2.6 Special Movement Rules N. 10.4.4 Checking Stacking Limitations O. 13.2.E Designating the Target P. 13.4.D Subtract the Defender's Strength from the Attacker's Q. 13.6.G Apply Combat Results R. 14.2.2, 14.2.3 Mark VPs for the Turn S. 15.2 Determining Victory
17.3 Set Up
A. A note on setup: Some of the hexes on the maps contain specific unit setup locations. These hexes are where the units started historically, and are more restrictive than the setup locations given below. You may use the historical locations if you wish, but note that not all units are listed on the map. Set those units up as listed below.
B. No unit begins the scenario in an improved position.
C. The number of UN air units received depends on the weather (7.0).
17.3.1 Counter Errata
A. One company of the CCF 80th Div. is labeled 3/1 instead of 3/240.
B. The counter for B Battery, 57 FA (US Army) is labeled D on its front side instead of B.
C. There is an unused F/11 USMC Battery Fire marker. Use it as one of the missing ammo markers.
D. One platoon of F/7 Marines is misprinted on the reverse. It should be a 7-6-10 like the others.
E. The back of the 1/11 barrage marker should read 105 not 81.
17.3.2 UN
17.3.2.1 Elements of the 5th and 7th Marine Regts near Yudam-ni
| Location | Unit(s) |
|---|---|
| 2032 (Fox Hill) | Fox Co/7th Marines (F/7): 3 plts |
| Available This Turn box | One 81 mm mortar marker; it is assigned to this regiment (historically, it was assigned directly to Fox Co). |
| 2434 | Charlie/7: 2 plts |
| 2638 | Charlie/7: 1 plts |
| 3039 (Hill 1426) | George/7: 3 v [sic] |
| 2842 | How/7: 3 plts |
| 2939 (Hill 1426) | Item/7: 3 plts |
| 3140 and/or 3141 | Dog/5th Marines: 3 v [sic] |
| 3141 and/or 3142 | Fox/5: 3 plts |
| 3042 | Easy/5: 2 plts |
| 3040 | Able Company: 1 plt, 1st (Marine) Engineer Bn; Easy/5: 1 plt |
17.3.2.2 Elements of 3rd Bn, 1st Marines plus assorted Marine and Army service units
Place all within two hexes of Hagaru-ri (hex 1728):
- How/1st Marines: 3 plts
- Item/1: 3 plts
- How Battery/11 Artillery regt (105)
- Dog Battery/11 (105)
- D/10th Engineer Combat Bn (USA): 3 plts
- B/1st (Marine) Engineer Bn: 3 plts
- D/1st (Marine) Engineer Bn: 3 plts
- Provisional Tank Plt (one unit)
- Tank Plt, 5th Marine AT Co (one plt)
- Tank Plt, 7th Marine AT Co (one plt)
- Service elements of the 4th Signal Bn, the X Corps, and the 1st Service Bn (6 plts with various logistical/ support symbols)
- HQ, 1st Marine Div
- 3 Trains units
- Place one 81mm mortar marker in the Available This Turn box and assign it to one of the regiments above.
17.3.2.3 Independent Unit
| Location | Unit(s) |
|---|---|
| 1530 (the Sawmill) | two plts of A/1st (Marine) Engineers |
17.3.2.4 Elements of the 2nd Bn, 1st Marines plus additional units
Place within two hexes of Koto-ri (hex 1613). These units may not move outside of their perimeter until Turn 3:
- Dog, Easy, Fox, and George cos/1st Marines (12 plts)
- 41st Royal Marine Commando (3 plts)
- B/31st Infantry (USA) (3 plts)
- Easy Battery/11
- 185th Engineer Bn (6 plts)
- Place one 81mm mortar marker in the Available This Turn box and assign it to one of the regiments above.
17.3.2.5 Task Force McLean/Faith
| Location | Unit(s) |
|---|---|
| Within one hex of 1240 | Able/32nd Infantry Regt: 3 plts |
| 1139 | Baker/32: 3 plts |
| 1140 | Charlie/32: 3 plts |
| 1036 | Item/31: 3 plts |
| 1037 | King/31: 3 plts |
| 1236 | Love/31: 3 plts, 1 Trains unit |
| 1335, 1336 | A, B Batteries, 57th FA Bn (2 units); D Battery, 15th Antiaircraft and automatic weapons Bn (4 units) (2 AAAAW and 1 battery per hex). |
| 1332 (Hudong-ni) | 31st Regimental Tank Co: 4 plts |
| Place one 81mm mortar marker in the Available This Turn box and assign it to one of the regiments above. |
17.3.3 CCF
Each CCF division that begins the scenario on the map is set up within an assembly area as indicated on the map. For each of the following divisions, a hex near the center of the area is listed.
A. CCF 59th Division (Regts 175, 176, and 177):
- Set up all units (27 cos) within two hexes of 2628 and/or 2729.
- All units are free to move and fire on Turn 1.
B. CCF 80th Div (Regts 238, 239, and 240):
- Set up all units of Regt 238 (9 cos) within the area near hex 0439, 0945, and/or 1044.
- Set up all units of Regt 239 (9 cos) in hexes 0844, 0945, and/or 1044.
- Set up all units of Regt 240 (9 cos) in hexes 0633, 0733, and/or 0832.
- All units are free to move and fire on Turn 1.
C. CCF 58th Div (Regts 172, 173, and 174):
- Set up all units (27 cos) within one hex of 2225 and/or 2227.
- This division may not move until Turn 2.
D. CCF 60th Div (Regts 178, 179, and 180):
- Set up all units (27 cos) within one hex of 2313 and/or 2315.
- This division may not move until Turn 3.
Historical note: The 58th and 60th Divisions were under orders not to attack until their assembly was complete.
17.4 Reinforcements
17.4.1 UN
Reinforcements arrive on the indicated turn at hex 1801.
| Turn | Units |
|---|---|
| 3 | Dog/1st Tank Bn (USMC) (3 plts), Baker/1st Tank Bn (3 plts), 1st Marine Division Recon Co (3 plts), Tank Plt, AT Co, 1st Marines (one plt) |
| 4 | Fox and George cos, 31st Infantry Regt (6 plts) |
| 11 | Cos A, B, and C, 1st Marines (9 plts); Battery B, 50th AAAAW (4 units). |
17.4.2 CCF
All CCF units may operate normally on the turn they enter.
| Turn | Units |
|---|---|
| 1 | CCF 89th Div (-) (Regts 265, 266 and 267): Enter all units (24 cos) on the northern and/or western map edges from 2945 to 3339. |
| 1 | CCF 79th Div (Regts 235, 236, and 237): Enter all units (27 cos) on northern map edge between hexes 2145 and 2745. |
| 6 | CCF 76th Div (Regts 226, 227, and 228): Enter all units (27 cos) anywhere on the eastern map edge. |
| 10 | CCF 77th Div (Regts 229, 230, and 231): Enter all units (27 cos) anywhere on the western map edge. |
18.0 Scenario Three: Hedgehog at Chipyong-ni
18.1 Scenario Information
18.1.1 Commentary
As the CCF Winter Offensive ground to a halt south of Seoul in late 1950, General Ridgeway ordered up a series of UN patrols to reestablish contact. Finding weak resistance in January, the 8th Army went over to a general offensive aimed at killing as many Chinese as possible. After good initial progress, UN forces ran smack into another Chinese offensive buildup. The CCF concentrated on the relatively weak ROK units and soon forced the 8th Army into another retreat. To cover the retreat, Ridgeway ordered the 23rd Regimental Combat Team to hold the vital crossroads at Chipyong-ni. Although this unit had been in position for some time, and was fairly well dug in, it soon faced elements of six CCF divisions. In a two day battle the 23rd RCT managed to hold its perimeter against potentially overwhelming numbers by utilizing the massed firepower of its artillery, tanks, and antiaircraft weapons. In the end, the Chinese withdrew after suffering horrendous casualties, but it was a close run affair.
18.1.2 Scenario Scale
Each turn is 8 hours long. Each hex is approximately 150 yards from side to side.
18.1.3 Scenario Length
The scenario lasts for a total of 7 turns.
18.2 Scenario Special Rules
These special rules apply to this scenario and include the heading that each falls under.
A. Determine the First Player B. 5.1.3.B Targets of Direct Fire C. 5.1.4.A Targets of Indirect Fire D. 5.1.5.2 Targets of Artillery Fire E. 5.1.7.3 Targets of Air Strikes F. 5.3.1 White DRMs G. 5.3.2 Colored DRMs H. 5.6.2 Eliminating Units I. 5.7.1.C General Retreat Guidelines J. 5.7.2.E, 5.7.2.E Special Retreat Conditions K. 10.1 Designate IPs L. 10.2.1.L, 10.2.1.M General Movement Restrictions and Conditions M. 10.2.2.C Strategic Movement N. 10.2.3.D Special Terrain Effects on Movement O. 10.2.7 Special Movement Rules P. 10.4.5 Checking Stacking Limitations Q. 13.7.C Removing Abandoned Improved-Position Markers R. 15.3 Determining Victory
18.3 Set Up
18.3.1 UN
A. The UN sets up first.
B. Place the following units of the 23rd Regimental Combat Team along their designated portion of the Chipyong-ni perimeter:
- 1st Bn/23rd RCT (A, B, C Cos: 9 plts)
- 2nd Bn/23rd RCT (E, F, G Cos: 9 plts)
- 3rd Bn/23rd RCT (I, K, L Cos: 9 plts)
- French Bn (1, 2, 3 Cos; 9 plts)
- Ranger Co (3 plts)
- B Co, 2nd Engineer Combat B (3 plts) 37th Field Artillery Battalion (Batteries A, B, C 105mm)
- B Battery, 503rd FA Bn (155mm)
C. Place the following units anywhere within the UN perimeter:
- 23rd Regimental Tank Co (4 plts)
- B Battery, 26th AAAAW Bn (4 units)
D. Place all battalion (81) mortar markers and the regimental (4.2) mortar marker in the Available This Turn box.
- Assign one battalion marker to each infantry battalion of the 23 RCT, and one to the French battalion; the regimental marker can be used by any unit in the regiment or the Rangers. 2. Place the three air units in the Available This Turn box.
18.3.2 Free Set Up (Optional)
Set up the UN at start units anywhere within the perimeter.
18.3.3 CCF
Set up all units (six regiments) second anywhere on the map at least 10 intervening hexes away from the UN perimeter. (The perimeter includes the prepared positions but not the line of obstacles.) The general area where each division entered from historically is printed on the map. Players may use these areas if they wish, but are not required to do so.
18.4 Reinforcements (UN Only)
A. TF Crombez arrives Turn 7, not Turn 6 as indicated on the turn track.
B. Enter all units of Task Force Crombez at hex 3332.
C. TF Crombez consists of:
- A Co, 70th Tank Bn (3 plts)
- D Co, 6th Tank Bn (3 plts)
- Love Co, 5th Cavalry Regt (1 pltn)
19.0 Extended Example of Play
19.1 Prep Fire Phase
Two full strength Marine units begin their turn adjacent to two CCF units in an improved position. The Marines may call in preparatory fire support because they are adjacent to the enemy at the beginning of the turn. The UN side places one air strike marker, fire strength of 6, on the CCF units. It rolls the dice once for each CCF unit in the hex; an air strike is area fire and affects all units occupying a hex. A 6 (a miss) is rolled on the white for the bottom CCF unit, so the colored die roll is irrelevant. A 3 (a hit) is rolled on the white die for the top unit, and it is flipped over to its reverse side. Because the unit suffered a loss, the colored die roll is checked. A 3 on the colored die is increased to 4 since the defender is in an improved position. This indicates that the unit does not have to retreat. The air strike marker is placed in the Used This Turn box on the map.
19.2 Movement Phase
The Marines decide to remain in place and dig improved positions. A friendly IP marker is placed on them.
19.3 Defensive Fire Phase
Having survived the Marine preparatory fires, it is now time for the CCF units to fire defensive fire. If the CCF side has any fire support markers available, it could also use artillery or an air strike, assuming it is allowed in the scenario. But no fire support is available, so the units fire point fire. The top unit rolls a 6 on the white die for a miss. The bottom unit rolls a 1 on the white die against the top Marine unit (increased to 2 due to the improved position), causing one step loss. The colored die roll is 6. This is increased by 2 since the Marines are in an improved position and they are Marines. The modified result allows the Marine unit to remain in place.
19.4 Offensive Fire Phase
The UN may now fire its units and any artillery and air markers available. The UN inflicts one step loss on the bottom CCF unit, but does not force it to retreat. The CCF may voluntarily retreat the unit since it incurred a loss. However, it doesn't want to leave the other half-strength unit alone so it chooses to make a stand.
19.5 Close Combat Phase
Since they are within the hex's stacking limit, both Marine units advance into the hex with the CCF units to engage them in close combat. The sum of the Marines' close combat values (9) is compared to the sum of the CCF units' close combat value (7) for a differential of +2. A 1 is rolled (increased to 2 due to the CCF improved position) resulting in one step loss for each side. One of the already reduced CCF units is destroyed and placed into the eliminated box appropriate for the scenario. The Marines may choose to eliminate its already reduced unit, or reduce its full strength unit. If an R had been rolled in addition to the numerical result, all surviving units of that side would have had to retreat one hex. Since units from both sides remain in the hex, a Close Combat marker is placed on top of the stack. The improved position marker that the Marines abandoned is removed from the map.
20.0 Design Notes and Player Tips
Originally we were going to design four games on the Korean War using one hundred counters per game and four small maps. Half way through the initial conception stage, we changed our minds. We all agreed the old quadrigame system, while entirely entertaining, left us a little short. We wanted to do these battles on a grand tactical scale, and even company level (the entire 1st Marine Division had only 27 rifle companies) had too few pieces. So we went with platoons not so much to get a feel like Panzerblitz, but to give sides a substantial force to maneuver across the map. Some might say that the time/distance/unit scale is off, but when you carefully read the history of the battles, you find that each platoon could handle about one good fight per day on the average. The units may be platoons, but you must think along the lines of a battalion or regimental commander.
A few notes about the order of battle. Experts of the era will notice that there are no weapons companies included in the game. This is because the mortars are abstracted and the machine guns were usually distributed among the rifle companies. Weapons company headquarters were often useful for a host of different missions and roles and they occasionally fought as separate entities (like at Hagaru). Their overall effect has been factored into unit combat strengths. The Chinese had several "special duty" companies that occur in various accounts. One can only speculate as to their role in combat, anything from specially trained assault detachments to penal troops. I have chosen to factor them in as well.
The basic rules are simple, the combat is bloody, and the special rules add individuality to each game. The battle along the Naktong demonstrates the danger of committing troops to battle who are unprepared for the rigors of war. It is extremely unusual to see US units with such low combat ratings and painful to watch them pile up in the eliminated units box. But this is exactly how it happened.
The game starts out somewhat like Gettysburg (the set up takes very little time) with only two understrength American battalions starting on the map. The North Koreans roll on the board and, for a while at least, brush aside all resistance. Gradually, however, the Communist offensive loses steam. It is important to recognize this decision point and dig in. The game is a back and forth affair as reinforcements are rushed to different sectors on the map.
The Chosin campaign speaks for itself; it was an accomplishment of epic proportions, even for Marines. Bound to either side of a tenuous road, the Marines had to battle their way to safety against the weight of six full strength CCF divisions. These odds are not insurmountable as a quick perusal of the OB reveals. Marine firepower and close combat capabilities are impressive; in one concentrated mass, they are unstoppable. Unfortunately, most of the Marine infantry combat power starts at the wrong end of the map and must run the gauntlet. Until this amoeba-like pocket reaches Hagaru-ri, the situation for the garrisons stretched out along the road is precarious. And none more than the garrison at Hagaru itself.
Historically, the decisions to pull the advance elements of the Marine division and Task Force Faith were slow in coming. The X Corps command was loath to give up its war-winning advance, and General Smith (commander of the 1st Marine Division) was not with its forward elements. Players will instantly begin the retrograde movement, as they should given the benefits of hindsight. We decided not to restrict this decision-making process through bogus special rules. The force in Yudam-ni starts out earlier, but runs into stiffer resistance along the trail to Hagaru. Also, the CCF side usually throws a lot more than one regiment into its assault on Hagaru. Indeed, except for the first turn, it is wise for the CCF to stay clear of attacking the Yudam-ni force - it's just too powerful. Rather, it is better to delay and snipe at the weak units of this force, then shift the focus to other areas, namely Hagaru.
Hagaru is the weak link in the chain. It is defended by only one Marine infantry battalion and a brittle assortment of rear echelon troops. The UN side must dig in, hold this place to the last man, and get other troops there to help out. Given the fact that the CCF will send one full division and a good chunk of a second against the perimeter there, the fate of the Hagaru Force will hang in the balance until substantial reinforcements, probably be the gallant soldiers of Task Force Faith, arrive.
Historically, this unit was surrounded and nearly annihilated on the eastern shore of the Chosin. Only a few hundred survivors out of several thousand managed to escape across the ice to the Hagaru perimeter, most without weapons. A number of errors compounded to ensure this humiliating defeat. The decision to break out was delayed too long, and it wasn't well organized once undertaken. A decisive shortage of 40mm ammunition for the M19s hit at just the wrong moment. Units got strung out and were defeated in detail when they hit a strong CCF roadblock. In the game, the UN side will take pains to avoid these mistakes, and, together with the help of the 32nd Regimental Tank Company, break through to Hagaru. Unfortunately, it will suffer a varying degree of attrition along the way. But any help to the Hagaru defenders is most welcome.
Once the soldiers and Marines close in on Hagaru, it becomes more difficult for the CCF to challenge UN forces directly through offensive operations. Dig in on both sides of the road and use the tactics Mao preached - hit him where it is weak! There are bound to be a lot of Marines filing off the board, but they have a lengthy column of slow moving and easily blocked vehicles to guard. Toward the end, attrition will take its toll, and the most powerful forces will be spearheading the drive off the board. This leaves the flanks guarded by the weaker units. You will still have to run a through a curtain of artillery fire, but once in close combat with the enemy you should be able to give as much as you receive. Remember you get more VPs for killing the enemy than it does for killing you. Brave the fire and press home your attacks.
Barring a major disaster, the Marines will be able to get some of their forces off the map. The question is just how many. The CCF has a lot of troops on the board, but it needs a lot to be effective.
It took us a little while to settle on a third game. Originally we were thinking of doing one on Inchon, but that has been ably covered in Command, and there was a wealth of subjects from which to draw. Pork Chop Hill did not lend itself well because there were only a couple of companies worth of troops involved and it did not fit our scale. It was then that I remembered the battle of Chipyong-ni where a surrounded American regimental combat team withstood the assaults of six Chinese regiments for two days. The stand at Chipyong-ni did much to bleed off the Chinese offensive, as the 8th Army demonstrated a greater of self-confidence. Thousands of Chinese were killed at relatively little cost, but the battle was a close run thing.
The CCF side will probably breach the perimeter and do so in a big way, simply because it will take every unit it has on the board and throw them into the wire. Once the fighting gets into close quarters, it is a question of who has the last platoon. UN tanks and flak wagons are formidable opponents, but the flood will wash around them like breakwaters in the tide.
So there you have it. The package gives you three different situations using the same basic system. In Chosin you have the classic withdrawal under heavy pressure (to understate the issue somewhat). In Chipyong-ni, maneuver is of less concern than getting in there and duking it out. Naktong features a classic meeting engagement (the rarest but most entertaining of situations). All three games fully involve both sides with the problems of attack and defense on subjects that are fresh, and to my knowledge, have not been done up before as games. Enjoy.
21.0 Bibliography
Appleman, Roy E. Disaster in Korea: The Chinese Confront MacArthur. College Station: Texas A&M University Press, 1989.
Appleman, Roy E. East of Chosin: Entrapment and Breakout in Korea. College Station: Texas A&M University Press, 1987.
Appleman, Roy E. Escaping the Trap: The U.S. Army X Corps in Northwestern Korea. College Station: Texas A&M University Press, 1990.
Appleman, Roy E. Ridgeway Duels for Korea. College Station: Texas A&M University Press, I 990
Appleman, Roy E. South to the Naktong, North to the Yalu. Washington: Office of the Chief of Military History, 1961.
Bergot, Erwan. Batailon de Corée: les volontaires Français, 1950-1953.Paris: Presses de la Cite, I 983.
Blair, Clay. Korea: The Forgotten War. Random House, 1987.
Goulden, Joseph C. Korea: The Untold Story. New York: Times Books, 1982.
Grey. Jeoffrey. The Commonwealth Armies and the Korean War: An Alliance Study. Manchester: Manchester University Press, 1988.
Gugeler, Russell A. Combat Actions in Korea. Washington: Army Historical Series, 1970.
Hammel, Eric M. Chasin: Heroic Ordeal of the Korean War. New York: Vanguard Press, 1981.
Hoyt. Edwin P. On to the Yalu. New York: Stein and Day. 1984.
Hoyt, Edwin P. Pusan Perimeter, Korea 1950. New York: Stein and Day, 1984.
Kim Chum-kon. The Korean War, 1950-1953. Seoul: Kwangmyong, 1980.
McGovern, James. To the Yalu: From the Chinese Invasion of Korea to MacArthur's Dismissal. New York: Morrow, 1972.
Montross, Lynn, and Canzona, Nicholas A. U.S. Marine Operations in Korea, Volume 3. Washington: Department of the Navy, 1957.
Mossman, Billy. Ebb and Flow, November 1950-July 1951. Washington: Center of Military History, 1990.
Robertson, William G. Counterattack on the Naktong, 1950. Fort Leavenworth: U.S. Army Command and General Staff College, 1985.
Staff Historian. Key Korean War Battles fought in the Republic of Korea. San Francisco: Office of the Staff Historian. U.S. 8th Army, 19 72.
Wilson, Jim. Retreat, Hell! New York: Morrow, 1988.