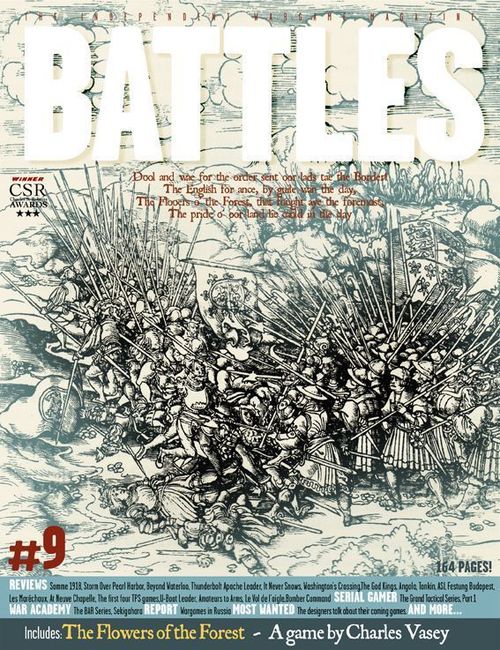
The Flowers of the Forest
The Flowers of the Forest Rulebook
Table of Contents
Table of Contents
- 1. Introduction
- 2. Sequence
- 3. Tactical Arrays
- 4. Leaders
- 5. Stacking
- 6. Facing (see also for pivoting)
- 7. Movement
- 8. Shot Combat
- 9. Hand-to-Hand Combat
- 10. Morale
- 11. Artillery
- 12. Cavalry Charges
- 13. Orders
- 14. Home and Huntly
- 15. Banners and Numbers
- Leader Order Chart
- 16. Doing Without Orders and Bringing Back Manoeuvre
- 17. Scenarios
- 18. Notes
1. Introduction
1.0 INTRODUCTION
1.1 PARTS
You will need a d10 and a d6 to play the game, additional d10s will be helpful. A "0" on a d10 counts as 10.
The Flowers Of The Forest is played on a map simulating the terrain around Branxton Hill in Northumberland on 9th September 1513.
Counters representing the units, often called battles, ("Units") manoeuvre on the map and have combat within the confines of the military and political structures of those armies in that period. Movement of Units is limited to that permitted by the Order (if any) which the Unit currently has. For players who do not wish to submit to the historical, but nonetheless limiting, Orders system there are options suggested at the end of the rules. Players are cautioned that The Flowers Of The Forest has not been balanced by altering the historical factors. Balanced play is achieved by playing in rubbers of two games, one commanding each side. You may now wish to read Rule 13 which deals with Orders and Rule 16 which explains how to do without them.
The tactical counters ("Bands") represent about 500 foot or 250 horsemen each and are arrayed on the Unit Display Charts ("the Arrays"), and not on the map, as part of Units. Bands are rated for the combat value and morale of the men represented. The predominant family or regional origins of the Band are noted on the counters (please alter these to reflect your own family history). Leaders are recorded on the Unit Display Chart. Artillery has Factors (representing number and effectiveness of guns) on its Array instead of individual Bands.
SCALE. Each turn represents 30 minutes, each hex is 200 yards from side to side.
BAND SUMMARY
These counters have a silhouette of the major unit type, a name of origin, and a combat and morale value in that order. Combat values are in the range 0 to 2, and Morale values in the range 5 to 9. Combat values reflect training and equipment; bowmen lacking shields and having only a sword cannot be expected to be doughty combatants. Units with low Morale may not necessarily be cowardly, but their favoured form of warfare may not be hand-to-hand (the Moss Troopers for example).
SCOTS BANDS
The Highlanders were typically armed with swords or axes, armour was less prevalent then among their southern neighbours and poor highlanders might have a sword and a light hunting bow only.
Gentlemen represent the pike-armed, armoured, elites of the Scots Army carrying a shield (pavaise) to the annoyance of the English longbow men who had little luck against them. Pikes are the less well equipped mass of the Scots Army who appear as a Chorus in a Greek tragedy.
NB: Both Scots Gentlemen and Scots Pikes are Pike-armed for combat purposes.
ENGLISH BANDS
NB: Both English Gentlemen and English Bills are Bill-armed for combat purposes.
Band-type key as printed (the diagram's two rows): Scots: Gentlemen | Pikes | Highlanders. English: Gentlemen | Bills | Longbows | Moss Troopers.
UNIT COUNTER FORMAT SUMMARY
These counters each show a representative number of soldier types from that unit. They have only one piece of information - the Unit name which refers to the names on the Arrays. There are also artillery counters ("Gunnes").
MARKERS
Each side has three messengers (or heralds). The Scots have four counters with "Pike" marked on them these are placed on the Array when the Unit is carrying pikes and removed when the Unit discards pikes. In addition the English have two chits for use in deciding which "wing" comes on first (Surrey or the Admiral) and the Scots have three chits numbered 0 to 2 which note the delay caused by about facing the army on the day of battle.
1.2 OVERVIEW OF PLAY
The Flowers of the Forest is a game about close combat. Both armies are in close proximity and are committed to a frontal action. Units defeat their opponents by killing the best fighters that front the enemy unit and scaring the rest. Morale is very "rough" and units are susceptible to holding on when they should break, and break when they should not. This arises from the psychology of mobs. Gamers may use the strict order system provided in Rule 13 (in which case there is little to do but enjoy seeing which county loses the most men) or the less onerous ones in Rule 16 which give opportunities for a bit of fancy footwork. The game is not balanced, it is fast and you should play it twice against each opponent swapping sides. It is good form to applaud a Scots victory.
2. Sequence
2.0 TURN SEQUENCE
Each game turn consists of two Player Turns (first the Scots Player Turn and then the English Player Turn). Each Player Turn is divided into the same number and description of Phases. Each Phase must be completed before the next is commenced and each Player Turn completed before the next starts. The Phases must be performed in the stated order. The player whose turn it is, is termed the Phasing Player.
THE PHASES OF A PLAYER TURN:
2.1a ORDERS. (First Turn Only) Both players may, but do not have to, mark up the Logs for all Units with any Orders. See Rule 13. These orders can be subsequently overridden by Leader Charts and new orders received. (Writing orders can be difficult because you cannot tell what will happen, just like the real thing isn't it). See Rule 16 for alternatives.
2.1b PHASING PLAYER ORDERS. (Every Turn if using Rule 13 and - in part - Option Two of Rule 16)
The Commander (represented by the Phasing Player) may attempt to issue new Orders which may or may not arrive with the target Unit. (Note the limits for King James in Rule 13.4 caused by his fighting in the front rank).
The Orders for both the current and future turns for each Unit may then be superseded by the mandatory effect of the LEADER ORDER CHART (effectively the Unit leader has decided to do something else). Leaders cannot alter the Orders of English Units on the turn they enter the map.
The new, operative, Orders are then recorded on the Order Log.
2.2 CAVALRY CHARGE. Cavalry Units declare charges and move into contact but do not fight in this Phase. See Rule 12.
2.3 MOVEMENT. The Phasing Player moves some, all or none of his side's Units as permitted and as required by the Unit's Orders. See Rule 7.
2.4 OFFENSIVE SHOT. The Phasing Player may shoot those of his:
- Longbow or Highlander Bands which have not moved in the Turn;
- Artillery which has not moved this or the previous Turn;
- and any Moss Troopers (whether they have moved or not).
See Rules 8 and 11.
2.5 DEFENSIVE SHOT. The non-Phasing Player may shoot any of his Moss Troopers, Longbow, or Highlander Bands (whether they moved in their previous turn or not), and such Artillery as has not moved in its previous Turn. See Rules 8 and 11.
2.6 COMBAT. The Phasing Player must use his Units to attack adjacent enemy Units. See Rules 9 and 10. This may mean a flanked Unit "attacks" out of its non-combat facing.
2.7 PHASING PLAYER MORALE RECOVERY: See rule 10.6.
3. Tactical Arrays
The Arrays are where the tactical detail of our armies is seen. Will the English put archers in the front row and await the Scots as they did at Homildon Hill? Losses are recorded here and the internal morale of the unit can be seen by the number of broken morale units - men who want to run but dare not yet do so.
(3.1) GENERAL. The Bands counters are arranged on the Unit Arrays located on the Player Sheets, no more than one Band per box. The Array represents the Unit in plan form with the ranks laid out so that the Player can examine them without the need to look at any stacks on the map.
(3.2) SET UP ON ARRAYS. Bands are arranged before play commences. The various Bands must be placed on the Arrays of the relevant Unit as given in the Scenario Notes. There is no limitation, other than no stacking, as to how they may be placed within the relevant Unit's Array (although some arrangements will be better than others). You may, for example, place bowmen in the front ranks and billmen in the rear or vice versa. However, the position of Band cannot be changed in the course of the game unless the rules permit or require.
(3.3) BANDS KILLED. Where a Band is eliminated the counter is removed and the Bands below it in a Column (if any) are moved up to fill the gaps.
(3.4) BANDS WITH BROKEN MORALE. Where a Band has its Morale broken (see Rule 10) the relevant counter is turned upside down in its previous position but is not removed from the Array. These are men whose will to fight is weak but the wish to avoid public ignominy causes them to remain with their Unit (and in some cases they are trapped in the press). Such Bands can still engage in Combat but with a -1 modifier to their Combat Value.
(3.5) FRONT AND REAR RANKS. The top Band on the Array is treated as the front men in the Unit and usually attacks and defends in combat assisted (where permitted) by the Band (or Bands) ranked behind them (who represent rear ranks see Rear Rank Participation rules 8.4 and 9.2). This is not the case with Flank or Rear Attacks where other Bands will face combat (see Rule 9.1).
(3.6) RELATING COLUMNS TO HEXES. There are as many Columns on the Unit's Array as hexes covered by its Unit on the map. Each Column corresponds to the relevant hex. So if the left hex only is in combat one consults the left Column on the Array of that Unit. Any reference to Columns in the rules refers to the Column on the Array which is deemed to occupy that respective hex. If a Column is emptied of Bands by losses the Unit continues to occupy the same number of hexes but any combat affects the next inward occupied Column in that direction.
(3.7) REORGANISING BANDS. In their Movement Phase Moss Troopers may freely reorganise the Bands on their Arrays both within Columns and between the two Columns. This may not occur when the Unit is adjacent to an enemy Unit or Units. Other Units may not do this.
4. Leaders
Leaders are printed on the Arrays, trapped in masses of their men they lead by example not by issuing orders. Their death will materially damage morale.
(4.1) GENERAL. Leaders are marked two to the Column on the Arrays and are printed on the Arrays; they may not therefore be moved from Column to Column. If Killed or Taken their morale factor is added to the Morale Check dice for their Column (which makes it more likely their Bands will break). While alive they do not modify the Morale Check dice (their effect is inherent). Leaders may only be killed if required by combat result (see Combat rules) or Morale result (see below). Owning players may select which of the two leaders for each Column are to test for losses in combat if both are available. Place a "Dead" counter on the box of a dead leader, and a "Taken" counter on a captured leader. There is no difference between these two statuses save that of family honour.
(4.2) LEADER LOSS IN ROUTS (OPTIONAL see Rule 15). If a Unit routs (see Rule 10) dice for each Leader in that Unit (1-3 killed fighting bravely, 4-5 captured fighting bravely ("Taken"), 6 escape fighting bravely).
5. Stacking
(5.1) GENERAL. Units may not stack on the map, Bands may not stack on the Arrays.
(The printed rulebook has no 5.2; the next paragraph is numbered "5.3" in the source.)
(5.3) BANNERS. Banner counters may be placed on Units.
6. Facing (see also for pivoting)
Pike-armed Units are going to have to move directly to their front. Foot armed with lighter weapons can move to the front and flank, but are unlikely to have the orders to do so (this would look like desertion in battle). The Moss Troopers have full light cavalry flexibility to move in any direction. Everyone fights to his front.
(Facing diagram omitted: it labels each Unit's hexes as FRONT, FLANK or REAR, as described in 6.1.)
(6.1) FRONT, FLANK AND REAR. Units have a facing for Combat, and depending on the types of Bands in them a facing for Movement. These may not be the same. Where a Unit has a number of types of Bands take the most limiting type for judging Movement Facing.
All Units must have their top-most edge (that is the edge with the name of the Unit nearest) facing a vertex or series of vertices. The top two (or more) hexes are 'front' hexes, those non-front hexes adjacent to front hexes are 'flank' hexes, and the remainder 'rear' hexes.
(6.2) MOVEMENT FACING. Units may only enter certain hexes. For movement purposes Units with the following Bands/Factors may enter the following hexes (You will note this permits sideways movement by non-pike Units, supposedly by column rather than line).
- Artillery and Moss Troopers: All hexes
- Longbows, Bill-armed and Highlanders: Front and flank hexes only
- Pike-armed: Front hexes only.
However, where using Rule 13 the conditions of Orders must be met, and this usually means moving towards the enemy out of your front hexes.
(6.3) COMBAT FACING. Combat occurs normally only out of the Front hexes. However, where an enemy unit has your Unit's flank or rear hexes in its own front hexes then, in your own Combat Phase, you are required to calculate combat as if attacking but with a horrid modifier - in fact you are being attacked but must make a combat calculation in your Combat Phase.
(6.4) PIVOTING. Pivoting during movement requires a dice roll if using Rule 13 (Orders).
- Single hex Units change direction by turning one vertex left or right at a cost of one movement point.
- Two hex Units change direction by the Unit not moving in one hex (which hex acts the pivot) and the other half of the unit moving one hex moving forward and (as a result) turning one vertex in the direction of the pivot unit. The moving part of the Unit can only do this if the hex into which it moves contains no other Units. Both parts of the Unit will now be faced to a new vertex, and comply with the facing rules; the Unit does not pay any additional movement points above the movement cost.
- Three hex Units can change direction in two ways:
- Firstly by the Unit not moving in one end hex (which hex acts the pivot) and the other end of the unit moving two hex moving forward and turning one vertex in the direction of the pivot unit in each hex. The moving part of the Unit can only do this if both of the hexes into which it moves contains no other Units. All parts of the Unit will now be faced to a new vertex, and comply with the facing rules; the Unit does not pay any additional movement points above the movement cost.
- Secondly, the Unit pivots on its central hex with one end hex of the unit moving one hex moving forward and turning one vertex in the direction of the pivot unit while the other end is now moved backwards. In order to do this the hexes moved into must contain no other Units and the part of the unit moving backwards cannot have been in contact with an enemy Unit.
Pivoting is only possible in the above circumstances.
See rules 7.2 and 7.5 for moving adjacent to enemy/friendly units.
7. Movement
The battlefield was cluttered only by marshes and steep terrain, down which men could easily slip but on which wargamers love to practice parade-ground manoeuvres. To keep control of their forces generals stood their battels a bowshot apart - about 100-200 yards, and major forces cannot be adjacent to each other. Once in action units win or rout.
(7.1) MOVEMENT SPEED. Each Unit has a movement factor per Movement Phase based on the slowest type of Bands on its Arrays. This factor is used to move across the terrain paying the cost listed on the Terrain Chart. A Unit may be obliged by the Unit rules to move less than its Movement Factor but it may never move more than that Factor.
Movement Factors: see player aid.
(7.2) ENEMY UNITS. Friendly Units entering an enemy Unit's front hex must stop immediately. Units starting their turn in the front hex of an enemy Unit may leave by a limited number of methods: (1) Routing, (2) if cavalry, by Recall.
(7.3) LARGE UNITS. Where a Multi-hex Unit enters hexes movement points are calculated by moving the Unit in increments of one hex, the Unit is deemed to have paid the highest cost of any of the hexes/hex sides entered/crossed.
(7.4) LEADERS. Leaders may not leave their Units (and are therefore printed on the Arrays).
(7.5) SPACING. No Unit may move adjacent to another Friendly Unit unless, either, (A) one of them is Artillery or Moss Troopers, or (B) one of them is in combat with an enemy Unit. This rule may prevent Units moving if so substitute a STAND order.
(7.6) TERRAIN CHART. See player aid. Terrain has no effect on Combat.
(7.7) ORDER OF MOVEMENT. Each Player may carry out the movement of his Units in any order he wishes.
(7.8) OTHER UNITS. Units may not move through other Units.
(7.9) SCOTS ARTILLERY. This cannot leave its start-up hex but can uses its MPs to change facing.
8. Shot Combat
The archers of both sides are not likely to inflict losses unless shooting at units which have lost their heavily armoured Bands. Artillery can kill the best Bands but was slow to fire and will not have a major effect of itself. Targets engaged are the closest, no silly stuff here.
(8.1) WHO MAY SHOOT AND WHEN. Artillery Units and all Units with Longbow, Moss Trooper, or Highlander Bands (see below) may engage in Shot Combat as follows.
- Highlander and Longbow Bands may shoot in the Defensive Shot Phase of the enemy player turn and (if they did not move that Turn) in their own Offensive Shot Phase.
- Artillery Units may shoot only if they moved in neither that Turn nor their previous Turn.
- Moss Troopers may shoot whether they moved or not.
(8.2) LINE OF SIGHT. All Units may only shoot out of their front hexes in a fan of hexes proceeding forward from front hex to the front hex of that hex. To be able to shoot a Unit must have a clear straight line of sight from the centre of each hex from which it wishes to shoot to the centre of the hex its intended Target occupies. Some Columns in a Unit may be able to shoot and others may not. Other Units and Branxton Village block shooting.
(8.3) FIRING INTO A MELEE. Shooting may not be directed into an Enemy Unit which had combat with a Friendly Unit last Combat Phase and is still adjacent to that Friendly Unit.
(8.4) SHOT VALUE. Each Band and each Point of Artillery shoot by throwing 1D10 each. Note that at certain ranges and certain targets hits may not be possible. Collect the dice by target type and shooting type and throw them by Target Unit.
(8.5) FRONT AND REAR RANKS SHOOTING. Bands may contribute to Shot Combat from any section of the Arrays, but Bands not in the front or second row of each Column count as Rear Ranks. Moss Troopers and Highlanders cannot shoot from the Rear Ranks, and Longbows are only able to shoot at one hex range (indirect fire on an enemy closing for battle).
(8.6) TARGETS. Bands must normally shoot at the nearest enemy hex/Column with the front Band of that Column as the target (alternative multi-targets must therefore be equidistant and are selected at the Shooter's choice).
Where the Line of Sight could be into Front or Flank hexes (but not Rear) then treat it as directed at the Front Band. Shots into only the Rear hex sides are directed at the last rank on the Array.
Shots into only the Flank hex sides are directed at any Bands in the entire Flank Column at Shooter's choice.
If the Line of Sight is evenly between Rear, Flank and Front treat as a Flank shot.
Target Bands are decided before Shot Combat occurs, occur simultaneously, and cannot be retargeted that Phase if the Target is killed.
(8.7) HITS. Each hit kills the target Band. Where two hits are scored then the second kill is recorded against:
- Front Band: The Band in the same Column but the next row down on the Array.
- Flank Band: The Band in the same row but the next Column away from the Flank under attack.
- Rear Band: The Band in the same Column but the next row up the Array.
See player aid.
9. Hand-to-Hand Combat
Columns of Bands on the Arrays correspond to hexes occupied by the Units on the map. Most rear rank Bands are there to support and replace their front-line comrades. Second rank Bands can assist. Overlapping Bands do not rush forward and gang up on the out-numbered as in old figure games. Troop combat value and weapon determine combat strength. The English may lose their nerve faced by a Scots pike charge.
(9.1) PARTICIPATION. Each friendly Unit which has an Enemy Unit in its Front hexes, or which is in the Front hexes of an Enemy Unit must attack in the Friendly Combat Phase. For each hex of contact the Active Band of that Column attacks the Active Band in an adjacent Column of the opposing Array, providing no hex is attacked by more than one hex (where this would occur, see Overlap below).
Where the attack is from a Front hex then the Active Band is the Front Band in that Column.
Where the attack is from a Rear hex the Active Band is the Band in the last rank of that Column;
Where the attack is from a Flank hex the Active Band is the weakest Band in that Flank Column.
NB see the special non-weapon modifier on the combat chart for such attacks. In neither case may Rear Rank Participation be used by the Defenders.
Combat is mandatory. Columns may not combine in combat other than via overlap nor may they attack or be attacked more than once in a Combat Phase.
(9.2) REAR RANK PARTICIPATION (only available when fighting out of front hexsides). If the top Band in the Array Column is pike armed and to the extent that the Bands behind it are pike-armed then an additional combat value of one may be added to the top Band for each counter up to the Rear Rank Participation Limit. For Historical scenarios given training levels the Rear Rank Participation Limit is one (so the second boxes only counts giving a +1).
Players may amend this if they wish to see what the Swiss looked like (say +4 and Lansknechts at +3) but the Swiss did not carry pavaises so were more open to shot losses from the longbows. Rear participation would also apply to Defenders were two pike arms forces to meet.
(9.3) OVERLAP. Where there is an overlap (that is more than one hex of a friendly Unit is in contact with only one enemy hex) one hex/Column is nominated as being the Operative Attacker or Defender and the top Band in the overlap hex (or hexes) may also add one (each) to the combat value of the operative Band irrespective of their weapon type or Combat Value. The Attacker may nominate which Columns attack which, with the Defender choosing any remaining overlaps. If the overlapping Band has broken morale it is disregarded for these purposes and may not overlap. Where one Column is attacked by two Columns, one adjacent to the Flank and the other the Front, then the Flank Column must be the Overlapping column.
(9.4) RETREAT BEFORE COMBAT. Moss Troopers may retreat before combat even where they moved adjacent to the enemy Unit in their own turn (for example, to shoot). At the beginning of the Combat Phase they may be withdrawn two hexes away from the Enemy Unit (but not adjacent to another Enemy Unit). The attacker must then advance into the vacated hex if possible, such an advance is in lieu of Combat. After a Retreat the Moss Troopers Order is immediately changed to STAND. Moss Troopers retain their orientation while retreating before combat.
(9.5) MORALE CHECKS BEFORE COMBAT
9.5.1. CHARGED UNIT MORALE CHECK. When a Unit is charged by cavalry in the Charge Phase it must test Morale at the end of the Charge Phase unless it has a STAND OF PIKE Order. All Columns in or adjacent to the charging Unit dice for Morale. If Bands fail to make their Morale Checks their Morale has broken (see Rule 10 below).
9.5.2. PIKE FRIGHT MORALE CHECK. All Columns of an English foot Unit must test Morale before Combat if this is that Unit's first Combat of the game with a Scots Pike-armed Unit which at the time of the combat is subject to an ADVANCE or ALIGNED ADVANCE Order. No Unit may be called upon to test for Pike Fright twice. (We know the pike was ineffective at Flodden, but only with hindsight, it must still have looked fearsome and this where this counts - when you can still run).
If you are using Rule 16 then Pike Fright arises where the Scots Pike-armed Unit attacks following its own movement.
(9.6) CALCULATION. The Combat Value for each Column in combat (modified for overlaps and rear ranks) of the defending Band is deducted from that of the attacking Band. Weapon modifiers are then applied (see player aid), and the score of 1D10 added. The final total is then read against the COMBAT TABLE.
Results are one of: eliminated Bands (removed from the Array and, if necessary, move all Bands on that Column of the Array up one); or of Morale Checks for that entire Column. The Phasing Player is always treated as the Attacker for that Combat Phase.
(9.7) COMBAT MODIFIER TABLE. See Player aid.
(9.8) SPECIAL COMBAT VALUES
9.8.1. ROUTED UNITS. Attacks on Bands in routed Units add two to the Combat Value of the attacking Bands.
9.8.2. CAVALRY COMBAT. Cavalry may only attack as the result of a Charge (see Rule 12 below) unless the enemy Unit entered a hex adjacent to the Cavalry in a previous Turn. When charging they add two to their Combat Value.
9.8.3. SWORDS AND DROPPING PIKES. Longbow Bands fight in Combat with Swords. Pike-armed Units may elect to drop Pikes (there is a "Pike" counter for each Unit on the Array, simply turn this over when Pikes are dropped) in which case they fight with Swords. The dropping of Pikes can occur at the instant before combat, but may not occur if that Unit obliged an English Unit to take a PIKE FRIGHT MORALE CHECK that Combat Phase. Pikes may be reassumed after the Unit leaves that combat unless it routs. The entire Unit must drop pikes, not just some Columns.
(9.9) COMBAT TABLE. (Read '0' as '10' in dicing)
(9.9) ADVANCE. If a hex is vacated as a result of combat the attacker must advance if his Unit is able to move into that hex, this cannot occur if other Columns of the Unit are pinned in combat.
(The printed rulebook labels both the Combat Table and the Advance paragraph "9.9"; both are kept as printed.)
10. Morale
Units break mostly because of morale, but Bands whose morale is broken remain (and fight) with their Unit until the Unit as a whole decides it has had enough. The loss limits will mostly be achieved by the death of the key leaders and front-rank fighters.
(10.1) METHOD. Morale is tested (if required by Rule 10.5) by throwing 1D10 for each Column testing and its result is used to check each Band in that Column. If the score is less than or equal to the Morale Factor of the Band then it has passed the test, if greater it has failed.
Note that if the all Bands are already Broken (see Rule 10.3) in a Column which must test Morale then the test is made by the nearest unbroken Column in that Unit, if any, PROVIDING this does not mean that a Column tests twice in the same Phase. (The contagion of fear may spread through the Unit)
Where there is a choice of Columns the owning Player makes it.
NB: If two Units are in combat and both must check Morale then the Unit with the most losses checks first. If it Routs then the second Unit need not test.
(10.2) LEADER LOSS. For each Leader dead or taken adds his value to his Column's Morale dice (each Column has two leaders) making it more likely to exceed break point.
(10.3) FAILED MORALE. Bands which have failed their Morale test ("Broken Bands") are turned upside down on the Array (or to face the other way). Their Combat Value is modified by -1 and they may not modify for Rear Rank Participation. A Broken Band does not have to test Morale again.
(10.4) ROUT. If the total of Broken Bands and double the number of dead Bands in a Unit equals or exceeds the Unit Morale (noted on the Arrays) the entire Unit routs at the moment the marginal loss or failed morale test occurs. Remove the Unit from the map.
OPTIONAL (see Rule 15): Do not remove the Unit. Routing Units must move at double full speed towards (and then off) the nearest map edge without moving closer to an enemy Unit. They make one move at the instant of rout and then move in their own turn. If in contact with an Enemy Unit at the moment of Rout that Enemy Unit (or Units) may attack once (but takes no losses itself) before the Routed Unit is moved. If a Unit routs dice for each Leader in that Unit:
- 1-3 killed fighting bravely
- 4-5 taken fighting bravely
- 6 escape fighting bravely
(10.5) TEST EVENTS. Morale checks are to be made:
10.5.1. COMBAT RESULT. When called for by the COMBAT TABLE (that Column only, though see Rule 10.1 if all Column has Broken Bands)
10.5.2. PIKE FRIGHT. At the moment of Combat by foot Bands under Rule 9.5.2 (All Columns in Unit)
10.5.3. FOOT FACING A CAVALRY CHARGE. At the moment of Combat by Bands facing a cavalry charge (Columns in or adjacent to Combat only)
10.5.4. CAVALRY ATTEMPTING TO CHARGE. Before a Cavalry Unit moves in the Charge Phase
10.5.5. COUNTER ELIMINATED. After each Combat Phase in which that Column suffered at least one Band eliminated. (NB. not after a Shot Phase)
(10.6) MORALE RECOVERY. Bands may be re-inverted/turned around if the Unit does not move, is not in Combat and the Bands makes a Morale Check successfully (per Band not per Column this time). Failure to achieve Morale Check does not have any further adverse effect.
11. Artillery
Artillery was in its infancy. Its crews would not stay around to be attacked and the weight of their pieces meant they had to be moved into position some time before fire commenced.
(11.1) ARTILLERY FIRE. Artillery Units do not have Bands but have a number of Factors as noted on their Array which approximate to multiples of effective pieces. Losses to Enemy Shot are noted by moving a marker down the number of Factors marked on the Array. These Factors give the number of shot dice for that Unit. At factor 0 remove the unit from the map.
(11.2) ARTILLERY IN MELEE. Artillery Units with enemy Units adjacent to them in the Combat Phase are removed (the crews have fled). They will have had a shot in the relevant Shot Phase if permitted by the rules.
(11.3) FIRING AND MOVING. Artillery cannot fire if they moved or changed facing in their previous Turn (turn the Counter upside down as an aide-memoire).
(11.4) MOVING. Unless already adjacent Artillery must either; (1) always move towards the nearest friendly Unit; or (2), if Scots, occupy the original position of emplacement. Artillery does not require Orders.
12. Cavalry Charges
Cavalry charges can be seen coming and the Scots may "get into square" (a clump of pikes) if the charge is to their front. Foot moving too close to cavalry may be charged. Following any charge cavalry will have to be recalled in order to reform themselves. Charges increase combat value but the Moss Troopers are not and will never be heavy cavalry.
(12.1) GENERAL. Cavalry Units may only attack enemy Units in the Combat Phase if the cavalry has charged (Exception: Enemy Unit moved within two hexes - see Rule 12.4). Charges must be ordered and are declared in the Cavalry Charge Phase. Once declared the Charging Unit tests Morale, if the majority of Bands pass this test the Unit may charge, if the Unit fails the test it will not charge (but no other adverse consequences are suffered) and the CHARGE Order is changed to STAND. If a CHARGE is ordered but no legal Target exists treat it as ADVANCE.
(12.2) MOVEMENT. Charging Units have their movement factors increased to 6. A Charge move may not be made through or into Marsh or over steep slope hex sides. Charging Units must only move through their front hexes.
NB: Moss Troopers benefit from six Front Hexes.
(12.3) FORMING STAND OF PIKE DURING A CHARGE. When a Charging Cavalry Unit comes within two hexes of a pike-armed enemy Unit that Infantry Unit may choose to try to form STAND OF PIKE. This is done by means of a Morale Test for each Column of the Infantry Unit. If the Infantry Unit has at least one Band in each Column which does not have broken Morale after the test then it may change its order to STAND OF PIKE. Note that Bands failing their Test are Broken and inverted/turned around (this sort of thing is awfully confusing without trained NCOs).
(12.4) ENCROACHING FOOT. Cavalry Units may declare a Charge during an Enemy Movement Phase whenever an enemy Unit comes within two hexes of the Cavalry Unit. They do not need an Order. The enemy Unit halts its movement temporarily and the Chargers test Morale as with Cavalry Charge. If successful the Cavalry Unit may change its facing to any it wishes before charging. The moving enemy Unit may not test for STAND OF PIKE.
(12.5) RECALL. If an Enemy Unit is charged and it does not Rout at the end of the combat resolution then the Moss Troopers immediately perform a RECALL Order. Their next Turn's Order is then STAND.
(12.6) COMBAT VALUE. A charging Moss Trooper has a Combat Value increased by two.
(12.7) HEAVY CAVALRY. Combat Value of 3, morale of 8 to 9 depending on type. Movement speed one less than Moss Troopers, plus one in combat factor against anyone but STAND OF PIKE (and -1 against them).
NB: No heavy cavalry were present but you can test with these factors to get the effect of the French knights at Marignano. Treat as "Bills" for shot target.
13. Orders
The Order system imposes the limits available to a man on foot on an undulating battle in the late afternoon in Northumberland. In general units will advance or stand. Anything else may work but probably will not. Leaders can change orders without reference to you - the Commander. The precise terms of each Order are vital - be very pernickety here. If you want something more like a game, disregard Rule 13 and go to Rule 16.
(13.1) GENERAL. Each Unit must be given orders using the Order Log. The Log provides space for more than one order per Turn as these may change during a Turn - see Rule 13.3 below. A Unit without an Order on the Log is automatically on STAND. Units may be given a number of Orders one a turn for any number of turns in advance. Where no Order is given the previous Order will remain effective until new Orders are received. The Unit with the Commander (King James or the Earl of Surrey) may change its order at will each Turn before the Leader Order Chart is consulted for the other Units. This automatic order does not require transmission by Herald, nor does it count against the one new order a turn limit.
(13.2) ARTILLERY. Artillery Units do not require Orders.
(13.3) ORDER TYPES. Orders are noted on the Log by Unit and may only be changed by New Orders from the Commander or New Orders generated from the Unit's Leader by means of the Leader Order Chart - see Rule 13.4. In any Turn a Unit can have had a number of Orders: it will have inherited an Order from the previous Turn or already have an Order written on the Log; it may receive fresh Orders from the Commander; and, the Order may be changed by its Leader. The range of Orders is limited by each army, method of change and Leader as follows. Once a Unit is adjacent to an Enemy Unit its Order becomes STAND. This applies to both Units moving adjacent and those to which they move adjacent.
Exception: Units with STAND OF PIKE which find themselves with adjacent units remain in STAND OF PIKE.
(A) STAND: the Unit may not Move, it may engage in Shot or Melee Combat. When in combat the Unit may pivot one or two Columns to bring additional Columns into contact with an enemy Unit, but such a manoeuvre can never withdraw an already engaged Column. Pivoting is performed as if moving normally and only within the relevant limits, but no dice score is required.
(B) ADVANCE: the Unit must Move at full speed towards the nearest enemy Unit in terms of movement points (disregard enemy Artillery Units). Where there are equidistant targets the owning Player chooses towards which the Unit moves towards. It may use Shot and Melee Combat. It may choose its movement path to align itself for combat as long as this does not increase the number of movement points to reach that Enemy Unit. A Unit with an ADVANCE order may pivot (see below).
(I) ADVANCE NEAR CAVALRY: if this Order would take a foot Unit within two hexes of the front hexes of a cavalry Unit it may unilaterally change its Order to STAND just before moving within two hexes, similarly a Moss Trooper Unit may halt two hexes from an enemy foot Unit change its Order to STAND.
(II) FIELD OF VISION: in determining the nearest enemy Unit consider only those Units in the fan of hexes projecting out from the Unit's Front hexes (count each hex separately). Units cannot see through other Units and if they have no enemy Unit in view will execute a temporary HOLD order until an Enemy Unit appears (in which case revert to ADVANCE) or another order is received or imposed.
Note: Moss troopers have all around vision. When Units form up "off-map" disregard this requirement. Braxton village does not block field of vision.
(C) REDEPLOY: only used by Moss Troopers, only ordered by Commander, the hex of redeployment is written on the Log and revealed when movement commences. Movement by shortest route avoiding coming within two hexes of enemy Units and adjacent to Friendly Units, the Unit may unilaterally alter direction to maintain this minimum distance.
(D) STAND OF PIKE: the Unit may not Move, it may engage in Melee Combat, the Unit now has front facing in all directions FOR AS LONG AS THIS ORDER IS IN POSITION. The Order may only be given to Pike Units. STAND OF PIKE achieved as a result of a Cavalry Charge should be noted on the Log.
(E) ALIGNED ADVANCE: the Unit performs as an ADVANCE Order except that the Units need not move at maximum speed if this would cause alignment to be lost with other aligned Units (define aligned Units on Log and the reference Unit). Alignment means holding a uniform position relative to the reference Unit until one Unit contacts the enemy. The reference Unit must move first. After contact threat this order as ADVANCE.
(F) RECALL: cavalry Unit moves at least one and up to four hexes towards the map edge on which it entered the game to reform.
(G) CHARGE: cavalry Unit will move in the Charge Phase to contact the nearest enemy Unit. If no such Unit exists treat as ADVANCE.
(H) HOLD: a HOLD order applies until the Orders are changed or the Commander makes a signal (of which each Commander has but one). Other Orders may be noted for turns after HOLD. They will apply as soon as HOLD is removed. The making of the signal is declared in the Order Phase and immediately the HOLD Order ceases. While in place a HOLD order is equivalent to STAND.
(I) PIVOT (MODIFIER TO ADVANCE): a Pivot may be made in the course of an ADVANCE even though this may not mean moving at full speed that turn. But this overriding of the terms of ADVANCE requires the Unit achieves a certain score on 1D10 (see below). If the Commander sends a PIVOT Order the dice is modified by -3. (A PIVOT Order does not override ADVANCE it modifies it). Test for PIVOT just before moving the Unit. If the Unit fails to achieve this score its movement ends.
| Leader | Pivot score (1D10) |
|---|---|
| E. Howard, Constable, Argyll, Bothwell, Errol | 1-2 |
| The Lord Admiral | 1-3 |
| Stanley, Home, Huntly | 1-4 |
| Dacre | 1-5 |
| King James, Surrey | 1-6 |
(13.4) CHANGE OF ORDERS. Friendly and enemy Units which are adjacent cannot change Orders: they retain a STAND or STAND OF PIKE order as long as they are adjacent (as per 13.3 intro).
Exception: Cavalry may enter into RECALL status even if adjacent (until then they are in STAND).
Otherwise, Orders can be changed by Commander or Leader as follows:
-
BY COMMANDER (The King of Scots or the Earl of Surrey)
- STARTING ORDERS. Any number of Orders may be given at the beginning of the game by writing these on the Log before play commences.
- CHANGING ORDERS ONCE THE GAME HAS STARTED. Orders may only be voluntarily changed by the Commanders issuing new orders. One new Order may be written per Turn. New Orders are effective on the turn they are received by the recipient Unit.
The range in hexes from Commander to Unit must be scored or exceeded on 1D10 if the order is to arrive. The distance to a Unit is counted the nearest hex occupied by part (or all) of the unit. If the Order does not arrive that Turn a marker representing the herald is placed on the map at the distance in hexes scored on the dice. Each turn after the first the herald moves a further 1D6 hexes. He should never move adjacent to enemy Units. If enemy Units move adjacent the herald is displaced one hex a time to avoid them. A herald counter is removed from map as soon as it reaches the recipient unit and available for a new mission in a later turn.
King James chose to fight in the front rank with a consequent loss in command control ability. Accordingly, if he is adjacent to an enemy Unit he may not give Orders, if his Unit has an ADVANCE or ALIGNED ADVANCE Order his messenger's dice score on the first turn is halved (rounding up).
-
BY LEADER
Unit Leaders may unilaterally issue new orders (this is not tested for English Units on the turn they enter the game map), these changes will cancel all other Orders. This event occurs by consulting the new Leader Order Chart.
The Scots Leaders may order ADVANCE, STAND or "NO CHANGE" (which means they continue with the Unit's present Order).
In addition to these some English Leaders have a "COMMANDER" result. This allows the Commander to immediately substitute any Order he wishes for that Leader's Unit.
OPTIONAL: ENGLISH WINGS
The English Army consisted of two Wings each with its own flank guards: the Lord Admiral's Wing (with Constable and Howard) and the Earl of Surrey's Wing (with Lord Stanley and Lord Dacre). The Leaders of the flank guards (other than Dacre) will not order ADVANCE where the Wing Commanders have a STAND command.
14. Home and Huntly
The two Units "Home" and "Huntly" move, fight and check for change of orders as one Unit until they separate - see below. Use the Home & Huntly Column of the log until then. The Huntly Column is used if the two then separate. Separation only occurs:
- If one Column routs (check rout separately, the two Break Levels are never combined), or
- Home has a STAND OF PIKE Order and Rule 13 is being used.
15. Banners and Numbers
Banners serve no purpose in the game save that of decoration. If a Unit bearing Banners routs the banners are laid on the hexes the Unit occupied at that stage to mark their demise. Players may prepare heroic laments (however, skirling and hooting are to be avoided).
You may wish to reach an estimate of losses in any games you play. Each Band eliminated is worth 500 men (or 250 if cavalry). In addition if a Unit routs count half losses for all Bands in that Unit for the losing side and one quarter for the winning side. You can count 400 dead for each Band with broken Morale where a Unit Routs in the face of a Cavalry Charge. If you are using numbers of losses to give a victory measure over a rubber of two games then you may wish to use the optional rules measuring losses once a Unit routs.
Leader Order Chart
Leader Order Chart, as printed on page 12. Throw 1D10 for each Unit other than the Unit led by the Commander.
SCOTS
| Leader | ADVANCE | NO CHANGE | STAND |
|---|---|---|---|
| Home and Huntly | 1-4 | 5-8 | 9-0 |
| Errol and Bothwell | 1-2 | 3-8 | 9-0 |
| Argyll | 1-2 | 3-6 | 7-0 |
Scots modifiers: leader's unit attacked by Artillery fire in previous Shot Phase -2; all English Units more than four hexes from testing Unit +2; Home and Huntly only: enemy Unit routed by the testing Unit +4.
ENGLISH
| Leader | ADVANCE | COMMANDER | NO CHANGE | STAND |
|---|---|---|---|---|
| E Howard | 1-2 | - | 3-9 | 0 |
| Lord Admiral | 1 | 2-4 | 5-9 | 0 |
| Constable | 1 | - | 2-9 | 0 |
| Dacre | 1 | 2-4 | 5-9 | 0 |
| Stanley | 1 | 2-3 | 4-9 | 0 |
(The English chart's rows and the Scots chart's rows are reproduced as printed; a "0" on a d10 counts as 10.)
16. Doing Without Orders and Bringing Back Manoeuvre
The Flowers of the Forest uses a very limiting Orders system in an attempt to give players the experience of the frustrations of command. But I am not suggesting you play in some fit of masochistic fury. Accordingly here are some optional methods of playing The Flowers of the Forest which will be a little less irritating. You may also find they speed the game up considerably. Do not hesitate to tinker with the rules and disregard any carping from anybody.
OPTION ONE "TOTAL COMMAND"
- There is no Order Phase.
- Use the set-ups as in the scenarios, the English still note where they will enter.
- Move the Units as you wish within the movement rules (note that you still cannot move backwards - unless you are Moss Troopers, you have to pivot all the way round).
- After a cavalry charge make a RECALL move as required in the Cavalry Charge rules.
- A cavalry unit cannot charge on successive turns unless Surrey can send it a herald.
- Because it is easier to take units in the flank you may agree to remove the flank/rear modifier or to reduce it.
- A foot unit may declare it is in STAND OF PIKE during its own turn if it does not move, and if charged may attempt to do so under rule 12.3.
- Remember to count hexes from enemy positions before positioning Gunnes or Units AND cover your flanks or advance in echelon.
Comments: This system shows how vital it is not to be taken in the flank and how easy it is for the longer line to do so. It also demonstrates the sort of reasoned management of a battle which Oman believed was possible rather than the Rule 13 mob effect. Good fun though.
OPTION TWO "TOTAL COMMAND BUT IMPERFECT SUBORDINATES"
- In the Order Phase only check for orders on the Leader Order Chart. Any Leader scoring STAND and ADVANCE orders applies these as under Rule 13 for that turn ONLY. All Units scoring "No Effect" or "Commander" may move unordered.
- Use the set-ups as in the scenarios, the English still note where they will enter.
- Move the Units as you wish within the movement rules (note that you still cannot move backwards - unless you are Moss Troopers, you have to pivot all the way round).
- After a cavalry charge make a RECALL move as required in the Cavalry Charge rules.
- A cavalry unit cannot charge on successive turns unless Surrey can send it a herald.
- Because it is easier to take units in the flank you may agree to remove the flank/rear modifier or to reduce it.
- A foot unit may declare it is in STAND OF PIKE during its own turn if it does not move, and if charged may attempt to do so under rule 12.3.
- Remember to count hexes from enemy positions before positioning Gunnes or Units AND cover your flanks or advance in echelon.
Comments: The flanks are still vital, but this time terrible dislocation can be caused by the Leaders. Frankly this has pretty much most of the Chaos effect of the full Rule 13 orders, but is not mechanistically as accurate. It gives a quick hair-raising game.
OPTION THREE "UNCERTAIN COMMAND"
- In the Cavalry Charge Phase and in Movement Phase before each Unit charges or moves throw 1D10. If the score is equal to or less than the Order Limit (see below) then the Unit may charge or move, if not then the Unit holds position. Note that this process is carried out Unit by Unit so you cannot guarantee that a later activated Unit will move.
Order Limits:
- 8: Surrey, Stanley
- 7: Edmund Howard, Lord Admiral, Constable, Dacre, the King
- 6: Bothwell, Home, Huntly, Errol & Montrose
- 5: Argyll
- Use the set-ups as in the scenarios, the English still note where they will enter.
- After a cavalry charge make a RECALL move as required in the Cavalry Charge rules.
- A cavalry unit cannot charge on successive turns unless Surrey can send it a herald.
- Because it is easier to take units in the flank you may agree to remove the flank/rear modifier or to reduce it.
- A foot unit may declare it is in STAND OF PIKE during its own turn if it does not move, and if charged may attempt to do so under rule 12.3.
- Remember to count hexes from enemy positions before positioning Gunnes or Units AND cover your flanks or advance in echelon.
Comments: Time to look forward to the invention of the radio.
17. Scenarios
The Flowers of the Forest contains two scenarios and some optional rules to cover the different interpretations placed on the battle by historians and chroniclers. The basic game follows the concepts of Sir Charles Oman because Oman is widely read and respected, not because the designer particularly agrees with him (not that the designer's views are of any moment at all). Other scenarios cover other views. By tinkering with individual Morale or Combat Ratings you can test your view of history on the table. You may also care to examine for example the tactics if English Heavy Horse (the Bulliners) had been present as they were at Pinkie three decades later.
17.1 SCENARIO ONE: SIR CHARLES OMAN'S VIEW
Historical set-up and appearance. Both sides place the Bands on the Arrays (see below for available Bands) and then note the start positions of the Units on their order logs in terms of hexes in from the map edges. Note that the set-up and entry points must not breach the rule against units being adjacent. Both Players complete their Logs for all Units before any units are placed (the English would not be able to make out individual units at that range). The Scots then place their Units.
VICTORY:
Victory goes to the side with the most unrouted Units (not counting Artillery) at the end of the 17:30 hours (dusk). If there is an equal number of unrouted Units then the Scots have the edge due to the lack of English supplies in the locality, but it is tawdry thing not fitting the honour of James of Scots. You can use Rule 15 if you wish to decide victory on losses, or just use numbers of Units left (giving soccer style results - Scotland winning on away goals of course).
UNIT ARRIVAL
SCOTS:
- 14:00 HRS: Units of Home and Huntly (must be adjacent), Errol & Montrose, the King, Argyll and two Gunnes must be deployed on hexes on Branxton Hill (which, for these purposes, is no more than six hexes from the south edge of the map but not within five hexes of the eastern edge). Bothwell should be three hexes behind the King (they acted as reserve formation). If the King is so close to the edge as to prevent Bothwell being on the map then his Unit is lost and the Scots Player revealed as a bit dopey.
ENGLISH:
- 14:00 HRS: Units of Edmund Howard, Lord Admiral, Constable and Gunnes enter on the eight most westerly hexes of the North edge.
- 14:30 HRS: Dacre and Earl of Surrey enter eastern six hexes of North edge.
- 15:30 HRS: Stanley enters on any two of the five most northerly hexes of East Edge.
BANDS TO BE PLACED ON THE ARRAYS:
You may refer to the back of the counters for a quick setup.
SCOTS:
- Lord Home:
- Gentlemen: Home, Berwicks
- Pikes: 2xBerwicks, 2xMerse, 2xRoxburghs
- The Earl of Huntly:
- Highlanders: 4xGordon, 1xInverness, 1xAberdeen
- Lord Errol & the Earl of Montrose:
- Gentlemen: Hays, Lindsays
- Pikes: 2xPerths, 2xAngus, 2xFife, 2xForfar
- The King of Scots:
- Gentlemen: Rothes, Morton, King, Cassilis
- Pikes: 4xEdinburgh, 3xAyr, 3xHaddington, 4xGalloway, 4xLowlands
- The Earl of Argyll:
- Highlanders: MacDonald, Sutherland, Orkneys, Caithness, Grant, Glenorchy, Campbell
- Lord Bothwell:
- Gentlemen: Hepburn, Bothwell
- Pikes: 2xLothians, Galashiels, Selkirk, Ettrick
- ARTILLERY: Two units of 2 factors (use the cannon ball counters on the Arrays)
ENGLISH:
(Morale in brackets where choice available)
- Sir Edmund Howard:
- Gentlemen: Vale Royal, S.Yorks
- Bills: Cheshire (6)
- Bows: Lancs (5), S.Yorks, Cheshire (5)
- Lord Admiral:
- Gentlemen: Durham, Howard (8), 2xN.Yorks
- Bills: Fleet, Durham, 3xN.Yorks
- Bows: Fleet, Howard (6), 2xDurham, 5xN.Yorks
- Sir Marmaduke Constable:
- Gentlemen: E.Yorks
- Bills: Lancs (7)
- Bows: Lancs (6), North
- Lord Dacre:
- Moss troopers: 2xCumbs, 2xWest, 2xNorth
- The Earl of Surrey:
- Gentlemen: Howard (9), Yorks
- Bills: 3xYorks
- Bows: Howard (7), 4xYorks
- Lord Stanley:
- Gentlemen: Lancs, 2xCheshire
VARIABLES (OPTIONAL)
These chits should be drawn by the English before they write their orders and by the Scots after they have written their orders.
- English mixed arrival (The English marched from a number of directions and the units marching furthest reached the battlefield first). Draw chits [English chits are "Admiral" and "Surrey"]. If "Admiral" chit is drawn, use historical appearance; if "Surrey" then Units 'Surrey' and 'Dacre' arrive at 14:00hrs, Edmund Howard, Lord Admiral, Constable and Gunnes at 14:30, Stanley as usual. All Units arrive in the same hexes as in the historical scenario.
- Scots Confusion: Scots draw one chit ['0', '1' or '2'] this is the number of turns for which no order is to be changed or obeyed (the Units stand unordered). The chit should only be shown once this period has ended. If playing the Total Command option treat these as turns in which the Scots cannot move.
- King James: If the King of Scots elects not to fight in the front rank then he may alter Orders without the penalties in Rule 13. However, add one to all Scots Leaders die rolls on the Leader Order chart (Scots armies expect to be led, not commanded. It is what gives them their splendid fury).
AND GOD DEFEND THE RIGHT
17.2 SCENARIO TWO: W. MACKAY MACKENZIE'S FLODDEN
Mackenzie was of the view that both armies (especially the Scots) were considerably smaller than is typically believed. He also believed all Scots units were pike-armed (so no highlanders as claymore-bearing tribesmen) and the English moss-troopers dismounted and armed with bills. Given the poor Scots weaponry it is to be expected they will be beaten in this scenario. The resulting battle is very quickly over and is more in the manner of a big riot than a full battle, which is not to say that this was not exactly as it happened.
- You will need to halve Rout Limits (round upwards).
- The bands are not given by area designation but by Morale values, select designations as you wish for available units.
- You may use any of the 17.1 Variables.
VICTORY: Victory goes to the side with the most unrouted Units at the end of the 17:30 hours (dusk). If there is an equal number of unrouted Units then the Scots have the edge due to the lack of English supplies in the locality. You can use Rule 15 if you wish to split on losses, or just use numbers of Units left.
UNIT ARRIVAL: As in scenario 1.
BANDS TO BE PLACED ON THE ARRAYS:
SCOTS:
- Lord Home:
- Gentlemen: 1
- Pikes: 1x7, 2x6
- The Earl of Huntly:
- Pikes: 1x7, 2x6
- Lord Errol & the Earl of Montrose:
- Gentlemen: 1
- Pikes: 2x7, 2x6
- The King of Scots:
- Gentlemen: 3
- Pikes: 4x7, 4x6
- The Earl of Argyll:
- Pikes: 2x7, 2x6
- Lord Bothwell:
- Gentlemen: 1
- Pikes: 1x7, 2x6
- ARTILLERY: Two units of 2 factors each
ENGLISH:
- Sir Edmund Howard:
- Gentlemen: 1x8
- Bills: 1x7
- Bows: 2x6
- Lord Admiral:
- Gentlemen: 3x8
- Bills: 2x7
- Bows: 2x6, 3x7
- Sir Marmaduke Constable:
- Gentlemen: 1x8
- Bows: 1x6
- Lord Dacre:
- Bills: 1x6, 1x7
- The Earl of Surrey:
- Gentlemen: 2x9
- Bills: 1x8
- Bows: 2x7
- Lord Stanley:
- Gentlemen: 2x9
- Bills: 1x8
- Bows: 3x7
17.3 HISTORICAL POSSIBILITIES
(These represent factors which were not present but which you may care to add into any scenarios according to your predilections).
SCOTS PIKE HANDLING: The strength of a phalanx arises from its organisation, training, good order, and momentum. Without these the unwieldy pike becomes something of an encumbrance compared to the bill or the humble sword. In theory a well-ordered phalanx might have additional units of 'push' from rear ranks over those represented in the game with two ranks. It is the designers view that lack of training and terrain militated against this. However, if the Scots had been Swiss the result might have been different. You should select additional ranks of participation (up to 5) but only when the Unit has not entered non-clear hexes that turn.
ENGLISH PROFESSIONALISM: A number of the English Bands may have been considerably more professional than the levies or banditti that composed the rest of the army. The Fleet units and the Howard units should have an extra plus one in combat.
18. Notes
18.0 DESIGN NOTES
To understand my view of the battle, and to correspondingly permit you to amend the rules the following may be of value.
- The Command Structure: The Flowers of the Forest posits an English army that will ultimately do what it is told. It may occasionally stop or advance without orders but not usually for long. It may even act in perfect conformity with your wishes - its commander being a fellow military man. My reasoning was based on the strong family structure of the leaders (three Howards) and the strong arm of the Tudors which had beaten the aristocracy into submission (if it had let it live). I see the Scots as much more a free nation in arms. Each Scots unit has a clear regional and family focus, and some of these families are mutual enemies. Led by their chiefs the Scots army is a number of sub-armies with consequent loss of overall command. In this interpretation the performance of Home and Argyll particularly have influenced me. The sudden stops and starts of the Order system are deliberately left in to deal with the eye-level view of contemporary commanders so misunderstood by commentators. They could see a great deal less than can we.
- Shot: The archery and artillery rules will not often come into play, requiring as they do obliging targets. You may care to consider how different matters would have been had both sides had real cavalry and how these rules would apply in other battles.
- The Armies: The Scots are, in the majority, pikemen with a little training in the Swiss method. Despite its defensive use against cavalry, the pike in the Swiss method is an offensive weapon. Consequently holding an excellent defensive position (as some have viewed the hill) is to nullify the strength of the Scottish army. Because I do not view the level of pike competence in the Scots army as high enough the pike is always outclassed by the bill, even if "pushing" successfully. However, at least one force (Edmund Howard's) broke at the onset of masses of pike-armed Scots. Accordingly I have used a morale concept of "pike fright" which is the Scots' real hope of softening up the English. Once in battle (unless cavalry are around) the pike will be dropped and swords drawn (in the best Stuart Reid tradition). Despite duff training and a poor weapon the Scots units fight and die hard, even in victory they should expect to lose more men than the English (putting aside pursuit losses).
The remaining Scots foot are shown as lightly armoured highlanders led by their chieftains. Vulnerable to shot units in a way the heavily armoured columns were not the onset of the highlanders engenders no fear in the hearts of the English.
The English armies are mostly billmen or archers. The latter being of little use in the battle (other than occasionally peppering highlanders and goading a Scots line which will not attack). Even in these modes most commanders will find it difficult to move up within bow range and then fire - the orders are designed that way because I see no evidence of the tactic. Consequently the real weight of combat falls on the gentlemen and billmen. These are very effective Bands, but they are also not numerous. The English cannot stand losses for long.
The Border prickers under Dacre are the only cavalry in the game. Lightly armoured and armed with lance and hunting crossbow (the latch) these are not really "charging" cavalry (but then the Scots pikes are not really Switzers). In a push they can stop an advance (although at a horrible cost). Their value is to block gaps and threaten flanks, a role in which their flexible Redeploy Order assists. A flank charge is more their style. You will note that cavalry that do not break the enemy will automatically rally back to reform.
Regional variations in morale are particularly noticeable in the English army with Cheshire and Lancashire men fighting poorly unless under a Stanley, and a general improvement of morale in the most prestigious commanders' units.
- The Artillery: for some reason the more numerous Scots guns were less effective than the English. Difficult to manoeuvre their use consists of weakening any English column that reaches the slopes (especially as they are effective against armoured gentlemen) and in looking smart. The English guns were more manoeuvrable (they kept up with the approach march) but scarcely more successful.