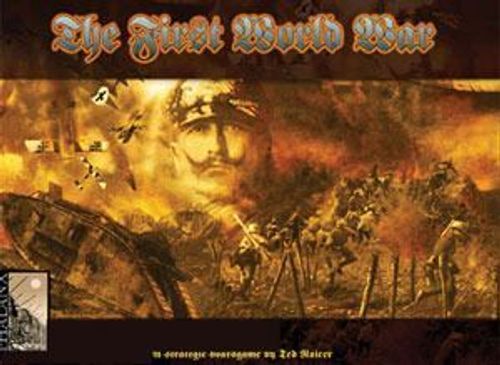
The First World War
The First World War Rulebook
Table of Contents
Table of Contents
- 1.0 - Components
- 2.0 - Game Components
- 3.0 - Playing the Game
- 4.0 - Offensives
- 5.0 - Events Markers
- 6.0 - Reinforcements and Replacements
- 7.0 - Command of Foreign Armies
- 8.0 - Capitulation
- 9.0 - Victory
- 10.0 - The Treaty of Brest-Litovsk
- 11.0 - Optional Rules
- Appendix A - Events Marker List
- Appendix B - The Full Map
- Appendix C - Nationalities & Supply Bases
1.0 - Components
Each copy of The First World War contains:
- 1 Game Board
- 96 Armies (including 24 Dummy armies)
- 46 Occupation Markers
- 30 Events Markers (+6 to make yourself)
- 1 Year Marker
- 1 Player Turn Marker
- 4 Victory Markers
- 8 Game Order Markers
- 4 Capitulation Markers
- 1 Treaty of Brest-Litovsk Marker
- 2 Special Dice
- 1 Rules Booklet
2.0 - Game Components
2.1 - The Game Board
The board is divided into three panels representing the different European Theatres of War - the Eastern, Italian and Western Theatres. Each Theatre is sub-divided into two or more numbered Fronts (11 in total). Each Front contains the location of one or more shapes (46 in total), colour-coded to show the original owning Empire:
- Box Shapes - Victory Cities.
- Circle Shapes - Replacement Cities.
- Hexagon Shapes - Supply Bases.
Shapes within each Front are connected by Attack Lines, indicating which cities may be attacked. Each Supply Base lists which friendly armies may be deployed or moved there using abbreviations. The national borders and terrain printed on the game board are for historical interest only. They have no effect on play.
Example - The Italian Theatre is divided into what was known as the Trentino and Isonzo Fronts. For ease of play these Fronts are numbered, respectively, 5 and 6. The Isonzo Front contains four Victory Cities - Venezia, Udine, Gorizia and Trieste. Venezia and Udine are coloured red (belonging to the Western Allies), while Gorizia and Trieste are coloured blue (belonging to the Austro-Hungarian Monarchy). Trieste and Venezia are Replacement Cities. There is also an unnamed Supply Base for each Empire. An Attack Line connects all these locations together. The two Supply Bases in the Trentino Front show that only British (BR), Italian (IT), Austro-Hungarian (AH) and German (DE) armies may be placed there. Armies of Nationalities not listed may not operate on that Front.
The Board contains a separate Game Year Track and a Player Turn Track to keep track of progress. The two Year/Player Turn Markers are used to mark the progress of play across both these tracks. It should be noted that although the game only has seven turns, it actually takes 112 actions to complete the war from beginning to end.
The board also has a Victory Track where players keep track of their relative success, a scroll-like Brest-Litovsk square to mark when the treaty is in effect, the Capitulation Track, and the Variable Order Chart (see the Variable Order Of Play optional rule). If in use, this last chart uses both Game Order Markers and replaces the blank boxes of the Player Turn Track.
2.2 - Attack Lines
All Cities and Bases are connected to each other by Attack Lines. An attacker may capture an enemy controlled Victory or Replacement City provided it is connected by an Attack Line to a City or Supply Base he already controls. Place an Occupation Marker matching the City's new owner or remove it if the original owner recaptures the City. Each time a City changes hands, the new owner gains a Victory Point and the previous owner loses a Victory Point.
Some Attack Lines connect to Cities in nations that were initially Neutral in the war. The Attack Line notes the Game Year, either Turns 3 (1915) or 4 (1916), that Cities and Bases connected across that line can be attacked. An Empire may not attack a Supply Base to inflict a Capitulation Point if there are still disconnected Cities awaiting capture, such as Fronts 10 and 11.
Example - Bucharest cannot be captured before Turn 4 (1916). Odessa, which is connected through Bucharest, cannot be lost before Turn 4 (1916).
2.3 - List Of Front Names
- 1 - Flanders Front (Western Theatre)
- 2 - Somme Front (Western Theatre)
- 3 - Marne Front (Western Theatre)
- 4 - Alsace-Lorraine Front (Western Theatre)
- 5 - Isonzo Front (Italian Theatre)
- 6 - Trentino Front (Italian Theatre)
- 7 - Northwest Front (Eastern Theatre)
- 8 - West Front (Eastern Theatre)
- 9 - Southwest Front (Eastern Theatre)
- 10 - Balkan Front (Eastern Theatre)
- 11 - Romanian Front (Eastern Theatre)
2.4 - The Armies
Armies are used to capture or defend Replacement and Victory Cities. There is no limit to the number of armies that can be held in a single Front. Armies are divided into four colour-coded Empires, containing one or more nationalities. The colours of each counter indicates which Empire controls which armies and nationalities:
- Austro-Hungarian Monarchy - Austro-Hungarian or Bulgarian armies are BLUE.
- German Empire - German armies are BLACK.
- Russian Empire - Russian, Serbian, Montenegrin, Romanian, or Greek armies are GREEN.
- Western Allies - French, British, Belgium, Italian, or US armies are RED.
Each army has an individual number or name and a Combat Value (from 0 to 3) indicating its strength in battle (the higher, the better). Armies also have a Game Turn Designation, indicating which Game Year the army first becomes available. If the number is "1", the army starts the game on the board. The back of each army is coloured according to its Empire and is used to ensure that its Combat Values are kept a secret until it is used as a lead army in an offensive.
Armies may only be allowed in Fronts if they are listed (by nationality or specific army name) in one of the hexagon shapes (Supply Bases) for that Front. A player may choose to reveal (turn face-up) his armies at any time, but is only required to do so when attacking or defending.
Dummy armies have no nationality, game turn number or combat values and may be placed in any Front where an army of that Empire can operate. They are always referred to as Dummy armies in the rules to differentiate them from real armies. Dummy armies are used as a means of deception by all sides and to introduce the fog of war in each sides planning.
2.5 - Abbreviations
- AA - Armee-Abteilung (DE)
- AH - Austro-Hungarian Monarchy
- BE - Kingdom of Belgium
- BR - Great Britain and the British Empire
- BU - Kingdom of Bulgaria
- CP - Central Powers
- DE - German Empire (Deutschland)
- EP - Entente Powers
- FR - French Third Republic and the French Colonial Empire
- GR - Kingdom of Greece
- IT - Kingdom of Italy
- ITB - Italian Balkans Army (IT)
- MEF - Mediterranean Expeditionary Force (BR)
- MN - Kingdom of Montenegro
- OR - Orient Army (FR)
- RO - Kingdom of Romania
- RU - Russian Empire
- SB - Kingdom of Serbia
- US - United States of America
2.6 - The Dice
The game contains two special dice marked 1 to 4, plus two sides marked "S" for "Special". An "S" result typically allows players to draw an Events Marker or signifies some other special result such as a capitulation.
3.0 - Playing the Game
3.1 - Simple Setup Instructions
- Organise the armies and Event Markers according to Game Year and Nationality. Place one of the Year/Player Turn Markers on Game Year 1/1914 and the other on the topmost, numbered box on the left-side of the Player Turn Track.
- Place one of each Empire's Game Order Markers in the empty boxes by the Player Turn Track. The markers should be lined-up as listed in the Order Of Play.
- Place Events Markers for 1914 into appropriate Central Power and Entente Power "Cups". Anything from the kitchen will do, providing that it is clean, cannot be seen through, and the markers can be easily withdrawn.
- Each Empire receives all Game Year 1/1914 armies, all six Dummy armies, and one randomly-drawn 1914 Events Marker. Place the remaining Armies and Events Markers by the appropriate spaces on the Year Track.
- Place all four Empires Victory Markers at 6 Victory Points, the Capitulation Markers at the top of the Capitulation Track, and the Brest-Litovsk marker to one side of its space. Start the game with the Deployment Turn.
3.2 - Full Setup Instructions
Players should separate their armies between those that start the game from those that enter the game later on as reinforcements. All Dummy armies are available to each Alliance from Game Year 1/1914.
- Armies are distributed between Fronts as desired, according to the nationalities listed within the Supply Bases. Place Game Year 1/1914 armies anywhere within the boundaries of each Front. Occupation Markers, not armies, are placed on cities when ownership changes. The armies positions within each Front are not relevant to the game.
- Organise the 46 Occupation Markers and place them to one side at the beginning of the game. They are placed on the board when a Replacement or Victory City is captured by the opposing alliance. Each marker is printed in the colour of the Empire that captured the respective City.
- Place the Year/Player Turn Marker on the first space of the Game Year Track (1/1914), and the first space of the Player Turn Track. These two markers are used to indicate the current Game Year (there are seven) or current Player Turn (there are 16 per Game Year, four for each Empire).
- Reinforcements are placed by the Game Year Track, next to the space they enter the game. The 4 Victory Markers are placed in the "6" box on the Victory Track of the board. These markers are used to determine the current number of victory points for each of the four Empires.
- There are 36 Events Markers divided into separate Entente Powers and Central Powers piles. All Events Markers with the "1914" designation are placed in a cup belonging to their respective Alliance. The remaining markers are placed in the cup at the beginning of the Game Year designated by the Markers themselves.
- The Treaty Marker is only placed on the Brest-Litovsk square if the peace treaty is currently in effect between Russia and Germany. The Capitulation Markers are used on the Capitulation Track of the game board. A single set of the Game Order Markers are only normally used on the Player Turn Track, but both sets may be used instead when the Variable Order Of Play optional rule is in effect.
3.3 - The Alliance System
There are two Alliances, the Central Powers (sometimes called the Axis Powers) and the Entente Powers (sometimes called the Allies), each divided into two Empires. The Central Powers are divided into the German Empire and the Austro-Hungarian Monarchy. The Entente Powers are divided into the Western Allies and the Russian Empire.
- In a 2-Player Game, one player takes the Entente Powers and the other the Central Powers. Each Alliances two Empires still operate separately, according to the rules.
- In a 3-Player Game, one player represents the Entente Powers, while the others each take one of the two Central Power Empires, Germany and Austria-Hungary.
- In a 4-Player Game, each player takes one of the four game Empires.
3.4 - Order Of Play
- Determining Variable Order Of Play - See Optional Rules. From 2/1914 onwards.
- Deployment Turn - a/. Austro-Hungary Monarchy, b/. Russian Empire, c/. Western Allies, d/. German Empire.
(The following Player Turns are played in the order of top to bottom, left to right, on the Player Turn Track.)
- Player Turn 1 - 1/. German Empire, 1/. Western Allies, 1/. Russian Empire, 1/. Austro-Hungarian Monarchy.
- Player Turn 2 - 2/. German Empire, 2/. Western Allies, 2/. Russian Empire, 2/. Austro-Hungarian Monarchy.
- Player Turn 3 - 3/. German Empire, 3/. Western Allies, 3/. Russian Empire, 3/. Austro-Hungarian Monarchy.
- Player Turn 4 - 4/. German Empire, 4/. Western Allies, 4/. Russian Empire, 4/. Austro-Hungarian Monarchy.
- Treaty Of Brest-Litovsk - From 1917 onwards.
- Capitulation Check - From 1916 onwards.
- Victory Check - Followed by New Game Year.
3.5 - Deployment Turn
- All armies are deployed face-down on any Front, provided only the nationalities listed in the Supply Bases are present. Unlisted armies, showing an incorrect nationality, are immediately eliminated as if they were casualties.
- Each player rolls a dice to establish the maximum number of Dummy armies that can be returned to the board, in addition to the ones that are already there. An "S" result means that none are returned. Empires cannot have more Dummy counters than are actually supplied, on the board at any one time.
- The Italian Theatre is completely inactive until the beginning of Game Year 1916. British, French, or German armies are not allowed in Fronts 5 or 6 until then. Austro-Hungarian are allowed in Fronts 5 or 6 early, but may not engage in offensives in the Italian Theatre before 1916.
3.6 - Operations
Each Player Turn consists of taking only one of the following Actions:
- Offensive Action - Attack in any one Front in which the player has real armies.
- Railway Movement - Move any or all real or Dummy armies from one Front to any adjacent Front(s).
- Strategic Transfer - Move upto two real or Dummy armies from one Front to any non-adjacent Front or Theatre.
- Pass - Do nothing.
3.7 - New Game Turn
Move the Game Year marker one space to begin the next Game Year. Move the Capitulation markers back to the "0" box on the Capitulation Track. Players place the new Game Years Event Markers in their respective Alliances cups, along with the used non-mandatory ones. They then shake the cup well and randomly draw one Event Marker for the new Game Year.
4.0 - Offensives
4.1/. Empires may mount an offensive in any Front where that Empire has real armies. If a Front has no defending armies when attacked, then the attacker immediately occupies a City, as if it had won normally.
4.2/. If a defending army (or armies) is present, then the offensive must be resolved. The defenders Dummy armies are immediately removed from play on that Front, but may return to the game in the next years Deployment phase.
4.3/. Each side reveals one army as its lead attacker or defender, the attacker selecting first. Other armies need not be revealed. The Combat Value of each lead army is the one that is used in the Offensive. The side with the most armies adds 1 to its Lead Armies Combat Value.
4.4/. A maximum of one Events Marker may be played face-down per Empire per Offensive. Once played, both Events Markers are turned face-up and their values added or subtracted from each sides total. Mandatory markers must be played in the Player Turn immediately after they become available.
4.5/. Each side rolls 1 die. A die roll of "S" is treated as a "0", but that Empire may randomly pick a new Event Marker. Each player may only hold a maximum of three Event Markers.
4.6/. During the Great War, the offensive was notoriously more costly than the defensive. An attacking army would suffer excessive casualties regardless of whether it was successful or not. The results of each offensive are calculated as follows:
Total Combat Value + Die Result + Special Events Marker = Each Sides Total
- If Attackers Total is less than the Defenders Total = Attacker loses lead army
- If Attackers Total equals the Defenders Total = Both lead armies are lost
- If Attackers Total is greater than the Defenders Total = Attacker places an Occupation Marker on the Defenders next City. The Defender receives 1 Capitulation Point if there are no Cities left for the attacker to occupy.
- For each City occupied, the Attacker gains a Victory Point and the Defender loses a Victory Point. Supply Bases do not count for Victory Points and never change hands.
4.7/. After the Offensive is finished, used non-mandatory Event Markers are returned to the appropriate Alliances cup. Used mandatory Events Markers are permanently removed from the game.
4.8/. All attacks are made at -1 on Fronts 4, 5, 6 and 10, as the historical armies had to supply themselves across mountains in addition to fighting the enemy.
Example - The German Empire is attacking the Western Allies on Front 1. The German Empire has 2 armies (both with a combat value of "3") whereas the Western Allies only have a British army of strength "3". The Western Allies play the Machine Guns Events Marker. The German Empire does not play a marker. The German Empire selects a lead army (as both armies have the same value, it does not matter which one). Because the German Empire has the most armies, he adds 1 to the combat value of the lead attacker (= 4). He rolls a 2 (= 6 total). The Western Allies rolls a 3. He adds the Machine Guns marker (+1) giving a total of 7. The Western Allies wins the Offensive and the German Empire loses its lead army.
5.0 - Events Markers
5.1 - Using Events Markers
An Empire may only use one Events Marker per Offensive, provided that the marker matches the nationality of the lead army being used. Events Markers are used for attacking (red letter "A") or defending (white letter "D"). Each Empire maintains its own pile of Events Markers, drawn from the same cup as its Alliance partner.
5.2 - Maximum Number Of Events Markers
A player may only hold a maximum of three Events Markers at any one time. If a player is required to take a fourth one, then one of the non-mandatory markers must be put back before drawing the new marker. If a player draws a marker that does not match his Empires nationalities (e.g., the Russian Empire draws a British Rifles marker), he may put it back at any time (including mandatory markers), but may not draw a replacement marker.
5.3 - Mandatory & Non-Mandatory Events Markers
There are four (seven if you have made the non-standard additions) mandatory Events Markers that must be played in the Player Turn after drawing them. The face-down colour of the mandatory markers is red for the Entente Powers or blue for the Central Powers. Mandatory markers are permanently removed from the game after use.
The face-down colour for non-mandatory markers is green for the Entente Powers and black for the Central Powers. Used non-mandatory markers are returned to each Alliances cup, along with the following year's Events Markers, at the end of the game year. Shake well to ensure that each draw is as random as possible.
5.4 - The No Man's Land Events Markers
These markers have a value of "0" and cancel the effect of any non-mandatory markers played by the enemy. This special bonus is cancelled if the enemy immediately counters with its own No Man's Land marker, usually the only time that a second marker may be played by one player in a single Player Turn.
5.5 - The Espionage Events Markers
Espionage markers are added to each Alliances cup from 2/1914 and do not count towards the maximum number of Events Markers that can be held or played.
Using an Espionage Marker cancels the effect of any non-mandatory markers played by the enemy, including No Man's Land markers, and may not be countered. Espionage markers may not be played against other Espionage markers.
For historical interest, although the markers are representative of spy-rings, deception plans, and internal plots, the Central Powers marker shows a picture of Mata Hari and the Entente Powers marker a picture of Sidney Reilly.
6.0 - Reinforcements and Replacements
6.1 - Reinforcements
Armies are placed by the space on the Game Year Track they are due to enter the game. During the Deployment Turn, Empires bring these Reinforcements into play in any allowed Front according to the Base City lists on the game board.
Example - Front 9 lists the abbreviations AH, DE, and RU. This means that only Austro-Hungarian, German, and Russian armies may operate in this Front.
6.2 - Replacement Armies
Each unoccupied, friendly Replacement City allows an Empire to bring back its eliminated armies as if they were Reinforcements. Replacements cannot be saved beyond the Deployment Turn following their loss (e.g. an army that was lost in 1915, can be brought back in 1916 but not after). If an Empire has more lost armies than it has Replacement Cities, it may choose which armies to bring back among the eliminated units. The remainder are permanently lost.
6.3 - Replacement Cities
Each Empires possible replacements are reduced by one for each lost Replacement City. This can be reversed if the lost Replacement Cities are recovered. Empires do not gain replacement armies through the control of enemy Replacement Cities.
- Austro-Hungarian Monarchy - Trieste (Front 6), Wien (Front 9), Budapest (Front 9), Lemburg (Front 9).
- German Empire - Aachen (Front 2), Metz (Front 3), Berlin (Front 8), Breslau (Front 8).
- Russian Empire - Riga (Front 7), Warsawa (Front 8), Minsk (Front 8), Kiev (Front 9), Odessa (Front 11).
- Western Allies - Calais (Front 1), Paris (Front 3), Nancy (Front 4), Venezia (Front 6).
6.4 - Minimum Garrison Rule
From Game Year 2/1914, each Empire must keep at least one army on certain Fronts. If there are not enough real armies to do so, then the gaps may be filled with Dummy ones. This rule applies to the following Fronts:
- Fronts 1, 2, 3 and 4 - Western Allies and German Empires.
- Fronts 5, 6, 9 and 10 - Austro-Hungarian Monarchy.
- Fronts 7, 8 and 9 - Russian Empire.
6.5 - Game Year 1919
Although Axis armies had been freed by Russia's exit from the war, the Central Powers were badly effected by Spanish Flu, starvation from the Royal Navy's unbroken blockade, and exhaustion from the strain of a long war. The desperate, last-ditch offensives of 1918 came too late to stop American armies from taking their place on the Western Front and led to a hastened military defeat, revolution and collapse.
American entry into the war meant that the Western Allies could now outlast their Axis opponents, even despite the French Army Mutinies and the Russian Revolution of 1917. From the Western Allies point of view, the Great War could therefore have easily lasted into 1919. If the Allied plans for using huge numbers of tanks and huge quantities of poison gas had taken place, it is certain that Germany would have been invaded in 1919, possibly ending in the occupation of Berlin.
For 1919, the maximum number of Events Markers that can be held by the Western Allies and the German Empire is increased to four. At the beginning of 1919, the Western Allies may add to or replace any of their current non-mandatory Events Markers with Tanks Attack, provided it is not already in use, and the Axis Poison Gas marker, even if it is currently held by the Central Powers. Germany may also add to or replace any of their current Events Markers with Stosstruppen markers.
The Western Allies receive replacement armies as though they still occupy all their own replacement cities. The Royal Naval Blockade marker is now increased to +2 in value. Neither side gets any reinforcements in 1919 as it is assumed that the limited manpower available to most combatant nations after four years of attritional Total War would be used to prop-up existing formations, one way or another.
7.0 - Command of Foreign Armies
7.1 - German Armies Under Austro-Hungarian Control
German armies that start any round in Fronts 5-6 or 9-11 immediately fall under the control of the Austro-Hungarian Monarchy. They may only operate during the Austro-Hungarian Player Turns until the Austro-Hungarian Monarchy voluntarily returns them to the German Empire. In a 2-player game, the Central Powers player can simply move his German armies to and from Austro-Hungarian Fronts by Railway Movement or Strategic Transfer. In a 3- or 4-player game the German Empire may not simply withdraw its armies from Austro-Hungarian control. The German Empire may only request the return of its German armies, which is done as an Austro-Hungarian Railway Movement or Strategic Transfer. However, the Austro-Hungarian Monarchy is not under any compulsion to do so and may refuse to return them for as long as they are wanted.
Example - In a 4-player game the German 4th Army is located in Front 9. The German Empire would like to attack in the Western Theatre and needs the army back. It asks the Austro-Hungarian Monarchy to use a Strategic Transfer action to move the army to the Western Theatre (Front 3). However, the Austro-Hungarian Monarchy has different plans. It continues an offensive towards Rovno and does not make the requested Strategic Transfer.
7.2 - Western Allied Armies Under Russian Control
The British Mediterranean Expeditionary Force (MEF) and French Orient (OR) armies may only operate in Fronts 10 and 11. The Italian Balkans (ITB) army may only operate in Front 11. These armies are Western Allied replacement armies, but are controlled by the Russian Empire and may only use Russian or Any nationality Entente Events Markers. In a 4-player game, the Russian Empire must ask the Western Allies to voluntarily replace them.
8.0 - Capitulation
Capitulation Tests start from 1916, and are taken by Empire's who received more than one Capitulation Point in a single year. If there are no more Cities left on an individual Front for an enemy to occupy following an actual Offensive, then the defending Empire receives 1 Capitulation Point. Empires receive a maximum of one Capitulation Point per Front per Game Year. All Capitulation Points are reset to "0" at the end of each Game Year.
Example - The German Empire wins an Offensive in Front 7 but there are no more Russian Cities left to occupy apart from the Russian Supply Base. Russia receives one Capitulation Point as a result.
Empires that gained more than one Capitulation Point during the Year roll a die. An "S" result counts as having automatically passed the test. If the die roll is equal to, or lower than, the number of Capitulation Points, then the Empire has failed its Test and must make a Results Throw:
- S = Capitulation - An Empires will to fight permanently collapses and its newly formed Revolutionary Government signs an Armistice as a preliminary to signing a peace treaty on the victors terms. The armies may no longer make offensives and the owning player concedes the game, retaining its current Victory Points. The enemy may no longer attack but remains in control of whatever Cities have been occupied. Both sides are still bound by the Minimum Garrison Rule. The game immediately ends if both Empires within an Alliance have capitulated.
- 1 = Revolution - A new Republican Government is in power following a popular uprising against the conduct of the war. The previous government has either been executed, is in prison awaiting trial, or has fled. There is a great deal of political turmoil and uncertainty. Civil War between rival factions may be imminent. During the following year, the Empire may not conduct any offensives, the Combat Value of all Armies is temporarily reduced to 0, and there are no reinforcements that year. A second failed Capitulation Test during the game will automatically result in Capitulation.
- 2 = Mutiny - Hearing tales of sickness and hunger from the Home Front, the Army refuses to accept any more orders to attack after the latest offensive ended in disaster yet again. Some soldiers talk of abandoning the war and going home without permission. Indiscipline and pacifism are rife. No offensives may be undertaken by whichever nationality has the largest number of game armies. This limitation only applies to the Theatre with the most Fronts. All armies may defend against enemy offensives without penalty. All later Capitulation Results Throws are increased by one level.
- 3 = Politics - The Government, under pressure to justify the war's huge cost in lives and expenditure, acts to publicly restore its own authority by removing failing, unpopular or incompetent Generals from their posts. New Generals are appointed on the basis of internal campaigning, favouritism and perceived political reliability. This abrupt changing of the guard has a temporarily bad effect on the war effort. Roll a die for each of the Empire's Player Turns in the following Game Year. The Empire must Pass in any Player Turn that it rolls an "S".
- 4 = Unrest - Morale on the Home Front is low. The government is experiencing food riots, demonstrations and strikes. Subversives and malcontents are encouraging sabotage to the war-effort and making anti-government speeches. The military are being used as an internal police-force to maintain order and guard important government centres from internal attack. Widespread desertion and malingering, both at home and at the front, is adding to the government's inability to supply enough men for the front-lines. No replacement armies are received that year.
Please Note - It is possible for every Empire to have capitulated by the end of the game. This is nothing to be worried or concerned about and is perfectly normal. It just means that the players ended civilisation more completely than Attila The Hun did for Rome, only on a global scale this time.
9.0 - Victory
All Empires start the game with 6 Victory Points each. If a city is occupied or re-occupied then the new owner receives 1 Victory Point and the previous owner loses 1 Victory Point. An Empire's Victory Points may not shrink below "0". Supply Bases do not count for Victory Points and never change hands.
Example - The Western Allies captures Aachen early in the game. The Western Allied Victory Marker is moved into the "7" box of the Victory Track. The German Victory Marker is moved into the "5" box.
During each Victory Check phase, check to see if the game has ended because the game has reached the end of 1919, OR if one Alliance occupies every City on any 6 Fronts, OR if both Empires within an Alliance have Capitulated. To determine who won, add together the Victory Points of the Empires within an Alliance and compare the score to the opposing Alliance:
- Always = The Central Powers win the game if their Victory Points are equal to or more than the Entente Powers. Otherwise, the Entente Powers win.
- If 3-4 Players and the Central Powers won = Germany wins the game if it has three more Victory Points than Austria-Hungary. Otherwise, Austria-Hungary wins.
- If 4 Players and the Entente Powers won = Add 8 Victory Points to the Russian total if Russia accepted the Treaty of Brest-Litovsk. The Western Allies win the game if they have more points than the Russians. Otherwise, Russia wins.
Players should note that they will NOT win if they allow their Alliance partner to be defeated or capitulate.
10.0 - The Treaty of Brest-Litovsk
In Year 1917, the German Empire may offer the Russian Empire the Treaty of Brest-Litovsk, provided that the game has not already ended. The offer must be made just before that Years Victory Check. All offers are subject to the following criteria being met in full before the offer can be made:
- The German Empire already has a minimum total of three German armies in Fronts 7 and 8.
- The Central Powers must occupy at least three Russian Replacement Cities.
- Russian nationality armies may not occupy any Austro-Hungarian or German nationality Cities.
In the 2- or 3-player game the Russian Empire must accept the Treaty if offered. In the 4-player game the Russian Empire may choose not to accept. The offer may be repeated each year if initially refused. If the treaty is accepted, for the rest of the game:
- Place the Treaty of Brest-Litovsk Marker in the appropriate space on the board. Russian and Romanian nationality armies may not attack or be attacked on any Front from this point onwards. Germany must permanently leave one army in each of Fronts 7, 8, and 9. Austria-Hungary must permanently leave three non-German armies in Front 9.
- Fronts 7, 8, 9 and 11 become completely inactive for the rest of the game. All Russian and Romanian armies take no further part in the game. The German and Austro-Hungarian garrison armies also take no further part in the game. Each Empire continues to control the Cities they occupied prior to the Treaty Of Brest-Litovsk.
- All three Empires may continue to fight in Front 10, provided no Russian or Romanian armies are used. The loaned Western Allied armies can continue to stage offensives there, but may only be legally replaced by the Western Allies. The other armies available to the Russian Player may be replaced for free at the rate of one army per year.
11.0 - Optional Rules
The following rules may be added, singularly or together, if both players agreed to use them before the start of the game.
11.1 - Historical Set Up
Players wishing to use a "historical" setup may try the following for the Year 1/1914:
| Front | Entente Powers | Central Powers |
|---|---|---|
| 1 | 1st BE | 1st, 2nd DE |
| 2 | 1st BR, 5th FR | 3rd, 4th DE |
| 3 | 2nd, 3rd, 4th FR | 5th, 6th DE |
| 4 | 1st FR | 7th DE |
| 5 | Not Available | Not Available |
| 6 | Not Available | Not Available |
| 7 | 1st, 2nd RU | 8th DE |
| 8 | 9th RU | AA DE |
| 9 |
11.2 - War-Plans
Out of all the combatants, France and Germany had developed the most detailed plans for the onset of hostilities, making full use of their respective railway systems and the mass mobilisation of their armies. Plan XVII (France) and the Schlieffen Plan (Germany) would therefore have profound consequences for the course of the war, stemming from the assumptions behind each plan. The French plan dictated a quick attack into a weakly defended Alsace-Lorraine, aimed at recovering the lost provinces and defeating a Germany equally divided between simultaneous French and Russian attacks. The German plan was to quickly concentrate against the French, sweeping through Belgium and northern France to encircle Paris, while the Russians took longer to mobilise. Once the French had been knocked out of the war, victorious German armies would turn against the fully-mobilised Russian armies now advancing westwards for the decisive battle.
The following rules apply to Year 1/1914 only:
- Players must use the Historical Set Up optional rule.
- Austro-Hungarian Armies may only attack in Front 10.
- German Armies may only attack in Fronts 1, 2, and 3.
- Western Allied armies may only attack in Fronts 3 and 4.
11.3 - No Axis Aggression
Germany did not have to march through Belgium in order to attack France. It might have sought to repeat the successful invasion of France from the Franco-Prussian War of 1870-71. Although the militarily tougher option, respecting Belgian neutrality would have prevented Germany from being portrayed as an uncivilised aggressor to the American and British public. Not invading Belgium might have meant that it was not politically possible for Britain to come to the aid of France, in which case British money and diplomacy would not have brought Italy into the War on the Allied side or pushed the Ottoman Empire into the war on the Axis side. It is very unlikely, however, that British sympathies and Governmental concern for the European balance of power would have allowed them to stay completely out of the war. Britain would still have given some moral or practical aid, HM Treasury permitting, if only to ensure the eventual peace treaty took into account British interests.
The hostile alliances are therefore limited to chaotic France and autocratic Russia on one side, and militaristic Germany and decrepit Austria-Hungary on the other. As a result, America might never have allowed itself to be drawn into the war. This progression of changes from what actually happened would have severely limited a World War to a much smaller Continental War. It might also have led to the creation of a free European Union much sooner than was the case and without the destruction of two world wars. Alternately, it might have led to the imposition of a militaristic German hegemony over most of Europe.
In this variant, all American, Belgian, British and Italian armies are permanently excluded from play. The Italian Balkan Army (ITB) and British Mediterranean Expeditionary Force (MEF) are also not available to the Entente Powers. Fronts 1-2 and 5-6 may not be used by either side, but both sides may still benefit from the Replacement Cities in all these Fronts.
It is assumed that the British will be contributing substantial amounts of materiel and munitions to the Entente Powers, but will not do anything that may provoke a German naval attack or result in a German propaganda coup. The Entente Powers therefore lose the British Rifles, Shell Shortage, Siege Mines, Americans Arrive, and Royal Naval Blockade Events Markers.
The Germans, in turn, will not be doing anything that might antagonise British or American public opinion into declaring war against the Central Powers. The Central Powers therefore lose the Axis Atrocity and Poison Gas Events markers, plus the Entente Powers Submarine Warfare Mandatory Marker.
11.4 - Variable Order Of Play
From Year 2/1914, the order in which Empires deploy and operate their armies is determined randomly each year. One die per Empire is rolled with an "S" counting as a "0". Empires roll first for Deployment and then for Player Turns. The Empire that has rolled the highest number goes first, followed by the next-highest score, etc. Players with the same score re-roll the die to determine which of them goes first. The Empires place their two Game Order markers in the respective boxes of the Variable Order Chart in the top left-hand corner of the Eastern Theatre panel.
Example - The Austro-Hungarian Monarchy rolled the highest number, out of all the Empires, for the order of Deployment. The player moves the Game Order Marker to the first space of that column. The Austro-Hungarian Monarchy then rolled an "S" for the order of Player Turns, meaning a score of "0". Fortunately, the Western Allies also rolled an "S". To break the tie, both Empires re-roll the dice. Austria-Hungary rolls a "2" and the Western Allies roll another "S". Austria Hungary is in third-place for Player Turns and the Western Allies are in last/fourth-place. Both Empires place their other Game Order Markers accordingly. After Player Turn 4, the Empires will need to re-roll at the beginning of the next Year.
11.5 - Solitaire Play
All normal rules apply, especially the Minimum Garrison Rule, in addition to the following:
- The solo player takes the role of the Central Powers. The Central Powers do not use Dummy counters. The Eastern and Western Theatres receive the majority of German Reinforcements and Replacements in alternating years, starting with the Western Theatre in 2/1914. From the same turn, there must always be at least one German Army under Austro-Hungarian control.
- The Austro-Hungarian Monarchy must roll a dice before making each Offensive. A score of "S" means that the action failed and the Offensive will NOT take place. The Russians also roll a dice before making each Offensive. A score of 1-4 means the Offensive does NOT take place, whereas an "S" means that the Offensive DOES take place.
- Randomly place all Entente armies each year. Each Front gets one real army, placed face-down. Mix together the remaining real and dummy armies according to Nationality, keeping them face-down. Legally distribute them equally to all the available Fronts. Any remainder is placed in the Fronts with the fewest number of Cities separating the Central Powers from an Entente Supply Base. The tie-breaker is the Front facing the most Central Powers armies.
- The Entente Armies roll a dice to decide where to make an Offensive. A score of "S" means that they will attack the Front where they have the most counters. A score of 1-4 means they will attack where the enemy has the fewest counters, regardless of how many Entente armies are facing them. In both cases, priority is given to the Front with the fewest number of Cities before reaching a Central Powers Supply Base.
- Each Alliances Events Markers are added to their respective cups at the beginning of each Year, starting with 1/1914. They are not accumulated by either side and do not enter on a roll of "S". Instead, randomly draw an Events Marker for each side before each offensive. It may only be used in the offensive if the markers nationality matches the lead armies' nationality. Otherwise, return it to the Alliances cup. Mandatory Events Markers are reserved for compulsory use in the next Player Turn.
In the event of any confusion, list the three options with the biggest chance of being true in alphabetical order. The first option is selected on an odd score, the second with an even score and the last if the score is "S".
Appendix A - Events Marker List
* Not included in real game. You will need to make these for yourself using similar cardboard to the real markers (each counter should be 0.9" wide; backs coloured appropriately; the backs of the Espionage markers should be left white or grey).
| Alliance | Year | Title | Nationality | Attack/Defence | Value | Mandatory? |
|---|---|---|---|---|---|---|
| Central | 1/1914 | Axis Atrocity * | Germany | Attack | -1 | YES |
| Central | 1/1914 | Espionage * | Any | Neither | +1 | no |
| Central | 1/1914 | Falkenhayn | Any | Attack | +2 | no |
| Central | 1/1914 |
Appendix B - The Full Map
The real board looks a little different to the idealised map shown in the source document. That map adds a 1919 Year Box and additional Victory Point spaces (so Germany could score the full 23 points), moving the Brest-Litovsk space. The only important point is the 1919 Year Box: just place the Year Turn Marker beyond the 1918 space to get the same effect with the real board.
Appendix C - Nationalities & Supply Bases
The following nationalities of armies are allowed to operate within each Empires or Alliances Fronts. This information is listed in the Supply Bases (hexagon shapes) at both ends of each Front, on the Board:
| Front # | Front Name | Central Power's Nationalities | Entente Power's Nationalities |
|---|---|---|---|
| Front 1 | Flanders Front | German | Belgian, British, French |
| Front 2 | Somme Front | German | British, French |
| Front 3 | Marne Front | German | American, British, French |
| Front 4 | Alsace-Lorraine Front | German | American, French |
| Front 5 | Isonzo Front | Austro-Hungarian, German | British, French, Italian |
| Front 6 | Trentino Front | Austro-Hungarian, German | British, Italian |