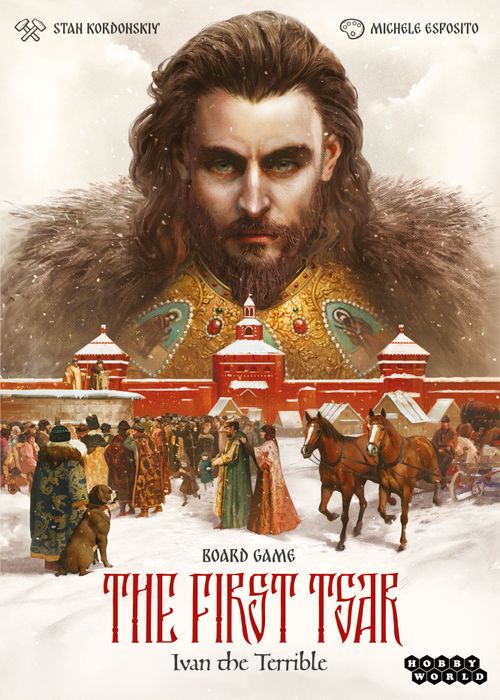
The First Tsar: Ivan the Terrible
The First Tsar: Ivan the Terrible Rulebook
Table of Contents
Table of Contents
Game Components
Game Board
The Game Board shows a map of the Russian state in the middle of the 16th century. Sixteen cities of four different colors are connected by waterways. The symbols under the name of the city indicate what income can be gained there. There are slots for Trade tokens on several waterways. The map is divided by borders into four regions: The East, The South, The West and The North. Each region has a slot for a Region token. In the lower right corner of the map there is the Field of War with slots for Spoils tokens. Along the edge of the map there is a Victory Point track with three spaces for Tsar's Favor tokens.
In the lower left corner of the board there is a Round track that shows the decades and special steps of the game. To the right there are five Kremlin Chambers where the players choose actions for the round. Each Chamber has its normal actions and Chamber's bonus, with a slot for a Seal token. Five Assignment cards are placed under the arrows leading from each Chamber. To the right of the Chambers there is a Tsar's Favor track.
Round marker — Shows the current round of the game.
3 Tsar's Favor tokens — These are collected by the players who are first to accumulate 10, 20 or 30 Victory Points.
Project Cards
There are 10 Project cards of each of the three types: Construction, Trade and Military. The left side of the Project card shows the goods needed to complete the project. On the right side there are the Victory Points for completing the project and the effect of a project of this type.
The Construction project's effect allows you to place a building, the Trade project's effect lets you resolve two of your Trade tokens, while the Military project's effect allows you to place a warrior into the Field of War and collect a Spoils token.
15 Title Cards
Each Title card shows how it scores Victory Points after the second and the fourth rounds.
15 Estate Cards
Each Estate card shows an effect that can be used once per round.
6 Assignment Cards
Each Assignment card shows the color of a city where a boyar must move to after performing actions in the Kremlin Chamber. Four cards send the boyar to a city of a specific color, one multicolored card allows the player to choose any city, while the last one keeps the boyar in the Kremlin.
30 Wooden Goods Pieces
Goods are used to complete projects, as well as in exchanges.
Local Goods (20 of each): Grain, Wood, Stone. You get local goods from cities on the map, as well as from Trade, Region and Spoils tokens.
Foreign Goods (12 of each): Gunpowder, Textile, Steel. Foreign goods are rarer and more valuable than the local goods: you usually get them in exchange.
12 Spoils Tokens
You collect a Spoils token and immediately resolve its effect after you place a warrior to the Field of War.
18 Region Tokens
Nine with the light background and nine with the dark background. Region tokens indicate the rewards that players receive for their influence in regions at the end of each round. In the last round, only tokens with the dark background are used.
40 Coin Tokens
The image does not matter, all coins are of equal value. You need coins to resolve the effects of many Estates, to increase the importance of boyars in the chamber, and in exchanges.
20 Trade Tokens
You collect Trade tokens by moving your warriors and boyars along waterways. The effect of the token is resolved immediately after collecting, and also later as part of a Trade project's effect.
First Player Token
Shows the player that acts first in the current round.
Player Sets
Four colored players sets, each consisting of:
Player's Pad — The player's Local Goods are stored in the upper part of the pad, while the Foreign Goods occupy the lower part. There are five spaces for Trade tokens in the middle, three of which have a pre-printed effect. The right side reminds how goods and Trade tokens can be spent during the game.
Victory Point marker — Shows how many Victory Points you have gained so far. During the game VPs are awarded for completing projects and for winning Regional, Spoils and Trade tokens. There is a special scoring step after the second and the fourth rounds of the game, when Title cards, Field of War and Tsar's Favor are scored. At the end of the game, remaining goods and coins are also converted into VPs. If you score more than 99 points, simply continue counting around the VP track.
Tsar's Favor marker — Shows your position on the Tsar's Favor track.
6 wooden Building pieces — You can only place a building in a city that has another piece of your color (a warrior or a boyar) and no other buildings. Buildings give you a presence in cities. Each building on the map gives you two influence points in its region.
3 wooden Boyar pieces — At the beginning of a round you send your boyars to the Kremlin Chambers, planning your actions for this round. After taking their actions, the boyars go to the map, giving you a presence in cities, and can move around the map later. Each boyar on the map gives you two influence points in their region. At the end of the round, all boyars return to their owners.
10 wooden Warrior pieces — Warriors give you a presence in cities and can move around the map. Each warrior on the map gives you one influence point in its region. You can only place a new warrior in a city that has any other piece of your color (a warrior, a boyar or a building). Warriors can also be sent to the Field of War to collect Spoils tokens and increase your war contribution.
2 Seal tokens — You place your Seal token in a Kremlin Chamber to indicate that you are using the Chamber's bonus.
Setup
- Place the Game Board at the center of the table.
- Place the Tsar's Favor tokens on spaces marked "10", "20" and "30" on the Victory Point track.
- Shuffle all six Assignment cards and place five of them face up next to the Kremlin Chambers, one card per Chamber. Place the remaining card face down nearby.
- Gather all Goods pieces and Coin tokens to form the pool.
- Place the Round Marker on the top space of the Round track ("1550's").
- Shuffle all nine Region tokens with the dark background face down, stack four of them up and place them face down on the bottom space of the Round track ("1580's").
- Shuffle the rest of the Region tokens (both with the light and the dark background) face down and place four of them face up below the Region names on the map. Make two face-down stacks of four Region tokens each and place them on the "1560's" and "1570's" spaces of the Round track. Put the rest of the Region tokens back into the box without looking at them.
- Shuffle the Spoils tokens face down and place a number of them face up to the Field of War: three tokens in a two-player game, five tokens in a three-player game and six tokens in a four-player game. Place the rest of the Spoils tokens nearby face down.
- Shuffle the Trade tokens face down and place ten of them in the round slots on the waterways on the map. Place the rest of the Trade tokens next to the Game Board face down.
- Shuffle the Title and Estate decks separately and place three cards out of each deck face up (or two cards out of each deck in a two-player game) as a display. Place the Title and Estate decks next to their corresponding displays.
- Each player takes all components of their chosen color: the Player's Pad, Victory Point and Tsar's Favor markers, two Seal tokens, three Boyar pieces, six Building pieces and ten Warrior pieces.
- Each player places their Player's Pad in front of them and takes one Grain, one Wood, one Stone and three coins from the pool.
- Each player places their Victory Point Marker to the "0" space of the Victory Point track.
You are ready to start the first round.
Tsar's Favor
Each player has a Tsar's Favor marker that occupies a certain space of the Tsar's Favor track to the right of the Kremlin Chambers. Whenever players tie for any reason during the game, the player whose marker is higher on the Tsar's Favor track has the advantage. Tsar's Favor is taken into account only if all other factors are equal.
There are four spaces on the Tsar's Favor track but in each game only one space per player is used. For example, in a two-player game, use only two top spaces of the track. Each used space is occupied by a single marker at a time.
When a player gains Tsar's Favor, they move their marker straight to the top space of the Tsar's Favor track and push the markers that they've "jumped" over one space down, keeping their relative order. If a player gains Tsar's Favor when already at the top of the track, they gain 1 VP instead.
At the start of the game there are three Tsar's Favor tokens on the Victory Point track (on spaces "10", "20" and "30"). The first player to reach such a token with their Victory Point marker (it doesn't matter if the marker stops on the space or passes it through) takes the token and immediately gains Tsar's Favor. After the second round ("1560's") remove all remaining Tsar's Favor tokens from the Victory Point track.
Game Round
The game consists of four rounds that represent decades, during which players take their individual turns. There are special scoring steps after the second and the fourth rounds, but the players gain Victory Points during regular rounds as well. Each round consists of three phases: Planning, Actions and End of Round.
Planning Phase
During this phase players take turns placing their boyars into the Kremlin Chambers, thereby planning their actions for the second phase. Players take turns going clockwise, starting with the first player. During your turn you must place one of your boyars into any of the five Chambers without your boyar in it. When placing your boyar you may also place any number of coins from your personal supply underneath that boyar.
Note: you can only place coins under your boyar during the same turn when you place it into a Chamber. You can't add coins to the boyars during the following turns.
Coins are gifts for the Tsar's entourage that increase the boyar's importance in their Chamber. The most important boyar in a Chamber gains the right to use its bonus as well as its regular actions.
When all players have placed all of their boyars into Chambers, go on to the next phase.
Action Phase
During this phase players take turns moving their boyars out from Chambers and taking respective actions.
Players take turns going clockwise, starting with the first player. During your turn you must move one of your boyars out of the Chamber they occupy on the corresponding Assignment card. After that you take that Chamber's actions and then move your boyar into any city that matches the Assignment card. You can move your boyars out of Chambers in any order you like.
Before moving your boyar out of a Chamber, check to see if that boyar is the most important in that Chamber. The more coins there are underneath the boyar the higher is their importance, ties are broken by comparing Tsar's Favor. During the Action phase, the importance of boyars can change, therefore a player should check if their boyar is the most important right before moving the boyar out of the Chamber.
If the boyar you are moving out is not the most important in the Chamber, return the coins from underneath the piece back to your supply. You cannot use the Chamber's bonus and only take the regular actions of the Chamber.
If the boyar you are moving out is the most important in the Chamber, discard all the coins from underneath the piece to the pool. If there is no Seal token in this Chamber, you may then place one of your seals in it to use the Chamber's bonus as well as taking its regular actions. If you've run out of Seal tokens, you cannot use the Chamber's bonus. If you have placed your Seal token in the Chamber, all other players immediately return all the coins from underneath their boyars in this Chamber to their respective supplies.
Exception: in a two-player game, you have to pay one extra coin from your personal supply to place your Seal token in a Chamber and use its bonus.
Place the boyar you are moving on the corresponding Assignment card and take the Chamber's actions. If you haven't placed your Seal token in this Chamber, you only take the regular actions, otherwise you use its bonus as well. You can take Chamber's actions in any order or skip any of them.
After you have taken the actions, move the boyar from the Assignment card to any city of corresponding color (or to any city of the map if the Assignment card is multicolored). If there is no city on the Assignment card, the boyar stays on it until the end of the round. However, such a card improves the Chamber's actions and the bonus: you gain one coin when taking the regular actions, and you gain Tsar's Favor when using the bonus. These additional effects are resolved immediately after moving the boyar out of the Chamber.
Example: There are white, black and green boyars in the Reward Chamber. Only the green one has a coin underneath them, and therefore they are the most important in this Chamber. If there were no coins underneath the green boyar, then the white one would be the most important, because this player is the highest of the three on the Tsar's Favor track. The red boyar is not present in the Chamber, so they don't compete for the importance there.
During their turn, the player moves their green boyar out of the Reward Chamber. This boyar is the most important in the Chamber, so the coin from underneath the piece goes to the pool and the player has the right to place their seal into the Chamber, which they do.
According to the Assignment card effect, the player gains one coin and Tsar's Favor, moving up to the top space of the Tsar's Favor track while pushing everyone else down. Now this player has the highest importance in the Exchange Chamber as well, since there are 2 coins underneath both the green and the red boyars, but the green marker is higher on the Tsar's Favor track. Now if the owner of red pieces does not change the situation, the owner of green pieces will be able to use the Exchange Chamber's bonus during their next turn.
Chamber Actions
Production Chamber
Choose up to three different cities with at least one piece of your color (a warrior, a building or a boyar) in each. Each of the chosen cities brings you income as indicated in its lower part. Take the received goods and coins from the pool. You need to pay one coin to get a stone from a city, and it can be the coin you just got from a different city.
Chamber's bonus allows you to get income from one of the chosen cities again.
Example: There are two red warriors in Moscow and one in Yaroslavl, a red building in Nizhny Novgorod and a red boyar in Putivl. When taking the regular action of the Production Chamber, the player chooses three of these cities. They gain two grain from Putivl, two coins from Nizhny Novgorod and immediately exchange one of these coins for one stone in Moscow.
Maneuver Chamber
Take up to two actions, each allowing you to either place one warrior or move one warrior or a boyar from one city to another. For the first option, take a warrior from your personal supply and place it into any city that already has any other piece of your color (a warrior, a building or a boyar). For the second option, choose one of your warrior or boyar pieces on the map and move it to an adjacent city by waterway. If this waterway has a Trade token on it, take it and immediately resolve it. You can perform the Chamber's actions in any order or combination.
Chamber's bonus allows you to take another Maneuver action, making it three actions in total.
Note: each city may contain any number of warriors and boyars of any players.
Trade Tokens
Whenever you get a Trade token, place it in any round slot on your Player's Pad (you may place it over a pre-printed effect as well) and resolve the effect of the taken token. If all round slots are taken up by other tokens, discard one of them before placing the new one.
Example: There's one black warrior in Chernigov, another one in Novgorod-Seversky and one black boyar in Kursk. When taking the regular actions of the Maneuver Chamber, the player moves their warrior from Chernigov to Novgorod-Seversky, taking the Trade token from the waterway connecting these cities. The effect of this token is resolved immediately and the player places their warrior in Kursk. With their second action, they move their boyar from Kursk to Putivl, but there is no Trade token on the waterway anymore.
Project Chamber
Take up to two actions, each allowing you to either take one Project card or complete one Project card from your hand. For the first option, take one of the six Project cards on display or draw the top card of the Project deck and keep it in your hand (immediately replenish the display from the deck if needed). For the second option, place a Project card from your hand in front of you, spend the goods shown on the left side of the card, gain Victory Points indicated on the right side of the card and resolve the project's effect. You cannot complete a project if you do not have enough goods to pay for it.
Chamber's bonus allows you to take another Project action, making it three actions in total.
Project Effects
There are three types of projects: Construction, Trade and Military.
When you complete a Construction project, place one building from your supply in any city that already has any other piece of your color (a warrior or a boyar) and no other buildings (yours or opponents'). If there are no such cities or if you have no buildings left, you do not place a building but you still gain VPs.
When you complete a Trade project, immediately choose two Trade tokens on your Player's Pad (pre-printed or the ones you took from the map) and resolve their effects in any order, one after another. You cannot resolve the same token twice.
When you complete a Military project, place one warrior from your supply to the Field of War, take a Spoils token from there (if there is one) and immediately resolve the token's effect. If you have no warriors left, you just gain the VPs.
Example: The player takes regular actions of the Project Chamber. First, they complete a Military project from their hand: they spend three grain and two wood, gain 5 VPs and place their warrior to the Field of War, taking a Spoils token and gaining 3 VP from its effect. With their second action, the player draws a Project card from the top of the deck and puts it into their hand.
Exchange Chamber
Exchange any number of your goods and/or coins for any goods and/or coins at a rate of 2:1. Also, gain one foreign good of your choice. Take all of the goods and coins you gain from the pool and return them to the pool when you spend them.
Chamber's bonus gives you one more foreign good of your choice.
Example: The player takes the Exchange Chamber's actions with a bonus. They receive two foreign goods (one for the regular action and another for the bonus): gunpowder and textile. They also exchange two grain for one stone, as well as one coin and one wood for one steel.
Reward Chamber
Take one Estate card or one Title card from the display or from the top of the corresponding deck. Keep your gained Title and Estate cards face up in front of you.
Chamber's bonus allows you to take another Estate card (but not a Title card) as described above.
Note: if you take a Title card or an Estate card from the display do not replace it with a new one from the deck. Title and Estate cards on display are only replenished at the end of a round.
Example: As the regular action of the Reward Chamber, the player takes from display an Estate card with the effect that provides two coins. They immediately use the Estate to gain two coins (see Free Actions below).
Free Actions
Besides the Chamber's actions, at any point of your turn during the Action Phase you may take free actions.
Free actions can be taken before moving your boyar out of the Chamber, after that, in between any Chamber's actions and/or token effects, before placing your boyar into a city or after that. You may take as many free actions as you want and are able to do.
Free Actions of Estates
Your Estate cards give you free actions indicated on them. Each Estate card can only be used once per round: rotate the card sideways to show it's been already used.
Free Actions of the Player's Pad
- Spend two local goods to gain one coin.
- Discard two Trade tokens from your Player's Pad to take one Project card and put it in your hand (as if taking the Project Chamber's action).
- Spend one foreign good to gain one coin.
- Rearrange Trade tokens between the round slots on your Player's Pad.
Note: you cannot take free actions during another player's turn, during the Planning phase or during the End of Round. Make sure that the previous player is done with their turn before starting your turn in the Action phase.
Discarded Trade and Region tokens are no longer used in the game. Place them beside the Game Board face up, apart from the face-down tokens. The players can look through any discarded cards and tokens at any moment of the game.
Example: The owner of the white pieces starts their turn. There are white, black and red boyars in the Project Chamber (with no coins each). The red marker is the highest on the Tsar's Favor track. Before moving their boyar out of the Chamber, the player spends three grain and one wood to gain two coins (free action of the Player's Pad) and uses their Estate that gives them Tsar's Favor for two coins (free action of the Estate). Now that their boyar is the most important in the Chamber, they can use its bonus.
The player moves their boyar out of the Project Chamber and places their seal in it. With their first action of the Project Chamber, they take a Military project from the display and complete it with their second action. The effect of the project allows them to put their warrior to the Field of War and take a Spoils token, which in turn allows them to move their warrior or boyar to an adjacent city. They move a warrior from Putivl to Kursk, taking a Trade token which brings them one grain and one coin.
Then the player discards two Trade tokens from their Player's Pad (the one they've just got and the one that was there beforehand) to take a Construction project from the display (free action of the Player's Pad). With the third (bonus) Chamber action they complete this project and place their building in Kursk, where they've just moved their warrior to.
Finally, the player moves their boyar from the Assignment card (which shows a black city) to Novgorod-Seversky. Then they use the Estate that allows them to place a warrior by spending one grain and one coin (that they've just received from a Trade token), and place their warrior in Novgorod-Seversky that now contains their boyar.
End of Round
When all players are done moving their boyars out of Chambers and taking actions, the End of Round phase begins.
First, players receive rewards of the Region tokens in the following order: first in the East (I), then in the South (II), in the West (III) and in the North (IV). Determine every player's influence in the region. Warriors give their owner one point of influence each, while buildings and boyars give their owner two points of influence each. The player with the most influence chooses one of two rewards indicated on the Region token. The player with the second most influence gets the other reward. If a player does not have any pieces in a region, they are not rewarded for it. Any tie is resolved by Tsar's Favor as usual.
Exception: in a two-player game, only the player with the most influence in the region is rewarded. However, the choice of reward depends on the difference between the influence points of players in this region. If the difference in influence points of players is lower than the number of Victory Points on the Region token, the player with lower influence chooses which reward the player with higher influence will receive. Otherwise (the difference is equal to or higher than the number of Victory Points) the player with higher influence chooses their own reward. If a region contains pieces of only one player, the other player's influence in this region is zero.
If it is the end of the second or fourth round, score Victory Points (see Scoring and Game End below). Then prepare for the next round:
- Each player returns their boyars and seals to their supply and rotates their used Estate cards back.
- Discard all Estate and Title cards left on display and reveal as many new cards as you did during setup (if the deck has run out, shuffle the discarded cards; if there are no more discarded cards, place as many as possible).
- Shuffle all six Assignment cards and place five of them face up next to the Chambers as you did during setup.
- Discard Region tokens from the map and replace them with four new ones, taken from the stack on the next space of the Round track.
- Move the Round Marker to the next decade of the Round Track.
- The player sitting to the left of the one with lowest Tsar's Favor gets the First Player token.
Scoring and Game End
At the end of the second and fourth rounds, after receiving rewards from regions (but before preparing for the next round), there's a special scoring step:
- If it is the second round, put all Tsar's Favor tokens not taken from the Victory Point track back in the box.
- Each player gains Victory Points according to their Title cards.
- The player with the most warriors on the Field of War gains 4 Victory Points, the player with second most warriors there gains 2 Victory Points (you cannot gain these VPs if you have no warriors on the Field of War).
- The player with the highest Tsar's Favor gains 4 Victory Points, the second highest gains 2 Victory Points.
- If it is the second round, each player returns their warriors from the Field of War to their supply. Discard any Spoils tokens left there and place as many new Spoils tokens as you did during setup.
- If it is the second round of the game, discard any Trade tokens left on the map and place ten new Trade tokens to their designated slots.
- If it is the fourth round of the game, each player may exchange any number of their foreign goods for Victory Points at a rate of 2:1, and then exchange any number of their coins and remaining goods (both foreign and local) for Victory Points at a rate of 3:1.
The game ends after scoring at the end of the fourth round. The player with the most Victory Points wins (in case of a tie, resolve it by Tsar's Favor as usual).
FAQ
What happens if there are no more goods or coins in the pool? There is no limit of coins and goods in the game: use any convenient substitutes for these components.
What happens if the Project deck runs out? Players can no longer take Project cards from the deck and can no longer replenish the display of Project cards. If the display runs out of cards as well, players can no longer take new Project cards for the rest of the game, but they still can complete the ones they already have.
What happens if the Title or Estate deck runs out? Shuffle the respective discarded cards immediately and form a new deck. If both the deck and the discarded cards run out, players can no longer take cards of this kind.
How do I gain VPs from the Title card that gives points for sets of completed Construction, Trade and Military projects? Each project can only be part of one set for such a Title. For example, if a player has completed one Construction, two Military and three Trade projects, they only gain VPs for one set of projects.
How does this Title work in combination with Titles that give points for each completed project of a certain kind? Titles give points separately, therefore one project can qualify for several different Titles. Thus, if a player in the previous example has a Title that gives points for sets and a Title that gives points for Trade projects, the former gives them five points and the latter gives them six points (two points for each of three projects).
How do I gain VPs from the Title card that gives points for Spoils and Trade tokens? The player gains as many points as the total number of Spoils tokens in their supply and Trade tokens on their Player's Pad. Trade tokens discarded from their Player's Pad, as well as the ones printed on it, do not count. Note that players keep their Spoils tokens until the end of the game.
How do I gain VPs from Title cards that give points for cities where a player has 3+ influence? Influence in cities is counted the same way as in regions: warriors give one point of influence each, boyars and buildings give two points of influence each. The influence of other players in these cities does not matter.
Reference
Round of the Game
Planning phase Players take turns, starting with the first player. During your turn, place one boyar into a Kremlin Chamber without your boyar. You can place any number of coins underneath that boyar. Continue until all players have placed all of their boyars into Chambers.
Action phase Players take turns, starting with the first player. During your turn, move one of your boyars out of any Kremlin Chamber on the corresponding Assignment card. If your boyar is the most important in the Chamber (depends on the number of coins underneath the boyar) you can place your seal in the Chamber if there's no seal there yet. Take the Chamber's action(s), and if you've placed your seal in it, use its bonus as well (in any order). Move the boyar from the Assignment card into a city of indicated color. At any point of your turn during the Action phase, you can take any number of your Pad and/or Estate free actions. Continue until all boyars of all players are moved out of the Chambers.
End of Round Players receive rewards for their influence in each region (in order). Each warrior provides one influence, while each building and each boyar provide two influence. The player with the most influence chooses one of two rewards from the Region token. The player with second most influence gets the other reward.
At the end of the second round discard all Tsar's Favor tokens, score points, replenish Spoils and Trade tokens and return all warriors from the Field of War.
At the end of the fourth round score points, exchange goods and coins for points and determine the winner.
Return the boyars and seals to their owners, replenish Region tokens, Title and Estate cards, rearrange Assignment cards, move the Round marker. The player sitting to the left of the one with lowest Tsar's Favor becomes the first player.
Reference Icons
- Coin — 1 Victory Point
- Any good or coin
- Local goods: Grain, Wood, Stone
- Foreign goods: Gunpowder, Textile, Steel
- Receive income from a city with your piece
- Place a warrior from your supply in any city with another piece of your color
- Move one of your warriors or boyars to an adjacent city on the map
- Take a Project card from the display or from the top of the deck
- Complete a Project card from your hand (pay the goods, gain VPs, resolve the effect)
- Take an Estate card from the display or from the top of the deck
- Take a Title card from the display or from the top of the deck
- Exchange any two goods and/or coins for any one good or coin
- Exchange any one good or coin for any one good or coin
- Gain Tsar's Favor (move your Tsar's Favor marker to the top space of the Tsar's Favor track, pushing others down; if your marker was already at the top of the track, gain 1 VP instead)
- Resolve the effect of any one Trade token on your Player's Pad (even a pre-printed one)
- Resolve the effect of any two different Trade tokens from your Player's Pad (even a pre-printed one)
- Place a building from your supply in any city that contains another piece of your color and no other buildings
- Place a warrior from your supply to the Field of War, then take a Spoils token if one is available
- Spend what is shown to the left of the arrow to gain what is shown to the right of the arrow