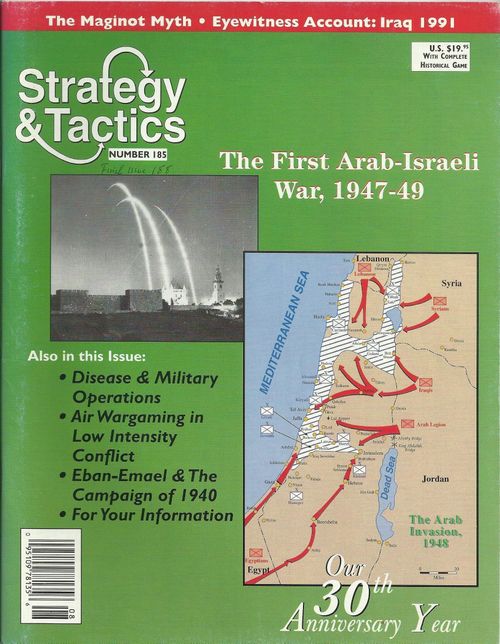
The First Arab-Israeli War
The First Arab-Israeli War Rulebook
Table of Contents
Table of Contents
- 1.0. Introduction
- 2.0. Game sequence
- 3.0. Casual events
- 4.0. Reinforcements
- 5.0. Reorganization
- 6.0. Promotion
- 7.0. Movement
- 8.0. Stacking ground units
- 9.0. Control zones
- 10.0. Air operations
- 11.0. Ground combat
- 12.0. Invasion
- 13.0. Combat effectiveness, breakdown and recovery
- 14.0. Logistics
- 15.0. Entrenchments
- 16.0. Destruction of bridges
- 17.0. Population
- 18.0. Terrorism
- 19.0. Non-combat units
- 20.0. Leaders
- 21.0. Fog of War
- 22.0. Truces
- 23.0. Israeli arms factory
- 24.0. Secret Israeli airfield
- 25.0. Anglo-Egyptian and Anglo-Transjordanian treaties
- 26.0. End-of-term restrictions
- 27.0. British units
- 28.0. Conditions of victory
- OPTIONAL RULES
- 29.0. Commando and guerrilla units
- 30.0. Amphibious operations
- 31.0. Fanaticism
- SCENARIOS
1.0. Introduction
First Arab-Israeli War is a simulation of the Israeli War of Independence of 1947-49.
First Arab-Israeli War is a two-player game. One player controls Israeli forces and the other controls those of the Arab League.
1. Scale of the game
Each turn of play represents a month. Each hexagon is equivalent to about 7.5 km from side to side. Each battalion is equivalent to 500-1000 soldiers; each brigade to 1,200-3,000 soldiers. Each air unit is one or two aircraft squadrons.
2. Game equipment
A complete First Arab-Israeli War team should include the following elements:
- A game map.
- A rulebook.
- 280 chips.
- A group of game tables (printed on the map).
- A six-sided die (must be provided by the players themselves).
3. Game map
The game map shows Palestine as it was in the late 1940s, plus the adjacent areas of Egypt, Transjordan, Syria, and Lebanon. A hexagonal network has been superimposed on the map to regularize the movement of units and to limit the types of terrain. For newbies, units are placed in the hexagons and must remain within their boundaries at all times.
- The borders on the map are the belongings to Palestine and adjacent countries in 1947.
- Each player has areas of Air Unit Possession. They are used to organize air missions.
4. The chips
They represent the armed forces that fought in the original campaign. There are two basic types of tokens in the game: units, which represent military forces, and markers that are used to indicate various game functions and other information. The units are divided into different categories.
a. Military units
See example on page 2.
A parenthetical combat force means that a unit can only defend and never attack. A unit with a combat force in parentheses also has no zone of control.
The front side of the unit indicates its effective combat status. The reverse side of the unit indicates its status as broken.
The number printed on the supply units is the "Strength" of this supply unit. This represents the number of supply points that the token represents.
[Chart: Infantry brigade (front) in its effective combat status; Infantry Brigade (reverse) in its broken state.]
Types of units:
- Armored
- Reconnaissance command or Motorized
- Machine gun (printed as "Machining" in the translation)
- Infantry
- Command/Guerrilla
- Militia/self-defense
- Airborne Infantry
- Marine Corps
- Military police
- Leader
- Air unit
- Supplies
- Entrenchments
- Secret Airfield
Unit size. X = Brigade; III = Regiment; the group symbol (battalion size) is shown on the unit. Note: the Transjordanian units were designated "regiments", although they were battalion-sized units.
Unit abbreviations:
- British.
- Pal Pol = Palestinian Police.
- Arab League.
- AL = Arab Legion.
- ALA = Arab Liberation Army.
- MB = Muslim Brotherhood.
b. National colors
Each player controls a coalition of units. The Israelis control the Zahal ("Defense Forces", formed by the Haganah and the Palmach, which formed the regular forces of the Israelis during this war) and the Irgun and the Stern group, two semi-independent underground organizations.
The Arab League controls the forces of the Arab Salvation Army (Palestinian Arabs), the Arab Liberation Army (a force of volunteers drawn from different Arab states), plus the armies of Egypt, Transjordan, Syria, Iraq, Lebanon, Saudi Arabia, Yemen and Morocco.
- Nationality. Each player controls the forces of more than one nationality. Each nationality has a different color, as indicated below.
Controlled by Israel:
- Zahal (Haganah/Palmach): light blue.
- Irgun: red.
- Stern Group: black.
Controlled by the Arab League:
- Arab Salvation Army (AAS): green.
- Arab Liberation Army (ALA): dark blue.
- Egyptians: gray.
- Transjordanians: blue.
- Iraqis: brown.
- Syrians: red.
- Lebanese: orange.
- Yemenis: dark blue.
- Moroccans: light green.
c. Game scoreboards
Game markers are used to indicate various functions of the game (note that certain markers are printed behind others; players use the side they need at any given time). The number of markers in the game is not a design limit; if players need more, they could craft them.
- Destroyed: Used to indicate the destruction of a bridge.
- Entrenching: Used to indicate units that have dug trench systems and other ground defenses.
- Game Turn: Used to indicate which turn you are on; the reverse side indicates that there is a truce in effect.
- Phase: Indicates which turn in the game sequence you are in.
- Terrified: Indicates a city/town whose population has been expelled.
- End of the truce: Used to indicate which turn the truce will end (if it is not broken sooner).
- Victory Points: Indicates the number of victory points a player has at a given time.
5. Playing cards and tables
Playing cards and tables are used to perform certain functions of the game and to simplify some procedures. These include:
- Completed/Available Air Units: Used to organize the game's air units.
- Combat Results Tables (CRT): Used to resolve combat. There are two CRTs: raid and assault.
- Other Movement Points: Used to record the number of movement points left to a force.
- Terrain Effects Card: Used to show the effects of different types of terrain on movement.
- Turn Marker: Used to indicate the turn and the current phase.
- Victory Point Index: Used to record victory points for each country.
6. Definition of terms
- Effective combat: A unit that is co-connected; in game terms, it is not broken. This is represented by the top face (full power) of the unit.
- Combat Strength: The basic military strength of a unit. It is based on the effectiveness of the unit's firepower and leadership.
- Combat Unit: A unit with a combat strength of one or more (even if it is in parentheses).
- Rota: A unit that has lost its combat effectiveness. It is represented by the reverse side (reduced strength) of the unit.
- Enemy: Units belonging to the player's opposing side.
- Friend: Units belonging to the player.
- Boost: A segment of a turn in which each player performs multiple operations.
- Non-combat units: A ground unit with a combat strength of 0 (e.g. leaders, supply units).
- Non-Phase Player: The player who is not the Phase Player.
- Player in phase: The player whose turn is in progress.
- Movement Factor: The basic number of hexes a unit can move in a turn. It is also the measure of a unit's maneuverability on an operational scale.
- Unit Designation: The identification, number, or historical name of a unit.
7. Die modifier
Certain tables require a die modifier. A positive modifier is added to the result of the die (for example, a modifier of +1 added to a result of 3 would give a final result of 4). A negative modifier is subtracted from the die's roll (e.g., a modifier of –1 subtracted from a roll of 6 would give a final result of 5).
2.0. Game sequence
First Arab-Israeli War is played in turns called game turns. Each turn of play can have one or two impulses. Each boost is divided into two player turns (Arab League and Israeli League). Each player's turn is made up of different segments, called phases. The player whose turn is in progress is called the Player in Phase. The actions take place in an outlawed order, called the game sequence.
1. Game sequence
a) Event phase. Players roll on the Event Table and apply the result.
b) British withdrawal phase. The British units indicated for this turn are removed from the map.
c) First impulse.
-
Arab League player's turn.
a) Reinforcement phase. The Arab League player places the reinforcements for this shift.
b) Reorganization phase. The Arab League player can split/reform and entrench units.
c) Movement phase. The Arab League player moves all, some or none of his ground units. It can also conduct invasions and aerial reconnaissance.
d) Air operations phase. The Arab League player performs air unit/airlift missions.
e) Combat phase. The Arab League player performs the matches he wants. He can then try to destroy bridges.
f) Terrorism phase. The Arab League player performs terrorism missions.
g) Recovery phase. The Arab League player attempts to restore broken units to their effective combat status. It can also repair destroyed bridges.
-
It is the turn of the Israeli player.
a) Reinforcement phase. The Israeli player places the reinforcements of the turn.
b) Reorganization phase. The Israeli player can split/reform and entrench units. He can also promote units.
c) Movement phase. The Israeli player moves all, some or no units. It can perform invasions and aerial reconnaissance.
d) Air operations phase. The Israeli player performs airstrike/airlift missions.
If it is a shift between January 1947 and April 1948 (inclusive) or there is a truce in effect, the shift ends. The turn marker is advanced by one space. The next turn begins.
If it is a turn from May 1948 at the end of the game or there is no truce in effect, a second boost is played, as follows.
d) Second impulse.
-
Arab League player's turn.
a) Reorganization phase. b) Movement phase. c) Air operations phase. d) Combat phase. e) Terrorism phase. f) Recovery phase.
-
It is the turn of the Israeli player.
a) Reorganization phase. b) Movement phase. c) Air operations phase. d) Combat phase. e) Terrorism phase. f) Recovery phase.
The turn of play ends.
-
Duration of the game. Players continue the previous sequence until the game turns required by the scenario are over, at which point the victory is evaluated.
-
Note that there is no reinforcement phase in the second impulse.
-
Phase marker. Players themselves should place the phase marker in the appropriate space on the game sequence marker to indicate which stage they are in.
Designer's Note: The inclusion of a second boost in turns where there is no truce in effect represents the great activity that occurred during the moments of open combat. From December 1947 to April 1948 the British still occupied much of Palestine and the scale of the fighting was small.
3.0. Casual events
The rule of chance events takes into account different political, diplomatic and military factors that affected the campaign. During the event phase, one of the players rolls two dice and consults the Casual Events Table (alternating the roll is recommended).
-
Procedure. Two dice are rolled. One is treated as tens and the other as units to get a number between 11 and 66. The appropriate number is searched in the table and the result is applied. Example: The player rolls a 1 and a 2, which causes the "12" event to go into effect, "More Israeli Supplies".
-
Unless otherwise specified, an event may occur more than once per game.
It is highly recommended that players read the Casual Events Table before starting to play, as this will have a greater impact on the game. Note that certain events occur only if one player has a certain number of victory points more than the other.
4.0. Reinforcements
Reinforcements are additional units received throughout the game. Reinforcements are (usually) placed in the friendly reinforcement phase.
-
A player can receive reinforcements in different ways:
a) As indicated in the Reinforcement Table. These are placed in the reinforcement phase of the indicated shift. The Reinforcement Chart indicates which reinforcements are received each turn.
b) Generated by the Event Table. These are placed in the friendly reinforcement phase of the turn in which the event occurs.
-
If a hex in which a player is supposed to receive reinforcements is occupied by the enemy, these reinforcements are permanently lost (although they do not count as victory points).
a) Certain reinforcements can only be placed in hexagons that contain friendly populations. If the population of a hexagon has been terrorized, then reinforcements are lost.
b) Reinforcements indicated to be placed on a "map edge" are placed on the hexagon line adjacent to the indicated map edge.
-
Reinforcements can move and fight normally on the turn they come into play. Their placement on the map does not count against their movement that turn. Note that new supply units are also indicated as reinforcements.
-
Replacements. A unit that has been eliminated in combat (or a spent supply unit) can return to the game as reinforcements later, if reinforcements indicate this particular type of unit.
The Israeli player can never reposition deleted Irgun/Stern Group units. Once eliminated for any reason, they are permanently out of the game.
- The countries of the Arab League receive certain units at the moment when an Israeli unit crosses the borders of that country. These reinforcements are placed on the hexes of normal reinforcements (representing units intended for self-defense).
The Israeli player can attack across the border without forcing these units in.
- The number of units in the chip template constitutes an absolute limit. If a certain type of unit is needed as reinforcement but is not available, then it is not received.
Designer's Note: Certain units on the reinforcement list represent equipment replacements and lost men; therefore, they are only available if the units have been removed. A few extra units are provided in the token template so that players can experiment with alternative scenarios.
5.0. Reorganization
Rule. A player can replace certain brigade-sized units with battalions. He can also reform battalions into brigades. Dividing brigades and reforming battalions is called reorganization.
1. Procedure
a) Division. To divide brigades, the unit is removed from the map and replaced by the number and type of battalions listed below. Splitting can occur only during the friendly reorganization phase and during combat (to take losses).
b) Reform. A player can combine battalions into brigades during the reorganization phase. Battalions must be in the same hexagon. Battalion units are withdrawn and replaced with an equivalent brigade.
2. Equivalences
a) Israel.
- Infantry Brigade = 3 x Infantry Battalions.
- Mechanized Brigade = 1 x Reconnaissance Battalion + 1 x Infantry Battalion + 1 x Commando Battalion.
- Tank Brigade = 1 x Tank Battalion + 2 x Recon Battalions.
b) League price.
- Infantry Brigade = 3 x Infantry Battalions.
- Commando/guerrilla brigade = 3 x guerrilla battalions.
- Egyptian/Syrian/Iraqi mechanized brigade = 1 x tank battalion + 2 x mechanized battalions.
- Transjordanian mechanized brigade = 2 x reconnaissance battalions.
- Broken brigades can be split. The resulting battalions are considered broken. Broken battalions can be reformed. The resulting brigade is considered broken. A player can combine battalions in effective and broken combat, but the resulting brigade is always considered broken.
4. Units of the Arab League
Units of one nationality (e.g., Egypt) can be reorganized using only units of the same nationality (e.g., an Egyptian brigade could not be divided into Syrian units).
5. Irgun/Stern Group
The Israeli player cannot split or reform units with his Irgun and Stern Group units.
- A player can split their units during combat to get losses. It is the only time during the turn, outside of the friendly reorganization phase, when a player can reorganize their units (e.g., a player has a brigade in a hexagon. He suffers a D1 result, which requires him to break a unit. Divide the brigade into its component battalions and break one of them [instead of the entire brigade]).
A player can split units to satisfy losses received as a result of air strikes.
6.0. Promotion
The Israeli player can (only!) turn certain types of units into stronger types. This takes place during the Israeli reorganization phase.
1. Procedure
The unit to be promoted is designated. There must also be a supply unit in the same hexagon. The supply unit is spent. The original unit is removed and the one of the ascended type is placed.
2. Which units can be promoted
- Militia group to infantry battalion.
- Infantry battalion to reconnaissance battalion.
- Commando battalion to reconnaissance battalion.
-
A unit can be promoted only once per turn (i.e., a militia group promoted to infantry battalion cannot be promoted to reconnaissance battalion in the same turn; it can be promoted in the subsequent turn).
-
Each unit to be promoted requires the expenditure of one unit of supplies.
-
Units can be promoted and reorganized in the same reorganization segment.
-
Only Haganah/Palmach units can ascend. The Irgun and Stern Group units cannot.
7.0. Movement
During a player's movement phase, they can move all, some, or none of their units. Each unit can move as many hexes as the player wants, as long as it does not exceed its movement factor. Unused movement points cannot be stacked or transferred from one unit to another.
1. Procedure
Each unit moves individually from one hex to another. Once a unit has been moved and the player has dropped it, it cannot move again. During the single-player movement phase, only friendly units can move. No enemy movement can occur during a friendly boost.
2. Costs of movement
Each hex you enter costs a set number of movement points (MP). Some hexagon sides (i.e. rivers, wadis, cliffs) cost additional MP to cross. The extra costs for the hexagon sides are paid when the unit crosses the hexagon side, i.e. in addition to the cost in movement points for entering the hexagon (i.e. it would cost three movement points to cross a river and enter a clear ground hexagon: +2 for the river hexagon side and one for the light hexagon). All costs for hexagons and hexagon sides are listed in the Terrain Effects Table.
A unit can always move a minimum of one hex per turn, as long as it does not move to forbidden terrain, a hex containing a friendly combat unit, or directly from one enemy control zone to another.
3. Forced marches
The movement factor of a unit can be doubled by a forced march (i.e., a unit with a movement factor of 5 would increase it to 10 in that movement phase). A supply unit trains all units of a force to perform forced marches. Forced March Supply Units are spent the moment the unit(s) begin their movement. The supply unit may have moved the hexagon and then provided supplies (i.e., the expense occurs at the beginning of the movement of the unit(s), not at the beginning of the movement phase).
a) Forced marching applies to all units of a force, including non-combat units with a movement factor of one or more.
b) If more than one force in a hex wishes to use a separate forced march, the player must spend one unit of supplies for each individual force.
4. Prohibited movement
A unit may never enter a hex containing enemy combat units of any type or terrain that it is not allowed to enter according to the Terrain Effects Table. Friendly combat units can enter hexes containing enemy combat units (see non-combat unit rule).
Enemy control zones. There is no extra cost in movement points for entering or leaving enemy control zones, as long as the unit does not move directly from an enemy control zone to an adjacent enemy control zone. Units can move through enemy control zones (i.e. directly from one to another) by paying an extra movement point (see Control Zones rule).
5. Special terrain
a) Roads. When moving along a road (from one road hex to another via a connected road), units ignore all the costs of the other terrain in the hexagon and only pay half MP per hex they enter. In effect, a unit that moves along sides of a road hexagon has its movement factor bent. Units must still pay an extra movement point for moving through an enemy control zone on the road.
b) Bridges. Bridges allow units to cross river hexagon sides with no additional movement cost when using road movement.
6. Special movement
a) Commando/guerrilla units only pay one movement point to enter hexes of rugged and mountain terrain. They pay the other moving costs normally.
b) Certain ground units can use air or amphibious landing movement. See the appropriate rules sections.
7. Remaining Movement Point Marker
It is used to record the number of movement points that a force has left in a movement phase. It is convenient to remember the movement that remains when invasions and infiltrations are carried out.
8.0. Stacking ground units
Stacking is having more than one friendly unit in the same hexagon.
- The stacking limit is two brigades per hexagon. One battalion is equivalent to half a brigade for stacking purposes. A player could therefore have any combination of the following in a single hexagon:
- Of the brigades (up to two).
- One brigade and two battalions.
- Four battalions.
a) The stacking limit applies only to the end of the movement and combat phases (friend and foe). As such, a player can move, retreat, and advance after combat through a friendly hex by exceeding the stacking limits if the situation is restored at the end of the stage.
b) A player can violate the stacking limits (intentionally or unintentionally). If at the end of the movement or combat phase (enemy or friendly) the number of friendly units exceeds the stacking limits of a hexagon, all friendly units in that hex are broken (those already broken remain so). There is no overstacking penalty at the end of phases other than movement or combat (i.e., a player can overstack reinforcements while moving them during the movement phase).
c) Group-sized units are considered battalion-sized units for all purposes of the game.
d) Non-combat units and game markers do not count towards stacking.
Historical note: A battalion is considered equal to one-half, not one-third, of a brigade because of the variety of command and control factors.
2. Effects of combat
A maximum of two brigades can attack or defend in a hex per combat phase. If there are more than two brigades in a hex, the remaining units are considered to have a combat force of zero for this battle. The player himself can determine which units reduce his strength. Such units cannot attack. If the player defends themselves, these units do not contribute their combat strength to the defense of the hexagon. They are affected by the results inflicted on the hexagon.
-
Friendly and enemy ground units can never be stacked in the same hex (Exception: see non-combat units).
-
Units of different nationalities can be stacked together.
9.0. Control zones
Ground units have control zones. Control zones (ZOCs) represent the area that the unit can influence through its firepower, patrols, and surveillance capabilities.
-
All ground units with unparenthesized combat forces of one or more have ZOCs. Units with combat forces in parentheses or zero combat forces do not have ZOCs. Broken units keep their ZOCs (unless their combat strength is in parentheses).
-
Extension of control areas. The ZOCs extend to the six hexagons adjacent to a unit. The presence of a unit (friend or foe) never blocks or overrides a ZOC. ZOCs extend into and through terrain that units would not otherwise be able to traverse or enter (except in or through hexagons or sea hexagon sides).
-
The ZOCs affect only enemy ground units. They never affect enemy air units. Air units do not have ZOCs.
4. Effects on movement
a) Units can enter or leave enemy ZOCs with extra costs at movement points.
b) Infiltration. Moving directly from one enemy ZOC to another is called infiltration. It costs a unit an extra movement point to move from one enemy ZOC to another directly. This extra point is in addition to the normal cost of entering the hexagon.
5. Effects on combat
a) A unit is not required to enter combat simply because it is in an enemy ZOC.
b) Advance after the fight. Units can advance after combat through an enemy ZOC without penalty.
c) Withdrawal. Units can retreat to an enemy ZOC (but remember, not to enemy ground units). A unit in effective combat that retreats to an enemy ZOC is broken. A broken unit that retreats to an enemy ZOC is eliminated.
-
Effects on supply. The presence of an enemy ZOC does not affect the hexagon's logistical operations. Note that unlike many wargames, First Arab-Israeli War does not draw supply lines (see supply rule) and therefore does not block supply lines per se.
-
The ZOCs do not extend across border hexagons at any time.
10.0. Air operations
Each player has a number of air units that can be employed in various missions.
1. Placement.
a) A player keeps his air units in his area of possession of Available Air Units. When he uses them for a mission, he places them on the map. When the mission is completed, they are placed in their Completed Air Unit possession area. At the start of the next phase of friendly air operations, the player will place all air units that were in the Completed area to the Available area.
b) An individual air unit can be deployed once per full boost (i.e., if a turn has two boosts, one air unit could be used on each). Air units can be used again from turn to turn (as long as it has not been eliminated).
c) Air units are never affected by the outcome of ground combat. They do not stop the movement of enemy ground units, nor do they have a zone of control. Note, however, that certain results of air strikes implement the effects of anti-aircraft fire.
2. Air unit missions.
a) Air units can be used for the following missions:
- Air Strikes: These are attacks on enemy ground units or cities made by air units.
- Air Transport: Used to move units via air during the friendly movement phase.
- Aerial Reconnaissance: Used to examine enemy hexes.
- Interception: Used by the non-phased player to attempt to take down phased air units that are in play.
b) Each air unit can be assigned to a single air mission in each impulse (be it air attack, air transport, reconnaissance or interception).
3. Air attack. The attacks take place during the friendly air operations phase. The air unit is placed in a hexagon containing ground units or enemy cities/towns. A player cannot perform attacks against hexes containing friendly units. A player can perform attacks on enemy units in hexagons that contain friendly population symbols and the friendly population is not affected by the air unit.
a) The player uses the Air Attack Table to solve attack missions. The player rolls a die for each air unit used.
b) A player can use up to two air units against a single hex per attack. The player must place all air units before resolving the air attack combat.
c) Air units used in air raid missions are removed from the map and placed in the Air Units Completed box at the end of the air raid.
d) Note that players cannot use strike missions to add to the combat strength of attacking ground units during the combat phase.
4. Aerial reconnaissance. Aerial reconnaissance is enhanced at any time during the friendly movement phase. Simply place a friendly air unit on any hex that contains enemy units. The player can examine them immediately. After finishing the aerial reconnaissance, they are placed in the Completed Air Units box.
5. Air transport. A player can transport certain ground units using air units. This is done in the friendly air operations phase. The units that are going to be transported are simply indicated and moved.
a) A player can airlift the following types of units:
- Supply points.
- Infantry battalion or commando/guerrilla size units.
- Leaders.
b) Each unit transported requires one air unit. The transported unit must start in a hex that contains a friendly city, clearing, or desert hex. The starting hex must not be in an enemy control zone. The airborne unit may land in any hexagon that 1) contains a friendly unit, 2) is not in an enemy control zone, and 3) contains cities or clear or desert terrain.
Exception: Airdrop of supplies. A player can attempt to land a supply unit on a hex in an enemy control zone (the hex must contain a friendly unit). A die is rolled. With 1-3 the supply unit disembarks normally. With a roll of 4-6 it is eliminated.
c) A unit moved by air transport may not perform any other movement in the immediately preceding movement phase. He can attack and perform other game functions (except movement) this turn.
d) The Arab League and the Israelis can each transport a maximum of one unit per shift in this way.
e) A player may carry by air only units of the same nationality as the transporting air unit.
Exception: Supply units can be transported by any friendly air unit.
6. Interception. Interception occurs during the enemy turn. After the Phased (Attacker) player has placed an Air Unit for any type of mission, the non-Phased (Defender) player can place a friendly Air Unit on the hex containing the Phased Air Unit(s). This produces interception (air-to-air) combat.
a) Procedure. Each player rolls a die for each friendly air unit (simultaneously) on the Interception Board. The results are applied after all air units have performed the air-to-air combat but before the mission is resolved.
b) Phased air units that survive the intercept can complete their mission.
c) Non-phased air units cannot perform missions other than interception on the same turn in which they perform the interception (i.e., the enemy player cannot perform "defensive" attack missions during the self-player turn).
d) Airlift missions can be intercepted in both the initial and end hex.
7. Allies. A player can never combine air units from different countries that they control in the same mission.
Designer's note: The Air Rules reflect the relatively primitive air force command and control system available to each side.
11.0. Ground combat
Ground combat occurs between ground units from adjacent opposing sides at the discretion of the player in phase. The player in phase is the attacker and the player not in phase is the defender, regardless of the overall strategic situation.
1. Attack and defend.
a) Ground combat occurs only if the attacking side chooses to fight. A player can attack with none, any, or all of their units. A player can combine more than one unit in a single attack, although all attackers must be adjacent to the defending hex. If a unit is adjacent to more than one hexagon that contains enemy units, it can only attack one of those hexagons. Each unit can attack only once per friendly combat phase. If the attacker has more than one unit in a hexagon, they can attack with any, none, or all of them.
b) All defending units in a single hex must defend together, and their fighting forces are added together to form a combined total. The defender cannot refuse to allow any unit to defend itself.
- A hex can be attacked more than once in a single combat phase, while no unit attacks more than once.
2. Procedure. For each specific ground combat:
a) It is determined which Combat Results Table is to be used (the Raid Table or the Assault Table).
b) The combat ratios are determined:
-
The combat forces of all attacking units are totaled.
-
The combat forces of all the defending units are totaled.
-
The attacker's total combat strength is divided by the defender's total combat strength.
a) If the attacker's strength is higher than the defender's, the fractions are ignored and this ratio is used to determine which column is needed.
- For example, if the attacker has 14 points of combat strength and the defender 5, the combat ratio would be 14 divided by 5, which is equivalent to 2.8/1; 0.8 is disregarded and the final ratio is 2/1.
b) If the defender's fighting strength is greater than the attacker's, the fractions are rounded up.
- For example, if the defender has 10 combat points and the attacker has 6, the combat ratio would be 1/1.67, which would be rounded to 1/2.
-
The relationship column is found in the appropriate Combat Results Table (CRT).
-
A die is rolled and the result is crossed with the relationship column to obtain the result of the fight.
c) Combat modifiers. Certain conditions will modify the column of relationships to be used. They move to the left in favor of the defender; moves to the right in favor of the attacker. All modifiers are cumulative. Column moves are cumulative up to five moves per player per combat phase (e.g., an attacker has four times as many strength points as the defender and the attacker has one move to the right [for a friendly leader] and the defender two to the left [for the terrain]; the final ratio would be 3/1).
Modifiers include:
-
Land. The terrain on which the defender is on will sometimes modify the ratio column used. Look at the Terrain Effects Chart.
-
Entrenchment. The presence of an entrenchment marker in the defender's hex causes a column to move in his favor.
-
Leaders. A friendly leader stacked with attacking or defending units gives the movement of a column in favor of that force. A maximum of one leader can be used to intensify a particular fight.
d) Combat ratios greater than 7/1 (or less than 3/1) use the 7/1 spine (or 3/1) as a basis for determining column movements.
For example, the attacker has 10 times more strength than the defender. The defender is on a field where he would have a two-column movement to the left. The final ratio would be 5/1 (starting with 7/1 as the base and moving two columns to the left).
3. Table of Combat Results. There are two combat results tables (abbreviated CRT) in First Arab-Israeli War: the Raid Table and the Assault Table. Normally, the attacker will choose which CRT they will use to resolve the fight. See the Guerrilla rule for an exception to this.
4. A player can combine units of different nationalities that he controls (e.g. Egyptians and Transjordanians) in the same attack.
5. Combat results. These are the consequences of combat. They are explained together with the same tables.
6. Advance and retreat after combat. This is a special form of movement that occurs as a result of certain combat outcomes.
a) Post-Combat Breakthrough. A post-combat breakthrough is made immediately after receiving certain combat results. The player designated in the outcome of combat may move any, all, or none of their ground units to the hex previously occupied by enemy units. Additionally, any leader who participated in combat can also advance. Units can advance after combat through enemy control zones without penalty. They may not enter otherwise prohibited land. Progress after combat has no cost in movement points.
-
Many units can advance after combat by a maximum of one hex.
-
Certain units can advance after combat by two hexes. The first hex must be the one that previously contained the enemy unit(s); the second can be any adjacent hex not occupied by enemy units.
The following units can advance two hexes after combat:
- Israeli armored/mechanized/reconnaissance units from May 1948.
- All Transjordanian mechanized/reconnaissance units.
- All British armoured/mechanised/reconnaissance units.
- The leading units of the same nationality stacked with the previous ones.
b) Withdrawal. Units that must be removed do so in accordance with CRT instructions. Note that there are certain restrictions on which hexagon a unit can be removed to (as indicated in the CRT).
7. A unit that has retreated to a hex where it is then under enemy attack must defend again. It defends normally (note that retreating units are broken, which will be a disadvantage in such circumstances).
8. Attack on prohibited territory. Units can attack terrain types that they would not normally be able to enter (exception: units cannot attack a/through hexes/hex-sides entirely from sea or lake).
9. Units that are prohibited from entering certain types of terrain may not advance/retreat to them, unless they advance/retreat along roads.
12.0. Invasion
Invasion is a special type of combat that occurs during movement. All types of combat units can perform invasions.
1. Procedure. A force can fight during movement by declaring an Invasion. This costs the force that moves two extra movement points. The game is temporarily suspended while the Invasion combat is resolved.
2. All units that perform an invasion must start in the same hexagon and stay together for the entire movement. They cannot catch other units along the way. An invading force can drop units after the invasion ends, although these units cannot move any more. Units that conduct an invasion can attack normally in their combat phase.
Each invasion can be carried out by a maximum of two brigades (or equivalent). Additionally, leaders and supply units can accompany a force that is conducting an invasion. An invasion cannot be performed from a hex where the stacking limits are exceeded (for example, if a hex contains two friendly battalions, a player could move a force of up to a brigade there and invade an adjacent hex).
3. The invasion combat is normally resolved except that the combat moves one column to the left, cumulative to other column movements.
a) The attacking force can choose the Invasion Combat Results Table they want, as in the normal CRT selection rule.
b) Players calculate the normal effects of terrain, entrenchments, and Invasion leaders. For the attacker, a leader can escalate an invasion only if he has moved with the invading force.
c) Both the attacker and the defender can spend supply points to double the combat forces of the units involved in the invasion. The attacker's supply must be part of the invading force in order to be spent.
d) Air units cannot be used in invasions.
e) A single force can perform as many invasions as movement points it has to spend. A single enemy unit can be attacked by invasion any number of times per turn.
Note: Unlike other wargames, invading units do not move the enemy unit's hex when they perform an invasion. Invasions are performed from an adjacent hex, just like normal combat.
4. Post-invasion.
a) No player can advance after combat, regardless of the outcome of the combat. The invading force can continue to move, spending movement points normally.
b) If the attacking force receives a result whereby it is forced to retreat or causes the breakdown or elimination of any attacking unit, then that force must stop movement that turn.
Player Note: It is often useful to combine the invasion with the Forced Marches move. This gives a better opportunity to use and exploit the invasion.
13.0. Combat effectiveness, breakdown and recovery
Units are in one of two states:
- Effective Combat: This is the normal state of a unit, indicated by the front side of the unit.
- Broken: This is indicated by flipping the unit to the reverse side.
1. Units in effective combat function normally.
2. Broken units have reduced combat strength and movement, as indicated in the table.
- Broken units maintain their zones of control, unless their combat strength on the reverse side is in parentheses.
3. Sources of breakage. Units in effective combat can be broken by any of the following:
- Certain results of combat.
- Retreat to an enemy control zone.
- Overstacking.
4. Secondary breaks. A broken unit that is broken again as a result of combat or by retreating to an enemy control zone is eliminated. Note that other game features that might require a unit to break again do not cause it to be removed; they just stay broken (e.g., overstacking).
5. Recovery from breakage. Units can return from their broken side to their effective combat side through recovery. Recovery occurs during the friendly recovery phase.
Recovery procedure. A unit can recover from breakage in one of two ways:
- The unit is in the same hex as a supply unit (which is then spent). A single supply unit can support the recovery of all broken friendly units in a hex.
- A player must spend two supply units to retrieve units on sandy terrain.
- Broken brigade-size units can be recovered by absorbing an effective battalion-sized unit in combat of the type listed below. The battalion must be in the same hexagon as the broken brigade. The battalion is withdrawn and the brigade turns to its effective combat side. The battalion and the brigade must be of the same nationality.
- Armored/Mechanized Brigade: An armored, mechanized, or reconnaissance battalion.
- Infantry Brigade: An infantry battalion or a command/guerrilla battalion.
- Commando/guerrilla brigade: One commando/guerrilla battalion.
14.0. Logistics
Logistics is the process of providing supplies, maintenance, replacements, and administrative and medical support to the armed forces. Players spend supply points to perform certain functions of the game. This increases their ability to move, fight, and recover.
- Supply units are not combat units. Each supply unit has a number printed in its upper right corner. This is the number of supply points the unit is worth. A player can change the number of supply units of a hex at any point in the game, using the supply units as a "change" (for example, a player could replace a three-point supply unit with three one-point units or one one-point unit and another two-point unit). This is not considered a reorganization – supply units are simply a convenient way to circumvent congestion on the map.
1. Use of supply units. A player spends supply units to perform certain functions of the game. Supply units are spent on the hex in which they are used. Unlike many other wargames, supply lines are not drawn to supply units.
Historical note: The supply rules reflect relatively primitive logistical systems employed by all sides.
2. When a supply unit is spent, it is removed from the map. It can be returned to the game as a normal reinforcement (or if it's a supply unit with a value greater than one, it's replaced with a reduced value).
3. Logistical functions.
- Logistical functions.
a) Forced marches. Units double their movement factor. Forced marching occurs in the friendly movement phase. A supply point enables all units of a single force to perform a forced march. Supply points for forced marches are spent the moment the unit(s) start moving. The supply unit may have moved the hexagon and then provided the supply (i.e., the expenditure occurs at the beginning of the movement of the moving unit(s), not at the beginning of the movement phase).
b) Increased attack. The combat strength of all attacking units in the hex of the supply point is doubled. This only applies to one attack (for example, if a player performs two different attacks from a hexagon, each supply point spent could only be applied to one of each). The attack increase occurs in the friendly movement phase (for invasion) and the combat phase (for normal combat).
c) Increased defense. The combat strength of all defending units in the supply point hex is doubled. This only applies to one defense (for example, if a hex is attacked more than once per turn – by invasion and by regular combat, for example – then each spent supply point could only be applied to one of each attack). Defense increases occur in the enemy movement phase (for invasion) and in the combat phase (for normal combat).
d) Recovery. A unit in broken status flips to its full strength side. This occurs in the friendly recovery phase. A supply point causes all broken units to recover from a hexagon.
e) Remove a destroyed bridge marker. A player can remove a destroyed bridge marker by spending a supply point on an adjacent hex during the friendly recovery phase (see 16.2).
f) Trenches. A trench marker is placed on a hex by spending a supply point on a hex with at least one friendly combat unit. This occurs in the friendly reorganization phase.
g) Promotion of a unit (only Israelis). This occurs during the Israeli reorganization phase. The Israeli player can convert certain types of units into others (see promotion rule).
-
A player must not spend supply points to move, attack, or defend. Units always move, attack, or defend using their imprinted forces. Spending supply points simply gives additional movement and combat capabilities.
-
Capture of supply units. A player can capture enemy supply units by entering with a friendly combat unit into a hexagon containing only supply units (plus other non-combat units; this is an exception to the normal rule that friendly units cannot enter enemy-occupied hexes). The moment a friendly combat unit enters a hex containing only enemy supply units (or supply units and other non-combat units), a die is rolled. On a roll of 1-3, the enemy supply point is eliminated and withdraws from the game. With a roll of 4-6 the supply point is captured. It is removed and replaced with a friendly supply point.
If there is more than one supply point in a hexagon, the player checks each point individually. This may require the supply unit to break at individual points.
-
A player can destroy their own supply points during any friendly recovery phase by simply removing them from the map (a player may want to do this to prevent the enemy from attempting to capture a supply unit).
-
Allies. A player can use supply units for all friendly units on their side. Supply units do not have "nationality".
-
Air units. Air units do not use supply units.
15.0. Entrenchments
A player can entrench their units to increase their defensive capabilities.
1. Procedure. Players can create entrenchment markers in a hex by having a friendly combat unit and a friendly supply unit in the friendly reorganization phase in the same hexagon. The supply unit is removed and an entrenchment marker is placed on the hexagon. A single entrenchment marker increases the defensive strength of all friendly units in the hex.
2. Units can move and fight on the turn they are entrenched. Once in an entrenchment marker hex, all friendly units in the hex gain the benefit of that entrenchment. An entrenchment can be placed on any type of playable hex. There can never be more than one entrenchment marker in a hexagon.
3. Effects of combat. Units defending in an entrenchment receive the movement of a column in their favor (to the left) when defending. This is in addition to other benefits of the hexagon terrain. Units can attack normally from an entrenchment.
4. Destruction of entrenchments. An entrenchment marker is removed from the map under the following circumstances:
- If all friendly units move out of the hexagon.
- If all friendly units are eliminated/removed outside the hexagon.
Note that this means that the friendly player can never capture and use enemy entrenchments.
16.0. Destruction of bridges
1. A player may attempt to destroy a bridge if they have at least one combat unit on an adjacent hexagon side of the bridge hexagon (on one of the two adjacent hexes on the bridge hex side). This is done at the end of the friendly combat phase. The player rolls a die on the Bridge Destruction Table and applies the result. A player can only attempt to destroy a bridge once per turn (all modifiers and results are in the Bridge Destruction Table on the map).
2. Bridge repair. A player can repair a bridge if they have a supply unit in a hexagon adjacent to the destroyed bridge marker during a friendly recovery phase. The supply unit and destroyed bridge marker are removed. A bridge cannot be repaired if there is an enemy unit adjacent to the two adjacent hexes on the hex side of the bridge.
17.0. Population
The hexagons of a city or town in Palestine have a symbol that shows the predominant population, whether Jewish (Star of David) or Arab (Crescent). Note also that the names of Jewish cities/towns are printed in blue, while Arabic ones are printed in green.
1. The type of population influences guerrilla operations (see guerrilla rules), intelligence (see Fog of War) and victory (see Table of Victory Points).
2. The population of a hexagon can be "wiped out" through terrorism. Once terrorized, the hexagon is considered to no longer have a friendly population on either side (see terrorism rule).
3. Eilat has no population symbol (as its population was too small at the time to make a difference for the purposes of the game).
18.0. Terrorism
Both sides frequently attacked the enemy civilian population. The main objective was to drive them out of their cities/towns in order to avoid the presence of hostile enemy populations on the front.
- Players can treat the terrorism rule as optional.
1. Procedure. Terrorism occurs during the friendly terrorism phase. The player must have a combat unit in the hexagon that is targeted by terrorism. A die is rolled on the Terrorism Table and the result is applied.
2. A player can make only one terrorist attempt against a hex per turn. Only one combat unit can be involved. Air units cannot carry out terrorist actions.
3. Which hexagons can be terrorized. A player can terrorize only one hexagon containing an enemy population symbol. The Arab League can terrorize only hexagons containing the Star of David; the Israelis can terrorize only hexagons containing the Crescent. Hexagons that have been successfully terrorized cannot be terrorized again.
4. Effects of terrorism.
a) Terrorism grants players victory points; see the Victory Points Table.
b) A non-terrorized population hex gives guerrilla units certain advantages when they are in or adjacent to it; see the guerrilla rule.
c) A non-terrified population hex gives the friendly player certain intelligence advantages; see Fog of War rule.
5. Once a hex has been terrorized, it remains terrified for the rest of the game. Note that the enemy player gains victory points at the time of terrorism; these represent adverse opinion both locally and globally. However, the friendly player earns more victory points at the end of the game for each terrified enemy hexagon, representing the security gained in the area. It is a trade between short-term and long-term profits.
19.0. Non-combat units
Certain units are called "non-combat units". There are units with a printed combat force of zero. Non-combat units have restrictions.
1. Non-combat units have no combat strength (or control zone).
a) Friendly combat units can enter hexes containing only enemy non-combat units; these eliminate non-combat units. This does not cost extra movement points and is not considered to be an invasion. Note that supply units can be captured in this way (see supply rule).
b) Enemy combat units can advance after combat/retreat to hexes containing only enemy non-combat units. This eliminates enemy non-combat units. Friendly non-combat units cannot retreat to hexes containing enemy non-combat units.
c) Obviously, non-combat units can never enter hexes that contain enemy combat units.
2. If the only units in a hex are non-combat units, the enemy player cannot attack them from an adjacent hex.
3. Non-combat units do not count towards stacking; a player can have an unlimited number of non-combat units in a hex.
4. Friendly non-combat units may not enter hexes containing enemy non-combat units, unless friendly non-combat units move with combat units.
5. Non-combat units can never attack. Non-combat units that are in the same hex as friendly combat units when attacked by enemy ground units are affected by the outcome of the combat as follows:
a) If a withdrawal result is received in your hexagon, they must be removed. Units with a movement factor of zero are eliminated if they must be removed. Supply units are eliminated if they are forced to retreat through enemy control zones. Leaders can retreat through enemy control zones without penalty.
b) If a result is received that eliminates all friendly combat units in the hexagon, the non-combat units are also eliminated.
c) Non-combat units are not otherwise affected by the combat results of their hex. Non-combat units cannot be broken.
6. Supply units can be attacked by enemy air strikes. Other types of non-combat units cannot be. See the Air Strike Table for results. Leaders, secret airfields, and weapons factories are never affected by air strikes on their hexes.
20.0. Leaders
Leaders represent individual managers (plus their staffs) who influenced operations above the norm. Leaders are special non-combat units.
1. Movement. Units that start their movement in the same hex as a friendly leader have their movement factor increased by one during this movement phase. This is checked before the leader moves. The leader can normally move in the same phase.
a) Forced march. If a leader is part of a force that makes forced marches, the extra point contributed by the leader is doubled.
b) You only get one extra movement point regardless of the number of leaders present.
2. Combat. Units that are in the same hex as a friendly leader have the combat ratio moved one column in their favor in any ground combat (offensive or defensive) in which they participate. This is in addition to other spinal movements. This is checked at the time of combat.
a) If a player launches more than one attack from a hexagon, the leader contributes the movement of the column to all of them.
b) A leader can provide a column move to invading units only if they move with them.
c) Only the movement of one column is provided, regardless of the number of leaders present.
3. Leaders do not provide movement/combat bonus to themselves or other leaders.
4. Combat results.
a) A leader can retreat through enemy control zones without penalty.
b) If a leader is stacked with advancing units after combat, then the leader can advance.
c) Leaders are never affected by airstrikes.
5. Limitations.
a) An Israeli leader can increase a combat only if at least 50% of the printed combat strength points involved are from Haganah/Palmach units.
b) An Arab League leader can increase a fight only if at least 50% of the printed combat strength points involved are of the same nationality.
6. An eliminated leader can never return to the game.
21.0. Fog of War
Players can examine enemy unit stacks only under the following conditions:
- At the time of combat (using the Raid/Assault CRT or the Air Strike).
- Aerial Reconnaissance. An air unit is placed in the hexagon. This can be done at any time during the friendly movement phase. The player can examine all enemy units in the hexagon.
- Whenever an enemy unit occupies a hexagon containing or adjacent to a friendly population (Arab for the Arab League, Jewish for Israel). The hexagon cannot be terrorized.
- As a result of certain events.
Note to players: A good use of invasion-style attacks is to make a raid to determine the enemy force in the hex and then move other units to attack.
22.0. Truces
Certain casual events will cause a truce to take effect.
1. Effects of a truce.
a) During the turns of truce only the first impulse is played. A second impulse is not realized.
b) A player may not engage in attacks (i.e., invasion, raid or assault combat, airstrikes, interception, and terrorism) for the duration of a truce.
c) Units cannot move through enemy control zones.
d) Israeli units starting their shift in Palestine cannot cross an international border into Egypt, Transjordan, Syria or Lebanon. Israeli units starting their shift in either of these countries can stay there or cross back into Palestine.
e) Arab League units starting their shift outside Palestine are not allowed to cross an international border to enter Palestine. Arab League units starting their shift in Palestine can stay there or leave Palestine.
2. Duration of a truce. At the moment a truce event occurs, a player rolls a die. This gives the number of turns that the truce will remain in effect as follows: 1-2 = one turn; 3-4 = two turns; 5-6 = three turns. This includes the turn in which the truce takes effect (i.e., the truce event occurs on the June turn; a die is rolled and a three is rolled; this means that the truce lasts for two turns, which would be until the end of the July turn).
3. Players must follow the terms of the truce on the turn in which it occurs. After this, they can intentionally violate the terms of the truce by crossing a border or launching an attack. The moment a player violates any of the terms of the truce, the following occurs:
-
The truce ends immediately. Players can move and fight normally.
-
The player who has not violated it immediately receives ten victory points.
4. Truces cannot take effect until the June 1948 shift; prior to June 1948 truce events are treated as "No Event."
5. Players should flip the Turn Marker to its reverse side (which says "Truce") to indicate that the truce is in effect. They should also place the Truce End marker in the slot of the turn in which the truce will end.
6. If a truce result occurs while a truce is effective, the subsequent truce has no effect (i.e., it is treated as "No Event"). If the number of turns in a truce is greater than the number of turns remaining, simply place the End of Truce marker in the last box.
7. There is no limit to the number of truces that can go into effect (or be broken) in the course of a match.
23.0. Israeli arms factory
The Israeli arms factory is a special non-combat unit. The Israeli player places it at the beginning of the game on any hexagon that contains a Star of David.
1. During each Israeli reinforcement phase, the Israeli player receives a supply unit at the weapons factory. This is in addition to the normal Israeli supply reinforcements.
2. If the Weapon Factory is destroyed, it is permanently removed from the game. It cannot be replaced.
24.0. Secret Israeli airfield
The secret Israeli airfield is a special non-combat unit. The Israeli player receives it as a reinforcement in the March 1948 shift. It is placed in any hexagon of Palestine that contains clear terrain/village occupied by an Israeli combat unit (the combat unit can move out of the hexagon after the airfield has been placed).
1. During each Israeli reinforcement phase, the Israeli player receives an extra unit of supplies at the secret airfield.
2. If the secret airfield is destroyed, it is placed back into the Israeli reinforcement phase two turns later. There is no additional cost for relocating the airfield. It is placed on any clear ground hexagon/village in Palestine occupied by an Israeli combat unit.
25.0. Anglo-Egyptian and Anglo-Transjordanian treaties
1. At no point in the game may Israeli units enter or attack El Arish, Aqaba or Amman by land. It can attack those places by air.
2. Additionally, at no point in the game can Israeli ground units enter or attack Damascus.
3. Optionally, the Israelis can attack these cities. In the immediately following Arab reinforcement phase, the Arab League rolls a die and receives that number of British ground or air units (of any kind). They are placed on any Arab League reinforcement hexagon. A die is rolled, regardless of the number of cities attacked. This can happen more than once per game.
26.0. End-of-term restrictions
This rule is used only if you play a scenario that starts before May 1948.
During the period between November 29, 1947 and May 14, 1948, Britain's Palestinian mandate was still in effect. This created considerable constraints on the operational capabilities of both sides.
1. Restrictions. During the shifts between December 1947 and April 1948, the following restrictions are in effect:
a) Each turn only the first impulse is played. There is no second impulse.
b) Players cannot use the Assault Table or employ air units. They can carry out any other type of combat (including terrorism).
c) Israeli units cannot cross borders to enter countries outside Palestine. Israeli control zones extend across borders. They can attack across the border. Israeli units are prohibited from advancing after combat or withdrawing out of Palestine. If an Israeli unit were forced to retreat across a border, it would be immediately eliminated.
d) Exception: Israeli commando/guerrilla units can cross the border freely and without penalty. However, they may not enter or attack hexagons containing cities, towns, or bases in Egypt, Transjordan, Syria, or Lebanon until May 1948.
e) Arab League units can freely cross all borders.
f) All Transjordanian units must be within the borders of Transjordan at the end of the April 1948 turn of play. The Israeli player receives five victory points for each Transjordanian unit that is outside Transjordan at the end of the April 1948 turn of play.
2. Starting with the May 1948 shift, the previous restrictions are ignored.
27.0. British units
This rule is used only if a scenario starting before May 1948 is played or if British units are used for alternate historical scenarios.
In late 1947 and early 1948, the British still occupied many key points in Palestine. As their Mandate was about to end, they withdrew and ceded many of these critical points to local forces.
1. British units are positioned according to the instructions on the stage.
2. British units are not controlled by any side. They cannot move or attack.
3. British units have no control zone.
4. Players can move through hexagons containing British units. This costs an extra movement point per hex it enters. The moving unit(s) must end their movement in a hexagon that does not contain British units. If they finish their move in a hexagon containing a British unit, then the moving unit is eliminated (and counts as points for the purposes of victory). Units cannot retreat or advance after combat to hexes containing British units. Units that have no choice but to retreat to a hex containing a British unit are immediately eliminated.
5. Players can never attack hexes containing British units.
6. Withdrawal. British units are automatically withdrawn during designated game turns. This is indicated in the Reinforcement Table. During the British retreat phase, the designated units are simply removed from the map (note that since they have withdrawn at the beginning of the game turn, the Arab player will generally have the advantage of moving to hexes previously occupied by the British since the Arab League moves first).
7. Additional British units are included in the token template to allow players to develop optional scenarios.
8. Special British capabilities. These rules are provided for players who develop alternative scenarios in which there is a British intervention in the conflict.
a) Air units. The British player can use a maximum of four air units per hex in each ground attack mission and two in each interception mission. They can employ up to two air units per impulse for air transport operations.
b) Airborne units. British airborne units that have moved via airlift can be landed in any hex on the map that does not contain an enemy unit or mountainous terrain. The British do not have to land in a hexagon containing a friendly unit. They can land in enemy control zones.
c) Amphibious units. The British player may perform amphibious operations with his commando units and marines, a maximum of one per turn, each turn of the game (see rule 30.0).
d) Supply.
-
British units use the supply markers of the side they are on.
-
If the British are fully involved in the game, the side controlling the game receives one extra supply point for every three bases/fortresses occupied by the British on the map (fractions rounded up). These extra supply markers are placed in any British-occupied base, no more than one per base per turn.
28.0. Conditions of victory
The game is won by gaining control of strategic objectives and inflicting losses on the enemy. At the end of the game, the players determine who the winner is. Victory points are recorded on the Victory Point Marker.
The Victory Point Marker is located with the scenarios.
1. Earning Victory Points. The Victory Point Marker designates the events for which players receive victory points. Certain victory points are received immediately after the events occur. Others are received only at the end of the game.
2. Victory levels. At the end of a game, each player checks the number of points they get. The player with the most points wins. The lowest point total is subtracted from the highest total to determine the win level. This will determine the size of the win.
- 0 – 9 = Draw
- 10 – 39 = Marginal victory
- 40 – 69 = Strategic victory
- 70 or more = Decisive victory (highest)
3. Occupation. A player occupies a hex if they have a ground unit (combat or non-combat) physically occupying it. Simply because it has passed through a hexagon does not occupy it. The presence of enemy control zones has no effect on occupation.
4. Armistice. During any turn in which the "United Nations Truce" event is effective, players can agree to an armistice and end the game. Both players immediately total their victory points and determine the winner. Both players must agree to the armistice or continue the game. (Note to players: this is a losing player's way of saving something by lowering the level of their enemy's victory.)
OPTIONAL RULES
Players can use the following rules to increase realism and make it difficult and change the balance of the game.
29.0. Commando and guerrilla units
Both sides can expand the use of guerrillas and other irregular forces.
1. Movement. Guerrilla or commando units only pay one movement point to enter hexes of wild or mountainous terrain.
2. Combat.
a) If all the attacking units are commando/guerrilla units, then the defender does not receive the benefits of terrain (column movement) when in rough or mountainous terrain (the defender would receive the benefits of the other terrain in the hexagon or along the sides of the hexagon he occupies).
b) The defender may choose the CRT to be used if the following conditions are met:
- If all defending units in a hex are guerrilla units And
- If combat takes place on or adjacent to a hexagon containing friendly settlement (Arabic for the Arab League, Jewish for Israel; the hex cannot have a terrified marker on it) And
- Less than 50% of the attacking force consists of guerrilla or military police units (if at least 50% of the attacking force consists of guerrilla/military police units, then the attacker chooses the CRT to use).
3. Commando/guerrilla units may retreat through enemy control zones without being broken if the unit begins its retreat in or adjacent to a hexagon containing a friendly population (Arab for the Arab League, Jewish for Israel; the hexagon cannot have a terrified marker on it). The hexagons to which they are removed do not have to meet this specification.
Commando/guerrilla units are otherwise treated as infantry.
30.0. Amphibious operations
Players can perform a limited movement of units across the sea or a lake. This is known as amphibious movement.
1. Procedure. Amphibious operations occur during the movement phase. They can be done as follows:
a) Israelis. The Israeli player can perform two amphibious operations in the game. They can be carried out in any shift starting in May 1948. The unit transported in this way must be an infantry or commando/guerrilla unit or a supply unit.
-
The supply unit/point must start its movement in a coastal hexagon of the Mediterranean. Then it moves to any other coastal hexagon of the Mediterranean.
-
The unit/supply point must begin its movement in a coastal hexagon of Lake Tiberias or the Dead Sea. It then moves to any other coastal hexagon of the same lake.
b) Egyptians. The Arab player can perform two amphibious operations per turn from May to October 1948 (both inclusive). The unit so transported must be an Egyptian infantry or commando/guerrilla unit or any Arab supply point.
-
The supply unit/point must begin its movement in a Mediterranean coastal hexagon in or south of the hexagon line containing Gaza, including (hexagon line 4000) or in the Gulf of Aqaba. It then moves to any other Mediterranean coastal hexagon in or south of the hexagon line containing Gaza, including (4000 hexagon line) or in the Gulf of Aqaba (and units can be transferred to/from the Mediterranean/Gulf of Aqaba).
-
Egyptian Supply Units/Points can land only in a hexagon that already contains another Arab Supply Unit/Point.
2. A supply unit/point that performs an amphibious landing cannot move more in the turn of amphibious operations. They can fight normally. The unit cannot land on a hexagon containing an enemy unit, nor can it attack from a hex entirely from sea or lake. You can start and end the amphibious movement in hexagons that contain enemy control zones. The unit can move through enemy control zones or enemy units in coastal hexes when conducting amphibious operations.
31.0. Fanaticism
Players can increase their combat capabilities, exchanging for victory points.
1. A player can declare fanaticism in any ground combat. The attacker declares it first and then the defender.
2. Effects.
a) If a player declares fanaticism in a fight, the ratio moves one column in his favor, cumulative with other column moves. If both attacker and defender declare fanaticism, then one move cancels out the other (although both players spend victory points).
b) Each time a player declares fanaticism, they lose a number of victory points equal to the total number of battalions involved (brigades use their equivalents in battalions). The player must have enough victory points available at the time they declare fanaticism.
SCENARIOS
Scenario 1. The War of Independence
This scenario begins with the British withdrawal and goes up to the moment when the Egyptians requested an armistice. This phase of the war was initially conventional and was marked by frequent periods of interruption of fighting because of United Nations truces.
1. Duration and setup. Duration of the game: May 1948 – January 1949. The game can end early if players sign an armistice.
a) Initial victory points: Arab League = 8; Israel = 18.
b) The following hexes start the game with terrified markers: the old city of Haifa, Tiberias, Deir Yassin and Etzion.
2. British deployment. There are no British units in this scenario.
3. Arab League deployment (Arab League player places first).
(a) Arab Salvation Army (AAS):
-
In each Arab settlement hexagon of Palestine (that does not contain a terrified marker): 1 x militia group.
-
In any city/town that contains an Arab settlement symbol (that does not contain a terrified marker): 4 x commando/guerrilla battalions.
(b) Arab Liberation Army (ALA): They are placed anywhere in Lebanon, Syria, Transjordan or in Arab settlement hexagons in Palestine (that do not contain a terrified marker) or in Fort Latrun: 1 x reconnaissance battalion and 6 x commando/guerrilla battalions.
(c) Egypt: Anywhere in Palestine within the four hexagons near the Egyptian border and that does not contain a symbol of Jewish settlement: 2 x commando battalions.
(d) Transjordan: Anywhere in Transjordan: 1 x Reconnaissance Battalion.
(e) Arab League supplies:
-
Anywhere in Egypt: 6 x supply units.
-
Anywhere in Transjordan: 4 x supply units.
-
Anywhere in Lebanon or Syria: 3 x supply units.
(f) The other units of the Arab League arrive as reinforcements.
4. Israeli deployment.
a) Zahal (Haganah/Palmach) units.
-
In each Jewish settlement hexagon that does not contain a terrified marker: 1 x militia group in each.
-
In or adjacent to cities/towns that contain a symbol of Jewish settlement (and are not occupied by the Arab League): Allon Leader, 2 x mechanized brigades, 4 x infantry brigades, 1 x commando battalion, 2 x reconnaissance battalions, and 4 x supply units.
b) Irgun. In any city/town that contains a symbol of Jewish settlement: 3 x commando/guerrilla battalions.
c) Grupo Stern. In any city/town that contains a symbol of Jewish settlement: 1 x commando/guerrilla battalion.
d) In any city/town that contains a symbol of Jewish settlement: 1 x Arms Factory.
e) In any clear or village hexagon of Palestine containing at least one Israeli combat unit: 1 x secret airfield.
f) The other Israeli units arrive as reinforcements.
5. Special rules.
a) There is no phase of casual events in the first turn of play.
b) The players received their normal reinforcements in May 1948.
c) The leader Abd el Kader has died in combat and is permanently out of the game.
d) Players can split/reform units during initial deployment.
e) Arab League units may be placed on Etzion during initial deployment.
Scenario 2. The struggle for Palestine
This scenario fully covers the 1st Arab-Israeli War. It begins with the guerrilla war that occurred after the partition of Palestine announced by the United Nations in November 1947. It goes from the withdrawal of the British (May 1948) and the war of independence to the final Israeli push towards Aqaba.
1. Duration of the game. December 1947-March 1949. The game may end earlier due to the signing of an armistice between the players.
a) Initial victory points: Arab League = 0; Israel = 0.
2. British starting deployment (Arab League player places first):
a) In each hexagon containing a fort/base: a British unit.
b) There are no terrified cities/towns/settlements at the beginning of the game.
3. Arab League deployment (Arab League player places first):
(a) Arab Salvation Army (AAS):
-
In each Arab settlement hexagon of Palestine: 1 x militia group in each.
-
In cities/towns that contain a symbol of Arab settlement, no more than one per hexagon: leader Abd el Kader and 8 x commando/guerrilla battalions.
(b) All other Arab League units arrive as reinforcements.
4. Israeli deployment (Israeli player places second):
a) Zahal (Haganah/Palmach) units.
-
In each Jewish settlement hexagon: 1 x militia group.
-
In cities/towns containing a symbol of Jewish settlement, no more than one per hexagon: 4 x commando battalions and 2 x supply units.
b) Irgun. In cities/towns that contain a symbol of Jewish settlement (and are not occupied by the Arab League): 3 x commando/guerrilla battalions.
c) Grupo Stern. In cities/towns that contain a symbol of Jewish settlement (and are not occupied by the Arab League): 1 x commando/guerrilla battalion.
d) In cities/towns containing a symbol of Jewish settlement: 1 x Weapons Factory.
e) All other Israeli units arrive as reinforcements.
5. Special rules.
a) There is no phase of casual events in the first turn of play.
b) Players receive their normal reinforcements in December 1947.
c) Players can split/reform units during the initial deployment.
Reinforcement table
Players use reinforcements in the turns indicated for the scenario being played.
Israeli reinforcements (all units are Zahal [Haganah/Palmach]):
- December 1947: 3 x infantry battalions, 1 x commando/guerrilla battalion and 1 x supply point.
- January 1948: Leader Allon, 2 x infantry battalions, 1 x reconnaissance battalion and 1 x supply point.
- February: 3 x infantry battalions and 1 x supply point.
- March: 2 x infantry battalions, 1 x reconnaissance battalion, 1 x secret airfield, and 1 x supply point.
- April: 3 x infantry battalions and 2 x supply points.
- May: Marcus Leader, 8 x infantry battalions, 1 x reconnaissance battalion, 1 x air unit, and 4 x supply points*#.
- June: 8 x infantry battalions, 1 x armored battalion, 1 x reconnaissance battalion, 2 x air units, and 6 x supply points*#.
- July: 6 x infantry battalions, 1 x reconnaissance battalion, 1 x air unit, and 6 x supply points*#.
- August: 6 x infantry battalions, 1 x reconnaissance battalion, and 8 x supply points*#.
- September: 4 x infantry battalions, 1 x reconnaissance battalion, 1 x air unit, and 8 x supply points*#.
- October: 4 x infantry battalions, 1 x reconnaissance battalion, 1 x air unit, and 10 x supply points*#.
- November: 2 x infantry battalions, 1 x reconnaissance battalion, and 10 x supply points*#.
- December: 2 x infantry battalions, 1 x reconnaissance battalion, and 10 x supply points*#.
- January 1949: 2 x infantry battalions, 1 x armored battalion and 12 x supply points*#.
- February: 2 x infantry battalions, 1 x reconnaissance battalion, and 12 x supply points*#.
- March: 2 x infantry battalions, 1 x reconnaissance battalion, and 12 x supply points*#.
Placement of Israeli reinforcements.
-
The Israeli player places infantry, commando/guerrilla, reconnaissance, and armor reinforcements in any of the following hexes, no more than three battalions per hexagon: Tel Aviv, the new city of Haifa, and the new city of Jerusalem. The city must be occupied by at least one Israeli unit and not have a terrified marker on it. If the Israelis could not place the units in a hexagon because it is occupied by the enemy or terrorized, then reinforcements are lost. If Tel Aviv, Haifa, and the new city of Jerusalem (all three) are occupied by the Arab League or terrorized, then the Israeli player receives in return a commando/guerrilla battalion in any non-terrorized hexagon occupied by Israel that contains a Jewish symbol.
-
The Israeli player can substitute a Zahal commando/guerrilla battalion with a reinforcement infantry battalion each turn.
-
Supply points are placed in Tel Aviv or the new city of Haifa. The hexagon must be occupied by an Israeli unit (it may be terrified).
4*. Israelis receive an additional supply point per reinforcement phase at the Weapons Factory (if in play).
5#. Israelis receive an additional supply point per reinforcement phase at the secret airfield (if in play).
-
The secret airfield reinforcement is placed in any hexagon containing clear terrain of Palestine, which has an Israeli combat unit. The player receives a point of reinforcement supplies at the secret airfield on the turn in which the airfield is placed.
-
Reinforcement leaders are placed in the same hexagon as an Israeli unit.
Arab League reinforcements.
Arab Salvation Army (AAS):
December 1947-March 1949: 1 x commando/guerrilla battalion per turn if leader Abd el Kader is in play (i.e. not eliminated). If Abd el Kader is not in play, a die is rolled for each phase of reinforcements of the Arab League. With a roll of 1-3 no reinforcement is received. With a roll of 4-5 you receive: 1 x commando/guerrilla battalion. On a roll of 6 the Arab League player must remove one unit from the AAS (if one is available).
Placement of reinforcements: The Arab League player places Arab Salvation Army reinforcements in any Arab League-occupied Palestine hexagon that contains a symbol of Arab settlement (and is not terrified).
Arab Liberation Army (ALA):
- January 1948: 4 x commando/guerrilla battalions and 1 x reconnaissance battalion.
- February: 2 x commando/guerrilla battalions.
- March: 2 x commando/guerrilla battalions.
- April: 2 x commando/guerrilla battalions.
- May: 2 x commando/guerrilla battalions.
Placement of reinforcements: The Arab League player places the reinforcements of the Arab Liberation Army in any city or town in Lebanon or Syria.
Egypt:
- January 1948: 2 x commando battalions.
- May: 2 x infantry brigades, 1 x armored battalion, 1 x mechanized battalion and 2 x air units.
- June: 1 x infantry brigade, 1 x mechanized battalion and 1 x commando battalion.
- July: 1 x infantry battalion and 1 x mechanized battalion.
- August: 2 x infantry battalions.
- September: 1 x infantry brigade.
- October: 1 x infantry battalion, 1 x mechanized battalion and 1 x air unit.
- November: 1 x infantry battalion.
- December: 1 x mechanized battalion.
- January 1949: 1 x infantry battalion.
- Special: At the time any Israeli ground unit enters Egypt (received only once per departure): 3 x infantry battalions.
Placement of reinforcements: The Arab League player places Egyptian reinforcements on El Arish or the west side of the map in Egypt.
Transjordan:
- January 1948: 1 x reconnaissance battalion.
- May: El-Tel Leader, 3 x reconnaissance battalions and 1 x infantry battalion.
- July: 1 x infantry battalion.
- September: 1 x infantry battalion.
- October: 1 x reconnaissance battalion.
- November: 1 x infantry battalion.
- December: 1 x infantry battalion.
- January 1949: 1 x reconnaissance battalion.
- March: 1 x infantry battalion.
- Special: The moment any Israeli ground unit enters a Transjordanian hexagon (received once per game): 1 x reconnaissance battalion and 1 x infantry battalion.
Placement of reinforcements: The Arab League player places the Transjordanian reinforcements in any city or town in Transjordan or the east side of the map in Transjordan.
Syria:
- May 1948: 2 x infantry brigades, 1 x armored battalion, 1 x mechanized battalion and 1 x air unit.
- June: 1 x infantry brigade and 1 x mechanized battalion.
- August: 1 x infantry battalion.
- October: 1 x infantry battalion.
- December: 1 x mechanized battalion.
- February 1949: 1 x infantry battalion.
- Special: The moment any Israeli ground unit enters a Syrian hexagon (received once per departure): 3 x infantry battalions.
Placement of reinforcements: The Arab League player places Syrian reinforcements in any city/town in Syria or on the northern or eastern edge of the map in Syria.
Lebanon:
- May 1948: 1 x reconnaissance battalion and 1 x infantry battalion.
- June: 1 x infantry battalion.
- October: 1 x infantry battalion.
- January 1949: 1 x infantry battalion.
- Special: The moment any Israeli ground unit enters any Lebanese hexagon (received only once per departure): 1 x infantry battalion.
Placement of reinforcements: The Arab League player places Lebanese units in any village in Lebanon or on the north side of the map in Lebanon.
Iraq:
- May 1948: 1 x infantry brigade and 1 x armored battalion.
- June: 2 x infantry brigades, 2 x mechanized battalions and 1 x air unit.
- July: 1 x infantry battalion.
- August: 1 x infantry battalion.
- September: 1 x infantry battalion.
- October: 1 x mechanized battalion.
- November: 1 x infantry battalion.
- December: 1 x mechanized battalion.
- January 1949: 1 x infantry battalion.
- February: 1 x mechanized battalion.
- March: 1 x infantry battalion.
Placement of reinforcements: The Arab League player places Iraqi reinforcements on the northern edge of the map in Syria or on the eastern edge of the map in Syria or Transjordan.
Saudi Arabia:
- May 1948: 1 x infantry battalion.
- June: 1 x infantry battalion.
Placement of reinforcements: The Arab League player places Saudi reinforcements in El Arish or on the western edge of the map in Egypt.
Morocco:
- May 1948: 1 x infantry battalion.
Placement of reinforcements: The Arab League player places Moroccan reinforcements in El Arish or on the western edge of the map in Egypt.
Yemen:
- May 1948: 1 x infantry battalion.
Placement of reinforcements: The Arab League player places Yemeni reinforcements in El Arish or on the western edge of the map in Egypt.
Arab League supplies:
- On El Arish or the western edge of the map in Egypt: January 1948 – April 1948: 1 point/turn. May 1948 – March 1949: 4 points/turn.
- In Amman, Aqaba or the western edge of the map in Transjordan: January 1948: 4 (this shift only). February 1948 – April 1948: 1 point/turn. May 1948 – March 1949: 2 points/shift.
- On the northern edge of the map in Lebanon or Syria: January 1948 – April 1948: 1 point/turn. May 1948 – March 1949: 4 points/shift.