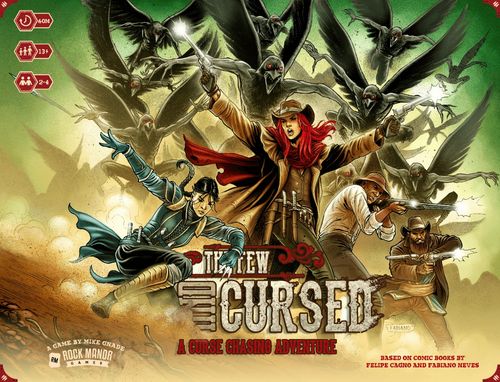
The Few and Cursed
The Few and Cursed Rulebook
Table of Contents
Table of Contents
Objective
The goal of the game is to achieve the greatest amount of Grit as a Curse Chaser before the game ends. You gain Grit by capturing bounties, attempting encounters, robbing other players, collecting powerful artifacts and completing jobs. The game ends when 3 monsters are defeated, all the artifacts on the board have been recovered or if a monster enters and destroys San Andreas. The player with the most Grit at the end is the winner.
Box Contents
- 90 Upgrade Cards
- 16 Cursed Encounters
- 12 Artifact Cards & Tokens
- 28 Encounter Cards
- 42 Character Cards
- 4 Character Boards
- 25 Store Cards
- 24 Colored Cubes (4 of each color)
- 14 Most Wanted Bounties
- 40 Job Cards
- 4 Wanted Bounties
- 4 Monster Figures
- 1 Game Board
- 4 Character Figures
- 60 Water Tokens (x30, x20, x10 denominations)
- 1st Player Marker
Game Setup
1. Set Out Board & Components
Place the game board, tokens, cards and components so that they are within reach of all players. Separate all the cards by type into Upgrade, Store, Job, Encounter, Artifact, Cursed Encounter, Bounty and Character decks.
2. Select Characters
Players select their character and take the corresponding Character card, deck, board, and figure. Choose a color and take the corresponding colored cubes.
Place one of your colored cubes on the Grit Track around the board, on the "0" spot. Place your figure in San Andreas on the game board.
3. Setup Your Characters
Set your Character card (A) face up in its Normal State and take Water Tokens equal to your starting money value (B). Place each of your colored cubes on your starting Health (C), Bullet (D) and Curse values (E). All characters start with their curse at the "0" spot.
Take a black cube and place it on the spot denoting your Maximum Bullet Capacity (F). This spot is shown in black and the number is highlighted with a red arrow.
Take a purple cube and place it on the spot denoting your Curse Threshold (G) This spot is shown in black and the number is highlighted with a red arrow. Take all of your Character's starting cards (H) and shuffle them to create your starting deck.
Draw four cards from your deck as your starting hand.
3. Setup Your Characters (continued)
A. Character Name
B. Weapon Proficiency
Every character can spend Bullet to generate more Attack during any phase of their turn. To do this, simply reduce the Bullet on your character board and then generate and use the Attack. Stocking up on Bullet is the best way to defeat the bigger Bounties in the game.
C. Unique Action
Each character in the Few and Cursed has their own unique ability listed on their card. During the action phase you can activate Action abilities as your action for that turn. Keep in mind that Characters lose access to this ability in their cursed state. In addition, their cursed state typical comes with it's own detriment listed in this area.
Pushing Your Luck With Curse
Being a Curse Chaser is all about managing your Curse. When you reach your Curse Threshold (when you colored cube overlaps the purple cube), flip over your character card to the Cursed side. If your Curse ever drops back below this Threshold, flip it back over to the Normal side.
Whenever you increase your Curse while Cursed, you suffer one damage!
Getting Critically Wounded
If your Health ever reaches zero, immediately end your turn and, lose three Grit (-3 Grit). Move your figure to San Andreas and pay Money equal to the number of spaces you moved to get back to San Andreas. If you do not have enough Money, you should reduce your Grit by one for each Money that you're short. After you pay a good Samaritan for dragging you back to San Andreas, set your Health to Three and shuffle your discard pile, hand and deck together to form a new deck.
Legend: Bullet, Attack, Health, Money, Grit.
4. Encounter Decks
Shuffle all of the basic Encounter cards together and place the deck on the game board. Shuffle all of the Cursed Encounter cards together and place the deck on the game board.
Example Encounter card (Desert / Ruins / Canyons):
Desert — You come across a stagecoach that has a broken wheel. You can assist them with the repair (-3 Movement) and move to any space or take advantage of them and rob them (-5 Attack) to gain 5 Money.
Ruins — A woman covered in a shroud waves to you with her gnarled hand. She is a healer and says she will reduce your curse for a bit of water. You can pay her (-2 Money & -2 Curse) or turn her down.
Canyons — A group of bandits poke their heads out of the rocky cliffs above you. They demand all of your Money. You can give them all of you Money or fend them off by fighting (-2 Attack).
5. Most Wanted Bounties
Look through the Bounty cards and separate out all of the monsters (Tsilkali, Crow Prime, Wendigo and the White Demon) and the Wanted Bounties (Talbot's Gang, Zombies, Demons and the Crows). Set aside the Wanted Bounties for now.
Shuffle the monsters and randomly place each card face down in one of the Most Wanted locations.
Shuffle the remaining Bounty cards and randomly deal cards face down on each Most Wanted location until you have dealt out the entire deck. Flip over the top card of each Most Wanted deck location.
There are three types of Bounty in the game: Monster, Most Wanted and Wanted. Monsters are unique figures that are worth a ton of Grit and affect when the game ends. These monsters embody what happens to a person who succumbs to the supernatural and becomes cursed. Most Wanted bounties represent unique characters and the Wanted bounties represent an endless supply of generic enemies. You can identify these types of bounties by their border color scheme and icons.
6. Job Deck
Shuffle all of the job cards together and deal every player four random job cards. Players select two jobs to keep and discard the other two and shuffle them back into the job deck. Once every player has selected their starting jobs, place the job deck on the game board.
7. Wanted Bounties
Take the double-sided Wanted Bounties (Talbot's Gang, Zombies, Demons and the Crows) and randomly select a face up side and place them on the game board.
8. Store Deck
Shuffle the Store cards together and place them on the game board. Draw three Store Cards and place them face up on the game board.
9. Artifacts
Place all of the artifact cards near the board. Place the Artifact Tokens facedown on each corner location (Santana De Aguasucia, Expedition, Mountain View and Mana O'lana) of the game board. They should be grouped together by color. If you are playing a 2 or 3 player game, you should randomly remove a token from each location and place it back into the box.
10. Begin Play
Give the player with the least starting money the First Player Token. They will go first.
Gameplay
General Rules
At any time, if your personal deck is empty and you need to draw a card or reveal a card from the top of your deck, reshuffle your discard pile to replenish your deck. When this occurs, you must return your character to San Andreas.
Players may play cards from their hand into their play area to generate resources, movement and attack at any time during each phase of their turn as necessary. You may spend bullets to generate more attack at any time during your turn as needed but you cannot save movement or attack resources generated in one phase over to the next. Any extra Movement and Attack resources are lost at the end of a phase and all played cards are discarded.
If a deck ever runs out of cards, reshuffle the discard pile to replenish it.
If your entire deck is in your play area, lose one Health for each card that you cannot draw.
If card text ever contradicts the rules, follow the card text instead.
Phases of Play
For each phase, the player with the First Player Token will go first, and play proceeds in clockwise order from there.
Improvise Phase
Players look at the top two cards from the Upgrade Deck and pick one to add to their hand. The other card is discarded into the communal Upgrade discard pile.
A. Resources Gained B. Card Name C. Additional Effects
Cards added this way are permanently added to your deck.
Encounter Phase
During this phase, players resolve their encounter based on their location on the map. Encounters help tell an emergent story and often give players a choice.
Outside of San Andreas
Draw an Encounter card if you are on a Desert, Canyons or Ruins space. If you are on a Cursed space, you will draw a Cursed Encounter card. Read through the text that corresponds to your location (Desert, Canyons, Ruins or Cursed) and weigh the various costs and benefits. Announce your choice to the other players and pay any applicable costs associated with it. After you have made your selection, discard the encounter to the corresponding discard pile. Players that share a space also share the same Encounter but may make their own independent choices.
Encounter cards are split up into three different events based on your location. If your figure currently occupies a Desert spot on the map, you will read from the Desert column. In this example your choice is to spend 3 Movement and move to an adjacent space (ignoring any other costs) or to spend 5 Attack to gain 5 Money. You must make one of these choices if able. If for some reason you cannot, show your hand to the other players and do nothing.
Cursed Encounters are drawn if you are on a cursed location. They typically present you with two beneficial outcomes with associated costs and one bad outcome if you choose to not spend the resources. There is always a choice that can be made, even if it is a detrimental one.
Example Cursed Encounter card:
Murder of Crows — 4 Attack: Kill them and loot the bodies (+8 Money). 3 Movement: Run away (move to an adjacent space). Suffer a massive bullet wound (-2 Health).
In San Andreas
If a player is in San Andreas during the Encounter phase, they may decide whether they would like to visit the Job Board or the Store.
Visiting the Job Board
When a player visits the job board, you draw two jobs from the top of the job deck. If you ever draw a job that you already scored, discard it and draw another card. The job should remain secret from the other players until it is scored.
After drawing new Job cards, you may sell any one of your unscored Jobs. Take Water equal to the Job's sale value and then discard the card.
Remember that unscored jobs are negative Grit at the end of the game.
Job Cards
1. Money Reward
This is the amount of money collected when you sell or complete the job.
2. Grit Reward
Gain this much Grit when you complete the job. You ONLY get the Grit listed from completing the Job.
3. Job Name
You cannot score the exact same Job more than once.
4. Job Requirement
This is the Job requirement. If Attack or Movement are displayed here, you must spend that much of that resource to score the Job.
Example: To score Farmhand, I must spend 3 Movement. This movement cannot be used to move around the board.
If Curse, Bullet, or Health are listed here, the value on your player board track must be equal to that number.
Example: To score Con Man, the Curse on my player board must be equal to 6. This must be my actual Curse and not my Curse Threshold.
Jobs can be scored at any time. As soon as you meet the Job's requirement, reveal the Job and show it to the other players. Collect both the Money and the Grit reward.
Remember that any Jobs that you have not scored before the end of the game will be subtracted from your score.
Shopping at the Store
When a player visits the store, they may spend their Money to buy Store cards, bullets or to upgrade their Character stats. You can make as many purchases as you can afford. Remember that you can purchase any face up Store card, including the top of the discard pile.
A. Card Cost
B. Card Name
C. Effect: Store cards that give you resources can be exhausted once per round to gain the effect. Some cards improve your weapon proficiency and can be used as long as you have Bullets.
D. Storage Location: Accessory, One-Handed, or Two-Handed. Each player has two accessory slots and two hands.
Players have one Refresh action per store visit. You may use this action to discard all of the available Store cards to the top of the Store discard pile in any order you desire. Immediately replace the discarded cards by drawing from the Store deck.
Action Phase
This phase is where the bulk of your turn takes place. Take a moment to plan out your action and movement for your turn then play cards to generate the resources you need to accomplish that action.
Movement
Movement is your primary method of navigating the game board. Each space on the game board is connected by a road that has symbols on it. These symbols are the cost from moving from one space to another. All of these roads require Movement and sometimes have other costs associated with them:
A road with Curse icon on it, increases your Curse by one when you move through it.
You may move through a road with an Attack symbol without spending Attack but must take 1 Health of damage for every Attack that you do not spend during your movement.
When you are at your desired location, take your action. You may continue to move again after taking your action.
Available Actions
Remember that you can only perform one action per round!
Recover an Artifact
If you are at a location with an Artifact Token, you may look at the corresponding Artifact cards and choose one to acquire to your hand immediately. Keep in mind that you can only recover one Artifact from each location, so remember to take the Artifact Token that matches the card you selected. You cannot take this action on any locations with Artifact Tokens that match any color already in your collection.
Encounter
If you are outside of San Andreas, you can draw another Encounter card based on your location and resolve it as your action (see Encounter Phase on pg 9). If you have moved into San Andreas, you can Visit the Job Board or go Shopping at the Store (see Encounter Phase pg 10).
Artifact Cards are played exactly like Upgrade cards but have more powerful effects.
Defeat a Bounty
If you are outside of San Andreas, you can spend Attack to defeat bounties and earn Grit. First you must be at a location that matches the Bounty you are going after. You must have enough Attack (generated by cards you've played or by converting Bullet into Attack) to defeat the Bounty. The amount of Attack a card generates is found in the upper left corner of cards that you play from your hand.
- Location On The Map — Your figure must be at the Last Seen location on the board.
- Defeat Cost — This is the amount of Attack that you must spend in order to defeat the Bounty.
- Bounty Name
- Reward — When the Bounty is defeated, immediately collect all of the rewards listed on the card.
When you defeat a Bounty, you immediately collect your rewards. Most rewards include Grit, but many Bounties may have other effects and rewards.
After defeating a Most Wanted Bounty, take the Bounty card and place it in your score area. Immediately flip over and reveal the next bounty in that deck. You may only defeat one Most Wanted Bounty per Action Phase.
However, you may defeat the same generic Wanted Bounties up to two times as long as you have enough Attack. Whenever one of these Bounties are defeated, immediately collect your rewards and flip the card over. Wanted Bounties are always available to defeat and are never discarded. You are allowed to defeat each side of a Wanted Bounty in one turn— example: you can spend 5 Attack while to defeat Talbot's Gang twice.
Setting up a Monster Figure
When you flip over a Monster Card, grab and place its figure on the Last Seen Location. The figure will move around the map at the end of each round. In order to defeat a monster, you must be on the same space as the Monster's figure. If a monster ever ends the round by entering San Andreas, the game immediately ends.
Rob another Player
If you share a space with another player, you can rob them if you have Money equal to double their current Health. If you spend the Money on a robbery, increase your Curse by two on your Character board and then gain Grit and Money equal to the opponent's current Money value. The player who was robbed loses one Health.
Take your Character Action
Each character has their own unique action or passive ability on their Character card. As your action, you can activate any ACTION: text on your character card.
Camp
Shuffling your deck automatically returns you to San Andreas during Cleanup Phase. When you take the camp action, immediately shuffle all (play area, discard, deck and hand) of your cards back into your deck and gain one Health. You DO NOT return to San Andreas when your deck is reshuffled this way. This ends your action phase.
Cleanup Phase
Discard
Discard all of the cards you played this round into your personal discard pile. You may also choose to discard any cards that are still in your hand or keep them for next round.
Redraw
Draw back up to four cards.
Remember that reshuffling your deck triggers your return to San Andreas! If you shuffled your deck at any point during this past round other than by taking the camp action, return your figure to San Andreas. This includes a reshuffle as a result of the Redraw step.
Monster Movement
If there are monster figures on the map, move them one space towards San Andreas. If a monster ever moves into a space with a player figure already in it, that player suffers one Health of damage. Monsters always move towards San Andreas by taking the shortest route with the fewest symbols. If there is a tie, the Monster always prefers to move into a space with a player. If it's still a tie, the player with the First Player Token should decide and move the monster.
Pass the first player token
Pass the First Player Token counter clockwise and proceed to the next round starting with Improvise.
Ending the Game
If a player reaches twenty-one Grit (21 Grit) without a monster figure appearing on the board, then that player selects a Most Wanted pile and replaces the card on top of that pile with the bottom monster card.
The game ends when any of the following occurs:
- If three monsters have been defeated, the current round is completed and the game ends.
- If all of the Artifact Tokens have been recovered off of the board, the current round is completed and the game ends.
- If a Monster figure ever ends a round in San Andreas, the game ends.
End Game Scoring:
Score any Jobs that trigger at the end of the game (Task Master, Maecenas, etc).
Players lose Grit for every Job they did not complete during the game. Subtract the Grit value in the upper right of these cards from each player's score on the Grit Tracker.
Gain Grit for every Artifact card that you've collected. This value is found in the upper right hand corner of each Artifact card.
The player who has accumulated the most Grit is then declared the winner and will go down as the most accomplished Curse Chaser in the Desert of the Pacific Ocean!
In the case of a tie, tiebreakers are (in order):
- Number of Most Wanted Bounties Defeated
- Number of Jobs Completed
- Remaining Money
Map Legend
For the purposes of bounty hunting and encounters, it is very important to understand the map and the type of space you're occupying.
- Ruins
- Canyons
- Cursed
- San Andreas
All of the remaining unmarked locations are desert.
Solo Variants
Single player games are generally setup like a normal game unless otherwise specified below. The one exception is that you should place all of the artifacts on the board. When you recover an artifact, you may choose which one you would like and then should discard the others. Remember that you can only acquire 1 artifact from each location.
The game is played normally, but at the end of every player turn, if you did not capture a Most Wanted bounty, you must discard one from a pile of their choosing. This will mean the game is always progressing towards the monsters being revealed.
Curse Chaser
Objective: Defeat 3 Monsters before they enter San Andreas
Losing the game: The game is lost if a Monster enters San Andreas or if your health ever drops to zero.
The Dark Arts
Objective: Collect 4 Artifacts and share the same space as the Crow Prime.
Losing the game: The game is lost if a Monster enters San Andreas or if your health ever drops to zero.
Operating in the Shadows
Setup: Create 3 job tracks by dealing 4 cards each to 3 different piles. Look through them and replace any duplicates.
Objective: Complete all of the jobs in two of the three tracks.
After a job is scored, flip over the next one in the stack.
Ending the Game: The game is successful when you have completed two tracks or ends with a loss if the monster enters San Andreas or if all 4 monster figures are on the board.
Cooperative
To setup a Cooperative game, pick your characters and setup the game as normal. Instead of each player placing a marker at 0 on the Grit tracker, take 1 marker and set your entire team's Grit to 140 minus 20 Grit per player (so a 2-player cooperative game would start at 100 Grit). You can adjust this starting Grit up or down to match the challenge you want.
The game plays normally with a few exceptions. Whenever players gain Grit, they should increase the team's Grit. Do not flip over a new unique bounty after you defeat one. At the end of each round during the cleanup phase, reduce your team's Grit by the Grit rewards showing on all of the face-up Most Wanted bounties. After you have reduced your team's Grit, make sure to flip over and fill the Most Wanted bounties area on the board.
If your team's Grit ever drops below zero or if a monster enters San Andreas, you lose. The players win if they can defeat three monsters.
FAQs
Where are the rest of Jebediah's starting cards?
Jebediah's starting deck is only 8 cards. Characters are asymmetric and don't have identical starting decks.
Are you allowed to count how many cards are currently in your draw stack?
Yes, but please do so when other players aren't waiting on you to finish your turn.
Can I spend multiple bullets during the same phase to generate attack? Can I spend bullets during different phases in the same round?
Yes you can spend bullets at any time as many times as you want as long as you have bullets to spend.
What does Trash a card mean?
Trashing cards is the only way to get rid of cards from your deck. When you trash a starting card, you can remove it from the game. When you trash an upgrade card, you can simply put the card back in the communal upgrade discard pile.
When playing a card which gives resources and has an "additional effect" on the bottom, do you always get both effects or must you choose one or the other?
You must always do everything on a card when it is played or you cannot play it. The only exception are cards with the Trash icon. These cards are played for their resources and may be trashed for the listed additional effect. i.e. Sprint may be played for 2 Movement and stay in your deck or trashed for an additional 1 Movement for a total of 3 Movement (see page 30 for more card examples).
What if you defeat the Demons and don't have a hand or discard pile to trash from?
Whenever you defeat the Demons, you must trash a card. If you cannot trash a card from your hand or discard pile, you should trash from your played card area (i.e. trash some of the cards you just played to defeat them).
Can I enter a space with a Monster figure even if I cannot defeat that monster?
You can only move into a monster space if you're fighting something in that space. If you don't attack the monster, the monster immediately moves towards San Andreas. An example would be if both Barrett and Crow Prime were in Mana O'lana. You could move into that space to defeat Barrett as your action but then the Crow Prime would move one space closer to San Andreas.
When a card says upgrade a Stat what is it referring to?
Your character stats are considered to be your Health, Bullet Capacity and Curse Threshold. If you run into a card that tells you to upgrade one of your stats, you may increase one of these on your character board.
Can I use a 'Cursed' card to copy the Trash effect of a card?
Yes, but remember that you would trash the 'Cursed' card as well. The best example of this would be trashing 'Sprint' for 3 Movement and then copying it with 'Cursed' for another 3 Movement. This would give you a total of 6 Movement and 1 Curse. You would trash both the 'Sprint' and 'Cursed' card from your deck.
Can I use a 'Cursed' card to copy the effect of a card that reduces my curse?
Yes. Remember that using a 'Cursed' card always increases your Curse by 1 i.e. copying 'Blessing' which normally reduces Curse by 2 would reduce your Curse by 1.
What happens if I don't like any of the Encounter options? Do I have to do something during this phase?
For normal encounters, you must make a choice if able. If for some reason you do not have the resources to make any of the choices on the card, you must show your hand to the other players and only then are allowed to do nothing.
Cursed encounters always have a detrimental outcome (listed in the rightmost column) that can be chosen if you lack the resources or simply prefer to save them for later in your turn.
If you have a questions that are not addressed here, please post them on the Few and Cursed page on BoardGameGeek. We actively monitor it and will answer any outstanding questions there. We will also upload additional FAQs there as needed.
Card Reference
'Redhead' (Cursed) — "Copy the effect of another card you played this phase. If it's an artifact, lose a Health."
Every character has 'Cursed' cards in their starting deck that allow you to copy the effect of any other card you played this phase. This allows you to copy the more powerful cards that you are acquiring but will require you to increase your Curse. When you copy another card, remember that you must copy everything on it. This means that copying cards that already raise your Curse, will raise your curse even further. Similarly, you can copy cards that decrease Curse by 1 without your Curse changing.
'Sprint' — "1 Bullet: +1 Movement" plus a Trash-icon effect
Cards with a Trash icon on them represent an optional action you can take when you play the card. If you take the trash action, you permanently remove the card from your deck and get the resources displayed in the upper left of the card and the additional effect listed after the Trash icon. i.e. You can play sprint for 2 Movement or trash it for 3 Movement.
'Call to Darkness' — "Trash a card from your hand to improvise again."
When you play 'Call to Darkness', you increase your Curse by two. It only makes sense to play this card when you're also going to trash it from your deck for the effect. When you trash the card, you trash another card from your hand and take the improvise action again (look at two cards from the upgrade deck and add one to your hand). You do not get any resources or effects from the additional card you have to trash. It is not played.
'Discover Treasure' — "7 Money: Add a random artifact card to your discard pile. 3 Attack: Destroy it (-2 Curse). Leave it alone (-1 Curse)."
If you have the movement to get an Artifact from the 'Discover Treasure' encounter, you should shuffle the artifact deck and randomly draw an artifact card from the deck and place it in your discard pile. Take the Artifact Token that matches your card (even if it has been placed in the box during setup). You can still only take the "Recover Artifact" action on Artifacts that do not match any of the Artifact Token colors in your collection. If you happen to draw a random Artifact of a color you've already recovered, that does not violate the rules.
'Pieces of Crow' — "Improvise again this turn." (+2 Curse, 8 Grit)
The 'Pieces of Crow' card is nearly identical to 'Call of Darkness' except that you do not have to trash any cards. Increase your Curse by two and then you improvise again this turn.
'A Touch of Evil' — "Trash a card from your hand to improvise again." (3 Grit)
'Touch of Evil' is similar to these other cards as well but is optional. If you trash a card from your hand (this card cannot be played), you improvise again this turn.
'Believer' (Job Card) — 4 Money, 6 Grit, Health requirement 0
The 'Believer' job card is a sort of 'Get out of Jail Free' card. You only score this job if your Health reaches zero. When you get critically wounded, you still lose three Grit (-3 Grit) and pay Money according to the rules on page 8. Then you can immediately score this job which will net you three Grit (6 - 3 Grit) and gets you some Money back.
This card is great for characters like Annabelle to draft at the beginning of the game, but works for anyone who is going to push their luck a bit.
'Torch' (Store Card) — 6 Money — "During Improvise, Draw 3 cards instead of 2."
The 'Torch' card allows you to draw three cards every time that you take an Improvise action (even through other card effects). You still only get to add one card to your hand though and will discard the other two.
'Colt Walker' (Store Card) — 5 Money — Bullet -1, Attack +2
Shop cards like the 'Colt Walker' permanently improve your character's weapon proficiency. This card allows you to spend a Bullet for +2 Attack and can be used continually as long as you have bullets.
Quick Reference
Round Sequence
Each round is divided into four phases:
1. Improvise
- Look at the top two cards of the Upgrade deck. Add one to your hand and discard the other.
2. Encounter
- In San Andreas: Shop or visit Job Board
- Outside: Draw an Encounter Card
3. Action Phase
Play cards to generate resources and take one of these actions:
- Defeat a Bounty
- Recover an Artifact
- Rob another Player
- Encounter Again
- Camp (Gain one Health)
- Character Card Action
4. Cleanup Phase
- Discard
- Draw back up to 4 cards
- Return to San Andreas if Shuffled
- Monster Moves towards San Andreas
- Pass First Player Token counter-clockwise
Iconography
- Attack
- Movement
- Bullet
- Health
- Curse
- Money
- Grit
- Trash card
- Draw card
Upgrade Prices
- Buy a Bullet
- Increase Bullet Maximum
- Increase Curse Threshold
- Increase Health