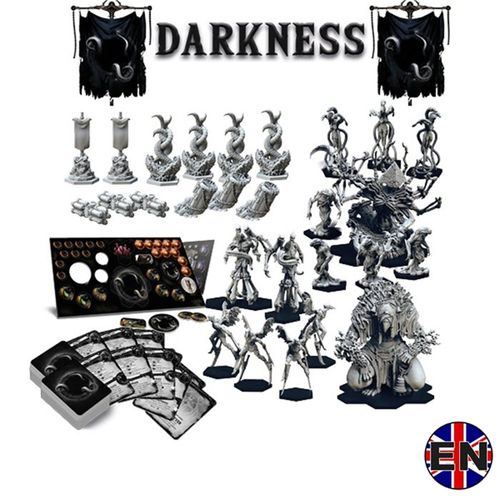
The Edge: Dawnfall – Darkness
The Edge: Dawnfall – Darkness Rulebook
Table of Contents
Table of Contents
Darkness Tokens
Component key as printed on page 2 of the leaflet.
- Shadow Gate (Darkness Shrine)
- Additional Darkness Shrine
- Grasp token [x3]
- Dark Point [x10]
- Black Mark token [x3]
- Poison token [x2]
- Darkness Endurance token [14]
- Wisdom token [x3]
- Misty Darkness token [x3]
- Time Track
- Small Campaign token [x10]
- Large Campaign token [x1]
Darkness Solo Mode
The Darkness is a nearly infinite being with its own consciousness, inhabited by creatures called Nightmares. Flavour text from the leaflet is omitted.
Caution: Darkness rules and all changes to base game rules described below refer to solo mode as the basic game mode: one player fighting to defeat the Darkness. The player themself operates the Darkness algorithm while playing against it. Darkness in solo mode uses its own, special Action, Squad and Difficulty cards. Keep in mind these are different from those used in PvP games.
Changes to Game Setup
You can choose either side of the board for a game with Darkness expansion – basic or dark side.
For a solo mode game sit by the longer side of the board to be able to easily access Squad cards, Action deck and resource pools of both factions.
- Skip step 4 (Determine the First Player).
- Darkness faction has no Banner card, therefore in step 6 place only the Banner of faction opposing Darkness.
- In step 7 choose any 5 Darkness Squads. For your first game we recommend you choose the following: Bell Crow, Slaughter Crow, Impostor, Void Specter, Shadow.
- In step 9 take all Darkness Action cards of the chosen Squads (and the All Hell Breaks Loose cards) and shuffle them. Shuffle the 5 Darkness Difficulty Level cards separately. Then create Darkness Action deck following the steps below:
- 6 Darkness Action cards (top of the deck)
- 2 Darkness Difficulty Level cards
- 6 Darkness Action cards
- 2 Darkness Difficulty Level cards
- 6 Darkness Action cards (bottom of the deck)
- Skip step 10.
- In step 11 start with deploying Darkness Shrine (Shadow Gate) to the middle of the board.
- In step 12, during Crystal Source deployment, consider additional restriction: each Crystal Source token has to be placed exactly one Space away from Shadow Gate (no more and no less).
- In step 13 begin with deploying any 3 Darkness models anywhere ⬡⬡ with Shadow Gate.
- In step 14 use any Small Campaign token as a Darkness Faction token.
- In step 15 place 3 Dark Points in Darkness pool. Do not add 2 Crystals to Darkness pool – Darkness faction does not use Crystals. If you are using an Elite Squad against Darkness, put more Dark Points in Darkness pool instead of Crystals.
- In step 16 do not draw 3 starting cards for Darkness faction (Darkness draws and resolves Action cards in different ways).
- Skip step 17 (Dispersal).
You are ready to start the game. Always begin with Darkness faction turn.
Darkness Difficulty Level Cards
5 Darkness Difficulty Level cards are special cards that are part of Darkness Action deck.
After playing a Darkness Difficulty Level card, place it anywhere on the board so that it is visible at all times. Its effect remains in play for the rest of the game (with the exception of the Now or Never card; its effect lasts till the end of next player turn).
The five Darkness Difficulty Level cards are:
- Leeches – From now until the end of the game: At the beginning of each Darkness turn all Darkness models perform Move.
- [Name obscured in source] – the card is partly covered in the leaflet's sample image and its text is not legible; it is not transcribed.
- Growing – From now until the end of the game: At the end of the player's turn restore 1 Endurance token of every Darkness Squad which has at least 1 model present on the board.
- Dark Mo[…] – the name is partly covered in the leaflet's sample image, and part of the text is not legible. From now until the end of the game: At the beginning of each Darkness turn change any Dark[…] to the Dark Mode.
- Now or Never – If no Darkness model dies during this Darkness turn, at the end of the turn the opponent loses 3 Victory Points.
Resolving Darkness Action Cards
Each Darkness Action card, unlike other factions' Action cards, is dedicated to only 1 Squad (with the exception of All Hell Breaks Loose card).
Darkness Action card is divided into two parts: upper and lower. The player first resolves the upper part, and then proceeds to resolve the lower part of the card.
Upper part: Resolve all steps, top to bottom (separated by a chain).
If a card offers a choice of options X or Y, always resolve option X (the first one). Only in the case where resolving option X is impossible, proceed to resolve option Y instead.
Example: Spawn Bell Crow OR gain 1 Dark Points means you have to deploy Bell Crow model. If that is impossible (ie. Bell Crow model is already on the board), Darkness faction gains 1 Dark Points.
If any step can be resolved only partially, the feasible part is still resolved.
Example: Spawn 2 Shadows and gain 3 Dark Points. If only 1 Shadow can be deployed, deploy it. If there are only 2 Dark Points in the resource pool, Darkness faction gains 2 (instead of 3) Dark Points.
If there are several activities in one step (X and Y), resolve as many as possible. Only in the case where no activities in step X are feasible, resolve step Y instead.
Example: Spawn Bell Crow and restore 1 Endurance token of Bell Crow OR gain 3 Dark Points means you have to deploy a Bell Crow model and restore up to 1 Endurance token. If none of these activities are possible, Darkness faction gains 3 Dark Points.
MOVE and COMBAT in the upper part always refer to all models of a given Darkness Squad, unless the card specifies otherwise.
Lower part: Lower part consists of two parts: X or Y, where X is a payable Action, and Y is a "gain Dark Points" option.
Actions in the lower part of Action card have a cost in Dark Points. Darkness will automatically pay the cost and perform the Action, as long as Darkness has enough Dark Points and the Action can be performed (eg. there's a valid target within range of that Action).
Only in the case where the Action can't be performed (either due to lack of Dark Points or Action conditions not being met – eg. no valid target), option Y will be resolved (Darkness gains X Dark Points).
Caution: Darkness Actions will never let you react in the opponent's turn (there are no Instant Actions on Darkness cards).
Sample Darkness Action Cards
The leaflet shows the following Darkness Action cards. Each is transcribed with its upper part (above the chain) and lower part (after the "OR").
- Bell Crow – Spawn Bell Crow OR gain 1 Dark Points. MOVE. Change to the Dark Mode. COMBAT (unless spawned by this card).
- Slaughter Crow (card 1) – Spawn 1 Slaughter Crow OR gain 2 Dark Points. MOVE. COMBAT if in Dark Mode (except models spawned by this card). Change to the Dark Mode.
- Slaughter Crow (card 2) – Spawn 2 Slaughter Crows and restore 1 Endurance token of Slaughter Crows OR gain 2 Dark Points. MOVE. COMBAT (except models spawned by this card). Change to the Dark Mode.
- Hunger (Slaughter Crow) – Teleport each Slaughter Crow model to ⬡⬡ with 1 player's model with biggest base and perform Combat with it. OR gain 1 Dark Points.
- Void – Remove any 1 Crystal Source or player's Shrine from the board. Range unlimited. OR gain 1 Dark Points.
- All Hell Breaks Loose – Each Darkness model performs Combat. OR gain 3 Dark Points.
- Living Death (Bell Crow) – Restore all Endurance tokens of Bell Crow and gain 3 Dark Points. Drag 1 player's model from Range 2 to ⬡⬡ with Bell Crow. COMBAT (unless spawned by this card). Change to the Dark Mode. Lower part: Kill 1 player's model without Endurance tokens within Range 1 of Bell Crow. OR gain 1 Dark Points.
- Darkworld – (partly covered in the leaflet's sample image; text as legible) Place this card on the board. Darkness models deal double Wounds. If any player's model dies, remove this card. OR gain 1 Dark Points.
Notes on the sample cards: the leaflet also shows a Black Mark card (name and effect partly covered, not transcribed) and a Madness card and an Abyssal Empress card. Madness is a Prime Shadow card and Abyssal Empress belongs to the Abyssal Empress mini-expansion; neither is reproduced here.
Flow of the Game
Darkness turn: Darkness turn has a different flow than a regular faction's turn. During each Darkness turn draw and resolve (respectively) 2 Darkness Action cards. Discard the cards after they've been resolved.
Resolving Darkness Action cards is described above.
If you draw 2 Darkness Difficulty Level cards in one turn, choose and resolve only 1 of them, discarding the other. Do not draw and resolve any additional Darkness Action cards this turn.
Dark Boundary: When playing solo mode (except for Solo Campaigns), at the end of each Darkness Turn check for any player models in any Space that has only 1, 2, 3 or 4 neighboring Spaces printed on the board (for example: along the edge of the map). The player must pay 1 Crystal for any such model. Each model that the player couldn't pay for, receives 1 Wound. Models killed this way grant Victory Points to the Darkness.
Player's turn: At the end of each of their Passive turns, flip all Darkness Squad cards to their Basic mode.
Paying with other resources: Darkness faction can never use other resources (Victory Points or Endurance tokens) as a substitute to Dark Points when paying any costs.
Dice: Darkness faction ignores special rule of Marked sides of dice during their rolls.
End of the game: "One of the players loses all of their models" condition does not apply to Darkness faction.
Dark Points
Darkness Faction uses Dark Points instead of Crystals to perform their Actions.
Darkness Squads and Squad Cards
Darkness Squad cards also specify which die (Yellow or Red) is used for all rolls of a given model. As shown on the Squad cards, for Basic mode a Yellow die will be used, while the Red die will be used for Dark mode.
For Darkness faction, absence of a given Squad on the board does not prevent using Change Mode or restoring Endurance tokens.
Darkness Solo Mode: Units and Actions
Spawn Darkness Models
Spawn Darkness models Action allows deploying models to the board.
Darkness model is deployed to any empty hexes ⬡⬡ with a Shadow Gate.
If this is not possible (all hexes adjacent to a Shadow Gate are occupied), the model is deployed to any empty hexes ⬡⬡ with any enemy model.
After a Darkness model is killed it is returned back to the pool, and can be Spawned on the board again.
Darkness AI
Move: Move and Combat Actions for Darkness models are performed by the player, following rules and restrictions below. Perform Move fulfilling all three conditions below. If they are mutually exclusive, forfeit the lower one.
A) Avoid penalties: Avoid hexes ⬡⬡ with Demon Shrine, Rha-Zack Shrine, Reborn Thornheart Wood, Demon models with Crystal Aegis token and Oracle of Wrath with Weakening Reborn token. Avoid Spaces with Underground Strike Reborn token and Mine Rha-Zack token. This condition can be forfeit if no other enemy models are available on the board.
B) Finish your movement ⬡⬡ with an enemy model with the lowest INI within Move range: If no enemy models are within Move Range, Move the maximum number of Spaces in the direction of the closest enemy model.
Caution: treat value "–" as lower than value 0.
C) Block Crystal Sources: Finish your Movement ⬡⬡ with Crystal Source that has no other Darkness models adjacent to it. If an enemy model is also ⬡⬡ with this Crystal Source, Push it to hexes non-⬡⬡ with the Crystal Source, if possible.
Demon Shrine is not a Crystal Source for Darkness faction.
Combat: If Darkness model performs a Combat Action while ⬡⬡ with several enemy models, its target will be the enemy model with lowest INI (and with no Weakening Reborn tokens).
Darkness model will never perform a Combat Action against an enemy model with Crystal Aegis Demon token.
Effects of Action Cards vs Darkness
Action cards containing "until opponent pays X Crystals" remain effective until Darkness pays X Dark Points. Darkness faction automatically pays X (if possible) at the beginning of Darkness turn, to remove the effect.
Action cards containing "until opponent Passive turn" remain effective until player Passive turn.
Dark Side of the Board
A game using Darkness expansion can be played on the dark side of the board.
If there is a break (missing Space) between two Spaces, this break cannot be crossed by Move Action and Line Of Fire cannot be drawn through it.
Additional Explanation for Darkness Cards
Second Gate – changes Crystal Source into a Shadow Gate (the token is no longer considered a Crystal Source).
The Last Stand Solo Mode
The Last Stand is a solo mode, in which the player struggles to survive as long as possible against Darkness.
This mode does not use the VP track. Instead, a Time Track token will be used to count VP gained by the player.
At the start of the game, place Victory marker next to the track, and move it to the track only after you have gained any VP.
Every time you gain or lose VP, adjust the track accordingly. Each time you move past 10 Space take 1 Small Campaign token (denoting 10 VP), gain 2 Crystals, and then move Victory marker to the start of the track. Continue to track your VP in this way for the remainder of the game.
In this mode Victory Points can't be used as substitute to Crystals, when paying any costs.
Build Darkness Action deck consisting of 45 cards. Chose the cards randomly from all dedicated Squad cards (of Squads chosen for the game), All Hell Breaks Loose cards and all 5 Darkness Difficulty Level cards.
When Darkness Action deck is depleted, take Large Campaign token (denoting 50 VP), reshuffle Darkness Action cards in the discard pile to create a new Darkness Action deck.
End of the game: This mode of play can end in only one way: player loses all of their models. At this time check your score. Points are awarded as follows:
- each resolved Darkness card in the discard pile (Darkness Difficulty Level cards on the board also count) is worth 1 VP
- each 1 Small Campaign token is worth 10 VP
- Large Campaign token is worth 50 VP
- add current points on VP track.
Caution: If the Darkness Action deck is depleted for a second time – you have beat all records and accomplished the impossible – winning The Last Stand mode, which can't be won by design. Congratulations! Just make sure you've got the rules right! :)
Darkness Faction (PvP Mode)
Introduction
This section presents rules for using Darkness as an additional faction in games of The Edge: Dawnfall. The player-controlled Darkness is more of a new faction, inspired by its previous version, than a direct rendition of the solo rules. Darkness is a very aggressive faction that uses special payment mechanics. While it might be a little bit more difficult for beginners, a skillful player will find playing Darkness a challenging and fulfilling experience.
NOTE: The player versus player Darkness faction uses the same miniatures and tokens as the solo game Darkness. This means that if you already ordered the Darkness expansion during our first campaign, you already have all the necessary components.
Setup
Darkness may be chosen as any other faction during step 5 of the standard Game Setup. If there is a Darkness player, add 10 Darkness Point tokens to the pool of Crystals and Charge tokens available for this game. The Darkness player starts with the regular number of Crystals, according to step 3 of the standard Game Setup. Note that the Darkness faction has no Elite Squad. All other standard Game Setup steps do not change.
Note: If a player decides to include the Prime Shadow Squad, make sure to check the Cavalry rules (page 10) before playing the game!
Note: The Darkness faction has no multiplayer Boss, so this faction cannot be chosen in any Boss game (page 68).
Darkness Points
The Darkness faction uses Dark Points to pay for their Action cards (with the exception of the Darkness Deployment card). Any cost measured in Dark Points CANNOT be paid with Crystals, Endurance tokens nor Victory Points.
During Game Setup, create a Neutral Pool containing 10 Dark Points beside the board. The Darkness player doesn't have any Dark Points in their Active Pool at the start of the game.
The Darkness player still spends Crystals to use the Red die, following the standard rules. Darkness models also follow standard rules for controlling Crystal Sources.
Gathering and Using Darkness Points
Dark Points are divided into 2 different pools:
Neutral Pool – The Darkness player may not spend Dark Points from this pool. When models are wounded, killed or when they spend Endurance tokens, the Darkness player places Dark Points from this pool on the board, where they can be collected and added to their Active Pool.
Active Pool – Dark Points in the Active pool are stored in the Darkness player's Crystal Pool, alongside their Crystals. The Darkness player may spend these to activate various Darkness abilities.
Each time a model receives a Wound, is killed or Sacrificed, the Darkness player takes 1 Dark Point from the Neutral Pool and places it on the board, in one hex ⬡⬡ with the wounded/killed/Sacrificed model (Darkness player chooses).
Each time a player pays a cost by spending an Endurance token of one of their Squads, the Darkness player takes 1 Dark Point from the Neutral Pool and places it on the board, in one hex ⬡⬡ with any model of that Squad (Darkness player chooses).
No hex may hold more than 1 Dark Point. When the Darkness player should place a Dark Point, if there are no free hexes available, that Dark Point is not placed. If the Neutral Pool is empty, the Darkness player may take 1 Dark Point from anywhere on the board and move it to the corresponding hex.
When a Darkness model ends its movement in a hex containing a Dark Point, that Dark Point is added to the Darkness player's Active Pool. Pushed models cannot collect Dark Points.
Regardless of their base size, models from other factions can Push Dark Points. Any spent Dark Points return to the Neutral Pool.
Darkness Shrine – Shadow Gate and Additional Darkness Shrine Token
Darkness PVP faction uses only 1 Additional Darkness Shrine token (put the second one into the box).
Basic Darkness Shrine (the Shadow Gate) and Additional Darkness Shrine tokens work like space-bending portals for the Darkness models. For the Darkness player, all Spaces adjacent to any of those Gates are considered as adjacent to each other. This means that a Darkness model may move from a Space adjacent to any Gate to any other Space also adjacent to any of those Gates. Such a movement cost 1 Space of the Darkness model's total Movement range, regardless of the distance actually crossed.
This rule also applies to all Darkness Ranged abilities, meaning that a Darkness model can perform any Action with limited range and/or Line of Fire using the Gates rules detailed above.
Example 1: Darkness model [A] uses a Range 2 ability against enemy [D]. Under normal circumstances, the enemy would be out of Range. However, Darkness model [A] can hit its opponent through the Shadow Gates. All Spaces adjacent to any Shadow Gate are treated as adjacent to each other, meaning that enemy model [D] is actually within Range.
Example 2: Darkness model [E] has a Move Attribute of 2. Movement from E to F is treated as a 1-Space Move, and Movement from E to G (through F) is treated as a 2-Space Move.
The Additional Darkness Shrine token starts on the Darkness Shrine itself, but it may be repositioned to a Crystal Source. In this case, the Crystal Source works both as a Crystal Source and a Darkness Shrine.
Darkness Banner
The Darkness faction has a Banner that works differently from other Banners.
In order to use the Banner, the Darkness player must spend 8 Dark Points and flip the card to reveal a special Squad card. When the card is flipped, the Darkness player places the Abyssal Empress model on a Shadow Gate and adds 3 Endurance tokens on her Squad card. The Abyssal Empress can be activated, killed or Sacrificed like any other Squad. Anytime during their Active turn, the Darkness player may spend 2 Dark Points to use the Oblivion Action, described on the Abyssal Empress Squad card.
The Abyssal Empress Squad card and its Oblivion Action are not reproduced in this excerpt; they belong to the Abyssal Empress mini-expansion.
The Darkness Banner IS NOT refreshed during the Darkness player's Passive Turn.
When the Abyssal Empress is killed or sacrificed, the Darkness Banner is flipped back and can be used to summon the Abyssal Empress again.
Alternative Darkness Banner
This passage is from the leaflet's Alternative Banners section (page 9), which applies to the Darkness faction's Banner.
With the Alternative Banner cards, the factions have now access to two different Banner cards, each with its own set of powers. During step 6 of the Game Setup, each player chooses one of their faction's Banner cards and puts the other back in the box.
The Alternative Darkness Banner: Spend 5 Dark Points from your pool to Flip this Banner card.
All the information about the Banner provided on the Darkness Faction Sheet and on page 8 in the Stretch Goal Rulebook apply to the Alternative Banner as well (except for the numbers). Note that the Abyssal Empress from Alternative Banner is able to move. In such case the player needs to take her off the Darkness Shrine.
Alternative Darkness Shrine: Shadow Vortex
This passage is from the leaflet's Alternative Shrines section (page 13).
Alternative Shrines give players an option to choose 1 of the 2 Shrines available for their Faction. Now, each Faction has 2 different Shrines, with their 2-sided tokens and 2 cards with description. During Setup, in Step 5, players choose 1 of the 2 of their Shrines – they use the chosen side of Shrine token and take the appropriate card with description. Put the other card one back to the box.
Darkness Shrine: Shadow Vortex – When any enemy model ⬡⬡ with Shadow Vortex Moves or is Pushed away from ⬡⬡ with Shadow Vortex, place a Dark Point anywhere ⬡⬡ with the Shadow Vortex.
General Rules for Solo & Co-op Campaigns
Leaflet page 15. These general rules apply to the Darkness campaign below.
Important! Please note that some of the campaign rules overwrite the standard guidelines for a Player vs Player game. Any exceptions are specified in the appropriate scenarios. If a scenario does not mention a certain aspect of the battle (such as a player order, unit deployment, or starting Crystal Pool), it always means this aspect remains unchanged and plays out according to the standard rules found in the Rulebook. The same goes for the "Setup" section of each scenario – it only contains unusual elements and non-standard placements that overwrite the regular battle setup procedure.
Playing the Campaigns
All campaigns in this booklet were created for solo or CO-OP play. You can attempt them with any faction, fighting the AI-controlled enemy in a series of branching battles, often including a territory control mini-game.
The enemy models fight according to the standard Darkness AI rules, explained in the previous sections of this booklet. Most often, the cards and algorithms only provide you with a general direction (e.g., "Activate all Shadow models, move them towards the closest enemy AND initiate Combat with every Shadow model"). This means, sometimes you may have several valid options on how to move the enemy models.
In such cases, simply pick an option that's least harmful or most beneficial to you, the human player. Trust us: beating the enemy will be a challenge regardless!
Starting Units and Decks
Unlike in standard games, players start these campaigns with a pre-determined force. The details can be found in introductions to specific campaigns. Additionally, the standard rule that restricts your deck to cards of Squads present in your army is lifted. Your deck carries over between the battles, and sometimes it may contain cards that don't refer to any Squad present in a particular engagement. Please remember that in this case the Top Action of the card is still available and may be used by any Squad!
Unlike in standard games, campaign battles do not end when human players run out of Action cards. If that happens, simply shuffle all your discarded cards and use them as your new deck.
Time Track
Many battles of these campaigns use the Time Track instead of (or in addition to) the Victory Points track. Time Track usually shows the end of the battle and all special events that happen during the encounter. Before a scenario begins, place a Time Marker on slot 1 of the track, and then set up any Event Markers listed in the scenario on their corresponding slots. They will help you remember when the next event triggers.
Please note that you move the Time Track only after ALL human players and the AI have taken their turns. This means the game progresses according to this sequence:
- Set the Time Track to 1, check for any initial events
- Player A Turn
- Player B Turn (when in CO-OP mode)
- AI Turn
- Move the Time Track to 2, check for any events
- Player A turn
- Player B turn (when in CO-OP mode)
- AI Turn
- Move the Time Track to 3, check for any events
- (…)
Please note: any Actions that grant a specific player extra turns (such as the Time Jump) do not move the Time Track!
Campaign Map & the Battle Map
The Darkness, Lord of Light and Last City campaigns play out on their own maps and include territory control aspects. Sometimes, a script will ask you to leave a sticker on a slot of the map. These stickers represent the decisions you've made that will influence future battles in many ways.
To keep the campaign map intact, you're never asked to remove any stickers from it. Instead, whenever a scenario requires you to disable any sticker (for example, when a buff runs out or a special unit dies), place a Cancelled sticker on top of it so that the number of the original sticker remains visible.
Some battles also use an alternative, Darkness-themed battlefield layout, printed on the back of the standard battle map. It has less available Spaces and more impassable obstacles. Please keep in mind that these obstacles DO NOT count as the edge of the map – only Spaces on the true border of the map do.
In the middle of this Darkness-themed map is the Red Zone – a cluster of four Spaces that's sometimes referenced in the setup rules of scenarios (see the diagram in the leaflet).
Cooperative Mode
Most campaigns in this booklet can optionally be played in a two-player CO-OP mode. In this case, simply split the starting force in half (e.g. instead of four Squads, each player controls two), and if the number is uneven, choose the player who receives a smaller force randomly.
These two forces may be of different factions. In this case, players need to choose which one receives the Shrine and which one gets the Banner card! There can never be two Shrines and Banner cards in the battles against AI.
Each player builds a separate deck of Action cards, picking five Action cards for each Squad they get to control (but no less than 10 cards).
Both players determine their player order and then take turns deploying their Squads. During the battle, they take turns one after the other, before the AI turn.
The Victory Points track (if a scenario uses it) is shared between the players. Any lost model or any killed enemy move the VP track exactly like in a single-player game.
The Crystal Pool is also shared. When Harvesting, both forces count as a part of the same army.
If a scenario grants a special buff, reward or a sticker that enables a special rule, apply it like you would when playing a single army. For example, if a debuff requires you to remove 1 Endurance token from any of your models at the start of each battle, you still remove only 1 Endurance token in the CO-OP play – and both players have to agree upon which model it affects.
Darkness Campaign
Single-player vs AI campaign. The leaflet's prologue is flavour fiction and is omitted.
Campaign Rules & Setup
Apart from the standard rules found at the beginning of this booklet, the following rules also apply during the Darkness campaign. This campaign has been designed for solo play only. You can attempt it with any faction, fighting the AI-controlled Darkness in a series of battles with legacy and territory control aspects.
Legacy Map, Campaign Map & the Battle Map
This campaign is played on a special, separate Darkness map (its sticker slots start with letters D and F). The single space for stickers in the corner of the map is called the "Effects" section – you will place various game-altering effects there. If you have already played any of the three large PvP campaigns (Chapter vs Demons, Faceless vs Reborn, Rha-Zack vs Dvergar), the map you used for them becomes your legacy campaign map. Some events in this story will change, depending on the results of these other campaigns.
Most engagements of the Darkness campaign take place on an alternative (red) board, printed on the back of the regular board.
Darkness Map
The track on the side of the Darkness campaign map represents the progress towards the Final Nightfall – that's when all light becomes eradicated from your world, and it becomes just one more domain of the Dark. Lost battles and campaign decisions will influence this counter. It does not reset even if you replay a scenario.
At the beginning of each battle, the Darkness receives a number of Dark Points equal to the current state of the Final Nightfall track. Whenever the Final Nightfall track reaches the end, read Ending 5.
Echoes of the Fallen Worlds
Your track on the campaign map becomes the Echoes of the Fallen Worlds counter. Every time you lose a battle, or something awful happens, the campaign will ask if you'd like to repeat your last battle (or previous choice). Every time you do that, you receive one Echo, as Darkness envelops and consumes an alternate reality in which your efforts have failed.
This mechanism will slowly lower the difficulty of the campaign – both through repetition and additional events. However, reaching the end with fewer Echoes will yield a different outcome, including a secret ending.
Your Starting Units and Deck
You will start the game with only a part of your force, your Banner card, your Shrine, and a deck that includes up to 20 Action cards of your choice. Unlike in other campaigns, you can rearrange this deck freely before each battle, as long as you use no more than 20 cards. More powerful units are added as the campaign progresses.
IMPORTANT: Unlike in standard games, the battles of the campaign mode do not end when you run out of the Action cards. If that happens, simply shuffle all your discarded cards and use them as your new deck.
Darkness Deck
Construct the Darkness deck before each battle, taking all cards with the names of Darkness units that take part in this specific scenario, unless instructed otherwise.
Saving the Campaign Progress
Although the campaign battles are shorter than regular matches, the full campaign may still take many hours to complete. If you wish to stop mid-game, simply take note of the current scenario number and the status of both campaigns. Then, fold and stow the game until you are ready to return, making sure to keep both decks separate from other Action cards. All of your scenario choices are remembered thanks to a system of stickers that you put on the Darkness campaign map as the game progresses.
Scenario 1: A New Threat
Flavour text omitted.
Setup:
- Use the standard battle map.
- Place the Shadow Gate token at least 3 Spaces away from the edge of the map.
- Place the Banner model two Spaces away from the gate and set two Endurance Tokens besides it – it represents your Faction Symbol.
- Place two Crystal Sources at least 2 Spaces away from one another and the Shadow Gate.
- Deploy your forces at least 3 Spaces away from the Shadow Gate, so that no model is in ⬡⬡ contact with any Crystal Source. Set your Banner card and Shrine aside, as they won't be used in this battle.
Your forces: Any three Squads, excluding the Elite Squad (Purge Doctor, Bloodsmith, Ancient Guard, Fleshripper, Gyrobot, Sourceblade) and your faction champion.
Your deck: Select any 10 of your Action cards and shuffle them. The battle does not end when you run out of cards – simply create a new deck out of discarded ones.
Your objective: Survive the Darkness assault.
Your special objective: Keep your Faction Symbol safe from harm.
Darkness forces: Shadow Squad, Impostor Squad, Void Specter Squad (all start off the board and will arrive when summoned by the appropriate Darkness card).
Darkness deck: Select all Shadow, Void Specter and Impostor cards. Shuffle them and draw the top eight cards, setting aside the rest. You will reveal and resolve ONE Darkness card during each Darkness turn. Once all Darkness cards are gone, the battle ends at the end of the current turn.
Achievements: If the Darkness manages to destroy the Faction Symbol (see Special Rules), read Script 18.
Special rules:
- Darkness models can attack the Faction Symbol just like every other model – treat it like a model with 0 INI for the movement purposes. The Faction Symbol automatically receives one wound from each attack. Once all of its Endurance Tokens are gone and it receives another wound, it is destroyed.
- Players don't earn Victory Points in this battle and the Victory Points track remains unused.
Your reward: Read Script 14.
Your penalty: Read Script 11.
Darkness reward: If the Darkness won, add 1 to the Final Nightfall track.
Scenario 2: Into the Breach
Flavour text omitted.
Choose one:
- Attack the Darkness immediately – Continue to the "Battle" section of this scenario.
- Spend more time preparing – Place the "Delayed Assault" (D10) sticker on the appropriate slot of the Darkness campaign map, and then read the "Preparations" section below.
Preparations
After a long search, you find something that could help you in the upcoming fight. Read the paragraph appropriate for your faction and apply the rules found there.
Weapons of Irithlion (Demons)
Flavour text omitted.
Place three "Weapons of Irithlion" stickers (D04) in the "Effects" section of the Darkness campaign map. Before starting each battle, mark the bases of three chosen models with Charge tokens. Whenever a model with a token wounds any Darkness model in Combat, it deals two wounds instead of one.
Unfortunately, these weapons are also brittle. If you ever roll a 6 during the Attack roll (possible only using the Red die), the weapon breaks. Disable one D04 sticker and place one Charge token less in the following battles.
Censer of Saints (Chapter)
Flavour text omitted.
Place sticker D05, "Censer of the Saints" on the "Effects" section of the Darkness campaign map.
From now on, remove 1 Dark Point from the pool at the beginning of each Darkness turn. The censer will also help you enter deeper into darkness during your conquests.
Darkvines (Reborn)
Flavour text omitted.
Place the "Darkvine Seeds" sticker (D06) on the "Effects" section of the Darkness campaign map. From now on, every Darkness model in ⬡⬡ with at least one Thicket token has its stats reduced by 1 (but no lower than 0).
Shadowgorger Caterpillar (Faceless)
Flavour text omitted.
Place the "Shadowgorger Caterpillar" sticker (D07) in the "Effects" section of the Darkness campaign map. At the beginning of each battle, and after setting up all your Squads, place a Charge token representing the Shadowgorger Caterpillar on the base of a chosen model – it becomes the Host.
The Caterpillar activates at the same time as the Host. As long as it remains active, it can move to any other friendly model in ⬡⬡ contact – this model becomes a new Host, and the Caterpillar becomes inactive until its new Host activates.
The Caterpillar cannot be attacked or damaged by Darkness models. Should its Host die, the Caterpillar token is placed on the board in his place and may attach to any Faceless who comes into ⬡⬡ contact.
Whenever a Darkness model in ⬡⬡ contact with the Host dies, place one Endurance Token on the Caterpillar token. You may transfer this extra Endurance Token to the Host at any point. If there are any unused Endurance Tokens at the end of the battle, collect them in the "Effects" section – a Caterpillar may transform and hatch during the later stage of the campaign if you gather enough.
Nanoswarm (Rha-Zack)
Flavour text omitted.
Place sticker D08, "Nanoswarm" on the "Effects" section of the Darkness campaign map. During the setup stage of each battle that uses the Shadow Gate, you may place the Gate anywhere on the board. Crystal Sources and Shrines still need to be at least two Spaces away from the Gate.
The Nanoswarm will also let your forces cover more ground and hold more territories than any other race.
Blackflame Belcher (Dvergar)
Flavour text omitted.
Place sticker D09, "Blackflame Belcher" in the "Effects" section of the Darkness campaign map. At the beginning of each battle, after setting up all your models, place a large token, representing the Belcher, anywhere on the map, at least three Spaces away from the Shadow Gate (or any other token/model that acts as the Shadow Gate for this specific scenario). Then, place two Endurance Tokens, representing Fuel, on the Belcher.
You can activate the Belcher like any other model. Once activated, it can move up to 2 Spaces. Then, it may remove one Fuel token to attack, pouring flames over one selected Space no more than 2 Spaces away. Any model on this Space immediately receives 1 wound.
If the Belcher douses the Shadow Gate (or token/unit that acts as a Shadow Gate), no Darkness models can be deployed during the next Darkness turn.
Battle
Flavour text omitted.
Setup:
- Use the alternate, Darkness-themed battle map found on the back of the regular one.
- Place two Crystal Sources and your Shrine on the map, at least two Spaces apart (and not ⬡⬡ with any obstacles).
- Place one Shadow model in ⬡⬡ contact with each of these Crystal Sources.
- Place the Shadow Gate at least three Spaces away from the edge of the map and two Spaces away from each Crystal Source. (See: Special Rules). Set up your force in ⬡⬡ contact with the Shadow Gate – this time it is you who came through it. If there's not enough space, leave the remaining models on their Squad cards as a Reserve.
- Take five small tokens and put them any way you like on the outer edge of the map, at least three Spaces away from each other. These represent the Encroaching Darkness and will turn into enemy models as the battle progresses (see Special Rules).
Your forces: Choose any four Squads, excluding your Elite Squad (Purge Doctor, Bloodsmith, Ancient Guard, Fleshripper, Gyrobot, Sourceblade).
If the "Delayed Assault" (D10) sticker is on the Darkness campaign map, your forces are worn out after a long defense – remove a total of 2 Endurance Tokens from any of the Squads.
Your deck: Select 15 of your Action cards and shuffle them. The battle does not end when you run out of cards – simply create a new deck out of discarded ones.
Your objective: Survive.
Your special objective: Win through Victory Points.
Darkness forces: 1 Shadow Squad (two models deployed at the beginning of the battle), 1 Void Specter Squad (no models deployed at the beginning), 1 Impostor Squad (no models deployed at the beginning).
Darkness objective: Win through Victory Points.
Darkness deck: Select all Shadow, Void Specter and Impostor cards. Shuffle them and draw the top 16 cards, setting aside the rest. You will reveal and resolve TWO Darkness cards during each Darkness turn.
Special rules:
- Whenever a Darkness card asks you to deploy a new Darkness model, pick the Encroaching Darkness token closest to one of your models and replace it with the reinforcing model. For the purpose of any rules, each Encroaching Darkness counts as a separate Shadow Gate.
- Whenever there are no Encroaching Darkness tokens left on the map, immediately place a new one, at least three Spaces away from the last consumed Spaces.
- Use the time track to count completed turns of the battle. Mark Turns I, II, III and VIII on the track.
- Turn I: Read Script 21.
- Turn II: You may deploy any models from your Reserve into ⬡⬡ contact with the Shadow Gate, as long as there are enough empty hexes.
- Turn III: Again, you may deploy any models from your Reserve into ⬡⬡ contact with the Shadow Gate, as long as there are enough empty hexes. This is your last chance to do so.
- Turn VIII: The last turn. The battle ends after you finish your actions but before the Darkness turn.
Your reward: Read Script 29.
Your special reward: If you have managed to win through Victory Points, read Script 22 instead.
Your penalty: Read Script 26.
Darkness reward: If the Darkness won, add 1 to the Final Nightfall track.
Scenario 3: Pillars of the Sunless Sky
Flavour text omitted.
Preparations
Take 2 "Conquest" stickers (D01) and distribute them any way you wish among the locations below. Read and apply all the rules of all Conquered lands, and then carry on to the Battle Phase.
If the "No Supplies!" sticker is present on the Darkness campaign map, your starting number of "Conquest" stickers is 0.
You receive 1 bonus "Conquest" sticker for each of the following criteria you meet:
- "Nanoswarm" (D08) sticker is present in the "Effects" section of your map.
- "Censer of the Saints" (D05) sticker is present in the "Effects" section of your map.
- "Rallying Warcry" (D02) sticker is present in the "Effects" section of your map.
- Echoes of the Fallen Worlds is equal to at least 5.
Available Areas
Birthing Ferns (D01-A)
Flavour text omitted.
As long as you control this area, the Shadow or Impostor Squad (you choose) has its maximum number of models reduced by 1 (for example, if a full Shadow Squad is used in a battle, it can never have more than 3 models). Mark the chosen Squad with your faction's Victory Token.
Gateway to the Motherforest (D01-B)
Flavour text omitted.
Place a Conquest sticker on this location. Then, if the "Charcoal Wastes" sticker (B20) is on the legacy campaign map, read Script 31. Otherwise, read Script 35.
Fields of Dread (D01-C)
Flavour text omitted.
As long as you control this area, the Darkness draws and plays only one card during the first turn of each battle.
Ancient Voracity (D01-D)
Flavour text omitted.
As long as you control this area, you start each battle with one additional Crystal.
Gateway to Al'Iskandria (D01-E)
Flavour text omitted.
Place a "Conquest" sticker on this location. Then, if sticker A29-A or A29-B is on the legacy campaign map, read Script 32. Otherwise, read Script 36.
Battle
Flavour text omitted.
Setup:
- Use the alternate, Darkness-themed battle map found on the back of the regular one.
- Put four large tokens in four Spaces of your choice, at least one Space away from the map's edge and two Spaces away from one another. Set three Endurance Tokens on each of them. They represent the Dark Monuments you will have to destroy in this battle. They block Line of Fire and can never be Pushed.
- Place three Shadows in ⬡⬡ contact with the first monument.
- Place two Impostors in ⬡⬡ contact with the second monument.
- Place two Void Specters in ⬡⬡ contact with the third monument.
- Place one Slaughter Crow in ⬡⬡ contact with the fourth monument.
- If sticker D07 "Shadowgorger Caterpillar" is present in the "Effects" section, and the Caterpillar has gathered more than six unused Endurance Tokens, read Script 34.
Your forces: Select up to five of your Squads. You may not pick your Elite Squad, unless the "Fortified Outpost" sticker (D12) is present on the Darkness campaign map.
Your deck: Select any 15 of your Action cards and shuffle them. The battle does not end when you run out of cards – simply create a new deck out of discarded ones.
Your objective: Destroy at least 2 Dark Monuments and survive.
Your special objective: Destroy all Dark Monuments and survive.
Darkness forces: 1 Shadow Squad (three models start on the battlefield), 1 Impostor Squad (two models start on the battlefield), 1 Void Specter Squad (two models start on the battlefield), 1 Slaughter Crow Squad (one model starts on the battlefield).
Darkness deck: Select all Shadow, Void Specter, Impostor and Slaughter Crow cards. Shuffle them and draw the top 20 cards, setting aside the rest. You will reveal and resolve TWO Darkness cards during each Darkness turn. Once all Darkness cards are gone, the battle ends.
Special rules:
- IMPORTANT: For the purpose of this battle, the standard Darkness AI rules are modified. Whenever Moving, the Darkness always tries to reach the closest enemy model ⬡⬡ with the Dark Monuments. In Combat, any enemy models ⬡⬡ with the Dark Monuments become the priority targets (if the Darkness model can initiate Combat with several of them, it always chooses the one with the lowest INI).
- A Dark Monument may be attacked like any other model – it automatically receives one Wound. When Checking for Hit, its INI is equal to 1. After its Endurance tokens are exhausted, the next attack destroys it.
- As long as all four monuments remain functional, Darkness Squads receive +1 to all of their stats.
- Players don't earn Victory Points in this battle and the Victory Points track remains unused.
- The battle lasts until the Darkness deck is exhausted, or one of the forces is defeated.
Your reward: Read Script 38.
Your special reward: If you have survived and destroyed all Dark Monuments, read Script 37 instead.
Your penalty: Read Script 39.
Darkness reward: Add 2 to the Final Nightfall counter.
Scenario 4: Atop the Tower of Ruin
Flavour text omitted.
Preparations
Take 2 "Conquest" stickers (D01) and distribute them any way you wish among the locations below – or locations from the "Preparations" Phase of Scenario 2 that you haven't Conquered yet. Read and apply the rules of all newly Conquered locations and then continue to the Battle Phase.
If the "No Supplies!" sticker is present on the Darkness campaign map, your starting number of "Conquest" stickers is 0.
You receive 1 bonus "Conquest" sticker if you meet any of the following criteria:
- "Nanoswarm" (D08) sticker is present in the "Effects" section of your map.
- "Censer of the Saints" sticker is present in the "Effects" section of your map.
- "The Fallen Spires" sticker (D14) is present in the "Effects" section of your map.
- The "Reborn Warband" sticker (D13) is present in the "Effects" section of your map.
Available Areas
Gateway to the Dvergar Digsite (D01-F)
Flavour text omitted.
Place a "Conquest" sticker on this location. Then, if sticker C32, "Wondrous Engine" is on the legacy campaign map, read Script 42. Otherwise, read Script 49.
The Lightless Sea (D01-G)
Flavour text omitted.
As long as you control this area, you get 1 additional Crystal at the beginning of each battle.
The Dreadhub (D01-H)
Flavour text omitted.
As long as you control this area, at the beginning of each battle discard the top five cards from the Darkness deck.
The Birthing Ferns (D01-I)
Flavour text omitted.
As long as you control this area, the Void Specter or Slaughter Crow Squad (you choose) has its maximum number of models reduced by 1 (for example, if a full Slaughter Crow Squad is used in a battle, it can never have more than 3 models). Mark the chosen Squad with your faction's Victory Token.
The Contested Gateway (D01-J)
Flavour text omitted.
Place a "Conquest" sticker on this location. Then, if the "Wondrous Engine" sticker (C32) is present on the legacy campaign map, read Script 44. Otherwise, read Script 47.
Battle
Flavour text omitted.
Setup:
- Use the standard battle map. The battle takes part on a platform high above the ground. To represent this, all Spaces at the edge of the map represent the Chasm. You can never place any tokens or models in the Chasm. Any model that's pushed over the edge of the Chasm immediately becomes lost (see Special Rules).
- Place a Shadow Gate at least three Spaces away from the edge of the map (two Spaces away from the Chasm). Deploy Bell Crow in ⬡⬡ contact with the gate (other Darkness models remain on their Squad cards). Your initial models are placed in ⬡⬡ contact with the edge of the Chasm. Finally, place two Crystal Sources at least two Spaces from the Shadow Gate and one Space from the Chasm.
- If sticker D07 "Shadowgorger Caterpillar" is present, and the Caterpillar has gathered more than six unused Endurance Tokens, read Script 34 and return here afterwards.
Your forces: Select any five of your Squads and build a deck of 20 Action cards. Deploy one of your Squads before starting the battle. The remaining Squads two [sic: printed as "Squads two"] will arrive at the beginning of each turn (see Special Rules).
Your deck: Select up to 20 of your Action cards and shuffle them. The battle does not end when you run out of cards – simply create a new deck out of discarded ones.
Your objective: Survive until the Darkness deck depletes.
Your special objective: Kill the Bell Crow.
Darkness forces: Bell Crow (starts in ⬡⬡ contact with the Shadow Gate), 1 Slaughter Crow Squad, 1 Shadow Squad, 1 Impostor Squad, 1 Void Specter Squad.
Darkness deck: Select all Shadow, Void Specter, Impostor, Slaughter Crow and Bell Crow cards. Shuffle them and draw the top 24 cards, setting aside the rest. You will reveal and resolve TWO Darkness cards during each Darkness turn. Once all Darkness cards are gone, the battle ends at the end of the current turn.
Achievements (Darkness): When a Darkness model pushes your first model over the edge of the Chasm, read Script 46.
Special rules:
- In this scenario, the Darkness AI rules change slightly. Whenever a Darkness model can push your model into the Chasm, it has to do so!
- The Bell Crow clings to the surface of the membrane with his mighty claws and can never be pushed away by your models. On the other hand, it can push any of your models of equal size (or smaller).
- At the beginning of each turn, you deploy one more Squad anywhere along the edge of the Chasm, until no Squads are left.
- No one earns Victory Points during this battle and the VP track remains unused.
Your reward: Place sticker D19, "The Fallen Tower" in the appropriate slot of the legacy campaign map and read Script 48.
Your special reward: If you've managed to kill the Bell Crow, put the "Defeated Bell Crow" sticker (D17) in the appropriate slot of the Darkness campaign map and reduce the Final Nightfall track by two. Then, read Script 48.
Your penalty: Add 1 Echo of the Fallen Worlds and restart the Battle Phase.
Scenario 5A: Heart of Darkness
Flavour text omitted.
If a "Heroes of Twilight" (D15) sticker is on the campaign map, go to Scenario 5B. Otherwise, continue.
Reinforcements
This scenario is a direct continuation of the previous battle. This means your force is restricted to the Squads and models that survived Scenario 4, though all temporary effects are removed and Endurance Tokens are replenished.
Setup
- Use the alternate, Darkness-themed battle map found on the back of the regular one.
- Place the Abyssal Empress at least 3 Spaces away from the edge of the map. Place Void Specters in ⬡⬡ contact with her model.
- Place the Bell Crow 1 Space away from the edge of the board (see Special Rules).
- Set up all of your forces according to the regular rules.
Your forces: If you have more than 4 Echoes of the Fallen Worlds, read Script 58. Otherwise, your force is restricted to the Squads and models who survived Scenario 4 (see Reinforcements).
Your deck: Select up to 20 of your Action cards and shuffle them. The battle does not end when you run out of cards – simply create a new deck out of discarded ones.
Your objective: Kill the Abyssal Empress.
Darkness forces: Abyssal Empress, 1 Slaughter Crow Squad, 1 Impostor Squad, 1 Void Specter Squad, Bell Crow (see Special Rules).
Darkness deck: Select all Abyssal Empress, Void Specter, Impostor, Slaughter Crow and Bell Crow cards. Shuffle them and draw the top 36 cards, setting aside the rest. You will reveal and resolve THREE Darkness cards during each Darkness turn. Once all Darkness cards are gone, the battle ends.
If you control the Dreadhub (D01-H), discard the top 9 Darkness cards, instead of 5.
Special rules:
- IMPORTANT: For the purpose of this battle, the standard Darkness AI rules are modified. Whenever Moving, the Darkness always tries to reach the closest enemy model ⬡⬡ with the Abyssal Empress. In Combat, any enemy models ⬡⬡ with the Abyssal Empress become the priority targets (if the Darkness model can initiate Combat with several of them, it always chooses the one with the lowest INI).
- The Empress model is considered a Shadow Gate for the purpose of deploying new Darkness units.
- There are no Crystal Sources on the map. Instead, the Harvest phase lets all of your models gather and materialize their inner strength. You refresh your Crystals and Banner card as usual, and you earn 1 Unused Crystal for each of your Squads still alive.
- If the Bell Crow was defeated during the last scenario (sticker D17, "Defeated Bell Crow" is on the Darkness campaign map), he starts the battle Immobile. He cannot be activated, and cannot attack, though Darkness cards with his name can still be played. Immobile Bell Crow can be attacked and killed as normal (he has 1 Endurance Token, requiring a total of 2 Wounds to be defeated).
- No one earns Victory Points during this battle and the VP track remains unused.
- Use the time track to count completed turns of the battle. Mark Turns III and V on the track.
- Turn III: If a Bell Crow is immobile and still alive, read Script 54.
- Turn V: Read Script 56.
Your reward: Read Script 59.
Your penalty: Read Script 51.
Scenario 5B: Conquerors of the Deep
Flavour text omitted. The leaflet's map illustration for this scenario is not reproduced.
Reinforcements
This scenario is a direct continuation of the previous battle. This means your force is restricted only to the Squads and models that survived Scenario 4, though all temporary effects are removed and Endurance Tokens are replenished.
Setup
- Use the alternate, Darkness-themed battle map found on the back of the regular one.
- Place a small token on the lowest (closest to the side of the board that contains your Squad cards) Space of the map. Then, look at the Spaces that lead in a straight line towards the other edge of the map and set four additional small tokens in any of them that have visible spine segments (see illustration). These tokens represent the Spinal Segments of the Primal Shadow (see Special Rules).
- Place the Bell Crow anywhere, at least 3 Spaces away from any Spinal Segment and place all Slaughter Crows in ⬡⬡ contact with his model.
- Place the Abyssal Empress model anywhere, 1 Space away from the edge of the map. Then, place one large and two small tokens in ⬡⬡ contact with her. All four represent a separate engagement between the wanderers and the Empress. You can't attack or control, or affect their battle in any way.
- Set up all of your forces according to the regular rules, at least 2 Spaces away from each Spinal Segment.
Your forces & deck: Same as in Scenario 5A.
Your objective: Disable the Primal Shadow.
Darkness forces & deck: Select all Void Specter, Impostor, Slaughter Crow and Bell Crow cards. Shuffle them and draw the top 30 cards, setting aside the rest. You will reveal and resolve THREE Darkness cards during each Darkness turn. Once all Darkness cards are gone, the battle ends.
Darkness objective: Kill all enemies.
Achievement: Whenever you wound a Spinal Segment for the first time, read Script 5B—05.
Special rules:
- IMPORTANT: For the purpose of this battle, the standard Darkness AI rules are modified. Whenever Moving, the Darkness always tries to reach the closest enemy model ⬡⬡ with the Spinal Segments. In Combat, any enemy models ⬡⬡ with the Spinal Segments become the priority targets (if the Darkness model can initiate Combat with several of them, it always chooses the one with the lowest INI).
- The Spinal Segments can be attacked like any other model. They have 3 DEF, 0 INI, always use the Red die when defending and cannot counterattack. Once a Spinal Segment is successfully damaged, place an Endurance Token, representing a wound, on it. Any Segment with three or more wounds is considered Destroyed.
- Destroying any two adjacent segments severs the spine of the Primordial Shadow and ends the battle.
- The Darkness has no Shadow Gate on the board; new Darkness models may arrive only after a Script-triggered scene (Script 5B—05).
- There are no Crystal Sources on the map. Instead, the Harvest action lets all of your models gather and materialize their inner strength. You refresh your Crystals and your Banner card as usual, and you earn 1 Unused Crystal for each of your Squads still alive.
- If the Bell Crow was defeated during the last scenario (sticker D17, "Defeated Bell Crow" is present), he starts the battle Immobile. He cannot be activated, and cannot attack, though Darkness cards with his name can still be played. Immobile Bell Crow can be attacked and killed as normal (he has 1 Endurance Token, requiring a total of 2 Wounds to be defeated).
- No one earns Victory Points during this battle and the VP track remains unused.
- Use the time track to count completed turns of the battle. Mark Turns III, V, VIII and X on the track.
- Turn III: If the Bell Crow is immobile and still alive, read Script 5B—04.
- Turn V: Read Script 5B—02.
- Turn VIII: Read Script 5B—08.
- Turn X: Read Script 5B—06.
Your reward: Read Script 5B—09.
Your penalty: Read Script 5B—01.
Endings
The leaflet's narrative text for each ending is flavour fiction and is omitted; the closing lines and instructions are reproduced.
Ending 1
Narrative omitted.
CONGRATULATIONS (I guess)
Ending 2
Narrative omitted.
CONGRATULATIONS!
Ending 3
Narrative omitted.
CONGRATULATIONS!
Ending 4
Open the secret Campaign Secrets Envelope and read the SECRET EPILOGUE.
CONGRATULATIONS!
Ending 5
There is no epilogue or closure. Only darkness remains. Start over, if you dare.
Scripts
Each script's flavour text is omitted; the rules and instructions are reproduced.
Script 11
You may decide to replay this scenario from the beginning. If you want to do that, read Script 19. Otherwise, apply the Darkness Reward and continue to the next scenario.
Script 14
If your Faction Symbol survived the battle, read Script 17. Otherwise, carry on to the next Scenario.
Script 17
Place the "Rallying Warcry" sticker (D02) on the "Effects" section of the Darkness campaign map. Continue to the next scenario.
Script 18
Place sticker D03, "Consumed Banner" on the appropriate slot of the Darkness campaign map. In your next engagement, the morale of your force will be affected. The battle continues.
Script 19
Add 1 Echo of the Fallen Worlds to your track and replay Scenario 1 from the very beginning. See "Campaign Rules & Setup" for more information on Echoes.
Script 21
If sticker D02, "Rallying Warcry" is in the "Effects" section of the campaign map, read Script 24. If it isn't but you have 3 or more Echoes of The Fallen Worlds, read Script 25. Otherwise, read Script 23.
Script 22
Place sticker D12, "Fortified Outpost" on the appropriate slot of the Darkness campaign map. Continue to the next scenario.
Script 23
Discard two of your Action cards. From now until the end of the battle, your maximum hand size is 2, and you have to spend a Crystal, a Victory Point or an Endurance Token to activate your next Squad. Following Activations proceed as normal. The battle continues.
Script 24
Discard one of your Action cards. From now until the end of battle, your maximum hand size is 2. The battle continues.
Script 25
The battle continues.
Script 26
Choose one:
- Replay this scenario: Add 1 Echo of the Fallen Worlds to your track and start over.
- Carry on without the supplies: Apply the Darkness Reward. Then, place sticker D11, "No Supplies!" on the "Effects" section of the campaign map. This will have a detrimental effect on your conquest. Continue to the next scenario.
Script 29
Continue to the next scenario.
Script 31
Take 1 additional "Conquest" sticker. Continue the Preparations Phase.
Script 32
Take 1 additional "Conquest" sticker. Continue the Preparations Phase.
Script 34
Disable sticker D07, "Shadowgorger Caterpillar" and place sticker D20, "Hatched Shadowgorger" in the "Effects" section. From now on, at the beginning of every battle, place a small token representing the Shadowgorger in ⬡⬡ contact with any of your models. It activates during each Passive turn, and moves up to 4 Spaces in the direction of the closest Darkness model, ignoring obstacles. If it manages to come into ⬡⬡ contact with its target, it immediately deals 1 wound.
The Shadowgorger cannot be attacked, damaged or affected in any way.
Script 35
Place the "Reborn Warband" (D13) sticker on the appropriate slot of the Darkness campaign map. Continue the Preparations Phase.
Script 36
From now on, you receive two additional Crystals at the beginning of each battle. Continue the Preparations Phase.
Script 37
Flavour text omitted.
Place sticker D14, "Fallen Spires" on the campaign map. Continue to the next scenario.
Script 38
Flavour text omitted.
Continue to the next scenario.
Script 39
Flavour text omitted.
Choose one:
- Add 1 Echo of the Fallen Worlds and restart the Battle Phase of this scenario.
- Add 1 Echo of the Fallen Worlds, disable all "Conquest" tokens on the campaign map and go back to the Preparations Phase of this scenario.
- Pull your warriors from the Shadow Gate and other outposts to make one more, desperate assault. Disable any two "Conquest" stickers and place the "No Supplies!" (D11) sticker on the appropriate slot of the campaign map. Then, apply the Darkness Reward and restart the Battle Phase of this scenario.
Script 41
Flavour text omitted.
Choose one:
- Restart the encounter – Go back to Script 44, add 1 Echo of the Fallen Worlds to your track.
- Carry on regardless – Place a "Lost Heroes" (D16) sticker on the appropriate slot of the campaign map. Return to the Preparations Phase.
Script 42
Flavour text omitted.
Subtract 2 from the Endless Nightfall track. (Printed as "Endless Nightfall track"; elsewhere in the leaflet this track is the Final Nightfall track.) Continue the Preparations Phase.
Script 44
Flavour text omitted.
Choose your reply:
- Let them continue and give them a small escort – Place sticker D15, "Heroes of Twilight" on the appropriate slot of the campaign map. Return to the Preparations Phase.
- Turn them down and proceed with your next assault – Return to the Preparations Phase.
- Attack them and try to take control of their artifact – Read Script 41.
Script 46
Flavour text omitted.
If Echoes of the Fallen World is equal to at least 6, immediately perform a bonus activation of one of your Squads. The battle continues.
Script 47
Flavour text omitted.
Take 1 additional "Conquest" sticker. Continue the Preparations Phase.
Script 48
Flavour text omitted.
Place all surviving models on their Squad cards and set these cards aside – they will take part in the next battle. Continue to Scenario 5A.
Script 49
Flavour text omitted.
Place sticker D18, "Ancient Vessel" in the "Effects" section of the Darkness campaign map. From now on, your maximum hand size is 4 and you draw up to 4 cards at the beginning of each turn.
Script 51
Flavour text omitted.
Choose one:
- Lose the campaign. Read Ending 5.
- Add 1 Echo of the Fallen Worlds and restart the battle.
Script 54
Flavour text omitted.
Bell Crow no longer counts as Defeated. Replenish his Endurance Tokens and add 1 extra. From now on, he fights according to the regular rules.
The battle continues.
Script 56
Flavour text omitted.
From now on, at the beginning of your every turn, make an Initiative roll for every model on the board, with the exception of the Bell Crow and the Abyssal Empress. The ones that fail lose their footing and tumble down into the eternal night.
The battle continues until you kill the Empress or all your models are dead.
Script 58
Flavour text omitted.
All your casualties from Scenario 4 are replenished – you start the battle with any five Squads at full strength.
Script 59
Flavour text omitted.
Count your Echoes of the Fallen Worlds and compare with the table below:
- No more than one Echo – read Ending 3.
- No more than five Echoes – read Ending 2.
- More than five Echoes – read Ending 1.
Script 5B—01
Flavour text omitted.
Choose one:
- Lose the campaign. Read Ending 5.
- Add 1 Echo of the Fallen Worlds and restart the battle.
Script 5B—02
Flavour text omitted.
Remove the large token in ⬡⬡ contact with the Empress. This turn, the Darkness draws and plays only ONE card. The battle continues.
Script 5B—04
Flavour text omitted.
Bell Crow is no longer Immobile. Replenish his Endurance Tokens and add 1 extra. From now on, he fights according to the regular rules.
The battle continues.
Script 5B—05
Flavour text omitted.
From now on, any wounded Spinal Segments act as Shadow Gates. New Darkness models are deployed in ⬡⬡ contact with them, choosing the ones closest to your models.
Script 5B—06
Flavour text omitted.
From now on, at the beginning of your every turn, make an Initiative roll for each of your models. The ones that fail lose their footing and tumble down into the eternal night.
The battle continues until you kill the Empress, or all your models are dead.
Script 5B—08
Flavour text omitted.
Remove one of the small tokens in ⬡⬡ contact with the Empress. This turn, the Darkness draws and plays only ONE card. The battle continues.
Script 5B—09
Flavour text omitted.
Count your Echoes of the Fallen Worlds and compare with the table below:
- No more than five Echoes – read Ending 4.
- More than five Echoes – read Ending 3.