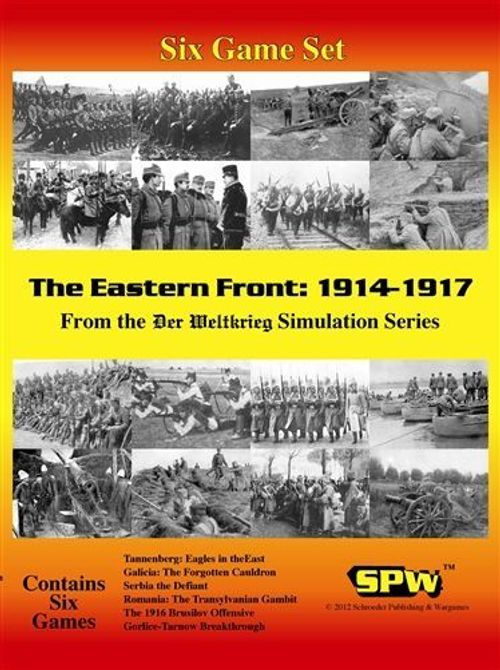
The Eastern Front: 1914-1917
The Eastern Front: 1914-1917 Rulebook
Table of Contents
Table of Contents
- Introduction
- 3. Game Components
- 4. Game Set-Up
- 5. Sequence of Play
- 6. Ground Movement
- 7. Rail Movement
- 8. Rail Capacity
- 9. Rail Line Status
- 10. Zones of Control
- 11. Stacking
- 12. Combat
- 13. Combat Resolution
- 14. Retreat
- 15. Advance After Combat
- 16. Column Attack
- 17. Supply Points
- 18. Headquarters
- 19. Supply
- 20. Surrounded Units and Surrender
- 21. Fortresses
- 22. Trenches
- 23. Recombination
- 24. Replacement Units
- 25. Reinforcements
- 26. Demoralization Points
- 27. Divisional Breakdown
- 28. Corps
- 29. Artillery Units
- 30. Cavalry Units
- 31. Cavalry Unit Strengthening
- 32. Mountain Units
- 33. Assault Units
- 34. Winter Weather
- 35. The Danube
- 36. River Flotillas
- 37. Nation Specific Rules: Germany
- 38. Nation Specific Rules: Great Britain
- 39. Nation Specific Rules: France
- 40. Nation Specific Rules: Austria-Hungary
- 41. Nation Specific Rules: Russia
- 42. Nation Specific Rules: Italy
- 43. Nation Specific Rules: Serbia
- 44. Nation Specific Rules: Belgium
- 45. Nation Specific Rules: Bulgaria
- 46. Nation Specific Rules: The Ottoman Empire
- 47. Nation Specific Rules: Romania
- 48. Nation Specific Rules: Greece
- 49. Nation Specific Rules: The United States
- 50. Unit Color Appendix
- Terrain Effects Chart
- Scenario Specific Rules
- Serbia the Defiant (August 1914)
- Serbia the Defiant (November 1914)
- Serbia the Defiant (October 1915)
- Romania: Transylvanian Gambit
- Scenario Linking Rules (Serbia and Romania Booklet)
- Gorlice-Tarnow Breakthrough
- The 1916 Brusilov Offensive
- The East Front Duration Game
- Victory Conditions (East Front Duration Game)
- The 1915 East Front Duration Game
- The 1916 East Front Duration Game
- Tannenberg: Eagles in the East
- Galicia: The Forgotten Cauldron
- Scenario Linking Rules (Tannenberg and Galicia Booklet)
Introduction
This rulebook contains the standard rules for each of the World War One scenarios found in the Der Weltkrieg series of games. Each of these games uses the same basic rules. The scenarios can be played separately, or linked together to form a larger game. This same Standard set of rules is included with each of these games.
Rules not originally in the standard rules have now been included since they apply to multiple games of the series. They retain the numbering given them when originally published with other games of the series.
While the diagrams in the rulebook show situations from The Schlieffen Plan, the concepts illustrated apply to all of the games.
All of the units depicted in these games were available to the historical commanders. Each of the units has combat and movement capabilities that represent what the historical unit was capable of doing. It is up to the players to conduct operations with their units within the framework of these rules.
Other games of the series can be tied together with these games to create more comprehensive simulations. The instructions for doing so are found in the scenario specific rules.
3. Game Components
Playing Pieces
Each game contains one or more counter sheets. The sheets contain a combination of units and markers. All markers may be used by either player.
Each map depicts the area of operations for the game it is included with. Each hex on every map of the Series is 20km across. See the map legend and the terrain effects chart for explanations of the different terrain and symbols found on the maps.
Tracks and Tables
Provided with each game are a number of cards. Two cards are Supply Tracks, one for the Central Powers player and the other for the Entente player. They are used by the players to keep track of the supplies available to the Headquarters under their command. Another card is the Combat Results Table. It is used in determining the results of Combat in the course of the game. Note that the Terrain Effects Chart is on the back of the rule booklet. Some games contain Corps Displays. These are used to reduce pieces actually on the map by the use of Corps markers.
Ground Combat Units
Combat Strength: This is a numeric value representing the ability of the unit to attack or counterattack.
Unit Size Symbols:
- XXXX Army size unit
- XXX Corps size unit
- XX Division size unit
- X Brigade size unit
- III Regiment size unit
- II Battalion size unit
- I Company or Battery size unit
Movement Allowance: This is a numeric value representing the unit's mobility.
Unit Designation: This is the unit's individual designation. For example, the Ground Combat Unit shown in Figure 1 is the German 39th Infantry Division.
Fortress Strength: This is a numeric value representing the ability of the fortress to counterattack.
Unit Type Symbol: This symbol shows what type the unit is. The following common types are used in most scenarios: Infantry, Mountain Infantry, Assault, Mountain Assault, Artillery, Siege Artillery, Cavalry, Bicycle, Engineers, Marine Infantry, Tanks.
Fortress Symbol: All fortresses are identified by the Fortress Symbol.
Location Hex Number: This is the placement hex of the fortress.
Location Name: Some fortresses are named after the city or town they are protecting.
National Flag: All Headquarters Units are identified by their National Flags.
Full Strength Symbol: This symbol shows the unit type for recombination and replacement purposes. The number in the symbol is the maximum strength of units of this type strengthened through recombination or brought back into play through replacement. Only units having the same background color of this symbol may recombine.
Unit Size Symbol: This shows the unit size.
There are 3 general types of units controlled by each player: Ground Combat Units, Fortresses, and Headquarters. See Figure 1 for diagrams of these units.
The background color of a unit designates that unit's nationality. See the counter sheet and the scenario specific instructions for information on which nationality is represented by each of the different background colors.
The background color of this symbol is the country's traditional color for that branch of service. Some countries may have multiple colors for a particular branch, the reason for this will be explained in rules covering Recombination.
Markers
There are a number of markers included on both counter sheets enclosed in the game. There are Strength Reduction markers, Trench and Construction markers, Railhead markers, and Supply Point markers. Many types of markers are shown in Figure 2.
Trench and Construction Markers: These are used to show the progress of trench construction by units in the game.
Devastation Markers: These are used to show hexes that have been laid waste by trench warfare.
Railhead Markers: These are used to show the extent of Rail Networks in the game.
Entrained Markers: These are used to show units that are still on trains at the end of their turn.
Supply Point Markers: Every Headquarters has a corresponding Supply Point Marker. These markers are placed on a player's Supply Track to show how many Supply Points the represented Headquarters possesses.
Strength Reduction Markers: These are used to show states of reduced strength in Ground Combat Units.
Victory Point Markers: These are used to show accumulation of Victory Points in certain scenarios.
Demoralization Point (DM) Markers: These are used to show accumulation of Demoralization Points in certain scenarios and campaign games.
4. Game Set-Up
Prior to starting play, both players need to set up their units on the map. The locations of units to be placed on the map are given in the scenario specific instructions.
5. Sequence of Play
Play of the game is segmented into turns. Each month consists of a Special Monthly Turn followed by 7 normal turns. Each turn is broken into a number of phases. Players keep track of the month, turn, and current phase on the Scenario Turn Record Track (on map border) using any unused counters.
Monthly Special Turn
Each month starts with a Monthly Special Turn. This turn is broken into two phases:
- Trench Construction Completion Phase: Both players replace construction markers under their units with Trench markers.
- Trench Construction Initiation Phase: Both players place construction markers under their units to start Trench construction.
Normal Turn
The Normal turn is broken into eight phases. The first four are conducted by the Central Powers player, the last four by the Entente player. The player whose phase it is is called the Phasing Player.
- Reinforcement Arrival Phase: The Phasing Player places reinforcements scheduled for the current turn onto their placement hexes on the map.
- Movement Phase: The Phasing Player may move any or all of his units up to the limits of their Movement Allowances.
- Combat Phase: The Phasing Player may initiate combat with any of his units that are adjacent to enemy units.
- Replacement / Recombination Phase: The Phasing Player may recombine units or replace those that have been removed from the map.
Record Keeping
At the end of the Entente Replacement / Recombination Phase, the turn marker is advanced to the next turn. If it is the 7th turn, the month marker is advanced to the next month, and the turn marker is advanced to the Special Monthly Turn.
6. Ground Movement
6-1 The Movement Allowance of a unit is printed on the counter (see Figure 1).
6-2 A unit's Movement Allowance can be increased due to Column Movement (see Rule 6-10).
6-3 During a player's Movement Phase, the player may move any of his Ground Combat Units and Headquarters Units up to the limits of their Movement Allowance.
6-4 A player may move the units that he controls through the map hex grid one unit at a time, or in stacks.
6-5 Units moved in a stack must begin movement in a particular hex, and end their movement together in another hex.
6-6 A unit expends Movement Points from its Movement Allowance for every hexside that it crosses in moving from one hex to another. The cost of doing so is dependent on the terrain in the hexside crossed (see Terrain Effects Chart), and the presence of enemy Zones of Control (see Zones of Control Rules).
6-7 The Movement Point costs of crossing a hexside are cumulative. (for example: Crossing a hexside that contains a river, wooded rough terrain and a single track Rail Line would cost 4 Movement Points: 4 for the wooded rough terrain, +1 for the river, -1 for the Rail Line.) Note that the benefit for the Rail Line has nothing to do with Rail Movement.
6-8 Movement Points may not be accumulated from turn to turn, nor may they be transferred between units.
6-9 A unit may move no farther during a Movement Phase than its Movement Allowance permits. It may, however, cross at least 1 hexside per Movement Phase, even if it does not have enough points in its Movement Allowance, so long as doing so does not violate the following restrictions:
- Cross a prohibited hexside.
- Do BOTH of the following at the same time:
- a) move directly from one enemy controlled hex to another (See Zones of Control Rule);
- b) moves across a hexside where it would have to expend four or more movement points to cross the terrain in the hexside/hex.
Note that trench or devastation markers count as terrain costs for movement.
6-10 Ground Combat Units (except Artillery units) may increase their Movement Allowance by 50% (round fractions down) so long as they do not enter an enemy controlled hex (they may, however, leave an enemy controlled hex). This increase in the Movement Allowance is called Column Movement. Units using Column Movement may not move by rail or perform Column Attacks.
6-11 A unit may never enter a hex containing an enemy Ground Combat Unit unless the enemy units have a combat strength of 0. In doing so the zero strength units are immediately destroyed and removed from the map. There is no additional Movement Point cost for eliminating 0 strength enemy units in this manner.
6-12 Some units do not have a regular movement factor. Instead, they have the letters "RR". Units with such a movement factor are rail bound. They may only exist in hexes containing an active friendly rail line. Such units have a movement allowance of 20 hexes per turn. Rail capacity is used to move them.
7. Rail Movement
7-1 During a Movement Phase a player may move some of his units by railroad.
7-2 To move a unit by rail, a player moves the unit into a hex containing an Operative rail hex under his control (see Rail Line Status Rules). The player then declares that the unit will move by rail.
7-3 In order to begin movement by rail, the moving unit expends 1 Movement Point in the hex containing the Operative rail hex. This expenditure of a Movement Point entrains the unit.
7-4 Only German units may entrain in an enemy Zone of Control. Units that do this do not pay the movement cost of exiting an enemy Zone of Control.
7-5 Infantry, Mountain, and Marine (and similar type RPL) units expend one-tenth of a Movement Point for every rail hexside crossed while moving by rail. All other units expend one-sixth of a Movement Point per hexside crossed while moving by rail.
7-6 Units may not enter hexes containing enemy Zones of Control while moving by rail.
7-7 Units may stop moving by rail and resume regular movement at any time. Any unused fractions of a Movement Point are lost when this is done.
7-8 Only German and British units may move into an enemy controlled hex in the same turn they use rail movement.
7-9 Only one unit (a single division or equivalent, a Headquarter with up to 10 supply points, or an artillery unit) may move across a particular single track rail hexside by Rail Movement in a given Movement Phase. Players will note, or use agreed upon markers to show which single track Rail Lines have been used during the Movement Phase.
7-10 Units may not use a combination of Rail and Column movement. Units may do one or the other during a turn, but not both.
7-11 Units may remain entrained at the end of a movement phase. Such units are placed under an entrained marker. Entrained units do not pay any additional costs the next turn to resume rail movement. Entrained units have no zone of control, and, if attacked, must immediately detrain and counterattack without being multiplied for defense.
8. Rail Capacity
8-1 Each country has a stated Rail Capacity. The Rail Capacity of a country is the maximum number of divisions (and/or division equivalents) that can use Rail Movement on that country's Rail Network in a turn.
8-2 The Rail Capacity of each country is given in the scenario parameters at the end of the rules.
8-3 A player may never conquer the Rail Capacity of another country.
8-4 A unit moving by rail counts against the Rail Capacity of each country it uses rail movement in. Rail movement occurs in every hex that is moved into or out of while using Rail Movement.
8-5 A unit moving by rail through conquered territory counts against the Rail Capacity of the country that repaired the Rail Line (example - German units moving by rail along rail lines in Belgium that have been converted to the German Rail Network by a German Engineer unit).
8-6 Understrength units count the same as full strength units for purposes of Rail Capacity.
8-7 Ten Supply Points count as 1 division for purposes of rail movement.
8-8 Siege Artillery units, Engineer units, Brigades, Regiments, and Headquarters count as 1 division each for Rail Capacity purposes. Artillery units (non-Siege) count as 2 divisions each for Rail Capacity purposes. The Supply Points in the possession of a Headquarters (past the first 10) count against rail capacity as well. Thus, a Headquarters with 20 Supply Points counts as 2 divisions for Rail Capacity purposes.
8-9 A country's Rail Capacity is permanently lost when all cities of the country have been occupied by enemy units, or when the country surrenders. When this happens, the remaining Operative rail lines in the country are transferred to the Rail Network of a friendly (or formerly allied in the case of surrender) adjacent country connected by rail lines. If more than one option exists, then the choice is made by the player who controlled the Rail Network whose Rail Capacity is lost.
9. Rail Line Status
9-1 In order to use Rail Movement in a hex containing a rail line, the rail line in the hex must meet two requirements:
- The rail line must be Operative.
- The rail line must belong to a Rail Network controlled by the moving player.
9-2 All rail lines begin a scenario Operative unless otherwise stated.
9-3 The rail line in a hex becomes Inoperative whenever an enemy Infantry type division (or multiple infantry type brigades) enters the hex.
9-4 An Inoperative rail line is returned to Operative status only by being repaired by an Engineer unit.
9-5 To repair an Inoperative rail line, an Engineer unit must begin the Movement Phase in an Operative rail hex and move from that hex along the same path as the rail line (using normal, non-column, non-rail movement). Any Inoperative rail line thus entered is returned to Operative status, but as part of the Rail Network that the Engineer unit started its movement from.
9-6 Engineer units may only return rail lines to Operative status when they start the Movement Phase in a hex containing an Operative rail line that belongs to the Rail Network of their nationality.
9-7 A rail line in a trench or devastation marker may only be converted to operative status by an engineer unit remaining stationary in the hex to be converted an entire turn. At the end of the following turn the rail is considered converted if the engineer does not leave the hex.
9-8 Engineer units exert no Zones of Control (see Zones of Control Rules), do not count for stacking purposes, and may never voluntarily enter enemy Zones of Control to repair rail lines unless a trench marker exists in the hex.
9-9 Engineer units are eliminated immediately if they are alone in a hex that contains no other friendly Ground Combat Units, and an enemy Ground Combat Unit enters that hex.
9-10 Railhead markers are used to show the extent of a country's Rail Network (see Figure 5).
9-11 The Russian rail network used a gauge (width between rails) different than everybody else. To reflect the difficulty of gauge conversion on the eastern front, engineers can only convert rail lines during the months of April through October and only on odd turns. Conversion in this sense is the repair of an inoperative rail line that was last part of a rail network using a different gauge than the rail network being extended.
9-12 Engineer units must expend their entire movement allowance in the hex being of a rail line being converted to a different gauge.
9-13 A rail network may only be lengthened by 1 hex along any given rail line by rail gauge conversion on turns that conversion is allowed.
9-14 A double track rail line intrinsically exists in every urban hexside.
10. Zones of Control
10-1 The six hexes that are immediately adjacent to certain Ground Combat Units (see Figure 6) are considered to be in that unit's Zone of Control. Such hexes are considered to be controlled by that unit.
10-2 Only Infantry (which includes Mountain, Marine, and Assault units) and Cavalry units exert a Zone of Control.
10-3 Replacement units (those with RPL designation) do not exert a Zone of Control.
10-4 Zones of Control extend into hexes occupied by other units, even those of the enemy.
10-5 Zones of Control of different units may coexist in the same hex.
10-6 Zones of Control do not extend across sea or alpine hexsides or into hexes in neutral countries.
10-7 Units must expend 1 extra Movement Point to enter or to leave an enemy controlled hex. Units thus must expend 2 extra Movement Points (in addition to terrain costs) to move directly from one enemy controlled hex into another.
11. Stacking
11-1 At the end of any phase, a player may have no more than 6 divisions in a single hex.
11-2 Reduced strength divisions count as if they were full strength divisions for stacking purposes.
11-3 If there are more than 6 divisions in a hex at the end of a phase, the owning player chooses which units in excess of the limit are to be eliminated.
11-4 Up to 3 Artillery units may be stacked in the same hex. These 3 Artillery units are in ADDITION to the 6 Divisions.
11-5 Fortresses, Engineer Regiments, Headquarters, and any type of marker counters do not count for stacking purposes.
11-6 All other Regiments and Brigades (except Artillery units as noted above) count as half a division for stacking purposes.
11-7 Units of different types and friendly nationalities may stack together in the same hex with no adverse effect, so long as doing so is not specifically prohibited by a special rule.
11-8 All units in a stack under a strength reduction marker are considered to be modified by that strength reduction marker.
11-9 Hexes containing less than 3 land hexsides have reduced stacking limits. Stacking limits are reduced by one third for each for each non land hexside less than 3 contained in the hex. For example, if a hex has only 2 land hexsides (such as hex 1202 of map 5-3), its stacking limit is reduced by one third (to 4 divisions and 2 artillery units).
11-10 Hexes with reduced stacking limits as outlined in rule 11-9 may be attacked by a maximum of twice as many units as could be stacked in the hex (example, a hex with 2 land hexsides could contain at most 4 divisions and 2 artillery units. This hex could be attacked by a maximum of 8 divisions and 4 artillery units).
12. Combat
12-1 During the Combat Phase, the player whose phase it is may attack enemy units. An attack against the units in a single hex, the resulting counterattack, and the results of both the attack and counterattack are together considered to comprise a single Combat.
12-2 The attacking player chooses which enemy occupied hexes are to be attacked, and in what order the Combats will be resolved.
12-3 Each Combat is completely resolved before the next Combat may take place.
12-4 A Ground Combat Unit can only attack enemy units in adjacent hexes.
12-5 Ground Combat Units can only attack across hexsides that they could move across if no enemy units were present. Units may never attack across alpine, sea, or lake hexsides.
12-6 As many units that are adjacent to a single enemy occupied hex, and are capable of attacking into it (see previous paragraph) may participate in an attack against that hex.
12-7 A single hex may only be attacked once per Combat Phase.
12-8 A unit is never compelled to attack or counterattack.
12-9 A unit may participate in combat as an attacker only once per phase.
12-10 Different units stacked together in the same hex may attack different enemy occupied hexes, but each unit may still only participate in one attack per phase.
12-11 All units in a hex under attack may counterattack.
12-12 All attacking and counterattacking units must expend Supply Points in accordance with the Supply Rules (see later rules covering Supply Points, Headquarters, and Supply).
12-13 The Combat Strengths of units involved in a Combat are judged at the instant of the Combat. A unit's strength may be reduced due to strength reduction, terrain (see Terrain Effects Chart) or Supply Line length (see rules covering Supply).
12-14 Combat strength values in parenthesis [i.e. (1)] are only for defense. The value in parenthesis is used only for counterattack and retreat calculations.
13. Combat Resolution
13-1 Each Combat (attack and counterattack) is resolved on a Strength Point basis using the Combat Results Table (the CRT).
13-2 To determine the results of a Combat, the attacking player first calculates the number of Strength Points that are attacking the hex in question. This is done by counting the number of Strength Points of the units involved less any adjustments for Strength Reduction markers, terrain, and Supply Line length.
13-3 The defender can choose which type of terrain is to be used for purposes of influencing the combat (both the attack and the counterattack). The terrain type can be chosen from that which exists in the hexsides through which the hex is being attacked, or any hexside adjacent to those through which the hex is being attacked, except for hexsides containing prohibited terrain or those that cross neutral borders (see Figure 8).
Figure 8 (Terrain Influence on Combat), as printed: The terrain used to influence a Combat is dependent on the hex being attacked, and which hexes it is attacked from. If a unit in hex X were to be attacked only by units in hex B, the defender could chose to have the attack influenced by the terrain in hexside 1, 2, or 3. If the unit in hex X were attacked by units in hexes B and C, the defender could chose to have the attack influenced by the terrain in hexside 1, 2, 3, or 4. If the unit in hex X were attacked by units in hexes B and D, the defender could chose to have the attack influenced by the terrain in hexside 1, 2, 3, 4, or 5. In the above examples, hexsides containing Ocean or Lakes are instead considered to contain the other terrain shown in the hexside. Also, a hexside's terrain cannot be used if that hexside is across a neutral country's border.
13-4 The defender can only opt to use urban terrain to influence the combat if the hex under attack contains any single urban terrain hexside AND a city center, OR if the hex contains 2 or more urban terrain hexsides, OR if the attacker is attacking through an urban hexside (NOT an adjacent hexside).
13-5 If ALL attacking units are attacking across hexsides containing rivers, then the effects of rivers on combat are combined with the effect of the terrain chosen by the defender. Likewise, if all attacking units are attacking across hexsides containing major rivers, then the effects of major rivers on combat are combined with the effect of the terrain chosen by the defender.
13-6 The type of terrain chosen by the defender may adjust the strength of attacking and or counterattacking units, and/or influence the outcome of the attack and/or the counterattack (see the Terrain Effects Chart).
13-7 The attacking player must expend Supply Points for the attacking units before the CRT is used (see Supply rules) to determine the results of the attack. Each particular unit must have Supply Points expended for it by a single HQ. Different HQs can be used for the expenditure for different units involved in the attack.
13-8 The total number of adjusted Strength Points involved in the attack is the column of the CRT used to determine the results of the attack.
13-9 The attacker rolls a single die to determine the results of an attack. The die roll is then reduced (if called for by the Terrain Effects Chart) due to the terrain chosen by the defender to influence the combat.
13-10 The die roll of the attacker may be further reduced due to the presence of trenches (see Trenches Rule).
13-11 All die roll adjustments are cumulative.
13-12 Die rolls adjusted to be less than -1 are still considered to be -1.
13-13 The adjusted die roll of the attacker is cross-indexed on the CRT with the column on the CRT equal to the adjusted number of Strength Points used in the attack. The number found on the CRT by this cross-indexing is the minimum number of Strength Points that the defender must eliminate from the hex being attacked.
13-14 After the results of the attack have been determined (but before the defender actually eliminates any Strength Points), the units in the hex under attack may counterattack.
13-15 The same procedure that was used to determine the results of an attack are used to determine the results of the counterattack. BUT, the adjusted Strength Point total of counterattacking units is tripled (counterattacking Artillery units are only doubled, see Artillery Rule). This multiplication takes place after supply and terrain adjustments have been made for the counterattacking units. The die roll for the counterattack may be increased due to the terrain chosen by the defender to influence the combat (see the Terrain Effects Chart).
13-16 Die rolls adjusted to be greater than 8 are still considered to be 8.
13-17 The number found on the CRT to be the result of the counterattack is the minimum number of Strength Points that the attacker will have to eliminate.
13-18 Only units that participated in the attack may be reduced or eliminated to reflect the effect of the counterattack.
13-19 If more than 50 Strength Points are involved in an attack or counterattack, add the result of the 50 column of the CRT (multiplied by the number of multiples of 50 involved) and the result of the remainder column, using the same adjusted die roll. (Example: 135 attacking Strength Points would cause the defender to have to eliminate a number of Strength Points equal to twice the result of the 50 column plus the result of the 35 column.)
13-20 Losses are taken by units involved in a single Combat only after the results of both the attack and counterattack have been determined. The attacker then will take losses first.
13-21 Strength Points can be eliminated in a number of ways. A unit can be removed from the map and placed in the destroyed pile. A unit may be flipped over to its backside (which shows a reduced strength). Strength reduction markers may also be placed on top of units (front or backside) to show reduced combat strength.
13-22 When strength reduction markers are used, the combat strength of any unit under the marker is reduced. Multiple markers may be used to reflect loss. Markers are applied in the order they are placed in the stack. If a 1/2 strength marker is on top of a -1 marker, then units underneath those markers are halved, then reduced by a further 1 point.
13-23 Strength Points are eliminated according to the following priority: Attacking Cavalry, Infantry (Assault, Marine, and Mountain are also considered infantry), Defending Cavalry, Artillery, Fortress, Headquarter. All the Strength Points of one type must be eliminated before Strength Points of another type can be eliminated. Cavalry units with a full strength in the upper-right corner of greater then 1 (greater then 2 for British and German units) are considered to be infantry for supply expenditure and loss taking requirements.
13-24 All units of one type involved in a combat must be reduced to the strengths shown on the backside of their counters before any unit of that type can be further reduced.
13-25 The most a die roll can be adjusted in any combat is +4 or -4.
13-26 A bloodier CRT is used starting with the first turn of January 1917. This CRT is labeled "1917 and Later".
Figure 9 (An Example of Combat and Combat Resolution), as printed: The French player has the 88T and 87T Infantry Divisions (Group A) in hex 2817. These units are attacked by the German units in hexes 2816, 2917, and 2918 in a single Combat. To resolve the combat, the German player first totals the number of Strength Points he is attacking with. He decides NOT to have the Cavalry Division in hex 2917 participate in the attack. Therefore, he has 13 Strength Points in hex 2816, 2 Strength Points in hex 2917, and 5 Strength Points in hex 2918. Thus he has a total of 20 Strength Points to conduct the attack. The French player now decides which terrain is used to influence the combat. He may chose between clear, woods, or rough terrain. Rough terrain is chosen. The German player now rolls a die. The number rolled is a 4. This is reduced by 3 due to the rough terrain (see the Terrain Effects Chart). The adjusted die roll is thus a 1. On the 20 column of the Combat Results Table, an adjusted die roll of 1 calls for the loss of 2 Strength Points. Before the 2 Strength Points are eliminated, the French player counterattacks. The French player first declares that he will not retreat. This means that the strengths of his units will be multiplied by 3 in determining their strength for counterattack purposes. The French player has 8 Strength Points in the hex attacked. He will use the 24 column on the Combat Results Table. He rolls a 4 on the die. This is increased by 3 due to the rough terrain. On the 24 column of the Combat Results Table, an adjusted die roll of 7 calls for the loss of 6 Strength Points. The results of the Combat are therefore that the French player must eliminate 2 Strength Points from the units in hex 2817, while the German player must eliminate 6 Strength Points from the German units that participated in the attack. The French player satisfies his loss requirements by flipping both divisions in 2817 over to their backside (each division now has a strength of 3). The German player must satisfy the first 3 points of his loss requirements by flipping over the full strength division in 2816, and the full strength brigade in hex 2917 (the division's strength is reduced from 8 to 6, while the brigade's strength is reduced from 2 to 1). He now eliminates the additional 3 points by placing the just reduced division in hex 2816 under the 1/2 strength marker already in the stack in that hex.
Note printed with Figure 9: This example assumes that all units involved in this combat are fully supplied. Please see the rules governing Supply Points, Headquarters, and Supply for explination of supply requirements.
14. Retreat
14-1 In order to reduce losses, the defender in a combat may opt to retreat all Ground Combat Units from the hex being attacked.
14-2 The defender declares his intention to retreat after the results of the attack have been determined, but before the results of the counterattack are determined.
14-3 By retreating, the number of Strength Points that the defender must eliminate are reduced by 1/3 (round fractions to the nearest whole number).
14-4 All Ground Combat Units in a hex under attack are required to retreat if the result of the attack would require the defender to eliminate a number of Strength Points equal to at least half the Strength Point total (unadjusted for supply or terrain) of all units in the hex. There are two exceptions to this:
- Units are never required to retreat from a hex that contains a city (the city center, not just an urban hexside) or a port, or if urban terrain is chosen by the defender to influence the combat.
- Ground Combat Units in the same hex as a Fortress are never forced to retreat. However, such units may do so if the defender wishes.
14-5 The defender eliminates Strength Points before any units are actually retreated on the map. Note that both the elimination of Strength Points and the retreat movement of units happen after the results of the counterattack have been determined.
14-6 In retreating, the defender moves units from the hex they occupy into an adjacent hex (or adjacent hexes).
14-7 The hex a unit retreats to is influenced by which Headquarters has expended Supply Points for the unit (see Supply rules). If no Supply Points are expended, then the unit's retreat is influenced by the nearest Headquarters that could have expended Supply Points for it.
14-8 Retreating units must move into hexes according to the following priorities:
- A hex that is not enemy controlled and is closer (in terms of Movement Points from the hex to the supplying Headquarters by a valid supply route, see Supply rules) to the supplying Headquarters than the hex they are retreating from.
- A hex that is not enemy controlled and is the same distance (in terms of Movement Points from the hex to the supplying Headquarters by a valid supply route, see Supply rules) to the supplying Headquarters as the hex they are retreating from.
- A hex that is enemy controlled, but is occupied by friendly Ground Combat Units, and is closer (in terms of Movement Points from the hex to the supplying Headquarters by a valid supply route, see Supply rules) to the supplying Headquarters than the hex they are retreating from.
- A hex that is enemy controlled, but is occupied by friendly Ground Combat Units, and is the same distance (in terms of Movement Points from the hex to the supplying Headquarters by a valid supply route, see Supply rules) to the supplying Headquarters as the hex they are retreating from.
- A hex that is not enemy controlled and is farther (in terms of Movement Points from the hex to the supplying Headquarters by a valid supply route, see Supply rules) to the supplying Headquarters than the hex they are retreating from.
- A hex that is enemy controlled, but is occupied by friendly Ground Combat Units, and is farther (in terms of Movement Points from the hex to the supplying Headquarters by a valid supply route, see Supply rules) to the supplying Headquarters than the hex they are retreating from.
- A hex that is enemy controlled, and is NOT occupied by friendly Ground Combat Units, and is as close as possible (in terms of Movement Points from the hex to the supplying Headquarters by a valid supply route, see Supply rules) to the supplying Headquarters.
14-9 If a stack of units retreat into an enemy controlled hex not occupied by a friendly unit (case 7 above), they must immediately make a Column Attack simultaneously against all adjacent enemy units after the retreat. The defending units all use the same terrain (even if in separate hexes), and may choose eligible terrain in any of the hexes being attacked. The Column Attack may only be supplied if all the attacking units were supplied in the combat that resulted in the case 7 retreat. All losses suffered by the stack of units that originally retreated are considered to have surrendered (even if they are in supply).
14-10 Units may not retreat in violation of stacking limits (see Stacking Rule).
14-11 A retreating unit may only retreat into a hex of a lower priority if it cannot retreat into a hex that meets the criteria of a higher priority retreat destination.
14-12 Retreating units may never retreat across sea or alpine hexsides, nor into neutral countries.
14-13 Units that retreat have their adjusted Strength Point total multiplied by 2 instead of 3 for determining the results of counterattack. Note that since fortresses never retreat, their strength is always multiplied by 3 for counterattack purposes.
Figure 10 (Examples of Retreat), as printed: Let's say that the French unit in hex 1609 is attacked by adjacent German units and it elects to retreat. Supply was expended for this unit by the 5th Army Headquarters. It cannot retreat into hex 1610 because this hex is in the Zone of Control of the German unit in hex 1710, and no unit friendly to the French player is currently occupying hex 1610. The unit thus has 2 viable retreat options, hex 1509 or hex 1510. Retreating to hex 1509 would be retreating into a hex that is enemy controlled, but occupied by a friendly unit, and would be closer to the Headquarter expending supply for the retreating unit. Retreating to hex 1510 would be retreating into a hex that is not in an enemy Zone of Control, and the unit would be retreating to a hex that is the same distance from the supplying Headquarter as the hex it is retreating from. Therefore, according to retreat destination priorities, the unit would retreat to hex 1510.
According the the retreat destination priorities, if the French unit in hex 1611 (supplied by Headquarter in hex 1411) were attacked and it chose to retreat, it would have the option of going to either hex 1511 or 1512 (Priority #1).
If the French unit in hex 1713 (supplied by Headquarter in hex 1411) were attacked and it chose to retreat, it would have to retreat to hex 1613 (Priority #1, NOTE - no valid supply route through hex 1612, see rules on Supply).
14-14 If a unit is forced to retreat, but cannot do so, it is eliminated. Yet it is still assumed to have retreated for counterattack purposes.
14-15 Should a unit retreat into a friendly occupied hex which is subsequently attacked during the same phase, the previously retreated units may not participate in the counterattack, or be used to meet Strength Point loss requirements of the new attack. They may retreat again if as a result of combat in the new hex, the defender opts (or is forced) to retreat.
14-16 Units cannot retreat normally into hexes they could not move into using the 1 hex per turn minimum move. Retreating into such a hex is the absolute last option for cavalry and infantry type (infantry, mountain, marine, and assault) units. All other types of units are eliminated if forced to do so. A cavalry or infantry type unit forced to make such a retreat is reduced by half (round fractions up).
14-17 Previously retreated units in a hex are not used in calculating when retreat is mandatory. (Example: Six strength points retreat into a hex containing four strength points, and no trench marker. The hex is attacked later the same turn. The result calls for a two strength point defender loss. Since this is half of the four strength points, all of the units in the hex would have to retreat).
14-18 Units able to use mountain or alpine defensive terrain in a hex are never forced to retreat unless surrounded.
14-19 Units forced to retreat into a neutral country are eliminated. Such units may not be rebuilt. The owner of the units suffers normal DM points for the elimination, not double DM as per surrender (the unit is interned).
14-20 Rail-based units may retreat, but only along an active rail line they could normally move to. Failure to do so results in the loss of the unit.
15. Advance After Combat
15-1 When the defending units involved in a Combat retreat, attacking units have the option of moving into the vacated hex.
15-2 No more units may move into the vacated hex than are allowed by the stacking rules.
15-3 Artillery units may not advance into a hex vacated as the result of retreat.
15-4 No unit can advance after combat into a vacated hex until all units that lost a greater percentage of their pre-combat strength have also advanced. For example, if an 8-5 and 2-4 unit participated in a combat, and were reduced to a 6-5 and 1-4 due to losses, then the 1-4 would have to advance before the 6-5 since it suffered 50% losses as compared to the 6-5's 25%. Thus, the attacking player could advance with no units, just the 1-4, or both the 1-4 and the 6-5.
16. Column Attack
16-1 A Column Attack is a Combat that takes place during the Movement Phase. Only units belonging to the player whose Movement Phase it is may conduct Column Attacks. Such units may still attack during the Combat Phase.
16-2 Column Attacks may be initiated at any time during the Movement Phase.
16-3 There is no additional Movement Point cost for moving units to participate in a Column Attack.
16-4 Ground Combat Units (except Artillery) that are moved as a stack during a Movement Phase may perform a Column Attack when they cease movement (or declare that they will not move at all during the Movement Phase).
16-5 Any given Ground Combat Unit (or stack of units) may only perform one Column Attack per friendly Movement Phase.
16-6 A particular hex may be attacked any number of times during a given Movement Phase by Ground Combat Units performing Column Attacks.
16-7 A particular unit or stack of units may be attacked any number of times during a given Movement Phase by Ground Combat Units performing Column Attacks.
16-8 Strength is determined and Supply is expended for both the attacking units and defending units at the instant of combat. The Combat is then resolved according to the Combat rules with the following exceptions: The defender's combat strength is doubled (in addition to any other adjustments), the attacker's combat strength is halved.
16-9 Units attacked by Column Attack may retreat. Units conducting the Column Attack would then be able to advance into the vacated hex. In so doing, no additional Movement Points are expended.
16-10 A Column Attack may never take place across an ocean, lake, alpine, mountain, urban, wooded rough, or major river hexside.
17. Supply Points
17-1 Supply Points represent the ammunition used by Ground Combat Units.
17-2 A Supply Point is always considered to be owned by a specific country. Supply Points belong to the country of the Headquarters that possess them, or that receive them as reinforcements.
17-3 Supply Points are possessed and transported by Headquarters (see Headquarters Rule). Headquarters may only possess Supply Points of the same nationality.
17-4 The number of Supply Points that a Headquarter possesses is kept track of on the Supply Track. Each Headquarters has its own specific supply marker. This marker is moved on the Supply Track to reflect the expenditure or receipt of Supply Points by that specific Headquarters. If a Headquarters possesses more than 50 Supply Points, the supply marker is flipped over to its "+50" side on the track. No Headquarters may contain more than 100 Supply Points at any time.
17-5 There is a separate Supply Track for each player. Players are not allowed to view other player's Supply Tracks during the course of the game.
18. Headquarters
18-1 Headquarters enable Ground Combat Units to attack and counterattack by expending Supply Points.
18-2 Headquarters do not exert a Zone of Control.
18-3 Headquarters may only enter a hex containing a trench or devastation marker if there is an Operative Rail Line in the hex or if a friendly engineer unit is in the hex and the hex is not in an enemy zone of control.
18-4 A Headquarters possessing up to 10 supply points counts as 1 division against Rail Capacity when moving by rail. Each 10 or fraction of 10 Supply Points in the Headquarter's possession in addition to the first 10 also counts as a division against Rail Capacity when the Headquarters moves by rail (example - a Headquarters possessing 42 Supply Points that moves by rail would count as 5 divisions for Rail Capacity purposes).
18-5 Headquarters do not count for stacking purposes.
18-6 Headquarters that do not move during a friendly Movement Phase may transfer Supply Points. A single Headquarters may transfer up to 10 Supply Points during a Movement Phase. This total includes both Supply Points received and Supply Points sent. Thus a Headquarters can both send and receive Supply Points during the same turn. Transfer may be by rail or overland.
18-7 To transfer Supply Points, a Supply Point Marker (not included in all titles - players may make their own) is placed on the Headquarters transferring supply. The number on the Supply Point Marker represents the number of Supply Points being transferred.
18-8 The Supply Point Marker may immediately move. For movement and rail purposes, it is treated as an infantry division with movement factor four.
18-9 Supply Point markers may only move away from rail lines under one of two conditions: One, they begin movement in the same hex as a Headquarters. Two, they end their movement in the same hex as a Headquarters. If they cannot move under one of these conditions, then they cannot move at all. [This is due to the fact that supply points can only be moved by rail or by HQ transportation assets (to or from the HQ). They CANNOT move on their own across country]
18-10 If at the end of any movement phase, a Supply Point Marker is in the same hex as a friendly Headquarters, it may be removed, and its supply points added to that of the Headquarters.
18-11 Supply Point Markers have no Zones of Control and a combat strength of zero. Supply Point Markers are immediately eliminated if an enemy unit moves into their hex, attacks them while alone, or forces them to retreat.
18-12 For purposes of calculating the number of Supply Points on a certain front, Supply Point Markers on a certain front or transferring to a front add their total to that front.
18-13 Headquarters normally only expend supply points in combat and transfer supply to units of the same nationality. One exception is when a nationality has fewer than 2 divisions (or the equivalent) on a map (or linked maps on the same theater) and no Headquarters. In this case, the "primary" friendly nationality on the map (or theater in the case of linked maps) may use its Headquarters to supply these units.
18-14 Headquarters may expend Supply Points for units at any time during the game. Headquarters need not complete mobilization prior to expending Supply Points.
18-15 Headquarters have a combat strength of 1 for defense purposes only. Headquarters can only use their defensive strength if they are the only unit possessing a combat strength in the hex.
18-16 If a Headquarters unit is destroyed or forced to retreat, all supply points it contains are lost.
18-17 (For Linked, Duration, or Campaign Games Only) Corps headquarters may be created at any time by placing a corps headquarters unit in the same hex as an army headquarters at the beginning of a turn. There is no restriction or limit on the number of corps headquarters that may be created.
18-18 (For Linked, Duration, or Campaign Games Only) Corps headquarters have limited capabilities. They may hold a maximum of 10 supply points, and may only send and receive supply points "overland" on the turn they are created (they may conduct rail transfer normally). Any attack may only have up to 2 supply points expended for it by Corps HQs. Similarly, any counter attack my only have up to 4 supply points expended for it by Corps HQs.
19. Supply
19-1 For a Ground Combat Unit to attack at full strength (or counterattack effectively), it must be supplied.
19-2 Ground Combat Units (except Artillery and Cavalry units, which are covered by special rules, see below) are considered to be supplied for attack or counter attack when a Headquarters expends the required number of Supply Points. The amount of Supply Points to be expended is dependent on the total of Strength Points involved in the attack (or counterattack). The expenditure of a single Supply Point fully supplies four Strength Points for an attack or two for a counterattack.
19-3 Supply Points are expended for all units participating in a Combat (attacking and counterattacking) before Combat Resolution begins.
19-4 There must be a Supply Line between the Headquarters expending the Supply Point and the unit(s) for which it is expended.
19-5 A Supply Line is a path of connected hexes from the hex occupied by the unit(s) to be supplied to the hex occupied by the Headquarters that expends the Supply Point(s).
19-6 A player may choose which of his Headquarters will expend Supply Points for any particular unit. Headquarters can only expend Supply Points for units of their own nationality. See the Scenario Rules for exceptions to this rule.
19-7 A Supply Line may not be traced into any hex that is occupied by an enemy unit, or is in an enemy Zone of Control and not occupied by a friendly Ground Combat Unit. A Supply Line may not be traced across sea, lake or alpine hexsides.
19-8 The length of a Supply Line is calculated in terms of the Movement Points it would take to move along the Supply Line by normal movement (not counting enemy ZOC costs) from the hex occupied by the unit to that occupied by the Headquarter.
19-9 If the length of the Supply Line for an attacking unit is greater than 4 Movement Points, the strength of the unit is reduced by 1 for every Movement Point over 4 in the length of the Supply Line. This strength reduction is in addition to any strength reduction of the unit due to losses, and is put into effect before any terrain effects are applied.
19-10 If the length of the Supply Line for a counterattacking unit is greater than 8 Movement Points, the strength of the unit is reduced by 1 for every Movement Point over 8 in the length of the Supply Line. This strength reduction is in addition to any strength reduction of the unit due to losses, and is put into effect before any terrain effects or tripling for counterattack are applied.
Figure 11 (Examples of Supply), as printed:
Example 1: The German units in hexes 1608, 1709, and 1710 are attacking the French unit in hex 1609. All of the German units involved in the attack will have Supply Points expended for them by the German 2nd Army Headquarter in hex 1809. There are a total of 19 German Strength Points involved in the attack, so the 2nd Army Headquarter would have to expend 5 Supply Points (One for each 4 or fraction of 4 Strength Points involved). The French player would have to expend 2 supply points for the unit in 1609 to counterattack using its full strength (One for every 2 or fraction of 2 Strength Points involved).
Example 2: The German units in hexes 1712 and 1812 are attacking the French unit in hex 1713. All of the German units involved in the attack will have Supply Points expended for them by the German 2nd Army Headquarter in hex 1809. There are a total of 19 German Strength Points involved in the attack, so the 2nd Army Headquarter would have to expend 5 Supply Points (One for each 4 or fraction of 4 Strength Points involved). The unit in 1712 has a supply line that is 5 Movement Points in length (from 1712 to 1711 to 1710 to 1809). It therefore has its strength reduced by 1 in determining the total of Strength Points attacking. The units in 1812 have supply lines that are 6 Movement Points in length (from 1812 to 1811 to 1810 to 1809). Therefore each unit in that hex has its strength reduced by 2 in determining the total of Strength Points attacking. Thus the German player would use the 14 column of the CRT (4 from hex 1712, 7 + 3 from hex 1812). Note that the reduction in strength due to Supply Line length does NOT influence the number of Supply Points that must be expended. The French player would have to expend 2 supply points for the unit in 1713 to counterattack using its full strength (One for every 2 or fraction of 2 Strength Points involved). While this French unit has a supply line that is 6 Movement Points in length (from 1713 to 1613 to 1513 to 1412 to 1411), its strength is not reduced in the combat because it is counterattacking.
19-11 Units (except Artillery) may always use at least 1/2 (round fractions down) of their combat strength to attack or counterattack. This may be done at any time, and regardless of Supply Line length or Supply Point availability. Units using this 1/2 strength option do not have Supply Points expended for them. Note that unsupplied units may still perform column attacks, but would do so at quarter strength.
19-12 All defending units in a Combat need not counterattack at full strength. Only those units for which Supply Points are expended counterattack at full strength. The defending units for which no supply points are expended counterattack at half strength. Note that the halved strength of unsupplied counterattacking units is still tripled for calculating the results of the counterattack (see rules on Combat Resolution).
19-13 Units do not have their attack strengths reduced due to supply line length if the Headquarters supplying the unit is in an adjacent hex.
19-14 Artillery units in a hex adjacent to their supplying Headquarter may attack no matter what the movement point cost between the two hexes.
19-15 A Headquarters suffers penalties if it cannot trace a line of communication to a friendly active rail line or depot that (1) does not include hexes in an enemy zone of control (unless occupied by a friendly unit), (2) is traced over no more than one mountain hexside, (3) does not include hexsides that movement is prohibited across. The penalties are: Rule 19-9 is modified to 2 movement points in length for attack supply and rule 19-10 is modified to 3 movement points in length for counterattack supply. Furthermore, rule 19-13 does not apply to units receiving supply from the headquarters, and the headquarter may expend NO supply points if in an enemy zone of control.
20. Surrounded Units and Surrender
20-1 Any unit is considered to be surrounded when it can not trace a line of communication of any length to a friendly map edge or friendly country interior. A line of communication is a line of hexes from the unit to the destination unbroken by enemy ground combat units and enemy zones of control (unless the hex is occupied by friendly ground combat units). A friendly country interior contains a personnel center and food resource center.
20-2 Surrounded units may attempt 'Break Out' by attacking. If unsupplied, such units attack at one quarter strength (round to nearest whole number).
20-3 For unsupplied surrounded units to make such an attack, one strength point per division (of any strength) involved in the attack is eliminated. One such strength point is eliminated for every two brigades or regiments involved in the attack. This strength point is eliminated prior to any strength point calculations for determining the results of the attack.
20-4 Any losses incurred by surrounded units are considered to have surrendered. If a unit is removed from the map due to strength point losses while surrounded, the entire unit is considered to have surrendered. This is true even if the surrounded units are able to advance after combat into a hex so that they again have a valid line of communication to the rear.
20-5 An attack by surrounded units may be made in combination with regularly supplied units. In this case, all of the strength point losses required by the attacker must be taken by the surrounded units.
20-6 Units that are removed from the map are lost due to surrender and may not be rebuilt by replacements.
20-7 Surrounded units are required to retreat if the losses called for by the CRT are greater than or equal to one quarter of the strength in the hex attacked. The retreat of surrounded units may be in any direction, so long as the destination is chosen in accordance to the priorities outlined in rule 14-8, without regard to distance to friendly Headquarters.
20-8 Units required to retreat while surrounded that cannot do so are removed from the map and are considered to have surrendered.
20-9 Units in the same hex as a fortress are not considered to be surrounded.
20-10 Surrounded units may not retreat from enemy ZOC to enemy ZOC. If forced to do so, units may only retreat into a hex containing a friendly fortress, otherwise, the unit is forced to surrender.
20-11 Surrounded units must expend supply points for defensive purposes from the nearest HQ in the same "pocket" if such supply points exist.
20-12 Surrounded units do not receive the defensive benefits of Trench markers.
20-13 Units surrounded in a "pocket" that does not contain a fortress, are destroyed and removed from the map if they are so isolated for a the full portion of a friendly half game turn. Such units are removed prior to the start of the next enemy movement phase.
20-14 A "pocket" is defined as a group of connected friendly controlled hexes, all of which are in an enemy ZOC (i.e. there are no 'interior' hexes), and none of which contains a friendly port.
21. Fortresses
21-1 Fortresses are immobile; they may never move, retreat, or be forced to do so.
21-2 Fortresses neither exert a Zone of Control nor negate enemy Zones of Control in the hex they occupy. Units may, however, trace Supply Lines through hexes in enemy Zones of Control that are occupied only by friendly Fortresses.
21-3 Fortresses may never attack; their Strength Points are used in counterattacks only (at which time their strength is tripled, just as other counterattacking units). They do not need a Supply Line nor are Supply Points expended for them by Headquarters to counterattack at full strength.
21-4 Fortresses may never use urban terrain to modify combat. The defender must opt to use another terrain that meets the requirements of rule 13-3. If no other option exists by this rule, the effects of broken terrain are used instead. Note that if a hex is defended by both a fortress and ground combat units, neither could use urban terrain in the defense due to the presence of the fortress. The effects of this rule may only be circumvented by voluntarily abandoning the fortress immediately so other units could use urban terrain if that would normally be an option.
21-5 Units in the same hex as a Fortress are never forced to retreat. If they do choose to retreat, the priority of Strength Point elimination is changed so that fortress Strength Points are eliminated first. Also, the reduction in the number of Strength Points to be eliminated due to retreat would be applied only to the number of Strength Points remaining to be eliminated after all fortress Strength Points are eliminated.
Example: two 4-4 divisions are in the same hex as a 3 Strength Point fortress. They are attacked and the results of the attack call for the elimination of 10 Strength Points. The defending player chooses to retreat the two 4-4 divisions. The fortress would be completely eliminated first. This would leave 7 Strength Points to be eliminated. This would be reduced by 1/3 due to the retreat. Thus the defender would only have to eliminate a total of 5 Strength Points from the two retreating divisions.
21-6 Fortresses do not count for stacking purposes.
21-7 A player may use any Fortress markers of the appropriate nationality he has available in order to show a Fortress' reduced strength.
21-8 A player may voluntarily abandon a friendly fortress during his Movement Phase if the fort itself is not considered surrounded by rule 20-1. This is done by removing the fortress from the map.
21-9 Starting with the first turn of November 1914, a player may reduce the strength of any friendly non-Russian fortress (as per 21-8). The player immediately receives RPL strength points equal to one third of the removed fortress strength in the hex of the reduced fortress.
21-10 Fortresses of most countries could hold out for quite some time, but not indefinitely. Fortresses of 12 strength points or less that are surrounded for more than 7 consecutive turns are prone to surrender. Fortresses of 13 to 23 strength points are not prone to surrender until 14 consecutive turns of being surrounded have passed. Fortresses of 24 or more strength points are not prone to surrender until 28 consecutive turns of being surrounded have passed. A turn is from the end of an enemy combat phase to the start of the same phase the next turn.
21-11 When a fortress is 'prone' to surrender, 2 dice are rolled at the start of the enemy combat phase. If the number rolled, minus 1, is equal to or less than the number of turns it has been 'prone' to surrender, the fortress and all other units in the same hex surrender and are removed from play. (Example, a 15 strength point fortress has been surrounded for 14 turns. The next turn, during the enemy combat phase, 2 dice are rolled. If the result is a '2' [number of turns prone to surrender at this point is '1'], the fortress and any units in it surrender.)
21-12 During August and September of 1914, a city center containing a fortress may declare itself an "open city" if confronted with overwhelming force. This happens the instant any of the following conditions occur:
- The city is surrounded. There is no line of communication between the city center and the country capitol. Any such line of communication cannot pass through a enemy Zone of Control unless that hex is occupied by a friendly combat unit.
- There are more than three times as many enemy strength points adjacent to the city as there are non-fortress strength points in the city.
- There is an enemy Siege Artillery unit adjacent to the city.
If any of the above conditions occur, the fortress in the city is immediately removed (no DM points are lost for the fortress), other friendly units in the city center must immediately retreat out of it, and the enemy units may continue moving normally. Fortresses above strength 8 are not affected by this rule.
22. Trenches
22-1 Trenches may be constructed by Infantry, Assault, Mountain, or Marine units in the hexes that they occupy. To begin construction a Construction Marker is placed underneath the unit in the Trench Construction Initiation Phase of the Monthly Special Turn.
22-2 Units cannot construct Trenches in hexes where either Mountain or Marsh is the only terrain between their hex and hex(es) occupied by enemy units. Neither trenches nor devastation markers can exist in mountain or marsh hexsides and would not be included in the movement point costs of crossing such hexsides.
22-3 Construction Markers may not be moved from the hex in which they are placed.
22-4 If a Trench or Construction Marker is ever found (at any instant) to be in a hex not occupied by a unit capable of trench construction, that marker is immediately removed from the map (for example, an Infantry unit retreats from a hex containing a Construction Marker. The Construction Marker is removed before the advance after combat takes place.).
22-5 During the Trench Construction Completion Phase of the Monthly Special Turn, any Construction Marker on the map is replaced by a Trench Marker.
22-6 A Trench Marker adds 2 to the Movement Point cost of entering the hex that it occupies.
22-7 A Trench Marker reduces the die roll of attacks against the hex it occupies by 2. There is no corresponding counterattack die roll adjustment.
22-8 Units in the same hex as a Trench Marker are only required to retreat when the defender's required Strength Point loss equals or exceeds the total strength of the defending units.
22-9 At the beginning of the 1st turn of April 1915, Trenches not on the "front line" are removed from the map. From this point in time forward, Trenches may only be constructed in front line hexes. Should a trench construction marker not be on the front line at the start of any friendly movement phase, that trench construction marker is removed. Note - "front line" applies to being at the forward edge of friendly territory. Players are urged to follow the spirit of this rule.
22-10 Beginning with the 1st turn of April 1915, trenches are not destroyed completely by retreat and advance after combat. Should a hex with a trench marker be entered by enemy combat units as a result of advance after combat, the trench marker is replaced with a devastation marker (if one is not available, use a trench construction marker with the figure inverted).
22-11 Beginning with the 1st turn of April 1915, trench markers not on the front line are replaced with Devastation Markers.
22-12 Beginning with the 1st turn of April 1915, trenches on the front line are not removed due to the hex being vacant. Should such a hex with a trench marker be occupied later by forces hostile to those that built it, the trench marker is replaced with a devastation marker.
22-13 Devastation markers add two to the movement point cost of entering the hex the marker occupies. There is no defensive benefit.
22-14 A Devastation marker is replaced by a Trench marker whenever trench construction is completed in the same hex.
22-15 The movement point costs of trenches and devastation markers is included in calculating the length of supply lines and in determining if the hex can be entered by a unit using the 1 hex per turn minimum move rule.
22-16 Armies quickly learned how to construct simple defensive works in difficult terrain rather quickly. The effect is stiffened defense in areas with good defensive terrain. During 1915, units are not required to retreat unless losses called for are greater than or equal to the total of defending strength points when utilizing defensive terrain giving them a -3 or better defensive die roll adjustment. From 1916 on, units get the same benefit when utilizing defensive terrain giving them a -2 or better defensive die roll adjustment. (note - mountain terrain effect is considered better than -3 drm).
22-17 During 1915 (only), the effect of trench markers or rule 22-16 can be negated by overwhelming artillery fire. If the number of siege artillery batteries AND the number of regular artillery batteries brought to bear in an attack are BOTH greater than or equal to the number of defending divisions in the hex under attack, the trench marker and rule 22-16 are negated. This rule DOES NOT apply to the Western Front.
22-18 Trench markers and rule 22-16 are negated if the unit is attacked from both front and rear. A hex under attack from opposite sides must have friendly ground combat units in at least two adjacent hexes, that are also adjacent to each other, to receive the benefit of Trenches or rule 22-16. Refer to figure 8. If hex 'X' is under attack from opposite sides, say from 'E' and 'B', then it must have friendly units in both hexes 'A' and 'F', or in both hexes 'C' and 'D', to receive the benefit of a Trench marker or rule 22-16. A unit attacked from three opposite directions (A, E, & C; or F, B, & D) never receives the benefit of a Trench marker or rule 22-16.
22-19 The need for heavy artillery increased as defenses improved. A hex is considered to have a "solid" defense when it contains a trench marker, and at least five, OR the number of infantry strength points equal to a full strength infantry division, for each hexside it is attacked through. (Note - the full strength of a nation's infantry division is seen in the upper right hand circle on an infantry unit)
22-20 Sufficient artillery for attacking a "solid" defense is dependent on the year and the front. In 1914, no artillery is necessary. In 1915, 3 artillery strength points are needed on the West Front, 2 on other fronts. In 1916, 6 artillery strength points are needed on the West Front, 2 on other fronts. In 1917, 9 artillery strength points are needed on the West Front, 4 on the Italian Front, and 2 on other fronts. In 1918, 12 artillery strength points are needed on the West Front, 6 on the Italian Front, and 2 on other fronts.
22-21 In combat phase attacks against a hex with a "solid" defense in which the attacker uses insufficient artillery, the attacker suffers an -1 drm for the attack, and the defender enjoys an additional +2 drm for the counterattack in clear terrain. In broken terrain, the defender enjoys a additional +2 drm for the counterattack. There is no effect in other terrain types.
22-22 (optional) Players may begin trench construction at the beginning of their part of any turn. Exactly seven turns later, the construction is complete and a trench marker is placed in the hex of construction. Players must themselves keep track of when trench construction was started in each hex.
23. Recombination
23-1 Units of the same type and nationality may recombine if they have Full Strength Symbols with the same colors.
23-2 Recombination may only take place in the same hex as a Headquarters of the same nationality of the recombining units. Neither the Headquarters nor the units to be recombined may have moved or participated in combat during the turn in which the recombination takes place.
Figure 13 (Example of Recombination), as printed: The German Player has the following units stacked together in a hex. None of these units have moved during the last German Movement Phase. It is now the German Replacement / Recombination Phase. The German player has a total of 12 Strength Points of the infantry type (as shown by units with the Full Strength symbol of a black 8 in a white circle) in the stack. He reduces the -1 strength 6-5 to its backside strength of 4-5 (by flipping the unit over and removing the -1 marker), using the additional point so gained, along with the RPL 5-4 and the 2-4 brigade to return an eliminated 8-5 division to the map to the hex the stack is in. In so doing, the RPL unit and the 2-4 brigade are removed from the map.
23-3 Recombination of a player's units takes place during the owning player's Replacement/Recombination Phase.
23-4 The following procedure is used in recombining units:
- Determine the total number of Strength Points of the units involved in the recombination. Note that the number of Strength Points a unit has may be reflected by the unit having been flipped over, strength reduction markers, or a combination of the two.
- A player may eliminate or reduce the strength of some of the units involved in a recombination so as to increase the strength of other units involved in the same recombination. Units that have their strength increased, may only increase it up to the point of having a number of Strength Points equal to their counter front side printed strength, or their Full Strength Symbol (whichever is a lower number). The total number of Strength Points of recombined units must be equal to or less than the number of Strength Points found in step 1.
23-5 Units that have been eliminated may be returned to play by recombination. The previously eliminated units are brought back into play in the hex where recombination occurs.
23-6 Recombination may not take place in an enemy ZOC.
24. Replacement Units
24-1 Replacement Units are those that have the unit designation RPL. These units are NOT Ground Combat Units. They do not exert Zones of Control. They may not use their Strength Points to attack or counterattack. They may not be reduced in strength to satisfy the requirements of a Combat result. If such a unit is alone in a hex (or in a hex only with other Replacement Units), and that hex is attacked, all such Replacement Units are immediately lost.
24-2 Replacement Units count as divisions for stacking and Rail Movement purposes. They move using their Movement Allowance, as per the rules on Ground and Rail Movement.
24-3 Replacement units may be split into smaller replacement units or recombined with other replacement units at any time.
24-4 The sole purpose of replacement units is to provide strength points for recombination.
25. Reinforcements
25-1 Players receive reinforcements during a scenario according to the scenario's reinforcement schedules.
25-2 Reinforcements appear in the hex stated in the scenario reinforcement schedules during the friendly Reinforcement Arrival Phase of the stated turn. If no hex is listed, refer to the scenario rules for the arrival location.
25-3 Reinforcements may not arrive in a hex that is occupied by enemy units, is enemy controlled, or is no longer an Operative Rail Hex belonging to a friendly Rail Network. If the reinforcements can only arrive in a hex with one of the above conditions, they may be placed in the nearest friendly Operative Rail Hex that is not in an enemy Zone of Control.
25-4 Units that arrive as reinforcements are considered to have completed mobilization.
25-5 All reinforcements may use Column Movement on the turn they are placed on the map.
25-6 Headquarters that arrive as reinforcements without a stated Supply Point stockpile arrive with 0 Supply Points in their possession. Those with Supply Points have a marker placed on the appropriate Supply Track the instant they are placed on the map.
25-7 On certain turns, countries may receive Supply Points as Reinforcements. These Supply Points can be transferred immediately to single Headquarters on an Operative Rail Line; or they may be split among multiple Headquarters, each of which must be located on an Operative Rail Line. Supply Points may also arrive as a Supply Point Marker in a hex containing an Operative Rail Line on a friendly map edge.
25-8 On some turns, players may be called upon to withdraw certain units. These units should be at the strength listed. If at reduced strength or eliminated, a number of strength points must be removed from replacement units or other units on the map to make up the difference.
26. Demoralization Points
26-1 Demoralization Points are accumulated by most belligerent countries when they suffer the negative effects of warfare. Demoralization Points (DM points) in this game are accumulated for loss of strength points, loss of units without strength points, loss of cities, and for other events that take place outside the scope of this game.
26-2 Demoralization Points in campaign games are accumulated by all countries except Belgium. In scenarios, players receive specific instructions as to which belligerents must keep track of Demoralization Point accumulation.
26-3 Demoralization Points are accumulated according to the following schedule:
- 1 DM point - Each Infantry (or Mountain or Marine or Assault) Strength Point lost in combat.
- 1 DM point - Each Fortress Strength Point lost due to combat or effects of siege. (Note that this does NOT include Fortress strength points voluntarily destroyed by the owning player).
- 2 DM points - Each Infantry Strength Point that surrenders, or is lost while surrounded.
- 2 DM points - Each Cavalry or Artillery Strength Point lost in Combat.
- 2 DM points - Each Engineer Unit lost.
- 4 DM points - Each Cavalry or Artillery Strength Point that surrenders, or is lost while surrounded.
- 10 DM points - Each Army Headquarter lost.
- 15 DM points - Each city (personnel or non-personnel center) when first occupied by the enemy. (Note - this does not apply when the center hex also contains an urban hexside. See next case instead.)
- 25 DM points - Each urban hexside when first occupied by the enemy.
Double DM points for personnel centers or urban hexsides comprising a nation's capital city.
26-4 Countries accumulate DM for the enemy occupation of their cities the first time an enemy unit occupies the particular city or both hexes containing a particular urban hexside. Such DM points are not subtracted should the city or hexside be regained by friendly forces.
26-5 Countries with high numbers of DM points may suffer the effects of 'Shaken National Morale' and 'Economic Collapse' before surrender (see campaign rules for details and specific effects).
26-6 If a country suffers from Shaken National Morale or Economic Collapse, it may not conduct unsupplied attacks.
26-7 If a country surrenders, all its units are immediately removed from play.
27. Divisional Breakdown
27-1 A division may divide into component regiments or brigades at the beginning of any movement phase. To do so, the division is removed and regiment or brigade counters of the same type and same (or lower) combined strength are placed in the hex the division counter was removed from.
Note printed with rule 27-1: Three Brigade Artillery Divisions. Such Artillery Divisions represent three full artillery units, and therefore an artillery division can be the only artillery unit in a hex due to stacking limitations.
27-2 Divisional components may recombine at the end of any movement phase if they are in the same hex. The total strength of the divisional component becomes the strength of the division that replaces those components. The division is placed in the hex the components combine in. Note that it is not necessary for the components to have originally been from the same division.
27-3 When divisional component units are stacked together, the component units that would constitute a full division are considered to be one division. This means that the combined strength of the component units is reduced due to excessive supply line length, not a reduction for each component unit. For example, the German player has five 2-5 regiments in a hex. Four of these regiments would be considered a division, as their 8 combined strength would be equal to a full German infantry division. The fifth regiment would be treated as a separate division for supply and stacking purposes.
28. Corps
28-1 Originally, Corps in World War One were composed of two divisions. Corps structures became fluid as the war dragged on. There are two types of Corps markers found in certain titles in the Der Weltkrieg series of games, "Three Division" Corps and "Flexible" Corps.
28-2 Flexible Corps markers have no strength or movement factors, only a roman numeral corps designation. The components of such corps are held in off board displays. Such Corps may comprise any mix of units allowed by the stacking rules.
28-3 Three Division Corps are comprised of three divisions of the same type and nominal strength. The front of the Three Division Corps shows the three component divisions at combined full strength. The back side shows the three component divisions at their combined back side strength.
28-4 In addition to Three Division Corps for infantry type units, there are also (text as printed ends here; the remainder of this rule is not present in the source PDF)
28-5 Players may switch between Corps and smaller units at any time. No strength or movement points are lost or created in doing so. Corps markers exist solely for a player's convenience.
29. Artillery Units
29-1 Units with Unit Type Symbols of Artillery and Siege Artillery are considered to be Artillery Units.
29-2 During 1914 Siege Artillery Units may ONLY be used to attack hexes containing fortifications. They may not attack other hexes, nor may they ever participate in a counterattack.
29-3 Up to 3 Artillery units may be stacked in the same hex. These 3 Artillery units are in ADDITION to the 6 Divisions allowed in the hex by the stacking rules.
29-4 Artillery units may neither attack nor counterattack if their Supply Line is longer than 4 Movement Points.
29-5 Artillery units counterattack at double (not triple) their combat strength.
29-6 Artillery Units are considered to be supplied for attack or counterattack when a Headquarters expends the required number of Supply Points. The expenditure of a single supply point supplies two Artillery Strength Points for attack or counterattack.
29-7 Artillery only attacks may be directed against all units in a hex OR only the defending fortress and artillery units in a hex. If directed at only fortresses and artillery, these units would be the only ones to take losses due to the attack. In all cases of when only Artillery units are involved in an attack, they may only be counterattacked by defending Artillery units. Artillery only attacks are not effected by river terrain (in attack or counterattack).
29-8 Artillery units counts as 2 divisions for Rail Capacity purposes. Siege Artillery units count as 1 division for Rail Capacity purposes.
29-9 Artillery units do not pay the additional movement point to enter an enemy Zone of Control if a friendly infantry unit already occupies the hex being entered.
29-10 When only artillery units are attacking a fortress hex, 1 is added to the attack die roll for each hexside through which artillery units are attacking the hex.
29-11 When artillery units are attacking a fortress hex, if the number of infantry strength points in the fortress hex is less than 4 times the number of hexsides through which artillery units are attacking the hex, the strength of artillery units is DOUBLED for purposes of determining the results of the attack.
Figure 12 (Example Use of Artillery), as printed: It is the German Combat Phase. The German Player decides to attack the Belgian fortress in hex 2107 with the Artillery Units in adjacent hexes. He has a 4 Strength Point Artillery unit in hex 2106, a 3 Strength Point Artillery unit in hex 2108, and two 8 Strength Point Artillery units (one in hex 2206 and another in hex 2207). For the total 23 Artillery Strength Points, the German player expends 12 Supply Points from the 1st Army Headquarter (One Supply Point for every 2 or fraction of 2 Artillery Strength Points). The attack would be resolved using the 46 column of the CRT due to rule 29-11 (the strength of infantry units in the fortress hex is less than four times the number of hexsides through which artillery units are attacking it [16]). Also, the attack is made with a +4 added to the die roll due to rule 29-10 (since artillery units are attacking the hex through 4 different hexsides). Since only Artillery units are attacking, and there are no Artillery units in the hex being attacked, there is no counterattack. NOTE - Had the German player attacked the fortress with a combination of Infantry and Artillery units, the Belgian fortress would counterattack. The Belgian player would not have to expend any supply points. The fortress would counterattack with a strength of 108 (36 times 3).
29-12 Artillery units may not make the 1 hex minimum move allowed by rule 6-10 across mountain terrain, unless a rail line also exists in the hexside.
29-13 Artillery units do not retreat. (Exception - rail based units. See 14-20) Should other units in a hex containing artillery units retreat, the artillery units are destroyed. Artillery units alone in a hex have a defensive strength of 0.
29-14 Artillery units are not included in calculations used to determine if retreat is mandated. Note impact this has on rule 14-4.
29-15 From 1915 on, Siege artillery units may be used as regular artillery. Siege artillery may only be used as regular artillery against units in trenches. When so used, Siege artillery units are considered to be regular artillery units possessing half of their regular strength (for both supply expenditure and combat purposes).
29-16 Artillery units cannot move from a hex containing either a trench or devastation marker that is in an enemy zone of control to another hex containing either a trench or devastation marker that is also in an enemy zone of control.
30. Cavalry Units
30-1 Cavalry units with a full strength in the upper-right corner of 1 (or 2 for British and German units) are always considered to be supplied for both attack and counterattack purposes.
30-2 If a Cavalry unit is attacked entirely by non-Cavalry units, the defending Cavalry unit may opt to retreat before Combat. This applies even to Cavalry units stacked with non-Cavalry units.
30-3 If, as a result of this pre-combat retreat, the hex is vacated, no Supply Point expenditure is made by the attacker, yet he may advance would-be attacking units into the vacated hex. Units that advance into the vacated hex ARE considered to have engaged in combat, even though no Supply Points have been expended.
30-4 If cavalry units cannot trace a line of supply of no more then 8 movement points from a friendly active rail line, port, or Headquarters during the months of November to June [inclusive], their combat strength is reduced by 1 point for each extra movement point in the length of the traced supply line, and have their movement allowance reduced to 4 (5 for Germany and Great Britain). Cavalry units with a strength of "0" per this rule would be removed from the map during the monthly trench construction phase (the horses have died off).
31. Cavalry Unit Strengthening
31-1 Starting in January of 1916, Cavalry units may be 'strengthened'. This represents putting additional assets and firepower under the control of these units.
31-2 Starting in January of 1916, Infantry RPL units may be used to increase the strength of existing cavalry divisions. The process is the same as for Infantry Replacement, but the cavalry divisions may now be increased to a higher strength, as determined by the 'strengthened' counter.
31-3 The cavalry conversion process is limited by the counter mix. Only units that have a corresponding 'strengthened' counter may undergo this process.
31-4 Strengthened Cavalry divisions are considered to be infantry units, but rules in section 30 continue to apply. They may NOT recombine with cavalry divisions that have not been strengthened. They may be freely recombined only with other previously 'strengthened' Cavalry units of the same type and nationality and replacement units.
32. Mountain Units
32-1 Mountain units pay one less movement point to cross wooded rough and mountain terrain hexsides than called for by the terrain effects chart.
32-2 Mountain units get the -1 movement point benefit of a single track rail line if the cost of crossing the hexside is normally 3 or more.
32-3 Mountain units may make the 1 hexside per turn minimum move (allowed by rule 6-10) so long as they would not pay more than six movement points in moving from enemy ZOC to enemy ZOC. The six movement point cost in this case does NOT include the additional cost of entering or leaving an enemy ZOC.
33. Assault Units
33-1 Assault units have an arrow in their unit type symbol. There are both Infantry Assault and Mountain Assault units.
33-2 Assault units do not expend the additional Movement Point for leaving a hex in which there is an enemy Zone of Control (Note: This means that only one additional movement point is spent by Assault units moving from one hex in an enemy Zone of Control to another).
33-3 During the first game turn that full strength Assault units attack units of a given country, the units of that country must retreat under the following conditions:
- If attacked by a full strength Assault unit; and
- the units in the hex under attack are called on to lose at least 1/2 of their combat strength, even if they are in a trench, city, or port.
This applies to a stack of multinational units if the majority of strength points are from the country being attacked by Assault units for the first time.
33-4 Assault units engaged in combat must take losses first, before any other type. In doing so, the Assault unit loses strength reducing it to the level of a full strength (the strength in the circle in the upper-right corner of the piece) unit of its regular type. Once this point is reached, the Assault unit is considered to have reverted to a regular unit. At that point all units involved in an attack take losses normally. (Example: A German 12-5 Assault Infantry Division is involved with other non-assault infantry units in an attack. The counter-attack results in the attacker being required to take 8 strength points as losses. The 12-5 is reduced to an 8-5 infantry division. This meets the requirement for the first four strength points of the loss. The 8-5 and other full strength infantry units would then take the rest of the losses normally.)
33-5 German "AlpK" and "Jgr" designated units never revert to regular infantry once they are converted to assault units. These units are considered to only contain assault strength points once they are converted.
33-6 Assault units may not be rebuilt or combined to return to full assault unit strength.
33-7 Assault units may attack into adjacent vacant hexes, and advance into those hexes. No supply is expended for such "vacant hex" attacks.
33-8 The effectiveness of Forts is reduced by assault units. Units in the same hex as a fort are required to retreat if they are attacked by a full strength assault unit and they are called on to lose half or more of their strength. Note that this rule applies only if there is not a viable trench marker in the hex, and neither the provisions of rule 22-16 or rule 33-3 apply.
33-9 The effects of rule 22-16 are negated if the number of attacking assault strength points is greater than the number of strength points defending the hex. Remember, not all strength points of an assault unit are assault strength points. Only those strength points in addition to the regular full strength (the strength in the circle in the upper-right corner of the piece) of a unit are assault strength points. (Example: A German 12-5 assault division has 4 assault strength points. This comes from subtracting the 8 regular infantry strength points from the 12 total. Also note that German "AlpK" and "Jgr" are pure assault strength point units.)
34. Winter Weather
34-1 Winter starts with the 1st turn of December. Winter ends with the completion of the 7th turn of February.
34-2 Rule 19-9 is MODIFIED during winter weather turns. An attacking unit's strength is reduced by 1 for every movement point over 3 in the length of the Supply Line between the unit and the Headquarters expending the required supply points.
34-3 Rule 19-10 is MODIFIED during winter weather turns. A counterattacking unit's strength is reduced by 1 for every movement point over 6 in the length of the Supply Line between the unit and the Headquarters expending the required supply points.
34-4 Add +1 to the counterattack die roll during winter turns unless all attacking units are located in trenches.
34-5 On map 6-4 (Italy), winter effects don't end until the completion of the 7th turn of April. In addition to this effect, units attacking into clear, broken, woods, or rough terrain on Map 6-4 have their attack strength reduced by one quarter (round fractions up) during winter weather turns.
34-6 There are no winter effects on map 7-9, or on map 8-8 south of the Sea of Galilee (hexes xx24 or higher).
35. The Danube
(This section applies only to those games that include the Danube, namely those involving Serbia and Romania.)
35-1 The Danube is more than just a major river. It is an obstacle of colossal proportions. As such it cannot be crossed if by doing so the moving unit is both crossing the Danube AND moving into an enemy Zone of Control exerted by a unit adjacent to the Danube.
35-2 Rule 35-1 can be ignored under the following conditions:
- The hex being moved into is occupied by friendly ground combat units.
- Such a move is the result of advance after combat.
35-3 Non-Artillery combat units may only attack across the Danube in conjunction with an engineer unit. Such attacks must include an engineer unit in each hex containing attacking units. Multiple attacks across the Danube from a single hex are not allowed. The engineer unit is eliminated if all other attacking units are eliminated as a result of the counterattack.
35-4 Artillery units may attack across the Danube as per the normal rules for attacks.
36. River Flotillas
(This section applies only to those games that include the Danube, namely those involving Serbia and Romania.)
36-1 The Danube is so big that many countries along its length had river flotillas to patrol it. River flotillas may only move along the length of the Danube river. In doing so, a River Flotilla counter is moved on the map through hexes that are adjacent to the Danube river.
36-2 River Flotillas are considered to have an unlimited movement allowance. They may move as far up and down the Danube as they want during a friendly movement phase.
36-3 In moving, River Flotillas must move from hex to adjacent hex. Each hex moved into must be adjacent to the Danube river.
36-4 River Flotillas may not enter hexes containing enemy ground combat units, enemy fortresses, or enemy River Flotillas.
36-5 River Flotillas do not count towards stacking limits when in the same hex as friendly units.
36-6 River Flotillas may participate in attacks with friendly ground units in the same hex that they occupy. Such an attack must be into a hex that also borders the Danube. When they participate in such an attack, the total strength of all participating River Flotillas is divided by 3, fractions rounded down. No supply points are expended to supply attacking River Flotilla units.
36-7 River Flotillas are a major impediment to crossing the Danube. A River Flotilla may 'interdict' any crossing of the Danube that happens within 2 hexes of the hex occupied by the River Flotilla. This 2 hex 'interdiction' range may be to the hex being moved into, or the hex being moved from in the crossing of the Danube. Units crossing the Danube and interdicted by a River Flotilla are attacked by that Flotilla at 3 times the River Flotilla's counter strength. No supply points are expended by the River Flotilla to make this attack. The interdicted unit may not counterattack. Retreat is not allowed across hexsides that would trigger an interdiction attack. Supply lines may be traced through such hexsides only if friendly ground combat units exist in the hexes on each side.
36-8 Each 'interdicted' unit is attacked by the interdicting River Flotilla (or Flotillas if multiple are in range) separately. Engineer units interdicted by enemy River Flotillas are destroyed. Should a Headquarters unit be interdicted, and it takes a strength point loss, all of the Supply Points in the possession of that Headquarters are lost.
36-9 River Flotillas may engage in combat with enemy River Flotillas in an adjacent hex. Both attack and counterattack are made at double strength. The results of both attack and counterattack are determined before any losses are taken. No supply is expended for this combat. Losses are taken with the use of strength reduction markers and or flipping counters over to their reduced strength side. Note that only River Flotillas can damage other River Flotillas. Ground combat units cannot attack or counterattack River Flotillas.
NOTE (as printed): The following sections deal with specific countries. Only those rules pertaining to countries involved in scenarios you are playing apply.
37. Nation Specific Rules: Germany
37-1 The German Rail Network has a capacity of 20 divisions. This capacity may be reduced in certain scenarios due to capacity tied up on other fronts.
37-2 German units may entrain in an enemy Zone of Control. Units that do this do not pay the movement cost of exiting an enemy Zone of Control.
37-3 German units may detrain in the Zones of Control of Russian units. In so doing they must pay the cost of entering an enemy Zone of Control.
37-4 German units may enter an enemy Zone of Control later in the same Movement Phase in which they used Rail Movement.
37-5 The German player may move two units (up to two divisions or equivalents) across a particular single track rail hexside belonging to the German Rail Network by Rail movement in a given Movement Phase.
37-6 Germany receives DOUBLE the normal DM points for cities or urban hexsides in Germany occupied by the enemy.
37-7 German units in a "pocket" containing a set of at least three friendly controlled hexes, each of which borders the other two, are exempt from rule 20-13.
37-8 German HQs may transfer supply points to any Central Powers HQ and may expend supply points for units of any of these countries.
37-9 German infantry, no matter from what kingdom, is all the same type. All German infantry units may recombine with each other without penalty.
38. Nation Specific Rules: Great Britain
38-1 British units may enter an enemy Zone of Control later in the same Movement Phase in which they used Rail Movement.
38-2 British units in a "pocket" containing a set of at least three friendly controlled hexes, each of which borders the other two, are exempt from rule 20-13.
38-3 British HQs may transfer supply points to Belgian, Serbian, Greek, Netherlands, Russian and United States HQs, and may expend supply points for units of these units. They may also perform these functions for Italy after Italy suffers "Shaken National Morale".
39. Nation Specific Rules: France
39-1 The French Rail Network has a capacity of 15 divisions.
39-2 French HQs may transfer supply points to Belgian, Netherlands, Switzerland, Serbian, Greek, Russian, and United States HQs and may expend supply points for units of these nationalities. They may perform these functions for Italy after it suffers "Shaken National Morale".
40. Nation Specific Rules: Austria-Hungary
40-1 The Austro-Hungarian Rail Network has a capacity of 10 divisions. This capacity may be reduced in certain scenarios due to capacity tied up on other fronts.
40-2 Austro-Hungarian units may not use column movement if at anytime during their movement, the moving unit ends movement closer to the enemy than it began. (This only applies to enemy units on the same map or within 20 hexes)
40-3 Austro-Hungarian cavalry units with yellow values must retreat when attacked by cavalry forces three times their size. This rule applies to all Austro-Hungarian cavalry units if more than half of the attacking cavalry force is Cossack. This rule applies only if there are no infantry units in the hex with the Austro-Hungarian cavalry units being attacked. (If the unit in question is being subjected to a column attack, the attacking forces would need to be six times the Austro-Hungarian cavalry strength to cause the retreat).
40-4 During 1914 and 1915, Austro-Hungarian units defending a hex are required to retreat if the result of an attack would require them to eliminate a number of strength points equal to at least one third (unadjusted for supply or terrain) in the hex. They are not required to retreat if they meet either of the exceptions stated in Rule 14-4, or if rules 22-8 or 22-16 apply.
40-5 Austro-Hungarian units stacked in the same hex as German units are only required to retreat under the conditions of Rule 14-4 (Strength Point losses called for are equal to at least half the total available).
40-6 Austro-Hungarian losses are NOT reduced due to retreat (for them Rule 14-3 does not apply).
40-7 Austro-Hungarian HQs may transfer supply points to Bulgarian and Ottoman HQs and may expend supply points for units of these countries.
40-8 Austro-Hungarian Siege Artillery units may be moved onto the Western Front (map 5-3) at any time. Other Austro-Hungarian units may only enter this map after Germany has suffered "Economic Collapse". Should this occur, only a total of four Austro-Hungarian divisions are allowed onto the Western Front.
41. Nation Specific Rules: Russia
41-1 The Russian Rail Network has a capacity of 10 divisions. This capacity may be reduced in certain scenarios due to capacity tied up on other fronts.
41-2 During 1914 and 1915, Russian units defending a hex are required to retreat if the result of an attack would require them to eliminate a number of strength points equal to at least one third (unadjusted for supply or terrain) in the hex. They are not required to retreat if they meet either of the exceptions stated in Rule 14-4, or if rules 22-8 or 22-16 apply.
41-3 Rule 41-2 permanently ceases its effects if at any time, the Central Powers control Warsaw and any four of the following cities: Kovno, Grodno, Bialystock, Brest-Litovsk Rowno, Kowel, Lemberg.
41-4 Russian Fortresses were often neglected and were not as 'capable' as those of other nations. This is reflected by the following rule: Russian fortresses are NOT tripled for counterattack purposes. Russian fortresses lose 6 strength points at the end of each turn in which they are surrounded. Any Russian fortress is immediately removed from play if its strength falls below 4.
41-5 All Russian Armenian (Ar), Kuban (Ku), Frontier Guard (FG), Cossack, Georgian (Geo), and Border (Bdr) Infantry units are considered to be Mountain units.
41-6 Russian HQs may transfer supply points to Romanian and Serbian HQs and may expend supply points for units of these nationalities.
42. Nation Specific Rules: Italy
42-1 The Italian Rail Network has a capacity of 7 divisions.
42-2 Until the start of 1918, Italian units defending a hex are required to retreat if the result of an attack would require them to eliminate a number of strength points equal to at least one third (unadjusted for supply or terrain) in the hex. They are not required to retreat if they meet either of the exceptions stated in Rule 14-4 or if rules 22-8 or 22-16 apply.
42-3 Italian losses are NOT reduced due to retreat (for them Rule 14-3 does not apply).
42-4 Italian HQs may transfer supply points to Serbian HQs and may expend supply points for Serbian units.
43. Nation Specific Rules: Serbia
43-1 Serbian and Montenegrin units do not require the expenditure of supply points for counterattack. They counter attack as if they had been supplied by a Headquarter, even if they are surrounded.
43-2 Starting in 1916, Serbian units require 1 Supply Point for every 2 or fraction of 2 Strength Points for counterattack.
43-3 The Serbian Rail Network has a capacity of 1 division.
43-4 Serbian Headquarters may expend Supply Points for any Montenegrin Ground Combat Unit.
43-5 All Serbian Infantry units are considered to be Mountain units.
44. Nation Specific Rules: Belgium
44-1 The Belgian Rail Network has a capacity of 5 divisions.
45. Nation Specific Rules: Bulgaria
45-1 The Bulgarian Rail Network has a capacity of 2 divisions.
45-2 All Bulgarian Infantry units are considered to be Mountain units.
45-3 Bulgarian HQs may transfer supply points to Ottoman HQs and may expend supply points for Ottoman units.
45-4 The Central Powers player may replace German 5-4 RPL divisions in Bulgaria for Bulgarian RPL units. For each German 5-4, the Central Powers player receives three strength points of Bulgarian RPL units in exchange. This process represent arms sent from Germany to Bulgaria.
46. Nation Specific Rules: The Ottoman Empire
46-1 Ottoman units do not require the expenditure of supply points for counterattack. They counter attack as if they had been supplied by a Headquarter, even if they are surrounded.
46-2 The Ottoman Rail Network has a capacity of 2 divisions.
46-3 All Ottoman Infantry units are considered to be Mountain units, except during winter weather turns.
46-4 Ottoman Headquarters may expend Supply Points for any German or Austro-Hungarian Ground Combat Units operating on the Palestinian Front.
47. Nation Specific Rules: Romania
47-1 The Romanian Rail Network has a capacity of 3 divisions.
47-2 Romanian units defending a hex are required to retreat if the result of an attack would require them to eliminate a number of strength points equal to at least one third (unadjusted for supply or terrain) in the hex. They are not required to retreat if they meet either of the exceptions stated in Rule 14-4.
47-3 The Entente player may replace Russian 3-3 RPL divisions in Romania for Romanian RPL units. For each Russian 3-3, the Entente player receives three strength points of Romanian RPL units in exchange. This process represent arms sent from the Entente to Romania.
48. Nation Specific Rules: Greece
48-1 The Greek Rail Network has a capacity of 2 divisions.
48-2 All Greek Infantry units are considered to be Mountain units.
49. Nation Specific Rules: The United States
49-1 United States infantry and marine units (only) are double the size of other combatant's units of the same size designation. As a result, a United States infantry or marine brigade counts as a full division for stacking and rail movement purposes. A United States infantry division counts as two divisions for stacking and rail movement purposes.
50. Unit Color Appendix
The background color of a unit designates that unit's nationality.
50-1 German units are grey. Regular German infantry have a white unit type symbol. German infantry from the Kingdom of Saxony have a green box with white diagonal stripes. German infantry from the Kingdom of Baden-Wurtemburg have a red unit type symbol. Those from Bavaria have a blue box with white diagonal stripes.
50-2 British units are dark blue. British units with green unit type symbols are Irish, white unit type symbols are used for Canadian (red for Canadian cavalry), dark blue for Australian (with red unit values for New Zealand), and orange for South African. British units with tan unit values are Indian troops.
50-3 French units are light blue. French colonial infantry units have different colors as the background of their unit type symbol. Green is for Algerian and Moroccan, light brown for colonial, brown for Senegalese.
50-4 Austro-Hungarian units are white, and a Polish contingent of the Austro-Hungarian army is pink. Austro-Hungarian infantry have different colors as the background of their unit type symbols. This shows the nationality of the infantry. Red is for Austrian infantry, green for Hungarian, pink for Polish, brownish for Czech, and light blue for Croatian and Bosnian. Austro-Hungarian cavalry with yellow unit values are Polish and Czech, those with black unit values are Austrian and Hungarian.
50-5 Russian units are tan. Russian units with brownish unit type symbols are Cossacks. Russian units with blue unit type symbol are Opolchenie. Russian units with green unit type symbol are Armenian.
50-6 Italian units are light green.
50-7 Serbian units are yellowish tan, and Montenegrin units are red.
50-8 Belgian units are black.
50-9 Bulgarian units are brown.
50-10 Ottoman units are deep red. Ottoman units with red unit-type symbols are Jandarma (Gendarmerie). Ottoman cavalry units with brown unit-type symbols are Ihtiyat (Kurdish reserve cavalry).
50-11 Romanian units are greenish grey.
50-12 Greek units are medium blue. Greek National Defense units have a lighter shade of blue.
50-13 Portugese units are green.
50-14 Polish units are grey.
50-15 United States units are olive green.
50-16 Central Powers specific units and markers are dark grey with white symbols and text.
50-17 Entente specific units and markers are medium blue with black symbols and text.
Terrain Effects Chart
Printed on the back of the rule booklet. Reproduced from the chart as printed.
| Terrain Type | Movement Point Cost to Cross Hexside or Enter Hex | Combat Effects on Attacks | Combat Effects on Counterattacks |
|---|---|---|---|
| Ocean | Prohibited | Prohibited | Prohibited |
| Clear | 1 MP | None | None |
| Broken | 1 MP | -1 Die Roll | None |
| Hilly | 1 MP | -2 Die Roll | +1 Die Roll |
| Desert | See Osmanli Harbi 3-1 to 3-4 | See Osmanli Harbi 3-1 to 3-4 | See Osmanli Harbi 3-1 to 3-4 |
| Woods | 2 MP | -2 Die Roll | +1 Die Roll |
Scenario Specific Rules
The scenario rules below are the Sterling Edition scenario rules for the Serbia and Romania scenarios (Serbia the Defiant; Romania: Transylvanian Gambit), the Gorlice-Tarnow / Brusilov scenario rules, and the East Front Duration Game, followed by the Tannenberg and Galicia scenario rules (see the edition note at the top of this file). Each scenario's rules apply only when that scenario is played; the Standard Rules above apply to all of them.
Serbia the Defiant (August 1914)
Source: Scenario Specific Rules and Instructions, Sterling Edition, "Serbia the Defiant" section. Map 6-5.
Note (as printed): All Rules in the following section apply to playing a Serbia the Defiant August 1914 scenario alone.
This rulebook includes the scenario specific rules, set up instructions, and tables for two separate games: Serbia the Defiant, and Romania: Transylvanian Gambit. Each of these games use the same basic rules. These rules are contained in the Standard Rules booklet for World War One Scenarios. This should be read first. The games described in this booklet can be played separately, or linked together with other games of the series to form a larger game.
Serbia the Defiant depicts the Campaigns in Serbia in 1914 and 1915. Romania: Transylvanian Gambit depicts the Campaigns in Romania and Transylvania in 1916.
Serbia the Defiant, August 1914
- First Turn: Turn 3 of August 1914.
- Last Turn: Turn 4 of December 1914.
- Combatants: Austria-Hungary vs. Serbia and Montenegro.
- Rail Lines: All part of the network of the country they are in.
- Rail Capacities: The Austro-Hungarian Rail Network has a capacity of 3 divisions in this scenario. It may not be used until turn 5 of August. The Serbian Rail Network has a capacity of 1 division. It may not be used until Turn 5 of August.
3-1 Anytime during or after September 1914, if the Entente player has a Serbian ground combat unit in Belgrade (map 6-5 hex 1607), Central Powers River Flotillas that move between hexes 1606 and 1707 may be attacked. No supply points are expended for the attack. On a die roll of '1', the attacked River Flotilla is flipped to its reduced strength side. If already at reduced strength, the Flotilla is eliminated.
Special Restrictions
Many of the Austro-Hungarian forces involved in this scenario mobilized and then acted automatically in accordance with plans drawn up well before the war began. Other units had to react to decisions made by a 'higher authority', such as the Supreme Command. Some Serbian units could not leave their stations until specific Austro-Hungarian threats disappeared. To reflect these conditions, the following restrictions are in force for the scenario:
3-2 During the 3rd turn of August, all Austro-Hungarian units capable of movement must move into an enemy Zone of Control if possible, by expending as few movement points as possible. If such a unit is already in an enemy Zone of Control, it may not move.
All Austro-Hungarian units under the control of the 5th Austro-Hungarian army (see setup instructions for the list of those units) in an enemy Zone of Control during the combat phase of the 3rd turn of August must participate in an attack.
During the 4th turn of August, all Austro-Hungarian units capable of movement, except Headquarters, must end the movement phase in an enemy Zone of Control if possible. Units that start the turn already in an enemy Zone of Control may move, but must still end the movement phase in an enemy Zone of Control.
Historical note (as printed): The Saga of the 'Go Here, No, Go There' AH 2nd Army. The Austro-Hungarian Chief of the General Staff, General Conrad von Hotzendorff (usually just referred to as Conrad), wanted to use the 2nd army to attack Serbia in conjunction with the 5th and 6th armies. This army had originally been assigned to the Russian front under the contingency plans should Russia mobilize. This had happened, but Conrad still wanted to use the 2nd army against Serbia. His political bosses, not to mention the German High Command, hit the roof when they found out that the Austro-Hungarian 2nd army was being sent not to face the Russian threat but to attack Serbia. Conrad was forced to move the 2nd army from the Serbian front to the Russian front. The following rules place the 2nd army in the situation that Conrad had placed them in at the start of the war.
3-3 Conrad was successful in keeping some of the 2nd army units in the Serbian Theater. The following units may be used by the Central Powers player as he sees fit: The 29th Infantry Division, the 14th and 107th LW Infantry Brigades, and the 10th Cavalry Division (until this unit is withdrawn). These units must move as mandated by the Special Restriction rules of the scenario, and become attached to the Austro-Hungarian 5th army after the departure of the 2nd army Headquarters from the map. Other units of the Austro-Hungarian 2nd army may neither move nor attack while they are on map 6-5, until they are required to exit off of the map (to transit to Galicia).
3-4 The 61st infantry brigade is a special case. Its commander was one of the very few Austro-Hungarian generals to show initiative. He refused to stay in place while awaiting transit out of the theater and his brigade participated in the campaign against Serbia as long as they could. This brigade may move and attack (following the rules for movement on the 3rd and 4th August turns as given under the scenario special instructions), until it is required to leave. The Central Powers player may take losses from this brigade only if he has no other choice.
3-5 The Austro-Hungarian 2nd Army Headquarters can only expend supply points for attack to those units that will remain in the Serbian Theater, and to the 61st infantry brigade. It may only expend supply points for counterattack purposes for any other units. It cannot transfer supply points to other Headquarters.
3-6 On the turn that they are required to leave the map, the Central Powers player must use all available Rail Capacity to exit units from the map. Those that must leave for which there is no rail capacity must move normally along rail lines until the Rail Capacity to move them off the map becomes available.
The following units are required to leave the Serbian Theater (map 6-5) during the movement phase of the 5th turn of August: The AH 2nd Army Headquarter, the 17th, 23rd, and 34th Infantry Divisions, and the 8th Engineer Regiment.
The following units are required to leave the Serbian Theater (map 6-5) during the movement phase of the 7th turn of August: The 32nd Infantry Division, the 61st and 62nd Infantry Brigades, and the 10th Cavalry Division. Should the 61st Infantry Brigade have taken losses, the Austro-Hungarian player is not required to exit other units off of the board in its stead.
3-7 The Serbs had to defend their Danubian border while the threat existed from the Austro-Hungarian 2nd Army. As a result, the Serb player must have either a unit or a Zone of Control present in each hex of their country that borders the Danube river prior to the Serb movement phase of the 7 August turn.
Victory Conditions (Serbia the Defiant)
While playing the scenario, Demoralization Points (DM's) are accumulated for enemy losses (See DM Schedule, Standard Rulebook, Rule 26-3 for DM accrual rates). Do not count DM points for territory captured.
- Austro-Hungarian Decisive Victory: The Austro-Hungarian player occupies Belgrade by the end of September. It is never retaken by the Serbs. In addition, the Austro-Hungarian player inflicts a total of at least 25 Demoralization points worth of unit losses on the Serbians in the course of the game. No Austro-Hungarian city is ever occupied by Serb or Montenegran forces.
- Austro-Hungarian Substantial Victory: The Austro-Hungarian player occupies Belgrade by the end of October. It is never retaken by the Serbs after that. In addition, the Austro-Hungarian player inflicts a total of at least 20 Demoralization points worth of unit losses on the Serbians in the course of the game. No Austro-Hungarian city is ever occupied by Serb or Montenegran forces.
- Austro-Hungarian Marginal Victory: The Austro-Hungarian player occupies Belgrade at the end of the game. [The opening words of the next sentence are missing from the source PDF text layer.] Austro-Hungarian city is ever occupied by Serb or Montenegran forces.
- Serbian Marginal Victory: Serbian player occupies all Serbian cities including Belgrade at the end of the game. A line of Serbian units and/or their ZOCs from the Montenegran to the Romanian or Bulgarian border exists. Belgrade is on or behind this line.
- Serbian Substantial Victory: Same as per Marginal Victory; in addition, the Serbian player inflicts a total of at least 20 Demoralization points worth of unit losses on the Austro-Hungarians in the course of the game.
- Serbian Decisive Victory: Same as per Marginal Victory; in addition, the Austro-Hungarian player never occupies Belgrade. In addition, the Serbian player inflicts a total of at least 25 Demoralization points worth of unit losses on the Austro-Hungarians in the course of the game OR a Austro-Hungarian city is occupied by Serb or Montenegran forces at the end of any game turn.
Scenario-level note on set-up and reinforcement tables (Serbia the Defiant): the Set-Up Instructions, Mobilization Completion Schedule and Reinforcement Schedules for the Serbia scenarios are printed as grid tables (unit, hex and turn columns) that the PDF text layer does not keep in reading order. They are not transcribed in this file; the set-up and reinforcement grids must be read from the printed scenario rulebook. The prose rules that accompany them are transcribed in this file.
Mobilization (Serbia the Defiant, August 1914): Units are not available to move or attack until they have completed mobilization. Once a unit completes mobilization, the controlling player may move and attack with the unit for the rest of the game. Units that are attacked that have not yet completed mobilization are considered to immediately complete the mobilization process and may thereafter move and attack for the rest of the game. Mobilization only effects a Headquarters ability to move. Headquarters may expend Supply points for units at any time.
Serbia the Defiant (November 1914)
Source: Scenario Specific Rules and Instructions, Sterling Edition, "Serbia the Defiant" November 1914 section. Map 6-5.
Note (as printed): All Rules in the following section apply to playing a Serbia the Defiant November 1914 scenario alone.
- First Turn: Turn 2 of November 1914.
- Last Turn: Turn 4 of December 1914.
- Combatants: Austria-Hungary vs. Serbia and Montenegro.
- Rail Lines: All part of the network of the country they are in except those behind enemy lines, which are inoperative.
- Rail Capacities: The Austro-Hungarian Rail Network has a capacity of 3 divisions in this scenario. The Serbian Rail Network has a capacity of 1 division.
Victory Conditions (Serbia the Defiant, November 1914)
While playing the scenario, Demoralization Points (DM's) are accumulated for enemy losses (See DM Schedule, Standard Rulebook, Rule 26-3 for DM accrual rates). Do not count DM points for territory captured.
- Austro-Hungarian Decisive Victory: The Austro-Hungarian player occupies Belgrade and one other Serbian city by the end of the scenario.
- Austro-Hungarian Substantial Victory: The Austro-Hungarian player occupies Belgrade at the end of the scenario.
- Austro-Hungarian Marginal Victory: The Austro-Hungarian player inflicts at least 20 Demoralization points worth of unit losses on the Serbians, and takes less in losses than the Serbian player.
- Serbian Marginal Victory: Serbian player inflicts at least 20 Demoralization points worth of unit losses on the Austro-Hungarians, and takes less in losses than the Austro-Hungarian player. A line of Serbian units and/or their ZOCs from the Montenegran to the Romanian or Bulgarian border exists. Belgrade is on or behind this line.
- Serbian Substantial Victory: Serbian player occupies Belgrade at the end of the game. A line of Serbian units and/or their ZOCs from the Montenegran to the Romanian or Bulgarian border exists. Belgrade is on or behind this line.
- Serbian Decisive Victory: The Austro-Hungarian player never occupies Belgrade. A line of Serbian units and/or their ZOCs from the Montenegran to the Romanian or Bulgarian border exists. Belgrade is on or behind this line. In addition, the Serbian player inflicts a total of at least 20 Demoralization points worth of unit losses on the Austro-Hungarians in the course of the game OR a Austro-Hungarian city is occupied by Serb or Montenegran forces at the end of any game turn.
Set-Up (Serbia the Defiant, November 1914)
8-1. The Front Line at Start: Units in this scenario are deployed on or behind the Front Line that existed at the start of the scenario. The Front Line defined here is given as those most forward hexes that can be occupied by Austro-Hungarian forces. Serbian and Montenegran forces can setup in hexes to the south and east of the described front line. The Front Line is defined as follows: Starting at the Serbian/Austro-Hungarian/Romanian border (hex 2405) the Front Line is hexes to the north of the Danube river, to hex 1606. The Front Line is then defined as the following hexes: 1507, 1407, 1308, 1207, 1108, 1008, 1009, 1110, 1210, 1211, 1112, 1113, 1013, 1014, 0915, 0815, 0816, 0817, 0818, 0919, 1019, 1120.
8-2 Austro-Hungarian Set-Up: Note that some units may be set up understrength. (Unit grid omitted; see the note above.)
8-3 Serbian Set-Up: Note that some units may be set up understrength. These units must be set up in or adjacent to the Front line from hex 1507 to hex 1008. NO units are allowed to the north or east of the Danube river. (Unit grid omitted; see the note above.) The 6th Army units must be set up in or adjacent to the Front line from hex 1009 to hex 1113. The remaining units must be set up in or adjacent to the Front line from hex 1013 southwards.
Order of Battle (Serbia, November 1914): All Serbian units present in the August 1914 Scenario are also available in this scenario. The difference is that the following units are reduced by 1 strength point from the strengths given for that scenario: Sabc, Obrn, Tim1, Cmp.
8-4 Montenegrin Set-Up: Order of Battle: All Montenegrin units present in the August 1914 Scenario are also available in this scenario. Placement - The Entente player may place the Montenegrin units anywhere desired within the borders of Montenegro or to the west of Montenegro out to the Austro-Hungarian front line (but not north of hex 1115).
8-5 Set-Up Sequence: The Entente player sets up first.
River Flotillas (November 1914): Units may be placed anywhere along the Danube river so long as they are not in the same hex as an enemy unit. Note that the second 'Koros' unit needs to be taken from the Romania scenario counter mix. There are none in this scenario.
9-2 Serbian Reinforcement Schedule, Placement: The Serb player must place his units according to the following restrictions:
- In or south of hex 1311: a total of 8 infantry strength points.
- East of Belgrade, adjacent to the Danube river: a total of 2 infantry strength points.
- In hex 1607 (Belgrade): A minimum of 2 infantry strength points.
- Each of the following hexes must be occupied by a minimum of 2 infantry strength points: 1109, 1208, 1209, 1309, 1310, 1408, 1508.
Serbia the Defiant (October 1915)
Source: Scenario Specific Rules and Instructions, Sterling Edition, "Serbia the Defiant" October 1915 section. Map 6-5.
Note (as printed): All Rules in the following section apply to playing a Serbia the Defiant October 1915 scenario alone.
The Serbian Cavalry Division may be placed anywhere behind the Serbian front, so long as it is not in an enemy Zone of Control. The Serbian HQ units may be placed anywhere in Serbian controlled territory. Supplies - The Serb player has a total of 23 supply points. These may be allocated among the Serbian HQ units as the player sees fit.
- First Turn: Turn 2 of October 1915.
- Last Turn: Turn 2 of December 1915.
- Combatants: Germany, Austria-Hungary, and Bulgaria vs. Serbia, Montenegro, Great Britain, and France.
- Rail Lines: All part of the network of the country they are in except those behind enemy lines, which are inoperative.
- Rail Capacities: The Austro-Hungarian Rail Network has a capacity of 3 divisions in this scenario. The Bulgarian Rail Network has a capacity of 2 divisions. The Serbian Rail network has a capacity of 1 division. The Greek Rail Network has a capacity of 2 divisions.
10-1 Serbian and Montenegrin units may enter Albania. Central Powers units may not enter Albania in the course of the scenario.
10-2 The Central Powers player must make withdrawals during the game. Twelve infantry strength points of German units must be withdrawn on each of the following turns: 3rd November, 4th November, and 5th November. Remove entire units equal to or exceeding the strength point totals each turn from the map.
Historical note (as printed), "Greece": Greece was a kind of 'special situation' in World War One. The king was of German decent, a blood relative of the Kaiser, and thus rather pro-German. So was the Army Chief of Staff. On the other hand, the civilian Prime Minister was very pro Entente, and, if the country was to be involved in the war, he wanted to enter the war on the Entente side. Besides the personalities involved, the Greeks had a mutual defense treaty with the Serbs against the Bulgarians. And of course there were the traditional hatreds against the Ottoman Turks, who were now German allies. All of these factors contributed to a very bizarre situation. The Entente were allowed to occupy and operate out of the Greek port of Salonika. The Central Powers tried to keep Greece out of the war by not violating her territory until the danger from the Entente forces there presented too much of a danger. The Greeks found a technicality in their treaty with Serbia that would allow them to stay out of the war. The result was a situation during the course of 1915 that is reflected by the following special rules:
10-3 British and French forces appear in Greece as reinforcements in the course of this scenario. These forces may move freely within Greece, or may cross the Greek border into Serbia, Albania, and Bulgaria. These units may use the Serbian rail capacity to move from Salonika into Serbia. Serbian and Montenegran units may enter Greece once French or British units have appeared in Salonika.
10-4 Although Entente forces are operating in and out of Greece, it is still considered a neutral country by the Central Powers. Central Powers units may not cross the Greek Border if Greece is neutral. They may, however, attack Entente units across the border. Greek units are ignored in doing so.
10-5 OPTIONAL Greece comes to Serbia's aid. When using this rule, Greece joins the Entente on the turn after Bulgaria joins the Central Powers. When this rule is used, all Greek units are available to the Entente player at that time. Greek units may cross into any adjacent country and operate as the Entente player desires.
Victory Conditions (Serbia the Defiant, October 1915)
While playing the scenario, Demoralization Points (DM's) are accumulated for enemy losses (See DM Schedule, Standard Rulebook, Rule 26-3 for DM accrual rates). Do not count DM points for territory captured.
- Central Powers Decisive Victory: Every Serbian city is occupied by Central Powers units by the end of the game. No Entente units in Serbia in any hex that contains a clear or broken terrain hexside.
- Central Powers Substantial Victory: Every Serbian city is occupied by Central Powers units by the end of the game. Also, Central Powers units control each hex of a rail line from Austria-Hungary to Bulgaria and on to an eastern map edge of Bulgaria. No part of this rail line contains an Entente Zone of Control. In addition, the Central Powers inflicts a total of at least 30 Demoralization points worth of unit losses (do not count DM points for territory captured) on the Serbians in the course of the game.
- Central Powers Marginal Victory: Every Serbian city is occupied by Central Powers units by the end of the game. Also, Central Powers units control each hex of a rail line from Austria-Hungary to Bulgaria and on to a eastern map edge of Bulgaria. No part of this rail line contains an Entente Zone of Control.
- Entente Marginal Victory: Entente player controls at least one Serbian city at the end of the game.
- Entente Substantial Victory: Entente player controls at least one Serbian city at the end of the game AND prevents the Central Powers player from having a rail line from Austria-Hungary to the eastern edge of Bulgaria by having a Zone of Control in at least one hex of each such possible rail connection.
- Entente Decisive Victory: The Entente player controls at least two Serbian cities at the end of the game AND prevents the Central Powers player from having a rail line from Austria-Hungary to the eastern edge of Bulgaria by having a Zone of Control in at least one hex of each such possible rail connection.
Set-up and reinforcement grids for the October 1915 scenario (sections 11-1 to 11-3 and the reinforcement schedules) are omitted here; see the note above.
Romania: Transylvanian Gambit
Source: Scenario Specific Rules and Instructions, Sterling Edition, "Romania: Transylvanian Gambit" section. Map 6-6.
Note (as printed): All Rules in the following section apply to playing a Romania scenario alone.
Map note (as printed): Some old version of map 6-6 have an error. Hex 0421 is in Romania. The Danube should flow only along the hexside 0421/0322. The other hexsides of 0421 should NOT contain the Danube.
- First Turn: Turn 7 of August 1916 (Entente movement phase).
- Last Turn: Turn 4 of December 1916.
- Combatants: Germany, Austria-Hungary, Bulgaria, and the Ottoman Empire vs. Romania and Russia.
- Rail Lines: All part of the network of the country they are in except those in Serbia, which are part of the Austro-Hungarian network.
- Rail Capacities: The Austro-Hungarian Rail Network has a capacity of 3 divisions in this scenario. The Bulgarian Rail Network has a capacity of 2 divisions. The Russian Rail Network has a capacity of 3 divisions in this scenario. The Romanian Rail Network has a capacity of 3 divisions.
13-1 The Central Powers player may move units by rail between hexes 0112 and 0126. To move between these hexes, units moving by rail must spend 2 complete turns off of the map in transit. While doing so, such units count against the rail capacity of both Austria-Hungary and Bulgaria.
The Central Powers player may move units by rail between the rail lines exiting the southern edge of the map.
The Entente player may move units by rail between the rail lines exiting the northern edge of the map east of hexrow 18xx. To move between these hexes, units must expend a number of movement points equivalent to traveling by rail lines 'one hex off the edge of the map' between these hexes.
13-2 The Entente player receives special reinforcements should Romania suffer a serious reverse. This reverse is defined as the Central Powers player having units operating inside Romania in hexes containing clear terrain that are both north of the Danube and Dambovija rivers (ex. Hex 1515). Should this occur, the following Russian units are placed immediately in hex 2603: 3 x 4-4 Inf XX (13, 1 Rfl, 3 CR) and 2 x 3-4 Inf XX (67R, 71R). If this happens, all 3 of the Bucharest fortresses are immediately removed from the map, and no Entente unit may defend inside any of the 3 hexes vacated by these forts (Bucharest is declared an open city).
13-3 The zones of control of Central Powers units do not extend into Romania at the start of the scenario.
Victory Conditions (Romania: Transylvanian Gambit)
- Central Powers Decisive Victory: The Central Powers player occupies Bucharest and three other Romanian cities at the end of the game. No Entente units are on the south side of the Danube in a hex with the last two digits being 13 or higher (example, this condition not met if there is an Entente unit in hex 2713). No Austro-Hungarian city is occupied by Entente units at the end of the game.
- Central Powers Substantial Victory: The Central Powers player occupies Bucharest at the end of the game, and either the south bank of the Danube is clear (see previous victory condition), OR no Austro-Hungarian city is occupied by Entente units at the end of the game.
- Central Powers Marginal Victory: No Entente units are on the south side of the Danube in a hex with the last two digits being 13 or higher (example, this condition not met if there is an Entente unit in hex 2713). No Austro-Hungarian city is occupied by Entente units at the end of the game.
- Entente Marginal Victory: Central Powers player cannot meet any of his victory levels.
- Entente Substantial Victory: Entente Player controls Bucharest at the end of the game, and the Central Powers player cannot meet his marginal victory level.
- Entente Decisive Victory: The Entente Player controls Bucharest at the end of the game. In addition, the Entente player controls two cities controlled by the Central Powers at the start of the game.
Set-up and reinforcement grids for Romania: Transylvanian Gambit (sections 14-1 to 14-5 and 15-1 to 15-2) are omitted here; see the note at the start of the Serbia scenario rules.
Scenario Linking Rules (Serbia and Romania Booklet)
The linking rules below are printed in the Serbia/Romania scenario booklet. The linked games' own rules (Galicia, Tannenberg, The Schlieffen Plan) are in other booklets of the series and are not reproduced here.
16. Scenario Linking Rules. The following possibilities exist for linking the first Serbia scenario (August 1914) described in this Rule booklet with previously published games of the Series:
- Serbia and Galicia
- Serbia, Tannenberg, and Galicia
- Serbia, The Schlieffen Plan, Tannenberg, and Galicia
When multiple scenarios are linked together, the rules for each scenario are still in force. There may be some exceptions, or additional rules, and these are given in the applicable section.
17. Linking Serbia and Galicia
17-1 This game is played on maps 5-5, 5-5S, and 6-5.
17-2 This linked game is played for the length specified by the solitary Galicia scenario.
Exceptions and Additions: The rules for each scenario are still in force, with the following exceptions and additional rules:
17-3 The removal of Austro-Hungarian forces from the Serbian Front for transfer to the Eastern Front is optional. The Austro-Hungarian player may decide to transfer any units between the two fronts that he desires, and may do so whenever he desires to do so. This means that units of the Austro-Hungarian army that appear in the Galicia scenario as reinforcements do NOT appear as reinforcements if they are set up in the Serbian theater.
17-4 No Austro-Hungarian unit may use Rail Movement during the first four turns of August. The Austro-Hungarian Rail Capacity is halved during the 5th-7th turns of August 1914.
17-5 The Austro-Hungarian 61st and 62nd 2-4 Inf Xs may combine to form the 31st 4-4 Inf XX at the end of any movement phase if they are in the same hex.
Victory Conditions (Serbia and Galicia): These are the same as per the Galicia and Serbia scenario rules. This means that the Austro-Hungarians and the Entente could have different levels of victory on different fronts.
18. Linking Serbia with Tannenberg and Galicia
- Maps: 4-5, 5-5, 5-5S, and 6-5.
- First Turn: Turn 3 of August 1914.
- Last Turn: Turn 7 of November 1914.
- Combatants: Germany and Austria-Hungary vs. Russia, Serbia, and Montenegro.
- Rail Lines: All part of the network of the country they are in except those behind enemy lines, which are inoperative.
- Rail Capacities: The German Rail Network in this scenario has a capacity of 12 divisions. It may not be used until turn 6 of August and is halved until Turn 1 of September. It may be used on any map or combination of maps. The Austro-Hungarian Rail Network has a capacity of 10 divisions. It may not be used until turn 5 of August and is halved until Turn 1 of September. It may be used on any map or combination of maps. The Russian Rail Network has a capacity of 10 divisions. It may not be used until turn 1 of September and is halved until Turn 3 of September. It may be used on any map or combination of maps. The Serbian Rail Network has a capacity of 1 division. It may not be used until Turn 5 of August.
Exceptions and Additions: The rules for each scenario are still in force, with the following exceptions and additional rules:
18-1 The German forces sent to aid the Austro-Hungarian army are released from their restriction (that is, staying in close proximity of the Austro-Hungarian 1st Army HQ) when the German 9th Army HQ arrives as a reinforcement.
18-2 Players may not transfer units and supply points between maps 4-5 and 5-5 until the 1st turn of September 1914. Units and supply points may be transferred to maps 4-5 and 5-5 from other maps at any time.
18-3 The removal of Austro-Hungarian forces from the Serbian Front for transfer to the Eastern Front is optional. The Austro-Hungarian player may decide to transfer any units between the two fronts that he desires, and may do so whenever he desires to do so. This means that units of the Austro-Hungarian army that appear in the Galicia scenario as reinforcements do NOT appear as reinforcements if they are set up in the Serbian theater.
18-4 The Central Powers player may NOT move German units to map 6-5.
18-5 Austro-Hungarian HQs may expend supply for German Landwehr units during 1914.
18-6 The pre-planned objective rules found in Tannenberg and Galicia rulebook section 7-1 to 7-5 are only in force through the end of the 4th September turn (the length of the stand alone Galicia scenario).
Victory Conditions (Serbia linked with Tannenberg and Galicia): In addition to the standard Demoralization point schedule (See DM Schedule, Standard Rulebook, Rule 26-3 for DM accrual rates), Demoralization points are taken by players in this scenario for the following additional instances:
- ½ Central Powers DM point - Each Strength Point of Reinforcements forced to be taken by the German player due to Russian positions on the 5 August turn.
- 2 Central Powers DM points - Each turn in September turns 1-4 that the Russian player occupies or controls a hex that counted toward points in forcing German West Front reinforcements.
- 2 Central Powers DM points - each turn a Russian unit is in a hex south of the Carpathians that contains at least one clear hexside (these are hexes with hex numbers that end with 16 or higher).
- 30 Entente DM points - Belgrade is occupied by Austria-Hungary at the end of the game. Note that no DM points are inflicted on the Entente for the capture of Belgrade under the normal DM rules.
No Russian DM points are accumulated for occupation of town centers west of hexrow 20xx.
- Central Powers Decisive Victory: The Entente suffers 225+ more Demoralization points than the Central Powers suffer.
- Central Powers Substantial Victory: The Entente suffers 145-224 more Demoralization points than the Central Powers suffer.
- Central Powers Marginal Victory: The Entente suffers 90-144 more Demoralization points than the Central Powers suffer.
- Entente Marginal Victory: Entente suffers 0-17 more Demoralization points than the Central Powers suffer or the Central Powers suffer 1-37 more Demoralization points than the Entente suffers.
18-7 OPTIONAL: The 'Army Objective' rules given for the Austro-Hungarian and Russian forces in the Galicia scenario are ignored. Players may move their forces as they wish.
18-8 The Austro-Hungarian 61st and 62nd 2-4 Inf Xs may combine to form the 31st 4-4 Inf XX at the end of any movement phase if they are in the same hex.
19. Linking Serbia with The Schlieffen Plan, Tannenberg, and Galicia
- Maps: 5-3, 4-5, 5-5, 5-5S, and 6-5 (as the linked map set).
- Rail Capacities: The German Rail Network in this scenario has a capacity of 12 divisions. It may not be used until turn 6 of August and is halved until Turn 1 of September. The Austro-Hungarian Rail Network has a capacity of 10 divisions. It may not be used until turn 5 of August and is halved until Turn 1 of September. The Russian Rail Network has a capacity of 10 divisions. It may not be used until turn 1 of September and is halved until Turn 3 of September. The Serbian Rail Network has a capacity of 1 division. It may not be used until Turn 5 of August.
Exceptions and Additions: The rules for each scenario are still in force, with the following exceptions and additional rules:
19-1 The Russian or Entente player is not forced to move units of the Russian 1st and 2nd Armies towards Konigsberg during August. He may move these forces as he wishes.
19-2 The German forces sent to aid the Austro-Hungarian army are released from their restriction (that is, staying in close proximity of the Austro-Hungarian 1st Army HQ) when the German 9th Army HQ arrives as a reinforcement.
19-3 The German or Central Powers player is not forced to move units from the 2nd Army HQ vicinity to the Eastern Front.
19-4 Players may not transfer units and supply points between maps 4-5 and 5-5 until the 1st turn of September 1914. Units and supply points may be transferred to maps 4-5 and 5-5 from other maps at any time.
19-5 Only Austro-Hungarian siege artillery units may be sent to map 5-3. Other Austro-Hungarian units are restricted to maps 4-5, 5-5, 5-5S, and 6-5.
19-6 Units moving from the Western Front (map 5-3) to the Eastern Front (maps 4-5 and 5-5) spend an entire turn entrained and off any map. Units move between rail hexes of the German Rail network on the eastern edge of map 5-3 and rail hexes of the German Rail network on the western edge of maps 4-5 and 5-5. They are placed on the Eastern Front during the Reinforcement Phase of the next turn. This means that if a unit is moved off the map by rail during the 4th turn of September, it would stay off the maps during the 5th September turn, and would appear on the other Front on the 6th September turn. The same process is used for moving from the Eastern Front to the Western Front.
19-7 The removal of Austro-Hungarian forces from the Serbian Front for transfer to the Eastern Front is optional. The Austro-Hungarian player may decide to transfer any units between the two fronts that he desires, and may do so whenever he desires to do so. This means that units of the Austro-Hungarian army that appear in the Galicia scenario as reinforcements do NOT appear as reinforcements if they are set up in the Serbian theater.
19-8 The Central Powers player may NOT move German units to map 6-5.
19-9 Austro-Hungarian HQs may expend supply for German Landwehr units in 1914.
19-10 The German player does not receive reinforcements on the Tannenberg Reinforcement Schedule that are proceeded by an asterisk (*). These units were transfers from the Western to the Eastern Front. They are only available to a linked Tannenberg & Galicia game.
19-11 The pre-planned objective rules found in Tannenberg and Galicia rulebook section 7-1 to 7-5 are only in force through the end of the 4th September turn (the length of the stand alone Galicia scenario).
19-12 OPTIONAL: The 'Army Objective' rules given for the Austro-Hungarian and Russian forces in the Galicia scenario are ignored. Players may move their forces as they wish.
19-13 The Austro-Hungarian 61st and 62nd 2-4 Inf Xs may combine to form the 31st 4-4 Inf XX at the end of any movement phase if they are in the same hex.
Victory Conditions (Serbia linked with The Schlieffen Plan, Tannenberg, and Galicia): In addition to the standard Demoralization point schedule (See DM Schedule, Standard Rulebook, Rule 26-3 for DM accrual rates), Demoralization points are taken by players in this scenario for the following additional instances:
- 200 Entente DM points - All 3 Paris hexes are German controlled or isolated from the rest of France by German units or German ZOCs in hexes not occupied by Entente ground combat units.
- 100 Entente DM points - German units are 2 or fewer hexes away from any of the three Paris hexes at the end of the game.
- 50 Entente DM points - German units are 4 or fewer hexes away from any of the three Paris hexes at the end of the game.
- 50 Central Powers DM points - German units are never 6 or fewer hexes away from any of the three Paris hexes at any time during the game.
- 100 Central Powers DM points - German units are never 8 or fewer hexes away from any of the three Paris hexes at any time during the game.
- 150 Central Powers DM points - German units are never 10 or fewer hexes away from any of the three Paris hexes at any time during the game.
- 2 Central Powers DM points - each turn a Russian unit is in a hex south of the Carpathians that contains at least one clear hexside (these are hexes with hex numbers that end with 16 or higher).
- 30 Entente DM points - Belgrade is occupied by Austria-Hungary at the end of the game. Note that no DM points are inflicted on the Entente for the capture of Belgrade under the normal DM rules.
No Russian DM points are accumulated for occupation of town centers west of hexrow 20xx.
- Central Powers Decisive Victory: The Entente suffers 475+ more Demoralization points than the Central Powers suffer.
- Central Powers Substantial Victory: The Entente suffers 320-474 more Demoralization points than the Central Powers suffer.
- Central Powers Marginal Victory: The Entente suffers 215-319 more Demoralization points than the Central Powers suffer.
- Entente Marginal Victory: Entente suffers 1-93 more Demoralization points than the Central Powers suffer or the Central Powers suffer 0-12 more Demoralization points than the Entente suffers.
- Entente Substantial Victory: Central Powers suffer 13-142 more Demoralization points than the Entente suffers.
- Entente Decisive Victory: The Central Powers suffer 143+ more Demoralization points than the Entente suffers.
Omitted from this file: the "20. Series Notes" designer commentary, the TSP/Mobilization unit lists in the Series Notes, and "21. Combined Schedules" (mobilization and reinforcement compilations printed as tables).
Gorlice-Tarnow Breakthrough
Source: Scenario Specific Rules and Instructions, Sterling Edition, "Gorlice - Tarnow Breakthrough" section.
Note (as printed): All Rules in the following section apply to playing a Gorlice-Tarnow Breakthrough scenario alone.
Any of the games described in the Gorlice-Tarnow / Brusilov booklet require the ownership of the previous East Front World War One titles in the series. These required games are: Tannenberg: Eagles in the East, Galicia: The Forgotten Cauldron, Serbia the Defiant, and Romania: The Transylvanian Gambit. (This note is from the booklet's introduction.)
Gorlice - Tarnow Breakthrough depicts the Campaigns in Poland and Galicia in 1915. The 1916 Brusilov Offensive depicts the Campaigns on the Eastern Front in the latter half of 1916.
- Maps: 4-5, 4-5N, 4-5E, and 5-5.
- First Turn: Turn 1 of May 1915.
- Last Turn: Turn 7 of September 1915.
- Combatants: Germany and Austria-Hungary vs. Russia.
- Rail Lines: All part of the network of the country they are in, with the following exceptions:
- Those rail hexes in 'occupied territory' (those hexes occupied by units of a foreign army, or hexes behind the front lines of those units) are not active (except as part of the foreign rail network as described below).
- Due to advances of the Russian army in Galicia, the Austro-Hungarian Rail Network within their home country that is still within their lines ends at two points well behind their lines, map 5-5 hex 3415, and map 5-5 hex 4017. Other rail lines in Austro-Hungarian territory behind Central Powers lines are not affected.
- The Russian Rail Network is extended into Austria-Hungary along the following rail lines: Map 5-5 hexes 3907-3808-3609, and Map 5-5 hexes 4409-4209-3808.
- The German Rail Network is extended into Russia along the following rail line: Map 5-5 hexes 1003-1503.
- The Austro-Hungarian Rail Network is extended into Russia along the following rail line: Map 5-5 hexes 1610-1909.
- Rail Capacities: The German Rail Network has a capacity of 7 divisions in this scenario. The Austro-Hungarian Rail Network has a capacity of 7 divisions in this scenario. The Russian Rail Network has a capacity of 10 divisions.
3-1 When playing a duration game, Russia has 325 DM points, Austria-Hungary has 220 DM points, and Germany has 100 DM points (for losses on the East Front) at the start of this scenario.
3-2 A Trench marker is placed in each hex where ground combat units set up adjacent to enemy ground combat units. There are exceptions to this rule. No trench marker is placed if the hex can only be attacked by adjacent enemy units where the defender can only use swamp as the defensive terrain. Other exceptions (no trench marker in a setup hex adjacent to enemy units) are the following:
- Hexes occupied by Russian units set up on map 4-5N, and those under the control of the 8th, 9th and 11th Army Hqs.
- Hexes occupied by German units under the control of the Lau and Sud HQs, and any German units under the control of any Austro-Hungarian HQ.
- Hexes occupied by Austro-Hungarian units under the control of the 2nd, Sud, and Pflzr HQ.
3-3 The Russians had no intention of fighting through the streets of Warsaw. The city was abandoned to the enemy when threatened with encirclement. To reflect this, all Warsaw fortresses are immediately removed from play when the Central Powers player takes Novogeorgisk (map 4-5 hex 1918), or when all but one of the rail lines leading east of the city is covered by a Central Powers Zone of Control (there are 3 such rail lines, 2119 to 2713, 2119 to 2618, and 2119 to 2802 [map 5-5]).
3-4 Use the reinforcement and replacement schedules in section 11 for supply point and RPL reinforcements and for arrival locations.
Victory Conditions (Gorlice-Tarnow Breakthrough)
While playing the scenario, Demoralization Points (DM's) are accumulated for enemy losses and gaining control of enemy cities (See DM Schedule, Standard Rulebook, Rule 26-3 for DM accrual rates).
- Central Powers Decisive Victory: Russia suffers 325+ more Demoralization points than the Central Powers suffer.
- Central Powers Substantial Victory: Russia suffers 250-324 more Demoralization points than the Central Powers suffer.
- Central Powers Marginal Victory: Russia suffers 125-249 more Demoralization points than the Central Powers suffer.
- Russian Marginal Victory: Russia suffers 50-124 more Demoralization points than the Central Powers suffer.
- Russian Substantial Victory: Central Powers suffer 1-29 more Demoralization points than Russia suffers.
- Russian Decisive Victory: The Central Powers suffer 30+ more Demoralization points than Russia suffers.
Set-up (section 4) and reinforcement schedules (section 5) for Gorlice-Tarnow Breakthrough are printed as grid tables and are omitted here; the Russian set-up grid begins with the 10th Army (map 4-5N hexes marked with an asterisk). See the source booklet for unit placement.
The 1916 Brusilov Offensive
Source: Scenario Specific Rules and Instructions, Sterling Edition, "The 1916 Brusilov Offensive" sections.
There are two ways to play the game: Limited Scope (historical, with only the Russian Southwest Front attacking), and Wide Scope (involving attacks all along the Eastern Front, as Brusilov intended).
Wide Scope
Note (as printed): All Rules in the following section apply to playing a 1916 Brusilov Offensive scenario alone. The following apply to a 'Wide Scope' Game:
- Maps: 4-5, 4-5N, 4-5E, and 5-5.
- First Turn: Turn 2 of June 1916 (Entente movement phase).
- Last Turn: Turn 6 of August 1916.
- Combatants: Germany, Austria-Hungary, and the Ottoman Empire vs. Russia.
- Rail Lines: All part of the network of the country they are in, with the following exceptions:
- Those rail hexes in 'occupied territory' (those hexes occupied by units of a foreign army, or hexes behind the front lines of those units) are not active (except as part of the foreign rail network as described below).
- The Russian Rail Network is extended into Austria-Hungary along the following rail line: Map 5-5 hexes 4409-4209.
- The German Rail Network is extended into Russia along the following rail lines: Map 5-5 hexes 1003-1602-Map 4-5 hex 2019. Map 4-5 hexes 2404-2802-Map 4-5N hex 1412. Map 4-5 hexes 2802-3203-3303. Map 4-5 hexes 2410-2713-2909. Map 4-5 hexes 1413-2119-2713. Map 4-5 hexes 2119-2618-2914-2713. Map 4-5 hexes 2914-3017.
- The Austro-Hungarian Rail Network is extended into Russia along the following rail lines: Map 5-5 hexes 1610-2502-Map 4-5 hexes 2619-3118 - Map 5-5 hexes 3601-3504-3605 - Map 5-5 hexes 3601-3903.
- Rail Capacities: The German Rail Network has a capacity of 7 divisions in this scenario. The Austro-Hungarian Rail Network has a capacity of 7 divisions in this scenario. The Russian Rail Network has a capacity of 10 divisions.
Unnumbered text printed beside the rail capacities (as printed): Russian units engaged in such attacks pay double the normal supply point cost in attacking. The Austro-Hungarian player MUST expend supply points for any unit such attacked for counter attack purposes.
The Sad State of the AH 4th Army. The Austro-Hungarian 4th Army was particularly caught off guard by the Brusilov offensive. Most of the HQ staff and senior commanders of this army were off on hunting trips and other vacations. Unit cohesion was lost in most units that were under pressure or found themselves in difficult circumstances. The following rule simulates this sad state of affairs:
6-1 When playing a duration game, Russia has 800 DM points (and suffered 'Shaken National Morale in 1Q1916), Austria-Hungary has 510 DM points, Germany has 245 DM points (for losses on the East Front), and Bulgaria has 10 DM points at the start of this scenario.
6-2 All ground combat units set up at the start of the scenario in hexes adjacent to or no more than 1 hex from enemy ground combat units are set up with a trench marker. The exception to this are units set up in hexes that can be attacked by adjacent enemy units and only swamp can be used defensive terrain.
6-3 The Russian Guard Army (1G, 2G, 3G, GRfl Inf XX and 1G, 2G, and 3GK Cav XX) begin the scenario around Minsk. The units can be used anywhere on the scenario maps but must be used together (each within one hex of another guards unit). Once the Guard infantry divisions have made one attack, the Guard cavalry units can be freely sent anywhere. However, the Guard infantry units must always remain within one hex of each other until the end of the scenario.
Russian Artillery 'Surprise'. The Russian Southwest Front artillery was carefully prepared to attack Austro-Hungarian positions at the start of the 1916 Brusilov Offensive. They were aided by the fact that the attack came as a complete surprise, and further by the fact that the Austro-Hungarian army had a policy of 'forward' defense. The following special rules simulate the devastating effect of the Russian artillery bombardment on the first turn of the scenario:
6-4 Russian attacks made against Austro-Hungarian units (except those under the control of the German Sud Army HQ - these are defined either as the closest six units that are not closer to an Austro-Hungarian HQ or the units in the closest three hexes with units that are not closer to an Austro-Hungarian HQ) with the use of an artillery unit have the attacking CRT results TRIPLED.
6-5 On the first game turn of the scenario, whenever units of the Austro-Hungarian 4th army are in a position where they could not hypothetically move without moving from a hex in Russian ZOC to another hex in Russian ZOC (even if friendly units are in an adjacent hex or hexes), those units (or unit) immediately surrenders. [Example - this happens when Russian units occupy hexes on the opposite sides of such surrender prone units]. Russian units adjacent to such surrendering units may advance into the hex as per Advance After Combat rules, even if they had already advanced as a result of a previous attack.
6-6 Use the reinforcement and replacement schedules in section 11 for supply point and RPL reinforcements and for arrival locations.
Victory Conditions (Wide Scope, Russian levels, as printed in section 6): While playing the scenario, Demoralization Points (DM's) are accumulated for enemy losses and gaining control of enemy cities (See DM Schedule, Standard Rulebook, Rule 26-3 for DM accrual rates).
- Russian Marginal Victory: Russia suffers 0-29 more Demoralization points than the Central Powers suffer.
- Russian Substantial Victory: The Central Powers suffer 1-49 more Demoralization points than Russia suffers.
- Russian Decisive Victory: The Central Powers suffer 50+ more Demoralization points than Russia suffers.
Victory Conditions (Wide Scope, Central Powers levels, as printed in section 7):
- Central Powers Decisive Victory: Russia suffers 150+ more Demoralization points than the Central Powers suffer.
- Central Powers Substantial Victory: Russia suffers 110-149 more Demoralization points than the Central Powers suffer.
- Central Powers Marginal Victory: Russia suffers 75-109 more Demoralization points than the Central Powers suffer.
Set-up (section 7) and reinforcement schedules (section 8, and the reinforcement grids in section 6-6 and section 11) for the Wide Scope game are printed as grid tables and are omitted here; see the source booklet.
Limited Scope
Note (as printed): All Rules in the following section apply to playing a 1916 Brusilov Offensive scenario alone. The following apply to a Limited Scope Game:
9-1 This scenario is played entirely on maps 4-5, 4-5E, and 5-5. On map 4-5, only hexes numbered xx18 or higher are in play. On map 4-5E, only hexes numbered xx25 or higher are in play.
9-2 This scenario uses the rules and set-up instructions for the Brusilov 'Wide Scope' scenario, with the exception that units listed as set up outside of the described playing area are not deployed on the maps.
9-3 Do not use section 11 for German supply point and RPL reinforcements. These reinforcements are incorporated into the normal reinforcement schedule in section 10-2.
The Limited Scope reinforcement schedule (section 10) is printed as a grid table and is omitted here.
The East Front Duration Game
Source: Scenario Specific Rules and Instructions, Sterling Edition, "The East Front Duration Game" section (section 11). The rules are printed in a two-column layout; they are presented here in numeric order. The Victory Point Schedule is transcribed below in text form.
Disclosure: in rules 11-46, 11-59, 11-64 to 11-66, 11-70 to 11-81 and 11-83, the Supply Point and RPL amounts and the turns they arrive on are set out in reinforcement grids that the PDF text layer scrambles. Only the figures legible in the text layer are given; the grid details (for example which turns carry RPL) are not reliably reproduced and must be checked against the printed booklet.
The entirety of World War One on the Eastern Front can be simulated by linking the following games: Tannenberg: Eagles in the East; Galicia: The Forgotten Cauldron; Serbia the Defiant; Romania: The Transylvanian Gambit; Gorlice-Tarnow Breakthrough; The 1916 Brusilov Offensive. The rules for each scenario are still in force. There may be some exceptions, or additional rules, and these are given in the applicable section.
- Maps: 4-5, 4-5N, 4-5E, 5-5, 5-5S, 6-5, and 6-6.
- First Turn: Turn 3 of August 1914.
- Last Turn: Turn 7 of October 1917 (or until Austria-Hungary or Russia surrenders).
- Combatants: Germany, Austria-Hungary, Bulgaria, and the Ottoman Empire vs. Russia, Serbia, and Montenegro.
- Rail Lines: All part of the network of the country they are in.
- Rail Capacities: The German Rail Network in this scenario has a capacity of 12 divisions. It may not be used until turn 6 of August and is halved until Turn 1 of September. It may be used on any map or combination of maps. The Austro-Hungarian Rail Network has a capacity of 10 divisions. It may not be used until turn 5 of August and is halved until Turn 1 of September. It may be used on any map or combination of maps. The Russian Rail Network has a capacity of 10 divisions. It may not be used until turn 1 of September and is halved until Turn 3 of September. It may be used on any map or combination of maps. The Serbian Rail Network has a capacity of 1 division. It may not be used until Turn 5 of August.
Exceptions and Additions: The rules for each scenario (Tannenberg, Galicia, Serbia, Gorlice-Tarnow, Brusilov, and Romania) are still in force, with the following exceptions and additional rules:
11-1 The Central Powers player should take the specified units in the Tannenberg scenario in the order they are listed (example: if 50 points are scored, the reinforcements should be the 3G, 1GR, 22, and 38 infantry divisions and the 8 cavalry division). This is to prevent confusion in the reinforcement/withdrawal schedule. Ignore references to reinforcements that are already in play, or withdrawals for units that are not present.
11-2 The removal of Austro-Hungarian forces from the Serbian Front for transfer to the Eastern Front is optional. The Austro-Hungarian player may decide to transfer any units between the two fronts that he desires, and may do so whenever he desires to do so. This means that units of the Austro-Hungarian army that appear in the Galicia scenario as reinforcements do NOT appear as reinforcements if they are set up in the Serbian theater.
11-3 The forces under the control of the Austro-Hungarian 2nd army may move and attack in Serbia or as the Central Powers player wishes. Units sent from the Serbian front to Galicia do come under the objective rules of Tannenberg and Galicia rulebook section 7.
11-4 The Austro-Hungarian Kov Headquarter unit is removed as per Tannenberg and Galicia rulebook section 7-10 whenever the Central Powers player moves one of the Austro-Hungarian Headquarters from the Serbian Front to the Galicia Front, or whenever the Pflanzer HQ appears as reinforcement. In any of these cases, the supply points from the Kov HQ are given to the HQ that causes its removal.
11-5 The German forces sent to aid the Austro-Hungarian army on map 5-5 at the start of the game in 1914 are released from their restriction (that is, staying in close proximity of the Austro-Hungarian 1st Army HQ) when the German 9th Army HQ arrives as a reinforcement.
11-6 Players may not transfer units and supply points between maps 4-5 and 5-5 until the 1st turn of September 1914. Units and supply points may be transferred to maps 4-5 and 5-5 from other maps at any time.
11-7 Austro-Hungarian HQs may expend supply for German Landwehr units in 1914 only.
11-8 The pre-planned objective rules found in Tannenberg and Galicia rulebook sections 7-1 to 7-5 are only in force for through the end of the 4th September turn (the length of the stand alone Galicia scenario).
11-9 OPTIONAL: The 'Army Objective' rules given for the Austro-Hungarian and Russian forces in the Galicia scenario are ignored. Players may move their forces as they wish.
11-10 The Austro-Hungarian 61st and 62nd 2-4 Inf Xs may combine to form the 31st 4-4 Inf XX at the end of any movement phase if they are in the same hex. Similarly, the 13th and 14th 1-4 Inf Xs can combine at any time to form the 7th 3-4 Inf XX (at full strength).
11-11 The Entente player does not receive special reinforcements according to Serbian and Romania rulebook section 13-2. It is the Entente player's decision what Russian forces to send into Romania, and when to do it.
11-12 The Entente player may send forces by rail between maps 4-5E, map 5-5, and map 6-6. Such forces sent by rail remain entrained while off-map, and count against rail capacity during that time. It takes 2 turns to move by rail between maps 5-5 and 6-6 or between maps 4-5E and 5-5. It takes 4 turns to move by rail between maps 4-5E and 6-6. Any such rail movement is from an active rail hex belonging to the Russian rail network that is on a map edge.
11-13 There are no restrictions on the use of Russian Guard units (rule 6-3 is void).
11-14 Russian Artillery 'surprise' (as per section 6-4) is valid against Austro-Hungarian forces only for a single turn. The Russian player decides when this turn is. This may be any turn, but only after May of 1915, and only after Austria-Hungary has suffered at least 485 Demoralization Points.
11-15 OPTIONAL: A single Austro-Hungarian army may fall into the same sad state as the Austro-Hungarian 4th army in 1916. After May 1915, and after Austria-Hungary has suffered at least 485 Demoralization Points, two dice are rolled during the Monthly Special Turn for each Austro-Hungarian army controlling forces in Russian Zones of Control. On a roll of '2', the HQ falls into the 'sad state' described by section 6-5. The units controlled by this HQ (the Austro-Hungarian units closer to it than to another Austro-Hungarian Headquarters) cannot disengage from Russian ZOCs unless the Russians move away. The Headquarter itself becomes immobile. The effects of section 6-5 are suffered by the hapless Austro-Hungarian army the first turn that the Russians use 'Artillery Surprise'. The first Austro-Hungarian army to become subject to this effect is the ONLY Headquarter to be so affected.
Replacement of lost Headquarters, Engineers, Artillery, and Mountain Units
11-16 This game does not provide for the production or rebuild of Headquarters and Engineers. Instead, Headquarters or Engineer units that are destroyed reappear as reinforcements three full months after they are destroyed. So if such a unit is destroyed on the 3 September turn, it would appear again as a reinforcement on the 4 December turn.
11-17 In this game, lost artillery strength points may be replaced by the use of double the number of infantry replacement strength points. Replaced artillery strength points must be of the same nationality as the used infantry replacements.
11-18 Croat RPL units may be used to rebuild Croatian mountain type units. Austrian RPL units may be used to rebuild Austrian mountain type units.
"We gave you an Army, we expect you to use it" (design note, as printed): Commanders of Armies are expected by their nations to use the forces at their disposal. No Commander could have survived in his position had he decided upon a strategy of just sitting there and waiting for the enemy to exhaust themselves over the course of a couple of years. Commanders were expected to attack the enemy when they had sufficient resources to do so. Those that did not would not be in charge for long. The following rule puts this demand on each player.
Sphere of Influence. (The text describing the Austro-Hungarian Sphere of Influence is printed beside rule 11-19 and reads:) Hungarian territory, Serbia, Romania, Albania, and any hex outside of these areas that is two hexes or less away from an active rail line belonging to the Austro-Hungarian rail network. German forces may only operate within the Austro-Hungarian 'Sphere of Influence' as described by the following rules:
11-19 Germany may not have more than 200 Supply Points total in its Headquarters on the Eastern Front during 1915 and no more then 250 starting 1916.
11-20 Austria-Hungary may not have more than 100 Supply Points total in its Headquarters on the Eastern Front during 1915 and no more then 125 starting 1916.
11-21 Russia may not have more than 125 Supply Points total in its Headquarters on the Eastern Front during 1915 and no more then 175 starting 1916.
11-22 Players that exceed these totals during the monthly special turn are relieved of command, and they forfeit the game.
11-23 Players may not voluntarily destroy Supply Points in order to avoid going over the limits.
11-24 No Headquarter of a minor country (Serbia, Bulgaria, Romania) may ever contain more than 25 Supply Points. (This prevents major powers from 'dumping' excess supply to minors).
11-25 For each supply point spent on attacking artillery, a supply point must be expended on infantry within two turns of the original artillery expenditure.
Relationship between Austria-Hungary and Germany. Austria-Hungary was not a vassal of Germany. Austria-Hungary considered herself an equal partner with Germany within the Central Powers. She had her own interests, and desired to maintain hegemony over the area that she believed to be within her sphere of influence. German forces were welcome in such areas only after Austria-Hungary had suffered serious military setbacks and huge losses of prestige. Even then, German assistance was accepted grudgingly. The following rules reflect this situation.
11-26 The Austro-Hungarian 'Sphere of Influence' includes all of original Austro-Hungarian territory, Serbia, Romania, Albania, and any hex outside of these areas that is two hexes or less away from an active rail line belonging to the Austro-Hungarian rail network.
11-27 In any of these rules describing the limits of German forces within the Austro-Hungarian 'Sphere of Influence', Headquarters, Artillery, and Engineers do not count. These units may be freely moved by either nationality anywhere the Central Powers player desires. Cavalry divisions and other non-divisional units (brigades and regiments) count as half divisions. RPL units count as full divisions, as do divisions of any reduced strength.
11-28 The German and Austro-Hungarian armies had an 'exchange' program at the start of the war. Under this program, up to four divisions may be exchanged between the control of German and Austro-Hungarian armies, allowing the exchanged German forces to operate within the Austro-Hungarian 'Sphere of Influence'. The four German divisions exchanged to Austro-Hungarian control may only operate on map 5-5 (Galicia).
11-29 When Austria-Hungary has accumulated 250 Demoralization Points, an additional twelve German divisions may operate within the Austro-Hungarian 'Sphere of Influence'. These twelve divisions may only be present for a six month period. The clock on this six month period begins with the start of the next turn after Austria-Hungary has taken the 250 DM.
11-30 Once Austria-Hungary suffers 'Shaken National Moral', there is no limit to the number of German units that may operate within the Austro-Hungarian 'Sphere of Influence'. Should the Central Powers player desire, he may trigger this himself by moving the Austro-Hungarian DM level to this point and declaring this undesirable state.
Triggering 'Grave Threat to Mother Russia'. Senior German military leadership prior to and during World War One realized that Russia was something of a 'Sleeping Giant'. They understood that deep penetration into Russian territory would probably trigger a psychological response among Russians that would lead them to drastically increased efforts to resist and beat back the invader. Hindenburg himself threatened to resign at one point when asked to go farther into Russian territory than he thought wise. The lessons of Napoleon's campaigns were not lost on these leaders. The following rule in the East Front Duration Game reflects this. (Note that in the full campaign game on World War One will give the players the option to move deep into Russia and take the risk of triggering the heightened Russian response).
11-31 Central Powers forces in this game may not move across the Daugava river (this river flows through Riga and south of the city of Daugavpils), they cannot cross the 1919 border of Russia (from hex 0401 on map 4-5E to hex 4902 on map 5-5), nor may they go farther east than the 4800 hexrow of map 5-5, nor may they move across the Dneister river (in front of Odessa) on map 6-6.
11-32 Demoralization Points in this game are accumulated by Austria-Hungary, Germany, Russia, Romania, and Bulgaria. They are NOT accumulated by Serbia, Montenegro, or Turkey.
11-33 In addition to the normal accumulation of DM points, Austria-Hungary accumulates DM points due to lack of imported food, and casualties on the Italian Front. Starting with the Monthly Special Turn of January 1915, Austria-Hungary accumulates 3 DM points each Monthly Special turn for the duration of the game (due to lack of imports). Starting with the Monthly Special Turn of May 1915, Austria-Hungary accumulates and additional 5 DM points each Monthly Special turn for the duration of the game (due to losses on the Italian Front).
11-34 Some cities were captured during, and then retaken by their original owners in the course of the war. Thus, capturing these cities again during a campaign game will yield no additional DM points (in individual scenarios these cities do count for DM points). In the 1915 scenario, these cities are Allenstein (hex 1611) on map 4-5 and Radom (hex 2203) and Kielce (hex 2106) on map 5-5. In the 1916 scenario these cities are Allenstein (hex 1611) on map 4-5 and Tarnow (hex 2311), Przemysl (hex 3111), Lemberg (hexes 3509 and 3609), and Stanislau (hex 4013) on map 5-5.
11-35 Russia receives DM points only for the losses of urban hexsides comprising Warsaw, Minsk, Riga and Odessa. It takes no DM points for the losses of other personnel centers. Russia also receives 3 DM per month due to losses on the Caucasus front, starting with November 1914.
Effects of Accumulated Demoralization
11-36 There are three progressive results that can occur to a country as a result of accumulating too many DM points. These effects are 'Shaken National Morale', 'Economic Collapse', and 'Surrender'. The amount of accumulated DM that it takes to trigger each of these results depends on the country.
11-37 The effects of 'Shaken National Morale' and of 'Economic Collapse' are reductions in the amount of supply and replacement units received as reinforcements. The effect of 'Surrender' is the immediate removal of all units of that nationality being immediately removed from play.
11-38 Austria-Hungary suffers 'Shaken National Morale' whenever it accumulates 550 DM points. The point at which it suffers 'Economic Collapse' or surrenders is based on year: (table, see Thresholds below).
11-39 Russia suffers 'Shaken National Morale' whenever it accumulates 600 DM points. The point at which it suffers 'Economic Collapse' or surrenders is based on year: (table, see Thresholds below).
Thresholds (rules 11-38 and 11-39), as legible in the text layer: Austria-Hungary Economic Collapse values 375, 525, 600, and 700 DM; Austria-Hungary Surrender values 450, 600, 700, and 800 DM. Russia Economic Collapse values 800, 850, 900, and 950 DM; Russia Surrender values 950, 1000, 1050, and 1100 DM. The printed booklet pairs each value with a year in a grid that the text layer does not keep in order, so the year pairing is NOT reproduced here and must be checked against the printed booklet.
11-40 Romania does not experience 'Shaken National Morale' or 'Economic Collapse'. It surrenders when it suffers 250 DM points.
11-41 Bulgaria does not suffer 'Shaken National Morale', 'Economic Collapse', or 'Surrender' in the course of this game. However, there are limits to the amount of losses it can take on the Eastern Front. This limit is 50 DM points. Bulgarian forces are removed from this game if this limit is reached.
11-42 Germany will not suffer any negative effects due to operations on the Eastern Front. However, the Entente player will receive benefits for excessive German losses (see Victory Conditions).
Serbia
11-43 Serbian forces are set up according to Serbia and Romania rulebook section 4-2. In addition to these forces, the nine 1-4 infantry regiments (III) are immediately deployed according to Serbia and Romania rulebook section 11-4 whenever any of the following conditions exist:
- Bulgaria joins the Central Powers.
- When any Central Powers unit crosses the Ibar, W. Morava, or Nisava rivers.
- When any Central Powers unit enters Albania.
- When any German unit moves adjacent to Serbian territory as described by the 1914 Serbian border.
11-44 Unless otherwise specified, Serbian reinforcements appear in any Serb-controlled city in Serbia.
11-45 The Serbian new unit reinforcement schedule can be found in section 15-6.
11-46 From the start of January 1915 until Serbian forces are removed from play, Serbia receives: 5 Supply Points on the 1st Turn of January, April, July, and October. (Remaining Serbian supply and RPL entries for this rule are printed in the reinforcement table and are not reproduced.)
11-47 The Serbian 'Bran', 'Sok2', and 'Kraj' divisions do not arrive as reinforcements, but they may be built from replacements or other units starting in 1915.
The Macedonian Front
11-48 The Eastern Front Duration Game does not portray the events and possibilities of the 'Macedonian' front that developed after the fall of Serbia. This is not really possible until Duration games involving the Western, Italian, and Turkish fronts (especially Gallipoli) are available. In the Eastern Front Duration Game, the Central Powers player is just required to withdraw forces from play that were used to 'cover' the Greek border and later the Entente enclaves in Greece.
11-49 When all Serbian cities are controlled by the Central Powers player, All Serbian and Montenegrin units are removed from play, and the Central Powers player must remove the following units from play:
- A German HQ.
- A German 5-5 Inf XX.
- Eight Strength points of Austro-Hungarian infantry and/or mountain units.
- Two Bulgarian HQs.
- Eight full strength Bulgarian infantry divisions (note that a Bulgarian infantry division has three brigades).
The German Units removed may be part of the German & Austro-Hungarian 'exchange program' so as to not necessarily trigger the effects of additional German assistance to Austria-Hungary.
11-50 There are no French or British reinforcements in Greece in the East Front Duration Game, and Greece joining the Entente is NOT an option.
Bulgaria
11-51 Bulgaria joins the Central Powers at the start of the next turn after any Central Powers unit is adjacent to Nish (map 6-5 hex 2413), or the start of the next turn after any Central Powers unit occupies Belgrade (map 6-5 hex 1607) after the 1 April 1915 turn, or on the 2 October 1915 turn, whichever of the three possible conditions comes first.
11-52 Bulgarian neutrality cannot be violated by either player prior to its joining the Central Powers.
11-53 The Bulgarian army is set up according to Serbia and Romania rulebooks sections 11-3 and 14-4 when Bulgaria becomes a belligerent. The exceptions to these sections are that the units of the 1st infantry division (1/1, 2/1, and 3/1), the 1/6 infantry brigade, the 1st cavalry division, and the 1st engineer regiment are set up according to 11-3, and NOT according to 14-4 (units are not in two different places at the same time).
11-54 The Bulgarian reinforcement schedule can be found in section 15-5.
Romania
11-55 Romania joins the Entente after Austria-Hungary suffers 'Shaken National Morale' due to Demoralization. At the instant that Austria-Hungary is 'Shaken', a single die is rolled. Two is added to the die roll. The result is the number of complete turns that must pass until Romania becomes an active Entente belligerent. Example, in the course of the 3 Jun 1916 turn, Austria-Hungary accumulates enough Demoralization points to become 'Shaken'. A die roll of two means that four complete turns must pass before Romania becomes a belligerent. This means that the Entente player can move Romanian forces starting on the 1 July 1916 turn.
11-56 The Romanian army is set up according to Serbia and Romania rulebook section 14-1 when Romania becomes a belligerent.
11-57 Romanian reinforcements appear on map 6-6 hex 1901 unless otherwise specified.
11-58 The Romanian new unit reinforcement schedule can be found in section 15-7.
11-59 From the start of the fourth full month after Romania enter the war, Romania receives supply points and RPL reinforcements according to the schedule printed with this rule (grid, not reproduced in the text layer).
Ottoman Reinforcements
11-60 Ottoman Reinforcements may be placed on any rail line on a map edge in Bulgaria.
11-61 The Ottoman reinforcement schedule can be found in section 15-4.
Russian Reinforcements
11-62 Unless otherwise specified, Russian reinforcements arrive in any Russian city or any rail line on a map edge in Russia.
11-63 The Russian new unit reinforcement schedule can be found in section 15-1.
11-64 From the start of December 1914 until Russia suffers 'Shaken National Morale', Russia receives supply points and RPL reinforcements on the 1st turn of each month (20 Supply Points) and on odd and even turns of the month (RPL), as printed.
11-65 After Russia suffers 'Shaken National Morale' until Russia suffers 'Economic Collapse', Russia receives: 15 Supply Points on the 1st Turn of each month, and RPL on all turns of the month, as printed.
11-66 After Russia suffers 'Economic Collapse', Russia receives: 5 Supply Points on the 1st Turn of the month, and RPL on even turns of the month, as printed.
11-67 During even turns of a month (or just the 2nd and 6th turns of a month after Russia suffers 'Shaken National Morale') until all reinforcement divisions marked with an asterisk (101-127) are created, Russia must take a 2-3 Inf XX RPL in lieu of the normal 3-3 Inf XX RPL. The divisions marked with an asterisk can only be created by removing two Opolchenie Inf Xs, using one 2-3 Inf X RPL, or removing two strength points from any on-map unit(s). Once all reinforcement divisions with an asterisk have been created, 3-3 Inf XX RPL units may replace infantry losses from any Russian unit.
German Reinforcements
11-68 Unless otherwise specified, German reinforcements arrive in any German city or any rail line on a map edge in Germany.
11-69 The German new unit reinforcement schedule can be found in section 15-2.
11-70 During January 1915, Germany receives supply points and RPL reinforcements as printed on the 1st Turn of Month.
11-71 From the start of February 1915 until the end of April 1915, Germany receives 40 Supply Points on the 1st Turn of each month, and RPL, as printed.
11-72 From the start of May 1915 until the end of October 1915, Germany receives 40 Supply Points on the 1st Turn of each month, and RPL on odd turns, as printed.
11-73 Starting November 1915, Germany receives 10 Supply Points on the 1st Turn of each month, and RPL on the 1st Turn of each month, as printed.
11-74 For the six months after Austria-Hungary suffers 'Shaken National Morale', Germany receives 50 Supply Points on the 1st Turn of odd months and 40 Supply Points on the 1st Turn of even months, and RPL on the 1st Turn of each month, as printed. If Russia has suffered 'economic collapse' (or suffers 'economic collapse' during the six month period), Germany does not receive the reinforcements described above. German reinforcements go back to their previous level (see 11-72 or earlier) once the six month period is over.
11-75 Should multiple conditions be applicable, Germany receives reinforcements according to the highest rate.
Austro-Hungarian Reinforcements
11-76 Unless otherwise specified, Austro-Hungarian reinforcements arrive in any Austro-Hungarian or any rail line on a map edge in Austria-Hungary.
11-77 The Austro-Hungarian new unit reinforcement schedule can be found in section 15-3.
11-78 From the start of January 1915 until the end of the April 1915, Austria-Hungary receives 25 Supply Points on the 1st Turn of the month, plus RPL on the turns printed in the source.
11-79 From the start of the May 1915 Monthly Special Turn until the end of the game, Austria-Hungary receives 15 Supply Points on the 1st Turn of the month, plus RPL on the turns printed in the source.
11-80 From the point that Austria-Hungary suffers 'Shaken National Morale' Austria-Hungary receives 10 Supply Points on the 1st Turn of odd months and 5 Supply Points on the 1st Turn of even months, plus RPL as printed.
11-81 From the point that Austria-Hungary suffers 'Economic Collapse' Austria-Hungary receives reinforcements each month according to the following schedule: 5 Supply Points on the 1st Turn of odd months, plus RPL on the 1st Turn of the month, as printed.
11-82 Should multiple conditions be applicable, Austria-Hungary receives reinforcements according to the lowest rate.
11-83 The 'national origin' of Austro-Hungarian RPL divisions received as reinforcements is based on the following rotating schedule (repeat first after last). Until May 1915: 1 x 3-3 Inf XX RPL (second); 1 x 2-3 Inf XX RPL (Croat) (third); 1 x 2-3 Inf XX RPL (Czech) (fourth); 1 x 3-3 Inf XX RPL (seventh); 1 x 2-3 Inf XX RPL (Polish) (eighth). Starting May 1915: 1 x 3-3 Inf XX RPL (second); 1 x 2-3 Inf XX RPL (Czech) (third); 4 strength points of Austrian and/or Hungarian RPL (player's choice) (fourth). The first replacement in May should be the 'fourth' in the above schedule.
Victory Conditions (East Front Duration Game)
Victory in this game is dependent on the comparison of how well the opposing major powers (Germany and Austria-Hungary in contrast to Russia) do in meeting their major war objectives.
Major Russian objectives in the war included the following: protect Serbia from Austro-Hungarian aggression; punish Austria-Hungary for aggression against Serbia; relieve German pressure on France. In assessing how well Russia does in relation to these objectives, we can look at the following measures of Russian success: how many German troops are drawn away from the Schlieffen Plan by early war operations against East Prussia, and later by how much of German resources are sapped away from the Western Front by operations in the East; how long is Serbia able to resist Austro-Hungarian pressure; how long does it take to put Austria-Hungary in an undesirable condition; how many losses the Germans take on the Eastern Front.
Major Austro-Hungarian objectives in the war included the following: punish Serbia; punish Russia for intervening in the Austro-Hungarian versus Serbian conflict; maintain the Austro-Hungarian 'Sphere of Influence'. In assessing how well Austria-Hungary does in relation to these objectives, we can look at the following measures of Austro-Hungarian success: how long does it take to subdue Serbia; how long does it take to put Russia in an undesirable condition; receive as little assistance as possible from the Germans in the area of the Austro-Hungarian 'Sphere of Influence'.
Major German objectives in the war included the following: minimal resource requirements for the Eastern Front until after the subjugation of France; protect German territory from Russian aggression; knock Russia out of the war while taking as few losses as possible. In assessing how well Germany does in relation to these objectives, we can look at the following measures of German success: minimizing the amount of resources drawn off of the Schlieffen Plan execution; how long does it take to put Russia in an undesirable condition; maintain Austria-Hungary as a war ally.
Victory Points are awarded according to the following schedule which reflects the degree to which these objectives are met. Victory itself is determined by comparing the opposing victory point totals. Positive VP accumulation is in favor of the Russians, while negative or lower VP accumulation is in favor of the Central Powers.
Victory Point Schedule (six areas):
- VP for the amount of forces drawn away from fighting in France in 1914. Divide the number of points achieved by the Russians according to rule 33-20 by fifteen. Round to the nearest integer. Result is the number of VP awarded.
- VP for the length of time that Serbia holds out. VP are awarded based on the time at which all Serbian forces are removed from play according to the rules governing the 'Macedonian Front'. 5 VP are awarded for Serbia holding out until 1916. 4 VP are awarded for Serbia holding out until the second half of 1915. 3 VP are awarded for Serbia holding out until the first half of 1915. 2 VP are awarded for Serbia holding out until November or December of 1914. 1 VP is awarded for Serbia holding out until October of 1914. No VP are awarded for Serbia falling earlier.
- VP for German military assistance of Austria-Hungary. VP are awarded based on the time at which Germany sends forces above the four division exchange into the Austro-Hungarian 'Sphere of Influence'. The VPs are awarded based on the point in time at which additional German forces actually cross into the Austro-Hungarian 'Sphere of Influence', not the time at which they could do so. 5 VP are awarded for use of German assistance in August through October of 1914. 4 VP are awarded use of German assistance in November 1914 through March of 1915. 3 VP are awarded for use of German assistance in April through June of 1915. 2 VP are awarded for use of German assistance later in 1915. 1 VP is awarded for use of German assistance in 1916 or 1917.
- VP for German Demoralization Points. VP are awarded based on the number of Demoralization Points that German accumulates in the course of the game. One VP is awarded for every 50 DM points taken by Germany. Round to the nearest 50 (round up to next fifty for 25 or 75).
- VP for the time at which Austria-Hungary suffers negative effects of DM accumulation. VP are awarded based on the point in time at which Austria-Hungary experiences any of the first two conditions related to DM point accumulation, 'Shaken National Morale', and 'Economic Collapse'. 5 VP are awarded if the change in condition occurs in 1914 or the first half of 1915. 4 VP are awarded if the change in condition occurs in the second half of 1915. 3 VP are awarded if the change happens in the first half of 1916. 2 VP are awarded if the change happens in the second half of 1916. 1 VP is awarded if the change happens in 1916.
Example (as printed): Austria-Hungary suffers 550 DM in August of 1915, triggering Shaken National Morale. Austria-Hungary suffers 775 DM in May 1916, triggering Economic Collapse. By the above schedule, 4 VP are awarded for the time at which 'Shaken National Morale' occurs, and an additional 3 VP are awarded for the time at which 'Economic Collapse' occurs.
- VP for the time at which Russia suffers negative effects of DM accumulation. VP are awarded based on the point in time at which Russia experiences any of the three conditions related to DM point accumulation, 'Shaken National Morale', 'Economic Collapse', and Surrender. Note that the VPs awarded for these events are NEGATIVE. The time is dependent on year and quarter. First quarter (abbreviated '1Q') is January, February, and March; second quarter is April, May, and June; and so on.
| Time of Occurrence | VP Awarded |
|---|---|
| 3Q 1914 | -17 VP |
| 4Q 1914 | -16 VP |
| 1Q 1915 | -15 VP |
| 2Q 1915 | -14 VP |
| 3Q 1915 | -13 VP |
| 4Q 1915 | -12 VP |
| 1Q 1916 | -11 VP |
| 2Q 1916 | -10 VP |
| 3Q 1916 | -9 VP |
| 4Q 1916 | -8 VP |
| 1Q 1917 | -7 VP |
| 2Q 1917 | -6 VP |
Victory levels (East Front Duration Game):
- Central Powers Decisive Victory: The Total of VPs is less than -15.
- Central Powers Substantial Victory: The Total of VPs is less than -7, but greater than or equal to -15.
- Central Powers Marginal Victory: The Total of VPs is less than -3, but greater than or equal to -6.
- Entente Marginal Victory: The Total of VPs is greater than or equal to -2, but less than 5.
- Entente Substantial Victory: The Total of VPs is greater than or equal to 5, but less than 10.
- Entente Decisive Victory: The Total of VPs is greater than or equal to 10.
Automatic End of Game: The Game ends immediately when either Austria-Hungary or Russia surrenders (or when a player forfeits due to failure to expend supply). Victory conditions are calculated at the point that either Russia or Austria-Hungary surrenders. In the case of Austro-Hungarian surrender, the final Victory Level achieved through VP addition is shifted 1 to the favor of the Entente for each year prior to 1918 in which this occurs (a 1916 Austro-Hungarian surrender would mean a shift of 2, for example, from Entente Marginal to Entente Decisive Victory).
The 1915 East Front Duration Game
Source: Scenario Specific Rules and Instructions, Sterling Edition, section 12.
12-1 This game is played from the starting point of the Gorlice-Tarnow scenario through to the end of October 1917.
12-2 Forces for both players on the Russian Front are set up according to the set up instructions for the Gorlice-Tarnow Breakthrough scenario instructions.
12-3 In addition to these forces, there are Austro-Hungarian and Serbian Forces set up on the Serbian Front. The Austro-Hungarian forces available are those described by Serbia and Romania rulebook section 11-1, but with the following exceptions: None of the artillery, none of the engineers, without the following brigades: Ybl, Schs, Full, Hau, Mrz, and the 3rd HQ replaced by the 6th (with 10 supply points). The Serbian and Montenegran forces are those described by Serbia and Romania rulebook section 11-4 and 11-5, with the change that six of the 3-4 strength divisions are set up as 2-4 (reduced strength) instead and Serbian HQs contain a combined total of 15 supply points (distributed as Entente player wishes).
12-4 In setting up the Serbian Front, Serbian and Montenegran forces are set up in the exact locations described by Serbia and Romania rulebook section 11-4 and 11-5. The Austro-Hungarian forces are set up anywhere in Austria-Hungary on map 6-5 the Central Powers player desires.
The 1916 East Front Duration Game
Source: Scenario Specific Rules and Instructions, Sterling Edition, section 13.
13-1 This game is played from the starting point of the 1916 Brusilov Offensive 'Wide Scope' scenario through to the end of October 1917.
13-2 Forces for both players on the Russian Front are set up according to the set up instructions for the 1916 Brusilov Offensive 'Wide Scope' scenario instructions.
13-3 The Macedonian Front has been activated.
Sections 14 (Combined East Front Mobilization Schedules) and 15 (Combined East Front Reinforcement Schedules) are printed as grid tables and are omitted here; see the source booklet.
Tannenberg: Eagles in the East
Source: Scenario Specific Rules and Instructions, 4th Edition (2006 printing), "Tannenberg: Eagles in the East" section. This is the 4th Edition text, not the 2012 Sterling Edition. See the edition note at the top of this file.
Note (as printed): All Rules in the following section apply to playing a Tannenberg scenario alone.
- Map: 4-5.
- First Turn: Turn 3 of August 1914.
- Last Turn: Turn 4 of September 1914.
- Combatants: Germany vs. Russia.
- Rail Lines: All part of the network of the country they are in.
- Rail Capacities: The German Rail Network has a capacity of 12 divisions in this scenario. It may not be used until turn 6 of August and is halved until Turn 1 of September. The Russian Rail Network has a capacity of 5 divisions in this scenario. It may not be used until Turn 1 of September, and is halved until Turn 3 of September.
The Russian 'Steamroller'. The Russian forces involved in this scenario moved as quickly as possible into German territory to panic the German High Command into moving units from the Western Front to meet them. The effect of this pressure is simulated in this scenario by forcing the German Player to take reinforcements based on Russian forces in German territory at the end of the 5th turn of August. The following two rules reflect the Russians acting towards this purpose, and the effect such efforts have:
(Rule 3-1 is optional, but it put players under the same constraints as their historical counterparts.)
3-1 The objective for all Russian infantry units during the 3rd through 5th turns of August is Konigsberg (hex 1506). All Russian infantry units must move as close as possible to Konigsberg (in terms of movement points along a path between themselves and Konigsberg that does not consider enemy units or Zones of Control) when they move during this period. This 'path' used in calculating distance to Konigsberg cannot be traced through hexes containing a German fortress. For ease in making these calculations, hexes 1512, 2204, and 2205 are all 8 movement points distant from Konigsberg. These three hexes are the usual places units will move toward. Note that Russian cavalry units may move wherever the Russian player desires and that all units are released from their movement restrictions on Turn 6 of August.
3-2 The German player is forced to take reinforcements based on the proximity of Russian Infantry units to Konigsberg. To determine the amount of German Reinforcements, the Russian player is awarded 'points' based on the location of his infantry units inside Germany at the end of the 5th August turn. These points are awarded according to the following schedule:
- 5 points for every infantry division in a hex inside Germany that is less than 8 movement points away from Konigsberg.
- 3 points for every infantry division in a hex inside Germany that is 8 movement points away from Konigsberg (ex. Hexes 1512, 2204, and 2205).
- 2 points for every infantry division in a hex inside Germany that is 9 movement points away from Konigsberg.
- 1 point for every infantry division in a hex inside Germany that is 10 movement points away from Konigsberg.
For purposes of these calculations, a Russian division's actual strength is not taken into account (it could be at reduced strength and count the same as a full strength division). Brigades count as half a division.
Based on the 'point calculation' made, the German Player must take Reinforcements according to the following schedule:
- Less than 20 points: No reinforcements.
- 20-22 points: A 2-6 Cav XX.
- 23-26 points: An 8-5 Inf XX.
- 27-30 points: An 8-5 Inf XX and a 2-6 Cav XX.
- 31-33 points: Two 8-5 Inf XX (one at half strength) and a 2-6 Cav XX.
- 34-36 points: Two 8-5 Inf XX and a 2-6 Cav XX.
- 37-40 points: Three 8-5 Inf XX and a 2-6 Cav XX.
- 41-43 points: A 9-5 Inf XX, three 8-5 Inf XX (one at half strength), a 2-6 Cav XX.
- 44-46 points: A 9-5 Inf XX, three 8-5 Inf XX, and a 2-6 Cav XX.
- 47-50 points: A 9-5 Inf XX, four 8-5 Inf XX, and a 2-6 Cav XX.
- 51-53 points: A 9-5 Inf XX, four 8-5 Inf XX, and two 2-6 Cav XX.
- 54-56 points: A 9-5 Inf XX, five 8-5 Inf XX, and two 2-6 Cav XX.
- 57-60 points: A 9-5 Inf XX, five 8-5 Inf XX, and six 2-6 Cav XX.
- 61 or more points: A 9-5 Inf XX, five 8-5 Inf XX, five 2-4 Ldw X, and six 2-6 Cav XX.
These reinforcements are taken from the following 'pool' of units:
- 9-5 - 3G
- 8-5 - 1GR, 22, 38, 3, 4
- 2-6 - 8, 4, 5, 6, 2, 9
- 2-4 - 18Lw, 17LE, 21Lw, 22Lw, 23Lw
These reinforcements arrive during the German Reinforcement Arrival Phase of the 1st September turn. They are placed in hex 0118 and are considered to have already paid the Movement Point cost of entraining. They may be placed in excess of the stacking limit in the arrival hex, but must comply with the stacking rules once moved.
A unit taken as a reinforcement from the pool of units listed above cannot be taken later as a reinforcement. Other units are NOT sent in its stead. It is considered to have been sent earlier.
Victory Conditions (Tannenberg), Demoralization points: In addition to the standard Demoralization point schedule (See DM Schedule, Standard Rulebook, Rule 26-3 for DM accrual rates), Demoralization points are taken by players in this scenario for the following additional instances:
-
½ German DM point - Each Strength Point of Reinforcements forced to be taken by the German player due to Russian positions on the 5 August turn (round fractions down for total DM points in this category).
-
2 German DM points - Each turn in September the Russian player occupies or controls a hex that counted toward points in forcing German West Front reinforcements.
-
German Decisive Victory: Russia suffers 50+ more Demoralization points than Germany suffers.
-
German Substantial Victory: Russia suffers 30-49 more Demoralization points than Germany suffers.
-
German Marginal Victory: Russia suffers 11-29 more Demoralization points than Germany suffers.
-
Russian Marginal Victory: Germany suffers 0-9 more Demoralization points than Russia suffers.
-
Russian Substantial Victory: Germany suffers 10-19 more Demoralization points than Russia suffers.
-
Russian Decisive Victory: Germany suffers 20+ more Demoralization points than Russia suffers.
Set-up (section 4), mobilization (section 5) and reinforcement schedules (section 6) for Tannenberg are printed as grid tables and are omitted here; see the source booklet.
Mobilization (Tannenberg). Units are not available to move or attack until they have completed mobilization in this scenario. Once a unit completes mobilization, the controlling player may move and attack with the unit for the rest of the game. Units that are attacked that have not yet completed mobilization are considered to immediately complete the mobilization process and may thereafter move and attack for the rest of the game. Mobilization only effects a Headquarters ability to move. Headquarters may expend Supply points for units at any time. Russian units may not use column movement on the turn that they complete mobilization.
Galicia: The Forgotten Cauldron
Source: Scenario Specific Rules and Instructions, 4th Edition (2006 printing), "Galicia: The Forgotten Cauldron" section. This is the 4th Edition text, not the 2012 Sterling Edition. See the edition note at the top of this file.
Note (as printed): All Rules in the following section apply to playing a Galicia scenario alone.
- Map: 4-5.
- First Turn: Turn 4 of August 1914.
- Last Turn: Turn 4 of September 1914.
- Combatants: Austria-Hungary and Germany vs. Russia.
- Rail Lines: All part of the network of the country they are in.
- Rail Capacities: The Austro-Hungarian Rail Network has a capacity of 7 divisions in this scenario. It may not be used until turn 1 of September and is halved until Turn 3 of September.
(Rules 7-1 through 7-5 are optional, but they put players under the same constraints as their historical counterparts.) The forces of both countries involved in this scenario mobilized and acted automatically in accordance with plans drawn up well before the war began. To reflect this situation, the following special rules are in force for the course of the scenario:
7-1 Units are controlled by the Headquarters under which they are set-up according to the set-up instructions for the scenario. Reinforcements are controlled by the Headquarters they are nearest (in terms of movement points) when they are placed on the map.
7-2 The listed Headquarters must move as close to the objective (as given below) during their Movement Phases. In doing so, they are never required to enter an enemy ZOC, but may do so if the player wishes. Infantry units belonging to the HQ (as specified by the setup instructions) must be as close to the objective as the HQ or closer. In doing so, they are not required to move out of the unreduced supply range of the HQ, but may do so if the player desires. An army's units must move to occupy its objective. Sitting outside a vacant objective is not allowed. Also, units may opt not to move if they start the Movement Phase in an enemy ZOC. [Note - throughout this rule "closeness" is measured in terms of hexes, NOT movement points]
Independent infantry brigades and cavalry units of either side are not constrained by this rule. These units may move wherever they wish.
7-3 The objective of each Army is given below:
| Army | Objective Hex |
|---|---|
| AH 1st | 2803 (Lublin) |
| AH 4th | 3203 (Cholm) OR 3601 (Kowel) |
| AH 3rd | any enemy ZOC |
| AH Kov or 2nd | any enemy ZOC |
| Russian 3rd | 3609 (Lemberg) |
| Russian 4th | 3111 (Przemysl) OR 1911 (Crackow) |
| Russian 5th | 3111 (Przemysl) |
| Russian 8th | 3609 (Lemberg) OR 4013 (Stanislaw) |
| Russian 9th | 3111 (Przemysl) OR 1911 (Crackow) |
The objective of any unit under the control of the Austro-Hungarian 2nd, 3rd, or Kov Armies is an enemy Zone of Control. When the units under the control of these armies move, they must make every effort to enter an enemy ZOC. If they cannot, they must move as close as possible to an enemy unit (in terms of hexes between them and the nearest enemy unit). If an army has two objectives, Individual units under the control of that army may chose which objective they will move toward. Should the objective(s) of a Russian Army be obtained, the Army's new objective is Przemysl (hex 3111).
7-4 Russian units under control of a specific army are not required move toward their objective if there is an enemy unit within 2 hexes of the placement hex of that army's Headquarters (example, units of the Russian 4th army can move wherever the Russian player desires if there is an Austro-Hungarian unit within two hexes of Lublin).
7-5 All Austro-Hungarian units are released from the requirement to move towards their objectives after Russian units control any objectives given for Russian armies.
7-6 The Austro-Hungarian 1st and 4th armies must spend at least 8 supply points each on attacks by forces they control during the 6th August 1914 turn if possible. The Austro-Hungarian 1st, 4th, and 3rd armies must spend at least 8 supply points each on attacks by forces they control during the 7th August 1914 turn if possible. Every effort must be made by the Austro-Hungarian player to insure these attacks are carried out.
Special Restrictions
7-7 The German units in the scenario are under the control of the Austro-Hungarian 1st Army. These units must move to be within the 4 movement point supply range of this army's Headquarters as soon as possible. Once inside this supply range, they may not voluntarily leave it.
7-8 Austro-Hungarian Headquarters may expend supply for German Landwehr units during 1914, but do so at Austro-Hungarian expenditure rates.
7-9 One Austro-Hungarian infantry brigade must remain in one of the Przemsyl fortress hexes at all times. The Przemsyl fortresses may not be abandoned (removed) at any time.
7-10 During the Central Powers Reinforcement Arrival Phase of the 7th August turn, the Austro-Hungarian player receives the 2nd Army HQ as a reinforcement. At the time this unit is placed, the Austro-Hungarian Kov HQ is removed from the map (if it is still there). As the Kov HQ is removed, any supply points in its possession are added to those of the 2nd Army HQ.
Victory Conditions (Galicia), Demoralization points: In addition to the standard Demoralization point schedule (see DM Schedule, Standard Rulebook, Rule 28-3), Demoralization points are taken by players in this scenario for the following additional instances:
- [The opening words of this item are missing from the source text layer; the item ends "... points than Austria-Hungary suffers."]
- 2 Austro-Hungarian DM points - each turn a Russian unit is in a hex south of the Carpathians that contains at least one clear hexside (these are hexes with hex numbers that end with 16 or higher).
- 1 Austro-Hungarian DM point - each German strength point lost in combat (two if the loss is by surrender).
No Russian DM points are accumulated for occupation of town centers on or west of hexrow 25xx. No Austro-Hungarian DM points are accumulated for occupation of town centers on or east of hexrow 40xx.
- Austro-Hungarian Decisive Victory: Russia suffers 25+ more Demoralization points than Austria-Hungary suffers. [The final words of this level are not legible in the text layer; the wording follows the other levels.]
- Austro-Hungarian Substantial Victory: Russia suffers 0-24 more Demoralization points than Austria-Hungary suffers.
- Austro-Hungarian Marginal Victory: Austria-Hungary suffers 1-25 more Demoralization points than Russia suffers.
- Russian Marginal Victory: Austria-Hungary suffers 50-84 more Demoralization points than Russia suffers.
- Russian Substantial Victory: Austria-Hungary suffers 85-119 more Demoralization points than Russia suffers.
- Russian Decisive Victory: Austria-Hungary suffers 120+ more Demoralization points than Russia suffers.
Set-up (sections 8 and the Galicia reinforcement schedules in section 10) are printed as grid tables and are omitted here; see the source booklet.
Scenario Linking Rules (Tannenberg and Galicia Booklet)
Printed in the 4th Edition Tannenberg and Galicia booklet. The Serbia and Romania booklet's linking rules are given above.
The following possibilities exist for linking the three scenarios described in this Rule booklet: The Schlieffen Plan and Tannenberg; Tannenberg and Galicia; All 3 played together. When multiple scenarios are linked together, the rules for each scenario are still in force. There may be some exceptions, or additional rules, and these are given in the applicable section.
12. Linking The Schlieffen Plan and Tannenberg
12-1 This linked game is played for the length specified by The Schlieffen Plan scenario, but the Tannenberg area is only used through the end of the turn specified by the Tannenberg scenario. This means that the game is played on the Western Front through the end of the 5th November turn, but on the Eastern Front only through the end of the 4th September turn.
Exceptions and Additions: The rules for each scenario are still in force, with the following exceptions and additional rules:
12-2 The removal of German forces from the Western Front for transfer to the Eastern Front still occurs during the Central Powers Reinforcement Arrival Phase of the 6th August turn. But now the Strength Point totals to be removed are determined by the Tannenberg scenario rules. The only difference is that the designation of the units withdrawn from the Western Front does not matter, only the Strength Point totals, and that all withdrawn units be taken from within 5 hexes of the 2nd Army HQ. Units withdrawn appear on map 4-5 on the 1st September turn (as per the rules for the Tannenberg scenario).
12-3 The Landwehr brigades that may also be forced to be taken as reinforcements are NOT taken from the 2nd Army HQ vicinity (they went to Galicia, and would have been recalled from there). They are placed as any regular reinforcements.
12-4 Only the units called on by the Tannenberg scenario rules to be sent from the Western Front to the Eastern Front may be transferred between the two fronts.
12-5 Units or supplies set-up on, received as reinforcements on, or sent to map 4-5 (the Eastern Front) may not be transferred to map 5-3 (the Western Front).
12-6 The German rail capacity may not be used until turn 6 of August (except as specified for artillery units according to The Schlieffen Plan scenario rules) and is halved until Turn 1 of September. It may be used on any map or combination of maps.
12-7 Units moved from the Western to Eastern Fronts count against the German Rail capacity during the 6th and 7th August and the 1st September turn.
12-8 The German Rail Capacity is reduced from 20 divisions to 15 divisions on the 5th September turn.
Victory Conditions (Linking The Schlieffen Plan and Tannenberg): These are the same as per The Schlieffen Plan and Tannenberg scenario rules. This means that the Germans and the Entente could have different levels of victory on different fronts (as was the case historically).
13. Linking Tannenberg and Galicia
- Maps: 4-5 and 5-5.
- First Turn: Turn 3 of August 1914.
- Last Turn: Turn 7 of November 1914.
- Combatants: Germany and Austria-Hungary vs. Russia.
- Rail Lines: All part of the network of the country they are in.
The rules for each scenario are still in force, with the following exceptions and additional rules:
13-1 The German forces sent to aid the Austro-Hungarian army are released from their restriction (that is, staying in close proximity of the Austro-Hungarian 1st Army HQ) when the German 9th Army HQ arrives as a reinforcement.
13-2 Both Players are free to transfer units and supply points between maps 4-5 and 5-5 starting on the 1 September turn. Until that time, units must stay on the maps they are deployed on.
13-3 Austro-Hungarian HQs may expend supply for German Landwehr units during 1914, but do so at Austro-Hungarian expenditure rates.
13-4 The pre-planned objective rules found in rules 7-1 to 7-5 are only in force for through the end of the 4th September turn (the length of the stand alone Galicia scenario).
Victory Conditions (Linking Tannenberg and Galicia): In addition to the standard Demoralization point schedule (see DM Schedule, Standard Rulebook, Rule 26-3), Demoralization points are taken by players in this scenario for the following additional instances:
- ½ Central Powers DM point - Each Strength Point of Reinforcements forced to be taken by the German player due to Russian positions on the 5 August turn.
- 2 Central Powers DM points - Each turn in September turns 1-4 that the Russian player occupies or controls a hex that counted toward points in forcing German West Front reinforcements.
- 2 Central Powers DM points - each turn a Russian unit is in a hex south of the Carpathians that contains at least one clear hexside (these are hexes with hex numbers that end with 16 or higher).
No Russian DM points are accumulated for occupation of town centers west of hexrow 20xx.
- Central Powers Decisive Victory: Russia suffers 210+ more Demoralization points than the Central Powers suffer.
- Central Powers Substantial Victory: Russia suffers 135-209 more Demoralization points than the Central Powers suffer.
- Central Powers Marginal Victory: Russia suffers 85-134 more Demoralization points than the Central Powers suffer.
- Russian Marginal Victory: Russia suffers 0-22 more Demoralization points than the Central Powers suffer or the Central Powers suffer 1-27 more Demoralization points than Russia suffers.
- Russian Substantial Victory: The Central Powers suffer 28-102 more Demoralization points than Russia suffers.
- Russian Decisive Victory: The Central Powers suffer 103+ more Demoralization points than Russia suffers.
14. Linking The Schlieffen Plan, Tannenberg, and Galicia
- Maps: 5-3, 4-5, and 5-5.
- First Turn: Turn 1 of August 1914.
- Last Turn: Turn 7 of November 1914.
- Combatants: Germany and Austria-Hungary vs. Great Britain, France, Belgium, and Russia.
- Rail Lines: All part of the network of the country they are in.
- Rail Capacity Changes: The German Rail Network has a capacity of 20 divisions. It may not be used until turn 6 of August (except as specified for artillery units according to The Schlieffen Plan scenario rules) and is halved until Turn 1 of September. It may be used on any map or combination of maps. The Austro-Hungarian Rail Network has a capacity of 7 divisions in this scenario. It may not be used until turn 1 of September and is halved until Turn 3 of September. The French Rail Network has a capacity of 15 divisions. It may not be used until Turn 6 of August, and is halved until Turn 1 of September. The Belgian Rail Network has a capacity of 5 divisions. It may not be used until Turn 6 of August, and is halved until Turn 1 of September. The Russian Rail Network has a capacity of 10 divisions. It may not be used until turn 1 of September and is halved until Turn 3 of September. It may be used on any map or combination of maps.
The rules for each scenario are still in force, with the following exceptions and additional rules:
14-1 The Russian or Entente player is not forced to move units of the Russian 1st and 2nd Armies towards Konigsberg during August. He may move these forces as he wishes.
14-2 The German or Central Powers player is not forced to move units from the 2nd Army HQ vicinity to the Eastern Front.
14-3 Both Players are free to transfer units and supply points between maps starting on the 1st September turn. Until that time, units must stay on the maps they are deployed on.
14-4 Only Austro-Hungarian siege artillery units may be sent to map 5-3. Other Austro-Hungarian units are restricted to maps 4-5 and 5-5. (The rule number is missing from the text layer; it is supplied here from the sequence.)
14-5 Units moving from the Western Front (map 5-3) to the Eastern Front (maps 4-5 and 5-5) spend an entire turn entrained and off any map. Units move between rail hexes of the German Rail network on the eastern edge of map 5-3 and rail hexes of the German Rail network on the western edge of maps 4-5 and 5-5. They are placed on the Eastern Front during the Reinforcement Phase of the next turn. This means that if a unit is moved off the map by rail during the 4th turn of September, it would stay off the maps during the 5th September turn, and would appear on the other Front on the 6th September turn. The same process is used for moving from the Eastern Front to the Western Front.
14-6 Austro-Hungarian HQs may expend supply for German Landwehr units during 1914, but do so at Austro-Hungarian expenditure rates.
14-7 The German player does not receive reinforcements on the Tannenberg Reinforcement Schedule that are proceeded by an asterisk (*). These units were transfers from the Western to the Eastern Front. They are only available to a linked Tannenberg & Galicia game.
14-8 The pre-planned objective rules found in rules 7-1 to 7-5 are only in force for through the end of the 4th September turn (the length of the stand alone Galicia scenario).
Victory Conditions (Linking The Schlieffen Plan, Tannenberg, and Galicia): In addition to the standard Demoralization point schedule (see DM Schedule, Standard Rulebook, Rule 26-3), Demoralization points are taken by players in this scenario for the following additional instances:
- 200 Entente DM points - All 3 Paris hexes are German controlled or isolated from the rest of France by German units or German ZOCs in hexes not occupied by Entente ground combat units.
- 100 Entente DM points - German units are 2 or fewer hexes away from any of the three Paris hexes at the end of the game.
- 50 Entente DM points - German units are 4 or fewer hexes away from any of the three Paris hexes at the end of the game.
- 50 Central Powers DM points - German units are never 6 or fewer hexes away from any of the three Paris hexes at any time during the game.
- 100 Central Powers DM points - German units are never 8 or fewer hexes away from any of the three Paris hexes at any time during the game.
- 150 Central Powers DM points - German units are never 10 or fewer hexes away from any of the three Paris hexes at any time during the game.
- 2 Central Powers DM points - each turn a Russian unit is in a hex south of the Carpathians that contains at least one clear hexside (these are hexes with hex numbers that end with 16 or higher).
No Russian DM points are accumulated for occupation of town centers west of hexrow 20xx.
- Central Powers Decisive Victory: The Entente suffers 440+ more Demoralization points than the Central Powers suffer.
- Central Powers Substantial Victory: The Entente suffers 290-439 more Demoralization points than the Central Powers suffer.
- Central Powers Marginal Victory: The Entente suffers 190-289 more Demoralization points than the Central Powers suffer.
- Entente Marginal Victory: Entente suffers 1-98 more Demoralization points than the Central Powers suffer or the Central Powers suffer 0-2 more Demoralization points than the Entente suffers.
- Entente Substantial Victory: Central Powers suffer 3-127 more Demoralization points than the Entente suffers.
- Entente Decisive Victory: The Central Powers suffer 128+ more Demoralization points than the Entente suffers.
Omitted from this file: the "15. Series Notes" designer commentary and "16. Combined Schedules" (printed as tables). Also omitted: the Tannenberg and Galicia set-up, mobilization and reinforcement grids (sections 4-6, 8, 10), which the text layer does not reproduce in reading order.