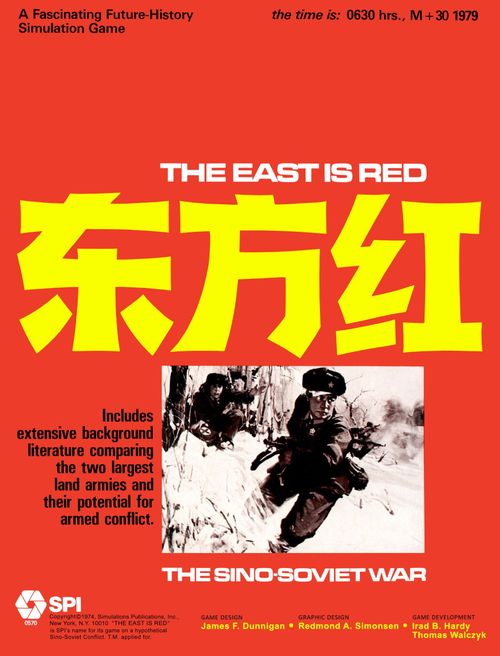
The East is Red: The Sino Soviet War
The East is Red: The Sino Soviet War Rulebook
Table of Contents
Table of Contents
- 1.0 Introduction
- 2.0 General Course of Play
- 3.0 Game Equipment
- 4.0 Sequence of Play
- 5.0 Movement
- 6.0 Zones of Control
- 7.0 Stacking
- 8.0 Soviet Unit Build-Up and Breakdown
- 9.0 Combat
- 10.0 Combat Resolution Table
- 11.0 Supply
- 12.0 Terrain Effects and Supply Chart
- 13.0 Chinese Major Cities and Industrial Hexes
- 14.0 Soviet Air Power
- 15.0 Tactical Nuclear Warfare
- 16.0 Atomic Demolitions
- 17.0 The Scenarios
- 18.0 Victory Conditions
- 19.0 Soviet Strategic Strike
- 20.0 Designer's Notes
- Errata
1.0 Introduction
The East Is Red is a simulation on a strategic/operational level of a possible attempt by Soviet forces to invade and occupy Manchuria and North China sometime in the 1970's. Within the theater of operations it is assumed that tactical nuclear weapons and atomic demolitions will be used. The game is played with variants of two basic scenarios. The M-1 scenario variants postulate a hasty Soviet attack into China and the M-30 variants describe a later stronger attack.
2.0 General Course of Play
The East Is Red is basically a two-player game. Each Player moves his units and executes attacks on Enemy units in turn, attempting to fulfill the conditions of victory. To move from one hex to another, each unit expends a portion of its Movement Allowance. Combat is resolved by comparing the total Combat Strength Points of adjacent opposing units and expressing the comparison as a simplified probability ratio (odds). A die is rolled and the outcome indicated on the Combat Results Table is applied to the units involved.
3.0 Game Equipment
3.1 The Game Map
The 22" x 34" mapsheet portrays Manchuria and parts of Siberia, Mongolia, and North China. A hexagonal grid is superimposed over the mapsheet to regularize movement and combat of the playing pieces. Terrain, communications and demographic features significant to the game are delineated.
3.2 The Playing Pieces
Two differently colored sets of playing pieces (henceforth known as units) are supplied. They represent the various units of the opposing forces that will be available in the campaign. The opposing forces in each of the varying "Orders of Battle" are composed by selecting units from those provided on the unit sheet. It is strongly recommended that the Players sort their units by type and color, and keep them segregated. This greatly facilitates setting up the game. The playing pieces are distinguished by type, strength, and mobility, as represented by various numbers and symbols printed on their faces.
3.21 Sample Unit
The sample unit counter is labelled as follows: the Organizational Size is shown at the top (XXX, XX, or X); the Organizational Type is shown by the symbol in the centre; the Attack Strength is shown at the lower left, the Defense Strength at the lower centre, and the Movement Allowance at the lower right. The sample shown is 4-6-6.
3.22 Summary of Unit Types
Mechanized units
Soviet:
- Mechanized Infantry Corps (XXX, mechanized infantry symbol) 3-7-9
- Mechanized Infantry Corps (XXX, mechanized infantry symbol) 4-6-9
- Tank Corps (XXX, tank symbol) 7-4-9
- Mechanized Infantry Division (XX, mechanized infantry symbol) 1-2-9
- Tank Division (XX, tank symbol) 2-1-9
Chinese:
- Tank Corps (XXX, tank symbol) 5-3-6
Non-Mechanized units
Soviet:
- Artillery Corps (XXX, artillery symbol) 12-3-12
- Marine Infantry Division (XX, marine symbol) 2-2-6
- Air Force Unit (air symbol) 0-1-1
- Supply Unit (supply symbol) 0-1-20
Chinese:
- Infantry Army (XXX, infantry symbol) 4-6-6
- Militia Army (XXX, militia symbol) 1-3-3
Other Markers
- Nuclear Contamination Marker
- Atomic Demolition Marker
Unit Sizes
XX = Division; XXX = Corps.
Note that Chinese "Armies" are shown as corps-sized units, which is a more accurate rendering of their size.
Note: Unit designations were not used on the counters due to the hypothetical nature of the conflict and the lack of specific orders of battle for either side.
3.23 Definition of Terms
Attack Strength is the basic attacking strength of a unit quantified in Strength Points.
Defense Strength is the basic defending strength of a unit quantified in Strength Points.
Movement Allowance is the basic movement ability of a unit quantified in Movement Points; in most cases, a unit expends one Movement Point of its total Movement Allowance for each hex entered.
3.3 Game Charts and Tables
Various visual aids are provided for the Players to simplify and illustrate certain game functions. These are the Combat Results Table, the Turn Record/Reinforcement Chart, Supply Effects Chart, Nuclear Contamination Table, and the Terrain Effects Chart. Each of these is fully explained where presented.
3.4 Game Equipment Inventory
A complete set of The East Is Red should include the following parts:
- One Game Map
- One set of Game Rules
- One set of die-cut counters
- One die (boxed version only)
3.5 Game Scale
Each Game-Turn represents one week and each hex is equivalent to 50 kilometers in distance.
4.0 Sequence of Play
4.1 The Game-Turn
The East Is Red is played in turns called Game-Turns. Each Game-Turn is composed of two Player-Turns. Each Player-Turn is composed of several discrete Phases. The Player whose Player-Turn is in progress is called the Phasing Player. Each Game-Turn proceeds as follows.
4.2 Sequence Outline
A. The Soviet Player-Turn
- Reinforcement Phase. The Phasing Player places his reinforcements on the map, as called for by the Turn Record/Reinforcement Chart.
- Initial Supply Judgement Phase. The Phasing Player determines which of his units are in supply and which are out of supply.
- Initial Movement Phase. The Phasing Player may move all of his combat units in any direction, to the limit of their Movement Allowances, within the restrictions outlined in the Movement and Supply rules. Air and Supply units may not move.
- Combat Phase. The Phasing Player may attack Enemy units. Combat is resolved as outlined in the Combat rules.
- Second Supply Judgement Phase. The Phasing Player repeats step #2 above.
- Second Movement Phase. The Phasing Player may move his Mechanized units (again), within the restrictions outlined in the Movement and Supply Rules. Move Air and Supply units in this Phase.
- Air Interdiction Phase. The Phasing Player may allocate Air Strike Markers to interdict Enemy Rail Mode Movement.
B. The Chinese Player-Turn
- Reinforcement and Militia Mobilization Phase. The Phasing Player places reinforcements on the map and where possible places Militia as called for by the Turn Record/Reinforcement Chart and the Chinese Militia Rules.
- Initial Supply Judgement Phase. The Phasing Player determines which of his units are in supply and which are out of supply.
- Initial Movement Phase. The Phasing Player may move all of his units in any direction, to the limit of their Movement Allowances, within the restrictions outlined in the Movement and Supply Rules.
- Combat Phase. The Phasing Player may attack Enemy units. Combat is resolved according to the Combat Rules.
- Second Supply Judgement Phase. The Phasing Player determines the supply condition of his Mechanized units.
- Second Movement Phase. The Phasing Player may move his Mechanized units (again).
- Removal of Air Interdiction Markers.
- ADM Detonation Phase: The Phasing Player informs the Soviet Player which (if any) Atomic Demolitions he is detonating, indicating the affected hexside(s) with an ADM marker. Note that a Chinese ADM Detonation Phase takes place as the first act of the game (before the first Soviet-Player Turn).
C. Game Turn Indication
The Game-Turn marker is advanced on the Game-Turn Record Track, signaling the start of a new Game-Turn.
4.3 Game Length
Repeat Steps A through C for ten Game-Turns. At the end of the tenth Game-Turn the game is over and the Players' performances are evaluated in light of the Victory Conditions.
5.0 Movement
General Rule: During the Movement Phase, the Phasing Player may move as many or as few of his units as he wishes. During each Friendly Movement Phase, each unit may be moved as many or as few hexes as the Phasing Player desires, as long as its Movement Allowance is not exceeded in a single Movement Phase. Unused Movement Points, however, may not be accumulated from Phase to Phase nor transferred from unit to unit.
Procedure: Move each unit individually, tracing the path of its movement through the hexagonal grid. Once a unit has been moved and the Player's hand withdrawn, the unit may not be moved again, nor the path retraced and/or changed during that Movement Phase.
Cases:
5.1 How to Move Units
5.11 During a Movement Phase only the Phasing Player's units are moved; all, some, or none of his units may be moved. No Enemy movement, and no combat, may occur during a Movement Phase.
5.12 Movement is calculated in terms of Movement Points. Basically, each unit expends one Movement Point of its total Movement Allowance for each hex it enters.
5.2 Movement Inhibitions and Prohibitions
5.21 A unit's Movement Allowance may be decreased by supply considerations, lowering the number of Movement Points that it may expend in a given Movement Phase. The number of Movement Points that must be expended to enter a given hex will vary with the terrain in the hex being entered and the terrain on the hexside which is crossed. For example, a Soviet Mechanized unit must expend seven Movement Points to cross a river hexside and enter a forest hex; two points for crossing a river hexside plus five points for entering a forest hex (see the Terrain Effects Chart for a detailed listing of terrain costs). All effects of reducing available Movement Points and increasing the number of Movement Points to enter a given hex are cumulative.
5.22 A unit may always move a single hex in a given Movement Phase as long as it is not leaving one Enemy controlled hex and directly entering another.
5.23 Units may never enter hexes containing Enemy units. Units may never enter all-sea hexes nor cross all-sea or all-lake hexsides. Soviet Artillery units may not move adjacent to Chinese units.
5.3 Sequence of Play Restrictions on Movement
5.31 Soviet Units. The Soviet Player may move his Mechanized units during both his Initial and his Second Movement Phase. He may move his Artillery units during his Initial Movement Phase only. He may move his Supply Units and his Air units during his Second Movement Phase only (see the Soviet Air Force Rules for special limitation on the movement of Air units).
5.32 Chinese Units. The Chinese Player may move his Mechanized units during both his Initial and his Second Movement Phase. He may move his Infantry and his Militia units during his Initial Movement Phase only.
5.4 Rail Mode Movement
Each Player may move up to three units by Rail Mode per Game-Turn.
5.41 A unit which is moved by Rail Mode must begin the Player-Turn on a Rail hex. It must end the Player-Turn on a Rail hex and may only be moved through the map along the connected Rail hexes.
5.42 A unit moving by Rail Mode may move up to twenty hexes per Player-Turn.
5.43 A unit may move only by Rail Mode in a Movement Phase in which it could normally move. For example, a Soviet Artillery unit could not be moved by Rail Mode on the Soviet Player's Second Movement Phase.
5.44 A unit which is moved by Rail Mode may not be moved in a normal manner in the same Player-Turn, nor may it attack during the Combat Phase.
5.45 A unit which is moved by Rail Mode may not start the move in an Enemy controlled hex nor may it enter an Enemy controlled hex at any point in the move.
5.46 A Player may only use the Railroads in his own country to move units by Rail Mode. [Note: The Railroads in the Enemy country may be used to speed normal movement through rough terrain.] The Railroads in Outer Mongolia are considered to be part of the Soviet Rail net and may be used by the Soviet Player as though they were in the USSR.
5.5 Soviet Amphibious Capability
In all scenarios the Soviet Player is given a Marine Division (2-2-6). This division may be "landed" on any Chinese clear terrain coastal hex.
5.51 The unit must begin the Game-Turn in Vladivostok. It then lands during the Soviet Initial Movement Phase and may not move any further on that Player-Turn.
5.52 It may not land in a hex containing a Chinese unit. It may land directly on an Industrial hex, but it must attack that hex on the Combat Phase immediately following.
5.53 The unit may move or retreat back to Vladivostok from its landing hex (either voluntarily or due to combat), however, it may only land once in China. If retreated back to Vladivostok it is treated as a regular combat unit.
5.54 So long as the unit is on or adjacent to the hex it landed on, it is automatically in supply. Otherwise, it is subject to all the supply rules that affect normal Soviet units.
6.0 Zones of Control
General Rule: The six hexagons immediately surrounding a hex constitute the Zone of Control of any units in that hex. Hexes upon which a unit exerts a Zone of Control are called controlled hexes, and inhibit the movement of Enemy units. All units exert a Zone of Control.
6.1 Movement Effects
6.11 Upon entering an Enemy controlled hex a unit must stop and may not move again in that Movement Phase. All Soviet units and Chinese Mechanized units must expend one additional Movement Point to enter an Enemy controlled hex.
6.12 A unit may never move from one Enemy controlled hex directly to another Enemy controlled hex.
6.13 A unit that starts its Movement Phase in an Enemy controlled hex may move and re-enter another Enemy controlled hex, provided it does not move directly from one Enemy controlled hex to another. It must first enter at least one non-controlled hex. All Soviet units and Chinese Mechanized units must expend one additional Movement Point to leave an Enemy controlled hex.
6.2 Combat Effects
6.21 Zones of Control do not affect combat. Attacking is completely voluntary and the presence of an Enemy unit's Zone of Control in a Friendly occupied hex does not force combat.
6.3 Retreat Effects
Units may not retreat (due to combat; see the Combat Results Table) into or through an Enemy controlled hex, unless another Friendly unit already occupies the controlled hex. Thus, for retreat purposes, Enemy controlled hexes are negated by Friendly units.
6.4 Supply Effects
Supply paths may not be traced through Enemy controlled hexes unless that hex is occupied by a Friendly unit. Thus, for supply purposes, Friendly units negate Enemy controlled hexes.
6.5 First Phase Nullification
In the first Movement Phase of the First Soviet Player-Turn, Chinese Zones of Control do not extend across the border into Soviet territory.
7.0 Stacking
(more than one unit per hex)
General Rule: Players may stack a maximum of three units of any type and strength per hex.
7.1 Movement Effect
In any given Movement Phase, Players may move units through hexes in temporary violation of the stacking limit so long as the overstacked condition is relieved by the end of the Movement Phase.
7.2 Combat Effect
Overstacking as a result of combat is allowed. A unit or units may be retreated in such a fashion as to create a stack of four or more units. However, such an overstack must be reduced by the owning Player during his next applicable Movement Phase.
7.3 Overstacking Penalty
Whenever the Owning Player cannot meet the conditions outlined in cases 7.1 and 7.2 above, he must eliminate units from the offending overstacks to reach the stacking limit. He may choose which units in an overstack to eliminate.
7.4 Movement Expense to Stack and Unstack
Mechanized units must expend one Movement Point to stack and one Movement Point to unstack. This expense is in addition to the terrain expense of the hex entered and is incurred whenever units enter and/or leave occupied hexes. Non-mechanized units pay no additional stacking or unstacking expense.
8.0 Soviet Unit Build-Up and Breakdown
(Substitution)
General Rule: Soviet Tank Corps (7-4-9) and Mechanized Infantry Corps (4-6-9 and 3-7-9) may be broken down into constituent divisional units by the Soviet Player. Conversely they may be reestablished from their constituent units.
Procedure: In order to breakdown a corps unit, the Soviet Player removes it from the map and replaces it with the necessary divisional units, in the same hex from which the corps unit was removed. To build up a corps unit he removes from one hex the necessary divisional units, and replaces them with a corps unit.
Cases:
8.1 Unit Equivalents
The following equivalents apply:
- Mechanized Infantry Corps 4-6-9 = Tank Division 2-1-9 + Mechanized Infantry Division 1-2-9 + Mechanized Infantry Division 1-2-9
- Tank Corps 7-4-9 = Mechanized Infantry Division 1-2-9 + Tank Division 2-1-9 + Tank Division 2-1-9
- Mechanized Infantry Corps 3-7-9 = Mechanized Infantry Division 1-2-9 + Mechanized Infantry Division 1-2-9 + Mechanized Infantry Division 1-2-9
8.2 When Substitution May Occur
The Soviet Player may execute unit substitution at the beginning of any Movement Phase before any movement has taken place, at the end of any Soviet Movement Phase after all movement has ceased, or at any time during any Combat Phase (Soviet or Chinese).
8.3 Limits on Unit Substitutions
The Soviet Player is provided with a limited number of Mechanized Infantry Divisions (15) and Tank divisions (5). He may only breakdown his corps units if he has constituent Mechanized Infantry and Tank divisions available from either his dead pile of units or from his uncommitted units.
8.4 Unit Substitution in Combat
Soviet Corps which are attacking Chinese units and which suffer an Exchange result have the option of breaking down into division-sized units and then suffering their loss in terms of divisional Attack Strength Points. For example, a Soviet 7-4-9 attacks a Chinese 5-3-6 at 2 to 1 odds and achieves an "Ex" result. The Soviet unit may be broken down into two 2-1-9's and one 1-2-9 and then lose one 2-1-9 and one 1-2-9 in order to equal the Chinese loss of three Defense Strength Points. This technique allows a single 2-1-9 to survive.
8.5 Effect on Stacking
The Soviet Player may execute substitution in excess of the stacking limit of three units per hex so long as he corrects the situation by the end of the Movement Phase (in an extreme case he could replace three corps with nine divisions). There is no Movement Point cost for building up or breaking down, but the resultant units pay the normal cost for entering or leaving a stacked hex.
9.0 Combat
General Rule: Combat occurs between adjacent opposing units at the Phasing Player's discretion (exception: see 9.6, Soviet Artillery). The Phasing Player is the Attacker, the non-Phasing Player the Defender, regardless of their overall strategic position.
Procedure: Total the Combat Strengths of all the attacking units involved in a specific attack and compare it to the total Combat Strength of all units in the hex under attack. State the comparison as a probability ratio: Attacker's Strength to Defender's Strength. Round off the ratio in favor of the Defender to conform to the simplified odds found on the Combat Results Table, roll the die and read the result on the appropriate line under the odds. Apply the result immediately, before resolving any other attacks being made during that Combat Phase.
Cases:
9.1 Which Units May Attack
9.11 During the Combat Phase of his Player-Turn, the Phasing Player may attack any and all Enemy units adjacent to Friendly units. Only those Friendly units directly adjacent to a given Enemy unit may participate in an attack upon that unit.
9.12 Attacking is completely voluntary; units are never compelled to attack, and not every unit adjacent to an Enemy unit need participate in any attack. Friendly units in a stack that are not participating in a given attack are never affected by the results of the attack.
9.13 An Enemy occupied hex may be attacked by as many units as can be brought to bear in the six adjacent hexes.
9.14 No unit may attack more than once per Combat Phase, and no Enemy unit may be attacked more than once per Combat Phase.
9.2 Multiple Unit and Multi-Hex Combat
9.21 All units defending in a given hex must be involved in the combat, and they must all be attacked as a single Strength. The Defender may not voluntarily withhold any units in a hex under attack. The Attacker must attack all the units as a whole, i.e., the Strengths of all the units in the hex are totalled, and this total Strength is attacked. Different units in a given hex may not, therefore, be attacked separately.
9.22 Other units in a hex that contains an attacking unit need not participate in that same attack or any other attack. Thus when one unit in a stack of three is attacking a given hex, one of the other units could attack a different hex, and the third could participate in no attack.
9.23 If a unit (or units) is adjacent to more than one Enemy-occupied hex, it could attack all of them in a single combat. Thus units in a single hex can attack more than one other hex. The only requirement is that all attacking units must be adjacent to all defending units.
9.3 Combat Odds Calculation
Combat odds are always rounded off in favor of the Defender. For example, an attack with a Combat Strength of 26 Points against a hex defending with nine Strength Points, for an odds ratio of 26-9, would round off to a 2-1 combat situation for combat resolution purposes. That column on the Combat Results Table would be used.
9.4 Effects on Combat Strength
Combat Strengths of units may be affected by terrain and supply considerations (see the Terrain Effects Chart and the Supply rules). This is always expressed as the Combat Strength being "halved," or "doubled." When these strengths are "halved," all fractions are retained. Thus an unsupplied tank unit attacking into rough terrain would be quartered (halved and then halved again). In this case a tank unit with a strength of five would effectively use one and one quarter Strength Points in the attack.
9.5 Concentric Attacks
When units combine in an attack on a hex in such a fashion that the Zones of Control of the attacking units completely surround the hex being attacked, the attacking units have their Combat Strength doubled. The presence of other units belonging to the Defending Player in adjacent hexes in no way affects the criteria for Concentric Attack. Friendly units do not negate Enemy Zones of Control in determining Concentric Attack.
9.6 Soviet Artillery
9.61 The Soviet Artillery Corps Attack Strength may only be used in conjunction with and in support of an attack by other Soviet combat units (Mechanized or Tank). The Artillery Attack Strength is added to the other units' Attack Strength to arrive at the total Attacking Strength.
9.62 The Soviet Artillery Corps must be adjacent to at least one of the other Soviet units whose attack it is supporting.
9.63 The Soviet Artillery Corps must be two hexes from the hex under attack.
9.64 Soviet Artillery may not move in Rail Mode and attack in the same Player-Turn.
10.0 Combat Resolution Table
Probability Ratio (Odds): Attacker's Strength to Defender's Strength
| Die Roll | 1 to 2 | 1 to 1 | 2 to 1 | 3 to 1 | 4 to 1 | 5 to 1 | 6 to 1 | Die Roll |
|---|---|---|---|---|---|---|---|---|
| 1 | Dr | Dr | Dr | De | De | De | De | 1 |
| 2 | Ar | Dr | Dr | Dr | De | De | De | 2 |
| 3 | Ar | Dr | Dr | Dr |
Attacks executed at greater than 6 to 1 are treated as 6 to 1. Attacks at less than 1 to 2 are not allowed.
10.1 Explanation of Results
Dr = All defending units are moved one hex by the attacking Player.
Ar = All attacking units which are adjacent to the hex under attack are moved one hex by the defending Player (see How to Retreat, 10.2, for further explanation of Dr and Ar results).
Ex = All of the defending units are eliminated first, then an equal or greater number of Attacking Strength Points are lost. All exchanges are made at the face value Combat Strength of the units (the defending units are calculated at their face value Defensive Strength). Soviet Artillery Corps and Air Strike Points are never lost through exchange when part of the attacking force.
De = All of the defending units are eliminated.
Ae = All of the attacking units (except Soviet Artillery and Air Strike Points) are eliminated.
10.2 How to Retreat
Retreating units are moved by the opposing Player according to the following priorities:
1st choice: to a vacant hex
2nd choice: to a stack of one or two Friendly units
3rd choice: to a stack of three or more Friendly units.
10.21 Retreat Restrictions
Units may not retreat through all-sea or lake hexsides nor may they enter all sea or lake hexes. Units may not enter an Enemy controlled hex unless that hex is occupied by another Friendly unit. Units which cannot retreat are eliminated.
10.22 Retreated Units and Other Combat
Retreated units have no effect on combat in the hex they retreated to. They do, however, suffer any adverse combat results assessed against other units in the hex they retreated to.
10.3 Advance After Combat
If as a result of combat, a hex is completely cleared of Enemy units, participating Friendly units (up to a maximum of three) may advance into the vacant hex.
10.4 Discretionary Odds Reduction
The attacking Player may choose to lower the odds in any given attack (to minimize the chance of an "Ex" result, for instance) by simply announcing the fact before the die is rolled. Note that this is a different technique from that of withholding the participation of whole units from a given attack. All of the participating units in a voluntary reduced odds situation still suffer the effects of any combat result.
10.5 Chinese Mass Attacks
The Chinese Player may declare any attack he executes a "Mass Attack." The effect is to double the Attack Strength Total of his attacking units. Naturally he must declare before he rolls the die. The normal Combat Resolution Table is used except that any result except Defender Eliminated means that the attacking Chinese units are eliminated and the Defending units suffer no result. In this case an exchange has no effect on the Soviet defenders.
11.0 Supply
General Rule: A unit must be in Supply in order to use its full Movement Allowance or its full Attack Strength. A unit which is not in supply (supplied) is out of supply (unsupplied). [Transcriber note: the printed text reads "not in supply (supplied) is out of supply (unsupplied)"; the parenthetical "(supplied)" appears to be a misprint for "(unsupplied)" and is transcribed as printed.] To be in supply a unit must be able to trace a supply path (line of hexes) from itself to some supply source. The length of the path is measured in Movement Points and varies with the unit which is tracing supply.
Procedure: Units trace supply to Supply sources in the same manner as they move, counting Movement Points to cross the intervening hexes to the source. Supply for movement is determined at the beginning of a Movement Phase for every unit. A unit that is unsupplied for Movement at the beginning of a Movement Phase is unsupplied for the entire Movement Phase and a supplied unit at the beginning of a Movement Phase is in supply for the entire Movement Phase. Supply for combat (attack) is determined at the instant of combat (see the Terrain and Supply Effects Chart).
Cases:
11.1 Supply Sources
11.11 The Soviet Player may trace his supply to any Soviet or Mongolian Railway hex which connects to hex 0701 or hex 3131; or he may trace his supply to a Soviet supply unit, which supply unit must be able to trace a line of hexes (crossing any passable terrain), unblocked by Chinese Zones of Control, to hex 0701 or hex 3131.
11.12 The Chinese Player traces his supply to a Chinese Railroad hex which must connect by rail with hex 0132 or a Friendly Industrial hex, unblocked by Soviet Zones of Control.
11.2 Supply Paths
11.21 The Soviet supply path from a unit to a Supply Source may not exceed five Movement Points in length. Soviet Air Armies and Artillery Corps calculate their supply path as though they were a Mechanized Unit. Soviet Supply Units are always considered to be in supply and valid as a Supply Source if they can trace an unblocked path of any length crossing any passable terrain to hex 0701 or hex 3131.
11.22 The Chinese supply path from a unit to a supply source may not exceed six Movement Points.
11.3 Soviet Supply Units
The Soviet Player is provided with four supply units. This is the maximum number he may deploy at any given time. Supply units are used as source of supply for movement purposes and, when expended, as a source of supply for attack at full strength. Supply units have a Defensive Strength of one and a normal Zone of Control.
11.4 Supply States
11.41 Chinese units are either supplied or unsupplied. They are supplied if they can trace a supply path, otherwise they are unsupplied.
11.42 Soviet units are either supplied or unsupplied. Soviet units are considered supplied for movement purposes if they can trace a supply path. Soviet units are considered supplied for attack purposes if they can trace a supply path to a supply unit, which unit is then expended (removed from the board) in the ensuing Combat Phase. One supply unit can supply any number of Soviet units for movement and the expenditure of one supply unit supplies any number of Soviet attacks within the five Movement Point supply path radius.
11.5 Intrinsic Soviet Supply
During Game-Turns one through four inclusive, all Soviet units are considered supplied for all purposes so long as they can trace a path of hexes of any length, unobstructed by Chinese Zones of Control, to either hex 0701 or hex 3131. During these turns they need not expend a supply unit to attack in a supplied state.
12.0 Terrain Effects and Supply Chart
(see Mapsheet)
13.0 Chinese Major Cities and Industrial Hexes
General Rule: There are six major cities shown on the map. In addition to serving as mobilization points for Chinese Militia Armies, they augment the Defense Strength of units stacked on them, possess an intrinsic Defense Strength of their own and nullify Soviet Zones of Control. There are 63 Chinese Industrial hexes and six Soviet Industrial hexes. The Chinese hexes are important for game victory. Both Soviet and Chinese Industrial hexes have intrinsic Defense Strengths.
Cases:
13.1 Major Cities
13.11 Units stacked on a Major City have their Defense Strength tripled.
13.12 Tank units which attack units in major cities are halved in strength.
13.13 When ungarrisoned, major cities have an intrinsic Defense Strength of two points. When garrisoned this strength is ignored.
13.14 A major city exerts a Zone of Control on the adjacent hexes, which impedes Soviet movement, retreat and supply as though it were an actual Chinese unit.
13.15 The Soviet Player seizes a Major City by attacking it or units stacked on it. If the attack results in a "Dr" there is no result, the city remains in Chinese hands, and any units stacked on it need not retreat. If the result is "De" or "Ex" the Soviet Player may advance after combat and occupy the city. Note that if an "Ex" result destroys all participating Soviet units, the city remains in Chinese control.
13.16 If, at any time during the course of play, the Soviet Player vacates an occupied major city, the city reverts immediately to Chinese control (regaining its intrinsic strength) just as though it had never been occupied by the Soviets.
13.17 Soviet units in major cities are tripled in defense.
13.2 Industrial Hexes
13.21 Industrial hexes represent built-up areas. Each hex has an intrinsic Defense Strength of one point. This Strength is used only when the Industrial hex is attacked separately. If other units are in the hex this intrinsic Strength is ignored. In order to destroy the intrinsic strength of an industrial hex a result of "Dr," "Ex," or "De" is needed. This applies even if other units were defending in the hex.
13.22 Once the Intrinsic Strength has been destroyed it is eliminated for the remainder of the game. The Players must keep track on paper which industrial hexes have had their Intrinsic Strength eliminated.
13.23 Industrial hexes never affect the presence of Enemy Zones of Control in the hex (nor do they exert a Zone of Control). However, until their Intrinsic Strength is eliminated, they do block Soviet movement and supply paths.
14.0 Soviet Air Power
Commentary: During the first week of a Sino-Soviet war, the Soviet Air Force almost certainly will crush the Chinese Air Force. Thereafter, it will intervene in the ground struggle assisting the Soviet Army in its attacks.
General Rule: Starting with his second Player-Turn, the Soviet Player may use Air Strikes to assist in attacks by his ground units. Air Strikes are flown from Soviet Air units and the distance from the Air unit to the target hex determines the Strength of the Air Strike. Each Air unit is allocated six Air Strike Points. These Air Strike Points may be added to the Attack Strength Points of other Soviet units to enhance the total Attack Strength of an attack on a Chinese unit.
Cases:
14.1 The Soviet Air unit is limited in the range it can project its Air Strike Points. Between one and six hexes, it projects a full Strength of six Air Strike Points; between seven and twelve hexes half of that Strength (or three Points); and at a range of between thirteen and eighteen hexes, a Strength of one-third (or two points).
14.2 The Soviet Air unit may not use its Air Strike Points and move in the same Player-Turn.
14.3 A given Soviet Air unit may not divide its Strength Points. It may strike only one target hex per Soviet Player-Turn.
15.0 Tactical Nuclear Warfare
General Rule: The Soviet Player (only) has the ability to use Nuclear Attacks. Nuclear Attacks increase the Attack Strength of all attacking units (including Artillery and Air units) and occasionally affect the map. Nuclear attacks may only be made against Chinese units, Major Cities, or Industrial hexes.
Procedure: On any given attack on Chinese units the Soviet Player may announce that he is using nuclear attack. The Soviet Player may use nuclear attack for all, some or none of his attacks in any Combat Phase.
Cases:
15.1 Effect on Combat Strengths
15.11 The Attack Strength of Soviet units when using nuclear attacks is doubled.
15.12 There is no other effect of nuclear attacks, on Defense Strength or Movement Allowance.
15.2 Nuclear Contamination Markers
15.21 If the combat result in any given nuclear attack is a "De" or an "Ex," the Nuclear Contamination Table is consulted, and the die rolled again immediately after the combat. If there is an "N" result, Nuclear Contamination results. The Phasing Player places a marker on that hex to indicate this. It is removed at the end of the same Player's next Combat Phase, and the hex returns to normal status.
15.22 Hexes that are nuclear contaminated may not be entered by either Player. These hexes also block supply lines and retreat routes.
15.3 Nuclear Contamination Table
| Originating Combat Result | 1 | 2 | 3 | 4 | 5 | 6 |
|---|---|---|---|---|---|---|
| "De" Result | - | - | - | N | N | N |
| "Ex" Result | - | - | - | - | N | N |
Die Roll; "-" = no result; N = Nuclear Contamination.
16.0 Atomic Demolitions
Commentary: The Chinese are presumed to have a limited quantity of atomic devices to be used as demolition mines to destroy communications and impede and channel the progress of a Soviet invasion. In this game their effect is simulated through the use of ADM markers and this rule.
General Rule: The Chinese Player has the use of eight Atomic Demolitions. Their effect is to change the terrain value in Movement Point cost of a map hexside. After both Players have finished their initial Set-Ups but before the Soviet Player has begun his first Player-Turn, the Chinese Player shall secretly decide and indicate on paper what hexsides he has mined. Then he shall announce which hexsides he has decided to detonate and so mark them. Undetonated mines may be exploded in ensuing Chinese ADM Detonation Phases.
Procedure: Indicate what hexsides have been mined by writing on a piece of paper the two adjacent hexes separated by the mined hexside; for example, 1423/1424 indicates that the hexside between hex 1423 and 1424 has been mined. At the end of any Game-Turn, the Chinese Player can then tell the Soviet Player "I'm detonating 1423/1424" at which point he places an ADM marker with its arrow pointing to the demolished hexside. He can place this marker in either hex 1424 or 1423. The marker itself has no bearing on the game, units may move over it and stack with it freely. It serves merely to identify the mined hexside.
Cases:
16.1 Movement Effect of Atomic Demolitions
On the Game-Turn immediately following an ADM detonation, every unit passing through the affected hexside must pay an additional cost of four Movement Points. On every Game-Turn thereafter, units must pay an additional two Movement Point expense. Soviet and Chinese units are equally affected.
16.2 Supply Effects
A supply path may not be traced through a demolished hexside.
16.3 Combat Effects
Units may attack and retreat across a demolished hexside. Detonations never destroy units or have any direct combat effect upon them.
16.4 Neutralization of ADMs
ADMs are neutralized if the Soviet Player passes a unit through the mined hexside before the Chinese Player has announced its detonation. Note that this means the Chinese Player must anticipate Soviet movements to avoid ADMs being neutralized and he is burdened with keeping track of all Soviet movement since the location of ADMs are concealed from the Soviet Player until their detonation.
16.5 Limits on ADM Placement
The Chinese Player cannot mine border hexsides or hexsides within the USSR, Outer Mongolia, or North Korea. He may not mine the same hexside twice.
17.0 The Scenarios
How to Set-Up and Play the Game
The East Is Red is actually four games in one, each using the same basic equipment and rules. The four different versions (scenarios) of the game are distinguished by the varying initial forces (Orders of Battle) and starting positions (deployments) of those forces. Players also receive units during the course of the game (reinforcements).
The scenarios derive their titles from the two possible states of "readiness" of the antagonists combined with two possible starting times of the Soviet offensive: "M+1" (the first day after mobilization) and "M+30" (a month after the start of mobilization). Players constitute a scenario by choosing a state of readiness and the starting time and then using the appropriate Orders of Battle and deployments. All scenarios are ten Game-Turns in length, at the end of which the victor is determined by reference to the Victory Conditions (see 18.0).
17.1 Orders of Battle (Initial Forces Available)
17.11 Soviet Orders of Battle
| Unit Type | Number of Units Available: M+1 | Number of Units Available: M+30 |
|---|---|---|
| 7-4-9 | 3 | 4 |
| 4-6-9 | 3 | 4 |
| 3-7-9 | 10 | 12 |
| 12-3-12 | 2 | 3 |
| 2-2-6 | 1 | 1 |
| 0-1-1 | 3 | 4 |
Note that the state of readiness has no effect on the number of starting Soviet units.
17.12 Chinese Orders of Battle
| Unit Type | M+1 Current Readiness | M+1 Full Readiness | M+30 Current Readiness | M+30 Full Readiness |
|---|---|---|---|---|
| 5-3-6 | 2 | 3 | 2 | 3 |
| 4-6-6 | 12 | 16 | 16 | 20 |
| ADM | 8 | 8 | 8 | 8 |
17.2 Deployment
In all scenarios the Soviet Player deploys his forces first.
17.21 Soviet Deployment
M+1 and M+30, Current Readiness: Deploy all forces anywhere within the Soviet Union on Railroad hexes. Units may not be deployed in stacks and may not be placed adjacent to one another. Units in Soviet Industrial hexes may be stacked. No units may be deployed in Outer Mongolia.
M+1 and M+30, Full Readiness: Deploy all forces anywhere within the Soviet Union. Units may be stacked three per hex and may be deployed adjacent to one another. In M+30, one Soviet corps may be deployed in Outer Mongolia.
17.22 Chinese Deployment
In all scenarios, Chinese units may be adjacent to one another and may stack three per hex.
M+1, Current and Full Readiness: Deploy all forces anywhere in China except for six 4-6-6's and all Tank Corps, which must be deployed within three hexes of Peking.
M+30, Current Readiness: Deploy two 5-3-6's and four 4-6-6's within three hexes of Peking; remainder of force deploys anywhere in China.
M+30, Full Readiness: Deploy all forces anywhere within China.
17.3 Reinforcements
During the course of the game, both Players receive additional forces which appear during their respective Reinforcement Phases (see Sequence of Play) on specific hexes on the map. If these appearance hexes are occupied by Enemy units, the reinforcements are lost. The total number of counters available in the game is a deliberate design limit; if counters called for in the reinforcement schedule are not available from the collection of previously eliminated or unused pieces, then those reinforcements do not appear (and are not accumulated). Units may not delay their appearance into the game. The act of placing reinforcements on their appearance hexes does not expend any Movement Points.
17.31 Soviet Reinforcements
The reinforcements due the Soviet Player on any given Player-Turn are always of the same makeup: one 1-2-9 and one 0-1-20 supply unit. On odd-numbered Game-Turns, Soviet reinforcements appear on hex 0701 (and can be considered in Rail Mode if the Player desires). On even-numbered Game-Turns, Soviet reinforcements appear on hex 3131 (Vladivostok) and may be considered in Rail Mode if the Player desires.
M+1 Reinforcement Schedule: The Soviets receive reinforcements every Game-Turn from Game-Turn four until the end of the game.
M+30 Reinforcement Schedule: The Soviets receive reinforcements from Game-Turn Two until the end of the game.
17.32 Chinese Reinforcements
Chinese reinforcements are always the same regardless of scenario: one 4-6-6 on Game-Turn two, and two 4-6-6's on every Game-Turn thereafter. Chinese reinforcements always appear on hex 0132, and may be considered in Rail Mode if the Player desires.
17.4 Chinese Militia
In all scenarios, commencing with Game-Turn Two, the Chinese Player receives Militia Corps in addition to his normal reinforcements. These Militia Corps are mobilized at the rate of one for every Major City which is unoccupied by Soviet units, and appear on the city hex from which they are mobilized. This is done every Game-Turn.
17.41 To prevent the mobilization of a Militia Corps the Soviet Player must physically occupy the Major City hex with a Soviet unit of any type or size. Simply being the last to pass through the hex or being adjacent to the hex is not sufficient to prevent the Militia mobilization.
17.42 The Chinese Player receives his Militia units during Phase One of his Player-Turn. He may not reconquer a Soviet-occupied Major City and then add a Militia unit on the same Game-Turn.
17.43 Chinese Militia units may not be voluntarily moved out of supply. Nor may they move across or attack across the Chinese border.
17.44 Militia are placed in the Major Cities even if this would violate the stacking limitations. However, all units must comply with the stacking limitations at the end of their respective Movement Phase(s).
17.45 There are six Chinese Militia units provided in the counter mix. After deploying the initial six Militia Corps, the Chinese Player may only mobilize additional Militia from previously eliminated Militia and therefore can never have more than six Militia Corps deployed at any one time.
(Two sample Militia counters are shown in the rulebook, both labelled 4-5-6.)
17.5 Korean Intervention Option
The possibility exists, in any Sino-Soviet War, that the North Koreans would intervene on the side of the People's Republic of China. If both Players agree to this option, then in any "M+30" Chinese Reinforcement Phase from Game-Turn Two onwards, the two North Korean 4-5-6's may appear in any hex in North Korea at the Chinese Player's discretion. They may move freely on the map, as if they were Chinese units. They may trace supply lines as if they were Chinese units with the addition that they may trace supply to Pyongyang (1734). Until the North Koreans are actually placed on the map, neither Player may enter North Korea, nor exert a Zone of Control across the border into North Korea.
18.0 Victory Conditions
How the Game is Won
The game standards of victory are based almost solely upon the Soviet point of view (i.e., the capture of Chinese industrial centers) simply because there is a likelihood that, in reality, the Chinese would simply fall back in the face of a Soviet invasion. This would allow the enemy to overextend himself in hostile territory and become bogged down in a long guerilla war, while preserving the Chinese Army virtually intact. This strategy would be consistent with Maoist thought as well as the historical evidence of how China has handled invaders (not to mention being a very sensible course of action). However, the game victory conditions form a valid environment in which a head-on clash between the two very different armies may be examined.
General Rule: Victory is determined at the end of the tenth Game-Turn. The degree of Victory achieved by the Soviet Player is measured by the number of Chinese Industrial hexes which are "cut-off" from the off-map portion of China.
18.1 Levels of Victory
| Soviet Victory Level | Number of Chinese Industrial Hexes Cut-off |
|---|---|
| Decisive Defeat | 0 to 10 |
| Substantive Defeat | 11 to 14 |
| Marginal Defeat | 15 to 22 |
| Marginal Victory | 23 to 41 |
| Substantive Victory | 42 to 49 |
| Decisive Victory | 50 to 63 (all) |
18.2 How Industrial Hexes are Cut-off for Victory
A Chinese Industrial hex is considered cut-off if at the end of the game it cannot trace a line of communication off the western edge of the map. A "line of communication" is defined as a clear path, no more than two hexes in length, traced from the Industrial hex to a Chinese railroad which in turn connects in a clear, unbroken line to the western edge of the map. The word "clear" in this application means free of Soviet units or their effective Zones of Control. A Chinese unit or Friendly City nullifies Soviet Zones of Control in the hexes so occupied. Atomic Demolitions do not cut lines of communication.
19.0 Soviet Strategic Strike
The USSR possesses the nuclear capability to obliterate the entire Chinese industrial and communications structure. Such a strategic strike would result in enormous Chinese civilian losses and severe atmospheric contamination. The consequences would probably be an incredible loss of "world opinion" and a resultant isolation of the Soviet Union as a war-crazed pariah. But given a serious enough threat or provocation by the PRC, the Soviets just might do it (as insane as such a course would be). Therefore, if the Soviet Player feels that the Chinese Player has provoked him (say he was slow in setting up his units or thumbed his nose at the Soviet Player or took some other ridiculous course of provocation) he may elect to bomb the rest of China (the portion off the map). The effect in the game is to erase both Player's reinforcement schedules. They get none except Militia. If the Soviet Player chooses this option he must achieve a "decisive" victory as defined in 18.1 or he "loses" the game. Players should be warned that this variation almost always results in a Soviet "victory" and that it is a highly unlikely possibility that the Soviets would be foolish enough to execute such a strike.
20.0 Designer's Notes
Designing the East Is Red proves, we think, the old saying that if you put your mind to it you can do just about anything. The situation in Manchuria and the Soviet Far East is covered by one of the thickest security blackouts in military history. In addition, the two armies involved are not famous for letting anyone know much about themselves. And to make the situation even more difficult, the events we are attempting to simulate haven't occurred yet.
Fortunately, designing most games involves large amounts of detective work, even where considerable information is available. Because of the enormous amount of work we have done previously on the Soviet Army, as well as the work we had to do on the Chinese Army for our Korea game, we did have a base of information to start with. We had also done some work on a Russo-Japanese war game which gave us a head start on an analysis of the geography of the battle area.
As it turned out, the biggest question mark was the actual combat performance of both armies. Both the Chinese and Russian armies had not been in combat for over twenty years. Nearly a generation. This, military history has shown, can make an enormous difference. In this area, more than any other, we had to make what can be charitably called, "estimates." We assumed that the Chinese would respond aggressively to a Russian invasion. We also assumed that the Russians would have reached a level of competence that would enable them to carry through a massive military operation in Manchuria.
One of our technical problems in the game was the scale. The area covered in the game is larger than all of the United States east of the Mississippi. For this reason the game would obviously not be division level. Unfortunately, the next logical level on which to have the game was army level. Here we mean the Russian and Chinese Army, which normally consists of four or five divisions. This gave us too few units. What we did then was to create our own version of the Chinese and Russian corps. We gave both sides the actual number of divisions they have available, but we put them in units representing only three divisions. This, it turned out, played quite well and realistically. We also had a problem in dealing with the rather large Chinese militia. We are not talking about the two hundred million man militia you often hear mentioned. But the much smaller and more efficient five million man militia, strengthened by the millions of local volunteers that the Chinese plan on using. The local forces, trained or at least directed into partisan warfare, would be expected to slow down the Russians whenever the Russians entered Chinese populated areas. These militia units also represent the intrinsic Defense Strength of Industrial Hexes and Major Cities.
The basic assumption behind the game is that the Chinese would resist strenuously any Soviet attack on their industrial heartland, which is exactly what Manchuria is. Given the Maoist theorists of protracted warfare, coupled with their emphasis on political measures and the idea that one should retreat in the face of the enemy strength, what happens if they abandon Manchuria or take to the hills? What do the Soviets do with sixty million Chinese after ten weeks or even ten years? In the game we assume that the Soviets, in order to avoid a protracted guerrilla war, must win and win fast. If they don't, the Chinese people in Manchuria will have all the more encouragement to carry on a long and bloody Partisan war. We assume that the Russians have accumulated enough stocks for three to four weeks of sustained operations. Anything beyond that would have to come by sea or rail.
Thus, a Russian invasion of Manchuria is not as much of a walkover as it might appear. The Russians must win decisively, and they must win fast. While Chinese conventional forces are not, man-for-man, a match for the Russians, the Chinese do have an armed populous which we feel is quite capable of waging an effective guerrilla and/or irregular type warfare.
Hopefully, the premises set forth in our game will never be put to the test.
Errata
The following errata for The East Is Red appear on the errata sheet that accompanies this scan (the sheet also contains errata for an unrelated game, which is omitted). The errata follow the numbering of the rules above. Entries are transcribed as printed.
- 4.2 (Superfluity): Players should delete the seventh phase of each Player-Turn. There are no Air Interdiction operations in the game.
- 5.21 (Omission): Whenever a unit's Movement Allowance is halved, any remaining fraction is dropped. Note: The "forest" hex mentioned in this example is synonymous with a rough terrain hex.
- 5.23 (Clarification): Soviet Artillery Units may not voluntarily move adjacent to Chinese units. A Soviet Artillery unit may, if forced to, retreat into a Friendly occupied hex adjacent to a Chinese unit.
- 5.43 (Omission): Mechanized units may use rail mode movement in either the Initial or Mechanized Movement Phase. A mechanized unit using rail mode movement may not, however, move normally in the same Player-Turn.
- 5.47 (Omission): Units using rail mode movement are subject to the normal Stacking rules, but there is not Movement Point expenditure to stack and unstack a unit which is using rail mode movement.
- 6.1 (Clarification): Soviet units and Chinese mechanized units expend one additional Movement Point to enter an Enemy controlled hex even if the hex is already occupied by a Friendly unit, i.e., for normal movement Friendly units do not negate Enemy Zones of Control.
- 8.5 (Clarification): The Soviet Player may not execute substitution after his Second Movement Phase if such a substitution would result in a violation of normal stacking limitations (three units per hex).
- 9.5 (Clarification): In the last sentence of this case the units referred to as "Friendly" are to be considered friendly to the unit defending against the concentric attack.