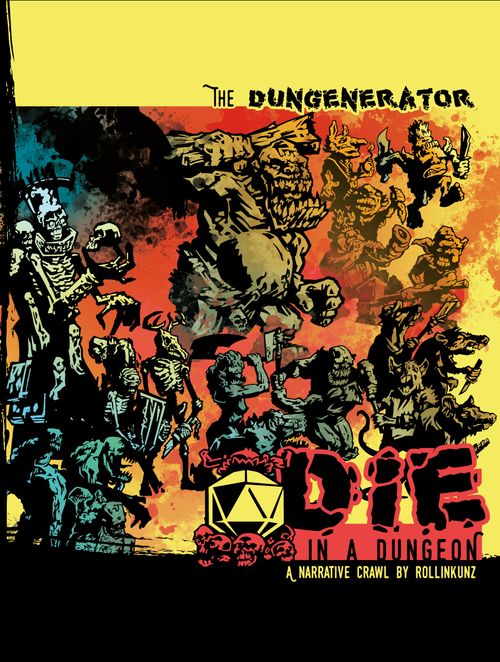
The Dungenerator: Die in a Dungeon
The Dungenerator: Die in a Dungeon Rulebook
Table of Contents
Table of Contents
The Campaign
DIE in a Dungeon is meant to be played over several sessions. During and after each session of the game, you'll grow in power by collecting Loot, training your Heroes, teaching them powerful Heroic Actions, acquiring Gear, and rebuilding your Village.
While it's technically possible to win the entire campaign in a single session, it's challenging, unlikely, and not recommended. Instead, enjoy the stories you generate as you lead generations of Heroes to eventually overcome the encroaching Evil!
Setup
To Play, You Need
- A copy of the DIE in a Dungeon game and these rules.
- A DUNGENERATOR deck.
- One set of polyhedral ("RPG") dice per player: a 4-sided, 6-sided, 8-sided, 10-sided, 12-sided, and 20-sided die.
NOTE: Most polyhedral dice sets include a second 10-sided "percentile" die, which will only rarely be used in this game.
Before Your First Game
Follow these steps for the first session of a new campaign:
- Set aside the Quick Setup and Player Turn Order/Deck cards.
- Make sure every other card's "Sunny" side is facing up. This icon should be in the upper-right corner of each card.
- Separate the cards by type (their upper-left icons) into the following decks:
- Player 1 Basic Actions: The cards that make up Player 1's starting Action Deck.
- Player 2 Basic Actions: The cards that make up Player 2's starting Action Deck.
- Village Quests: Session-long objectives that add new Buildings to the Village Deck.
- Hero Quests: Quick objectives that add Hero Actions to a player's Action Deck.
- Loot: Found in the Dungeon. Used to pay for Building actions or turned into Gear.
- Traps: Hazards found in the Dungeon while searching for Loot.
- Monsters: Creatures found in the Dungeon that are trying to destroy the Village.
- Gear: Useful equipment for a player's Action Deck. Found in Loot or bought from certain Village Buildings.
Session Setup
You may follow the Quick Setup cards to prepare for a game session, or you can follow the more detailed instructions below.
When using the Quick Setup cards, follow each card's steps and then flip it to its "Sunny" side.
-
Designate a "Village Square" area in the center of your table.
-
Lay the cards in your Village Deck next to the Village Square.
(NOTE: If this is your first game, your Village Deck will include only the Town Hall, Tavern, Temple, and Cemetery, all of which are on the reverse sides of the Quick Setup cards. The Village will always contain at least these 4 cards.)
-
Roll all 6 of each player's dice (their "Heroes") and place them into the Village Square.
-
Shuffle the Village Quest Deck. Draw 2 of them and place them near the Village. Place the Village Quest Deck near the edge of the table.
-
Prepare the Dungeon Deck (using the DUNGENERATOR deck of your choice):
- Remove any Dungeon Room cards without Dead End icons on their backsides and set them aside. The Dead End icon on each Dungeon Room card should be face-down.
- Divide the Dungeon Room cards into 4 roughly equal piles.
- Shuffle 1 Treasure Room into each pile, then stack the piles to form the Dungeon Deck.
- Place 1 Entrance card next to the Village Square, with its Open Passage pointing away from the Village.
-
Place the Dungeon Deck, its Dead End sides facing down, near the edge of the table.
-
Shuffle the Traps and Loot together to create the Loot Deck. Place it Sunny-side-up near the edge of the table.
-
Shuffle the Hero Quest cards together to create the Hero Quest Deck. Place it Sunny-side-up near the edge of the table.
-
Set the Boss Monster aside, then shuffle the Monster cards together to form the Monster Deck. Place it Sunny-side up near the edge of the table. Place the Boss Monster near it.
NOTE: The DUNGENERATOR decks used as Dungeon Decks in this game organically fill whatever sized table you choose to play on. While just about any table size is usable, smaller tables will naturally lead to shorter sessions, and larger tables will lead to longer sessions. If you'd prefer shorter sessions, try sectioning off a portion of your table as the designated play area.
Playing the Game
The Golden Rules
Keep these key rules in mind while playing:
- Don't flip cards unless you're told to. All the cards have different fronts than backs and must only be flipped through specific actions during the game. Make sure you don't accidentally flip cards over while shuffling them; you'll ruin the surprises!
- Always draw from the bottom of a deck. This also helps keep the element of surprise.
- Discard to the top of a deck. When discarding a card, add it to the top of the appropriate deck.
- Don't reroll dice unless you're told to. Your dice ("Heroes") retain their current results ("Faces") until an action or effect has you roll them.
- One of each card type per Room. You can have multiple cards on each Room, but only 1 of each card type.
- Cards can override basic rules. When the text on a card conflicts with a basic rule, follow the card's text.
- The active player decides. The "active player" is the player currently taking their turn. When there's an unclear decision to be made (for example, a Monster needs to pick between two "closest" Heroes that are the same number of Rooms away), the active player chooses between the options.
The Heroes
Your Dice are now Heroes. Each of a player's dice represents a Hero in their party:
- The d4 OUTLAW is an elusive rapscallion, always on the lookout for treasure.
- The d6 SCOUT finds the quickest routes through any terrain.
- The d8 MERCENARY is a hardened warrior who knows how to take a hit.
- The d10 ARCHMAGE uses their arcane expertise to surprise the enemy.
- The d12 WAR PRIEST makes sure their comrades are fighting-fit.
- The d20 BERSERKER is big, brutal, and hardy!
"Your" Heroes Are Your Own:
When a card's text refers to "your [Hero/Heroes]," it means "the [Hero/Heroes] that belong to the player that owns this card." Only cards that refer to "any" or "a" or "all" Heroes can affect other players' Heroes.
"Your Hero's Room" means "a Room containing at least one of your Heroes."
Faces and Targets
The current result showing on a die is that Hero's "Face." Comparing those faces to the Targets on Monsters, Traps, and other cards is a main mechanic of this game.
"Target: X or higher" — Minimum Targets are used when Battling Monsters. If a Hero's Face is higher than or equal to the number in the Target, the Target is met.
"Target: X or lower" — Maximum Targets are used when finding Loot, disarming Traps, and Sneaking past Monsters. If a Hero's Face is lower than or equal to the number in the Target, the Target is met.
As you begin playing, you'll quickly find that the Heroes with lower maximum numbers are best for sneaking past Monsters, disarming Traps, and finding Loot, while the larger dice are best for fighting — though each Hero can be customized by adding Gear and Hero Actions to your Action Deck!
The Flow of the Game
Beginning with Player 1 and proceeding to the left, each player takes a turn, then activates Monsters.
Once all 4 Entrances or all 4 Treasure Rooms have been placed into the Dungeon, immediately activate all Monsters in the Dungeon, then place the Boss Monster into the Empty Room furthest from any Heroes.
Winning and Losing
Play continues in this way until one of these conditions is met:
- A Village Quest is completed. The session ends with a win for the players, and they add the Building on the back of the Village Quest to their Village Deck.
- The Boss Monster is defeated. If the players can Kill the Boss Monster, they claim victory over the entire campaign!
- All Village Buildings are Damaged. The session immediately ends in a loss.
- Monsters can't Spawn. If a Monster needs to Spawn but cannot (because the Monster Deck is empty or there is no available Room or Entrance), the session immediately ends in a loss.
- All Heroes are Killed. The session ends in a loss at the end of the current player's turn if no Heroes are Resurrected.
The Player Turn
The Action Deck
A player's Action Deck is their arsenal of options used to play the game! Though it only contains 10 Basic Actions at the start of a campaign, by the end it will be brimming with all sorts of cards gained through play.
When a player, through an action, adds a card into their hand or discard pile, they are also adding it to their Action Deck. Cards stay in the Action Deck unless another action or effect removes them.
Taking Action:
Each player begins their turn holding a handful of 5 cards from their Action Deck.
On a player's turn, they take actions from the cards in their hand, on the table, and in the Dungeon.
A player's turn ends when they can't afford any more actions or when they choose to stop.
You Must Unless "You May":
Unless an action specifically says "you may" before part of it, the player taking that action must do the entirety of the action's text. If a non-optional part of an action is impossible, the action cannot be taken.
Discard at Turn's End:
Before ending their turn, the active player may choose to keep or discard any cards remaining in their hand.
Draw Back Up to 5:
After using, discarding, or choosing to keep each of their cards, the active player draws cards from their Action Deck until they have 5 in their hand.
Then, their turn ends with a Monster activation.
Decking Out
Running out of cards: When a player's Action Deck is empty, they immediately shuffle their discard pile into their Action Deck before continuing to draw.
Action Costs
"Pay 1 discard" — Many actions require the player to pay their cost before taking them. The cost of each action is listed to the right of its type icon.
To take an action that has a cost of 1 discard, the active player first needs to discard any 1 other card from their hand to their discard pile.
"Discard this card" — After an action is taken, its card is (usually) discarded to the player's discard pile. Some actions will require discarding their card for an additional effect.
To pay for an action with Loot, a player must flip the listed number of Loot cards in their hand to their Sunny sides and place them on top of the Loot Deck (removing them from their Action Deck).
Some actions offer a choice of costs, separated by "OR." A player taking one of these actions first chooses to pay the cost on either side of the "OR."
If there is no "OR" separating different cost icons, a player taking that action must first pay the combined cost of discards and Loot.
Some actions have a variable cost. The action's text will describe the amounts of discards/Loot required to take it.
Action Types
Each action has one or more type icons that indicate when a player can take them:
"In Hand" — An action with this icon can be taken if the card is in the active player's hand. It appears on almost all cards that can end up in the player's Action Deck, including Basic Actions, Hero Actions, Loot, and Gear.
"Hero in Room" — If a player's Hero is in the same Room as a Loot, Trap, or Quest card, that player may take an action with this symbol from that card. They must still pay the discard cost listed on the action.
If a player has at least one Hero in the Village Square, they may take any actions with "Hero in Room" icons listed on (undamaged) Village Buildings.
"On Table" — These actions/effects can only be taken/used once their card has been played onto the table.
Unless the card states otherwise, only the owner of the card may take/use this action/effect. A player still owns a card that they play onto the table/in front of themself.
If the action describes an activation condition (for example, "When/If __"), its owner can take the action whenever the condition is met (even on another player's turn).
"Ongoing" — These are ongoing effects that add new actions for players to take or modify other actions or rules. As long as a card with this action is on the table, its effect is happening.
"On Monster" — These actions can only be taken once their card has been played upon a Monster.
"In Battle" — These actions can only be taken during a Battle. They may be used in a Battle on another player's turn, as long as the player who owns this card has a Hero in the Battle's Room.
"On Reveal" — Some cards do something special as soon as they're revealed. If you see this symbol on a card you draw or flip, the listed effect happens immediately before play continues.
Moving Heroes
Heroes chosen to Move can move through any number of adjacent Rooms (including the Village Square).
All Entrance Rooms are considered adjacent to the Village Square for Movement purposes. Heroes moving between a Dungeon Room and the Village Square must pass through an Entrance.
Arrow icons point towards adjacent Rooms and create a path towards an Entrance.
Sneaking
When a Hero Moves into a Room containing a Monster, they may only continue their movement if their Face shows a number less than or equal to that Monster's Sneak Target (shown under "Sneak" on the Monster's card).
Otherwise, they must end their movement in that Monster's Room. They may leave the Room by taking another Move Action (or similar).
Multiple Heroes Moving together must start and end their movement together. For example, a player can use the Trained Move Action to choose 2 Heroes in the same Room and Move them. If they move into a Monster's Room and one of their Faces is higher than its Sneak Target, both Heroes must stop their movement.
Placing
"Placing" is not the same as Moving! A Hero that's moving has to travel through a path of adjacent Rooms. A Hero being "placed" ignores them and goes straight to their destination.
This means, for example, not having to Sneak past Monsters in the ignored Rooms.
Exploring a Room:
Open Passages are the hallways leading off the edges of (most) Room cards.
When a Hero is in a Room with at least 1 Open Passage, they immediately Explore:
- Draw new cards from the Dungeon Deck equal to the number of Open Passages on that Room.
- Place the new Room cards so that their arrow icons point at each Open Passage on that Room.
If this placement would cause any Room cards to overlap (other Room cards or the edge of the table), instead flip over the original Room card to its Dead End side and discard the newly drawn Rooms to the Dungeon Deck.
Battling
Battles are started one of two ways: Either a player initiates one against a Monster by taking a Battle (or similar) Action, or a Monster initiates one when it activates.
To resolve a Battle, the active player attempts to assign one Hero in that Monster's Room to fill each of its Battle Targets (shown under "Battle:" on the Monster's card). In order to fill a Target, a Hero's Face must meet the Target. If all Targets are filled, the Heroes win the Battle! Otherwise, they lose.
The active player may assign any Heroes in the Battle's Room to Targets, even another player's. Asking for help against a powerful foe is key to victory!
Winning a Battle:
When the Heroes win a Battle, the effect listed under "Win:" on the Monster's card happens.
This will usually either wound the Monster (by flipping its card to its reverse side) or Kill it (by discarding it to the top of the Monster Deck, Sunny-side-up).
Losing a Battle:
When the Heroes lose a Battle, the active player must choose one of the Heroes in that Battle's Room to be Killed. The chosen Hero is placed onto the Cemetery card in the Village.
The active player may choose another player's Hero instead of their own.
Surviving a Battle:
At the end of a Battle, any Heroes in the Battle's Room that have not been Killed have Survived that Battle. Surviving Heroes are immediately rolled.
Killed Heroes
Heroes that are Killed by Monsters, Traps, or other effects are placed onto the Cemetery card in the Village. They must remain there and cannot act, move, or be placed until they are Resurrected (usually via the Resurrect action on the Temple Building).
Generally speaking, if an action mentions a specific Hero, and that Hero is currently dead, that action cannot be taken. Ongoing Effects still activate while their corresponding Hero is Killed.
Monsters
Monsters are the main danger Heroes will encounter in the Dungeon. They will march through a Dungeon's Entrance and destroy the Village if not stopped.
Each Monster behaves differently, is double-sided, and may have an additional type:
- Minion Monsters are weaker but plentiful, seeking to overwhelm with numbers.
- Boss Monsters are extremely powerful, controlling entire armies. Defeating a single Boss Monster is the goal of each campaign!
- There may be more types of Monster lurking in the Dungeon!
Some actions can only affect Monsters of particular types. If an action's text doesn't specify a type, it can affect any Monster.
At the end of their turn, the active player draws a card from the bottom of the Monster Deck, activates any Monsters in play with Danger Icons that match the drawn Monster's, and places the drawn Monster into any Room with an Open Passage.
For example, Drawing a Monster with a Rage icon activates all the Monsters and/or Traps with Rage icons already in the Dungeon, from lowest Initiative to highest.
Example: The active player draws the Orcs (with a Rage icon) at the end of their turn. Two Monsters in the Dungeon share the Rage icon; the Goblins have a lower Initiative and act first. After the Goblins and Ratters have both activated, the Orcs are placed into the Dungeon. Because there is no Room with an Open Passage and without a Monster, a new Entrance is drawn and placed.
Activating a Monster
Monsters activate in order starting from the Monster with the lowest Initiative. A Monster's Initiative is the number listed on its Danger Icon.
Traps also have Danger Icons, and they share an Initiative of 0. All Traps activate before Monsters.
Monster Actions
When a Monster activates, it takes one of two actions listed on its card. The active player takes the appropriate action for each activated Monster: one action is taken if a Hero is present in the Monster's Room, the other is taken if no Heroes are present in the Monster's Room.
If a Monster cannot complete part of its action (for instance, it cannot Flee any further from the Village), simply ignore that part of its action's text.
On Reveal
A few Monsters do something special as soon as they're revealed. When this symbol appears on a drawn or flipped Monster card, the listed effect happens immediately (before Monsters activate).
Devoured
Some Monsters might Devour a Hero. When this happens, the Hero is placed onto the Devoured space on that Monster's card.
A Devoured Hero is not in any Room, and cannot Move or be used to meet a Target. If another Hero is Devoured by the Monster, the first Devoured Hero is Killed.
If the Monster is Killed, the Devoured Hero is placed into that Monster's Room before it is discarded.
Wounded Monsters
Each side of a Monster's card is unique. Be prepared for a wounded Monster to change its behavior!
Moving Monsters
Each Monster's card describes how it moves.
Monsters move from their current Room to an adjacent Room the number of times listed, always toward their listed goal.
When a Monster moves towards the Village, it follows the arrow icons that lead towards an Entrance.
One Monster Per Room
Each Monster card has an arrow icon in one corner (underneath its Sun/Moon icon). Point it towards the Room it occupies in the Dungeon to keep track.
Each Room can only contain 1 Monster.
While moving (including being moved by an Action), when a Monster would enter a Room that already contains a Monster, move it an additional Room in the same direction as its movement or, if being placed, into an adjacent Room.
Example: Because there is a Hero in their Room, the Goblins take their Run action when they activate, which moves them 2 Rooms towards the Village. Because the Zombies are in the second Room, the Goblins skip it and move 1 more Room into the Village, damaging a Building.
Damaging the Village
If a Monster moves towards the Village while on an Entrance (or otherwise ends up in the Village), the active player rotates one undamaged Village Building card to its Damaged edge, then removes that Monster from the game.
The Heroes have failed to contain that Monster, and it now ravages the countryside!
Spawning Monsters
Once all matching Monsters have activated, the active player places the drawn Monster into any available Room with an Open Passage.
If there are no available Rooms in the Dungeon with Open Passages, immediately place a new Entrance near the Village Square and place the drawn Monster into that Entrance.
If there are also no Entrances left to be placed, the session immediately ends in a loss.
The Boss Monster
The Boss Monster is a special Monster that is set aside during session setup.
It is only placed into the Dungeon once 4 Entrances or 4 Treasure Rooms have been placed. As soon as the 4th Entrance or Treasure Room is in the Dungeon, the Boss Monster is revealed.
The Boss Monster included in the core game is the Lich, which has a powerful ability that activates as soon as it is revealed: Every other Monster in the Dungeon activates, and then the Boss Monster is placed in the Dungeon Room furthest from any Heroes.
If the players can defeat the Boss Monster (by winning a Battle against its card's backside), they win not just the session, but the entire campaign!
OPTIONAL: Once the players' Village Deck contains at least 3 Specialist Buildings, they may add the Boss Monster to the top of the Monster Deck during setup.
This allows players who are confident they can defeat the Boss Monster to accelerate their campaign.
The Dungeon
Rooms
Each card in the Dungeon Deck is a single Room.
Standard Rooms each have an arrow icon. Each Room is considered adjacent to the Room its arrow points toward (as well as any Rooms whose arrows point toward it).
When placing a Room, point its arrow icon toward one of the Room being Explored's Open Passages.
A Room may contain any number of Heroes, but only one of each card type (Monster, Trap, Quest, etc.).
Each Trap, Loot, Hero Quest, and Monster card has an arrow icon in one corner. Point it towards the Room the card occupies in the Dungeon to keep track!
A card's Room is the Room that currently contains that card.
Empty Rooms
A Room is considered Empty if it contains no Heroes or cards (Monsters, Loot, etc.).
Open Passages
Most Rooms in the Dungeon Deck have one or more Open Passages: hallways visibly leading off the side of the card. Dead Ends, Treasure Rooms, Secret Passages, etc. do not have Open Passages.
Open Passages are important when Exploring Rooms and Spawning Monsters.
Once an Open Passage has a Room adjacent to it, it is no longer considered an Open Passage.
Dead Ends
Each standard Room card has a Dead End on its backside.
Dead Ends have no Open Passages.
When placing a new Room would cause it to overlap with an already-placed Room (or the edge of the table), the Room being Explored is instead flipped to its Dead End side.
Treasures
Treasure Rooms are special Rooms that contain Loot.
When a Treasure Room is placed, immediately draw a card from the Loot Deck and place it into that Room.
Treasure Rooms have no Open Passages.
Entrances and Stairs
Entrances are special Rooms that connect the Village to the Dungeon. They are considered adjacent to the Village Square.
Stairs are on the back of each Entrance. You may use them interchangeably with Entrances when playing the standard version of DIE in a Dungeon.
Expansions
An Expansion is used to add to a Room and change its direction.
Expansion Rooms are in some DUNGENERATOR Series decks. They add to an already-placed Room to create one larger Room. The group of cards that makes up this larger Room is considered a single Room for all purposes in DIE in a Dungeon.
When placing an Expansion (or flipping it to its Dead End side), the active player is allowed to overlap the Room being Explored, connecting the two Rooms' outer black walls in an eye-pleasing manner. Both corners of the Expansion's bottom edge (the edge with the arrow icon) must overlap the Room being Explored.
When a player draws an Expansion while Exploring a Room, they will immediately Explore again until the Room being Explored has no Open Passages.
Players can use Expansion Rooms to change the direction of the Dungeon's growth or convert multiple Open Passages into one.
NOTE: Playing with Expansion Rooms will give your Dungeon (and through it, your game) a different "texture." There will be fewer Rooms total in play each session. You may prefer to instead remove some or all of the Expansion Rooms from your Dungeon Deck and only place them when you would place a Secret Passage (see below).
Secret Passages
Secret Passages are in some DUNGENERATOR Series decks. They are removed from the Dungeon Deck during setup and are only placed via specific actions.
A Secret Passage is a special Room that is considered adjacent to every Room its arrows point towards, even across a large expanse of empty table.
Secret Passages have no Open Passages.
A Secret Passage connects 2 separate Dungeon Rooms, making them adjacent.
Players can use Secret Passages to create shortcuts in the Dungeon that Monsters are (usually) reluctant to move into.
The Village
The Village consists of the Village Square (which is just an area on the table designated during setup) and a collection of Building cards (plus the Cemetery).
At the beginning of a campaign, the Village contains only the Town Hall, Temple, Cemetery, and Tavern (all of which are on the backs of the Quick Setup cards).
The Village Square is adjacent to all Entrances and counts as a Room for the purposes of player actions. For example, the Prepare action can be used to roll Heroes in the Village Square.
Building Actions
Each Building gives all players access to a unique action or effect.
An icon on a Building action indicates that the active player can only take the action if they have at least 1 Hero in the Village Square. Another icon on a Building indicates an ongoing effect that is active at all times (whether or not the Village Square contains a Hero).
Damaged Buildings
Every Building in the Village has a "Damaged" edge.
Buildings will become Damaged during play (usually by a Monster escaping through a Dungeon Entrance). To show this, the active player will choose an undamaged (vertical) Building and rotate it so that the Damaged edge is at the top (horizontal).
Actions and effects on Damaged Buildings cannot be taken/used.
If every Building in the Village is Damaged, the game immediately ends in a loss.
The Cemetery
The Cemetery is a unique card that is always in the Village.
Whenever Heroes are Killed, they are placed onto the Cemetery card.
The Cemetery cannot be Damaged.
Keep in mind that because the Temple's Resurrection action is the most common way to bring a Killed Hero back into play, it's important to protect it!
Specialist Buildings
Specialist Buildings can be added to your Village Deck for the length of your campaign by completing Village Quests.
Each Specialist Building adds another unique action or effect, usable by all players.
Village Quests
Village Quests are goals that can be completed during a single session.
The 2 Village Quest cards that are drawn during setup represent different residents of the Village requesting help with their problems.
Each Village Quest can be completed by discarding the listed number and type of Monster cards onto it, then taking the "Complete" action.
Any player may discard Killed Monsters onto a Village Quest card.
Completing a Village Quest immediately ends the session in a victory and adds the Specialist Building on the reverse side of the card to the Village Deck for the rest of the current campaign.
Players must decide each session whether to complete a Village Quest (expanding their options and making their Village more robust) or attempt to reveal and defeat the Boss Monster (claiming victory over the whole campaign).
Hero Quests and Actions
Hero Quests are short-term goals that add unique and powerful actions, called Hero Actions, to a player's Action Deck.
Hero Quests do not share a single icon; instead, each Quest's icon indicates the Hero type that it upgrades. Likewise, their labels indicate that Hero type.
For example, an Outlaw Hero Quest (which upgrades a player's 4-sided die) will have the upper-left icon and the label "OUTLAW Quest" underneath its title.
Completing a Hero Quest
- A player may draw and place a Hero Quest from the Hero Quest Deck into the Dungeon by taking the "Gossip" action on the Town Hall Building. Each Hero Quest card has an arrow icon in one corner; point it towards the Room it occupies in the Dungeon to keep track.
- A player with a Hero that matches a Quest's Hero type in that Quest's Room may claim that Quest, placing the Quest card in front of them.
- Players may discard Loot from their hand and/or Killed Monsters onto claimed Hero Quests (including those claimed by another player).
- Once any combination of 3 Loot/Monster cards is on a Hero Quest card, its owner may take that card's "Complete" action to flip the card over and add the Hero Action on its backside to their hand (and their Action Deck).
If a player is unable to complete a claimed Hero Quest by the end of the session, any Monsters placed on it are returned to the Monster Deck. Loot placed on it is added back to the player's Action Deck as usual. The Hero Quest card is added to the player's Action Deck, to be placed back in front of them at the start of the next session.
Hero Actions
Like Hero Quests, Hero Actions' icons and labels indicate which Hero type they upgrade.
Like all cards, once a Hero Action is in a player's Action Deck, it remains there until removed or until the campaign ends.
There are many different Hero Actions to discover, and upgrading your Action Deck with them is one of the main ways you can grow powerful enough to defeat the Boss Monster!
Loot
Loot cards are found in the Dungeon and can either be spent on Building actions or Appraised to add powerful Gear to a player's Action Deck.
Finding Loot
- Once there is a Dead End or Treasure Room in the Dungeon, the "Search" Basic Action can be taken to draw a card from the Loot Deck and place it into that Room. Each Loot card has an arrow icon in one corner; point it towards the Room it occupies in the Dungeon to keep track.
- Once Heroes know about Loot, they have to actually find it! A player with a Hero in the same Room as a Loot card can take the "Search" action on that card. All Heroes in that Room are rolled, then their new Faces are compared to the Loot's Search Target.
If any 1 Face rolled is lower than or equal to the number in the Search Target, the Loot card is added to the active player's discard pile.
If no Faces rolled meet the Search Target, nothing happens.
Spending Loot
When a player pays for an action's cost with Loot, they must return the listed number of Loot from their hand to the Loot Deck, flipping their cards to their Sunny sides first.
Some cards may be worth more than 1 Loot. These cards may be spent to pay for multiple actions whose Loot costs equal their Loot worth, or be used to "overpay" for a less costly action. Any "Loot remainder" from these cards is lost at the end of the active player's turn.
Appraising Loot
By discarding 4 other cards from their hand, a player can take the "Appraise" action to flip a Loot card in their hand to its backside, possibly adding a new piece of powerful Gear to their Action Deck.
Though the front side of every Loot card is the same, there are many surprises to be found on their backs! Collecting Loot and deciding whether to Appraise or spend it is one key way to become powerful enough to defeat the Boss Monster.
Encumbrance
Loot cards are added to a player's Action Deck through its discard pile and must be drawn into a player's hand before they can be spent or used.
Like other cards, Loot stays in an Action Deck between sessions.
Having too much Loot in your Action Deck can make it difficult to draw the actions you need, so manage it wisely.
Gear
Gear cards contain a variety of unique actions and effects that can be added to a player's Action Deck during the game to help them succeed.
Most Gear is on the backsides of Loot cards, and is obtained by Appraising Loot.
The Gear Deck
Some Gear cards have Gear on both sides. These are shuffled to form a Gear Deck during setup, and can only be bought from specific Specialist Buildings.
Upgrading Gear
Double-sided Gear cards can be Upgraded.
To Upgrade Gear, an undamaged Smithy must be in the Village. A player pays the Loot cost listed next to the Upgrade icon on the Gear card, then flips that Gear card over.
If a Gear card has no Upgrade icon, it cannot be Upgraded.
A Smithy Building can be added to the Village by completing a certain Village Quest.
Traps
Traps are dangerous surprises found in the Dungeon by Heroes searching for Loot.
Traps are shuffled into the Loot Deck at setup.
When a Trap is drawn from the Loot Deck (usually via the "Search" Basic Action), it is placed into a Dungeon Room. Each Trap card has an arrow icon in one corner; point it towards the Room it occupies in the Dungeon to keep track.
Disarming Traps
A player with a Hero in the Trap's Room can take the "Disarm" action:
All Heroes in that Room are rolled, then their new Faces are compared to the Trap's Disarm Target.
If any 1 Face rolled is lower than or equal to the number in the Disarm Target, the Trap card is flipped to its backside.
If no Faces rolled meet the Disarm Target, nothing happens.
Though Disarming Traps is dangerous, it can also be profitable.
Springing Traps
If a Trap is not Disarmed before a Monster with a matching Danger Icon is drawn from the Monster Deck, the Trap is Sprung. The active player must choose one of the Heroes in that Trap's Room to be Killed.
If no Hero is in a Sprung Trap's Room, nothing happens.
Traps remain in the Dungeon until Disarmed.
It's risky to leave a Hero in the same Room as a Trap! Bringing a group to help Disarm it is usually safer.
Dropping In or Out
Players can be added to, or removed from, a session of DIE in a Dungeon at any time.
Dropping In
To add a player in the middle of a session:
- Give them an Action Deck and have them shuffle it (reminding them not to flip any cards over).
- Have them roll their Heroes and place them into the Village Square.
The new player is inserted into the turn order according to where they are seated at the table. (Play proceeds to the left.)
Dropping Out
To remove a player in the middle of a session:
- Remove all of their Heroes from the game and set them aside.
- Collect all of their cards from their hand, their discard pile, and those played in front of them. Add them into their Action Deck, being careful not to flip any over. If the player has a claimed but incomplete Hero Quest, it is added to their Action Deck along with any Loot on it. Any Monsters on it are returned to the Monster Deck.
- Place their Deck cover card on top of their Action Deck and set it aside.
Continue play with the next player's turn!
Ending the Game
A session of DIE in a Dungeon can end in several ways:
- A Village Quest is completed. If the players Complete a Village Quest, the session immediately ends with a win for the players! Flip the completed Village Quest and add the Building on its backside to your Village. Then, follow the steps listed under "Leveling Up."
- The Boss Monster is defeated. If the players can Kill the Boss Monster (by winning a Battle against the backside of its card), congratulations! You have won your DIE in a Dungeon campaign! Celebrate appropriately, then follow the steps listed under "Before Your First Game" to reset the game and play a new campaign.
- All Village Buildings are Damaged. If every Building in the Village is on its Damaged side at once, the session immediately ends in a loss. Follow the steps listed under "Leveling Up."
- Too many Monsters. If a Monster needs to Spawn but cannot (either because the Monster Deck is empty, or because there is no available Room with Open Passages and no Entrance left to draw), the session immediately ends in a loss. Follow the steps listed under "Leveling Up."
- All Heroes are Killed. If all Heroes in the game are in the Cemetery at the same time, and no Heroes can be Resurrected, the session ends in a loss at the end of the current player's turn. Follow the steps listed under "Leveling Up."
In addition, a session can be ended at any time! Simply follow the steps listed under "Dropping Out" for each player in the game.
Leveling Up
After each session of the game:
- Collect the Buildings in the Village and add them to your Village Deck.
- Each player collects all of their cards (from their hand, their discard pile, and played in front of them) and adds them to their Action Deck, taking care not to flip any over. Any Monsters on claimed but incomplete Hero Quests are returned to the Monster Deck, and any Loot on them is added to the player's Action Deck along with the Hero Quest itself.
- Each player may flip 1 Basic Action in their deck to its Trained side. Trained Actions are more powerful versions of your Basic Actions.
- Players may trade Hero Actions and Gear in their decks with other players after each session.
- Each player places their Deck cover card on top of their Action Deck.
Be sure to keep Action Decks and your Village Deck separate and safe between sessions. This is how you save your progress in the campaign!
Narrative Mode
Try the following if you'd like to add more narrative flavor to your campaign (and play the game more like a solo tabletop RPG).
You can use a campaign log sheet to record your campaign, or make your own!
Before the Campaign:
- Name your Village.
- Give each of your Heroes a name.
- Name each Building in your Village, as well as its owner/operator.
- Record the year your Village was established.
After Each Session
- What was the most memorable event of the session? Write it in the log.
- If you earned a new Building, name it (and its owner/operator). A year passes. Record it.
- Any Heroes in the Cemetery at the end of the session are dead. Move their names to a list of venerated ancestors ("The Catacombs"). New Heroes of those types join your party. Name them.
- Any Heroes not in the Cemetery have survived. Mark it. If they've survived twice, they've raised an heir. If they've survived 5 times, they get to retire! Their heir takes their spot.
- If all your Buildings were Damaged, rename one of them. Write how its owner perished in the log. Record ten years passing.
- If the Monster Deck ran empty, monsters overran the countryside. Write how they were eventually pushed back. Record five years passing.
- Optionally, if you defeated the Boss Monster: Record 5d20 years passing. All of your Heroes retire; record how, and name new ones. You may keep all the Specialist Buildings you've added to your Village Deck or, if you like, roll d6 and remove that many Specialist Buildings randomly from your Village Deck. Either way, give them new owners/operators (perhaps some retired Heroes). Finally, follow the instructions under "Ending the Game" to set up a new campaign and keep playing!
Glossary
Terms
- Action
- Basic Action
- Building Action
- Hero Action
- Trained Action
- Action Deck
- Active Player
- Battle
- Battle Target
- Building
- Damaged Building
- Specialist Building
- Campaign
- Cemetery
- Damaged
- Danger Icon
- Dead End
- Devoured
- Disarm
- Disarm Target
- Dungeon
- Empty Room
- Entrance
- Face
- Gear
- Hero
- Archmage
- Berserker
- Mercenary
Icons
- Action, Hero In Room. An action that can only be used if a Hero is in the card's Room. Found on Buildings, Monsters, Traps, Hero Quests, etc.
- Action, In Battle. An action that can only be used during Battle.
- Action, In Hand. An action that can only be used if the card is in the player's hand.
- Action, No Hero. An action that can only be used if no Hero is in the card's Room. Found on Monsters.
- Action, Ongoing. An effect that is ongoing while its card is on the table.
- Action, On Monster. An action that can only be used once it is played upon a Monster.
- Action, On Table. An action that can only be used once it is played onto the table.
- Arrow, Adjacency. Used to designate adjacency between Rooms. Also shows the path Monsters will follow towards an Entrance.
- Arrow, Room. Points towards the Room a card is in.
- Battle. An action taken by players or Monsters.
- Danger Icon, Rage. A type of Monster. When one is drawn, all others of its type activate.
- Danger Icon, Ruin. A type of Monster. When one is drawn, all others of its type activate.