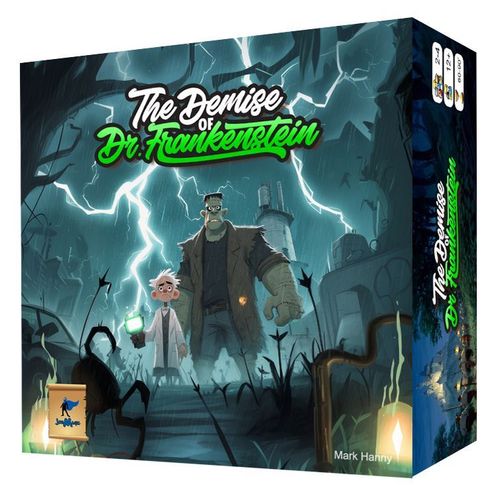
The Demise of Dr. Frankenstein
The Demise of Dr. Frankenstein Rulebook
Table of Contents
Table of Contents
Objective
Earn Victory Points through clinical research, collecting laboratory creatures, and stitching body parts together to re-animate into hideous Monsters. Have the most Victory Points after the mob of angry villagers comes to end your deeds once and for all to win the game.
Components
- Main Board
- Victory Point Board
- Starting Player Tile
- 32 Officer Cards
- Villager Meeple
- 8 Small Dice
- 1 Large Die
- 32 Player Blocks
- 42 Body Parts (colors vary)
- 20 Gold Tokens
- 1 Igor Pawn
- 4 "100 Victory" tiles
Setup
Each player selects a color and takes the 8 corresponding blocks of that color. Each player places 2 of their cubes on the zeroes of the Victory Point/Curator Board. Place the Igor pawn in the Clinician Grid of the Main Player Board on the upper left box showing Igor. Place the Villager Pawn on the number 1 of the Village Rage Track at the bottom of the Main Player Board.
Each player receives 2 coins, one arm, and one leg body part. Put all other body parts in the Undertaker Area and all coin tokens in the Trader Area of the Main Player Board directly above the Village Rage Track. Shuffle the Officer cards and place them in the middle of the table. Draw the top 3 cards and place them face up next to the deck for all to see.
Take one block of each color and draw one at random to determine the starting player. Give that player the beaker starting player tile. You are now ready to begin.
Gameplay
Division of game play falls into three terms:
- Player Turn: This is when a player selects their action dice and takes any actions they have available to them.
- Rolling Round: This begins with the rolling player rolling the influence dice and ends with the rolling player's second Player Turn of that round.
- Game Round: There is one game round per player during any play session. A Game Round begins with the Villager Pawn on 1 of the Village Rage Track (including at the start of the game) and ends with scoring and round reset when the Villagers burn down the players' labs.
Progression of Play
- Rolling Round: The starting player takes all 8 Influence Dice and rolls them. (6 dice in a 2-player game) That player places the dice on the corresponding numbers on the main board. These boxes show the people and places each player can attempt to influence on their turn.
For example: All sixes rolled are placed in the curator box, all fives rolled are placed in the officer box, and so on.
- Player Turns: After the dice are rolled the rolling player chooses one from the available options and takes the corresponding action. Only actions can be taken where there are dice available. Once all dice are removed from a box, that action is no longer available to other players. Play goes clockwise around the table until each player has taken a turn.
For example: Player 1 may take the only die from the Undertaker influence box (a 2 on the die). After removing that die from the board, the player can roll the Undertaker Die and take the body parts the roll grants them. With no more dice on the Undertaker Influence box, this action is not an option this rolling round for Player 2. However, on their turn Player 2 takes a die from the Curator Influence box (a 6 on the die) and selects an action from the Curator Area instead.
-
Reverse Player Turns: The last player to take an Influence Die in clockwise order then immediately takes a second one and performs that action. Player Turns are then performed in counter-clockwise fashion until the original rolling player takes his or her second action and the Rolling Round ends.
-
Check the Village Rage: If during the course of the rolling round a player performed an action that would anger the villagers, move the Villager Pawn one space to the right on the Village Rage Track. If the Villager Pawn reaches 4 on the track, proceed to the scoring phase and round reset (The angry mob has stormed your lab and burnt it to the ground.)
-
If the villagers have not formed a mob yet, play continues and the Influence Dice are then passed to the player to left of the previous round's roller. Repeat steps 1-4.
Not all villagers are always available to help you anytime you want them. Some are sleeping, some have been arrested for things you had them do the day before, and some are frightened and have taken a journey across the mountains to avoid involvement in your nefarious activities. Therefore, the die roll represents those villagers who are around and somewhat willing to assist.
Influence Actions
Requesting aid from Igor gives the player 2 actions, both of which are entirely optional.
a. The player MAY move the Igor Pawn up or down 1 level on the Clinician Track.
b. The player MAY move any one of his blocks already in play (on either the Clinician Grid or the Curator Area) to any other legal space, receiving the benefit of that space. A legal space is one that is not already occupied by another block or, in the case of the Clinician Grid, a space determined by Igor's level on the Clinician Track.
NOTE: Instead of action "b" a player may choose to upgrade a monster they have already built and put on the Monster Scoring Track. They must return any one body part to the Undertaker pool and can move a block they have on the Monster Scoring Track to the first open space down the track.
When visiting the Undertaker, a player rolls the Undertaker Die, checks the key on the Undertaker Area of the board, and takes the appropriate body part(s) that the roll grants them. However, for each block that player has on the Clinician Grid, they may adjust the value of their roll up or down by 1. IMPORTANT: Visiting the Undertaker is an action that will enrage the villagers. At the end of any rolling round where at least 1 player has visited the Undertaker, increase the Village Rage by 1.
Example 1: A player takes the Undertaker action and rolls a 3 on the Undertaker Die. This would give them a Torso from the pool of body parts.
Example 2: Let's say the player in the first example really needed a head to complete a Monster and they had 2 blocks in the Clinician Grid. They could adjust the Undertaker Die to a 4 (head) or a 5 (Take any 2) to claim a head instead of a Torso for their action.
Visiting the Trader allows you to take 1 gold from the Trader area.
Performing clinical research provides you with two available actions on your turn.
a. Place a block on any open square of the Clinician Grid provided the level is less than or equal to Igor's level on the Clinician Track. The primary function of these spaces are pure Victory Points during the scoring phase.
b. The secondary function of the Clinician spaces are to provide an alternate method to building a Monster. If you have at least one block on each column of the Clinician Grid, when you choose the Clinician action you may use a torso, head, and one arm or leg to build a Monster, placing a block on the lowest open space on the Monster Scoring Track (unlike the normal way of building a monster, this costs no gold and other body parts needed to complete the monster may be taken from the undertaker). You may perform this action on the same turn you first meet the Clinician Grid requirements after taking the "a" action.
IMPORTANT: Building a Monster is an action that will enrage the villagers. At the end of any rolling round where at least 1 player has built a Monster, increase the Village Rage by 1.
For the cost of 1 gold each, a player selecting the Officer may purchase up to 2 Officer cards. These cards may be from the face up display or drawn randomly from the top of the Officer Deck. Unless otherwise stated, cards purchased by a player immediately go onto their side of the table and they will begin benefitting from them right away. Any of the 3 cards purchased from the face up display are not replaced until the current player has finished his or her turn.
The constables who roam the streets are suspicious of your strange activities. They need monetary encouragement to look the other way, but your bribes also make them the perfect cover to make contact with less reputable associates, smuggle in your laboratory devices, and keep the sightings of your wandering creatures under wraps.
Visiting the Curator allows the player to place one of their blocks on any of the nine special action spaces in the Curator Area, provided that space is unoccupied. The player then immediately takes the action that space grants them.
NOTE (transcriber): The printed Curator text refers to nine special action spaces, but the printed Curator Area legend shows eight actions. They are transcribed below exactly as printed; no ninth action is supplied.
Roll the Undertaker Die and take the appropriate body parts without increasing Village Rage at the end of the rolling round. This counts as visiting the Undertaker for cards that affect that action.
Gain 1 VP for each body part and gold coin you currently possess. Score these VP immediately rather than during the Scoring Phase.
Move the Villager Pawn up or down the Village Rage Track by 1. If this would put the Villager Pawn on 4, the villagers will not burn down player labs (Scoring Phase/Round Reset) until the current rolling round is finished.
Take 2 gold from Trader Area. This does NOT count as visiting the Trader for cards that affect that action.
Discard 4 Officer cards you own and place a block on the lowest available space on the Monster Scoring Track. This alternate method of building a monster WILL increase the Village Rage at the end of the rolling round.
Purchase 2 Officer cards for 1 gold. This action may only be performed once (you cannot purchase 4 Officer cards for 2 gold, for example).
You may pay 1 gold for a roll of the Undertaker Die OR you may turn in 1 body part for 1 gold. This action may be performed as many times as you wish this turn.
Place a block on any open space on the Clinician Grid regardless of Igor's Clinician Level.
The village librarian is a respected member of the citizenry. What the townsfolk don't know about him is his unusual knowledge of macabre subjects and the museum of knowledge that is best forgotten he secretly curates. He is usually a willing accomplice in your undertakings and has some of the greatest resources and pull in town.
On your turn, rather than selecting a die and taking its corresponding action, you can take any die available for one of two actions.
-
If you have a fully constructed Monster (all 6 body parts), pay 2 gold and place both a block and that Monster on the lowest available space on the Monster Scoring Track. Building a Monster WILL increase the Village Rage at the end of the rolling round.
-
Immediately gain 2 VP. You may also optionally reshuffle the discarded and unpurchased Officer cards into the Officer Deck and place 3 new cards face up. Though you do not get any of the other benefits from the die selected if you use this option, it can be useful in situations where your options are not ideal.
NOTE: If at any time you need to place a block and you have no more in your reserve, you can free up a space you are already on and use a block you already have on the board. You can only move a block on your board if you have none remaining in your reserve (or you use the Igor action).
The Angry Mob
NOTE: The Village Rage cannot increase more than 1 level during the course of a rolling round through normal enraging actions (Undertaker, Monster Building). The exception to this rule is the Village Rage Curator Space. The action can be used to increase the Village Rage IN ADDITION to any increases that will happen at the end of the rolling round normally.
If, at the end of any rolling round, the Village Rage level is at 4 or all the spaces on the Monster Scoring Track are filled, the villagers grow fed up with your sinister doings and your abominations terrorizing them and they come bearing pitchforks and torches to burn your lab to the ground and you in it!
Scoring Phase
- Tally up the points you have accumulated in the Clinician Grid, making sure to include the bonuses for having 2, 3, or 4 blocks on any single level row. +1 points for two blocks on the same row, +3 for 3 blocks, and +6 for 4 blocks. (These bonuses are listed on the board as well.) Move your blocks on the Victory Point tracker to reflect these gains.
- Tally up the points you have accumulated on the Monster Scoring Track. Move your blocks on the Victory Point tracker to reflect these gains.
- Feed Your Creatures: If you have four or fewer Creature cards in your tableau, the price for feeding your creatures is zero as they will happily survive on the gruesome scraps in your lab. 5 or more creatures, however, require a payment in gold to keep them fed and happy. These amounts are reflected on the chart at the bottom of each Creature card. Any creatures you cannot pay to feed are discarded.
- Reference a Creature card chart to determine how many points you will earn based on how many creatures you own and have successfully fed this round. Move your blocks on the Victory Point tracker to reflect these gains.
- If every player has been in possession of the First Player Marker (beaker), then the game is over and you have all died in a fiery death. If not, then you have all escaped to steal corpses another day! The player with the First Player Marker passes it to their left and the round reset follows.
Round Reset
- Discarded and unpurchased Officer cards are reshuffled into the Officer deck and three new cards are displayed for purchase. Officer cards players owned remain in play.
- Clear all blocks except those on the Victory Point tracker from both boards and return to their respective players.
- Reset Igor to level 1 on the Clinician Grid.
- Reset the Villager pawn to level 1 on the Village Rage Track.
- Because you were forced to flee your lair, now engulfed in flames, if you have more than 3 gold coins and 3 body parts, you are forced to return the excess of each to the Undertaker and Trader areas.
- Disassemble any fully constructed and scored Monsters on the Monster Scoring Track and return the body parts to the Undertaker area.
- The new round begins. The player with the First Player Marker makes the first roll of this game round.
Game End: Meet Your Demise
When the Village Rage level is at 4 at the end of a rolling round and every player has been in control of the First Player Marker, the game ends. There is one final scoring phase and afterwards the player with the most Victory Points has proven to be the legendary Dr. Frankenstein-- a name that will go down in history! Everyone else? They're just a bunch of mad scientist schlubs! In the event of a tie, the player with the most body parts wins. If there is still a tie, the player with the most gold coins wins. If there is still a tie (come on, guys... seriously?), the player with the most Officer cards wins.
Note: If you exceed 100 points during any round, take a 100+ Point token and continue tracking your points from 0.
Frequently Asked Questions
Card Clarification: Cards that give players advantages are cumulative-- they can add together for an expanded effect. For example, if a player has the Abettor card and the Coadjutor card, he can roll for an extra body part and an extra resource when he chooses the trader (when he takes the die from box 3). Gaining body parts from the undertaker is random and determined by die roll.
The Polythew : This card allows a player to build a Frankenstein monster with one less body part or one less coin, but only when building a monster by choosing a die and paying with body parts and resources. This cannot be used when choosing the curator or the clinician to build a monster.
The Abettor: Allows a player to roll for a body part from the undertaker in addition to the resource he gets from the trader when he chooses the number 3 box. This does not anger the villagers since he did not choose number 2.
The Microscope: Allows a player to immediately take the top, unseen card from the officer deck and keep in his possession each time he builds a Monster.
Physiology: Allows a player to move 2 blocks when he chooses Igor. The player must have two blocks on the board to move them (the same block cannot be moved twice). A block cannot be placed on the same square vacated this turn by the player using this card. The blocks may be placed anywhere Igor would allow you to place a block from another part of the board.
Cavy: Allows a player to change any one small die to any number he wants after rolling all small dice. The player can only do this when he is the roller of the dice.
The Internist: Allows you to visit the undertaker and roll for a body part without raising the rage level of the villagers. Other players who visit the undertaker in the same turn will still raise the rage level as normal.
The Engineer: This allows a player to build a Frankenstein's Monster on any victory point number available. All other rules for building monsters must be followed.
Note: Monsters indicates Frankenstein's Monsters, Creatures are different-- they are on Officer Cards.