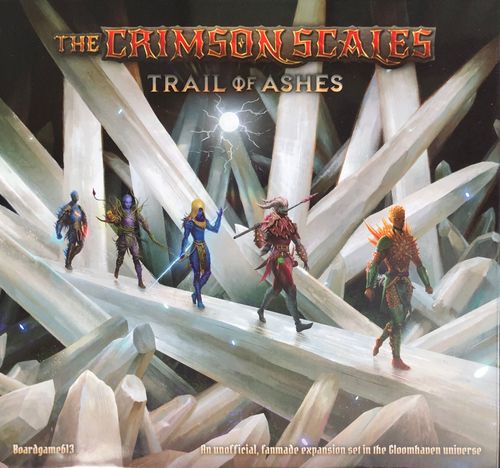
The Crimson Scales: Trail of Ashes
The Crimson Scales: Trail of Ashes Rulebook
Table of Contents
Table of Contents
What's Updated
Before you begin the new scenarios in Trail of Ashes, we need to cover which concepts are new, updated, or clarified in the expansion. If you are already experienced with Gloomhaven and familiar with the rules of Frosthaven, you can jump to the "Campaign Introduction" section on pg. 9 and reference any rules later, but it is recommended that you read through this section before starting the expansion.
Area Effect
A blank hex indicates a hex that functions as a blank spacer between other types of hexes, where a figure is unaffected by the ability, unless otherwise specified.
Attack
An attack is a single attack performed against one target, an attack ability is an ability that consists of one or more separate attacks, and an attack action is any action that contains at least one attack ability.
Attack Modification Order
As explained in Frosthaven, when an attack is performed, the base attack value written on the card can be modified in four different ways in the following order:
- All applicable attack bonuses and penalties, such as "+/-" effects, are applied. If there are multiple bonuses or penalties, the party chooses the order in which they are applied.
- An attack modifier card is drawn from the attacker's deck and applied.
- The target's shield bonus is applied.
- Ward and Brittle are applied. If the target has both conditions, they negate each other and are removed.
Once all modifications have been applied, the target suffers the resulting amount of damage. If the target has any abilities or effects which can negate a source of damage, including losing cards to negate damage, they may apply them now.
These steps are repeated for each individual target of the attack ability.
Attack Effects
An attack effect is an effect attached to an attack. These effects are applied either during damage resolution or after the attack resolves. If applied after the attack resolves, the attack effect is still applied even if the attack deals no damage (including due to a card).
The attacker must choose whether to apply any attack effects before they draw an attack modifier card.
Timing of Attack Effects:
| Effect | When it is applied |
|---|---|
| +X Attack | During damage resolution (must be applied) |
| Pierce | During damage resolution |
| +X Target, Elemental Infusions, Conditions, Forced Movement, Other Added Effects | After the attack resolves |
Added Effects: Some modifiers have added effects, besides modifying the attack value, and an attacking character can always choose whether to apply those effects after the modifier is drawn. Modifiers that affect a character's class-specific resources or abilities are always applied to that character, no matter which figure draws the modifier.
Elements
If an ability depicts multiple separate elemental consumptions of the same element, the acting figure chooses which one to activate. The same element cannot be consumed multiple times in a single turn. If an action depicts elemental (or resource) consumptions in the upper left corner, all of those elements (or resources) must be consumed to perform any part of the action.
A mixed element, which depicts two elements within the same border, represents one of those two elements (but not both of them). When a mixed element is infused (generated), at the end of their turn, the acting figure chooses which of those elements to infuse (generate).
Flip (Items)
Introduced in Frosthaven, the flip icon means the item is flipped after use, revealing a different use on the other side of the card. When the other side is used, the item is then flipped over back to its front side to be used again. The specific timing of when to flip the card is detailed in its text. Characters should always start the scenario with these items on the side with the gold cost.
Conditions
Brittle is a negative condition introduced in Frosthaven. When applied to a figure, the next time it suffers damage from any source, it causes the figure to instead suffer double that amount of damage. Brittle is then removed from the figure. Brittle is also removed if the figure is healed.
Note: A single heal can remove any combination of Brittle, Infect, Poison, Rupture, and Wound (including Bane from Frosthaven) from a figure. However, if the figure has Poison, the hit point increase from the heal is prevented.
Dodge is a positive condition which can only be gained by characters and allied figures. When applied to a character, the next time they would be targeted by an attack, before modifiers are drawn, they may discard one card from their hand, or lose one card from their discard pile to prevent the attack; the attacker draws no attack modifier cards, and any effects or conditions from the attack are negated. Dodge is then removed from the character after the attack.
Any character that can lose a card to negate a source of damage to another figure may discard one card from their hand, or lose one card from their discard pile to prevent the attack instead, if that figure has Dodge.
If a figure with Dodge is targeted by an attack by an enemy immune to Disarm or Stun, remove Dodge before it takes effect, and then perform the attack.
Empower is a positive condition. When a figure is empowered, they must shuffle an empower card from the acting figure's personal supply into their attack modifier deck. If the empowered figure does not use an attack modifier deck, Empower has no effect. When an empower card is drawn, it acts as a positive modifier and is returned to the personal supply of the figure it came from once resolved, indicated by that figure's class icon, instead of being placed into the discard pile. If there are no empower cards available in an acting figure's personal supply, Empower has no effect.
Whenever an empower card is drawn by a character or one of their allies with Disadvantage, or by an enemy with Advantage, it is considered to have a +2 value when determining which modifier is used.
Enfeeble is a negative condition. When a figure is enfeebled, they must shuffle an enfeeble card from the acting figure's personal supply into their attack modifier deck. If the enfeebled figure does not use an attack modifier deck, Enfeeble has no effect. When an enfeeble card is drawn, it acts as a negative modifier and is returned to the personal supply of the figure it came from once resolved, indicated by that figure's class icon, instead of being placed into the discard pile. If there are no enfeeble cards available in an acting figure's personal supply, Enfeeble has no effect.
Rupture is a negative condition. The figure suffers 1 damage at the end of each ability where it moves at least one hex. Rupture is removed when the figure is healed. If a figure is targeted with an ability with Rupture and a forced movement effect (e.g., Push), Rupture is applied first. A figure immune to Wound is also immune to Rupture.
Overlay Tiles
Overlay tiles are placed on top of map tiles to provide additional features for the scenario. The type of overlay tile is defined by the colored border of the tile, as depicted in the scenario book, not necessarily the illustration on the tile.
A hex with no overlay tiles is considered featureless. A hex with no figure is considered unoccupied. A hex with neither overlay tiles nor a figure is considered empty.
Tokens are not overlay tiles.
Manipulating Tiles
As explained in Frosthaven, manipulating tiles is any ability that allows a figure to alter the layout of overlay tiles on the map. There are six ways to manipulate tiles:
- Create: Allows a figure to place an overlay tile.
- Destroy: Allows a figure to remove an overlay tile.
- Relocate: Allows a figure to remove an overlay tile and place it elsewhere.
- Move: Allows a figure to move an overlay tile up to the specified number of hexes, much like a figure would move. Overlay tiles can only be moved through featureless hexes, including occupied hexes.
- Replace: Allows a figure to destroy an overlay tile in order to create a different overlay tile in the same hex.
- Spring: Allows a figure to destroy a trap and apply the effects of the trap to themselves, unless otherwise stated.
No hex can have more than one overlay tile in it (except corridors and open doors). Traps cannot be placed in occupied hexes. If hazardous terrain is placed in an occupied hex, its effects are not applied to the figure in that hex.
Perks
Perk Boxes
The number of unlinked boxes shown next to the perk list indicates the maximum number of times that the perk can be gained, with each box requiring one perk mark. Gold perks can be gained once. Some perks instead have multiple linked boxes, and all of these boxes must be filled with perk marks to gain the perk once.
Perk Reminder Card
If a perk provides the character with any other benefit unrelated to their attack modifier deck, they can keep the relevant perk reminder card in their active area as a reminder.
Milestones
Once you unlock a character class, you will find a Milestone Card along the other components of the character. This card represents a unique challenge for the character to complete. During the scenario, each time you meet the criteria of the card, gain one checkmark to the milestone. The checkmarks are gained regardless of whether the scenario is completed or lost.
If the character has gained all checkmarks for the milestone during a scenario, when the scenario is over, they will follow the instructions as specified at the bottom of the card.
A milestone card has the following:
- Details for how the milestone can be achieved.
- Outcome after completing the challenge.
- The name of the milestone.
- The icon of the character's class.
Campaign
Unlocking Classes
The classes of Trail of Ashes are unlocked through personal quests or campaign progression. Shuffle the cards from the expansion in to your current personal quest deck.
Retiring Characters
When a character retires from fulfilling the requirements of their personal quest, if the specified class on the card is already unlocked, the party instead gains a random side scenario and random item design. When you complete a personal quest, remove that card from the game.
Scenario
Allies
Certain figures are allies of the party. Each ally is represented either by a monster standee, in which case their stats are defined by their monster stat card, or by a numbered scenario aid token, in which case their stats are defined by the scenario rules. Allies are not controlled by any character, obeying automated monster rules instead.
Equations
Certain variables, such as hit point values for objectives or named monsters, are determined by equations. These equations can depend on scenario level (L), number of characters (C), or maximum hit point value of a monster of the relevant type and rank (H).
Kill Credit
Certain battle goals, personal quests, and abilities require characters to track their kills. Summons and spawns pass credit for their kills to their summoner.
If a monster dies from damage caused by an attack, retaliate bonus, or suffer damage ability, the figure who caused the damage gets credit for the kill. If a monster dies from damage caused by rupture or a negative hex due to forced movement, the figure who caused the forced movement gets credit for the kill.
If a monster dies from damage caused by wound, bane, another monster, or a negative hex or rupture due to voluntary movement, no kill credit is given.
Section
Any time you see the section book icon in Trail of Ashes, read the specified section in the Scenario Guide (this book). The number after the book icon is the specific page number, and the letter is the specific section on that page.
Unlocking Envelopes
New content is unlocked through progression in the campaign or character retirement. Each new piece of content has a corresponding sealed envelope, labeled with a symbol, e.g., M.
When you are instructed to unlock an envelope, you are free to open it and inspect the contents. Any content that is not available at the start of the campaign (incl. content from The Crimson Scales), e.g., tuck boxes or envelopes, is considered to be locked (sealed) content. To indicate which content is locked, affix a red seal sticker (see Setup Guide) to the necessary components in the game.
Campaign Introduction
Talo, the elderly Inox Shaman stares into the middle distance for a long time before spitting on the ground and rubbing it into the dirt with her staff. At Councilman Raksani's insistence, you have traveled day and night to be here. The trouble is, no-one appears to have told the shaman about the urgency.
"Smoke spirits. On'y emerge with the ember crystal, they say. Not to be trifled with, yes? But you'll find out soon enough"
"'S happening," she says after another interminable pause, nodding towards the horizon; her jaw furiously working on the leaves she was chewing into a paste.
You look at each other. Shamans tend to look out for themselves and are not to be trusted. The volcano is at least two days' travel; a long way for a folk tale. And you could easily tell Raksani that you couldn't find the tribe and forget all about it.
Following her gaze, you see that the distant volcano that has been sputtering for weeks has now fully erupted, and that a large storm that has swept in from the Misty Sea is now funneling lightning through the smoke column into the chamber itself.
"First time in three generations," she continues, her eyes narrowing and swilling the leaf pulp around his mouth. Wanting to know more without having to ask, you raise an eyebrow. It does the trick.
"The storm and the eruption. That Lightning's what makes the ember crystal, isn't it, yes? Very valuable, those. Your Valrath friend will pay big money, yes? Enchanters too, I'd wager."
With this she dissolves into wheezy chuckles and stomps away, leaning heavily on her staff.
You reflect on all these reasons not to investigate as you turn towards the volcano and start walking despite your better judgment.
Rewards
Party Achievement: Follow the Trail
New: The Dark Valley 67
"Three days. That's all you've got, so best hurry. There'll be others taking them anyway unless you're quick. And mind the guardians too, yes?"
You are now ready to begin playing the scenarios in Trail of Ashes, which continues your mercenary career from the Crimson Scales and can be played at any point in your campaign. From this point onward, the book contains content that is considered part of the campaign experience, and it is recommended you do not read ahead as to not spoil any of the content.
At this you can't help but express curiosity. "Guardians?"
Go to scenario 67 on the next page to begin the expansion.
The Shaman spits the ball of chewed leaves onto the floor and peers at it, before poking with her staff again.
Scenario Guide
Scenario 67: The Dark Valley
Requirements: Party Achievement "Follow the Trail" COMPLETE
Scenario Goals: When all enemies are dead, the scenario is complete. Read 11.C at the end of that round.
Introduction:
After a full day's uneventful walking with tired legs, empty stomachs, and short tempers, your thoughts turn to making camp and resting, when the track you have been following along a small river turns sharply and drops to your right. With thick stands of trees on either side, all grumbling is forgotten as you all think the same thing—this is an ideal spot for an ambush.
You silently creep forward on high alert, skirting the area between the trees and the riverbank, when something entirely unexpected happens.
Barely an arm's length in front of you, a small group of Vermlings emerge from the bushes. Holding your breath, you watch as they scamper forwards, their comfort with the habitat clear as they effortlessly move through the scrub despite their small size. However, no Vermlings live this far north, and they usually inhabit much larger forests. This pack is very far from home—are they also looking for the ember crystals?
They also sense something. Together as one, they freeze; ears pricked and bows tense—but not in your direction. A thick cloud of smoke flows up the river, before swirling into several vortices and then twisting into a recognizable—and terrifying—shape.
"Turn back!" the gaseous figure bellows. Its form constantly shifts, wisps of its smoky body curling up and twisting. The forest floor smolders as it leaves a trail of ember and ash behind it. "The fire stones do not belong to you!"
The Vermlings do not reply, but ready their attack. And then you take the smallest step back and knock a huge rock into the river. All eyes turn to you. The Vermlings sense a rival; the Smoke Spirits sense a greater foe.
Special Rules: All characters start with MUDDLE (icon) as a scenario effect.
Section Links: When a door (icon) is opened, read 11.A.
Scenario Setup:
- Deep Terror (monster)
- Smoke Spirit (monster)
- Spitting Drake (monster)
- Vermling Scavenger (monster, marked with a star icon)
- Log: 2
- Bush: 2
- Stump: 2
- Treasure Tile: 1
- Light Fog: 2
- Large Earth Corridor: 2
- Hot Coals: 5
Map Layout: Dib, C2a, A4a, Bib, Lib (tile codes as printed on the map).
11.A
As you march forward, you find smoldering bushes which are slowly burning out. You hear a snarl from a Vermling on your side, and from the distance hear the shrill cry of one-eyed creatures with burn marks and scorched tentacles wrapping around the remains of a blackened log.
The Smoke Spirits' movement leaves a trail of ashes behind them as they spread out, to the detriment of the diminishing wildlife in the area. You haven't seen anything like them before, but you're not going to let them wreak any more havoc.
Section Links: When a door (icon) is opened, read 11.B.
11.B
Turning into another clearing, you see another group of smoke spirits rise up, formed from the smoke of an intense fire burning in the undergrowth—and behind it, a flight of spitting drakes. It never rains, but it pours.
11.C
Conclusion
Having emptied the clearing, you can finally relax. But sleep does not come easily. It seems the old shaman was right; the creatures you saw had to be the Smoke Spirits she spoke of—they even mentioned a 'fire stone'; could that be their name for the ember crystals? As for the Vermlings, do you have rivals for this mythical treasure?
Rewards: New: Rival Explorers 68
Scenario 68: Rival Explorers
Requirements: None
Scenario Goals: When all Ancient Artillery are dead, and every character is on, or exhausts on, (exit icon), the scenario is complete. Read 14.B at the end of that round.
Introduction:
You wake early, the morning light interrupting fitful dreams of monsters made of smoke and vicious little forest creatures. As you come round, you start to remember the events of yesterday and become less sure if that was a dream after all, or if it was just a memory.
Feeling uneasy and disorientated, you quickly pack up and pick up the trail you were following towards the angry looking storm on the horizon—the heavy tree cover temporarily blocking your view of the volcano.
The morning is bright and the forest is quiet; even the birds seem subdued. There is just one insistent alarm call that you can't quite place. This call moves with you for a few minutes, always coming from somewhere just ahead, and always urgent, clearly alerting others of its species.
Just as you approach a rickety bridge across a deep ravine, you see a couple of small creatures bounding away through the brush to your left—Vermlings! You give chase, leaving the path temporarily in order to catch the band. Presumably they're from the same group you encountered yesterday.
You sprint after the Vermlings into a clearing. As it opens up, the Vermlings melt away into the trees on the far side, and a shout goes up from nearby. Next thing you know, projectiles are falling all around you—the Vermlings have rigged up some kind of catapult and are firing all kinds of rocks and forest debris!
Ducking the worst of it, you quickly glance around. There are catapults and Vermlings everywhere. You stand little chance of surviving this trap—you have to get to the bridge before they secure it, bring it down, or bury you under flying rocks.
Special Rules:
Vermling enemies do not draw ability cards. Instead, they perform "Move 2, Attack -1" at Initiative 50 every round. These Vermlings always move towards the exit marked (exit icon), regardless of enemy focus, moving through traps when there are no other valid paths.
If any Vermling enemy reaches the exit, the scenario is immediately lost. If any character becomes exhausted not on an exit marked (exit icon), the scenario is immediately lost. Vermling Shamans act before Vermling Scouts.
Section Links: When a character or character summon enters the M1a tile, read 14.A.
Scenario Setup:
- Ancient Artillery (monster)
- Smoke Spirit (monster)
- Vermling Scout (monster)
- Vermling Shaman (monster)
- Man-made Stone Corridor: 1
- Large Man-made Stone Corridor: 2
- Immobilize & Poison Trap: 4
- Boulder: 5
- Large Boulder: 1
- Huge Boulder: 1
- Treasure Tile: 1
Map Layout: M1a, H3b, F1a, A4b (tile codes as printed on the map).
14.A
Special Rules: Spawn one normal Smoke Spirit on each hex marked (icon). For three characters, one of these Smoke Spirits is elite. For four characters, both are elite.
You can barely see the bridge up ahead through the smoke as you approach the clearing area. Moving forward towards the last of the catapults, you see two figures take shape through the smoke. You feel the pressure to clear the bridge area quickly before the smoke consumes you.
14.B
Conclusion
You race across the bridge, setting it ablaze as you make it to the other side. The rotten treads are dry and brittle and the fire takes quickly. In just a minute or two, the bridge collapses into the river far below, forcing a couple of Vermlings who were trying to brave the flames to leap back to safety. As they curse you and try to reconfigure their catapults so that they can fire across the gorge, you quickly move onwards. It is at least a day's journey to a safe crossing, so you are rid of the Vermlings for now. But what else awaits you, even before you try to pull crystals out of a live volcano? You'll be having words with Councilman Raksani when you return to Gloomhaven.
Rewards: New: Shaman Chaperone 69
Scenario 69: Shaman Chaperone
Requirements: None
Scenario Goals: When Talo ends her turn on an exit (icon a), the scenario is complete. Read 14.E at the end of that round.
Introduction:
Having escaped the Vermlings with their catapults and evaded the Smoke Spirits' attempt to stop you from reaching the volcano, you are hoping for a chance to catch your breath—or at least an hour or two of quiet walking. However, it seems that you are not so lucky.
There are clear signs of recent fighting here; arrows are embedded into trees on both sides of the path. As you go further, there are worrying pools of blood, and torn and bloodied strips of clothing and strapping that look to be of Inox origin. You become aware of animal howling and roaring in the distance, and closer, cries of pain. Following the cries, you find an elderly Inox slumped against a tree with a roughly bandaged but still bleeding leg. With a shock of recognition, you realize it is Talo, the same Shaman that Raksani sent you to meet.
Gritting her teeth through the pain, Talo looks up and acknowledges you. "So it's you again, yes? Goin' to need a hand I think. Pass my staff?" Astonished, you ask her what he's doing here, while helping her slowly to her feet. Looking only slightly embarrassed, she shrugs.
"Told you there'd be lots of people interested. The more chasing the prize, the harder it is for the Spirits. You made for a good diversion, yes?" You say nothing as you look at the Inox arrows embedded in the trees and Talo's ruined leg.
Talo reaches for her pouch of leaves and starts to chew thoughtfully. "Shame you couldn't distract the wolves too. Big pack of them, yes?" As if on cue, a great howling begins from over a nearby hill, followed by a battle cry in response. "That's the sound of my brothers and sisters," Talo says with a proud smile, leaning heavily on her staff. "Help an old Inox reach her family, and we'll help you?"
As Talo has just told you that she used you to draw the Smoke Spirits away, you have no intention of helping her. You pull her to her feet and start to walk away, but the wily old shaman calls after you, "Someone told you how to get into the chamber, yes?"
You pause, and look at each other. Can you trust her? Do you have a choice? You quickly cut a deal—you will get Talo back to her tribe, and she will tell you how to get to the ember crystals once you reach the volcano.
Special Rules: Talo is an ally to you and enemy to all other monster types. Talo draws from whichever attack modifier deck you prefer. If Talo is killed, the scenario is immediately lost. Talo always moves forward toward the exit marked (exit icon a) on the B1b tile, opening doors and springing traps when necessary, regardless of enemy focus.
All characters start with CURSE (icon) as a scenario effect.
Section Links:
- When door (icon 1) is opened, read 14.C.
- When door (icon 2) is opened, read 14.D.
Scenario Setup:
- Cave Bear (monster)
- Talo (ally)
- Earth Demon (monster)
- Hound (monster)
- Inox Shaman (monster)
- Vermling Scout (monster)
- Rubble: 3
- Light Fog: 2
- Water: 8
- Earth Corridor: 1
- Bush: 2
- Large Earth Corridor: 2
- Stump: 2
- Damage Trap: 3
- Treasure Tile: 2
Map Layout: H2b, F1b, B1b, G1a (tile codes as printed on the map).
14.C
Rounding the corner you see several large hounds. Talo hobbles after you and calls, "I see we need to pick up the pace... you take care of the wolves, and I'll take care of you, yes?"
14.D
You crest the hill and Talo cries out in joy as she sees the others from her tribe, backed against a sheer drop by a small group of Vermlings. You, however, look the other way and see several more of the wolves. You have succeeded in finding Talo's tribe, but you are also trapped by the quickly circling wolves. As the Inox tribe members return the cry on seeing Talo, you realize that she wasn't lying, and at least you have some help.
Special Rules: The Inox Shamans are allies to you and your allies, allies to each other, and enemies to all other monster types. They draw from the monster ability deck.
14.E
Conclusion
As you slay one of the few remaining hounds, the rest turn tail and flee. You quickly reunite Talo with the rest of her tribe. Talo is extremely grateful and thanks you profusely, but you want more than her words of gratitude. "So, you still want those stones, yes?" she says, chewing away on her leaves.
"OK, we made a deal, so no tricks. 'Tis great pressure that creates the crystals, yes? That pressure has to go somewhere, so out it pops—through the side. You'll find a small hole, just big enough for a young'un, somewhere near the base of the slope. That's your way in. No tricks." You shake hands, and as you are about go on your way, Talo places her staff in your hand. "Take this, it will help protect you on your way. I'll craft another with my tribe; you now need it more than I."
You can't help but like the old Shaman, but you also hope that you don't cross paths again soon.
Rewards: +1 Prosperity. Gain "Talo's Staff" (Item 109). New: Spirits Rising 70
Scenario 70: Spirits Rising
Requirements: None
Scenario Goals: When all Spirit monsters are dead, the scenario is complete. Read 17.C at the end of that round.
Introduction:
Tired and bruised from your travails of the past days, your party is finally getting closer to the volcano. The smoke and the still-raging storm have brought an eerie twilight, although it cannot be far past midday. As well as blocking out the light of the sun, this darkening also highlights the flames that are belching from the red hot magma below and, now you are closer, you can see glowing streams of lava flowing down the volcano's side.
Transfixed for a second by the sight of the liquid rock, your attention is brought back to the clearing you stand in. A trail of ashes has led to a small fire breaking out on the far side of the clearing, and the Smoke Spirits are forming again from the thick clouds rising from the fire. If anything, they seem larger and more determined to stop you than before. However, having come so far, you are not considering turning back, as close to the volcano and its secrets as you are.
Special Rules:
Hazardous terrain is also considered difficult terrain.
Water Spirits ignore all movement penalties from difficult terrain.
All characters start with POISON (icon) as a scenario effect.
Section Links:
- When door (icon 1) is opened, read 17.A.
- When door (icon 2) is opened, read 17.B.
Scenario Setup:
- Bandit Archer (monster)
- Water Spirit (monster)
- Forest Imp (monster)
- Smoke Spirit (monster)
- Vermling Scavenger (monster, marked with a star icon)
- Hot Coals: 3
- Stump: 1
- Light Fog: 1
- Water: 14
- Tree: 1
- Stone Door: 2
- Rock Column: 1
- Treasure Tile: 2
- Thorns: 2
- Stalagmites: 2
Map Layout: K1b, L3a, M1b (tile codes as printed on the map).
17.A
You make your way into a passage off the side of the volcano. The floor is filled with puddles that seem to be bubbling from the heat underground. Toward the center of the passage, you see the water rise up and take form. The spirits don't seem pleased to meet you here.
Section Links: When door (icon) is opened, read 17.B.
17.B
You break through the tree line to the edge of a small lake. One of the streams of lava is flowing directly into the water, and the surface hisses and bubbles as it is boiled instantly by the molten rock.
As you watch, the hissing and boiling grows steadily more intense and violent, until the water rises up into the shape of a Water Spirit. As you watch, it is joined by others, the towers of churning liquid, moving inwards in an attempt to prevent you from wading across the lake. The Water Spirits join with the Smoke Spirits to prevent you going forward.
Section Links: When door (icon) is opened, read 17.A.
17.C
Conclusion
As the last of the spirits is vanquished, the forest creatures melt away and you get an unobscured view of the magnificent and terrifying mountain of flame. If you can somehow get into the main chamber, you'll get to see these ember crystals that Talo spoke of. They had better be worth it.
Rewards: Add Road Event 61 to the deck. New: Embers of Corruption 71
Scenario 71: Embers of Corruption
Requirements: None
Scenario Goals: When both Vanquishers are killed, the scenario is complete. Read 19.C at the end of that round.
Introduction:
The huge volcano stands before you - long thought to be dormant, but now very active—with the electrical storm still rumbling overhead. As the rain hisses on the rivers of hot lava, you carefully work your way around the base, seeing how you can access the volcano's chamber and finally get to see the fabled ember crystals.
You carefully pick your way around the slopes, looking for a blast-hole in the side, as Talo described.
You are beginning to curse her for lying to you, when you take notice of a hole a few feet across with a small stream of lava gently flowing out of it. With extreme care, you make your way around the molten rock and inside the volcano itself. The small entrance opens up to a stunning network of caverns—the chambers of which are filled with huge and beautiful quartz-like pillars that crisscross each other at all angles, like a complex crystalline bird's nest. Some of them are even more special; these seem to glow from the inside, and shift from a blood-red to almost black. This is exactly what you've wanted to see. You walk through the cave system, unable to stop touching the crystal in the rock—which feels slightly warm.
A narrow cave opens up on both sides to a much larger chamber that is almost like a shelf over the magma chamber itself. It is dramatically lit from below and, as the magma bubbles and flames, a sudden light shows that you are not alone. Two large Valraths are in the chamber—and though it is not clear whether they are protecting the ember crystal, or harvesting it themselves, with their thick armor and spiked weapons, it does not look like they plan to be friends.
Scenario Setup:
- Smoke Spirit (monster)
- Valrath Vanquisher (monster)
- Natural Stone Corridor: 2
- Large Natural Stone Corridor: 4
- Hot Coals: 6
- Crystal: 2
- Treasure Tile: 2
Map Layout: J2b, G2a, J1b (tile codes as printed on the map).
Section Links: When both Vanquishers are reduced to below one hit point, read 19.A.
19.A
The huge Valraths are extremely strong and powerful, and it takes everything you have to slay them. As they lay fallen on the ground with their eyes closed, the crystals start go glow from underneath their bodies. Their eyes suddenly open wide, and as they slowly rise back up on their feet, you hear an unfamiliar voice call out from behind.
"Begone, Vanquishers!" the unfamiliar voice shouts as you see an Orchid, daggers in hand, spring forward. Seeing the worry in your eyes, he turns to you and lets out a sigh. "These Vanquishers have destroyed my home, this crystal Orchid garden, and drove away my family—all in the name of harvesting the corruption of the ember crystals. They have not been able to manifest the corruption, and it has driven them mad.
I am a proud Shardrender, and I have returned to protect these crystals and destroy the Vanquishers before they can cause any more harm. Join me, and together we will put an end to this madness."
The Vanquishers let out a large battle cry as blood pours out from their wounds. They charge toward you, maces in hand, and you brace yourself for combat.
Special Rules:
Immediately open Envelope S.
Spawn the Shardrender in one of the starting hexes. Prepare its standee, statistic card and deck of 6 cards. The Shardrender is an ally to you and your allies and an enemy to all monster types. It draws from whichever modifier deck you prefer.
Spawn one Vanquisher on each of the hexes marked (icon c). Increase C by +1 when determining their hit point value. They draw from the Enraged Vanquisher Ability Card deck consisting of two sets of four cards, marked with letters (A, B, C, D) and the number zero (0). Set aside the four numbered (0) cards for now. The Vanquishers draw one lettered ability card per round, performing all actions, top to bottom, of the card.
Spawn one normal Smoke Spirit on each hex marked (icon b). For three characters and four characters, also spawn one elite Smoke Spirit on one hex marked (icon c). For four characters, spawn one elite Smoke Spirit on both hexes marked (icon c) instead.
Section Links: When one Vanquisher is killed, read 19.B.
19.B
The Vanquisher lets out a sorrowful cry at the sight of his fallen brother. You almost feel bad for him, but his bloodshot eyes turn to you and he clenches his fists. There's no time for empathy; as the Shardrender previously said, it's either your lives or his.
Special Rules:
The remaining Vanquisher removes all negative conditions from Self, then performs "Heal L+C self" (icon). It is now immune to all negative conditions.
Shuffle the set of numbered (0) cards in to the Enraged Vanquisher ability card deck. At the start of every round, the remaining Enraged Vanquisher plays its top two cards face-down and reveals them normally, using the first as its lead card for initiative. During its turn, it performs the top action of the first card, then the bottom action of the second. If the Enraged Vanquisher plays a lettered card (A, B, C, D), it performs either the top or bottom action of the card depending on which actions has its standee number, and then the other action of the second.
19.C
Conclusion
The second Vanquisher falls, and the crystals in the area slowly dim until they are no longer glowing. You understand why these geological wonders are in so much demand, and the old Shaman was right; you'd make a tidy sum from selling these jewels, irrespective of what Enchanters or Quatryls could use them for in their chemical or mechanical concoctions." Leave this place be," the Shardrenders says as he places his daggers back into their sheathes.
"The sanctity of this home will remain preserved, and the corruption cannot be harnessed by those who cannot contain it. Lest you desire to be driven to madness, as were these Valraths."
As you look around, tempted to harvest these precious minerals, the Shardrender extends his hand toward you. "I can see the disappointment in your eyes. However, you have not traveled for naught. Allow me to join you on your journey, and we will leave this trail of ashes behind us forever.
Rewards: Unlock Envelope (icon)
Scenario 72: Inox Salvation
Requirements: None
Scenario Goals: When all Stump tiles are placed on an exit (icon a), the scenario is complete. Read 22.A at the end of that round.
Introduction:
"Help! Save us! Quickly!"
The peace of a sunny summer morning is shattered by the increasingly urgent shouts for help. Heading quickly in their direction you see smoke, and then a wildfire heading straight for an Inox camp.
Worse, it looks like the majority of the tribe are out hunting, leaving behind only the children and those too old or frail to join the hunt.
"Help us! It's getting closer!"
The fire is spreading, jumping from tree to tree and racing through the undergrowth. A couple of enterprising young Inox are tearing at the ground to make a rudimentary firebreak, but the area around the camp is quite heavily wooded. To save the camp, you'll need to cut down the trees, while the young Inox dig up the ground between them.
"Hurry!" As you rush to cut down the trees, you hit another problem; alerted by the shouts or pushed out of the forest by the fire, a range of demons and spirits stand between you and the camp. You also see a rival Inox attempting to light a torch held by another; they must be responsible for this fire.
Forced to choose between defending the camp from the fire and yourself from the monsters, you grab your weapons and head towards the blazing forest.
Special Rules: All characters start with POISON (icon) as a scenario effect.
Section Links: When door (icon 1) is opened, read 21.A.
Scenario Setup:
- Earth Demon (monster)
- Flame Demon (monster)
- Inox Archer (monster)
- Smoke Spirit (monster)
- Light Fog: 1
- Earth Corridor: 2
- Large Earth Corridor: 3
- Stun Trap: 4
- Hot Coals: 4
- Log: 1
- Bush: 2
- Stump: 3
- Tree: 3
- Treasure Tile: 1
Map Layout: B1b, F1b, M1b, D1b (tile codes as printed on the map).
21.A
As you make your way deeper into the forest, you turn to your right to see the smoke is getting thicker and taking form around the burning trees.
"The demons are coming! Help!" you hear the children cry out. You look towards your left and see a group of demons blazing forward, leaving a trail of ashes in their path. You realize that you can kill two birds with one stone and use the stumps from the burning trees to block the path from the demons before they can reach the camp.
Section Links:
- For two characters, after one stump has been placed or all trees have been cut down: Read 21.B.
- For three and four characters, after two stumps have been placed or all trees have been cut down: Read 21.B.
Special Rules:
The tree obstacles each have (L+C) hit points. The trees can only be destroyed this way and cannot be moved. For two characters, do not set up the tree marked (icon).
When a character destroys a tree, remove it from the map and place a Stump obstacle in the characters active area. If a character summon destroys a tree, place the stump in the active area of the character who owns it. A character may not have more than one stump in their active area at a time. If a character that already has one stump in their active area would receive kill credit for destroying a tree, the tree is reduced to 1 hit point instead of being destroyed.
If a character ends their turn on an exit hex marked (icon), remove all overlay tiles and tokens from the hex. Then, the character places the stump from their active area onto the hex marked (icon). These stumps cannot be moved or destroyed.
If a character becomes exhausted while holding a stump, the scenario is immediately lost.
21.B
As you wipe the sweat from your brow, you feel the ground shake as more demons approach, seemingly from out of nowhere. Two rival Inox wielding torches pop out from the bushes. Time is running short; you have to act quickly if you're going to put an end to this madness.
Special Rules:
Spawn one normal Earth Demon on one of the hexes marked (icon), and one normal Flame Demon on the other hex marked (icon). For three and four characters, the Earth Demon is elite. For four characters, the Flame Demon is elite.
Spawn one normal Inox Archer on each of the hexes marked (icon). For three and four characters, one is elite. For four characters, both are elite.
22.A
Conclusion
As you fell the trees and beat back the demons, the young Inox beat out the flames and dig a firebreak to keep the deadly flames from their camp. You finally complete the task and fall, exhausted, to the floor, covered in soot and blood.
A few minutes later, the hunting party returns and, seeing how you have saved their camp without a single child or elder harmed, they invite you for a well deserved meal with them. As you leave, they thank you again, and press a pouch of coins into your hands.
Rewards: +1 Reputation. Gain 20 collective gold.
Scenario 73: Lootpalooza
Requirements: None
Scenario Goals: When the Lootbot is rescued, the scenario is complete. Read 24.A at the end of that round.
Introduction:
Several of the buildings near the University are rented by current and former students, and it is not unusual to hear explosions and other strange noises from the area. Therefore, you are not surprised when you encounter a sooty and panicked Quatryl rushing towards you as you walk past the University one afternoon.
"Ah, good fortune at last! Please help me, they have my Lootbot! My Lootbot!"
After a few minutes, you manage to calm the Quatryl down enough to interpret what has gone on. It seems that this budding artificer has developed some kind of prototype automaton that is attracted to gold. Somewhat predictably, this has made the automaton attractive to the less desirable residents of Gloomhaven.
You decide to take pity on this young engineer, and agree to get his invention back to him. He eagerly escorts you to the workshop and wishes you luck.
Kicking the door of the workshop open reveals a squad of bandits, but no robot. You decide to see if they can be persuaded to reveal its whereabouts.
Special Rules:
The door marked (icon 1) is locked and cannot be opened until instructed. If a character becomes exhausted, they must place all their money tokens in the hex in which they died.
Section Links: When all enemies are dead and all money tokens have been looted, read 22.B.
Scenario Setup:
- Bandit Archer (monster)
- Bandit Guard (monster)
- Stone Golem (monster)
- Vermling Scavenger (monster, marked with a star icon)
- Wood Door: 1
- Man-made Stone Corridor: 2
- Large Man-made Stone Corridor: 2
- Bookcase: 1
- Cabinet: 2
- Crate: 2
- Shelf: 2
- Treasure Tile: 1
Map Layout: E1a, I1b, J2a, D1a (tile codes as printed on the map).
22.B
You hear the door click and slowly open. Looking toward the rear of the room, you see the robot. It seems to be very much a prototype—you can see the inner workings in places—and it is moving a little erratically. It is certainly attracted to gold though; as one of the bandits places a coin near it, it makes a rising noise, as if it is powering up and spins quickly around. You're charmed by the thing, and can't help wondering what will happen if you keep placing more coins on the little robot.
Special Rules:
Open door (icon 1).
The elite Stone Golem is the Lootbot. It has no hit points, draws no ability cards, and is neither an ally nor enemy to any figure. If a character ends their turn adjacent to the Lootbot, they may place any number of money tokens from their mat onto the Stone Golem's statistic card.
Section Links: When (Cx3) money tokens have been placed on the Stone Golem's stat card, read 22.C.
22.C
As you put one more coin on the Lootbot, it powers up again, before an ugly grinding noise comes from deep within it. A gear pings out of the top and it appears to lose all control, veering wildly around. It's at this point that you realize that it could be very dangerous, and as it careens around, you decide it needs to be disabled—hopefully before it destroys all that gold that is now rattling around inside it.
Special Rules:
The Lootbot is now an enemy to you and an ally to all other monster types. The Lootbot has Hx(C-1) hit points, where H is the hit point value of an elite Stone Golem, and is immune to STUN (icon), DISARM (icon) and IMMOBILIZE (icon). It draws from the Guard ability deck instead of the Stone Golem ability deck.
Each time the Lootbot performs an Attack, remove one money token from it and return it to the supply.
New Scenario Goal: When the Lootbot is dead, the scenario is complete. Read 24.A at the end of that round.
24.A
Conclusion
You strike a final blow and the robot falls into several pieces spraying gold everywhere—just as the young Quatryl peeks through the door. "My Lootbot!" the Quatryl cries. "What have you done?!"
He erupts in tears, before grabbing a handful of tools and throwing them at you. For such an inoffensive, studious creature, he has a good aim and a surprising amount of power. You grab what gold you can, before beating a hasty retreat, and regretting helping out.
Rewards: Each character gains X gold, where X is 3 times the number of money tokens remaining on the Stone Golem's statistic card.
Scenario 74: Song of the Harrower
Requirements: None
Scenario Goals: When all the Harrowers are dead, the scenario is complete. Read 26.A at the end of that round.
Introduction:
It's been a warm, still day, but you take notice of something peculiar as you walk across the river bank. The insects surrounding the flowing water all seem to be drawn in a certain direction. Your curiosity gets the best of you and you follow the trail of insects off the path.
A short way off the path, you find a large hole leading underground. You hear faint whistling sounds, which seems to be coming from an instrument. The entrance is buzzing with slow, fat flies and the stench is appalling. This must be a Harrower Hive. Wondering where the music is coming from, you grimly wrap fabric around your faces and head underground.
The main burrow contains an infernal buzzing that seems to go up a tone as you appear. The Harrowers coalesce, but this hive seems to have a leader of a type that you've not seen before. It clearly commands the others somehow with the music emanating from the pan-flute gripped in its mandibles, and aggressively sends its swarm towards you.
Special Rules:
The Harrower Bugflute can't be targeted or affected by any ability or suffer damage in any way. It performs the following specials:
- Special 1: Move -1, Attack -1. All other Harrowers perform "Move -1, Attack -1".
- Special 2: "Attack -1", Target all enemies adjacent to at least one Harrower.
All characters start with CURSE (icon) as a scenario effect.
Section Links: When all Harrower Infesters are dead, read 24.B.
Scenario Setup:
- Black Imp (monster)
- Harrower Bugflute (boss)
- Harrower Infester (monster)
- Nest: 3
- Stone Pillar: 4
- Treasure Tile: 1
- Stone Door: 2
Map Layout: D1a, J2a, K1a (tile codes as printed on the map).
24.B
You carve your way through the harrowers, but the leader easily evades your attacks; buzzing and shifting shape like a shoal of fish escaping a predator.
It falls back into the next chamber and as you follow, it arranges its limbs differently, signaling a different approach. It begins playing a different tune, and the other Harrowers sway softly as if in a trance in a mysterious, almost psychic fashion as they rise as one to attack you once again.
Special Rules:
Open door (icon 1).
The Harrower Bugflute teleports (icon) to the hex marked (icon a). The specials have changed, it now performs the following specials:
- Special 1: Attack (icon) -1, Target the closest enemy at any range. Remove one negative condition from all other Harrowers. Generate (icon).
- Special 2: Move (icon) -1, Attack (icon) +0, Range (icon) 3. All Harrower Infesters gain Range 3 on all their Retaliate abilities this round.
24.C
The music stops as the Harrower retreats again, into the rear-most chamber. It seems to realize that there is nowhere else to go and the music has not been stopping you so far; that this is the last stand and it needs to focus on combat if it's going to survive.
Special Rules:
Open door (icon 2).
Harrower Bugflute teleports (icon) to the hex marked (icon 6). You can now kill the Bugflute. It still draws from the boss deck, now performing the following specials:
- Special 1: Move (icon) -1, Attack (icon) +0, (icon): Target discards one card or doubles the damage suffered from the attack.
- Special 2: Move (icon) +0; Attack (icon) +0; If the attack was performed, Move (icon) +0 back toward its starting location.
26.A
Conclusion
Finally you destroy the Harrower, and with it the incessant buzzing whine of the burrow falls silent. The hive also seems to lose an energy that you hadn't noticed until it was gone. You swiftly grab the panflute from the ground and exit the burrow before any more Harrowers return.
You pick up the road again, and get moving. That little diversion has cost you several hours and you need to move quickly now to hit your planned camp. Next time you see something strange, you resolve to keep on walking.
Rewards: Gain "Shepherd's Flute" (Item 104).
Scenario 75: Sunken Temple
Requirements: None
Scenario Goals: When the Active Mechanism is dead, the scenario is complete. Read 30.A at the end of that round.
Introduction:
The map details an island that only appears above water once a year, as well as a forgotten temple hidden beneath its surface. The messy sketches even show how one might open the front door and the inner treasure chamber within. The island won't quite be visible yet, but patience was never a strong suit for anyone in this group, and you hired a captain willing to sail you all out to the sunken island several weeks before it was scheduled to surface. Upon arriving, you find the island covered by several feet of water—nothing too tough to handle. You locate the entrance to the temple, dive down, and pass though the secret door to the flooded entrance chamber, following the instructions on the map.
Something is... wrong about this place. Ancient, faded writing fills the walls, just as the map described, but a new script has been scrawled over the top—it appears this "abandoned" temple is not quite as abandoned as it once was. Someone, or something, has moved in since.
Before you can chose whether or not to abandon the mission, the door opens behind you again, letting in another stream of water and a couple of lurkers. Now you know who the new managers are here and they don't look friendly. Who knows how far their meddling has gone?
Special Rules:
All hexes on the B4b and A2b map tiles are underwater and considered to be difficult terrain. All Lurkers in the scenario ignore all difficult terrain and gain an additional Shield L/3 (rounded down) if they are on the B4b map tile, A2b map tile, or a water tile. They always attempt to end movement abilities on such tiles if such a movement would still allow them to target their focus.
Doors (icon 1) and (icon 2) are locked and will open when the Goal treasure tile is looted.
All characters add two (icon) modifiers to their attack deck as a scenario effect.
Section Links: When the Goal Tile has been looted, read 26.B.
Scenario Setup:
- Deep Terror (monster)
- Lurker (monster)
- Stone Golem (monster)
- Dark Fog: 1
- Wood Door: 1
- Water: 9
- Immobilize & Poison Trap: 4
- Stone Pillar: 4
- Treasure Tile: 1
- Damage Trap: 2
Map Layout: M1a, H3b, B4b, A2b (tile codes as printed on the map).
26.B
After operating a few levers according to the pattern listed on the map key, both doors open with a cacophony of grinding gears. The one near you opens up to the ocean, letting in a torrent of water and several more unfriendly claws, while the one further in opens up to an antechamber that seems untouched by the deep folk. Supposedly this chamber was the one that held the "riches beyond measure". The patterns required to activate the final mechanism will definitely take everyone working together to pull off.
Special Rules:
Immediately open doors (icon 1) and (icon 2).
Place water overlay tiles in the hex that contained the chest and all hexes adjacent to that hex. Spawn one normal Lurker at (icon a). For three or four characters, also spawn one elite Lurker at (icon b).
Pillar obstacles cannot be moved or destroyed and hexes containing pillars cannot be entered by any figure.
Section Links: At the end of a round when all characters are adjacent to at least one pillar obstacle and all enemies are killed, read 26.C.
26.C
Working together, you are able to operate the complex series of levers on the pillars, and you hear a faint expulsion of air around you as dormant machinery hums to life. Then, with a shriek of sirens and a clash of metal, red light floods the room. The pillars groan and vibrate as the walls begin flashing with bursts of electricity - this is not how the day was supposed to go.
Special Rules:
At the end of every round, all figures adjacent to at least one wall suffer L/2 damage (rounded up).
Spawn one elite Deep Terror on the pillar marked (icon c). This is the Active Mechanism. It has 3x(CxH) hit points, where H is the hit point value of an elite Deep Terror. The Active Mechanism is immune to forced movement and STUN (icon).
At the beginning of each round, play one card from the Deep Terror ability deck and one card from the Boss ability deck. It will act through two turns each round, performing each of the ability cards on their initiative values. Any condition that is lost at the end of a turn is lost at the end of each of its two turns (for example, if the Active Mechanism has DISARM (icon) at the start of the round, it wouldn't be able to use attack abilities on its first turn, but would act normally on its second turn that round, unless DISARM (icon) was applied to it again before its second turn). It performs the following boss specials:
- Special 1: All enemies that are adjacent to two pillars suffer L damage. Teleport (icon) to the next pillar in the order of c, d, e, and f.
- Special 2: Heal (icon) (L+C)-3, Self. PUSH 1, target all enemies adjacent to exactly one pillar, pushing them into a trap if possible. Teleport (icon) to the opposite pillar. c is opposite e, and d is opposite f.
30.A
Conclusion
With a final burst of energy, the mechanism powers down, dropping a small contraption at your feet that pulses with foreign energy. You take a second to mourn the fact that this barren room may never have held riches, or if it did, they are long gone.
You scoop up the small pulsating object as a consolation, and leave the sputtering mechanism behind. Best to just go before anything else can ruin your day.
Rewards: Gain "Magnetic Relocator" (Item 103).
Scenario 76: Untold Woe
Requirements: None
Introduction:
This isn't the first time Raksani has asked for your help and it likely won't be the last time either. However, today feels a little different. Today's meeting has a certain air of discretion that you would associate with some of your less reputable associates.
"Ah, I'm glad to see you" the councilman says as he welcomes you into his manor, "would you like something to drink?" You're not known to turn down a free drink, especially on a week you can barely afford the swill at the Brown Door, but you hesitate – Raksani has seen what you usually drink, yet he offers one of his good wines? Something's up... "Of course you do!" he exclaims, pouring some wine. This Valrath knows you a little too well.
After some unexpected but nevertheless pleasant small talk, and a glass and a half of wine each, Raksani seizes a lull in the conversation and begins what you can only assume is a scripted monologue "You know, this wine we're drinking is from Jhinda, the cultural and historical centre of my people."
You feign interest, as the well-spoken Valrath continues. "I'm sure you know at least a little of our history, but there's a good deal that is best lost to history. Despite my standing in Gloomhaven, where my family has called home for generations, even I still hear the comments from time to time. 'Demonspawn' they call us. And worse. When a human goes mad with power trying to learn magic he cannot handle, and blows up an armory, he's a lone madmad. But if a Valrath tunes into their dormant magical affinities in a way that offends someone's sensibilities, the town crier is labeling all Valraths demons."
At this point, Raksani seems to have gone off-script and is clearly upset bringing this up. He's not wrong at all in describing this, and if it affects someone of his standing in Gloomhaven, it must be far worse for less wealthy Valraths.
But he hasn't explained at all why you are here.
Raksani apologises, and continues with what sounds like the rest of his script. "A few years ago, there was an... incident... in Jhinda. My contacts close to the government there..." he pauses for a moment, as if to appreciate the weight of the words he was about to speak. "The reason I mention the struggles of Valraths in Gloomhaven is that if information about this incident gets out, the townspeople won't speak of a lone mad Valrath. I am asking for your utmost discretion with what I am about to tell you." You nod both respectfully and reassuringly as you sip on what remains of your wine. Raksani continues. "My contacts told me a story of a group of youths, driven by envy, sought to unlock their dormant powers and overthrow society. I'm told they didn't get far before being discovered and fled through the Red Desert, where they all perished at the mercy of the elements."
Raksani takes a deep drink from his wine before letting out a sigh that is almost as deep as his sip. "So these troublemakers. You likely wonder why you are here today to discuss an incident several years ago. Well, here's where it becomes uncomfortable for me. There have been whispers ever since, of encounters with Valraths who possessed an arcane control of the elements. Valraths who could be these exiles. I have begun to suspect that my contacts have been misleading me, and these Valraths are still out there. And if so, the powers that be in Jhinda are surely hiding something more. There are secrets in that city that no Valrath wants the light of day to touch, but I begin to wonder the cost of protecting them. Please, could you look into this for me, with an oath to keep whatever secrets you learn along the way to yourself? At least until I have had the opportunity to assess what is really going on. Naturally you will be paid well for this, however today I am truly asking as a friend, not an employer."
This feels far bigger than an odd job, but you're now convinced that you've drank more value in wine than Raksani has ever paid you for your services before. It must be as serious as he says.
You agree to investigate, and negotiate a bottle of that wine on top of your usual fee. It tastes awful, but there's something satisfying about knowing how expensive your hangover is. After obtaining the location where one of these exiled Valraths has been seen several times recently, you make your way there. Just north of the Red Desert.
Getting close to the desert, you can feel the hot winds and sand in the air. But that's not the only thing in the air. It doesn't take a Savvas to sense that there is some elemental magic in the air – the energy is erratic. It's flickering like a bonfire in a strong wind, with surges of immense power then lulls, then it changes somehow. It feels like fire one second, and ice the next, teetering between light and dark, earth and air. And like a fire in the wind, it is without intent – it just is. As you walk further towards the desert the energy feels like it somehow dims and become more intense at the same time, and then in one bright flash of pure elemental light that pulses deep through you, it is gone. All that remains is the hot sand blowing in your face.
You trek onwards, unsure of what you experienced without further flickers of energy. Eventually you come across a pack of drakes feeding on some poor sod, lying face-down in the dirt. There isn't time to stop and think too long about how she ended up out here alone, nor what she was doing before the drakes got to her, because they've quickly turned to you. They think they've hit the jackpot today, but you won't go down nearly as easily as their last victim.
Scenario Goals: When all the Demons are dead, the scenario is complete. Read 32.A at the end of that round.
Special Rules:
The door (icon 1) is locked and cannot be opened until the Goal treasure tile is looted. The goal tile represents the victim. Any player may loot this tile as normal to investigate the body.
Section Links: When the Goal Tile has been looted, read 30.B.
Scenario Setup:
- Flame Demon (monster)
- Gnashing Drake (monster)
- Hound (monster)
- Spitting Drake (monster)
- Sun Demon (monster)
- Light Fog: 1
- Earth Corridor: 5
- Large Earth Corridor: 4
- Large Natural Stone Corridor: 2
- Thorns: 4
- Log: 2
- Huge Boulder: 1
- Bush: 2
- Treasure Tile: 1
Map Layout: M1b, L1b, L3a (tile codes as printed on the map).
30.B
The Valrath lying in front of you may well be one of those Raksani spoke of, and it doesn't take a medic to realise that the drakes were not the cause of this. They just stumbled upon a feed. This woman was taken down by what looks like a hard strike to the head with a blunt object. This was the doing of someone, not something. It seems you're not the only ones out here looking for these Valrath outcasts.
You rifle through her things and although you don't find any information about what happened here, you're pretty sure she won't miss her weapon….
Special Rules: Door (icon 1) is unlocked and can now be opened.
Section Links: When door (icon 1) is opened, read 30.C.
Rewards: Gain "Dynamic Sickle" (Item 130).
30.C
As you push forward, the dust begins to settle – literally as well as metaphorically. Suddenly you find yourself face to face with demons, and there are even more in the distance. Were they looking for the same thing as you? And then you notice, it isn't just demons here. Walking among the them, with her back to you, you see a heavily armored Valrath carrying a golden hammer and shield. She casually looks over her shoulder at you before untying some dogs then mounting a large horned beast and riding south off into the distance through the desert. Seems you'll never catch up to her with all these demons in your path. What was she doing consorting with demons anyway? You only have more questions than you came here with, and no answers. But you'll be sure to tell Raksani everything when you get back.
Just as you ready your weapons to face down these demons, you hear loud screeches of drakes nearby, behind you. It appears you find yourself between a rock and a hard place. You'll have to think of something quick, because you're not getting out of this alive if you're fighting off trouble on both sides.
Special Rules:
Starting from the round after the next round, spawn one elite Gnashing Drake at (icon a) at the start of each round.
Gnashing Drakes are enemies to you and all other monster types.
Demons and Hounds are allies to each other and enemies to you and Gnashing Drakes. However, Demons will never treat Gnashing Drakes as their primary focus unless there is no other valid focus.
32.A
Conclusion
After scrambling through the demons and leaving behind the strangest scene you've encountered in a while, you begin the long hike home and try not to think what the digestive system of any creature that can eat a demon looks like.
When you arrive at Raksani's manor, he is already in front of you opening the door – he must have been looking out the window. He clearly wants to ask you what you found before greeting you, but exhibits enough restraint to wait until you take a seat.
On the small table in front of you is an open bottle of some kind of spirit that none of you recognise, next to an empty glass that still smells of some strong herbs. Raksani doesn't offer you any.
"Well..." he says, and you begin. You tell him every detail, from the unusual sensation in the air, to both Valraths – the fallen, and the gold-clad one – and how the latter appeared to have help from demons. He looks concerned, but not as surprised as you were. It's likely he has some idea of what happened here – certainly more than you do – but he isn't revealing anything. He doesn't seem overly interested in the sickle you found though, only commenting that it looks like an old one a retired guard may have lost, so at least you can keep that.
When you have nothing left to tell him, Raksani pours a few glasses of – well you still don't know what it was, but it tastes bitter – and thanks you for your help. Who knows if you'll ever learn what this was all about, but at least you got paid and Raksani is clearly grateful.
Rewards: +2 Reputation. Gain 10 gold each.
Scenario 77: Rat Traps
Requirements: None
Scenario Goals: When all Crypt traps have been disarmed or sprung, the scenario is complete. Read 33.B at the end of that round.
Introduction:
While walking through the Sinking Market looking for a bargain, you hear a familiar voice call out to you from behind the crowds. "Oi hey, no love for ol' Phin today huh?" The cocky Vermling is sitting comfortably with his larger compatriots standing in front of him ensuring his presence is larger than his stature.
"Phinrael Brass-Tooth" is only this jovial and welcoming if he needs a job done, but hey maybe some extra coin would mean you don't need to scour this place for bargains, so you listen to what he has to say.
"Buddies!" he begins uncharacteristically. "You look like you could use a few extra coins this week…" he continues more in-line with Phin's usual attitude, where he is clearly suggesting 'between-the-lines' that you look a little worse for wear. "Xain couldn't pay up, but the darn drunk seems to have stumbled across a crypt filled with valuables, so I'm gonna let him off his debt if I can extract it."
Big Phin goes on to explain that he's had someone check out the crypt Xain told him about, and discovered it's not only completely overrun with the living dead, but it's also booby-trapped. Whoever was buried there long ago apparently was well-prepared for someone to come after their treasures. Once all the traps in the entrance hall are deactivated, Phin has a thief in mind who can go deep into the crypt and extract everything there is to find without alerting the undead, but he needs someone to deactivate the traps first. That's where you come in. The mission sounds simple—find the crypt, disarm the traps, and leave without touching anything.
Phin gives you clear directions to the crypt, and as final parting words he makes it very clear that whatever treasures you come across there are his and not for you to touch. Your only payment will be in gold when you return. "If I find out you've taken what's mine, well..." Phin narrows his eyes and rubs his small paws together. "I'm sure you understand."
Special Rules:
The spiked pit traps and poison gas traps represent Crypt Traps.
Any character may forgo their top or bottom action during their turn to perform a "PUSH 2, Target one adjacent enemy" ability.
The door marked (icon 3) is locked, and becomes unlocked once both doors (icon 1) and (icon 2) have been opened.
Section Links:
- When door (icon 1) is opened, read 32.B.
- When door (icon 2) is opened, read 32.C.
Scenario Setup:
- Bandit Archer (monster)
- Living Spirit (monster)
- Living Corpse (monster)
- Living Bones (monster)
- Stone Door: 4
- Immobilize & Poison Trap: 4
- Stun Trap: 4
- Rubble: 6
- Bookcase: 4
- Boulder: 3
- Large Boulder: 1
- Treasure Tile: 5
Map Layout: C2b, B3b, I1b, G1b, E1a (tile codes as printed on the map).
32.B
As you enter through a side door, you see a wailing spirit slither out from the shadows. You hear groaning as a slumped body in the corner shudders and rises to its feet. It's no wonder Big Phin sent you here to do the dirty work; this place is infested with death.
32.C
Barging in through the next door, you lock eyes with an archer drawing her bow in your direction. It seems Big Phin isn't the only one who heard about this crypt and the treasures within.
32.D
Pushing forward, you are met with a choir of groaning corpses who begin slowly fumbling their way towards you as a spirit flutters towards the back of the room. You see a trail of footprints leading towards the next room, and realize that there may be more bandits ahead.
Section Links: When door (icon 4) is opened, read 33.A.
33.A
Making your way into the last room, you find two more bandits surrounding a treasure on the left-side of the room, and skeletons shambling to re-assemble their bony bodies on the right. You quickly spot the traps in the corners of the room, and ready yourself to finish the job so you can leave this dead-ridden place and the bandits behind.
33.B
Conclusion
After having cleared the crypt entrance of traps, you return to find Phin at his usual place in the Sinking Market. Today he seems less enthusiastic and as you approach him he just stares for a moment, apparently forgetting your arrangement. However, before you can explain yourself, he jumps to his feet with enthusiasm and exclaims, "oh right! The traps. So, it's done?"
You nod in confirmation and he hands you a bag of coins. As you open up the pouch to ensure he's not handing you a bag of rocks again – fool me twice and all that – Phin quickly reaches in and grabs one coin out of the bag and throws it at another Vermling napping nearby, hitting him firmly in the side of the head. "You're up! Get to that crypt!" he calls to the Vermling before turning back to you and shooing you away with his paws. "Alright, get lost you. That should be more than enough."
Rewards: Gain 39 collective gold.
Section Links: If you looted two or more treasure tiles, also read the Conclusion on 33.C.
33.C
Conclusion
Several days have passed. While heading out to grab a bite to eat, you take a shortcut through a back alley and find yourself surrounded by three of Phin's Inox thugs. "You know what you did," they growl in confrontation, "and Big Phin doesn't take kindly to it".
You were caught completely off guard, and after a mild beating were left no option but to pay Phin back the reward he granted you. Just to add insult to injury, the thugs laughed at the idea of you walking home barefoot in the rain and they stripped you of your footwear.
"While your feet press against the rough and muddy cobblestones," one of them says, "I want you to think of two things. First, think about what Big Phin will do to you next time if you decide to mess with him again. Second, think of how many horses come through here and how sure you are that this is mud you're stepping through."
Rewards: Lose 40 collective gold. Each character loses 1 (icon) item.
33.D
A Milestone Reached
Rewards: Unlock envelope M.
Scenario 78: Ternion Tomb
Requirements: "Grave Robber" Personal Quest
Scenario Goals: When the Grave Robber has ended their turn adjacent to Totem (icon a), the scenario is complete. Read 35.B at the end of that round.
Introduction:
You're plundered enough crypts to have learned some odd facts about the dead. One of the more interesting customs among humans in the region is to bury their honored dead not just with their own treasure, but with "the promise of further wealth to come." Rather than taking this statement metaphorically, some people even throw in unused treasure maps or clues to find lost hoards. On rare occasions, these hints actually have a grain of truth to them. By cross-referencing ancient carvings and rotted scraps of parchment you've found with the dead, and poring through manuscripts in the town archives, you've put together the likely location of a tomb that no one else has found. You can feel it: this is going to be the biggest score of your life.
Your luck holds true, and it takes less than a day of searching before you find the entrance to a dome-shaped stone building, squat and foreboding. The cry of triumph dies in your throat, however, when you notice that one of the ubiquitous small cults around Gloomhaven set up shop well before you arrived. Still, you're willing to bet there's something of value within, or they wouldn't still be here. You wait until nightfall, then sneak through their camp and get ready to ambush the unfortunate fanatics guarding the imposing stone door.
Section Links: When door (icon 1) is opened, read 35.A.
Scenario Setup:
- Ancient Artillery (monster)
- Cultist (monster)
- Inox Archer (monster)
- Inox Guard (monster)
- Inox Shaman (monster)
- Living Bones (monster)
- Stone Golem (monster)
- Stone Door: 2
- Large Earth Corridor: 1
- Stun Trap: 2
- Hot Coals: 3
- Log: 1
- Rubble: 2
- Stairs: 1
- Sarcophagus: 2
- Stone Pillar: 4
- Stump: 1
- Totem: 1
- Treasure Tile: 1
Map Layout: D1b, J1a, M1a, C2a, J2a (tile codes as printed on the map).
35.A
Scenario 78 • The Prize
Upon entering the dome, you see that the cultists have had plenty of time to turn its defenses to their will, and ancient machines stir to life, barring your way. However, a glint of gold across the room catches your trained eye; on a raised platform in the center of the building, there appears to be a totem bedecked in enough ornate gilded splendor to set you up for life. With no further incentive needed, you forge ahead to heroically rescue the treasure from the cult of whichever Blood God happens to be in vogue this year—you're pretty sure they're all the same anyway.
Special Rules:
Crumbling Halls: Door (icon 2) is locked and cannot be opened until instructed. Stairs cannot be destroyed or moved.
Section Links: When the Grave Robber has ended their turn adjacent to Totem (icon a), read 35.B at the end of that round.
35.B
Scenario 78 • Predictable Consequences
Hearing raised voices back the way you came, you realize your window of escape is closing quickly. You break down half of the golden totem in order to carry it out with you, and you're only mildly surprised to hear the howling of angry spirits fill the dome. This is a tomb, after all. The forms of three menacing-looking Inox materialize, faces contorted in pain and rage, their battle cries echoing the angry mob growing outside.
As expected, the building also starts to rumble menacingly and stones start to fall from the ceiling; you've seen this sort of thing before. But you haven't used up all your luck yet; as the building does its best to bury everything inside it, a locked door on the far side of the room shakes loose from its track, and moonlight leaks around its edges. It looks like you might have a way out.
Special Rules:
Door (icon 2) is unlocked.
Incarnation: At the start of the next round, spawn one elite Inox Guard at (icon a) who is the Reaver, one Elite Inox Archer at (icon b) who is the Conqueror, and one elite Inox Shaman at (icon c) who is the Ritualist. They are immune to STUN (icon) and have Hx(C/2) hit points, where H is the hit point value of an elite enemy of their monster type.
If the Ritualist is killed, all enemies perform "Heal 2, Self" at the end of each of their turns. If the Reaver is killed, all enemies gain Advantage on all their attacks. If the Conqueror is killed, all characters and character summons gain Disadvantage on all their attacks.
If the Grave Robber exhausts while not occupying an exit (icon 1), the scenario is immediately lost.
Defeat the named Inox enemies to gain increasing rewards at the end of the scenario.
New Scenario Goal: When the Grave Robber has ended their turn while standing on an exit (icon a) or has become exhausted while standing on an exit (icon 1), the scenario is complete. Read 36.C at the end of that round.
Section Links: When door (icon 2) is opened, read 36.A.
36.A
Scenario 78 • The Dramatic Escape
Pushing the heavy stone door aside, you discover the last of the tomb's ancient defenses stirring to life, no less deadly for the patina of rust coating them. But more importantly, you see a collapsed wall beyond them leading outside. Nothing is going to keep you from a well-deserved retirement; not the lunatic who constructed this elaborate barrow, not the spirits they imprisoned within it, and especially not your slower allies.
36.B
Printed section 36.B, headed Scenario 79, is a map only; the page carries no text for it. It is the section read when door (icon 1) of Scenario 79 is opened.
36.C
Conclusion
You stumble into the night, pulling away from the grasping arms of spirits seeking to share their lingering torment. You barely have time to reach the cover of the nearby trees (dragging the section of gilded totem behind you, of course) before the building collapses in upon itself, trapping the remaining cultists together with the vengeful souls. Good, you think; they deserve each other.
As you put some distance between yourself and any remaining robed assailants, you feel a sense of pride at more than just the prize you escaped with. This may be the capstone of your semi-illustrious career, but whatever you did granted those spirits some measure of freedom; maybe this one time, you've actually given back more than you stole.
Rewards:
- "Grave Robber" quest complete.
- Open Envelope (icon).
- If you killed one named Inox: Gain 1 checkmark each.
- If you killed all named Inox: Gain 2 checkmarks each instead.
Scenario 79: Unsouled
Requirements: (class icon) Level 5
Scenario Goals: When the Unsouled is dead, the scenario is complete. Read 38.B at the end of that round.
Introduction:
Liar. Exile. Unsouled. These were the insults your tribe threw upon you when they cast you out for claiming to hear the voices of the tribe's ancestors. You dared to usurp the power of the great warrior Okeda, who declared himself your people's first spirit-caller in generations. And so they forgot about you, but you have not forgotten.
Years later, when the spirits of the Reaver, Ritualist, and Conqueror came upon you broken and alone, you doubted your worthiness to embody those legendary souls. But through your trials and their guidance, you now know that you were more worthy than the liar patriarch Okeda ever was. You have grown far more dangerous in the many years since. And you have not forgotten.
And so, when the torture of memory grew too great, you followed familiar trails to the place of your birth. Now you walk among this tribe, seeing their poverty and starvation as you stalk toward the largest hut. Two old huntresses join you, shame and determination warring on their faces, for they have not forgotten.
"Okeda!" you bellow. "You cast me out for your lies! But our ancestors see you through my eyes, and they are ashamed! You hoped that none would remember what it means to be Inox, that they would forget the strength of true champions. But I have not forgotten."
Special Rules:
The elite Inox Guards are allies to you and your summons, and enemies to all other figures. They use the Cave Bear monster ability deck, and use your attack modifier deck. You may lose cards from your hand or discard pile as normal to negate one source of damage an allied Inox Guard suffers.
When you open either door (icon 1), open the other door (icon 1).
Section Links:
- When door (icon 1) is opened, read 36.B.
- When all enemies are dead, read 38.A.
Scenario Setup:
- Inox Archer (monster)
- Inox Bodyguard (monster)
- Inox Guard (monster)
- Wood Door: 2
- Large Earth Corridor: 1
- Wound Trap: 1
- Thorns: 2
- Log: 1
- Barrel: 1
- Bush: 1
- Tree: 1
Map Layout: C1b, D1b, C2a (tile codes as printed on the map).
38.A
Scenario 79
As you paint the hut with the blood of his servants, Okeda screams in rage and draws his blade. The Conqueror's spirit notes more Inox surrounding you while the Ritualist assesses your wounds, but the Reaver simply bares your teeth at the imposter in a predatory grin, inviting the Unsouled to fight a true Incarnate.
Special Rules:
Okeda, the Unsouled: At the start of the next round, spawn one Inox Bodyguard at hex (icon a), and one elite Inox Archer at each hex (icon 1).
The Inox Bodyguard is Okeda, the Unsouled. Do not use the Inox Bodyguard statistic card for Okeda. His hit points are double your maximum, he has Shield 1, Retaliate 1, and is immune to DISARM (icon) and STUN (icon).
The Unsouled does not use the boss ability deck. Instead, he acts immediately after each of your turns, performing the same bottom action then the same top action you performed during your turn, ignoring persistent actions.
After the Unsouled performs your bottom action, if he did not move during that action, he immediately performs "Move 2". After the Unsouled performs your top action, if he did not attack during that action, he performs "Attack 4, ENFEEBLE (icon)".
The Unsouled ignores all Spirit special rules, and uses your Empower and Enfeeble decks.
38.B
Conclusion
The Unsouled pretender collapses into the obscurity of an honorless death. Your former tribe sees you anew, recognizing the spirits that joined you in battle to lift the veil from their eyes. Some of the Inox thank you profusely, but this was never about saving them; it was about taking back your honor.
As they once abandoned you, now you return the favor. The souls of their greatest ancestors turn their backs on the tribe with you, their blood running cold in your veins at the weakness of their descendants. You stop only to claim a relic as your prize from the nameless corpse before fading into the trees, never to be forgotten again.
Rewards: Gain "Thrice-Souled Warsword" (Item 119). Add City Event 64 to the deck.
Scenario 80: Conflux of Power
Requirements: (class icon) Level 5
Scenario Goals: When all enemies are dead, the scenario is complete. Read 40.B at the end of that round.
Introduction:
Your Savvas Acolyte crests the hill and looks down on the valley below. Despite the backlash caused by helping it grow into its power, you are happy to have it here to help you with this. The peaceful trees belie the terrible power you can feel coalescing in the area. You would not have even noticed the power if you had not heard unsettling rumors of Flame and Frost demons gathering in the area. To your friend, this is a simple mission to keep the elemental powers in check, but you are hoping that the strong elemental presence in the area can help it grow. Despite your hopes you still feel some measure of concern for the inexperienced Savvas.
As you descend into the valley you see what the trees were hiding: the largest Flame and Frost Demon you have ever seen. To your Acolyte's credit, they do not seem daunted by the sight.
Special Rules:
You have a Savvas Acolyte that you are training, represented by a Savvas Lavaflow or a Savvas Icestorm standee, your choice. It uses the normal Savvas Icestorm statistic card but has no traits. They are an ally to you and an enemy to all other monster types.
Assemble the Savvas Acolyte ability deck by combining cards from the Savvas Lavaflow monster abilities with initiatives 51 and 68, and with Savvas Icestorm monster abilities with initiatives 14 and 19. The Savvas Acolyte cannot consume any elements, and can only generate Fire or Frost. When the acolyte attacks, it uses your attack modifier deck.
If there are no revealed enemies, the Savvas Acolyte will ignore its revealed ability card on its turn, and instead it will either perform "Heal 3, Self" or "Move 5", your choice with you controlling the ability. You may lose one card from your hand to negate any one source of damage the Savvas Acolyte suffers. If the acolyte is killed, the scenario is immediately lost.
Trial of Ice and Fire: The Flame Demon is the Inferno Demon, and the Frost Demon is the Glacier Demon. They have Hx(C+1) hit points, where H is an elite Flame Demon or elite Frost Demon's hit point value, respectively.
Whenever a character or character ally ends their turn adjacent to the Inferno Demon or Glacier Demon, that figure gains WOUND (icon) or CHILL (icon), respectively.
Whenever the Inferno Demon has CHILL (icon), they lose their retaliate trait.
Whenever the Glacier Demon has WOUND (icon), they lose their retaliate trait.
Door (icon 1) is locked and cannot be opened until instructed.
Section Links:
- When the Glacier Demon is dead, read 38.C.
- When the Inferno Demon is dead, read 38.D.
Scenario Setup:
- Flame Demon (monster)
- Frost Demon (monster)
- Savvas Icestorm (monster)
- Savvas Lavaflow (monster)
- Hot Coals: 6
- Altar: 1
- Bush: 6
- Crystal: 3
- Rock Column: 3
- Dark Fog: 2
Map Layout: L3b, E1b, J1b (tile codes as printed on the map).
38.C
Scenario 80 • Glacier Demon Slain
Your ally runs up to collect the raw energy streaming off of the Glacier Demon's quickly melting corpse. You can immediately see a change in your mentee, but it has a cost—the power will be difficult for it to handle. While you were watching the transformation, the other demon retreated further into the trees. You decide to follow after it and rid the world of its heresy.
Special Rules:
Door (icon 1) is now unlocked.
Remove the Inferno Demon from the map.
Burgeoning Potential: The Savvas Acolyte now has a CHILL (icon) trait, and can (icon) to augment its abilities.
Section Links: When door (icon 1) is opened, read 40.A.
38.D
Scenario 80 • Inferno Demon Slain
Your ally runs up to collect the raw energy streaming off of the Inferno Demon's quickly melting corpse. You can immediately see a change in your mentee, but it has a cost—the power will be difficult for it to handle. While you were watching the transformation, the other demon retreated further into the trees. You decide to follow after it and rid the world of its heresy.
Special Rules:
Door (icon 1) is now unlocked.
Remove the Glacier Demon from the map.
Burgeoning Potential: The Savvas Acolyte now has a WOUND (icon) trait, and can (icon) to augment its abilities.
Section Links: When door (icon 1) is opened, read 40.A.
40.A
Section Links: When door (icon 2) is opened:
- If the Glacier Demon is dead, read 40.C.
- If the Inferno Demon is dead, read 42.A.
40.B
Conclusion
As the Demon screams its last breath your ally gathers the magic emanating from its corpse. Meanwhile you collect the object off of the altar that may have been drawing the Demons to this location. Upon closer inspection you can see that it is an old core of a Rimehearth. Was this the reason the demons were here, or did one of your brother's fail where you succeeded? You will see to it that it did not die in vain, the power emanating from the core can still be used.
Rewards: Gain "Rekindled Core" (Item 120).
40.C
Scenario 80 • Inferno Demon Revealed
You can see your quarry standing next to an altar. The trees seem to have burst alight in the mere presence of it! Amazingly, it seems to have grown even more powerful than before. Did you perhaps do it a favor by removing its rival? Using fire magic in its presence may be dangerous. It is no matter to you, the job is not complete.
Special Rules:
Trial of Fire: The Flame Demon adjacent to the alter is the Inferno Demon. It has Hx(C+1) hit points, where H is the hit point value of an elite Flame Demon. Whenever a character or character ally ends their turn adjacent to the Inferno Demon or (icon), that figure gains WOUND (icon).
42.A
Scenario 80 • Glacier Demon Revealed
You can see your quarry standing next to an altar. The trees seem to have crystallized in the mere presence of it! Amazingly, it seems to have grown even more powerful than before. Did you perhaps do it a favor by removing its rival? Using ice magic in its presence may be dangerous. It is no matter to you, the job is not complete.
Special Rules:
Trial of Ice: The Frost Demon adjacent to the alter is the Glacier Demon. It has Hx(C+1) hit points, where H is the hit point value of an elite Frost Demon. Whenever a character or character ally ends their turn adjacent to the Glacier Demon or (icon), that figure gains CHILL (icon).
Scenario 81: Corrupted Presence
Requirements: (class icon) Level 5
Scenario Goals: When the Tendril of Corruption is dead, the scenario is complete. Read 42.C at the end of that round.
Introduction:
While meditating in the mountains at camp one night, you feel a mysterious presence nearby. A presence you haven't felt since you escaped the crystal gardens that once were your home. You think back on the events that took place at your home, rekindling your desire to avenge all those that perished during its corruption.
You know the dangers involved if it is what you think it is, but you can not risk others falling to this corruption, as most don't possess the necessary willpower to withstand it.
Before heading out to investigate, you leave a note behind, letting your party know they will need to find another way past these mountains.
You follow the presence into a cavern system, running deep underground, where eventually you find yourself in a great hall, where in the distance you see a huge eye surrounded by tentacles, with its gaze fixated on you.
Special Rules:
The Sightless Eye is a Tendril of Corruption. It is immune to BRITTLE (icon), POISON (icon), and WOUND (icon) in addition to any other immunities. Its hit point value is determined as if C is 4. If its hit points would drop below 10, it becomes 10 instead.
Remove the ability cards with initiatives 36 and 52 from the Boss ability card deck. Remove the ability card with initiative 96 from the Deep Terror ability card deck.
Each time a Deep Terror is killed, the Tendril of Corruption suffers D/2 (rounded up) damage, where D is a normal Deep Terror's maximum hit point value.
It performs the following specials:
- Special 1 - Maddening Sting: Attack -3, target one enemy within two hexes of either the Tendril of Corruption or a Dark Pit overlay (whichever is closest). If this attack deals damage, shuffle a (icon) card into the target's modifier deck. If this attack deals no damage, the Tendril of Corruption suffers 2 damage. This cannot reduce the Tendril of Corruption's hit points below 1.
- Special 2 - Expand Corruption: If an enemy is in the same room as the Tendril of Corruption, the Tendril of Corruption suffers 2 damage and summons a Normal Deep Terror adjacent to either the Tendril of Corruption or any Dark Pit overlay tile closest to the nearest enemy. This cannot reduce the Tendril of Corruption's hit points below 1. The Tendril of Corruption and the summoned Deep Terror gain Shield 1 for the round.
Section Links: At the end of round 2, read 42.B.
Scenario Setup:
- Deep Terror (monster)
- Frost Demon (monster)
- Living Spirit (monster)
- Night Demon (monster)
- Sightless Eye (monster)
- Rubble: 6
- Crystal: 1
- Dark Pit: 6
- Rock Column: 6
- Stalagmites: 6
- Dark Fog: 4
Map Layout: N1a, J2b, D2b, J1b (tile codes as printed on the map).
42.B
Close proximity to the tendril has penetrated your mental defense. You find yourself in a place where corrupted forces reside. This is now a fight of body and mind, and you have to face these terrors that infest your mind head-on.
Special Rules:
Doors (icon 1) are locked.
Place a character token on (icon a). At the end of this round and every even round after this, simultaneously move your character to the hex that contains your character token and move that character token to the hex you occupied.
Section Links: When all enemies in tile J1b are killed, open doors (icon 1) and read 43.A.
42.C
Conclusion
With a final blow, the Tendril of Corruption screeches out a deafening scream. You watch as the eye starts to implode until finally, it collapses and falls into the abyss, and all the tentacles throughout the room fall limp and are dragged into the pits below.
A sense of silence hits you as the light returns back to the cave. You have finally done it. You have cleansed the corruption from this place; you have avenged the fallen. You have cleansed the corruption from this place; you have avenged the fallen, and you have come out stronger than ever before. The numbing influence you felt for so long has been overcome and replaced with a sharp clarity: you can now focus your mind spontaneously to grow your crystalline skin. This will no doubt assist you in many battles to come.
You head back to camp, get rid of the note, and act as if nothing happened.
Rewards: Gain "Crystal Catalyst" (Item 121).
43.A
After a brief moment of respite, a path opens to a room with a corrupted crystal formation in its center. Clearing this place of terrors should give you a chance of cleansing the crystal formation and help restore your mental defense.
Special Rules:
Doors (icon 2) are locked.
Perform Heal 2, Self, and Refresh (icon) all your spent items.
Section Links: The next time after you move to a character token, remove all character tokens on the board and read 43.C.
43.B
A period of serenity from eradicating more invaders is quickly interrupted by the opening of another passage. Now you might be able to focus on ridding your mind of the final terrors, setting it free.
Special Rules:
Perform Heal 2, Self, and Recover (icon) one of your lost cards.
Section Links: When all enemies on tile D2b are dead, read 43.D.
43.C
Just when you think you saw an opening, it closes, and your mind gets taken to another place filled with more corrupted forces.
Special Rules:
Place a character token on (icon 6).
Section Links: When all enemies on tile J2b are dead, open doors (icon 2) and read 43.B.
43.D
As the last terror drops, the corruption from the crystal formation starts dispersing. You head straight for the formation, grab a big crystal from it with both hands and start to focus your mind. The grasp on your mind snaps, and you feel your mental defenses recovering. Your body reacts in response, resulting in spontaneous crystal growth.
You watch the Tendril of Corruption burst into a panic. His tentacles go into an uncontrolled whirlwind, slamming into the surroundings which causes rocks and sand to disperse across the floor, filling up the once dark pits that surrounded the Tendril. A direct path opens to the Tendril, allowing you to finish it off.
Special Rules:
At the end of the next even round, Teleport to map tile N1a and remove all character tokens on the board. Remove the Dark Pit overlay tiles that are adjacent to The Tendril of Corruption. The Source of Corruption can now be reduced below 10 hit points. You may perform a Crystallize action from a card in your hand or discard pile.
Scenario 82: Storm Mountain
Requirements: (class icon) Level 5
Scenario Goals: When all enemies are dead, and the demons were prevented from reaching the Altar (icon a), the scenario is complete. Read 46.C at the end of that round.
Introduction:
As you journey across the Misty Sea, you recall your conversation with an elderly Orchid merchant back in Gloomhaven. Being a Tempest himself, the merchant encouraged your return to the island on which you first harnessed the power of the storm. He could barely contain his excitement, saying, "Trust me when I tell you that the second time on that island is even more grand than the first! You must meditate at the top of Storm Mountain once again, and I promise that you will not be disappointed!"
Though you have visited the renowned location once before, last time you had an innate sense of purpose—civil war has a way of narrowing one's focus. This time, however, you truly have no idea what to expect. You can only hope for a... less painful meditative experience than your previous visit.
Your ship rounds the northeastern edge of the large island in the middle of the Misty Sea to approach the much smaller, tempestuous island of which tales are told in Orchid society—Storm Mountain. Wasting no time, you quickly scale the jagged rocks, ascending toward the Storm Temple. This stone structure was built up little by little over the years as prospective Tempests sought shelter from the elements during their stay. A tall crystal spire sits in the middle of a plateau near the temple—the Earth Crystal.
You remember this stone's dual purpose from your first visit here. Not only does it provide the surface on which to meditate, high above the surrounding rocks while lightning strikes your body, but it also grants a reprieve from the storm when the pain becomes unbearable. Nobody knows for sure how the stone was imbued with the capability to infuse earth into the plateau, but every prospect learns quickly how to activate the stone's healing power until they build up the stamina to meditate through an entire storm.
Your fond reminiscence is cut short, however, when you notice an all-too-familiar presence appear from behind the Earth Stone on the other side of the plateau. Wind and Sun Demons. Except these Sun Demons appear different—electrified! You always wondered if the demonic realm would discover this mountain's arcane source of power. The demons have noticed your presence too, and seem keen to escape with their newfound powers through a portal that is opening above the Storm Temple altar.
Map Layout: J1b, B4b, D1b, J2b (tile codes as printed on the map).
Special Rules:
The Frost Demons are Volt Demons. Instead of using the Frost Demon ability deck, use the Night Demon ability deck with the following exceptions: Treat all Dark element generations and consumptions as Light instead, and treat (orange cross icon) as (green cross icon) instead.
Volt Demons will always focus on the altar (icon a) unless the Tempest is closer to them and they can perform an attack targeting the Tempest that round. If a Volt Demon is unable to perform at least one ability during their turn, it performs Move +0 towards the altar (icon a) instead. Reminder: a stand-alone element consumption is an ability. If a Volt Demon is adjacent to the altar (icon a) at the end of a round, the scenario is immediately lost.
All enemies gain Retaliate 2 while (leaf icon) is Inert, and all of their attacks that target multiple enemies gain WOUND (icon).
When (leaf icon) moves to the Inert column, gain two Sparks (spark icon). Start the scenario with three Sparks (spark icon).
The crystal obstacle overlay in the middle of the D1b map tile is the Earth Crystal. Once per round, immediately after the Tempest performs a move that enters any hex adjacent to the Earth Crystal, generate (leaf icon) and perform Heal 2, Self.
If a non-flying enemy is forced from the B4b map tile or Stairs overlay tiles onto the D1b map tile, they suffer half the damage of a trap (rounded down).
Section Links: At the end of the third round, read 46.A.
Scenario Setup:
- Frost Demon (monster)
- Stone Golem (monster)
- Wind Demon (monster)
- Rubble: 1
- Thorns: 2
- Altar: 1
- Natural Stone Corridor: 9
- Crystal: 1
- Stairs: 2
- Stone Pillar: 5
46.A
Scenario 82
You are working hard to prevent the demons from escaping this sacred mountain when you feel a tremble in the ground. At first, you presume an earthquake, but quickly sense that the rumbling is emanating from the direction of the Storm Temple. The rock column that once stood as a silent guardian before the temple has toppled to the ground.
Emerging from the rubble stands a Stone Golem that has somehow been corrupted by the demon's presence and vitalized by the Volt Demons' electrical energy! Should the demons be able to give life to inanimate objects, they would soon amass an unstoppable army.
Special Rules:
Remove the Rock Column obstacle on tile B4b and spawn one normal Stone Golem in the hex that it occupied. The Stone Golem's movements ignore difficult terrain.
Section Links: When both Volt Demons are dead, read 46.B at the end of that round.
46.B
Scenario 82
Sensing a surge of electrical energy in the air, you realize that your task is not yet complete. Another wave of demons appears through the mist, and for a split second you wonder if you have the strength to fight them off.... You must. You have no choice.
Special Rules:
Spawn one normal Wind Demon at (icon h), one normal Volt Demon at (icon c), and one elite Volt Demon at (icon a).
46.C
Scenario 82
Conclusion
The final enemy falls to the ground, and even though you can feel that your muscles are tired, the intensity of the battle in the midst of this storm has reinvigorated your strength. You patrol the plateau for a while until you are confident that no demons remain. Before returning to Gloomhaven, you pay a final visit to meditate upon the Earth Crystal as your Orchid merchant friend suggested. Now that the stress of battle has ceased, you notice with renewed appreciation the life-giving energy that the gem imparts.
Upon your return to the merchant's shop, he is teeming with excitement to hear your tale.
"Well, it's a good thing you went back to the temple when you did! That wasn't the experience I was expecting you to have, but like I told you, Storm Mountain never disappoints! Come, let me show you something. I worked while you were away to make this armor for you. It should increase your stamina in battle. Guess you could have used it on that mountain! I know it will still serve you well. Come back soon!"
Rewards: Gain "Arclight Cladding" (Item 123).
Scenario 83: Collapsed Cavern
Requirements: (class icon) Level 5
Scenario Goals: When all enemies are dead, and the Thornreaper is alive, the scenario is complete. Read 40.B at the end of that round.
Introduction:
During a short outing in the Corpsewood, on what was supposed to be a quick and easy job removing some imps, those of you attuned to the natural world begin to feel an overwhelming energy from the ground beneath you. Moments later those less-attuned feel something too—the ground beneath you suddenly collapses. Without hesitation, the Thornreaper taps into the ambient energy to manipulate the nearby underbrush shoving the rest of the party to safety while simultaneously slowing their own fall through the earth below.
The Thornreaper quickly discovers the source of the earthly magic—Earth Demons residing the cavern they just landed in, far below the ground above. It looks like they won't last long if the rest of the party can't find a way down there to help out.
Special Rules:
Thornreaper starts on the D2b tile and cannot be affected by any Teleport ability. The scenario starts with (leaf icon) in the Waning column. Thornreaper starts the scenario with STRENGTHEN (icon).
If the Thornreaper becomes exhausted, the scenario is immediately lost.
Section Links:
- When door (icon 1) is opened, read 48.A.
- When door (icon 2) is opened, read 48.B.
- At the end of the fifth round, read 48.B.
Scenario Setup:
- Black Imp (monster)
- Cave Bear (monster)
- Deep Terror (monster)
- Earth Demon (monster)
- Forest Imp (monster)
- Living Bones (monster)
- Light Fog: 1
- Earth Corridor: 1
- Poison Trap: 3
- Thorns: 3
- Rubble: 2
- Boulder: 3
- Large Boulder: 1
- Bush: 2
- Dark Pit: 3
- Rock Column: 3
- Treasure Tile: 1
- Dark Fog: 2
Map Layout: J1a, A4a, D1b, J2b, D2b, A3a (tile codes as printed on the map).
46.D
Scenario 83
Conclusion
With the last of the creatures cleared out and your party reunited, you make your way back up to the surface and try to recall what job you were even sent on in the first place. At this point it doesn't really matter because after that you are sure the Sleeping Lion is calling you, and besides, you found something more interesting down there than whatever pittance was being offered for the job—some of the thorned undergrowth that you landed in at the bottom of the cavern appears to be imbued with some kind of magic, presumably what drew the Earth demons to it. Surely something of use can be fashioned from it.
Rewards: Gain "Barbed Whip" (Item 128).
48.A
Scenario 83
Section Links: When door (icon 4) is opened, read 48.C.
48.B
Scenario 83
There is movement stirring in the lower caverns and it seems other creatures living in the depths have taken an interest in the wild Orchid that has landed in their home. More skeletons and demons are quickly moving in on the Thornreaper's location. Time is of the essence.
Special Rules:
If it's the end of the fifth round and door (icon 2) is not yet opened, open it immediately.
Section Links:
- When door (icon 3) is opened, read 48.C.
- At the end of the ninth round, read 48.C.
48.C
Scenario 83
More creatures seem to be alerted to the Thornreaper's presence and without some help distracting them, the creatures may soon overwhelm the Thornreaper down below.
Special Rules:
If it's the end of the ninth round and door (icon 3) is not yet opened, open it immediately.
Section Links:
- When door (icon 4) is opened, read 48.A.
- When door (icon 3) is opened, read 48.B.
Hidden Content
Printed warning (p. 49): "Stop! Do not read ahead to the next pages (pg. 50-51) in this book. These pages contain content that is secret and will spoil your experience of unlocking that content in the campaign. Do not worry, the game will tell you when you are ready to unlock this hidden content during the campaign. For now, consider these pages to be locked content."
Scenario 84: Return to Crystal Gardens
Requirements: (class icon) Level 5
Scenario Goals: When the Shardrender is dead, the scenario is complete. Read 50.A at the end of that round.
Introduction:
The time has come. As you approach the crystal gardens which house the ember crystals, you find an Orchid Shardrender guarding the cavern. The Shardrenders are responsible for fallen Vanquishers, and you've garnered the necessary power and strength to vanquish the Shardrender once and for all.
"Leave here at once!" the Orchid barks as he draws his blade. "Your kind are not welcome here."
You'll leave, but not before you fulfill your oath to avenge the death of your fallen brothers and slay the one responsible.
Special Rules:
Start with WOUND (icon) as a scenario effect.
The Shardrender is considered a named enemy and its hit point value is H+(Lx3), where H is the regular hit point value of a Shardrender, and it is immune to hazardous terrain, MUDDLE (icon), IMMOBILIZE (icon), STUN (icon), DISARM (icon), and WOUND (icon).
Scenario Setup:
- Shardrender (monster, named)
- Smoke Spirit (monster)
- Natural Stone Corridor: 2
- Large Natural Stone Corridor: 4
- Hot Coals: 10
- Crystal: 2
Map Layout: G2a, J2b, J1b (tile codes as printed on the map).
50.A
Scenario 84
Conclusion
As the Shardrender takes his last breath, you hear the crystals surrounding his body crack and crumble as he slumps to the ground.
In the name of all Vanquishers, you've accomplished your mission and look forward to returning to the city tonight to celebrate your hard-earned victory.
Rewards: Gain "Predator's Wristblade" (Item 131).
51.A
Inevitable
Rewards: To view your reward, visit thecrimsonscales.com/reveal. Password: ashes
Scenario Chart
Printed note: "Read this First! Do not read this information if you want the scenario order to be a secret; this chart is used to track your unlocked scenarios in the campaign." The printed chart also carries a chain, check-box and Side / Personal Quest / Solo legend, which is not reproduced.
- 67 • The Dark Valley
- 68 • Rival Explorers
- 69 • Shaman Chaperone
- 70 • Spirits Rising
- 71 • Embers of Corruption
- 72 • Inox Salvation
- 73 • Lootpalooza
- 74 • Song of the Harrower
- 75 • Sunken Temple
- 76 • Untold Woe
- 77 • Rat Traps
- 78 • Ternion Tomb
- 79 • Unsouled
- 80 • Conflux of Power
- 81 • Corrupted Presence
- 82 • Storm Mountain
- 83 • Collapsed Cavern
Treasure Index
Printed warning: "Stop! Do not read this information except to reference the contents of specified numbered treasure tiles that have been looted."
- 51. Gain BLESS and one Random Side Scenario
- 52. Gain 15 gold and one Random Side Scenario
- 53. Gain "Shoes of Ataraxy" (Item 102)
- 54. Gain "Chief's Garb" (Item 107)
- 55. Gain 25 gold. Either discard one card or suffer 3 damage and WOUND
- 56. Unlock "Rat Traps" (Scenario 77)
- 57. Gain 10 XP and one Random Item Design
- 58. Gain "Tyrannical Staff" (Item 105)
- 59. Spawn one elite Forest Imp in the nearest empty hex. This elite Forest Imp is an ally to you and an enemy to all other monster types. This Forest Imp gains WOUND and cannot be healed
- 60. Gain 25 gold. Either discard one card or suffer 3 damage and POISON
- 61. Gain BLESS x2 and "Runic Visard" (Item 101)
- 62. Gain "Graveweed Extract" (Item 118)
- 63. Gain "Sun Earring" (Item 49)
- Gain Muddle and "Shoes of Ataraxy" (Item 102)
Envelope Index
Printed note: "Stop! Read this first! This information is used to reference when the contents of a specified envelope is unlocked and for any related instructions."
- Complete a Milestone challenge: read the section from the specified instructions to unlock envelope M.
- Section 19.A: follow the instructions to unlock envelope S.
- Retire a (class icon) character: read the section on the back of the character mat to unlock envelope U.