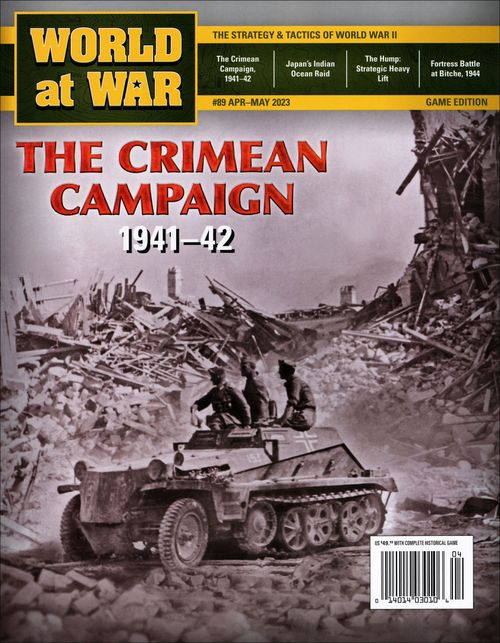
The Crimean Campaign
The Crimean Campaign Rulebook
Table of Contents
Table of Contents
- 1.0 Introduction
- 2.0 Components
- 3.0 Set Up & Hex Control
- 4.0 How to Win
- 5.0 Turn Sequence
- 6.0 Stacking
- 7.0 Zones of Control
- 8.0 Supply
- 9.0 Reinforcements & Replacements
- 10.0 Movement
- 11.0 Combat
- 12.0 Special Movement & Attacks
- 13.0 Optional Historic Soviet Set Up & Reinforcements
- Support Units (11.1) Quick Reference
- Game Turn Sequence Quick Reference (5.1)
- Stacking Limits Quick Reference
- Combat Shifts Quick Reference
1.0 Introduction
The action simulated in the game took place historically between 28 October 1941 and 4 July 1942. The first date marks the German entry into the Crimea via the Perekop Isthmus, while the second marks the end of organized Soviet resistance across the whole peninsula. Those nine calendar months are divided into chronologically varied and unequal numbers of turns. That approach allows for the convenient simulation of the ebb and flow in the action that took place due to bad weather and logistical and command-control constraints.
The Perekop Isthmus fight, which took place from 24 September through 27 October, just off-map to the north, is not included in the game because it took place across terrain too restrictive to allow for maneuver by either side. At this scale it would have come down to how lucky the German player got in rolling his inescapably low-range and mid-range initial frontal attacks. So that episode is considered to have taken place as the last act of the Dniepr River campaign rather than the first act in the Crimean campaign.
1.1 Scale
Each hex on the map represents 5 miles (8 km) from side to opposite side. Each full game turn (GT) represents between half a month to one month; however, due to the extremely high operational tempo at the start and end of the historic campaign, the first and final GTs each represent only about half a week. Units of maneuver (a.k.a. "line units") are primarily divisions and brigades.
1.2 Sides
One player commands the German and Romanian forces (Axis). The other player commands the Soviet forces. There is no operational distinction between the two Romanian corps in the Axis side's counter-mix and the German units. If a rule is said to apply to Axis units, it applies to Romanian and German units equally.
Exception: Replacements (9.4).
2.0 Components
A complete game of TCC includes a 22×34-inch game map, rule set, and a sheet of 176 5/8-inch counters. Players must provide one six-sided die to resolve combat and other random game events.
2.1 Map
The map shows the militarily significant terrain across the main portion of the Crimean Peninsula where this campaign was fought when portrayed at this scale.
- The hexagonal (hex) grid printed over the map regulates the placement and movement of units.
- A unit is always in only one hex at any one time.
- Each hex contains natural and/or man-made features that affect movement and combat.
- The map sheet also provides the players with the following tracks, tables, and charts.
- German & Soviet Turn Tracks: Allows players to track the current GT and provides other game information related to each GT.
- Combat Results Tables (CRT): Players use this table to resolve combat (11.0).
- Turn Sequence Outline: A ready reference for players to conduct the player turns and phases in the prescribed order (5.0).
- Terrain Effects Charts (TEC): Provides examples of the types of terrain, Movement Effect, and Combat Effects when units enter, exit, or are in the type of hex shown.
- Each hex on the map has a unique four-digit identification number printed within it. They are provided to help find referenced places more quickly. They also allow players to record unit positions if a match is interrupted and taken down before it can be completed.
Example: The town of Simferopol is in hex 1912.
2.2 Counters
There are two basic types of counters, combat units and markers.
- Combat units represent the combat formations present at the time.
- Markers allow players to note the specific status of a hex or unit(s) and function as memory aids.
- After reading these rules at least once, carefully punch out the counters. Trimming off the dog ears from their corners with a fingernail clipper will facilitate easier handling and stacking during play and enhances their appearance.
2.3 Combat & Support Units
Each combat unit counter displays specific types of information: nationality, historic identification, unit type, organizational size, number of steps, and combat strengths.
Important: The white circle next to the GT of arrival for German units indicate that the unit counter represents a reduced unit.
2.3.1 Unit Color Schemes
The color of the counters denotes which side or nationality the counter belongs to.
Soviet Units
- Mobile Combat Units: Black on Red
- Static Combat Units: Black on Brown
- Support Units: White on Red
Axis Units
- Mobile Combat Units: Black on Gray
- Static Combat Units: Black on Gray
- Support Units: White on Gray
Important: The R7 Rumanian Infantry Corps is missing the red background in its unit type symbol. The RMC Rumanian Corps is correctly showing the red background.
2.3.2 Organizational Size
The organizational sizes of the units are shown using the following symbols at the top of each counter. The organizational size of a unit may affect its ability to stack with other units (6.0).
- XXX: Corps
- XX: Division
- X: Brigade
- III: Regiment
- II: Battalion
2.3.3 Movement Factors
Unlike most wargames, the units' movement factors are not printed on the counters.
- Mobile combat units may move an unlimited number of hexes per friendly Movement Phase using the restrictions in 10.0.
- Static units may not move once placed on the map.
- Support units are not placed on the map. They are used during the Combat Phase to affect the combat strength of friendly combat units (11.0).
2.3.4 Unit Types
There are seven types of line units in the game, which are divided into three broad sub-categories:
Mechanized
- German Panzer
- Assault Guns
- Motorized Infantry
- Mechanized Infantry
Non-Mechanized
- Soviet Rifle / German Infantry
- Soviet Naval Infantry
- Cavalry
Static
- Soviet Fortress Garrisons / Axis Garrison Marker
Designer's Note: On the Soviet side, all tank units are support units rather than combat units; whereas on the German side all panzer and assault gun units are combat units.
2.3.5 Support Unit Types
Support units do not maneuver across the map via the hex-grid; rather, they appear on the map only during combat resolution.
- Heavy Artillery
- Railroad Artillery
- Field Artillery
- Anti-Tank
- Rocket Artillery
- Heavy Rocket Artillery
- Mortars
- Militia
- Combat Engineers
- Soviet Tank
- Anti-Aircraft
- Combat Air Support
Important: Engineer and rocket support units have two factors. All other support units only have one printed factor, that factor is used for both attack and defense.
2.3.6 Historic Identities & Abbreviations
In addition to their historic identity numbers, units may have abbreviated names. Those abbreviations are as follows:
- CAS: Combat Air Support
- J: Jaeger (Light Infantry)
- KGG: Kampfgruppe Groddeck
- KGZ: Kampfgruppe Ziegler
- L: Lehr
- M: Mountain Infantry / Mountain Rifle
- Mi: Militia
- NKVD: Soviet Security Troops
- R: Romanian
- RMC: Romanian Mountain Corps
- SDS: Sevastopol Defense Sector
- SFG: Sevastopol Fortress Garrison
- SS: Schutzstaffel
Designer's Note: There is no functional difference between Mountain Infantry/Rifle and regular Infantry/Rifle, so an "M" is included in the unit ID of mountain units.
2.3.7 Attack & Defense Factors
A unit's attack and defense factors serve as a measure of each unit's ability to engage enemy line units in combat. When considered together, they are called "combat factors" (11.0).
Important: Static units do not possess an attack factor and thus may never attack; they defend normally.
2.3.8 Combat Unit Step-Strength
All line units contain from one to five "steps." A step is an arbitrary term used to express the ability of a unit to absorb a certain amount of combat losses before ceasing to be an effective formation (a measure of its robustness in current US Army jargon).
Important: Support units do not contain steps.
- Units with combat factors printed on only one side of their counters are one-step units; all Soviet units are one-step.
- Axis units with printing on both sides of two or more counters are multi-step units.
- Each Axis combat unit's current step strength is shown by the number shown in a white circle at the bottom of the counter.
- Axis combat units consist of one to five steps. Units with more than two steps consist of from two to three counters. These units are known as "multi-counter" units.
- Only one of each unit's counters will ever be on the map at one time.
Example: The five steps of the 1SS Motorized Division are printed on 3 counters. Shown below: Full-Strength (Front), and one-Step Loss (Back). Two-Step Losses (Front), and three-Step Losses (Back). Four-Step Losses (Front), and back.
- As a multi-step unit takes step losses the player flips the unit to its weaker side, or if already showing its weaker side, replaces the counter with the next step-down counter. The player will repeat this process until all steps have been eliminated.
- Full-strength two-step units that suffer a step loss are flipped to show their weaker side. If the unit receives another step loss it is removed from the map (eliminated).
- All Axis units that start on the map or arrive as reinforcements are at full-strength.
- Eliminated Axis combat units may be returned to play and reduced combat units may regain lost steps via replacement (9.3 & 9.4).
- All Soviet combat units have one step and are eliminated if they suffer a step loss.
Important: Eliminated Soviet combat units are never returned to play.
2.3.9 Soviet Tried & Untried Units
Soviet combat units may enter play (either as starting units or reinforcements) with the back of the counter being placed face up.
- Neither player will know their exact strength until the first time a unit participates in a combat.
- Once revealed, the unit remains face up until removed from the map.
- All Soviet units with a four-digit number (hex number) on their reverse are set up with their combat side up.
2.4 Markers
The counter-mix includes the following informational memory aid markers. Their uses are explained in appropriate sections of the rules:
- Axis garrison/Soviet Control Marker (3.5)
- Axis Game Turn Marker (5.0)
- Soviet Game Turn Marker (5.0)
3.0 Set Up & Hex Control
After choosing who will command which side, both players should sort and set up their own unit counters and markers.
- The Soviet player sets up first, followed by the Axis player.
- Stacking limits are in effect for both sides (6.0).
3.1 Marker Placement
Set aside the control markers within easy reach of both players. Each player places his own game turn (GT) marker in the "Turn 1 October 1941" box on his own Turn Track (on the map).
3.2 Soviet Set Up
The Soviet player sets up the Soviet units as follows:
Soviet Support Units:
-
Place the five Soviet support units with a "1" on their reverse sides off to the side of the map, face up and within easy reach. They are available for use on GT 1.
-
Place all remaining support units in a wide mouth open container (bin). The bin is the Soviet Support Units Pool.
Soviet Combat Units:
-
Place all Soviet combat units with a "1" and a four-digit hex number (12 units; five static and seven mobile) on their reverse sides in their respective hexes. Units are placed with their combat sides up.
-
Place all Soviet combat units with only a "1" on their reverse sides (nine units) in any hexes on the map with hex numbers ending in xx02 to xx09, inclusive. Units are placed with their combat sides down. The Soviet player may not look at the combat sides.
-
Place all remaining Soviet combat units in a separate bin. The bin is the Soviet Reinforcement Pool.
[Map: Soviet Combat Units Setup Zone]
3.3 Determine Long or Short Game
The Axis player then determines whether the short or long game will be played.
- The Axis player rolls one six-sided die (1d6) and applies the following result:
- 1–3: Hitler has reaffirmed his historic decision to send the 1st SS Motorized Division, the 1st and 4th Mountain Divisions, and the 73rd Infantry Division (those units marked as 1SG in their upper left corner) to Rostov and thus are not available for the upcoming campaign in the Crimea. The Long Game will be played out with a maximum of 15 GTs. The above units will not be used in this scenario.
- 4–6: Hitler does not interfere, and the four above divisions are available. The Short Game will be played out with a maximum of four GTs. The German KGZ Mechanized Brigade, and all Axis combat/support units marked to enter the game on GT 5 or later, will not be used in this scenario.
3.4 Axis Set Up
Long Game: If the Long Game was determined in 3.3, the Axis player sets up the Axis units as follows:
- Place all combat units with a "1" in their upper left corner on the map (the strongest counter for each unit). They may be placed in the xx01 hex row from 1101 to 2101 inclusive.
[Map: German Combat Units Setup Zone]
Exception: 22nd Infantry Division has four steps but is set up in a reduced state with the three steps.
-
Place the three support units marked with a "1" off to the side of the map. They are available on GT 1.
-
Place all remaining combat and support units on the Axis Turn Track in the GT box corresponding to the number in the upper left corner of the counter.
Short Game: If the Short Game was determined in 3.3, the Axis player sets up the Axis units as follows:
- Place all combat units with a "1" in their upper left corner (the strongest counter for each unit), including the four divisions marked SG, on the map. They may be placed in the xx01 hex row from 1101 to 2101 inclusive.
Exception: 22nd Infantry Division has four steps but is set up in a reduced state with the three steps.
-
Place the three support units marked with a "1" off to the side of the map. They are available on GT 1.
-
Place the three support units with a "2" in the upper left corner on the Axis Turn Track in the GT 2 box.
-
All other combat and support units are set aside. They will not be used in the Short Game.
3.5 Initial Hex Control
At the start of play, the Axis player controls all hexes lying in the xx01 hex row. The Soviet player controls all other hexes.
- The control status of a hex changes from one side to the other each time a combat unit of the opposing side enters the hex.
- Opposing combat units will never be in the same hex at the same time, and the projection of a zone of control (ZOC) into a hex does not cause a switch in control status (7.0).
- The control status of most hexes on the map is not important; however, for crucial exception see How to Win (4.0).
- Soviet control markers may (when needed) be used to show which side currently controls a hex.
Important: The Axis player must place an Axis garrison in a town hex that is Axis-controlled (8.0 & 12.1). Axis garrison units have a defense strength of two (they may not attack) and do exert a ZOC.
4.0 How to Win
The German player begins the game on the offensive, fighting to win by conquering the Crimean Peninsula. The Soviet player may win defensively by preventing the German player from achieving this goal, or he may win by preventing (or breaking) the siege of Sevastopol.
The victory conditions are intended to create a competitively interesting situation for both players, despite the advantage historical hindsight inescapably gives them over their historic counterparts in command. Within that limitation, they are intended to recreate, as much as possible, the outlooks and goals of both sides' high commands as they existed and evolved during the campaign.
4.1 Short Game Victory Conditions
If, as determined in 3.3, Hitler decides to send all of 11th Army into the Crimea, play ends no later than the completion of GT 4 (December 1941). The players determine victory as follows:
German Victory: If at any time during the game the German player controls both the Sevastopol Fortress (hex 1417) and the town of Kerch (hex 4503), the German player wins the game.
Draw: If at the end of GT 4, the German player controls either the Sevastopol Fortress hex or Kerch hex (but not both), the game ends in a draw.
Soviet Victory: If at the end of GT 4, the German player controls neither Sevastopol nor Kerch, the Soviet player wins the game.
Important: The supply state of the two localities has no bearing on victory determination.
4.2 Long Game Victory Conditions
If, as determined in 3.3, Hitler decides to send 11th Army divisions off toward Rostov, as was historically the case, play ends no later than the completion of GT 15 (July 1942). The players determine victory as follows:
German Victory: The German player may win the game in either of two ways:
-
If at any time during the game, the German player controls both the Sevastopol Fortress (hex 1417) and the town of Kerch (hex 4503), the German player wins the game.
-
If the Soviet player fails to fulfill an order from Stalin for an offensive (12.2), play stops, and the Axis player is declared to have won the game.
Draw: If at the end of GT 15, the German player controls either the Sevastopol Fortress hex or Kerch hex (but not both), the game ends in a draw.
Soviet Victory: The Soviet player wins the game in one of three ways:
- If at the end of any GT, beginning GT 5, the German player does not have Sevastopol Fortress under siege. Sevastopol Fortress is under siege when it is impossible to trace a path of hexes of any length from it to Kerch (4503) that is free of Axis units and/or Axis ZOC.
Important: Soviet units negate Axis ZOC for this purpose.
- If at the end of GT 6 (January II 1942) the Soviet player controls at least four of the following five locations, the game ends and the Soviet player wins the game:
- Feodosia (hex 3309)
- Alushta (hex 2415)
- Evpatoria (hex 1110)
- Sudak (hex 2912)
- Yalta (hex 2118)
Optional: Beginning the end of GT 7 and continuing until the end of the game, if the Soviet player regains control of any of the above locations, the game immediately ends in a draw.
- If at the end of GT 15, the German player controls neither Sevastopol Fortress nor Kerch, the Soviet player wins the game.
Important: The supply state of the two localities has no bearing on victory determination.
5.0 Turn Sequence
Every GT is divided into two "player turns," one Soviet and one Axis. Each sequence of phases (5.1) makes up one GT.
- Except for the first GT, the Soviet player is the first player.
- The player who is conducting a player turn is the phasing player. The opposing player is the non-phasing player.
- In each GT, after the completion of every Axis player turn there is a mutual Supply Check Phase in which both players participate equally.
- Each action taken by a player must be conducted during the appropriate phase of the sequence given below.
- Once a player has finished a phase, or an activity within a phase, the player may not go back to perform a forgotten action or redo a poorly executed one unless permitted by his opponent.
5.1 GT Turn Sequence
The turn sequence is shown below in outline. The rest of the rules are organized, as much as possible, to explain things in the order they are encountered.
Soviet Player Turn (Skip on GT 1)
- Soviet Reinforcement Phase (9.0) a) Conduct reinforcement procedures. b) Declare movement and Combat Phase sequence. See 12.2 for Stalin Mandated Offensives on GT 5 through 10.
- Soviet Movement or Combat Phase (10.0 & 11.0)
- Soviet Combat or Movement Phase (11.0 & 10.0)
Axis Player Turn
- Axis Reinforcement & Replacement Phase (9.0) a) Conduct reinforcement procedures. b) Declare movement and combat Phase sequence.
- Axis Movement or Combat Phase (10.0 & 11.0)
- Axis Combat or Movement Phase (11.0 & 10.0)
Terminal Supply Check Phase (8.0) (Skip on GT 1 and last GT)
5.2 Ending the GT
A GT is completed when the Supply Check Phase is complete.
Exception: The Supply Check Phase is skipped on GT 1 and the last GT of a game (GT 4 or GT 15).
- If at the end of a GT neither player has met their required victory conditions (4.1 or 4.2), move the game turn marker one box forward on each Game Turn Track and begin play of the next GT.
5.3 Phase Sequence Choice
During a player's Reinforcement Phase, the phasing player must declare the order in which he will conduct the ensuing Movement and Combat Phases (e.g., Movement (move) (10.0) or Combat (fight) (11.0). He then flips his GT marker to the side that indicates his choice of sequence.
- No matter what phase order is chosen, all the phasing player's units may participate to the limit of their normal capabilities in both the Movement and Combat Phases.
- Each player chooses only one phase order per GT, which is then applied to all friendly units throughout that player turn.
- A player may not declare one phase order for some units and another phase order for other units.
- The phase order chosen may affect all attacks by the player's friendly units:
Axis: If the Axis player chooses a fight/move sequence, all attacks conducted by friendly units gain a one-column shift to the right on the Combat Results Table (CRT) (11.2).
Soviet: If the Soviet player chooses a move/fight sequence, all Soviet attacks garner a one-column shift to the left on the CRT.
6.0 Stacking
Stacking is the term used to describe the placement of more than one friendly unit in the same hex at the same time.
- Opposing combat units may never be in the same hex at the same time.
- All Axis units (German and Romanian) are friendly to each other and may be stacked together.
- Markers, static units, and support units do not count for stacking.
- Stacking limits apply at the following times:
- During set up.
- At the end of each phase, including each player's Reinforcement Phase.
- Units advancing after combat must meet stacking limits after completing advance after combat.
- If at any of the above times, a stack is found to exceed its stacking limit, the opposing player may eliminate any units (his choice) more than the stacking limits.
6.1 Axis Stacking Limit
The Axis player may stack up to three division equivalents in each hex.
- The number of steps remaining in a unit has no bearing on stacking.
- Each division-sized unit counts as one division.
- Romanian corps count as one division.
- Each brigade, regiment, and/or battalion counts as one-half a division.
- Axis garrison units do not count for stacking.
6.2 Soviet Stacking Limit
The Soviet player may stack six combat units in each hex. Organizational size and number of steps has no bearing on stacking.
6.3 Fog of War
Neither player may look beneath the top unit of an enemy stack until such time as the phasing player declares an attack against that stack.
Important: Once the phasing player has observed an opposing stack, the player may not cancel the declared attack.
7.0 Zones of Control
The six hexes immediately surrounding a hex containing one or more combat units (mobile or static) constitute the zone of control (ZOC) of the units in that hex.
Important: Support units do not project ZOC.
- The ZOCs of an opponent's units are referred to as enemy zones of control (EZOC).
- There is no difference in effect between ZOC projected by combat units of different sides or types into the same hex.
- Opposing combat units may simultaneously project ZOC into the same hexes.
- A unit (or stack) projects ZOC into, out of, and across all types of terrain.
Exception: Units do not project ZOC across or into all-sea, all Kerch Strait Landing Zone, or all-lake hexsides. This includes the hexside between hex 1416 and 1417.
Designer's Note: At this time in the war, the Soviet army was not trained to conduct mobile operations at a level it achieved later in the war. Attacks tended to be set piece affairs with extensive buildup time in 1941 to mid-1942.
7.1 EZOC & Movement
A moving combat unit must stop its movement for that phase when it enters a hex containing an EZOC.
- A mobile unit of either side that begins its side's Movement Phase in an EZOC may leave that hex provided the first hex it enters does not contain an EZOC.
- After leaving that hex, it may move normally until it enters another EZOC, at which time it must stop its movement for that phase.
- The presence of a friendly unit in an EZOC does not negate the EZOC for movement purposes.
Important: Mobile combat units may move an infinite number of hexes each Movement Phase, unless that unit enters an EZOC. The phasing player must move units across the map from one adjacent hex to another to ensure that a unit does not violate the movement halt required for EZOC.
Exception: Mechanized units and rough/mountain terrain (10.0).
7.2 EZOC & Advance After Combat
EZOC do not inhibit or stop the ability of victorious mobile combat units of either side from advancing after combat, nor do EZOC affect Axis momentum or probe attacks (11.6 & 11.7).
7.3 Negating EZOC for Supply Tracing
The presence of a friendly combat unit (mobile or static) in a hex containing an EZOC negates that EZOC for supply tracing purposes (8.0).
8.0 Supply
Mobile combat units require supply to use their full combat factors.
Important: The following units are not affected by supply. They are always in supply:
- Static Soviet Units,
- Axis Garrisons,
- Soviet units in Kerch (hex 4503), Sevastopol Fortress (hex 1417), Sevastopol Defense Sector (hexes 1416, 1517, 1518, and 1418).
- A mobile combat unit is always in one of two supply states; supplied or out of supply (OOS).
- OOS mobile combat units are penalized in combat and are eliminated during Supply Check Phases.
- A player may move units into hexes where the units will, or may, become OOS.
8.1 When to Check Supply
Players check the supply status of units at two points during the game.
Combat Declaration: Both the phasing and non-phasing player checks the supply status of all participating units when a combat is declared. Halve the attack or defensive factor (round up each individual unit) of all units found to be OOS.
Supply Check Phase: The Soviet player, then the Axis player checks the supply status of all mobile units. Units found to be OOS are eliminated and removed from the map.
Important: Do not conduct the Supply Check Phase on GT 1 and on the last GT of the scenario.
8.2 Overland Supply
Overland supply is traced from a valid supply source to the checking unit.
- To be a valid supply source the hex must be friendly-controlled.
- Players may choose to trace a supply line to any valid supply source on a unit-by-unit basis.
Important: A supply source that is re-occupied by friendly units after being controlled by enemy units immediately becomes a valid supply source again.
- The supply line is traced from a supply source along any path of contiguous hexes of any length to the checking unit.
- The supply line may enter and/or cross any type of terrain.
Exception: Supply lines may not cross or enter an all-sea, all Kerch Strait Landing Zone, or all-lake hex or hexsides. This includes the hexside between hex 1416 and 1417.
- A supply line may not enter an enemy-occupied hex (including Axis garrisons).
- A supply line may not be traced through or out of a hex containing an EZOC, unless that hex is occupied by a friendly combat unit.
- A supply line may be traced into an EZOC.
8.3 Soviet Supply
The Soviet player may be in overland or coastal supply.
8.3.1 Soviet Overland Supply
An overland supply line is traced from either the town of Kerch or the Sevastopol Fortress hex.
8.3.2 Soviet Coastal Supply
Beginning GT 1 and continuing until the Supply Check Phase of GT 12, any Soviet unit occupying a hex adjacent to the Sea of Azov or the Black Sea (including Kerch Strait Landing Zone hexes) is always in supply.
Note: The Sivash is not considered part of the Sea of Azov.
Important: Beginning GT 13 Soviet units may not use coastal supply.
8.4 Axis Supply
Axis supply lines are traced from any north map edge land hex (hex 1101–2501, inclusive) using the procedure in 8.2.
[Map: Axis Supply Sources]
9.0 Reinforcements & Replacements
Reinforcements are units that enter play after a game has begun. Replacements (RP) are a way of strengthening Axis units on the map that are below their maximum step-strength or of returning eliminated units to play.
- There are no Soviet combat or support unit replacements.
Exception: Soviet static garrison units may be replaced (9.1.1).
- There are no Axis support unit replacements. Axis support units, once entering play, may be used once each GT. They are never eliminated.
- The owning player must abide by stacking restrictions when placing reinforcements, replaced, or eliminated units on the map.
9.1 Soviet Reinforcements
During the Soviet Reinforcement Phase beginning GT 2, the Soviet player consults the Soviet Turn Track and determines if any Soviet reinforcements arrive. The track lists Soviet reinforcements as follows:
CU x# (Combat Units): The Soviet player randomly picks the listed number of Soviet combat units from the Soviet Reinforcement Pool (3.2). He may not examine the units.
- Units may not be deployed in enemy occupied hexes; however, they may be placed in EZOC.
- Units must adhere to stacking restrictions (6.2).
Exception: No more than four units may be deployed on each KSLZ hex; however, the six-unit Soviet stacking limit remains in place.
- The Soviet player may delay combat unit reinforcements (for any reason). Delayed reinforcements may be placed during any subsequent GT or as part of an amphibious landing.
SU x# (Support Units): The Soviet player randomly picks the listed number of Soviet support units from the Soviet Support Units Pool (3.2). The Soviet player may examine support units. They are available for use during the current GT.
- Combat unit reinforcements are deployed onto the map during the Soviet Reinforcement Phase. Reinforcements may be deployed at the following locations:
- Sevastopol Fortress hex
- The town of Kerch
- Any Kerch Strait Landing Zone (KSL) hex
- Units are placed on the map with their non-combat side up.
Important: The Soviet player must take all support unit reinforcements; however, there is no requirement to use them in the GT received (11.1).
9.1.1 Soviet Static Unit Replacements
Eliminated Soviet static units may be returned to play.
- During the Soviet Reinforcement Phase, the Soviet player may place an eliminated static unit back on the map if the original placement hex (on the back of the counter) is Soviet-controlled and in overland supply. The hex may be in an EZOC.
- Soviet static units may be replaced any number of times, if the above conditions are met.
9.2 Axis Reinforcements
During the Axis Reinforcement & Replacement Phase the Axis player places the reinforcements noted for the current GT on the map.
- Reinforcements may not be placed in an enemy-occupied hex; however, the hex may be in an EZOC.
- Stacking limits must be observed.
- All reinforcements enter at full-strength.
- Reinforcements are placed as follows:
- In any north map edge hex (hex 1101 through 2501).
- In any in supply Axis-controlled town hex.
[Map: Axis reinforcement entrances]
- Reinforcements must be placed on the map the GT of arrival. Units not placed, for any reason, are lost and may not arrive on a later GT.
Important: If KGZ is still in play when KGG arrives on GT 11 (May I, 1942), permanently remove KGZ from play.
- Axis support units received are placed with the other available support units and are available for use during the current GT.
9.3 Axis Replacement of Eliminated Units
Eliminated Axis units may be returned to play. The procedure differs by their supply status when eliminated.
-
When the last step of an OOS combat unit is eliminated (for any reason), or a combat unit is eliminated because of a concentric attack. The Axis player must roll 1d6. The result of the DR is the number of GTs that must pass before that unit may return to play (do not count the current GT).
Example: An OOS unit is eliminated on GT 2. The Axis player rolls 1d6 with a result of four. The player would place the unit in the GT 6 box of the Axis Turn Track.
-
When the last step of an in-supply combat unit is eliminated (for any reason) but was not eliminated because of a concentric attack, the Axis player must roll 1d6. The player divides the DR result by two (round up). The result is the number of GTs that must pass before that unit may return to play (do not count the current GT). These units should be placed in the appropriate turn number of the Turn Track.
Example: An in-supply unit is eliminated on GT 2. The unit was not eliminated due to a concentric attack. Axis player rolls 1d6 with a result of five divided by two. The Axis player places the unit in the GT 5 box of the Axis Turn Track.
Exception: Romanian units and the two German KG units may not be returned to play when eliminated.
- Eliminated Axis combat units reenter play with one step. The Axis player does not expend replacement points (RP) for returning the unit to play.
- If the DR for a unit's return to play is after GT 4 (short game) or GT 15 (long game) the unit is permanently removed from play.
9.4 Replacement of Reduced-Strength Axis Units
The Axis player receives RP steps that allow that player to rebuild reduced on-map combat units (those units that have not been eliminated).
- The Axis player receives RP by checking the Axis Turn Track.
- Each RP may replace one step.
Important: RP may not be used to rebuild the two German KG (KGG and KGZ) units when reduced.
- The Axis player may accumulate RP from GT to GT.
- To receive a RP a unit must be in supply. The unit may be in an EZOC.
- RP are listed as follows:
- NM (Non-mechanized): NM RP may only replace non-mechanized German (non-Romanian) units.
- M (Mechanized): M RP may replace mechanized or non-mechanized German (non-Romanian) units.
- R Repl (Romanian): R RP may only replace Romanian (not German) units.
Example: On GT 7, the Axis player may use the one M RP to rebuild a German mechanized unit or a German non-mechanized unit and use the two NM RP to rebuild two German non-mechanized units.
10.0 Movement
Mobile combat units of both sides move from hex to adjacent hex, potentially out to any distance from their starting hex.
- Units must move along a path of contiguous eligible hexes.
- The movement of each player's units takes place only during a friendly Movement Phase.
- A player may move any number of friendly mobile units each GT.
- The movement of each unit or stack must be completed before that of another is begun.
- A player may only change the position of an already moved unit if his opponent allows it.
- Units may not cross all-water hexsides, nor may they enter all-water hexes.
Important: Mechanized units are prohibited from entering rough or mountain terrain except when moving from a road or a railroad hex to a road or railroad hex via a hexside crossed by a road or railroad symbol.
- See 7.1 for the effect of EZOCs on friendly movement.
10.1 German KG & 1SS Movement
The two German KGs and the 1SS Division have special movement abilities.
- When playing the Long Game, the two German KG units may ignore EZOCs for all movement purposes.
- When playing the Short Game, the German 1SS Division and KGZ may ignore EZOCs for all movement purposes.
- In both the above cases, the units must trace supply normally (8.0).
11.0 Combat
Combat takes place between adjacent opposing units during the Combat Phase of each player turn.
- The phasing player is always the attacker, and the non-phasing player is always the defender.
- Combat is voluntary. A player is never required to conduct an attack.
- If there are two or more enemy units in a hex being attacked, the attacking player must attack all units in that hex. The attacker may not attack individual units in a hex. An attack must be against all units in that hex.
- An enemy-occupied hex may be attacked by any or all adjacent enemy units that the attacking player desires.
- No more than one defending hex may be attacked in a single combat.
- No attacking unit may divide its attack factor and apply it to more than one combat.
- No defending unit may have part of its defense factor attacked by one or more attackers, while another part is attacked by others.
- Units in a stack are not required to attack the same hex. The attacking player may allocate units stacked in a hex to different combats as desired.
- Defending units may not refuse combat. All units in a defending hex must participate when attacked.
- Defending Axis units may only be attacked once per Combat Phase.
- Defending Soviet units may be attacked more than once per Combat Phase (11.6).
- Attacking Soviet units may only conduct one attack per Combat Phase.
- As per the Axis Momentum Attack rule (11.6), attacking Axis units may conduct more than one attack per Combat Phase.
- There is no limit on the number of attacks a player may resolve during a friendly Combat Phase.
- The attacking player need not declare all attacks beforehand, and they may be resolved in any order the attacking player desires.
- Each attack must be resolved prior to the attacking player declaring and resolving the next attack.
11.1 Support Units in Combat
Players may commit support units (when available) to each combat.
- Each support unit is printed with a support factor. The total number of support factors committed by each side is added to the total combat factors of friendly participating units.
Important:
- The German Engineer unit (only) has two combat factors: attack (left) and defense (right). See also 11.1.2(b).
- Rocket artillery support units also have two factors on them. The higher number (right hand) is only used if the supported friendly unit or stack is attacking into or defending in clear terrain.
- Soviet support units may only be used to support one combat per game. Once used, the player should set them aside in a separate area; they may not be used again.
- Axis support units may be used once each GT. Used support units should be set aside until the beginning of the next GT.
Important: Players may commit any number of support units to a given combat; however, note that the maximum number of support factors that may be used cannot exceed the total number of friendly combat factors (after any modifications) used in the combat.
11.1.1 Soviet Support Unit Restrictions
a) If all Soviet units participating in a combat are OOS, only in coastal supply, or can only trace overland supply to the Sevastopol fortress hex, then only air support units (CAS 1 & CAS 2) may participate in that combat.
Important: If any one participating unit has an overland supply line to Kerch, any support unit may be used (8.1).
b) Soviet anti-tank units may only be committed if the Soviet player is the defending player. Anti-tank units may not be used to support Soviet attacks.
c) If all the participating Soviet combat units are in a rough or mountain hex, tank support units may only be committed to the combat if at least one of the participating Soviet units is in a road or railroad hex and (a) does not apply.
11.1.2 German Support Unit Restrictions
See 11.2.4 for DR modifications for specific German support units.
a) If all Axis units participating in a combat are OOS, the Axis player may only apply support units when at least one participating Axis unit is within four hexes (do not count the hex occupied by the units, do count the supply hex) to a hex that can trace a supply line to an Axis source of supply. Enemy units and/or EZOC have no effect on the four-hex distance.
b) The German combat engineer unit may always support Axis defenses but may only be used to support Axis attacks if one or more of the involved Axis line units is in supply and that player has chosen the Fight/Move phase sequence.
Important: German support markers may support Romanian and/or German combat units.
c) German railroad artillery units may only be used to support attacks or defenses taking place within four hexes of a rail hex that is in turn connected to Dzhankoi (2101) via a path of Axis-controlled railroad hexes. The presence of an Axis unit in a railroad hex containing a Soviet ZOC is considered to negate that ZOC for purposes of this rule.
11.2 Combat Results Table (CRT)
Column Shifts & Die Roll Modifiers
Players will determine the initial differential for each combat (11.3, Step 5).
- The initial differential column on the CRT may change (be shifted to the right or left) due to terrain and/or other circumstances.
- All applicable shifts are cumulative in their effect. All applicable shifts are applied to get one final left or right differential column shift.
- Shifts to the left favor the defender; shifts to the right favor the attacker.
Important: If the total number of shifts would cause the final column to be lower than zero or greater than 55, no further shifts are applied.
11.2.1 Terrain Shifts
The terrain in the defender's hex (defending hex) and/or hexside terrain may shift the differential column to the left. A synopsis of all column shifts and combat result modifications is listed on the Terrain Effects Chart (TEC) on the map.
- Clear and Town Hexes: Units defending in clear or town terrain hexes derive no benefit to their defense.
- Rough Hexes: Units defending in a rough hex receive a one shift to the left. German mechanized combat units may only attack into a rough hex if that hex contains a road or railroad, and the German force is attacking across a hexside crossed by that road or railroad symbol.
- Mountain Hexes: Units defending in a mountain hex receive two shifts to the left. German mechanized combat units may only attack into a mountain hex if that hex contains a road or railroad, and the German force is attacking across a hexside crossed by that road or railroad symbol.
- All-Water Hexsides & Arabatskaya Spit: No combat is allowed across all-water hexsides, no matter if they are all-sea or all-lake.
Important: The six Arabatskaya Spit hexes (2901–3304) are out of play for all movement and combat.
- Sevastopol Fortress & Defense Sector Hexes: a) Soviet combat units defending in the Sevastopol Fortress hex, or a Sevastopol Defense Sector hex receive three column shifts to the left. b) Axis combat units defending in the Sevastopol Fortress hex receive a one column shift to the left. c) Axis combat units defending in a Defense Sector hex do not receive any shifts. d) All of the above shifts apply no matter the number of times the hexes are captured or re-captured.
11.2.2 Soviet Naval Gun Support
On GTs 1 through 12, inclusive, the Soviet player may apply one column shift to the left for one combat each GT when defending on any coastal hex.
Exception: Coastal hexes containing the Sevastopol Fortress or Sevastopol Defense Sectors, and those bordering the Sivash, do not receive the Soviet naval gun support.
Designer's Note: The hexes, except those noted in the rule above at and around Sevastopol, are considered separate terrain types throughout all GTs, and they have their distinct combat benefits for Soviet defenses. Also note: The Sivash is not considered part of the coast.
11.2.3 Concentric Attacks
Attacking units receive a concentric attack bonus if units are attacking a defending hex from:
- Hexes directly opposite to each other; or,
- Three surrounding hexes with one hex between each attacker-occupied hex; or,
- Four or more hexes.
Example: The 22nd and 170th Divisions would qualify for a concentric attack for being directly opposite each other. The 24th, 46, and 170th would qualify for a concentric attack for having three units attacking with one empty hex between them.
[Map: Concentric Attack]
- The concentric attack bonus does not apply if:
- Axis or Soviet units are defending in a town; or,
- Soviet units are defending in the Sevastopol Fortress hex or the Sevastopol Defense Sector hexes.
- The concentric attack bonus awards attacking Axis units two column shifts to the right.
- The concentric attack bonus awards attacking Soviet units a one-column shift to the right.
11.2.4 German Superiority
The German forces (especially their mechanized forces) enjoyed a marked superiority over their Russian opponents.
- Apply one right shift if at least one German mechanized unit participates in an attack against a clear or town hex.
- Apply one left shift if at least one German mechanized unit participates in a defense in any terrain.
- Modify the combat DR as follows:
- −1: If at least one German CAS support marker is committed to an Axis attack.
- +1: If at least one German CAS support marker is committed to an Axis defense.
- −1: If the German engineer unit and or at least one rail siege gun support unit is committed to an Axis attack into any type of fortified hex.
11.3 Combat Procedure
Conduct each combat in the order given.
Step 1: The attacking player informs the defending player which hex will be attacked, and which friendly units will participate in the attack. Unit combat strengths are not revealed at this time.
Step 2: The attacking and defending player secretly determine the number of support units that will participate in the combat using the restrictions in 11.1. After both players have made their choices, the players simultaneously reveal all support units.
Step 3: Players reveal the combat strengths of all participating units and then each player totals the combat factors of all friendly participating combat units. Modify each OOS participating combat unit prior to totaling each unit's combat factor.
Step 4: Players then add their total support factors to the combat factor totals. The total support factors for each side may not exceed the modified total combat factors. Support factors greater than the total combat factors are ignored.
Step 5: Subtract the defending player's total from the attacking player's total. The result is the initial combat differential.
Step 6: Players consult the CRT and locate the column matching the differential from Step 5. If the differential is greater than a column, but less than the next column to the right, the players must use the lower differential column.
Step 7: The players then determine the net column shifts (11.2) to locate the final combat differential.
Step 8: The attacking player rolls 1d6 and modifies the DR as required in 11.2.4.
Step 9: The player then cross references the modified DR with the final combat differential column.
Step 10: Players resolve the combat using the procedures in 11.4 and 11.5.
11.4 Combat Results Table (CRT) Limits
The column headings on the CRT range from "0" to "55." Final combat differentials of less than zero are resolved on the "0" column and final combat differentials of greater than 55 are resolved on the 55 column.
11.5 Combat Results
Combat results are given in terms of steps lost by the involved forces in each battle.
- Results to the left of the slash apply to the attacker and those to the right of the slash apply to the defender.
Example: The final differential column is +5. The attacker's DR result is 3. Cross referencing the DR with the +5 column shows a 1/1. Each side must lose one combat step.
Important: It is possible that both sides may be eliminated due to step loss requirements.
- If a side receives more step losses than the total number of friendly steps participating in the combat, all units are eliminated, and any remaining step losses are ignored.
- Both players may apportion their own side's step losses among participating friendly units as desired.
Exceptions:
- When Soviet units are defending in the Sevastopol Fortress hex or a Sevastopol Defense Sector hex and a Soviet static unit is in the hex, the Soviet player may only assign a step loss to the static unit if all other units in the hex have been eliminated.
- In any combat (attacking or defending) if the German KGG and/or KGZ unit is participating in the combat, the KGs must be eliminated prior to assigning any step losses to any other Axis unit.
- If after resolving all step losses all defending units have been eliminated, the attacking player may advance into the defending hex.
- The attacking player may advance any non-static participating units into the hex. Stacking and terrain limits apply in the hex.
- EZOC have no effect on advance after combat.
- Movement factors are not expended.
- The attacking player is not required to advance after combat, nor is the player required to advance all participating units.
- Defending units may not advance after combat.
11.6 Axis Momentum Attacks
During the Axis Combat Phases of GTs 2 through 14, the Axis player may (after conducting any advance after combat) conduct a momentum attack.
- Axis combat units that advance after combat may immediately attack again (owning player's choice). Momentum attacks are an exception to the one unit one attack per GT rule.
- Only Axis units that advance after combat may conduct a momentum attack.
- A momentum attack may not be conducted into a hex containing a Soviet static unit. This is true even if the static unit is stacked with other Soviet combat units.
- The owning player must make the decision to conduct a momentum attack prior to initiating any further combats.
- Other than the restriction noted above, conduct a momentum attack using the same procedures as a normal attack.
- Units that participate in a momentum attack may advance after combat after conducting the momentum attack.
- Each unit can only initiate one momentum attack per game turn.
Important: Momentum attacks may be conducted against Soviet units that have previously been the subject of an Axis attack during the current phase.
11.7 Axis Probing Attacks
During the Axis Combat Phase, the Axis player may decide to conduct a probing attack with any unit into an adjacent unoccupied hex, if both of the following apply:
- The Axis units are adjacent to one or more hexes containing enemy units; and,
- They are also adjacent to one or more unoccupied hexes that are within an EZOC.
- A unit conducting a probing attack may be in an EZOC.
- Conduct probing attacks using the same procedures as regular attacks, except do not conduct the odds calculation process and neither side can in anyway suffer any losses.
- Instead, announce the probing attack and then make an advance after combat into the designated hex.
- A player may conduct a momentum attack as a probing attack. The player may use the advance resulting from an initial probing attack to create the opportunity for a momentum attack.
- A unit can only make one probing attack and one momentum attack per friendly Combat Phase (in either order).
12.0 Special Movement & Attacks
12.1 Soviet Amphibious Landings
During GT 4 and GT 5 only, the Soviet player may conduct one amphibious landing in each of these GTs.
- The Soviet player must declare a move/fight sequence.
- The amphibious landing must be the first action taken during the Soviet Movement Phase.
- The landing may be made into any coastal hex containing a town that is occupied by an Axis garrison unit only (i.e., no other Axis unit may be in the hex).
- The Soviet player may select any one mobile combat unit. The unit must be in Kerch or Sevastopol (it may be an untried unit or a previously revealed unit).
- The Soviet player moves the unit from its location directly to the invasion hex.
- During the ensuing Soviet Combat Phase, the Soviet player must conduct an attack on the target hex using the landing unit.
- Other adjacent Soviet units may also participate in the attack.
- All standard combat and support rules apply.
- The Axis garrison defends with a combat factor of two.
- If the Axis garrison takes one step loss it is eliminated.
- If at the end of the combat the Axis garrison is not eliminated, the Soviet unit conducting the amphibious landing must be eliminated, no matter any other losses taken by the Soviet player.
- No Axis momentum attack may take place during Game Turns 1 or 15, as they each represent too short a time span to allow for them.
12.2 Stalin-Mandated Offensives
If playing the Long Game (only), then on GTs 5 through 10 (inclusive), after declaring the sequence of phases, the Soviet player must roll 1d6.
- 1–3: no effect.
- 4–6: the Soviet player must roll a second 1d6.
Important: If the Soviet player has already conducted four Stalin Mandated Offensives GTs (rolled 4–6), the Soviet no longer conducts the mandated offensive check.
- The result of the second DR is the number of Soviet division equivalents that must participate in Soviet attacks during that GT.
- The required number of units may all participate in one attack or any number of attacks, if the required number of units do attack.
- If the Soviet player cannot get the required number of units adjacent to Axis units, play stops and the Axis player is declared the winner (4.2).
12.3 22nd Panzer Division Shake Out
Due to its historic unpreparedness to enter combat when it initially arrived in the Crimea, the actual combat factor strength of the 22nd Panzer Division is uncertain the first time it enters battle.
- The first time that the 22nd participates in a combat the Axis player must determine the division's combat factor for that combat as follows:
Important: If the 22nd has not participated in a combat prior to GT 13, the division operates normally using its printed combat factors.
- If the first combat is an attack, the Axis player rolls 2d6 and totals the two DRs. The result is the 22nd Division's attack factor for that attack.
- If the first combat is a defense, the Axis player rolls 1d6. The result is the 22nd Division's defense factor for that defense.
- After the first combat, the 22nd Division operates normally and uses its printed combat factors.
12.4 Axis Assault Boats
Once per game (long or short), during any Axis Combat Phase, the Axis player may announce a cross-water attack into the Sevastopol Fortress hex.
- A cross-water attack may be conducted into the Sevastopol Fortress hex from hex 1416 by non-mechanized Axis units.
- During Step 1 of the combat procedure (11.3), the Axis player may declare the cross-water attack. All non-mechanized units (up to the stacking limit) in hex 1416 may participate.
- This attack may be combined with other Axis units attacking from any other adjacent hex.
- The units attacking across the water hexside ignore the water hexside for combat purposes, including advance after combat.
13.0 Optional Historic Soviet Set Up & Reinforcements
The Soviet set up and reinforcement procedures given above in the standard rules are meant to model in the player's minds the uncertain realities with which their historic counterparts in command had to deal regarding those crucial aspects of their planning. That is, as viewed from the Stavka in Moscow, the Crimean Front was the "step-child" of them all, with Stalin's attention moving between a laissez faire outlook to one of tactical monitoring and direction on a sporadic basis. That meant the commanders within the front never knew what orders were coming next or what units they would be sent to carry-out those missions.
For those who prefer a historically deterministic approach to military history and its simulation, we present the following information regarding the initial Soviet deployment and their later reinforcements. You can decide to use them to whatever degree best suits your own outlook and comfort level.
13.1 Soviet Historic Set Up & Reinforcement Schedule
Scenario At-Start Units
Combat Units (with hex location):
- Sevastopol Fortress Garrison — 1417
- Sevastopol Defense Sectors — 1416, 1418, 1517 & 1518
- 7th Naval Infantry Brigade — 1417
- 9th Naval Infantry Brigade — 4503
- 40th Cavalry Division — 1417
- 42nd Cavalry Division — 0306
- 48th Cavalry Division — 1502
- 40th Rifle Division — 1303
- 106th Rifle Division — 1402
- 156th Rifle Division — 1102
- 157th Rifle Division — 1404
- 172nd Rifle Division — 1403
- 184th Rifle Division — 1912
- 271st Rifle Division — 1302
- 276th Rifle Division — 2201
- 320th Rifle Division — 3309
- 321st Rifle Division — 1110
- 421st Rifle Division — 1912
Support Units:
- 3/8 Guards Rocket Battalion
- 52nd Artillery Regiment
- 265th Artillery Regiment
- CAS ×2
- Militia Division
GT 2 Combat Unit Arrivals
- 2nd Rifle Division
- 302nd Mtn Rifle Division
- 79th Naval Infantry Brigade
GT 3 Combat Unit Arrivals
- 396th Rifle Division
- 398th Rifle Division
GT 4 Combat Unit Arrivals
- 8th Naval Infantry Brigade
- 9th Mtn Rifle Division
- 63rd Mtn Rifle Division
- 138th Mtn Rifle Division
- 236th Mtn Rifle Division
- 84th Mot Infantry Brigade
- 224th Rifle Division
- 251st Mtn Rifle Regiment
- 291st Mtn Rifle Regiment
- 345th Rifle Division
- 388th Rifle Division
- 390th Rifle Division
- 400th Rifle Division
- 404th Rifle Division
- 1130th Rifle Regiment
- Crimea Front NKVD Regiment
Support Unit Arrivals (GT 4):
- 1/7 Guards Rocket Artillery Battalion (1–2)
- 51st Artillery Regiment (1)
- 456th Artillery Regiment (1)
- 24th Tank Regiment (1)
GT 5 Combat Unit Arrivals
- 12th Infantry Brigade
- 72nd Cavalry Division
Support Unit Arrivals (GT 5):
- 55th Tank Brigade
- 81st Tank Brigade
- 136th Artillery Regiment
- 457th Artillery Regiment
- 51st Mortar Battalion
GT 7 Combat Unit Arrivals
- 143rd Infantry Brigade
Support Unit Arrivals (GT 7):
- 56th Tank Brigade
- 79th Tank Brigade
- 126th Tank Brigade
- 229th Tank Brigade
- 25th Artillery Regiment
- 53rd Artillery Regiment
- 19th Rocket Regiment
GT 9 Combat Unit Arrivals
- 77th Mtn Rifle Division
- 109th Rifle Division
Support Unit Arrivals (GT 9):
- 39th Tank Brigade
- 40th Tank Brigade
- 124th Tank Brigade
- 674th Mortar Regiment
- 766th AT Regiment
- 979th AT Regiment
- 989th AT Regiment
GT 10 Support Unit Arrivals
- 125th Tank Brigade
- 548th Artillery Regiment
- 18th Rocket Regiment
- 25th Rocket Regiment
- 52nd Rocket Battalion
- 596th AT Regiment
GT 11 Combat Unit Arrivals
- 139th Rifle Brigade
- 386th Rifle Division
- 2nd Naval Infantry Regiment
- 3rd Naval Infantry Regiment
Support Unit Arrivals (GT 11):
- 18th Artillery Regiment
- 674th AT Regiment
- 700th AT Regiment
Support Units (11.1) Quick Reference
Soviets (11.1.1):
a) Support units each used only once per game. b) If Soviet units are OOS, only in coastal supply, or can only trace overland supply to Sevastopol fortress, then may only use CAS units in support. c) Anti-tank units may only support Soviet defenses. d) If all Soviet units are in rough/mountain, Soviet tank support may only be used if some of the Soviet units are in a road/railroad hex and (b) does not apply.
Axis (11.1.2):
a) Support units each used once per GT. b) If all Axis in a combat are OOS, may only use support units if at least one Axis unit in the combat is within 4 hexes (ignore Soviet units and EZOC) of a hex that can trace Axis supply. c) Engineer only supports attacks, and only if at least one unit is in supply and Axis player has chosen Fight/Move. d) Railroad artillery only support combats within 4 hexes of a rail hex connected to 2101 via Axis-controlled railroad hexes (Axis units negate EZOC).
Game Turn Sequence Quick Reference (5.1)
Soviet Player Turn (Skip on GT 1)
- Soviet Reinforcement Phase (9.0) a) Conduct reinforcement procedures. b) Declare movement and combat phase sequence. See 12.2 for Stalin Mandated Offensives on GT 5 through 10.
- Soviet Movement or Combat Phase (10.0 & 11.0)
- Soviet Combat or Movement Phase (11.0 & 10.0)
Axis Player Turn
- Axis Reinforcement & Replacement Phase (9.0) a) Conduct reinforcement procedures. b) Declare movement and combat phase sequence.
- Axis Movement or Combat Phase (10.0 & 11.0)
- Axis Combat or Movement Phase (11.0 & 10.0)
Terminal Supply Check Phase (8.0) (Skip on GT 1 and last GT)
Phase Sequence Choice (5.3) Phasing player must declare the order in which he will conduct the ensuing Movement and Combat Phases. Flip the GT marker accordingly.
- The phase order chosen may affect attacks by the player's friendly units.
Stacking Limits Quick Reference
Axis Stacking Limit (6.1) The Axis player may stack up to three division equivalents in each hex.
- Ignore step remaining.
- Corps and divisions count as one division.
- Romanian corps count as one division.
- Brigades, regiments, and battalion counts as half a division each.
- Axis garrison units do not count for stacking.
Soviet Stacking Limit (6.2) Six combat units (any size) may stack in each hex. Organizational size and number of steps has no bearing on stacking.
Combat Shifts Quick Reference
Terrain (11.2.1) See TEC on the map.
Soviet Naval Gun Support (11.2.2) GT 1–12: Defending in a coastal hex: one column shift left. Maximum of one such shift per GT. Exception: No such shifts allowed in 1416–1418, or hexes bordering the Sivash.
Concentric Attacks (11.2.3) Axis attacks: 2 shifts right Soviet attacks: one shift right Does not apply to attacks on towns, or Axis (only) attacks on Sevastopol fortress/defense sectors.
German Superiority (11.2.4) German mechanized unit(s) attacking clear or town hex: 1 shift right. German mechanized unit(s) defending in any terrain: 1 shift left.
Die Roll Modifiers (11.2.4)
- Modify the combat DR as follows:
- −1: Axis attack includes at least one CAS support marker.
- +1: Axis defense includes at least one CAS support marker.
- −1: Axis attack on any fortress/defense sector hex includes the engineer and at least one rail siege gun.
- Soviet static units take losses last.
- Axis KGG/KGZ units must be eliminated before other Axis units take losses.
Phase Sequence Choice (5.3) Axis Fight/Move: Axis attacks gain one shift right. Soviet Move/Fight: Soviet attacks gain one shift left.