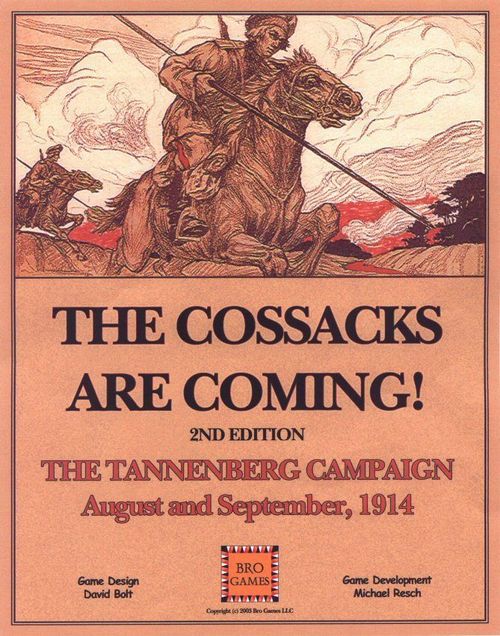
The Cossacks Are Coming!: The Tannenberg Campaign August and September, 1914 – 2nd Edition
The Cossacks Are Coming!: The Tannenberg Campaign August and September, 1914 – 2nd Edition Rulebook
Table of Contents
Table of Contents
- Death of Empires Standard Rules
- 1.0 Introduction
- 2.0 Game Equipment
- 3.0 Important Concepts Before You Begin
- 3.1 Formations
- 3.11 Identifying Primary Formations
- 3.12 Primary Formations and Morale Checks
- 3.13 Formation Attachment
- 3.14 Determining Formations for Combat and Stacking
- 3.15 Strategic Formation Characteristics
- 3.16 Army Formation Characteristics
- 3.17 Corps Formation Characteristics
- 3.18 Division Formation Characteristics
- 3.19 Air Units and Formations
- 3.2 Unit Facing
- 4.0 Sequence of Play
- 5.0 Weekly Interphase
- 6.0 Impulses
- 7.0 The Command Phase
- 7.1 Mission Order Segment
- 7.11 Formation Attachment Step
- 7.12 Reinforcement and Withdrawal Step
- 7.13 Mission Order (MO) Step
- 7.14 Special Rules Effecting MOs
- 7.15 Types of Mission Orders
- 7.16 RR Engineer Point Step
- 7.2 Supply and Command Segment
- 7.21 Relocate Army Base Step
- 7.22 Determine Main Depot Status Step
- 7.23 Supply Status Step
- 8.0 Movement Phase
- 8.1 Concealment Segment
- 8.2 March Segment
- 8.22 Detachment Units
- 8.3 Deployed Mode
- 8.31 Reconnaissance
- 8.32 Overruns
- 8.33 Place Combat Markers
- 8.34 Morale Level (ML) Recovery
- 8.4 Road Mode
- 8.41 Characteristics of Units in Road Mode
- 8.42 Stacking, Road Mode, and Movement Costs
- 8.43 Road Mode and Combat
- 9.0 Counter-Movement Phase
- 10.0 The Mutual Combat Phase
- 10.3 Fire Attacks
- 11.0 Morale
- 11.2 Morale Checks (MCs)
- 12.0 Loss Results (LR)
- 13.0 Special Rules
- Glossary
- Cossacks Exclusive Rules
Death of Empires Standard Rules
1.0 Introduction
This rules booklet contains the Standard Rules (3rd Edition) used for all games in the Death of Empires series. These Rules provide the foundation for all the games of the series. The Exclusive Rules included with each title modify the Standard Rules to accommodate the unique aspects of the campaign being modelled. The rules are generally presented in the sequence the game turn follows, after some key initial concepts have been presented.
Underlining emphasizes the importance of a set of rules. Examples and Notes are printed in Italics.
1.1 General Rules
This game involves a great deal of limited intelligence, the use of inverted counters, and so on. Players should exercise special care to adhere to rules that their opponents will not be in a position to enforce due to lack of knowledge (e.g., overstacks that may occur in a hex containing units hidden from your opponent). When players are conscientious, these rules can provide a detailed working model of the historical campaigns. When players are not conscientious, trust and enjoyment can erode, and the pace of the game will decrease.
1.2 Important Concepts
The use of Formations and off-map Command Counters are important design concepts which players may find unfamiliar. As will be explained below in greater detail, the term "Formation" is used to describe a unit or set of units which share a common attachment. (see 3.1) A unit is always part of several formations at different levels of attachment.
- Markers: Markers are used to indicate important bits of information and provide reminders to players about special conditions. Each marker is described in detail in the relevant portion of the rules.
2.0 Game Equipment
2.1 The Playing Pieces
The sheets of die cut counters represent the units that took part in the campaign being modelled. These pieces can be divided into three broad categories: Troop Units, Command Counters, and Markers.
- Troop Units: Troop units are the playing pieces that make up the formations of the opposing armies in a campaign. Most playing pieces fall into this category. Printed on the front side of a counter is information indicating the Primary Formation the unit belongs to, its class, its type within its class, strength, mobility rating, machine gun rating, barrage strength and other important game information. With few exceptions, the back side of a counter indicates the nationality of the unit and which direction it is facing.
- Command Counters: There is a Command Counter for each Primary Formation. These pieces do not represent troop units but are used to establish the Chain of Command for each Primary Formation, and are operated on the Command Tracks. They represent logistical troops and any leaders commanding the formation not represented by a separate leader counter. The only time a Command Counter is not placed on a Command Track is when a Primary Formation is isolated; the Command Counters of isolated Primary Formations are flipped to their isolated side and placed on the map. (see 7.23.C)
Example: A [II] might have been referred to historically as a company or battery, or it might have actually been several independent companies or batteries.
2.2 Troop Units
Troop units represent organized groups of frontline soldiers that operate on the map or are placed in Headquarters Holding Boxes (HQHB) on a chart. Troop units are divided into six classes: Combat Class, Artillery Class, Headquarters Class, Supply Class, Fortress Class, and Air Class. These classes of troop units are explained below.
Counter anatomy (Standard Rule 2.2 illustrations). The printed rules illustrate the counter layout with callouts, which are keyed to the following lettered items:
-
A. Unit Facing: All Combat Class units have a specific facing. Facing is the orientation of a unit's counter in the hex it occupies. The three hexsides adjacent to the top of the counter are the unit's front facing, the three hexsides adjacent to the bottom of the counter are the unit's flanks and rear. (see 3.2)
-
B. Primary Formation Identifier: Printed at the top of the counter is the unit's Primary Formation Identifier which designates the unit's attachment to a Primary Formation. This number or designation is used to identify the unit and its relationship in the Chain of Command. Units whose Primary Formation is an Army have their Primary Formation identifier spelled out in italicized uppercase letters. Units whose Primary Formation is a Corps have their Primary Formation identifier written in Roman numerals and uppercase letters. Units whose Primary Formation is a division, brigade, regiment or battalion have their Primary Formation identifier written in Arabic numerals and mainly lowercase letters; at the end of the identifier is the abbreviation "div" for division, "bd" for brigade, "rgt" for regiment or "bn" for battalion.
-
C. Unit Size Indicator: Printed beneath the Primary Formation Identifier, on top of the Unit Type Symbol, is a symbol denoting the unit's size. A unit's size is one of the following:
- Supreme – XXXXXX Supreme HQ
- Level 1 – XXXXX Front/Army Group
- Level 2 – XXXX Army/Army Detach.
- Level 3 – XXX Corps
- Level 4 – XX Division
- Level 5 – X Brigade or Group
- Level 6 – III Regiment or Wing
- Level 7 – II Battalion or Squadron
- Level 8 – I Company or Battery
Brackets [ ] around any of the above indicate that the unit's size was historically one level smaller or that the unit is made up of a group of units one or more levels smaller.
2.21 Combat Class Units
Combat Class units represent the front line units that do most of the fighting and dying. They are the most numerous class of troop units. They are made up primarily of foot soldiers or cavalry. Engineer and Armored units, when present, also fall into this class. Most Combat Class units are brigade or regiment-sized.
A double unit type symbol (one superimposed on the other) indicates the unit is comprised of two identical sub-units; a triple unit type symbol indicates the unit is comprised of three identical sub-units. Beneath the unit type symbol may be a mobility indicator. The presence of two small wheels beneath the unit type symbol indicates the unit is a wheeled unit. If the wheels are shaded the unit is motorized (i.e., infantry would become motorized infantry if the infantry symbol had two small shaded wheels beneath).
-
E. Strength Points (SP): Printed in the lower left corner is a number representing the unit's Strength Points (SP). SPs represent the basic combat power of the unit, its ability to project fire against the enemy. Each SP represents a number of troops and equipment, depending upon the type of unit. (See the Exclusive Rules for a description of what each SP represents) As SPs are lost in combat the fighting ability of the unit will decline, so SP Loss Markers are placed beneath a unit to indicate its reduced strength. If the printed SP value is enclosed by parentheses, the unit may not attack other units and uses its SP value only when defending.
-
F. Machine Gun Factor (MGF): Some Combat Class units have a number indicating the unit's Machine Gun Factor. The MGF (which is often fractional) is found mainly on infantry units. The MGF is multiplied by the current SP of a unit and added to its SP to determine its combat strength. If enclosed by parentheses, the MGF may only be used when defending.
-
G. Organic Combat Unit Indicator: Combat Class units may have an OCU indicator printed on them symbolizing the presence of less than one SP of organic cavalry (C). This indicator is printed to the left of the Unit Type Symbol.
-
H. Battery Indicator: Some Combat Class units have a "dot" symbol indicating the unit has an attached artillery battery. The Battery Indicator is located to the left of the unit type symbol. If present, one SP is added to the unit's strength in Fire combat.
-
I. Cadre Indicator: This indicator takes the form of either a "+" or "-". Units without any sort of Cadre Indicator are automatically assumed to have one Cadre Point. A "-" symbol means a unit does not have a Cadre Point (CP) when eliminated. A "+" symbol means the unit forms a double strength CP when eliminated. The number of Cadre Points a unit has is dependent upon the number of unit symbols present on the counter. Multiply the cadre strength by the number of unit symbols to determine the total cadre strength.
2.22 Artillery Class Units
Artillery Class units are troop units made up of guns and howitzers, weapons that do most of the killing in industrialized warfare. Non-heavy artillery units have a one hex range. Heavy artillery units have a range of two hexes for Barrage Attack. The information on artillery units is laid out the same way as Combat Class units, except where noted below.
-
A. Unit Type Symbol: This symbol, printed in the center of the unit, identifies what type of Artillery Class unit the counter represents. These symbols are interpreted as follows: Direct Fire Field Artillery; Direct Fire Mountain Artillery; Indirect Fire Field Artillery; Indirect Fire Mountain Artillery; Super Heavy Artillery; Super Heavy Railroad Artillery.
Beneath the unit type symbol may be a mobility indicator. The presence of two small shaded wheels beneath the unit type symbol indicates the unit is a motorized unit. The presence of one shaded wheel attached to an non-shaded wheel indicates the unit is towed.
-
B. Barrage Factor (BF): Artillery Class units have a number indicating the unit's Barrage Factor. The BF is located to the left of the unit type symbol. The BF is used to attack enemy units, either by barraging independently (Barrage Attack) or attacking in conjunction with Combat Class units (Fire Attack).
-
C. Heavy Artillery Indicator: Heavy artillery has a square drawn around the Barrage Factor.
-
D. Bonus Indicator: The BF of some artillery units may have a bonus point. The Bonus Indicator caret (^) is located just above the BF. Artillery Class units with a Bonus Indicator add one to their Barrage Value in any combat they participate in while expending an AP.
2.23 Headquarters (HQ) Class Units
Headquarters Class units are troop units that represent the HQ controlling Combat Class units, as well as the Organic Combat Units (OCU) they contain. All corps and army HQ units have two Cadre Points. All divisional HQ units have one Cadre Point.
The information on these units is laid out the same way as Combat Class units, except where noted below.
- A. Unit Type Symbol: This symbol, printed in the center of the unit, identifies the unit as a HQ Class unit.
- B. Organic Combat Unit Indicator: HQ Class units may have an OCU Indicator printed on them symbolizing the presence of less than one SP of organic cavalry (C). This indicator is printed to the right of the Unit Type Symbol.
- C. Barrage Factor (BF): HQ Class units with a BF are considered to have an OCU of artillery, which is treated exactly like Artillery Class units, as described in Standard Rule 2.22. The strength of the organic artillery is equal to the SP printed in the lower left of the HQ unit counter. The Exclusive Rules will state whether this BF is direct or indirect artillery. If the BF has an indicator for heavy artillery, treat the SP of the HQ Class unit as Heavy Artillery.
- D. Command Control Radius (CCR): Only HQ Class units have a CCR number. This is printed directly beneath the HQ symbol and enclosed by a circle to distinguish it. It is the number of hexes the HQ may project Command Control to its subordinate units.
The Unit Size Indicator printed above the unit type symbol (see 2.21.C) identifies the size of the formation controlled by that HQ. (For example, XXXX denotes an army HQ, XXX a corps HQ, etc.).
2.24 Supply Class Units
Supply Class units are troop units that represent the supply trains and dumps that support Combat Class Units. Command Counters from isolated Primary Formations (on map) are considered Supply Class units. Supply Class units have two unique characteristics: 1) Supply Class units are composed solely of Cadre Points, and have no Strength Points and no facing, and 2) Supply Class units that have been eliminated are automatically returned to play during the friendly March Segment. Main Depots are returned in the impulse following their elimination. Army supply units and corps train units are returned one full game turn after elimination (i.e. a minimum of 7 days after elimination).
The information on Supply Class units is laid out the same way as Combat Class units, except where noted below.
-
A. Unit Type Symbol: This symbol, printed in the center of the unit, specifically identifies what type of Supply Class unit the counter is. These symbols are interpreted as follows: Main Depot; Army Supply Unit; Corps Train.
Beneath the unit type symbol may be a mobility indicator. The presence of two small wheels beneath the unit type symbol indicates the unit is a wheeled unit. If the wheels are shaded the unit is motorized.
2.25 Fortress Class Units
Fortress Class units are troop units that represent individual forts or fortress complexes, well defended by artillery and machine guns. Unlike most troop units, Fortress Class units face equally in all directions, they have no "flanks" or "rear". In general, the information on the counter is presented exactly like that of Combat Class units, except where noted below.
- A. Unit Type Symbol: This symbol, printed in the center of the unit, identifies the unit as a Fortress Class unit.
- B. Barrage Factor (BF): Fortress Class units have a BF printed to the left of their unit type symbol. This is treated as Indirect Artillery unless otherwise noted in the Exclusive Rules. Some Fortress Class units have a Heavy Artillery indicator (a box around the BF), indicating that they have Heavy Indirect Artillery.
- C. Machine Gun Factor (MGF): Some Fortress Class units have a number indicating the unit's Machine Gun Factor. The MGF is found to the right of the unit symbol on the unit counter. The MGF indicates the proportion of the unit's firepower that comes from the garrison (personnel weapons, machine guns, etc.), and provides a bonus in combat. On Fortress Class units the MGF is always enclosed by parentheses, indicating that it may only be used when defending.
- D. Caliber Factor (CF): Only Fortress Class units have a CF rating. It is printed in the lower right corner of the unit counter. The CF symbolizes the defensive power of the Fortress Class unit to resist Barrage Attacks from enemy Artillery Class units. Generally, the higher the CF rating, the more resistant the fortress is.
- E. Supply symbol: Some Fortress Units have a Supply symbol printed below the fortification unit type symbol. This symbol identifies the fortress unit as a supply source. (see 13.25)
2.26 Air Units
Air units are troop units that represent the balloons, dirigibles and the aircraft able to perform reconnaissance and intervene on the battlefield. Facing is irrelevant for Air units. Air units have their own unique counter layout as indicated below.
- A. Unit Type Symbol: Printed in the center of the counter is a silhouette of the principal type of aircraft making up the unit. Examples are pictured below: Airplane Unit; Dirigible Unit; Balloon Unit.
- B. Operations Rating: Only Air units have an Operations Rating. This number is printed in the lower center of the Air unit and symbolizes the unit's general effectiveness at performing air operations. The higher the rating, the more successful the air unit is likely to be.
- C. Range: Only Air units have a Range. This number is printed in the lower right hand corner of the Air unit. It indicates the maximum range of the unit in hexes within which it may conduct air operations.
2.3 Command Counters
Every Primary Formation (but not every unit) in the game has a corresponding Command Counter. A unique Primary Formation Identifier is printed at the top of every Command Counter. Command Counters play a dual role in the game. The Command Counters will usually be found on the Command Tracks printed on the Strategic and Army Charts, where they are used to establish the Chain of Command for each Primary Formation. Command Counters move up and down the tracks to represent the fluctuating Moral Level of their Primary Formations. The only time Command Counters are placed on the map is when the Primary Formation they represent becomes isolated. When placed on the map, Command Counters are flipped to their back sides to represent the location of the rear-area troops of the isolated formation. When a Primary Formation is no longer isolated, the Command Counter returns to its front side and is returned to its Command Track off-map.
2.31 Formation Command Counters
-
A. Flag or Symbol of the originating Country: Printed in the center of the Command Counter is a Flag or Symbol of the country, region, or state from which the Primary Formation originates.
-
B. Morale Level (ML): Printed in the lower left corner of the Command Counter is the Primary Formation's base ML. The ML applies to all the units with the same Primary Formation Identifier as the Command Counter. (Exception: Strategic, Army and Corps Asset units – see 3.13.D) A Primary Formation's ML may fluctuate during the course of the game. The ML may even exceed the Primary Formation's base (i.e. printed) ML, but never by more than two.
-
C. Attachment Limit: All Corps-sized and some Division-sized Primary Formations have an Attachment Limit printed in the lower right corner of the Command Counter. This number represents the maximum number and size of formations that may be placed under the control of that Primary Formation. A player can recognize the size of a formation from its Primary Formation Identifier. (see 2.21.B) Each division-sized (div) primary formation counts as 1 (one) towards the total Attachment Limit permitted. Each brigade-sized (bd) primary formation counts one-half (½). Each regiment (rgt), battalion (bn), or smaller-sized primary formation counts zero (0) towards the total Attachment Limit permitted. If a formation does not have a formation size designation in its Primary Formation Identifier it counts zero (0) towards total Attachment Limit permitted.
EXAMPLE: A Corps has the following formations attached: 35 r div, tn e bd, tn lw rgt and Thorn. The division (div) counts as 1, the brigade (bd) as ½; the regiment (rgt) and the formation with no size designation count as 0. The attachment total is 1½.
-
D. Isolation Status: Printed on the reverse of every Command Counter is an isolation status marker. When the Primary Formation is determined to be isolated, the Command Counter is removed from the Command Tracks and placed on the map, flip-side up. (see 7.23.C) Command Counters on-map have the characteristics of Supply Class units except they may join with other units to form a single formation. (see 2.24 & 3.13.E)
2.4 Leader Counters
Some formations (but not all) in the game have a related leader counter. These represent exceptionally good or exceptionally bad leaders. Unexceptional leaders don't have a leader counter; they are assumed to be with the HQ unit of their formation and have no effect on play. The function of a leader counter is to modify the Mission Order (MO) Procedure. (Exception: Staff Officers – see 2.42) Each leader will have one of four MOs printed on the counter. Each leader counter has a unique Primary Formation Identifier printed at the top of the counter to identify his formation. If a leader commands an army-sized formation the leader counter is placed in the Commander Box on the corresponding Army Chart. Leaders of corps-sized formations are placed in the HQHB for the corps.
-
2.41 Leader Counters: Below are examples of these units.
-
A. Leader Name and Profile: In the center of every leader counter is the leader's name and his likeness.
-
B. Mission Order (MO) Preference: Printed in the lower left-hand corner of the leader counter is the leader's historical MO Preference. If the MO given from a superior leader is different from the leader's MO preference, the leader may execute the printed MO on his counter instead. This creates situations where leaders disobey their superiors, forcing their primary and attached formations to engage in Mission Orders contrary to a player's intentions. This is determined during the Mission Order procedure. (see 7.13)
-
C. Mission Order Modifier: In the lower right hand corner of the leader counter is printed that leader's MO Modifier. This number provides a die roll modifier whenever the leader attempts to execute his MO Preference (basically a representation of how independent he and his headquarters staff are).
2.42 Staff Officers
Some leader counters are Staff Officers. The specific function of each staff officer is found in the Exclusive Rules.
2.5 Markers
Various Markers are used throughout the game to indicate a particular unit's status, or other game functions. These are described throughout the rules.
2.6 Strategic Chart
The Strategic Chart represents the strategic assets of a nation in the game. The following tracks are printed at the top of the chart: The Rail Points Track, which is used to record the number of Rail Points available for moving the units of a nation and the number of RR Engineer Points available for conducting RR Tasks; the Prisoner Point Track, used to record the total number of Prisoner Points held; and the Replacement Points Accumulated Track, used to record the total number of replacements (REP) available. The Mission Requirements Diagram on the chart indicates the hexsides on the map used for Mission Orders (MO) given through the MO Procedure. (see 7.13) Printed on the Strategic Chart are the Command Tracks used to denote Strategic Formations directly under the control of the Supreme Commander, and to indicated whether the formations are in turn attached to corps. Adjacent to the Command Tracks are Headquarters Holding Boxes (HQHB). The Supreme Commander has his Leader Box printed on the chart to the left of the Independent Strategic Formations track. The Exclusive Rules may indicate additional boxes found on the Strategic Chart. The various aspects of the Strategic Chart are explained in detail below.
NOTE: A nation's Strategic Chart may be split in two and the information found on two charts. (See Exclusive Rules)
2.61 Rail Point (RP) Track
This track records the number of RPs currently available to a nation. RPs do not accumulate from turn to turn. The RP Track is reduced to zero each Strategic Phase of a game turn, after which the current game turn's allowance of RPs is added to the track. Each RP allows one Brigade Equivalent (BE) to move one MP in Rail Mode. There are two markers for the RP Track: one marked Rail Points x1 and one marked Rail Points x10. These markers are moved along the track to represent individual RPs, and RPs in increments of one and ten, respectively.
EXAMPLE: A nation has twenty-three RPs available. The x10 marker on 2 and the x1 marker on 3. If three BE moved 7 MP during an impulse this would total 21 RP used, and the Rail Point Track would be reduced by 21 RP (the x10 Marker would move from the 2 box to the 0 box and the x1 marker would move from the 3 box to the 2 box).
The RP Track also records the number of RR Engineer Points currently available to a nation. RR Engineer Points do not accumulate from impulse to impulse. The RP Track is reduced to zero each Command Phase of an impulse, after which the current impulse's allowance of RR Engineer Points is added to the track.
2.62 Prisoner Point (PP) Track
This track records the number of PPs that a nation has accumulated. There are three markers placed on the PP Track: Prisoner Points x100, Prisoner Points x10, and the Prisoner Points x1. As PPs are accumulated by a nation these markers are moved up the PP Track to record the current total of PPs. This is done at the instant that the PP is received as a result of combat. PP totals can affect initiative, the mission procedure, and victory conditions.
2.63 Replacement Point (REP) Tracks
These tracks record the number of REPs available to a nation. The number of REPs a nation receives per turn during a scenario is listed in the exclusive rules. Each Strategic Phase of a Game Turn the current allowance of REPs is added to the REP Track. REPs may accumulate from turn to turn. Each REP allows one Strength Point to be replaced in a unit that is in Replacement Mode. (see 9.12) There are three possible markers for each kind of REP available to a particular nation on the REP Track: Replacement Points x1, Replacement Points x10 and Replacement Points x100. These markers are moved along the track to represent individual REPs, REPs in increments of ten and REPs in increments of one hundred, respectively. The exclusive rules indicate the types of REP available to each nation.
EXAMPLE: A nation has twenty-three REPs available; the x10 marker is placed on 2 and the x1 marker on 3.
2.64 Command Tracks
The Command Tracks have Command Counters placed upon them to record the attachment of Primary Formations and their current Morale Levels (ML). Whichever numbered ML Box a Command Counter occupies on the Command Track indicates the current ML for all the units of its Primary Formation (i.e. all those units with the same Primary Formation Identifier as the Command Counter).
Note that there are two kinds of Command Tracks, one for Independent Strategic Formations and several others for Corps-sized Strategic Formations. Any non-Corps Command Counter may be placed on the Independent Strategic Formation's Command Track. Any Corps Command Counter can only be placed on one of the Corps-sized Strategic Formation Command Tracks. In either case, Command Counters placed on the Strategic Chart represent Strategic Formations. Primary Formations with their Command Counters anywhere on the Strategic Chart are considered "Strategic Formations". (Strategic Formations are described in Standard Rule 3.15)
There is a limit to the number of Independent Formations that may be placed upon a Independent Formations track. This limit is found printed in parenthesis on each chart. The number of corps that may be placed on a strategic chart is limited by the number of corps tracks on the chart.
2.65 Ammo Boxes
Each Corps-sized Command Track has an Ammo Box printed to the left of the track. Each time an Artillery Class unit attached to a corps-sized formation uses its BF in combat, an Ammo Point (AP) marker is placed in the AP Box adjacent to the Corps Command Track. The AP marker records the number of APs remaining to the corps-sized formation. The number of AP a corps-sized formation begins with is specified in the Exclusive Rules.
NOTE: Independent Strategic Formations may not expend APs.
2.66 Headquarters Holding Boxes (HQHB)
Headquarters Holding Boxes are printed on the Strategic Chart. There are three types of HQHB on the chart: Division HQHB, Corps HQHB and Supreme HQHB.
-
Divisional HQ Holding Box: There is one Divisional HQ Holding Box on the Strategic Chart. This box is for division-sized formations with Command Counters on the Strategic Chart. Whenever a unit is stacked with the HQ unit of its division-sized formation the player may remove the unit from the hex on the map containing its HQ unit and place it in the Divisional HQ Holding Box on the Strategic Chart. On the Strategic Chart there may be more than one division-sized formation with a HQ unit; if that is the case, place each unit from the same division-sized formation in a separate area on the Divisional HQ Holding Box.
-
Corps HQ Holding Boxes: Whenever a unit attached to a corps-sized strategic formation is stacked with the HQ unit of that corps-sized strategic formation, the player may remove the unit from the hex on the map containing the Corps HQ unit and place it in the HQHB adjacent to the Corps' Command Track. All units stacked in a HQHB are considered to be one formation for purposes of stacking and combat. A player can keep track of which units may occupy a HQHB by examining the Command Tracks adjacent to that HQHB. Only units with the same Primary Formation Identifiers as the Command Counters found on the Corps Command Track may be stacked in the corps' HQHB. (Exception: Strategic, Army and Corps Asset units)
EXAMPLE: The IV Corps Command Counter is on a Corps Command Track with the Command Counters from the 7th and 8th divisions. The HQHB adjacent to this Corps Command Track could contain units with a Primary Formation Identifier of "IV" or "7 Div" or "8 Div". These units would be considered stacked with the IV Corps HQ unit on the map and would be treated as one formation.
-
Supreme HQ Holding Box: A Supreme HQ unit may have a corresponding HQHB on its Strategic Chart. Only units with the Primary Formation Identifier of the Supreme HQ unit may be placed in this HQHB.
2.67 Supreme Commander Box
The Supreme Commander's leader counter is always placed on the Strategic Chart. The Supreme Commander counter is the leader counter that represents a player in the game. This counter is the source of all Mission Orders in the MO Procedure (see 7.13).
Designer's Note: In reality a Supreme Commander may have moved all over the map, but his counter is not present on the map at any time in the game. Some commanders, like the French Supreme Commander in 1914, drove constantly across the map; a complex and lengthy set of rules would be needed to simulate his physical presence, so it is abstracted instead. The Supreme Commander's counter is intended to represent the functioning of the Supreme Headquarters staff under his direction.
2.68 Mission Requirements Diagram
This diagram is printed on the Strategic Chart to indicate which hexsides units of each nationality may move through when following a particular Mission Order (MO).
NOTE: Some special army charts have their own Mission Order (MO) Diagram. The formations attached to such armies ignore the national MO diagram found on the strategic chart and use their army's MO diagram.
2.7 Army Charts
Each army in the game has a corresponding Army Chart. Usually a nation will have more than one army in a game. Additionally, a nation may have a number of Army Detachments. Charts for these Army Detachments are treated as if they were Army Charts.
Each Army Chart has a number of boxes printed at the bottom, called Army Boxes. The Army Boxes identify the army's commander and staff, the Mission Order the army is executing, the supply status of the army's Main Depot, and whether the army has troops guarding its Line Of Communications. Army Boxes may contain counters that effect the units of the formations attached to the army. It is important to keep in mind what markers are in an Army Box, and when to change them if necessary.
An Army Chart contains a number of Command Tracks. These function just like the Command Tracks on the Strategic Chart. The Command Tracks record which Primary Formations are attached to the army, their MLs, and whether they are in turn attached to corps that are attached to the army.
The Army Chart contains a number of HQ Holding Boxes adjacent to the Command Tracks. These boxes function just like the HQ Holding Boxes on the Strategic Chart. There is also a Divisional HQ Holding Box; this box is for division-sized formations with Command Counters on the Army Chart.
2.71 Commander Box
The Commander Box contains the leader counter in command of an army. The function of a leader counter is to modify the Mission Order (MO) Procedure. (see 7.13)
2.72 Army Staff Box
The Army Staff Box indicates which leader(s) is currently part of the army's staff. The functions of a staff officer leader counter are found in the Exclusive Rules.
2.73 Mission Order (MO) Box
The MO Box records the current MO of the army. All scenarios indicate the MO an army begins the scenario under. During the Mission Order Segment of the Command Phase a player will take MO Checks with the leader in command of an army (the leader counter placed in the Commander Box on the Army Chart). If the MO of the army changes, the MO counter in the MO Box is changed to record the new MO.
2.74 Main Depot Status Box
The Main Depot Status Box indicates the supply status of the Main Depot of an army. The Main Depot Status of an Army is determined in the Supply and Command Segment of the Command Phase. The type of rail line the Army's Main Depot traces its Line of Communications (LOC) along affects the supply status of the Main Depot, and consequently the capabilities of that Army. (see 7.22)
2.75 Line of Communications (LOC) Box
The Line of Communications (LOC) Box may have units placed in it to protect the LOC. The Exclusive Rules may require that units be placed in an army LOC Box and will specify which units are eligible to be there. A unit may be placed in the LOC Box if it occupies the same hex as its army's Main Depot or Army Supply unit at the beginning of any March Segment. A unit may be taken from the LOC Box and placed onto the LOC on map during any friendly March or Counter-March Segment at the owning player's discretion.
Units in the LOC Box have a special ability. If at any time an enemy unit moves adjacent to any of the railroad hexes of the LOC, the owning player may immediately place units in the LOC Box on the map anywhere along the railroad line before the enemy unit completes its movement.
NOTE: Players are advised to keep units in the LOC Box of each army at all times.
- A. LOC Definition: The LOC is defined as the rail line hex occupied by an Army Supply Unit and all contiguous rail line hexes that lead from that supply unit to the hex occupied by the Army Main Depot unit, and all contiguous rail line hexes that lead from that depot to the hex occupied by the Army Base Marker.
2.76 Command Tracks
Command Counters are placed on the Command Tracks to record both the attachment of Primary Formations to armies and their current Morale Level (ML). The numbered ML Box on the Command Track occupied by a Command Counter indicates the current ML for all the units of its Primary Formation (i.e. all those with the same Primary Formation Identifier as the Command Counter). (Exception: Strategic, Army and Corps Asset units.)
Note that there are two kinds of Command Tracks, one for Independent Formations and several others for Corps-sized Formations. Any non-Corps Command Counter may be placed on the Independent Army Formations Command Track. Any Corps Command Counter can only be placed on one of the Corps-sized Army Formation Command Tracks. In either case, Command Counters placed on the Army Chart represent Army Formations. Formations with their Command Counters anywhere on an Army Chart are considered "Army Formations".
There is a limit to the number of Independent Formations that may be placed upon a Independent Formations track. This limit is found printed in parenthesis on each chart. The number of corps that may be placed on an army chart is limited by the number of corps tracks on the chart.
2.77 Ammo Boxes
The independent Formations Command Track has an Ammo Box printed to the left of its track. Each time an Artillery Class unit which is attached to a formation with its Command Counter on the independent formations track uses its BF in combat, an Ammo Point (AP) marker is placed in the AP Box adjacent to the Independent Formations Command Track. The AP marker records the number of APs remaining to the formations with Command Counters on the Independent Formations track. The number of APs the independent army formations begin with is specified in the Exclusive Rules.
Each Corps-sized Command Track has an Ammo Box printed to the left of the track. Each time an Artillery Class unit which is attached to a corps-sized formation uses its BF in combat, an Ammo Point (AP) marker is placed in the AP Box adjacent to the Corps Command Track. The AP marker records the number of APs remaining to the corps-sized formation. The number of APs a corps-sized formation begins with is specified in the Exclusive Rules.
2.8 Additional Player Records
Other charts used in the game in addition to the Strategic Charts and Army Charts include each player's Detachment Chart and the Time Chart.
The Detachment Chart allows a player to record the parent (primary) formation of a detachment and to store detachment counters when not in play.
The Time Chart contains the four levels of time in the game. The Game Turn Track records weeks (game turns). The Days Used in Impulses Track records the length of each impulse (thereby recording the number of days each impulse will consist of). The Phase Cycle records the phases and segments of each impulse. The Mutual Combat Phase Cycle records which step of a combat phase is currently in play. The Time Chart contains a weather box to record the current weather condition on the map.
-
Hand-Written Records: Several rules instruct a player to make note of something on a sheet of paper, and there are times when a player will want to make notes of their own accord. Players are of course free to adopt any symbology that suits them to record this information. Most importantly Victory Points (VP) earned from events during the game must be recorded. Some other information players will want to record on paper may include the Main Depot Capabilities not available to an army during the coming impulse, the exact moment of a Main Depot's elimination and the subsequent reentry turn of that Main Depot into the game, the MPs expended by units moving off-map in Rail Mode, and the reassignment of a unit from one formation to another.
NOTE: Some scenarios begin with units detached from their parent formations and reassigned to different formations.
-
Covering the Map in Mylar: One handy method for recording some game information is to cover the game map with Mylar (available through art supply stores). An erasable marker can be used to mark directly on the Mylar surface.
EXAMPLE: Railheads may be recorded with an erasable marker rather than a counter.
3.0 Important Concepts Before You Begin
There are several important concepts to keep in mind in order to follow the remainder of the rules effectively. These include the concepts of formations, facing, stacking, Zones Of Control (ZOC), limited intelligence, Morale Levels (ML) and Morale Checks (MC).
3.1 Formations
All units belong to a "Primary Formation" at all times (Exception: Fortress class units). Every Primary Formation consists of one or more units and a Command Counter. All the units and the Command Counter of a Primary Formation have the same Primary Formation Identifier on the top of their counters. The lowest level of formation to which a unit may be attached is a Primary Formation. Only units with the same Primary Formation Identifier and Asset units (see 3.13.D) may be attached to these formations.
NOTE: In some cases a detachment made from one Primary Formation may be attached to a different Primary Formation.
3.11 Identifying Primary Formations
All Primary Formations identified by words spelled out in italicized capital letters are Army-sized (or larger) formations. All Primary Formations identified in roman numerals or abbreviations spelled out in capital letters are corps-sized
corps-sized formations. All Primary Formations identified in Arabic numerals and primarily lower case letters followed by the notation "div" or "bd" or "rgt" or "bn" are considered to be smaller than corps-sized formations. Fortress Class units and units directly assigned to a fortress (fortress formations) may be identified in a unique manner. (See the Exclusive Rules)
3.12 Primary Formations and Morale Checks
Morale Checks are always taken at the Primary Formation level. A unit's morale level is always the ML of its Primary Formation's Command Counter — or in the case of Asset units, the ML of the Primary Formation the unit is attached to. (see 3.13.D)
3.13 Formation Attachment
Every Primary Formation will have at least one level of higher attachment, and possibly two or three.
-
A. Strategic and Army Formations: By placing the Command Counter of a Primary Formation on an Army Chart or the Strategic Chart, that formation is attached to the formation represented by that chart. If a Primary Formation's Command Counter is on an Army Chart, the formation is considered an Army formation. If a Primary Formation's Command Counter is on the Strategic Chart, the formation is considered a Strategic formation. Strategic and Army formations have special characteristics according to their attachment. These characteristics are explained in Standard Rules 3.15 and 3.16 below.
NOTE: The Command Counter for the Supreme Headquarters must always be placed on the Strategic Chart and the Command Counter for each army must always be placed on that army's chart. These Command Counters are the exception to the rule that every Primary Formation has at least one level of higher attachment.
-
B. Corps Formations: Primary Formations which are corps-sized may only place their Command Counters on Corps Command Tracks; they may not be placed on an Independent Formation Command Track. No more than one Corps Command Counter may be on a single Corps Command Track at the same time. Corps Command Counters have an Attachment Limit (printed on the counter) allowing some number of Primary Formations that are smaller than corps-size to be attached to a corps. Attachment to the corps is recorded by placing the Command Counter of the smaller formation on a Corps Command Track. (Thus Primary Formations which are smaller than corps-size, when attached to a corps-sized formation, have two levels of higher attachment: the corps-sized formation and the army-sized formation or the Supreme Headquarters.) If a Primary Formation's Command Counter is placed on a Corps Command Track the Primary Formation is considered a Corps formation. Corps formations have special characteristics due to this placement. (see 3.17)
-
C. Division Formations: Primary Formations that are smaller than division-size may in some cases be attached to a division. This is recorded by placing the Command Counter of the smaller formation under the division's Command Counter. Thus Primary Formations attached to a division-sized formation may have three levels of higher attachment: the division-sized formation, the corps-sized formation, and the army-sized formation or the Supreme Headquarters.
3.14 Determining Formations for Combat and Stacking
The lowest level of formation is the individual unit. An individual unit is always a part of a Primary Formation but may constitute an independent formation in some circumstances. If a unit is not stacked with the other units of its Primary Formation, or if it is facing in a different direction, it is considered a separate formation for purposes of combat and stacking.
The next higher level of formation is the Primary Formation. Primary Formations are the lowest level multiunit formations. Units attached to a Primary Formation, if stacked together and facing in the same direction, are always considered to be part of the same formation for purposes of Combat and Stacking.
The next level of formation is the corps-sized formation. Division-sized or smaller Primary Formations can be attached to a corps-sized formation, up to the attachment limit printed on the Corps' Command Counter. For purposes of combat and stacking, Corps-sized formations are the largest multiunit formations possible. Units belonging to a Corps-sized Formation, if stacked together and facing in the same direction, are considered to be part of the same formation for purposes of Combat and Stacking. (Exception: Road Mode - see 3.31.B)
NOTE: The Exclusive Rules may allow some division-sized formations to attach smaller formations to themselves. This multiunit formation would fall between the smallest multiunit formation (Primary Formations) and the largest multiunit formation (corps-sized formations).
3.15 Strategic Formation Characteristics
Strategic Formations, those Primary Formations with their Command Counters on the Command Tracks of the Strategic Chart, receive the following benefits and restrictions:
-
Supply and Replacements: Units of Strategic Formations are always in supply if they are within their supply range of any friendly operational railroad line. (see 7.23.A) Strategic Formations may not receive Replacement Points (even when in Replacement Mode) and they may not replace Ammunition Points.
NOTE: Corps-sized strategic formations may expend APs but may not replace them.
-
Command Control: Units of Strategic Formations do not have to be within Command Control Radius of the Supreme Headquarters unit. However units of Corps-sized Strategic Formations (those with their Command Counters on a Corps Formation Track) must stay within the CCR of the corps' HQ Class unit. (see 3.17.B)
Units of Independent Army Formations (those with their Command Counters on the Independent Formations Track) which are attached to division-sized formations with an HQ class unit, need only stay within the CCR of the division's HQ Class unit. Units of those Independent Army Formations which are division-sized or smaller and have no HQ class unit must be on or adjacent to all other units of the division-sized formation to be in Command Control. (see 7.24)
-
Mission Orders: Strategic Formations can only be given the Hold MO by the Supreme Commander. The actual MO units of Strategic Formations must follow will be determined by the Mission Order procedure. (see 7.13)
-
Combat: Independent strategic formations are prohibited from expending APs.
-
A. The Supreme HQ Unit: The Supreme HQ unit, and any units in the Supreme HQ holding box, may not join with any other Primary Formations for purposes of combat or stacking.
3.16 Army Formation Characteristics
Army Formations, those Primary Formations with their Command Counters on the Command Tracks of an Army Chart, receive the following benefits and restrictions:
-
Supply and Replacements: Units of Army Formations are only in supply if they are within their supply range of a supply source. (see 7.23.A) Army Formations may use the army supply units of their army for supply purposes. Army Formations may receive Replacement Points when in Replacement Mode and may replace Ammunition Points (unlike Strategic Formations).
-
Command Control: Units of Corps-sized Army Formations (those with their Command Counters on a Corps Formation Track) need only stay within the CCR of the corps' HQ Class unit; However the Corps' HQ Class unit must always stay within the CCR of the Army HQ Class unit.
Units of Independent Army Formations (those with their Command Counters on the Independent Formations Track) which are attached to division-sized formations with an HQ class unit, need only stay within the CCR of the division's HQ Class unit; however, the Division's HQ Class unit must always stay within the CCR of the Army HQ Class unit. Units of Independent Army Formations which are division-sized or smaller and have no HQ class unit must, in addition to being within the CCR of the Army's HQ unit, be on or adjacent to all other units of the division-sized formation to be in Command Control. (see 7.24)
-
Mission Orders: Army Formations may be given any MO by the Supreme commander. The actual MO which units of Army Formations must follow will be determined by the Mission Order procedure. (see 7.13)
-
Army Headquarters Holding Box (HQHB): An Army HQ unit does not function like a Corps HQ unit in terms of placing units from an attached formation in its HQHB. The only units an Army HQ unit may place in its HQHB are strategic and army asset units (i.e. those units with a Primary Formation Identifier of an Army HQ unit or the Supreme HQ unit) and air units.
-
A. Army HQ Units: Army HQ units, and any units in the HQ's holding box, may not join with any other Primary Formations for purposes of combat or stacking.
3.17 Corps Formation Characteristics
Corps Formations, those Primary Formations with their Command Counters on a Corps Command Track, receive the following benefits and restrictions:
-
Supply: Units in Corps-sized Formations are only in supply if they are within their supply range of a supply source. Corps Formations may use the corps train units of their corps for supply purposes.
-
Command Control: Units of Corps Formations (those with their Command Counters on a Corps Formation Track) which are attached to division-sized formations with an HQ class unit, need only stay within the CCR of the division's HQ Class unit; However the Division's HQ Class unit must always stay within the CCR of the Corps HQ Class unit. Units of Corps Formations which are division-sized or smaller and which have no HQ class unit must always stay within the CCR of the Corps HQ Class unit and be on or adjacent to all other units of the division-sized formation to be in Command Control. (see 7.24)
-
A. Corps Headquarters Holding Boxes (HQHB): A unique property of a Corps HQ unit is its ability to place any units of attached formations and asset units in its Headquarters Holding Box (HQHB). All units in the HQHB are considered stacked in the same hex as the Corps HQ unit and are considered to be one formation for stacking and combat purposes. Only asset units and units of Primary Formations which have their Command Counters on the Corps Command Track may be placed in a Corps HQHB. Thus a Corps HQ unit could have as many units of division-sized (or smaller) primary formations stacked with it as have their Command Counters on the Command Track of the corps. This number is subject to the limitations of the attachment limit printed on the Corps Command Counter. (see 2.32)
EXAMPLE: If a Corps HQ unit's Command Counter has an Attachment Limit of 3, then up to three division-sized formations can place their Command Counters on the same Command Track as the Corps Command Counter. The units of these formations can all stack with the Corps HQ unit and be placed in its HQHB. All these units are now considered to be one formation for purposes of stacking and combat.
3.18 Division Formation Characteristics
Most division-sized formations have no HQ unit. Divisions with Headquarters Class units allow players to use the Divisional HQHB on the Strategic and Army Charts.
-
Supply: How a unit of a division-sized formation determines supply is based on the formation's higher attachment. (See Standard Rules 3.13 - 3.17)
-
Command Control: Units attached to division-sized formations with an HQ class unit must always stay within the Command Control Radius of the Division's HQ Class unit. Units of division-sized formations, or smaller, which have no HQ class unit, must be stacked with or adjacent to all other units of the formation to be in Command Control. (see 7.24)
-
A. Divisional Headquarters Holding Boxes: If a division-sized formation has a HQ unit, and a unit from that formation is stacked with the HQ unit, the unit may be placed in the Divisional HQHB found on the Strategic and Army Charts. The placement of units in the Divisional HQHB indicates the unit is stacked with the HQ unit of that formation. If a unit is stacked with a divisional HQ and a corps HQ simultaneously, place the unit in the Corps HQHB (place the divisional HQ unit in the Corps HQHB also).
3.19 Air Units and Formations
Air units must be placed in the HQHB of the HQ unit they are attached to. (Air units are described in Standard Rule 8.8)
3.2 Unit Facing
Facing is the orientation of a unit's counter in the hex it occupies. Every counter has its top edge indicated by the way the counter is printed; when the unit is revealed the top edge of the counter indicates the unit's facing. Each unit should be oriented so that the top of the counter is facing a hexside. This hexside and the two hexsides on either side are the unit's frontal hexsides. The two hexsides located directly behind these hexsides are the unit's flank hexsides. The remaining hexside, facing the bottom of the unit counter, is the rear hexside.
3.21 How Facing is Changed
During the March and Counter-March Segments a player may reorient the facing of any of his units. This may occur anytime during a unit's movement. The only other times a player may reorient the facing of his units are as follows:
- During an opponent's March or Counter-March Segment your opponent may move one of his units from a hex adjacent to one of your non-phasing units to another hex adjacent to that non-phasing unit. At this time you may change the facing of that non-phasing unit. (see 3.45.A)
- During an opponent's March or Counter-March Segment a non-phasing cavalry unit which conducts Cavalry Reaction Movement may reorient its facing. (see 3.46)
- During the Mutual Combat Phase a player may reorient a unit's facing if it is included in the attacker combat option of Pursue or the defender combat option of Withdraw Before Combat. (see 10.32.C and 10.33.A)
- During the Mutual Combat Phase a player may reorient the facing of a unit in Road Mode that is subjected to a Fire Attack.
- During the Mutual Combat Phase a player may reorient the facing of a unit that suffered the Loss Result (LR) of Defender Retreats or that successfully conducted a Pursuit after Fire Combat. Note that an attacking unit that fails its pursuit Morale Check cannot conduct a pursuit, and therefore may not reorient its facing. (see 10.36.C)
3.22 Facing and Combat
A Unit may only attack enemy units adjacent to one of its three frontal hexsides. However, Units may be attacked through any hexside. Units that are attacked through their flank or rear hexsides have the combat modified against them. (see 10.24.A) A Combat Marker placed on a unit must be placed so that both the top of the unit counter and the arrow on the Combat Marker are aligned.
3.23 Facing and Formations
All the units of a formation must face in the same direction within a hex. If there is more than one formation in a hex the formations may face in different directions, but there cannot be more than two facings in a hex.
EXAMPLE: Using the facing diagram above, if one Formation in a hex were facing in the direction shown in the example, it would be possible to have another formation facing in the opposite direction. Thus, if the hex is attacked, it will have all-around facing, although only one formation could defend against a given attack without penalty (the formation whose frontal hexsides is being attacked).
NOTE: Two units bearing the same Primary Formation Identifier may be stacked in a hex facing in two different directions. In this case the two units are considered two separate formations for stacking and combat purposes with all the related effects. (see 3.14)
3.24 Units with No Facing
Supply Class units, Units in Road Mode, and Entrained units (i.e. units in Rail Mode) have no facing.
3.3 Stacking
More than one unit may occupy a hex in a process known as stacking. The maximum number of units that may be placed in a hex is determined by the criteria listed below. Issues related to Formations and Stacking may be found in Standard Rule 3.14. A unit may not voluntarily enter a hex which would create an overstack situation. Stacking limitations are in effect at all times, including movement.
NOTE: A player must take care not to exceed stacking limitations while moving his units.
3.31 Stacking Limitations
A player can choose to adopt one of two possible criteria for stacking in a hex: 1) all the units of two different formations in a hex, or 2) units from more than two different formations in a hex, but not more than six (6) Brigade Equivalents (BE) total for the hex.
-
A. Stacking Criteria: The friendly player always chooses which criteria to apply to a hex: two formations or six BEs. These limitations are in effect at all times.
-
B. Road Mode and Stacking: A formation moving in Road Mode may not be larger than one division-sized primary formation or 4 BE (whichever is larger). Units in Road Mode may move through a hex which is occupied by a second formation also in Road Mode but may not end its movement in that hex unless: 1) the two formations consist of four or less BEs, or 2) the second formation in road mode moves from the hex before the end of that Segment.
NOTE: Units of a formation in Road Mode may end their movement stacked with units of a second formation which is not in road mode subject to the limitations in 3.31 above.
-
C. Fortresses and Stacking: Fortress Class units do not count toward stacking limits.
-
D. Entrained Units: Entrained units, with the exception of Main Depot and Army Supply units, do not count toward stacking limits. (see 8.52)
-
E. Embarked Units: Embarked units (i.e. units in Naval Mode) do not count toward stacking limits.
-
F. Enemy Units: Friendly units can never enter hexes containing enemy ground units. EXCEPTION: Enemy fortress class units stacked alone in a hex. (see 13.21.B)
3.32 Brigade Equivalents (BEs)
A BE is determined by the size and type of unit. Certain units in the game have a double-sized or triple-sized Unit Type indicator on the counter; these units count as two or three of the type and size indicated on the counter. Thus a unit with a double-sized Unit Type indicator for an infantry brigade would count as two infantry BEs. The BE equivalents for various sized units are defined below:
- Company (I): zero BE
- Battalion (II): 1/4 BE
- Regiment (III): 1/2 BE
- Brigade (X): 1 BE
- Division- or Brigade-sized HQ: 1 BE
- Supreme command HQ: 1 BE
- Corps Train unit: 1 BE
- Double brigade unit: 2 BE
- Army- or Corps-sized HQ: 2 BE
- Triple brigade unit: 3 BE
- Army Supply unit: 3 BE
- Main Depot: 4 BE
It is important when counting BEs to consider only the Unit Size symbol printed on the counter, not the size of the formation the unit belongs to.
- A. Detachments and Brigade Equivalents: BE equivalents for detachments are counted in the following manner: 1 SP Detachment: 1/4 BE; 2 SP Detachment: 1/2 BE; 3 SP Detachment: 1 BE. Detachments over 3 SP in size count as 1 BE.
3.33 Stacking during Combat
A player can adopt one of two criteria for stacking during combat, either all the units of one formation in a hex participate in the combat, or units from more than one formation in a hex participate, but not more than two BEs.
-
First Combat Stacking Criterion: If the first criterion is chosen, no more than one formation may defend in, or attack out of, a hex. This criterion is selected if a player wishes to utilize all the BEs of a formation in the combat.
NOTE: This is typically chosen if a player wishes to use all the BEs of a corps with attached formations as one formation.
-
Second Combat Stacking Criterion: If the second criterion is chosen, units from more than one formation may defend in, or attack out of, a hex. However, the maximum that may do so is two BEs.
EXAMPLE: A player chooses the First Combat Stacking Criterion, having one formation in a hex participate in combat. There is an infantry corps with two infantry divisions attached in the hex. Adding the BEs of the corps goes as follows: There is a Corps HQ unit (2 BEs), two cavalry regiments belonging to the two divisions (1 BE total), four infantry brigades belonging to the two divisions (4 BEs total), and two artillery brigades belonging to the two divisions (2 BEs total), for a grand total of 9 BEs in the corps (2 + 1 + 4 + 2 = 9). These would count as one formation, provided the divisions have been either placed in the HQHB of the Corps HQ unit or are all facing the same direction while stacked on the map. If a player chooses instead to use the Second Combat Stacking Criterion, having units from more than one formation in a hex participate in the combat, he could include a unit in the hex that did not belong to the corps in this example. However, the BE total that could attack from or defend in the hex in this case would be just two BE (compared to 9 BEs if the corps is used). Obviously, players will opt whenever possible to use corps formations that have divisions attached.
-
A. Defender Multiple Facings Exception: An exception to the First and Second Combat Stacking Criteria above may occur if a defending hex contains two different formations facing in different directions. If these two formations are attacked from at least two different hexes and 1) both defending formations are being attacked in the flank or rear by at least one of the attacking forces (but not by the same attacking force) and 2) both defending formations are being attacked in the front by at least one of the attacking forces (but not by the same attacking force).
Procedure: When the attacker announces a fire attack upon a hex which qualifies for the Defender Multiple Facings Exception, the defender must choose to 1) defend the hex using the First or Second Combat Stacking Criteria, accepting the penalty of being attacked in flank or rear, or 2) invoke the Multiple Facing Exception to fight two separate combats, with neither being treated as a flank attack. If two combats are chosen then the attacker must resolve them both before resolving any other combats. If the first fire attack completely eliminates the defender but the other units in the hex do not retreat, the second attack is considered an attack in flank or rear.
3.34 Stacking, Road Mode and Movement Costs
For units moving in Road Mode, the Movement Point cost to enter a hex is affected if the hex already contains friendly units. For each friendly BE in a hex add one-half MP to the cost of entering that hex. (I.e. it costs an additional one-half (½) MP to enter a hex per BE already there.) Combat, artillery, and HQ class units with the same Primary Formation Identifier printed at the top of the counter may enter a hex containing another part of the same Primary Formation without paying extra MPs. For purposes of this rule round down any fractions remaining after determining the total of all BEs in a hex. (E.g. 1½ = 1 BE.)
FIRST EXAMPLE: The 5th Infantry division, which includes a double-brigade infantry unit (2 BE), a cavalry regiment (½ BE), and an artillery brigade (1 BE), plus the VII Corps HQ unit (2 BE) are stacked in a clear terrain hex. This makes a total of 5½ BEs in the hex, rounded down to 5 BEs. The 6th Infantry division, is about to enter the hex in Road Mode. To do so the 6th Infantry division would pay two and one-half movement points (½ x 5) for the other units already in the hex, plus one MP for the clear terrain, for a total of three and one-half MPs.
SECOND EXAMPLE: The artillery brigade of the 5th Infantry division is stacked alone in a hex. The 5th Infantry division's double-brigade infantry unit is about to enter the hex in Road Mode. The double-brigade infantry unit could do so with no extra MP cost, as the artillery brigade bears the same Primary Formation Identifier.
3.35 Overstacking
Any time there are more units in a hex than is allowed by the stacking limitations, an overstack results. Overstacks may only occur during retreat after combat when retreating to avoid an enemy ZOC. When this occurs, units must be displaced. Sufficient units must be displaced one hex so that stacking limitations are no longer exceeded. If the excess units cannot be displaced, they are eliminated. The friendly player determines which units are to be eliminated.
IMPORTANT: Overstacks are not allowed at any time except when retreating after combat and then only if to avoid a hex in an enemy ZOC which is not occupied by friendly units.
3.36 Reinforcements and Stacking
Units arriving as reinforcements may appear in their designated entry hex in violation of the stacking rules, but must be moved to conform with the stacking requirements during their Movement Phase.
3.4 Zones of Control (ZOCs)
The hex a unit occupies and the six hexes immediately surrounding it constitute the unit's Zone of Control (ZOC). A ZOC may affect supply, command control, movement and combat.
3.41 Which Units Project ZOC
Combat Class and Fortress Class units project a ZOC into the six surrounding hexes. Units which do not project a ZOC into the six surrounding hexes are: Combat Class units with only one (1) SP, Artillery Class units, Supply Class units, and HQ class units. All units, except dummy units, exert a ZOC into the hex they occupy. Dummy units do not exert a ZOC, even into the hex they occupy.
3.42 Terrain and ZOC
A unit's ZOC extends into any hex it could enter in Deployed Mode. ZOC do not extend into hexes containing enemy Fortress Class units, or across Permanent Entrenchment hexsides if the hex is occupied by an enemy unit. ZOC do not extend over Major and Grand River hexsides.
3.43 ZOC and Supply
The presence of an enemy ZOC in a hex prohibits supply from being traced through that hex. Friendly units negate the presence of enemy ZOC in a hex when tracing supply.
3.44 ZOC and Command Control
The presence of an enemy ZOC does not block the tracing of Command Control from an HQ unit to a subordinate unit.
Designer's Note: This is because of the use of messengers, carrier pigeons, and radios in establishing Command Control over units.
3.45 ZOC and Movement
It costs +1 MP to enter or leave an enemy ZOC. It costs +1 MP to move from one enemy ZOC to another. These effects are cumulative. These costs are in addition to any terrain costs for movement. Units in Road Mode cannot move from one enemy ZOC to another enemy ZOC. Friendly units, with the exception of Fortress Class units, do not negate the presence of enemy ZOC in a hex during movement. For purposes of movement, Fortress Class units negate the presence of enemy ZOC in the hex occupied by the fortress unit.
EXCEPTION: If a unit leaves an enemy ZOC at the beginning of its own March Segment (not Counter-March Segment) and does not move directly into another enemy ZOC, there is no extra MP cost to leave the enemy ZOC.
EXAMPLE: A unit moving from one hex in an enemy ZOC directly into another hex in an enemy ZOC would pay +3 MPs: +1 MP to leave the enemy ZOC, +1 MP to enter an enemy ZOC, and +1 MP to move directly from an enemy ZOC to another enemy ZOC. Terrain costs would be additional.
- A. Non-Phasing Units Reaction: If a phasing unit moves from the ZOC of a non-phasing unit to another ZOC of the same non-phasing unit, that non-phasing unit may change its facing.
3.46 ZOC and Cavalry Reaction Movement
During a friendly March or Counter-March segment enemy Cavalry units in deployed mode may exercise the option of "Cavalry Reaction Movement". All Combat, Artillery and HQ Class units which are part of a Cavalry Primary Formation and have a Mobility Rating of M, C, or H are eligible to perform Cavalry Reaction Movement.
If an enemy unit moves from a hex adjacent to a unit eligible for Cavalry Reaction Movement into another hex adjacent to that unit, and/or any other friendly unit, the eligible unit may immediately move one hex or simply change its facing. The Cavalry Reaction unit may not enter the hex the enemy unit has vacated. All units performing Cavalry Reaction Movement may reorient their facing in the newly occupied hex. A unit which moves by Cavalry Reaction must remove a regular Combat Marker, or flip an intensive Combat Marker, if either have been placed upon it. If a unit eligible for Cavalry Reaction has its counter in a Holding Box on an Army Chart or the Strategic Chart, simply place the counter on the map.
Restrictions: Units in Road Mode may not perform Cavalry Reaction Movement. Units may not move by Cavalry Reaction into an enemy ZOC other than the ZOC of the unit which triggered the move. Friendly units in a hex negate the presence of an enemy ZOC for purposes of this rule. A reaction move which causes an Overstack is prohibited.
NOTE: Cavalry Reaction Movement is the only time non-phasing units may voluntarily move during the Movement Phase. Non-phasing units may be eligible to change facing. (see 3.45.A)
3.47 ZOC and Withdrawal before Combat
During the Mutual Combat Phase some defending units may exercise the combat option of Withdrawal before Combat. (see 10.33.A) Units may not Withdraw Before Combat into an enemy ZOC. Friendly units in a hex negate the presence of an enemy ZOC for purposes of this rule. Before a unit withdraws into a hex adjacent to an inverted enemy unit (i.e., a concealed unit), the owning player must be asked if the unit exerts a ZOC.
3.48 ZOC and Retreat after Combat
During the Mutual Combat Phase, units may retreat as a result of combat or failed MCs. The presence of friendly units in a hex retreated into negates the influence of enemy ZOC. If a unit retreats into a hex adjacent to an inverted enemy unit, it must first enter the hex, then the owning player must declare whether it exerts a ZOC.
- A. Effects of Retreating through an Enemy ZOC: When a unit retreats into a hex in an enemy ZOC that is unoccupied by a friendly unit the ML of its Primary Formation is reduced to one. If the retreat includes two unoccupied hexes in enemy ZOC the Primary Formation's ML is reduced to one, all SPs are eliminated, and the unit is reduced to its cadre strength. If a unit retreats into three or more unoccupied hexes in enemy ZOC, all its SPs and CPs are eliminated. SPs and CPs eliminated while retreating through enemy ZOC are counted as Prisoner Points for the opposing player.
3.49 Optional ZOC
The owning player may choose not to exert a ZOC into a hex not occupied by a friendly unit. The exertion of ZOC into hexes not occupied by friendly units is optional. In effect, ZOC may be withheld to confuse the opposing player.
3.5 Limited Intelligence
A player cannot examine the contents of an enemy-occupied hex, except when successfully conducting reconnaissance or initiating a Fire Attack against the hex. Normally, a player may only see the back of the top counter in a hex, which indicates nothing more than the nationality of the unit and the direction it is facing. Unless a player has conducted a successful reconnaissance or initiated a Fire Attack against a hex, he may not lift up, turn over, or in any way expose the nature of a unit in any enemy hex.
3.6 Morale Levels (MLs) and Morale Checks (MCs)
Morale is an important aspect of a unit's composition. Each unit belongs to a Primary Formation, and each Primary Formation has a Command Counter with a Morale Level (ML) printed on it. The ML printed on the Command Counter of the Primary Formation is the base ML of the units in the formation. As the ML increases or decreases, the Command Counter is moved along a Command Track to indicate the current ML of the Formation.
The act of testing a unit's morale is called a Morale Check (MC). In order to make a MC, the ML of the unit's Primary Formation is referred to. The procedure for making a MC, and the situations where this is necessary, are listed in Standard Rule 11.2.
Note: Sometimes a failed MC results in a Loss Result, sometimes it only means a unit(s) cannot perform an intended action.
3.7 Controlled Hexes
Any hex that was last occupied by forces of a specific player is defined as being controlled by that specific player. Any hex that is completely behind the "Front Line" of a specific player is also controlled by that specific player.
3.8 Railroad (RR) Lines
RR lines may be found in three states: "Operational", "Neutral" or "Damaged". Friendly controlled RR lines which are operational are termed "Friendly Operational". Enemy controlled RR lines which are operational are termed "Enemy Operational". All other RR lines are either Neutral or Damaged. A player may utilize only "Friendly Operational" RR lines to trace supply and/or to move units in rail mode. Players should use Railhead markers to indicate the furthest advance of "Friendly Operational" RR line hexes.
Enemy operational RR lines may be changed to Neutral by any friendly combat class unit. A friendly unit which passes through or stops upon an Enemy Operational RR line hex changes the state of the railroad line to neutral. (Railroad lines are changed from Friendly to Neutral by the presence of an enemy unit in the RR line's hex.)
NOTE: Railroad lines in friendly controlled hexes are not automatically friendly operational RR lines. In most cases there will be stretches of track that is not operational for either side (i.e. neutral).
Neutral RR lines may be "Prepared" into Friendly Operational RR lines. In addition, RR lines may be Damaged or Repaired. These RR Tasks are explained in Standard Rule 8.13.
4.0 Sequence of Play
Each game is resolved in a series of turns, called game turns. Each turn represents one week of real time. A turn consists of a Weekly Interphase followed by a variable number of impulses. The number of impulses in each game turn, which can range from one to seven, is determined by the player who has the initiative. When all impulses in a game turn have been completed the turn is over, and the players proceed to the next turn, repeating the process. During the 1st player's Phases of an impulse, the 1st Player is referred to as the phasing Player and the 2nd Player is referred to as the non-phasing Player. During the 2nd Player's Phases of an impulse these roles are reversed. All action within a game turn is conducted within the following sequence of play; the order of the phases, segments and steps may not be altered by the players.
4.1 Weekly Interphase (at the beginning of each game turn)
The Weekly Interphase consists of a Strategic Phase followed by the Impulse Determination Phase.
- The Strategic Phase: This phase is conducted simultaneously by both players. The Rail Point (RP) total for both sides is reduced to zero on the RP Track, then the new weekly allotment of RPs is added. All eligible units currently in Entrenchment Mode may attempt to construct Permanent Entrenchments and enter Permanent Entrenchment Mode. Replacement points (REPs) are recorded.
- Impulse Determination Phase: The player with the initiative is determined, according to the provisions in the Exclusive Rules. The player with the initiative announces how many impulses there will be in the game turn, and how many days each impulse will consist of. This is done once per turn during this phase.
4.2 Each Impulse
Each impulse is broken down into four phases: the Command Phase, where supply and Command Control are determined; the Movement Phase, where the phasing player may move his units; the Counter-Movement Phase, where the non-phasing player may move his units; and the Mutual Combat Phase. Each phase is described below.
NOTE: Determine the Weather prior to the 1st Player's Command Phase.
-
4.21 1st Player Command Phase: This phase consists of two segments: a Mission Order Segment followed by the Supply and Command Segment.
-
Mission Order Segment: In this segment the 1st Player may change the attachment of his formations by moving Primary Formation Command Counters from one Command Track to another. All reinforcements indicated by the scenario for the current segment are placed on the map and charts. All withdrawals dictated by the Scenario are executed. All attachments are finalized before any Mission Orders (MOs) are given. After all attachment changes are made, MOs are then given by the supreme commander to the army commanders and strategic formation leaders. Then leaders of corps-sized army formations must be given a MO by their army commanders. Finally the RR Engineer Point total is reduced to zero on the RP Track, then the new allotment of RR Engineer Points is added.
-
Supply and Command Segment: Undertake the following actions in the following order. To begin with the 1st Player may relocate Army Base Markers. Then he determines the supply status of each of his armies' Main Depot, and records it on the Main Depot's Status Box on the Army Chart. Then the supply status of all friendly units is determined. Any unit found to be out of supply has its Primary Formation's ML lowered by one for each day the current impulse consists of. Next Command Control for all friendly units is determined. Any unit found to be out of Command Control has its Primary Formation's ML lowered by one for each day the current impulse consists of. These effects are cumulative, so a unit found to be out of supply and out of Command Control in an impulse consisting of two days would have its ML lowered by four.
Next all Army Formations that are in supply may be issued new APs, provided this is allowed by the supply status of their controlling army's Main Depot.
Next all Air units that were flipped to their "Air Unit Used" sides in the previous impulse may revert to their face-up sides if they pass a Maintenance Rating Check.
Next all units belonging to army formations in Replacement Mode that are in supply may receive Replacement Points (REP) if allowed by the supply status of their controlling army's Main Depot.
-
4.3 The Next Impulse
The above sequence concludes one impulse; if there are other impulses remaining in a game turn, return to Standard Rule 4.2 with the 1st Player's Command Phase, and repeat phases 4.21 through 4.28. Otherwise, proceed to the Weekly Interphase (Standard Rule 4.1) and begin a new Turn.
4.4 Recording Time
The passage of time is recorded using the printed tracks and cycles on the Time Chart. The Time Chart contains the four levels of time in the game. The Game Turn Track records weeks (game turns). The Days Used in Impulses Track records the last day of each impulse (thereby recording the number of impulses and the number of days each impulse will consist of). The Phase Cycle records the phases and segments of each impulse. The Mutual Combat Phase Cycle records which step of a combat phase is being played.
There is no penalty for failing to record the passage of time in a game turn, other than the mammoth confusion that will set in as players try to remember what to do next.
- Recording Victory Points (VP): VP earned by events are recorded at the end of each Game Turn.
NOTE: The various activities in each segment are explained in full later in the rules. Reread section 4 after reading through the rules. Don't be concerned with the amount of Phases and Segments - many activities occur infrequently and most take only a few minutes to execute once you have the hang of it.
5.0 Weekly Interphase
The Weekly Interphase occurs at the start of each turn, and consists of a Strategic Phase and an Initiative Determination Phase. Players conduct the activities of the interphase jointly.
5.1 Strategic Phase
During the Strategic Phase, both players adjust their Rail Point (RP) totals, select eligible units to construct Permanent Entrenchments, and note any Replacement Points (REP) received.
-
5.11 Adjust Rail Point Segment: At the start of this segment, both players adjust their RP markers to zero. Both players then determine from the scenario instructions how many new RPs they receive and adjust their RP total markers accordingly. Unused RPs are not carried over from turn to turn.
-
5.12 Construct Permanent Entrenchments Segment: An eligible combat class unit which has fulfilled the requirements to construct a Permanent Entrenchment may attempt to enter Permanent Entrenchment Mode during this segment. Permanent Entrenchment Mode benefits and restrictions are found in Standard Rule 8.8.
Construction Requirements: To be eligible to construct a permanent entrenchment, an Infantry Division-sized combat class unit or a Combat Engineer unit must be in Entrenchment Mode and must have spent an entire game turn without using MPs. A unit may defend against attacks in a hex and it may take SP and ML losses as a result of combat without losing its eligibility to construct a permanent entrenchment. More than one formation can be stacked in the hex where a unit is attempting to construct a permanent entrenchment. Only one formation may attempt to construct a permanent entrenchment per hex per turn. Formations in the hex which are not attempting to construct a Permanent Entrenchment are unrestricted in the use of MPs.
Only Infantry Division-sized and Combat Engineer units may attempt to construct permanent entrenchments. Any combat, artillery, or HQ class unit may receive the benefits of permanent entrenchments.
Procedure: In this segment, at least one turn after a unit fulfilled the requirements to construct a Permanent Entrenchment, a MC is taken for the unit; if the unit passes its MC the construction is complete and it can enter Permanent Entrenchment Mode. To place the unit in Permanent Entrenchment Mode flip the entrenchment mode counter to display the permanent entrenchment mode side. Permanent Entrenchment markers are placed on top of units facing forward (i.e. pointing through the center frontal hexside).
Subsequent Game Turn Modifier: Each turn a unit fails to construct a Permanent Entrenchment counts as a modifier for subsequent attempts. Place a SP marker beneath the entrenchment mode marker to indicate the number of turns a unit has previously attempted to construct a Permanent Entrenchment. This number is subtracted from the die roll used to resolve the MC taken to construct a Permanent Entrenchment in the next turn.
NOTE: This modifier progressively improves the chances of a unit attempting to construct a permanent entrenchment.
5.2 Impulse Determination Phase
The Impulse Determination Phase is used to assign initiative and to allow the player with the initiative to decide the number of impulses for the turn.
-
5.21 Initiative Procedure: Both players roll a die. Roll again in case of a tie. The player with the highest score has the initiative. The Exclusive Rules may list die roll modifiers which influence the final score.
-
5.22 Impulse Sequence: The player who gains or retains the initiative announces the impulse sequence. He announces how many impulses there will be in the turn, and how many days each impulse will include. The total number of days must be equal to seven. The Exclusive Rules may limit the length and number of impulses a turn can include. When the impulse sequence is announced, if the game turn will consist of more than one impulse, players mark the announced sequence on the Time Chart. This impulse sequence remains in effect until the Impulse Determination Phase of the next turn.
EXAMPLE: The player with the initiative could decide that the turn will consist of two two-day impulses and one three-day impulse, or one five-day impulse and one two-day impulse, or any other combination allowed in the exclusive rules.
6.0 Impulses
Impulse Characteristics: For each day in an Impulse, a player receives 2 MPs during his Movement Phase and 1 MP during his Counter-Movement Phase.
EXAMPLE: A three-day impulse would give a player 6 MPs during the Movement Phase and 3 MPs during the Counter-Movement Phase.
7.0 The Command Phase
Each Game Turn represents one week of time and consists of one to seven impulses. Therefore each impulse represents one to seven days of activity. Each impulse consists of two player turns. Each player turn consists of a Command Phase, a Movement Phase, a Counter-Movement Phase for the opposing player, and a Mutual Combat Phase. These phases are more fully described in the modules below. It is important to note that each impulse follows the same sequence of phases.
During his Command Phase, the phasing player determines the Mission Orders his forces will carry out, places reinforcements, removes withdrawals, checks supply and Command Control of his units, and incorporates replacements. Each Command Phase consists of a Mission Order Segment followed by a Supply and Command Segment.
NOTE: Determine the Weather prior to the 1st Player's Command Phase.
7.1 Mission Order Segment
During this segment, a player may change the attachment of his formations and issue Mission Orders (MOs) to his formations. Each Mission Order Segment consists of a Formation Attachment Step, followed by the Reinforcement and Withdrawal Step, followed by the Mission Order Step. These are explained below.
7.11 Formation Attachment Step
Formation attachment (see 3.1) may be changed freely during this step of the Command Phase. Changing attachments is always done before the Mission Order Step.
General Rule: To change a Primary Formation's attachment place the Primary Formation's Command Counter on a new Command Track. When the Command Counter is placed on a Command Track it must be placed in the appropriate Morale Level (ML) Box on that Command Track.
- A. Formation Attachment Summary: All Primary Formations are either attached to the Supreme Commander or to an army (or army detachment). Many Primary Formations are also attached to a corps. Primary Formations that are not attached to a corps are Independent Formations. Thus, a formation will be in one of four possible states of attachment:
- Independent Strategic Formation attachment: Primary Formations with their Command Counter on the Strategic Chart that are not attached to a corps.
- Corps-sized Strategic Formation attachment: Primary Formations with their Command Counter on the Strategic Chart that are attached to a corps.
- Independent Army Formation attachment: Primary Formations with their Command Counter on an Army or Army Detachment Chart that are not attached to a corps.
- Corps-sized Army Formation attachment: Primary Formations with their Command Counter on an Army or Army Detachment Chart that are attached to a corps.
7.12 Reinforcement and Withdrawal Step
Both sides may receive reinforcements or be required to withdraw units during the course of the game. Both activities occur in this segment.
NOTE: Reinforcements may also arrive during the March or Counter-March segments.
Reinforcements: Reinforcements are indicated for a specific game turn, impulse and segment in the Exclusive Rules. Units arriving as reinforcements must enter the map on the specified entry hex. If a unit arrives in Rail Mode it receives one free MP of Rail Mode Movement that does not consume any RP from the Strategic Chart's RP pool. Units may appear in their entry hex in violation of the stacking rules (see 3.3) but they must be immediately moved in their Movement Phase to conform with stacking. Reinforcements may not enter the map in a hex which is currently occupied by an enemy unit or which is in an enemy ZOC. If a scheduled entry hex is enemy occupied or enemy controlled, the reinforcing unit may enter at the nearest unblocked railroad line. A player may deliberately withhold reinforcements from game turn to game turn. However, reinforcements must appear at their scheduled hex or, if blocked, at the nearest unblocked railroad line.
Place the Command Counters of any Primary Formations that arrive on the map as reinforcements on the designated Chart. The player may choose a chart if none is designated, but this will have implications for supply and Command Control.
NOTE: Most reinforcements begin on the Strategic Chart.
Withdrawals: Units that are designated as withdrawals are indicated in the scenarios for a specific game turn and impulse. On the indicated impulse the units to be withdrawn are simply removed from the map.
7.13 Mission Order (MO) Step
Every Army-sized and Corps-sized Formation (except Cavalry) must be given a MO for every impulse. Every formation (which is not exempt or an exception) will always be on one of these MOs. MOs are issued through the Mission Order procedure and are in effect at all times.
Designer's Note: Mission Orders introduce some new concepts that may be unfamiliar, but the requirements of the four MOs are simple, and easily memorized. The procedure is also quickly done. It will usually be a process with the Supreme Commander issuing MOs to one or more Army Commanders then noting the results from the MO Procedure by placing appropriate markers in each Army Chart's MO Box and under the individual leader counters.
The Chain of Command: MOs originate with the Supreme Commander, are issued to Army Leaders (and directly to Strategic Corps formations' leaders), and then to corps leaders. Division-sized and smaller formations attached to a Corps automatically assume the MO of that corps. Independent Army formations (those with their Command Counters on an Army Chart independent formations tracks) automatically assume the MO of the army to which they are attached. Independent Strategic formations (those with their Command Counters on a Strategic Chart independent formations track) automatically assume the Hold MO. If an Army-sized or Corps-sized formation does not have a leader it automatically assumes the MO given to it by the leader above it in the Chain of Command.
NOTE: Many corps-sized formations do not have leader counters.
Mission Order Procedure: In order for a leader to give a MO to a leader below him in the Chain of Command, the MO Procedure must be followed. This procedure follows the chain of command from the top down. Army Leaders will assume the MO resulting from the MO Procedure they undergo with the Supreme Commander; this will be the MO they attempt to issue to the corps leader counters under them in the Chain of Command. Corps Leaders will assume the MO resulting from the MO Procedure they undergo with their Army leader.
The MO Procedure consists of rolling one die for each leader, adding the MO Modifier printed on each leader counter to his die roll, and comparing the modified die rolls to see which is higher. The leader with the highest modified die roll is the leader that determines the MO for the formation and its subordinates. Ties on the modified die rolls are won by the leader higher up the chain of command.
EXAMPLE: A Supreme Commander with a MO Modifier of +4 is attempting to give a MO of Advance to an Army Commander with a MO Modifier of +2 and a MO Preference of Hold. A three on the die is rolled for the Supreme Commander and six on the die is rolled for the Army Commander, giving the Supreme Commander a modified die roll of seven (3+4) and the Army Commander a modified die roll of eight (6+2). The result is that the Army Commander's MO is not Advance, but Hold. This is the MO the Army Commander will consequently attempt to issue to leaders of corps attached to his army.
Recording MOs: An Army's MO derived from the MO procedure is recorded in the MO Box on the Army Chart. If a leader's MO derived from the MO procedure is different than the MO given the leader by his superior (i.e. If a subordinate leader undertakes his preferred MO over the MO issued by his superior) record this by placing a strength point loss marker under the leader's counter (see below).
Leaders and Mission Orders: The function of a leader counter is to modify the Mission Order (MO) Procedure. Each leader has a MO Preference and a MO Modifier printed on his counter (with the exception of the Supreme Commander, who does not have a MO Preference).
Leader MO Preference Modifiers: If a subordinate leader follows his MO Preference over his superior leader's MO, place a SP loss marker under the leader counter to indicate the number of consecutive impulses he has acted under his own preference. For each consecutive occurrence rotate the SP marker by one. The SP marker is the number that is subtracted from the leader's MO Modifier in the next Mission Order Step. The SP marker is removed when a subordinate leader is issued a MO and does not follow his own MO Preference. The SP marker is placed again whenever the subordinate leader follows his MO Preference over his superior's MO. This may occur numerous times in a game.
NOTE: The modifier makes it increasingly unlikely that a leader will persist in going against his superior's MO.
7.14 Special Rules Effecting MOs
- A. Strategic Formations: Strategic Formations are corps and smaller formations with their Command Counters on the Command Tracks of the Strategic Chart. Strategic Formations may only be issued the Hold MO. Strategic Corps-sized Formations with a leader counter follow the MO procedure normally except the only MO the Supreme Commander may attempt to give them is the Hold MO. (See the Exclusive Rules for exceptions)
- B. Army LOC Exception: A Unit attached to an Army and located on or adjacent to that army's LOC may ignore MO requirements. This applies to units which begin their movement on or adjacent to their Army's LOC as well as units which move adjacent to the LOC during the Movement Phase. A Unit on or adjacent to its army's LOC is free to move in any direction so long as it remains on or adjacent to the Army LOC. The moment a unit is no longer on or adjacent to the Army LOC, it must revert to its MO and fulfill its MO requirements.
- C. Isolated Formations: Whenever a Headquarters (HQ) class unit of a corps-sized army formation becomes isolated (see 7.21.G), the Army to which the isolated corps is attached may voluntarily assume the Retire Mission Order (MO). If the affected army voluntarily chooses to assume the Retire MO, the normal MO procedure is suspended for that army. The affected army may revert to the normal MO procedure when one of two events occur: 1) the Corps HQ class unit is no longer isolated; or 2) the Corps HQ class unit is eliminated.
- D. MO Requirement Exemptions: The MO Requirement exceptions are as follows:
- Cavalry Formations: Units attached to a Cavalry Primary Formation (units whose Primary Formation identifier contains a "C" or "CS") are exempt from MO restrictions. Cavalry formations do not go through the MO procedure. (See the Exclusive Rules for exceptions)
- Engineer Units: Engineer units, except Engineers that are Organic Combat Units, are exempt from MO requirements.
- Isolated Units: Isolated units are exempt from MO requirements.
7.15 Types of Mission Orders
Units of formations implementing a MO have their expenditure of Movement Points (MP) restricted. A MO may also require units to perform different types of movement during the Movement and Counter-Movement Phases. All the units of formations required to be on a MO are affected by it equally, unless otherwise noted.
There are four types of MOs: Advance, Retire, Hold and Flexible. Each MO type is explained below:
-
A. Advance: Units which belong to formations on the Advance MO may only move through hexsides designated on the Mission Requirements Diagram as an advance hexside. They may not move through the hexsides designated as exclusively retire hexsides. They may not expend MPs to recover morale levels, nor may they enter replacement mode. If an Infantry Combat Class unit on the Advance MO enters, or starts in, an enemy ZOC it must stop its movement in the hex (exception: Overrun – see 8.32) and immediately place a Combat Marker before expending any other MPs in the hex. No unit of a formation on the Advance MO may voluntarily increase the distance between the closest enemy unit and itself during any part of the march or counter-march segments. Each impulse each unit must decrease the distance between the closest enemy combat class unit and itself by a minimum of one hex if possible, with the exception of enemy combat class units within a fortress complex. (I.e., Units with the Advance MO need not decrease the distance between themselves and enemy combat class units stacked with or surrounded by fortress units.)
Designer's Note: This exception is meant to allow Armies on the Advance MO to bypass fortress complexes.
EXCEPTION: Main Depots, army supply units, corps trains and Army HQ units may move freely through any hexside.
EXCEPTION: Units of Shattered Primary Formations may move freely through any hexside and may expend MPs to enter Replacement Mode or recover Morale levels. (See 12.23)
-
B. Retire: Units which belong to formations on the Retire MO may only move through hexsides designated on the Mission Requirements Diagram as a retire hexside. They may not move through hexsides designated as exclusively advance hexsides. They may not expend MPs to recover morale levels, nor may they enter replacement mode. No unit of a formation on the Retire MO may voluntarily decrease the distance between the closest enemy unit and itself during any part of an impulse. Each impulse each unit must increase the distance between the closest enemy unit and itself by a minimum of one hex if possible. If a unit fails a MC as a result of Force Marching, any SPs lost are counted as Prisoner Points by the opposing player. (see 12.52)
EXCEPTION: Main Depots, army supply units, corps trains and Army HQ units may move freely through any hexside.
EXCEPTION: Units of Shattered Primary Formations may expend MPs to enter Replacement Mode or recover Morale levels. (see 12.23)
EXAMPLE (Mission Order Segment): The phasing player examines the map to see if there are Primary Formation attachments he wishes to change. He decides to change the attachment of an infantry division from one corps HQ to another. He removes the division's Command Counter from the Command Track where the current Corps HQ unit's Command Counter is located and places it on the Command Track the new HQ's Command Counter is on. Since the division is no longer attached to its old corps HQ, it may no longer be in that corps' Headquarters Holding Box (HQHB). The player removes the units of the division from the box and places them on the map in the same hex with the old corps HQ. He notes that the units are within supply range and Command Control Radius (CCR) of the new corps HQ, so they will be in supply and Command Control during the upcoming Supply and Command Segment.
The phasing player next decides to change the attachment of a division from being an Independent Formation to being under control of a corps HQ. He removes the division's Command Counter from the Independent Formations Command Track and places it on the Command Track where its new corps HQ's Command Counter is located. If the division is not already stacked with its new corps HQ, it may not be placed in the corresponding HQHB. If the division is not presently within CCR of its new corps HQ, but does occupy the LOC of the army HQ controlling the corps HQ, it will be in Command Control in the upcoming Supply and Command Segment.
Having completed his formation attachment changes, the player checks the scenario instructions for reinforcements and withdrawals. If a Brigade is scheduled to arrive, the player places the Brigade's combat class unit on the entry hex and places the Brigade's Command Counter on the Independent Formations track on the Strategic Chart.
Having completed the Reinforcements step the player begins the Mission Order Step. If there are no formations on the Strategic Chart Command Tracks with leader counters, there is no MO Procedure for the Supreme Commander to undergo with Strategic Formations; all Strategic formations are issued, and automatically assume, the Hold MO.
The player wants a particular army to Advance. The Army Commander's MO Preference is to Advance, as is one of his corps leaders, but a second corps leader's MO Preference is Hold.
Transcriber's note: in the printed example the words "as is one of his" and "corps leaders, but a second corps leader's MO Preference is Hold" fall in different columns, with the 7.21 caption text between them; they are joined here into one sentence in their printed order.
There is no need to undergo the MO procedure between the Supreme Commander and the Army Commander as the preference printed on Army Commander's counter is Advance, the same as the desired MO. Similarly, there is no need to undergo the MO procedure between the Army Commander and the first corps leader, as Advance is the preference printed on the corps leader's counter. The Army Commander must undergo the MO procedure to issue a MO of Advance to his second corps leader, whose MO Preference is Hold. The player rolls a die for the Army Commander and another for the corps leader, adding their respective printed MO Modifiers to the die rolls. The Army Commander rolls the die and gets a modified total of 6, and the corps leader rolls the die and gets a modified total of 5. The corps will assume the Advance MO. (If the corps leader had the higher total, his corps would have assumed the Hold MO.)
Finally the player adjusts his RR Engineer Point total to zero and then adds the new allotment by multiplying his daily RR Engineer Point total by the number of days in the current impulse. This concludes the Mission Order Segment of the Command Phase.
7.16 RR Engineer Point Step
The phasing player adjusts his RR Engineer Point marker to zero. He then determines from the scenario instructions how many new RR Engineer Points he receives per day. He then multiplies this number by the number of days in the current impulse. The sum is the number of RR Engineer Points received that impulse and is recorded accordingly. Unused RR Engineer Points are not carried over from impulse to impulse.
7.2 Supply and Command Segment
During this segment the phasing player will determine the supply status of his units and Main Depots, determine if his units are in Command Control, replenish his Ammunition Points, ready air units for operations and take replacements. These steps are outlined below.
7.21 Relocate Army Base Step
The Army Base Marker indicates the beginning of an Army's LOC. The Army Base represents the point (usually within the home country) where supplies are gathered, stored and organized before delivery to the front. There is no MP cost to move an Army Base Marker. Where an Army Base Marker may be placed is found in the Exclusive Rules.
NOTE: Main Depots are in supply only if the railroad line they are on consists of a contiguous path of friendly operational railroad line hexes leading from the Main Depot to the Army's Army Base Marker. The railroad line must be free of enemy units and their ZOC.
7.22 Determine Main Depot Status Step
During this step, the phasing player must determine the status of each of his armies' Main Depots and their capabilities. The Main Depot status and capabilities simulates the adequacy of supply being brought forward from the rear areas and governs the activity level of the army. Note that only friendly operational railroad lines may be used by a Main Depot to trace its LOC. The Main Depot's status determines the availability and quantity of Main Depot capabilities. These capabilities are described below.
-
Main Depot Capability 1: All units of the formations attached to the army can be kept in supply if they are within their supply range of the Main Depot, or of a chain of supply class units leading back to the Main Depot, or any hex of the LOC.
-
Main Depot Capability 2: The units of the army can replace Ammunition Points (APs) freely.
-
Main Depot Capability 3: The units of the army can replace SPs previously lost by incorporating REPs through entering Replacement Mode.
-
Main Depot Capability 4: The railroad line comprising the LOC can be used to transport units of any kind by Rail Mode. (LOC definition – see 2.75.A)
-
A. Main Depot Status delimits: Each Main Depot may be in one of four states each turn: Maximum Double Status, Medium Double Status, Minimum Double Status and Single Status. The Main Depot's status determines the availability of Main Depot capabilities, as described above.
-
Maximum Double Main Depot Status (Highest State): If the hex occupied by the Main Depot is a double railroad line, and all the hexes along the Line of Communications (LOC) between the Main Depot and Army Base are double railroad lines, none of which are shared with another Main Depot's LOC, then the Main Depot Status is Maximum Double. A Main Depot with Maximum Double status allows all four of the Main Depot Capabilities listed in 7.22.
-
Medium Double Main Depot Status (Second Highest State): If the hex occupied by a Main Depot is a double railroad line, if all the hexes along the LOC between the Main Depot and Army Base are double railroad lines, some of which are shared with one other army's Main Depot, the status of the army's Main Depot is Medium Double. A Main Depot whose status is Medium Double can provide any of the capabilities of a Maximum Double listed in 7.22, but only three of the four capabilities in any one impulse. A player announces during the Supply and Command Segment which one of the four Main Depot Capabilities will not be exercised that impulse. This should be noted on a piece of paper.
-
7.23 Supply Status Step
A player should attempt to keep his units in supply at all times. Units not in supply have their Primary Formation's ML reduced, may not receive Replacement Points, and may not replace Ammunition Points (APs). Supply status is determined in two situations in an impulse. Supply is determined for all friendly units during the Supply Status Step of the Command Phase. Supply is also determined at the instant of combat; whenever an attack is announced both players must determine the supply status of all units involved.
Tracing Supply: A unit must be able to trace a contiguous path of hexes to a supply source within its Supply Range in order to be in supply. Supply Ranges for all units are given in the Exclusive Rules. A supply path is broken if any hex along the path of hexes traced by a unit for its supply path is occupied by an enemy unit or an enemy ZOC. Friendly units negate the presence of enemy ZOC in a hex for purposes of tracing supply.
The supply source to which a unit traces its supply line is determined by the type of formation it belongs to. Strategic Formations must be within Supply Range of a friendly operational railroad line. The railroad line must consist of a continuous line of friendly operational railroad hexes leading to a friendly map edge. Army Formations must be within Supply Range of 1) the Main Depot of the army they are attached to, or 2) an Army Supply unit which is within Supply Range of the Main Depot, or 3) within Supply Range of the Army's LOC.
-
A. Types of Supply Sources: There are five types of supply source: Main Depots, Army Supply units, Corps Train units, friendly operational railroad lines, and Fortress Supply Depots. The Exclusive Rules may list additional supply sources.
-
Main Depots: Main Depot units are among the most important units in an army-sized formation, as they are the source of supply for all the units attached to that army, including the army's supply units. Main Depot units have a Primary Formation Identifier printed on them which is the same as the army-sized formation to which they are attached. Depots may only provide supply to units of formations that are attached to the army identified on the depot counter.
Main Depots themselves are in supply if the railroad line they are on consists of a contiguous path of friendly operational rail hexes leading from the Main Depot to the Army's Base Marker. The railroad line must be free of enemy units and their ZOC.
Main Depot units are always in Rail Mode; they have a Mobility Rating (MR) of R printed on their counter. There is no need to place a Rail Mode marker on a Main Depot unit. They may only move by rail (or in Naval Mode), and only if the owning player has sufficient Rail Points (RPs) available. Main Depots may not Force March. Main Depots need not be in Command Control (i.e. they need not be within the CCR of a HQ unit).
Main Depots are composed exclusively of Cadre Points (CPs); if they are attacked alone in a hex they are eliminated, and the opposing player counts all CPs eliminated in this manner as Prisoner Points. Main Depot units that have been eliminated appear in the next friendly March segment following their elimination, entering from any friendly map edge railroad line.
-
Army Supply Units: An Army Supply unit is only considered a supply source if it is itself in supply. To be in supply, the supply unit must be able to trace a contiguous path of friendly operational rail hexes leading from the Supply Unit to the Army's Main Depot within its supply range. Army supply units from the same army may form a chain of army supply units, each within Supply Range of the other.
Army Supply units have a Primary Formation Identifier printed on them which specifies the army they are attached to. They may only trace supply from the Main Depot to which they are attached and may only supply units of formations attached to the same army. Army Supply units are always in Rail Mode; they have a Mobility Rating (MR) of R printed on their counter. There is no need to place a Rail Mode marker on an Army Supply unit. They may only be moved by rail (or Naval Mode), and only if the owning player has sufficient Rail Points (RPs) available. Army Supply units may not Force March. Army Supply units need not be in command (i.e., they need not be within the CCR of any HQ unit).
-
7.24 Command Control Step
A player should attempt to keep his units in Command Control at all times. Command Control is determined in two situations in an impulse. During the Command Control Step of an impulse the phasing player determines Command Control for all his units. Command Control is also determined at the instant of combat. Note that Supply Class units are exempt from the need to be in Command Control.
Command Control Procedure: There is a CCR printed in a circle at the bottom of the counter of most HQ units (The HQ units for Army Groups, Fronts, and the Supreme Commander have no CCR). If a unit belongs to a formation with a HQ unit with a CCR it must be within the CCR of the appropriate HQ unit. CCR is measured in terms of numbers of hexes distant from the HQ unit.
EXAMPLE: If a HQ unit had a CCR of 3, all units belonging to its formation, or that are attached to it, must be within three hexes to be within Command Control. If more than three hexes from the HQ the units are out of Command Control.
-
A. Formation Attachment and CCR: The HQ to which a unit must trace Command Control is determined by the unit's Primary Formation attachment. There is only one CCR a unit must stay within. A unit must trace Command Control to the lowest level HQ unit to which it is attached. An army HQ is the lowest level above a corps HQ. A corps HQ is the lowest level above a division. A division HQ is the lowest level above a brigade-or-smaller unit. The four types of Formation Attachment and their corresponding Command Control structure are described below:
-
Independent Army Formations (all Primary Formations on an Army or Army Detachment Chart that are not attached to a corps):
-
Units without a HQ unit that belong to an Independent Army Formation must be within the CCR of the Army's HQ unit.
-
If the Independent Army Formation has a HQ unit, all units attached to the formation must be within the CCR of the formations HQ unit, and the formation's HQ unit must be within the CCR of the Army's HQ unit.
NOTE: the Supreme Headquarters does not have a CCR. Therefore, Strategic Formations have no higher HQ unit CCR to be within.
EXAMPLE OF THE COMMAND CONTROL STEP: An army has one division-sized Primary Formation Command Counter on its Independent Formations Command Track. The army has one corps-sized Primary Formation Command Counter on one of its Corps Command Tracks, and one division-sized Primary Formation Command Counter attached to the corps. The CCR printed on the Army HQ unit is 6 and the CCR on the Corps HQ unit is 3.
Army LOC Exception: A Unit stacked on or adjacent to an army's LOC is always in Command Control.
-
-
Corps-sized Army Formations (all Primary Formations on an Army or Army Detachment Chart that are attached to a corps):
-
Units without a HQ unit that belong to a Primary Formation, attached to a corps, must be within the CCR of the Corps HQ unit, and the Corps HQ unit must be within the CCR of the Army's HQ unit.
-
-
7.25 Replenish Used Ammo Points Step
During this step the phasing player may replenish Ammunition Points (APs) for Army formations which meet the following requirements.
Requirements: An army formation wishing to replenish the APs of its attached formations must have a Main Depot Supply Status that permits the replenishment of APs. If an army's Main Depot Supply Status is Medium Double, Minimum Double or Single, and the owning player has chosen not to have Main Depot Capability 2 in the impulse, no formation attached to the army-sized formation may replenish APs. (see 7.22) Corps-sized Army formations may only replenish APs if the Corps HQ unit is both in supply and in Command Control. Strategic Formations may not replenish APs.
Procedure: If the criteria in 7.25.A are met, an AP marker may be removed from the Ammo Box adjacent to an Independent Formation or Corps Formation Command Track. The removal of an AP marker restores the full allowance of APs to the units of the Primary Formation whose Command Counter is on the Command Track adjacent to the Ammo Box. The Exclusive Rules will specify a formation's full allowance of APs.
NOTE: It makes no difference if a formation has used one, two or all AP, the act of removing an AP marker has the same effect of restoring the full allowance of APs to a formation. Empty Ammo Boxes represent a full allowance of APs; AP markers are only used when APs have been consumed.
7.26 Take Replacements Step
A Unit that are under full strength may incorporate REPs if it meets the following requirements: 1) is in Replacement Mode, 2) is attached to an Army formation, and the Main Depot Supply Status of the army's Main Depot must include Capability 3 in the current impulse (see 7.22), and 3) the unit must be in supply and command control.
Procedure: For each REP incorporated into an eligible unit, add one SP to the unit and deduct one REP from the REPs track on the Strategic Chart.
Restrictions: Only units that have SPs or CPs remaining may receive Replacement Points (REPs). With the exception of units of cadre strength or with only one SP, which may always replace two points, a unit may not receive more REPs than its current level of SPs during a Take Replacements Step.
EXAMPLE: A unit had an original SP total of eight; it lost five SPs, so its current SP total is three; it could replace no more than three SPs during the Take Replacements Step.
NOTE: Units may only enter Replacement Mode during their Counter-Movement Phase (see 9.12). However, it is not until the Take Replacements Step on the following Supply and Command Segment that a unit actually incorporates the REPs.
7.27 Ready Air Units Step
Friendly air units that have been flipped to their "Air Unit Used" side take a Maintenance Rating Check (MRC).
MRC Procedure: Roll one die. On a die roll of six the air unit's equipment is considered damaged through use and the air unit is removed from play. On a die roll of five the air unit is considered to be under repair and remains flipped to the "Air Unit Used" side until the MRC in the next impulse. Air units that did not receive a die roll of five or six may be flipped to their front side.
Supply and Command Segment Example
The player determines the Main Depot Status of an army. The army's Main Depot traces back to the Army Base Marker by way of a Double-Track railroad line shared by one other army's LOC. The army's Main Depot status is therefore Medium Double. Medium Double Status requires a player to forego one of the following Main Depot Capabilities: 1) to place all the units of formations attached to the army in supply, 2) to replenish APs, 3) to replace SPs with REPs, or 4) to allow units to travel in Rail Mode along the LOC. In this case the player has chosen to forego Capability 4. Consequently, no unit is allowed to travel in Rail Mode along the army's LOC during the impulse.
Because the army has Main Depot Capability 1, the phasing player now examines his units on the map and confirms that all units belonging to Army Formations, whether attached to corps-sized formations or independent, are within the normal supply radius of a supply source. He checks to see that all Strategic Formations are within their supply radius of a friendly operational railroad line. Any units found to be out of supply would have their Primary Formation's ML reduced by 1 for each day in the impulse.
The player checks for units out of Command Control and confirms that all the units under the control of the army HQ are within the printed CCR of the army HQ, or along the army's LOC, except for two cavalry divisions. The first cavalry division is within the CCR of the corps HQ it is attached to, which in turn is within the CCR of the army HQ. This cavalry division is in Command Control. The second cavalry division is not attached to a corps HQ, so it is out of Command Control. It loses 1 ML, recorded by adjusting the Command Counter of this division one space down on the Independent Formations Command Track.
Because Main Depot Capability 2 is available, all army formations in supply and command control are eligible to replenish APs. The player examines the army's Command Tracks to see if any formations need APs. Those that do are replenished by removing the AP markers from their Ammo Boxes. (Remember that Strategic Formations may not replenish APs.)
Main Depot Capability 3 is available, so all army formations in Replacement Mode, in Supply, and in Command Control may replace lost SPs by incorporating REPs. (Remember that Strategic Formations may not incorporate REPs.)
Finally, the player examines the map and HQHBs for air units. Any air units that pass a Maintenance Rating Check are flipped to their "Air Unit Used".
8.0 Movement Phase
The Movement Phase consists of a Concealment Segment, in which the phasing player attempts to deceive the opposing player as to the true nature of his units, and a March Segment, when the phasing player moves his units on the map and performs movement-related activity.
8.1 Concealment Segment
During the Concealment Segment the phasing player may hide his revealed units, place dummy units to confuse the opposing player, and generally seek to deceive him as to the true nature and strength of his units. Concealment Segment activities are discussed below.
-
8.11 Inverting Units: Friendly units that are face-up at the start of the Concealment Segment may be flipped facedown to conceal their identity. Unless a player conducts a successful reconnaissance or combat against an opposing unit he may not lift up or flip an opposing unit. (see 3.5)
-
8.12 Dummy Units: Dummy units are an important part of the game. They are used to confuse and mislead the opposing player as to the exact disposition of your units. Dummy units are placed on the map only during the Concealment Segment. Dummy units may only be placed on top of existing friendly non-dummy units. They remain inverted on the map until their identity is revealed by reconnaissance or combat, at which point they are removed from the map. All Dummy units removed during an impulse may be returned to play in the following Concealment Segment.
Characteristics: Dummy units may move with any Mobility Rating a player chooses. Dummy units must pay movement point costs to move; they do not fly. They may place any kind of marker above or below them, except Rail Mode, Naval Mode, Entrenchment, or Permanent Entrenchment Mode markers. They act as real units in all ways except that they may never exert a ZOC, not even in the hex they occupy. Units moving adjacent to an enemy dummy unit do not pay the MP cost of entering an enemy ZOC. Dummy units may never initiate combat of any kind. Dummy units may not Withdraw Before Combat. Dummy units do not block enemy supply or paths of retreat.
Restrictions: Dummy units can only enter friendly controlled hexes; they may not enter enemy controlled territory. (see 3.7) Dummy units may not enter an enemy ZOC.
Revealing Dummy Units: A dummy unit must be revealed if an enemy unit attempts to attack or overrun it or conducts reconnaissance against it. A dummy unit must be revealed if an enemy unit attempts to retreat through its hex. Dummy units are not revealed if an enemy unit moves adjacent but does not attack it or perform reconnaissance against it. Enemy units that wish to move into the hex of a suspected dummy unit must declare an overrun attempt, unless retreating as a result of combat. Units attempting to overrun a dummy unit pay no cost for the overrun attempt. (see 8.32)
NOTE: A dummy unit cannot enter an enemy ZOC. However, if an enemy unit moves adjacent to a friendly dummy unit, thereby projecting a ZOC into the dummy unit's hex, it is not removed from the map unless and until it is subjected to an attack or reconnaissance.
8.2 March Segment
During the March Segment the player can move all, some, or none of his units. The condition that affects a unit's movement is its Movement Mode (MM). There are four MMs a unit may assume during the Movement Phase. These are Deployed Mode, Road Mode, Rail Mode and Naval Mode. MM effects are listed below in rules 8.3 through 8.6. A unit's MM is sometimes indicated by placing a marker on the unit.
- 8.21 Normal Movement: Units move by tracing a path through adjacent hexes, expending Movement Points (MPs) for each hex entered. Depending on the unit's Mobility Rating, Movement Mode, and type of terrain, various amounts of MPs will be used to enter various hexes. There are some terrain types that require MP expenditure to cross a hexside. For units in Road Mode there may be costs of entering hexes occupied by friendly units. (see 8.42)
-
A. Mobility Ratings: Although units of the same side have the same number of MPs available each impulse, the rate at which they expend them by entering various types of terrain is governed by the unit's Mobility Rating and the unit's current Movement Mode (MM). (Mobility Rating Types are found in rule 2.21.J)
EXAMPLE: The cost for moving through clear terrain in deployed mode is 1 MP per hex for units with an I Mobility Rating and 1 & 1/3 MPs for units with an L Mobility Rating.
-
B. Terrain Effects on Ground Movement: The MP cost of a hex or hexside varies with the mobility rating of the unit moving. The Terrain Effects Chart (TEC) lists the MP costs to enter a hex or cross a hexside for the different types of terrain for the various mobility categories. While in Road Mode units may move along adjacent contiguous road lines in order to avoid paying MP costs for the other terrain in the hex.
Units moving in Road Mode along roads or across bridges ignore hexside features. A unit can only move from hex A to hex B if it could also move from hex B to hex A.
EXAMPLE: A unit with a MR of M, which is prohibited from entering mountain hexes, could not move from a mountain hex to a clear hex through a non-road hexside.
-
C. MP Expenditure: Unit Movement Allowances are independent of each other; the expenditures of one unit do not affect other units. Units can begin moving as a stack and split up by dropping units off as the stack moves. Once dropped off, the unit cannot move further, even if some of its MA remains unused. Players cannot move units a portion of their MA, move some others, then return to finish the movement of the earlier (unfinished) units. Once a unit begins to move, it must continue until it has completed its movement.
-
8.22 Detachment Units
Detachment units may be created any time during a friendly March or Counter-March Segment by removing SPs from a unit in a hex or holding box and placing a detachment unit with the same number of SPs in the hex or holding box. Detachments may be disbanded and reabsorbed by the parent unit (only) at any time during a friendly Movement or Counter-Movement Phase. The detachment unit must be of the same unit type, Mobility Rating, BF (if Artillery Class), and MGF (if Combat Class) as the unit it is created from.
NOTE: When creating Detachment units keep in mind the movement limitations imposed by Rule 8.21.C.
Characteristics: A detachment unit functions as a normal unit of the type indicated on its counter. A detachment may never be less than one SP. A detachment belongs to the Primary Formation of the unit that created it; note its attachment on the Detachment Chart. Detachment units check supply in the same manner as the parent unit. Detachments which are found to be Out of Supply affect the parent formation just like any other unit. (see 7.23.B) Detachment units have the Morale Level (ML) of their parent Primary Formation. However, detachment units may not reduce MLs to satisfy Loss Results as a result of combat or as a result of failed Morale Checks.
Detachments do not have to stay with or remain adjacent to the other units of their parent Primary Formation. In effect, they cannot go out of Command Control from their parent primary formation (in this case brigade or division) although they must remain within the CCR of their parent corps HQ (if applicable) or Army HQ unit. Detachments which are found to be Out of Command Control affect the parent Primary Formation. (see 7.24.C)
Detachment units whose parent Primary Formation is not attached to a corps (i.e. Command Counter on a corps track) may not expend Ammunition Points (APs).
- A. Detachment Chart: The Detachment Chart includes boxes for keeping track of detachment units in the game. Place the detachments available in a scenario on the Detachment Chart in the Detachment ID Boxes.
- Detachment ID and Parent Unit ID: Detachments are created by removing the detachment unit from the Detachment Chart, placing it on the map and noting the identity of the parent Primary Formation on the Detachment Chart. This allows a player to track the ML of the detachment as well as the identity of the unit losing the SPs to form a detachment.
- Sheet Protectors (Optional): Place the Detachment Chart in a Clear Polypropylene Sheet Protector to allow marking with an erasable marker. The erasable marker can be used to note the identity of a detachment's parent Primary Formation.
8.3 Deployed Mode
Deployed Mode is the mode a unit is normally considered to be in; no marker is used to indicate a unit in Deployed mode. A unit is capable of doing anything in this mode except traveling by road, rail or water.
8.31 Reconnaissance
Armored Car, Bicycle and Cavalry combat class units and HQ Class and Combat Class units with a Cavalry OCU indicator of C or (C) are capable of performing reconnaissance. These Units are known as Reconnaissance Capable Units (RCUs). In order to conduct reconnaissance a RCU must be in deployed mode and within two hexes of the objective hex during the March or Counter-March Segment. (Exception: OCU cavalry units must be adjacent to the objective hex.) The cost to conduct reconnaissance is one MP. In order for a cavalry unit to conduct a reconnaissance across a major river hexside it must be adjacent to the objective hex and must expend two MPs. Reconnaissance by RCUs may not be performed across a Grand River hexside or Permanent Entrenchment hexside. Reconnaissance by Armored car or Bicycle units may not be performed across any size river hexside. No unit may perform a reconnaissance into a hex or across a hexside that it is prohibited from entering or crossing. For example, a unit may not perform a reconnaissance across blocked hexside(s).
Procedure: The phasing player identifies a hex within range of a friendly Reconnaissance Capable Unit (RCU). He announces he is performing a reconnaissance on the hex and the hex from which the reconnaissance originates. Each unit participating in the reconnaissance then expends the required MPs. There are three possible results: 1) If the hex reconnoitered contains only enemy Dummy units, the Dummy units are removed and the procedure is complete. The phasing player does not reveal his units; 2) If the hex contains an enemy unit, and it does not contain an enemy RCU, the reconnaissance is said to be successful; 3) If the hex contains an enemy RCU or Motorized Infantry unit, the reconnaissance is said to be contested.
-
A. Successful Reconnaissance: All units in a hex that are the object of a successful reconnaissance are flipped to reveal their identity, and the opposing player may examine their identities (but not their strengths). A HQ unit with units in its HQHB must reveal them as well. The friendly RCUs that conducted the reconnaissance are flipped to reveal their identity.
-
B. Contested Reconnaissance: If a hex targeted for reconnaissance contains an enemy RCU or Motorized Infantry unit, the targeted player can contest the reconnaissance. The targeted player simply states that the reconnaissance is contested. The player conducting the reconnaissance now reveals the total number of SP's of RCUs conducting the reconnaissance. The contesting player need only reveal the identity of RCU or Motorized Infantry units strength points (SP's) that are contesting the reconnaissance. The contesting player can decide which RCUs or Motorized Infantry Unit(s) will contest the reconnaissance; not all available units are required to do so. A HQ unit with a cavalry OCU need only reveal the HQ counter (not the units in its HQHB) at this time.
The number of SPs conducting the reconnaissance is compared to the number of SP's of enemy RCU or Motorized Infantry unit(s) in the hex. If the player conducting the reconnaissance possesses fewer or equal to the number of points revealed by his opponent, the contested reconnaissance is unsuccessful. In the case of an unsuccessful contested reconnaissance the Friendly RCUs that conducted the reconnaissance, including units with a Cavalry OCU, are flipped to reveal their identity. The Enemy player reveals the RCUs and/or Motorized Infantry Units that contested the reconnaissance.
If the player conducting the reconnaissance possesses more points than the number of points revealed by his opponent, the contested reconnaissance is successful. A successful contested reconnaissance is conducted just like a successful uncontested reconnaissance.
8.32 Overruns
Overruns are a special kind of Fire Attack, and the only kind of combat to occur during the Movement (or Counter-Movement) Phase. Only Combat Class units in deployed mode and accompanying Non-Heavy Artillery Class units in deployed mode can perform an overrun. Units incapable of performing an overrun may move with a stack performing an overrun but may not add their combat strength. Any unit may defend against an Overrun attempt.
Requirements: All units attempting an overrun must begin the march or Counter-March Segment stacked together. Every unit attempting the overrun must have sufficient MPs to pay the terrain cost to enter the hex being overrun plus one MP for the overrun attempt. If a unit does not have sufficient MPs to pay one MP plus the terrain cost to enter the hex being overrun, it may not participate in the overrun. Overruns may be repeated as long as the attacking units have the MPs to continue. An Overrun may not be performed across a major or grand river hexside.
Uninvolved units: Friendly units not eligible to participate in the Overrun may be stacked in a hex from which an Overrun is attempted. An unsuccessful Overrun has no effect on these units.
Procedure: To perform an overrun a player moves friendly Combat Class units adjacent to an enemy-occupied hex and declares he is performing an overrun. If the defender is only a dummy unit, the owning player removes it and the units attempting the overrun are placed in the hex, paying normal movement costs (no cost for the overrun attempt). If the defender is not a dummy unit the phasing player must expend the MPs for the units attempting the overrun. The overrun is calculated in all ways like a Fire Attack. (see 10.3) The attacker first reveals the contents of the attacking (i.e., overrunning) force, then the defender reveals the contents of the defending force. The defender may expend an AP only if his unit(s) are in deployed mode. All defending combat, artillery, or HQ class units with a mobility rating of T, M, C, H and D may exercise the defender combat option Withdraw Before Combat. (see 10.33.A) If a defender exercises Withdraw Before Combat and vacates the hex the player attempting the overrun must enter the hex and may continue moving normally, except that it may disregard the ZOC of the unit(s) that withdrew.
- A. Successful Overrun: If the modified odds column on the Fire Combat Results Table (FCRT) is 6-1 or higher, the overrun is successful. (The FCRT is not actually used to resolve Overruns, the table modifiers are used to determine the applicable odds.) A successful Overrun causes the defending formation to lose one SP, retreat one hex, and take a MC modified by plus one on the die roll. Units that are forced to retreat due to an Overrun lose any Combat Markers they may have. Any MC Loss Results may be taken as retreated hexes, SPs eliminated, or ML reductions.
- B. Unsuccessful Overrun attempt: If the modified odds column on the Fire Combat Results Table (FCRT) is less than 6-1, the overrun is unsuccessful. An unsuccessful overrun causes the attacking formation to lose one SP and to take a MC modified by plus one on the die roll. Any MC Loss Results may only be taken in SPs eliminated or ML reduction. Units that have participated in an unsuccessful Overrun attempt may move no further in that Segment. They may however expend movement points while stationary in a hex to place Combat Markers, perform reconnaissance, and/or enter Entrenchment Mode.
8.33 Place Combat Markers
Unlike most wargames, combat in The Death of Empires system allows both players to attack in every Combat Phase. Intensive Combat Markers allow units to participate as an attacker in the Initial Combat Segment (I.e. Only units with Intensive Combat Markers may attack during the Initial Combat Segment). All units may participate as an attacker in the Final Combat Segment of the Mutual Combat Phase, with or without a Combat Marker. However only units with a Regular Combat Marker may initiate a Barrage Attack or expend an AP while participating in a Fire attack during the Final Combat Segment.
Only units in deployed mode may elect to place Combat Markers. In order for a unit to place a Regular Combat Marker it must expend one MP. In order for a unit to place an Intensive Combat Marker it must expend two MPs. Weather may affect the MP cost of placing Combat Markers (see the Exclusive Rules for weather affects). Once a unit or stack of units has placed a Combat Marker it may move no further without first removing the Combat Marker. Combat Markers may not be moved.
Note: A unit need not be adjacent to an enemy unit to place a Combat Marker.
8.34 Morale Level (ML) Recovery
Primary Formations may recover lost MLs by expending MPs in a process called Morale Level Recovery. In order for a Primary Formation to regain lost MLs all units of the Primary Formation must be in deployed mode and at least three hexes from the nearest enemy unit. If some units of a Primary Formation fulfill the requirements for ML recovery, and one does not, the Primary Formation may not recover MLs. All units of the Primary Formation must expend three MPs for each ML the Primary Formation wishes to recover.
For every ML recovered, advance the Command Counter of the Primary Formation up one ML Box on its Command Track. No Primary Formation may exceed its base ML printed on the Command Counter through this Morale Level Recovery process.
Restrictions: Primary Formations under an Advance or Retire Mission Order (MO) may not perform the Morale Level Recovery process. (Exception: Shattered Units - see 7.15) Units may not Force-March to recover MLs.
8.4 Road Mode
Units in Road Mode which move along contiguous road lines pay the road movement cost and ignore other terrain in the hexes and hexside crossed. Bridges and Ferries over river hexsides negate the effects of river terrain. Roads, Bridges and Ferries can only be used for movement by units in Road Mode.
Procedure: To enter Road Mode simply place a Road Mode Marker on top of the unit or stack of units desiring to be in Road Mode. There is no MP cost to enter Road Mode. A unit need not be stacked on a hex containing a road to enter Road Mode or to move while in Road Mode. A unit in Road Mode not moving along contiguous road lines pays the normal MP cost of the hex. To leave Road Mode and enter any other Movement Mode a unit must expend 1 MP. Weather may affect the MP cost to leave Road mode and enter Deployed mode.
IMPORTANT: A stack of units moving in Road Mode may not be greater than one division-sized formation or 4 BE, whichever is greater.
8.41 Characteristics of Units in Road Mode
Units in Road Mode may not place Combat Markers, expend AP, enter Entrenchment or Permanent Entrenchment Mode, perform Reconnaissance, attempt an Overrun Attack, or perform Morale Level Recovery. Units in Road Mode are not allowed to move from enemy ZOC to enemy ZOC. Units in Road Mode have no facing and do not possess a ZOC outside the hex they occupy.
8.42 Stacking, Road Mode, and Movement Costs
The Movement Point cost for units moving in Road Mode is affected if the hex contains friendly units. For each friendly Brigade equivalent (BE) in a hex add one-half MP to the cost of entering the hex (i.e. it costs an additional one-half MP to enter a hex per BE located there). Combat, artillery, and HQ class units with the same Primary Formation Identifier printed at the top of the counter may enter a hex containing another part of the same Primary Formation without paying extra MPs. For purposes of this rule round any fractions remaining after determining the total BEs in a hex down to the nearest whole number. (e.g. 1½ = 1 BE, 2-2/3 = 2 BE)
FIRST EXAMPLE: The 5th Infantry division, which includes a double-brigade infantry unit (2 BEs), a cavalry regiment (½ BE), and an artillery brigade (1 BE), along with the VII Corps HQ unit (2 BEs) are stacked in a clear terrain hex. This is a total of 5½ BEs in the hex, rounded down to 5 BEs. The 6th Infantry division, which is in Road Mode, would like to enter the hex. To do so the 6th Infantry division must pay two and one-half movement points (½ x 5) for the other units stacked in the hex and one MP for the clear terrain, for a total of three and one-half MPs.
SECOND EXAMPLE: The artillery brigade of the 5th Infantry division is stacked alone in a hex. The 5th Infantry division's double-brigade infantry unit, which is in Road Mode, would like to enter the hex. The double-brigade infantry unit could do so with no extra MP cost, as the artillery brigade bears the same Primary Formation Identifier.
THIRD EXAMPLE: The 6th cavalry division, consisting of three brigades and a HQ unit (4 BEs) is stacked together with one brigade of the 7th cavalry division (1 BE). The remaining two brigades of the 7th cavalry division, which is in Road Mode, would like to enter the hex. To do so the two brigades of the 7th cavalry division would pay two additional MPs for the other units stacked in the hex (not 2½ additional MPs).
8.43 Road Mode and Combat
Units in Road Mode may not initiate an attack. If subjected to a Fire Attack a unit(s) in Road Mode defends at half its normal strength and may not expend an AP. Immediately prior to the resolution of the Fire Attack upon a unit(s) in Road Mode, place the defending unit(s) in Deployed Mode (remove the Road Mode marker) and combat is resolved with the unit halving its final Fire Value. Units in Road Mode may not choose the defender combat option of Stand Fast.
8.5 Rail Mode
During each March Segment the phasing player may move a specified number of BEs of friendly units a specified number of hexes along friendly operational RR lines. These numbers are referred to respectively as Railroad Capacity and Railroad Movement Rate.
Railroad Capacity is the number of RPs a given side receives per turn; all units which move by rail in a March or Counter-March Segment count towards Railroad Capacity. One Rail Point (RP) allows one Brigade Equivalent (BE) to expend one Movement Point (MP) in Rail Mode.
All units of a given side can move a certain number of RR hexes for each MP expended; this is their Railroad Movement Rate.
The Railroad Capacity, Railroad Movement rate and number of MPs required to entrain/detrain can be found in the exclusive rules.
-
8.51 Entraining: To use rail movement a unit must enter Rail Mode in a hex containing a friendly operating Railroad Station that is not in an enemy ZOC, expending a number of MPs for each BE in the formation, and placing a Rail Mode marker on top. This process is called entraining. Units need not be in supply or Command Control to entrain. Units may Force March to entrain. If a unit does not have sufficient MPs to entrain in a March Segment, place a SP marker under the Rail Mode marker equal to the number of MPs that have been spent so they can be carried over to the next movement segment. Such a unit may not Barrage or Fire Attack and if Fire Attacked removes the SP marker from under the Rail Mode marker losing the expended MPs.
EXAMPLE: The MP cost to entrain is 1 MP per BE. A formation with 3 BEs expends 2 MPs towards entraining in a March Segment, so the player places a Rail Mode marker on top of the unit with a Strength Point marker oriented toward "2" beneath the Rail Mode marker. The formation will only need to expend 1 additional MP in the following Counter-March Segment to entrain.
-
8.52 Entrained Units: A unit in Rail Mode is considered "Entrained". Entrained units are in supply and Command Control as long as they are in Rail Mode. Entrained units do not possess a ZOC and may not attack. If an enemy combat or artillery class unit moves adjacent to an entrained unit the entrained unit must displace along a friendly operational RR line eight (8) hexes toward the nearest friendly army base marker.
Entrained units, with the exception of Main Depot and Army Supply units, do not count toward stacking limits (i.e. Entrained units moving by rail may pass through stacks of friendly units without causing an overstack, and vice versa).
-
8.53 Rail Movement: Once entrained, a unit may be moved from one contiguous railroad hex to another along a railroad line. Each MP expended in Rail Mode allows the unit to move a number of railroad hexes as specified in the Exclusive Rules; this is the Railroad Movement Rate. A unit may be moved up to the maximum number of hexes permitted by the Railroad Movement Rate for each MP expended. Each time one BE of units uses one MP in Rail Mode, decrease the number of Rail Points by one.
EXAMPLE: Four BEs of units move 6 MPs in Rail Mode, so 24 Rail Points (RP) are deducted from the RP Track. Assume the Exclusive Rules allow a Railroad Movement Rate of 12 hexes per MP, so the units can be moved 72 railroad hexes.
8.6 Naval Mode
Naval Mode is identical to Rail Mode except units move through all-water hexes, coastal hexes or major/grand river hexsides instead of along railroad lines. Place a Naval Mode marker on the unit to indicate that it is in Naval Mode. A unit in Naval Mode is never subject to attack. The Naval Capacity, Naval Movement rate and number of MPs required to embark/disembark can be found in the exclusive rules.
-
8.61 Embarking and Disembarking: Units wishing to enter or leave Naval Mode must embark or disembark. A formation embarks or disembarks in a naval port hex by paying a number of MPs for each BE in a formation. Units may embark while in an enemy ZOC. However units may not disembark into a hex occupied by, or in the ZOC of, an enemy unit, or any hex in enemy controlled territory. (see 3.7) Units may disembark into Deployed or Road Mode. Once disembarked, a formation with MPs remaining may resume moving normally.
A formation may not disembark (i.e., remove its Naval Mode marker) until all its BEs have disembarked. If a unit lacks sufficient MPs to embark or disembark in a March Segment, place a strength point marker under the Naval Mode marker indicating the number of MPs that have been spent so they can be carried over into the next segment.
Restrictions: Units that are in, embarking into, or are disembarking from Naval Mode, may not expend MPs to Force March.
- A. Marine Units: Combat Class Marine Units (only) may embark or disembark in any coastal hex. Combat Class Marine Units may disembark into a hex last occupied by an enemy unit and may disembark into an enemy ZOC.
-
8.62 Naval Capacity and Movement Rate: Naval Capacity is the number of BEs that a given side can move in a turn; all units which move by Naval Mode in a March or Counter-March Segment count towards Naval Capacity. All units of a given side can move a certain number of all-water or coastal hexes or major river hexsides for each MP expended; this is their Naval Movement Rate.
-
8.63 Naval Port Capacity: Each Naval Port hex has a daily maximum BE capacity. No more than the capacity of BEs may be Embarked and Disembarked in a Naval Port hex per day. The Naval Port capacity for each Naval Port hex is found in the exclusive rules.
EXAMPLE: The current impulse consists of 3 days and the Naval Port capacity is 4. A Formation could embark or disembark 12 BEs in the impulse.
8.7 Entrenchment Modes
A combat class unit in Deployed Mode may enter Entrenchment or Permanent Entrenchment Mode in order to receive combat advantages in defending a hex.
-
8.71 Entrenchment Mode Procedure: A unit may enter Entrenchment Mode in two ways: 1) by expending three MPs and placing an Entrenchment marker facing forward (i.e. pointing through the center frontal hexside); or 2) by entering a hex with an entrenchment marker already in place and aligning its facing with the marker.
-
8.72 Permanent Entrenchment Mode Procedure: A unit may enter Permanent Entrenchment Mode in two ways: 1) by fulfilling the requirements for construction during the Construct Permanent Entrenchments Segment (see 5.12); or 2) by entering a hex with a permanent entrenchment marker already in place or printed on the map, and aligning its facing with the entrenchment.
-
8.73 Entrenchment Benefits: Entrenchments are treated as a form of terrain. A unit in Entrenchment Mode may benefit from a number of column shifts in Barrage Combat and Fire Combat. (see the TEC) A Unit benefits from an Entrenchment only if attacked through an Entrenchment hexside. Entrenchments also provide a modifier to Morale Checks (MCs) taken by entrenched units. (see the TEC) Units that retreat from an entrenchment hex as a result of combat no longer gain the MC benefit of the entrenchment. Attacking units conducting a Pursuit after Fire Attack through a frontal hexside of an enemy Permanent Entrenchment must stop after entering the hex.
-
8.74 Entrenchment Marker Removal: Once it is placed, an entrenchment or permanent entrenchment marker remains on the unit, or stack of units, until all friendly units leave the hex, at which time the marker is removed from play.
-
8.75 On-Map Permanent Entrenchments: There are permanent entrenchments printed on the map. (See map key) A unit is in Permanent Entrenchment mode if one of its frontal hexsides is facing the same hexside as a permanent entrenchment symbol printed on the map. This is done automatically, there is no MC or expenditure of MPs. The unit remains in Permanent Entrenchment mode as long as one of its frontal hexsides faces the same hexside as a Permanent Entrenchment symbol. If at any time the unit does not conform to this facing it is no longer in Permanent Entrenchment mode.
8.8 Air Units
Air Units represent aircraft able to perform reconnaissance and intervene on the battlefield. The various types of aircraft units available in a game are described in the exclusive rules. Air Units may perform three types of Air Unit Operations: Air Reconnaissance, Air Transfer, and the Artillery Spotting mission. The Air Reconnaissance and Air Transfer operations take place in the March and Counter-March Segments; Artillery Spotting missions takes place during the Combat Segment. The Reconnaissance operation is explained in Standard Rule 8.81.A. The Air Transfer operation is explained in Standard Rule 8.81.B. The Artillery Spotting mission is explained in Standard Rules 10.21.C and 10.34.C.
Procedure: Each air unit has a range printed on its counter. This is the maximum number of hexes it may fly from its base or landing ground to the hex where it performs an operation. Count the hexes between the Air unit (exclusive) and the intended hex of the operation (inclusive); if it is greater than the range of the air unit it may not perform the operation. (Exception: Air Transfer Operation - see 8.81.B)
Each time an air unit attempts an operation, whether the attempt is successful or not, flip the unit to its "Air Unit Used" side. It may be flipped back to its front side in the player's next Supply and Command Segment if it passes its Maintenance Rating Check (MRC). (see 7.27)
Restriction: Only one air unit may perform an operation against a hex in any given segment.
8.81 Air Units Operations Segment
Air Unit Operations Segments take place concurrently with the March, Counter-March, and Combat Segments.
-
A. Air Reconnaissance Operation: An air unit may perform an Air Reconnaissance Operation during the phasing player's March or Counter-March Segment.
Procedure: Choose four contiguous hexes all within the range of the air unit. All inverted enemy counters in the four hexes are subject to an Air Reconnaissance Operation. The air unit makes an Operations Rating Check (ORC) for each hex it is attempting to reconnoiter. An inverted enemy unit that is the object of a successful Air Reconnaissance Operation is either flipped to reveal its identity or announced as a non-dummy unit, depending on the terrain in the hex. If an enemy HQ unit is revealed, all units stacked in its HQHB must be revealed as well. If an Air Reconnaissance is performed in a city, town, or woods hex, only enemy dummy units are revealed; non-dummy units need not be revealed.
Operations Rating Check (ORC): In order for an air unit to successfully perform an operation it must pass an ORC. Roll one die and compare it to the Operations Rating printed on the air unit counter. If the number on the die is equal to or less than the Operation Rating, the unit may successfully perform its operation; otherwise it fails.
EXAMPLE: The I Corps HQ unit has an air unit with a range of 20 hexes in its HQHB. Four contiguous hexes no more than 20 hexes from the HQ unit are chosen for Air Reconnaissance. Three of the four hexes are occupied by inverted enemy units; two are dummy units and one is an infantry brigade. The dummy units are in clear hexes, the infantry brigade is in a woods hex. The air unit performs successful Air Reconnaissance Operations against one of the dummy units and the infantry brigade. The opposing player does not have to reveal the identity of the dummy unit that was not successfully reconnoitered, and because the infantry brigade is in a woods hex, he only has to announce that it is not a dummy unit.
Transcriber's note: in the printed example the words "Three of the four hexes are occupied by inverted" and "enemy units; two are dummy units..." are separated by the movement example text; they are joined here in their printed order.
-
B. Air Transfer Operation: An air unit may perform an Air Transfer Operation by moving to any friendly hex within triple its range during the March or Counter-March Segments.
Movement Phase Example
The phase begins with the Concealment Segment. The phasing player flips his units that are face-up to their concealed sides. He places available dummy units in hexes with existing units. He conducts any desired RR Tasks.
The March Segment begins. A two-day impulse has been chosen, so 4 MPs are available. The phasing player's army is currently on the Advance MO, in the west direction. The player's SECOND Army HQ unit controls three corps HQ units numbered III, IV, and V. Each corps HQ has multiple units stacked in its HQHB. There is an Independent double-brigade division-sized infantry formation (10 lw div) with a MR of L stacked under the Army HQ unit, an independent cavalry division (1 c div) guarding the left flank of the IV Corps HQ unit and an independent cavalry division (2 c div) in reserve.
The III Corps HQ unit starts the phase in an enemy ZOC. The Army is on an Advance MO so a Combat Marker must be placed on the unit. The III Corps expends 2 MPs to place an Intensive Combat Marker. Two cavalry regiment units attached to the infantry formations in the HQHB expend 1 MP to perform a reconnaissance of the adjacent enemy unit. This completes the III corps movement.
The IV Corps HQ unit starts the phase one hex from the above-mentioned enemy unit. In accordance with the Advance MO, the IV corps must decrease the distance between itself and the closest enemy combat-class unit. The IV Corps moves into a clear terrain hex next to the enemy unit. It costs 2 MPs to enter the hex (1 for the terrain and 1 for the enemy ZOC) leaving 2 MPs for other activities. Again, because the army is on the Advance MO, the IV corps must place a Combat Marker; the IV corps expends 2 MPs to place an Intensive Combat Marker. This completes the IV corps movement.
The V Corps HQ with two attached infantry formations moves west through clear terrain free of enemy ZOC in the direction dictated by the Advance MO. The corps moves as a single stack through three hexes at a cost of 3 MPs, then places a Regular Combat Marker at a cost of 1 MP. Two cavalry regiments stacked in the corps HQHB with a Mobility Rating (MR) of C have only expended 3-1/4 MPs in the move (3/4 MPs per hex for the terrain and 1 MP for the Combat Marker); they now expend 1 MP to perform a reconnaissance of an enemy unit two hexes away, for a total of 4-1/4 MPs (which is rounded to 4 MP). This completes the V corps movement.
The Independent infantry division (10 lw div) under the Army's HQ unit moves northwest two hexes, expending 3-1/3 MPs to do so (2 MPs for a rough hex, 1-1/3 MP for a clear hex). This leaves the division with 2/3 of a MP, so a Regular Combat Marker is placed at a cost of 1 MP. (The total of 4 1/3 MPs is rounded to 4).
The 1st cavalry division (1 c div) guarding the flanks of the IV Corps HQ unit does not move, but is given a Regular Combat Marker just in case it is needed later in the turn. (Cavalry units are exempt from MO restrictions, so the cavalry division does not need to reduce the distance between itself and an enemy unit.)
The 2nd cavalry division enters road mode (no MP cost), moves four hexes along a primary road (3 MPs), one of these hexes is occupied by the 10 lw div. The 2 BEs of the double-brigade infantry division impose a cost of 1 MP (1/2 MP per BE). The cavalry division has expended 4 MPs, so it does not have enough MPs remaining to enter Deployed Mode and must remain in Road Mode.
Finally, the player moves his Army HQ unit one hex due west to keep all its attached formations within Command Control Radius. This concludes the March Segment of the Movement Phase.
9.0 Counter-Movement Phase
The Counter-Movement Phase is pivotal for the non-phasing player. Due to its place in the sequence of play, the non-phasing player can use it to position his units for the upcoming Mutual Combat Phase and to qualify to receive replacements. The Counter-Movement Phase is largely identical to the phasing player's Movement Phase, except there is no Concealment Segment and there are some additional movement options available. The major difference is that only 1 MP is available during the Counter-March Segment for each day in the current impulse. For example, if an impulse consists of two days, there are 2 MPs available during the Counter-March Segments of the impulse.
9.1 Counter-March Segment
All movement activities allowed in the March Segment are allowed in the Counter-March Segment except one hex Minimum Movement. (see 8.21.D) In addition, a player can Force-March and enter Replacement Mode. These are described below.
-
9.11 Force-Marching: During the Counter-March Segment a player may attempt to Force-March units that move in deployed or road mode. A unit may move up to twice as many additional MPs for a Force March as it has available in the regular Counter-March.
EXAMPLE: The current impulse consists of three days, so a player has 3 MPs available in the Counter-March Segment. A player's units could move 3 MPs, then Force-March up to 6 more MPs, for a total of 9 MPs available in the segment.
Restrictions: Units may use MPs gained by Force-Marching to perform any activity that requires MP expenditure, with the exception of Morale Level Recovery. Units in Rail Mode, units entraining or detraining, units in Naval Mode and units embarking or debarking may not Force-March.
-
A. Effects of Force-Marching: Each unit that undertakes a Force-March must take a MC. For each MP used to Force March, the die roll is modified by +1. The MC is taken at the conclusion of the unit's Force-March. Thus a unit will always be able to expend the MPs desired; a failed MC results in losses after the fact. (See Morale Check situations in Standard Rule 11.21.B and Morale check procedure in Standard Rule 11.22)
EXAMPLE: A unit with a ML of 6 Force-Marches 4 additional MPs. It undergoes a MC at the conclusion of its movement with a die roll modifier of +4. The MC die roll result is six, for a modified result of ten (6 + 4). The unit suffers four Loss Results.
NOTE: Units belonging to Primary Formations with a ML of more than 6 can Force March a number of MPs equal to the difference between their ML and six without fear of failing a MC. Thus a unit with a ML of 8 could Force March 2 MPs without risk of failing a MC.
-
B. Corps Supply Units: Corps Train units may Force-March up to two additional MPs (maximum); however, if a Corps Train unit Force-Marches, reduce the ML of all Primary Formations attached to the Corps Train unit's corps-sized formation by one (1). (see 7.23.A)
-
9.12 Replacement Mode
A unit enters Replacement mode in order to receive replacements. A unit can only enter Replacement Mode during the Counter-March Segment of an impulse.
Requirements: To be able to enter Replacement Mode the Unit must be either: 1) at least 4 hexes from the nearest Enemy Unit or 2) at least 2 hexes from the nearest Enemy Unit, with a Friendly Unit or impassable terrain between it and the nearest Enemy Unit or 3) be in permanent entrenchment mode.
Procedure: A unit which has met any of the above requirements may enter replacement mode in one of two ways: 1) by expending 3 MPs or 2) by expending no movement points during the entire Counter-March Segment. Place a Replacement Mode marker on top of units that meet either requirement.
If a unit in replacement mode participates in combat (barrage or fire combat) remove the replacement mode marker.
NOTE: The actual incorporation of Replacement Points (REPs) takes place during a player's Supply and Command Segment. (see 7.26)
Counter-Movement Phase Example
The current impulse consists of two days, so the non-phasing player has 2 MPs available for the Counter-Movement Phase. Because a player has twice as many MP available in the Counter-Movement Phase for Force Marching, he also has the option to Force March any unit he chooses an additional 4 MPs (2 available MPs x 2 = 4).
The player begins by moving an entrained Corps HQ unit (1 BE) with 7 BEs attached 24 hexes by rail. The Railroad Movement Rate given in the Exclusive Rules is 12 hexes per MP, so the move consumes 16 RPs (8 BEs times the 2 MPs used). The player deducts 16 from his RP Track. The units may move no further, as units may not use Force March in Rail Mode.
A brigade-sized reinforcement enters the map on a railroad hex. As a reinforcement it has 1 "free" MP in Rail Mode. (see 7.12) It moves 12 hexes along the railroad line with its "free" MP at a cost of zero RP from the RP Track and 1 MP from its movement allowance. The unit detrains (1 MP) and could continue moving in Deployed Mode only by Force March.
A second Corps HQ unit with two attached divisions in its HQHB (all ML of 7) marches 4 MPs to move adjacent to some enemy units. An Intensive Combat Marker is placed, bringing the total MPs expended to 6. This is 4 more than the normal Movement Allowance of 2 MPs for the impulse. The player rolls a die, with a result of 3. The adjusted total is 7 because of the 4 MPs used in the Force March. Seven is equal to the Primary Formation's ML, so it passes the Force March MC without loss.
10.0 The Mutual Combat Phase
Combat in The Death of Empires system consists of a Mutual Combat Phase with two Combat Segments, the Initial Combat Segment and Final Combat Segment. In outline, the Mutual Combat Phase has the following structure:
- A. Initial Combat Segment: (1) Phasing Player Barrage Attack Step; (2) Non-Phasing Player Barrage Attack Step; (3) Phasing Player Fire Attack Step; (4) Non-Phasing Player Fire Attack Step.
- B. Final Combat Segment: (1) Phasing Player Barrage Attack Step; (2) Non-Phasing Player Barrage Attack Step; (3) Phasing Player Fire Attack Step; (4) Non-Phasing Player Fire Attack Step.
The sequence of the Combat Phase may not be altered in any way.
10.1 Important Concepts Concerning Combat
Combat in The Death of Empires system allows both players to attack in every Combat Phase. Initiating Combat is never mandatory (exceptions may be found in the Exclusive Rules).
- To be eligible to initiate a Barrage or Fire attack in the Initial Combat Segment, a unit must have an Intensive Combat Marker.
- To be eligible to initiate a Barrage Attack or a Fire attack in the Final Combat Segment while expending an AP, a unit must have a Regular Combat Marker. Units may initiate Fire Attacks in the Final Combat Segment with or without a Combat Marker. However, units without a Combat Marker may not expend an AP.
- Units must check to see if they are in supply (7.23) and command control (7.24) prior to combat.
- When resolving combat the attacker must designate an objective hex at the moment of combat; the hex must be an enemy hex adjacent to one of its frontal hexsides. A formation may attack through one frontal hexside in the Initial Combat Segment and through another frontal hexside in the Final Combat Segment.
- Combat class units may not attack into a hex they are prohibited from entering while in Deployed Mode.
10.11 Combat Markers
The placement of Combat Markers determines the type of attacks that can be made and when in the Mutual Combat Phase sequence they can be initiated. Combat Markers also affect a unit's ability to expend Ammunition Points (AP). In order to expend an AP during an attack a unit must have a Combat Marker. Barrage Attacks require the expenditure of AP, therefore only units with Combat Markers can conduct Barrage Attacks. (see 10.2) In addition, the combat options Pursue and Probe may only be exercised by units with Combat Markers. (see 10.32) Units that defend against attacks of any kind in either Combat Segment are not required to have a Combat Marker to expend an AP.
Combat Markers are flipped or removed upon initiation of an attack (or when required to exercise an attacker combat option). There are two types of Combat Marker: Intensive and Regular.
-
Intensive Combat Markers: Intensive Combat Markers allow units to initiate a Barrage Attack or Fire attack during the Initial Combat Segment. Only units with Intensive Combat Markers may attack during the Initial Combat Segment. Any Intensive Combat Markers remaining after the Initial Combat Segment of a Mutual Combat Phase are flipped to become Regular Combat Markers.
-
Regular Combat Markers: Regular Combat Markers allow units to initiate a Barrage Attack during the Final Combat Segment. Regular Combat Markers allow units to initiate a Fire Attack while expending an AP during the Final Combat Segment. Any Regular Combat Markers remaining after the Final Combat Segment of a Mutual Combat Phase are removed.
-
A. Place Combat Markers: Combat Markers are placed during the March or Counter-March Segments of the Movement or Counter-Movement Phase. Only units in deployed mode may place Combat Markers. To place an Intensive Combat Marker a unit must expend two MPs. To place a Regular Combat Marker a unit must expend one MP. Weather may affect the MP cost of placing Combat Markers. (See the Exclusive Rules for weather effects) Combat Markers are placed on top of units and facing through their center frontal hexsides.
Stacks of units may have some units with Combat Markers and some without. In order to record which units have expended the required MPs to place a Combat Marker, place the units that can utilize a Marker beneath it and those that cannot on top. In this manner, all eligible units will be under the Combat Marker and all ineligible units will be on top of it.
Combat Markers may not be moved during the March or Counter-March Segments. Units that march from one hex to another after placing a Combat Marker lose the Combat Marker. Units that are forced to retreat due to an Overrun lose any Combat Marker.
IMPORTANT NOTE: Units with Combat Markers placed are not required to attack.
Designer's Note: The MPs expended in placing a Combat Marker represent the time it takes for a unit to prepare for combat, organize supplies and ammunition, reconnoiter the terrain, prepare emplacements for artillery, etc. Units that have taken the time to place Combat Markers are allowed a wider range of combat options and have increased effectiveness.
10.12 Ammunition Points (AP)
Artillery Class units and Headquarters Class units with artillery OCUs have a Barrage Factor (BF). In order for a unit to use its BF the formation to which the unit is attached must expend an AP.
In order to expend an AP a unit must be in Deployed Mode. No Artillery class or Headquarters class unit may Barrage Attack without expending an AP.
The expenditure of an AP allows all units of Primary Formations with Command Counters on a given Command Track to use their full BF multiplier in one specific combat. If a Headquarters or Artillery Class unit belonging to a Primary Formation with a Command Counter on a Command Track chooses not to participate in a combat where an AP is expended, and subsequently participates in a different combat (using its BF), it will require the expenditure of an additional AP.
NOTE: Independent Strategic Formations may not expend an AP (and therefore may not Barrage Attack).
Procedure: Each time Artillery Class units use their BFs in a Barrage Attack or Fire Combat, an AP must be expended. Place the appropriate AP marker in the Ammo Box adjacent to the Command Track containing the Command Counter of the Primary Formation whose Headquarters or Artillery Class unit is using its BF. (See Standard Rules 2.65 and 2.77) The AP marker records the number of APs remaining to the formations on that Command Track.
EXAMPLE: There are three Primary Formations with Command Counters on the same Corps Command Track of an Army Chart. The AP Box of the Command Track is empty, indicating that no APs have been expended, therefore the corps-sized formation has the default number of AP (in this example assume 3 AP). To allow the Artillery Class units of two of the Primary Formations to participate together in a Barrage Attack an "Ammo Left 2" marker is placed in the AP Box of the Command Track. The third Primary Formation, which did not participate in the first attack, has an Artillery Class unit that participates in a subsequent Barrage during the same Barrage Attack Step. This second barrage requires the expenditure of an additional AP, and placement of an "Ammo Left 1" marker in the same AP Box.
Out of Ammo: Headquarters or Artillery Class units that belong to a Primary Formation with an "Out of Ammo" AP marker in its Ammo Box may not Barrage Attack, and their BF is reduced to one in Fire Combat.
No AP Expenditure: In a Fire Combat, if the formation to which a Headquarters or Artillery Class unit is attached does not expend an AP, the unit has a BF of 1. Reasons for not expending an AP may be involuntary, such as not having a Combat Marker placed or being "Out of Ammo". A player may voluntarily decline to expend an AP to conserve his AP supply.
- A. Artillery Superiority (AS): Artillery units with an AS marker have a BF of zero in all situations, and they may not participate in any kind of combat. (see 12.5)
Designer's Note: A Player should use his AP wisely. Each formation is faced with the possibility of two Mutual Combat Phases, each with two Combat Segments in an impulse. If a formation expends its AP early in an impulse, it will be forced to engage in later Combat Steps without ammunition. Sophisticated players will lure their opponents into just such an expenditure of APs; without the BF of Artillery Class units most formations are greatly reduced in combat strength.
10.2 Barrage Attacks
Artillery Class units and Headquarters Class units which contain Organic Combat Units (OCU) composed of Artillery Class SPs are capable of conducting Barrage Attacks. Barrage Attacks are conducted during the Phasing Player Barrage Attack Step and the Non-phasing Player Barrage Attack Step of a Combat Segment. To Barrage Attack, the formation a unit is attached to must expend an AP. In addition, the unit must be in Deployed Mode and under a Combat Marker.
Designer's Note: Barrage primarily represents the use of artillery to prepare an enemy position for assault by Infantry (Fire Attack). A skillful player will use Barrage Attacks to complement his Fire attacks.
10.21 Barrage Attack Procedure
Each formation with Artillery Class units participating in a Barrage Attack must expend an Ammunition Point. A unit which Barrage Attacks may do so only through a frontal hexside, and may only attack one enemy hex. The identities of attacking and defending units involved in a Barrage Combat are not revealed. Barrage Attacks are conducted in five steps. They are explained below:
-
A. Determine Target Type: If units are to Barrage a hex which contains both a Fortress Class unit and non-Fortress Class units, the barraging player has the option of attacking the Fortress Class unit or all non-Fortress Class units. The barraging player announces prior to determining the Barrage Value which type of units are being attacked in each Barrage Attack. (Fortress targets are explained in Standard Rule 13.22)
- Cavalry Withdraw Before Barrage: Cavalry Combat, Artillery and HQ class units that belong to a cavalry formation (with primary identifier of c) may withdraw before a barrage attack. The procedure is the same as Withdraw Before Combat. (see 10.33.A)
-
B. Determine Barrage Value: Multiply the Barrage Factor (BF) of an artillery unit by its remaining SPs. Repeat this for all artillery units involved in an attack, combining their total. Modify this number for super heavy artillery, range, terrain and weather affects. (See the Exclusive Rules) The final number is the Barrage Value.
Find the column containing the Barrage Value on the Barrage Combat Results Table (BCRT). If the total Barrage Value is greater than one column and less than the next column, the lesser of the two is used.
EXAMPLE: A total Barrage Value of 39 is to be used in a Barrage Attack; the 35 column on the BCRT must be used because the next column to the right is for a minimum Barrage Value of 40.
-
C. Determine Column Shifts: There are three types of modifications when resolving Barrage Attacks against non-fortress units: the terrain of the target hex, the use of Indirect Artillery, the presence of friendly air units. All modifications to Barrage Attacks are cumulative. Subtract the total defender column shifts from the total attacker column shifts and apply any remaining shifts.
-
Terrain Effects: The TEC has a column entitled "BCRT Column Shifts." If the terrain type modifies a Barrage Attack, there will be a number notation indicating the number of column shifts to the left (in favor of the defender). Some types of terrain modifiers on Barrage Attacks are reduced if there are Indirect artillery units involved in the attack. All terrain modifications are cumulative.
-
10.22 Resolve Barrage Attack
The Barrage Value of the artillery units making the attack is totaled to determine the initial column on the BCRT. Column shifts are determined and applied. The attack is resolved with a single die-roll cross-referenced with the final column. Combat results on the BCRT affect only the defending player's targeted units. A result obtained on the BCRT will be one of six possibilities:
- - : The attack had no effect.
- X : The defending unit(s) must take Loss Results equal to X.
- c : The defending unit(s) must take a Morale Check. (Refer to the BCRT for MC modifiers.)
- Xc : A number X followed by c means the unit(s) must suffer Loss Results equal to X, then take a MC.
- c + N : The defending unit must take a MC with a modifier to the die roll equal to N (in addition to any other modifiers).
- Xc + N : If there is a number equal to X, followed by c + N, the unit must take Loss Results equal to X then take a MC with a modifier to the die roll equal to N (in addition to any other modifiers).
- S : An S result only applies to Barrage Attacks against Fortress Class units. The Fortress Class unit surrenders and is removed from play. The SPs lost in this manner do not count as Prisoner Points.
EXAMPLE: The result of a Barrage Attack is "2C + l". The defending unit must suffer two Loss Results of some type, then take a MC with a die roll modifier of +1.
10.23 Loss Results due to Barrage Attack
Odd numbered Loss Results (LR) are applied by the defender, even numbered Loss Results are applied by the attacker. For each odd numbered LR called for on the BCRT, the defender may lose one SP, retreat one hex, or reduce by one the ML of all Primary Formations in the hex. For each even numbered LR the attacker may choose to eliminate a defending SP or reduce by one the ML of all defending Primary Formations in the hex. The attacker may not choose to reduce the defender's ML until at least one SP loss has been inflicted upon the defending unit(s). Fortress Class units only suffer SP loses. (Loss Results are described in Standard Rule 12.0)
Losses from Barrage Combat must be taken from the targeted unit(s). If losses due to a Barrage Attack eliminate all targeted unit(s) and additional losses are called for, they are not applied to the non-targeted units in the hex.
EXAMPLE: The BCRT calls for two LRs against a Fortress Class unit with one Strength Point, stacked with non-Fortress Class units. The Fortress unit is eliminated and the second loss is not applied against the non-Fortress Class units.
Restrictions: Each player can apply no more than one retreat and no more than one ML reduction per Loss Result; all other LRs must be taken in SPs. (see 12.4)
EXAMPLE: The BCRT calls for three LRs. The defender determines the first and third LR, so after choosing a one-hex retreat to satisfy the first, to satisfy the third he could reduce defending MLs by one, or lose a SP, but not retreat an additional hex.
- A. No Pursuit after Barrage: There is no pursuit after combat during the Barrage Attack Step. If a Barrage Attack clears a hex of defenders, the attackers can only enter the hex in an ensuing Fire Attack step by exercising the Pursue Combat option. (see 10.32.C)
10.24 Barrage and MC Results
Defending non-Fortress Class units may be required to take a Morale Check (MC) as a result of a Barrage Attack. The MC may be called for on the BCRT or may be the result of a retreat LR. (See Retreats in Standard Rule 12.1) Fortress class units and one formation posted to a fortress need not take a MC. (see 13.23) MCs are taken after any Loss Results called for on the BCRT have been resolved.
-
A. BCRT MC Modifiers: There are four types of die roll modifiers to a MC resulting from a Barrage Attack. All modifications to the die roll are cumulative.
-
Facing: If a defending unit in the target hex is being Barrage Attacked through a flank hexside, a die roll modifier of +1 is applied if a MC is required. If a unit is Barrage Attacked through a rear hexside, there is a die roll modifier of +2 if a MC is required.
-
Strength Point Losses: For every SP a defending Primary Formation loses as a result of a Barrage Attack, the MC die roll is modified by +1.
NOTE: A SP loss only affects the MC of the specific Primary Formation that takes the SP loss, not every Primary Formation in the hex.
-
Entrenchments: The Terrain Effects Chart (TEC) lists the die roll modification entrenchments provide a defender in Barrage Combat. Units which retreat from an entrenchment hex to satisfy a LR before taking a MC lose the MC benefit of the entrenchment.
NOTE: Units in Entrenchment mode receive the benefits of entrenchments only when attacked through their three frontal hexsides.
-
Heavy Artillery Units: If any of the units making a Barrage Attack are Heavy Artillery, a modification of +1 is made to any resulting MC die roll.
EXAMPLE OF BCRT MC MODIFIERS: Assume a corps-sized formation with a ML of 7 has attached an infantry division-sized formation with a ML of 6 and a cavalry division-sized formation with a ML of 8. Units from the infantry division and the cavalry division are in the HQHB of the Corps HQ unit. The corps-sized formation is Barrage Attacked through a flank hexside by Heavy Artillery and receives a result of 1C + 1 on the BCRT. The defender chooses to take the 1 LR as a SP reduction to the cavalry division. The modifications to the MC die roll for the corps HQ and infantry division are +1 for the Heavy Artillery, +1 for being attacked through a flank hexside, and +1 for the MC modifier result on the BCRT. The modifications to the MC die roll for the cavalry division are the same as for the others, with an additional +1 for the SP loss.
-
10.3 Fire Attacks
Fire Attacks occur during the Fire Attack steps of the Initial and Final Combat Segments of the Mutual Combat Phase. To initiate a Fire Attack during the Initial Combat Segment, units must have an Intensive Combat Marker in place. No Combat Marker is required to initiate a Fire Attack during the Final Combat Segment, but only units with a Combat Marker may expend an AP while Fire Attacking. The attacker determines which units will attack a hex. The defender determines which units will defend in a hex. Both attacker and defender may be restricted by stacking limitations.
10.31 Which Units May Conduct Fire Attacks
Only Combat Class Units in deployed mode can initiate Fire Attacks. Units with a parenthetical SP value, shattered units and units not in deployed mode can not initiate Fire Attacks. Combat class units may not attack into a hex they are prohibited from entering while in Deployed Mode. An Artillery Class unit (or HQ unit with an artillery OCU) may engage in a Fire Attack only in combination with Combat Class units (i.e. Artillery Class units may never participate in a Fire Attack alone). Artillery Class units alone in a hex and the object of a Fire Attack are automatically eliminated.
NOTE: Artillery units can Withdraw Before Combat (see 10.33.A), but may be forced to abandon equipment. (see 12.34)
10.32 Attacker Combat Options
The attacker has options that can be chosen in place of a standard Fire Attack. The attacker can choose to Probe the defending hex, conduct a Cavalry Charge, or attempt to Pursue enemy units that have moved away from his own. Only units that have placed Combat Markers may exercise the Combat Options of "Probe" and "Pursue". Only units with an Intensive Combat Marker may probe or pursue during the Initial Combat Segment. Units with Regular Combat Markers may probe or pursue during the Final Combat Segment.
NOTE: The Pursue combat option and Pursuit after Fire Attack (see 10.36.C) are completely distinct.
-
A. Probe: A probe is a form of reconnaissance made by a combat class unit during the Fire Attack Step of a Combat Segment. A unit with a Combat Marker and adjacent to an inverted enemy unit can probe instead of a Fire Attack.
Procedure: The attacker announces that a hex is being probed and then takes a MC for the probing units. If at least one attacking unit passes the MC, the probe is successful and the contents of the enemy hex must be revealed, including the contents of the HQHBs for any Headquarters Class units in the hex. If an attacking unit does not pass its Probe MC, the defending units in the hex are not revealed.
After completing the probe attempt, successful or not, the attacking unit must flip or remove its Combat Marker, as appropriate. There is no other effect of a Probe option.
Restrictions: Probes may not be conducted over Grand River hexsides or across any hexside or into a hex which the combat class unit is prohibited from moving into.
NOTE: Probe is the only way for combat class units to perform reconnaissance across a permanent entrenchment hexside.
-
B. Cavalry Charge: If the defender in a Fire Attack is in a clear terrain hex, and the attacker has at least two SPs of cavalry attacking, the attacker can declare a cavalry charge. A cavalry charge is a normal Fire Attack with the following additions: Cavalry SP are halved, not quartered, when conducting a charge, and the attacker shifts the odds column one to the right (in addition to any other modifications). The Loss Results called for on the FCRT for the attacker are doubled in a charge. SP losses must first be taken from the cavalry units involved and may only be taken by other attacking units after all cavalry SPs have been eliminated.
-
C. Pursue: When a friendly unit with a Combat Marker has frontal hexsides adjacent to an enemy unit that voluntarily moved away during the Counter-March segment, exercised a Withdraw Before Combat option, or retreated due to a Barrage Attack LR, the friendly unit may pursue.
Procedure: Pursuing units advance one hex (only) to occupy the hex vacated by the enemy unit(s) and may then redirect their facing in the new hex. If a friendly unit is a HQ Class unit, the HQ Class unit may pursue with some or all of the units in its HQHB. Units which Pursue may not initiate a Fire attack during the same Fire Attack Step and must flip or remove their marker after pursuing.
10.33 Defender Combat Options
Like the attacker, the defender has options in a Fire Attack. The defender can Withdraw Before Combat if the defending units have the necessary Mobility Rating or he can, if eligible, attempt to perform a Stand Fast.
-
A. Withdraw Before Combat: Defending Combat, Artillery or Headquarters Class units with a Mobility Rating of T, M, C, H, or D may attempt to Withdraw Before Combat.
Procedure: If a qualified unit has an attack announced against it and it opts to Withdraw Before Combat, retreat the defending unit one hex, reorient its facing and remove any Combat Marker it may have. Withdrawal is automatic and occurs before any units are revealed, however each withdrawing formation must take a Morale Check (MC). (see 11.22) If the MC is successful, the unit retreats one hex with no penalty. If unsuccessful, the unit retreats one hex and suffers LRs. The friendly player determines the nature of each odd numbered LR. The opposing player determines the nature of even numbered LRs. LRs may be taken as retreated hexes, SPs eliminated, or ML reductions.
Restrictions: Units may not Withdraw Before Combat into an enemy ZOC. Friendly units in a hex negate the presence of an enemy ZOC in this case. Units may not Withdraw Before Combat into an Overstack situation. Only one Withdrawal Before Combat may be made per hex per Fire Combat. All units in a hex desiring to withdraw must be withdrawn together.
Morale Check Modifier: If a Withdrawing unit leaves a hex occupied by a friendly Combat class unit that is defending the hex, the MC die roll is modified by -2.
Artillery Class Units: Artillery Class units with a Mobility Rating of T or D may only Withdraw Before Combat by abandoning equipment. (see 12.34) An artillery unit that abandons equipment in Withdrawal need not take a MC.
NOTE: This procedure allows an Artillery Class unit's cadre points to be preserved if a player believes it will otherwise be eliminated.
-
B. Stand Fast: A Combat Class unit or stack of units including a Combat Class unit may be ordered by the defending player to Stand Fast. To be eligible to execute the Stand Fast option the defenders must be in Deployed Mode, in supply, and not under attack through a Flank or Rear hexside. All Combat Class units in the designated hex take a MC, and only if all are designated hex take a MC, and only if all are successful is the Stand Fast option executed. The MC is modified if the units attempting to Stand Fast occupy entrenchments. (See the TEC) If any unit fails its MC the defenders may not Stand Fast and are treated as normal defending units.
Units which Stand Fast have the following special characteristics:
- Loss Results: To fulfill LR requirements units which Stand Fast may elect only SP and ML results. The attacker may assign only SP and ML results. If the defender is eliminated the attacker may conduct Pursuit after Fire Attack into the vacated hex.
- FCRT result of X + r: Units that are Standing Fast must retreat and take a MC after a FCRT result of X + r. All SP losses suffered by the defender are treated as Prisoner Points for the attacker.
10.34 Fire Attack Procedure
Fire Attacks are conducted in as follows: first announce any Attacker and Defender Combat Options, next determine the Fire Value of both the attacker and defender to find the basic attacker/defender odds ratio. Then adjust the basic attacker/defender odds ratio for any modifiers. Then proceed to Resolve the Fire Attack.
All units (attacker and defender) involved in the Fire Attack are revealed, including those in HQHBs.
-
A. Determine the Fire Value: For each side, add the SPs of the Combat Class units to get a Total Basic Fire Value. Multiply each eligible participating unit's SPs times its MGF and add these to get a Total MG Value. (The attacker may not use parenthetical MGFs.) Add the Fire Values of all participating artillery units to get a Total Artillery Fire Value. Add each side's Total Basic Fire Value, Total MG Value, and Total Artillery Fire Value to produce the a Total Fire Value. Note that Fire Values may be affected by terrain and weather. (See the Exclusive Rules for terrain and weather effects)
-
Road Mode: Units attacked while in Road defend at half strength. (See 8.43)
-
Artillery Units: Artillery Class units in deployed mode can use their full BF by expending an AP. In Fire Attacks, but not in Barrage Attacks, Artillery units can choose to reduce their BF to one and thereby avoid the expenditure of an AP. If an AP is expended, each Artillery unit multiplies its SP by its BF to derive its Fire Value. The Fire Value of the Artillery Class units is added to the Fire Value of the attacking or defending units in the Fire Attack.
EXCEPTION: Artillery Class units with an AS Marker placed on them. (see 12.5)
-
Battery Indicator Dot: Some Combat Class units have a "dot" symbol indicating that the unit has an attached artillery battery. The Battery's one strength point is added to the unit strength in combat (does not require the expenditure of an AP).
-
Cavalry Units: Cavalry units have their SPs halved when calculating their Basic Fire Value in defense. Cavalry units have their SPs quartered when calculating their Basic Fire Value when attacking. Cavalry units do not modify their SPs when calculating their MG Value. Cavalry units are capable of making Cavalry Charges. (see 10.32.B)
EXCEPTION: Dragoon-Cavalry units have their SP point total halved, not quartered, when attacking.
Designer's Note: Cavalry units are halved because their SPs represent one-half the troops of other Combat Class units. Cavalry units are halved again in the attack (i.e., quartered overall) to reflect the archaic cavalry tactics of the period. Dragoon type units are exempt from this latter reduction in the attack because they functioned as mounted rifles.
-
10.35 Resolve the Fire Attack
Roll two dice and add the results together. Cross reference the sum with the final adjusted odds column on the FCRT. Combat results on the FCRT may affect both players' units. The result to the left of the slash applies to the attacker, the result to the right applies to the defender. SP losses apply to the hex, not to each unit involved. The attacker takes the number of LRs indicated on the FCRT from each attacking hex. There are four possible results:
-
- : No effect.
-
X : The unit takes a Loss Result equal to X.
-
X + c : The unit takes a Loss Result equal to X and a MC.
-
X + r : The unit takes a Loss Result equal to X, retreats one hex, and takes a MC.
-
A. (-) No Effect: Nothing further needs to be done by either side.
-
B. (X) Loss Result: The numeric part of the result is the number of Loss Results a player must implement. LRs are described in Standard Rule 12.0. The owning player determines the nature of odd numbered LRs. The opposing player determines the nature of the even numbered LRs.
-
C. (X + c) Loss Result: If the result on the FCRT is a number + c, the result is the same as an X plus the unit(s) must take a MC. Defending units posted to a fortress are exempt from the need to take a MC. (see 13.23)
-
D. (X + r) Loss Result: If the result on the FCRT is a number + r, the result is the same as an X, plus the defending unit(s) must retreat one hex and take a MC. Units executing the Stand Fast option and units posted to a fortress are not exempt from this result.
If the basic odds of an attack are beyond the left column of the FCRT (8-1), column shifts are first applied, then the appropriate column selected. For example, if the basic odds were 12-1 and 5 column shifts in favor of the defender existed, the attack would be resolved on the 7-1 column.
All attacks of odds greater than 8-1 are resolved at 8-1. All attacks of odds less than 1-6 are resolved at 1-6.
Combat Example
Attacking unit names (those of the phasing player) are in bold italics in this example and in white in the diagram. Defender unit names (those of the non-phasing player) are in plain text and grey in the diagram. The HQ units are shown on the map, all other units are stacked in the Corps HQHBs.
The attacker has 2 stacks of units (III and IV Corps), all with a ML of 5, and 3 APs available. The defender has 1 stack (XX Corps), all with a ML of 7, and two APs available.
The attacker has an Intensive Combat Marker placed on both stacks and plans to Barrage Attack in the Initial Combat Segment then Fire Attack during the Final Combat Segment. (He cannot Fire Attack in the Initial Combat Segment because he is conducting a Barrage Attack in that segment – Exclusive Rule.) The defender, stacked in rough terrain and in Entrenchment Mode, has an Intensive Combat Marker placed, and also plans to Barrage then Fire attack.
The Initial Combat Segment begins. The first step in the Mutual Combat Phase Cycle is the Phasing Player Barrage Step. The III and IV Corps will Barrage attack the XX Corps. The divisional artillery of the four attacking divisions and the organic artillery of the III and IV Corps HQ units provide a barrage value of 40 (4+8+8+4+8+8=40), both Heavy and Indirect. Each of the HQ units expends an AP in order to utilize their full BFs. The column to be used on the BCRT is modified by the rough terrain and the entrenchment in the defender's hex (a shift of 1 + 1 = 2 to the left). However, the attacker's use of indirect artillery negates both of these column shifts. Therefore the final resolution is on the 40 column of the BCRT. A die roll of 6 calls for "C+1" (MC with a plus one modifier). The MC die roll is modified by +2 (+1 from the barrage result and +1 for the use of heavy artillery by the attacker). The defender rolls a 5, adds 2, for a result of 7. The defender compares this result to his formation's Morale Level. Since the result is equal to or less than 7 his formations pass the MC (with a roll of 6 he would have failed by one and suffered a LR). Having resolved the Barrage Combat the attacker flips his Intensive Combat Markers to the Regular Combat side. This completes the first step of the Mutual Combat Phase Cycle.
The second step in the Mutual Combat Phase Cycle is the non-Phasing Player Barrage Step. The defender decides to barrage the IV Corps. He expends 1 AP and announces he has a barrage value of 36 (the XX Corps HQ unit contributes 10 and the two divisional artillery brigades each contribute 13, i.e. 4x3+1 for the caret above the BF), which is both Heavy and Indirect. There are no column modifiers so the 35 column is used. A die roll of 2 calls for a "1C" result (one LR and a MC). The attacking player (the recipient of the barrage) chooses how to allocate the LR (he must lose a SP, retreat one hex, or reduce the ML of the formations in the hex by one). He chooses to lose one SP from the 8th Infantry Division's double-brigade infantry unit. The MC die roll is modified by +2 (+1 for the use of Heavy artillery by the defender, and +1 for the SP loss taken). Given the IV Corps' ML of 5, a die roll of 3 or less is required to pass a MC with a +3 modifier. The die roll is 6 (adjusted to 8), which means 3 additional LRs are required (for failing the MC by 3). The attacking player may choose how to allocate the first and third LRs. (He must either lose a SP, retreat one hex, or reduce the ML of all the formations in the hex by one.) To fulfill the first LR he takes one SP from the 9th Infantry Division's double-brigade infantry unit, then waits for the defender to assign the second LR before allocating the third. The defender may assign a SP loss of either Combat or Artillery class, reduce the ML of the formations in the hex by one, remove a Combat Marker, or place an Artillery Superiority marker. The defender decides to place an Artillery Superiority marker on the IV Corps. This is an option available exclusively in Barrage Attacks (as is removing a Combat Marker); it means that the IV Corps will not be able to use its artillery in the upcoming Final Combat Segment (its artillery will have a BF of zero). The attacker must now allocate the third LR. He chooses to lose one SP from the 8th Infantry Division's infantry unit. Having resolved the Barrage Combat the defender flips his Intensive Combat Marker to the Regular Combat side. This completes the second step of the Mutual Combat Phase Cycle.
Because of the restriction that a formation may only conduct one form of combat per Combat Segment, both sides are unable to Fire Attack during the Initial Combat Segment (steps three and four are skipped), and the Initial Combat Segment is therefore completed.
NOTE: A player may not choose or assign more than one Artillery SP loss, ML reduction, or retreat LR per combat or MC. (see 12.81)
The Final Combat Segment begins. The first step in the Mutual Combat Phase Cycle is the Phasing Player Barrage Step. Both sides plan to Fire Attack during this segment so steps five and six (the Barrage Steps) of the Final Combat Segment are skipped.
The seventh step of the Mutual Combat Phase Cycle, the Phasing Player Fire Attack Step, begins. The attacking player declares his intention to attack the enemy XX Corps with his III and IV Corps. The attacker's III Corps expends a second AP so that its artillery may use its full BF. The defender's XX Corps does not expend its last remaining AP, anticipating its own Fire Attack during the next Fire Attack Step. The III and IV Corps combined have a fire value of 58. The III Corps has a total fire value of 40-1/2: The Corps HQ contributes 4 from its artillery OCU; the corps cavalry regiment contributes 1/2 (1 SP divided in half); the 1st division contributes 18 (10 for the infantry and 8 for artillery); the 2nd division contributes 18. The IV Corps HQ and the artillery units from the 13th and 14th divisions cannot contribute due to the artillery superiority marker, therefore the IV Corps total fire value is 17-1/2 (8 for the infantry of the 8th division, 9 for the infantry of the 9th division and 1/2 for the IV corps cavalry regiment). The defending XX Corps has a total fire value of 35. The 11th and 12th divisions each have 8 infantry SPs (16), plus a parenthesized MGF of 1/2 adding 4 more each (8). Each also has a 4 SP artillery brigade; because no AP was expended (therefore the BF = 1) they contribute 4 factors each (8). Finally, the 11th and 12th divisions' cavalry regiments each add 1/2 (1). The XX Corps HQ adds 2 factors (2 multiplied by a BF of 1).
The two fire values are compared (58 vs. 35) and the basic odds are found to be 1.5:1. These odds are modified by the rough terrain in the target hex (shift left 1), by the defender being attacked through an entrenchment hexside (shift left 1), and by the XX Corps being attacked through two hexsides (shift right 1). The modified odds are 1:1. Two dice are rolled, a "6" gives a 1/1 result. The defender must take one LR, as must both of the attacker's corps (the FCRT LRs apply to each hex involved). The attacker chooses to lose one infantry SP from the 9th division and one infantry SP from the 1st division. The defender chooses to lose one infantry SP from the 11th division. Having resolved the Fire Combat the attacker removes his Regular Combat Markers. This completes the seventh step of the Mutual Combat Phase Cycle.
The last step in the Final Combat Segment is the non-Phasing Player Fire Step. The defending player declares his intention to attack the enemy IV Corps with his XX Corps. The defender's XX Corps expends its second and last AP so that its artillery can use its full BF. The attacker's IV Corps has an Artillery Superiority marker upon it so there would be no benefit to it expending an AP. The XX Corps has a total fire value of 51-1/2. The corps HQ contributes 10 for its artillery OCU; the 11th division contributes 20-1/4 (7 for the infantry, 13 for artillery and 1/4 for the cavalry); the 12th division contributes 21-1/4 (8 for the infantry, 13 for artillery and 1/4 for the cavalry). The attacker's IV Corps Fire Value is 24-1/2: The 8th and 9th divisions each have 8 infantry SPs (16), plus a parenthesized MGF of 1/2 adding 4 more each (8); the corps cavalry regiment contributes 1/2. The two fire values are compared (51-1/2 vs. 24-1/2) and the basic odds are resolved as 2:1. Two dice are rolled, a "8" yields a 1/1 result, so both sides must take a LR. The defender (the non-phasing player) removes an infantry SP from his 12th division. The phasing player decides to retreat one hex. Any time a unit retreats due to combat it must take a MC. The IV Corps, with a ML of 5, roles a "5" and passes its MC. The XX Corps now has the opportunity to attempt a Pursuit, but as the non-phasing player wishes to hold his entrenched position, he declines to do so. Having resolved the Fire Combat, the defender removes his Regular Combat Marker. This completes the Mutual Combat Phase Cycle.
In summary, the defending XX Corps has lost 2 SPs while the attacking III Corps has lost 1 SP, and IV Corps has lost 4 SPs and retreated one hex.
Transcriber's note: the printed combat example is laid out across several columns and diagram captions; the steps above are given in the order the example describes them, with the III Corps and XX Corps fire value details placed at the Fire Attack step to which they belong.
10.36 Loss Results due to Fire Attack
A defender's LRs on the FCRT may be taken as retreated hexes, SPs eliminated, or ML reductions. Attacker's LRs may only be taken in SPs eliminated or ML reductions. A player may not choose to reduce an opponent's ML until at least one SP loss has been inflicted upon an opposing unit. A player may not assign an opposing Artillery Class SP loss until at least one SP loss has been inflicted upon an opposing Combat Class unit. In addition, a player may not assign an opposing Artillery Class SP loss unless he has expended an AP. (see 12.4)
-
A. Defender Retreats: If a defending unit retreats after a Fire Attack, it must take a MC. If a defending player receives a X + r result on the FCRT, or chooses or is assigned a retreat LR, the retreating units must take a MC.
Units executing the Stand Fast option and units posted to a fortress may not be assigned a retreat LR as a result of combat, except in the case of a X + r result.
EXAMPLE: A result on the FCRT is 1/2. The attacker can choose to lose one SP or reduce the ML of the attacking formation(s) by one. The defender can choose to lose one SP, retreat one hex, or reduce the defenders' ML by one. The attacker can assign the defender a one SP loss, or force a retreat of one hex, or reduce the defenders' ML by one. After implementing the LRs called for, if the defender has retreated, the defender undergoes a MC, possibly incurring additional LRs.
Units in a defender's hex that exceed the limitation on combat stacking are subject to retreat LRs and all excess LRs. Excess LRs occur if the participating units in the hex have been eliminated and there are LRs that have not been allocated.
-
B. Fire Attack and MC: If attacking or defending units receive a X + c result, or if units in the defending hex are forced to retreat, the units take a MC, with all appropriate modifications to the MC die roll. The number by which a unit fails its MC is the number of additional LRs. The owning player determines the nature of each odd numbered LR. The opposing player determines the nature of even numbered LRs. The same range of possible LRs are available to the defender and attacker as in Standard Rule 10.36 above with the exception that the attacker may retreat.
NOTE: MC LRs in excess of 4 are ignored. (see 11.1)
Morale Checks due to fire combat have two types of die roll modifiers: SP losses and entrenchments.
-
Strength Point Losses: For every SP that a Primary Formation loses as a result of a Fire Attack the MC die roll is modified by +1.
NOTE: A SP loss only affects the MC of the Primary Formation that takes the SP loss, not every formation in the hex and not every formation in a HQHB. (see 11.22)
-
11.0 Morale
Morale is measured in game terms by the Morale Level (ML) of the Primary Formation.
Designer's Note: Morale represents a complex web of relationships; it is far more than a measure of the simple enthusiasm (or lack thereof) among troops in a particular situation.
11.1 Morale Levels (MLs)
Each unit belongs to a Primary Formation, and each Primary Formation has a Command Counter with a ML printed on it. The location of a Command Counter on a Command Track records the current ML of the Primary Formation. As the ML of the Primary Formation increases or decreases, the Command Counter is moved along the Command Track to record the formation's new ML.
EXAMPLE: A Command Counter of a Primary Formation that loses three MLs from its total of five puts the Command Counter in the 2 box. A Command Counter of a Primary Formation that adds one ML to its current total of five puts the Command Counter in the 6 box.
Primary Formations can have their ML reduced due to the use of Force March, Withdrawal Before Combat, engaging in combat, being out of supply or being out of command control. Primary Formations can regain MLs through the ML recovery process, or through combat.
When a Primary Formation changes its attachment, and hence which Command Track it is on, it must be placed on the new Command Track in the same numbered ML Box as it was on its old Command Track.
11.2 Morale Checks (MCs)
The act of testing a unit's morale is called a Morale Check (MC). The procedure for taking a MC, and the situations in which it is necessary, are listed below.
11.21 Morale Check Situations
Below are listed the situations in which a unit is required to take a MC. When required to take a MC a unit does so immediately, and the results are implemented immediately.
-
A. MC with No Loss Result Required: The player may determine the nature of each odd numbered LR. The opposing player determines the nature of the even numbered LRs.
NOTE: If a Withdrawing unit leaves a hex which remains occupied by a friendly Combat class unit, the MC die roll is modified by -2.
-
Defender Combat Results: Some results on the BCRT call for defending unit(s) to take a MC. Defending units may also be forced to retreat as a LR. A result on the FCRT may call for a retreat, the friendly player may choose to retreat to fulfill a LR, or the enemy player may assign a retreat LR; in all three cases each Primary Formation represented by the retreating unit(s) must take a MC.
Defending units of formations that fail their MC suffer additional LRs and must eliminate SPs, reduce MLs, or retreat hexes to satisfy each resulting LR. The owning player determines the nature of each odd numbered LR, the opposing player determines each even numbered LR.
-
Attacker Combat Results: Some results on the FCRT call for attacking unit(s) to take a MC. Attacking units of formations that fail their MC suffer additional LRs and must eliminate SPs or reduce MLs to satisfy each resulting LR. The owning player determines the nature of each odd numbered LR. The opposing player determines each even numbered LR.
11.22 Morale Check Procedure
When a player must check the morale of a unit, one die is rolled and compared with the Morale Level (ML) of the unit's formation. The die roll for a MC may be modified in a number of ways in addition to the modifiers listed in 11.21. (See the MC modifiers 11.23 or 11.24) If the modified die roll is equal to or less than the ML of a unit's Primary Formation, the unit passes its MC. If the modified die roll is greater than a unit's Primary Formation ML, the unit fails its MC. If the MC is being taken due to combat, Force Marching, or Withdrawing Before Combat, every number a unit fails its MC by (up to 4) is an additional Loss Result.
EXAMPLE: A unit's Primary Formation ML is 5. The unit takes a MC due to a combat result. The modified die roll is 6, so it suffers one LR.
-
A. Multi-level Formations and MCs: When making a MC for a stack of units with several Primary Formations that are all attached to the same corps- or division-sized formation, the stack is treated as one formation in determining the LR. The die roll is compared to the ML of each Primary Formation (including the Corps Command Counter if the Corps HQ unit is stacked in the hex). Some formations may pass the MC and some may fail due to their differing MLs. If any of the Primary Formations fails the MC, the greatest MC failure is applied collectively to the corps-sized formation and its attached Primary Formations.
EXAMPLE: A corps-sized formation with a ML of 7 has attached an infantry division-sized formation with a ML of 6 and a cavalry division-sized formation with an ML of 8. Units from the infantry division and the cavalry division are in the HQHB of the Corps HQ unit. A combat involving the Corps HQ unit results in a MC being taken by the HQ unit and the units in the Corps HQHB. A modified MC result of 8 exceeds the ML of the corps-sized formation by 1 and the ML of the infantry division-sized formation by 2. The 2 result is the largest LR, and as such, it is applied.
-
B. Separate Formation MCs: When a stack of units that consist of two or more formations must take a morale check a separate die is rolled for each formation. Some formations may pass and others may fail. If one or more formations fail the MC, the LRs are applied only to the units of the formations that fail.
EXAMPLE: The units of two formations occupy the same hex. One formation is an infantry division with a ML of 4 and the other is a cavalry division with a ML of 5. Each formation would roll a separate die. The infantry divisions die roll is 3; therefore passing the MC. The Cavalry's die roll is 6. This number exceeds the ML of the cavalry division by 1. The infantry division-sized formation takes no loss results, while the cavalry-division-sized formation takes 1 LR.
11.23 BCRT MC Modifiers
There are four types of die roll modifiers to a MC that a defending unit may be forced to take as a result of a Barrage Attack. These include the facing of the defending unit, the SP losses it takes as a result of the Barrage Attack, the presence of entrenchments in the defending hex, and the use of Heavy Artillery units in the barrage. All modifications to the die roll are cumulative. (see 10.24.A)
11.24 FCRT MC Modifiers
A MC taken as result of a Fire Attack can be modified by the number of SPs eliminated in the Attack and by the presence of entrenchments in the defending hex. All modifications to the die roll of the MC are cumulative. (see 10.36.B)
11.25 Automatic Morale Level Reductions
There are four situations in which a Primary Formation can automatically lose MLs without making a MC.
-
Out of Supply: If a unit is found to be out of supply during the phasing player's Supply Step the ML of the unit's Primary Formation is reduced by one for each day of the current impulse. If a unit is found to be out of supply at the instant of combat (when the attacker declares the attack), the ML of its Primary Formation is reduced by one.
-
Out of Command Control: If a unit is found to be out of Command Control during the phasing player's Command Control Step, the ML of the unit's Primary Formation is reduced by one. If a unit is found to be out of Command Control at the instant of combat (when the attacker declares the attack), the ML of the Primary Formation is reduced by one.
-
Retreats Through Enemy ZOC: If a unit is forced to retreat into an enemy ZOC as a result of combat, its Primary Formation ML is reduced to one, regardless of its current level. If it retreats into 2 hexes in an enemy ZOC its Primary Formation ML is reduced to one, all SPs are eliminated and the unit is reduced to its Cadre strength. If a unit retreats into 3 or more hexes in an enemy ZOC, all its SPs and CPs are eliminated. Friendly units negate enemy ZOC for purposes of this rule.
NOTE: All SPs and CPs eliminated while retreating through enemy ZOC are counted as Prisoner Points for the opposing player.
-
Corps Train Force-March: If a Corps Train unit Force-Marches, reduce by one (1) the ML of all Primary Formations attached to the Corps Train unit's corps-sized formation.
11.26 Decreasing Morale Level
Restrictions: No unit may have its Primary Formation ML reduced below one.
-
A. Decreasing Corps-Sized Formation Morale: A stack of units with identical facing whose Primary Formations are attached to the same corps-sized formation are treated as one formation. If such a formation has its ML reduced, then all the primary formations represented have their Morale Level reduced equally.
FIRST EXAMPLE: A corps-sized formation with a ML of 7 contains an infantry division-sized formation with a ML of 6 and a cavalry division-sized formation with a ML of 8. Both division's units are stacked in the Corps HQHB. A combat involving the Corps HQ unit results in a LR of one ML. The MLs of all three formations are reduced by one. The corps-sized formation's ML drops from 7 to 6; the infantry division-sized formation's ML drops from 6 to 5; and the cavalry division-sized formation's ML drops from 8 to 7.
SECOND EXAMPLE: A corps-sized formation contains an infantry division-sized formation and a cavalry division-sized formation. Units from the infantry division and the cavalry division are stacked in the same hex, but the Corps HQ unit is stacked elsewhere. A combat involving the infantry and cavalry divisions results in a LR of one ML. Both divisions have their MLs reduced by one. The ML of the corps-sized formation is not reduced, as it was not involved in the combat.
11.3 Increasing Morale Levels
There are two situations in which a Primary Formation can gain MLs: Morale Level Recovery and Prisoner Results. The ML of a formation may not be greater than the highest number printed on the Command Track.
-
11.31 Morale Level (ML) Recovery: Primary Formations may recover lost MLs by expending MPs in a process called Morale Level Recovery. In order for a Primary Formation to regain lost MLs all units of the Primary Formation (those with the same Primary Formation Identifier) must be at least three hexes away from the nearest enemy unit. All units of the Primary Formation must expend three MPs for each ML the Primary Formation recovers. For every ML recovered, advance the Command Counter of the Primary Formation up one ML Box on its Command Track. No Primary Formation may exceed its base ML printed on the Command Counter through this Morale Level Recovery process. If one unit of a Primary Formation fulfills the requirements for ML recovery, and one does not, the Formation may not recover MLs.
Restrictions: No Primary Formation may increase its ML to greater than the base ML printed on its Command Counter by the Morale Level Recovery process. Units may not use Force March to recover MLs. Primary Formations under an Advance or Retire Mission Order (MO) may not perform the Morale Level Recovery process. EXCEPTION: Shattered units. (see 7.15)
-
11.32 Prisoner Results: If the attacking units in a Fire Attack achieve a Prisoner Result on the FCRT increase the ML of one attacking Primary Formation by one. (see 12.71) The ML of a Primary Formation may increase above the base ML due to obtaining a Prisoner Result through combat. However under no circumstances may the ML of a Primary Formation increase to more than two higher than the base ML.
EXAMPLE: The ML of a Primary Formation printed on the Command Counter is 5. The formation's ML can never exceed 7.
-
A. Multi-Level Formations: A stack of attacking units whose Primary Formations are all attached to the same corps- or division-sized formation are treated as one formation. However if such a formation achieves a prisoner result raise the ML of only one primary formation (i.e. only one Command Counter).
EXAMPLE: A corps-sized formation contains an infantry division-sized formation and a cavalry division-sized formation. A Fire Combat involving units from all three Formations results in a Prisoner Result. This result allows the ML of only one of these three Primary Formations to be increased by one.
-
11.4 Detachments and Morale
Detachments use the ML of the parent unit whenever checking Morale. (see 8.13) Detachment units may never reduce a ML to satisfy a LR.
12.0 Loss Results (LR)
LRs occur as a result of Barrage Combat, Fire Combat, and failed MCs. The retreat LR may entail a MC which may cause additional LRs. LRs include SP loss, retreats, ML reduction, Artillery Superiority (AS), removal of Combat Markers, and prisoners.
LRs due to a failed MC in excess of 4 are ignored.
12.1 Retreats
Players may choose to take LRs in the form of retreats. All units in a hex, even those in excess of combat stacking, are affected by a retreat LR. Units which retreat to fulfill a LR caused by Combat must immediately take a MC. The retreat MC is executed after all other LRs have been taken. If the MC causes further LRs, and any are fulfilled by retreating, no more MCs are taken; there is a maximum of one MC per formation per combat.
A retreating unit must move away from enemy ZOC and toward a friendly map edge. Retreating units must remove any Combat Markers upon retreating; these markers are forfeited automatically and do not count towards the fulfillment of a LR.
If a defending unit retreats as a consequence of a Fire Attack the attacking units can attempt a Pursuit. (see 10.36.C)
-
12.11 Enemy ZOC: If a unit is forced to retreat into a hex in an enemy ZOC that is unoccupied by a friendly unit, additional LRs are incurred. If a unit's retreat includes just one such hex, the ML of its Primary Formation is reduced to one. If the retreat includes two such hexes the Primary Formation's ML is reduced to one, all SPs are eliminated, and the unit is reduced to its cadre strength. If a unit retreats into three or more such hexes, all its SPs and CPs are eliminated. SPs and CPs eliminated while retreating through enemy ZOC are counted as Prisoner Points for the opposing player.
Units that are completely surrounded by enemy units (or a combination of enemy units and impassable hexsides) that are unable to retreat are completely eliminated; the eliminated SPs and CPs are counted as Prisoner Points for the opposing player.
12.2 Morale Level Reduction
Players may take LRs in the form of Morale Level reduction. Units of a Primary Formation with a ML of 1 can not choose or be assigned a ML LR.
Procedure: Upon receiving a LR of one ML, move the Command Counter for each effected Primary Formation down one ML.
EXAMPLE: A Primary Formation with a ML of 7 and a second with a ML of 6 participate in a combat that results in a LR of one ML. The LR reduces the ML of the formations to 6 and 5, respectively.
Decreasing Multi-Level Formation Morale: A stack of units with identical facing whose Primary Formations are all attached to the same corps- or division-sized formation are treated as one formation. If such a formation has its Morale Level reduced, all the Primary Formations represented in the hex are affected equally.
Restrictions: A player may not assign a Morale Level reduction to his opponent until one SP loss has been taken by one of the opponent's Combat or Artillery class units. Players may choose only one ML reduction per combat result and per failed MC. (see 12.81)
12.21 Shattered Formations
A primary formation is considered Shattered if: 1) the ML of the primary formation is one; or 2) all combat class units attached to the primary formation are Shattered Units. (see 12.32)
Characteristics: The units of a Shattered Primary Formation are exempt from some Mission Order (MO) requirements. When on the Advance MO, units of a shattered formation may move freely through any hexside. (see 7.15.A) When on the Advance MO or Retire MO, units of a shattered formation may expend MPs to enter Replacement Mode or recover Morale levels. (see 7.15.B)
12.3 Strength Point (SP) Losses
There are a number of SP loss markers included in the counter mix. These markers are placed under individual units and are used to record the SPs lost by units as they take losses in the course of the game.
Procedure: When a unit loses a SP, place a SP loss marker so that the appropriate number is aligned with the top of the unit counter. As additional SPs are eliminated, rotate or flip the SP loss marker so that the appropriate number is aligned with the top of the unit counter. When inverting unit counters during the concealment period take care not to invert the SP loss marker, as this will change the strength of the unit. (It as this will change the strength of the unit. (It is best to invert only the top counter in a stack.) If a unit has lost all its SPs, rotate the SP loss marker to the cadre side.
12.31 Cadres
When a unit has lost all its SPs the SP loss marker beneath the counter is rotated to the side labeled "Cadre." Units that have no plus or minus symbol below the unit type indicator on the counter have one CP per unit type indicator. (see 2.21.H) Some units have no CPs; this is indicated by a minus symbol (-) below the unit type indicator. If a unit without a CP loses all its SPs, it is removed from the game. Some units have two CPs per unit type indicator; this is indicated by a plus symbol (+) below the unit type indicator. All corps and army HQ units have two Cadre Points while all divisional HQ units have one Cadre Point.
Characteristics: A unit with a cadre marker beneath it may not participate in any kind of combat, nor may it perform reconnaissance. If a unit with a cadre marker is Fire Attacked or Overrun, and it is alone in the hex, it is eliminated.
Artillery Class units with a cadre marker have a Mobility Rating of L, regardless of what is printed on the counter.
The opposing side receives any CPs lost as Prisoner Points (PPs).
Restrictions: A player cannot elect to lose CPs to fulfill a LR if there are SPs available to be lost.
- A. Replacements and Cadres: Units that have a cadre marker and enter replacement mode may receive two Replacement Points during the Take Replacement step of the Supply and Command Segment. (see 7.26) A Combat, Artillery, or Headquarters Class unit that has been eliminated (including the cadre) due to losses may not be rebuilt (I.e. may not receive replacements).
12.32 Shattered Units
Combat Class units that have lost more than 70% of their SPs are Shattered. To determine if a unit is Shattered, compare its current strength to its original strength printed on the counter. If the current SP total of the unit is less than 70% of the original SP total, the unit is Shattered.
If a unit has lost SPs through the creation of detachments, note this on the Detachment Chart. SPs lost through the creation of detachments do not count towards the calculation of 70% losses for purposes of this rule.
Characteristics: Shattered Combat Class units may not initiate Fire Attacks, but may defend against them normally. Shattered Combat Class units may place Combat Markers.
EXAMPLE: A unit that originally had 8 SPs has lost 6 SPs. A SP loss marker is placed under the unit to indicate 6 SPs lost. As 6 is more than 70% of 8, the unit is Shattered.
12.33 Organic Combat Unit Losses
HQ Class unit Artillery OCUs take SP losses in the same manner as Artillery Class units; place a SP marker under the HQ Class unit. Cavalry OCUs and Battery Indicator "Dots" do not suffer SP losses and may not be used to fulfill LR obligations.
12.34 Abandoning Equipment
Artillery Class units may be forced or may voluntarily abandon equipment. Artillery Class units which are forced to retreat due to a combat LR but are unable to retreat due to terrain, weather, or other circumstance must abandon equipment. Artillery Class units may voluntarily abandon equipment to exercise the Combat Option Withdraw Before Combat. (see 10.33.A)
Procedure: An artillery unit that abandons equipment must immediately retreat three hexes and becomes a cadre by placing a cadre marker under the unit. Any SPs lost as a result are counted as Prisoner Points for the opposing player.
12.4 Artillery Class SP Loss Results
Artillery SP losses may only be assigned to artillery units subjected to a Barrage or involved in a Fire Combat in which the opponent expended an AP. A player may not assign an Artillery Class SP loss to his opponent as a result of a Fire Attack until one SP loss has been taken by a Combat Class unit. Each Player may choose only one Artillery Class SP LR per combat result and only one per failed MC. (see 12.81) The owning player may choose which Artillery unit will take the SP loss.
12.5 Artillery Superiority (AS)
If the target of a Barrage Attack includes a non-fortress artillery unit and the Barrage Attack is resolved on a Barrage Value column of 35 or higher, the targeted artillery units may be assigned an Artillery Superiority LR. If a formation that is the target of such a Barrage Attack fails its MC by two or more, the barraging player can place an AS marker on the hex.
- 12.51 AS Markers: If an Artillery Class unit(s) has an AS marker, its BF is zero in all situations. An AS marker is removed at the end of the Mutual Combat Phase in which it was placed. Fortress Class units may never have a AS marker placed upon them.
12.6 Combat Marker Removal
A Combat Marker can be removed by the opposing player as a Barrage Combat LR. If the target of a Barrage Attack fails a MC by 2 or more, the opposing player can remove a Regular Combat Marker, or flip an Intensive Combat Marker to its Regular Combat Marker side. If a formation fails its MC by 4 or more, the opposing player can remove an Intensive Combat Marker altogether from the formation's unit(s). The owning player cannot choose to remove a Combat Marker, only the opposing player.
12.7 Prisoners
The principal method of capturing prisoners is through Fire Attacks, but there are six other methods as well. (see 12.72 below) Prisoner Points (PP) are recorded on the Prisoner Tracks on each side's Strategic Chart.
-
12.71 Prisoners through Fire Attacks: There is only one way to achieve a Prisoner Result that gives a ML Benefit to the attacker.
Procedure: A column on the right hand portion of the FCRT is labeled "Prisoner Result." It contains a series of numbers that run parallel to the dice roll numbers used to resolve Fire Combat. When resolving Fire Attacks on the 1-1.5 odds column or greater, the dice roll number is compared to the corresponding number on the Prisoner Result column. If the number on the column is greater than the MLs of any one of the defending Primary Formations, prior to applying LRs, a Prisoner Result is achieved. If a prisoner result has been achieved each defender SP loss is counted a Prisoner Point (PP) and recorded on the strategic chart.
-
A. ML Benefits: If the attacking units in a Fire Attack achieve a Prisoner Result on the FCRT increase the ML of one attacking Primary Formation by one.
EXAMPLE: While resolving a Fire Attack, two dice are rolled with an outcome of 6. The corresponding number on the Prisoner Column is 5. If the defending unit's Primary Formation ML is 4 or less, the attacker has achieved a Prisoner Result. If the Primary Formation's ML were 5 or greater there would have been no Prisoner Result.
-
-
12.72 Other Prisoner Results: There are six other situations in which PPs may be taken.
- Force Marching while on Retire MO: If a unit takes a MC as a result of Force Marching, and the MO of its Primary Formation is Retire, any SPs lost count as PPs to the opposing side. (see 11.21.B)
- Stand Fast Combat Option: If a defending unit conducting the Combat Option Stand Fast is forced to retreat due to a FCRT result (i.e. a Xr result) any lost SPs count as PPs to the attacking player. (see 10.33.B)
- Abandoning Equipment: When an Artillery Class unit Abandons Equipment, the lost SPs count as PPs to the opposing side. (see 12.34)
12.8 Loss Result Limits and Restrictions
-
12.81 Artillery SP, Morale Level and Retreat Limit: A player may not choose more than one Artillery SP loss, ML loss, or retreat per combat or MC. If both players were to exercise these options in allocating LRs to a side, there would be 2 artillery SPs lost, 2 MLs lost, and 2 hexes retreated in a combat or MC.
EXAMPLE: Four LRs are called for by a Fire Combat result, and an ensuing MC calls for 4 more. There could be as many as 2 ML losses (one per player) and 2 retreated hexes (one per player) for the LRs from the combat applied against one side. There could be as many as 2 more MLs and 2 more retreated hexes (one each per player) for the LRs from the MC.
-
12.82 Equally Distributed Infantry SP Loss Results: No more than one infantry SP may be taken from a Combat Class unit to satisfy a LR until all infantry Combat Class units subject to the LRs have lost one SP.
EXAMPLE: A corps with three divisions attached suffers a number of LRs, and the owning player would like to remove infantry SPs to satisfy the LR requirements. No infantry unit of the three divisions involved can suffer a second SP loss until all the infantry units of all three divisions have suffered a first SP loss.
12.9 Recovering From Loss Results
In order to replace an eliminated SP, a unit must enter Replacement Mode. (See Standard Rules 7.26 and 9.12) In order for a Primary Formation to increase its ML, all the units of the Formation must undergo the ML Recovery process. (see 11.31)
13.0 Special Rules
13.1 Combat Engineer Units
Combat engineer units are considered Combat Class units. All combat engineer units are exempt from MO restrictions. (see 7.13.D) Additionally, combat engineer units may attempt to construct Permanent Entrenchments. (see 5.12)
-
13.11 Engineers and Combat: Combat engineer units that participate in combat during a Fire Attack Step may shift the FCRT odds column in the owning player's favor if the Fire Attack is conducted against units in Permanent Entrenchments or against a Fortress. The maximum FCRT odds column shift due to engineer participation is one. Engineers act as normal combat units in any other combat situation.
Procedure: Before the final FCRT odds column in a Fire Attack is determined, either player may announce the use of combat engineers. The player announcing the use of engineers must have at least one SP of engineers present. When attacking a unit in Permanent Entrenchment Mode, or a Fortress, shift the odds column one to the right. When defending in Permanent Entrenchment Mode or stacked with a Fortress unit, shift the odds column one to the left. SP eliminations taken to satisfy LRs must include at least one engineer SP if engineers are used to modify combat.
13.2 Fortress Class Units
Fortress Class units have characteristics of both Combat Class and Artillery Class units, and may have characteristics of a Supply Class unit.
-
13.21 General Characteristics: Fortress Class units may never move. Fortress Class units have all-around facing, a frontal hexside in every direction, and hence no flank or rear hexsides. Fortress Class units do not count toward stacking limits.
Fortress Class units do not have a Command Counter. They are always in Command Control and supply. (See the Exclusive Rules for exceptions)
Fortress Class units may have other unit classes "Posted" to them. A formation posted to a friendly Fortress Class unit has special characteristics explained in rule 13.23.
Same Hexes: If an enemy Fortress Class unit is alone in a hex, friendly Combat and Artillery Class units may occupy the hex; this is the only circumstance in the game when a friendly ground unit and an enemy ground unit may occupy the same hex.
When a friendly Combat or Artillery Class unit occupies an enemy Fortress Class unit's hex, the enemy Fortress unit must be subjected to attack during every Combat Segment. The attack may be either a Barrage Attack or a Fire attack. If a Barrage Attack, it can come from Artillery Class units not stacked in the fortress unit's hex. If a Fire attack, it must come from Combat Class units stacked in the same hex with the enemy Fortress Class unit. Friendly Artillery Class units may only occupy enemy Fortress Class unit hexes if a Friendly Combat Class unit also occupies the hex. If at any time a Friendly Artillery Class unit is alone in a hex with an enemy Fortress Class unit, it must immediately vacate the hex by retreating into a hex unoccupied by enemy Fortress Class units.
ZOC: Enemy ZOC do not extend into a Fortress Class unit's hex. Fortress Class units do exert a ZOC into all surrounding hexes. If an enemy Combat Class unit occupies a Fortress unit's hex, the fortress unit no longer exerts a ZOC.
13.22 Fortresses and Combat
Fortress Class units may make Barrage Attacks. They can not initiate Fire Attacks, but they may defend against them normally. To Fire Attack a Fortress Class unit stacked alone in a hex, an enemy Combat Class unit must occupy the same hex as the Fortress Class unit. All LRs a Fortress Class unit takes as a result of combat must be in SPs eliminated. Fortress Class units are never required to take MCs, nor can they retreat.
-
A. Barrage Combat: A player making a Barrage Attack against a hex containing both a Fortress and non-Fortress Class unit, must indicate whether the target of his Barrage Attack is the Fortress Class unit or the non-Fortress Class unit; this is done before the Barrage Attack is resolved.
-
Defending: When defending against a Barrage Attack, a Fortress Class unit has a Caliber Factor (CF) printed on its counter which is compared to the highest BF among the Artillery Class units making the attack. If the BF is greater than the CF, the difference between them is subtracted from the die roll in the attack. (see 10.21.C) If the CF is greater than the BF of any attacking Artillery Class unit, the difference between the BF and the CF is multiplied by two and added to the die in the attack.
EXAMPLE: A Fortress Class unit with a CF of 4 is subjected to a Barrage Attack by an enemy artillery unit with a BF of 3. The CF is greater than the BF by one, so the difference is multiplied by two and added to the Barrage Attack die roll. If the CF were lower than the BF, the difference between them would be subtracted from the die roll.
If a Barrage Attack is made against a Fortress Class unit and there are LRs called for in excess of its remaining SPs, the excess is ignored and the Fortress Class unit is simply removed from play, with no adverse effect on other units in the hex.
-
Attacking: Fortress Class units may make Barrage Attacks. They need not place a Combat Marker in order to initiate a Barrage Attack during the Initial or Final Combat Segments.
-
-
B. Fire Combat: Fortress Class units cannot initiate Fire Attacks, but may defend against them normally. A Fortress Class unit may have both a Barrage Factor and a Machine Gun Factor, and may use both when defending against Fire Attacks.
To Fire Attack a Fortress Class unit an enemy Combat Class unit must occupy the same hex as the fortress unit; Combat Class units not stacked in the same hex with the fortress unit may not Fire Attack it. Artillery Class units stacked in the same hex or in an adjacent hex may add their strength to a Fire Attack against a fortress unit.
13.23 Posted Units
Combat, Artillery and Headquarters class units may be Posted to a fortress unit. A fortress may only have one formation posted to it at a time. Place a unit or formation under the Fortress Class unit's counter to indicate that the formation is posted to the fortress.
NOTE: The posted formation may be a corps-sized formation with Primary Formations attached.
- A. Benefits for Posted Units: A Fortress Class unit provides a number of benefits to a Posted unit or formation. Only the Posted unit or formation may receive the benefits of a fortress in a hex. If a Fortress Class unit is eliminated, the benefits of being Posted are immediately voided.
-
Combat Benefits: A unit or formation Posted to a Fortress Class unit adds the Fire Attack value of the fortress unit to its own strength when defending against a Fire Attack. If the hex is an entrenchment hex, the terrain modifiers for entrenchment apply to all the defending units.
NOTE: The terrain modifier for a permanent entrenchment printed on the map does not apply to a Fortress Class unit alone in a hex.
A Posted unit or formation may not be assigned a retreat LR by the attacker. The defender has the option to take a LR as a retreat. If a Posted unit receives a FCRT result of X + r, the Posted unit must retreat.
-
Morale Checks: A unit or formation posted to a Fortress Class unit is exempt from Barrage Attack LRs that call for a MC.
-
Command Benefits: Posted units may receive Command Control benefits. These are found in the Exclusive Rules.
-
13.24 Fortresses as Supply Units
Fortress units with supply symbols provide supply. The type of supply a fortress provides is described in the Exclusive Rules.
13.3 Army, Corps and Division Detachment-Sized Formations
Army-sized Detachment formations are called Army Detachments. Corps-sized detachment formations are called Corps Detachments. Division-sized detachment formations are called Division Detachments.
If Army-sized, Corps-sized or Division-sized Detachment Formations are available in a game, they will be identified in the Exclusive Rules.
-
13.31 Army Detachments: Army Detachments are treated as Army formations in every respect. Army Detachments may attach Primary Formations by placing them on the Army Detachment chart. A Primary Formation must be in command and supply range when attached.
Creating an Army Detachment: An Army Detachment may be created and brought into play during the Supply and Command Segment. When an Army Detachment is brought into play place its HQ unit in any friendly hex on the map that is in supply and at least 3 hexes away from the nearest enemy unit. Place all Supply Class units belonging to the Army Detachment in any friendly hex within the CCR of the HQ unit. The Main Depot unit must be placed on a friendly operational railroad hex connected to a friendly map edge. Place the Army Base Marker on any eligible hex on the map or map edge to create the Army Detachment's LOC.
Disbanding an Army Detachment: Army Detachments may be disbanded, in which case the units belonging directly to the Army Detachment (those with the Army Detachment Primary Formation Identifier printed on their counter) are removed from play in the next Supply and Command Segment. Once removed, an Army Detachment may be returned to play in a subsequent Supply and Command Segment at a player's discretion, subject to scenario restrictions.
Leaders: The Leader of a Corps attached to an Army Detachment may function as the leader of the Army Detachment. Simply place the Leader counter in the Army Detachment chart's leader box. Army Detachments do not require a leader counter. If an Army Detachment does not have a leader, the Army Detachment automatically accepts the MO given it by its superior commander during the MO procedure. (see 7.13)
-
13.32 Corps and Division Detachments: A Corps Detachment or Division Detachment may be created during the Supply and Command Segment. Corps and Division Detachments are brought into play by placing the HQ class unit in a hex occupied by a unit of one of the Primary Formations to be attached to the detachment. A player may disband a Corps or Division Detachment by removing the HQ class unit from play during a Supply and Command Segment. Once removed, a Corps or Division Detachment may be returned to play during a subsequent Supply and Command Segment at a player's discretion, subject to scenario restrictions.
Glossary
We've gathered many of the terms used throughout the rules and reproduced them here in a more easily referenced alphabetical order. The terms are defined in detail throughout the rules, some with entire sections of the rules devoted to them. Many of the definitions are new interpretations of old terms used in earlier games in the series. All of them play an important role in the 3rd Edition Death of Empires Series Rules.
-
Air Units: Air Units represent aircraft able to perform reconnaissance and intervene on the battlefield. Air Units may perform three types of Air Unit Operations: Air Reconnaissance, Air Transfer and Artillery Spotting. The Air Reconnaissance and Air Transfer operations may take place in the March and Counter March Segments; The Artillery Spotting mission may take place only during the Mutual Combat Phase. It should be obvious that when performing an Air Unit Operation the Air unit is considered to "fly" over the map, ignoring terrain MP costs.
-
Ammunition Points (APs): Each time a formation with an Artillery Class unit uses its full barrage factor, a player must expend one AP. This also applies to HQ Class units with artillery SPs (see Organic Combat Units). AP levels are recorded by placing an AP marker in the Ammo Box on an Army or Strategic Chart. Each Ammo Box records the status of all the primary formations with command counters on the Command Track. The AP marker denotes the number of APs remaining for all the formations on a command track. A corps-sized formation can use one AP to enable every artillery SP of each formation attached to it to use its full barrage factor in a combat.
-
Army Chart: Each army in the game has its own Army Chart. Each Army Chart has command tracks which simultaneously record the attachment and morale levels of subordinate formations. Any primary formation which has its command counter placed upon the Army Chart is subordinate to that army and is considered an Army Formation.
Army Charts also contain Army Chart Boxes. These boxes record the commander (in the Leader Box), the army's staff officer (the Army Staff Box), the Mission Status of the army (the Mission Status Box), what kind of supply it is receiving (the Main Depot Status Box), and whether any units are guarding its Line of Communications (the LOC Box). In addition, the Army Chart has a number of HQ Holding Boxes. These record any units stacked on the map with the army headquarters class unit (in the Army HQ Holding Box), units stacked on the map with each corps headquarters unit attached to the army (the Corps HQ Holding Box), and units stacked on the map with each divisional headquarters unit attached to the army (the Divisional HQ Holding Box).
-
Artillery Class Units: Artillery Class units represent troop units made up of guns, howitzers and heavy mortars. There are two types of artillery units: Direct and Indirect. In addition, there are Heavy artillery units (which may be direct or indirect) and Super Heavy artillery units.
Sequence of Play Summary
Weekly Interphase (once per turn): calculate any Victory Points earned.
- Strategic Phase (mutual): Rail Points, replacement Points (REP) recorded; construct Permanent Entrenchments.
- Impulse Determination Phase: Initiative determined, number of Impulses and their length determined.
Each Impulse (Phase Cycle): Determine Weather.
- Mission Order Segment (1st Player Command Phase): Alter Formation Attachments, place Reinforcements (if any), remove Withdrawals (if any), Mission Orders given down the chain of command, RR Engineer Points allocated.
- Supply and Command Segment: Relocate Army Base(s), check Main Depot Status, units Supply determined, determine Command Control, replace Ammunition Points (AP), allocate REPs to eligible units in Replacement Mode, take Air Unit MRCs.
- Concealment Segment: All friendly units are inverted, place dummy units, use Engineer Points to conduct RR Tasks.
- March Segment: 2 MPs available for each day that the current impulse consists of, all activity requiring the expenditure of MPs undertaken. Expend MPs to: move hexes, change Movement Modes, change facing (no MP cost), recover Morale Levels, place Combat Markers, carry out Overruns, perform Reconnaissance, bring on Reinforcements (if any).
- Counter-March Segment: 1 MP is available for each day the current impulse consists of and units may Force-March 2 additional MP for each day the current impulse consists of. Expend MPs as in the March Segment above and in addition: Force-March and enter Replacement Mode.
- Mutual Combat Phase:
- a. Initial Combat Segment: Only units with Intensive Combat Markers may Barrage or Fire attack (and expend AP). 1) 1st Player Barrage Attack Step; 2) 2nd Player Barrage Attack Step; 3) 1st Player Fire Attack Step; 4) 2nd Player Fire Attack Step.
- b. Final Combat Segment: Only units with Regular Combat Markers may Barrage or Fire attack while expending AP. Units without Regular Combat Markers may Fire attack while not expending AP. 1) 1st Player Barrage Attack Step; 2) 2nd Player Barrage Attack Step; 3) 1st Player Fire Attack Step; 4) 2nd Player Fire Attack Step.
This concludes the 1st Player's half of an impulse. The 2nd player's half follows and is structured identically to the 1st player's half, only the roles are reversed.
Cossacks Exclusive Rules
The Exclusive Rules add to or modify the Standard Rules. Wherever there is a conflict of interpretation between a Standard Rule and an Exclusive Rule, the Exclusive Rule takes precedence.
1.0 General Rules
The Cossacks are Coming! covers the 1914 campaign which took place in Prussia between Imperial Germany and Imperial Russia.
1.1 Game Scale
The scale of the map is five miles to the hex (eight kilometers) measured from hexside to hexside. The game scale assumes that approximately one-third of a days worth of activity by a trained infantry formation would consist of passing through one clear hex on the map. The various related scales, movement rates and categories derive from this basic premise.
Each Strength Point (SP) in an Infantry Combat Class unit represents roughly 1000 to 1500 soldiers. In a German Cavalry Combat Class unit each SP represents roughly 450 to 600 soldiers. In a Russian Cavalry unit each SP represents roughly 600 to 900 soldiers. Each specialist SPs (e.g. engineers) or elite infantry SPs (e.g. German Jägers) represents roughly 1,000 soldiers per SP.
A Machine Gun Factor (MGF) of one represents roughly 6 to 8 heavy machine guns per SP. Fractional MGFs represent proportionately fewer heavy machine guns.
The composition of SPs in Artillery Class and Headquarters Class units depends on the type of artillery. Field artillery SPs represent 2 to 3 batteries. Heavy artillery SPs represent 2 batteries per SP. Super heavy artillery SPs (BF of 7 or 8) represent 1 to 2 batteries per SP. All Barrage Factors, in both Artillery Class and Headquarters Class units, are based on the millimeter (mm) of the predominant gun or howitzer available in that unit. Barrage Factors (BF) of 2 represent batteries with a caliber less than (<) 65mm; BF of 3 <95mm; BF of 4 <135mm; BF of 5 <170mm; BF of 6 <220mm; BF of 7 <330mm; BF of 8 represent batteries with a caliber greater than 330mm. BFs are sometimes reduced to reflect lack of equipment, aged equipment or poor training. BFs are sometimes increased to reflect additional equipment or different calibers present in a unit.
Therefore some German Landwehr formations have Artillery Class units with BF of 2 even though the predominant caliber in those units was 77mm; this lower BF reflects the lack of batteries attached to these formations. Russian Field Artillery Class units have a BF of 4 even though the predominant caliber in those units was 76mm; this reflects the number of guns (8) per battery attached to these formations.
German artillery brigades add 1 to the Barrage Value of any combat they expend an AP in; this bonus reflects the presence of a 105mm artillery battalion (BF of 4) with the three 77mm artillery battalions (BF of 3) in each artillery brigade (this 105mm artillery battalion is also the reason for the indirect artillery unit type these brigades possess).
SPs in Fortress Class units represent one major fort or a combination of several smaller forts and batteries in a hex. BF and MGF in Fortress Class units represent an amalgamation of all the weaponry available in the forts and batteries for that unit. The MGF does not represent purely machine guns but can represent an infantry garrison. Therefore a Fortress Class unit with an MGF of 1 may represent roughly 10 heavy machine guns or may represent a garrison of roughly 1500 infantry men or a combination of the two.
Each airplane unit in this game represents one squadron (roughly four to six airplanes). Each balloon unit represents one or more balloon formations.
1.2 Who's Who
Troop units and command counters have a pattern of upper and lower case identifiers. Army-sized primary formations have their identifier spelled out in italicized upper-case letters; Corps-sized primary formations in Roman numerals or upper-case letters; Division and brigade-sized primary formations in Arabic numerals and primarily lower-case letters and contains the abbreviation "div" or "bd"; And fortress garrison primary formations have the fortress name as an identifier written in upper and lower-case letters.
-
1.21 Troop Unit Colors: The backside of the counters bears an Imperial crest of each nation. HQ units bear a thin red band at top of the counter.
-
1.22 Command Counter Colors: The command counters feature the troop's national flag or symbol between the unit identifier and the morale rating. Command counters with an Attachment Limit bear a thin white band at top of the counter.
Russian: Imperial Russian: Black, orange, white horizontal tricolor. Finland: Blue cross on white field.
German: Prussian: Black, white, black horizontal tricolor. Saxon: White over green bicolor.
-
1.23 Symbols: Some units have special drawings in place of normal unit type symbols. Airplane units have silhouettes. Balloon units have a balloon symbol. Fortress units have a fortress symbol. Leaders have a profile on their counter.
1.3 Abbreviations
The following abbreviations are used throughout these rules and on the counters. These abbreviations may be used in both upper and lower case.
- For All Sides: Accum: Accumulated; AP: Ammunition Points; Art: Artillery; Bd: Brigade; BE: Brigade Equivalent; Bt: Artillery Battery; C, Cav.: Cavalry; Det: Detachment; Div: Division; GD: Guard; HQ: Headquarters; HQHB: Headquarters Holding Box; Inf: Infantry; LOC: Line Of Communication; MRC: Maintenance Rating Check; Replace.: Replacement; REP: Replacement Points; RP: Rail Points; RR: Railroad.
- Russian: F: Finnish; fn gd: Frontier Guard; hvy: Heavy; O: Opolchenie (3rd line troops); R: Reserve (2nd line troops); rf: Rifle; S: Siberian; T or tk: Turkestani.
- German: e: Ersatz (3rd line troops); gz, grdz: Graudenz; KÖNIG, kg: Königsberg; ls: Landsturm (3rd line troops); LW: Landwehr (3rd line troops); OHL: Army Supreme Command; OBO: Army Supreme Command East; R: Reserve (2nd line troops).
1.4 Friendly Map Edges
The map edges considered friendly to the German player are those that fall within the borders of Germany (except those east of the Baltic Sea). Map edges considered friendly to the Russian player are those that fall within the borders of Russia.
-
1.41 Off-Map Rail Movement: Only the Russian player may engage in off-map rail movement. The Russian may only use off-map rail movement on the railroad line between hexes 60.46, 53.45 and 46.46. The distances between these hexes is marked on the southern map edge. Units performing off-map rail movement count against Railroad Capacity.
EXAMPLE: Assume a Russian unit would like to travel from hex 52.44 (Rozan) to hex 60.46 using off-map rail movement. The distance travelled would include 6 single-track railroad line hexes to reach the off-map RR station (exit at hex 53.45), plus 5 double-track railroad line hexes to reach Praga, plus 8 single-track railroad line hexes to reach the RR station in hex 60.46. In total the unit would travel on 14 single-track hexes and 5 double-track hexes.
-
1.42 Off-Map Non-Rail Movement: Units not in Rail Mode may voluntarily move or retreat off the map to escape destruction. A unit that moves off the map may not return to play for the duration of the game.
NOTE: There is no Naval Movement in The Cossacks are Coming!.
1.5 Reinforcements
If reinforcements are indicated as arriving on the third impulse in a Game Turn, and the player with the initiative determines that the Game Turn has only two impulses, the reinforcements appear during the second impulse.
1.6 Special Mission Order Diagrams
In The Cossacks are Coming! the Russian Second Army Chart (titled Special NW Front Army Chart) and German Eighth Army Chart have a Mission Order Diagram printed on the bottom left-hand side. Formations attached to these armies are restricted by these Mission Order diagrams. All other formations, attached either to the strategic chart or other army charts are restricted by the Mission Order Diagrams found on their nation's strategic chart.
2.0 Initiative and Impulse Determination
Having the Initiative is a powerful asset in controlling game tempo. Special rules governing initiative in The Cossacks are Coming! are outlined below. The standard rules concerning Initiative and Impulse Determination are 5.2 and 6.0. In The Cossacks are Coming! the Russian player is the FIRST player every turn.
2.1 Impulses
The opening of World War One found both sides unprepared to fully utilize the modern methods of warfare. Therefore, no player may declare more than three impulses in a game turn and no one impulse may be more than five days long.
2.2 Initiative Determination
The Russian player automatically has the initiative in turn 2. Beginning with turn 3 the standard initiative determination procedure is followed with the modifications found below.
- 2.21 Initiative Die Roll Modifiers: The following conditions modify the Initiative determination die roll:
- A. Advance Mission Orders: The side with the most armies with an Advance Mission Order receives plus one (+1) on the die.
- B. Retire Mission Orders: The side with the most armies on the Retire Mission Order receives minus one (-1) on the die.
- C. Prisoner Points: The side with the most Prisoner Points receives a modifier of plus one (+1).
- D. Hindenburg: When Hindenburg is in play the German player receives a modifier of plus one (+1).
3.0 Supply Ranges, Supply Sources and Tracing Supply
Supply is traced from the unit seeking supply to the supply source. (See Standard Rule 7.22)
Designer's Note: The German General Hoffmann estimated that a German Army "would come to a standstill when it got about a hundred kilometers from a railway." He calculated that a Russian army's supply range from a railway was twenty kilometers further "in consequence, firstly of their exceedingly modest requirements, and secondly of their great want of consideration for their horses."
3.1 Supply Ranges
Supply ranges for German and Russian units differ slightly.
- German: German Supply Class units and units from Primary Formations attached to a corps-sized formation or any-sized cavalry Primary Formation have a supply range of 6 hexes. The supply range for all other units (those attached to infantry division-sized or smaller independent formations) is 3 hexes.
- Russian: Russian Supply Class units and units from Primary Formations attached to a corps-sized formation or any-sized cavalry Primary Formation have a supply range of 7 hexes. The supply range for all other units (those attached to infantry division-sized or smaller independent formations) is 3 hexes.
NOTE: A unit that has the Command Counter of its Primary Formation on a Corps Command Track is attached to that corps. Independent Formations are those with their Command Counters on an Independent Formations Track and detachment units beyond an HQ's CCR.
3.11 Railroad Lines
When tracing supply along contiguous friendly operational railroad line hexes count each railroad line hex as one-half a hex.
3.12 Swamp Hexes
When tracing supply through a hex containing swamp terrain count each hex as 2 hexes, unless it is being traced along a contiguous roadway or railroad line.
3.2 Tracing Supply Terrain Restrictions
-
3.21 Grand and Major River Hexsides: Supply may not be traced over a Grand or Major river hexside except where an intact bridge, pontoon bridge, or ferry crossing is located.
-
3.22 Lakes and the Baltic Sea: Supply may not be traced across a lake hexside nor through a Baltic Sea hex or hexside.
PILLAU EXCEPTION: The German player can trace supply normally from hex 66.19 to hex 67.18, as if not separated by the Baltic Sea.
3.3 Additional Supply Sources
-
3.31 Fortress Units with Supply Symbols: Friendly Fortress Class units with supply symbols may supply any friendly unit on or adjacent to the Fortress unit. The friendly unit need not be Posted to the fortress unit to receive supply. EXCEPTION: The German Boyen Fortress Class unit. (See Exclusive Rule 10.42)
NOTE: Only Posted units receive Command Control and AP replacement benefits from a fortress. (See Exclusive Rule 7.3)
-
3.32 Baltic Sea Ports: Every city, town or village in a Baltic Sea coastal hex is considered a sea port. Any German-controlled Baltic Sea port hex may supply one German division-sized formation within 3 hexes. The Baltic Sea ports of Danzig, Elbing and Königsberg may supply up to three German corps-sized formations within 6 hexes (the corps train unit must be stacked in the city hex) or six division-sized formations within 3 hexes.
3.4 Main Depot and Supply Unit Locations
Main Depot and Army Supply units must be stacked on a Railroad Station hex to be eligible to be in and provide supply. (See Railroad Stations Exclusive Rule 4.3)
3.5 Army Base Marker Locations
A German Army Base marker may be placed upon any double-track RR line exiting the map into Germany. A maximum of 2 Russian Army Base markers may be placed upon any double-track RR line exiting the map into Russia. A maximum of one Russian Army Base marker may be placed on any single-track RR line hex exiting the map into Russia.
3.6 The Russian Praga Depot
The Russian Depot unit with formation identifier PRAGA sets up off-map in Praga (See southern map edge). The Praga Depot unit is considered attached to the Second Army and has the same characteristics as the SECOND Army Main Depot unit (see Standard Rule 7.23.C.1) with two exceptions: 1) it is always in supply (it has no Army Base), and 2) it may not move. Notice that the PRAGA unit is 8 hexes from the map edge at 60.46 (inclusive).
NOTE: The Russian player may trace supply normally along the off-map railroad lines between hexes 60.46, 53.45 and 46.46.
4.0 Railroad Movement
4.1 Railroad Movement Rate
The railroad movement rate is the number of hexes that may be moved per MP while in Rail Mode. The railroad movement rate for all nations is 24 hexes per MP on a Double-Track railroad line and 12 hexes per MP on a Single-Track railroad line.
- 4.11 LOC Rail Movement Encumbrance: The railroad movement rate is halved when moving over that part of an army's LOC that is between an army's Army Supply unit and the army's Main Depot.
- 4.12 Russian Rail Movement inside Germany: The Russian player's use of railroad lines inside Germany is restricted. Only Supply Class units may move in Rail Mode inside Germany.
4.2 Railroad Capacity
The railroad capacity of a side is the number of rail points (RPs) it receives per turn. One Rail Point (RP) allows one Brigade Equivalent (BE) to expend one Movement Point (MP) in Rail Mode. Each scenario lists the number of RPs available to each side.
EXAMPLE: A formation with a total of three BE moving two movement points in Rail Mode would consume six Rail Points (3 BE x 2 MP = 6 RP).
- 4.21 Special Formation and Unit Characteristics: The following rules affect the calculation of BEs for Railroad movement.
-
A. Infantry Division-Sized Formation's Logistical Troops: Each division-sized infantry formation moving in Rail Mode, adds one BE for the logistical troops presumed to be organic to the formation.
-
B. Artillery Units: Each Artillery BE in the game counts as two BE for moving in Rail Mode.
EXAMPLE: An infantry division with two infantry brigades, a cavalry regiment, an artillery brigade and a heavy artillery regiment attached costs 6½ BEs to move by rail: 2 BEs for the infantry brigades, ½ BE for the cavalry regiment, 2 BE for the artillery brigade (1 BE is doubled for artillery), 1 BE for the heavy artillery regiment (½ BE is doubled for artillery), and 1 BE for the presumed logistical troops of the infantry division.
-
C. German Cavalry Divisions: Each German Cavalry division-sized formation consisting of 3 cavalry brigades subtracts 1 BE from its size for purposes of Rail Mode movement.
EXAMPLE: A German cavalry division with three cavalry brigade units (or one three-brigade unit) and a HQ unit would equal a total of 3 BE to move by rail; 2 BE for the three cavalry brigades (3 minus 1), 1 BE for the divisional HQ.
Designer's Note: German cavalry divisions were organized in 3 brigades while Russian divisions had only 2 brigades, but the divisions all contained the same number of squadrons.
-
4.3 Railroad Stations
Units may only entrain and detrain in hexes with Railroad Stations. Railroad Stations are found in hexes where Railroad Station, City, Town or Village symbols are connected to a railroad line. Each Railroad Station has a daily Brigade Equivalent (BE) capacity. No more than the maximum number of BEs may be entrained or detrained at the Railroad Station per day.
EXAMPLE: The current impulse consists of 2 days, and a railroad station's daily capacity is 3 BEs. A Formation could entrain or detrain 6 BEs that impulse.
-
4.31 Railroad Station Capacities: The daily BE capacity for a city is 6 BEs. For a Town, Village or RR Station it is 3 BEs.
-
A. MP Cost to Entrain/Detrain: In a City each BE costs ½ MP to entrain or detrain; in all other station types it costs 1 MP per BE to entrain or detrain.
-
B. Procedure: If only one formation is attempting to entrain or detrain in a hex during an impulse, multiply the number of BEs in the formation by the MP cost to entrain/detrain. If 2 or more formations attempt to entrain or detrain in a hex during an impulse, the formations must be queued. The first formation in the queue is unaffected by the other formations. Each additional formation must take into consideration the amount of time (MPs) the preceding formation(s) have expended entraining or detraining.
FIRST EXAMPLE: Two formations stacked in the same hex at the beginning of an impulse wish to enter Rail Mode. The first formation, consisting of one BE, expends 1 MP and rails off. The second formation begins entraining with one less MP available.
SECOND EXAMPLE: Two formations of 3 BEs each are stacked in a Town, and both intend to entrain during the impulse. It is a 3 day impulse, so there are 6 MPs in the March Segment. The first formation uses 3 MPs to entrain and rails off. The second formation can entrain but has no additional MPs available, having expended 3 MPs waiting for the first formation to entrain, and needing 3 MPs to entrain itself.
THIRD EXAMPLE: Two formations wish to use the same RR station to entrain during an impulse. One formation is stacked in the RR station while the other must march 2 MPs to enter the hex. The first formation consists of 2 BEs, so the second formation is not delayed, because it arrives as the first finishes entraining. If the first formation consisted of 3 BEs, the second would have to lose 1 MP waiting for the first.
-
C. Determining Formations for Rail Mode: The friendly player may determine which units in a stack constitute a formation for entraining and detraining purposes. Once Entrained a formation must maintain its structure and detrain together.
EXAMPLE: A corps-sized formation has 2 division-sized Primary Formations attached, with a total of 7 units. The corps could entrain as one formation, as 3 separate Primary Formations, or as up to 7 separate formations, one for each unit. The player organizes the queue and proceeds to entrain.
-
4.4 Railroad Track Characteristics
There are two types of railroad lines in the game: Double-Track and Single-Track. All railroad tracks may be used for rail movement and to trace supply. Players will note that there may be more than one railroad line running through a hex; railroad lines are not traced by hex but by the railroad lines drawn on the map.
- 4.41 Russian Off-Map Railroad Line: The off-map railroad line between hexes 60.46, 53.45 and 46.46 may be used by the Russian player as a normal railroad line in all respects. The length of the rail line, in hexes, is marked on each section.
4.5 RR Engineer Points and Railroad Tasks
The number of RR Engineer Points each side receives per day is found in each Scenario. Railroad Tasks are explained in Standard Rule 8.13.
- 4.51 RR Task Cost - Preparation: In The Cossacks are Coming! the only RR Task is Preparation. It costs 1 RR Engineer point to prepare one hex of railroad.
5.0 Combat Rules
5.1 Combat Restrictions
A formation may only attack once per Combat Segment. If any part of a formation conducts a Barrage Attack it may not Fire Attack in the same Combat Segment. A hex may only be attacked once per Combat Segment — by Barrage or Fire, not both.
Designer's Note: The prohibition on Barrage Attacking and Fire Attacking the same hex in the same combat segment reflects the poor state of artillery coordination in 1914.
5.2 Barrage Attack Limitations
In The Cossacks are Coming! Artillery Class units may only Barrage Attack during the Initial Combat Segment of the Combat Phase. (See exceptions below) Additionally, a Barrage Attack made against any unit except a Fortress Class unit must be followed by a Fire Attack against the same hex in the Final Combat Segment. The obligation to Fire Attack can not be fulfilled with the Probe Combat Option. If the target of a Barrage Attack chooses to retreat, the barraging formation is no longer obligated to Fire Attack the hex. EXCEPTION: Enemy units on the opposite bank of a Major or Grand River do not have to be Fire Attacked in the Final Combat Segment following a Barrage Attack.
5.21 Fortresses and Barrage Attack Exceptions
The following are exceptions to Exclusive Rule 5.2.
- A. Barraging Fortresses Exception: Formations may Barrage Attack an enemy Fortress Class unit during the Final Combat Segment. A Barrage Attack against a Fortress Class unit during the Initial Combat Segment need not be followed by a Fire Attack during the Final Combat Segment.
- B. Posted Unit Exception: Artillery Class units Posted to a Fortress Class unit may Barrage Attack during both the Initial and Final Combat Segments. A Barrage Attack made by an artillery unit of a formation Posted to a Fortress Class unit during the Initial Combat Segment need not be followed by a Fire Attack during the Final Combat Segment.
6.0 Special Unit Rules
6.1 Motorized Infantry Units
Motorized infantry units (those with an M movement rating) must always move and be stacked with another Combat Class unit, unless they are at least 3 hexes behind friendly lines.
SPECIAL RULE: The German 1c div and 8c div motorized infantry units begin some scenarios attached to the 35th division (35 div) or 37th division (37 div) respectively. These units may remain attached to the 35 div or 37 div for as long as desired. Once detached and assigned to the 1c div or 8c div these units may not have their attachment changed again.
- 6.11 Motorized Infantry Retreats: Motorized infantry units may not retreat across an unbridged major or grand river hexside, except at a friendly controlled Ferry crossing. A retreat over an unbridged major or grand river hexside, either as a result of combat or withdrawal before combat, causes a motorized unit to abandon its motor vehicles. Motorized infantry that abandon their vehicles are immediately removed from play. Units removed from play in this manner can be brought back into play with one Specialist REP.
6.2 Heavy Artillery Units
Heavy artillery units have a range of two hexes for Barrage Attack. When firing at a two hex range halve all heavy artillery SPs. Heavy artillery units may only participate in Fire Attacks against adjacent hexes. Heavy artillery units that conduct a Barrage Attack against an enemy unit cause a +1 die roll modifier when resolving any defender MCs.
6.3 Cavalry Formations
-
6.31 Double Command Radius: During Game Turns 2, 3 and 4 (only) a Corps HQ unit may double its Command Control Radius to command a cavalry formation.
EXAMPLE: Assume the 5th Cavalry division (5 c div) is attached to the III Corps. The III Corps' HQ unit has a CCR of 2. If the 5th Cavalry division's HQ unit were within 4 hexes of the III Corps HQ unit it would be in command control.
-
6.32 Cavalry Fatigue Morale Checks: Starting with the second impulse of Turn 3, cavalry formations with units that move or conduct reconnaissance must take a cavalry fatigue MC. The MC is taken at the conclusion of the formation's march. The MC is modified by +1 for each MP used moving or conducting reconnaissance. Note this excludes MPs expended placing a combat marker, entering replacement mode, recovering morale levels, entraining/detraining or entrenching in a hex. If the cavalry formation fails its Cavalry Fatigue MC, reduce its ML by one for each number that its current ML was exceeded by. Motorized units' movement is not taken into account for this rule. EXCEPTION: The German 1st Cavalry Division (1c div) is exempt from this rule as long as it remains inside Germany.
6.4 Air Units
There are two types of Air Units in The Cossacks are Coming! Airplane units and balloon units.
-
6.41 Airplane Units: Airplane units may perform all missions listed in the standard rules. Airplane units must be stacked in a HQHB except when executing the Air Reconnaissance or Artillery Spotting missions. (See standard rules 8.81 and 10.42.C.3)
When an Airplane unit performs the Air Transfer operation (see standard rule 8.81.B) it is moved from HQHB to HQHB. The airplane unit may not currently be isolated. Upon reassignment, place the airplane unit in the new HQHB flipped over to show the "Air Unit Used" side.
-
A. Formation Restrictions: Airplane units attached to a corps may only perform the Artillery Spotting operation for units that are attached to the same corps-sized formation. (The airplane unit's formation attachment must be the same as at least one of the artillery class units participating in the combat.) Airplane units attached directly to an Army HQ (in the Army HQHB) may only perform the Artillery Spotting mission for Independent Army formations.
EXAMPLE: An airplane unit is stacked in the XI Corps HQHB and is therefore attached to that corps. The airplane unit can only perform the Artillery Spotting operation for artillery units attached to the XI Corps.
-
-
6.42 Balloon Units: Balloon units can perform the Air Reconnaissance or Artillery Spotting missions against any unit within two hexes of the town or city hex named on the balloon unit counter.
- A. Formation Restrictions: Balloon units may not change their formation attachment. Balloon units may perform the Artillery Spotting operation for units of the same formation only. (The Balloon unit's Primary Formation attachment must be the same as at least one of the artillery class units participating in the combat.)
- B. Maintenance Rating Check (MRC): Balloon units need not make a MRC. During the Ready Air Units Step of the Supply and Command Phase flip each "Balloon Unit Used" face-up.
6.5 Organic Combat Units
- 6.51 Artillery Organic Combat Units: Organic Combat Units (OCU) composed of artillery SPs in Corps HQ units are Indirect Artillery Class units. OCUs composed of artillery SPs in Cavalry Division HQ units are Direct Artillery Class units. (See Barrage Factor in Standard Rule 2.23)
- 6.52 Cavalry Organic Combat Units: Some Combat Class units have printed Cavalry OCU indicators (C) indicating the presence of cavalry directly subordinate to them. Cavalry OCUs in The Cossacks are Coming! represent less than one SP worth of cavalry. They may not be used in combat. For the purpose of contesting a reconnaissance, Cavalry OCU counts as ½ a SP. Cavalry OCUs may not be detached.
6.6 Pontoon Bridges
Each player in the game has a limited number of Pontoon bridge markers. Pontoon bridges may only be placed across Major and Grand River hexsides. They may not be placed across a river hexside adjacent to an enemy combat class unit. Once placed, a Pontoon bridge is considered a bridge for all purposes. Pontoon bridge markers may be voluntarily removed by the owning player at any time during a friendly March or Counter-March Segment, and must be removed involuntarily anytime an enemy unit moves adjacent.
- 6.61 Procedure: Only Corps HQ units and Combat Engineer units can place a Pontoon Bridge Marker by expending 3 MPs. Record the laying of a Pontoon Bridge by placing a Pontoon Bridge Marker with the arrow pointing toward the designated hexside.
7.0 Fortresses
The Standard Rule concerning Fortresses is 13.2. For the definition of "Posted" see Standard Rule 13.23.
-
7.1 General Characteristics:
- 7.11 Maximum Range: Fortress Class units have a Barrage Attack range of one hex.
- 7.12 Fortress Class Units and the Army Mission: Units stacked in the same hex with a Fortress Class unit may act as if their MO is flexible.
-
7.2 Fortress Units Barrage Limit: A fortress unit may expend a maximum of 3 APs per impulse. A fortress unit stacked alone in a hex and subjected to a Fire Attack need not expend an AP to use its full BF.
Procedure: Place an Ammo Marker on the fortress unit on the game map so that the number of APs it has expended can be tracked. A Fortress Class unit with an "Out of Ammo" AP marker may no longer expend AP. The AP marker is removed during the friendly Supply and Command Segment.
-
7.3 Fortress Units with Supply Symbol: Fortress units with supply symbol provide additional benefits to nearby friendly units.
-
7.31 Fortress Supply: A fortress unit with a supply symbol may supply units in the same hex or adjacent hexes. A unit need not be Posted to the fortress unit to receive supply. A formation on or adjacent to the fortress unit is exempt from the effects of isolation.
-
7.32 Posted Units Command Benefit: A unit Posted to a Fortress Class unit with a supply symbol is considered to be in Command Control.
-
7.33 Posted Units AP Benefits: A formation containing Artillery Class units that is Posted to a Fortress Class unit with a supply symbol may replace expended APs regardless of its formation attachment.
-
8.0 Terrain Effects
8.1 Road Movement
Only a unit in Road Mode may use roads, and only if the moving unit is following a contiguous road line. Units moving along adjacent contiguous road lines pay the cost of the road, ignoring the other terrain in the hex and ignoring hexside terrain features.
8.2 Rivers
There are three types of rivers in The Cossacks are Coming! Minor, Major and Grand. Canals are treated as minor rivers for all game purposes. Grand Rivers are treated as Major rivers due to low water levels until the first Heavy Rain weather turn. (see 9.14) In some locations a river will make a sharp turn and a hexside will have two river symbols; treat this as one river symbol.
-
8.21 Bridges and Ferry Crossings: Only units in Road Mode may use bridges and ferry crossings. Bridges (Roadway, Railroad & Pontoon) and Ferry Crossings negate river hexside MP costs. Bridges and Ferry Crossings may only be utilized if both sides of the river are friendly controlled. Control of a hex is defined in Standard Rule 3.7.
NOTE: A Bridge is considered to be wherever a road or railroad crosses a river hexside.
-
B. Grand River: Combat and Artillery class units conducting a Fire attack across a Grand River hexside have their SPs quartered. Artillery class units conducting a Barrage attack across a Grand River hexside have their SPs halved. (See the TEC)
-
8.22 ZOC: ZOCs do not extend across Major or Grand Rivers.
-
8.23 Fire Combat: If all attacking combat class units are attacking across river hexsides (Minor, Major or Grand), shift the odds column one to the left in favor of the defender. (See the TEC)
- A. Major River: Combat and Artillery class units conducting a Fire attack across a Major River hexside have their SPs halved. (See the TEC)
8.3 Special Terrain Feature Pillau
German units may move and trace supply normally between the hex containing Pillau (hex 66.18) and hex 67.18 (adjacent). A maximum of 3 BE may move between the two hexes per day. It costs 3 MPs to move from Pillau to hex 67.18 and vice-versa. (See the TEC) Fire Combat may not take place between the Pillau hex and hex 67.18.
8.4 Permanent Entrenchments Printed on Map
There are permanent entrenchments printed on the map. (See the TEC)
- 8.41 Reduced Effect of Permanent Entrenchments: Permanent Entrenchments printed on the map do not begin the game with their full effectiveness. The TEC lists the benefit of Permanent Entrenchments as 5 column shifts to the left on the BCRT and FCRT, along with 5 subtracted from a defending unit's morale check die roll. (See the TEC) During Turns 2, 3, and 4 permanent entrenchments have a reduced effectiveness. Starting on Turn 5 the benefit of permanent entrenchments rises to 5 (as printed on the TEC) and remains so for the rest of the game.
- A. Game Turns 2, 3 and 4: Permanent Entrenchments provide a modifier equal to the current Game Turn. For example on turn 2 all permanent entrenchments provide a column shift to the left of 2, along with 2 subtracted from a morale check die roll. On turn 3 this would rise to three.
- 8.42 Destruction of Permanent Entrenchments printed on the map: Permanent entrenchments printed on the map can be destroyed. A permanent entrenchment occupied by an enemy unit at any time during an impulse is destroyed and no longer provides any benefit. Players should note this on a piece of paper. To repair permanent entrenchments printed on the map that have been destroyed, follow the normal Construct Permanent Entrenchment procedure.
9.0 Weather
Weather is determined at the beginning of each impulse. The player with the initiative rolls one die prior to the first Player's Mission Order Segment. The resulting weather is recorded with the weather marker on the Time Chart.
9.1 Weather Categories and Effects
The following are the four types of weather possible in The Cossacks are Coming!
-
9.11 Clear: No special effects.
-
9.12 Summer Heat: A heat impulse has the following rules in effect: 1) Units add one to the die roll for Force-March morale checks. (See Standard Rule 9.12.B)
-
9.13 Light Rain: A light rain impulse has the following rules in effect: 1) Air units may not fly any kind of mission. 2) Artillery Class unit strength points are halved in barrage combat.
-
9.14 Heavy Rain: A heavy rain impulse has the following rules in effect: 1) All terrain costs except primary roads are doubled. 2) Reconnaissance costs are doubled. 3) MP costs to place combat markers are doubled. 4) Air units may not fly any kind of mission. 5) Artillery Class unit strength points are halved in fire and barrage combat.
In addition, the first time Heavy Rain is rolled on the weather table discontinue treating Grand rivers as Major rivers.
NOTE: While artillery SP totals are halved by rain, this does not reduce the Barrage Factors of the Artillery Class and Headquarters Class units making the barrage. This is critical when conducting attacks against Fortress Class units. (See Standard Rule 13.23.B)
10.0 The German Armed Forces
10.1 The German Supreme Commander
The German player initially represents the German Supreme Commander at OHL (the German acronym for "Oberste Heeresleitung"). Initially this was Helmuth von Möltke and then Erich von Falkenhayn upon von Möltke's dismissal. The player next represents Paul von Hindenburg upon his arrival on the map no later than Turn 6. There is no OHL HQ class unit in the game, as the German Supreme Command is off-map in Western Europe.
-
10.11 Mission Orders: All Mission Orders (MO) to the Eighth Army and Strategic formations originate with the German Supreme Commander until the arrival of Hindenburg on the map, at which time they originate with him. Hindenburg does not have a MO preference therefore while Hindenburg commands the Eighth Army it automatically assumes the desired MO.
NOTE: Strategic formations may only be issued the Hold MO through the Mission Order Procedure. (See Standard Rule 3.12.C)
-
10.12 Mission Orders to Prittwitz: The German Supreme Commander at OHL (Möltke or Falkenhayn) must always issue Prittwitz (EIGHTH) the Flexible MO through the mission order procedure. Prittwitz automatically accepts the Flexible MO unless one of the following two conditions has been met: 1) at least 5 German SPs have been lost in combat, or 2) a Russian Corps HQ class unit attached to the Russian Second Army is inside Germany. If either condition has been met Prittwitz will attempt to follow his mission preference.
NOTE: Individual Corps leaders must attempt to exercise their own mission preference through the Mission Order Procedure. (See Standard Rule 7.14)
10.2 German Leaders
-
10.21 German Leader Replacement Event – Hindenburg replacing Prittwitz: The German Eighth Army commander Prittwitz is replaced if Prittwitz follows his Mission Order (MO) Preference (i.e. Retire) instead of following the MO given to him by the Supreme Commander. The Prittwitz counter is removed from play during the Mission Order Segment of the following impulse. Replace the Prittwitz leader counter with the Hindenburg leader counter when Prittwitz is removed from play, and place the Ludendorff (EIGHTH) Leader counter in the Eighth army's Army Staff box (but do not remove Hoffmann). The removal of Prittwitz triggers the West Front Reinforcements. If Prittwitz has not been replaced through Turn 5, automatically replace him on the first impulse of Turn 6.
-
A. German West Front Reinforcements: There are several units listed as "West Front Reinforcements". These are reinforcements taken from Germany's war in Western Europe.
- Procedure: The West Front reinforcements arrive a minimum of three impulses after Prittwitz is replaced, in the impulse containing the tenth day after his replacement by Hindenburg. Entry hexes are listed on the German Reinforcement Chart.
Designer's Note: Historically, these formations arrived as reinforcements ten to fourteen days after General Hindenburg's promotion to command of the Eighth Army. Actual replacement of Prittwitz occurred Aug. 23rd, the reinforcements arrived between Sept. 2nd–6th.
-
B. Hindenburg Adds To The Initiative Die Roll: When Hindenburg enters play the German player adds one to the die roll used to determine Initiative for the remainder of the game.
-
-
10.22 German Staff Officers - Ludendorff and Hoffmann: The German leaders represented by the counters Ludendorff and Hoffmann are staff officers. They may not command formations. Their only effect is to double the Command Control Radius (CCR) of the Army HQ Class unit they are stacked with. If both Ludendorff and Hoffmann are stacked in the same Army Staff Box, they quadruple the CCR of the army HQ unit. A Staff officer's attachment may not be changed during the game.
10.3 Special German Divisions and Units
-
10.31 German 1st Cavalry Division: The German 1st Cavalry Division is exempt from Exclusive Rule 6.32, Cavalry Forage Morale Checks, as long as it remains inside Germany. Any unit outside Germany attached to the 1st Cavalry Division is not exempt.
-
10.32 The Graudenz (grdz div), 35 Reserve (35 r div) and Königsberg Landwehr (kg lw div) Divisions: The Graudenz division (grdz div), the 35 Reserve division (35 r div), and the Königsberg Landwehr division (kg lw div) can attach brigade-sized formations. The Command Counters for these three divisions have an attachment limit of one (or a ½) printed on them. They may attach one or two brigade-sized Landwehr (lw), Landsturm (ls) or Ersatz (e) formations only. Place the Command Counters of the attached brigades on the same command track as that of the division's Command Counter. The Graudenz, 35 Reserve and Königsberg Landwehr divisions may be attached to a corps.
NOTE: When attached to a corps, count only the division against attachment limits, not the attached brigades.
-
10.33 Strategic, Army and Corps Asset Units: Units that bear the Primary Formation identifier of an army or corps are considered Army and Corps Asset Units. (See Standard Rule 3.13.E) Army or Corps Asset Units may not be reassigned to other formations. Units that bear the Primary Formation identifier OBO, masurian and ls XX are considered Strategic Asset Units. (See Standard Rule 3.12D) There are no restrictions on Strategic Asset unit attachment.
-
A. Fortress Artillery: Artillery Class Units with the OBO Primary Formation identifier and a fortress designation on the right side of the unit counter are considered Strategic Asset units upon release from fortress garrison duty.
Designer's Note: The Königsberg OBO artillery units are not released during the game. These units are released during the game "Clash of Eagles, the Battle for Galicia and Poland, 1914".
-
B. ls XX and masurian Movement Restrictions: masurian units may not move further than twelve (12) hexes from Lötzen (hex 49.27) unless Lötzen is Russian controlled. ls XX units may not move more than twelve (12) hexes from Allenstein (hex 61.30) unless Allenstein is Russian controlled.
-
10.4 German Fortresses and Garrisons
The German player has several formations that are considered Fortress Garrisons. These Fortress Garrison formations warrant special rules.
NOTE: Fortress Garrison formations may be "Released" from garrison duty during a scenario. (See the Unit Releases section of the scenario rules)
- 10.41 Fortress Garrisons Restrictions: Units of German fortress garrison formations may not voluntarily move more than two hexes from the fortress city or town they garrison (exception Königsberg, see 10.41.A below). If such a unit is involuntarily moved more than two hexes from the fortress city or town, it must move to within the two hex limit during the next friendly March or Counter-March Segment. A unit unable to do so is removed from play and is considered to be disbanded. If isolated when disbanded, all SPs and CPs are treated as Prisoner Points.
- 10.42 Special Fortress Rules: These special rules pertain to individual fortress complexes.
-
A. Fortress Königsberg: The following Primary Formations and asset units make up the Königsberg Fortress Garrison: KÖNIG, König, kg e div, 1 lw bd and OBO artillery units bearing the König designation (located on the right side of the unit counter).
- Königsberg Fortress Area Hidden Deployment: The Königsberg Corps (KÖNIG) formation and any attached formations and asset units are bound by the following rules. The KÖNIG HQ unit and all units attached to the Königsberg Corps may not leave the "Königsberg Fortress Area", unless the Russian player occupies the city of Königsberg (hex 60.17). The "Königsberg Fortress Area" is defined as the area bounded to the south-east by the permanent entrenchment line that stretches from Königsberg to Tapiau and Labiau, to the north-west by the Kurisches Haff, the Baltic Sea to Pillau, and then the Frisches Haff, including the four fortress units adjacent to Königsberg.
All units attached to the KÖNIG Corps may be kept off map in the Königsberg Fortress Area Holding Box. They are placed on map when a Russian unit moves adjacent to the "Königsberg Fortress Area," anywhere within the area, at the German player's discretion. No unit may be in the Königsberg Fortress Area Holding Box if a Russian unit is adjacent or within the Königsberg Fortress Area.
All units of formations attached to the Königsberg (KÖNIG) Corps (including non Königsberg Fortress garrison units), that are within the "Königsberg Fortress Area", are always considered to be in Command Control.
-
B. Fortress Graudenz: The following Primary Formations and asset units make up the Graudenz Fortress Garrison: GRAUDENZ, Graudenz, gz lw bd and OBO artillery units bearing the Graudenz designation.
-
10.5 German Artillery and Ammunition
- 10.51 Two Heavy Artillery Units per Corps: The German player is restricted to having no more than two Heavy Artillery Class units attached to a corps (or smaller formation) at any one time. This includes Heavy Artillery Class units attached to divisions or brigades attached to the corps, but not OCUs of Headquarters Class units. EXCEPTION: All Fortress Corps, while stacked upon a Fortress Class Unit or within the fortress city or town, are exempt from this restriction.
- 10.52 Available Ammunition: The maximum quantity of Ammo Points available to German formations is 3. When formations replace APs during the Command Phase of an impulse, they may replace 3 APs per Command Track. (See standard rule 10.44)
- 10.53 German Immobile Batteries: The Artillery Class units with a * Mobility Rating may not move nor change facing. Immobile batteries may expend an unlimited amount of APs per impulse. The German player may disband these batteries during his Mission Order Segment. Disband batteries do not count toward Russian Victory Points.
10.6 German Doctrinal Restrictions
- 10.61 German Entrenchments: The German player is not limited in the ability to construct entrenchments during turns 2 and 3. However, no German unit may begin constructing permanent entrenchments until Turn 4.
- 10.62 German Airplane Units and Artillery Spotting: No German airplane unit may conduct Artillery Spotting until Turn 5.
10.7 German LOC Garrisons
Each army-sized formation has a Line of Communication. (See Standard Rule 2.75.C) The Eighth Army must maintain a minimum of 4 Combat Class SPs in its LOC Box when its LOC extends outside Germany.
- 10.71 8 loc bd: The EIGHTH Army's Line-of-Communications Brigade (8 loc bd) may not be placed on the game map outside of Germany and does not fulfill the requirements of Exclusive Rule 10.7.
10.8 German Isolated Formation Exception
- 10.81 Isolated German Units: An isolated German unit is not penalized until it has been isolated for 2 consecutive impulses. Invert the Command Counter of an isolated German unit on the Army Chart, do not place it on the map. An isolated German unit is not penalized as long as its Command Counter remains inverted on the Army Chart. If a unit is isolated for a second straight impulse, place the inverted Command Counter on the map and treat the formation as isolated per Standard Rule 7.23.G.
10.9 Militia Units
Prussian towns and villages have their own local militia. During Game Turn 2, the moment a Russian unit moves adjacent to an eligible town or village, the German player takes a MC against a ML of 2 to see if the militia will defend the town or village. If successful, place a 1 SP militia unit in the town or village. A militia unit may never move and is eliminated by any LR due to combat (max. one hex pursuit after combat). It is always considered to be in supply.
-
10.91 Eligible Towns and Villages: All towns and villages are eligible until their militia has been eliminated. The militia is eliminated in two ways: 1) through combat, or 2) the town or village has been occupied by a Russian unit. Note on a piece of paper the towns and villages that have had their militia eliminated.
NOTE: The use of militia units is not limited by the counter mix.
11.0 The Russian Armed Forces
11.1 The Russian Supreme Commander
The Russian player represents the Commander of the Northwest Front (NW Front), General Yakov Zhilinsky.
-
11.11 Mission Orders: All Mission Orders (MO) originate with the NW Front Commander.
NOTE: The effect of isolation on the MO procedure is found in Standard Rule 7.13.H.
11.2 Russian Leaders
- 11.21 Army and Corps Leader Replacement and Promotion Events: There are several events that may occur which trigger the replacement and promotion of Russian Army and Corps commanders.
- A. Army HQ Isolated - Scheideman Replacing Samsonov: If the HQ unit of the SECOND Army is found to be isolated during the Russian Command Phase, the leader of the isolated army is replaced, (He commits suicide.) In the Formation Attachment Step following the isolation of the Second army's HQ unit replace the Samsonov (SECOND) leader with the Scheideman (SECOND) leader (the flip-side of the Scheideman II counter). When Scheideman takes command of the Second Army, Slyusarenko takes command of the II Corps. Place the Slyusarenko (II) Leader counter (the flip-side of the Samsonov counter) in the HQHB of the II Corps.
- B. I Corps – Dushkevich Replacing Artamonov: The I Corps commander Artamonov is replaced by Dushkevich during the Formation Attachment Step of the impulse following the replacement of Samsonov by Scheideman or when the Second Army has no corps HQ units (excluding isolated HQs) inside Prussia. Place the Dushkevich (I) Leader counter (the flip-side of the Artamonov counter) in the HQHB of the I Corps.
- 11.22 Artamonov's Special Mission Order Preference: The Artamonov Leader counter has a special Mission Order (MO) preference of Advance/Hold (Adv/Hold). When the I Corps HQ unit is in Russia he has an Advance MO preference. When the unit is in Germany he has the Hold MO preference.
- 11.23 Khan Nakhichevan: The cavalry corps commander Nakhichevan (IC), unlike other cavalry leaders, must participate in a modified MO procedure. All units of cavalry formations attached to the IC are affected by its results. The result of the MO procedure will be either Hold, if the Khan prevails, or Flexible, if his commander prevails.
- 11.24 Russian Staff Officers: The Russian leaders represented by the counters Mileant (FIRST) and Postovski (SECOND) are staff officers. They may not command formations. Their only effect is to add their MO preference (i.e. +1 Hold) to their army commander's MO preference when the Army commander is receiving a MO from the Front Commander during the Mission Order Segment. A Staff officer's attachment may not be changed during the game.
11.3 The Russian Strategic Plan: Modified Schedule 19, Case A
"The Russian plan of campaign provided for an immediate general offensive, without waiting for the arrival of belated troops from the interior of the country" [N. Golovine]. Russia promised France an offensive against Germany on the Northwest Front beginning on M+15.
-
11.31 Strategic Plan Mission Orders (MO): As long as the Strategic Plan is in effect, the NW Front Commander Zhilinsky is restricted in the MOs he may issue his subordinates. He must issue each Army-sized formation under his command the Modified Advance MO through the Mission Order procedure. This restriction is in effect until the NW Front has taken sufficient SP losses to abandon the Strategic Plan (see below). Once the NW Front has taken sufficient SP losses to be allowed to abandon the Strategic Plan, Zhilinsky may issue each Army-sized formation either the Modified Advance MO or the Hold MO through the Mission Order procedure, or he may order the entire NW Front to abandon the Strategic Plan.
NOTE: Strategic formations must be issued the Hold MO through the Mission Order Procedure. (See Standard Rule 3.12.C)
-
A. Special Event - Occupation of Elbing: If any impulse begins with the German city of Elbing (hex 71.24) occupied by a Russian unit, the NW Front Commander may consider the Strategic Plan void and is no longer restricted by any part of Rule 11.3.
-
B. Advance Mission Order - Strategic Plan Modification: Any unit of a Primary Formation on the Advance MO while the Strategic Plan is in force is bound by the following MO modification. The Modified Advance Mission Order is exactly the same as a Regular Advance MO with one significant modification: Units attached to formations on the Modified Advance Mission Order that are in Russia must expend ALL available MPs to move through hexsides designated as Advance hexsides, until an enemy ZOC is entered or the unit enters Germany. (Unit need not Force-March). A unit may not reenter a hex previously occupied during the same March or Counter-March Segment.
-
C. Strength Point Losses and Abandonment of the Strategic Plan: The Strategic Plan may not be abandoned under any circumstances before Turn 4. On Turn 4 and thereafter, if the NW Front has taken sufficient SP losses, the Russian player may abandon the Strategic Plan by announcing its abandonment at the beginning of the friendly Mission Order Segment. The Russian NW Front may abandon the Strategic Plan when 75 SPs have been lost or are currently isolated. SPs lost by Force Marching in the Counter-March Segment are counted.
-
11.4 Special Russian Corps and Units
- 11.41 Reserve Corps: Russian Reserve corps-sized formations may only attach Reserve (r) and Opolchenie (o) formations.
- 11.42 Cavalry Corps: Russian cavalry corps-sized formations may only attach other cavalry (c) formations.
- 11.43 Dragoon Cavalry: All Russian Cavalry and Cossacks are considered Dragoons. Therefore, Russian cavalry strength while attacking is only halved, not reduced to one quarter. (See Standard Rule 10.34.A.1)
- 11.44 Russian Strategic and Corps Asset Units: Units that have the Primary Formation identifier of a corps are considered Corps Asset Units. (See Standard Rule 3.13.E) Corps Asset units may not be reassigned to other formations. Units that have the Primary Formation identifier NW Front, 1st Hvy and 2nd Hvy are considered Strategic Asset Units. (See Standard Rule 3.12.D) There are no restrictions on Strategic Asset unit attachment.
- 11.45 Airplane Unit Attachment: There are no restrictions on airplane unit attachment. Airplane units may be assigned to any formation that has a HQ Holding Box (HQHB). Note that this includes divisions with HQ class units.
11.5 Russian Fortresses and Garrisons
-
11.51 Fortress Garrison Formations: The Russian player has 3 formations with the Primary Formation identifier of a fortress: KOVNO, grodno div, and osowiec div. These formations are considered Fortress Garrison formations and warrant special rules. Units of Russian fortress garrison formations may not voluntarily move more than one hex from the fortress city, town or village they garrison. If such a unit is involuntarily moved more than one hex from the fortress city, town or village, it must move to within one hex during the next friendly March or Counter-March Segment. A unit unable to do so is removed from play and considered to be disbanded. If isolated when disbanded, all SPs and CPs are treated as Prisoner Points.
-
11.52 Fortress Garrisons Requirements: Stavka requires that certain Russian fortresses are garrisoned. To fulfill the requirement, units from Primary Formations with sufficient SPs that do not bear the fortress identifier must be Posted to one of the Fortress Class units of the fortress complex. If a formation attachment is necessary, a Primary Formation's Command Counter must be placed on the Command Track with the Command Counter of the fortress garrison. Two brigade-sized Primary Formations may substitute for a division-sized Primary Formation for purposes of this rule. SPs from any unit may be counted to meet the garrison SP requirements. Units of Primary Formations that are on map but have not been released during the scenario count toward fulfillment of garrison requirements.
- A. Osowiec: The fortress of Osowiec must have at least 5 SPs Posted to it. This requirement may be fulfilled without a Primary Formation being attached to the Osowiec division.
- B. Grodno: The fortress of Grodno must have at least one division-sized Primary Formation and a minimum of 8 SPs Posted to it.
- C. Kovno: The fortress of Kovno must have at least 2 division-sized Primary Formations and a minimum of 16 SPs Posted to it.
NOTE: Additional garrison requirements are found in 11.8 below.
11.6 Russian Artillery and Ammunition
- 11.61 Two Heavy Artillery Units per Corps: The Russian player is restricted to having no more than two Heavy Artillery Class units attached to a corps (or smaller formation) at any one time. This includes Heavy Artillery class units attached to divisions or brigades that are attached to the corps. This rule does not apply to OCU Heavy Artillery Class units attached to corps or division HQ units. EXCEPTION: The Kovno Corps (KOVNO), Grodno division (Grodno div) and Osowiec division (Osowiec div) are exempt from this restriction.
- 11.62 Available Ammunition:
- A. Turns 2 to 4 - 3 Ammo Points: During Turns 2 through 4 the maximum number of Ammo Points available to Russian formations is 3. When formations replace APs during the Command Phase of an impulse, they may replace 3 APs per Command Track. (See standard rule 10.44)
- B. Turns 5+ - 2 Ammo Points: Beginning on Turn 5, the maximum number of APs available to Russian formations is reduced to 2. When formations replace APs during the Command Phase of an impulse, they may replace 2 APs per command track.
11.7 Russian Doctrinal Restrictions
-
11.71 Russian Entrenchments: The Russian player is not limited in the ability of his units to construct entrenchments. However, Russian units may not construct permanent entrenchments at any time.
-
11.72 Russian Airplane Units and Artillery Spotting: Russian Airplane units may not conduct the Artillery Spotting mission.
-
11.73 Russian Wireless Communication: A Russian unit (or dummy unit) inside Germany is immediately revealed if it expends MPs and begins its Movement or Counter-Movement phase within 12 hexes of the German Eighth Army Headquarters unit, if the latter is not concealed. Russian dummy units within 12 hexes of the "unconcealed" Eighth Army HQ unit that are not stacked with a real unit during the Concealment Segment are revealed and removed.
NOTE: The German player should take care not to conceal his Army HQ unit if he wants to benefit from Russian Wireless Communication.
11.8 Russian LOC Garrisons
- 11.81 Army Line Of Communication: Each army-sized formation has a Line of Communication (see Standard Rule 2.75.C). Each Russian army-sized formation must maintain a minimum of four (4) combat class SPs in its Line Of Communication (LOC) Box when its LOC extends outside of Russia.
- 11.82 Civil Garrison - Bialystok: The city of Bialystok (hex 36.41) must have at least one brigade-sized Primary Formation with a minimum of 4 SPs Posted to it. Place the command counter on the Independent Formations track of the NW Front.
THIS IS THE END OF THE EXCLUSIVE RULES. THE FOLLOWING ARE THE SCENARIO RULES, WHICH LIST ALL INFORMATION NEEDED TO PLAY THE SCENARIOS.
12.0 Scenario Explanation
The Cossacks are Coming! contains five scenarios ranging in length from one Combat Phase to 5 turns in length. (Player's will note that no scenario includes Game Turn 1. This is to allow the game to be synchronized with the game Home Before the Leaves Fall.) This "Scenario Explanation" section of the Scenario Rules provides an overview of the 9 parts to each scenario.
-
12.01 Historical Background and Summary Explanation: This contains a brief commentary by the designer on the significance of the scenario. It is assumed that players who want an in-depth assessment will do background reading, so the commentaries have been kept brief.
-
12.02 General Information Explanation: This section describes the map area in play. It informs the players which turn, impulse, and phase a scenario begins with, and in some cases the number of days already used in the Turn. The status of each player's Strategic Plan is noted.
-
12.03 Special Rules Explanation: This section covers any special rules in force during the scenario, such as the availability of various types of points on the Strategic Chart, replacement rates, special supply rules, the number of RR Engineer points (if available), special attachment restrictions, etc.
-
12.04 German Forces Set-Up Explanation: This section lists the location of the various markers and counters to be placed on the German Strategic and Army Charts, as well as the set-up location of German units on the map. (Note that this information may be on a Scenario Set-Up Chart.) The section begins by listing the Strategic Charts and Army Charts to be used in the scenario.
Each Strategic and Army Chart in play is capitalized and underlined (e.g. GERMAN STRATEGIC CHART or EIGHTH ARMY CHART). Below the Strategic Chart's title and information are the specifications for the Strategic Chart Command Tracks. Below an Army Chart's title and information, are the specifications for the Army Chart Command Tracks.
The title of each Command Track is underlined (e.g. XX Corps track).
Any Command Counters to be placed on the Command Tracks are listed.
When a formation is described its formation identifier, found at the top of their counter, is used. The formation identifier is followed by a parenthesized number, the Morale Level for that formation at the time of its entry in the scenario. The parenthesized Morale Level number may be followed by bracketed numbers and letters. These are Strength Point reductions for the formation at the time of its entry into the scenario. The bracketed numerical designation indicates the number of strength points reduced while the letter designation indicates whether the SPs reduced are from a Combat Class unit [-C] or an Artillery Class unit [-A].
13.0 Scenarios in Prussia
13.1 Scenario 1 - The Battle of Stallupönen, August 17
Introductory Scenario - Mutual Combat Phase only.
13.11 Historical Background and Summary
Because the Russian First Army was better organized in peacetime it got off to a quicker start than the Russian Second Army. The main body of the First Army reached the German border on August 16th. The German I Corps commander General Von Francois had deliberately disobeyed orders to wait behind the reconnoitered positions on the Angerapp River and had instead pushed his forward positions right up to the border. The opening battle of the campaign in East Prussia was fought in the vicinity of the town of Stallupönen. Von Francois did not hope to stop the Russian advance with just his corps, but he did seek to throw the Russian advance off balance from the start. What ensued was a confused and see-saw battle. The Russian XX Corps (primarily the 29th Infantry Division) assaulted the town of Stallupönen along with the full III Corps (25th and 27th Infantry Divisions) and got the better of the German 1st Infantry Division there.
13.12 General Information
The function of this scenario is to familiarize players with the combat system. There are many aspects of the game not touched on by this scenario. Don't worry about them, run through this scenario at least once to get a feel for what you can and cannot do with the combat mechanics. This scenario lasts one combat phase.
- A. Map: Only the area described in where to place units is in play.
- B. Game Turn: This scenario takes place on game turn two however only the combat period indicator is used. Place the combat step marker in the Phasing Player Barrage Step box of the Initial Combat Segment of the Mutual Combat Phase Cycle.
- C. Phasing Player: Russian Player.
13.13 Special Rules
All units are in command and supply for purposes of the scenario.
13.14 German Forces Set-Up
Only the Eighth Army Chart is used in this scenario. Place the following command counters on the specified command track in the indicated box. Also place the following units (with markers) on the indicated hex.
EIGHTH ARMY CHART
- I Corps track: I (8), 1 div (9) — 41.19 with Intensive Combat marker. 2 div (8) [-4C,-2A] — 41.21 with Intensive Combat marker.
13.15 Russian Forces Set-Up
Only the First Army Chart is used in this scenario. Place the following command counters on the specified command track in the indicated box. Also place the following units (with markers) on the indicated hex.
FIRST ARMY CHART
- XX Corps track: XX (5) (XX Cav. unit absent), 29 div (5) [-3C] — 40.19 with Intensive Combat marker.
- III Corps track: III (5) (III Cav. unit absent), 25 div (5) — 40.20 with Intensive Combat marker. 27 div (5) [-1C] — 41.20 (facing hex 42.20) with Regular Combat marker.
- IV Corps track: 40 div (5) [-2C] — 40.22 with Regular Combat marker.
13.16 Fortress Units Information
There are no fortress units present in this scenario.
13.17 Unit Releases
None.
13.18 Reinforcements and Withdrawals
None.
13.19 Victory Conditions
For every strength point loss or morale level reduction that a side suffers the opposing player gets one victory point. If the Russian player forces the German player's units out of Stallupönen the scenario is an automatic Russian victory. Otherwise the German player wins if he gets twice as many victory points as the Russian player. The Russian player wins if he gets more victory points than the German player. Any other result is a draw.
NOTE: The German units in Stallupönen will want to exercise the defender combat option of "Stand Fast" (see Standard Rule 10.34.B).
13.2 Scenario 2 - The Battle of Gumbinnen, August 16 - 22
Game turn Two only.
13.21 Historical Background and Summary
The battle of Stallupönen upset General Von Prittwitz's plans for the defense of East Prussia. Prittwitz had planned to defend the reconnoitered line of the Angerapp River against the Russian First Army. Instead, General Von Francois, who had advanced to Stallupönen in defiance of his orders, was now in position in front of Gumbinnen. Prittwitz couldn't allow Francois to engage the Russian First Army alone for a second time. Prittwitz hurled the XVII Corps, the I Reserve Corps and the Königsberg Fortress Division at the advancing First Army. In the north the Russian Cavalry Corps commander, General Khan Nakhichevan, had failed to advance with the rest of the Army uncovering the Russian right flank. The German I Corps with the 1st Cavalry Division brushed the Russian 1st Cavalry Brigade out of the way and hit the 28th Division in the flank and shattered them, the cavalry division advanced to Pillkalen, placing it ten miles in the Russian rear. In the center the XVII Corps hit the Russian III Corps supported by a howitzer group, the Russian barrage and fire defense sent the XVII Corps reeling back with 4,000 to 5,000 casualties. In the south there was a stalemate around Goldap. Prittwitz was unnerved, especially in light of information received from the XX Corps in southern East Prussia that the Russian Second Army was advancing in force. Prittwitz phoned the German Supreme Commander, Von Möltke, and informed him that he was falling back to the Vistula River. Möltke was stunned, his attention was focused on the west where hundreds of German and French divisions were locked in combat, he decided to sack Prittwitz. An elderly German general, Von Hindenburg, was called out of retirement to replace Prittwitz and a chief of staff was found for him, a general by the name of Ludendorff. Ironically enough, Prittwitz's Operations Officer Hoffmann had already put into effect a plan whereby the German corps at Gumbinnen would rail and force-march to the south to face the new threat from the advancing Russian Second Army. When Hindenburg arrived on the scene he merely approved what Hoffmann had planned. Meanwhile General Rennenkampf was as unnerved by Gumbinnen as Prittwitz was. When the German corps withdrew he mistook it for a retreat to the Vistula. He wired his Front commander, General Zhilinsky, and urged him to have General Samsonov march Northwest to intercept the supposedly fleeing German army, instead of marching Northeast to link up with the First Army. The stage was set for the battle of Tannenberg.
13.22 General Information
- A. Map: The eastern half of the game map is in play (inclusive hex row 61.xx).
- B. Game Turn: Place the game turn marker on the second turn. Place the current phase marker on the Russian Mission order Segment. The scenario's length is one game turn and is divided into three impulses of 3-2-2 days in length. Place the Impulse markers on Tues., Thurs. and Sat.
- C. Strategic Plans: The Russian strategic plan has not been abandoned. Zhilinsky, the Russian NW Front commander, must attempt to give the modified advance MO to his subordinates (see Exclusive Rule 11.3). While the German OHL must attempt to give Prittwitz the Flexible MO (see Exclusive Rule 10.12).
NOTE: German OHL commander has a +3 Mission Order Modifier.
13.23 Special Rules
Disregard Rail Points in this scenario, no units may move in rail mode. German units may enter Rail Mode to fulfill victory conditions (once in rail mode remove them from the map). No unit may receive replacements during this scenario.
13.24 German Forces Set-Up
Only the Eighth Army Chart is used in this scenario. Place the following leaders and command counters either in the indicated box or on the specified command track in the indicated box. Also place the following units on the indicated hex or holding box.
EIGHTH ARMY CHART
- Commander Box: Prittwitz.
- Army Staff Box: Hoffmann.
- Mission Order Box: Flexible.
- Main Depot Status Box: Maximum Double.
- LOC Box: 8 loc bd (4).
- Independent Formations track: EIGHTH HQ (8) — 57.24. 2 lw bd (5) — 47.12. 1c div (8) (1 SP motorized-Inf. unit absent) — 41.17. kg lw div (5) — 48.19. 3 r div (6) — 49.27. 6 lw bd (5) — 50.29. lötzen bd (5), Inf. unit [-1C] — 46.29. det k (1 SP from lötzen bd Inf. unit) — 49.27. masurian MG units (one per hex) — 50.29, 51.30, 51.32.
- I Corps track: I (8) Francois — 43.19. 1 div (9) — 41.19. 2 div (8) [-4C,-2A] — 42.22. det a (4 SP from 2 div), det e (2 SP from 2 div) — 42.25. I corps train unit — 44.20.
- I Reserve Corps track: IR (6) Below, 1 r div (7), 36 r div (6), IR corps train unit — 49.24.
- XVII Corps track: XVII (8) Mackensen, 36 div (8) — 48.19. 35 div (8) (attached: 1c div 1 SP motorized-Inf. unit) — 50.21. XVII corps train unit — 53.19.
- Königsberg Corps track: KÖNIG (5) (attached: 5 OBO artillery units with Konig designation), König (5), 1 lw bd (5), kg e div (5) within Königsberg Fortress Area Holding Box.
- Army Supply Class units: Main Depot — 60.18, Army Base — 61.18, Supply Units — 53.22 and 56.26.
Place six (6) Dummy counters anywhere inside Germany at least one hex distance from the Russian border.
13.25 Russian Forces Set-Up
Only the Northwest Front Chart and First Army Chart are used. Place the following markers, leaders, and command counters either in the indicated box or on the specified command track in the indicated box. Also place the following units on the indicated hex or holding box.
NW FRONT CHART
- Commander Box: Zhilinsky.
- Independent Formations track: NW FRONT HQ (5) — 36.41.
- II Corps track: II (5) (II Cav. unit absent), 26 div (5), 43 div (5), II corps train unit — 37.30.
NOTE: No formation other than the II Corps (II, 26 div, 43 div) may have its command counters placed on the Command tracks of the Strategic chart; all other formations must remain on the First Army chart.
FIRST ARMY CHART
- Commander Box: Rennenkampf.
- Army Staff Box: empty.
- Mission Order Box: Advance.
- Main Depot Status Box: Maximum Double.
- LOC Box: det h (1 SP from 27 div), det e (3 SP from 28 div).
- Independent Formations track: FIRST HQ (5) — 37.21. 1c div (5) [-1C], 5 rf bd (5) — 40.26. 1c bd (5) — 37.15. 56 r div (4) (attached: 73 r div Art. unit) — reinforcement.
- I Cavalry Corps track: IC (5) Nakhichevan, 2c div (5) — 38.19. 1gd c div (6), 2gd c div (6) — 38.17. 3c div (5) — 39.19. IC corps train unit — 36.19.
- XX Corps track: XX (5) (XX Cav. unit absent), 29 div (5) [-3C] — 38.18. 28 div (5) [-3C] — 37.17. XX corps train unit — 36.19.
- III Corps track: III (5) (III Cav. unit absent), 25 div (5) — 38.20. 27 div (5) [-1C] — 38.21. III corps train unit — 35.22.
- IV Corps track: IV (5) (IV Cav. unit absent), 30 div (5), det n (1 SP from 1c div) — 39.24. 40 div (5) [-2C] — 38.23. det g (2 SP from 40 div) — 38.24. IV corps train unit — 36.25.
- Independent Units: 3/1st Hvy — 39.19.
- Army Supply Class units: Main Depot — 28.16, Army Base — 25.16, Supply Unit — 36.19.
Place five (5) Dummy counters anywhere inside Russia.
13.26 Fortress Units Information
The following fortress and immobile battery units are in play. See the Scenario 5 Set-up Charts for hex set-up information.
- A. German: Boyen, Schimonken, Nikolaiken.
13.27 Unit Releases
All units attached to the following formations may not move until released during the following segments:
- A. First Impulse, German March Segment: XVII, 36 div (hex 48.19) and 35 div (hex 50.21).
13.28 Reinforcements and Withdrawals
- A. Second Impulse, Russian March Segment: det f (3 SP from 29 div) (hex 36.19 or 38.19). May not be placed adjacent to any German unit.
- B. Third Impulse, Russian Mission Order Segment: 56 r div (hex 36.19 or 38.19). May not be placed adjacent to any German unit.
13.29 Victory Conditions
The German player must have the following formation's units in their indicated locations at the end of the scenario or he loses victory points. I Corps, 1st Infantry Division, 2nd Infantry Division in or west of Insterburg. XVII Corps, 35th Infantry Division, 36th Infantry Division within one hex of Bokellen. I Reserve Corps, 1st Reserve Division, 36th Reserve Division within one hex of Gerdauen. 3rd Reserve Division in Rail Mode. 6th Landwehr Brigade in Rail Mode or within one hex of Lötzen. The German player can move these units to their required location at any time during the game turn, as long as they are in their respective locations or modes at the end of the scenario.
Each player counts each Strength point lost by the enemy as 1 Victory point. Each player counts each Prisoner point on his track as 1 Victory point. For each unit of the First Army west of Insterburg the Russian player gets 1 Victory point. For each German formation that does not fulfill the requirements described below the Russian player receives 5 Victory points. If the German player has twice as many Victory points as the Russian player then the result is a German tactical Victory. If the German player has three times as many Victory points as the Russian player then the result is a German Strategic Victory. If the German player has more Victory points than the Russian, but not twice as many, then the Result is a Russian Tactical Victory. If the Russian player has more Victory points than the German player then the result is a Russian Strategic victory.
13.3 Scenario 3 - The Battle of Tannenberg, August 23 - 31
Game Turn Three and the first impulse of Game Turn Four only.
13.31 Historical Background and Summary
While the Russian First Army spent the first weeks of the campaign marching to the frontier, and engaging in the battles of Stallupönen and Gumbinnen. The Russian Second Army had needed more time to concentrate its forces. Consequently it was not until August 20th that it crossed the frontier. The original plan called for the Second army to advance to a position between Rastenburg and Bischofstein, where it would link up with the First Army. The Russian high command, after receiving news of the battle of Gumbinnen, mistakenly thought the Eighth Army was retreating to the Vistula. Therefore the Second Army was instructed to advance to the position Allenstein-Osterode with the objective of striking towards Elbing where they would cut off the supposedly retreating Eighth army. The Second Army's commanding General Samsonov had wanted to advance in this direction all along so he willingly complied. Meanwhile the newly arrived commander of the Eighth army, General Von Hindenburg, had inherited a situation where the I Corps was moving by rail to the area around Deutsch-Eylau and the XVII Corps, with the I Reserve Corps, had force-marched to the Bartenstein-Bischofstein area. At this time the Russian Second army was widely dispersed with its two flank cavalry divisions, the 15th and 4th, out of touch with Samsonov. The center Corps, XIII, XV, XXIII were hammering the German XX Corps, which fell back. The VI Corps marched to Bischofsburg and was fallen upon by the German XVII and I Reserve Corps which were marching to meet it. The Russian I Corps, the army's left flank guard, was subjected to a fierce attack from the German I Corps supported by the Thorn and Graudenz fortress divisions; the attack forced the Corps to retreat. At this point Samsonov had both his flanks driven in and had lost control of the situation. The Russian center corps, receiving no new orders, relentlessly pressed the attack on the XX Corps. The German I Corps hurled its divisions and cavalry regiments down the road between Neidenburg and Willenberg, while the XVII and I Reserve Corps did the same on the Bischofsburg-Willenberg road. The result was that the Russian center Corps and Army HQ of the Second Army were isolated and destroyed within a matter of days. A relief attempt mounted from Soldau on Neidenburg with the 3rd Guard division, 1st Rifle Brigade and elements of the I Corps came near to relieving the encircled corps, but it was too little too late. Upon completing the destruction of the surrounded elements of the Second army the German corps force-marched away from the field of battle at Tannenberg to drive the First Army from Prussia in the first Battle of the Masurian Lakes.
13.32 General Information
-
A. Map: The area of the map in play is between hex rows 53.xx and 74.xx only (except for the starting locations of the German IR and XVII Corps and Russian SECOND Army Main Depot unit).
NOTE: All units attached to the German IR and XVII Corps must enter the map area in play as quickly as possible.
-
B. Game Turn: Place the game turn marker on the third turn. Place the current phase marker on the Russian Mission Order segment. The scenario's length is one game turn plus one impulse. Game Turn Three is divided into three impulses of 2-3-2 days in length. Place the Impulse markers on Mon., Thurs. and Sat. The first impulse of Game Turn Four is 2 days in length.
-
C. Strategic Plans: The Russian strategic plan has not been abandoned. Zhilinsky, the Russian NW Front commander, must attempt to give the modified advance MO to his subordinates during the first two impulses of turn 3. (see Exclusive Rule 11.3) During the last impulse of turn 3 and first impulse of turn 4 Zhilinsky may attempt to give the modified advance MO or the Hold MO. Prittwitz has been replaced by Hindenburg (see Exclusive Rule 10.1).
13.33 Special Rules
Disregard Rail Points in this scenario. No units may enter or move in Rail Mode during this scenario. No unit may receive replacements during this scenario. All Russian formations, except the I corps, automatically accept the Advance MO during the Mission Order segment of the first impulse. The Russian I corps (I, 22 div and 24 div) has three special rules affecting it: 1) The primary formations 22 div and 24 div may not be detached from the I Corps. Other formations may be attached and are then affected by these special rules; 2) The regular MO procedure is suspended and the I corps is always placed on the Hold MO; 3) The I corps must remain within three (3) hexes of either Soldau (65.37) or Mlawa (63.39).
13.34 German Forces Set-Up
Only the Eighth Army Chart is used in this scenario. Place the following leaders and command counters either in the indicated box or on the specified command track in the indicated box. Also place the following units on the indicated hex or holding box.
EIGHTH ARMY CHART
- Commander Box: Hindenburg.
- Army Staff Box: Ludendorff & Hoffmann.
- Mission Order Box: Flexible.
- Main Depot Status Box: Maximum Double.
- LOC Box: 8 loc bd (4).
- Independent Formations track: EIGHTH HQ (8) (attached: Posen air unit) — 74.26. 3 r div (6) — 61.30. grdz div (5), gz e bd (5) [-1C], 20 lw bd (5) — 66.35. 5 lw bd (5) — 73.36. 1 lw div (5) (attached: OBO Graudenz 1SP 5BF Art. unit) — reinforcement.
- I Corps track: I (8) Francois (attached: OBO Thorn 2SP 5BF Art. unit), 1 div (9) [-3C], 2 div (8) [-3C,-1A] — reinforcement. det b (2 SP from 1 div) — reinforcement. det a (2 SP from 2 div), det e (1 SP from 2 div) — reinforcement.
- I Reserve Corps track: IR (6) O.Below, 1 r div (7) — 53.22. 36 r div (6) — 50.23. 6 lw bd (5) — 49.27. IR corps train unit — 56.24.
- XVII Corps track: XVII (8) Mackensen, 35 div (8) — 50.21. 36 div (8) [-3C] — 51.21. XVII corps train unit — 56.21.
- XX Corps track: XX (8) (attached: Boyen air unit), 41 div (8) — 65.34. 70 lw bd (5) — 64.35. 37 div (8) (attached: 8c div 1 SP motorized-Inf. unit) — 63.34. XX corps train unit — 66.31.
- Army Supply Class units: Main Depot — 74.26, Supply Units — 60.18 and 68.24.
Place ten (10) Dummy counters anywhere inside Germany at least one hex distance from any Russian unit.
13.35 Russian Forces Set-Up
Only the Second Army Chart (i.e. Special NW Front Army chart) is used in this scenario. Place the following markers, leaders, and command counters either in the indicated box or on the specified command track in the indicated box. Also place the following units on the indicated hex or holding box.
SECOND ARMY CHART (use special NW Front Army chart)
- Commander Box: Samsonov.
- Army Staff Box: Postovski.
- Mission Order Box: Advance.
- Main Depot Status Box: Single.
- LOC Box: det a (3 SP from 16 div), det d (2 SP from 4 div).
- Independent Formations track: SECOND HQ (5) — 51.40. 6c div (5) [-1C] — 65.37. 15c div (5) [-1C] — 66.39. 1 rf bd (5) — reinforcement. 3 gd div (6) [-3C] — reinforcement. det f (3 SP from 3 gd div) — reinforcement.
- I Corps track: I (5) Artamanov (I Cav. unit absent), 22 div (5) [-3C], 24 div (5) [-2C] — 65.37. I corps train unit — 62.41.
- XV Corps track: XV (5) (VI Cav. unit absent), 8 div [-5C,-1A] (5), det ag (1 SP from 6c div) — 62.36. det b (5 SP from 8 div), det ad (1 SP from the 8 div) — 60.35. 6 div (5) (attached: NW Front Cav. unit) — 63.36. XV corps train unit — 59.39.
- XIII Corps track: XIII (5) (XIII Cav. unit absent), 1 div (5), 36 div (5), det ah (1 SP from 15c div) — 58.36. XIII corps train unit — 56.40.
- VI Corps track: VI (5) (VI Cav. unit absent), 4 div (5) [-2C], 16 div (5) [-3C] — 57.33. 4c div (5) — 55.34. VI corps train unit — 53.36.
- XXIII Corps track: XXIII (5), 2 div (5) — 63.39. XXIII corps train unit — 61.42.
- Main Depot — 51.40, Supply Unit — 56.43.
Place nine (9) Dummy counters anywhere inside Russia or upon any friendly unit within Germany.
13.36 Fortress Units Information
No fortress or immobile battery units are in play.
13.37 Unit Releases
All units attached to the following formations may not move until released during the following segments:
- A. First Impulse, German March Segment: 5 lw bd (hex 73.36).
13.38 Reinforcements and Withdrawals
- A. German Reinforcements:
- First Impulse, German March Segment: det b (hex 69.33 or 71.32 or 73.30); det a, det e (hex 71.34 or 72.34 or 74.32). May not be placed adjacent to any Russian unit.
- Second Impulse, German March Segment: I, 1 div (hex 69.33 or 71.32 or 73.30); German 2 div (hex 71.34 or 72.34 or 74.32), I corps train unit (hex 73.30 or 74.30). May not be placed adjacent to any Russian unit.
- Third Impulse, German Counter-March Segment: Place the 1 lw div on any railroad station hex that is connected to a double railroad line running between Montowo – Dtsch.Eylau - Allenstein, not adjacent to any Russian unit. Historically hexes 64.31 and 66.31.
- B. Russian Reinforcements:
- First Impulse, Russian Counter-March Segment: det f (hex 63.39).
- Second Impulse, Russian March Segment: 3 gd div [-3C], 1/2nd Hvy (hex 63.39).
- Third Impulse, Russian March Segment: 1 rf bd (hex 63.39 or 64.38). May not be placed adjacent to any German unit.
13.39 Victory Conditions
The Russian player receives 5 victory points for occupying each one of the following towns at the end of any impulse: Allenstein, Osterode and Deutsch-Eylau. In addition, each player counts each Strength point lost by the enemy as 1 Victory point.
If the German player has twice as many victory points as the Russian player the result is a tactical Victory. If the German player has three times as many victory points as the Russian player then the result is a strategic victory. If the German player has more Victory points than the Russian player, but not twice as many, then the result is a Russian tactical victory. If the Russian player has more Victory points than the German player then the result is a Russian Strategic Victory.
13.4 Scenario 4 - The First Battle of the Masurian Lakes, September 6 - 17
Game Turn Five and the first two impulses of Game Turn Six only.
13.41 Historical Background and Summary
While the Battle of Tannenberg had raged to the south, Rennenkampf had been advancing slowly but steadily across northern East Prussia. His advanced cavalry units had reached the area of Wormditt and Allenstein. When he received word of the debacle of the Second Army he immediately called in his cavalry and took up an entrenched position between Taplau and Angerburg, a reinforced division masking the Lötzen defile. Further south the newly arrived Tenth Army was just beginning to concentrate its units, it only had two Finnish rifle brigades in Germany, covering the entrances to the southern Masurian Lakes. The approaching Eighth army was at the height of its strength. The formations which had fought at Tannenberg had high morale, and two new Corps with a cavalry division had arrived from France. The German plan of battle was to move two Corps and two Cavalry divisions through the Masurian Lake defiles to unhinge the First Army's left flank and separate it from the Tenth Army. The rest of the Eighth Army was to launch a massive frontal assault on the entrenched line of the First Army. On September 7th the German forces struck out from the lake district, driving the weak Russian forces back. By the 9th the German XVII and I Corps, with the 1st and 8th Cavalry divisions, were within 15 miles of Maggrabowa. The way for them to advance toward the Kovno-Stallupönen railroad line was clear, a disaster larger than Tannenberg loomed for the First army. Rennenkampf, however, quickly grasped the situation and began a general retreat in order to avoid encirclement. Hindenburg then made a grave error. Instead of ordering the corps turning Rennenkampf's left flank to march on Wierzbolowo (Virbalis), he ordered them to turn sharply north toward Goldap. The Russian II and IV Corps, along with elements of the 1st Heavy Artillery Brigade, delivered a sharp counterattack near Darkehmen that temporarily threw the advancing German XX Corps back. The Russian First army then began force-marching every unit to its maximum ability. Tens of thousands of troops fell out during the march, and were captured, but Rennenkampf was able to pull the First army back to the Nieman River intact. Hindenburg pursued aggressively, however now that Prussia was safe the decision was made to move to the aid of Germany's Austrian ally. The Germans quickly withdraw the bulk of their troops to the south.
13.42 General Information
- A. Map: The area of the map in play is all hex rows east of 65.xx inside Germany and all hex rows east of 50.xx inside Russia.
- B. Game Turn: Place the game turn marker on turn five. Place the current phase marker on the German Counter March Segment. The scenario's length is one game turn plus two impulses. Game Turn Five is divided into three impulses of 3-2-2 days in length. Place the Impulse markers on Tues., Thurs. and Sat. The first impulse of Game Turn Six is 2 days in length, the second impulse is 3 days in length.
- C. Strategic Plans: The Russian strategic plan has not been abandoned. However the number of LRs required to abandon the plan has been exceeded therefore the NW Front commander Zhilinsky, until abandoning the Strategic plan, may attempt to give the modified advance MO or the Hold MO to his subordinates (see Exclusive Rule 11.3). Prittwitz has been replaced by Hindenburg (see Exclusive Rule 10.1).
13.43 Special Rules
No unit may receive replacements during this scenario. Disregard Rail Points in this scenario. No units may enter or move in Rail Mode during this scenario. The following Railroad line hexes have been prepared by Russian RR engineers to Friendly Operational and may be used to trace supply: All hexes on the Double-Track line between 48.19 (Insterburg) and 39.19 (on the border).
NOTE: The Russian player must abide by Exclusive rule 11.5 – Russian Fortresses.
13.44 German Forces Set-Up
Only the Eighth Army Chart is used in this scenario. Place the following leaders and command counters either in the indicated box or on the specified command track in the indicated box. Also place the following units on the indicated hex or holding box.
EIGHTH ARMY CHART
- Commander Box: Hindenburg.
- Army Staff Box: Ludendorff & Hoffmann.
- Mission Order Box: Advance.
- Main Depot Status Box: Maximum Double.
- LOC Box: 8 loc bd (4).
- Independent Formations track: EIGHTH HQ (8) (attached: Posen air unit) — 61.30. 1c div (8) (one brigade absent) — 55.26. 8c div (8) — within two hexes of 66.28. lötzen bd (5) — 49.27. masurian MG units (one per hex) — 50.29, 51.30, 51.32. 1 lw div (5) (attached: OBO Graudenz Art. unit) — 62.38. ls XX Inf. unit (MG unit absent) — 49.33. 18 lw div (5) — reinforcement.
- I Corps track: I (9) Francois (attached: OBO Thorn 5BF Art. unit), 2 div (9) [-1C] — 56.33. 1 div (9) [-1C] — 54.34. 3 r div (7) (attached: one 1c div 2 SP Cav. unit) — 54.35. I corps train unit — 57.33.
- I Reserve Corps track: IR (6) Below (attached: Boyen air unit, det y (1 SP from OBO Thorn 4BF Art. Unit), det v (1 SP from OBO Marienburg 5BF Art. unit)), 1 r div (7) [-1C], 36 r div (6) [-1C] — 60.25. 6 lw bd (5) — 61.25. IR corps train unit — 62.25.
- XVII Corps track: XVII (8) Mackensen, 35 div (8) [-1C], 36 div (8) [-1C] — 56.30. XVII corps train unit — 57.29.
- XX Corps track: XX (8) (attached: OBO Thorn 4BF Art. unit [1A]), 37 div (8) [-1C], 41 div (8) [-1C] — 57.28. XX corps train unit — 61.30.
- Guard Reserve Corps track: GD R (8), 1 gd r div (7) — 64.23. 3 gd div (9) — 62.22. GD R corps train unit — 68.24.
Place ten (10) Dummy counters upon any German units.
13.45 Russian Forces Set-Up
The Northwest Front Chart and the First and Tenth Army Charts are used in this scenario. Place the following markers, leaders, and command counters either in the indicated box or on the specified command track in the indicated box. Also place the following units on the indicated hex or holding box.
All Russian units in the front line between hexes 53.15 and 46.27 (inclusive) are placed with entrenchment markers.
NW FRONT CHART
- Commander Box: Zhilinsky.
- Independent Formations track: NW FRONT HQ (5) — 36.41. grodno div (4), 76 r div [-3C] (art. unit absent)— 29.33. osowiec div (4) — 40.36. det y (2 SP from 68 r div) — 47.12.
- KOVNO Corps track: KOVNO (4), Kovno (4), 73 r div (4) (Art. unit absent), 68 r div (4) [-2C] — 28.16.
NOTE: No formations other than fortress garrisons (i.e. fortress corps and divisions and attached formations) may have their command counters placed on the Command tracks of the Strategic chart; All other formations must remain on the Army charts.
FIRST ARMY CHART
- Commander Box: Rennenkampf.
- Army Staff Box: Mileant.
- Mission Order Box: Hold.
- Main Depot Status Box: Maximum Double.
- LOC Box: det e (3 SP from 28 div), det ba (2 SP from 1 gd c div).
- Independent Formations track: FIRST HQ (5) — 48.19. 1c div (5) — 47.24. 1gd c div (6) [-2C], 2gd c div (6) — 49.23. 54 r div — 48.19. 72 r div — 46.22. 57 r div — 50.23.
- I Cavalry Corps track: IC (5) Nakhichevan, 2c div (5), 3c div (5) [1C] — hexes 51.21 and 50.22. IC corps train unit — 50.21.
- II Corps track: II (5) — 48.25. 26 div (5) [-5C] — 49.24. det a (5 SP from 26 div) — 50.24. 43 div (5) [-5C], det ao (3 SP from the 76 r div; attached: art. unit 76 r div) — 48.26 and/or 47.26. det f (3 SP from 43 div) — 48.28. det g (2 SP from 43 div) — 47.30. II corps train unit — 46.25.
- III Corps track: III (5), 3/1st Hvy — 51.19. 25 div (5) [-1C] — 53.19. 27 div (5) [-2C] — 53.20. III corps train unit — 48.19.
- IV Corps track: IV (5) — 52.22. 30 div (5) [-1C] — 53.22. 40 div (5) [-1C] — 53.21. 5 rf bd (5) — 52.23. IV corps train unit — 50.21.
- XX Corps track: XX (5) — 52.17. 29 div (5) [-2C], 1/1st Hvy, 2/1st Hvy — 52.18. 28 div (5) [-6C] — 53.17. XX corps train unit — 50.19.
TENTH ARMY CHART
- Commander Box: Pflug.
- Army Staff Box: empty.
- Mission Order Box: Hold.
- Main Depot Status Box: Medium Double.
- LOC Box: empty.
- Independent Formations track: TENTH HQ (6) — 40.36 (Osowiec).
- XXII (Finnish) Corps track: XXII (6), 2 f rf bd (6), det l (2 SP from 3 f rf bd) — 43.30 (Lyck). 3 f rf bd (6) [-3C] — 47.30 (Arys). 1 f rf bd (6) [-2C], det h (1 SP from 3 f rf bd) — 46.33 (Bialla). det k (2 SP from 1 f rf bd) — 42.33 or 44.34. 4 f rf bd (6) — within one hex of 41.32. XXII corps train unit — 42.33.
- III Siberian Corps track: III S (6) Radkevich, 8 s div (6) [-5C] — 40.36. det b (4 SP from 8 s div) — 42.35. det c (1 SP from 8 s div) — 48.36. 7 s div (6) — reinforcement.
- I Turkestan Corps track: I T (6), 1 tk rf bd (6) — 47.39 (Lomza). 2 tk rf bd (6), 3 tk rf bd (6) — reinforcement.
- Army Supply Class units: Main Depot — 36.41, Army Base — 36.47.
13.46 Fortress Units Information
The following fortress and immobile battery units are in play. See the Scenario 5 Set-up Charts for hex set-up information.
- A. German: 4xKönigsberg, Pillau, Boyen, Schimonken.
- B. Russian: 4xKovno, Olita, 2xGrodno, 2xOsowiec, 2xLomza.
- C. Destroyed Permanent Entrenchments: The following Permanent Entrenchments printed on the map have been destroyed and no longer convey any defensive benefit: hex 51.32 and 51.30.
13.47 Unit Releases
All units attached to the following formations may not move until released during the following segments:
- A. Game Turn Five, Third Impulse, Russian March Segment: 1 tk rf bd (hex 47.39).
13.48 Reinforcements and Withdrawals
- A. German Reinforcements: Game Turn Five, Second Impulse, German Counter-March Segment: 18 lw div — hex 60.17 (Königsberg).
- B. Russian Reinforcements:
- Game Turn Five, Second Impulse, Russian March Segment: det d (5 SP from 7 s div) — hex 48.47.
- Game Turn Five, Third Impulse, Russian March Segment: 2 tk rf bd – hex 48.47.
- Game Turn Six, First Impulse, Russian March Segment: IT (corps train unit absent) – hex 48.47; 7 s div [-5C] (Art. unit absent) – hex 48.47.
- Game Turn Six, Second Impulse, Russian March Segment: 3 tk rf bd – hex 48.47; 7 s div Art. unit – hex 48.47.
13.49 Victory Conditions
The Russian player receives 5 victory points for occupying each one of the following towns (may not be isolated) at the end of the game: Insterburg, Gumbinnen, Tilsit, Suwalki and Wilkowiszki. In addition, each player counts each Strength point lost by the enemy as 1 Victory point.
If the German player has twice as many Victory points as the Russian player the result is a tactical Victory. If the German player has three times as many victory points as the Russian player then the result is a strategic victory. If the German player has more Victory points than the Russian player, but not twice as many, then the result is a Russian tactical victory. If the Russian player has more Victory points than the German player then the result is a Russian Strategic Victory.
13.5 Scenario 5 - The Tannenberg Campaign, August 16 - September 19
Game Turn Two thru Game Turn Six.
13.51 Historical Background and Summary
The battles of Tannenberg and the Masurian Lakes were crushing defeats for the Russians, but strategically they merely relieved the pressure on the Germans for a while.
13.52 General Information
- A. Map: The area of the map in play is all hex rows east of 79.xx excluding all hexes west of the Vistula River.
- B. Game Turn: Place the game turn marker on turn 2. Place the current phase marker on the Strategic phase. The scenario's length is five game turns.
- C. Strategic Plans: Neither the Russian nor German strategic plans have been abandoned. Zhilinsky, the Russian NW Front commander, must attempt to give the modified advance MO to his subordinates (see Exclusive Rule 11.3). While the German OHL must attempt to give Prittwitz the Flexible MO (see Exclusive Rule 12.2).
13.53 Special Rules
- The Russian player automatically has the initiative on Game Turn Two. Game Turn Two must consist of three impulses with the first impulse consisting of two days duration and the remaining two impulses (five days) composed of any combination of days with at least one day to an impulse.
- A Maximum of two (2) corps (excluding fortress corps) may be placed upon the Russian Strategic Chart at any one time.
- Replacement rates: Both sides begin receiving replacement points starting on turn 4. The German receives 6 infantry, 1 field artillery and 1 specialist Replacement per turn. The Russian receives 10 infantry, 2 field artillery and 1 specialist Replacement per turn.
- Air unit replacement rates: 2 German, 1 Russian per turn.
- Rail Points per game turn: German 30, Russian 10.
- RR Engineer points per day: German, turns 2-5 = 1, turn 6 = 2; Russian = 1.
13.54 German Forces Set-Up
See the Scenario 5 Set-up Charts.
13.55 Russian Forces Set-Up
See the Scenario 5 Set-up Charts.
13.56 Fortress Units Information
All fortress and immobile battery units are in play. See the Scenario 5 Set-up Charts.
13.57 Unit Releases
See the Scenario 5 Set-up Charts.
13.58 Reinforcements or Withdrawals
See the Scenario 5 Set-up Charts.
13.59 Victory Conditions
The Russian player receives 5 victory points for each German town and 10 VP for each German city controlled at the end of each impulse. In addition, each player counts each Strength point lost by the enemy as 1 Victory point.
If the German player has twice as many Victory points as the Russian player the result is a tactical Victory. If the German player has three times as many victory points as the Russian player then the result is a strategic victory. If the German player has more Victory points than the Russian player, but not twice as many, then the result is a Russian tactical victory. If the Russian player has more Victory points than the German player then the result is a Russian Strategic Victory.
If the Russian player abandons his strategic plan prior to turn 5 the level of victory is shifted one level to the German Player's favor. If the Russian player has not abandoned his strategic plan by the end of game turn 6 the level of victory is shifted one level to the Russian Player's favor.
Transcriber's note: the Scenario 5 unit set-up, unit release and reinforcement tables are printed on separate Scenario 5 Set-up Charts, which are not part of either PDF. Those sections are therefore given above only as the rules direct them. The rulebook's printed "Table of Contents" and "Bibliography" are navigational and reference material and are not transcribed.