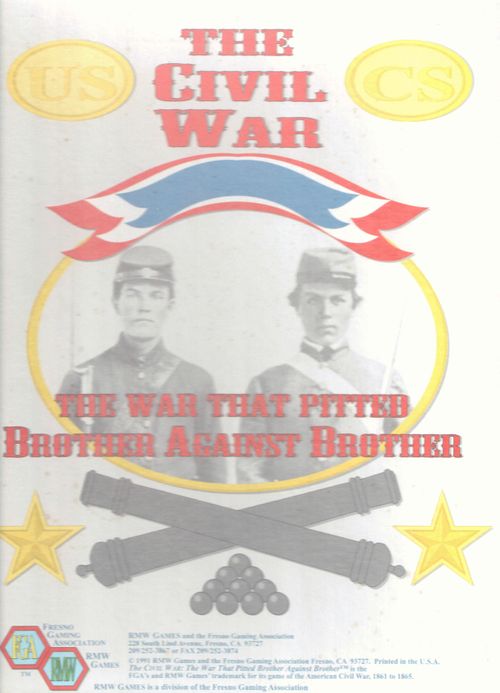
The Civil War: The War That Pitted Brother Against Brother
The Civil War: The War That Pitted Brother Against Brother Rulebook
Table of Contents
Table of Contents
- 1.0 Introduction
- 2.0 Components
- 2.1 Terms
- 2.1.1 Bombardment Rating
- 2.1.2 Combat Results Table (CRT)
- 2.1.3 Die Roll Modifier (DRM)
- 2.1.4 Force
- 2.1.5 Garrison
- 2.1.6 Human Point (HP)
- 2.1.7 Independent Force (IF)
- 2.1.8 Improved Position (IP)
- 2.1.9 Leadership Value (LV)
- 2.1.10 Movement Allowance (MA)
- 2.1.11 Resource Point (RP)
- 2.1.12 Strength Point (SP)
- 2.1.13 Terrain Effects Chart (TEC)
- 2.1.14 Table of Organization and Equipment (TO&E)
- 2.1.15 Zone of Control (ZOC)
- 2.2 The Rules
- 2.3 The Map
- 2.4 The Playing Pieces
- 2.5 The Die
- 2.6 Player Aid Cards Errata
- 2.1 Terms
- The Standard Game
- 3.0 Sequence of Play
- 4.0 Initiative Determination and Player Actions
- 5.0 Political Events and Political Track Adjustments
- 6.0 Leader Selection, Casualties, and Promotion
- 7.0 Production
- 8.0 Seasonal Effects
- 9.0 Supply
- 10.0 Navies
- 11.0 Forrest and Custer (Optional)
- 12.0 Play Balance (Optional)
- 13.0 Setting Up
1.0 Introduction
THE CIVIL WAR, The War That Pitted Brother Against Brother is a game covering the entire American Civil War from its beginning in 1861 until its conclusion in 1865. Rules for maneuver and production are the main features in this three-map monster game.
THE CIVIL WAR is designed as a game, not as a simulation. The Fresno Gaming Association does not design or publish simulations. The FGA does not concern itself with such minutiae as how many mules it takes to move a cannon or to carry a day's rations for any given corps in different theaters of operations. If you are looking for that sort of simulation-style detail, then please look in the pages of future issues of the FGA's board gaming magazine, the Boardgame Journal for articles and variants.
We tried to be as accurate as possible with the order of battle, production capacities, and the scenario information. We feel that we have created a game that allows you to learn about the historical realities of the campaign and is also fun to play. If the game looks good, feels good, tastes good, and you are having fun, then we have succeeded in our goal. But please remember the game now belongs to you. You paid for it. The rules are not written in stone. If you see something you want to change, change it. If you find something that is interesting or worthwhile, write to us and we will include it in the Boardgame Journal as an optional rule or as an additional scenario. The important things are that you enjoy your purchase and that you're having fun.
2.0 Components
Each copy of THE CIVIL WAR includes:
A. Three 22"x34" game maps B. 960 Back-printed playing pieces C. One Rule/Scenario/Historical Commentary booklet D. Thirteen Player-Aid cards E. One ten-sided die
2.1 Terms
This game uses many terms that are easily abbreviated by using standard wargame shorthand. These abbreviations can sometimes be daunting for a beginner. If you are an old hand, skip to the next section, but if you are just starting out in wargaming, you might find a quick examination of this section helpful.
2.1.1 Bombardment Rating
The firepower capacity of naval units. The rating is used by the attacking player during combat.
2.1.2 Combat Results Table (CRT)
The CRT is used to resolve combat between opposing forces by comparing their strengths and rolling a die to determine which of several possible outcomes to apply.
2.1.3 Die Roll Modifier (DRM)
A DRM affects the result derived on the CRT or other tables by reducing or increasing the natural die-roll to a lower or higher result. This method is used to more accurately reflect certain advantages or disadvantages inherent in certain military situations.
2.1.4 Force
An Army or Independent Force. A stack of strength points which does not qualify as an independent force is not included in this definition.
2.1.5 Garrison
An immobile stack of SPs subject to stacking limits. Garrisons are found in cities, but could be stacks of SPs dropped off in non-city hexes by a force.
2.1.6 Human Point (HP)
This is an abstract quantification of the number of men used to create a military unit. These are also referred to as Personnel Points.
2.1.7 Independent Force (IF)
An Independent Force takes the place of the small armies and corps that were active for short periods during the Civil War. Many of these so-called armies were in fact oversized corps or divisions and had short lives.
2.1.8 Improved Position (IP)
This is a marker denoting the presence of earthworks, trenches, or other field-expedient improvements to the defensive lines of a unit. An IP represents every type of improvement short of concrete fortifications with revetments, etc. They are listed as entrenchments on the Production Points Chart.
2.1.9 Leadership Value (LV)
A quantification of a specific leader's effectiveness in leading troops, especially in battle. This number is used as a DRM (always subtracting) in various situations but especially when resolving battles.
2.1.10 Movement Allowance (MA)
The movement capacity, measured in Movement Points (MPs) of the unit during one Action Phase. It is a quantification of the ability of men to move from one point to another in a fixed span of time.
2.1.11 Resource Point (RP)
This is abstract quantification of the money and raw materials used to create a military unit or installation.
2.1.12 Strength Point (SP)
A quantification of the strength used when a unit is engaging in combat. In this game, one SP equals 500 men.
2.1.13 Terrain Effects Chart (TEC)
This chart is used to reflect differences in terrain and how it affects the movement and combat capabilities of the units represented in the game. Combat is affected by DRMs, and movement is affected by changing the number of MPs required to enter a given hex.
2.1.14 Table of Organization and Equipment (TO&E)
This is a term used extensively in the twentieth-century American Army. What it means is the paper strength of a unit: that is the number of people and weaponry a unit is authorized to have in its organization. Of course, actual strength generally varies, sometimes greatly, from TO&E strength.
2.1.15 Zone of Control (ZOC)
A ZOC consists of the six immediately adjacent hexes surrounding a hex. Sometimes terrain variations will prevent a unit in one hex from projecting a ZOC into the adjacent hex. For example, a land unit on a coastal hex does not project a ZOC into the ocean hexes immediately adjacent to it.
2.2 The Rules
A. The rules are written so as to follow the sequence of play as closely as possible. Many rules sections are written in an outline manner and are further defined and detailed in the Examples of Play, on the Player Aid Cards, and on the Maps. Unit definitions and symbology are found on the Game Maps.
B. Always round up fractions or decimals to the next whole number. For example; .0001 = 1, 1.22 = 2, 7.837 = 8, etc.
2.3 The Map
2.3.1 In General
A. The maps represent the terrain over which the war was fought. The scale is approximately 13 miles per hex.
B. Each hex contains only one type of predominate terrain except where superimposed by roads.
C. The TEC explains the effects of terrain on movement and combat.
D. The map is divided into three theaters of operations (called departments during the war): The East, the West, and the Trans-Mississippi.
E. Some of the terrain does not fill a hex or extend the length of a hex spine. Consider them to do that.
2.3.2 Errata
2.3.1.1 Map Section A
A. The Level-2 (3/+1) Confederate fortification should be placed in A3723 and not A3722.
B. Hexspine 4614/4715 incorrectly shows a Head of Navigation symbol. This symbol should be placed at hexspine 4615/4715.
C. The state of Kentucky is not labeled.
2.3.1.2 Map Section B
A. The level-3 (5/+2) Union fortification should be placed in B4121 and not B4020.
B. Hexspines 2225/2325, 2325/2425, and 2425/2526 show a Head of Navigation symbol. There should also be Head of Navigation symbols at hexspines 2121/2221 and 2322/2422 to reflect that no naval movement is allowed along these rivers.
C. Ignore the Head of Navigation symbol at the hexspine between 0807/0808.
D. Proctersville (Louisiana) is misspelled. It should be Proctorsville.
2.3.1.3 Map Section C
The Level-3 (5/+2) Union fortification should be placed in C3017 and not C3118.
2.4 The Playing Pieces
A. There are two types of playing pieces (also called counters): units and markers.
B. Units represent the actual combat units (ground and naval) involved in the battles.
C. Counters display information about a unit's organization (in the case of leader or organizational units); or, in the case of strength-point counters, the size and combat strength are indicated.
D. Markers are placed on the mapboard at various times to indicate unit conditions.
E. Confederate and Federal Fleet Land TO&Es and Federal Fleet TO&Es may use any type of SP marker to indicate SP totals of the correct type. The graphics depictions on the SP markers are artistic in nature only and do not indicate the type of unit as such. They are simply SPs and can be used for any unit type.
Example: Ironclad counters could be used to show 10 ocean naval SPs or 10 cavalry units by placing them in the correct box on the TO&E chart.
F. Confederate naval SPs and any land unit SP when placed on the map (garrisons) must use the correct marker type. Confederate naval SPs are as shown on the counters; ironclads are ironclads, etc.
G. Errata: On counter sheet 9103-3B (back), a 15 SP Union marker shows the infantry symbol as green; it should be yellow. This in no way affects play.
2.5 The Die
The game uses a ten-sided die. The number 0 is read as 10, instead of 0.
2.6 Player Aid Cards Errata
2.6.1 Player Aid Card 9
Naval CRT: Results of I or 2 should read "One (or Two) Naval SPs lost" rather than "Federal."
2.6.2 Player Aid Cards 11 and 12
Add one more combat DRM: Apply a -1 DRM to any IF or army in which 50% or greater are line infantry SPs. (This is the difference between line infantry SPs and militia SPs.)
2.6.3 Tactical Combat Matrix
See new Charts and Tables.
The Standard Game
THE CIVIL WAR is played in a series of game-turns, representing one week of real time. Each turn, the players perform actions according to the sequence of play. After the players have completed their moves, combat, and production, if any, the turn ends. Move the Game-Turn marker to the next space on the Turn-Record Track, and begin a new turn.
3.0 Sequence of Play
A. Action Phase
- Determine Initiative
- First side performs one Action (4.0)
- Second side performs one Action (4.0)
- Repeat Steps 2 and 3 above until all actions have been completed.
B. Administrative Phase
- Make adjustments to the Political Track.
- Check for leader promotion.
C. Production Phase
- Build and place new units on the map.
- Pick new leader units every odd-numbered turn.
- Designate armies and IFs.
D. Advance Turn-Record Marker
3.1 Stacking
3.1.1 Garrison Stacking Limits
A. No Confederate garrison may exceed 16 SPs. B. No Union garrison may exceed 20 SPs.
3.1.2 Garrison Stacking with Armies or IFs
A. Garrisons may stack with friendly Armies or IFs in friendly cities. The garrison is considered to be inside the city, while the force is outside the city. B. The force must be eliminated or otherwise vacate the hex before the enemy can attack the garrison. C. It is possible to engage both a garrison and a force in the same hex in one Combat Sequence via multiple rounds of combat.
3.1.3 Cities Without Garrisons
If a city hex has no garrison, then the friendly force may declare itself to be inside the city for combat purposes.
3.1.4 Army/IF Stacking Limits
A. There are no stacking limits for forces as such. Instead, the armies are limited to a fixed number of SPs. See the TO&E charts for each army. B. This limitation serves as a function of both supply and of administrative restrictions. C. IFs may contain SPs up to the limit allowed by their leader's rank. D. No more than one force may be in any hex at the end of any movement action. E. Armies and IFs may not stack together. An army may, however, absorb an IF into its ranks (4.1.4). F. Each side is allowed five armies and five IFs on the map at any given time.
3.1.5 Naval Stacking Limits
A. There are no stacking limits for naval forces. B. The Union player is limited to twenty fleets on the map at any given time.
3.2 ZOCs
3.2.1 In General
A. Each force exerts a ZOC into each adjacent land or coastal hex. B. Naval units and game markers do not exert ZOCs.
3.2.2 Effects on Movement
A. Units may move into or through ZOCs with no movement penalty. B. ZOCs prevent enemy rail movement.
3.2.3 Effects on Retreats
A. Units may not retreat into an enemy ZOC unless no other route is available. B. If a unit must retreat into an enemy ZOC, it must continue retreating until it is able to end its retreat in a hex free of enemy ZOCs. C. If the force cannot retreat for any reason, it loses 10% of its strength (round fractions up) and remains in place. D. If a force outnumbers an opposing force by 10:1 or more, and no other retreat path exists, it may retreat into the enemy-held hex and overrun the enemy force (4.1.5). The enemy SPs are eliminated as if they had been by a combat result.
3.3 Placement of Armies, IFs, and Fleets
3.3.1 Leader Required
A. Each army and IF must have at least one leader in its TO&E to function. In other words, any group of SPs may stack with a leader and be designated a force. B. Once an army is placed, its marker may not be removed from the map unless it is destroyed in combat.
3.3.2 Designating and Undesignating IFs
A. An IF may be designated and undesignated at the owning side's option.
Example: During the Production Phase of Turn 12, the Union may designate a stack of SPs and a leader as an IF and so indicate by placing one of the IF markers on the map. Then, during the Action Phase of Turn 13, the Union can use the IF to perform any of the actions allowed by the rules. Then, during the Production Phase of Turn 13, the Union may undesignate that IF and redesignate a completely different stack of SPs with a leader as an IF, even if the new stack is in a different theater.
B. During the Production Phase, an IF may be designated by detaching a corps from an existing army, complete with its leader, and displacing it into any adjacent hex not occupied by the opposing player's units.
3.3.3 Fleet Placement
Fleets are placed just like army markers and behave exactly the same except that they operate on water instead of on land. They are not treated as IFs.
4.0 Initiative Determination and Player Actions
A. At the beginning of each turn, each side rolls one die.
- The side rolling the lower number has the option of performing the first action.
- In case of a tie, the side with the initiative the previous turn retains it.
- If a tie occurs on Turn 1, roll until the two sides roll differently.
B. Once a side passes in lieu of performing an action, it may perform no other actions for the rest of that Action Phase.
C. Each side may perform several different actions with its armies, fleets, and IFs.
D. Naval forces are discussed in the Naval Rules (10.0). The remainder of the rules in this section pertains only to land forces.
E. The actions each side may perform are:
- Movement
- Combat
- Reconnaissance
- Improve Positions
- Raze Production Cities (1864 and later)
F. Each force may perform two actions per turn with the following restrictions:
- No force may declare and fight (offensive combat) more than one combat (one to seven combat rounds) per turn. A force may fight any number of defensive combats in a turn.
- No force may perform any action at all unless it contains at least one leader counter. (See effects of leader casualties, 6.4.)
G. A force may perform two movement actions per turn.
4.1 Movement
4.1.1 In General
A. Each force any number of hexes up to its MA. (See Movement Capabilities Chart.)
B. A force composed of both infantry and cavalry may only stay together if it moves at the same speed, that is, at the movement rate for infantry.
C. A unit expends MPs when moving through a hexside into an adjacent hex, paying the cost of terrain in the hex entered and/or the hexside crossed.
D. A unit may never skip over a hex.
E. If a hex contains terrain with a cost higher than the moving unit's remaining MA, it may not be entered.
F. Regardless of the circumstances, any unit with a nonzero MA may always move at least one hex in its Action Phase unless prohibited by the TEC.
4.1.2 Forced March
A. A forced march may increasing the MA for infantry and cavalry by one.
B. Leaders may not force march by themselves.
C. When performing a forced march with a force, roll for attrition on the Forced-March Table, applying all appropriate DRMs.
4.1.3 Restrictions
A. Ground units only enter all-water hexes when being transported by naval transport units.
B. No SP may move unless it is part of a force. Exception: Rail Movement (4.2).
4.1.4 Absorbing IFs into an Army
A. An IF may be absorbed (fused) into an army by moving one of the stacks into the same hex as the other.
B. When doing this, both stacks are charged with having performed an action. Thus an army and IF may not join together if either has already performed one action.
C. Remove the IF marker from the map. It is available for placement in the upcoming Production Phase of the same turn.
D. This is an exception to the general restrictions on the placement and removal of IFs.
E. Fusing may not take place unless the army has room in its ranks (space on its TO&E chart) for the SPs and the leader from the IF that is fusing with it.
4.1.5 Overrun Movement
If a force outnumbers an opposing stack by 10:1 or more, then it may move through the enemy-held hex at the cost of an additional MP. The enemy stack is treated as if it had been eliminated in combat.
4.2 Railroads
4.2.1 Rail Movement
A. The Rail Capacity for each side is 15% of its RP total for that turn, rounding fractions down and ignoring blockade RPs.
B. Rail movement may be performed in conjunction with normal movement. To do this, move the leader, army, or IF to a rail line and then move a number of SPs equal to or less than the Rail Capacity for the appropriate side.
C. SPs transported by rail movement may move up to 60 hexes provided that they never leave a rail line and the rail line does not pass through enemy ZOCs.
D. More than one group of SPs may move by rail provided that the total number of SPs so moved does not exceed the Rail Capacity.
E. Leaders may make use of rail movement at no Rail Capacity cost.
F. SPs may use rail movement without being formed into a force, even if they have no leader to accompany them. When doing so, the SPs may not leave the rail line. They may not combine normal movement with rail movement.
G. Rail movement is considered two actions; therefore, a force may not use rail movement and declare combat in the same turn.
H. As rail movement is a two-action option, no force may fuse and use rail movement in the same Action Phase.
4.2.2 Railroads West of the Mississippi (Optional)
Because the rail net in this area was not as extensive (mostly non-existent), each ground combat SP costs 3 RPs against the area's rail capacity.
4.2.3 Railroads and River Crossings
Some railroads cross rivers with the bridge symbol missing. Consider the bridge symbol to be there.
4.2.4 Breaking and Repair of Railroads
A. It costs one additional movement point to break a railroad.
B. Railroads can be repaired in friendly territory by expending the required RP cost.
4.3 Combat
4.3.1 In General
A. During the course of the game, each side attacks and defends against enemy units.
B. Attacking is voluntary until an attack is declared. Once declared, combat becomes mandatory; the attacker must execute the declared combat as the next action. It should be noted that the declaration itself is not an action; it is merely a declaration of intent. The combat itself is the action.
C. Combat may be declared against any unit in the ZOC of the declaring force, provided that combat is only declared against a single hex.
D. Elimination of enemy units by overrun movement (4.1.5) does not count as a combat action.
E. Combat is performed in rounds and uses tactical maneuver chits.
F. Once combat is declared and accepted by the other side, all other actions cease until the battle is resolved.
4.3.2 Refusing Combat
A. The side against whom combat is being declared may refuse combat before any action in the Combat Sequence is performed. To refuse combat, the defender must make the declaration to move away immediately.
B. If a defending force has already performed both of its actions for a turn, it may not refuse combat.
C. If combat is refused, the attacker performs the Combat Sequence once (steps 3 and 4; include Leader DRMs), whereupon the Combat Sequence ends and the attacking player's force is not charged with having performed a combat action.
4.3.3 The Combat Sequence
- Each side divulges the strength of its force or garrison.
- Select and compare tactical chits.
- Determine DRMs.
- The attacker rolls the die and finds the result on the CRT.
- Extract losses as defined on the CRT.
- Determine if combat ends (4.3.4).
- If the combat sequence is not ended, repeat steps 2 through 5 above until combat is ended
- After the last round of combat, each side rolls for one Leader Casualty
4.3.4 Ending Combat
A. In Step 6 of the Combat Sequence, the attacker rolls one ten-sided die. On a 10, the combat sequence ends.
B. Apply a +1 DRM per round after the first, i.e. the second round has a +1 DRM, the third a +2 DRM, etc.
C. Combat can also be ended if one side chooses a Withdraw Tactical Chit. When this happens, that side must retreat one hex. If unable to retreat due to terrain restrictions, the force is destroyed.
D. Combat ends automatically at the conclusion of the seventh round, provided no other occurrence has forced its end previously. In other words, no matter what else happens, two forces may not fight more than seven rounds in any declared combat.
E. It is possible, however, for one force to attack another, fight a maximum number of rounds of combat, and then do it all over again if the original defender chooses to attack the original attacker's units with its own units later in the Action Phase.
F. If one side's force is destroyed or withdrawn, that side is judged the loser of the battle for Political Track Adjustment Purposes.
G. If the round ends with neither player withdrawing, or if both players withdraw in any round, the battle is considered a draw and neither side is the loser.
H. If combat was refused, then no battle was fought (though one was declared), so no Political Track Adjustment accrues.
4.3.5 Combat Results
A. See the CRT for combat results and their explanation. All appropriate DRMs are listed there.
B. There are extra losses for one side or the other (in addition to the prescribed DRM) if one side has a strength advantage of 4:1 or higher. These are also listed on the CRT.
C. These increase the SP loss, not the percentage. Calculate the SP loss by taking the CRT-prescribed percentage (always round all fractions up), and then double, or triple, as called for on the CRT.
4.3.6 Advance After Combat
A. Victorious units that survive combat may advance into the hex if the other player's units retreat or if the other player's units are eliminated from play.
B. The decision to advance must be made immediately.
4.3.7 Defending Garrisons
A. Garrisons may only choose the Defend chit, regardless of the presence of a leader.
B. Garrisons may not choose the Withdraw chit. Only a force can choose the Withdraw chit.
4.3.8 Restrictions
A. No unit may attack into or across terrain prohibited to that unit.
B. No Force may declare and execute combat more than once per turn.
4.4 Reconnaissance
4.4.1 Fog of War
A. To recreate the fog of war, no examination of the contents of enemy-held hexes is allowed. Cover stacks with Army and IF markers or, use the Player Aid Cards to keep track of the number of SPs in a force.
B. Stacks of SPs without leaders or that do not belong to a force may not be examined.
4.4.2 Conducting Reconnaissance
A. Any force containing at least one cavalry SP may attempt to discover the strength of an enemy-occupied hex by performing reconnaissance.
B. The enemy-occupied hex must be within two hexes, regardless of MP cost.
C. Roll a die. On a 1, the recon is successful.
D. Apply the DRMs from the Reconnaissance DRMs Table to the attempt.
E. Leaders designated as cavalry leaders may influence all recon die rolls with favorable DRMs (e.g., Stuart).
F. The presence of a leader in either stack need not be disclosed if the owning side so chooses, but if it is kept secret, no DRM may be taken.
4.4.3 Penalty for Recon Failure
A. If the recon attempt fails, roll the die again and consult the Cavalry Loss Table.
B. When extracting these losses, round all fractions up to the next higher whole number.
4.4.4 Successful Recon Results
Upon a successful recon attempt, the side whose force was the object of the recon must announce the number of SPs occupying that hex, within plus or minus 10% of the actual strength.
Example: If a hex containing an army of 400 SPs is successfully reconnoitered, the owning side may announce any number between 360 and 440, inclusive.
4.5 Improving Positions
4.5.1 Placement
A. An IP provides defensive benefits to forces in a hex.
B. Either side may place an IP by performing no movement or combat with those units that turn.
C. One IP marker may be placed per hex.
D. IP markers may be placed in a hex with a fort.
E. Reconnaissance may be performed if by a force's units during the turn an IP is placed if they include cavalry SPs.
4.5.2 Restrictions
A. Only defending units may receive an IP DRM.
B. If the force subsequently leaves the hex for any reason, even if SPs are detached from the force to remain behind in the original hex, the IP marker is removed.
C. IP markers may not be placed in a hex that contains a force which has just had combat declared against it.
D. A lone garrison may not place an IP marker.
4.5.3 RP Cost for IPs (Optional Rule)
As an optional play-balance feature, expend RPs for IP placement at the cost indicated on the Production Points Cost chart (listed as entrenchments).
4.6 Razing Cities
4.6.1 Procedure
A. Either side may raze the other's cities with a production capacity. (Printed text as given; the sentence appears to be incomplete in the source at this point.)
B. This action constitutes two actions by the owning player. Therefore, the side razing the city must have a force in the city at the beginning of the turn, and the force may not perform any other action throughout the entire turn.
C. If the force doing the razing is subjected to enemy attack, then the razing is considered unfinished, that is, the city remains standing.
4.6.2 Effects
A. A razed city ceases to exist for game purposes.
B. Its production value is lost for the rest of the game, even if the original owning player recaptures it.
C. Rail lines running through the city hex are considered permanently destroyed.
D. Optional: There are effects which affect the Political Track.
4.6.3 Restrictions
A city cannot be razed before January, 1864.
5.0 Political Events and Political Track Adjustments
A. There are several events which affect the Political Track. (See Political Events Table.)
B. Consider the hex occupied by the defender to be the soil upon which any given battle is fought.
C. All Political Track Adjustments are cumulative.
D. If a Strategic City changes hands several times, multiple adjustments can be made to the Political Track.
Example: If the Union captures Atlanta, apply a -3 adjustment. If the South recaptures it, it has undone the political damage, so apply a +3 adjustment. On a yet later turn, if the Union captures Atlanta again, reapply the -3 adjustment. This cycle can happen any number of times in any number of cities. It can also happen in the North in a similar fashion, except that the marker will move four spaces instead of three.
5.1 Neutral Declaration
It was possible that Kentucky or Missouri would join one side or the other.
5.1.1 Kentucky
A. Kentucky is considered invaded the first time either side moves its units into the state.
B. If one side invades Kentucky, it joins the other side and all hexes are considered friendly to its allied side except for any hexes captured by the invading side.
C. Upon invasion, each city immediately generates four SPs of militia-class infantry for the other side. This is an exception to the production rules. The invading side's action is interrupted for the militia to be placed by the opposing side.
D. If Kentucky is still neutral in January, 1864, it joins the Union. Adjust the Political Track as if the Confederacy had invaded.
5.1.2 Missouri
A. Unlike the situation in Kentucky, invasion by one side does not trigger automatic allegiance to the other side.
B. All hexes in Missouri, including rail hexes, are considered neutral at the beginning of the game and must be captured before they can be used by anyone.
C. Missouri must be conquered for the Political Track adjustment to be made.
D. The first side to capture all of Missouri's cities conquers (controls) the state.
5.1.3 Status When Conquered
A. Kentucky and Missouri are always treated as conquered territory for the side which controls them.
B. They are never considered home country for either side for the purposes of production or any other purpose.
C. An exception to this is St. Louis. If St. Louis is in Union hands, it can generate new SPs as defined by the Production Rules (7.0).
5.2 Foreign Intervention/Neutrality Declaration
It was possible that Great Britain or France would intervene in the war or remain neutral permanently.
5.2.1 Intervention
A. If there are 81-90 points on the Political Point Track, the Confederate side rolls for Franco-British intervention. Each box displays the number needed for success.
B. The Confederacy may roll for only one country (either France or Great Britain) in any given turn.
C. If either intervenes, an immediate adjustment is made to the Political Track.
5.2.2 Permanent Neutrality
A. If there are 11-20 points on the Political Point Track, the Union side rolls for permanent Franco-British neutrality. Each box displays the number needed for success.
B. The Union may roll for only one country (either France or Great Britain) in any given turn.
C. If either intervenes, an immediate adjustment is made to the Political Track.
5.3 Automatic Victory
A. If, after all adjustments are made, the Political Marker is in one of the shaded zones (Automatic Confederate or Union Victory), roll a ten-sided die to determine whether there us an automatic victory.
B. If the result falls within the range indicated on the Political Track, that side wins the game automatically. Otherwise, play proceeds until April, 1865.
C. If the Union has not achieved automatic victory by the end of the game, the result is considered to be a marginal Confederate victory.
6.0 Leader Selection, Casualties, and Promotion
6.1 Placement
A. Leaders appear every odd-numbered turn during the Production Phase by making a random draw from among the leader counters.
B. Select one leader, placing him on a city hex in the player's home country.
C. When drawn from the leader pool, leaders are not required to be placed in Armies or IFs; they can be held off-map (e.g., Washington desk jobs) until needed or desired.
D. Please the weaker side of the counter face-up.
E. A promotion improves the leader.
F. If there are more than one counter for a leader (e.g., more than two possible ranks), make sure that the lowest level is the one chosen. If the higher-level leader is chosen, look in the unused-leader pool for the lower-level leader and make the substitution.
Example: Grant, when drawn, must start as a brigadier general, not as a lieutenant general.
6.2 Seniority Ratings, Command, and Promotion
6.2.1 Seniority Ratings and Command
A. A leader's seniority rating is their position, so a lower number is a higher rating (e.g., 1 is the highest).
B. Leaders command other leaders of the same rank (e.g., one-star vs. one-star) when they have a higher rating.
C. If two equal-rank leaders are present in an army, then the one with the higher seniority rating must be placed in command of the army.
Example: A three-star Buell has a higher seniority than a three-star Grant.
6.2.2 Promotions
A. A leader is promoted by engaging in battle. Each turn that a leader is in a battle, he is eligible for promotion.
B. Roll one die for the leader in question, and subtract the leader's LV as a DRM. On a 4 or less, the leader is promoted.
C. Only one -promotion attempt may be made per theater per turn.
6.3 Leader Casualties
A. Leaders can become casualties in battle. At the end of each battle, each side rolls one die per battle. On a 10, that side may have leader a leader casualty.
B. When that occurs, roll a second die and consult the Leader Casualty Table. A leader who is killed is permanently removed from the game.
6.4 Special Considerations for Leaders
6.4.1 Leader Separating from a Force
A. A leader may not abandon a force, other than a garrison, to move independently.
B. The only way a leader can be detached from his troops is:
- To move an unattached leader into the force's hex during the Action Phase, and
- Then change command during the Administrative Phase, replacing the old leader with the new one on the TO&E for that force.
- The old leader may then move in the Action Phase of the next turn.
6.4.2 Loss of Corps Commander
A. If an army loses a leader such that a part of the stack is left leaderless (that is, if a corps commander is killed), then the army must be immediately reorganized to adhere to the limitations of that army's TO&E.
B. If excess SPs are present in the hex, they must be dropped off as a garrison in the army's next action.
6.4.3 Loss of Army Commander
A. If the army's leader is killed, another is placed in command from the TO&E chart. This could subject the army to an immediate force reduction if the highest-ranked leader cannot command as many troops as the leader who became a casualty.
B. If there is no leader to take the place of an army's commander (which can happen especially in the early stages of the game), then the army may only move and defend itself. It may not declare combat, improve positions, force-march, or perform reconnaissance; if attacked, it may only choose the Defend chit.
6.4.4 IF Commander Killed or Wounded
If the leader of an IF is killed or wounded, the IF is treated the same as a leaderless Army.
6.4.5 Leader of Completely Eliminated Force
A. If a leader is part of a force which is completely eliminated in combat, he is taken in the subsequent Production Phase as a new leader, unless he is a leader casualty (6.3), regardless of which turn it is.
B. If this happens on an odd-numbered turn, the player may still draw from the unused-leader pool during the Production Phase.
6.4.6 Cavalry Leaders; Leading Cavalry
Cavalry leaders may not lead Infantry SPs, but non-cavalry leaders may lead cavalry. Exception: Beginning in July 1864 Sheridan may command both infantry and cavalry armies and IFs.
6.4.7 Naval Leaders
Naval leaders may only lead naval units and use their LV to affect the Naval Combat die-roll.
7.0 Production
7.1 In General
A. Production is performed every turn. Units are drawn from the counter mix by expending Human and Resource Points like money to buy units of the appropriate type.
B. Under no circumstances may any sort of deficit-spending take place.
C. See the Unit Production Chart for costs of units.
D. Players decide beforehand whether production is open or secret.
7.2 Human Points
A. Human points are obtained by issuing calls for volunteers and by issuing draft calls. Record these points.
B. Human Points may be accumulated from turn to turn. Each time a draft is made, negative results accrue on the Political Track.
7.3 Resource Points
A. Resource Points are obtained similarly. They are received weekly and may be accumulated from turn to turn.
B. Total the number of points from the various sources each side controls and record that amount.
7.4 Capturing and Recapturing Production Cities
A. Enemy cities may be captured and thus deprive their owners of their RPs while occupied.
B. Each turn an enemy army, IF, or garrison occupies an enemy city that produces RPs, the original owning player loses the RPs generated by that city for that turn. The city must be occupied during the Production Phase for the original owner to lose the RPs.
7.5 Unit Placement
A. Place units in appropriate hexes of the owning player's country:
- Place land units in cities.
- Place naval units ports. River cities are ports for river-type naval units.
B. Unit placement, within these restrictions, is at the owning side's discretion.
Exception: Infantry upgrades must be made to existing units wherever they are found, that is, an existing militia SP must be removed, and a line-infantry SP must be put in its exact place on the map.
7.6 Fortifications
7.6.1 Placement
Fortifications can be placed in any friendly-controlled hex.
7.6.2 Above Level 6 (Optional)
A. Fortifications can exceed Level 6.
B. Each level beyond 6 costs 5 RPs and provides an additional +1 DRM.
Example: One Level-6 and one Level-3 equals a Level-9 fortification. The cost is 35 RPs and the DRM is +8.
7.7 Restrictions
Line-infantry SP upgrades may not be purchased before January, 1863.
8.0 Seasonal Effects
A. Determine the onset of Winter for when Winter effects start (8.2).
B. Determine the onset of Spring for when Winter effects cease (8.3).
8.1 Winter Effects
A. To reproduce the effects of inclement weather and the resulting mud and snow, reduce the MA of all non-leader ground units by one.
B. The attacker suffers a+ 1 DRM on all combat.
C. The attacker suffers a+ 1 DRM on all recon attempts.
D. Naval units are unaffected by winter.
8.2 Winter Onset Determination
Beginning with the November IV turn, roll one die, and consult the Winter Onset Determination Table each Production Phase until Winter arrives.
8.3 Spring Onset Determination
Beginning with the February III turn, roll one die, and consult the Spring Onset Determination Table each Production Phase until Spring arrives.
9.0 Supply
A. There are no supply rules per se. The standard supply restrictions are incorporated in the stacking limits and Army TO&E charts.
B. For those players desiring extra chrome in their gaming, look for optional supply rules in future issues of the FGA's magazine, the Board game Journal.
10.0 Navies
There are several types of naval units: ocean-going men-of-war, ocean-going transports, ironclads, river gunboats, and river transports.
10.1 Fleets
A. Union naval units (SPs) are organized into fleets.
B. Confederate naval SPs are not placed in fleets and are instead placed on the game map.
C. Naval SPs may enter tidal river and river hexsides and coastal and all-ocean hexes.
D. Ocean-going men-of-war and transports may enter all-ocean, coastal hex, and tidal river hexsides. They are the only naval SPs that may enter the Commerce Raiding and Anti-Commerce Raiding Displays.
E. Fleets are treated as IFs for the purposes of the rules 4.0-4.3. In other words, there is no separate Naval Movement Phase. Naval actions are interspersed with land actions at the discretion of the owning side.
Exception: Fleets and/or naval SPs do not require a leader to move or engage in combat.
F. Fleets may perform any of the following actions in any given turn:
- Fleet Movement
- Transport Land Units
- Declare and Execute Fleet Combat
- Perform Blockade
- Provide Support for Land Forces (Shore Bombardment)
G. Furthermore, each fleet may perform any two actions in the same turn, provided that no action is performed more than once per turn by a single fleet. This is a major difference from the land action rules, where some of the actions may be performed twice per turn, e.g., movement and reconnaissance.
10.2 Fleet Movement
10.2.1 In General
A. The movement allowance of all naval SPs is forty (40) MPs.
B. A fleet may be moved up to the limits of its MA by tracing its movement path along navigable river hexsides or through ocean or coastal hexes. (River movement will therefore be slower than ocean and coastal movement.)
10.2.2 Naval Movement Around Florida
A. It takes two actions to move naval SPs around Florida.
B. The SPs must start the action in C1154 or B6129.
C. Movement does not have to be completed in the same turn. The SPs can take their second action in a turn to start the trip, ending the turn in transit. They then spend their first action to finish the trip the next turn.
10.2.3 Coastal Hexes
Ironclads, River Gunboats, and River Transports may move in coastal hexes.
10.2.4 Restrictions
A. Riverine naval SPs may never enter all-ocean hexes.
B. A fleet may not move and transport land units in the same turn.
C. Naval units may not enter all-land hexes.
10.3 Naval Combat
10.3.1 In General
A. Naval combat takes place in one of four areas:
- Commerce Raiding-Anti Commerce Raiding Displays,
- Blockade Boxes,
- Tidal-River and River hexsides, and
- Against fortifications.
B. There is no naval combat in all-ocean hexes.
10.3.2 Opposed Amphibious Assaults (Optional)
Apply a +1 DRM to the assaulting force's combat die-rolls for the first turn of landing (each combat round).
10.4 Naval Combat (Rivers and Fortifications)
A. Fleets engage other fleets and fortifications using the Naval CRT.
- Determine the size of the forces engaged.
- Roll the die to determine the result of the naval combat.
B. Unlike land combat, naval combat may not be refused. (The chance of an enemy fleet slipping away from its pursuers is reflected in the Naval CRT.)
C. If naval SPs destroy a fortification, it is considered a naval victory for the purposes of Political Track Adjustment.
10.5 Naval Transport
A. Transport armies or IFs from one friendly port to another and then disband the army or IF (leaving the SPs as garrisons). The army or IF may be recreated in the port of origin, along with the army's or IF's leader. Then repeat the process.
B. Transport fleets can carry armies, IFs, or leaders.
C. One transport SP can carry one land SP and/or an unlimited number of leaders.
D. The units or leaders may move to the naval SP's location before the transport action is made, but may not move on land any further that turn. (Once the units arrive to their destination port, they may not move until the next turn.)
E. Rail movement may be combined with naval transport provided that the rail movement begins in the same theater of operations as the theater in which the naval transport begins.
F. If transport begins at a river hexside or at a coastal hex, the land units must expend an additional MP to board.
G. If transport begins at a port hex, the land units do not expend any extra MPs.
H. Transport can end at any hex where it is permissible to begin naval transport.
I. A force that starts the turn in a port is not considered to have performed an action by boarding naval transports in that port.
J. Cities on rivers are considered ports for transport purposes.
10.6 Shore Bombardment
A. Fleets of all types may apply their SPs as Bombardment Points against coastal fortifications (use the Naval CRT).
B. They may also provide support for land combat, providing DRMs to such combat (see CRT for DRMs that result from this).
C. To perform either of these actions, the fleets must be adjacent to the land units or fortifications being bombarded.
10.7 Blockading Confederate Ports
A. Ports may be blockaded by announcing the intention of doing so.
B. The Union moves a fleet containing naval SPs to the port hex to be blockaded. This is considered an action, the same as performing a land action, and must be interspersed with other actions during the sequence of play.
C. Resolve blockades at the beginning of the Production Phase. (In other words, the number of Confederate RPs available that turn cannot be known unless and until the blockades are resolved).
D. To resolve a blockade, subtract the number of Confederate fortification points from the number of Union naval SPs. Roll a die and consult the Blockade Table to determine the result.
E. The table can be used multiple ways: a roll can be made for all ports at once, or individual ports, or by theater, or state. The factor used to determine this issue is solely the player's own views toward random-number generations (in other words, the number of die-rolls you consider acceptable).
10.8 Naval Leaders
A. Naval leaders subtract their Leadership Value (LV) from Blockade, Commerce Raiding, or Naval combat.
B. Opposing leaders can cancel each other out; i.e., LVs are cumulative.
C. If more than one friendly naval leader is present, then only one may be used.
Optional Rule: Friendly naval leaders may combine their ratings.
10.9 Special River Situations
10.9.1 Control of Hexsides
A. This control of a river hex/hexside can be shared by each side having a unit adjacent to the hexside.
B. Land SPs do block normal riverine movement. Thus riverine movement may not pass next to enemy SPs.
10.9.2 Displacement of Riverines
A. If land units move adjacent to enemy naval SPs on a river, immediately displace the naval SPs five hexsides in the direction of the owning side's choice.
B. Such displacement is not considered an action on the part of the naval SPs.
C. If enemy naval SPs block this displacement, then riverine combat is mandatory.
D. If an enemy land force is adjacent to the hexside where the riverine displaces to, another displacement must take place; multiple displacements can occur.
E. If an enemy land SP is adjacent to a hexside that the riverine passes through (i.e., not the fifth hexside) there is no effect.
10.9.3 Running Forts (Optional)
A. Naval units may run enemy forts.
B. The side controlling the fort(s) gets one free shot per hexside that the naval units move through.
C. The running units may not fire.
D. Roll on the Naval CRT.
E. The side owning the fort may use any leader present in the fort to modify (subtract from) the naval CRT die-roll by the LV of the leader.
10.10 Ironclads (Optional)
A. There are two options to provide an increased effect for ironclads:
B. Apply a DRM to the naval combat die roll for any naval fleet or stack containing:
| Ironclad % | DRM |
|---|---|
| 25-49% | -1 |
| 50-74% | -2 |
| 75% + | -3 |
C. Adjust these percentages as required for play balance.
OR
D. Each ironclad SP equals two regular naval SPs.
11.0 Forrest and Custer (Optional)
11.1 Forrest
Nathan Bedford Forrest was a charismatic leader of Southern dragoons. He terrified Northern leadership and survived a number of dramatic encounters with Union forces. An entire battalion of Union infantry failed to kill him when he charged them (alone) after Shiloh. Therefore, as he seemed to lead a charmed life, consider Forrest immortal for game purposes.
A. If Forrest is the leader of an IF which is completely eliminated, he is taken in the subsequent Production Phase as a new leader, regardless of which turn it is. If this happens on an odd-numbered turn, the Confederate side may still draw from the unused-leader pool.
B. Forrest cannot be wounded (yes, I know he was wounded during the war, but we're talking game terms here).
C. Reviser's Note: Forrest was wounded at the Battle of Shiloh and out for two months, therefore he can be wounded in combat.
11.2 Custer
Consider George Armstrong Custer to be the Union equivalent of Forrest for those desiring quid pro quo.
A. Custer cannot be killed.
B. Custer cannot be wounded if using the rule that Forrest cannot. Otherwise, Custer can be wounded as other leaders.
11.3 Historical Smart-Aleckism Department
We couldn't resist it: the flip-side of Grierson's counter is labeled John Wayne in honor of the Duke, who played the Union cavalryman in The Horse Soldiers. His LV is higher than his historical counterpart's on purpose.
Start with Grierson and promote him to Dukedom.
12.0 Play Balance (Optional)
A. Sometimes two players find that they are not as evenly matched as they would like, or one side appears to have an advantage over the other.
B. To redress this perceived imbalance, there are several possible adjustments that can be made.
- Vary the number of IFs for each side (nine IF markers are provided).
- Adjust the number of Production Points available for each side by a small percentage (this should be done with extreme caution, and players should be aware that doing so will lower the level of historical accuracy in the game).
- Adjust the starting point of the Political Marker on the Political Track a few spaces one way or the other as desired (a small adjustment should be all that is necessary to achieve balance).
- Vary the number and quality of the leaders available to one side or the other.
C. These are only suggested examples; they are not the only measures players who desire a balanced game can try. Remember: it's your game, and if you want to make some adjustments or write some optional-rules articles for the Boardgame Journal, go for it.
13.0 Setting Up
A. For the 1862 and 1863 Campaign Scenarios, all units are listed according to scenario, map, and hex number in which they appear.
Unit codes: M = Militia; C = Cavalry; N = Naval; F = Fort.
B. Leaders are listed by name and rank (superscript number is the number of stars) in their starting hex.
C. Armies, IFs, and fleets may be created by the owning side within the limits of command and SPs.
D. Infantry, cavalry, and naval (all types) SPs are listed individually by specific type and strength.
E. Fortifications: L with a number indicates the level. IP means improved positions.
F. Each hex lists the number of SPs to be placed in it. The owning side selects SP markers to fit the called-for strength.
G. Naval unit abbreviations:
| Abbr | Type |
|---|---|
| GB | River Gunboat |
| IC | Ironclad |
| ON | Ocean Naval |
| OT | Ocean Transport |
| RT | River Transport |
H. At the time of deployment, players may assign leaders to command armies, IFs, and fleets in the same hex.
I. The owning side decides on the position of units that occupy the same hexes as forts (inside or outside).
J. Proctersville, Louisiana is spelled incorrectly and should be Proctorsville.
13.1 1862 Campaign Scenario
Duration: Start March I 1862 and end June IV 1865.
Confederate Resource Points: 122
Union Resource Points: 0
Personnel Points: First Volunteer Call expended for both players. All other Volunteer and Draft Calls available.
Missouri and Kentucky: Missouri is not controlled by either side at the start of the scenario. Kentucky has been invaded by the Confederacy.
Union Control of Confederate Strategic Cities and Ports: The Confederacy controls it own Strategic Cities and ports.
Political Point Track: 60
Scenario Setup: The Union sets up first and is the Second Player.
Confederate Commerce Raiders: Ten Ocean Naval SPs.
SP Overstacking: Armies or IFs in violation of SP stacking limits are required to treat the excess as garrisons and may not be considered part of the army or IF.
Victory: Use the standard victory conditions.
Armies, IFs, and Fleets: Any 12 Confederate armies and IFs, any 12 Union armies and IFs, and all Union Fleets. This is an exception to standard rule 3.1 (Stacking).
Naval Leaders: One Confederate and two Union naval leaders may be selected at random from the Leader Pool.
Militia-SP Conversion (optional): Each side may convert up to 25% of its at-start Militia SPs to Line Infantry SPs by paying the appropriate RP costs. Either may convert Militia SPs through the normal process. In any event, no more than 25% of either army may be Line Infantry at any point in the game before 1863.
Leader Pool Limits: Remove Lyon from the Union pool.
Confederate Setup (1862 scenario, as printed)
| Hex | Leader(s) | M | C | N | F |
|---|---|---|---|---|---|
| A1019 | Price1 | 10 | 6 | ||
| A1731 | Van Dorn3 | 18 | 4 | ||
| A2828 | A. Johnson3 | 4 | 4 | 2 RT | L3 |
| A2927 | 2 | L3 | |||
| A3021 |
"Magruder*" carries an asterisk in the source; no footnote is printed for it.
Union Setup (as printed on the page following 13.1)
| Hex | Leader(s) | M | C | N | F |
|---|---|---|---|---|---|
| A1410 | Pope2 | 18 | 6 | ||
| A2014 | Curtis1 | 10 | 6 | ||
| A2226 | 8 | ||||
| A2712 | Halleck3 | 80 | 2 | 20 RT | L3 |
| A3119 |
Scenario notes printed beside the Union setup:
Scenario Set-up: The Union player sets up first and is the Second Player.
Victory: Use the standard victory conditions.
Armies, IFs, and Fleets: Any 14 Confederate armies and IFs, any 13 Union armies and IFs, and all Union Fleets. This is an exception to standard rule 3.1 (Stacking).
Naval Leaders: One Confederate and two Union naval leaders may be selected at random from the Leader Pool.
Militia SP Conversion: Each side may convert up to 50% of its at-start Militia SPs to Line Infantry SPs by paying the appropriate RP costs. No other limitations apply.
Leader Pool Limits: Remove Lyon, A.S. Johnson, and Jackson from their respective Leader Pools.
Confederate Commerce Raiders: 12 Ocean Naval SPs.
SP Overstacking: Any armies or IFs in violation of SP stacking limits are required to treat the excess as garrisons and may not be considered part of the army or IF.
Confederate Setup (as printed beside the Union setup)
| Hex | Leader(s) | M | C | N | F |
|---|---|---|---|---|---|
| A0726 | 4 | ||||
| A1705 | Holmes1, Smith2 | 16 | 6 | ||
| A2025 | 4 | ||||
| A3334 | 6 | ||||
| A4232 |
13.2 1863 Campaign Scenario
Duration: Start April I 1863 and end June IV 1865.
Confederate Resource Points: 25
Union Resource Points: 175
Personnel Points: First and Second Volunteer Call expended and the First Draft Call for both sides. All other Volunteer and Draft Calls available.
Missouri and Kentucky: Missouri is controlled by the Union player at the start of the scenario. Kentucky has been invaded by the Confederacy.
Union Control of Confederate Strategic Cities: Memphis, Nashville, and New Orleans
Union Control of Confederate Strategic Ports: Brashear, New Orleans, Proctorsville, Norfolk, Morehead City, and Newbern
Political Point Track: 45
Confederate Setup (continued from the table above)
| Hex | Leader(s) | M | C | N | F |
|---|---|---|---|---|---|
| C1641 | 10 | L3 | |||
| C2024 | 4 | ||||
| C2211 | Ewell2 | 24 | |||
| C2312 | Lee4*, Longstreet2, Stuart2 | 36 | 20 | IP | |
| C2412 |
Union setup table (no heading printed above it on the page)
| Hex | Leader(s) | M | C | N | F |
|---|---|---|---|---|---|
| C0608 | 10 | ||||
| C0612 | 10 | ||||
| C1003 | 2 | ||||
| C1145 | 10 | L2 | |||
| C1243 | Buell3 |
Union Setup (1863 table, as printed)
| Hex | Leader(s) | M | C | N | F |
|---|---|---|---|---|---|
| A1319 | 4 | 4 | 15 GB, 20 RT | L2 | |
| A1811 | 6 | ||||
| A2014 | Schofield2 | 16 | |||
| A2429 | 2 | ||||
| A2431 |
Notes printed beside the 1863 Union setup and the Campaign game:
13.3 Campaign Game (Entire War)
Duration: April II 1861 through June IV 1865
Political Status: Kentucky and Missouri are neutral. The Political Marker is set at 50
CONFEDERACY
Control: All Confederate hexes, and control of Fort Sumter.
Units: 6 SPs: one each in C1640, Richmond, Memphis, New Orleans, and Pensacola, plus 1 SP in any Confederate hex.
Leader: Beauregard in C1640 at his lowest LV.
Fortifications: A3722 and C1640A (level-2); B2724 (level 5)
UNION
Control: All Union hexes.
Units: 5 SPs: one each in Washington, D.C., C3118, and B4020, plus 2 SPs may be placed in any Union hex.
Leaders: None
Fortifications: C3118 and B4020 (level-3).
Naval SPs: 2 Ocean-going Naval Transport SPs and 2 Ocean-Naval SPs in any Union port on map C.
Special Rules:
A. No Armies or IFs may be placed before the game begins.
B. Play until victory is achieved per 5.3.