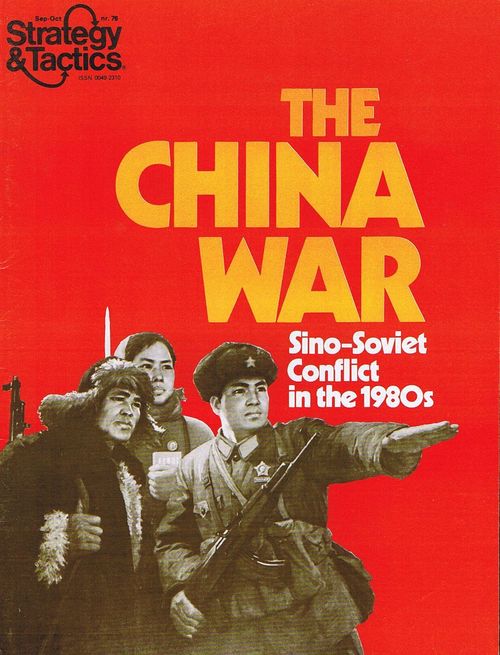
The China War: Sino-Soviet Conflict in the 1980s
The China War: Sino-Soviet Conflict in the 1980s Rulebook
Table of Contents
Table of Contents
- 1.0 Introduction
- 2.0 How to Play the Game
- 3.0 Game Equipment
- 4.0 Sequence of Play
- 5.0 Political Events
- 6.0 Movement
- 7.0 Overrun
- 8.0 Stacking
- 9.0 Combat
- 10.0 Terrain Effects on Movement and Combat
- 11.0 Supply
- 12.0 Reinforcements and Replacements
- 13.0 Tactical Air Support and Tactical Nuclear Weapons (USSR Player Only)
- 14.0 Army Reorganization (PRC Player Only)
- 15.0 Taiwanese Amphibious Attack Capacity
- 16.0 Tactical Nuclear Weapon (USSR Player Only Optional Rule)
- 17.0 The East Is Red (Scenario 1)
- 18.0 Objective: Hanoi! (Scenario 2)
- 19.0 Back to the Mainland! (Scenario 3)
- The China War Notes
1.0 Introduction
The China War is an operational-level simulation of the current military situation in Asia. The game consists of three scenarios. The first covers the first eight weeks of a full-scale war against the People's Republic of China (PRC) by the Union of Soviet Socialist Republics (USSR). The second scenario examines the possibility of a second, more serious war between Vietnam and the PRC. The third concerns a possible amphibious invasion of Taiwan in the context of an ongoing Sino-Soviet War.
2.0 How to Play the Game
The Players set up their units. Each Player chooses which side he will play and places his units on the map according to the deployment listed in the scenario being played. Units that do not belong on the map at the start — Reinforcements — are placed aside for the time being. Some may later be placed on the map. The Players then consult the Scenario rules to determine which side (USSR or PRC) is the first Player and which is the second Player.
The Players determine if any political events occur. Each Player rolls the die once and modifies the result if called for by the rules governing Political Events. The Players consult the Political Events Table to see if any events have occurred.
The first Player moves. The first Player checks to see which of his units are in supply. Units which are out of supply may be moved only half their normal Movement Point Allowance. After determining each of his units' supply status, the first Player begins to move them. He may move as many of his units as he wishes in any Game-Turn. Each unit may be moved up to a certain maximum number of hexes, depending on the particular unit's Movement Point Allowance (printed on the unit) and the type of terrain in the hexes which the unit is moved through. Any reinforcements due the first Player may be placed on the game map and moved.
While moving his units, the first Player may decide to overrun Enemy units. Any unit or stack of units may attempt an overrun, at a cost of five (for mech) or all (for non-mech) of their Movement Points. If the overrun succeeds and the Enemy unit(s) has to be retreated or is eliminated, the first Player may continue moving the units (if they are mech units) up to their full Movement Point Allowance. An overrun is considered part of movement, although it resembles combat.
The second Player reacts. The second Player may now move as many of his mechanized units and/or first line non-mechanized units as he wishes. Mech units may expend up to two Movement Points and non-mech units one Movement Point. If, after all reaction movement has been completed, the second Player has vacated any hexes adjacent to units of the first Player, the first Player may move one or more units one hex into such a vacated hex.
The first Player attacks. After the first Player has moved all the units he can move or wishes to move, he may resolve any combats which he chooses to initiate, attacking Enemy units which are in hexes adjacent to his own units excepting any of his units that advanced after Enemy reaction. He does not have to initiate any attacks. If the attack is affected by tactical nuclear weapons or airpower or any of the modifications listed on the Combat Results Table (e.g., "Tanks in the Desert," "All Units Unsupplied"), these factors must be taken into account. For the first of his attacks the first Player adds the Attack Strengths of all his involved units and compares it to the total defense strength of the defending unit(s). He then converts the ratio of these totals to a simplified odds statement, such as "1 to 1" or "2 to 1." He then consults the Combat Results Table and rolls a die. Cross-referencing the result of the die roll along the proper row (as determined by the terrain in the hex occupied by the defending units), with the column corresponding to the combat ratio (modified as necessary) the Players determine the outcome of the attack.
The results obtained on the Combat Results Table dictate which units involved in the combat have to either take a loss or (for defending units) retreat. Players subtract losses and/or retreat the losing units as called for. If the first Player wins the combat, he may advance his victorious units into any vacated hexes. He then proceeds to resolve his other attacks, one by one, in any order he chooses, until he has resolved all the attacks he wishes to initiate. The first Player's turn is now — er. [Sic: the printed text of this sentence breaks off here in the source.]
The second Player's turn. The second Player now moves his units, the first Player reacts, and the second Player attacks in the same manner as described previously. When the second Player's turn is over, one Game-Turn has passed. The next Game-Turn starts with the Players rolling the die to determine if any political events occur.
This sequence is followed in general for a set number of Game-Turns (depending on the scenario), after which the Players check the victory conditions to see who has won.
While playing the first few Game-Turns, the Players should keep an eye on the Sequence of Play (Section 4.0). This outlines the strict order in which each Player should undertake the functions of his turn.
3.0 Game Equipment
[3.1] The Game-Map and Charts. The 22" x 34" mapsheet portrays the area of the People's Republic of China and the surrounding border regions, including terrain and population centers. A grid pattern of hexagons (hexes) superimposed over the terrain features regularizes movement and the positioning of the playing pieces. Also printed on the mapsheet are various charts and visual aids.
[3.2] The Playing Pieces. The cardboard pieces represent the military units of the respective armies of the USSR, the PRC, and several smaller Asian nations. The PRC's army is occasionally referred to as the People's Liberation Army (PLA). These playing pieces are hereafter referred to as units.
[3.21] How to Read the Units. The unit counters are read by the following printed elements: Cadre Level, Unit Type, Unit Size, Attack Strength, Movement Allowance and Defense Strength. The diagrams in the source show the counter layout for a First-Line Infantry Army (PRC) (Cadre Level 1, Unit Type, Army/Corps Sized, Attack Strength 10, Movement Allowance 16, Defense Strength 3) and for a Mechanized Infantry Division (Soviet) (Cadre Level 1, Unit Size XX, Attack Strength 5, Movement Allowance 5, Defense Strength 9). Unit size symbols are as follows: XX = division; XXX = corps ("army" to the PRC).
[3.22] Summary of Unit Types. The three numbers printed on each counter are given below in the order shown on the counter (Attack, Movement Allowance, Defense Strength). The front and back of each counter are listed where the source shows both.
USSR Non-Mechanized (Front / Back):
- Marine Division — Front 1-2-3 / Back 0-1-3
- Airborne Division — Front 2-3-3 / Back 1-2-3
USSR Mechanized (Front / Back):
- First-Line Tank Division — Front 6-6-9 / Back 3-3-9
- Second-Line Tank Division — Front 5-5-9 / Back 3-3-9
- First-Line Mechanized Infantry Division — Front 5-5-9 / Back 2-2-9
- Second-Line Mechanized Infantry Division — Front 4-4-9 / Back 2-2-9
PRC Non-Mechanized (Front / Back):
- First-Line Infantry Army — Front 10-16-3 / Back 7-9-2
- First-Line Infantry Division — Front 2-4-3 / Back 1-2-2
- Second-Line Infantry Army — Front 7-13-3 / Back 4-8-2
- Second-Line Infantry Division — Front 1-3-2 / Back 1-2-2
- Third-Line Infantry Army (ignore Border Division side of counter) — Front 0-1-2 / Back 5-11-2
- Third-Line Infantry Division (use weaker step of 2nd-Line division; treat as 3rd-Line) — Front 1-3-2 / Back 1-2-2
- Airborne Division (First-Line) — Front 1-3-2 / Back 0-2-2
- Border Division (Third-Line; ignore Third-Line Army side of counter) — Front 0-1-2 / Back 5-11-2
PRC Mechanized (Front / Back):
- Tank Division (First-Line) — Front 4-4-9 / Back 2-2-9
Other Nations (Front / Back):
- Taiwanese Infantry Army — Front 8-15-3 / Back 3-7-3
- Taiwanese Tank Division — Front 4-4-9 / Back 2-2-9
- Vietnamese Infantry Army — Front 11-18-3 / Back 5-9-2
- Vietnamese Mechanized Army — Front 18-22-9 / Back 9-12-9
- Laotian Infantry Division — Front 2-3-2 / Back 1-2-2
- North Korean Infantry Army — Front 8-15-3 / Back 4-8-2
- North Korean Mechanized Army — Front 15-20-9 / Back 7-10-9
- North Korean Tank Division — Front 4-4-9 / Back 2-2-9
Game Markers (Front / Back):
- USSR Victory Point (x 1)
- PRC Victory Point (x 1)
- USSR Tactical Nuclear Weapon Point (x 1)
- Game-Turn marker
[3.23] Definitions of Unit Values.
Attack Strength is the relative strength of a unit when attacking.
Defense Strength is the relative strength of a unit when defending.
Movement Allowance is the maximum number of movement points that may be expended in moving a particular unit during a Movement Phase.
Cadre Level is a measure of how well trained and equipped a unit is. USSR units are distinguished as being either first-line or second-line (less well equipped). PRC units are distinguished as being first-line, second-line, or third-line (upgraded militia). No cadre level distinctions are made for units of other nationalities in The China War.
[3.3] Parts Inventory.
- One 22" x 34" game map
- One die-cut counter sheet (200 counters)
- One rules folder
- One die (not included in magazine version)
- One game box (not included in magazine version)
If any of these parts are missing or damaged, fill out the Complaint Card enclosed in the game and return it to SPI with the appropriate items checked on the card. Note: The process used in manufacturing of the die-cut counters used in SPI games sometimes results in colors from one counter overlapping the color of a neighboring counter, or in the slightly off-center printing of the letters and/or numbers on a counter. SPI cannot replace counters displaying these minor manufacturing inaccuracies. Only counters that are illegible can be replaced by SPI.
4.0 Sequence of Play
[4.1] The Game-Turn. The China War is played in Game-Turns. Each Game-Turn is composed of two Player Turns. The Player whose Player-turn is in progress is often called the Phasing Player. Each Game-Turn proceeds strictly as outlined in Case 4.2.
[4.2] Game-Turn Sequence Outline.
A. Political Events Inter-Phase. Each Player rolls one die and, after applying any modifications called for to the results, refers to the Political Events Table (5.2).
USSR Player-Turn
-
USSR Reinforcement/Replacement Phase. The Phasing (USSR) Player deploys any reinforcement units scheduled to arrive this Game-Turn on the map and/or incorporates Replacement Steps into eligible units.
-
USSR Movement Phase. Any or all of the Phasing Player's units may now be moved in any direction(s) up to the limit of each unit's Movement Point Allowance and within the restrictions outlined in the rules for movement and supply. The Phasing Player may conduct overruns and/or garrison railroad and/or Enemy Pop 200/Pop 100 hexes in this Phase.
-
PRC Reaction Phase. Any or all of the non-Phasing Player's mechanized and first-line non-mechanized units may be moved as per the restrictions outlined in the rules. Exception: 6.43.
-
USSR Combat Phase. The Phasing Player's units may attack adjacent Enemy units according to the rules of combat. If either Player has Tactical Air Support Points or Tactical Nuclear Weapon Points he may allocate them to aid his attack or defense.
PRC Player-Turn
The PRC Player, acting as the Phasing Player, executes Phases 1 and 2 (executing any reorganization of his units prior to moving them), the USSR Player (as the non-Phasing Player) executes Phase 3, and the PRC Player executes Phase 4.
D. Game-Turn Indication Inter-Phase. The Game-Turn marker is advanced to signal the beginning of the next Game-Turn.
5.0 Political Events
Commentary: A war between the USSR and the PRC, if fought to a decision, would drastically affect the balance of power throughout the world. Such a war, therefore, would affect the national interests of many countries, and those of them with the means to influence the outcome would be sorely tempted to do so.
General Rule: At the beginning of the game, NATO, North Korea, Taiwan, and Vietnam are considered to be in a status of undeclared neutrality. The machinations of the Political Events Table may result in any of these third parties entering the war or declaring neutrality (which represents not merely a declaration per se, but a convincing demonstration of resolve to stand on the sidelines). Any result causes the indicated state to terminate its undeclared neutrality status and adopt either declared neutrality or alliance.
Procedure: During the Political Events Inter-Phase of each Game-Turn each Player rolls one die. The result of each die roll is modified, if necessary (consult the list of modifications printed on the table). The USSR Player's result indicates a column and the PRC Player's result indicates a row. At the intersection of the column and row the Players will find a letter from A to J. Each such letter indicates a possible political event.
Note: Once a state has terminated undeclared neutrality (i.e., a result affecting that nation has been obtained on the Political Events Table) all further results obtained that apply to that nation are treated as No Effect. If a No Effect result is obtained, the Players do not re-roll; there is simply no political effect for that Game-Turn.
Example: During the Political Events Inter-Phase of the first Game-Turn, the PRC Player rolls a 4 and the USSR Player rolls a 1. As the PRC Player has fewer than 100 Victory Points, his die roll result is increased by one to 5. At the intersection of the appropriate column and row on the Political Events Table is a G result, which means that NATO declares neutrality. This means the USSR Player will receive all of his scheduled reinforcements and benefit from additional Tactical Air Support points (see 5.11 and 5.12). For the rest of the game, NATO is in a status of declared neutrality; any A or G results obtained through Political Events Table Resolutions are treated as No Effect.
[5.1] How to Apply the Results of the Political Events Table
[5.11] As long as NATO retains undeclared neutrality status or if NATO enters the war, the USSR Player receives 15 Tactical Air Support Points per Game-Turn. Should NATO declare neutrality, the USSR Player receives 30 Tactical Air Support Points per Game-Turn beginning with the current Game-Turn or Game-Turn 3, whichever is later.
[5.12] As long as NATO retains undeclared neutrality, the USSR Player receives his reinforcements as listed in 17.2. However, should NATO enter the war, he receives only one 4-4-9 in hex 2701 or hex 1301 on Game-Turn 6, plus any reinforcements that have arrived in previous Game-Turns.
[5.13] As long as North Korea, Taiwan and Vietnam remain in a status of undeclared neutrality, their units remain in place as originally deployed on the map. Neither Player may attack such units or move his own units into non-border North Korean or Vietnamese hexes.
[5.14] Should North Korea, Taiwan or Vietnam declare neutrality, the counters representing that country's military forces are removed from the map. Neither Player may move his units into non-border hexes of that state.
[5.15] Should North Korea, Taiwan or Vietnam enter the war, the Player whose country that state has allied with gains control of all that state's units, beginning with his next Player-Turn. The opposing Player (only) may attack those units and move his own units into non-border hexes of that state. If Taiwan enters the war, the USSR Player also receives Taiwan's 4 Tactical Air Support Points (see 13.1).
[5.2] Political Events Table
The table is printed on the map sheet (page R16 of the source) and is transcribed here from that printing. Each Player rolls one die and the results are cross-indexed to yield a letter result.
| PRC Roll \ USSR Die | 1 | 2 | 3 | 4 | 5 | 6 | 7 | 8 |
|---|---|---|---|---|---|---|---|---|
| 1 | B | E | D | F | G | C | G | F |
| 2 | E | J | E | D | F | G | F | G |
| 3 | H | E | B | E |
Political Events Table letter results:
- A: NATO enters the war allied with the PRC
- B: North Korea enters allied with the PRC
- C: Vietnam declares neutrality
- D: Taiwan declares neutrality
- E: North Korea declares neutrality
- F: Vietnam enters the war allied with the USSR
- G: NATO declares neutrality
- H: Taiwan enters the war allied with the USSR
- J: North Korea enters the war allied with the USSR
Modifiers to Political Table Die Rolls.
USSR die roll modifications:
- +1 if Soviets were last to pass through or occupy 30 or more points of Resources
- +1 If Soviets have 100 or more Victory Points
PRC die roll modifications:
- +1 if the Soviets have used 100 or more Nuke Points
- +1 if the PRC player has less than 100 Victory Points
6.0 Movement
General Rule: Movement occurs during the Movement Phases of each Game-Turn. During each Player's respective Movement Phase, he may move all, some, or none of his units as desired. The Phasing Player may also conduct overruns (see 7.0) and/or move units by rail. During the Reaction Phase, the non-Phasing Player may move some, all or none of his mechanized and first line non-mechanized units.
Procedure: Each unit or stack of units is moved individually hex-by-hex, in any direction or combination of directions. Movement of a unit into a hex costs a certain number of Movement Points. As a Player moves a unit, he keeps track of the number of Movement Points expended for each hex.
Cases:
[6.1] How to Move Units.
[6.11] Movement is calculated in terms of Movement Points (Exception: 6.3, Rail Movement). Each unit has a Movement Point Allowance indicating the maximum number of Movement Points that can be expended for the movement of that unit in any one Movement Phase.
[6.12] A Player may expend as few or as many Movement Points as desired in moving one of his units, up to the limit of that unit's Movement Point Allowance. Movement Points may not be saved from one Game-Turn to the next, nor may unused Movement Points be transferred from unit to unit.
[6.13] For each clear terrain hex into which a unit is moved, one Movement Point is expended. Other terrain costs more to enter; these costs are detailed in Section 10.0, Terrain Effects on Movement and Combat, and on the Terrain Effects Chart.
[6.14] A unit may always be moved one hex during the Friendly Movement Phase(s). In other words if no Movement Points have been expended for a unit and it has insufficient Movement Points to be moved into any adjacent hex, it may be moved into one of those hexes anyway, within the restrictions of Case 6.2.
[6.2] Movement Inhibitions and Prohibitions.
[6.21] During a Player's Movement Phase, no Enemy units may be moved.
[6.22] Friendly units in no way affect the movement of other Friendly units. A unit may never be moved into a hex containing an Enemy unit.
[6.23] Any unit that is out of supply (see 11.0) at the beginning of a Movement Phase has its Movement Allowance halved for that Movement Phase, with any fractions ignored.
[6.24] Combat may not occur during a Movement Phase; however overrun — a combination of movement and combat — may take place.
[6.25] Movement may also be inhibited by terrain; note that some terrain is prohibited entirely (see Terrain Effects Chart, 10.6).
[6.3] Rail Movement.
Both Players may use rail movement by moving a unit through rail hexes, disregarding other terrain.
[6.31] In order to be moved by rail, a unit must begin and end the Movement Phase in a Friendly rail hex. It must be moved from Friendly rail hexes to adjacent, connected friendly rail hexes without ever leaving the railroad during the Phase. It need not begin the Movement Phase in supply to be moved by rail.
[6.32] A unit may expend no Movement Points on normal movement in the same Movement Phase in which it is moved by rail.
[6.33] Units may be moved by rail only during the Movement Phase of the owning Player's Player-Turn. A Player may not use rail movement during his Reaction Phase.
[6.34] Railroads are also considered roads. Therefore units not being moved by rail may be moved along railroads at the road movement rate (see Case 10.21).
[6.35] All rail hexes in China are Friendly to the PRC Player unless occupied or garrisoned by Enemy forces. All rail hexes in the USSR and Mongolia are Friendly to the USSR Player unless occupied by Enemy forces. If North Korea allies with the PRC (see 5.0), the PRC Player may move both Korean and PLA units by rail in North Korea and the PRC; otherwise, no rail movement by North Korean, Taiwanese, or Vietnamese units is permitted. (Railroads in those countries are still considered roads.)
[6.36] Units may be moved a maximum of 20 hexes along single-track lines (or along a combination of double- and single-track lines). A unit moved exclusively through double-track line hexes may be moved any number of hexes by rail movement. No more than two divisions may be moved through any one double-track rail hex by rail movement in a single Game-Turn; no more than one division may be moved through any one single-track rail hex.
[6.4] Airborne Transport.
[6.41] A PRC airborne division that begins a PRC Movement Phase in a hex containing a Chinese city (including provincial capitals) may be moved to any other city in China that is not in a hex occupied or garrisoned by USSR forces. It may not be moved further that Game-Turn; it may attack.
[6.42] A USSR airborne division that begins a USSR Movement Phase in a hex containing an air field may be transported to any clear or desert hex not occupied by a non-USSR unit that is within a six hex radius of that air field. The unit may not be moved further that Game-Turn; it may attack. An airborne unit is always in supply during the Game-Turn it is transported. The USSR Player may transport two airborne divisions per Game-Turn in this manner (see also 11.3).
[6.43] Airborne units cannot retreat or be moved during the Reaction Phase. Note: Two Soviet airborne divisions have Movement Point Allowances of six, while others have two. The higher value is for use with the optional USSR tac-nuke forward observer rule (16.0). Unless using that rule, all Soviet airborne divisions should be treated as having a Movement Point Allowance of two.
[6.44] Airborne transport cannot occur if the USSR Player employs air supply (see 11.3).
7.0 Overrun
General Rule: During the Movement Phase of his Player-Turn, the Phasing Player may have any combat unit (or stack of units; see 7.13) attempt to overrun an Enemy unit(s). An overrun is an attempt to move into an Enemy occupied hex. A successful overrun results in the elimination or retreat of the Enemy unit(s). A successful overrunning unit occupies the hex and may be further moved up to the extent of its Movement Point Allowance. Note: Although it bears some resemblance to combat, overrun is a function of movement.
Procedure: By expending Movement Points (five for mech units, all of its Movement Point Allowance for non-mech units), the Phasing Player has a Friendly unit (or stack of units) execute an overrun against an adjacent Enemy unit. The Phasing Player totals the attack strength of his unit(s). The non-Phasing Player totals the Defense Strength of his unit(s). An attack by the Phasing Player's unit(s) is then resolved (see 9.0, Procedure). If the overrun is successful, the overrunning unit(s) is moved into the vacated hex (at no additional cost in Movement Points), and the Phasing Player may then continue moving the overrunning unit(s) if it retains unexpended Movement Points.
Cases:
[7.1] Restrictions on Overruns.
[7.11] Overruns may be conducted by the Phasing Player only during his own Movement Phase.
[7.12] A unit (or stack of units) must be in supply (see 11.0) at the beginning of the Movement Phase (prior to the movement of any units) to be eligible to execute an overrun. Thus, supply for units conducting an overrun is determined at the beginning of the Movement Phase, not at the instant of overrun (see 7.21).
[7.13] Units that begin the Movement Phase stacked in the same hex may be used to execute an overrun provided they are not moved independently prior to resolution of the overrun. Friendly units that begin the Movement Phase in different hexes may not be used to conduct a single overrun.
[7.14] A single overrun can be conducted against more than one Enemy unit only if such Enemy units occupy the same hex.
[7.15] There is no limit to the number of overruns which may be executed against the same unit in the same Movement Phase.
[7.16] An overrun may be conducted from a hex occupied by Friendly units that are not taking part in the overrun. That is, a unit may be moved into a Friendly occupied hex and conduct an overrun from that hex.
[7.2] Resolution of Overruns.
[7.21] Supply for units defending against an overrun is determined at the instant of resolution.
[7.22] Should an overrun attack fail to dislodge the Enemy unit(s) from the overrun hex, the unit(s) executing the overrun may be moved no further in that Movement Phase.
[7.23] Should an overrun attack result in any loss to the overrunning unit(s), it may not be moved any further in that Movement Phase, regardless of whether it has any remaining Movement Points or whether the hex overrun was vacated. Note: A unit that conducts an overrun may not be retreated if an adverse result is obtained against it.
[7.24] Should an overrun attack result in the retreat or elimination of all defending units, and no loss for the overrunning unit(s), then the latter must be advanced into the vacated hex (at no additional cost in movement points) and the Phasing Player may continue moving the unit(s) if they have Movement Points remaining.
[7.25] Enemy units that successfully defend against an overrun may not be advanced into a vacated hex if overrunning units are destroyed.
[7.26] An overrun may not be conducted against an urban hex occupied by an Enemy unit. Note that an overrun against an unoccupied Pop 200 hex (against the militia) is permissable.
8.0 Stacking
Commentary: Each hex on the map represents a limited area of space within which only a certain amount of men and equipment can be effectively deployed. Therefore the Players are restricted in the number of units they may place in a hex.
General Rule: The stacking limit is measured in terms of divisions, and varies depending upon the terrain in a hex in which units are stacked (see Terrain Effects Chart). For stacking purposes, each corps ("Army" for the Chinese) is equivalent to three divisions. A Player may never have more Friendly combat units than allowed by the stacking limit in any one hex at the end of his movement or Reaction Phase, or at any time during a Combat Phase. Units may pass freely through other stacks of Friendly units, except during retreats, and the restrictions of stacking apply only at the end of the Friendly Movement Phase and Reaction Phase, and throughout the Combat Phases. If units exceed the stacking restrictions at the end of a Friendly Movement Phase or Reaction Phase, or at any point during a Combat Phase, the excess must be removed from play. The choice of which unit to eliminate is up to the owning Player.
9.0 Combat
General Rule: Combat occurs during the Combat Phase between adjacent opposing units at the Phasing Player's discretion. The Phasing Player is termed the attacker and the non-Phasing Player the defender, regardless of the overall strategic situation. The outcome of any particular combat depends on many factors: the strength, the quality level (e.g., "first-line"), and supply status of the units involved, the terrain, whether the USSR Player elects to utilize tactical air support, tactical nuclear weapons, electronic warfare, or chemical warfare, or whether the PLA Player elects to mount a mass attack. Results may include retreat, partial loss, or elimination of involved units.
Procedure: Total the Attack Strength of all attacking units involved in a specific attack and compare it to the Defense Strength of all units in the hex under attack. State the comparison as a ratio of the attacker's strength to the defender's strength. Round off the ratio in favor of the defender (e.g. 29 to 10 = 2 to 1) to conform to the simple ratios found on the Combat Results Table; modify the ratio as necessary depending on the quality of the units involved in the combat, terrain, etc. (A summary of all ratio modifications appears on the Combat Results Table.) Roll one die and read the results on the appropriate line under the modified ratio. Apply the results immediately, before resolving any other combat.
Note: Usually, both Players will apply modifications to the combat ratio. All such ratios are allowed to cancel out as much as possible and then one adjustment is made to the combat ratio prior to the roll of the die. Example: The Soviet Player uses units with a combined attack strength of 45 plus 25 Tactical Nuclear Weapons Points to attack a PLA 6-10-3 in a hex containing mountain terrain and a river. Prior to the application of any modifications, the combat ratio is 7-1. Referring to the listing of modifications on the Combat Results Table (9.6), the Players note a total modification of 3 to the right (Soviet first line, chem attack against PLA first line, EW) and a total modification of 5 columns to the left (PLA first line — 2 columns, Chinese in mountains, and river in hex — 2 columns). The shifts cancel out to a final shift of two to the left, and thus the combat ratio used is "5-1."
Cases:
[9.1] Which Units May Attack.
[9.11] Units may attack only during their own Combat Phase (see also Overrun, 7.0). They may attack any one unit or stack of units to which they are adjacent.
[9.12] Attacking is voluntary; units are never compelled to attack, and not every unit adjacent to an Enemy unit need participate in an attack. A Friendly unit that is not participating in a given attack is never affected by the results of that attack.
[9.13] An Enemy-occupied hex may be attacked by as many units as can be brought to bear in the six adjacent hexes.
[9.14] No unit may attack more than once per Combat Phase, and no Enemy unit may be attacked more than once per Combat Phase. (Remember, overrun is not combat.) Exception: 15.0.
[9.2] Multiple Hex and Multi-Unit Combat.
[9.21] All units in a hex must be attacked as a single, combined Defense Strength. The defender may not withhold a unit in a hex under attack.
[9.22] When one unit in a stack is attacking a given hex, the other units in the stack may attack a different hex or not attack at all.
[9.23] A unit adjacent to more than one Enemy-occupied hex can attack units in only one such hex in a single combat.
[9.3] Effects of Terrain on Combat.
Most terrain effects on combat are integrated into the Combat Results Table. After determining the combat ratio, determine which terrain type among those present in the defending unit's hex is most favorable to the defender. (However, see 10.72.) One of the six rows (depending on the die roll result) corresponding to that most favorable terrain type will be cross-indexed with the combat ratio column to determine the result of the combat. In some instances additional modifications to the combat ratio may be called for. These are detailed in Section 10.0 and summarized on the Combat Results Table (9.6).
[9.4] Unit Cadre Levels and Combat.
The Cadre Level of the units involved in any attack may modify the combat ratio one or more columns in favor of either of the Players. Each Player is entitled to a maximum of one Cadre Level combat ratio modification per combat. For example, if three Laotian and Vietnamese units attack one first line and one second line PLA units, the USSR Player would modify the ratio three columns to the right (for the Vietnamese unit) and the PRC player would modify it two columns back to the left (for his first line unit).
[9.41] Whenever any Soviet first line unit, PLA second line unit, Taiwanese unit, or North Korean unit is involved in a combat, the combat ratio is adjusted one column in favor of the owning Player.
[9.42] Whenever any PLA first line unit is involved in a combat, the combat ratio is adjusted two columns in favor of the PRC Player.
[9.43] Whenever any Vietnamese unit is involved in a combat, the combat ratio is adjusted three columns in favor of the USSR Player.
[9.5] Effects of Supply, Electronic Warfare, Mass Attacks, and Concentric Attacks on Combat.
[9.51] Supply. If any units involved in a combat are unsupplied or isolated (see 11.0) the combat ratio is adjusted three columns in favor of the opposing Player. See also 17.4.
[9.52] Chemical Warfare (USSR Player only). Whenever any Soviet unit is involved in an attack, the combat ratio is adjusted to the right to reflect the effects of Soviet chemical warfare. If one or more of the defending units are PLA first line units, the combat ratio is adjusted one column; otherwise it is adjusted two columns. Note: Chemical warfare may be employed by the USSR Player for attacks only.
[9.53] Electronic Warfare (USSR Player only). Whenever any Soviet unit is involved in combat, the combat ratio is adjusted one column in favor of the USSR Player to reflect the effects of Soviet electronic warfare.
[9.54] Mass Attacks (PLA Player only). Whenever all the units involved in an attack are PLA units, the PRC Player may elect to conduct a mass attack, and adjusts the combat ratio two columns to the right. Losses for defending units are tripled (however, if the USSR Player elects to retreat his units, they would lose only one step instead of three). Furthermore, should the PRC Player fail to capture the attacked hex, or should a step loss result against the PLA units result, each PLA unit involved in the attack is reduced one step.
[9.55] Concentric Attacks. Whenever a unit(s) is attacked from opposite hexes, the attack is considered concentric and the combat ratio is adjusted one column to the right.
Example (diagram on page R6 of the source): The two A units can make a concentric attack against unit B; the three C units cannot make a concentric attack against unit D.
No unit which is the object of a concentric attack can benefit from a river in its hex.
[9.6] Combat Results Table. The table is printed on the map sheet (page R16 of the source). Its terrain row indices are read by the die roll: each row below gives the row number used for each terrain column (Clear/Armor units use the left-hand index; Forest, Pop 100/Mountain and Pop 200 use their own columns). Results left of the slash apply to the attacker; results right of the slash apply to the defender.
| Clear/Armor | Forest | Pop 100/Mountain | Pop 200 | 1-4 | 1-3 | 1-2 | 1-1 | 2-1 | 3-1 | 4-1 | 5-1 | 6-1 | 7-1 |
|---|---|---|---|---|---|---|---|---|---|---|---|---|---|
| 1 | E/- | E/- | E/- | E/- | E/- | 1/- | 1/- | 1/- | 1/1 | 1/1 | |||
| 1 | 1 |
Combat Ratio Shift Summary (printed beside the table; the number is the number of columns shifted):
- Mech in desert: 1
- Tanks in desert: 2
- Mongolians in desert: 1
- North Koreans & Chinese in mountains: 1
- Soviet 1st line: 1
- PLA 1st line: 2
- PLA 2nd line: 1
- Vietnamese: 3
- Taiwanese: 1
- North Koreans: 1
- Oppositions unsupplied: 3
- Prepared position (defender only): 1
- PLA mass attack: 2
- Chem attack against PLA 1st line: 1
- Chem against other PLA: 2
- EW: 1
- Concentric (attacker only): 1
- River in hex (defender only): 2
Table footnote as printed: All results to left of slash apply to attacker; all results to right of slash apply to defender. E = All affected units are eliminated; opposing Player may advance. 1 = Player whose units are affected may choose to lose one step or (if defender) retreat all affected units one hex; opposing Player may advance (see also Case 9.8). Notes: In a split result (i.e. 1/1), the defender takes losses or retreats first, then the attacker must lose a step. If the defender's hex is vacated, the attacker may advance after combat. All victorious units may advance after combat up to the stacking limit.
[9.7] Combat Results and Unit Steps.
Many units have combat and movement values on both sides of the counter. At the start of the game each unit is placed with its stronger side up. (Exception: PRC border division units.) Should an adverse combat result be applied against the unit, it may be flipped over, or replaced with a counter representing it at a weaker state to show combat losses.
[9.71] Some units (e.g., Laotian divisions, PRC border divisions and third-line armies) consist of only one step. If such a unit incurs a loss, it is eliminated.
[9.72] Some units (e.g., PRC first and second-line armies and divisions, USSR divisions) consist of two steps, the second step being on the reverse side of the counter.
[9.73] There are two combat results E and 1. Results listed to the left of a slash apply only to the attacker and results to the right apply to the defender, respectively.
[9.74] A result of E/- or -/E means that all steps for the unit(s) involved are lost and no retreat option is possible.
[9.75] A result of 1/- means that one step must be removed from the affected attacking unit (or one of the attacking units). Attacking units may never retreat.
[9.76] A result of -/1 means that affected unit(s) must either lose one step or all be retreated one hex (if the unit is eligible to retreat, see 9.8). The Player whose unit is so affected may elect to either retreat or take a step loss.
[9.77] When a loss of one step is required or chosen, the Player removes one step from any one unit involved. Example: If three mechanized Soviet units are defending against a Chinese attack and the CRT shows a result of -/1, the Soviet Player has the option of either reducing one of his units by one step and leaving the units in place, or retreating all three units one hex.
[9.78] Some results on the CRT are split results; e.g. 1/1. In a split result, the defender's result is always applied first, whether it is a step loss or a hex retreat. Then the attacker applies his step loss result. If any attacking units remain, they may be advanced after combat, provided the defending hex has been vacated. The defender may never advance in a split result.
[9.8] Which Units Can Retreat and How Retreats Are Conducted.
Only mechanized units and most first line non-mechanized units have the option to retreat. PRC second-line, third-line, border division units, all Laotian units, the Mongolian unit, the Soviet marine division, and all airborne divisions can never retreat. If a Player's units incur an adverse result in combat, and he does not wish to fulfill the result by taking a step loss, if and only if all his units are eligible to retreat, he may retreat all his units that were involved in the combat by moving all the units one hex away from the combat position and the Enemy. Retreating does not require the expenditure of Movement Points.
[9.81] Retreats are always optional. A Player may choose to lose a step rather than retreat. However, a unit may never be retreated into an Enemy-occupied hex. Units may not retreat off the map; those that do are considered eliminated.
[9.82] Retreats are always conducted by the owning Player.
[9.83] A retreating unit must, if possible, retreat into a vacant hex. (Exception: A unit may be retreated into an occupied — by Friendly units — Pop 100 or Pop 200 hex as if it were a vacant hex.) If no vacant hex is available, it may retreat into a Friendly-occupied hex. Units may not retreat into a hex in violation of stacking restrictions. If forced to do so the excess retreating units are eliminated.
[9.84] Friendly units being retreated as a result of a single combat may be retreated into different hexes.
[9.85] If a unit is forced to retreat into a Friendly occupied hex as a result of combat and that hex then undergoes an attack in that Combat Phase, the retreated unit does not add its Defense Strength to that of the other units in the hex. However, if that new hex suffers any combat result (loss or retreat) the previously retreated unit(s) is automatically eliminated. Note: This case does not apply to overrun, which is not combat.
[9.9] Advance After Combat.
If the defending unit's hex is vacated by retreat or elimination, attacking units may be advanced into the vacated hex. This does not require the expenditure of Movement Points.
[9.91] Whenever an Enemy unit is forced to retreat (or is eliminated) leaving a hex vacant as a result of combat, any or all victorious attacking units which participated in the combat are allowed to advance into that hex (however, see 8.0).
[9.92] The option to advance after combat must be exercised before any other combat resolution. A Player is never forced to advance a unit after combat. After being advanced, units may not attack in that Phase (see 9.14), even if their advance places them adjacent to Enemy units whose combat is yet to be resolved or who are not involved in combat. However, advances are useful in cutting off the retreat of Enemy units whose combat has not yet been resolved.
[9.93] Advance after combat does not apply to overrun.
10.0 Terrain Effects on Movement and Combat
General Rule: The terrain in a hex affects the movement of units into that hex and may affect the ratio of an attack made against a unit in that hex. In addition to any combat ratio adjustments, the effects of terrain on combat are integrated directly into the Combat Results Table, in that the row which is used to resolve each attack is dependent upon the terrain in the hex of the defending unit(s). Terrain never affects the Combat Strength of a unit per se. Terrain characteristics are summarized for each type of terrain on the Terrain Effects Chart (10.6), and on the Combat Results Table (9.6).
Cases:
[10.1] Rivers.
Any hex containing any portion of a river symbol is a river hex for all game purposes. If a river should fall along a hexside, both hexes sharing that hexside are river hexes.
[10.11] Each river hex costs all mechanized units one additional Movement Point to enter, in addition to the normal expenditure of Movement Points necessary to enter the hex. Non-mechanized units may enter hexes containing rivers at no additional cost.
[10.12] The combat ratio of any attack against a unit in a river hex is adjusted two columns to the left, unless it is a concentric attack (9.55).
[10.2] Roads, Pop 100 and Pop 200 Areas: Militia and Garrisons.
[10.21] It costs one movement point to move a unit into a road hex through a hexside crossed by that road, or through any hexside into a Pop 200 or Pop 100 hex. Exception: Three Movement Points must be expended to move a mech unit into a mountain hex, roads notwithstanding.
[10.22] All Pop 200 and Pop 100 hexes are considered road hexes for purposes of movement. Thus, moving a mechanized unit into a Pop 100 hex which also contains forest costs one Movement Point. However, for a mech unit to enter a Pop 100 hex which also contains mountain costs three Movement Points.
[10.23] All PRC and Vietnamese Pop 200 and Pop 100 hexes contain militia, which are represented by an intrinsic Defense Strength of, respectively, two and one combat Strength Points. Whenever a hex containing operative militia is attacked, the strength of the militia is added to any units present to determine the total defense strength.
[10.24] A Player may move a unit into an Enemy Pop 200 or Pop 100 hex containing militia only by overrun or advance as a result of combat, whenever all defending units are eliminated or retreated or — if the hex is defended by militia only — any combat result other than No Effect is obtained against the militia. Militia in a Pop 200 or Pop 100 hex are inoperative so long as the hex is occupied by one or more Enemy units. Unless the hex is garrisoned (see 10.25), the militia instantly becomes operative again whenever no Enemy units are present.
[10.25] An Enemy Pop 100 or 200 hex may be garrisoned to keep the militia inoperative, even when the hex is unoccupied. Garrisoning a hex requires the expenditure of one division Step. During the Movement Phase the garrisoning Player reduces one of his units in that hex by one step and notes that the hex has been garrisoned. The garrison has no Defense Strength and cannot prevent Enemy units from moving back into the hex.
[10.26] Roads, railroads and cities per se have no effect on combat.
[10.3] Forest and Mountains.
Any hex containing any portion of forest or mountain is a forest or mountain hex for all game purposes.
[10.31] It costs one Movement Point to move a non-mechanized unit into a forest hex; it costs three Movement Points to move a mechanized unit into a forest hex. Exception: 10.21.
[10.32] It costs two Movement Points to move a non-mechanized unit into a mountain hex (Exception: 10.22); it costs three Movement Points to move a mechanized unit into a mountain hex.
[10.33] Whenever non-mechanized Chinese or Korean units defend in or attack into a mountain hex, the combat ratio is adjusted one column to the left or right (at the option of the Player controlling the PRC or North Korean units).
[10.4] Desert.
Any hex containing any portion of desert is a desert hex for all game purposes.
[10.41] Whenever a tank unit defends in or attacks into a desert hex, the ratio for that combat is modified two columns in favor of the owning Player. Whenever a mechanized unit defends in or attacks into a desert hex, the ratio for that combat is modified one column in favor of the defending Player. Each Player may benefit from only one of these modifications in any one combat.
[10.42] Whenever the Mongolian unit defends in or attacks into a desert hex, the USSR Player may modify the ratio for that combat one column to the left or right.
[10.5] Prepared Positions.
When a unit defends while occupying a prepared position in its own country, the defending Player may modify the combat ratio one column to the left. Prepared positions have no other effect on combat or the movement of units.
[10.6] Terrain Effects Chart (Terrain Movement Effects Chart). The chart is printed on the map sheet (page R16 of the source); its values are:
| Terrain | Mechanized units | Non-mechanized units |
|---|---|---|
| Clear | 1 | 1 |
| Desert | 1 | 1 |
| Railroad/Road (see also Case 6.3) | 1 or 3 (see Case 10.21) | 1 |
| Mountain | 3 | 2 |
| Forest | 3 | 1 |
| River | +1 | other terrain |
| Pop 200 | 1 | 1 |
| Pop 100 | 1 | 1 |
# = Movement Point cost to enter hex.
Stacking limits (typed errata sheet, page 13 of the scan, not page-numbered): "The terrain stacking limits have been omitted from the Terrain Movement Effects Chart. Three divisions are equivalent to one army."
| Terrain | Stacking limit |
|---|---|
| Clear | 10 divisions |
| Desert | 10 divisions |
| Forest | 3 divisions |
| Mountain | 3 divisions |
| Pop 200 | 20 divisions |
| Pop 100 | 15 divisions |
[10.7] Effects of Mixed Terrain.
[10.71] Movement Point costs to move from one hex to another are cumulative, except for movement along a road. Thus moving a Soviet unit into a river hex which also contains forest, costs four Movement Points — one for the river and three for the forest terrain. Moving a PRC non-mechanized unit into a river hex which contains forest costs one Movement Point — as neither river nor forest terrain requires the expenditure of extra Movement Points by non-mechanized units. Note that a Pop 200 or Pop 100 hex, even if it contains other terrain, is a road hex.
[10.72] Generally, terrain combat effects are cumulative. All effects may be applied by either Player, depending strictly on the terrain in the defending unit's hex. Note however that only one terrain type in the defender's hex — the most favorable to the defender — is used to determine which die roll result row on the Combat Results Table will be used to resolve the attack.
Example: The Mongolian division and eight Soviet divisions in a hex containing desert and river attack two Chinese units in a hex containing mountain and river. The combat is resolved using the mountain and Pop 100 die roll results rows and is adjusted two columns to the left because of the river in the defender's hex. (Other adjustments — Cadre Level, chemical warfare, supply status — may be made.) Note that the Mongolian and Soviet units do not benefit from the desert as there is no desert in the defending units' hex.
[10.8] Garrisoning the Trans-Siberian Railroad (USSR Player only).
During any of his Movement Phases, the USSR Player may garrison the Trans-Siberian Railroad (hexes 2701 to 4711) by moving any mechanized unit to a hex containing the railroad and removing the unit from the map, noting that it is now garrisoning the railroad. For each unit so utilized each hex through which the railroad runs has an intrinsic Defense Strength of 1. This Soviet garrison functions in all respects identically to Chinese militia (see 10.23 and 10.24). The USSR Player may reconstitute a garrisoning unit by placing it on any Trans-Siberian Railroad hex during that Game-Turn. Such a unit may not be moved, but may attack in that Game-Turn.
11.0 Supply
Commentary: Logistics affect every aspect of warfare. If ammunition, fuel and basic necessities cannot be supplied to the troops, their survival for any period of time is in question. This is especially critical in The China War for the USSR, which must achieve victory utilizing a finite stockpile of resources. The Soviets do not have the transport capacity to sustain a full-scale military effort indefinitely.
General Rule: In order to be moved up to its full capacity, perform overruns, and attack and defend normally, a unit must be in supply. Units not in supply may either be unsupplied (which means a supply line can be traced to them but it is more than 13 mechanized Movement Points in length) or isolated (which means a supply line cannot be traced to them). Isolated units are subject to elimination if the isolated condition is not relieved.
Procedure: At the beginning of each Movement Phase — prior to the movement of any units — the Phasing Player determines which of his units are in supply. During each Combat Phase, immediately prior to the resolution of each attack in turn, the supply status of the attacking and defending units is determined. Units out of supply (only) incur an adverse modification to the combat ratio. At the end of each Player's Combat Phase, any unit which has been isolated for one complete Game-Turn (i.e., since this same Player's last Combat Phase) is reduced by one Step. Exception: An isolated unit in a Pop 200 or Pop 100 hex is not reduced.
Cases:
[11.1] Line of Supply.
A line of supply is a path of consecutive, adjacent hexes that leads to a unit from a supply source (see 11.3). A line of supply may not be traced through an Enemy occupied or Enemy garrisoned hex, nor through a hex containing enemy militia.
[11.11] A line of supply may be traced through any type of terrain hex except all-sea or lake hexes or hexsides. A unit is in supply only if a line of supply may be traced for a distance of up to 13 mechanized Movement Points, counting the hex occupied by the unit but not the hex containing the supply source.
[11.12] Units to which a line of supply that exceeds 13 mechanized Movement Points can be traced are unsupplied. A unit to which no line of supply of any length can be traced is isolated.
[11.2] Effects of Being Out of Supply.
[11.21] Any unit that is unsupplied or isolated at the beginning of a Movement Phase has its Movement Point Allowance halved (round down) in that Phase and cannot execute an overrun, even if, due to subsequent movement during that Phase, the unit is in a position where it would be in supply. (Note also that a unit that is in supply at the start of a Movement Phase is in supply for the entire Phase, even if it is moved to a position where it would be out of supply.)
[11.22] Supply for combat is determined at the instant of combat. Therefore, it is possible for a unit that was in supply at the start of a Combat Phase to become unsupplied or isolated (due to advance or retreat of other units) prior to the resolution of an attack against it.
[11.23] Units that are unsupplied or isolated incur an adverse modification to the combat ratio on attack and defense (see 9.51).
[11.24] A unit is reduced by one Step for each complete Game-Turn it is isolated (see Procedure).
[11.25] Units may be unsupplied indefinitely; no unit is ever reduced or eliminated solely for being unsupplied.
[11.3] Supply Sources.
Any Friendly rail hex may serve as a source of supply for a unit. Mongolian and USSR rail hexes are Friendly to the USSR Player's units only; PRC rail hexes are Friendly to the PRC Player's units only, regardless of who occupies or garrisons any particular hex. Korean and Vietnamese rail hexes are Friendly to all of the units of the Player who controls that country's units. Laotian units are always in supply in Laos. Taiwanese units may use any coastal hex within two hexes of Taiwan which is not occupied by PRC units or militia as a source of supply. See also 6.35.
A Friendly rail hex can serve as a source of supply for Soviet and Mongolian units only if it is connected by a line of rail hexes, none of which are occupied by Enemy units, to either hex 2701 or 4711 (Vladivostok). A Friendly rail hex can serve as a source of supply for PLA units only if it is connected by a line of rail hexes with six or more Pop 200 and/or Pop 100 hexes in the PRC; all the rail and Pop 200 and/or Pop 100 hexes must be unoccupied by Enemy forces. A Friendly rail hex can serve as a source of supply for Vietnamese units only if it is connected by a line of rail hexes unoccupied by Enemy units to hex 2534.
[11.4] Air Supply (USSR Player only).
The USSR Player may supply up to two divisions by air. They must be within six hexes of an air field.
The USSR Player must indicate such units during his own Movement or Reaction Phase. They are considered supplied for the remainder of that Game-Turn. No airborne transport (6.4) is allowed during a Game-Turn in which one or two units are air-supplied (and vice versa). Exception: 16.0.
12.0 Reinforcements and Replacements
General Rule: Players may receive reinforcements and/or replacements according to the rules for each scenario. Reinforcements are new units. Replacements are measured in Steps and are used to strengthen reduced units already on the map. If not used the first Game-Turn they are available, reinforcements may be deployed in subsequent Game-Turns and Replacement Steps may be saved and accumulated.
Procedure: Reinforcements are always deployed in a Player's Reinforcement/Replacement Phase. All reinforcements may be moved up to their full Movement Point Allowance in the subsequent Movement Phase and attack in the Combat Phase. All reinforcements are in supply throughout the Player-Turn of their entrance. Reinforcements may be moved by rail movement if deployed in a railroad hex.
To receive replacements, a unit must be in supply, on a rail hex, and not adjacent to a hex occupied by an Enemy unit during the owning Player's Reinforcement/Replacement Phase. A unit receiving replacements may be moved and attack normally in that Player-Turn. A unit that receives replacement is flipped over from its reduced side to its full strength side. It requires one Replacement Step to convert a reduced division to full strength; it requires three Steps to convert a reduced army. Replacement Steps may only be used to strengthen reduced units, not to "revive" eliminated units.
13.0 Tactical Air Support and Tactical Nuclear Weapons (USSR Player Only)
General Rule: The USSR Player can utilize Air Support Points and Nuclear Weapon Points in a tactical mode to augment the Combat Strength of his units. The USSR Player may utilize a specified number of Tactical Air Support Points each Game-Turn. He may utilize up to a total of 200 Tactical Nuclear Weapons Points during the course of the game with no limit on the number used in any one Game-Turn.
Procedure: For each combat, in calculating his Combat Strength, the USSR Player adds in one Combat Strength Point for each point of Tactical Air Support and/or Tactical Nuclear Weapons utilized. The total number of Tactical Nuclear Weapons points available are kept track of on the Victory and Tactical Nuclear Weapons Points Track (see the game map). Each time any Tactical Nuclear Weapons Points are utilized, the Players must adjust the markers on the track to reflect their use. Players must note how many Tactical Air Support Points are used each Game-Turn.
Cases:
[13.1] Restrictions on the Use of Tactical Air Support Points.
[13.11] The limits on the number of Tactical Air Support Points (hereafter Air Points) which can be used each Game-Turn is listed in the Scenario. Unused Air Points cannot be accumulated and used in subsequent Game-Turns.
[13.12] Air Points cannot be used to augment the strength of units conducting an overrun.
[13.13] The USSR Player can base Soviet Air Points in Vietnam if Vietnam allies with the USSR by announcing the transfer of the given number of Air Points. The points cannot be used during the Game-Turn in which they are transferred. Otherwise, Soviet Air Points must be based at USSR air fields. The four Taiwanese Air Points must always be based in Taiwan.
[13.14] Air Points can be employed up to six hexes away from an air field. However, the total points used are halved (round down) whenever the defending unit's hex is more than three hexes from the nearest attacking Player's airfield.
[13.2] Restrictions on the Use of Tactical Nuclear Weapons.
[13.21] Tactical Nuclear Weapons Points (hereafter Nuke Points) cannot be used against units defending in a Pop 200 hex.
[13.22] The USSR Player cannot employ more than six Nuke Points in any combat per each supplied Soviet unit involved in that combat. (Exception: 16.0). Nuke Points can only be used in combat involving one or more supplied Soviet units.
[13.23] Nuke Points can be used to augment the strength of overrunning units.
[13.24] In any combat where 15 or more Nuke Points are utilized, the PRC Player cannot retreat his units (they must stand and absorb step losses).
14.0 Army Reorganization (PRC Player Only)
General Rule: The PRC Player may reorganize his armies into divisions, and vice-versa.
Procedure: During his Movement Phase, prior to moving any units, the PRC Player substitutes division counters for each army he wishes to reorganize and vice-versa. A full strength army is the equivalent of three full strength divisions of the same Cadre Rating. A reduced army is the equivalent of one full strength and one reduced division. To reorganize, units (if divisions forming an army) must start in the same hex. Reorganized units may be moved and attack normally during that Player-Turn. Note: The PRC Player is restricted as to reorganization by the number of counters available. He may use all counters provided (including eliminated units) to reorganize, but he cannot coin additional counters for that purpose. First Line armies must be reorganized into First Line divisions only (and vice versa); Second Line armies must be reorganized into Second Line divisions only (and vice versa). Third Line armies can be reorganized into three reduced strength Second Line divisions; Players must note that such divisions are Third Line.
15.0 Taiwanese Amphibious Attack Capacity
General Rule: If the Taiwanese are active in a given scenario, the USSR Player can transport Taiwanese troops from Taiwan to the mainland and conduct attacks into PRC-occupied coastal hexes.
Procedure: Up to one Taiwanese army and one division (or both divisions) can be transported from Taiwan to the mainland in each Game-Turn. During the USSR Player's Movement Phase, units may be transported to any hex within two hexes of Taiwan. They may be moved no further than that Game-Turn, although they may attack. If a hex to which the USSR Player wishes to transport Taiwanese troops contains PRC units or operative militia, then the Taiwanese must be deployed in an adjacent ocean hex and conduct an amphibious assault. During his Combat Phase, the USSR Player conducts a series of attacks by the Taiwanese unit(s) in the ocean hex against the PRC unit(s)/militia. The ratio is calculated, the die is rolled, and the results applied for each attack in turn until either the Taiwanese unit(s) succeeds in occupying the coastal hex or is eliminated. If successful, the Taiwanese unit cannot make any subsequent attack in that Combat Phase. If Taiwanese Tactical Air Support Points are used in the amphibious assault, they are considered to apply to each combat resolution. Units on land may participate in support of an amphibious attack.
16.0 Tactical Nuclear Weapon (USSR Player Only Optional Rule)
Commentary: One of the most difficult aspects of employing nuclear weapons is spotting a concentrated target accurately and far enough away from Friendly troops and then delivering on that information before it is stale. The USSR has recently (early 1979) increased the number of airborne troops deployed in the Far East to all-time high levels. It is possible that they intend to combine the mobility of these helicopter-borne troops with a sophisticated communications system to create a new Blitzkrieg-style tactic; coordination of tactical nuclear weapons delivery with FO's so far forward as to literally be behind enemy lines. Properly employed — if the Soviet Army is indeed capable of it — such a tactic could be devastating, particularly against a technically inferior, non-mechanized enemy.
General Rule: Two Soviet airborne divisions have Movement Point Allowances of six. Those units may be moved up to six hexes through any terrain, regardless of Movement Point costs. They may be moved through (but may not stop in) hexes containing mountain terrain, Pop 200 hexes and/or hexes containing three or fewer divisions of Enemy units. They may not be moved through or stop in any hex which is more than three hexes from an air field, or Soviet unit in a clear, desert, Pop 200 or Pop 100 hex.
These two units are always in supply. They may not conduct overruns. Each unit may be supported by an unlimited number of Tactical Nuclear Weapons Points during any Combat Phase (i.e., they are not subject to 13.22). Movement of these units does not affect the USSR Player's capacity to move his other three airborne divisions (6.4) or use Air Supply (11.3).
17.0 The East Is Red (Scenario 1)
Commentary: This scenario concerns a full-scale war between the USSR and the PRC. The dynamics of the scenario turn on whether the USSR Player can damage the PLA sufficiently and gain enough territory to win before he shoots his logistical bolt. Victory, therefore, measures Soviet gains against Soviet expenditure of supplies.
Cases:
[17.1] Scenario Length. The East is Red lasts eight Game-Turns.
[17.2] How to Set Up the Game.
The USSR Player controls the Soviet units (including the Mongolian unit) and moves first. The PRC Player controls the Chinese units. Depending on Political Events resolutions (see 5.0), the Vietnamese/Laotian units and the Taiwanese units may be controlled by the USSR Player; the North Korean units may be controlled by either Player. The PRC Player first sets up the Chinese units. Then the USSR Player sets up the Soviet, Mongolian, North Korean, Taiwanese, and Vietnamese and Laotian units.
[17.21] PRC Set-Up.
PRC units may be set up in any land hexes in the PRC, including hexes traversed by international borders except for PRC-Vietnam border hexes and hex 4808. All border divisions must be set up in or adjacent to hexes containing international borders. Where indicated, armies must be first line; otherwise the PRC Player makes a choice. PRC infantry armies may be reorganized (see 14.0) into divisions which may in turn be deployed in separate hexes in the initial deployment.
- Shenyang Military Region (within seven hexes of 4207): 6 first line infantry armies; 3 border divisions; 2 tank divisions
- Beijing Military Region (within five hexes of 3210): 6 infantry armies; 3 border divisions; 3 tank division
- Lanzhou Military Region (within nine hexes of 2316): 2 infantry armies; 2 border divisions; 1 tank division
- Xinjiang Military Region (within seven hexes of 1108): 2 first line infantry armies; 2 border divisions; 2 tank divisions
- Chengdu Military Region (within three hexes of 1319): 1 infantry army
- Kunming Military Region (within five hexes of 2225): 3 infantry armies; 2 border divisions
- Wuhan Military Region (within four hexes of 3123): 1 infantry army
- Guangzhou Military Region (within five hexes of 2927): 6 infantry armies; 2 border divisions
- Fuzhou Military Region (within one hex of 3627): 2 infantry armies
- Nanjing Military Region (within four hexes of 3922): 2 infantry armies
- Jinan Military Region (within two hexes of 3817): 1 infantry army
- Anywhere in China: 8 infantry armies; 4 tank divisions; 3 airborne divisions
[17.22] USSR Set-Up.
Soviet units may be placed in any land hex in the USSR or Mongolia according to the following restrictions. Soviet (or the Mongolian) units may not be placed in any hex containing an international border except the Mongolian-USSR border and the border in hex 4808. Where not specified, the USSR Player has his choice between deploying first line or second line units.
- Central Asian Military District (within eight hexes of 0903): 1 tank division; 5 mechanized divisions
- Ajaguz (1202): 1 airborne division
- Siberian Military District (within three hexes of 2201): 4 mechanized divisions
- Irktusk (2902): 1 airborne division
- Trans-Baikal Military District (within eight hexes of 3203): 2 tank divisions; 8 mechanized divisions
- Far East Military District (within six hexes of 4605): 2 first line tank divisions; 19 first line mechanized divisions
- Vladivostok (4711): marine division
- Chabarovsk (4906): 3 airborne divisions
- Anywhere in Mongolia: Mongolian division; 1 first line tank division; 2 first line mechanized divisions
[17.23] North Korean, Taiwanese, and Vietnamese/Laotian Set-Up.
Unless otherwise stated, the USSR player must place units on a hex within their respective country. Units may not be deployed on hexes containing an international border (Exception: Vietnamese units may be placed on hexes through which the PRC-Vietnam border runs).
- North Korea: 2 tank divisions; 1 mechanized army; 4 infantry armies
- Taiwan: 2 tank divisions; 6 infantry armies (plus 4 Tactical Air Support Points; see Case 5.15)
- Vietnam: 1 mechanized army; 6 infantry armies
- Laos: 3 infantry divisions; 1 Vietnamese infantry army
[17.24] Game Markers. Place all Victory Point markers at zero. Place the USSR Tactical Nuclear Weapons markers to indicate 200 points available. Place the Game-Turn marker in the space corresponding to Game-Turn 1.
[17.3] Reinforcements and Replacements.
[17.31] USSR Reinforcements.
- *Game-Turn 2 at 1301 or 2701: 1 tank division
- *Game-Turns 3, 4, 5, 6, 7, and 8 at 0104 or 0105: 1 mechanized division each turn
- *Game-Turns 4 and 8 at 1301 or 2701: 1 mechanized division each turn
- Game-Turn 6 at 1301 or 2701: 1 mechanized division
*Not available if NATO allies with PRC; see Case 5.12.
[17.32] USSR Replacements. The USSR Player receives two steps of replacements per Game-Turn beginning with Game-Turn 2 (see 12.0). However, any unit that receives a replacement step must be (or become) a second line unit; i.e., if a reduced first line tank division receives replacements, the reduced counter must be replaced with a full-strength second line tank division counter. If no such counter is available (among eliminated units or unused reinforcements), the unit may not receive replacements. Soviet airborne divisions cannot receive replacements.
[17.33] PRC Reinforcements.
- Game-Turns 4, 5, 6, 7, and 8: up to a total of ten (for the whole game) second line infantry armies, taken from eliminated units as available. Deployed in any Military Region as listed in 17.21; no more than one per Game-Turn in any one Region.
- Game-Turns 6, 7, and 8: up to a total of 14 (for the whole game) third line infantry armies, taken from among eliminated border divisions (they are printed on the reverse side of such units) as available. Deployed in any non-Soviet occupied or garrisoned province capital hex; no more than one per Game-Turn in any one province.
[17.34] PRC Replacements. The PRC Player receives replacement steps according to the following schedule:
- Game-Turn 3: 3 steps
- Game-Turn 4: 6 steps
- Game-Turn 5 and 6: 8 steps each
- Game-Turn 7 and 8: 10 steps each.
PRC Tank divisions cannot receive replacements.
[17.35] There are no reinforcements or replacements for Mongolia, North Korea, Taiwan, Vietnam, or Laos.
[17.4] How to Win The East Is Red.
Relative performance of the players is measured in Victory Points. Each player receives a certain number of Victory Points for various actions which may be performed. These Victory Point acquisitions are recorded on the Victory Point and USSR Tactical Nuclear Weapons Point Display (see map). At the end of the game, compare the totals and refer to the Level of Victory Chart (17.43) to determine the outcome of the game.
[17.41] USSR Victory Points.
- 1 — For each PRC non-mechanized division step eliminated
- 1 — For each PRC-allied unit (any type or size) step eliminated
- 3 — For each PRC army or tank division step eliminated
- 4 — For each "other industries" symbol in hexes occupied or garrisoned by Soviet or allied forces at the end of the game
- 4 — For each "other minerals" symbol (as above)
- 7 — For each "coal" symbol
- 10 — For each "iron" symbol
- 10 — For each "oil" symbol
- 12 — For each "uranium" symbol
- 35 — For each "shipbuilding" symbol
- 40 — For each "railroad" manufacturing symbol
- 50 — For the "truck manufacturing" symbol
- 100 — For the "nuclear equipment" manufacturing symbol
[17.42] PRC Victory Points.
- 1 — For each supplied Soviet unit involved in combat (attack, defence at a ratio of 1-3 or greater, or overrun)
- 1 — In addition to the above-listed Victory Point for each supplied Soviet unit involved in combat which the supply line runs through any non-USSR desert hex (remember the hex the unit is in does count)
- 1 — For each hex the Tactical Nuclear Weapon FO airborne units are moved (only if optional rule 16.0 is used)
- 20 — For each hex of the Siberian Railroad (see Case 10.8) occupied at any time, for any duration of time, per Game-Turn
None: neither player receives any points for garrisons or militia destroyed.
[17.43] Level of Victory Chart. Subtract the PRC Victory Point total from the USSR. The difference determines the level of victory, if any, either player has attained.
| Difference in Points | Level of Victory |
|---|---|
| 100 or more | Decisive USSR Victory |
| 50 to 99 | Substantial USSR Victory |
| 25 to 49 | Marginal USSR Victory |
| 0 to 24 | Draw |
| −25 to −1 | Marginal PRC Victory |
| −50 to −26 | Substantial PRC Victory |
| −51 | Decisive PRC Victory |
18.0 Objective: Hanoi! (Scenario 2)
Commentary: Unable to accede to the continued existence of a powerful potential Soviet ally to the south, the PRC resumes its invasion of Vietnam, this time with the objective of decisively defeating her before the USSR can effectively react.
Cases:
[18.1] Scenario Length. "Objective: Hanoi" is ten Game-Turns long.
[18.2] Set Up and Special Rules. In this scenario, the PRC player controls the Chinese units and moves first. The USSR player controls the Vietnamese and Laotian units. The USSR player sets up his units first, and then the PRC Player sets up the Chinese units.
[18.21] Vietnamese/Laotian Set-up. The USSR Player may set up the following units in Vietnam or Laos. Units may be set up in hexes containing international borders except for any hex containing the PRC-Laos border or hex 2629.
- Anywhere in Vietnam: 3 infantry armies; 1 mechanized army
- Anywhere in Laos: 3 infantry divisions; 1 infantry army (Vietnamese)
[18.22] PRC Set-up. PRC units may be set up in any land hexes in the PRC, including hexes through which the Laos-PRC international border runs and hex 2629, but not any other hexes containing the Vietnamese-PRC border. PRC infantry armies may be Reorganized (see 14.0).
- Anywhere in the PRC: 1 tank division; 10 second line infantry armies; 2 first line infantry armies; 5 third line infantry armies; 1 airborne division
[18.23] Special Rules.
- There are no Political Events; the Political Events Inter-Phase is skipped.
- Laotian units cannot be moved out of Laos (they can be moved into border hexes).
- There are no Chemicals, Electronic Warfare, Tactical Air Support Points, or Tactical Nuclear Weapons Points.
- When attacked from 2030, hex 2031 is not considered to be a River hex.
- Vientiane (hex 2031) is considered to be a supply source for the Laotians and Vietnamese at the beginning of the game. If occupied by a PLA unit, it is thereafter considered to be a supply source for whichever player last had (or currently has) a unit in that hex.
- Neither player may move units into Thailand or Burma.
[18.3] Reinforcements and Replacements.
[18.31] Chinese Reinforcements and Replacements. There are no PRC reinforcements. The PRC Player receives replacement steps according to the following schedule:
- Game-Turn 2: 1 step
- Game-Turn 3: 2 steps
- Game-Turns 4, 5, and 6: 3 steps
- Game-Turns 7, 8, and 9: 4 steps
[18.32] Vietnamese Reinforcements and Replacements. The USSR player receives one Vietnamese infantry army each Game-Turn as reinforcement for Game-Turns 2, 3, and 4. The unit is deployed in hex 2534.
The USSR Player receives one replacement step per Game-Turn, beginning with Game-Turn 2.
[18.33] There are no Laotian reinforcements or replacements.
[18.4] How to Win Objective: Hanoi!
[18.41] USSR Victory Points.
- 1 — For each PRC non-mechanized division step eliminated
- 3 — For each PRC army or tank division step eliminated
[18.42] PRC Victory Points.
- 1 — For each Laotian step eliminated
- 3 — For each Vietnamese infantry step eliminated
- 9 — For each Vietnamese mechanized step eliminated
[18.43] Points for Both Players. Either Player may receive points for having a unit occupy or be the last to occupy the following hexes. Note that only one Player may receive the points for any one hex. At the start of the game, all hexes are assumed to be occupied or have been last occupied by Vietnamese units.
| Points | Hex |
|---|---|
| 10 | 2031 (Vientiane) |
| 3 | 2331 |
| 20 | 2429 (Hanoi) |
| 4 | 2430 |
| 10 | 2530 (Haiphong) |
| 10 | 2534 |
[18.44] Level of Victory Chart. Subtract the PRC Victory Point total from the USSR. The difference determines the level of victory, if any, either player has attained.
| Difference in Points | Level of Victory |
|---|---|
| 50 or more | Decisive USSR Victory |
| 35 to 49 | Substantial USSR Victory |
| 20 to 34 | Marginal USSR Victory |
| 0 to 19 | Draw |
| −15 to −1 | Marginal PRC Victory |
| −30 to −16 | Substantial PRC Victory |
| −31 or fewer | Decisive PRC Victory |
19.0 Back to the Mainland! (Scenario 3)
Commentary: Some six weeks after the beginning of a full-scale Soviet invasion, the Nationalist government in Taiwan determines that the time is ripe for the long dreamed of return. In spite of the ongoing war with the USSR, the PRC diverts an overwhelming force to combat the Nationalists, true to the pattern of the Second World War, during which the Communists and Nationalists still found energy to fight each other, despite the presence of over one million invading Japanese troops. But such a diversion of effort can be sustained for only a limited time period; the Nationalists must be defeated completely and quickly.
Cases:
[19.1] Scenario Length. Back to the Mainland! is ten Game-Turns long.
[19.2] Set Up and Special Rules for Back to the Mainland! The PRC player controls the PLA units and moves second. The USSR Player controls the Nationalist (Taiwanese) units and moves first. The PRC Player sets units up first, and then the USSR Player sets up his units.
[19.21] PRC Set-up.
- Fujian Province (within 2 hexes of 3927): 3 second line divisions
- Guangdong Province (within 3 hexes of 3129): 1 first line army
- Zhejiang Province (within 3 hexes of 3924): 1 second line army
[19.22] Taiwanese Set-Up. Taiwan: 2 tank divisions; 6 infantry armies.
[19.23] Special Rules.
- There are no Political Events.
- There are no Chemicals, Electronic Warfare, or Tactical Nuclear Weapons Points. There are 4 Taiwanese Tactical Air Support Points.
- The USSR Player may garrison Pop 200 and Pop 100 hexes as per Case 10.25. Garrisoning a hex costs one division step. The USSR Player may either divert Replacement Steps to garrison duty or must reduce an army one step for every three garrisoned hexes. An army still in Taiwan may be reduced for garrison duty. (Use another color of counters not being used in this scenario to mark garrisoned hexes.)
- If the USSR Player has units (or has garrisoned) any province capital during two consecutive Game-Turn Inter-Phases, beginning with the next Game-Turn, all PRC militia in that province are considered to have disbanded for the rest of the game. Any steps being employed for garrison duty in that province may be used as Replacement Steps.
[19.3] Reinforcements and Replacements.
[19.31] Taiwanese Reinforcements and Replacements. There are no Taiwanese reinforcements. However, see Section 15.0. There are no Taiwanese Replacements.
[19.32] PRC Reinforcements and Replacements. PRC reinforcements arrive according to the following schedule:
- Game-Turn 2: One third line army in each of the following hexes: 3224, 3228, 3424, 3621, 3727, 3822, and 3922
- Game-Turn 3: One second line army in each in 3224 and 3922; three second line armies (one per hex) in any of the following hexes: 2827, 2828, 2829, 2830, 2930
- Game-Turn 4: One third line army each in hexes 3224 and 3922.
Reinforcement units may not be placed in hexes currently occupied or garrisoned by the USSR Player's forces; they may never be placed in any hex in a province the capital of which has been captured by the Taiwanese. If a reinforcement unit cannot be deployed in the hex for which it is slated, it may be delayed and deployed in that hex later in the game, if possible (otherwise it may never be brought into the game).
The PRC receives four replacement steps per Game-Turn, beginning with Game-Turn 2.
[19.4] How to Win Back to the Mainland! If by the end of the game there are any Taiwanese units (garrisons do not count) left on the Mainland, the USSR Player wins the game. If there are none, the PRC Player wins.
The China War Notes
The following designer's notes are printed in the rules booklet after the scenarios. They are commentary, not rules; they are transcribed here for completeness.
Conception. The China War is the second game to be published in S&T concerning a hypothetical invasion of the PRC by the USSR. The decision to retrace our steps over apparently broken ground was not taken lightly, nor was it reached quickly. Already as 1979 began, we had been considering updating The East is Red (which was published in 1974) to re-evaluate the situation in the light of the rapid progress the PRC has been making along the path towards modernization. The potential for war between the USSR and the PRC is perhaps the most profound threat to world peace that exists today. It is our responsibility to provide the most current analysis of that threat that we can. The events in Southeast Asia in the spring of this year galvanized us into action, and as the fighting between the PLA and Vietnamese forces raged, with tension plainly mounting in Moscow, Washington, and the editorial conference room of the N.Y. Post, we kidded each other that our efforts were pointless; long before the game could be printed, SPI and most of the rest of the world would have been reduced to radioactive slag. It's not much of a joke, and though we laughed about it last spring, it was laughter produced by nervousness more than by amusement.
The main question we had to decide was what the focus of the game would be. To a great extent, one's preference for a focus on the Sino-Soviet confrontation begs the question of how one thinks it would be resolved, if it came to a fight. We considered options ranging from a daily-turn, 15 km/hex, operational/tactical version of the Vietnamese and/or Manchurian frontier regions to an area movement, seasonal turn, grand strategic version covering all of China with rules for Western arms shipments and naval blockade, and extensive political rules covering control of territory in the PRC and attempts by both sides to gain international support or deny it to each other. The first version would be more satisfactory if one expects such a war would be resolved quickly depending on the outcome of the early battles; the second version is preferable if one anticipates a long war with no early victory for either side likely. The final result is much closer to the first version than the second.
Political Events. Short of an all-out nuclear attack against the USSR, there is precious little the Western world could do in eight to ten weeks that would affect the outcome of a large-scale battle in China. Therefore, the most significant political events in the scope of the game are the decisions of those Asian powers with the military wherewithal to exercise (or to refrain from exercising) their muscles in concert with one side or the other. Incidently, although the most likely event (according to our Table) is the entry of Vietnam into the war in alliance with the USSR, there is some sentiment hereabouts that the chances of such an alliance are underestimated still. We consider that it would be not at all unreasonable to play the game assuming at the outset that Vietnam is an ally of the USSR (ignoring all Political Event results which apply to Vietnam).
Movement and Combat. The basic game system mechanics for The China War are largely borrowed from the venerable Panzergruppe Guderian. Weekly game-turns and 126 km/hex game scale makes The China War the largest-scale SPI game to employ a derivative of that system, and this is reflected in the weakening of the overrun rules (only one overrun per unit per Game-Turn is possible) and the substitution of a defensive reaction Phase for the usual offensive mech movement Phase.
The "ratio shift" character of the combat system was the focus of some debate. We were concerned that it might prove too cumbersome in play, and indeed we managed to cut down a bit on their ubiquity. But we ultimately decided that the ratio shift system was the best means of underscoring the relative importance of such factors as training and morale (combined into the Cadre Rating) and electronic warfare.
Terrain. The map for The China War is a source of great satisfaction to us. No doubt we will be roundly castigated by some for the relatively arbitrary terrain definitions that are used in the game. But we early on determined that we would make the map as accurate and "realistic" as possible, for all intents and purposes ignoring the hexgrid. While some recalcitrants on the R&D Staff have sneered at "the Great Step Backward" (as they refer to our decision to allow the rivers to flow, courses unaltered, through the hexes where they will, as in the Avalon Hill games of the 1960's), we believe that The China War map encompasses not only some of our best research, but one of our most effective graphic presentations of information ever in S&T.
Supply. Few situations are more harshly constricted by logistics considerations than the subject of The China War. Readers may, therefore, be somewhat surprised at the relative lack of constricting supply rules per se. The decision to build the supply considerations into the victory conditions rather than represent them more directly was a product of two considerations: the length of time covered by the game and the "playability" of the system. First of all, the Soviets simply will not have difficulty in sustaining a full-scale military effort within the first 8 to 10 weeks, assuming they do not outrun their stockpiled supplies. So the question (given an eight-week time frame) is not "Will the Soviets run out of supplies?" but rather "Will the Soviets accomplish their objectives before they run out of gas?" In deciding on an operational level game, we had in effect decided to concentrate on factors that would impact on the opening weeks of the war, since given the system, a game of longer than six to ten Game-Turns stretches the bounds of gameability. And that brings to mind our second consideration — playability. We were already concerned about the density of the play mechanics; in particular the combat system approached cumbersomeness in testing. We did test a very unsubtle supply system which utilized fuel and ammo points and required the players to keep track of the expenditures of points by each unit as it moved and participated in combat and which limited the number of points which could be transported through any one hex (the limit varied depending on the terrain, of course) in any one Game-Turn, so that the players had to keep track of that as well. We immediately recognized that we were asking too much of the player, and, utilizing the results of our testing with that system, strove to apply the requisite restrictions on the freedom of the USSR player in other ways.
Scenarios. We considered many scenarios for The China War. Some of the ones we did not publish include a Soviet-backed warlord versus PRC central government struggle that assumes a relatively successful USSR invasion and (for balance) an Andrei Amalrik 1984 scenario wherein a too-modernized China forces the USSR to resort to strategic nuclear weapons and disaster for everyone. Ultimately, we dispensed with these frivolously speculative scenarios to concentrate on the ones provided with the game. The first scenario provides the best game; it simply has the most gameable situation. The Vietnam scenario is not uninteresting however. One variant that we tried a couple of times but not enough to include in the game proper was to assume that Thailand, no friend of Vietnam, allows free passage to forces of the PRC. Of course, as soon as the PLA enters that country, Vietnamese forces will follow suit, possibly involving the Thais (for whom we had no counters)...but as the north of Thailand is relatively sparsely populated, if one is willing to assume the Thais might risk a bit of fighting in their country for the opportunity of furthering the possible defeat of Vietnam, the scenario could be played that way. It gives both sides a bit more room to manuever. As for the Taiwanese scenario, one play through reveals why it is Chiang never quite brought himself to get his feet wet.