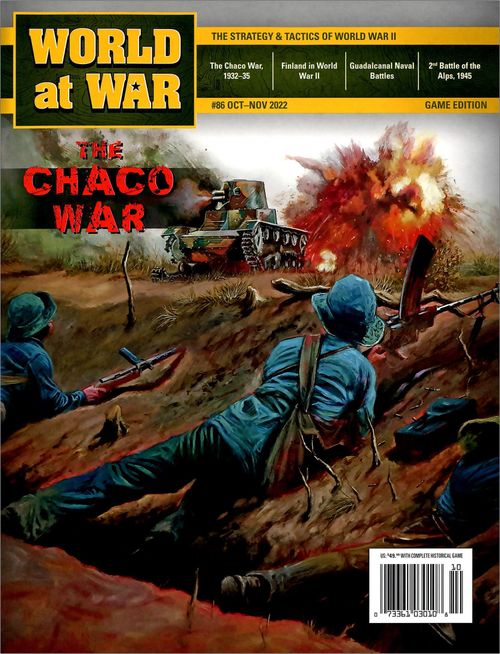
The Chaco War, 1932-1935
The Chaco War, 1932-1935 Rulebook
Table of Contents
Table of Contents
- 1.0 Introduction
- 2.0 Components
- 3.0 Set Up & Hex Control
- 4.0 Sequence of Play & How to Win
- 5.0 Movement
- 6.0 Stacking
- 7.0 Zones of Control (ZOC)
- 8.0 Combat
- 9.0 Leaders, HQs, & Fortifications
- 10.0 Reinforcements, Replacements & Mobilizations
- 11.0 Supply & Attrition
- 12.0 Random Events
- 13.0 Optional Rules
1.0 Introduction
Chaco War, 1932–1935 is a simulation of the brutal war that pitted Bolivia against Paraguay (two of the poorest nations of South America) in one of the most inhospitable territories on earth: the Chaco Boreal.
1.1 Scale
Each game turn represents three months. Each hexagon is 30 miles (50 kilometers) from side to opposite side. Ground units are regiments or equivalents.
1.2 Common Abbreviations
- #d6: Roll the number of six-sided dice equal to the number, then total the results.
- CRT: Combat Results Table
- DR: Die Roll
- DRM: Die Roll Modifier
- EZOC: Enemy Zone of Control
- GT: Game Turn
- LP: Logistics Points
- LOS: Line of Supply
- MF: Movement Factor
- MP: Movement Points
- Must: The player is required to take the action.
- May: The player can choose to take or not take the action.
- OOS: Out of Supply
- Occupy: Have a unit in a hex.
- Pick: Randomly draw a unit or marker.
2.0 Components
A complete game of Chaco War includes a 22×34-inch game map, rule set, and a sheet of 176 5/8-inch counters. Players must provide one six-sided die to resolve combat and other random game events.
Support Markers: When available are placed in the Support Available Box. They do not have a stacking value.
2.1 Map
The map shows the Chaco Boreal (Northern Chaco) as it was circa 1932. A hexagonal grid has been superimposed over the terrain features on the map to regularize the movement and positioning of the playing pieces. The hexagons are called "hexes" in the game rules.
Map Errata: The DR Modifiers on the map for the Support Marker Determination Table are incorrect. Use the modifiers as listed at the end of the rules.
2.2 Playing Pieces
The playing pieces (counters) are referred to as "units" for military forces, and as "markers" for informational pieces.
2.3 How to Read the Units
The counter diagrams label the following parts: Front (Full Strength) with Non-Replaceable Indicator, Unit Identification, Unit Type Symbol, Unit Size Symbol, Number of Steps, Attack Factor, Movement Factor and Defense Factor; Back (Reduced Strength) with Reduced Indicator; Leader Front with Support Modifier, Combat Modifier DRM and Leader Name; and Leader Back.
Attack Factor: The unit's basic combat strength when attacking (8.0). Defense Factor: The unit's basic combat strength when defending (8.0). Movement Factor: The basic number of hexes through which a unit can move in a turn (5.0). Number of Steps: The number of step losses the unit can suffer before being destroyed and moved to the appropriate Pool (10.0).
Important: HQ and supply columns have an attack factor and defense factor of zero.
2.4 Military Asset Types
Combat Unit Types: All units listed have a stacking value of one, an attack, defense, and movement factor.
- Infantry
- Cavalry
- Corps HQ
- Supply Column
- Paraguayan Navy
- Leader
- Air Support Marker
- Mortar Support Marker
- Artillery Support Marker
- Armor Support Marker
- Naval guns (optional)
2.5 Unit Sizes
- III: Regiment
- XXX: Corps (HQ only)
2.6 Unit Designations, Nationalities & Sides
Units may be identified by a title, a number, or a two-part designation.
Bolivians (Green):
- Aba: Abaroa
- Aro: Aroma
- Aya: Ayacucho
- Azu: Azurduy
- Bag: Bague
- Ball: Ballivián
- Cam: Campero
- Cha: Chacaltaya
- Cho: Chorolque
- Cmp: Campos
- Col: Colorados
- Cor: Corrales
- Flo: Florida
- ILI: Illimani
- Ing: Ingaví
- Jun: Junín
- Lan: Lanza
- Rio: Riosinho
- Suc: Sucre
- Qul: Quijarro
- War: Warnes
Paraguayans (Brown):
- 24M: 24 de Mayo
- AC: Aca Carayá
- AV: Aca Verá
- AY: Acá Yuasá
- B40: Batallón 40
- Bo: Boquerón
- CB: Capitán Bado
- CC: Cerro Corá
- CL: Cerro León
- CM: Coronel Mongelós
- CO: Coronel Oviedo
- Co: Corrales
- Cur: Curupayty
- CT: Coronel Toledo
- DM: Dos de Mayo
- Du: Duarte
- GC: General Caballero
- GD: General Díaz
- GSM: General San Martín
- LM: Lomas Valentinas
- ML: Mariscal López
- Pi: Piribebuy
- Pt: Pitiantuta
- RÑ: Rubio Ñu
- Sa: Sauce
- Tu: Tuyutí
- YC: Yatayty Corá
- YI: Itá Ybaté
- YTO: Ytororó
- VR: Valois Rivarola
2.7 Administrative Markers
The following markers are included in the game as informational and memory aids. Their functions are explained in the noted portions of the rules.
- Fortification Marker
- Out of Supply Marker
- Depleted Marker
- Game Turn Marker
- Bolivian Mobilization Marker
- Bolivian Replacement Points Marker
- Paraguayan Replacement Points Marker
- Random Event
3.0 Set Up & Hex Control
Set up according to the following general rules.
- The Paraguayan player sets up first, followed by the Bolivian player.
- Play proceeds according to the sequence given in (4.0) for ten GTs, from October-December 1932 to January-March 1935.
Important: Players must adhere to stacking restrictions during set up (6.0).
3.1 Paraguayan Set Up
The Paraguayan player should sit on the eastern edge of the map.
- Place the six Paraguayan random event markers printed with Turn 1 Event on the back of the counter in an opaque container. This container is the Paraguayan Random Event Pool. The remaining event markers are set aside until GT 6.
- Deploy I Corps HQ, any six Paraguayan Infantry Regiments, and any four Cavalry Regiments in or adjacent to any of following Paraguayan forts (hex #):
- Nanawa (2816)
- Toledo (2413) (Units may not set up in Camacho)
- Isla Poí (2814)
- Boquerón (2614)
- Deploy any five Infantry Regiments in or adjacent to any of the following Paraguayan forts (hex #):
- Colonel Bogado (2907) (Units may not set up in fort Florida)
- Puerto Pinasco (3414)
- Puerto Sastre (3412)
- Pitiantuta (2709)
- Puerto Casado (3413)
- Bahía Negra (3305)
- Place the following units in the Paraguayan Support Available Box:
- Leaders: Estigarribia and Franco
- Support Markers: Two Artillery, One Mortar, 1 Air, Paraguayan Navy
- Place two supply columns on any friendly HQ or friendly supply source.
- Refer to the Reinforcement Chart and place the units listed in the corresponding GT Box on the Turn Record Track.
3.2 Bolivian Setup
The Bolivian player should sit on the Western edge of the map.
- Place the six Bolivian random event markers printed with Turn 1 Event on the back of the counter in an opaque container. This container is the Bolivian Random Event Pool. The remaining event markers are set aside until GT 6.
- Deploy nine non-replaceable Infantry Regiments, three non-replaceable Cavalry Regiments, and 1 Corps HQ in or adjacent to the following Bolivian forts (hex #):
- Saavedra (2517)
- Muñoz (2317)
- Camacho (2312)
- Deploy all other non-replaceable Infantry (x4) and the remaining non-replaceable Cavalry Regiments in any other Bolivian forts on the map.
- Place the following units in the Bolivian Support Available Box:
- Leader: Peñaranda
- Support Markers: Three Artillery and three Air
- Place three supply columns on any friendly HQ or friendly supply source.
- Place the "current Bolivian commander" marker in the Peñaranda box on the Current Bolivian C-n-C Track. All remaining leaders are placed in an opaque container (bin) (9.2).
- Randomly pick four of the remaining Infantry Regiments and place them in the GT 5 Box.
- Refer to the Reinforcement Chart and place the units listed in the corresponding GT Box on the Turn Record Track.
3.3 Hex Control
Keeping track of who controls each hex is important for determination of victory points. Control of hexes is attributed to side that currently occupies the hex or was the last side to enter that hex.
3.4 Winter Game Turns
GTs marked "Winter" on the Turn Record Track have special effects on combat and movement. (See the Terrain Effects Chart on the map.)
4.0 Sequence of Play & How to Win
Chaco is divided into 10 GTs. Each complete GT is divided into two Player Turns.
- The Bolivian player is always the first player in every phase of every GT, followed by the Paraguayan player.
- Player turns are divided into a series of sequenced steps (or "phases").
- During the player turns, the player who is conducting the turn is the phasing player and the other player is the non-phasing player.
- Every action taken by a player must be conducted in the appropriate phase of his own player turn.
4.1 Sequence of Play
Important: On GT 1, ignore the Reinforcements, Replacements and Support Determination Phases. GT 1 begins with the Random Events Phase, then the Fort Building Phase and then continues normally with the remainder of the game turn sequence.
Random Events Phase: Each player randomly picks one event marker from their respective Random Events Pool. Each player then consults the Random Events (12.0) and applies any results if the event must be applied immediately. Otherwise, players can keep the event and use it as indicated by the event rules.
Reinforcements Phase (Skip on GT 1): Each player receives and places on the map the reinforcements scheduled for that GT (10.0).
Replacements Phase (Skip on GT 1): Each player adds up the number of RPs available and uses them to rebuild units (10.0).
Support Determination Phase (Both players skip on GT 1, the Bolivian player only skips on GT 2): Each player rolls on the appropriate Support Marker Determination Table (on map) to determine the number of supply columns and support markers available for current GT (11.1). Supply columns are placed on any friendly HQ or friendly supply source on the map. Paraguayan leaders in the Paraguayan Support Used Box are placed in the Paraguayan Support Available Box.
Fortification Building Phase: Players spend supply columns to build forts (9.4).
Bolivian Player Turn
- Movement Phase (5.0)
- 1st Combat Phase (8.0)
- Infiltration Phase (8.6)
- 2nd Combat Phase (8.0)
Paraguayan Player Turn
- Movement Phase (5.0)
- 1st Combat Phase (8.0)
- Infiltration Phase (8.6)
- 2nd Combat Phase (8.0)
Supply & Attrition Check Phase: First the Bolivian Player and then the Paraguayan Player conduct the following steps in the order given:
- Remove OOS markers from units now judged to be in supply.
- Place OOS markers on units judged to be out of supply. 3) Roll for attrition checks.
- Remove depleted markers from surviving units.
- Complete Forts (9.4)
- Roll for Bolivian command change (9.2).
Victory Check Phase: Victory is checked at two times in the game.
- At the end of GT 5, determine the number of Victory Points accumulated by both sides and compare the totals. a) If the Paraguayan player's total victory points are less than five more than the Bolivian player, the game continues until the end of GT 10. b) If the Paraguayan player's total victory points are five or more than the Bolivian player, the game ends and the Paraguayan player wins a sudden death victory.
- At the end of GT 10, determine the number of victory points accumulated by both sides and compare the totals. a) If the Paraguayan player's total victory points are nine or more than the Bolivian player, the Paraguayan player wins the game. b) If the Paraguayan player's total victory points are eight or less than the Bolivian player, the Bolivian player wins the game.
Paraguayan Victory Points
- Award one victory point to the Paraguayan player for each of the following locations (hex #) that are controlled by the Paraguayan player:
- Yrendagué (1607)
- Ingavi (2204)
- 27 de Noviembre (1705)
- Award two victory points to the Paraguayan player for each of the following locations (hex #) that are controlled by the Paraguayan player:
- Arce (2515)
- Camacho (2312)
- Muñoz (2317)
- Award three victory points to the Paraguayan player for each of the following locations (hex #) that are controlled by the Paraguayan player:
- Bolivian Oil Well Hexes (2301) and (1011)
- Villamontes (1109)
- Award one victory point to the Paraguayan player for every Bolivian mobilization performed during the game (10.4).
Bolivian Victory Points
- Award three victory points to the Bolivian player for each of the following locations (hex #) that are controlled by the Bolivian player:
- Bahía Negra (3305)
- Puerto Guaraní (3409)
- Fuerte Olimpo (3408)
- (Optional) Award the Bolivian player one victory point if the Paraguayan player uses the naval guns optional rule (13.1).
Important: Victory Point hexes are shown on the map. Hexes containing an orange number (see Terrain Key) indicate the number of victory points earned by the Paraguayan player. Bolivian victory point hexes contain a green number indicating the number of victory points earned by the Bolivian player.
5.0 Movement
All ground combat units are printed with a movement factor. The movement factor of a unit is the maximum number of factors that may be expended during a friendly Movement Phase.
- Units are moved tracing a path of contiguous hexes through the hex grid until all movement factors are expended, or the player decides to cease moving the unit, whichever comes first.
- As each unit enters a hex it pays one or more of its available movement factors. Consult the Terrain Effects Chart (TEC) printed on the map for further details.
- Unused movement factors may not be accumulated from GT to GT, nor may they be in any way transferred from one unit to another.
- Units may never enter an enemy-occupied hex, nor may they enter a prohibited hex or cross a prohibited hexside.
- A unit may always move a minimum of one hex regardless of the cost in movement factors to enter the hex.
Exceptions: Units may not move from one hex in an enemy zone of control (EZOC) to another hex in an EZOC (7.0) unless the unit is performing advance after combat (8.5) or infiltration (8.6).
- A unit that enters an EZOC must immediately cease its movement.
- A unit that begins its movement in an EZOC may leave that EZOC; however, the first hex entered may not be in an EZOC. The unit could later enter another EZOC (and stop movement).
5.1 Terrain
To enter any given hex a unit must spend the number of MP designated by the TEC for the kind of terrain in it.
- When the TEC calls for a movement factor expenditure to cross a hexside, such as a river, that cost is in addition to the cost for entering the hex.
- If there is more than one terrain type in a hex, use the highest single movement cost from among all the terrain involved.
Exception: If there is a railroad, road, or bridge use the railroad, road, or bridge movement rate regardless of any other terrain in that hex, as described below.
5.2 Railroads & Roads
Units expend a reduced number of movement factors when moving from one road or railroad hex directly into an adjacent road or railroad hex through a hex side traversed by that road or railroad:
Non-Winter GTs:
- Paraguayan Units: 1/2
- Bolivian Units: 1
Winter GTs:
- Paraguayan Units: 1
- Bolivian Units: 2
5.3 Bridges
A river hexside crossed by a road is called a bridge hex. Bridges negates the effects of rivers and lakes on movement for units crossing such hexsides. Bridges are indestructible for game purposes.
5.4 Operational Movement
Units moving entirely from, into, and through non-EZOC hexes may triple their printed movement factors.
Important: A unit conducting operational movement may neither begin its movement nor enter a hex adjacent to an enemy unit.
5.5 Chaco Bush Movement
Important: Supply columns can only enter or move through Chaco bush hexes if moving along a railroad or road.
If at any time during a unit or stack's movement during the Movement or Infiltration Phases those units enter a Chaco Bush hex, each moving unit must check for depletion.
Exception: If a unit's entire movement through Chaco Bush hexes is along a railroad/road no check is required.
Example: If a unit moves from 2506 to 2607 then to 2706 the unit would not check for depletion; however, if the unit moved from 2706 directly to 2707 the unit must then check for depletion.
- The unit(s) only makes one check at the end of their movement. The owning player performs the following for each unit that meets the above criteria.
- The owning player checks depletion for each unit separately by rolling 1d6 and applying the below DRMs:
- +1: If the unit is Paraguayan.
- +1: If random event Local Guide is in effect.
- +1: If using an air unit to provide guidance (9.6).
- If the modified DR is a 1 through 3, the unit is depleted. Place a depleted marker on the unit.
Important: Units performing advance after combat or retreat do not roll for depletion.
5.6 Depletion Effects
Depleted units are more vulnerable to attrition (see Attrition Table on the map) and are affected as follows:
- Printed movement factor is halved (round up).
- May not move during the Infiltration Phase.
- Printed attack and defense factors are reduced by one (never below one).
5.7 Winter Turns
GTs marked "Winter" (remember, this is the Southern Hemisphere) have special effects on the movement of units. See the TEC.
Important: Units may not enter a marsh hex during winter GTs. Units that begin a Winter GT Movement Phase in a marsh hex may only move one hex per Movement Phase and (if possible) move into a non-marsh hex.
6.0 Stacking
Having more than one friendly unit in a hex at the same time is called "stacking".
- Stacking limits vary by terrain type and are given on the TEC.
- Stacking limits are given on the TEC in terms of "units". Each combat unit type in the game (2.4), no matter its nominal organizational size, is "one unit" for stacking purposes.
- Stacking limitations apply for all units of both sides at the end of each Reinforcement, Movement, and Combat Phase.
- Friendly units may move through hexes occupied by other friendly units at no extra cost. There is no limit on the number of friendly units that may pass through a single hex or cross a single hexside in one Movement Phase.
- If, at the end of any friendly or enemy Reinforcement, Movement, or Combat Phase one or more hexes is over-stacked, the excess units must be eliminated by the owning player.
6.1 Support & Administrative Markers
Markers, leaders, and forts do not count against stacking limits.
- Markers may be added to any hex if the specific rule for the marker's use is not violated.
- Air support markers may be placed in the same hex as an enemy unit or marker, and vice versa.
6.2 Stack Movement
To move as a stack, units must begin their movement already stacked in the same hex.
- Units are not required to move together because they started the Movement Phase in the same hex; in such situations, those units might be moved together, individually, or in smaller sub-stacks.
6.3 Splitting Stacks
A moving stack may temporarily halt to allow a unit or sub-stack to split off and move away on a separate course.
- The units left behind in the original stack may then resume their own movement, even splitting off other units and sub-stacks.
- Once a split unit or stack starts moving, all its movement must be completed before that of another unit/stack is begun.
6.4 Different Movement Factors in a Stack
If units with different movement factors are traveling together in a stack, the stack must use the movement factor of the slowest unit.
Important: If the slowest unit in the stack is split off prior to the stack ending its movement, the remaining units subtract the already expended movement factors from the printed movement factors of the next lowest unit. The result is the number of movement factors the stack has remaining.
7.0 Zones of Control (ZOC)
The six hexes immediately surrounding a unit's hex constitute that unit's ZOC. Hexes into which a unit exerts a ZOC are called "controlled hexes."
- Only cavalry and infantry units exert ZOC.
- ZOCs are always in effect, regardless of the phase or GT.
- ZOC do not extend across prohibited hexsides or into prohibited hexes.
- Both friendly and enemy units may simultaneously exert ZOC into the same hexes. There is no additional effect if more than one unit, friendly or enemy, exerts ZOC into the same hex at the same time.
- If an infantry or cavalry unit is in an EZOC, that enemy unit is also in its ZOC. The two units are equally and mutually affected.
- See (5.0) for the effects of enemy zones of control (EZOC).
- EZOCs block supply lines unless there is a friendly unit in that EZOC.
8.0 Combat
Combat takes place between opposing units during each player's two combat phases. Combat is always voluntary.
- An enemy-occupied hex may be attacked by any or all adjacent units.
- No more than one hex may be the object of a single attack.
- No single attacking unit may have its attack factor divided and used in more than one combat.
- Units stacked together need not participate in the same combat. Some units in the stack might attack into one hex, while others attack other hexes, or do not attack at all.
- No defending unit may have part of its defense factor attacked by one or more attackers while another part of that defense factor is attacked by other enemy units.
- No attacking unit may attack more than once per Combat Phase.
- No defending unit may be attacked more than once per Combat Phase.
- Defending units cannot decline combat.
8.1 Attack Sequencing
There is no limit on the number of attacks each player may make during each Combat Phase. He need not declare all his attacks beforehand, and he may resolve them in any order he wishes if the resolution of an attack is completed before that of the next is begun.
8.2 Fog of War
Neither player may look beneath the top unit of enemy stacks until the odds are computed. Once the odds are known, the attack may not be called off.
Exception: Air unit recon (9.6).
8.3 Combat Procedure
- Each support type will either provide column shifts on the CRT or DRMs that are applied to the DR when resolving combat.
- Players may commit any number of available artillery, mortar, armor and/or (optionally) naval gunfire support markers to each combat. A support marker may only be used once per GT. Exception: See (8.3, step 4).
- Only one air unit, one event, and/or one leader may be committed to a single combat.
- Combat column shifts are stated in "right" (R) shifts which are those favorable to the attacker, or in "left" (L) shifts which are favorable to the defender.
Combat is conducted using the following steps in the order given:
- The attacking player declares which enemy hex will be attacked and which units will participate in the attack.
- Both players secretly decide if they will use any support units (armor, artillery, mortars, naval gunfire (optional), air support, supply counters, leaders, or event markers).
Important: To commit a support unit (of any type) in support of a combat the player must be able to trace a line of supply (11.0) from at least one friendly participating unit no longer than two hexes (one intervening hex) to a friendly Corps HQ.
- Players simultaneously reveal if they have committed any of the above support methods.
- The owning player must roll 1d6 for each artillery, mortar, armor support, Paraguayan Naval Flotilla, and (optional) naval gunfire support marker that a player committed to the combat. Modify the DR and then apply the result.
- +1: (Attacker only) To the DR for a mortar support marker if the defending hex contains a fort symbol or fort marker.
Important: The owning player may re-roll an availability DR if the player expends a supply column. One column must be expended for each re-roll.
If the modified DR is:
- 1–2: The support marker is withdrawn and returned to the Support Available Box.
Important: A player may attempt to use returned support markers in a subsequent combat in the same GT.
- 3–6: The support marker may support the combat.
-
The attacker and the defender determine their individual total combat strength by adding the appropriate combat factor (attack factors for the attacker and defensive factors for the defender) to arrive at a total combat strength. Factors may be modified as follows:
- a) Depleted units subtract one from their combat factor (5.6). Exception: A combat factor cannot be reduced to zero.
- b) Attacking and defending units marked with an OOS marker halve their appropriate combat strength (round down to a minimum of 1).
-
The players then divide the attacker's total by the defender's total to establish an odds ratio (combat odds).
- a) If the attacker's total modified combat factors are equal to or greater than the defender's total modified combat factors, round down any remainders. Express the result as an odds ratio (result:1).
Example: If 26 attack factors attack 7 defense factors (26 ÷ 7 = 3.71, rounded down, yields an odds ratio of 3:1 (three to one).
- b) If the attacker's total modified combat factors are less than the defender's total combat factors. Express the result as an odds ratio (1:result). If the result is less than one, the ratio will always be 1:2.
Example: If 8 attack factors attack 12 defense factors (8 ÷ 12 = .67, automatically becomes a ratio of 1:2.
-
The attacking player consults the Combat Results Table (CRT) and locates the corresponding odds column on the table.
Important: Resolve odds greater than 7:1 as 7:1. Resolve odds less than 1:2 as 1:2.
-
Players determine and apply all combat shifts. All applicable odds shifts are cumulative. Apply all applicable shifts to get one final left or right shift. Leftward shifts favor the defender; rightward shifts favor the attacker. Combat shifts are applied for:
- a) One shift to the right for each artillery, mortar, armor marker and (optionally) two shifts for the naval gunfire support marker successfully committed to the attack.
- b) One shift to the left for each artillery, mortar, armor marker and (optionally) two shifts for the naval gunfire support marker successfully committed to the defense.
- c) If any attacking units cannot trace a line of supply no longer than two hexes (one intervening hex) to a friendly in-supply HQ, apply a one left column shift.
Important: If any attacking units cannot trace a line of supply per the above, the attacking player may expend one supply column that is within two hexes of any attacking unit to cancel the left column shift.
- d) Terrain in the defending hex, printed Forts, Fort markers, and hexside terrain crossed by the attacking units provide left shifts in favor of the defender (TEC). All such terrain shifts are cumulative.
Important: If the odds column derived in (8.3, step 6) is greater than 7:1 or less than 1:2 make all column shifts beginning from those columns.
-
Determine DRMs: Total all DRMs each side is eligible to receive:
Important: Paraguayan leaders can only be used once per GT. Return them to the Support Used Box after being used. They are returned to the Support Available Box during the Support Determination Phase.
- a) Paraguayan leaders may provide a +1 DRM to an attack or a −1 DRM to a defense.
- b) If the Bolivian player launches any attacks during the current GT, the current Bolivian leader must be committed to one attack (only one attack per GT). The Bolivian player may choose which attack the leader supports. When supporting an attack, the Bolivian player rolls 1d6 and applies the DRM modifier shown on the leader's counter to the DR which determines the DRM applied to the combat.
Important: A DR modified to less than one is treated as a one. A DR modified to more than nine is treated as a nine.
8.4 Combat Resolution
The combat results are listed as a number/number or number/R.
- The number to the left of the slash is the attacker's combat result; the number to the right is the defender's combat result.
Example: Using the 2:1 combat column and a modified DR of 2, the result reads 3/1. The attacker must lose three steps and the defender one step.
Important: If one or both sides cannot fulfill all losses, the side with the lesser gap loses the same amount less as the side with the greater gap.
Example: A one-step unit attacks a one-step unit, and the result is 3/2. The attacker has a gap of two step losses it cannot fulfill. The defender may reduce its step loss requirement by two also. Result: The attacker loses one step, eliminating the attacking unit. The defender reduces his step losses by two, thus the defending unit does not suffer any step losses.
- Apply attacker results, then defender results.
- If a result of "R" (rout) is given, the defending player must eliminate all friendly defending units. The attacking player may advance all attacking units a maximum of two hexes.
- The owning player determines the units that suffer step losses; however, no unit can be eliminated until all participating friendly two-step units have suffered at least one-step loss.
8.5 Advance After Combat
When the defender's hex is vacated of ground units, the attacking player may advance into that hex.
- This movement does not expend movement factors.
- Units advancing into Chaco Bush hexes do not roll for depletion.
- If the defender receives a rout result, the attacking player may advance all attacking units up to two hexes.
- EZOC have no effect on advance after combat.
Example: The Paraguayan player attacks a lone Bolivian unit at hex 2214. The result is a 6, 1/R. The Bolivian unit is eliminated, and the Paraguayan forces take one step loss and may advance to hex 2214 plus another hex, which can be 2114, 2215, for instance, with any attacking units.
8.6 Infiltration & Second Combat Phase
Important: Depleted and/or OOS units, HQ, and supply columns may not move during the Infiltration Phase.
During the Infiltration Phase, the phasing player may move any number of his units up to one hex.
Important: Infiltration movement is an exception to the rule that a unit may not move from one EZOC directly into another EZOC.
-
Units infiltrating into Chaco Bush hexes do not roll for depletion.
-
If the unit moves directly from one EZOC to another EZOC, the owning player must roll 1d6 and apply the below modifiers (if applicable):
- If the owning player commits a leader (9.0), modify the DR by the support modifier (on the left side of the leader counter).
Important: The Bolivian player may commit the current C-n-C (if desired). This is in addition to supporting the one mandatory combat (8.3, step 9), b)).
- Specific events may provide an additional DRM.
- Paraguayan units always receive a +1 DRM.
- If the modified DR is a four through six, the infiltration succeeds the unit may move into the hex.
- If the result is a one through three the infiltration fails, and the unit may not move during the Infiltration Phase.
8.7 Second Combat Phase
During the Second Combat Phase the phasing player may conduct attacks with any number of friendly units.
Important: Attacks are not limited to those units that conducted infiltration.
- Combat is conducted using the same procedures used in the previous Combat Phase.
Important: Leaders, support markers, air units, and events used in the first Combat Phase cannot be used in the Second Combat Phase.
Combat example: The Bolivians launch an attack on Boquerón (2713) with 8 infantry regiments. Boquerón is defended by 2 Paraguayan infantry regiments. The Bolivian player decides to use 1 air, 1 artillery, and 1 mortar support unit. The Paraguayan player decides to use 1 artillery support unit. Both players reveal simultaneously their support markers. The Bolivian player rolls for support availability, rolling a 5 and 1. Only one artillery unit is available. Then the Paraguayan player rolls for support. He rolls a 3, so the artillery is available.
Players then calculate odds. All Bolivian units have attack factors of 3. Both Paraguayan regiments have defense factors of 5. The initial combat odds are (24 vs. 10 or 2:1). The Paraguayan unit is in a fort (1L) and in Chaco bush (1L). The Bolivian player has a 1R (for one artillery unit) but the Paraguayan has a 1L (one artillery) so the final odds are 1:2 (it cannot be lower than 1:2).
The Bolivian player rolls one die and checks the CRT. The result is 4 modified to 5 (air unit support), so it is a 1/1, i.e., 1 step loss for the attacker and 1 for the defender.
9.0 Leaders, HQs, & Fortifications
Leaders represent historical commanders and their staffs.
9.1 Paraguayan Leaders
There are two Paraguayan Leaders in the game.
- When available, they are placed in the Paraguayan Support Available Box.
- Leaders can only be used to support one game function per GT.
- When used to support a game function they are placed in the Paraguayan Support Used Box.
- During the Support Determination Phase, Paraguayan leaders in the Paraguayan Support Used Box are placed in the Paraguayan Support Available Box.
9.2 Bolivian Commander in Chief (C-n-C)
There are four Bolivian leaders. These leaders represent the different generals who served as the Bolivian C-n-C at various times during the war.
- At the beginning of the game, place the Peñaranda counter in the Bolivian Support Available Box.
- The Bolivian C-n-C may change during the game. At the end of each Supply & Attrition Check Phase the Bolivian player rolls 1d6:
Important: Apply a maximum of a +1 DRM if one or more Bolivian fort hexes or fort counters have been captured or destroyed in the current GT.
- If the result a six or more, the current Bolivian C-n-C is removed, and another takes his place.
- If the result is a one through five, the current C-n-C remains in place.
- When the current Bolivian C-n-C is replaced, the Bolivian player randomly picks one leader counter from the Leader Pool and places that counter in the Bolivian Support Available Box. The player then moves the Bolivian current commander marker to the corresponding box on the Current Bolivian C-n-C Track. The sacked leader counter is returned to the Leader Pool and may be picked in later GTs.
Example: At the end of GT 2, the Bolivian player rolls for C-in-C replacement. During that turn forts Arce and Muñoz were lost, so there is a +1 DRM. The die roll is 5, modified to 6: the current commander is sacked. The current commander is Peñaranda. The player randomly picks Lanza from the Leader Pool and places the counter in the Bolivian Support Available Box. The current Bolivian commander marker is moved to the Lanza box. The player then returns the Peñaranda marker to the pool.
9.3 Support & Infiltration Modifiers
The support modifier (left side of counter) represents staff work to improve the logistics of each army. The support modifier of each Bolivian C-in-C may change the support marker DR (see Support Marker Determination Table).
9.4 Fortifications
Players may build additional fortifications and replace enemy printed fortifications with friendly fortification markers during the game.
Important: Printed fortifications (fort) and a fort counters provide the same combat and stacking benefits.
- If a player captures a printed enemy fortification (fort), that player may place a fort marker in the hex.
- Both players may build forts during the Fortification Building Phase. To build a fortification:
- The player selects any hex occupied by at least one step of friendly ground units not in an EZOC.
- The ground unit must be in supply and be able to trace a supply line of no more than two hexes to an in-supply Corps HQ.
- The player then expends one supply column and then places a fort counter in the hex with the "under construction" side up.
- If, during the Supply & Attrition Check Phase the hex remains friendly controlled (it may be in an EZOC at this time), the owning player flips the fort counter to its completed side.
Important: Units constructing a fort may not conduct an attack; however, they do defend normally and may be attacked with no penalty.
- Units may enter a hex containing an enemy fort marker if there are no other enemy ground units in the hex. The player whose units entered the hex may replace the enemy fort marker with a friendly fort marker. The entering units may continue moving after the marker is replaced.
- If all units in a hex with a fort marker are eliminated or retreated due to combat, the fort marker is removed from the map.
9.5 HQ Units
HQ units represent support and logistical units. Only units tracing supply to an HQ unit can receive artillery, armor, or mortar support.
- A HQ unit that is present in a hex where all friendly units are routed or eliminated in combat is withdrawn from play.
- A HQ unit that is not stacked with at least one friendly ground combat unit and is attacked by enemy units is automatically withdrawn and the enemy units may advance into the HQ's hex (no further advance is allowed). This does not count towards an attack for random event Truce.
- Withdrawn HQ may be replaced during any subsequent GT by expending one RP. Replaced HQ are deployed in any friendly printed fort hex.
- HQs cannot advance after combat.
9.6 Air Units
Air units can be used to support attacks, to fly recon missions, or to guide units moving across Chaco hexes. Air units can provide support to units anywhere on the map (they do not need to trace supply through an HQ).
Important: Air units can only conduct one mission per GT. To be committed to a mission an air unit must be in the player's Available Support Box. After completing the mission, the air unit is placed in the Support Used Box.
- Combat: Combat support takes place during the Combat Phase (all combat phases). Air unit support provides favorable DRMs when resolving combat (8.3). A maximum of one air unit may provide a DRM to a single combat.
- Recon: Recon takes place during a friendly Movement Phase and Infiltration Phase.
- The owning player declares a recon on any one enemy occupied hex on the map.
- The owning player rolls 1d6 and if the result is a five or six, the phasing player may examine all units within the hex. Any other result is a failure.
- After completion of the mission the air unit is returned to the Support Used Box.
- Movement Support: When making a depletion check for Chaco Bush movement (5.6), the owning player may commit one air unit to a single unit or stack of units. Apply a +1 DRM to that unit or stack's depletion checks.
9.7 Supply Columns
Supply columns arrive per the Support Marker Determination Table (10.3).
- Received supply columns may be placed with any in-supply friendly HQ or in any friendly supply source.
- A supply column that is not stacked with at least one friendly ground combat unit and is attacked by enemy units is automatically removed from the map and the enemy units may advance into the supply column's hex (no further advance is allowed). This does not count towards an attack for random event Truce.
- Players may expend supply columns to affect the following:
- Re-roll failed artillery and mortar support DRs (8.3, step 4). The supply column must be within two hexes of at least one friendly participating unit.
- Cancel the one left column shift awarded when an HQ is not within two hexes of the attacking units (8.3, step 8).
- Construct a fort (9.4). The supply column must be within two hexes of at least one friendly participating unit.
- To reduce the number of steps lost due to attrition (11.4). In this case the supply column may be anywhere on the map.
9.8 Paraguayan Navy
The Paraguayan flotilla can be used to support any Paraguayan attack or defensive combat in any hex adjacent to the Paraguay River.
- The flotilla is held in the Support Available Display.
- It can be used once per GT, after which it is placed in the Support Used Display and returned to the Support Available Display at the end of each GT.
- The Paraguayan flotilla is treated as any other support marker for the purposes of (8.0, step 4).
- This support marker is returned to the Support Available Display during the Support Determination Phase each GT, unless the optional rule Naval Guns (13.1) is used.
10.0 Reinforcements, Replacements & Mobilizations
Units and support markers are made available to players through reinforcement, replacement, and the Support Marker Determination Table.
- Support markers are always placed in the appropriate Support Available Box.
- Reinforcements and rebuilt eliminated units are deployed as follows:
- Paraguayan units may be deployed in or adjacent to any Rio Paraguay River fort hex, Isla Poi (2814), or in hex 3517.
- Bolivian units may be deployed in or adjacent to Carandaiti (hex 1307), Villamontes (1109), and Ravelo (2301).
Important: The above locations must be friendly controlled and not in an EZOC.
10.1 Reinforcements
Reinforcements are received as per the Reinforcement Chart during the Reinforcements Phase. This phase is skipped on GT 1.
10.2 Replacements
Replacements are received by the expenditure of replacement points (RP) during the Replacements Phase.
Important: Do not conduct the Replacements Phase on GT 1.
- Players receive RP by consulting the Replacement Chart and cross referencing the GT with the appropriate side's column.
- RP may be accumulated from GT to GT.
- Players use their respective RP markers on the General Data Track printed on map.
- A player can never have more than 14 RP or less than zero RP at any time.
- Eliminated units may be rebuilt at a cost of 1 RP per step. A two-step unit may be rebuilt with one or two steps.
Example: An eliminated two-step unit is rebuilt. The player would expend a total of two RP.
- Two-step Bolivian units showing a white dot cannot be rebuilt at full strength. They can only return as one-step units.
Historical Note: This rule represents the loss of the pre-war cadres and troops accustomed to the Chaco environment and their replacement with demoralized and undertrained conscripts.
Important: Units cannot be brought to full strength while on the map. It is not possible to "replenish" two-step units that have suffered a step loss. To be rebuilt, a unit first must be eliminated and be placed in the appropriate Pool Display.
10.3 Support Units
Support marker availability is determined during the Support Determination Phase. Do not conduct the Support Determination Phase on GT 1.
Important: The Bolivian player (only) does not roll for support on GT 2.
- Each player consults their own Support Marker Determination Table and rolls 1d6, modifying the DR as follows:
- If the player commits a leader from the Support Available Box, apply the leader's support modifier.
- Each player determines which HQ is the furthest from the locations listed below the table in the Die Roll Modifiers. The DR is modified based on that distance in hexes from the location to the farthest friendly HQ. It makes no difference as the actual location.
- Players then cross reference the modified DR with the columns for the different types of support markers and supply columns.
- Players are not required to play all support markers each GT. Unused markers may remain in the Available Box indefinitely; however, the counter mix is the maximum number of support markers available to each player.
10.4 General Mobilization
Beginning GT 4 players can declare a general mobilization during the Replacements Phase.
- The Bolivian player can declare a maximum of three general mobilizations per game. A general mobilization provides the Bolivian player with four additional RP that GT. Use the Bolivian mobilization marker to keep track of the total number of Bolivian mobilizations conducted. Declaring a Bolivian general mobilization has a cost in Victory Points (4.0).
- The Paraguayan player may declare a general mobilization once during the game. A Paraguayan mobilization provides the Paraguayan player with three additional RP that GT.
11.0 Supply & Attrition
Units trace lines of supply (LOS) to supply sources.
- Supply is needed to be able to move and fight at full effectiveness.
- Supply is checked at the end of each GT during the Supply & Attrition Check Phase.
- To be judged in supply a unit must be able to trace a line of communications to a friendly HQ or supply source hex.
- An LOS cannot be traced into an enemy-occupied hex, through an impassable hex (marsh in winter), and/or through an EZOC.
Important: If a hex in an EZOC is occupied by a friendly unit the effect of the EZOC is cancelled when tracing an LOS.
11.1 Bolivian Supply
Bolivian units must trace an LOS no longer than two hexes (one intervening hex) to a Corps HQ that can in turn trace an LOS along a road or railroad of any length to:
- Villamontes (1109)
- Ravelo (2301)
- Carandaiti (1307)
Important: Bolivian units can trace an LOS of any length directly to a supply source hex, but in doing so cannot receive support on the attack or defense and do receive one left shift when attacking.
11.2 Paraguayan Supply
Paraguayan units must trace an LOS no longer than two hexes (one intervening hex) to a Corps HQ that can in turn trace an LOS along a road or railroad of any length to:
- Isla Poí (2814)
- Any Paraguayan city adjacent to the Paraguay River Hex 3517
Important: Paraguayan units can trace an LOS of any length directly to a supply source hex, but in doing so cannot receive support on the attack or defense and receive one left shift when attacking.
Example of supply tracing: The Bolivian 7th Infantry Regiment is in hex 2514. It is in supply because it can trace an LOS to the 1st Corps HQ in hex 2313, which can then trace an LOS to Villamontes (hex 1109).
The Bolivian 23rd Infantry Regiment is at hex 2405. It cannot trace an LOS to any corps HQ within two hexes; however, it can trace an LOS to Ravelo (2301) so it is in supply, although with the limitations listed in (11.1).
The Bolivian 2nd Cavalry Regiment is at hex 2311. There are Paraguayan units at 2211 and 2313. The 2nd Regiment is out of supply.
11.3 Out of Supply Units
During the Supply & Attrition Check Phase, both players determine the supply status of all units.
- The owning player places an out of supply (OOS) marker on all units judged to be OOS.
- During any subsequent Supply & Attrition Check Phase, the marker is removed if the unit is found to be in supply.
- Units marked with an OOS marker have their combat and movement factors halved (round down, minimum of one). When conducting combat, multiple participating units halve their combat factors and then are totaled.
11.4 Attrition
During the Supply & Attrition Check Phase, both players roll for attrition due to tropical diseases, exhaustion, cold, heat, hostile fauna, desertion, etc.
- First, one player then the other (order is not important) rolls 1d6 for each OOS unit to determine attrition and then applies the below results to the unit rolled for:
- 1–4: The unit suffers one step loss.
- 5–6: No Effect.
- Following the above procedure, each player rolls 1d6 for each in-supply combat unit (do not roll for HQ) marked with a depleted marker and applies the below results to the unit rolled for:
- 1: The unit suffers one step loss.
- 2–6: No Effect.
- Each player then consults the Attrition Table (on the map) and rolls 1d6; modifying the result by the modifiers listed below the table. The result is the number of unit steps and/or supply columns that are eliminated. Losses may be taken from any unit regardless of supply or depletion status. A two-step unit may be eliminated to fulfill two step losses.
12.0 Random Events
Both sides have random event markers.
- Prior to beginning a game, each player places all event markers noted as GT 1 into a bin.
- At the beginning of GT 6, both players remove any events remaining in the bin (Exception: Return the No Event marker to the bin). Each player then adds all event markers noted as GT 6 to the bin.
- During the Random Events Phase of each GT. Both players randomly pick one event marker from their corresponding bin.
- Each event has a different effect. Events may require the player to immediately play the event, others may allow the player to hold the event marker until such time as he wishes to play it.
- Each side may only apply one event per combat (8.3).
12.1 Bolivian Events
GTs 1–5 October 1932-December 1933:
Mandatory Offensive: Must be played in the current GT.
- During the Bolivian Movement Phase, the Bolivian player must move all units in such a way that all units that can end their move adjacent to an enemy unit are adjacent to enemy units at the end of their move. The Bolivian player may move (or not) all other units as desired.
Exception: The Bolivian player may leave one unit in any printed fort or fort counter that was occupied at the beginning of the Movement Phase if the printed fort or fort counter is not adjacent to an enemy unit.
- During the ensuing Bolivian Combat Phase, all Bolivian units that are adjacent to an enemy unit must participate in an attack. Discard Event after use.
Flamethrowers: Hold until used. Bolivian player receives a +1 DRM on any attack against a Paraguayan printed fort or fort counter during the GT used. Discard after use.
Marzana: Hold until used. Bolivian player receives a −1 DRM if defending in a printed fort or fort counter on the GT used. Discard Event after use.
Ambush: Hold until used. On the GT used, if a Paraguayan unit ends its movement adjacent to a Bolivian unit. roll 1d6. Apply the below results:
- 1–3: No Effect.
- 4–6: The moving enemy unit suffers one step loss.
Discard Event after use.
Local Guide: Hold until used. On the GT used, apply a +1 DRM to all Bolivian depletion DRs when moving through Chaco bush hexes, or apply a +1 DRM to one Bolivian infiltration attempt. Discard Event after use.
No Event: Nothing happens. Return the marker to the bin.
GTs 6–10 January 1934-March 1935:
Mandatory Offensive: Must be played in the current GT.
- During the Bolivian Movement Phase, the Bolivian player must move all units in such a way that all units that can end their move adjacent to an enemy unit are adjacent to enemy units at the end of their move. The Bolivian player may move (or not) all other units as desired.
Exception: The Bolivian player may leave one unit in any printed fort or fort counter that was occupied at the beginning of the Movement Phase if the printed fort or fort counter is not adjacent to an enemy unit.
- During the ensuing Bolivian Combat Phase, all Bolivian units that are adjacent to an enemy unit must participate in an attack. Discard Event after use.
Trocha: Hold until used. On the GT used, the Bolivian player adds a +1 DRM to infiltration attempts. Discard Event after use.
Truce: Must be played in the current GT. Foreign powers broker a truce. No more than two attacks may be launched that turn by either player (i.e., two Bolivian attacks, two Paraguayan attacks). Discard Event after use.
Arms Embargo: Must be played in the current GT. The Society of Nations considers Paraguay the aggressor side in the war. All arms sales to Paraguay are embargoed. Apply a −2 DRM to Paraguayan support marker die roll. Discard Event after use.
Military Coup: Must be played in the current GT. The Bolivian military topples Bolivian president Saavedra. Effects: No Bolivian attacks that turn. All Paraguayan attacks receive a +1 DRM this GT. All Paraguayan infiltration attempts receive a +1 DRM. Discard Event after use.
12.2 Paraguayan Events
GTs 1–5 October 1932-December 1933
Well: Must be played in the current GT. Apply a +2 DRM to all Paraguayan attrition DRs during the current GT. Discard Event after use.
Trocha: Hold until used. On the GT used, apply an additional +1 DRM to all Paraguayan infiltration attempts. Discard Event after use.
Ambush: Hold until used during the Bolivian Movement Phase. If a Bolivian unit ends its movement adjacent to a Paraguayan unit. Roll 1d6. Apply the below results:
- 1–3: No Effect.
- 4–6: The Bolivian unit suffers one step loss.
Discard Event after use.
Tunnel: Hold until used. On the GT used, the Paraguayans dig a tunnel to launch a surprise attack. Apply a +1 DRM to any one Paraguayan attack. Discard Event after use.
Local Guide: Hold until used. On the GT used, apply a +1 DRM to all Paraguayan depletion DRs when moving through Chaco bush hexes or apply a −1 DRM to one Bolivian infiltration attempt. Discard Event after use.
No Event: Nothing happens. Return the marker to the bin.
Turns 6–10 January 1934-March 1935
Well: Must be played in the current GT. Apply a +2 DRM to all Paraguayan attrition DRs during the current GT. Discard Event after use.
Wireless (Radiotelegraphy Interception): Hold until used. On the GT used, Bolivian communications are intercepted by Paraguayan wireless operators. Apply a +1 DRM to all Paraguayan infiltration attempts or a +1 DRM on all Paraguayan attacks this GT. Discard Event after use.
Rout: Hold until used. On the GT used, any Paraguayan attack on a printed fort or fort counter may cause the defending Bolivian units to abandon the position. If a combat result inflicts two or more step losses to the Bolivian defenders, the Paraguayan player rolls 1d6 and applies the below results.
- 1–3: The unit is eliminated.
- 4–6: The unit is depleted (place a depleted marker on the unit) and the unit must be moved one hex towards the nearest Bolivian supply source hex by a route free from EZOC, checking for depletion if doing Chaco Bush movement. If the fort is surrounded by enemy occupied hexes or EZOC the unit is eliminated.
Discard Event after use.
Trocha: Hold until used. On the GT used, the Paraguayan player applies a +1 DRM to one infiltration attempt. Discard Event after use.
Ambush: Hold until used during the Bolivian Movement Phase. If a Bolivian unit ends its movement adjacent to a Paraguayan unit, roll 1d6. Apply the below results:
- 1–3: No Effect.
- 4–6: The Bolivian unit suffers one step loss.
Discard after use.
No Event: Nothing happens. Return the marker to the bin.
Historical Note: In March 1934, the 6th Paraguayan Division surrounded at Cañada Tarija a Bolivian Regiment. The Bolivians had to resort to wireless to communicate with their commander in chief. The messages were intercepted and broken by the Paraguayans. Therefore, Cañada Tarija is also known as the "battle of the cryptographers".
13.0 Optional Rules
13.1 Naval Guns
During the Replacements Phase of GTs 9 or 10, the Paraguayan player can dismantle the guns of their flotilla and use them against any major Bolivian town.
- The Paraguayan player may remove the naval flotilla support marker from play.
- The Paraguayan player may then use the naval guns marker to provide two right shifts to any one attack against a Bolivian printed fort or fort marker. The marker may be used once per game.
- If the Paraguayan player uses this option, subtract one VP from the Paraguayan VP total.
Historical Note: Towards the end of the war, Paraguayan commander in chief Gen. Estigarribia planned to use naval guns to take Villamontes, the Bolivian logistical and supply center during the war. He requested the Paraguayan Navy to dismount two 120mm naval guns from the gunboat Humaitá and move them to within 15 km of Villamontes. The Paraguayan engineers reinforced railway bridges, designed a transport, and brought a large tractor to pull the guns to the front. The end of the war cancelled that plan.
13.2 Riverine Transport
Both players may use riverine transport to haul troops and supply columns along the Pilcomayo and Paraguay Rivers.
- Units/supply columns using riverine transport can also use regular movement before and/or after moving a unit during same Movement Phase.
- During the Movement Phase, the Paraguayan player may move up to two land units and three supply columns along the Paraguay River from any printed fort hex adjacent to the river to another printed fort hex.
- The Bolivian player may move up to one supply column from Villamontes to any friendly controlled hex adjacent to the Pilcomayo River.
- This movement does not cost movement factors.
- A unit using riverine transport cannot enter an EZOC (if a hex bordered by the river the transport is using contains an EZOC) nor may it move along a river if both adjacent hexes are enemy occupied.
Paraguay Support Marker Determination DR Modifiers
Important: The Paraguayan player does not use the table on GT 1.
- +/−: Current leader supply modifier.
- -1: If distance from Isla Poi to furthest Corps HQ is 7–10 hexes.
- -2: If distance from Isla Poi to furthest Corps HQ is 11+ hexes.
- -2: If Arms Embargo event is pulled this turn.
Bolivian Support Marker Determination DR Modifiers
Important: The Bolivian player does not use the table on GT 1 and GT 2.
- +2: For Command in Chief.
- -1: If distance from Villamontes, Carandaiti, or hex 2400 to farthest Corps HQ is 7–10 hexes.
- -2: If distance from Villamontes, Carandaiti, or hex 2400 to farthest Corps HQ is 11+ hexes.