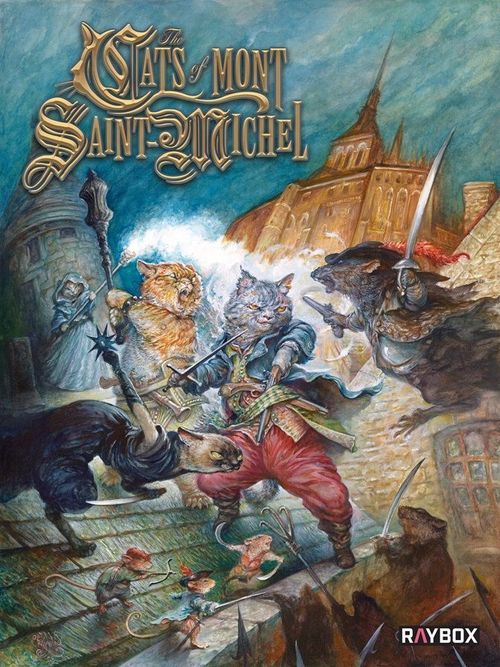
The Cats of Mont Saint Michel
The Cats of Mont Saint Michel Rulebook
Table of Contents
Table of Contents
What's in the Box
- Adventure book
- The ABCs rulebook
- x9 Character sheets
- x104 Loot cards
- x81 Skill cards
- x18 Plastic standees
- x6 Stun tokens (status marker)
- x3 Loot tokens
- x3 Scratch tokens
- x6 Objective tokens
- Round marker
- x4 Vulnerable tokens (status marker)
- x2 Twelve sided dice
- x2 Toxic stench tokens
- x4 Depleted tokens
- x12 Wound tokens
- x9 Cat markers
- x9 Roach markers
- x9 Rat markers
- x18 Cardboard standees
Introduction
The Cats of Mont Saint-Michel is a miniatures solo/cooperative campaign game set in the historical island monastery of Saint Michel during the French revolution. The game plays out over a series of linked scenarios forming a campaign and ongoing story. Each previous scenario in the campaign affects the start of the next.
As you play each scenario, your hero will come closer to reaching their ultimate goal of ridding the Abbey of the villainous rats and their brethren. Along the way, they will need to defeat swarms of cockroaches, warrior rats and other foul beings. They will also gain experience and unlock unique skills.
This game takes several sittings to complete but you can save your progress easily. This manual is intended to help you learn to play the game by guiding you through the first 3 scenarios. Play the game as you read through the text. The first 3 scenarios are meant to be played until thoroughly understood. If you failed the objective or are unsatisfied with the results, feel free to play them again. When you proceed beyond these first few scenarios, you will start to have choices as to which scenario you would like to play next. These decisions, the path you choose, can change events in the narrative story campaign.
You hear the gnawing of wood and shuffling of feet below. Time to figure out how far your enemies have come. Grab the scenario book and turn to page 3.
In the first scenario we are going to teach you how to set up a scenario, move your cat on the map, search for essential loot and pick up items. In addition, we will learn how to move the rats insidious allies, the roaches.
Core Concepts
First, we'll cover the core concepts that you'll need to know before you set up and play scenario 1. Core concepts are common terms that are frequently referenced throughout the rules. They are included now so as to make it easier to understand future rules.
Adjacency
Many rules in The Cats of Mont Saint-Michel use the term "adjacent." This term specifically refers to orthogonal adjacency (except where it explicitly states "diagonally adjacent"). So, for example, a rat is adjacent to a hero if it is in one of the four squares to the immediate left, right, in front of, or behind the hero.
(Illustration: the squares numbered 1-4 are adjacent to the hero Guy.)
Conflicting Rules
If there is ever a contradiction of rules between the rulebook and the scenario book, the scenario book rules take precedence.
Dice
The Cats of Mont Saint-Michel is played using twelve-sided dice (d12). Players may be required to roll one or more dice to resolve an action. The number of dice required for a roll is abbreviated as Xd12 where "X" represents the number of twelve-sided dice to be rolled. The result of each die is read separately.
Figures
When on a scenario map, whatever is used to represent the cat heroes or rat army is referred to as a figure - whether it be a marker, standee or miniature.
Game Structure
In The Cats of Mont Saint-Michel, you will alternate between playing a scenario and visiting the Taverne. In the Taverne stage, you'll perform a little housekeeping, and your heroes might get the chance to recuperate.
Squares on the Map
As you look at the map you can see that there are small squares outlined in a black line and then those small squares are grouped into 4 creating the big squares, outlined in solid black line.
Rat Army
The rat army is made up of cockroaches, rats and boss enemies. Whenever you see the key word "rat" it refers to all of these figures.
Tied for Closest
Any time there is a tie in the game then the player chooses which option is used.
Cat Character Sheet
Before proceeding any further let's get a broad overview of your cat's character sheet.
- Health Track: Track your health here. Every time you take a wound reduce your life total by one. At the start of the campaign, you have 9 health. Place your wound token here.
- Skill Slot: Place the skill cards your cat has earned here and is using for the upcoming scenario here.
- The Hero's Name and Image.
- Armour Slot: Equip your armour card here. Only 1 armour card may be placed.
- Loot Slot: Place loot cards in this section.
- Weapon Slot: Equip your Weapon cards here under your hero card. Up to 2 can be placed.
- When attacking without a weapon, use the stats printed on the sheet for the attack.
Scenario 1: The Dawn Patrol
The instructions on how to set up the scenario and any special rules are contained on the left page. The map on which your heroes will traverse (and complete objectives) is on the left page or extends from the left page over to the right page. Setting up is the same for a solo or cooperative game. The following is the standard setup procedure. In this scenario we have the Setup heading and the Spawn heading, but future scenarios will omit these unless they do not follow standard set up procedure.
Choose Your Heroes
Each player picks one or more heroes from those provided. Retrieve their figure and character dashboard. The number of cats that must play is 4.
Do you want to play with 2 cat heroes instead? When playing with 2 cats increase their action points to 3 instead of 2. This will be a more challenging game, and you may lose some cats along the way. If you have a casualty, then choose another hero from the mix. The new hero starts at the same level of experience as the one lost and you may choose 4 loot cards.
Setup Scenario 1
- Open your scenario book to the scenario you are going to play. In this case it is scenario 1, The Dawn Patrol.
- Place your character dashboards close to the scenario book.
- Checking the forces section, select the rat markers and place them in a designated area near the map (the rat pool). Make sure they are inverted so you can't see what they are and shuffle them. If a rat name is in orange, then do not put it in the rat pool.
- Place your hero figures on or adjacent to the square marked C.
- Draw and place one rat marker from the rat pool on each of the squares marked with an R.
- Place one blue objective marker on each square marked 0.
- Place two loot markers on each square marked L.
- Shuffle the loot deck specified for the scenario and set it close at hand.
- Place the round track marker on the first space of the round track.
- Designate an area next to the scenario book as your "discard area". You'll place the markers of eliminated rats here.
Scenario Book Rules Layout
Here is a summary of the rules that you will find on the left hand page.
- A. Introduction Text: You can read this now.
- B. (Loot #): Use this loot card deck.
- C. Rat Army Pool: The rat figures that will be used in the scenario.
- D. Setup: If the setup for the scenario differs from the standard setup rules, details will be written here.
- E. Spawn: Rules for when and where rats will spawn on the map. Standard Spawn rules as follows: When the S, S1 or S2 letter appears on the round track, draw a rat marker from the rat pool and place it face down on all of the squares marked with that letter.
- F. Objective(s): The Objective(s) that needs to be completed to finish the scenario.
- G. Special Rules: Any rules that apply to this particular scenario.
- H. Exit: Read this after you have successfully completed the scenario. Follow its instructions and you will be told what your next scenario is or whether you may choose one.
- I. Between Scenarios: The details in this section outline the details of what to do next.
- J. Round Track: The round track is used to keep track of the ROUND you are playing in. Advance the marker on the round track one position to the right when you reach the end segment of each round. When the round track marker would move off the end of the round track, move the round track marker back to the first space of the track.
Read Entry. At various points during a scenario, you may be instructed to read an entry - you can find the entry in the Entries section of the rulebook. Please read only the designated entry and follow its instructions as directed.
Scenario 1
The scenario is set up! Let's get started. This scenario focuses on learning how to move your cat and the rat army. There will be no attacking in this scenario. Next scenario we will focus on attacking but for now your goal is to evade the encroaching roaches.
Sequence of Play
The game is played out over a series of rounds. Each round is comprised of the Initiative segment, 2 Turn segments and an End segment.
- Initiative Segment: This segment determines who will take the first turn, cats or rats. Take two different colored dice, choosing one colour for the cats and one for the rats, and roll them together. Subtract 4 from the rat's die and see which result is higher. The higher roll gains the initiative and chooses who will take the first turn. Players can choose to go first or allow the rats to go. Rats always choose to go first. In this scenario we will assume the cats go first.
- Turn Segments: This segment is split into one cat, and one rat turn. One at a time, activate all of the figures of one side's turn then repeat for the other side. Once you complete both turns, the round proceeds to the end segment.
- End Segment: Advance the round marker on the round track by one and perform any scenario specific tasks.
Cat Actions
When the turn starts, remove any status markers on the cats. During the turn you will activate your cats one at a time. When each cat is activated, it may perform any number of actions up to or equal to the cat's action points (AP). Action points are used to perform actions during your hero's turn while it is activated. Below is a list of the actions that cats can perform and the cost in AP to perform. All cats have 2 AP.
| Cat Action | AP |
|---|---|
| Prowl | 1 |
| Stride | 1 |
| Pounce | 2 |
| Search/Investigate | 1 |
| Transfer loot to and from armour and weapon slots or other cats | 0 |
| Attack | 1 |
| Pickup an item | 0 |
| Remove Stun Marker | 1 |
Rat Actions
During their turn you will activate the rat figures one at a time starting with the one closest to a cat. When each rat is activated, it may perform actions equal to the action points that rat has. In scenario 1 they are just moving. Activate the roaches, one by one, starting with the one closest to a cat.
Roaches will always move towards the closest cat, which is the target that could be moved adjacent (no diagonals.) to in the smallest number of moves. Roaches have 1 Action Point and may only move to adjacent small squares. They do not move diagonally.
| Rat Action | AP |
|---|---|
| Move 1 small square | 1 |
| Attack | 1 |
| Remove Stun Marker | All |
Moving Your Cat
There are 3 movement types that your cat can choose to use: prowling, striding, and pouncing.
- Prowling: if you choose to use the prowling movement then your cat will move just one small square. You must choose prowling movement if an enemy is in an adjacent small square to the cat. Diagonal movement is not allowed.
- Striding: When this mode of movement is chosen you can move your cat into any adjacent big square or diagonal small square. When striding to a big square, choose any unoccupied small square in the big square to move into.
- Pouncing: When this mode of movement is chosen you can move your cat into any big square which is up to 2 big squares away. This costs 2 Action Points but one attack with a RANGE 0 weapon may be performed at the end of this movement using normal attack rules. Diagonal movement is not allowed. Place a Vulnerable marker on the cat which pounced. We will explain Vulnerable in the next scenario.
- Picking Up Stuff: Your cat can pick up an item in the large square they occupy for no AP cost. Place the item card in your loot slot or equip it to your hero. Cards may be freely re-organized anytime.
- Trading Stuff: When activating your cat, you can transfer or trade any item between cats in the same big square. If exchanging items with other players, they must agree.
Vulnerable
A Vulnerable status marker is placed on a cat which pounces. While a vulnerable marker is on a cat that cat is easier to hit. Apply a +2 modifier to the attack die roll result of any rat attack against it. Remove this marker when you activate the cat next.
Yellow and Red Squares
Squares and square edges outlined in red are blocking terrain. You cannot move into or through these squares, walls or closed doors. Squares and square edges outlined in yellow have no effect for this scenario, but their rules will be covered in the next scenario.
Movement example: Guy can Prowl into light green squares. The dark green squares are ones that he can Stride into, and Guy may Pounce into both red and dark green squares. Notice that the squares outlined in red have no shading as entry into them is prohibited. When activated the roach must move towards Nera because she is the cat that is within the shortest number of moves to reach. To move to Nera (the path along the green arrow) takes 2 moves. To reach Leon, (the path represented by the red arrow) would require 5 moves.
On the third round, after all rats have been activated, a rat marker will spawn on the square marked with an S. If there was more than one S on the map, then a rat would spawn on each S square.
Les Cafard: The Roaches
Servants and worshippers of L'Abbesse, Les Cafarde are the premier regiment in the vast horde of cockroaches which follow the Cardinal. A ready food source, and individually weak, when organized they are an unstoppable wave. Their time is nigh.
Each member of the rat army has a different power. The roach's power is the ability to stack. That means that they can end their move on the same small square as a rat or cat. There is no limit to the number of roaches that can be on a small square. Gross, I know.
Roach card (Les Cafard (the Roaches)): Health 1, Action Points 1. Stacking: Can end their move on the same small square as a rat or cat. There is no limit to the number of roaches that can be on a small square.
Rat card anatomy:
- Health: Number of wounds needed to eliminate this figure.
- Action Points: available.
- Ability: Power name and game effects.
Spawning
New rats are spawned (placed on the map) after all rat figures on the map have been activated and when there is an S, S1, S2 or S3. on the current round track square. When these conditions occur, draw rat markers from the rat pool and place one face-down on each matching spawn location on the map.
Some scenarios will also instruct you to place a specific rat that was set aside during setup (the ones whose names are coloured orange), rather than draw one from the pool. Place them, face up, in the specified square.
The Following Rules Apply to All Rat Spawns
- If you need to spawn a rat and there are no markers left in the rat pool, take all the rat markers in the DISCARD PILE, shuffle them, and place them face down into the rat pool. If none remain in the discard or pool, skip the spawn.
- If a spawn location is occupied by a rat, skip the spawn.
- If a spawn location is occupied by a cat, the cat takes 1 wound and no rat spawns.
Loot Cards and Loot Deck
As you play the game you will search loot squares marked with an L to obtain loot cards. To search a loot square, spend 1 AP while adjacent or on it. Then draw a card from the Loot deck and remove one loot marker. The Loot deck could contain weapons, armour, other useful item or event cards. Each cat may search each loot square only once. Rules for how each item, armour or weapon works are on the card.
When you pick up a Loot card, either place it into your weapon or armour slot or onto the Loot space on your character sheet for later use. Unless specified, there is no action point cost to use a non-weapon Loot card.
During setup, the loot deck is constructed with the following rules: Loot cards come in different levels. Only use the loot cards listed for the scenario. This list is beside the name of the scenario. Shuffle the remaining cards together to form the Loot deck.
- Weapon cards: Go in your loot slot.
- Item cards: Go into your loot slot.
- Armour cards: Go in your loot slot.
- Event cards: Example event card "Ambush": Draw a marker from the Rat Army pool and place it on the objective square.
Scratch Rule
If you roll a 1 you may either take or use a scratch token. If your team does not already have 3 scratch tokens when the 1 is rolled, you may take one from the token discard area. Or, if the team has any scratch tokens, then you may discard one at any time to reroll a die. Scratch tokens are not assigned to a specific hero so if any cat rolls a 1 it can use a scratch token. The maximum scratch tokens available to a team is 3.
Play Scenario 1
You are now armed with all the information you need to play to the end of scenario 1. Give it a try.
Finished Scenario 1
Have you escaped the skittering roaches? If so, congratulations! Read the exit text and either put away the game for a later play or continue to scenario 2, PRÊT AU COMBAT. If you failed, or are unclear about any rules, feel free to replay this scenario as many times as you need.
Scenario 2: Prêt Au Combat
Welcome to scenario 2. The setup is nearly identical to the first scenario. Go ahead and open the scenario book to scenario 2 and lay it out flat in front of you. Follow the SETUP instructions as you did in the first scenario. This scenario will teach you how cats and rats attack as well as introducing you to terrain, experience points and more.
Terrain
There are two markings on the map that will affect movement or combat. These are hindering terrain, bordered in yellow, and blocking terrain, bordered in red.
- Blocking Terrain: You cannot move or attack through blocking terrain like closed doors, walls and any item outlined in red. All figures except roaches are also considered blocking terrain. If a figure's Line of Sight (covered below) passes through a square with blocking terrain its line of sight is blocked, and the figure cannot see the target to reveal or attack it.
- Hindering Terrain: Any attack into or through a square outlined in yellow gets a -2 to the result of the attack die roll. If the attacker is in hindering terrain do not apply the -2 modifier for that terrain.
Line of Sight (LOS)
To determine Line of Sight, trace a straight line from any corner of the small square the attacker occupies to any corner of the small square the potential target occupies. Any square or linear feature such as a wall the line passes through is considered when checking if a LOS exists between the two figures.
You use LOS when revealing or attacking Rats. Rats also use this rule when attacking our heroes. An attacker can only target something if they have a LOS to it.
The Line of Sight is blocked by blocking terrain (closed doors, walls, squares outlined in red, red lines etc.). If a LOS only touches the corner of a square, that square IS considered when checking LOS.
Furthermore, if an attack passes through a yellow line, or into or through a yellow bordered square, then the attack suffers a -2 modifier to the attack die roll. It does not block LOS. The maximum modifier is -2 regardless of how many yellow lines the LOS passes through.
LOS example: Nera has LOS to rats A, B and D but not to rats C or E. She can only attack A (Roach), B (Norwegian Brown) and D (Arbalétrier). If attacking rats A or B she would receive a -2 to her attack die roll because her LOS crosses a yellow line. She cannot attack rat C (Roach) or E (Roach) because her LOS crosses a red line for C and a square occupied by a rat figure (D) for target E.
Revealing Rats
Rat markers start on the map with their question mark side up and are flipped, revealing the specific rat, as soon they are in LOS of a hero. This is done immediately regardless of when it occurs (e.g., during spawning, rat or cat movement or a scenario effect). When revealed, replace the marker with the standee or appropriate miniature (if you have them) and place the rat marker in the RATS IN-PLAY area.
Rats In-Play: The rats in-play area is where you place a rat's marker when it is replaced by a miniature or standee. This occurs when REVEALING RATS.
Unrevealed Rat Markers
- Unrevealed rat markers have only 1 AP.
- Unrevealed rat markers have no powers.
- If an unrevealed rat marker is attacked for whatever reason, reveal it and then resolve the attack.
Example: Nera can see roach A but can not draw line of sight to either rat marker B or C, so their identities remain hidden. When activated they would have 1 action point. Once they move into her line of sight, the markers would be flipped over to reveal what kind of rats she is facing.
Weapon Loot Cards
Below is an example of a weapon loot card (a level 1 loot card, as denoted by the red stripe behind the name). It is explained further in the Cat Attack section.
- Price: The purchase price of this weapon at the tavern.
- Attack Dice: The number of Attack Dice you will roll.
- Hands to Use: Indicates if the weapon is 1 or 2 handed.
- Stun: The result you must roll on one of the Attack Dice to inflict a stun.
- Damage: The roll result you must equal or exceed on one of the attack dice to inflict a stun and a wound.
- Distance: The range of the weapon in Big Squares.
- Ability: Any special rules pertaining to the weapon.
Cat Attack
While a cat is activated, they may use one or more Action Points to perform ATTACK ACTIONS. When using an attack action, a hero must:
- Pick a TARGET which the cat has LINE OF SIGHT to and is within range of a weapon they are holding.
- Roll the ATTACK DICE.
- Add any ATTACK MODIFIERS.
- Determine if a hit has been scored.
- Apply stuns and wounds to the target if a hit is scored.
Counting Range
When performing an attack, determine the range by counting the number of BIG SQUARES from the attacking figure to the target figure, including the target's square but not the attacking figure's square. When calculating range, do not use diagonal squares.
- RANGE 0 = Target is either in an adjacent small square or anywhere in the big square the attacker occupies.
- RANGE 1 = Target is anywhere in the big square the attacker occupies or an adjacent big square.
- RANGE 2 = Target is one or two big squares away from the attacker. A range 2 weapon cannot attack a target in its own big square.
(Illustration: range brackets counted from Nera. Green = Range 0 / Blue = Range 1 / Orange = Range 2.)
Rolling Attack Dice
Roll an amount of d12 equal to the ROF of the weapon.
Adding Attack Modifier
Add or subtract ATTACK MODIFIERS to each die rolled.
Attack Modifiers
Various factors may make it harder or easier to hit your target. These could include the type of attack conducted, the target's status, or perhaps an attacker is attacking through hindering terrain. These circumstances create attack modifiers (AM) which are applied to your attack die roll result to give your final attack die roll number.
- Modifiers are added or subtracted from the result rolled on each attack die.
- Modifiers are cumulative.
- A figure in hindering terrain does not apply any AM for the square they are attacking from.
- A natural roll of 1 is a miss, regardless of any modifiers.
| Action | AM |
|---|---|
| Stunned Rat | +3 |
| Hindering Terrain (includes figures) | -2 |
| Rat attacking a Vulnerable Cat | +2 |
| Skill and Weapon | Various |
Attack Results
If any of the attack die roll numbers are equal to or more than the weapon's stun value, the target is stunned. Each number equal to or more than the weapon's wound value causes 1 wound to the target as well as stunning it. Follow the effects:
- For each wound the target has received, reduce the target's health by 1.
- If a rat's health is reduced to 0, then it is eliminated from the map and its marker is placed in the RAT DISCARD AREA. Otherwise, track the damage by placing a wound marker next to the rat.
- If a rat is stunned, place a black stunned marker beside it. Note that a roll that causes a wound will also stun a rat if it has not been eliminated by the wound. Further stun results against a stunned rat have no effect - do not add additional stun markers.
- Roach markers are removed from the map and placed in the rat discard pile if they are stunned.
Attack Examples
NERA has decided to use both of her Action Points to attack during her activation.
- With her shuriken she attacks roach (A) at range 1. She rolls 1d12 and gets a 7 which stuns the roach. Stunned roaches are eliminated so the roach marker is removed from the map and placed face down in the rat discard pile.
- Next, with her sword she attacks the Arbalestier (B) who is at range 0. Since her attack crosses a yellow line she must subtract 2 from the number she rolls. She rolls 1d12 and gets a 7. She subtracts 2 from the result giving her a final attack roll number of 5 which neither stuns nor wounds the rat.
LEON is at range 2 to the Norwegian Brown (C) and chooses to use his first AP to Stride and move closer to it. Leon attacks with his Pistol. His LOS passes through a yellow line but because he is within the square surrounded by the yellow line he does not deduct the -2 attack modifier to the number he rolls for his attack. He rolls an 8 which inflicts a wound and a stun on the Norwegian Brown. This rat has 2 lives, so it is not eliminated. Wound and stun token are placed on it.
ADARA is next up and activates beside the stunned Brown who has taken one wound. She spends her first AP to attack. She has a +1 AM due to her proficiency skill with staffs and +3 AM because the rat is stunned. She rolls 1d12 and gets a 2. With the AM this is modified to a 6 which stuns the rat. Because it is already stunned there is no effect. She decides to use her 2nd AP to attack again, rolling a 5 plus the +4 AM for a final attack roll number of 9. A wound is delivered to the rat. It loses its last life and is removed from the map. Its marker is placed in the rat pool discard area.
New Foes
This scenario introduces some new foes, each with its own special power. In the attack lines below, the three values are the attack's range, the stun roll needed, and the wound roll needed.
Norwegian Brown Rats
Descendants of stowaways onboard Viking longships centuries ago, the large, aggressive and adaptable Norwegian Brown rats have risen to positions of power and command in the Vermin Army. These brutes terrorize their own troops nearly as much as the enemy, if not more...
Health 2, Action Points 2. Leader of the Pack: When This rat is on the map all rats and roaches have 2 AP and the -4 for initiative is removed.
Attacks:
- Spiked Mace: Range 0, Stun 7-8, Wound 9+
- Pistol: Range 1, Stun 6-7, Wound 8+
A Pistol May only be fired once per scenario. Place a Depleted token beside the rat once it has been fired.
Les Détestables
A raucous troop of decadent rats, hailing from the cellars of Versailles itself, Les Détestables claim to be nobles of the Royal House of the Rat King. Clad in filth encrusted remnants of courtly finery, they have taken up the custom of gorging themselves on an unwholesome mixture of subterranean fungi, molasses, and fermented garbage runoff. In a drunken frenzy they attack, often carrying bottles full of their noxious brew. The foul contents of these bottles, if ruptured, can be as much a danger to the rats themselves as the foe. C'est la Guerre.
Health 1, Action Points 1. Toxic Stench: If this rat is stunned the bottle breaks unleashing its vile substance. Place a toxic stench token in the big square. Any cat activating in the big square takes 1 wound.
Attacks:
- Tooth and Claw: Range 0, Stun 7-9, Wound 10+
Arbalétrier
Not as brave as some of the Cardinal's troops, the Arbalétrier strike from a distance with their crossbows, but will fight tooth and claw when cornered.
Health 1, Action Points 1. No special powers.
Attacks:
- Arbalest: Range 2, Stun 7-9, Wound 10+
- Tooth and Claw: Range 0, Stun 8-10, Wound 11+
Rat Attack
As stated in the first scenario, during the rat turn they will activate one at a time starting with the one closest to a cat. When each rat is activated, it may perform any number of actions equal to action points that rat has in the following order:
- If the rat has a target in range and LOS, it will attack.
- If 1 is not true it will move towards the closest cat.
- Repeat 1 and 2 if the rat has remaining Action Points.
Unless otherwise specified, rat attacks cause 1 stun or wound. A wound stuns as well.
Rat Elimination
When rats are eliminated, remove the marker (or miniature/standee) from the map and place their marker into the RAT DISCARD PILE beside your play area. They will be returned to the rat pool when the rat pool is empty.
Roaches Are Different
Roaches move the same as rats and use their AP the same, but their attack and effect is different. A roach only attacks a cat that occupies the same small square with it. If a roach activates while in the same small square as a cat, it inflicts 1 wound to the cat and then is removed from the map and placed in the rat discard pile.
Scenario 2 Complete!
Congratulations on vanquishing the vermin horde. Before continuing to the third scenario, do the following.
- Advance your cat level to 1.
- Visit the Taverne.
Cat Level and Skills
Your cat heroes will level up during the campaign. An entry in specific scenarios will notify you that your cat has earned the next level. Right now, your cat has earned level 1. Each level gives you access to more and better skills. Each cat has their own set of 9 skill cards. Three for each of level 1, 2 and 3. Find the level 1 skill cards for the cats you are using for this campaign. Moving forward, at the beginning of each scenario you can choose one Level 1 skill card to use for the scenario. As you grow in skill your choices will expand. See the chart below.
| Cat Level | Number of Skills |
|---|---|
| 1 | One level 1 skill. |
| 2 | Two level 1 skills and one level 2 skill. |
| 3 | Three level 1 skills, two level 2 skills and one level 3 skill. |
Taverne du Pélican de Mer
Between scenarios your cats will rest and visit le Taverne Du Pelican de Mer. There you can:
- A. Listen for rumors and gossip.
- B. Heal your wounds.
- C. Purchase gear.
A cat must sleep. A cat must eat. A cat must drink, and a cat must talk. Oui? The finest place on the island for a cat to do this is the Taverne du Pélican de Mer. Within its thick walls, either in the human section up top, or in our own space here, you will find the tastiest soups, stews and meats, not to mention the drink, all to renew the soul of the most famished feline. The tavern master, M. Varenne, his wife and his three daughters see to it that no one goes hungry. If there are other items an adventurous cat might need, then you can talk to Big Gus, the door cat. He always has interesting things for sale. There are dartboards for those who relish competition and rumour has it that there may be other discrete games of chance as well, but let's be careful that the Abbot hears nothing of those. The tavern is a busy place sometimes, and one is advised to keep one's ears open for juicy gossip. The stage is home to some of the island's most skilled musicians and things can sometimes get a bit raucous, but everyone's friends again the next night. So, mon ami, entrez vous. Sit down. Fill your pipe, empty your glass and let's have a tale...
A. Gossip and Rumour # Events Chart
After every scenario the first thing to do is visit the taverne and roll on the Events Chart to see if there is anything particularly interesting happening. We have included 6 listings of the 20 that will come with the final game. We recommend you only read the event that is rolled and keep the others secret. In the final game some of the events involve side scenarios and games of chance. For now, we are keeping it simple. Roll 1d12 and consult the chart below.
| Roll | Event |
|---|---|
| 1-2 | Sleepy Legs: You have been sitting here too long. When you stand up from your seat your legs are numb and they collapse beneath you, much to the amusement of the other patrons. Yo don't know wich is worse, the pins and needle of your limbs waking up, or the embarrassment... |
| 3-4 | Ah Cherie: Cherie On Tooth is making her rounds, looking for a friend, or at least someone to buy her a drink. Don't make eye contact... |
| 5-6 | Civil War: The Royalists have brought the civil war to the mont. While the Abbot has barred their entry from the chapels and the monastery, they sweep the lower town for remnants of Napoleon's rebels. Cat, rat, and human alike take shelter lest they get caught up. No further actions can occur at the Taverne at the moment. Play the nex scenario. |
| 7-8 | Supply and Demand: Another boat ran aground last evening on the ever changing sand flats of the mont. Co-incidentally, Big Gus' friends happen to have a surplus of very similar items to that unfortunate vessel's cargo... Big Gus' sales are half price (rounded up) for this visit only. |
| 9-10 | Fête de Sainte Gertrude: It's the Feast of St. Gertrude!. St. Gertrude of Nivelles is the patron saint of cats and sets an example for all to follow. Prayer in the morning, feasting in the evening!. For this visit all cats may be healed for free and each cat receives a St. Gertrude medallion (trade in for automatic success on a die roll). |
| 11-12 | Almost Heaven: The band is fantastic, a few friends roll in, and the wine and talk flow. Next thing you know it's way past last call and the sun is on the horizon... |
B. Heal Your Wounds
Spend any amount of your healing salves to heal your wounds up to your maximum of 9.
C. Purchase Gear
You may purchase and sell your gear to Gus when at the taverne. Draw 5 cards from the Loot deck(s) used from the last scenario. These are the items that are available for purchase this time. You may also sell any extra gear you have for 10x the loot level. So, loot level 1 gear can be sold for 10 francs each.
Scenario 3
You are ready to continue the adventure. Good luck mon ami.
Dramatis Personae
We are including background on 4 of the nine heroes for you to try out the rules with. You will find their character cards preceding the backgrounds.
Guy, a scarred grey Tabby. Rogue.
Guy is a battered old Tom who has seen it all, or so he says. If you need something bad done well, he's your cat, if you can meet his price. Most days you can find him out back of the Taverne de Pelican du Mere recovering from the night before. A saucer of crème will get you a story, but to hire his guns and his knives you will need a lot more.
- Weapons: Brace of Pistols, Pair of Poignards
- Skills: Reload both pistols with 1 big action.
- Quote: "I'm only in this for the catnip. And a fish head or two. Don't look at me like that."
Adara, a Calico. Wizard.
So well versed in the ancient mystical arts for someone so young, this cat, barely out of kittenhood, really, has spent most of her life in the classrooms, libraries and archives of the monastery and the abbey. Yet now she travels the streets with foreigners and ruffians, hunting for knowledge in rare book stalls, curiosity shops and the dockside bazaar. She hunts for something, no doubt, but I hope she remembers about curiosity and cats...
- Weapons: Spells, Staff
- Quote: "Science and magic. They're one and the same really, once you know their laws."
Leon, a Chartreux. Paladin Musketeer.
Ah, that handsome young fellow is Leon, as fast as he is big, and clever too. If you think he is something, you should have seen his father and his brother, Musketeers both, and, alas no longer with us. Leon worries, yes, that he can never fill those paw prints, no matter how hard he tries, but his friends know better. He says trouble is coming, and in spite of his youth, I believe it too.
- Weapons: Charleville Musket, Rapier
- Quote: "Now we play, Rat, then you tell me where your King is, then we play some more...and now you are dead."
Tsundere Nera, The Shadow who Bites, a Siamese. Ninja.
The alleys are abuzz with tales of a rather peculiar stranger in town, a voyager from far off Nippon. Exotic, beautiful and dangerous, she hunts the former agents of the legendary Rat King, dead for so many years now. Her reasons are known only to her, and what she looks like, beyond what I have already said, I do not know. No one who has met her describes her the same way twice, but I think you will know her when you meet her...
- Weapons: Shuriken, Tantō
- Quote: "These are the humans we have chosen. They are under our protection, and if they are too foolish to see the threat, well, they are only human. Our duty is before us and we shall not fail, mes amis!"
Entries
Entry #1
Molasses oozes from a cracked earthenware jug and puddles on the floor. Black hairs and a smeared pawprint tell you the culprit...A rat has invaded the kitchen, part of the realm you have sworn to protect. They've never been this bold at least, not since... You must inform your friends, but, what is this? Something moves at the edge of the sugary puddle. It is a roach, stuck in the mess, over by the jug. Why is it there? Fascinated you watch it struggle in the thick liquid. It is almost within reach. You should bring it in for questioning. As you stretch out towards it, the vermin suddenly notices you and rears out of the mire, hissing and trying to attack. Though it is held fast the movement startles you and you slip as you try to jump back...landing partially in the goo. As the cockroach sinks under the surface for the last time you realize that even though there's not a lot on you it really slows you down.
Entry #2
You finally knock down the brute in charge of the raiders. With his last gasp he snarls, "This is not it. This is not over. It's not even begun. The Crimson Cardinal is coming. This island will be ours..." When the rat stops moving, you see that he has book tucked into his belt. It turns out to be a Tome of Fencing and would be kept in one of the libraries or scriptoria in the Abbey. The danger is greater than you thought. He also has a healing draught, that he fortunately waited too long to use.
Receive a Tome of Fencing. Put it in your pack for now. Receive a Healing Draught.
Entry #3
Built on high, stout pilings out over the water, that shed has long been a haven of scoundrels and ne'er-do-wells. Its water gate, an ingenious method by which secret cargoes can be brought in or taken out, uses the strength of the tide to raise or lower small boats through an open hatch in the floor of the warehouse. Most respectable folk have forgotten about it, but the cats, well, the cats all know. So, apparently, do the rats. Looking in a grimy window you can see a pack of rats and roaches milling around, but not nearly in the numbers you expected. A small dinghy floats in the water gate pool of the warehouse, where the high tide holds it for unloading its verminous passengers. On the dinghy's aft seat, a bloated white rat in a soiled pink ballgown sprawls amidst the contents of spilled bottles of pickled delicacies and boxes of fancy flaky treats. She picks daintily at the morsels and angrily shoos away any of her pack which stray too close.
"Why am I kept waiting here?" she shrills. "How dare you provincials treat Madame Antoinette du Cognac in such a manner? We have an audience with the Cardinal himself, and if he values the aid of the House of Cognac, he will punish you all for this. Oh Pierre, Justin, see how they treat maman so poorly..." The Lady's two lap roaches click and wriggle at her touch and glare about viciously.
You exchange glances. If you can capture this noblerat, you can interrogate her and find out not only who the Crimson Cardinal she spoke of is, but why these mainland rats are flocking here, even risking the treacherous water crossing.
Welcome to the Mont, Madame...
Entry #4
"Oh, you rude peasants. Thugs, mountebanks...How dare you lay hands on a Lady. Aidez Moi, Aidez Moi, is there no champion to help me?" the great rat moans, spilling part of an éclair down her front.
"Lady," you say. "We are folk of honour. We shall parley and discuss the terms of your ransom. A ransom which, for one of such stature, should be quite substantial. Co-operate, and you shall not be harmed."
She agrees to your terms and surrenders. The Cardinals forces refuse to lay down their arms, however.
Madame Antoinette no longer activates, and her powers stop functioning. If Pierre and Justin are still alive, they are removed from the scenario. All spawn points deactivate.
Entry #5
"Rats will be rats and cats will be cats. Au revoir, Madames et Monsieurs. No one to tell tales, oui? Now grab this one. So, they still live. I'll put them in the pit tomorrow night. The Cardinal enjoys a good show."
By the time the freshening wind clears the smoke you can see your companions clinging to the pilings holding the gatehouse above the waters. Of Madame Antoinette there is no sign. Her waterlogged gown would have dragged her down to her doom.
Dejectedly you climb up and head for le Taverne du Pélican de Mer to regroupe and plan for a rescue at the Pit, a notorious rat baiting arena. Shut down when the Abbot discovered the gambling going on there, it's obvious that the rats have re-opened it for their own sinister purposes.
Entry #6
As the enemy falls to the sand covered floor the crowd noise peaks. Judging from the money changing paws, as many have bet for the prisoner as have against them. The masses want blood, and they don't care from where.
"Marvelous. Marvelous" roars a voice, the same from last night. The crowd falls silent. A young doe rat drunkenly whispers the name Maximillien and is quickly shushed by her equally tipsy girl friends...
"A most excellent display. I think I shall have a go myself. Oui?". The speaker, a giant grey tomcat, vaults onto the sands. "Place your bets", the one-eyed swordsman roars..."The house never loses."
Place Maximillien on the square marked S4 immediately. If the square is occupied move the occupier to an adjacent square of your choice.
- Maximillien activates and when he is done, the turn resumes as normal.
- Maximillien has the powers Leader of the Swarm and Counterattack.
- He is armed with a Rapier and a Flintlock Pistol. He will not use the pistol until he is wounded, the prisoner leaves the Pit, the fire bell is rung or a rat outside the pit is attacked.
Entry #8
The rats have already disturbed the cider master's collection of sample bottles and containers of special ingredients. While searching through this mess for items of use, you find a satchel containing several medical texts from La Grande Bibliothèque deep within the Monastery. What damage they could do there amongst the fragile tomes. And more disturbing, why are these crude vermin stealing plague texts?
Draw 1 card from Search Deck 1 and you may choose to play scenario 6 La Grande Bibliothèque instead of scenario 7, L'Etranger as your next scenario.
Entry #9
Attuned as you are to the energy the humans call magic, it is no wonder that this shelf with its racks of neatly stored scrolls has attracted your attention. While you really should be helping your comrades in the fight, this opportunity cannot be overlooked. A quick search reveals a spell scroll written in the secret language of cats. It will be useful. You will put the scroll back later, after you have learned it by heart. (Honest.)
If Sekhmet or Adara are part of this party, they may select a level 1 ability card and begin using it immediately. If both are in the party only one may receive this boon. If neither are in the party then the hero who searched this square receives 2 X Scratch tokens.
Entry #10
As soon as you kill this monstrosity, you see another, identical one, emerge from hiding within one of the newly arrived small craft. Not far off, an attentive vermin retinue heralds the emergence of still more of these mantises.
A lightning fast strike from the wimpled praying mantis in front of you draws your notice back to the task at hand.
"Attendez moi, sil vous plait. The lesson is about to begin, oui. I shall eat your brain now and I will know all of your secrets."
This praying mantis may wear the robes of a nun, but she is definitely not holy, and she and her foul sisters must be stopped.
When you remove a L'Abbesse marker, place an objective marker on the square it was removed from unless it is in a water square. Searching this square allows a draw from Search Deck 1.
Entry #11
Hissing furiously and lashing out with her remaining limbs, L'Abbesse tries vainly to lunge into the air on her broken wings. As you block her escape, she composes herself once more and speaks.
"Commendable. You have taught me much about your strengths and skills. We thank you for the lesson in humility. But, it does not matter. You have caused my Master some small inconvenience, a minor setback in his great plan..."
One of your companions lays their ears back and smiles, extending a velvet paw forward with exaggerated slowness. The tips of five claws emerge. "Yes, tell us of these plans."
You see the mantis' mask of serenity break as you turn away to continue the fight with the other vermin. Your comrade will get the information you need. After all, cats will be cats.
The cat who took the last life from L'Abbesse ends their turn now and spends their whole next activation interrogating the prisoner. They receive 3 x Scratch tokens and in the setup of scenario 9 the L'Abbesse marker is placed in the Rat Army pool after the starting set up is completed. Surprisingly, she never talked, only saying that her red master would be here soon, and vengeance would be done...
Entry #12
La Bouche staggers to the ground, wheezing and cursing. You have him cornered and are about to finish him when he unexpectedly pulls a swollen wineskin from under his frock coat and quaffs a huge draught.
He sneers and heaves himself upright.
"That is much better. You are an 'ard one, oui? But so am I. 'ow about we settle this just between the two of us. Rat on Cat. "
If you refuse the challenge, amidst a flurry of filthy comments about your cowardliness, La Bouche heals back to 3 lives, gains the power Leader of the Swarm and activates immediately. After this activation, the game returns to its normal sequence.
If you accept the challenge and agree to fight the duel, read the following:
Sensing a duel, the other patrons and vendors withdraw to a prudent distance and find viewing points to watch the show. No matter their allegiance, everyone loves a good scrap. As the two of you step into the central crossroad of the market bets have already been placed...
La Bouche heals back to 3 lives, and the game returns to its normal sequence.
Place the cat which triggered this event on or adjacent to the square with the broken statue and place the Norwegian Brown Rat marker on or adjacent to the square with the fish. Relocate any vermin markers and cat markers within the bounds of the central square, (denoted by the dashed brown line), to the nearest empty R square or adjacent to one.
So long as no other cat attacks him, La Bouche will treat the cat he is duelling as the closest enemy figure and ignore all other figures. All other vermin except L'Abbesse will ignore the duellists.
If the cat in the duel reduces La Bouche to 0 lives, he surrenders. The cat immediately chooses and receives a level 1 skill card and 3 scratch tokens. If the cat loses, then play goes on as normal.
All rats are removed from the board and S# spawn points become inactive.
La Bouche reveals that all the vermin have been summoned to a Dark Festival tomorrow to celebrate their own version of the Feast of St Francis. Even Maximilien, the mercenary bodyguard of the Crimson Cardinal will be there.
In the setup of scenario 9, the Maximilien marker is placed in the Rat Army pool after the starting setup is completed.
Entry #13
Again, the monster goes down, but this time you press him so hard that he has no chance to recover. Tail fluffed out like a bottlebrush, howling in shame and frustration he flees. You are not sure such a beast can even feel humiliation, but judging by the look he gives you as he slinks off he can, and is probably not the type to leave it alone...
Keep Maximilien's marker aside. It does not respawn. In scenario 12 place 5 kitten markers as hostages rather than 6.
Entry #14
Clumps of fur and torn whiskers fly aplenty from both sides but in the end with much hissing and spitting, the fearsome Maximilien is driven to his knees. The cat who removed Maximilien's last life receives 1 Scratch token.
"Traitor! Rat Slave! Now you'll pay!" you yell furiously. Maximilien's one eye blazes with fury as he reaches into a pocket and takes out a small snuffbox, loudly inhaling the contents. "Oh, you'll get your money's worth," he says to you with a laugh that is contains more rage than mirth. He leaps to his feet with renewed vigour and returns to the fray...
Return Maximilien to full health and place him adjacent to the party member with the least lives remaining. He then activates. After that, return to the normal sequence of play.
Entry #15
The strange glow that has been deflecting your shots and healing the red robed rat whenever he set foot on the altar fades. The altar itself collapses under your strikes and crumbles away, consumed by the energies it once channeled. The Cardinal looks quite annoyed and redoubles his efforts to attack the chains, but does seem to be keeping a concerned eye out for an escape route as well.
The Cardinal receives 1 additional AP but when his last life is taken, his marker is not returned to play for this scenario.