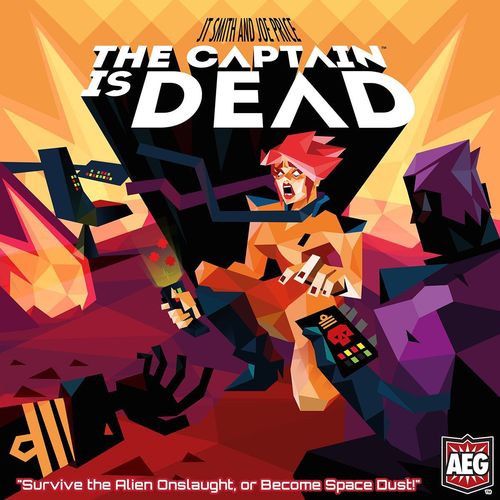
The Captain Is Dead
The Captain Is Dead Rulebook
Table of Contents
Table of Contents
- Components
- Setup
- How The Game Works
- Before You Begin
- Starting The Game
- Continuing Play
- Winning The Game
- Losing The Game
- Roles
- Spending Actions
- Spending Skills
- Hand Size
- Injuries
- Tools
- Systems
- Using Systems
- Upgrades
- Repairing Systems
- Destroyed Systems
- Battle Plans
- The Bad Stuff
- Example Of Play
- Strategy Guide
- Variants
- System Actions Quick Reference
- Find Out More
Components
Your game of The Captain is Dead should include the following. If it does not, please contact [email protected] for assistance.
- 16 Battle Plans
- 24 Level 1 Alerts (Yellow)
- 26 Level 2 Alerts (Orange)
- 6 Level 3 Alerts (Red)
- 2 Yellow Status Bars
- 1 Orange Blocker Bar
- 7 Torpedoes
- 18 Roles
- 30 Pawns
- Game Board
- 5 Upgrades Cards
- 48 Skills Cards
- 5 Tools Cards
- 6 Systems Cards
- Rulebook
Setup
Place the game board in the middle of the table. This is your ship, and it is the only thing between you and the vacuum of space.
Place the 6 System cards on their designated spots on the game board. The "Online" side should be face up. Not all Systems have cards. The 5 System Upgrade cards should be placed near the Science Lab. They'll come into play later. The "Inactive" side should be face up.
Shuffle the three Alert decks individually. Place them face down on the indicated space on the game board connected to the External Scanners, with 3 (Red) on bottom, then 2 (Orange), and 1 (Yellow) on top. Now, draw the top two cards and place them face up (in order) in the spaces off the board connected to the deck. The External Scanners let you see what's coming. When asked to draw an Alert, you'll draw those that are face up (in order) and then replenish the face up cards with one from the deck.
Shuffle each Alert deck and stack them as shown. The face up cards fill the First Space and the Second Space.
Shuffle the Skill deck and place it face down on the indicated space on the game board connected to the Computers.
Draw three Skill cards and place them face up on the space connected to the Internal Sensors.
Then deal 5 Skill cards to each player. Each player should choose a Skill from their hand and place it in the Cargo Pod; place the Tools in the Cargo Pod as well.
Shuffle the Battle Plans deck and place them face down in the indicated space on the game board connected to the Captain's Journal.
Place 5 of the Torpedoes on the red Torpedo icons on the board near the Armory. Place the remaining Torpedoes off to the side of the board.
Place a yellow status bar on the Shields at 100%.
Place a yellow status bar on the Jump Core at the position labeled "Insane". Ok. You're right. Insane is probably not the best difficulty setting for your first game. Start out on "Normal". If you're feeling meager and weak, go ahead and bump it down to "Novice". If you're feeling strong, bump it up to "Veteran".
Place the orange blocker bar near Engineering. You'll need that later.
Place the 12 Hostile Alien pawns along side the board. You'll need them later.
Randomly assign each player one color of pawn. You can do this by either passing out a random role card of each color to players, or handing them a random pawn of a color. Note that some players may have to have the same color if you have a larger number of players. Each player chooses a Role card that matches the color they were given. You will probably want to wait to choose until you read "How The Game Works".
Each player should place their pawn in the room that matches the color of their pawn.
For example, the First Officer / Admiral would place their pawn in the War Room.
How The Game Works
The ship is made up of rooms. Each room (except hallways) has one or more Systems. Each System gives the players an advantage, helping them achieve the primary objective: repair the Jump Core.
Take a moment now so that everyone can familiarize themselves with what all the Systems do. Starting with the External Scanners, go around the board and read aloud what each System does. See "Systems" (Pg. 8) for details.
NOTE: There is a colored line from each room to each System (so you know where that System is located). In addition, the heading on each System is colorized to match the color of the room it belongs to.
The System Card
Front:
- Title
- Always-on ability
Back:
- Per use cost
- Per-use ability
- Status
These Systems are going to go offline throughout the game. When they go offline, you'll lose the advantage they provide. You can repair them using Skills and actions.
Symbols
The game uses the following symbols: Action, Command, Engineering, Science, and Tactical.
Take a look at the symbols listed above. They'll be referenced through out the game components.
All the Systems have abilities you can use, and the costs to use those abilities are listed on the System. The rest of your abilities are inherent and are listed on the back of your Role card. Therefore, once you have selected which Role you want, you should keep the other card and flip it over as reference.
The Role Card
Front:
- Rank
- Name
- Hand Size
- Actions to spend
Back:
- Skill Discounts
- Ability
For example, the Tactical Officer Role has 4 actions on every turn. Each time the Tactical Officer spends actions, she may also use 2 Tactical discounts. This means that the Tactical Officer may repair the Shields for 2 actions and spend no cards. If your Role does not have enough Skill discounts to accomplish a task, then you must spend Skill cards to make up the difference. You simply discard them to spend them.
Before You Begin
Make sure each player has chosen their Role. If they can't decide, distribute them randomly. No Role is a bad choice, they just allow you to have different paths to victory. See "Roles" (Pg. 6) for details.
Each player's Role has a rank on it. This is the order in which you'll be taking turns. Some players find it helpful to play musical chairs to get into clockwise turn order. Whoever has the lowest rank number goes first.
For example: the Admiral who is rank 1, the lowest rank, will take the first turn. He is followed by rank 2 if played, etc.
After Roles are chosen draw one Alert from the top of the Alert deck. Read the card aloud and resolve its effects.
For example: if an Alert takes a System offline, flip over that System card and read the "offline" side of it.
Repeat this process 4 more times, for a total of 5 Alerts. See "Alerts" (Pg. 10) for details.
Note: You cannot Override this initial damage.
After you've damaged the ship from these Alerts, discard the Alerts and you're ready to begin the game.
Starting The Game
Now the first player will take their first turn. They may continue until they have spent all their actions, or they choose not to spend any additional actions. See "Spending Actions" (Pg. 7) for details. For example, you'll likely want to repair some Systems that were damaged in the initial assault. See "Repairing Systems" (Pg. 9) for details.
When you have completed your turn, draw an Alert, read it aloud, and do what it says on the card. See "Alerts" (Pg. 10) for details.
Continuing Play
Play now passes to the next rank and so on, each spending their actions to the best of their abilities, and each ending their turn by drawing and resolving an Alert.
Winning The Game
This is a cooperative game. You win or lose as a team. To win, you must repair the Jump Core to the "Engage!" status.
Losing The Game
There are several ways to lose:
You will lose if the Shields get to 0% and you take another hit; at that point the ship is destroyed.
You'll also lose if you are asked to place a Hostile Alien on the board, and you don't have enough remaining to place. See "Hostile Aliens" (pg. 10) for details.
If you get to the Red Alerts, they will surely kill you very quickly, but in a multitude of ways.
If somehow you get through the Red Alerts and are still alive, when you try to draw another Alert and cannot the Hostile Alien ship blows you out of the sky and you still lose!
Roles
Each Role offers the player unique abilities and play styles. While no Role is bad, each Role certainly has its advantages and disadvantages. Choose wisely.
- Admiral – A natural leader and master of the Battle Plans. Has 2 Command discounts, 4 actions, and a hand size of 6.
- First Officer – He's the guy you want in charge in an emergency. Has 1 Command and 1 Tactical discount, 4 actions and a hand size of 6.
- Tactical Officer – She can fix the Shields faster than anyone. Has 2 Tactical discounts, 4 actions and a hand size of 6.
- Telepath – No one is better at pooling the collective talents of the crew than he is. Has 4 actions and a hand size of 6.
- Crewman – He will save the ship or die trying. Has 1 Tactical discount, 4 actions and a hand size of 6.
- Counselor – She's the woman who can get things done. Has 4 actions and a hand size of 8.
- Medical Officer – He'll patch you up when you're injured. Has 1 Command and 1 Science discount, 4 actions and a hand size of 6.
- Diplomat – She'll negotiate with any aliens you encounter. Has 1 Command discount, 4 actions and a hand size of 6.
- Scholar – She always has the Skills you need. Has 1 Science, 1 Command, and 1 Tactical discount, 4 actions and a hand size of 7.
- Science Officer – When the weird stuff happens and no one else knows what to do, she will. Has 2 Science discounts, 4 actions and a hand size of 6.
- Cyborg – She is immune to chaos and has heightened reflexes. Has 5 actions and a hand size of 7.
- Teleporter Chief – He can move around the ship better than anyone. Has 1 Engineering discount, 4 actions and a hand size of 6.
- Chief Engineer – She can fix the Jump Core faster than anyone. Has 2 Engineering discounts, 4 actions and a hand size of 6.
- Ensign – He makes sure everybody has what they need. Has 4 actions and a hand size of 4.
- Hologram – He can do almost anything, but also has severe limitations. Has 1 Science, 1 Engineering, and 1 Tactical discount, 5 actions and a hand size of 8.
- Janitor – He can jury rig any System on the ship. Has 4 actions and a hand size of 5.
- Weapons Officer – He will defend your ship against other vessels at all costs. Has 1 Tactical and 1 Engineering discount, 4 actions and a hand size of 6.
- Soldier – She will defend your ship against intruders at all costs. Has 1 Command and 1 Tactical discount, 4 actions and a hand size of 6.
Spending Actions
Almost all activities in the game require you to spend actions. For example, take a look at the back of your Role card. There are several activities listed there, each requires spending one action, indicated by the action icon at the top of the card.
Your number of actions is listed on your Role card. Most Roles have 4 actions. If your card lists 4, then you have 4 actions every turn. So if you spend all 4 actions this turn, you'll still get 4 more next turn.
There is a list of activities on the back of each Role card. These activities are always available to you unless you're injured (see "Injuries" pg. 8 for details), you have Hostile Aliens in your location (see "Hostile Aliens" pg. 10 for details), or some other effect specifically states that they are not available.
Spending Skills
When an activity requires you to spend Skills, first look at your Skill discounts on your Role. Every time you spend an action or actions, you can subtract those discounts first (if needed). They can be used over and over again, and never run out. This is your built-in knowledge.
If you do not have enough Skill discounts to cover the cost of that activity, then you must spend Skills from your hand of Skill cards. For example, if the Weapons Officer wishes to fire the Torpedo Tube, he will need a Command card in addition to his Tactical discount.
Hand Size
You may only hold Skill and Tools cards in your hand up to your hand size. If you are ever given or take a Skill or Tool that puts you over your hand size, you must immediately discard down to your hand size.
Injuries
When you become injured turn your pawn on its side to indicate your injured status. While injured the only activities available to you are moving, killing Hostile Aliens in your location, using the Teleporter, and using the Trauma Station. All other activities are out of reach.
Some Systems, and the back of your Role card, will have the injured symbol. Wherever you see this symbol it means you can use that activity when you are injured.
You might think it seems weird that you can fight a Hostile Alien while injured. However, when animals are injured, that is when they are most dangerous; adrenaline kicks in and your killer instinct takes over.
Role abilities are available even if you are injured.
Tools
Players may pick up Tools from the Cargo Pod. Tools give the player additional special abilities, but these abilities are used only twice. Use the ability from the "Side A" side of the Tool card, then flip it over. Then use the ability from the "Side B" side of the card and remove the card from the game.
Tools may not be transferred to another player using the Comm System, but they may be transferred using the Teleporter if it is online.
NOTE: The Hologram may not use or carry Tools.
You may use Tools when you are injured so long as the action you are trying to take is allowed when you are injured. For example, you may fire the rifle, but could not repair a System.
Systems
Each System represents an advantage in the game. The trick is to keep as many advantages as possible without losing sight of the mission goal.
- Jump Core – Repairing this is how you win the game. There is nothing more important than repairing the Jump Core.
- Teleporter – Makes it easy to move from any location to any other location on the ship.
- Shields – Protect you from the damage of the ship that is attacking you. If they go offline, and you take another hit, you lose.
- Comm System – Allows you to easily give or take cards from other players anywhere in the ship.
- External Scanners – Allow you to see what bad stuff is coming before it arrives so that you can plan accordingly.
- Computers – Allow you to get more Skill cards. Without this you simply cannot win the game.
- Internal Sensors – Allow you to have a choice of what Skill card to draw.
- Trauma Station – Heals injured players.
- Torpedo Tube – Temporarily fend off the alien onslaught.
- Security Station – Zap the aliens who have already made it on board the ship.
- Upgrades – Research new Systems to be added to the ship.
- Research Station – Research and remove an Anomaly from the game.
- Captain's Journal – This is how you get Battle Plans, which are one use special abilities.
- Cargo POD – Another place you can get Skills.
Using Systems
In each room on the ship there are Systems. Some Systems have cards attached to them because they have an "Online" or "Offline" state. While the System is online, you can use its special abilities.
Some Systems, like External Scanners, are passive. This means that when they're online, you're automatically using them.
Other Systems, like Computers, require you to spend actions and maybe even Skills to use them.
Normally you must be in the room that contains the System to use it. Some Systems may be used from any location. Those Systems will be designated with the any-location icon.
If your Role has an ability that uses a System, like the Teleporter Chief, the ability goes away when the System goes offline.
Upgrades
Upgrades are special Systems that are not installed in the ship at the beginning of the game. You can go to the Science Lab and research Upgrades that will give you permanent special abilities.
There are only two Upgrade slots, so you can only have two Upgrades in effect at one time (except the Auto Surgeon which doesn't use an Upgrade slot). You may replace existing Upgrades if you wish to use a better Upgrade later.
Repairing Systems
When a System becomes damaged, it should be flipped over to its "Offline" side, except for Shields and the Jump Core, which have graduated states rather than just Online/Offline. You can repair a damaged System by spending actions and Skills, which are listed on the Offline side of the card or at the top of the Jump Core and Shields on the board.
Once it is repaired, flip it back over to its "Online" side. In the case of Shields and the Jump Core, when you make a repair you slide the yellow status bar up one position.
Destroyed Systems
Some Systems may be destroyed during the game. This will only happen if an Alert card specifically says that the System is destroyed.
Note: If a System is "Offline" and then is damaged again, it is NOT destroyed.
You may reinstall a destroyed System by spending two actions, two Tactical, and four Science.
Battle Plans
Battle Plans are one-use special abilities that give you a large advantage in the game. You can win without them, but it is much more difficult to achieve. They are available from the Captain's Journal in the War Room.
If a battle plan ever conflicts with another rule, then assume the Battle Plan overrides that rule.
Once the Battle Plans deck runs out, they are gone. You cannot use the Battle Plans more than once.
Battle Plans are not counted toward your hand size. You may hold as many as you like.
The Bad Stuff
Here you will learn about all the things that can hurt you in the game.
Alerts
Alerts are the "big bad" in the game. They keep on coming, get progressively worse, and will generally ruin your day. You will draw 5 at the beginning of the game, plus one at the end of each player's turn.
When you draw an Alert, you'll draw the face up ones first (in order) if there are any face up Alerts. When drawing a face up Alert, you'll replenish it with one from the deck.
Overriding Alerts
Many Alerts can be overridden. Overriding an Alert means that you discard it as it happens, thus preventing its effects. Overriding an Alert generally costs 3 Command and does not require an action.
You may only override an Alert that was drawn at the end of your turn. In other words, each player is responsible for the Alerts that happen on their turn. You may use your Skill discounts when overriding Alerts.
The Diplomat Role may override Alerts out of turn but must spend an additional Command to do so. No one else may override Alerts unless it is their turn.
Hostile Aliens
Hostile Aliens do not move, nor do they attack. They are simply obstacles to overcome.
While you are in a room with a Hostile Alien, the only activities available to you are killing Hostile Aliens and using the Teleporter. It takes just one action to kill a Hostile Alien.
Some Systems and the back of your Role card will have the Hostile Alien symbol. Wherever you see this symbol it means you can use that activity when a Hostile Alien is present.
Anomalies
Anomalies are the gift that keep on giving. They come from the Alerts deck, but instead of being a one-time bad thing, they remain in play and must be dealt with by doing research in the Science Lab. You'd do well to dispose of them quickly.
There are two "irrational" Anomalies, titled "Irrational Fear" and "Irrational Anger". These sometimes cause confusion for new players. Unless their conditions are met, you cannot use any Systems, which includes the Teleporter and the Comm System.
If you're in the Science Lab or you are playing the Cyborg Role, then Anomalies have no effect on you.
Alien Ships
Alien Ships are additional parts of the Hostile Alien fleet that occasionally show up to aid the ship that's attacking you. They'll often magnify the effects of whatever Alerts you're drawing. The only way to get rid of them is to fire the Torpedo Tube.
When you fire the Torpedo Tube, you may discard one ship card in play (attached to the board), or you can use the ability of the Torpedo Tube, but not both.
While the External Scanners are online, you may shoot ships that are in the visible Alert queue. If you shoot the first ship in the queue (the one that will be revealed at the end of your turn) then you do not need to draw an Alert at the end of your turn. If you shoot the second ship in the queue, replace it at the end of your turn when you resolve the Alert for your turn.
Example Of Play
Three players set up the game. The pawns are distributed randomly to the players, with blue, yellow, and red being chosen and green, purple, white and orange going back in the box.
The blue player chooses the Admiral, the red player chooses the Tactical Officer, and the yellow player chooses the Soldier.
We need to draw 5 cards from the Alerts deck for initial damage.
We start with the first face up card, which knocks the External Scanners offline and damages all players on the Bridge. We flip over the External Scanners card, which asks that we discard all face up Alerts, so the next Alert that hasn't been activated yet is discarded. Red player tips over her pawn indicating injured status.
The second Alert card gets drawn from the top of the deck, and it damages the Shields by 10%. The yellow bar is slid from 100% down to 90%.
The third and fourth Alerts add 3 Hostile Aliens to the Computer Core and the Science Lab.
The fifth Alert adds an Alien Fighter which magnifies future damage to the Shields by 10%.
Now we're ready to begin the game. The Admiral is rank 1 and therefore goes first. He teleports the injured Tactical Officer to the Infirmary for 1 action.
He then spends 2 actions and uses his Command discount to draw a Battle Plan from The Captain's Journal. The card allows him to perform 2 free System repairs, so he decides to hold on to it for later.
He spends his 4th action asking for and taking a Command card from the Tactical Officer.
To finish his turn the Admiral draws an Alert and finds that it will knock the Torpedo Tube offline and injure all players in the Armory. Rather than let that happen, he spends his Command card, using his 2 Command discount again and overrides the Alert. This allows him to discard the Alert without it taking effect.
The Tactical Officer has the next highest rank with a rank of 3, so she goes next. She spends her first action healing herself using the Trauma Station. After healing, she stands her pawn up to indicate her full health status.
She spends her second action teleporting herself back to the Bridge.
She then spends her two remaining actions repairing the Shields by 10%, using her 2 Tactical discount in the process. She slides the yellow bar on the Shields back up to 100%. This allows her to draw two random cards from the Skill deck because of her special ability.
To finish her turn she draws a card from the top of the Alert deck. It knocks the Teleporter offline and injures all players in Engineering; luckily no one is there. The Teleporter card is flipped over to it's offline side.
The Soldier then takes her turn, starting by spending 1 action to use the Security Station and her special ability to zap all the Hostile Aliens in the Computer Core. She then removes their dead husk-like bodies from the board.
She then spends 2 actions and uses her Command/Tactical discount to fire the Torpedo Tube. She removes 1 Torpedo from the board. Firing the Torpedo means she will not have to draw an Alert at the end of her turn.
With her remaining action she discards two Tactical cards from her hand, and again uses her Tactical discount to build a Torpedo. She places 1 Torpedo back on the board.
Play now passes back to The Admiral to continue with his second turn.
Strategy Guide
If you're having trouble winning The Captain Is Dead then you've come to the right place. However, if you don't like spoilers, skip this section!
Remember What's Important
The biggest single thing you can do to improve your odds of winning is to remember what your objective is: repair the Jump Core.
It's very easy to get caught up in all the various Systems being offline. You'll feel the need to repair them, and you should, but not at the expense of the main goal.
Cycle That Skill Deck
There are 12 Engineering cards in the Skill deck. It costs you 5 Engineering to repair the Jump Core. That means that unless you have Engineering discounts, you will need to cycle through the Skill deck roughly once for every two sets of repairs you need to make based upon your difficulty setting. For example, if you have the game on Normal difficulty, you'll need to cycle through all the cards in the Skill deck roughly three times to win the game.
Plan Your Crew
Do your best to pick Roles that complement each other. For example, if you are the purple Role and your team doesn't have anyone with Science or Command, then you might be better off picking the Medical Officer than one of the other Roles.
Heed The Future
Having the External Scanners online allows you to peek into the future. You can make sure that the right player has enough Command to override a critical Alert. You can use the Torpedo Tube judiciously to delay bad stuff until the right person can handle it. And you can make sure that all players are out of the way of injury.
Be A Couch Potato
Moving around a lot is a huge waste of actions. Make use of the Comm System as much as possible. Always move via the Teleporter when you do have to move.
If the Teleporter is offline, then that's probably the first thing (after the Comm System) you'll want to get back online.
When you do have to move, make the most of your movement. For example, when you go to draw cards in the Computer Core or Cargo Hold, you might as well stay there and fill up before leaving. If you go to the War Room to draw a Battle Plan, make sure you can draw more than one before you leave. If you go to the Bridge to repair a System, hopefully you can repair more than one.
Think Action Count
When you're trying to decide the severity of one thing versus another, think action count.
You can cancel a big pile of aliens getting on the ship for 3 Command, but if you have a Soldier in your crew, she can kill all those aliens for 1 action. Three Command probably took you at least 3 actions to acquire.
When you're deciding whether to research an Anomaly or an Upgrade, think about how many actions leaving the Anomaly in place will cost you versus how many actions the Upgrade will save you. It costs 2 Tactical and 2 actions to repair the Shields, so the Shield Modulator is quite helpful. However, if Increased Gravity is costing you an extra action on each player's turn, that could add up very quickly.
Oh Captain, My Captain
The Captain was smart and left you a bunch of Battle Plans that will aid you in your victory. Even if you don't have an Admiral or First Officer, someone on your crew should be trying to get at least a few Battle Plans. Everything in that deck is worth more than the 2 actions and 1 Command it costs to get the card. More importantly, each card gives you more options at very critical moments in the game.
Likewise, you should make sure you save the Battle Plans you get for the best possible use. For example, don't give someone a Skill discount until they need to use it. But be careful, if you're too stingy with the Battle Plans then they'll become a wasted effort.
Dead Ends
Be mindful of where you end your turn.
When possible, end your turn somewhere that will help someone else. For example, so they can take a card from you, or if your ability or their ability will help them on their turn.
Make sure you don't end your turn somewhere where you will be a detriment to other players. For example, if the Alert you're about to draw dumps Hostile Aliens in the room that the other player has to clean up before they can start their turn, you may wish to rethink this action.
No Wasted Actions
Actions are very precious, so don't waste them. If you don't know what to do with your last action, then maybe you can use it to Teleport someone, or give them a card.
Variants
While we love the base game and all its rules, there are a few variants that we like to play now and again. Maybe you will too.
Quick Game
Remove all the Orange Alerts from the Alerts deck. This one is simple: you either fix the ship before the Yellow Alerts run out, or the Red Alerts will kill you.
Advanced Quick Game
Remove all but 5 Yellow Alerts from the Alerts deck, then play as normal. This allows you to set up the initial damage with Yellow Alerts, but you'll begin the game directly in the Orange Alerts, making the game exceedingly difficult.
Any Role
Instead of making the players choose a Role from a specific color, allow the players to choose any Role they wish. This would allow, for example, for a crew made up of a Medical Officer, Counselor, and the Diplomat (all purple Roles). When playing this way, any overlapping ranks are resolved in order by birthdate (oldest goes first).
Single Player
Because this is a co-op game, there's no reason a single player can't play The Captain by him or herself. When you do this, however, we recommend choosing 3 or 4 Roles to play, rather than just a single Role. The extra abilities come in handy.
System Actions Quick Reference
- 1 action — Comm System (usable from any location) – Take or give a Skill card to or from a player at any location.
- 2 actions, 1 Tactical, 1 Command, 1 Torpedo — Torpedo Tube – Fire a Torpedo to delay drawing from the Alerts deck, or destroy a ship.
- 1 action, 3 Tactical — Torpedo Tube – Manufacture a Torpedo.
- 1 action, 1 Tactical — Security Station – Kill one alien at any location.
- 1 action — Trauma Station (usable when injured) – Heal a player.
- 1 action, 4 Science — Research Station – Research an Anomaly.
- 1 action — Teleporter (usable when injured, usable with a Hostile Alien present, usable from any location) – Teleport a player to any location.
- 1 action — Cargo Pod – Take or exchange 1 Skill card, or 1 Tool.
- 1 action — Internal Sensors – Choose a face up Skill.
- 1 action — Computers – Draw a random Skill.
- 2 actions, 1 Command — Captain's Journal – Draw a Battle Plan.
Find Out More
For more information about this game or our other great games, check out our web site at: www.alderac.com/thecaptainisdead