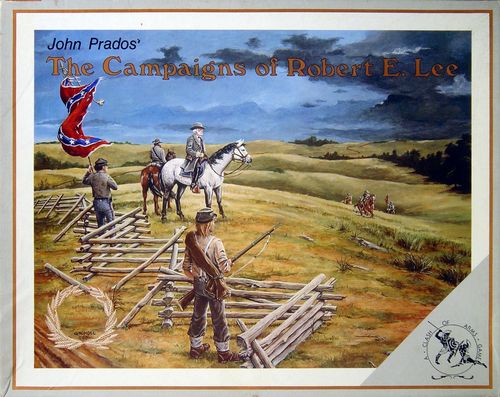
The Campaigns of Robert E. Lee
The Campaigns of Robert E. Lee Rulebook
Table of Contents
Table of Contents
- 1.0 Introduction
- 2.0 The Playing Pieces
- 3.0 The Turn
- 4.0 Decision Segment/Operations Effort
- 5.0 Army Organization Display
- 6.0 Leaders
- 7.0 Movement
- 8.0 Supply
- 9.0 Strategic Attrition
- 10.0 Weather
- 11.0 Zones of Control
- 12.0 Battle Development
- 13.0 Combat
- 14.0 Morale
- 15.0 Artillery Points
- 16.0 Cavalry
- 17.0 Engineers
- 18.0 Detachments
- 19.0 Naval Capabilities
- 20.0 Railroads
- 21.0 Partisans
- 22.0 Pinkertons
- 23.0 War Effort
- 24.0 Capture
- 25.0 Devastation
- 26.0 Entrenchments
- 27.0 Militia
- 28.0 Limited Intelligence
- 29.0 Victory Conditions
- 30.0 Introduction to the Scenarios
- 31.0 The Scenarios
- 32.0 Historical Commentary
- 33.0 Recommended Reading
1.0 Introduction
1.1 Background
For four bloody years of the American Civil War families were divided, brother ranged against brother in a rebellion that determined the future history of the United States. Many of the most important campaigns of the Civil War occurred in the eastern theater where the capitals of both the Union and Confederacy were located within a hundred miles of each other. One soldier, Robert E. Lee, was the Confederacy's best field commander and perhaps its main chance to emerge victorious from the Civil War.
1.2 Scale
A. The Campaigns of Robert E. Lee is a strategic-operational simulation of Lee's campaigns in the eastern theater of the Civil War. The game covers the fighting between Union and Confederate forces in Virginia, Maryland, and Pennsylvania between 1861 and 1865. The game offers ten scenarios covering the major engagements of the war.
B. The game is played on a map representing the areas involved, this is overlaid with a hexagon grid to regulate movement of pieces and other game activities. Each hexagon (hex) represents an area roughly four miles in diameter. Each turn in the game represents five days, or in winter 10 days of real time.
C. During each turn, two players, one representing each side in the Civil War, move their pieces and fight battles to execute their game strategies. At the conclusion of play, performance is compared to the Victory Conditions to determine the winner.
1.3 Abbreviations
| Abbr | Explanation | Abbr | Explanation |
|---|---|---|---|
| AP | Administration Point | OE | Operations Effort |
| DRM | Die Roll Modification | OOC | Out of Communication |
| FERT | Fire Exchange Results Table | OOS | Out of Supply |
| HQ | Headquarters | SP | Strength Point |
| IMC | Initiative Movement Chart | TEC | Terrain Effects Chart |
| LOS | Line of Supply | VP | Victory Point |
2.0 The Playing Pieces
2.1 In General
The pieces represent the military leaders and combat forces of both sides which took part, each piece containing numbers and symbols that define combat value and morale for units and leadership abilities for leaders. There are also a number of markers intended to facilitate play and avoid paperwork.
2.2 Sample Units
2.2.1 Leader Unit
A. The values are the Administrative Rating, the Combat Command Rating, and the Movement Efficiency/Reaction Rating, respectively.
B. The number of stars is the leader's rank and stacking value.
C. The leader's name is only on his inactive side.
[Figure: front (active) and back (inactive) leader counters.]
2.2.2 Combat Unit
A. Unit size is above the unit-type box.
B. The unit-type box indicates the unit type.
C. The numbers on the bottom are the Combat Value and the Morale Rating, respectively.
[Figure: front (full strength) and back (reduced strength) combat unit counters.]
2.2.2.1 Unit Sizes
| Symbol | Unit Size |
|---|---|
| XXXX | Army Headquarters |
| XXX | Confederate Corps Headquarters |
| XX | Division |
| X | Brigade |
| III | Regiment |
2.2.2.2 Unit Types
| Unit type | Counter symbol |
|---|---|
| Infantry | Solid black box |
| Cavalry | Black triangle |
| Artillery | Black dot in a box |
| Engineer | Engineer symbol |
| Partisan Leader | Partisan leader figure |
2.2.3 Sample Headquarters
Headquarters (HQs) have only the unit size and name.
[Figure: front (United States Army HQ) and back (blank) headquarters counters.]
2.2.3 Naval Units
A. The numbers are the Naval Combat Value and the Gunfire Support Value, respectively.
B. The triangle in the middle is the Hexside Facing Indicator.
[Figure: front (full strength) and back (reduced strength) Wooden Ship and Ironclad counters.]
2.2.4 Supply Units
A. The first number on the bottom is the Combat Value.
B. The second number on the bottom is the Morale Rating.
C. The number in the upper right corner is the Supply Capacity.
[Figure: front (Wagon) and back (Supply Depot) supply counters.]
2.2.5 Other Units
[Figure: markers for Pinkertons, Rebel Sympathizers, Train, Observation Balloon, Pontoon Bridge, and Engineer Supervisor.]
Various markers are pictured throughout this rulebook.
3.0 The Turn
A. The game is played in turns during which each side performs various game activities. Both sides move their forces and engage the opponent during Impulses of the turn.
B. There may be a variable number of Impulses depending on a bid from each side at the beginning of the turn and the two sides' subsequent rate of expenditure of Operations Effort (OE) during the turn. OE is a measure of the total ability of each side to mount military moves of significant size. The level of OE available is set by the scenario in play.
C. During each Impulse the phasing side uses one or more points of OE to establish the range of possibilities for movement allowances (MAs) granted to each of its leaders. Leaders move in sequence and prepare for combat, then combat is resolved. Alternate Impulses until both sides have used up all available OE. A Reorganization Segment follows. The Turn marker is then moved forward on the Time Record Cycle printed on the map and a new turn begins.
3.1 Decision Segment
A. Both sides select a bid of OE to expend in their first Impulse of the turn. The bid may range from a pass (bid 0) to a bid for the full amount of OE available in the current turn. The side making the highest bid takes the first Impulse of the turn, uses up the amount of OE bid, and pays a cost in War Effort Points (WEPs) for the special effort required to organize operations in advance of the opponent.
B. In case of a tie bid, bid again. If the bid ties three times on the same number, the side with the greatest amount of WEPs wins the initiative but pays double the normal amount for the effort. Further detail is supplied in the Decision Segment (4.0).
3.2 Impulses
A. During Impulses both sides conduct all operations with their forces, including both Movement and Combat. Players alternate taking Impulses. In each Impulse they expend OE in the amount stated at the beginning of the Impulse.
B. In the first Impulse of any game the phasing side must expend the amount of OE bid during the Decision Segment.
C. Every Impulse of each turn is composed of a Movement Sequence during which attacks are declared, a Battle Development Sequence, and finally Combat Sequence.
3.2.1 Movement Sequence
A. In the Movement Sequence, the phasing side attempts to move each leader or unit it may have on the board. Each leader or unit is moved separately and performs all game functions desired of that leader or unit before the moving the next leader or unit.
B. During the Movement Sequence each stack may declare an attack to perform during the Combat Sequence, rolling against the Combat Command Rating (7.7) of the leader to see if the attempted attack is sustained. All leaders or units which advance to a hex adjacent to the opponent's leaders or units must declare an attempted attack against an adjacent enemy-occupied hex.
C. Ships may move on the map and embark or disembark Naval Assault Missions.
3.2.2 Battle Development Sequence
In this sequence the defender, if able, may attempt to Retreat Before Combat (12.4), or it may attempt to reinforce the forces engaged by means of Reaction Movement (12.1) from nearby eligible leaders.
3.2.3 Combat Sequence
A. During this sequence each battle marked on the map by successful declaration of attack is resolved in any order desired by attacker.
B. A stack can only attack opposing forces in one hex adjacent to it.
C. Each stack attacking a hex resolves its attack separately and in succession.
D. All attacks on a hex must be resolved before any attack against a different hex.
E. The combat strength of a stack is affected by its Supply Status (8.0) and (for the defender) by the presence of other friendly forces on an adjacent hex for Support (12.3).
F. The attacker gains additional advantages for second and subsequent attacks on a hex while the defender is penalized in such attacks.
G. Combat resolution is also affected by the leaders (6.8) available on both sides, Artillery (13.3), Morale (13.5), and the Terrain (13.6) in which the battle takes place.
H. All attacks against a hex are resolved before the effects of battle are applied to both sides.
I. When the phasing side has resolved its last attack, the Impulse is complete and play reverts to the opponent for a new Impulse, which begins with that side's statement of how much OE it will expend in the Impulse.
3.3 Reorganization Segment
A. This segment begins when both sides have expended all OE for the current turn.
B. During this segment, both sides execute a number of functions related to preparation for continued operations.
C. First they perform Devastation (25.0) and then roll for Foraging (23.2) if this is allowed by the scenario.
D. Forces which cannot trace a Line of Supply (8.2) or stacks containing more than one leader with assigned troops must roll for Attrition (9.0).
E. Both sides then may introduce Replacements (23.4) into their forces, change or promote leaders, appoint new leaders and Corps or Army Commanders (6.12), and build new units, Artillery Guns, and procure Ammunition under the rules for War Effort (WE, 23.0).
F. During the Reorganization Segment, either side may also put existing leaders into Training (14.5) to improve Morale, may use leaders with Engineers (17.0) for Entrenching, and may procure other specialized units as noted in the rules that follow.
G. The Union may send units to sea for Naval Transport missions (19.0).
H. Captured leaders are exchanged (6.18).
I. Both sides conduct all actions with their own forces simultaneously in the Reorganization Segment. When all Reorganization actions have been completed, move the Turn marker ahead. Reset all leaders' Administration point (AP) markers to their Administrative ratings. Finally, a new turn begins with a bid from each player.
4.0 Decision Segment/Operations Effort
A. The Decision Segment begins every turn. The purpose of the segment is to determine which side moves first in the current turn through the outcome of a bid by each side.
B. Players bid OE set by the scenario in play. OE cannot be accumulated and, except in the case of passed turns, each side must expend all its OE every turn.
C. In the first Impulse taken in the turn, each player must expend the amount of OE bid during the Decision Segments.
D. In each subsequent Impulse, the player begins by announcing the amount of remaining OE is to be used.
E. Players alternate Impulses until neither player has OE remaining.
F. Players may also use OE in an Impulse to extend Combat (13.10) for engaged forces that remain in contact following battle resolution.
G. The following are special cases in the bidding routine of the Decision segment:
4.1 Whole Effort Bid
A. It is possible that either side may take the initiative in a turn by including its whole amount of OE, which may outbid the opponent.
B. It is also possible in this case that the opponent has not bid all of its own OE in the Decision Segment. In this case the player outbid (the second player) may take two Impulses in a row. The first Impulse expends the OE bid by the second player, and the repeat Impulse automatically expends all OE remaining to the second player.
4.2 Maximal Effort Plus Battle Extension
A. The second player may also be placed in the situation where the OE is split in two Impulses in a situation where the player with the initiative used most of his/her OE in an initial Impulse and the rest of it to extend a battle.
B. Again the second player would have two Impulses in a row, the first with his/her bid level of OE, the repeat Impulse expends the remainder.
C. It is also possible that the second player can expend a portion of her/his OE in battle extension following her/his initial Impulse before the remainder of the effort is consumed by a repeat Impulse.
4.3 Limitation of Repeat Impulses
The preceding two cases (4.1 and 4.2), where the moving player has expended all her/his OE before the second player receives his/her initial Impulse, are the only cases in which a player may receive a repeat Impulse. In all other cases players alternate taking Impulses throughout the turn.
4.4 Passed Turn
If either side bids a pass in the Decision Segment and the opponent has also bid a pass, or if the opponent has bid half or less (fractions rounded up) of its available OE, then the turn is considered closed for operations. In this case play proceeds immediately to the Reorganization Segment and all functions of reorganization are carried out.
4.5 Bidding
A. Each side receives a set of chits printed with a Confederate flag or Union shield motif to conceal the substance of the players' bids.
B. The reverse sides of the chits are numbered from 0 to 6, with the zero chit representing the pass bid. That chit is always in play. Otherwise use the chits for as much OE as allowed by the scenario in play.
C. Each side may bid all or any portion of this OE in each Decision Segment.
D. There is no bidding in Impulses following the Decision Segment, during Impulses the players simply state how much of their remaining OE is being expended, with a minimum of 1 required to proceed with an Impulse.
4.6 The Pass Bid
A. It is possible for one side to bid a pass with the other seizing the initiative for the full turn by a bid of more than half his total (4.4).
B. In this case the side seizing the initiative automatically expends half of its available OE (fractions rounded up) during its own initial Impulse. Thereafter that side may use up remaining OE as desired.
4.7 Ties
A. If both sides bid the same amount of OE (but not if both bid a pass), then the bid is repeated.
B. If both sides tie in bids on the same number three times in a row, then the side with the larger number of WEPs receives the Initiative and takes the first Impulse of the turn.
C. The WEP cost for taking the initiative is doubled for the receiving it after a tied bid.
4.8 Operations Effort for Battle Extension
A. After resolution of combat in any Impulse, if forces remain engaged on adjacent hexes, either side may elect to continue combat through a further round.
B. Extending battle costs one from the player's remaining OE. The practical effects of extending combat are covered in 13.10.
5.0 Army Organization Display
A. The Army Organization Chart is important for keeping track of each side's combat units, organizing units into discrete commands, marking the assignment of leaders to higher commanders, holding the reserve leaders, tracking remaining WEPs and Replacement status, and displaying each leader's current Morale and Ammunition supply status.
B. In many ways the Display is the center of the player's military organization in the game. Each player should place the Display close by but out of sight of the opponent for purposes of limited intelligence.
5.1 Marking the Display
A. The player's Organization Display contains a number of large boxes. Each box corresponds to a specific Army or Confederate Corps designation (a higher command), or to a potential subordinate leader with a number (e.g., leader #9) called a field command. Union Corps commands are considered to be field commands.
B. The leader box contains an area to place all assigned units as well as an area to which to move units that have broken Morale as a result of comparison with the leader's current Morale level (14.1).
C. Each leader box in the game corresponds to a set of markers in the counter mix. These allow the player to mark a current status for Administration, Morale, Ammunition, and Artillery for each leader.
D. One marker, the troops marker (or the HQ unit), is stacked directly with a leader counter to denote which leader commands the troops in that box of the Display. All leaders in play must appear either on the map or on the display.
5.1.1 Field Commands
A. A leader marker with his troops marker is used on the map at the physical location of that force, or is assigned to one of the higher commands available on the Army Organization Display.
B. Do not place leaders holding field commands in the box of another leader holding a field command even if subordinate to him. The subordinate leader (and his Troops # counter) is placed on the map under the Commanding leader and his Troops # counter.
5.1.2 Higher Commands
A. Leaders holding higher commands always appear on the map along with their HQ marker.
B. Do not place leaders holding higher commands in the boxes of other leaders holding higher commands, even if subordinate. Stack them underneath each other.
C. Place leaders holding field commands and their Troops # marker in higher command leader boxes when assigned to them. Only the Army or Corps Commander appears on the board in this case.
D. When leaders and Troops # markers are stacked together it is important to remember they are treated as a single stack until detached via Administrative Action (7.6).
5.2 Leader Status Box
Each leader box on the display contains a small interior box in the upper right corner. This box is used to display any Wound (6.10) the leader has received, any promotion through Breveting (6.3), or to designate a (Union) leader's Corps command or command of the troops in Washington (the Washington Garrison marker). Markers are provided in the game to show any and all of these conditions that may affect each leader. All such markers are displayed in the status box.
5.3 Leader Pool
A. On the Army Organization Display is the leader Pool. At the beginning of a scenario, place the leader counters in the pool required by the scenario listing.
B. The choice of new leaders to replace those killed, captured, or replaced in play is limited to the leaders available in the pool box (6.12).
C. A player may also choose from those already on the board.
5.4 Number Track
A. The Display contains a number track with columns for ones, tens, and hundreds. This track is to record the current WEPs left as well as any available Replacements. Markers are provided for both these functions.
B. As the player expends WEPs during the turn or inducts Replacements during Reorganization these markers are shifted in their tracks accordingly.
5.5 Union Naval Assault Display
On the Army of the Potomac Organization Display is a smaller display for Naval Assault. Any time the Union plans a Naval Assault and sends forces to sea for this purpose, the units and ships involved are placed on this display and used per 19.6.
6.0 Leaders
A. The utility and capabilities of all troop units is critically affected by the abilities of local commanders. Each leader has a variety of ratings, some printed on the leader counter and others shown on the Army Organization Display.
B. At the top of each leader piece is printed a stacking rank given in stars.
C. Across the bottom of each leader counter are an Administrative Rating, a Combat Command Rating, and a Movement Efficiency/Reaction Range Rating.
D. The top of the counter (with his head) represents his Active ratings, the reverse (with his name) contains the leader's ratings when Inactive. The use of leader ratings is explained below.
6.1 Active Leaders
A. Active leaders are those who are not in the Leader Pool or currently Inactive. All leaders begin the game as Active leaders. Thereafter, a leader goes Inactive whenever he fails to generate an MA of at least 1 on a movement die roll.
B. A leader may also be forced to go Inactive as a result of outcomes on the tables governing Strategic Attrition (9.0) and Forced March (7.8). To show Inactive status simply flip the counter to its reverse. Immediately reduce the leader's AP total to the number allowed on the Inactive side, if currently above this total.
C. An Inactive leader may be reactivated on a subsequent Impulse by a die roll less that or equal to his (Inactive) Administrative Rating, by an Administrative Action on the part of an Army or Confederate Corps Commander (6.14, 6.15) within his Command Range, by a War Order, or with a die roll utilizing the Inactive Movement Efficiency rating that successfully generates an MA. Only one of these methods per Impulse may be used.
D. Leaders may be voluntarily Inactivated or left Inactive by the player. At the conclusion of each Impulse, pay 1 WEP per operating Active leader.
E. Only Active leaders may attempt to attack enemy forces (7.7), Force March (7.8), enter enemy ZOCs (11.0), attempt Reaction Movement (12.1), use Rail Movement (20.0), Raise Partisans (21.0), Forage (23.2), Capture (24.0), or Devastate (25.0).
6.2 Rank of Leaders
A. Each leader has a rank expressed as a number of stars printed on the counter. When stacked together in a hex the leader with the highest rank commands the forces in that hex and is termed the Commander for rules purposes.
B. Only one leader may be in command on any hex.
C. A lone leader in a stack is automatically the Commander.
D. Equal rank leaders cannot be present in the same hex, even with another higher-ranked officer in command, unless an Army or Confederate Corps HQ (6.14, 6.15) is present in that hex.
E. A natural rank (printed on the counter) takes precedence over a Brevet promotion (6.3) for determination of which leader commands in a hex.
F. All leaders on the map are subordinate to an Army Commander (6.14) even if of equal rank.
6.3 Breveting Leaders
A. A player may wish to promote leaders so that individual leaders may hold certain commands or so that they may stack more troop units.
B. Leaders are breveted (promoted) during the Reorganization Segment at a cost in WEPs listed on the War Effort Expenditure Chart.
C. A leader may be promoted only one rank per turn.
D. Any leader breveted more than one rank above his natural rank must subtract one when using any of his printed performance values.
E. Leaders may be demoted to their natural rank at the same rate and cost as they are breveted.
6.4 Leaders for Stacking
A. The leaders' capacity for handling forces determines how many combat units may be personally assigned to that leader.
B. The stacking ability of a leader is one division more than his rank. (Three Confederate brigades equal one division for stacking.) That is the number of infantry divisions that may operate.
C. Cavalry units, Engineers, Detachments, Wagons, Depots, or markers do not count for stacking.
Example: A two-star leader could command up to three Union infantry divisions (or nine Confederate infantry brigades).
D. In no case may a leader operate on the map without assigned troop units. The minimum force that may be assigned to a leader is a detachment.
E. In any hex containing more than one Union division or equivalent (a Confederate division equivalent equals three brigades), there must be a leader who directs the movement and combat of the forces with him.
6.5 Leaders for Movement
A. Units are greatly advantaged in their possibilities for movement when under command of leaders. To move a stack with a leader, use the leader's Movement Efficiency Rating (or the Commander's rating in a multi-leader stack), rather than that of the units, to establish the column consulted when using the Initiative Movement Chart (IMC) to generate an MA.
B. Multi-leader stacks apply a +1 die roll modification (DRM) with the IMC.
C. The Cavalry Corps (16.4) of each side and Confederate leader Jackson subtract apply a -1 DRM in this situation. [Source text reads "subtract apply" here; the sense is a -1 DRM.]
D. The Commander of the force may voluntarily reduce his Morale Level by 1 and receive a -1 DRM (14.4).
6.6 Reaction Movement
Leaders located within a certain distance of a hex where friendly forces are being attacked may under certain conditions intervene in those battles. This form of intervention is termed Reaction Movement and occurs during the Battle Development Sequence of the opponent's Impulse. Procedures for Reaction Movement are detailed in the Battle Development rules (12.1).
6.7 Leader Administration
A. Each leader has a printed Administrative Rating. This is both the total number of APs available to that leader each turn, and the maximum number of Administrative Actions the player may take with that leader in an Impulse or the Reorganization Segment.
B. The total number of APs available in any one hex is equal to the combined Administrative Ratings of all leaders present in that hex.
C. Each leader regenerates his full allowance of APs each turn.
D. Each Administrative Action costs 1 AP.
E. Normally leaders may take Administrative Actions only within the hex they occupy, and thus possess a Command Range of 0. Exception: Army and Confederate Corps Commanders stacked with their Headquarters have an extended Command Range (6.14, 6.15).
F. Leaders may undertake Administrative Actions during friendly Impulses and the Reorganization Segment.
G. Administrative Actions during enemy Impulses are possible for Battle Development (12.0) or Extended Combat (13.10) only.
H. The following are all separate Administrative Actions:
- Add/Detach unit(s) from a stack (7.6)
- Create Detachments (18.0)
- Incorporate Replacements (23.4)
- Replenish Ammunition (23.6)
- Capture/Devastation (24.0, 25.0)
- Forage (23.2)
- Make an Attack (7.7)
- Begin Entrenching (26.0)
- Go Into Training (14.5)
- Move a subordinate leader using a higher ranked leader's Movement Efficiency/Reaction Rating
I. The Commander of a force may also take Administrative Actions in place of subordinate leaders.
Example: A higher ranked leader may detach and move a subordinate leader from his main force, substituting his own Movement Efficiency Rating for that of the subordinate leader when rolling on the IMC. Reduce the higher ranked leader's AP allowance by two in this case, as detaching a subordinate and then moving him using the higher ranked leader's Movement Efficiency Rating counts as two different Administrative Actions.
6.8 Combat Modification for Leaders
A. The Commanders of both sides act to influence the outcome in each attack resolved during the Combat Sequence. Each Commander (not subordinate leaders) adds his Combat Command Rating (middle number on the leader counter) to other modifiers to derive a total modifier for the die roll used to inflict losses on the opponent.
B. In addition, the current Morale levels (13.5.1) of the Commanders on both sides are compared at the instant of combat. The Commander with higher Morale gets an advantage of a one-column-shift to the right on the Fire Exchange Results Table (FERT) column used to determine the battle result.
6.9 Capture of Leaders
A. In a rear guard action where all combat units with a leader are eliminated and the opponent is able to occupy a leader's position hex (12.5), that leader is considered captured and may be held by the opponent for exchange (6.18). Return his HQ or Union Corps Command Marker (if any) to the Leader Pool.
B. If in a regular battle, all units with a leader are eliminated, then the leader without troops (and his HQ or Union Corps Command Marker if any) is returned to the leader Pool and his box on the Army Organization Display vacated.
C. In both cases any Artillery points with the leader are lost and eliminated from play.
6.10 Leader Casualties
A. Any time a 6 is rolled when resolving combat, check for leader loss.
B. Roll one die per leader in the stack.
- On a 6, the leader is killed and removed from play.
- On a 5, the leader is wounded and must check again for his wound. Roll one die again. a. A 1-5 is the level of the wound inflicted on the leader. Place a corresponding Wound Level marker on the Status box of that leader's portion of the Army Organization display. b. On a 6, the leader dies from his wounds.
C. Dead leaders are immediately removed from play.
D. Wounded leaders remain in play.
E. When making any use of their ratings, a Wounded leader must subtract the level of his wound from any rating number used in the course of play.
Example: A leader with Movement Efficiency of 5 and a -2 Wound Level must use the 3 column of the IMC when trying to generate an MA.
6.11 Duration of Wounds
A. A leader remains wounded for a number of turns equal to the level of the wound.
B. Beginning the turn after the leader is wounded, reduce the level by one each turn during the Reorganization Segment of the turn.
C. Wound level counters, printed on both faces, provide indicators that are changed to reflect the health of the leader.
D. Wound levels are reduced in the Reorganization Segment regardless of whether the leader holds a command or resides in the leader Pool.
6.12 Replacing Leaders
6.12.1 Circumstances
A. Leaders may be replaced only under these conditions:
- A leader who is killed or captured, or has a Wound Level greater than -2.
- Any leader who has taken a Morale loss of two or more levels during the turn.
- Any time a field command box on the Army Organization Display falls vacant.
- An Army or Confederate Corps Commander changes a subordinate as an Administrative Action.
- A War Department Order (23.10) is used.
B. Leaders located at sea cannot be replaced.
6.12.2 Procedure
A. Any replacement or change of leaders occurs during the Reorganization Segment except in the case where leaders in command were killed at a point in the turn where more Impulses must follow before the start of the Reorganization Segment. All leader appointments in the latter case are made by War Department Order at a cost in WEPs.
B. Replacing leaders may require a combination of Administrative Actions and/or WEP Expenditure depending on the exact situation.
6.12.3 Dead Leaders
A. Killed leaders can be replaced without Administrative Actions or WEP cost unless more Impulses remain to be played in the turn, in which case a War Department Order must be expended. (A player cannot refuse to appoint a new leader in this case).
B. When replacing a dead leader with more Impulses to play, a player is limited to leaders in the pool or those in the hex where the leader was killed.
C. If replacing a dead leader causes a command box to fall vacant, transfer those forces to the replacement leader's command box.
D. Replacement leaders may also be breveted one rank (1 WEP) to fit the command structure in the hex.
E. Leaders brought in to replace eliminated leaders appear on the hex occupied by the leader being replaced.
6.12.4 Captured Leaders
A. Replacing a captured leader with one from the pool and reactivating his command, or bringing a new leader from the pool into play to assume control of leaderless troops requires the expenditure of WEPs. Leaders may only be selected from the Leader Pool.
B. A one rank brevet promotion requires additional WEPs. In this case, the leader may only be brought into play at a Major City, Railroad Station Depot, or Naval Landing.
6.12.5 Changing Subordinates
A. Substituting new leaders for wounded leaders, or those suffering from excessive Morale loss, or Army and Confederate Corps Commanders changing subordinate leaders requires an Administrative Action by the Commander or a War Department Order.
B. All changes in this section involve a pair of leaders, and each Administrative Action (or War Department Order) covers one pair. The leaders being substituted must be within the Army (or Confederate Corps) Commander's Command Range unless the replacement is being selected from the Leader Pool.
C. A brevet promotion costs additional WEPs.
D. Leaders brought in as substitutes appear on the hex occupied by the leader being replaced.
6.12.6 Changing Army Commanders
A. Any change involving an Army or Confederate Corps Commander requires both a War Department Order and additional WEPs.
B. A one rank brevet promotion (if needed) costs additional WEPs.
C. Randomly select from those eligible leaders in the Leader Pool.
D. Leaders replacing an Army Commander (or Confederate Corps Commander) appear in the hex containing the HQ.
6.12.7 Other Requirements
A. A leader chosen from the Leader Pool to replace a wounded, killed, or captured officer must have total leadership ratings (Administrative Rating combined with Combat Command plus Movement Efficiency) no more than two (three for the Confederacy) points higher than the leader being replaced.
B. Leaders chosen via War Department Order, or because of excessive Morale loss must be chosen randomly from the available pool.
6.13 Leader Pool
A. Place all leaders listed by the scenario beginning in the leader Pool on their box of the Army Organization Display (5.3).
B. Replacements for a leader who has been killed or captured or is being substituted are limited to the leaders on the board and those available in the pool.
C. Leaders entering play from the Leader Pool begin with the standard Morale Level prescribed by the scenario in play.
D. Leaders chosen from the pool cost 5 WEPs to place in play, beyond any other requirements in 6.12.
6.14 Army Command
6.14.1 In General
A. Each Army has an HQ unit that stacks with and maneuvers with its Commander on the map. [Source text as printed: "stacks with an maneuvers with".]
B. Place the counters of all subordinate field command leaders and forces on the Army Organization Display in a box corresponding to the name of the Army.
C. Presence of the HQ confers Army Command on the leader occupying the hex with it.
- The Confederate Army must be commanded by a four-star leader.
- Union armies may be led by a three or four-star leader.
D. Presence of the Army HQ allows subordinate leaders of equal rank to stack in the same hex.
E. All leaders are subordinate to an Army Commander.
6.14.2 Administrative Actions
A. Army Commanders stacked with their HQ may undertake Administrative Actions (6.7) over an area of the map equal to their Movement Efficiency Rating as measured in hexes (thus increasing their Command Range), and may issue Movement orders or take Administrative Actions for any subordinate leader within this radius in hexes on the map, regardless of terrain or any other condition.
B. Certain additional Administrative Actions are possible only for the Army Commander:
- Add new Artillery points (23.7) to a command. This action costs 2 APs instead of the normal 1 AP.
- Activate an Engineer unit (17.0).
- Activate an Inactive subordinate leader (6.1).
- Change a subordinate leader (6.12).
C. In scenarios with two or more Army Commanders per side, each may undertake these Administrative Actions.
6.15 Confederate Corps Command
A. Confederate Corps also have HQs. When stacked with the HQ, the Corps Commander can exercise his Administrative and Movement Efficiency/Reaction Ratings on any hex within his Command Range Radius and issue Movement and Administrative orders to subordinate leaders on those hexes.
B. Confederate Corps Commanders may also activate Inactive subordinate leaders or change subordinate leaders in their Corps via Administrative Action, like Army Commanders above.
C. Equal rank leaders may also stack in the presence of the HQ.
D. Confederate Corps commands must be held by three-star leaders.
E. Confederate Corps command does not confer any other attribute of Army Command on any leader.
6.16 Union Corps Command
A. Union Corps do not have HQs and do not permit a leader to make any Administrative Action outside his own hex, as his Command Range is 0.
B. Union Corps commands enable four Infantry divisions to be stacked with a leader regardless of that leader's actual rank.
C. Union Corps command does not confer any other attribute of Army Command on a leader.
6.17 Replacing Higher and Field Commands
A. New Army, Confederate Corps, and Union Corps commands cannot be created in the course of the game, although they may be received as reinforcements.
B. If eliminated, these commands can be reactivated at a cost in WEPs during the Reorganization Phase.
C. Reactivated higher commands may appear with any leader eligible to receive them.
D. New field commands can be created by taking leaders from the pool (at a WEP cost) and appointing them to command leaderless troops already on the board, subject to the restrictions in 6.12.
E. No leader may appear on the board without at least a Detachment.
F. New or reactivated field commands may only appear at Major Cities, Railroad Station Depots, or a Naval Landing.
6.18 Exchanging Captured Leaders
During the Civil War, prisoners were exchanged within days of a battle. This stopped on December 28, 1862, when the Confederacy ordered that any Black prisoners be sent back to the states from where they came to be enslaved and their officers would be tried for inciting riots. On March 27, 1863, the War Department reauthorized prisoner exchanges, but that was again halted on May 25, 1863 due to Confederate treatment of Black troops and their officers. On July 4, 1863, prisoners of the Vicksburg battle were exchanged, and the Confederacy released its prisoners from the Battle of Gettysburg. However, prisoner exchanges were stopped again on July 13, 1863. There was an exchange of officers on February 25, 1864, but regular exchanges did not start again until February 2, 1865.
A. This section applies to turns in 1861 and 1862, April-May 1863, the first half of July 1863, the last turn of February 1864, and all turns from February 1865 onward.
B. During the Administration Sequence of the Administration Phase, the players shall exchange captured leaders on a one-for-one basis. The leaders may be returned to the Leader Pool or may immediately replace another leader, following the procedures of 6.12.
C. If one side has more captured leaders than the other, the leaders who were captured first shall be exchanged. If multiple leaders were captured in the same turn and not all can be exchanged, those of higher rank shall be exchanged first.
D. Prisoner exchange is mandatory during the turns this rule covers. The players shall discuss and agree before starting play about turns which may or may not be in the time periods above. If they cannot agree, they shall roll a die to determine whether a turn is covered. On a 1-3, the turn includes prisoner exchange, On a 4-6, it does not.
7.0 Movement
A. Regular movement of combat units in occurs during the Movement Sequence of the Player's Impulse.
B. Units maneuver through the map grid, moving from hex to hex and paying terrain movement costs that are specified by the Terrain Effects Chart (TEC).
C. Units expend movement points (MPs) both for entering hexes and for crossing certain terrain hexsides. All MP costs listed in the TEC are cumulative.
D. MP costs may be increased by weather conditions (10.0), while certain movement costs are reduced when a unit is successful in a Forced March (7.8).
E. The MA for each unit in the game is a variable, not a fixed feature, and changes from Impulse to Impulse depending on a die roll, the level of OE used, and the Movement Efficiency rating of the unit or leader. This is determined by the IMC (7.1).
F. Units grouped together on a hex in a stack and units with a leader must move together.
G. All movement by any leader or unit must end before the player moves any other unit.
H. Declaration of Attack (7.7), if any, must also precede the movement of any other unit.
I. Once a player has rolled for the MA of a unit or leader s/he may no longer change the movement path of or declare an attack with another unit or leader that the player has previously rolled for.
J. MPs cannot be transferred from unit to unit or accumulated from Impulse to Impulse.
7.1 Initiative Movement Chart
A. The IMC is used to generate the actual MA for each unit or leader during each Impulse.
B. The IMC is composed of six sub-tables corresponding to all possible levels of OE being used in the Impulse.
C. The player uses the sub-chart of the OE s/he is expending for all movement die rolls in the Impulse. Add 1 to the OE if the force is composed solely of cavalry units (16.5).
D. To determine the actual MA accorded to any unit or leader take the appropriate sub-chart, find on it the column corresponding to the Movement Efficiency of the Commander of the force or unit, and roll a die, applying relevant DRMs per 6.3 and 6.5.
E. Cross-index the die result with the correct Movement Efficiency column to yield the MPs accorded to the leader or unit for this Impulse.
[The six IMC sub-tables are not reproduced in this rules document; they are printed on the game's own charts.]
7.2 Unit Movement Efficiency
A. Infantry and Engineer units not under command of leaders (and thus moving separately) have a Movement Efficiency rating of 1.
B. Cavalry units have a Movement Efficiency rating of 2.
C. Militia units (27.0) may not move independently without a leader.
D. Detachments (18.0) may only move if stacked with a leader or Wagon (8.4).
7.3 Free Movement
A. Each side may attempt to move all, any, or none of its units and leaders on the map in each Impulse.
B. Any unit or stack granted an MA by the IMC may use all, any, or none of the MPs received.
C. Movement of units is not automatic; however, it is always governed by the initiative movement system.
7.4 Impassable Terrain
A. Mountain hexes are impassable and cannot be entered at any time.
B. Water hexes and seacoast hexsides are also impassable.
C. Units may enter seacoast hexes from the land side or by water when being carried on Naval Transport or Assault missions (19.0).
7.5 Major Rivers
Major Rivers can be crossed only at hexsides that are bridged, at fords marked on the board, or across Pontoon Bridges constructed by Union Engineers (17.5), all at MP costs specified by the TEC.
7.6 Merging and Splitting Forces
7.6.1 In General
A. Forces in movement may freely pass through hexes containing other friendly units and stacks. The units and stacks that a Leader moves through that have not themselves already been moved in an Impulse, may be picked up via an Administrative Action (costing 1 AP) and taken with the leader's stack.
B. When different stacks of friendly units combine to form a single stack, all forces must meet command structure restrictions, or the stacking is not allowed.
C. Equal rank leaders cannot stack together in the absence of an Army or Confederate Corps HQ.
7.6.2 Higher Ranked Leaders
A. A higher ranked leader must assume command (expending 1 AP) if a lower ranked leader ends stacked in the hex.
B. Place the lower ranked leader and his Troops # counter under the higher ranked leader and place any Troops # marker in the field command box of the higher ranked leader.
C. If the higher ranked leader is an Army (or Confederate Corps) Commander, place the lower ranked leader counter and his Troops # marker in the Army/Corps box.
7.6.3 Detaching Units
A. Any detachment of units must be made before a leader makes his own move.
B. A stack of units which breaks up to move in two different directions must first have its Commander expend 1 AP to detach a force. The two forces then roll separately on the IMC to determine each stack's MA. The original Commander in the hex could immediately substitute his Movement Efficiency Rating for that of the detached leader at a cost of 1 AP.
C. An Army or Confederate Corps Commander stacked with his HQ, and in his Command Range could substitute his Movement Efficiency Rating for 1 AP although the original Commander must first spend 1 AP detaching the force.
D. Detaching a force from a higher command causes the subordinate leader and his Troops # marker to be placed on the map, ready to be moved in a different direction.
7.7 Declaration of Attack
A. Any force in a hex adjacent to the opponent is considered to be in attack position and may declare an attack against the opponent's hex. Any force in a hex containing a Zone of Control (ZOC, 11.0) must attempt to attack.
B. The phasing side specifies the attacking force(s) and the adjacent hex to be attacked.
C. The Commander of each attacking force must expend 1 AP, as attacking is an Administrative Action. Units without leaders do not need to expend an AP.
D. Next roll one die, comparing the result with the printed Combat Command rating of the Commander (or with the morale of the unit, in case of an attack attempt by an individual unit).
E. If the roll is less that or equal to the Combat Command rating or under a unit's inverse Morale level (14.2.2) the attack will occur in the Combat Sequence of the Impulse. Place an Attack marker on the hex containing the Commander or units, with the marker arrow pointing at the hex being attacked. If the attack die roll fails, the force immediately retreats one hex, must suffer a step loss from one combat unit, and the Commander (only) involved suffers a Morale loss of 1.
7.8 Forced March
A. A stack with an Active leader may attempt to execute a Forced March during any Movement Sequence. A successful Forced March reduces the movement costs of certain terrain and thus moves the stack more rapidly. On the other hand, stacks which Force March run the risk of suffering losses of strength, while the Commanders may have to flip Inactive.
B. To conduct a Forced March simply state the intention to do so before the Commander in question has rolled on the IMC to generate his MA for the Impulse. Using the IMC then provides an MA of a given number of MPs. This MA provides the column used on the Forced March Table to determine if the Force March is authorized or not and whether the stack suffers any losses.
C. The Forced March Table uses one die for the authorization roll.
D. Several DRMs may apply for distance from a Supply Source (8.1), for Supply status, Weather (10.0), and the Movement Efficiency rating of the commander. Also apply a -1 DRM if expending one of the Commander's Morale points. (Immediately subtract that from the Commander's Morale level on the Army Organization Display). The DRMs are listed with the Forced March Table.
E. Forced March combat strength losses are given in steps extracted from troop units under the leader's command. These losses are extracted immediately.
F. If a Commander is forced to go Inactive, this is implemented after the completion his movement. In that case, he may not enter enemy ZOCs during the Impulse.
G. A stack that fails in its attempt to Force March may still move normally to the extent allowed by its original roll on the IMC.
H. Stacks that Force March and then become involved in a battle during the same Impulse may use only one half their combat strength and Artillery points (rounded up).
7.9 Other Restrictions
A. Forces must halt movement whenever they enter an enemy ZOC (11.0).
B. Units may leave an enemy ZOC only as their first movement during the Movement Sequence.
C. Units cannot move directly from one enemy ZOC to another.
D. Units which enter an enemy ZOC during movement must attempt to declare an attack against an adjacent hex occupied by the opponent's leaders or units.
8.0 Supply
A. Units must be in Supply to use their full potential for movement and combat and in order to avoid losses due to Strategic Attrition (9.0).
B. There are three possible states of Supply: Full Supply, Combat Supply, and Out of Supply (OOS).
C. Supply status is judged at the instant of Movement and Combat. It is also judged in the Reorganization Segment for the purpose of determining whether leaders must undergo attrition and whether they are allowed to incorporate Replacements (23.4), new Ammunition or Artillery (23.6-7), etc. The test for a leader's supply status is whether his unit or stack can trace a Line of Supply (LOS) to a valid Supply Source.
8.1 Supply Sources
A. All supply lines terminate at a Supply Source.
B. There are four types of Supply Sources:
- Map edge hexes on which Railroads enter the map;
- Major City hexes connected with the board edge via open railroad lines;
- Major Cities that are ports; and
- Naval Landings (19.9), which may be created by the Union in the course of play.
C. All units and stacks within 10 MPs of a Supply Source are considered to be in Full Supply.
8.2 Line of Supply
A. Armies maneuver in the field, not always close to the Supply Source. The supply range may be extended from the Source by construction of a Line of Supply (LOS) linking the Source with the units in the field.
B. An LOS consists of intermediate links leading back to the Source; the links may be either Depots or Wagons.
- Depots must be placed in Towns, have a supply range of 10 MPs, and cannot move once placed.
- Wagons have a supply range of 4 MPs; they may move at a constant rate of 8 MPs per Impulse.
C. A chain of Wagons and Depots extends the LOS to the range of the component links. Units and stacks within range of the LOS are considered to be in Full Supply.
D. An LOS is blocked by the presence of the opponent's units or ZOCs. However, the presence of friendly units in a hex nullifies the opponent's ZOC effects for purposes of tracing Supply.
E. Units and leaders which cannot trace an LOS apply a +4 DRM whenever using the Forced March Table (7.8) or the Strategic Attrition Table (9.1).
8.3 Railroad Supply
A. Units may also trace supply by railroad back to a Supply Source.
B. A Depot located on a town on a friendly unbroken Railroad line (a Railroad Depot connected to a Supply Source) is considered to be the first link from a Supply Source to which it is connected regardless of distance.
C. If the rail link to such a Depot is cut, by destruction of tracks or blockade by the opponent, the Depot can no longer serve as an LOS link until rail service is restored.
D. Cut-off rail Depots can be expended to eliminate OOS penalties for Strategic Attrition (9.0).
8.4 Wagons and Depots
8.4.1 Wagons
A. New Wagons come into play in the Reorganization Segment of the turn at a Supply Source or at a Railroad Depot and cost WEPs equal to their Supply Capacity.
B. Wagons have a Supply Capacity rating printed on the upper right of the counter. This is the number of independent stacks of units that may trace a LOS through that Wagon.
C. Wagons move at a constant 8 MPs per Impulse.
D. Wagons have zero combat value and may be captured when their hex is entered by the opponent.
E. Each Wagon can carry a Detachment (18.0) as a wagon guard.
8.4.2 Depots
A. Depots are created in the Reorganization Segment by the expenditure of WE for conversion of a Wagon located at a town within supply range of an existing LOS.
B. Depots constructed at Railroad Stations (any town or Major City on a rail line) are considered to be Railroad Depots.
C. The conversion of a Wagon requires the removal from play of one troop Detachment located with the Wagon. Simply flip the counter.
D. A Depot cannot move but it has a combat value equal to its Supply Capacity. Depots have Supply Capacity rating printed in the upper right of the counter. This is the number of independent stacks of units that may trace an LOS through that Depot.
8.4.3 Using Wagons and Depots for Full Supply
A. Wagons and Depots may be expended to assure Full Supply for one Impulse for units lacking an LOS, or during a Reorganization Segment to avoid a heavy penalty on Strategic Attrition (9.0).
B. One counter (of any Supply Capacity) can supply one stack within the stacks' Commander's Movement Efficiency range. Remove the counter from play.
C. Stacks without leaders must be stacked with the Wagon or Depots to use them for Full Supply.
8.4.4 Converting Wagons to Ammunition Points
Wagons may also be converted into that number of Ammunition points for a force in the field, distributed among that side's leaders as desired.
8.5 Effects of Supply
A. Units and Stacks in Full Supply can exercise their whole movement and combat potential.
B. During Reorganization Segment, they may draw Replacements and new Ammunition.
C. Units can be in Full Supply even if they have no Ammunition, if they are in range of a valid Supply Source, Depot, or Wagon.
D. Always use the Commander's Supply Status to determine the entire stack's Supply Status.
8.5.1 Out of Communication
If a unit or stack is more than 10 MPs from the nearest Depot LOS link (or 4 MPs if a Wagon), or exceeds the Supply Capacity of the link, then it has gone off the Supply grid. Such a force is out of communication (OOC).
8.5.2 Combat Supply
A. A force that is OOC but still has Ammunition remaining is considered to be in Combat Supply. Single units are always considered to have Ammunition.
B. A force in Combat Supply may use only half the MA (fractions rounded up) authorized by the IMC when it attempts movement. Its combat ability remains unaffected as long as it retains an Ammunition supply.
8.5.3 Out of Supply
A. A force that is OOC but has no Ammunition is considered to be OOS. Any OOS force on the map is indicated with a marker on top of the leader to denote this status. OOS forces may use only half their MA (fractions rounded up) authorized by the IMC.
B. In combat an OOS force uses only half its combat factors and may not use its Artillery points (fractions rounded up).
C. Any force that is OOC must undergo Strategic Attrition during the Reorganization Segment. Penalties on resolution of attrition increase as forces go from Combat Supply status to OOS.
D. Mark the OOS status of a force on the map the instant it is revealed either by an Attrition action or by Combat.
8.5.4 Restoring Full Supply
A stack with status of Combat Supply or OOS can be given Full Supply for an Impulse by successful Foraging (23.2) during the Reorganization Segment. If successful in the Foraging effort, designate the stack with an Own Use marker.
8.6 Other Restrictions
A. Subordinated leaders stacked under a Commander, single units in hexes, and stacks led by Inactive Commanders do not count against the Supply Capacity of a Wagon or Depot.
B. An LOS may cross Major Rivers only at Bridges or Fords and may not enter or cross other impassable terrain.
C. Players are limited to the number and capacity of Wagon/Depot units in the counter mix in the denominations in which they are given.
D. Wagon and Depot units are not interchangeable once procured.
9.0 Strategic Attrition
9.1 In General
A. During the Reorganization Segment, each side must undergo attrition with any force that is overconcentrated or is not in Full Supply.
B. A force is overconcentrated if there are two or more leaders, both of whom are assigned combat units, stacked in the same hex under a single commander.
C. A force is not in Full Supply if it is in Combat Supply, OOS, or if it cannot trace an LOS due to any combination of opposing units, their ZOCs, and impassable terrain.
9.2 Using the Strategic Attrition Table
A. First calculate the total factor strength of the forces in a hex including all Infantry, Engineer, Cavalry and Artillery points present. The total value corresponds to one of the columns on the Strategic Attrition Table.
B. Next apply all relevant DRMs:
| DRM | Condition |
|---|---|
| +1 | per every 5 MPs separating a stack from the nearest valid supply source or LOS link |
| +4 | if the stack cannot trace any LOS at all |
| +2 | if the stack is in Combat Supply |
| +4 | if the stack is OOS |
| X | specific weather conditions (10.0) |
| X | Administrative Rating of the Commander |
C. Avoid the OOS penalty (8.5) by the expenditure of Depots or Wagons (8.4) or by Own Use supply markers from successful foraging (23.2).
D. Roll one die, applying the net DRM. Cross-index the result with the relevant column of the Strategic Attrition Table.
E. Attrition losses are chosen by the owner and are immediately removed from play.
[The Strategic Attrition Table itself is not reproduced in this rules document; it is printed on the game's own charts.]
10.0 Weather
A. Nine months of the year, are considered to be weather months. Otherwise, the weather is assumed to be Clear.
B. During weather months, the player who wins the bid in the Decision Segment rolls two dice on the Weather Table to determine the weather for that turn.
C. There are no modifiers used with the Weather Table.
D. Weather Conditions are as follows:
10.1 Clear Weather
All conditions are normal. Precipitation from previous turns is considered to have evaporated.
10.2 Light Rain
A. All terrain costs +1 MP.
B. Counts as ½ Rain result to determine onset of Mud conditions (10.4).
10.3 Rain
A. All terrain costs +1 MP.
B. -1 DRM for all combat resolution die rolls.
C. Apply a +1 DRM to Forced March (7.8) and Strategic Attrition (9.0) die rolls.
10.4 Mud
A. Mud occurs whenever there are two full Rain results in a row.
B. All terrain costs +1 MP (supersedes the movement effect of Rain).
C. Apply a -1 DRM to all combat resolution die rolls.
D. Apply a +3 DRM to Forced March or Strategic Attrition die rolls.
10.5 Thaw
All terrain costs +1 MP, except river crossing costs, which are doubled.
10.6 Cold
All leaders immediately lose one Morale point.
10.7 Light Snow
All terrain costs +1 MP.
10.8 Snow
A. All terrain costs +1 MP, except road movement.
B. Treat Road hexes as whatever terrain type is in that hex.
C. Railroad movement is not allowed.
D. Apply a +2 DRM to Forced March or Strategic Attrition die rolls.
10.9 Blizzard
A. All terrain costs are doubled.
B. Treat Road hexes as the other terrain in the hex.
C. Railroad movement is not allowed.
D. Terrain costs for crossing minor rivers are canceled.
E. A leader or unit(s) that moves in the turn loses one Morale point.
F. Apply a -4 DRM to all combat resolution die rolls.
G. Apply a +4 DRM to Forced March and Strategic Attrition die rolls.
11.0 Zones of Control
A. All units with a combat strength except for Detachments (18.0), Depots (8.4), and unmanned Entrenchments (26.0) are considered to have a ZOC extending into the six hexes adjacent to the hex occupied by the unit or stack. The units may be represented by a leader counter on the map and thus have a ZOC.
B. A manned Entrenchment does project a ZOC, even if the Entrenchment is not physically occupied (26.0).
C. Opposing units must halt their movement when they enter an enemy ZOC and must attempt to declare an attack (7.7).
D. Opposing units may leave an enemy ZOC only as their first movement in an Impulse, as a result of failure to sustain an attack, or as the result of Retreat Before Combat (12.4).
E. Units may never move directly from one enemy ZOC to another.
F. ZOCs do not cross major rivers (even across bridges or fords) nor seacoast hexsides.
G. An LOS cannot be traced through enemy ZOCs. The presence of friendly units in a hex cancels the effect of an opponent's ZOC for purposes of tracing Supply (8.2).
H. Forces led by Inactive Commanders may not enter enemy ZOCs.
12.0 Battle Development
A. In each Impulse a Battle Development Sequence separates the movement sequence from attack resolution in the Combat Sequence.
B. Battle Development is intended to allow the opponent to respond in a limited fashion to the attacks made by the phasing side.
- For some eligible leaders (12.1), the opponent may choose Reaction Movement to have them join in a battle that has begun.
- The opponent may wish to have other leaders retreat before combat.
- Other forces may be able to come up in a Support role for combat.
12.1 Attempting Reaction Movement
A. Whenever an Active leader is within his Reaction Range (in hexes) of a friendly force under attack, and both the leader and the hex under attack are within Command Range of a Confederate Corps or an Army Commander stacked with his HQ, the leader may attempt to make a Reaction Movement.
B. Leaders in Entrenchments (26.0) and Cavalry Corps (16.4) may also attempt Reaction Movement without being in Command Range of a Confederate Corps or Army Commander.
C. The reacting leader rolls one die and must roll less than or equal to his Reaction Rating.
D. If the leader makes his die roll, he may move a number of hexes equal to his Reaction Rating.
E. The Corps or Army Commander may, through an Administrative Action (costing 1 AP) substitute his Reaction Rating for that of the reacting leader, possibly increasing the reacting leader's chance of success and Reaction Range.
F. If summoning only part of a stack to reinforce a battle, its Commander must first detach it (1 AP).
G. Substituting another leader's Reaction Rating requires another AP.
H. Forces led by Inactive leaders must first be Activated (6.14, 6.15).
I. A force may not react if it is being attacked itself or has already moved in Reaction Movement.
12.2 Executing Reaction Movement
A. A leader moving in Reaction may not enter impassable terrain nor cross Major Rivers, except at Bridges or Fords. Otherwise the leader may ignore normal terrain costs.
B. The leader must end movement when he enters an enemy ZOC, including a hex already occupied by friendly units.
C. A leader entering combat through Reaction Movement must be able to fit within the command structure of friendly forces already in a hex. There may not be more than one leader of each rank on a hex without the presence of a Corps or Army HQ, and it requires an Administrative Action (costing 1 AP) to attach his forces to those in the hex under attack.
D. If the leader reaches the hex under attack, he may join the defense and contribute his full strength during combat Resolution.
12.3 Support
A. If a leader in Reaction Movement cannot reach the hex actually under attack, he may still contribute to the battle if it can reach a support position. A support position is a hex that is adjacent to both the attacking formations and the hex under attack.
B. A leader in Support may add half his combat factors and half his Artillery points to the value of the forces in the hex under attack (round up).
C. Forces in Support do not count for or participate in any of the effects of combat resolved on an adjacent hex.
D. Cavalry in a Support role does not count in the determination of Cavalry Superiority in battle.
12.4 Retreat Before Combat
A. A leader who is under attack has the option of retreating before combat if he wishes to avoid a battle.
B. Retreat before combat is possible under the following conditions:
- All units must be able to retreat to a hex outside enemy ZOCs, and;
- The Commander has a current Morale level superior to the opponent or has Cavalry factors superior to the opponent, and;
- The Commander (only) takes a 1 loss in Morale level and leaves a Rearguard.
C. Union leaders may always choose to Retreat Before Combat without Morale loss during 1864 and 1865 scenarios.
D. Confederate leaders may always choose to Retreat Before Combat without Morale loss in 1862 and 1863 scenarios.
E. To make the Retreat Before Combat move the leader one hex to a new position. In the vacated hex, one or more combat units or subordinate leaders must remain as a rear guard. Detaching this force is an Administrative Action costing 1 AP.
12.5 Attacker Overrun
A. Retreat Before Combat may not stop an attack if the rear guard is too weak.
B. In case of a Retreat Before Combat, the attacker may challenge the rear guard by stating the intent to challenge and the number of combat strength factors.
C. If the rear guard is outnumbered by more than 20:1 odds, then the units left behind are destroyed and any leaders are captured.
D. The attacker immediately occupies the hex vacated, and continues to resolve its attack against the leader who originally withdrew before combat.
12.6 Sequencing
All attempts at Reaction Movement must be made before any attempts to retreat before combat.
13.0 Combat
A. Combat is mandatory between adjacent opposing forces when there is a declaration of attack.
B. All units eligible for an attack must engage in combat against the hex indicated by the Attack marker placed atop the attacking force.
C. All forces attacked, and half the combat strength of any defending forces in Support, respond to the declared attack.
D. All combat is resolved in sequence. All attacks against one hex are resolved before any attacks upon another hex.
E. Attacks are resolved in the order specified by the phasing side.
F. In each battle the procedure for resolution is the same.
- First the attacker totals the combat strength of its units and DRMs, then rolls on the FERT.
- The attacker totals the strength and rolls for each stack of units attacking a hex.
- The defender totals its strength and DRMs, then rolls on the FERT to inflict losses on the attacker.
- If a leader is Inactive or if he has Force Marched into battle, he can use only half his available combat strength points (SPs) and artillery on the FERT, rounding fractions up.
- If a leader's status is OOS, he is also halved.
- Losses inflicted by both sides on the FERT are compared and respective loss and retreat results are implemented.
- This process is repeated for as many battles as are marked on the map at the beginning of the Combat Sequence.
G. In the rules below, the attacker is the phasing side (the one taking the current Impulse). The defender is the side that did not Retreat Before Combat, or has otherwise been brought to battle.
13.1 Combined Attack
A. The second and each additional attack launched against a hex gets the advantage of a one column-shift to the right on the FERT.
B. For the defender, the second attack results in a column-shift to the left on the FERT in making its own attack.
C. Each additional attack on the defender's hex penalizes its attack with one further column-shift to the left on the FERT.
13.2 Leader Ratings
A. The Commander in the stack may use his Combat Command Rating (middle number on the leader counter), as a DRM whenever engaged in combat, even if Force Marching or OOS.
B. Do not add subordinate leader's Combat Command Ratings as DRMs even if stacked in the hex.
13.3 Artillery Modifiers
A. Apply a +1 DRM for the FERT per Artillery point attached to the Commander (including those with subordinate leaders).
B. Current Artillery strengths may vary and are shown on the Army Organization Display.
13.4 Cavalry Superiority
A. The side with more Cavalry Combat Factors in the battle has Cavalry Superiority. Compare the total number of Cavalry Combat Factors in all the attacking stacks to the total in the defender's stack to determine Cavalry Superiority.
B. The side with Cavalry Superiority determines the direction of any retreats that result from combat.
C. The side with Cavalry Superiority applies a +3 DRM to its FERT die roll.
D. The side inferior in Cavalry applies a DRM to its FERT die roll an amount equal to the difference in the total number of Cavalry units present on the two sides.
E. Cavalry stacked with leaders in a Support (12.3) role do not count in the determination of superiority.
13.5 Morale Effects
There are two ways in which Morale (14.0) affects combat. One is a comparison of the current Morale of two sides, the other is the internal Morale situation of each engaged leader.
13.5.1 Morale Superiority
A. At the instant of combat, each side states the current Morale level of its Commander (or unit) as shown on the Army Organization Display. The side with the higher Morale gets a one column-shift to the right on the FERT when resolving combat.
B. In multi-stack battles, compare each set of Commanders (or units) separately.
13.5.2 Troop Morale
A. When resolving combat, both sides also check the troop units with each leader. Each troop unit has a printed unit Morale on the counter.
B. Any unit with a Morale factor higher than the current Morale of its leader is considered to have broken or routed. All such units are placed in the Broken units section of the leader's box on the Army Organization Display and remain there until the leader's current Morale is equal to or greater than the unit's printed value.
C. Apply a -1 DRM to the FERT die roll per Broken unit in a force.
13.6 Terrain Effects on Combat
A. Terrain effects for each type land form are given in the TEC. In general, terrain effect column-shifts are cumulative and result in column-shifts to the left on the FERT. It is possible for the terrain effects pertaining to each die roll to be different.
B. The attacker and defender each calculates terrain effects separately for their own FERT rolls.
C. When attacking across rivers, both the defender and attacker receive the benefit of the column-shift.
[The Terrain Effects Chart (TEC) and the Fire Exchange Results Table (FERT) are not reproduced in this rules document; they are printed on the game's own charts.]
13.7 Weather Effects on Combat
A. Apply a -1 DRM to any combat during Rain turns.
B. Apply a -4 DRM to any combat during Blizzard turns.
Example: Refer to the diagram above. [The diagram that accompanies this example is not reproduced in this rules document.]
A. A stack led by Lee (current Morale 4), with 45 Combat Factors (including 8 Cavalry Factors) and 4 guns, is assaulted by three Union stacks led by Meade, Hancock, and Reynolds (each with a current Morale of 2). Assume each made his attack roll (7.7). Meade has 30 Combat Factors (4 Cavalry) and 4 guns. Hancock has 26 factors (2 Cavalry) and 4 guns. Reynolds has 42 Combat Factors (2 Cavalry) and 3 guns.
B. Outnumbered, Lee summons Anderson (5 hexes away) to his hex, substituting his Reaction Rating (at a cost of 1 AP). Anderson rolls under Lee's Reaction Rating and is able to move the 5 hexes to join him, bringing 18 Combat Factors (4 Cavalry) and 1 gun.
C. The battle now begins. Lee has Cavalry Superiority (13.4) with 12 factors to 8. He also has Morale Superiority (13.5.1), with a Morale Level of 4 to 2. The Union announces its first attack with Hancock. Hancock rolls on the 21-28 column with a +5 DRM for his Combat Command Rating, a +4 DRM for his guns, and no DRM for Cavalry Inferiority (three units to three) for total DRM of + 9.
D. Lee fires back with 53 factors but shifts right 1 column for Morale Superiority to the 58-66 column. He has a +5 DRM for his Combat Command Rating, a +5 DRM for his guns, and +3 for Cavalry Superiority (12 Factors to 8), for a total DRM of +13.
E. Meade now attacks with 30 factors shifting right 1 column as this is the second attack on the same hex. He adds a +5 DRM for his Combat Command Rating, a +4 DRM for his guns, and no DRM for Cavalry Inferiority for a total DRM of +9.
F. Lee fires back using the same calculations as above, but suffers a 1 column-shift left for his second attack, netting to zero.
G. Finally, Reynolds fires with 42 Factors, shifting right 1 column as this is the third attack on the same hex. He adds a +4 DRM for his Combat Command Rating, a +3 DRM for his guns, and no DRM for Cavalry Inferiority for a total DRM of +7.
H. Lee fires back again using the initial calculation above but with a 2 column-shift left for his third attack, netting to a 1 column-shift left. Losses are now extracted and Retreats conducted.
13.8 Cumulative Effects
All column-shifts to the left are applied before rightward bonus shifts to the FERT column to be used in combat. All column-shifts and DRMs are cumulative and produce one net die roll on one FERT column for each attack.
13.9 Final Resolution
A. On the adjusted FERT column, roll one die and add the net DRM. Cross-index the result to give the number of steps of losses inflicted on the opponent plus a preliminary retreat result. The FERT may also require the opposing Commander to undergo a Morale check after the battle.
B. The opponent repeats this procedure. The retreat lengths are subtracted from each other. The force with the longer retreat is the only one that must retreat from the battle site. If retreat results are the same, then the forces of both sides remain in contact.
C. When there are multiple attacking stacks, each must retreat if the defender scores the larger retreat. The length of the retreat equals the result of the subtraction. Retreat is per the guidelines in 13.9.6.
D. If the opponent is forced to retreat the player's forces may occupy the vacated hex.
E. Loss results are extracted immediately, chosen by the owner. However, no unit in a combat may be eliminated until all other units in the combat have taken one step loss.
13.9.1 Overall Outcome
A. In any Combined Attack (13.1), resolve all attacks on the FERT before adding up all combat results achieve to get an overall outcome of the battle. These overall retreat results are the ones subtracted.
B. Overall loss results indicate which side inflicted more casualties. All loss results are applied to the forces in one hex for the defender. For the attacker, the individual loss inflicted by the defender on each hex is applied to the forces in that hex. It is recommended that in case of a Combined Attack battle, the players record the individual results achieved in each exchange of fire for further reference.
13.9.2 Checking for Other Losses
A. Whenever either side rolls an unmodified 1 on a combat die roll, it must check for any loss of Artillery guns (15.1).
B. Whenever the either side rolls an unmodified 6 on the combat resolution die roll, it must check for leader casualties (6.10).
13.9.3 Extraction of Ammunition
A. All leaders engaged in a battle holding commands with Artillery points assigned must expend one Ammunition point each time they use Artillery.
B. Leaders without artillery directly assigned to them do not expend ammunition.
C. In addition, the Commander of the stack must expend one Ammunition point above the costs of using any assigned Artillery points.
D. In a Combined Attack the defender expends only one Ammunition point per participating leader; the repeat uses of the FERT do not count as different battles for ammunition consumption.
E. Each side should make the appropriate changes on its Army Organization Display.
F. Leaders who have Ammunition but wish to conserve it may choose not to fire their Artillery points, and their combat units still fight at full value.
G. Forces without Ammunition may use only one half of their combat SPs (round up) and may not use their Artillery points in the battle.
13.9.4 Morale Changes
In each battle, the side that inflicted more losses on the opponent than it suffered may raise the Morale level of its Commander (and his subordinate leaders) by one.
13.9.5 Morale Checks from Combat
If the FERT requires a Morale check after combat, the check is run against the Commander's new Morale as it is changed by the battle. The Commander must roll less than or equal to his current Morale level to pass the check. If he fails the Morale Check, he must retreat one hex, reduce his Morale (but not that of subordinate leaders) by one, and extract a step loss of combat strength. These results are in addition to any result of combat and retreat is mandatory even if the Commander won the battle and took a Morale gain.
13.9.6 Retreat Priorities
A. Forces are retreated from battle in a direction determined by the player with Cavalry Superiority or, if no one has superiority, by the owner.
B. Forces must retreat toward a friendly Supply Source or LOS link.
C. Forces must avoid retreating through enemy ZOCs, if possible. Forces obliged to retreat through enemy ZOCs require the Commander to take an extra Morale point loss, and the stack of units to take an extra step loss for each enemy ZOC crossed. The length of its retreat is extended by one hex per enemy ZOC retreated through.
D. Forces may not retreat through impassable terrain or across Major Rivers except at Bridges or Fords.
E. Forces cannot retreat through hexes occupied by enemy combat units.
F. Forces unable to retreat are eliminated.
13.10 Extended Battle
A. At the conclusion of the Combat Sequence of an Impulse, if any engaged opposing forces remain in contact, either side may opt for a second round of combat by expending one point of Operation Effort.
B. Both sides may attempt Reaction Movement to reinforce the battle. No other movement is allowed.
C. If the original attacker is the side extending battle, then the combat is considered a second attack and it receives the Combined Attack bonus per 13.1.
D. If the original defender is the side extending combat, then it is considered to have become the attacker and makes first use of the FERT.
E. The extended battle is resolved in exactly the same fashion as the first round of combat and requires the extraction of another Ammunition point from the Commander and all engaged leaders with Artillery assigned per 13.9.3.
F. The Commander of the attacking stack must expend another AP.
G. No die roll (7.7) versus the Commander's Combat Rating is required to make the second attack.
14.0 Morale
A. Morale is an important factor in troop capabilities.
B. Leaders with high Morale can risk generating higher MAs and gain an advantage in combat. Troops with low Morale reduce the DRMs when rolling on the FERT in combat.
C. The Morale status of forces and leaders changes throughout the game in a dynamic fashion.
14.1 Leader Morale
A. The current Morale level of any leader is shown on the Army Organization Display. A Morale marker is paired with each Display box.
B. Record Leader Morale changes with developments in the game by moving the Morale marker up and down on the track.
C. Leader Morale can never fall to less than 0 nor rise higher than 9.
14.2 Unit Morale
All units (Infantry, Cavalry, Wagons, Depots, Detachments, Union Engineers, etc.) have a Morale level printed on the piece. To facilitate comparison with leader Morale levels when the units are assigned to a leader on the Organization Display, these printed Morale values for the unit are stated in inverse terms on a value scale from 0 to 6 (zero is the best rating).
14.2.1 Units on the Display
A. A unit assigned on the Display calculates Morale conditions with a comparison of its printed Morale value to its leader's current Morale.
B. A unit is broken when its printed Morale value is greater than the current Morale value of its leader.
14.2.2 Units on the Map
A. If a combat unit is on the board without a leader and is engaged in a battle, then the Morale level taken for the determination of Morale Superiority (13.5.1) is the inverse number.
B. A unit must roll under its inverse Morale level in order to attack (7.7) and again to check for breaking in combat (13.5.2).
Example: A unit showing a printed morale of 0 has an actual Morale level of 6, a Morale of 1 inverse equals 5, etc. when on the map by itself without a leader.
14.3 Changes of Morale
A. All leaders' Morale levels in a force rise by one level (the Commander and his subordinates) when that force inflicts more losses on the opponent in combat than it suffers in return. Morale may also be increased by Training.
B. Commander Morale falls by one level when:
- The Commander fails to sustain an attack declaration (7.7);
- The Commander retreats before combat (12.4);
- The Commander must retreat as a result of combat (13.9.4);
- The Commander fails a Morale check required as a result of Combat (13.9.5);
- The Commander must retreat through the opponent's ZOCs (13.9.6).
- All leaders in a force lose Morale as a result of certain Weather conditions (10.6, 10.9).
C. Unit Morale levels are fixed values for each level of combat strength.
14.4 Voluntary Reduction of Leader Morale
In any Impulse, a leader may take a voluntary reduction in his Morale in return for certain benefits:
14.4.1 Morale and Initiative Movement
For one Morale point, the Commander of a force receives a -1 DRM from the roll to generate an MA on the IMC, the Force March Authorization roll, and the Strategic Attrition Chart.
14.4.2 Morale Loss Instead of Retreat
A Commander required to retreat one or two hexes as a result of combat may substitute the equivalent level of Morale loss to cancel the retreat.
14.5 Training
A. Leader Morale may be increased by means of Training. Only leaders with field commands may be placed in Training, and only during the Reorganization Segment of the turn.
B. To be placed in Training, the leader must be located in a town or Major City and expend 1 AP (as Training is an Administrative Action). Indicate this with a Training marker.
C. Leaders in Training are considered Active and cost WEPs to maintain.
D. If attacked while in Training a leader may use only half his combat factors and Artillery points.
E. Leaders in Training may not move in an Impulse, cannot attempt Reaction Movements, and cannot attack.
F. During the Reorganization Segment, increase the Morale of a leader by one for each full turn of Training.
G. Leaders may be taken out of Training in any Reorganization Segment after the one in which Training began.
H. Individual units cannot be put into Training.
14.6 Limited Propagation of Morale Losses
The Morale of subordinate leaders included in a stack but who do not command that force is affected only by Morale changes that result directly from Weather conditions and not such things as failure to sustain a declared attack, Retreat Before Combat, post-combat Morale checks, voluntary reduction in Morale to nullify Retreat results, and retreating through enemy ZOCs.
15.0 Artillery Points
A. Guns are assigned to each leader as Artillery points. Like Morale levels, Artillery is shown by a marker on the track with each field command's box on the Army Organization Display. Each leader marks the number of guns he commands directly on this track.
B. The maximum number of guns a leader may have under his command is equal to his Active side Administrative Rating.
C. Each gun point is a positive DRM during combat, as long as there is Ammunition to expend in battle.
D. OOS leaders may not use their available Artillery points. Leaders may choose to not use their Artillery points to conserve Ammunition.
15.1 Losing Guns
A. All guns are lost when a leader is captured and accompanying units are eliminated.
B. When a leader is killed in battle, his accompanying guns remain with the command and go to the leader appointed to replace him.
C. In any battle, there is a possible Artillery point loss whenever a side rolls an unmodified 1 for combat resolution. In this case, roll another die.
- A 1-3 means there is no loss.
- A 4-5 means that a gun is eliminated. Immediately remove an Artillery point from any one leader involved in the battle.
- A 6 also means the gun is captured by the opponent. Immediately remove an Artillery point from any one leader engaged in the battle, and the opponent may select a leader involved in the battle to immediately receive the Artillery point.
D. Only one Artillery point per combat resolution can be lost.
15.2 Artillery Reserve
A. In most scenarios one or more armies are equipped with an Artillery Reserve of guns assigned directly to the Army Commander. No guns assigned to an Artillery Reserve can ever be detached or reattached to any other field command.
B. The Artillery Reserve is always considered to be in the hex containing the Army HQ.
C. No formation except an Army HQ can operate an Artillery Reserve.
15.3 Confederate Artillery Battalions
A. In some scenarios a separate Artillery Battalion unit is assigned to a Confederate Army or Corps command. Each Confederate Artillery Battalion may be assigned a maximum of two Artillery points.
B. At the start of each scenario, these units are assigned a set number of guns but are considered to be units, and, like other units can be freely detached and reattached to other subordinate leaders.
C. On the Army Organization Display, an Artillery Battalion is shown on the marker track rather than in the field command's box for placing combat units.
D. Artillery point markers have been included for the Confederate Corps commands if players wish to assign them permanent (non-transferable) guns (23.7). No scenario calls for such markers at the start.
15.4 Garrison Artillery
A. In many scenarios, Washington's defenses have assigned to them a certain number of Artillery points of heavy, built-in guns.
B. A marker is provided to indicate the number. This marker is shown on the track of whatever Union leader occupies Washington at the beginning of the game. This garrison Artillery is separate from any Artillery the leader may have assigned to himself personally.
C. Although the leader may march away from Washington in the course of play, the DC Garrison guns can participate in battle only on the Washington hex.
D. Garrison Artillery cannot be detached or reattached to any field command.
16.0 Cavalry
A. Mounted forces serve a number of functions.
B. The function of Cavalry Superiority in battle (13.4) has already been detailed.
C. A force with Cavalry Superiority may also Retreat Before Combat (12.4).
D. Cavalry has further importance for Screening, Scouting, and Raiding.
E. Cavalry forces, like other forces, may also participate in Capture (24.0) or in Devastation (25.0).
F. A field command entirely composed of Cavalry gains special advantages and is called the Cavalry Corps.
16.1 Screening
A. A single Cavalry unit with any leader may be used on the map, on top of the leader counter, to mask the identity and capabilities of that leader.
B. Friendly leaders may move and remain hidden, provided they remain under cover of the Cavalry Screen.
C. Any Cavalry unit in this kind of Screening role must be assigned directly to the Commander in the hex.
D. A Cavalry Corps (16.4) may extend the range of Screening beyond a single hex. The Cavalry Corps has a Screening range equal to the number of Cavalry units assigned to it. Any friendly formations within this radius in hexes on the map may be hidden, removed from the map, and their hex locations noted on a piece of paper.
E. Whenever engaged in Screening the Cavalry Corps marker and its Commander must appear on the map.
16.2 Scouting
A. Any Cavalry formation may engage in Scouting activity. Each side may Scout one hex for each of its Cavalry units.
B. Single Cavalry units can Scout only adjacent hexes.
C. The Cavalry Corps (16.4) may Scout any hex within its Screening range.
D. Cavalry units Scouting are not obligated to attack (7.7) and may continue moving after the Scouting attempt. The same hex may be Scouted repeatedly, as many times as there are Cavalry units.
E. To Scout, each side rolls one die and add to it the number of Cavalry units (the side being Scouted counts its Screening units). High adjusted roll wins. Reroll ties.
F. If the Scouting side wins, the opponent must place on the map any leader hidden in that hex and reveal how many units are in that leader's command.
G. Scouting may also be directed at known opposing leaders in an effort to discover their rough combat strength using the same procedure.
16.3 Raiding
A. Only cavalry units are allowed to tear up railroad track. Broken rail markers are provided to indicate this on the board. Tearing up the railroad requires the expenditure of 3 MPs (in addition to the terrain cost) in the hex.
B. A Cavalry unit may tear up tracks as long as it has enough MPs to continue moving.
16.4 Cavalry Corps
A. Any field command entirely composed of Cavalry units is considered to be the Cavalry Corps. The Cavalry Corps is designated with a unit marker placed with the appropriate leader on the map.
B. Unlike other Cavalry, the Cavalry Corps is able to exert a Screening range around itself and to project its Scouting efforts out to that distance.
C. The Cavalry Corps may also attempt Reaction Movement without being within Command Radius of the Army or Confederate Corps Commander.
D. The leader of the Cavalry Corps applies a -1 DRM from all his rolls on the IMC.
E. Only one Cavalry Corps may be in play at the same time per side.
F. A Cavalry Corps may not operate more than two Artillery points.
16.5 Cavalry Movement
Any force wholly composed of Cavalry, whether a single Cavalry unit or the Cavalry Corps, may use an Operations Effort chart on the IMC one level higher than the amount of OE expended in that side's Impulse.
17.0 Engineers
A. Engineers are specialized units which do much construction and support work for an army. They are responsible for repairing Railroad track that is torn up, repairing Devastated (25.0) bridge, constructing Entrenchments (26.0), and Mine work.
B. Union Engineer units may also assemble Pontoon Bridge trains and Observation Balloon trains.
C. It requires an Army Commander Administrative Action (costing 1 AP) to activate an Engineer unit and flip it over to its At Work side.
D. If attacked while working, the Engineers (or any Confederate combat unit that has been assigned to an Engineer Supervisor) defend at half their combat strength (fractions rounded up).
17.1 Railroad Repair
A. In any Impulse, an Engineer unit may move to a torn up railroad track hex and prepare to repair it.
B. In the Reorganization Segment, flip the Engineer unit over to its at Work side.
C. On the Reorganization Segment of the next turn, remove the broken rail marker. The track is repaired, and the Engineer unit flips up to his combat strength side (or Supervisor side if Confederate).
17.2 Bridge Repair
Engineers may repair bridges using the same procedure as for railroads.
17.3 Constructing Entrenchments
Engineers must assist other forces to construct Entrenchments. Details are given in the Entrenchment rules (26.0).
17.4 Mine Work
17.4.1 Requirements
A. Beginning in 1864, Engineers may engage in the construction of tunnels to be filled with explosives and detonated underneath the opponent's Entrenchments to reduce their effectiveness.
B. Mine Work can only be performed in a hex containing an Army HQ. Mines can be dug into hexes adjacent to that hex.
C. Note the mined hex on a slip of paper.
D. Only one Engineer can engage in Mine Work per hex.
17.4.2 Procedure
A. To begin construction of a mine, flip the Engineer unit during a Reorganization Segment and display it on top of the stack of counters in that hex.
B. Mining costs 2 WEPs per level of enemy Entrenchments being dug under per turn of digging.
C. Mine work cannot be Screened by Cavalry or the presence of Entrenchments.
D. The Mine Detonation Results Table has columns corresponding to the number of turns the mine has been under construction.
E. A single die roll referencing the proper column indicates whether the Entrenchment level has been successfully reduced and by how much.
F. The mine may be detonated in any Combat Sequence, before resolution of any attack into the hex containing the mined Entrenchment.
G. Flip the Engineer back to its combat side on the Impulse the Mine is detonated.
17.4.3 Effects
A. Units attacking behind the detonation of a mine apply a -2 DRM from their FERT roll.
B. A mine which fails to detonate is lost and may not be reused.
[The Mine Detonation Results Table is not reproduced in this rules document; it is printed on the game's own charts.]
17.5 Union Pontoon Bridge
A. The Union may procure a Pontoon Bridge Train to be set up by Engineers to connect any two hexes across a major river.
B. Disassembled, the bridge acts as a Wagon and may move 8 MPs per Impulse.
C. Once assembled into a bridge, the unit cannot move.
D. To assemble a Pontoon Bridge, the Bridge Train must be stacked with an Engineer unit. The Union Army Commander may undertake an Administrative Action (expending 1 AP) in any Impulse, flipping the Engineer to its At Work side, displaying the counter on top of any counters that may be on the hex.
E. On the next Impulse, flip the Pontoon Bridge to its assembled side with the crossing arrow pointing to the hex connected by the bridge.
F. Union forces may then use the bridge to cross, paying the MA cost for crossing a major river at a ford.
G. When the bridge is assembled, the Engineers flip back to normal status.
H. Bridges cannot be assembled in hexes containing Confederate ZOCs.
17.6 Union Observation Balloon
A. The Union may procure an Observation Balloon to serve a Scouting function much like Cavalry.
B. Like the Pontoon Bridge Train, the balloon arrives in a disassembled state as a Wagon unit.
C. The balloon is assembled by Engineers in the same fashion as the pontoon bridge, requiring a Union Army Commander Administrative Action.
D. Once assembled, flip the balloon to its deployed face.
E. A deployed Observation Balloon may Scout any hex within three hexes.
F. It applies a +3 DRM to the Scouting die roll.
G. The Balloon unit is destroyed if forced to retreat.
17.7 Confederate Engineer Supervisor
A. Unlike the Union Army, the Confederates did not have regularly constituted Engineer units. The Confederates used single Engineers to supervise the work of others.
B. To reflect this the Confederacy must stack a regular combat unit with the Engineer Supervisor counter for it to do any engineering work. When engineering work is in progress, flip the Supervisor to its At Work side. Do not alter the combat unit assigned to the engineer.
C. Engineer Supervisors are not leaders and may not hold field commands. They are units with a Movement Efficiency rating of 1, but without combat value.
D. An Engineer Supervisor without attached combat units may be captured if the hex he occupies is entered by Union forces.
18.0 Detachments
A. Both sides have the ability to create Detachments to serve as Wagon guards, as part of the conversion of a Wagon to a Depot, as a Rearguard, or as a small garrison.
B. Detachments may be created by a Leader during an Impulse or the Reorganization Segment as an Administrative Action costing 1 AP.
C. To create one or more Detachments take a step loss from a combat unit or remove the unit from play. The number of Detachments created is specified on the Detachment Creation Chart.
D. Detachments have printed combat and morale values, and cannot move except in conjunction with a leader or a Wagon.
E. Detachments do not project a ZOC (11.0).
F. Detachments are considered to be equal to one step for purposes of taking losses.
G. Once created, detachments cannot be reabsorbed into combat units.
[The Detachment Creation Chart is not reproduced in this rules document; it is printed on the game's own charts.]
19.0 Naval Capabilities
19.1 In General
A. There are limited but important naval capabilities in the game. Naval units are each capable of performing one mission in an Impulse or Reorganization Segment.
B. Naval units can freely move to any water hex on the map and to any water major river hexside upstream to the first place at which a major river is crossed by a ford or bridge. Otherwise, ships have unlimited movement every Impulse.
C. Naval units perform one of four missions: Naval Transport, Naval Assault, Gunfire Support, or Naval Combat.
D. Naval units have a facing and are located on a hexside, as indicated by the facing pointer on the naval counter.
19.2 Gunfire Support
A naval unit may furnish Gunfire Support to friendly forces on adjacent hexes, provided the naval unit is also adjacent to the opponent's force in action. The Gunfire Support value equals the number of Artillery points the naval unit brings to bear on battle.
19.3 Naval ZOCs
A. With their hexside location, Naval units have a different kind of ZOC against opposing Naval units. The ZOC of a naval unit is the four hexsides that branch from the hexside on which the ship itself is located.
B. Any opposing ship must stop its movement and must attack against a ship (or shore battery) when movement brings it into contact with a ZOC.
19.4 Naval Combat
A. Use the Naval Combat Value for naval combat. Total the value of all participating naval units and shore batteries.
The Naval Combat Results Table (NCRT) is a differential strength comparison chart. Determine the correct column by subtracting the value of the defender from that of the attacker.
B. If the exact differential cannot be matched on the NCRT, round up to the next highest column.
C. The attacker rolls one die, applying all relevant DRMs.
| DRM | Side Rolling is |
|---|---|
| -1 | Wooden Ship(s) against an Ironclad |
| -1 | Any ships against shore batteries |
| +1 | Shore battery against any ships |
| +1 | Ironclad against any ships |
| +1 | Any ship(s) against a Confederate Gunboat |
D. All NCRT results are expressed in terms of step losses for the attacker and defender.
[The Naval Combat Results Table is not reproduced in this rules document; it is printed on the game's own charts.]
19.5 Naval Transport
A. Wooden Ships have the capacity to transport all of the units comprising a Union Corps command if used for a transport mission. One Wagon unit may travel for free. Leaders ride for free.
B. A naval transport mission begins on the Reorganization Segment of the turn.
C. Units to be transported must be located on a port city (Baltimore, Washington, Norfolk) or a Naval Landing.
D. Take the unit(s) to be transported, with one ship per Corps formation, and place the force on the Turn Record Chart in the next turn's space.
E. In the Reorganization Segment of the following turn, remove the naval transport force from the turn track. They may be landed at any port or Naval Landing.
19.6 Naval Assault
A. Wooden Ships may embark combat units for assault landings against seacoast town hexes. Each ship can carry one unit. One Wagon unit may travel for free; any additional Wagons consume one ship of transport each. Leaders ride for free.
B. Troops for a Naval Assault mission must begin the Impulse in a port city or Naval Landing.
C. Remove ships and troops from the board in the Impulse and place them in the T-0 box of the Naval Assault Display on the Union's Army Organization Display.
D. In the Reorganization Segment of the turn in which units are sent to sea, move the counters forward to the T-1 box of the display.
E. In the Reorganization Segment of the following turn, move the counters to the T-2 box. At the same time, the Union announces it has readied forces for an Assault Landing.
F. An Assault Landing may be made in any friendly Impulse of a turn following the Reorganization Segment in which the assault force moves to the T-2 box of the Assault Display.
G. A naval assault may be made only against a town hex located on a seacoast hexside, outside the ZOCs of enemy land or naval units and shore batteries.
H. The force that makes an assault landing expends its entire MA in disembarking on the Impulse of landing.
19.7 Ship Type Limitations
A. Ironclad ships may not carry out Naval Transport nor Naval Assault missions.
B. The Confederate Gunboat unit may not carry out Naval Transport nor Naval Assault missions.
19.8 Shore Batteries
A. In most scenarios the Confederacy has a 3-strength naval shore battery placed in an Entrenchment on Drewry's Bluff. This unit has a ZOC identical to other naval units and its value is a naval combat value.
B. When the NCRT mandates step losses for the shore battery, the losses can be taken in levels of Entrenchment or from the battery. The battery does not have to lose strength until all Entrenchments have been eliminated.
C. Union ships can run past the battery, but they must stop first and exchange fire before moving again in the next friendly Impulse.
D. Union ships cannot make naval transport or assault missions past the battery nor may they ever pass the battery in any direction without exchanging fire.
19.9 Naval Landings and Naval Supply
A. A Naval Landing can be created on any town located on a seacoast or major river far enough downstream to be reached by ships.
B. Create a Naval Landing during the Reorganization Segment of the turn through the expenditure of WE and the removal of a 4-Capacity Supply Wagon, and placement of a detachment on the desired hex. [Source text reads "Crate a Naval Landing".]
C. The Naval Landing then serves as a Supply Source from which Lines of Supply may be traced.
D. A Naval Landing may supply any number of leaders within range.
20.0 Railroads
For the first time in the American Civil War, railroads exercised a significant military role by supplying war and moving troop units to desired locations. To reflect this, each side may use open railroads for a variety of transport purposes.
20.1 In General
A. Any town or major city on a rail line is a Railroad Station.
B. A railroad is open between two Stations if the points are linked by a continuous and unbroken line of connected railroad hexes and that side has previous control over that rail line.
C. Railroads south of the Potomac and east of the Shenandoah Rivers are generally considered controlled by the Confederacy.
D. All railroads north of the Potomac are controlled by the Union.
E. In all scenarios in which the Union begins with a Depot on a Station south of the Potomac, it is considered to control the line of railroad hexes between that location and Washington.
F. Railroad traffic is interrupted by the presence of enemy units or their ZOCs.
20.2 Converting Railroads
Railroads may be opened and converted to the use of the other side at a rate of one Station per turn, provided that side was the last to occupy or pass through all intervening hexes.
20.3 Trains and Troop Transport
A. Each side begins the game with one Train unit placed in a Major City under its own control.
B. During the game, each side may procure one additional Train unit through the expenditure of WEPs.
C. A Train may transport troop units at a small WEP cost.
D. Each Train may move one combat unit (leaders ride free) a maximum of six Stations along the railroad during the Movement Sequence of a friendly Impulse.
E. Inactive leaders and their units may not travel by rail.
F. To entrain or detrain a unit requires one-half the unit's MPs and must be done at a Railroad Station.
G. A unit moving by rail cannot participate in Initiative Movement in that Impulse.
H. Units moved by Train may not enter an opposing ZOC at any time. If a rail line is blocked by opposing units or their ZOCs, then the player's Trains may move no further than the last station to which the line is open, before the link which is blocked.
I. Trains have no combat value and may be captured if opposing units enter a hex containing an undefended Train counter.
21.0 Partisans
A. The Confederacy can create irregular cavalry troops called Partisans beginning in the Second Manassas scenario.
B. A Partisan force is composed of two classes of units, Rebel Sympathizers and Partisan leaders.
C. During the Reorganization Segment, the Confederacy may roll one die per Active leader located on a Town or Major City hex south of the Potomac and east of the Shenandoah Rivers.
D. On a 1, a new unit is created, normally a Rebel Sympathizer unit.
E. On every fourth successful creation die roll, place a Partisan leader counter instead of a Rebel Sympathizer.
F. The first Partisan leader created in each game must be the leader Mosby.
21.1 Rebel Sympathizers
A. By themselves Sympathizers cannot move and have no combat value. They cannot be captured nor eliminated.
B. They impose an additional +1 MP movement cost on any Union formation entering the hex where Sympathizers are located.
C. Sympathizers may be moved by a Partisan leader or any other Confederate leader.
D. There is no cost to pick up, move with, or drop off a Sympathizer.
21.2 Partisan Leader
A. Sympathizers gain special capabilities when stacked with a Partisan leader.
B. A Partisan leader and any Sympathizers with him may automatically move 12 MPs per Impulse.
C. Partisan forces may move freely through Union units and ZOCs.
D. For every Sympathizer stacked with a Partisan leader, the force gains one point of combat strength. The number on the right is a DRM for combat and is also the Morale rating of that Partisan force.
21.3 Scouting, Screening, Raids, and Combat
A. Partisans may Scout (16.2) one hex per attached Sympathizer and each Sympathizer (not Partisan leader) counts for the Scouting die roll.
B. The force has a Scouting range of one hex per attached Sympathizer.
C. A Partisan leader may Screen (16.1) one regular leader on the map.
D. Partisans can make Raids (16.3) to tear up the opponent's Railroads. If the next Railroad Station in either direction down the line contains a Union combat unit or Detachment the Partisan force must pass a die roll (1-3 successful, 4-6 not allowed) for authorization to tear up the Railroad.
E. If engaged in Combat, each Sympathizer unit in a Partisan force counts as one step for extraction of combat losses.
F. Partisan forces are considered to be cavalry for calculation of Cavalry Superiority unless it is in the same hex as other regular combat units, in which case the Partisans add their combat factors to the regular force but do not count for Cavalry Superiority.
22.0 Pinkertons
A. During any Reorganization Segment the Union may procure Pinkerton spy units to act as Scouts at a cost in WEPs. Pinkerton units have an automatic MA of 12 every Impulse.
B. The Union may Scout (16.2) one hex for each Pinkerton, who must be located in the hex to be searched.
C. Union Cavalry and Pinkertons may combine to search the same hex, in which case both units add to the Union Scouting die roll.
D. Pinkertons have no combat value but cannot be captured or eliminated and may freely move through Confederate units or their ZOCs.
23.0 War Effort
A. The resources available to both sides in this theater of the Civil War are modeled with the War Effort rules. Each side expends WE throughout the turn for a variety of purposes.
B. The WE cost for each game function are listed on the War Effort Expenditure Projection (WEEP).
C. Current WE levels are shown by markers on a track on the Army Organization Display. These markers are adjusted whenever an expenditure takes place.
D. Starting levels of WE are specified by each scenario. Once play begins, add WE as a result of Major City Production, successful Foraging, or Capture from the opponent.
E. WE levels are drawn down by expenditures for operations, and by Capture (24.0) and Devastation (25.0) on the part of the opponent.
23.1 Major City Production
A. During the Reorganization Segment, each side receives 2 WEPs per Major City that it was the last to occupy or pass through. The Major City must be a port or connected to a map edge by open Railroad.
B. Major Cities produce WE every turn.
23.2 Foraging
A. During the Reorganization Segment of any Summer or Fall turn (June through September), either side may attempt to Forage with any currently Active Commander located on a Town or Major City hex. This is an Administrative Action costing 1 AP.
B. Count the number of clear terrain hexes (a Town hex counts as clear terrain for Foraging) surrounding the Commander, including the hex he occupies.
C. Commanders in an opponent's ZOC cannot Forage.
D. Hexes in both sides' ZOC are considered contested and cannot be counted for Foraging by either side.
E. Commanders may not Forage from a Town hex that has been exposed to Devastation (25.0).
F. Foraging results are doubled west of the Shenandoah River and for the Confederacy north of the Potomac.
G. Using the Foraging Table, locate the column that corresponds to the number of clear hexes to which the Commander has access and roll one die.
23.2.1 Own Use
A. If the result is Own Use (OU), mark the Commander with an Own Use marker. The Commander may then expend this supply to avoid penalties on Strategic Attrition (9.1). He may also move in the next turn's Impulse in Full Supply, and does not have to expend WEPs to keep him and his subordinate leaders in the hex Active.
B. Own Use results are never doubled, even in the Shenandoah or north or the Potomac.
23.2.2 Numeric Result
If the Foraging Table result also contains a number, then this number or WEPs is added to that side's total.
23.3 Building New Units
A. Several types or new units can be built simply by expending WEPs. These are: a Railroad Train unit, Wagons, Observation Balloon Trains, Pontoon Bridge Trains, Pinkertons; and Engineer Units or an Engineer Supervisor.
B. Each of these types or units must appear at a Supply Source (8.1) or at a Railroad Station Depot.
C. New Combat units appear as reinforcements or replacements and cannot be built with WEPs.
23.4 Replacements
A. Units that have been reduced to lower strengths or eliminated can be rebuilt to strength or returned to play by Replacements. Each side receives a set number of Replacement Steps specified by the scenario during the Reorganization Segment.
B. These steps may be absorbed by any leader's unit in Full Supply, or may be brought into play as completely rebuilt units from the dead pile, at a friendly Railroad Depot, Major City, or Naval Landing.
C. One step creates a weak side unit from the dead pile or flips a weak side unit to the strong side.
D. Each Replacement step requires an Administrative Action and costs 1 AP to the leader absorbing the replacements.
E. The total Replacements steps added to any command in one Reorganization Segment cannot exceed the Administrative rating of the leader receiving the replacements.
23.5 Reinforcements
A. New units entering play are specified by the scenario.
B. Confederate reinforcements arrive during turn Impulses at the first Railroad Station from a friendly map edge designated, unless otherwise noted.
C. HQ Reinforcements appear on top or any leader who is eligible to receive it.
D. Union reinforcements arrive by Naval Transport (19.5) during the Reorganization Segment, unless otherwise noted, and may land immediately.
23.6 Ammunition
A. The available supply of Ammunition plays a vital role in allowing each leader to use his full capabilities (8.5).
B. Ammunition is procured during the Reorganization Segment by the expenditure of WEPs and may be added to any leader currently in Full Supply.
C. A leader may add as much Ammunition as his Administrative Rating at a cost of 1 AP per Ammunition Point.
D. Army and Confederate Corps leaders may hold Ammunition Points and reassign these to subordinates during the Reorganization Segment. This is free and does not cost any APs.
E. Current Ammunition levels are shown using Ammo Points markers for each command on the Army Organization Display.
23.7 Building Artillery
A. Both sides may add new Artillery points to their forces at a defined WEP cost and under strict conditions of placement.
B. Adding an Artillery point is an Army Commander Administrative Action and costs 2 APs.
C. New Artillery points may be built at a Naval Landing, Washington, or Richmond. They may also be built at a Railroad Station Depot that is within the Command Radius of the Army Commander and connected with Washington or Richmond by an open Railroad line.
D. Only one Artillery point can be put into play at any one location per Reorganization segment.
E. Even though built by Army Commanders, new Artillery points may be added directly to any command. However, they may not be built if a leader is not present to accept them.
Exception: Union garrison guns at Washington may always be added to.
23.8 War Effort and Commands
A. Reactivating an HQ or Union Corps command marker on the Army Organization Display requires WE expenditure.
B. Pay the appropriate cost in points and take the HQ or Corps command marker from the dead pile and place it per 6.1.7. [The source cross-reference "6.1.7" is as printed; no such subsection appears in this document.] There is no cost for reactivating or creating a field command.
23.9 War Effort and Leaders
A. During each Impulse, each Active leader (unless expending his Own Use Supply from Foraging) costs 1 WEP to maintain.
B. In the Reorganization Segment, promoting a leader by Brevet (6.3), bringing a new leader from the leader Pool (6.13), or replacing an Army Commander (6.12.6) all cost WEPs.
23.10 War Department Orders
A. Occasionally, a player may be subjected to anomalous combat results or bad luck and may have to resort to a War Department Order.
B. A War Department Order may be used to:
- Activate a leader who fails his own activation and/or movement die rolls;
- Appoint a new leader out of sequence (that is, not during the Reorganization Segment but during an Impulse); or
- Replace any Army Commander or other leader during the Reorganization Segment who cannot otherwise be changed under the provisions or 6.12.
C. In particular, if a leader is killed in combat at a point in the turn in which one or more Impulses remain to be played before onset or Reorganization, the player must use a War Department Order to obtain a new leader.
D. A War Department Order entails a substantial expenditure of WE.
E. Only one War Department Order may be used by each player per turn unless the player is forced by combat results to make additional appointments. In the latter case the player may not make any War Department Orders in addition to the ones required by developments in the game.
24.0 Capture
24.1 In General
A. In the course of the game, either player may Capture material from the opponent.
B. Units that can be captured are Supply Wagons, Railroad Trains, and Naval Landings. For Wagons or Trains, immediately replace the unit with an identical friendly counter and return the captured unit to the opponent.
24.2 Naval Landings
A. If capturing a Naval Landing, the capturer must decide between Capture and Devastation (25.0). Capture is possible only if the Naval Landing is occupied with at least one combat unit and an Active leader accompanied by Wagon units.
B. For every Impulse that the Confederacy occupies a Naval landing supplied by the Union, it may cart off and add to its WE a number of WEPs equal to the Supply load capacity or its accompanying Wagon units (whichever is less). This is an Administrative Action and costs 1 AP. The Union must reduce its WE by the same number of points.
C. In any Union Impulse after the Impulse or capture, the Union may declare that it is no longer supplying a given Naval Landing. Once this declaration is made, flip the landing counter its Depleted side. In the following Reorganization Segment, the Naval Landing counter is removed from the map after any Devastation is applied.
D. The Union may exercise this depletion option with any Naval Landing, including those captured and occupied by Confederate forces.
25.0 Devastation
A. In addition to Capture, either side may also engage in purposeful Devastation destruction to deny WE or facilities to its opponent.
B. During the Reorganization Segment, Active leaders may carry out Devastation before Foraging.
C. Devastation is possible against Naval Landings, Washington, Towns, or against Bridges connecting Major River hexsides.
D. Devastation is an Administrative Action costing 1 AP per site.
E. The effects of Devastation last throughout any scenario in play.
25.1 Devastation of Naval Landings
A. For every two brigades in the Confederate force occupying a Naval Landing (fractions rounded down), the Confederacy may deduct 1 WEP from the Union level. State the amount of Devastation allowed.
B. The Union removes this amount from its WE level immediately.
C. Resolve Devastation before removing the depleted Naval Landing marker from play.
D. Devastation may continue if the Union fails to halt the flow of supplies to a Naval Landing.
25.2 Washington
A. Devastation against Washington is resolved in the same way as against a Naval Landing.
B. If the Union refuses to supply Washington, then that city must be reoccupied by Union troops before it can again serve as a Supply Source (8.1) for Union forces.
25.3 Towns
A. Either side may also burn down Towns to prevent their use in Foraging (23.2).
B. Roll one die. On a 6, the Town is burned. Mark it with a Destruction marker.
C. Multiple attempts may be made if the first try fails so long as there are the APs to expend.
25.4 Bridges
A. Either side may destroy Bridges to prevent their use in crossing Major rivers.
B. This type of Devastation can be accomplished only by Cavalry units.
C. Roll one die. On a 1, the Devastation effort is successful. Mark the Bridge hexside as broken. The River then may not be crossed at that point unless the Bridge is repaired by Engineers (16.2).
D. Multiple attempts may be made if the first try fails so long as there are the APs to expend.
26.0 Entrenchments
Entrenchments are prepared defenses designed to help defend ground. There are three levels of Entrenchment: 1, 2, and Fortress, (equivalent to a 3). These Entrenchments supply multiple benefits to the side occupying them.
26.1 Requirements
A. Entrenchments must be occupied or in the ZOC of a regular combat unit to supply their benefits.
B. Level 1 Entrenchments remain in play only as long as they are occupied. Remove the counter from play if they are no longer occupied.
C. Higher level Entrenchments are considered permanent works.
26.2 Defensive Benefits
A. An occupied Entrenchment provides a defensive benefit of a left column-shift equal to its level on the opponent's final FERT column.
B. The Entrenchment also has combat strength equal to its level, and cancels Retreat results inflicted on the FERT up to the level of the Entrenchment. Unlike with shore batteries (19.5), the Entrenchment does not absorb step losses for defending units occupying them.
C. When attacking an unoccupied Entrenchment that is in an enemy ZOC, the Entrenchment is destroyed if it takes a step loss or retreat result.
26.3 Other Characteristics
A. Cavalry Superiority is not effective against Entrenchments, but forces in Entrenchments may exert Cavalry Superiority when attacking out of the trenches.
B. ZOCs do not extend into Entrenchments but units entrenched retain their ZOCs.
C. Entrenchments act in the same way as a Cavalry Screen (16.1) to mask the identity of units or leaders occupying them.
D. Leaders in Entrenchments may attempt Reaction Movement (6.6, 12.1) without being in the Command radius of an Army or Confederate Corps Commander.
E. Moving into or through friendly Entrenchments costs 3 MPs per hex and cancels the normal terrain cost of that hex.
F. Enemy units may move through unoccupied Entrenchments that are not in enemy ZOCs, but must attack and destroy all other Entrenchments to be able to enter their hex.
26.4 Construction
A. Entrenchments can be built by Active leaders holding field commands by the expenditure of WEPs and the labor of troops and Engineer units (or Confederate Engineer Supervisors).
B. Entrenchment begins during a Reorganization Segment and requires 1 AP per turn of Entrenching, as it is an Administrative Action. Mark the leader with the appropriate marker.
C. Engineers (or Confederate Engineer Supervisors) must be assigned to a force for it to build Entrenchments but do not have to be flipped to their At Work side. At least one combat unit must also be present. Troops building an Entrenchment are not required to attack.
D. During the Reorganization Segment of the turn following Entrenching, place a 1-level Entrenchment marker in that hex.
E. If construction continues, the level may be raised. Each level of Entrenchment costs additional WEPs.
F. Only one level of Entrenchment may be put into a hex per turn, regardless of the number of Engineers or combat units that may be available for labor.
G. If attacked, forces engaged in Entrenching fight with only half their available combat factors and Artillery points (fractions rounded up).
27.0 Militia
Militia are short-service combat units composed usually of local volunteers. Both sides have several Militia that may be raised when the opponent threatens home and hearth.
27.1 Creation
A. The Union may attempt to create Militia units in any Town or City hex within five hexes of Confederate combat units (not Partisans) located north of the Potomac River and east of Harper's Ferry.
B. The Confederacy may attempt to create Militia only in Richmond or Petersburg, when Union combat units are within five hexes of those places.
C. Attempt creation of Militia in the Reorganization Segment by rolling a die. On a 1, the militia unit is created.
D. The Union may roll only once per Town or City.
E. The Confederacy may roll only once for the Petersburg Militia, but may roll twice for the Richmond Militia.
F. To select a Militia unit, randomly choose an infantry brigade (Confederate) or infantry division (Union) from the remaining counter mix or dead pile.
27.2 Characteristics
A. Units of Militia do not have a Movement Efficiency rating and may not use the IMC.
B. Militia may not move from the hex of creation unless attached to a leader. They may not be used to create Detachments (18.0).
C. For combat purposes, Militia units are identical to regular combat units.
D. A Militia unit takes an automatic step loss in each Reorganization Segment unless it has just been created. Flip all full-strength Militia to their reduced-strength side and remove from play all reduced-strength Militia.
28.0 Limited Intelligence
A. Many features lend themselves to simulation of the fog of war. In addition to provisions for Screening by Cavalry and Entrenchments, player may not examine enemy stacks. However, the Commander in each hex is required to be the top counter on the stack unless that stack is being Screened.
B. Players may not examine the other's Army Organization Display.
C. Before the start of the game, players may agree to further restrictions:
- Reveal in combat only the general strength column of a force and not its precise factor strength;
- Do not reveal the results of Strategic Attrition (9.0) die rolls to the opponent;
- Show on the map versus show on the Army Display the wound markers and brevet promotion markers of leaders; and/or
- Announce the fact on Reorganization Segments when the player sends troops to sea, builds a Pontoon Bridge train, or builds Engineers.
29.0 Victory Conditions
A. The winner is the side fulfilling its Decisive Victory Conditions while preventing its opponent from fulfilling its own.
B. Failing that, the winner is the side with the greatest total of Victory Points (VPs) at the end of the game. If one side achieves the Decisive Victory Conditions but the other ends the game with more VPs, the side achieving its Decisive Victory Conditions wins only a Marginal Victory.
C. If neither side achieves its Decisive Victory Conditions and both have equal VPs, the game is a draw.
29.1 Decisive Victory Conditions
A. The Union may achieve a Decisive Victory by holding Washington and Richmond at the end of the game or by holding Washington and having a field command in Full Supply (8.5) in Petersburg at the end of the game.
B. The Confederacy may achieve a Decisive Victory by holding Richmond and Washington at the end of the game or by holding Richmond and having a field command in Full Supply in Baltimore or Harrisburg at the end of the game.
29.2 Victory Points
29.2.1 Enemy Step Losses
A. Each side receives 1 VP per step loss inflicted on the enemy in Combat.
B. If an enemy force is eliminated, VPs are received for the number of steps eliminated even if the FERT mandated result called for greater losses.
C. Losses from Retreat Before Combat, from Morale Checks, from Force Marches, and from Strategic Attrition do not count for VPs.
29.2.2 Enemy Leaders Killed or Captured
1 VP is awarded per star of (breveted or regular, whichever is greater) rank of all enemy leaders killed or captured in the course of play.
29.2.3 Additional Objectives
The scenario in play may provide additional objectives that with a VP value.
30.0 Introduction to the Scenarios
Scenarios range from three to twelve turns in length. The scenario listings contain all information necessary to set up each scenario presented in an identical format for each scenario. Setup is simultaneous.
30.1 Preparing to Set Up
A. Both sides should first set up on their Army Organization Display all marker counters that are specific to each field command plus Ammunition counters, WE indicators, and the Replacement indicator.
B. When proceeding through the scenario setup, each leader named should be given a field command in order on the display with the units listed with him placed in the box for that command.
30.2 Introductory Material
A. Each scenario begins with a short historical note together with specification of the dates encompassed by the scenario, the turns for each month, and the weather.
B. Listings are then given sequentially for each army, beginning with the Confederacy.
30.3 General Listings
The listing for each side begins with information that affects its overall operations through the game: available level of OE, beginning Ammunition Points, general Morale value for the scenario, per turn Replacement rate, and beginning level of WE.
30.4 Force Listings
A. All troop units beginning the game are listed in order.
B. Each listing specifies the location of the force, with or without a Town or City name. Pieces listed for a hex with no assignment to a leader are given first and simply placed in that hex on the map.
C. After this the listing specifies which leader, if any, has command for the location, followed by his subordinate leaders and their forces. Troop units for each specific leader are listed following the leader's name.
D. An Army Commander is noted in bold. A Corps Commander is noted with an asterisk.
E. A superscript number after the leader's name means he starts at that rank. A breveted leader also has a superscript B with the rank after his name.
F. Leaders listed after the first leader on a hex are subordinate leaders and may have troop units assigned to them as well.
G. Troop units are listed by Union division (DIV) or Confederate brigade (BDE) strength, or detachments (DET).
H. Cavalry is abbreviated CAV.
I. All units assigned to a leader are placed on the field command boxes of the Army Organization Display.
J. Entrenchments are indicated by L1 ENT and L2 ENT for Level 1 and Level 2, respectively. Fortresses are listed as FORT.
K. Shore batteries are indicated by SH-BAT.
L. Supply Wagons are noted by their capacity. For example 1 x 1-Wagon means one supply wagon with a supply capacity of one.
M. Corps Markers are listed as by their name, such as "I Corps" or "VI Corps."
N. Assigned Ammunition is divided among all the leaders in play.
O. Artillery Points are listed as Guns (the number of Artillery Points). Army Reserve Guns are listed as ARG. Garrison Guns are listed as GAR-GUN.
P. Naval Landings are listed as NAV-LAN.
Q. Certain regions have several hexes that are designated as their defenses:
| Town | Hexes |
|---|---|
| Petersburg | 3146, 3247, 3345, 3346, 3445, 3446 |
| Richmond | 3139, 3239, 3339, 3340 |
| Yorktown | 4345, 4346, 4445 |
| Union Entrenchment Line | 3248, 3348, 3447, 3544, 3545, 3546 |
30.5 Choosing Troop Units
A. Unit Morale (14.2) varies and is unknown to the owner at the start of the scenario.
B. Place all combat units with the same strength in an opaque cup or container. Each time a unit of that strength is required for setup, pick one without looking at the printed unit Morale values.
C. Follow this procedure when selecting Reinforcements.
30.6 Leader Pool
The scenario then specifies the leaders who begin the game in the Leader Pool, available for appointment.
30.7 Reinforcements
A. The scenario specifies the strength units which enter the same as reinforcements and on what turn.
B. Unless otherwise noted, reinforcements arrive per 23.5.
30.8 Special Rules
To reflect special conditions pertaining to different periods of the Civil War each scenario may contain one or more special rules.
31.0 The Scenarios
Notation used in the scenario listings (Section 30.4): a bold leader name is an Army Commander; an asterisk marks a Corps Commander; a superscript rank is the rank at which the leader starts; "B" with a rank is a breveted leader.
31.1 First Manassas, 1861
31.1.1 Situation
A. In 1861, the United States was rent by a civil war, as eleven southern states declared they were leaving the Union and forming the Confederate States of America. The capital of the new nation was Richmond, barely one hundred miles from the Washington, the capital of the United States.
B. Virginia, one of the most powerful Confederate states, lay just across the Potomac River from the Union capital. Both sides began massing armies to defend their capitals. As the weeks went by, however, and the armies gave most of their attention to organizing themselves, public opinion began to demand military action more and more vociferously.
C. In the north, the cry was On to Richmond! Major Union forces gathered at Washington and in the Shenandoah Valley. Soon immediate action was necessary as many of the new troops had volunteered for only three months and their enlistments were expiring. Major General Irwin McDowell moved out of Washington and took to the field with 50,000 troops.
31.1.2 General Information
First Turn: July 10, 1861 (Turn 1) Last Turn: August 14, 1861 (Turn 5) Weather: Clear all turns
31.1.3 Confederate Initial Values
Available OE: 3 Ammunition Points: 10 Morale Value: 3 Replacement Rate: 2 per turn War Effort: 100
31.1.4 Confederate Forces
| Location | Leader | Units |
|---|---|---|
| Norfolk (4650) | Huger | 1 x 5-BDE, 1 x 3-BDE |
| Yorktown (4445) | Magruder | 5 x 3-BDE |
| Richmond (3240) | 1 x Train, 1 x 5-BDE | |
| Acquia Creek (3429) | Holmes | 1 x Gun, 1 x 5-BDE |
| Manassas (3122) | Beauregard | Army of NVA HQ, 1 x ARG, 1 x 7-BDE, 4 x 5-BDE, 1 x 3-BDE |
| Leesburg (3017) | 1 x 3-BDE | |
| Winchester (2216) | Johnston | 1 x Gun, 1 x 7-BDE, 2 x 5-BDE, 1 x 3-BDE |
| Moorefield (1318) |
31.1.5 Confederate Depots
| Location | Capacity |
|---|---|
| White House (3840) | 1 |
| Fredericksburg (3230) | 1 |
| Manassas (3122) | 2 |
| Front Royal (2221) | 2 |
31.1.6 Confederate Leader Pool
Early, Ewell, DH Hill, Jackson (B2), Johnson, Longstreet (B2)
31.1.7 Union Initial Values
Available OE: 3 Ammunition Points: 15 Morale Value: 3 Replacement Rate: 1 per turn War Effort: 150
31.1.8 Union Forces
| Location | Leaders | Units |
|---|---|---|
| Arlington (3621) | McDowell (B3) | 1 x Gun, 2 x 12-DIV, 1 x 10-DIV |
| Heintzelman | 1 x Gun, 2 x 10-DIV | |
| Alexandria (3622) | 1 x 8-DIV | |
| Washington (3720) | 1 x Train, 1 x DC GAR-GUN, 1 x 8-DIV | |
| Baltimore (4313) | Banks | 2 x 5-DIV |
| Harper's Ferry (2814) | 1 DET | |
| Hex 2415 | Patterson | 1 x 10-DIV, 1 x 9-DIV |
| Fort Monroe (4748) | Butler |
31.1.9 Union Depots
| Location | Capacity |
|---|---|
| Harper's Ferry (3814) | 2 |
31.1.10 Union Leader Pool
Franklin, Keyes, McClellan, Sumner, Wadsworth
31.1.11 Special Rules
A. Beginning in the Reorganization Segment of Turn 3, any Union multileader stack must undergo a second Strategic Attrition (9.0) die roll to simulate the effect of expired enlistments. In addition to all other DRMs, apply a +2 DRM to these special attrition rolls.
B. McDowell and Johnston are Army Commanders with no HQ unit.
C. When Confederate leaders Beauregard and Johnston are stacked together, Johnston is assumed to possess the higher rank and may use the Army of Northern Virginia HQ unit.
D. To simulate the heavy political pressure to take the offensive, the Union loses 1 VP per turn until it scores at least 1 VP using leader McDowell (or the replacement Army Commander) against the Confederacy. From then on, it loses no additional VPs but any accumulated negative score reduces its final total.
31.2 The Peninsula Campaign, 1862
31.2.1 Situation
A. The initial campaign in the east was practically all the work of amateur armies. Both sides realized the necessity for well-organized and trained formations. The Union brought General George McClellan to take over command of the forces. He formed the Army of the Potomac and trained it over the winter of 1861-62.
B. In the spring, after long consideration, McClellan moved his army by sea to the mouth of the James River, leaving some forces behind to cover Washington. McClellan figured to leave the main Confederate Army behind in northern Virginia and reach Richmond before the rebels could react to his maneuver.
31.2.2 General Information
First Turn: April 1, 1862 (Turn 1) Last Turn: June 30, 1862 (Turn 12) Weather: Turns 1-4 are considered to be in April, Turns 5-8 in May, and the remainder are in June (Clear weather).
31.2.3 Confederate Initial Values
Available OE: 4 Ammunition Points: 30 Morale Value: 3 Replacement Rate: 3 per turn War Effort: 200
31.2.4 Confederate Forces
| Location | Leaders | Units |
|---|---|---|
| Norfolk (4650) | Huger | 1 x Ironclad, 1 x 5-BDE, 2 x 3-BDE |
| Yorktown Defenses | Magruder | L1 ENT in each hex; 2 x Gun, 1 x 7-BDE, 5 x 3-BDE |
| Richmond (3240) | 1 x Gunboat, 1 x Train, 1 x 5-BDE | |
| Richmond Defenses | L2 ENT in each hex | |
| Petersburg (3345) | L2 ENT | |
| Drewry's Bluff (3242) | L2 ENT, 1 x 3-SH-BAT | |
| Orange (2330) or Culpeper (2428) | Johnston | Army of NVA HQ |
| Longstreet |
| Gordonsville (2232) | Ewell | 2 x Gun, 3 x 4-BDE | | Staunton (1031) | Johnson | 1 x 5-BDE | | Winchester | Jackson | 1 x Gun, 1 x 7-BDE, 1 x 5-BDE, 1 x 1-CAV BDE |
31.2.5 Confederate Depots
| Location | Capacity |
|---|---|
| White House (3840) | 3 |
| Gordonsville (2232) | 2 |
| Culpepper (2428) | 2 |
| Front Royal (2221) | 2 |
31.2.6 Confederate Leader Pool
Anderson, Early, Heth, Lee, McLaws, Pickett, Pender, Rodes, Starke, Wilcox
31.2.7 Confederate Reinforcements
| Turn | Units |
|---|---|
| 2 | 1 x 5-BDE |
| 4 | 1 x 5-BDE |
| 5 | Right and Left Wing HQs |
| 7 | 1 x 5-BDE |
| 10 | 1 x 5-BDE |
31.2.8 Union Initial Values
Available OE: 6 Ammunition Points: 40 Morale Value: 4 Replacement Rate: 3 per turn War Effort: 400
31.1.8 Union Forces (numbered as printed in this section)
| Location | Leader | Units |
|---|---|---|
| Fort Monroe (4748) | FORT, NAV-LAN, 1 x 9-DIV | |
| Arlington (3621) | McDowell | I Corps, 2 x Gun, 3 x 12-DIV |
| Moorefield (1318) | Fremont | 2 x 5-DIV |
| Washington (3720) | Wadsworth | 1 x Train, 3 x DC GAR-GUN, DC Garrison, 2 x 10-DIV |
| Harper's Ferry (2814) | Banks | 2 x Gun, 1 x 10-DIV, 1 x 9-DIV, 1 x 7-DIV |
| Newport News (4548) | McClellan | NAV-LAN, Army of the Potomac HQ, 4 x ARG |
| Sumner | II Corps, 1 x Gun, 2 x 16-DIV | |
(x) Naval Transport Mission
31.2.9 Union Depots
| Location | Capacity |
|---|---|
| Harper's Ferry (3814) | 2 |
| Cumberland (1508) | 2 |
| Moorefield (1318) | 1 |
31.2.10 Union Leader Pool
French, Pleasonton, Reynolds, Sedgwick, Sickles, Shields, Stoneman
31.2.11 Union Reinforcements
| Turn | Units |
|---|---|
| 2 | 1 x Ironclad (4548 or 4748) |
| 4 | 1 x 10-DIV |
| 5 | 1 x Wood Ship (4548) |
| 9 | 1 x 10-DIV |
31.2.12 Special Rules
Foraging may not begin until Turn 9.
31.3 Second Manassas, 1862
Situation: After the failure of the Peninsula campaign, the Union determined to make yet a new effort upon Richmond. From the West came General John Pope to command a newly formed Army of Virginia. From the Peninsula, McClellan was ordered to send the major portion of the Army of the Potomac up to support Pope's operations in Virginia. McClellan himself could choose to whether to remain in the Richmond vicinity to divert the Confederates or whether he, with the remainder of the Army of the Potomac, should withdraw to the north as well.
31.3.1 General Information
First Turn: July 15, 1862 (Turn 1) Last Turn: August 30, 1862 (Turn 9) Weather: Clear all turns
31.3.2 Confederate Initial Values
Available OE: 5 Ammunition Points: 30 Morale Value: 3 Replacement Rate: 2 per turn War Effort: 150
31.3.3 Confederate Forces
| Location | Leader | Units |
|---|---|---|
| Petersburg (3345) | L2 ENT | |
| Drewry's Bluff (3242) | L2 ENT, 1 x 3-SH-BAT | |
| Richmond Defenses | L2 ENT in each hex | |
| Richmond (3240) | Lee | 1 x Train, Army of NVA HQ, 3 x ARG |
| DH Hill | 1 x Gun, 4 x 5-BDE | |
| Longstreet (*) | Right Wing Corps HQ, Right Wing Art. Batt. with 1 Gun | |
| Hood | 1 x Gun, 1 x 5-BDE, 2 x 3-BDE | |
| Wilcox | 1 x Gun, 1 x 4-BDE, 1 x 3-BDE |
31.3.4 Confederate Depots
| Location | Capacity |
|---|---|
| Hanover Station (3136) | 3 |
| Gordonsville (2232) | 3 |
31.3.5 Confederate Leader Pool
Ewell, Evans, Early, Heth, Holmes, Johnson, McLaws, Pender, Smith
31.3.6 Union Initial Values
Available OE: 4 Ammunition Points: 40 Morale Value: 3 Replacement Rate: 3 per turn War Effort: 200
31.3.7 Union Forces
| Location | Leader | Units |
|---|---|---|
| Arlington (3621) | Heintzelman | III Corps, 1 x Gun, 1 x 10-DIV, 1 x 9-DIV |
| Reno | IX Corps, 1 x Gun, 1 x 8-DIV, 1 x 7-DIV | |
| Washington (3720) | Wadsworth | 1 x Train, 4 x DC GAR-GUN, DC Garrison, 2 x 5-DIV |
| Newport News (4548) | 2 x Wooden Ships | |
| Harrison's Landing (3644) | McClellan | NAV-LAN, Army of the Potomac HQ 2 x ARG |
| Sumner | II Corps, 1 x Gun, 1 x 10-DIV, 1 x 9-DIV, 1 x 8-DIV | |
| Keyes | IV Corps, 1 x Gun, 2 x 10-DIV, 1 x 7-DIV | |
(x) Naval Transport Mission
31.3.8 Union Depots
| Location | Capacity |
|---|---|
| Alexandria (2814) | 2 |
| Front Royal (2221) | 2 |
| Warrenton (2633) | 3 |
| Falmouth (3229) | 1 |
| Alexandria (3622) | (capacity not printed) |
31.3.9 Union Leader Pool
Burnside (rank 2), Fremont, French, Pleasonton, Reynolds, Sedgwick, Sickles, Shields, Stoneman
31.3.10 Special Rules
A. One of DH Hill's infantry brigades represents the Richmond City Guard. This unit may not leave Richmond if and when DH Hill does.
B. McClellan and Pope, the two Union Army Commanders, thoroughly detested each other. Neither is subordinate to the other. Forces starting the game under the command of one army commander may not be transferred to the other. (Banks and Sigel are considered part of Pope's army command.) Units from the two commands may not stack together or Support (12.1) one another in combat.
31.4 Sharpsburg, 1862
31.4.1 Situation
With the Confederacy in desperate need of any help it could get, Lee decided to take the war north in the fall of 1862. He wanted to forage in fresh lands, raise sympathizers in Maryland, and possibly defeat the Union Army on its own ground, an action that could bring foreign military intervention on behalf of the Confederacy. The Union's problem was to stem the succession of military defeats it had suffered through 1862. Lee began his campaign concentrated in northern Virginia, with McClellan just coming back into control of the whole of the Army of the Potomac.
31.4.2 General Information
First Turn: September 7, 1862 (Turn 1) Last Turn: October 15, 1862 (Turn 7) Weather: Turns 1-4 are in September and the remainder are in October.
31.4.3 Confederate Initial Values
Available OE: 3 Ammunition Points: 25 Morale Value: 4 Replacement Rate: 2 per turn War Effort: 175
31.4.4 Confederate Forces
| Location | Leader | Units |
|---|---|---|
| Petersburg (3345) | L2 ENT | |
| Drewry's Bluff (3242) | L2 ENT, 1 x 3-SH-BAT | |
| Richmond Defenses | L2 ENT in each hex | |
| Richmond (3240) | 1 x Train, 1 x 5-BDE | |
| Centreville (3121) | Lee | Army of NVA HQ, 2 x ARG |
| Stuart | 1 x Gun, 2 x 4-CAV BDE | |
| Longstreet (*) | Right Wing Corps HQ, Right Wing Art. Batt. with 2 x Gun | |
| Hood |
31.4.5 Confederate Depots
| Location | Capacity |
|---|---|
| Orange (3330) | 4 |
| Warrenton (2623) | 4 |
31.4.6 Confederate Leader Pool
Early, Evans, Ewell, Heth, Holmes, Pender, Pickett, Rodes, Wilcox
31.4.7 Confederate Reinforcements
| Turn | Units |
|---|---|
| 2 | 1 x 5-BDE |
| 4 | 1 x 5-BDE |
31.4.8 Union Initial Values
Available OE: 5 Ammunition Points: 30 Morale Value: 3 Replacement Rate: 2 per turn War Effort: 250
31.4.9 Union Forces
| Location | Leader | Units |
|---|---|---|
| Arlington (3621) | Porter (B3) | V Corps, 2 x Gun, 1 x 16-DIV, 2 x 12-DIV |
| Heintzelman | III Corps, 1 x Gun, 1 x 7-DIV, 1 x 5-DIV | |
| Washington (3720) | 1 x Train, 3 x Wooden Ships, 4 x DC GAR-GUN, 1 x 5-DIV | |
| Rockville (3618) | McClellan | Army of the Potomac HQ, 2 x ARG, 1 x 4-CAV DIV |
| Hooker (2) | I Corps, 2 x Gun, 1 x 10-DIV, 3 x 7-DIV | |
| Sumner | II Corps, 1 x Gun, 1 x 10-DIV, 2 x 8-DIV | |
| Franklin | VI Corps, 2 x Gun, 1 x 8-DIV, 1 x 7-DIV | |
31.4.10 Union Leader Pool
Couch, French, Howard, Meade (2), Reynolds, Sedgwick, Shields, Sickles, Sykes, Wadsworth
31.4.11 Union Reinforcements
| Turn | Units |
|---|---|
| 1 | 1 x 10-DIV |
| 5 | 1 x 12-DIV |
31.4.12 Special Rules
A. Foraging is in effect throughout the game.
B. The Confederacy was coming off spectacular summer victories. Feeling just one more win on Northern soil would demoralize the Union and trigger foreign intervention, Lee headed north. To simulate this, in addition to normal victory conditions, the Confederacy gains double VPs for eliminating Union combat units and leaders north of the Potomac River.
31.5 Fredericksburg, 1862
31.5.1 Situation
A. McClellan was replaced at the head of the Army of the Potomac after Sharpsburg, where the Confederates won a moral victory but suffered a strategic defeat. The new commander was Ambrose Burnside, who was convinced he should not be given responsibility of the Potomac command. Lincoln insisted.
B. Burnside took over the army for a campaign. He prepared a plan to get the Union Army across the Rappahannock River, after which he could advance on Richmond. Lee, however, had prepared a powerful defense of the river line.
31.5.2 General Information
First Turn: November 7, 1862 (Turn 1) Last Turn: December 15, 1862 (Turn 12) Weather: Turns 1-4 are considered to be in November, and the remainder are in December.
31.5.3 Confederate Initial Values
Available OE: 3 Ammunition Points: 30 Morale Value: 2 Replacement Rate: 1 per turn War Effort: 150
31.5.4 Confederate Forces
| Location | Leader | Units |
|---|---|---|
| Petersburg (3345) | L2 ENT | |
| Drewry's Bluff (3242) | L2 ENT, 1 x 3-SH-BAT | |
| Richmond Defenses | L2 ENT in each hex | |
| Richmond (3240) | 1 x Train, 1 x 3-BDE | |
| Culpepper (2428) | Lee | Army of NVA HQ |
| Stuart | 1 x Gun, 3 x 4-CAV BDE | |
| Longstreet (*) | I Corps HQ | |
| Hood | 1 x Gun, 3 x 4-BDE |
31.5.5 Confederate Depots
| Location | Capacity |
|---|---|
| Culpepper (2428) | 4 |
| Front Royal (2221) | 2 |
31.5.6 Confederate Leader Pool
Evans, Ewell, Heth, Holmes, Jones, Pender, Rodes, Walker, Wilcox
31.5.7 Union Initial Values
Available OE: 5 Ammunition Points: 40 Morale Value: 4 Replacement Rate: 3 per turn, ending on the first snow turn. War Effort: 225
31.5.8 Union Forces
| Location | Leader | Units |
|---|---|---|
| Fort Monroe (4748) | FORT, NAV-LAN, 1 x 10-DIV | |
| Bristoe Station (3023) | Stoneman | III Corps, 2 x Gun, 3 x 7-DIV |
| Washington (3720) | 1 x Train, 4 x DC GAR-GUN | |
| Banks | DC Garrison, 2 x 5-DIV | |
| Warrenton (2623) | Burnside (3) | Army of the Potomac HQ, 2 x ARG |
| Reynolds | I Corps, 2 x Gun, 3 x 8-DIV | |
| Sumner | II Corps, 2 x Gun, 1 x 9-DIV, 1 x 8-DIV, 1 x 7-DIV | |
| Hooker (2) |
31.5.9 Union Depots
| Location | Capacity |
|---|---|
| Gainesville (2921) | 4 |
| Harper's Ferry (2814) | 2 |
31.5.10 Union Leader Pool
Couch, Heintzelman, Howard, Meade (2), Pleasonton, Sedgwick, Sickles, Smith, Sykes, Wadsworth
31.5.11 Special Rules
To simulate the heavy political pressure to take the offensive (caused by the Republican setback in the 1862 elections) the Union loses 1 VP per turn until it scores at least 1 VP using leader Burnside (or the replacement Army Commander) against the Confederacy. From then on, it loses no additional VPs but any accumulated negative score reduces its final total.
31.6 Chancellorsville, 1863
31.6.1 Situation
During the winter months after Fredericksburg, the Army of the Potomac was once again rebuilt to great strength, this time under command of General Joseph Hooker. The army still faced the Confederate defenses at Fredericksburg, but Hooker developed a plan to outflank the rebels and surprise them by crossing further upstream. He would combine this with a cavalry raid towards Richmond. It was a good plan; with good weather it might have worked as well. Lee was
able to defeat Hooker's plan through some of the most daring maneuvers ever executed by the Army of Northern Virginia.
31.6.2 General Information
First Turn: April 24, 1863 (Turn 1) Last Turn: June 7, 1863 (Turn 7) Weather: Turn 1 is in April, Turns 2-6 are in May and Turn 7 is automatically Clear.
31.6.3 Confederate Initial Values
Available OE: 5 Ammunition Points: 40 Morale Value: 4 Replacement Rate: 1 per turn War Effort: 175
31.6.4 Confederate Forces
| Location | Leader | Units |
|---|---|---|
| Petersburg (3345) | L2 ENT | |
| Drewry's Bluff (3242) | L2 ENT, 1 x 3-SH-BAT | |
| Richmond Defenses | L2 ENT in each hex | |
| Richmond (3240) | 1 x Train, 1 x 3-BDE | |
| Fredericksburg (3230) | L1 ENT | |
| Lee | Army of NVA HQ, 2 x ARG | |
| Stuart | 1 x Gun, 3 x 4-CAV BDE | |
| Anderson | 1 x Gun, 1 x 5-BDE, 2 x 4-BDE, 2 x 3-BDE |
31.6.5 Confederate Depots
| Location | Capacity |
|---|---|
| Hanover Station (3136) | 4 |
| Spotsylvania (3032) | 4 |
| Harrisonburg (1326) | 1 |
| Staunton (1031) | 1 |
31.6.6 Confederate Leader Pool
Ewell, Heth, Johnson, Kemper, Fitzhugh Lee, Mahone, Pender, Wilcox
31.6.7 Confederate Reinforcements
| Turn | Units |
|---|---|
| 1 | 1 x 7-BDE |
| 3 | 1 x 5-BDE |
| 4 | 1 x 5-BDE, 1 x 4-CAV BDE, III Corps HQ |
| 6 | 2 x 5-BDE |
| 7 | 1 x 5-BDE |
31.6.8 Union Initial Values
Available OE: 6 Ammunition Points: 45 Morale Value: 4 Replacement Rate: 3 per turn War Effort: 250
31.6.9 Union Forces
| Location | Leader | Units |
|---|---|---|
| Fort Monroe (4748) | Smith | FORT, NAV-LAN, 1 x Gun, 1 x 10-DIV, 1 x 8-DIV |
| Suffolk (4353) | FORT, 1 x 12-DIV | |
| Washington (3720) | 1 x Train, 6 x DC GAR-GUN, 1 x 10-DIV | |
| Falmouth (3229) | L1 ENT | |
| Hooker (3) | Army of the Potomac HQ, 2 x ARG | |
| Reynolds | I Corps, 2 x Gun, 1 x 8-DIV, 2 x 7-DIV | |
| Couch | II Corps, 2 x Gun, 2 x 10-DIV, 1 x 7-DIV | |
| Sickles |
31.6.10 Union Depots
| Location | Capacity |
|---|---|
| Gainesville (2921) | 4 |
| Harper's Ferry (2814) | 2 |
31.6.11 Union Leader Pool
Hancock, Heintzelman, Humphreys, Pleasonton, Sumner, Sykes, Wadsworth, Warren, Wright
31.6.12 Union Reinforcements
| Turn | Units |
|---|---|
| 2 | 1 x 5-DIV |
| 5 | 1 x 12-DIV |
31.6.13 Special Rules
A. To simulate expiring Union enlistments during this campaign, beginning in the Reorganization Segment of
Turn 6, the Union must make an extra Strategic Attrition (9.0) roll for each multi-leader stack. Apply a +2 DRM for expired enlistments, in addition to all other modifiers.
B. Despite an aggressive past history, the Union army commander, Hooker, demonstrated an unusual lack of resolve during the campaign. To simulate this, when Hooker is the Commander in a battle, he may not initiate a second round of combat.
C. Foraging is in effect throughout the scenario.
31.7 Gettysburg, 1863
31.7.1 Situation
With the defeat of Hooker at Chancellorsville, the conditions had never looked better for a Confederate invasion of the north. Lee pointed this out to a meeting of senior Confederate officials, including Jefferson Davis, in mid-May. Lee hoped to draw the Army of the Potomac out of its bases and defeat it on northern ground. He also wanted to forage in the fertile Maryland farm belt and gather as much as he could for the Confederate war effort. If the Army of the Potomac could catch Lee on its own ground and defeat him sufficiently badly, then the Confederates might never be able to return to Virginia. Both sides committed themselves to a decisive campaign.
31.7.2 General Information
First Turn: June 9, 1863 (Turn 1) Last Turn: July 15, 1863 (Turn 7) Weather: The weather is always clear for this scenario.
31.7.3 Confederate Initial Values
Available OE: 5 Ammunition Points: 40 Morale Value: 3 Replacement Rate: 2 per turn War Effort: 175
31.7.4 Confederate Forces
| Location | Leader | Units |
|---|---|---|
| Petersburg (3345) | L2 ENT | |
| Drewry's Bluff (3242) | L2 ENT, 1 x 3-SH-BAT | |
| Richmond Defenses | L2 ENT in each hex | |
| Richmond (3240) | 1 x Train, 1 x 5-BDE, 1 x 4-CAV BDE | |
| Hanover Station (3136) | Pickett | 2 x 5-BDE, 2 x 4-BDE |
| Wakefield (3949) | DH Hill | 1 x Gun, 2 x 5-BDE, 2 x 4-BDE |
| Fredericksburg (3230) | AP Hill (*B3) | L1 ENT, III Corps HQ, III Corps Art. Batt. with 1 x Gun |
| Anderson | 1 x Gun, 1 x 7-BDE, 2 x 5-BDE, 2 x 4-BDE |
31.7.5 Confederate Depots
| Location | Capacity |
|---|---|
| Hanover Station (3136) | 4 |
| Culpepper (2428) | 4 |
| Fredericksburg (3230) | 1 |
31.7.6 Confederate Leader Pool
Breckinridge, Gordon, Kemper, Lawton, Fitzhugh Lee, Mahone, Ranseur, Wilcox, Walker
31.7.7 Confederate Reinforcements
| Turn | Units |
|---|---|
| 2 | 1 x 5-BDE |
| 5 | 1 x 5-BDE |
| 6 | 3 x 5-BDE |
31.7.8 Union Initial Values
Available OE: 6 Ammunition Points: 50 Morale Value: 3 Replacement Rate: 2 per turn War Effort: 275
31.7.9 Union Forces
| Location | Leader | Units |
|---|---|---|
| Fort Monroe (4748) | FORT, NAV-LAN, 1 x 5-DIV | |
| Suffolk (4352) | FORT, 1 x 9-DIV | |
| Newport News (4548) | Dix | NAV-LAN, VII Corps, 2 x Gun, 1 x 10-DIV, 1 x 4-CAV DIV |
| West Point (4041) | NAV-LAN, 1 x 8-DIV | |
| Acquia Creek (3429) | NAV-LAN | |
| Sedgwick | VI Corps, 2 x Gun, 1 x 16-DIV, 1 x 12-DIV, 1 x 10-DIV |
| Washington (3720) | | 1 x Train, FORT, 7 x DC GAR-GUN | | | Heintzelman | DC Garrison, 1 x Gun, 1 x 10-DIV, 1 x 7-DIV, 1 x 4-CAV DIV | | Hex 3128 | Hooker (3) | 1 x 4-Wagon, Army of the Potomac HQ, 4 x ARG | | | Reynolds | I Corps, 2 x Gun, 1 x 10-DIV, 2 x 8-DIV | | | Hancock | II Corps, 2 x Gun, 1 x 16-DIV, 1 x 12-DIV, 1 x 10-DIV | | | Sickles | III Corps, 1 x Gun, 1 x 10-DIV, 1 x 9-DIV, 1 x 7-DIV | | | Howard | XI Corps, 1 x Gun, 2 x 10-DIV, 1 x 9 DIV | | Hex 3028 | Meade (2) | V Corps, 2 x Gun, 1 x 12-DIV, 1 x 10-DIV, 1 x 9-DIV | | Hex 2825 | Pleasonton | 1 x Gun, 4 x 4-CAV DIV | | Harper's Ferry (2814) | | 1 x 7-DIV | | Winchester (2216) | | 1 x 9-DIV |
31.7.10 Union Depots
| Location | Capacity |
|---|---|
| Harper's Ferry (2814) | 2 |
31.7.11 Union Leader Pool
Birney, Couch, Humphreys, Meade (3), Sigel, Slocum, Smith, Sykes, Wadsworth, Wright
31.7.12 Union Reinforcements
| Turn | Units |
|---|---|
| 2 | 1 x 12-DIV (on the first Railroad Station from the northern map edge) |
| 4 | 1 x 10-DIV |
31.7.13 Special Rules
A. The Gettysburg campaign happened at a time when 23,000 Union Army enlistments were expiring, thus reducing strength even without combat. To reflect this, on the Reorganization Segment of each turn Hooker is the Army Commander, the Union must undergo an extra Strategic Attrition die roll (9.1). Modifiers for the die roll are calculated for Hooker's map position and an additional +2 DRM is applied to the roll. Losses to this Attrition, however, may be extracted from Union units anywhere in play, by choice of the Union.
B. During the Reorganization Segment of Turn 2, Union General George Meade is promoted to three-star rank. This promotion is free and does not cost APs or WEPs. His two-star counter is simply removed from play and substituted by the three-star counter from the Leader Pool. If the two-star Meade counter has been killed or captured, the three-star counter may instead be Activated in the normal manner as a new leader from the leader Pool. Union Players may wish to take this opportunity to replace Hooker with Meade as Army Commander (Lincoln did) using the normal Army Commander replacement rules, but this is not mandatory.
C. Confederate interests in foraging in the north in 1863 campaign went beyond the usual practice of taking what was immediately required for survival of the army. The Confederates were interested in anything that could help their war economy. To reflect this, the Confederacy earns 1 WEP per town hex in the northern states it passes through with an Active leader in the course of play. The bonus is collected only once per town and applies only to towns north of the Potomac River and east of the (north-south) hex line that runs through Hancock (hex 2408). Players may note the names of raided towns for future reference or they may note them on the map with spare counters. The resulting WEPs are added to the Confederate total in the Reorganization Segment. The Confederacy achieves a Marginal Victory if it ends the game with a total of 88 or more WEPs (half of its total at the start of the game).
D. The Confederacy may earn 5 VPs by occupying Bryantown (hex 4026) with an Active Leader and at least one combat unit. (This symbolizes a raid to free Confederate prisoners of war held in the area.)
E. Foraging is in effect throughout the scenario.
31.8 Wilderness to Richmond, 1864
31.8.1 Situation
A. At the beginning of the 1864 campaigning season, both armies again were poised in northern Virginia. For the first time in the war, the Union forces had quality leadership roughly equivalent to that of the Army of Northern Virginia. A new Union Army command was formed under Ulysses S. Grant, who was promoted to take command of all Union forces. The Union also retained its traditional advantages in war production and the effort devoted to operations.
B. Now, with the Confederacy at the limit of its war effort, Lee's leadership was tested as never before. Grant moved south at the beginning of May. To Lincoln he promised to fight it out along this line if it took all summer.
31.8.2 General Information
First Turn: May 1, 1864 (Turn 1) Last Turn: June 15, 1862 (Turn 7) (as printed; the scenario is set in 1864) Weather: Turns 1-4 are in May and the remainder are always Clear (June).
31.8.3 Confederate Initial Values
Available OE: 4 Ammunition Points: 30 Morale Value: 4 Replacement Rate: 1 per odd-numbered turn, 2 per even-numbered turn War Effort: 150
31.8.4 Confederate Forces
| Location | Leader | Units |
|---|---|---|
| Petersburg (3345) | L2 ENT | |
| Drewry's Bluff (3242) | L2 ENT, 1 x 3-SH-BAT | |
| Richmond Defenses | L2 ENT in each hex | |
| Richmond Area (x) | Beauregard | 2 x Gun, 2 x 5-BDE, 2 x 4-BDE |
| Richmond (3240) | Partisan leader Mosby | 1 x Train, 1 x 5-BDE, 1 x Rebel Sympathizer |
| Hanover Station (3136) | Pickett | 2 x 5-BDE, 2 x 4-BDE |
| Fredericksburg (3230) | Stuart | L1 ENT, 1 x Gun, 2 x 3-BDE, 3 x 4-CAV BDE |
| Todd's Tavern (2831) | Ewell (*B3) |
(x) Within 5 hexes of Richmond but not north of the Pamunkey-Little River line.
31.8.5 Confederate Depots
| Location | Capacity |
|---|---|
| Hanover Station (3136) | 4 |
| Spotsylvania (3032) | 4 |
| Gordonsville (2232) | 3 |
| Harrisonburg (1326) | 1 |
| Staunton (1031) | 1 |
| Fredericksburg (3230) | 1 |
31.8.6 Confederate Leader Pool
Gordon, Jones, Kemper, Fitzhugh Lee, Mahone, Ramseur, Ransom
31.8.7 Union Initial Values
Available OE: 6 Ammunition Points: 40 Morale Value: 3 Replacement Rate: 3 per turn War Effort: 250
31.8.8 Union Forces
| Location | Leader | Units |
|---|---|---|
| Fort Monroe (4748) | FORT, NAV-LAN, 1 x 10-DIV | |
| Newport News (4548) | Butler | 3 x Wooden Ships, 1 x Gun, 1 x 8-DIV |
| Smith | XVIII Corps, 2 x Gun, 1 x 8-DIV, 1 x 7-DIV | |
| Acquia Creek (3429) | NAV-LAN, 1 x 12-DIV | |
| Brandy Station (2627) | Sedgwick | 1 x DET leader, VI Corps, 3 x Gun, 1 x 16-DIV, 1 x 12-DIV, 1 x 10-DIV |
| Washington (3720) | 1 x Train, FORT, 3 x DC GAR-GUN, 1 x 10-DIV | |
| Culpepper (2428) | Meade (3) | L1 ENT, Army of the Potomac HQ, 3 x ARG |
31.8.9 Union Depots
| Location | Capacity |
|---|---|
| Harper's Ferry (2814) | 2 |
| Culpepper (2428) | 4 |
31.8.10 Union Leader Pool
Birney, Gibbon, Humphreys, Hunter, Parke, Wadsworth, Wright
31.8.11 Special Rules
A. Despite his four star rank, Beauregard is not an Army Commander, nor may he issue Army Commander Administrative Actions. He is subordinate to Lee.
B. Both Grant and Meade are Army Commanders and may issue Army Commander Administrative Actions but Meade is subordinate to Grant (not vice versa).
C. Despite the appointment of Grant to command all Union forces in the field, political realities tied his hands in a number of ways. Leaders Butler and Sigel may not be replaced during the game unless eliminated, nor may a higher ranked leader be appointed to their commands. No land forces may be transferred from their starting commands, although they may be reinforced. If Inactive, Butler and Sigel
may not be reactivated by Army Commander Administrative Actions nor may they move using another leader's Movement Efficiency/Reaction Rating.
D. To simulate the political pressure for a grand offensive to end the war, the Union loses 1 VP per turn until forces commanded by Butler, Sigel, and Meade (or Grant) each score 1 or more VPs against the Confederacy. Each of the three Commanders must score 1 or more VPs before the Union stops losing 1 VP per turn. From then on, it loses no additional VPs but any accumulated negative score reduces its final total.
31.9 The Siege of Richmond and Petersburg, 1864
31.9.1 Situation
A. Grant did some heavy fighting along the lines he chose. The armies fought three pitched battles – the Wilderness, Spotsylvania, and Cold Harbor – in only four weeks. The Army of the Potomac alone took 40,000 casualties.
B. Grant came up with a new plan; he would outflank the Richmond defenses by crossing to the south bank of the James River and taking Petersburg. The Army secretly prepared for this move while continuing to fight on the Richmond front. Only when the Pontoon Bridge was secretly completed did Grant issue the marching orders. As a result the Union concentrated a great force at Petersburg under very favorable conditions. But Confederate General Beauregard held the city and forced Grant into a siege.
31.9.2 General Information
First Turn: June 15, 1864 (Turn 1) Last Turn: August 15, 1864 (Turn 8) Weather: Clear all turns
31.9.3 Confederate Initial Values
Available OE: 3 Ammunition Points: 25 Morale Value: 5 Replacement Rate: 1 per turn War Effort: 175
31.9.4 Confederate Forces
| Location | Leader | Units |
|---|---|---|
| Petersburg (3345) | FORT, 2 x 3-BDE | |
| Drewry's Bluff (3242) | Pickett | L2 ENT, 1 x 3-SH-BAT, 1 x 4-BDE, 2 x 3-BDE |
| Hex 3343 | Beauregard | L1 ENT, 2 x Gun, 1 x 7-BDE, 2 x 5-BDE, 1 x 3-BDE |
| Richmond (3240) | Partisan leader Mosby | 1 Train, 1 x 5-BDE, 1 x Rebel Sympathizer |
| Charlottesville (1833) | Early (*B3) | II Corps HQ, II Corps Art. Batt. with 1 x Gun |
| Gordon | 3 x 5-BDE | |
| Ramseur | 1 x Gun, 1 x 5-BDE, 1 x 3-BDE | |
| Rodes |
31.9.5 Confederate Depots
| Location | Capacity |
|---|---|
| Staunton (1031) | 3 |
| Charlottesville (1833) | 3 |
| Harrisonburg (1326) | 3 |
31.9.6 Confederate Leader Pool
Colston, Evans, Jones, Kemper, Lawton, Ransom, Walker
31.9.7 Union Initial Values
Available OE: 5 Ammunition Points: 30 Morale Value: 3 Replacement Rate: 2 per turn War Effort: 275
31.9.8 Union Forces
| Location | Leader | Units |
|---|---|---|
| Fort Monroe (4748) | FORT, NAV-LAN, 3 x Wooden Ships, 1 x 10-DIV | |
| Bermuda Hundred (3443) | Butler | L1 ENT, NAV-LAN, 1 x Gun, 2 x 5-DIV |
| Hex 3543 | 1 x 3-Engineer BDE, 1 x Pontoon Bridge (assembled) |
| Hex 3541 | Wright | VI Corps, 1 x Gun, 1 x 7-DIV, 2 x 5-DIV | | | Smith | XVIII Corps, 2 x Gun, 2 x 9-DIV, 1 x 4-CAV DIV | | Washington (3720) | | 1 x Train, FORT, 6 x DC GAR-GUN, 1 x 5-DIV | | Hex 3442 | Meade (3) | Army of the Potomac HQ, 1 x ARG, 1 x 4-CAV DIV | | | Warren | V Corps, 2 x Gun, 2 x 12-DIV, 1 x 9-DIV | | | Hancock | II Corps, 2 x Gun, 1 x 12-DIV, 2 x 8-DIV | | Hex 3540 | Grant | US Army HQ, 1 x 4-CAV DIV | | | Burnside (3) | IX Corps, 2 x Gun, 1 x 16-DIV, 1 x 12-DIV, 1 x 9-DIV | | White House (3840) | | NAV-LAN, 1 x 7-DIV | | Chancellorsville (2929) | Sheridan | 1 x Gun, 2 x 4-CAV DIV | | Culpepper (2428) | | L1 ENT, 1 x DET | | Brandy Station (2627) | | 1 x DET | | Bristoe Station (3023) | | 1 x DET | | Manassas (3122) | | 1 x DET | | Alexandria (3622) | | 1 x DET | | Harper's Ferry (2814) | | 1 x 5-DIV | | Strasburg (2019) | Hunter | 1 x Gun, 2 x 10-DIV, 1 x 5-DIV | | Suffolk (4352) | | FORT |
31.9.9 Union Depots
| Location | Capacity |
|---|---|
| Harper's Ferry (2814) | 2 |
| Culpepper (2428) | 4 |
31.9.10 Union Leader Pool
Birney, Gibbon, Humphreys, Parke, Wadsworth
31.9.11 Special Rules
A. Despite his four star rank, Beauregard is not an Army Commander, nor may he issue Army Commander Administrative Actions. He is subordinate to Lee.
B. Both Grant and Meade are Army Commanders and may issue Army Commander Administrative Actions but Meade is subordinate to Grant (not vice versa).
C. Grant still faced certain political realities during the campaign. To simulate this, leader Butler may not be replaced during the game unless eliminated, nor may a higher ranked leader be appointed to his command. No land forces may be transferred from his starting command, although he may be reinforced. If Inactive, Butler may not be reactivated by Army Commander Administrative Actions nor may he move using another leader's Movement Efficiency/Reaction Rating.
D. Union morale was sensitive to news of any Confederate success this late in the war. The Confederacy receives double VPs for any earned north of the Potomac River.
31.10 Appomattox, 1865
31.10.1 Situation
The siege of Richmond and Petersburg continued from the late summer of 1864 straight through the New Year and into the spring of 1865. Grant extended his lines southwest from Petersburg in an effort to outflank the Confederate defenses. The Union also tried to break through after detonating a mine underneath one of the Confederate strongpoints. These maneuvers were not successful. But by spring, hunger was doing what the Union armies had not been able to do. Lee was faced with a fateful decision: should he use up his last resources defending in position, or should the Army of Northern Virginia make a last desperate attempt to break out of the stranglehold and seek to unite with Confederate commands still in the field in the deep south.
31.10.2 General Information
First Turn: March 20, 1865 (Turn 1) Last Turn: April 9, 1865 (Turn 3) Weather: Turn 1 is in March and Turns 2-3 are in April.
31.10.3 Confederate Initial Values
Available OE: 3 Ammunition Points: 20 Morale Value: 2 Replacement Rate: 1 per turn War Effort: 75
31.10.4 Confederate Forces
| Location | Leader | Units |
|---|---|---|
| Petersburg (3345) | L2 ENT, 1 x 5-BDE, 1 x 3-BDE | |
| Petersburg Defenses | Lee | L2 ENT in each hex, Army of NVA HQ, 1 x ARG |
| Gordon (*B3) | II Corps HQ | |
| Evans | 1 x Gun, 3 x 3-BDE | |
| Walker | 2 x 3-BDE | |
| AP Hill (*B3) | III Corps HQ | |
| Heth | 1 x Gun, 1 x 7-BDE, 3 x 5-BDE | |
| Wilcox | 1 x Gun, 2 x 5-BDE, 2 x 4-BDE |
| Drewry's Bluff (3242) | | L2 ENT, 1 x 3-SH-BAT | | | Longstreet (*) | I Corps HQ | | | Field | 1 x Gun, 1 x 5-BDE, 1 x 4-BDE, 1 x 3-BDE | | | Kershaw | 1 x Gun, 1 x 5-BDE, 2 x 4-BDE, 1 x 3-BDE | | Richmond Defenses | | L2 ENT in each hex | | | Mahone | 1 x Gun, 1 x 5-BDE, 2 x 4-BDE, 1 x 3-BDE | | Richmond (3240) | | 1 x Train, 1 x 5-BDE |
31.10.5 Confederate Leader Pool
Colston, Jones, Kemper, Lawton
31.10.6 Union Initial Values
Available OE: 5 Ammunition Points: 30 Morale Value: 3 Replacement Rate: 1 per turn War Effort: 100
31.10.7 Union Forces
| Location | Leader | Units |
|---|---|---|
| Fort Monroe (4748) | FORT, NAV-LAN, 1 x 10-DIV | |
| Acquia Creek (3429) | NAV-LAN | |
| Washington (3720) | 1 x Train, FORT, 6 x DC GAR-GUN, 1 x 10-DIV | |
| Hanover Station (3136) | L1 ENT, 1 x 10-DIV | |
| Union Entrenchment Line | L1 ENT in each hex | |
| Hex 3545 | Parke | IX Corps, 2 x Gun, 2 x 12-DIV |
| Hex 3546 | Wright | VI Corps, 2 x Gun, 2 x 8-DIV, 1 x 7-DIV |
| Hex 3348 | Meade |
31.10.8 Union Depots
| Location | Capacity |
|---|---|
| Fredericksburg (3230) | 1 |
| Waverly (3648) | 4 |
31.10.9 Union Leader Pool
Birney, Gibbon, Wadsworth
31.10.10 Special Rules
A. The Confederacy may gain VPs for successfully exiting remaining units from the board in a direction from which they might be able to link up with other Confederate forces. Allowable exit hexes are any road hex between 1031 and 3152 inclusive. Each Confederate unit exited from these hexes earns 2 VPs. Each Confederate unit that remains on the board at the end of play gives the Union 1 VP if the Union holds Richmond at the end of the game.
B. The Decisive Victory Conditions (29.1) are not valid for this scenario.
C. From Confederate units in play at the start of the scenario extract the following losses before the game begins:
- Forces south of the James and Appomattox Rivers lose ten steps of strength of which two must be from cavalry units.
- Forces north of the above line must lose four steps of strength.
32.0 Historical Commentary
European strategists dismissed it as a war without lessons, the product of amateur armies and leaders. At first this label seems just. In the East it took four years to advance 100 miles, a pale achievement compared with the Great Napoleon. Yet the Civil War remains the largest conflict in the century between Waterloo and World War I. Fought in the beginning with methods Napoleon would have found familiar, it ended using new techniques, a foretaste of the grim bloodbaths to occur years later in Europe. It was a war of masses, dominated by individuals. Fame reserved its highest place for General Robert E. Lee, principal commander of the Army of Northern Virginia. His actions held the North at bay for years. In the end he was overwhelmed. Why was the decision so long in coming?
If the enemy's sixty thousand are sufficient to keep our ninety thousand away from Richmond, why, by the same rule, may not forty thousand of ours keep their sixty thousand away from Washington, leaving us fifty thousand to be put to some other use? --President Abraham Lincoln
Despite outnumbering the South by about three to two, the Union faced an uphill battle. The declaration of independence by a Confederacy meant the Union had to devise a strategy to physically invade and subdue the South. The advantage lay with the South as it simply wanted to be left alone and didn't have to conquer anything, just hold out. It was a war of peoples and nobody was going to surrender until compelled to. This wasn't realized at once which in turn led to expectations on both sides that one large battle would settle things. The North thought Southerners would come to their senses and the South hoped the Yankees would judge the cost of reunification too high. Ultimately after bumbling around the North devised a strategy for winning and the South didn't. How did they do it?
One of the problems with arriving at strategies for conducting the war was the pre-war lack of interest in the subject. The small size of the regular army guaranteed that the best a West Point graduate could hope for was a small post out West. No one ever dreamed they would be commanding 10,000 or more men. Parade ground drill routines were meat and drink of cadet life. Why bother studying strategy?
What little strategic theory was taught emphasized the importance taking the offensive. Presumably this would lead to a decisive battle. Vigorously take the tactical offensive to sweep the foe from the field and follow up with a devastating pursuit. This approach had been vindicated by American experiences during the war with Mexico in 1847. It was classic Napoleonic doctrine. A complementary strategy was to threaten points the enemy found vital to defend, so as to compel him to fight the decisive battle. Even better was to capture important enough turf to cause capitulation. Of course the biggest target was Richmond. With the city, capital of the Confederacy, less than 100 miles from Washington, it acted as a natural magnet for Federal armies. As late as June 1863, Lincoln had to order the Joe Hooker to forget about Richmond and go after the Confederate forces invading Pennsylvania (disturbing the voters and what not). Now it's true the war ended shortly after the capture of Richmond, but the Confederate forces defending it had been ground to a nub by four years of war. Why did it take so long?
To begin with, the size of the forces involved in the Virginia theater proved a two-edge weapon. Outside of some cities, the armies represented the largest concentrations of manpower in North America. Such huge numbers of men, horses and artillery required mountains of supplies to maintain them (at least by prewar standards) and a secure supply line. Such forces could only be concentrated together for an imminent battle. To maneuver along the roads of the day and receive a steady stream of supplies from the rear required armies to break apart into smaller formations, or suffer ruinous attrition. Smaller, but more numerous formations required slower moves to avoid advancing in an uncoordinated fashion. Lastly, while winning was desirable, avoiding strategic defeat was imperative. For example, muster lists for the Army of the Potomac show it at times comprised over half the available Union manpower in the field. To lose it in a defeat would have been catastrophic for the Union cause.
These problems were present for both sides. The Army of Northern Virginia, being smaller, was more maneuverable, and ultimately willing to risk more to win. This led to a series of Union offensives during the years 1861-3 which pulled back when encountering tactical setbacks in the field. The Confederates would use the chance to rebuild their army or launch limited offensives of their own.
Eventually the Union settled on an attrition approach to solve their strategic problems. In 1864 Grant initiated a continuous series of offensive operations designed to keep maximum pressure on the Army of Northern Virginia, in essence risking more. Lee would not be allowed time to rebuild or reorganize his battered forces. The attrition strategy was tough on the Union rank and file but was quite effective in eroding Confederate ability to resist.
Of course Southern officers had been raised on the same diet of offensive doctrines as their northern counterparts. The Confederate President (an ex-war hero himself from the Mexican War) was a believer in the offensive, as were a good portion of his cabinet. The end result was official approval for offensives into the north. These were temporarily embarrassing for the Union, but also provided good opportunities at bagging all of Lee's army. The offensives served no discernible strategic purpose, other than the need to divert Union attention away from Virginia. They certainly resulted in excessive casualties the South could not afford.
It is still my desire to threaten a passage into Maryland, to occupy the enemy on this frontier, and, if my purpose cannot be accomplished, to draw them into the Valley, where I can attack them to advantage. --General Robert E. Lee
Once a strategy was decided upon, it was necessary to move the armies around to execute it. This leads to the question of selecting the best route along which to invade. A brief look at the map of the eastern theater raises some interesting points. The area covered was one of the most densely populated and developed in the United States at the time. An excellent road network permeated the area but heat brought choking clouds of dust and rain brought muddy quagmires so an army's progress could slow to a crawl. Only one road along the Shenandoah Valley had a hard surface.
The best invasion route from the Army of the Potomac's perspective would leave from Alexandria and follow the railroad through Manassas Junction and Culpepper to Orange. From there the route turned south following the roads over the North Anna River and on to Richmond. What made this path so attractive was the railroad supply line and the fordable rivers along the way. The main drawback was that the railroad was exposed to Confederate raids across the Bull Run Mountains. In fact, the area around Centreville was known as Mosby's Confederacy due to the strong presence the partisan leader exerted. McDowell, in 1861 and early 1862, choose to campaign along this route, as did Pope later in 1862.
Further west, an invasion of Virginia faced more difficult terrain and a thinning of the road network (with the consequent supply problems). The Bull Run Mountains form a barrier running up and down the length of the railroad. Even further west, across the mountains lay the Shenandoah Valley. It was quite obvious that passes over the mountains could be easily defended by small numbers of Confederates. Any Union army operating in the valley would also be moving away from Richmond, leaving Washington open to a Confederate counterstroke. Consequently no major Union forces operated in the Valley during the war. The route along the mountains or up the Valley was Lee's choice for moving north however. A curious fact of geography was that any southern force exiting from the northern entrances of the Valley was closer to Washington than any Union forces operating along the Rappahannock! Lee chose this route in 1862 (Sharpsburg), 1863 (Gettysburg) and for a large scale raid in 1864.
Moving due south from Washington was the shortest route to Richmond. Any invasion here would eventually confront the Army of North Virginia along the line of the Rappahannock River. Again a look at the map reveals why. East of Fredericksburg, the terrain behind the river was open, but the river itself could not be forded. To the west of Fredericksburg were numerous fords and crossing points over the Rappahannock, but the terrain behind the river consisted of thick woods and underbrush: the Wilderness. The road net was thin in this area, and communication problems were magnified, a fact which tended to negate any numerical superiority an invader might have. Despite this, the advantages of operating here are clear for any Union commander. The Federal navy had uncontested command of the sea to the east, and a short secure line to Acquia Creek, a large supply base, was available. Plus the difficult terrain made it equally hard for the Confederates to launch surprise attacks. Burnside in 1862 (Fredericksburg), Hooker in 1863 (Chancellorsville), and Grant in 1864 (the Wilderness) all crossed the Rappahannock to reach Richmond.
The last way south lay via the sea. The Federal Navy possessed a vast preponderance of ships over any Confederate naval force that could be raised. Transporting Union forces by sea and landing them in the Confederate rear allowed the principles of security, speed, and surprise to come into play. The Confederacy, with its long coastline, could not garrison every landing point without stretching its forces too thin. The principal danger with this approach was that any Union forces at sea could not act as a shield for Washington D.C. The Union tried this method with McClellan in command in 1862 (Peninsula Campaign). The campaign was a failure and the Union never tried again (aside from seizing landings up and down the coast). Perhaps McClellan's thorough bungling soured any incentive to try again.
It is extremely perilous to change systems of tactics in an army in the midst of war and highly inconvenient even at the beginning of one. --General Winfield Scott
Pre-war tactical theory was based around the short range of the regulation smoothbore musket and the infantry charge. Basically, the approach was to move close to the enemy in small column formations then deploy into a line. Volleys would be exchanged and then the more aggressive side would charge the other, causing their morale to break. The long musket reloading time guaranteed that a quick charge could overwhelm the enemy before too many shots were fired. Variations on this theme included bombarding enemy troops with artillery from a distance, which precluded any effective reply, and cavalry charges to rupture the defending line. Or, cavalry could be held in reserve to mop up the shattered army and exploit the victory. These tactics were used with great success during the Mexican War of 1847. The victories were undeniable and officers on both sides ate up the theory.
Unfortunately for the troops, the adoption of the rifled musket shortly before the war made such tactical ideas suicidal. Whereas the maximum effective range of musketry had been 100 to 200 years, the rifled musket proved deadly at 500 to 600 yards. Indeed, officers reported being able to break up enemy attacks at ranges of 1,000 yards or more. Troops using pre-war tactics suffered huge loss rates. Some 90% of all battlefield casualties were caused by rifled muskets. Now bright people on both sides gradually realized the rules had changed. Armies eventually abandoned massive infantry assaults (the North persisting into 1864!) and took to fieldworks and new offensive techniques. The problem lay in discovering the tactics that worked and communicating them across the breadth of the army. Tens of thousands of soldiers and officers had been hurriedly raised and inducted. The only training materials available were pre-war manuals emphasizing the importance of pre-war tactical theory! It was easier for both sides to rely on valor and ignore the problem.
Artillery enjoyed the highest reputation when the war began. Widely feared in offense and defense (officers were instructed not to charge guns frontally) the artillery found itself shunted off to a basically defensive role in the war. No longer able to outrange the infantry (and indeed vulnerable to infantry fire) the artillery found itself a good target but a poor partner in inflicting casualties. Only about 9% of all battlefield losses were caused by artillery. This statistic masks the specific defensive contribution that could be made by artillery. Both at Malvern Hill (1862) and Gettysburg (1863), Union artillery helped break up Confederate infantry assaults. The Confederates returned the favor at Fredericksburg (1862) and scored a notable offensive success with artillery at Chancellorsville (1863). So both sides strove for artillery superiority and some commanders (McClellan) refused to act without it. The cavalry found itself in the wrong war. Originally conceived as a battlefield dominating weapon, the troopers found themselves shot out of the saddle long before engaging the enemy line. Infantry fire was now so effective, they no longer needed to form squares when faced by a cavalry charge. After a while, the cavalry caught on that the infantry was not a juicy target and no longer risked a charge. Instead they turned to scouting, screening, and raiding the enemy rear. The South started out with considerably more talent and initiative in this area, which led to serious Union embarrassments. The Northern cavalry eventually caught on and as the war situation deteriorated for the South, their cavalry could no longer compete.
Warfare has always stimulated ideas for ways to kill the enemy more efficiently and the Civil War was no exception. Lincoln himself had patented an invention before the war and took a keen interest in technology. Breech loading rifles, primitive machine guns, barbed wire, ironclads, and submersibles all appeared during the conflict. None of them were war winners by themselves, but each pointed the way for future conflicts. Certainly most were adopted with glee as soon as the war was over. There lay the crux of the matter. Could either side afford to disrupt the production of proven weapons to introduce a more effective one? For the South the answer was no. The North occasionally said yes and produced some but usually too late or in too small a quantity to be decisive.
... our Army would be invincible if it could be properly organized and officered. There never were such men in an Army before. They will go anywhere and do anything if properly led. But there is a difficulty – proper commanders – where can they be obtained? --General Robert E. Lee
Leadership was the key to getting the most out of the troops. No other factor explains the ability of the Army of Northern Virginia to repulse Union forces campaign after campaign. In the end, the armies succumbed to superior forces but the men retained faith in their leaders.
What is leadership? The popular notion of stern-faced generals leading their troops in battle comes to mind. However, the actual number of days in pitched battle (not counting skirmishes) amounted to about 5% of the total time period covered by the war. The remainder was spent training, disciplining, dealing with cranky subordinates, securing supplies, organizing marches, and all the other details necessary to mount an effective fighting force. The higher the rank, the more important these details became.
Men who would lead troops in battle were admired, but those who mastered the other 95% of warfare were the ones who achieved prominence. Where did they come from? Mostly from the pre-war officer corps. While the volunteer civilian officers bitterly resented the old boy network, the truth was that outside graduates of West Point and various military academies, no one knew the business. A military education was no guarantee of competence. While obviously bad officers were exposed in about two months active duty, a poor but clever leader might take a year to reveal himself.
Knowing the tricks at a low level of command offered no certainty a leader could handle higher responsibilities. Many promising division commanders proved mediocre when commanding corps. Some absolute disasters occurred when unqualified men were given an independent command or even charge of the army. On the other hand, some leaders like Mahone got better with more responsibility. A commander's sound judgment of a subordinate's abilities proved absolutely vital when issuing orders. Too rash a leader might stretch orders to suit his own inclinations (Stuart's ride in the Gettysburg campaign) and the too indolent might not seize opportunities (Burnside's attack following the mine explosion in 1864).
Assuming that one did show promise as an officer, the attrition rate was such that new men were being constantly thrust into command with the sketchiest of training. A look at the Army of Northern Virginia between July 1862 and July 1863 shows only 1 out of 3 corps, 3 out of 9 divisions, and 5 out of 38 brigades were commanded by the same person continuously throughout the period. A detailed breakdown of casualties among officers of general rank for the same army during the period May 4 to June 3, 1864 reveals the following :
| PRESENT | KIA | WOUNDED | POW | |
|---|---|---|---|---|
| Army HQs | 1 | - | - | - |
| Corps | 11 | 1 | 3 | - |
| II Corps | 16 | 4 | 4 | 2 |
| III Corps | 16 | 1 | 5 | - |
| Cav. Corps | 11 | 2 | - | - |
| Artillery |
About 38% of all generals serving became casualties in a month! Such losses tore apart any attempts to maintain a stable command structure.
The peculiar job skills an army commander required are best revealed when dealing with subordinates. An incredible amount of time was spent arguing over touchy questions of rank, prestige, and removal of incompetents. Deserving men could be held back from positions of command because of regulations favoring seniority of rank over skill. Officers would threaten resignations if not permitted their way of doing things, or if slighted by their commander in a post-battle report. Brilliant but unpleasant leaders could be shunted off to distant theaters, a diversion of talent the North could afford, but not the South. In addition, a commanding general was pressured to make sure all the states were fairly represented in the ranks. The Union in particular had a number of generals appointed for their political connections and who could not be removed without clear-cut evidence of massive bungling. Some men, like Lee, were tactful but firm in rendering their judgments. Others, like Burnside, vacillated on personnel issues, to their detriment.
The Ordnance Department in the main kept the supply up to the demand, and by the cheerful and ready attention to complaints, and the prompt creation of the requisite means enabled me to withdraw inferior material, and substitute such as was found to be more reliable. --Chief of Artillery, Army of the Potomac
An ancient author remarked that money is sinews of war.
The South began with under $30,000,000 in cash. Worse yet, most of its remaining capital was in the form of land and slaves, not easily convertible. Attempts were made to raise money by selling bonds backed by the cotton crop. Only a fraction of the money could be realized once the Union blockade was effective. Taxation proved difficult due to the shortage of cash and the lack of administrative machinery for collection. The Confederate government turned to printing money in a big way, horrified by the knowledge they were debasing the currency, but unable to stop. Eventually this undermined confidence in the government. Prices soared, civilian morale plummeted and soldiers deserted to provide for their destitute families.
If money is the sinews, then industrial production is the backbone. The South started off woefully ill-equipped. Most pre-war industrial goods were manufactured in the North and were imported. Particularly troubling was the lack of iron ore and foundries to produce the means of war. In fact, not a single rail was produced by the South during the war. Repairs to existing lines were accomplished by tearing up sidings and little used branch tracks. Rolling stock could not be replaced.
The existing rail net did not serve Southern war interests in the most efficient manner. Most rail lines were designed to connect interior cotton producing areas with coastal ports. Vested interests also interfered. The city fathers of Petersburg allowed the railroads in the city to be connected only on the express promise they be ripped out once the war was over: a sop to hustlers and wagon drivers who made a living hauling passenger's luggage from one terminal to another! All these frictions could result in the agricultural surplus of the Deep South being unavailable to Lee's army defending Richmond.
Armies without arms are useless. The initial lack of arsenals mean the South had to rely on home stocks at first (including seized Federal weapons) and then on imports and captured pieces through 1862. Confederate reliance on captured weapons was absolute. Over 100,000 muskets were captured in 1862 alone. Armies require cannons too.
During the war the South manufactured over 2,000 cannons with one factory, the Tredegar Iron Works in Richmond accounting for about half. But the South began the war with over 2,500 pieces. With the explosive growth of the army's requirements, not counting losses due to wear and tear of enemy action, this simply wasn't enough.
If the shoe pinched everywhere for the South, the North was much more fortunate. Most Union war effort questions revolved upon the allocation of resources, rather than what could be made by giving up other things. But then the Union did not have its industrial base in the front line either. So well supplied were Union armies that Lincoln wisely observed the reason Union armies moved so slowly was due to the vast amount of equipment they carried along.
Federal efforts to finance the war took the form of increased taxes, loans, and unable to resist the temptation, the printing of money (called greenbacks). While this led to a serious inflation after the war. the number of greenbacks in circulation was more successfully kept in check. About a sixth of the Union war effort(460 million dollars) was financed through fiat money compared to 95% (1.5 billion dollars) for the South.
Northern railroads were well situated for moving men and supplies. The whole system was quickly put under Federal control by the end of 1862. Industrial capacity allowed for the replacement of captured or damaged stock. In fact, there was enough capacity to build entirely new rail lines and United States Military Railroad units did just that. An advancing railroad bringing up the rear was just the thing to relieve Union commanders of supply headaches.
The abundance of supplies meant the North could suffer defeats and promptly reequip the units. No Union army waged war with weakened horse flesh, inadequate food rations or lack of arms. The flip side was that most Union commanders never tried to capitalize on the abilities of their men by cutting loose from their supply lines. Instead they settled for a grinding war of attrition, knowing they could win.
33.0 Recommended Reading
There is a large amount of printed material on the Civil War available. The following books are merely a beginning for gamers interested in the period. Works were selected for their relevance and readability.
- The American Civil War by Peter Parish. Holmes & Meier Publishers, Inc. 1975. This is the best one volume work covering all aspects of the war. Highly recommended.
- Battles and Leaders of the Civil War. This 4-volume set was originally printed in the 1880s and reprinted in the 1960s. Features a lot of "I was there" material by survivors justifying their roles.
- Lee's Lieutenants by Douglas Freeman. Charles Scribner's Sons, 1942. This 3-volume work details the command structure of the Army of Northern Virginia throughout the war. More recent soft bound editions are available.
- The Army of the Potomac by Bruce Catton. Doubleday & Co. Inc. 1963. Another 3-volume set, this time chronicling the Army of the Potomac during the war. Widely available.
- Attack and Die by McWhiney and Jamieson. University of Alabama Press, 1982. Excellent statistical data and discussion of Civil War tactics but a fuzzy conclusion mars the book.
- The Gettysburg Campaign by Albert Nofi. W. H. Smith Publishers, 1986. Offers good analysis of a specific campaign and battle as well as interesting sidelights.
- Grant and Lee by J. F. C. Fuller. University of Indiana Press, 1962. Interesting account by a European author on the relative merits of the two. Basically concludes that Grant was far and away the better general of the two.
- Lincoln and the Tools of War by Robert Bruce. The Bobbs-Merrill Company, Inc. 1956. A valuable book on Union decisions concerning weapon production.