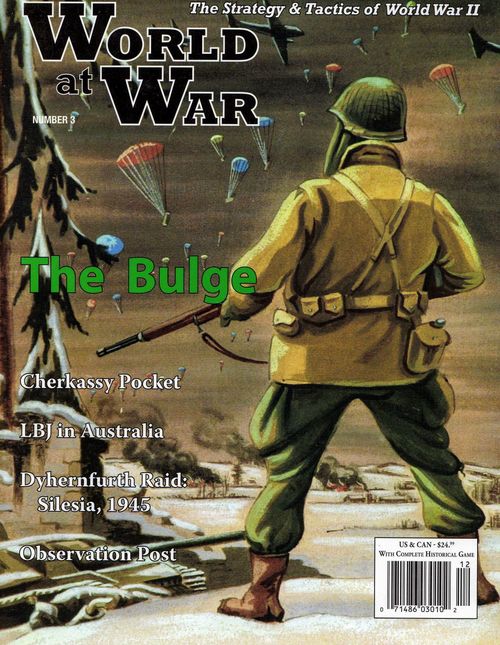
The Bulge
The Bulge Rulebook
Table of Contents
Table of Contents
- Unit Counter Errata
- 1.0 Introduction
- 2.0 Components
- 3.0 Set Up & Hex Control
- 4.0 How to Win
- 5.0 Sequence of Play
- 6.0 Stacking
- 7.0 Supply
- 8.0 Zones of Control
- 9.0 Regular Movement
- 10.0 Road Movement & Mechanized Movement
- 11.0 Allied Bridge Interdiction
- 12.0 Reinforcements
- 13.0 Combat
- 14.0 Special Unit Characteristics
- 15.0 US Airpower & Combat Support
- 16.0 Combat Results Table
- 17.0 Q & A
Unit Counter Errata
Among the British iconic units, the three tank brigades shown with combat factors of "5" should actually have combat factors of "1." Their NATO-style counterpart-counters are shown correctly.
The reverse side of the US 80th Infantry Division, in both the NATO and iconic counter-sets, is misidentified on its reverse as the 83rd Infantry Division. It should be the 80th on both sides of the counter.
1.0 Introduction
1.1 This is a redesign and redevelopment of the title originally published by old-SPI in 1979. That earlier version was, in fact, published under two titles, the other being Big Red One, a marketing effort to coincide with the release that same year of a motion picture of the same name. Under any title, then and now, this design runs counter to the decades-old trend within our hobby concerning the 1944 German counteroffensive in the Ardennes, in that it's not bigger and more complex than the one published just prior to it. In releasing The Bulge, we're not seeking hobby immortality by claiming yet another reanalysis-this one truly correct!-of the all-critical forest road net; nor have we uncovered any new-and heretofore hidden or ignored!-secrets concerning both sides' sub-divisional orders of battle.
What we're presenting here has merit, we believe, in four ways. First, it represents a major graphic update and improvement to what had been the minimalist presentation of the game's first edition. The hexes are now dramatically and cinematically huge, and the large counters are much easier to read and handle. Further, you can even choose the type of counters-NATO abstract or full iconic-with which you'll play, mixing and matching between sides and unit-types as you please. Second, we couldn't resist making use of the expertise of Joe Youst-surely this century's leading expert on the Ardennes road net-to update the map in that way. Third, systemic modernizations have also been built in, along with some enhancements to the order of battle, which work to bring the game's system-certainly clever and innovative by the standards of the 1970s-up to the lofty level of today's state-of-the-art. (Hey, who could resist? This is, after all, still a Bulge game, which calls forth certain inescapable expectations.) Last, the game has been shortened to cover only the first part of the battle-the interesting part in terms of operational and strategic potentiality-that of the German blitzkrieg offensive (or, should I say, the would-be blitzkrieg offensive), which lasted from 16 to 25 December.
1.2 Scale
Each hex on the map equals five miles (eight kilometers) from side to opposite side. Each game turn represents one day. Playing pieces represent divisions, brigades, combat commands, regiments and Kampfgruppen (German for "battlegroups") of various kinds of infantry and armored formations, each containing from about 3,000 to 14,000 men or 50 to 400 armored fighting vehicles.
1.3 North
Whenever a compass direction is refered to, it should be understood that north side of map is composed of hexes 0101 to 0126, inclusive. The east side of that map is composed of hexes 0101 to 1901, inclusive. The south side is 1901 to 1326, inclusive, and the west side is 0126 to 1326, inclusive. Note the corner hexes are therefore each part of two map sides.
Old Hands Note: no replacements; no fog of war. (If you don't know what that means, you're not an "old hand." Don't worry about it for now.)
2.0 Components
2.1 The components to a complete game of The Bulge (TB) include these rules, the mapsheet and 176 die-cut counters (also called "units" and "unit counters"). Players must provide themselves with a standard six-sided die to resolve combat and other probabilistic events that occur during play.
2.2 Map
The game map represents the militarily significant terrain found in and around the Ardennes in 1944 when portrayed at this scale. A hexagonal ("hex") grid has been printed over it to regulate unit placement and movement similar to the way squares are used on Chess and Checker boards. A unit is always in only one hex at any one instant.
Each hex contains natural or manmade terrain features that may effect movement and combat. The map's terrain representations have been altered slightly from their exact real-world configurations in order to make them conform to the hex-grid, but the terrain relationships from hex to hex are accurate to the degree necessary to present players with the same space-time dilemmas that were faced by their historic counterparts during this campaign.
Each hex on the map also has a unique four-digit number printed in it. It is provided to help you find specific locations referred to in the rules (for example, the town of Bastogne is in hex 1412), and to allow you to record unit positions if a match has to be interrupted and taken down before it can be completed.
2.3 Counters
There are 176 counters in the game most of which represent combat formations; others are provided as memory aids and informational markers. Carefully punch out the counters. Each combat unit-counter displays several pieces of information: nationality, organizational affiliation, specific type, mobility class, combat and step strength, reinforcement or set up status, and historic identification.
Note there are actually two complete sets of combat units included with the game. One set is printed using NATO-style abstract symbols to distinguish among the various unit-types. The other set is printed using iconic representations of those same unit types. Players should play with the counter-set (or a mix between the two) that pleases them most. Also note the informational markers and aircraft counters aren't duplicated; the same ones are used no matter what your decision concerning the deployment of the ground counters.
2.4 Sample Combat Unit
This unit is the German SS Kampfgruppe Peiper. It is an ad hoc panzer unit of divisional size, has a full-strength combat factor of "3," a reduced strength of "2," and begins play set up in hex 0401. It contains two strength steps.
2.5 Sides
A unit's nationality, and therefore its "side," as well as its mobility class, is indicated by its color scheme.
German Units
- Mechanized units: black background
- Non-mechanized units: grey-green background
Allied Units
- US units (all are mechanized): leaf-green background
- British units (all are mechanized): red background
2.6 Historic Unit Identifications & Abbreviations
Each ground combat unit is identified by the number or abbreviated name of its historic counterpart. Those abbreviations are as follows.
- FE - Fuhrer Escort
- FG - Fuhrer Grenadier
- G - Guards
- L - Lehr
- SS - Schutzstaffel
- SSES - SS Kampfgruppe Einheit Steilau
- SSP - SS Kampfguppe Peiper
- VDH - Von Der Heydt
2.7 Unit Types & Mobility Classes
German units are distinguished by their specific type and mobility class, that is, whether they move about mostly using some kind of motor vehicles or go afoot. There are two mobility classes: mechanized and non-mechanized. All Allied units are mechanized.
Allied Unit Types
- Armor
- Infantry
- Paratroops
German Mechanized Units
- Panzer
German Non-Mechanized Units
- Paratroops*
- Commando*
- Artillery
- Infantry
- Flak
*Note: The single German commando formation isn't a regular unit; see 14.4. Similarly, the only paratroop unit of either side with airborne capabilities is the German VDH unit; see 14.5.
2.8 Unit Sizes
Units' organizational sizes are indicated by the symbols atop their unit-type boxes. There's no real difference in functionality among divisions, brigades and regiments; those details are provided for historical accuracy (but also see the stacking rules, section 6.0). If a German unit has its organizational size-symbol bracketed on its counter, that unit is a Kampfgruppe (KG). That is, it's an ad hoc "battlegroup" that wasn't part of that army's normal tables of organization, but that was instead assembled specifically to take part in this campaign. The size-symbol beneath the bracket corresponds to the standard-unit-size that most closely corresponds to the functional size of each KG. The various unit sizes are listed below from largest down to smallest.
- XXX - German Volks Artillerie Korps (VAK)
- XX - Division
- X - Brigade or US Armored Division Combat Command
- III - Regiment
- II - Battalion
- I - Company
2.9 Combat Factor
These numbers are measures of each unit's relative ability to attack and defend (see section 13.0).
2.10 Movement Factors
Unlike most wargames, in TB the movement factors of the units aren't printed on their counters. The movement factor of almost all the units of both sides is six. The exception is German Volks Artillerie Korps have movement factors of three. Also note both sides' mechanized units may make use of a special high-speed kind of movement ("mechanized movement") that's denied to non-mechanized units (see 10.3).
2.11 Step Strength
All units in the game contain one or two "strength steps" (also simply called "steps"). That's an arbitrary term used to express the ability of a unit to absorb a certain amount of combat losses before ceasing to be an effective formation (a measure of its "robustness" in current US Army jargon). Those units with combat factors on only one side of their counter are "one-step" units; those with combat factors on both sides of a single counter are "two-step" units. If a two-step unit suffers a step loss, it's flipped so its reduced side (the one with the lower combat factor) shows upward. If a one-step unit, or a two-stepper that had already been reduced, takes a step loss, it's removed from the map (eliminated) and placed in the "dead pile." All units of both sides start the game, or enter play later, at their full step strengths. No unit may ever give or loan a step to another.
2.12 Other Counters
The uses of the following counters are explained at appropriate points throughout the rest of the rules.
- Game Turn Marker (see section 5.0)
- US Aerial Supply Marker (see 7.5)
- Out Of Supply Marker (see 7.11)
- US Ground Combat Air Support Marker (see 15.1)
3.0 Set Up & Hex Control
3.1 After having determined who will command which side, both players should simultaneously set up for play. Those units that start each game already deployed on the map have four-digit numbers printed in their upper-left corners on their full-strength sides (see 2.4). Units that enter play after the game has begun have one-digit or two-digit numbers printed in the upper-left corners of their full-strength sides. Place the starting units directly in the hexes indicated on their counters. Place later-entering ("reinforcement") units on the Game Turn Record Track printed on the mapsheet. Put each one of them in the numbered box corresponding to the number printed in the upper-left corner of its full-strength side.
3.2 Initial Marker Placement
After all units have been sorted and placed according to the procedure described above, place the "Game Turn" marker in the Game Turn 1 box on the Game Turn Record Track. Temporarily place aside, within easy reach, the other markers in 2.12.
3.3 Hex Control
Hex control is the term used to describe which side is in control of (owns) important hexes at different times during play. In this game, hex control is important when tracing supply and when determining victory (see sections 4.0 and 6.0). At the start of play the German side controls all the hexes on the map in and generally east of the West Wall. Note, though, US forces have pierced the West Wall at three hexes at the start of play (0503, 0804 and 1005). The Allied side controls those three hexes, along with all other hexes on the map. See 4.2 for more on this.
The control status of a hex changes the instant a unit of the other side enters it. The control status of each hex may change any number of times during a game as units of the two sides enter and reenter various parts of the map. The mere projection of a zone of control into a hex is not enough to establish or change the control status of that hex. Don't confuse this idea of "hex control" with that of "zone of control," which is explained in 8.0.
4.0 How to Win
4.1 The German player is generally the one on the offensive in the game. He's seeking to win by: 1) exiting one or more of his mechanized units off the map; or 2) by seizing a number of key locales on the map.
4.2 German Sudden Death Victory
Play stops, and the German player is declared the winner, the instant he succeeds in moving one or more of his mechanized-class units off the map (supply status irrelevant). Such exits may take place only between hexes 0110 and 1326, inclusive. If using regular or road movement to exit, it costs the exiting unit one movement point. If using mechanized movement to exit, it costs the exiting unit 0.20 (one-fifth) movement point.
4.3 German Victory on Points
At the start of the game all the towns on the map are under Allied control (see 3.3). Each town is worth a certain number of "victory points" (VP) to the German player. That is, Bastogne, in hex 1412, is worth three VP. Namur, in hex 0324, is worth four VP. All other towns are each worth one VP. If, at the end of Game Turn 10, the German player controls 12 or more victory points worth of towns (supply state irrelevant), he wins the game at that time.
4.4 Allied Victory
There's no sudden death Allied victory. The Allied player may only be determined to have won at the end of Game Turn 10. At that time, if the German player has failed to win either kind of victory available to that side, the Allied player is declared the winner. No draws are possible.
5.0 Sequence of Play
5.1 Every game turn of TB is divided into two "player turns," one German and one Allied. That sequence makes up one "game turn," of which there are a maximum of 10 in one entire match. The German Player Turn is the first player turn in every game turn. At the very end of every completed game turn, move forward the Game Turn marker one box on the Game Turn Record Track. Every action taken by a player must be carried out during the appropriate part of the sequence outlined below. Once a player has finished a particular activity, he may not go back to perform some forgotten action or redo a poorly executed one unless his opponent graciously permits it.
5.2 Turn Sequence
The game turn sequence is given below in outline. The rest of the rules are organized, as much as possible, to explain things in the order they're encountered as you go through each game turn's sequence.
I. German Player Turn
- A. German Pre-Movement Combat Phase
- B. German Movement Phase
- C. German Post-Movement Combat Phase
II. Allied Player Turn
- A. Allied Pre-Movement Combat Phase
- B. Allied Movement Phase
- C. Allied Post-Movement Combat Phase
5.3 Ending a Game Turn
Each game turn is complete when the Allied Post-Movement Combat Phase is concluded. At those times move forward one box the Game Turn marker on the Game Turn Track printed on the mapsheet.
5.4 Special Game Turn 1 Rules
The following four special rules pertain only during Game Turn 1. First, the German VAK may not fire (see 14.7). Second, all German attacks in that side's pre-movement combat phase gain a one column rightward column shift in addition to all other normal shifts and modifiers (see section 13.0). Third, there's no German road or mechanized movement. Fourth, with one exception, all US units are considered to be automatically out of supply for movement purposes (see 7.6), though their combat supply is determined normally. The one exception to that last rule is the US 2nd Infantry Division, which starts play in hex 0304, always has a full movement factor of six during Game Turn 1.
Design Note. That 2nd Division's commander was totally on the ball, effectively maneuvering and fighting his division from the very first moments of the campaign.
5.5 Early Game German Supply
All German units are considered automatically supplied all during Game Turns 1, 2 and 3. The German SSP unit is considered supplied all during the game.
6.0 Stacking
6.1 "Stacking" is the word used to describe the piling of more than one friendly unit in a hex at the same time. The general rule is, both players may stack up to two divisions in each hex.
6.2 Stacking Values
Each division-sized unit (see 2.8) counts as one division for stacking purposes. Units of sizes smaller than a division each count as one-third of a division for stacking purposes. Each German VAK counts as two divisions for stacking purposes. Note that combat and step strengths have no bearing on any unit's ability to stack; it's based solely on their organizational sizes as described above. Units with bracketed sizes still count as being that size for stacking purposes.
6.3 No Stacked Movement
Units are never moved in stacks; they are always moved one at a time. Further, the movement of a given moving unit must be completed before that of another unit is begun.
6.4 Stacking & Unstacking Costs
In general, it costs one extra movement point (+1 MP) for a stacked unit to move out of a hex that contains one or more other units. Similarly, it also costs +1 MP for a moving unit to enter a hex that, at the time, contains one or more friendly units. The single exception is the German SSP unit, which never pays those stacking and unstacking costs. Note, though, other German units moving in and out of SSP's hex would still have to pay them. Also note that "extra" means in addition to the other costs involved for entering a hex (see section 9.0).
6.5 No Overstacking
A moving unit may not enter a hex if doing so would mean that hex would thereby become overstacked. That prohibition remains true even for the German SSP unit when it moves.
6.6 Stacking & Movement
The stacking rules are in effect at all times throughout the game turn. That means players must pay attention to the sequence in which they move their units or risk having early moves block units moved later in the phase. Note, though, there's no limit on the number of units that may enter and pass through a given hex over the course of a movement phase, player turn, or game turn as long as stacking limits aren't violated move by move.
Units beginning a movement phase stacked together need not remain together simply because of that fact.
Watch for stacking restrictions all through play, and make certain to check all stacks of both sides at the end of every phase and the end of the resolution of every individual combat. Whenever any hexes are found over-stacked, the owning player must immediately eliminate the excess units of his choice.
6.7 Free Stacking Markers
None of the markers in rule 2.12 have any stacking value. They may be added to any stacks according to the details given for their use.
6.8 No Fog of War
There is no "fog of war" in this game. Both players may freely examine the units beneath the top units of all of his opponent's stacks at any time.
6.9 Enemy Occupied Hexes
In general, your units may never enter hexes containing any kind of enemy ground unit. On the German side, the exception involves the commitment of the SSES unit (see 14.4). On the Allied side, the exception involves the elimination of the German VDH paratroop unit (see 14.5).
6.10 No Inter-Allied Stacking
US and British units may not stack together. That is, they may enter and pass through one another's hexes normally during Allied Movement Phases, but they may never end any phase stacked together.
7.0 Supply
7.1 In general, in order for a unit to be able to move and fight at its full potential, it must be in supply. Supply for movement is determined at the moment a given unit begins to move, and that status lasts all during that move. Supply for combat is determined at the start of each individual battle for all the units of both sides involved in that battle.
7.2 Tracing Supply Lines
No counters are provided to represent the materiel consumed by the combat units. Instead, that's abstracted into the process of supply line tracing ("tracing supply"). A unit has supply ("is in supply") if it can trace a path of hexes requiring six movement points or fewer from its location to a road hex. None of those hexes may be enemy occupied or contain an unnegated enemy zone of control. Once on the designated road hex, a supply path, to be valid, must then be connected to a friendly map edge by a contiguous path of road hexes, none of which are enemy occupied or in the unnegated zone of control of any enemy unit.
Note that the hexes in the first portion (the "non-road" portion) of a unit's supply line need not necessarily be truly road-free. That is, you're not obligated to begin tracing the road portion of a unit's supply line in the first road hex you come to (as such a path might be a dead end, depending on the situation). In general, however, once you've designated a hex as being the start of a given supply line's road portion, you may not thereafter take that supply back off the road, even if you didn't use up the full six movement maximum to get it onto the road. For the exception, see 7.4 below.
Also note that a friendly unit in a hex containing an enemy zone of control, road or non-road, negates that enemy zone of control for purposes of tracing supply lines into and through that hex. See section 8.0 for more details on zones of control.
7.3 Roads in Supply Tracing
When tracing the non-road portion of a unit's supply line, the presence or absence of roads in a hex has no bearing on the point cost assessed for each portion of that supply line: simply count normal terrain costs as if all those hexes were without a road. Of course, if a unit is on a road hex, and that road leads directly back, as an unobstructed supply path, to a friendly board edge supply source hex, then no non-road portion of the supply line need be traced. That unit's supply line is all road. Similarly, if a unit is not in a road hex, but is within six movement points of a friendly board edge supply source hex, it's in supply simply by tracing its non-road supply line to that board edge hex.
7.4 Interdicted Bridges & German Supply Lines
When tracing German supply lines, if the non-road portion of a unit's supply path crosses an interdicted bridge (see section 11.0), normal river crossing costs (+1) must be paid to trace the supply path over that hex side. If an interdicted bridge lies within the road portion of a German unit's supply line, that supply line is incomplete.
7.5 Allied Aerial Supply
Allied aerial supply is an alternate method by which units of that side, which would otherwise be out of supply ("O.O.S.") may be granted supply. Aerial supply becomes available only at the start of Game Turn 8, when the Allied player receives three of those markers (see 2.12) as reinforcements. Each such marker may be committed once per game turn, at any instant of the game turn, in any Allied occupied hex anywhere on the map, by the Allied player. The markers themselves are indestructible in game turns but, at the same time, they have no stacking, step or combat values of their own. Similarly, they don't exert zones of control; however, their presence in a hex doesn't in anyway inhibit regular zone of control projection by other units in that same hex.
Each aerial supply marker provides supply to up to one division. Thus up to two markers may be deployed into any one hex at the same time. If there's more than one division's worth of OOS units in a hex, the Allied player isn't obligated to provide aerial supply to all those units; he may do so for one, some or all of them, as he chooses, based simply on marker availability. Remove all deployed aerial supply markers at the very end of every game turn. Otherwise OOS units that have been granted aerial supply are thereby in supply for all purposes for the remainder of that game turn. Also see 10.3.
7.6 OOS Movement
If a unit is found to be OOS at the start of its move, the owning player should roll a die to determine the number of movement points it has available to use during that movement phase (one through six). Also note that such rolls are made after a unit checks to see if it has a supply path. That is, all units, no matter how seemingly precarious their position in relation to supply, still make their supply line tracing attempt using the full six movement points normally available for such operations. Only after a unit has been determined to be OOS this rule comes into effect in order to determine its ability to move that movement phase. Also note that, if there is more than one OOS unit in a given hex, a separate die roll is made for each one.
7.7 OOS Combat
If an attack contains one or more units found to be OOS at the start of that battle's resolution, shift that combat differential one column left, in addition to applying all other applicable differential column shifters (see section 13.0). If a defending force contains one or more units found to be OOS at the start of that battle's resolution, shift that combat differential one column right, in addition to applying all other applicable differential column shifters (see section 13.0). If both those shifts apply in the same battle, they're mutually canceling.
7.8 Indefinite OOS
No unit is ever reduced in step strength or fully eliminated simply for being OOS. Units of both sides may remain OOS indefinitely.
7.9 Willful OOS
Both players may move units into hexes in which they may or will become OOS.
7.10 Friendly Map Edge Supply Sources
For the German player, friendly map edge supply source hexes are all those on the map's east side from 0101 to 1901, inclusive, along with 0102, 0103 and 0104 on the north map edge. For the Allied player, friendly map edge supply source hexes are all those not included in the German source area described above. For both sides, a friendly supply source hex loses its supply providing capacity while enemy occupied or while lying in an unnegated enemy zone of control. That supply capacity returns whenever that enemy blockage is removed. Such supply status changes may occur, judged on a hex by hex and instant by instant basis, any number of times per game.
7.11 German Fuel & Supply Shortages
Starting with Game Turn 6, the German side begins to experience unavoidable difficulties with keeping its forces supplied engaged in this offensive. At the very start of that game turn, as well as at the start of each of the following game turns, the Allied player should roll a die. That result (one through six) is the number of OOS markers the Allied player should immediately place atop any six German units of his choice. Those units may be located anywhere on the map, and the units so marked are thereby out of supply for that game turn for all purposes. Note that one marker makes one German unit OOS. Thus, in stacked situations, the Allied player may choose to place more than one OOS marker per hex, or not, as he sees fit. A marker is assumed to render OOS the unit immediately beneath it. Note the Allied player is free to pick through a German stack and place markers as he wishes; he needn't start at the top and work down, etc. Also note German reinforcement units may not be marked OOS until such time as they actually start a game turn on the map.
7.12 Neither portion of an Allied supply line may be traced into or out of a West Wall hex unless that hex is occupied by one or more Allied units at the moment of that tracing.
8.0 Zones of Control
8.1 The six hexes immediately surrounding a hex containing one or more ground combat units constitute the "zone of control" (ZOC) of the units in that hex. Zones of control extend across all hexsides and into all types of terrain. All ground combat units of both sides project their ZOC at all times in all supply states. There's no difference in effect between ZOC projected by units of different mobility classes or sides into the same hex. Opposing units may simultaneously project their ZOC into the same hexes.
8.2 Units Without ZOC
All units in the game project ZOC except for the markers in rule 2.12 and the German SSES and VDH units.
8.3 Effect of Enemy Zones of Control (EZOC)
In order for one of your moving units to be able to enter an EZOC, it must pay one extra movement point to do so. Similarly, in order for one of your units to leave an EZOC, it must pay one extra movement point to do so. "Extra" means in addition to whatever terrain and river related costs are involved. Thus movement from one EZOC hex directly to another EZOC hex is generally permitted, provided the moving unit has the two extra movement points within its overall remaining movement allowance to allow it to pay for such a move. The exception is: no US unit may move from one German EZOC directly to another German EZOC if the hex being moved into is a West Wall hex. Also note the extra movement costs remain unchanged no matter how many enemy units may be simultaneously projecting their EZOC into a hex.
8.4 Negating EZOC
A friendly ground unit(s) located in a hex into which an EZOC is being projected negates that EZOC for purposes of tracing supply lines (both road and non-road portions), as well as for retreat after combat. Friendly units don't negate EZOC for purposes of movement phase movement. EZOC never work to block victorious attacking units from advancing after combat (see 13.22). Further note the markers and units listed above in rule 8.2 may never in anyway be used to negate EZOC.
8.5 Roads & EZOC
Units may use the road movement rate to enter or leave EZOC; though they must still also pay the normal entering/leaving movement point penalty. Units may never use the mechanized movement rate to enter or leave EZOC.
8.6 EZOC & Supply Tracing
When tracing the non-road portion of supply lines into and/or out of negated EZOC, don't pay any extra entry or leaving costs. When tracing the road portion of a supply line, the line is either blocked or not, based on the presence or absence of unnegated EZOC in the road path.
9.0 Regular Movement
9.1 Every unit in the game has a movement factor as described in rule 2.10. That movement factor is the number of "Movement Points" (also referred to as "MP" and "MF") available to the unit to use in moving across the map during its side's movement phase every game turn.
9.2 Movement Strictures
MP may not be accumulated from turn to turn or phase to phase, nor may they be given or loaned from one unit to another. A player may move all, some, or none of his units in each of his side's movement phases throughout the game at his own discretion and within the strictures given in these rules. Units that move aren't required to expend all their MP before stopping. The movement of the currently moving unit must be completed before that of another is begun. A player may change the position of an already moved unit only if his opponent agrees to allow it.
No "skipping" of hexes is allowed. Units move from hex to adjacent hex, paying varied movement costs to do so depending on the terrain and water barriers in the hex being entered and along its hexsides. In general, the movement of your units takes place only during your own player turns; no enemy movement takes place during your player turns (exceptions: see 13.7 and 14.1).
9.3 Minimum Movement Capability
Unlike many other wargames, units in this game aren't guaranteed the ability to move at least one hex during each of its side's movement phases. A unit may enter a hex only if it has in its remaining movement allowance all (or more) of the required movement points needed to pay all the entry costs for that hex.
9.4 Enemy Units
In general, your units may not enter hexes occupied by enemy units. For the exceptions, see 14.4 and 14.5.
9.5 Terrain & Movement
The number of movement points a unit must expend to enter a hex depends on the type of terrain in that hex and, possibly, the presence of a river in the hexside over which it will cross to enter the new hex. The costs to enter a hex containing only clear terrain is one MP. The cost to enter other terrain types are higher. If a hex is pictured containing more than one kind of terrain, for movement and combat purposes it's considered to consist entirely of the single most high-cost terrain within it. For example, a hex containing both clear and rough terrain would be considered all rough; a hex containing both light and heavy woods would be considered all heavy woods, etc.
9.6 Rivers & Bridges
When crossing an unbridged river hexside, or a river hexside crossed by an interdicted bridge (see section 11.0), one MP must be expended in addition to the MP necessary to enter the hex being crossed into. Thus, for example, a unit would expand a total of five MP to cross an unbridged river into a heavy woods hex. In the case of German movement across interdicted bridges, there's always a road leading up to, across, and away from the bridges on the map. So a German unit could use regular road movement up to the bridge, pay the +1 to cross the interdicted bridge, and then pay just one MP upon entering the road hex on the opposite side of the bridge. Interdicted bridges may not be crossed by German units using mechanized movement. See section 10.0 for more on that.
9.7 Exiting the Map
Only German mechanized units may move off the map (see 4.2).
9.8 British Mobility Restriction
British units may move or attack only into hexes lying generally west and north of the Meuse River. Note, though, that river doesn't limit their ability to interdict bridges on both sides of it (see section 11.0).
10.0 Road Movement & Mechanized Movement
10.1 There are two types of movement along roads. The first type, available to all units of both sides regardless of their type or supply status, is simply called "road movement" (or "regular road movement"). The second type, called "mechanized movement," may be conducted only by supplied Allied units (of all types), and by supplied German mechanized-class units. When a unit enters a hex through a road hexside, it pays only the cost for moving one hex along a road regardless of the type of terrain entered. A unit moving by regular road movement expends only one MP per hex, while a unit moving by mechanized movement expends only one-fifth (0.2) MP per hex.
10.2 Regular Road Movement
Units may combine regular road movement with off-road movement in any combinations(s) during a single movement phase. OOS units may still use regular road movement and, further, it may be used to enter and leave EZOC. In such circumstances, though, the plus-one extra MP cost must still be paid to enter or leave an EZOC. Similarly, regular road movement could be interrupted by an unbridged river hex side, or by an interdicted bridge hex side, and then might still be resumed after the river had been crossed (within the overall limits of the moving unit's MF).
10.3 Mechanized Movement
To use mechanized movement, an otherwise eligible unit must start its move in overland supply (not aerial supply) on a road hex not in an EZOC, and it may not have already used any other kind of movement that same phase. A unit may use mechanized movement and then switch to regular road movement or off-road movement, but it may not switch to mechanized movement during the same phase in which it's already used regular road and/or off-road movement. Further, a unit using mechanized movement may not use it to enter or leave an EZOC, nor may German units use it to cross an interdicted bridge hexside.
11.0 Allied Bridge Interdiction
11.1 All bridges within three hexes of one or more Allied ground units are considered "interdicted" (negated) for purposes of German movement and supply. When tracing the three-hex path, the hex the Allied unit occupies isn't counted, and all hex sides bordering each of the hexes within the three-hex radius of the interdicting unit are interdicted. For example, a US unit in Bastogne (1412) would interdict all the bridges along all the hex sides of hexes 1712, 1315, 1214, 1113, 1111 and 1112
11.2 Allied units interdict bridges within their range at all times, regardless of their own supply state, intervening terrain, German unit adjacency or any other considerations.
11.3 In general, a German unit or non-road supply line that crosses an interdicted bridge hexside pays +1 MP to do so (see: 7.4, 8.6, 9.6, 10.2 and 10.3).
11.4 German units don't interdict bridges 'at range.' Note, though, when German units are located directly adjacent to a bridge hexside, or have either side of a bridged hexside in their unnegated ZOC, that bridge is, in effect, interdicted for purposes of Allied movement and supply.
12.0 Reinforcements
12.1 Both players receive new units during the movement phases of their own player turns during specified game turns. The new units may enter the map via any road hexside that leads onto the map from the indicated map edges. All German reinforcement entry takes place along the east map edge. Allied entries take place from their supply source hexes on the north, west and south map edges (see 1.3 and 7.10). Each Allied unit's side of entry is indicated by the abbreviation N, W or S, along with the game turn number of that entry. In relation to the entry of British units there's a further stricture; see 9.8.
12.2 When an arriving reinforcement unit enters the map-which may occur at any time during friendly movement phases-the unit pays the regular road movement or mechanized movement rate to enter the first hex. When entering more than one unit through the same hex and/or hex side, they enter singly and without regard to which entered first. That is, it doesn't cost units more to enter the map because they happen to be entering behind some earlier entered unit.
12.3 Reinforcement entry hexes may not contain enemy units or their EZOC, negated or unnegated.
12.4 Either player may delay the arrival of any given reinforcement, decided by them on a turn by turn and unit by unit basis. Neither player, though, may accelerate the arrival of any reinforcement.
13.0 Combat
13.1 There are two combat phases per player turn, one prior to the movement phase and one after the movement phase. Combat between adjacent opposing units is always optional, decided on by the player presently taking his combat phase. Each unit has a combat factor printed on it, which represents its basic power to attack during its side's combat phases and its basic power to defend during the opposing side's combat phases. Note that all units of one side may potentially attack within both combat phases of a player turn. That is, attacking in the pre-movement combat phase in no way works to prohibit a unit from also attacking during that same player turn's post-movement combat phase.
13.2 A unit must be adjacent to (in the EZOC) of any enemy unit in order to be able to attack it. Such adjacency doesn't require an attack be made; it simply allows for it.
13.3 No single attack may have as its objective more than one enemy occupied hex. No single defending unit or stack may be attacked more than once per combat phase.
13.4 Multi-Hex Attacks
As many units as can be brought to bear from one or more adjacent hexes may combine their combat factors to participate in the same attack on the same defending hex.
13.5 Unitary Combat Factors
A single unit's full combat strength must always be used whenever it's involved in combat. No single attacking unit may have its combat factor split in order to be applied in more than attack. In general, no defending unit or stack may refuse combat (exception: see 14.1).
13.6 Stacks Attacking
Units located in the same hex need not all take part in the same attack simply because they're stacked together. If stacked units are adjacent to more than one enemy occupied hex, one or more of those units might attack into one hex while other units in the same stack attacked into another hex or simply not attack at all.
13.7 Attack Resolution
Attacks may be made in any order as long as the resolution of one attack is completed before that of the next is begun. The attacking player need not declare beforehand all the attacks he will make that phase.
13.8 General Combat Resolution Procedure
To resolve an attack, the attacking player should total the combat factors of all his units involved in that combat. Then he subtracts from that total the combat factor strength of all the units in the defending force being attacked. That resulting number-either positive, zero, or negative-is the "combat differential." The attacking player then locates the column heading on the Combat Results Table (CRT) printed on the mapsheet that corresponds to the combat differential he just calculated. He then rolls a die and cross-indexes that result beneath the previously determined column heading and finds the "combat result." That result is applied immediately, before going on to start the resolution of another attack. When he's made the attacks he wants, he announces the end of that combat phase.
13.9 Terrain & Rivers in Combat
When calculating the combat differential as described above, the number listed in the third column of the Terrain Effects Chart printed on the mapsheet (headed "Combat Addition"), is added to the combat strength of the defending force. Only add in the terrain number one time, no matter how many units constitute the defending force.
The river hexside bonus is added in, in addition to the in-hex terrain bonus for rough or light woods or heavy woods, regardless of the presence or absence of a bridge, interdicted or not. Note, though, the river bonus is granted to defenders only when all the units attacking are coming across river hexsides.
The defensive bonus for a town is also added in, in addition to that for the natural terrain in that hex or the presence of a river. Thus a unit defending with its combat factor of, let's say, "2" in a rough hex that contained a town, and that was being attacked only through river hexsides, would have a total defense strength of "9." That's its own combat factor of "2," plus the rough terrain bonus of "1," plus the town combat strength addition of "3," plus the river hexside addition of "3."
13.10 West Wall Hexes
West Wall hexes provide their defensive combat addition only to German defenders. When calculating the defense strength of US defenders in such hexes, completely ignore the fortifications. Note, though, West Wall hexes aren't destroyed by US occupation. If a once-captured West Wall hex is retaken by the German player, that defensive bonus is again available to his units in those hexes. Also see 7.12 and 8.3.
13.11 Concentric Attack
In general, if a defending unit or stack is attacked by enemy units from opposite sides, or by units from three hexes with one hex between each and the next, or by units from more than three hexes, that attack gains a one column rightward differential column shift. The exception is that this bonus is never available against defenders in town hexes.
13.12 Supply & Combat
See 7.7 for the effects of being out of supply on combat differential determination.
13.13 Differential Limits
If the finally determined combat differential is higher (or lower) than the highest (or lowest) column heading on the CRT, resolve that attack using the highest (or lowest) column.
13.14 Lowering Combat Differentials
The attacking player may choose to lower his combat differential in any given battle by one or more columns. He must, though, announce that decision before rolling the resolution die.
13.15 Attack Stalled (AS) Combat Result
In effect, nothing happens. No losses are suffered, nor does any movement take place, by the involved units of either side.
13.16 Attacker Eliminated (AE) Combat Result
All involved one-step attacking units are removed to the dead pile; all involved two-step attacking units are reduced to one-step strength. In German attacks, if a VAK fired in support of the attack, it's not affected in any way.
13.17 Defender Retreat (DR) Combat Result
When a combat result requires a player's units be retreated after combat-the "DR" result-the defending player must immediately move the affected units one hex. If no hex is open to receive the retreat, a blocked unit or stack is instead kept in place and must there suffer a DE result instead (see 13.20 below). No unit may retreat into an unnegated EZOC or off the map or into a hex where it would be overstacked.
Units retreating from the same hex must be retreated into the same hex unless stacking limits would thereby be violated in the new hex. In that case, the owning player must carry out the minimum stack-break up necessary in order to meet stacking limits.
Both players retreat their own units. If more than one retreat destination hex is open to retreating German units, they should be retreated into the hex that brings them closest to their nearest functioning supply source hex. If two or more equally eligible retreat-destination hexes exist equidistant, the German player is free to choose among them. If more than one hex is open to retreating Allied units, they should be retreated into the hex that brings them closest to their nearest functioning supply source hex. If two or more equally eligible retreat-destination hexes exist equidistant, the Allied player is free to choose among them.
If more than one hex is open to retreating units, they may be retreated into any one that brings them closer to a functioning supply source hex (owning player's choice on a case-by-case and unit-by-unit basis).
If a unit is retreated onto another friendly unit or stack that's subsequently attacked that same phase, the retreated-in unit doesn't contribute its combat strength to the new defense, but it does share in the result of the attack made into its new hex.
13.18 DR Option in Towns
As noted on the Terrain Effects Chart printed on the mapsheet, whenever a DR result is obtained against defenders in a town hex, the player owning those units may decline to make the retreat, in effect converting the result into an AS. That decision need not be declared before a DR result is rolled; however, it's all or nothing. That is, the defender can't choose AS for some of his defending force and DR for another portion. The application of this rule supercedes rule 13.23.
13.19 DR Conversion Outside Towns
Whenever a DR result is obtained against defenders in any kind of hex other than a town, the player owning those units may decline to make the retreat by converting it into a DL1. The DL1 (Defender Lose 1 Step) result isn't on the CRT as such; it occurs only in this kind of conversion. To administer a DL1 result, the defending player must reduce any one of his units involved in that battle by one step, with the survivors remaining in place. If a defending force contains only one step, this DR conversion is not available as a choice for the defending player. The decision to convert a DR to a DL1 need not be declared before a DR result is rolled. Also note, if a defending force has no retreat path as described above in 13.17, it inescapably suffers a DE. This conversion to a DL1 is open only to defenders who would otherwise have a valid retreat hex open to them.
13.20 Defender Eliminated (DE) Combat Result
All involved one step defending units are removed to the dead pile; all involved two-step defending units are reduced to one-step strength. If the defender hex is left vacant by this result, victorious attacking units may advance after combat (see below, 13.21).
13.21 Bloodbath (BB) Combat Result
All involved one step defending units are removed to the dead pile; all involved two-step defending units are reduced to one-step strength. The attacker should note the number of strength-steps (not combat factors, but strength steps) that were just lost by the defender. He must then reduce his attacking force by that number of steps. In multi-unit situations, the attacker may apportion those step losses among his involved units any way he sees fit. If the defended hex is left vacant by this result, victorious attacking units may advance after combat (see below).
13.22 Advance After Combat
Whenever a defended hex is vacated by any combat result, one or more involved attacking units may be advanced into that vacated hex. Within normal stacking limits, more than one involved attacking unit may advance. Exactly which involved unit(s) conduct(s) the advance-after-combat is up to the owning player. For both players, such advances after combat may be made without regard to EZOC. Advances after combat don't involve the expenditure of any movement points by the advancing units; they are, in essence, free movement. Advances after combat are always voluntary, but each must be performed immediately as the opportunity for it occurs, before any other battles are resolved. Note there are never any defender advances after combat; victorious defenders simply remain in place. Also note VAK never advance after combat.
13.23 National Socialist Ardor
Whenever the German player is attacking on any one of the three leftmost columns on the CRT ("<= -3" or "-2 or -1" or "0"), he may announce he's committing to a "National Socialist Ardor Attack." That means he will roll the resolution die until the first time he gets a result other than AS. He must make that commitment prior to rolling the die the first time and, once so committed, he can't change his mind.
13.24 No Joint Allied Attacks
US and British units may not participate in the same attack.
14.0 Special Unit Characteristics
14.1 Certain units on both sides have characteristics unique to their types. Those characteristics are described below.
14.2 US Armored Cavalry Retreat Before Combat
If an overland supplied US armored cavalry regiment is alone in a hex, and the German player launches an attack against it, and that German attacking force doesn't contain any supplied mechanized-class units, the Allied player may decide he will retreat before combat (take a DR result) with his armored cavalry regiment. The declaration is made prior to the combat resolution die roll being made. Such retreats before combat allow for normal German advances after combat, must be made under all the strictures given for the normal DR result and, further, they may not be made into West Wall hexes.
14.3 SS Kampfgruppe Peiper (SSP)
The German SSP unit is always in supply and it never pays the extra stacking and unstacking costs when it moves
14.4 SS Einheit Steilau Commandos (SSES)
As soon as the German player receives this unit as a reinforcement, he should place it atop any US unit then on the map. The effect is that US unit is out of supply for movement purposes during that game turn's Allied Movement Phase. Remove the SSES unit at the completion of that US Player Turn's Movement Phase. The SSES unit has no step or combat strengths of its own, nor does it exert a ZOC, nor does it have any combat effects.
14.5 Von Der Heydt Paratroop Unit (VDH)
The German player should place the VDH unit in any non-town, non-heavy woods hex on the map at end of Game Turn 1. It may not be placed within six hexes of any other German unit. If a German unit moves into the VDH unit's hex prior to VDH having been eliminated by Allied action, remove the VDH and score one victory point for the German player. For the Allied player to remove the VDH unit, an Allied ground unit must simply move atop it. The VDH doesn't have any stacking, combat or step values of its own, nor does it exert a normal ZOC; however, all hexes adjacent to the VDH unit, as well as the hex occupied by the VDH unit, cost Allied units double the normal movement factors to enter. Further, Allied units moving in those hexes may not use road or mechanized movement to do so, though supply tracing isn't inhibited or blocked in any way. US units may retreat after combat atop the VDH, in which case it (the VDH unit) is eliminated. The VDH unit, once placed on the map, doesn't move except to into the dead pile.
14.6 German 2nd FLAK Division
This unit may never attack alone. One or more other German units must attack with it in order to enable the 2nd to attack at all. Note, though, it isn't necessary for the other German unit(s) participating in an attack with the 2nd to do so from the same hex as the 2nd. It also never attacks at all when it's out of supply. US combat ground support aircraft units may not support an attack or defense in which the supplied 2nd FLAK is involved.
14.7 German Volks Artillerie Korps (VAK)
These units each count as two divisions for stacking purposes. Unlike other units in the game, they have movement factors of three and they may not move at all when they're out of supply. VAK exert normal ZOC, but they themselves may never move from EZOC to EZOC. If one or more Allied ground units attack a VAK, that combat result is automatically DE.
VAK don't attack normally. They participate in offensive combat by supporting other non-VAK German units in an attack taking place against an Allied defended hex that's two hexes away from the VAK's location. They may not contribute such support when out of supply, nor may they do so when directly adjacent to one or more enemy units. They also don't fire on Game Turn 1. Further, even when all those pre-conditions have been met, they may still fire only during the pre-movement combat phase of the German player turn, and no more than one VAK may ever contribute its combat factor to any given German attack. Also note they contribute by adding one combat factor to German attack strength, not by causing a one-column differential shift.
15.0 US Airpower & Combat Support
15.1 US Ground Combat Air Support
The US player receives four ground combat air support markers as special reinforcements on Game Turn 8. Those units are available for use starting with the very beginning of that game turn. The markers have no step, stacking or combat values of their own, nor do they exert zones of control. They are indestructible in game terms. They have no range limit, and each one may be deployed once per game turn. They may be deployed onto the map in any German or Allied Combat Phase, at the rate of one per battle. If deployed against a German attack, the effect is to shift the combat differential one column in the Allied defending force's favor (left). If deployed into an Allied attack, the effect is to shift the combat differential one column in the Allied attacking force's favor (right). They may support British or US combats.
15.2 US Combat Support
Though not represented by their own counters in the game, US combat support units made a considerable contribution to the battle once their higher commands got over the shock of being involved in an unexpected major enemy counteroffensive. To reflect that change, starting with Game Turn 8, all overland supplied Allied Pre-Movement Combat Phase attacks gain a one column right differential shift, and all German Post-Movement Combat Phase attacks suffer a one left differential shift.
16.0 Combat Results Table
Columns are combat differentials; rows are the die roll.
| Die Roll | <= -3 | -2 or -1 | 0 | +1 or +2 | +3 | +4 | +5 or +6 | +7 or +8 | +9 to +11 | >= +12 |
|---|---|---|---|---|---|---|---|---|---|---|
| 1 | DR | DR | DR | BB | BB | BB | BB | DE | DE | DE |
| 2 | AS | DR | DR | DR | DR | DR | BB | BB | DE |
17.0 Q & A
Q. Once the Flak unit is placed, does it travel as a mechanized unit?
A. Please note that unit's coloration: the FLAK is a non-mechanized unit.
Q. On the CRT at a 12+, the highest differential you can get, you get TWO chances of a BloodBath. What gives with that?
A. Please see rule 13.14.
Q. It looks like terrain is cumulative even if just a small portion of a hex has a different type. For example on game turn one hex #1307 with the 110th (1 SP) has six points added to it's strength due to combat additions (3 for the river, 2 for the light woods and another 1 for the rough the light woods are in) correct?
A. Please see rule 13.9.
Q. Another example of my terrain question is a hex like 1124 which has Heavy Woods, Light Woods, Rough and a Town for a total addition of nine points to the combat value for the defender
A. False - give the defender the single-best natural in-hex terrain additive. To that add the hexside benefit for any river. To that add the benefit for a town and/or a WestWall fortification.
Q. If an interdicted bridge lies within the road portion of a German unit's supply line, that supply line is "incomplete," but I just can't figure out exactly what this means. Is it as simple as "you can't use interdicted bridges to trace the road part of the supply line"?
A. Yes.
Q. But 7.2 seems to suggest otherwise when it says: "Once you've designated a hex to be the start of a given supply line's road portion, you may not thereafter take that supply back off the road, even if you didn't use up the full six movement maximum to get it onto the road. For the exception, see 7.4 below." This suggests you can somehow use saved MPs to trace across interdicted bridges,
A. I don't understand how it suggests that. Please simply read and apply 7.4.
Q. The problem is the phrase "that supply line is incomplete." What does incomplete mean for this rule?
A. Broken, unusable, Kaput, Vorbei.