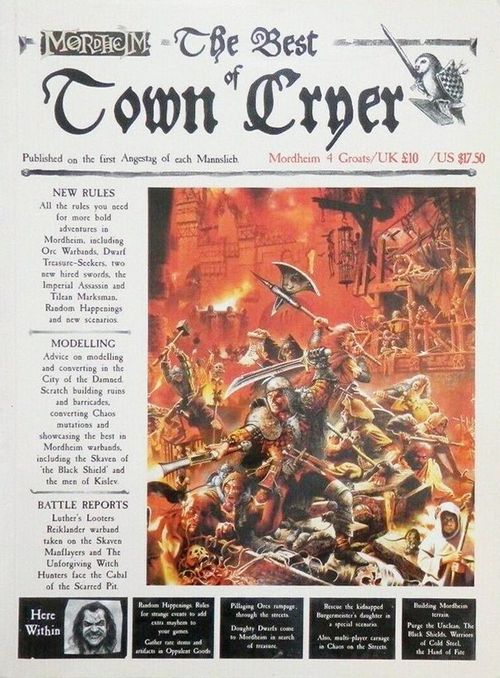
The Best of Town Cryer
The Best of Town Cryer Rulebook
Table of Contents
Table of Contents
New Rules
Random Happenings
Mordheim is a dark and sinister city – dangers lurk around every corner. Even the basic laws of nature cannot be relied upon. [Byline omitted.] These dangers can be introduced to your battles.
These rules represent the weird and wonderful things that can happen in Mordheim which are beyond the control of players. These rules are intended to be optional and should only be used if agreed on by all players taking part. To determine if a random encounter occurs, roll a D6 at the start of each player's turn. A result of 1 indicates a random encounter. Roll a D66 for the random encounter on the chart below to see what exactly is encountered and follow the directions. The player whose turn it is places any models that represent the encounter and they will act in each of his turns (that player doesn't control their actions though, see the individual descriptions to see how the models act). This player is known as the 'Encountering Player', even though random encounters will frequently affect only his opponent or both players indiscriminately.
The models that represent a random encounter must all be placed within 6" of a randomly determined board edge and they will remain within 2" of another member of their group at all times. Random encounter members must be placed (and will remain, unless their description indicates otherwise) at ground level in the open. The Encountering Player places the models representing the random encounter, but note that they cannot initially be placed within 12" of any warband models.
After being placed, many encounters will travel as quickly as possible (without running) towards the nearest warband model. For this purpose the nearest model is the model that the encounter can reach most quickly and encounter models will never climb the sides of a building to get at a warband member. What each encounter does from there is listed in its description. Note that charging models will engage as many warband members as they can reach, ganging up if some of them can't reach different models. No more than one random encounter will ever take place in a single game, so after a random encounter is rolled, the players no longer need to roll at the start of their turns.
Random Encounters Chart
D66 Result
11 Ogre Mercenary
An Ogre Mercenary (see the Hired Swords section of the Mordheim rules for details on the Ogre Mercenary) appears further down the street. Sensing trouble brewing, he decides to seize the opportunity and offer his services to the warband with the lowest warband rating (if there are two warbands with the same rating, roll a dice to see whom he offers his help to). The warband that he offers to help must add the Hired Sword to its roster for this game. At the end of the game the Ogre demands payment for services rendered. The warband that he joined must pay his hire and upkeep fee. If the warband cannot (or will not) pay him, he leaves, but not before taking out his frustration on a random member of the warband (only roll among members of the warband who were not taken out of action during the game). Roll for injuries to this unfortunate member just as if he had been taken out of action.
12 Swarm of Rats
Something in the sewers has frightened the rats that live there. The rats are in a hurry to get away and will attack anything that stands in their path. Use a template 80mm x 120mm to represent the rats. Six monster bases (use rat swarms if you have them), placed in a rectangle with one short side representing the front, will do nicely. The rats move 2D6" each turn. They will always move forward down the centre of the street and if they come to an intersection roll randomly to determine which direction they take (example: for a normal 4-way cross-intersection roll a D6: 1-2 right, 3-4 straight forward, 5-6 left). The rats cannot be engaged in close combat and if they make contact with a model they will run right over him. Any model moved over by a swarm of rats will suffer D3 Strength 2 hits, normal armour saves apply.
13 Earthquake
Powerful magical energies from the crater at the centre of the city shake the local landscape. The ground heaves and buckles violently and warband members find it hard to keep their footing. Roll a D3 to determine how many turns the earthquake lasts. While the shaking persists all movement is halved, all Initiative tests (climbing, etc) suffer a -2 penalty and all Shooting and Close Combat to hit rolls are made with a -1 penalty.
14 High Winds
A powerful wind screams through the area, wildly scattering debris and knocking down anything that is not firmly anchored to the ground. Warband members now suffer a -1 penalty to all Initiative tests (climbing, jumping, etc) and to hit rolls (close combat and shooting) for the rest of the game.
15 Blood for the Blood God!
Unfortunately for the warbands involved, the scent of blood has brought the attention of one of Khorne's minions. Reality is breached as a vicious Bloodletter emerges from the realm of Chaos to shed even more blood for its master. The Bloodletter has the following characteristics and special rules:
| Profile | M | WS | BS | S | T | W | I | A | Ld |
|---|---|---|---|---|---|---|---|---|---|
| Bloodletter | 4 | 6 | 0 | 4 | 3 | 1 | 6 | 2+ | 10 |
Fear: As monstrous and horrifying creatures, Bloodletters cause fear.
Save: 4+ Daemonic armour save.
Psychology: Immune to all psychology tests.
Hellblade: The Bloodletter is armed with a Hellblade which will automatically cause a critical hit if a 4+ is rolled to hit.
The Bloodletter will seek out the nearest close combat and join in, drawn by the clash of steel. The Daemon has a number of Attacks equal to the number of opponents it is fighting (down to a minimum of 2 Attacks). It will split its attacks amongst the opponents, and no matter how many warriors are involved it may roll to hit each one at least once. It will also prevent an opponent from taking any other warrior out of action in the massed combat, as they will be too concerned with the Daemon to finish off their other enemy!
If there are no ongoing close combats within range, it will charge the model with the highest Weapon Skill in order to do battle with a worthy opponent. If there are no enemies within charge range, the Daemon will run towards the nearest warrior, eager to do battle. The Daemon will stay for D6 turns after which it will disappear.
16 Lucky Find
One random model, on his feet and not in hand-to-hand combat or fleeing, has stumbled upon a shard of wyrdstone! Assuming he doesn't go out of action, this is added to any other shards the warband finds after the game. If he is taken out of action in close combat, the enemy model steals the shard away! Note that only non-animal models can find or steal a shard, not Dire Wolves, Hunting Dogs, etc.
21 Restless Spirit
Countless unfortunates have suffered agonising deaths in countless forms since the comet crashed into the city. Not all of these individuals can easily accept their new condition and they refuse to rest. Perhaps they left some important task unfinished or seek revenge on those who did them harm. The warbands have stumbled upon one such ghost. Any warband member who is within 8" of the spirit at the start of its Movement phase must make a Leadership test or flee (exactly as if he were fleeing from combat). Models that are immune to psychology automatically pass this test. This creature is unable to affect (or be affected by) the physical world, but it is very frightening nonetheless. The spirit moves 4" in a random direction, moving through walls, obstacles or warband members as if they were not there. It will not charge and cannot be harmed by the warband members in any way. The only exception to this is if the spirit comes into contact with a Sigmarite Matriarch or a Warrior-Priest of Sigmar. These models may choose to put the dead to rest. If the player controlling such a model decides to do this, the spirit is immediately banished (disappears and does not return) and the priest gains one Experience point.
22 Burning Building
Suddenly, one of the buildings (chosen at random) bursts into flames, ignited by smouldering embers from a fire thought extinguished long ago. Warband members inside take a S3 hit unless they move outside in that turn and any models within 2" of the walls take a S2 hit from the smoke and heat unless they move farther away as well. For the rest of the game, the building itself will cause fear due to the intense flames and anyone who wishes to enter it must first pass a Fear test exactly as if they wished to charge a fear-causing enemy.
23 Man-Eater
One of the trees growing in the area has been changed into a carnivorous predator by exposure to the Chaos magic inundating the area. Randomly determine which member of the Encountering Player's warband finds the plant. That model is attacked as a large mouth opens up in the trunk of the tree and its branches whip down to grab its unfortunate victim. Place a tree next to the victim. He is now considered to be in close combat with the tree, which has the following characteristics:
| Profile | M | WS | BS | S | T | W | I | A | Ld |
|---|---|---|---|---|---|---|---|---|---|
| Tree | 0 | 3 | 0 | 4 | 6 | 3 | 3 | 2 | 10 |
The tree automatically passes any Leadership tests it is required to make. Any result on the Injury table will cause the Man-Eater to stop attacking, though it is not possible to actually take it out of action or knock it down. Opponents are +1 to hit the tree, due to the fact that it is rooted to the spot!
24 Skeletons
While the intense magic of the area rapidly dissolves skeletons to dust, shambling hordes of them spring up at random from the bones of the fallen. Uncontrolled, they roam the city wasteland, blindly attacking everything they find before falling apart. 2D6 Skeletons appear with the following profile:
| Profile | M | WS | BS | S | T | W | I | A | Ld |
|---|---|---|---|---|---|---|---|---|---|
| Skeleton | 4 | 2 | 2 | 3 | 3 | 1 | 1 | 1 | 10 |
Fear: The Skeletons cause fear.
Psychology: Skeletons are immune to all Leadership-based tests and Stunned results.
They are armed with simple weapons or bony fists (treat as daggers in close combat). The skeletons will move towards and attack the closest models as quickly as possible. Roll a D3 when they appear, after that many turns they crumble back to inanimate bones (count the current turn as the first one).
25 The Twisting of the Air
Reality itself seems to twist, warping perceptions until no one can be sure of what their senses tell them. Roll a single D6 at the start of each player's turn. For the next D3 turns, the distance within which warriors can use their Leader's Leadership value and the distance for being All Alone is the value rolled instead of the normal 6". All distances between models are also increased by the same D6" roll for purposes of weapon ranges and charging. Note that the actual models are not moved, but only the shooting/charging models' perceptions of the distance.
26 Spawn
The warbands have stumbled upon one of the many former inhabitants of the city that got too close to the crater at the centre of the city and was turned into a mindless Spawn. Spawn have the following characteristics:
| Profile | M | WS | BS | S | T | W | I | A | Ld |
|---|---|---|---|---|---|---|---|---|---|
| Spawn | 2D6 | 3 | 0 | 4 | 4 | 2 | 3 | 2D6 | 10 |
Fear: Spawn are disgusting and revolting blasphemies against nature and cause fear.
Psychology: They are mindless creatures, knowing no fear of pain or death. Spawn automatically pass any Leadership-based test they are required to make.
Movement: The Spawn moves 2D6" towards the nearest model in each of its movement phases. It does not double its movement for charging, instead if its movement takes it into contact with a model it counts as charging and engages that model in close combat.
Attacks: Roll at the beginning of each close combat phase to determine the spawn's number of Attacks for that phase.
31 Collapsing Building
Pick one building at random. Any models inside must pass an Initiative test or suffer a S5 hit, armour saves applying as normal, as the building collapses. Remove the building from the table (replacing with ruins if possible), and place the models back on the table where it stood. Any models climbing the sides of a building or on the roof when it collapses automatically fall from whatever height they were at.
32 Scrawlings on a Wall
A randomly determined warband member who is within 4" of a building (if there are no models this close to a building, ignore this encounter), sees writing suddenly appear in blood on the wall closest to him. Roll on the following table to find out what the writing says:
| D6 | Result |
|---|---|
| 1 | The writings are a map of the area. The model's warband receives a +1 on the roll to pick the scenario for the next game they take part in. |
| 2 | Reading the writing accidentally sets off a spell on the reader. The model suffers a minor curse and now has a -1 penalty to all dice rolls for the rest of the game. |
| 3 | The warband member learns of the remains of some booty inside the building. If he moves inside, he finds 1D6 gold crowns. |
| 4 | The writings reveal all the hiding places in the area. The model can hide even in the open for rest of the game. |
| 5 | The warband member learns of a secret passage inside the building – if he moves inside, he can pop out next turn in any other building. |
| 6 | A fun read, but nothing else happens (Veskit was here!). |
33 Thick Fog
A fog rolls in, thick as pea soup. Models can only see 2D6" (roll once for the distance all models can see; do not roll individually for each model). Re-roll at start of each Encountering Player's turn to see what the visibility is for that turn. The fog lasts for the rest of the game.
34 Hands of Stone
Hands of earth and stone suddenly jut out of the ground in a small area of the battlefield. The Encountering player must pick a spot anywhere on the battlefield and anything within 3" of that spot is affected. The area is now very difficult ground as the hands grasp and attempt to hold anyone passing near them. This encounter lasts one turn, at the end of which the hands sink back into the ground.
35 Dog Pack
Recent events in Mordheim have caused many of the city's dogs to suddenly find themselves without homes. Groups of these animals turn feral and form into hunting packs. The warbands have been discovered by one such (very hungry) pack. The pack consists of 2D3 wild dogs (use the Hunting Dog stats from the Witch Hunter warband list). The dogs move as quickly as they can toward the nearest models, dividing themselves as evenly as they can between multiple targets if they are available. If members of a dog pack take a warband member out of action, he will be eaten if not rescued. If no friendly model comes within 6" of where the model fell by the end of that warband's next turn, the fallen member is considered lost (dog food). If a dog pack fails a Rout test, they leave without taking their 'food' with them, any warband members taken out of action in the last turn of the game have not been eaten and follow the normal rules for models taken out of action.
36 Possessed!
One randomly-selected member of the Encountering Player's warband is suddenly possessed by a minor spirit. This spirit is far too weak to control the model's entire body, but is instead limited to controlling one of his or her limbs (usually an arm). The model takes an automatic hit at his or her own Strength during each of his or her close combat phases until the possession is over and may do nothing else. The possession lasts 1D3 turns. Note that Sigmarite Matriarchs and Warrior-Priests are immune to this possession, as are non-living warband members. If such a warband member is the object of the spirit's attention, randomly determine another warband member to suffer the effect instead.
41 Fountain of Blood
The city itself seems to weep as even more blood is shed on its streets. For the rest of the game, whenever a model is taken out of action in close combat, the model that did the deed must take a Strength test or be knocked down as he is hit by a torrent of blood pouring from the ground. If there were others involved in the combat they are not affected, as the steaming liquid seems to be directed only at those who have called it into being by their bloodthirsty actions.
42-44 Storm of Chaos
Clouds rapidly gather above the city in an unnatural, sickly yellow-green mass and warp lightning begins to dance from one cloud to another. Thunder rocks the air, screaming out in almost intelligible noises. The clouds themselves seem to take on the shapes of monstrous creatures and both warbands in the conflict look at each other with fear on their faces. Roll a D6 to see what the storm manifestation will bring:
| D6 | Result |
|---|---|
| 1 | Warp lightning begins to strike the ground in search of a victim! It will hit the warrior with the best armour save, attracted to the large amount of metal. That warrior takes a S5 hit, with no armour save possible. If multiple warriors all have the highest armour save, randomly determine which is struck. The warp lightning will strike for D3 turns before moving on towards another part of the city. |
| 2 | Fish suddenly fall out of the sky to pelt the area! All movement is halved for one turn (due to wet, flapping fish underfoot), but there is no other effect. |
| 3 | Wyrdstone dust has mixed with the water vapour in the area and produced the strange-looking clouds from which a tainted rain begins to fall. The rain burns flesh and eats into stone and metal. Each warband member in the open takes a single S2 hit (normal armour saves apply) every turn the rain lasts until he gets under cover. The rain lasts 1D3 turns. |
| 4 | A magical mass of lightning forms near the ground, illuminating the area with an eerie greenish glow. It begins to move about the area, drawn to magical powers from which it feeds. Place a counter as per the normal Encounter rules to represent the mass and each turn move it 2D6" towards the highest level spell user (the one with the most spells: each turn roll a D6 if two or more spell users have the highest number of spells). If there are no magic users in the game, the mass will move towards the opposite table edge, doing nothing but blocking line of sight as it moves. If the model the mass is moving towards casts a spell, immediately move the counter another D6" towards the model. If the ball of lightning touches the target model, the model is frozen in time and cannot do anything. While frozen, the model cannot be attacked or harmed in any way – the lightning mass protects its prey! After freezing a model, the lightning will no longer move but will instead remain near its victim to feed. The lightning will feed for D3 turns on the magical energy of its victim and then flies back towards the warp clouds above, freeing the magic user. If the game ends before the feeding is done, the victim is immediately released. Victims suffer no long-term ill effects from their exposure to the lightning. |
45 Pit Fighter
This encounter is identical to the Ogre Mercenary encounter before, except the Hired Sword encountered is a Pit Fighter, not an Ogre Mercenary.
46 Plague of Flies
An enormous cloud of flies appears in the sky and swoops down on the warbands below. All models have an extra -1 to hit penalty when shooting or fighting in close combat as flies buzz around them and into open orifices. The flies remain for D3 turns and then fly away.
51 Sinkhole
An enormous mouth suddenly opens up under the feet of one randomly-determined warband member. Make an Initiative test for the model. If the test is failed, the model falls into the pit. If a 1 is rolled for the test, the model is sucked underground and taken out of action. Any other failure results in the model catching himself in the opening, which closes around him. Treat the model as being knocked down for the rest of the game, though he may not move at all.
52 The Horror in the House
Randomly select one warrior lurking alone inside a building (if there are no warband members inside a building, ignore this result and re-roll on the Random Encounters table). Unfortunately for him, he's not as alone as he thought. He hears a slight ripping sound as if the air itself is being torn apart and something manifests itself behind him. The warrior must make a Fear test and if he fails in his next movement phase he will run screaming 2D6" from the building towards the nearest table edge and can do nothing else in that turn. If he passes the test, the unnatural presence still forces him D6" outside, but he suffers no other effects. At the start of his subsequent turn a fleeing model can try to recover from his ordeal by passing a Leadership test, but at a -1 penalty. If he does, he stops, but cannot do anything else that turn other than catch his breath. If he fails, he again moves 2D6", trying in vain to erase the terrifying images from his memory. For the rest of the game, the building itself will cause fear, and anyone who wishes to enter it must first pass a Fear test exactly as if they wished to charge a fear-causing enemy.
53 Plague Victims
Disease is a common occurrence among the few survivors left in the ruins of the city. This group of 1D6 citizens has contracted a particularly nasty plague known as Nurgle's Rot. They move at normal rate (4") towards the nearest warband members, seeking their help. If they come into contact with a warband member, they will not attack, but will instead cling to him as they beseech his aid, hindering him greatly. A model with Plague Victims in contact with him acts as if he had just recovered from being knocked down (moves at half rate, may not charge or run, etc. See the Mordheim rules for details). If one or more of the Plague Victims is charged, shot at, or otherwise attacked, these pitiful victims will rout immediately. At the end of the game, roll a dice for each warband member in play when the Plague Victims appeared and on a roll of 1, that member has contracted Nurgle's Rot. Roll again to see what effect the disease has on that member:
| D6 | Result |
|---|---|
| 1 | Major Symptoms: The plague races through the victim's system, producing horrible disfiguring lesions before killing him. If the model is a Henchman, he dies. If the model is a Hero, roll D3 times on the Serious Injury table (ignoring Robbed, Bitter Enmity, Captured and Sold to the Pits results) to determine the long term effects of the disease. |
| 2-5 | Minor Symptoms: The plague takes its toll on the victim as it takes its course. Without proper bed rest the victim will die. The warband member must miss the next game as he recovers. |
| 6 | Full Recovery! The victim has an especially hardy constitution or gets an extremely mild case of the disease. The victim suffers no ill effects. |
54 Last One Standing
The horrors of Mordheim can drive even the strongest mind past the point of madness. This Sigmarite Matriarch (for stats see the Sisters of Sigmar section of the Mordheim rules) has seen her entire warband cut down around her and the experience has proven too much for her. She now seeks revenge and is not particular about who she gets to pay! She is armed with a sword and steel whip and wears heavy armour and a helm. She carries Blessed Water and a Holy Relic on her person as well. She knows the prayers The Hammer of Sigmar and Armour of Righteousness (see the Prayers of Sigmar chart in the Mordheim rules for details). Roll randomly to determine which she casts on herself each turn. She has the skills Absolute Faith, Jump Up and Step Aside. The Matriarch will move as quickly as possible towards the nearest model and engage them in close combat if able. She will not rout and must be taken out of action to make her stop. If the Matriarch is taken out of action, leave her body where it fell, any non-animal warband member may loot her body by moving into contact with it during their movement phase. If this warrior is later taken out of action as well, place a counter where the warrior fell to represent the Matriarch's equipment. This it can then be picked up by a different model, as above.
55 Booby Traps
Some nefarious individuals have trapped the whole area the warbands are searching. These traps may take the form of spiked pits, deadfalls, spring-driven spiked boards, etc. When this encounter is rolled, the Encountering Player must randomly determine which of his warband members has discovered the first trap. This unfortunate individual springs a trap immediately. If the trap is not avoided by passing an Initiative test, the model takes a Strength 3 hit; armour saves apply as normal. From this point until the end of the game, each player will roll a D6 at the start of his or her movement phase. A roll of 1 means that one member of that player's warband has discovered another trap and must make an Initiative test to avoid it. If the trap is not avoided, the model takes a S3 hit as above; apply any damage before the model is moved.
56 Catacombs
The ground gives way under one randomly selected warrior and he falls into the depths of the catacombs below the city. He takes a S3 hit from the fall unless he passes an Initiative test, and lands near the remains of others who have fallen before him. Assuming he's not taken out of action by the fall, he discovers one of the following after a quick search (roll a D6):
| D6 | Result |
|---|---|
| 1 | A helmet |
| 2 | A small pouch containing 2D6 gold crowns |
| 3 | A lantern |
| 4 | A net |
| 5 | A vial of Black Lotus |
| 6 | A sword |
Unless he has a rope & hook, the warrior is stuck in the catacombs and cannot rejoin the game. He will count as being out of action for Rout purposes, but will rejoin his warband after the game with no other untoward effects. If he does have a rope & hook, he can climb out D3 turns later, appearing inside a randomly determined building.
61 Forbidden Fruit
Ghostly white flowers suddenly open on a tree in the area and emit a powerful fragrance. Randomly determine a member of the Encountering Player's warband who happens to be standing next to the tree when it comes to life. Place the tree within 2" of this model. Any warband members within 8" of the tree must make a Leadership test at the start of their turns or move as quickly as possible towards the tree. If within 1" of the tree, a spellbound model will pick and eat one of the swollen, blood-red fruit hanging from its branches. Any model eating one of the fruit is automatically taken out of action, as powerful poisons incapacitate it or her. A non-spellbound warband model may keep another model from moving toward the tree by moving into base to base contact with him or her and holding him back. Neither model may do anything else while the spellbound model attempts to move to the tree and the restraining model attempts to prevent him from doing so. Both spellbound and restraining models can react normally if attacked in close combat and a restraining model can give up his attempts at any time. This encounter lasts the remainder of the game. Close inspection of the tree reveals the bones of several animals overgrown with grass and leaves lying at its base.
62 The Lost
Many view the destruction of Mordheim as a sign that the world is coming to an end. Groups of these lunatics are often drawn to the city where they attack anyone they come across, certain that they are in some way helping to avert this cataclysm. This group of 1D3 Flagellants (see the Witch Hunter section of the Mordheim rules for stats and special rules) will move as quickly as possible towards the nearest warband members and engage them in close combat as soon as they are able. They are armed with flails.
63 Reflecting Pool
One warrior on the ground (selected at random from the Encountering Player's warband) notices a small pool of what looks to be still water. Reflecting the gloomy sky above, it appears to be liquid metal or unnaturally deep silvery water, rippling only slightly with the dank breeze blowing through the city. He can ignore it, or bend quickly to peer into its depths. If he's brave enough to gaze into the murky liquid, roll a D6:
| D6 | Result |
|---|---|
| 1 | The water reflects back nightmare images of his own demise, filling him with fear for his own safety. For the rest of the game, no matter how far away he is from friendly models he will always count as being all alone in close combat. |
| 2 | The warrior glimpses an image of what is yet to come. For the rest of the current turn he may re-roll (once!) any shooting or close combat rolls to hit. |
| 3 | A faint image of his personal god appears, be it Sigmar or even the dread Shadowlord. Filled with courage, the warrior may ignore any and all Leadership-based tests he is required to make for the rest of the game. |
| 4 | The warrior peers into the depths of his own mind, unlocking untapped abilities. He can detect any enemy models hidden that turn, even those not in his normal line of sight, and passes the information on to the rest of his compatriots. All enemy models lose their hidden status. |
| 5 | A slender arm reaches out from the pool, leaving no ripples in the smooth liquid, and pale fingers touch the warrior's chest. The soft caress causes a faint glow, which spreads throughout his body. Though it quickly dims away, a strong feeling of strength and vitality is left behind. The warrior may ignore the next wounding hit he receives, even if it is a critical hit. |
| 6 | The city chooses to reveal its true visage to the warrior, unveiling the monstrous intelligence that lurks behind the facade of simple ruins and rubble. The warrior's mind is overwhelmed by the enormity of the impression and he stumbles away in stark terror. For the rest of the game, all enemy models count as causing and the warrior will refuse to enter any buildings or get within 2" of any walls or ruins. After the game the effects will wear off, though he will always hesitate slightly before entering an unlit room from now on... |
Note: Only warriors who can gain in experience can choose to look into the pool, all others simply lack the curiosity to bother!
64 Screaming Walls
Faces appear in the walls of one randomly-determined building and start to emit a piercing shriek. Any warband members within 8" of the building take a S1 hit (no armour saves allowed) and are at -1 on all to hit rolls (close combat and shooting) while the screaming lasts. Spellcasters are even more sensitive to the noise than others and so no spells may be cast from within this radius. Roll a D3 to determine how many turns the screaming lasts.
65 Peddler
No matter which turn it is rolled on, this encounter happens at the end of the game. The winning warband sees a peddler wandering through the ruins. This travelling merchant keeps his entire stock on his back and he offers to sell part of it to the warband. He has the following items at half their normal price: mace, hammer, sword, dagger, axe, helmet, crossbow, pistol, duelling pistol, rope and hook, any poison, lucky charm, blessed water, hunting arrows, garlic, healing herbs, holy (or unholy) relic, lantern and Mordheim map. Roll a D3 for each item to find the quantity the pedlar carries.
66 Itsy-Bitsy Spider
The presence of the wyrdstone has mutated this common household pest into a monster of titanic proportions! This Gigantic Spider has the following characteristics:
| Profile | M | WS | BS | S | T | W | I | A | Ld |
|---|---|---|---|---|---|---|---|---|---|
| Spider | 5 | 3 | 0 | 5 | 4 | 4 | 1 | 2 | 10 |
Fearsome Beast: The Gigantic Spider causes fear.
Chitinous Hide: The Spider has an armour save of 4+.
Poisonous Bite: Any to wound rolls of 5 or 6 (rather than just a 6) are treated as critical hits.
The Gigantic Spider moves from the table edge it starts from to the opposite table edge, attacking any warband members that get in its path.
Mob Rule (Da Mob Roolz)
Orcs enjoy fighting and looting more than anything else. Because of this, an Orc's life is spent in constant battle – either with his fellow Orcs or some other enemy. With its wealth of opponents and loot ready for the taking, Mordheim offers the perfect opportunity for an aspiring Orc Warboss to prove himself. What follows are complete rules for Orc and Goblin warbands.
Among the races of the Warhammer world, none enjoy the prospect of a good looting more than Orcs and Goblins. For this reason many Orc warbands have been drawn to the city of Mordheim and the wyrdstone that lies hidden there. Of course, Orcs would much rather ambush other warbands and take their wyrdstone than collect it themselves, but their goals are the same as any other warband – collect as much treasure as possible! These traits are reflected in the following special rules.
Special Rules
Animosity. Orcs and Goblins enjoy nothing more than a good scrap, unfortunately they're not always very discerning about who they scrap with! To represent this, at the start of the Orc player's turn, roll a D6 for each Henchman who is either an Orc or a Goblin. A roll of 1 means that the warrior has taken offence to something one of his mates has done or said. Do not roll for models that are engaged in hand-to-hand combat (they're already scrappin'!). To find out just how offended the model is, roll another D6 and consult the following chart to see what happens:
| D6 | Result |
|---|---|
| 1 | "I 'Erd Dat!" The warrior decides that the nearest friendly Orc or Goblin Henchman has insulted his lineage or personal hygiene and must pay the price! If there is a friendly Orc or Goblin Henchman or Hired Sword within charge reach (if there are multiple targets within reach, choose the one nearest to the mad model), the offended warrior will immediately charge and fight a round of hand-to-hand combat against the source of his ire. At the end of this round of combat, the models will immediately move 1" apart and no longer count as being in close combat (unless one of them fails another Animosity test and rolls this result again). If there are no friendly Orc or Goblin Henchmen or Hired Swords within charge reach, and the warrior is armed with a missile weapon, he immediately takes a shot at the nearest friendly Orc or Goblin Henchman or Hired Sword. If none of the above applies, or if the nearest friendly model is an Orc Hero, the warrior behaves as if a 2-5 had been rolled on this chart. In any case, the warrior in question may take no other action this turn, though he may defend himself if attacked in hand-to-hand combat. |
| 2-5 | "Wud Yoo Say?" The warrior is fairly certain he heard an offensive sound from the nearest friendly Orc or Goblin, but he's not quite sure. He spends the turn hurling insults at his mate. He may do nothing else this turn, though he may defend himself if attacked in hand-to-hand combat. |
| 6 | "I'll Show Yer!" The warrior imagines that his mates are laughing about him behind his back and calling him silly names. To show them up he decides that he'll be the first one to the scrap! This model must move as quickly as possible towards the nearest enemy model, charging into combat if possible. If there are no enemy models within sight, the Orc or Goblin warrior may make a normal move immediately. This move is in addition to his regular move in the Movement phase, so he may therefore move twice in a single turn if you wish. If the extra move takes the Orc or Goblin warrior within charge reach of an enemy model, the warrior must charge into close combat during his regular movement. |
Distasteful Company. Many Hired Swords refuse to work for Orcs, as they know that Orcs are just as likely to eat them as fight alongside them. Orcs may only hire the following Hired Swords: Pit Fighters, Ogre Bodyguards or Warlocks.
Orc Skill Table
| Combat | Shooting | Academic | Strength | Speed | Special | |
|---|---|---|---|---|---|---|
| Boss | ✓ | ✓ | ✓ | ✓ | ✓ | |
| Shaman | ✓ | ✓ | ||||
| Big 'Un | ✓ | ✓ | ✓ | ✓ |
Choice of Warriors
An Orc warband must include a minimum of three models. You have 500 gold crowns which you can use to recruit and equip your warband. The maximum number of warriors in the warband is 20.
Boss: Each Orc warband must have one Boss: no more, no less!
Shaman: Your warband may include up to one Shaman.
Big 'Uns: Your warband may include up to two Big 'Uns.
Orc Boyz: Your warband may include any number of Orc Boyz.
Goblin Warriors: Your warband may include any number of Goblin Warriors, though it may not have more than two Goblins for each Orc in the warband (including Orc Heroes).
Cave Squigs: Your warband may include up to five Cave Squigs. You may never have more Cave Squigs in your warband than you have Goblin Warriors.
Troll: Your warband may include up to one Troll.
Starting Experience
A Boss starts with 20 experience.
A Shaman starts with 10 experience.
Big 'Uns start with 15 experience.
All Henchmen start with 0 experience.
Characteristic Increase
Orc characteristics may not be increased beyond the maximum profile limits shown below. If a characteristic is at its maximum, take the other option or roll again if you can only increase one characteristic. If both are already at their maximum, you may increase any other by +1 instead. Remember that Henchmen can only add +1 to any characteristic.
| Profile | M | WS | BS | S | T | W | I | A | Ld |
|---|---|---|---|---|---|---|---|---|---|
| Orc | 4 | 6 | 6 | 4 | 5 | 3 | 5 | 4 | 9 |
Orc Equipment Lists
The following lists are used by Orc warbands to pick their equipment.
Orc equipment list
Hand-to-hand combat weapons
| Weapon | Cost |
|---|---|
| Dagger | 1st free/2 gc |
| Battle axe | 5 gc |
| Morning star | 15 gc |
| Sword | 10 gc |
| Double-handed weapon | 15 gc |
| Spear | 10 gc |
| Halberd | 10 gc |
Missile weapons
| Weapon | Cost |
|---|---|
| Crossbow | 25 gc |
| Bow | 10 gc |
Armour
| Armour | Cost |
|---|---|
| Light armour | 20 gc |
| Shield | 5 gc |
| Helmet | 10 gc |
Goblin equipment list
Hand-to-hand combat weapons
| Weapon | Cost |
|---|---|
| Dagger | 1st free/2 gc |
| Sword | 10 gc |
| Spear | 10 gc |
Missile weapons
| Weapon | Cost |
|---|---|
| Short bow | 5 gc |
Armour
| Armour | Cost |
|---|---|
| Light armour | 20 gc |
| Shield | 5 gc |
| Helmet | 10 gc |
Heroes
[Opening narrative vignette omitted.]
1 Orc Boss
80 gold crowns to hire
An Orc Boss is a tough and brutal warrior, who will throw his lads into any fight that he thinks he can profit from. He is the strongest, toughest and most barbaric member of the warband and if any of his Boyz think otherwise, the band may soon find itself with one less member!
| Profile | M | WS | BS | S | T | W | I | A | Ld |
|---|---|---|---|---|---|---|---|---|---|
| Orc Boss | 4 | 4 | 4 | 4 | 4 | 1 | 3 | 1 | 8 |
Weapons/Armour: An Orc Boss may be equipped with weapons and armour chosen from the Orc equipment list.
Special Rules
Leader: Any warrior within 6" of the Orc Boss may use his Leadership characteristic when taking Leadership tests.
0-1 Orc Shaman
40 gold crowns to hire
Orc Shamans are outcasts from Orc society. They are gifted by the Orc gods Gork and Mork with powers they can neither understand nor completely control. Many join roaming Orc warbands where they are no longer shunned for their abilities, but respected for them.
| Profile | M | WS | BS | S | T | W | I | A | Ld |
|---|---|---|---|---|---|---|---|---|---|
| Orc Shaman | 4 | 3 | 3 | 3 | 4 | 1 | 3 | 1 | 7 |
Weapons/Armour: An Orc Shaman may be armed with weapons chosen from the Orc equipment list. An Orc Shaman may never wear armour.
Special Rules
Wizard: An Orc Shaman is a wizard and uses Waaagh! Magic. See Waaagh! Magic overleaf for his spell list.
0-2 Big 'Uns
40 gold crowns to hire
Orc society is a savage hierarchy where only the toughest survive and rise through the ranks (often atop the bodies of other challengers). Big 'Uns are such rising stars, and they carry out the orders of the Orc Boss. If the Boss ever falls, it is up to the Big 'Uns to decide on a new leader (usually through personal combat).
| Profile | M | WS | BS | S | T | W | I | A | Ld |
|---|---|---|---|---|---|---|---|---|---|
| Big 'Un | 4 | 4 | 3 | 3 | 4 | 1 | 3 | 1 | 7 |
Weapons/Armour: Big 'Uns may be equipped with weapons and armour chosen from the Orc equipment list.
Henchmen
Bought in groups of 1-5.
Orc Boyz
25 gold crowns to hire
Orc Boyz are savage and tough. They fear nothing that they can get their bare hands on, though they are even more ignorant and superstitious than most other beings in the Warhammer world. They form the core of any Orc warband.
| Profile | M | WS | BS | S | T | W | I | A | Ld |
|---|---|---|---|---|---|---|---|---|---|
| Orc Boy | 4 | 3 | 3 | 3 | 4 | 1 | 2 | 1 | 7 |
Weapons/Armour: Boyz may be equipped with weapons and armour chosen from the Orc equipment list.
Special Rules
Animosity: Orc Boyz are subject to the rules for Animosity (see Special Rules for details).
Goblin Warriors
10 gold crowns to hire
Goblins are often used as cannon fodder (as well as a food source in lean times!) by their larger Orc cousins. They are usually not as well equipped as Orc Boyz, having to make do with whatever the Orcs do not want or cannot use.
| Profile | M | WS | BS | S | T | W | I | A | Ld |
|---|---|---|---|---|---|---|---|---|---|
| Goblin | 4 | 2 | 3 | 3 | 3 | 1 | 3 | 1 | 5 |
Weapons/Armour: Goblins may be armed with weapons and armour chosen from Goblin equipment list.
Special Rules
Animosity: Goblin Warriors are subject to the rules for Animosity (see Special Rules for details). Note: A Goblin Warrior who fails his Animosity test and rolls a 1 for the result will never charge an Orc Henchman, though he will still use any missile weapons to attack as normal. Goblins are far too afraid of Orcs to challenge them individually.
Not Orcs: Orcs don't expect much from non-Orcs, and are therefore not unsettled if Goblins or Cave Squigs break or get cut down in battle. In fact, they expect as much from these weaklings! Therefore, when testing to see if an Orc Warband needs to take a Rout test, each Goblin Warrior or Cave Squig taken out of action only counts as half a model. Therefore, a band of 5 Orcs and 10 Goblins (15 models) would only have to take a test if 4 models fell (4 Orcs or 8 Goblins, or some combination thereof).
Useless Gits: Goblins never gain experience.
Cave Squigs
15 gold crowns to hire
Goblins raise the deadly Cave Squigs. These creatures are a curious blend of animal and fungus, and are composed mostly of teeth, horns, and a nasty temperament.
| Profile | M | WS | BS | S | T | W | I | A | Ld |
|---|---|---|---|---|---|---|---|---|---|
| Cave Squig | 2D6 | 4 | 0 | 4 | 3 | 1 | 4 | 1 | 5 |
Weapons and Armour: Big gob and brutality! Cave Squigs never use or need weapons or armour.
Special Rules
Movement: Cave Squigs do not have a set Movement characteristic but move with an ungainly bouncing stride. To represent this, when moving Squigs, roll 2D6 for the distance they move. Squigs never run and never declare charges. Instead, they are allowed to contact enemy models with their normal 2D6" movement. If this happens, they count as charging for the following round of close combat, just as if they had declared a charge.
Minderz: Each Cave Squig must always remain within 6" of a Goblin Warrior, who keeps the creature in line. If a Cave Squig finds itself without a Goblin within 6" at the start of its Movement phase, it will go wild. From that point on, move the Squig 2D6" in a random direction during each of its Movement phases. If its movement takes it into contact with another model (friend or foe), it will engage the model in hand-to-hand combat as normal. The Cave Squig is out of the Orcs & Goblins player's control until the end of the game.
Not Orcs: See Goblin Warriors entry for rules.
Animals: Cave Squigs are animals of a sort and so do not gain experience.
0-1 Troll
200 gold crowns to hire
Trolls are not intelligent enough to recognize the value of gold, but large amounts of food can often instill a certain loyalty in them.
| Profile | M | WS | BS | S | T | W | I | A | Ld |
|---|---|---|---|---|---|---|---|---|---|
| Troll | 6 | 3 | 1 | 5 | 4 | 3 | 1 | 3 | 4 |
Weapons/Armour: Trolls do not require weapons to fight but often carry a big club. In any event, Trolls can never be given weapons or armour.
Special Rules
Fear: Trolls are frightening monsters which cause fear.
Stupidity: A Troll is subject to the rules for stupidity.
Regeneration: Trolls have a unique physiology that allow them to regenerate wounds. Whenever an enemy successfully inflicts a wound on a Troll roll a D6, on a result of 4 or more the wound is ignored and the Troll is unhurt. Trolls may not regenerate wounds caused by fire or fire-based magic. Trolls never roll for Injury after a battle.
Dumb Monster: A Troll is far too stupid to ever learn any new skills. Trolls do not gain experience.
Always Hungry: A Troll requires an upkeep cost. This upkeep represents the copious amounts of food that must be fed to the Troll in order to keep him loyal to the warband. The warband must pay 15 gold crowns after every game in order to keep the Troll. If the warband lacks the gold to pay the upkeep, the Boss has the option of sacrificing two Goblin Warriors or Cave Squigs to the Troll in lieu of buying food (Trolls eat nearly anything). If this fee is not paid (either in gold or in warband members) the Troll gets hungry and wanders off in search of food.
Vomit Attack: Instead of his normal attacks, a Troll can regurgitate its highly corrosive digestive juices on an unfortunate hand-to-hand combat opponent. This is a single attack that automatically hits with a Strength of 5 and ignores armour saves.
Orc Special Equipment
Squig Prodder
15 gold crowns. Availability: Common (Goblins only).
This item is a long pole with a trio of spikes at the end. It is used by Goblin Squig herders to keep their livestock in line. Cave Squigs will recognize a Squig prodder and automatically give the bearer more respect, as they've all been on its pointy end more than once! To represent this, a Goblin with a Squig prodder can keep all Cave Squigs within 12" from going wild, instead of the normal 6" (see the Minderz special rule under the Cave Squig entry). In addition, a Squig prodder is treated exactly like a spear in hand-to-hand combat.
Mad Cap Mushrooms
25 gold crowns. Availability: Common (if warband includes Goblins).
Mad Cap Mushrooms (see the rules in the Mordheim rulebook for more information on Mad Cap Mushrooms) are a necessity for someone wishing to wield a ball and chain (see below). Fortunately for Orc warbands, Mad Cap Mushrooms are cultivated by the Night Goblins of the Worlds Edge Mountains, and they are much more willing to trade these to other Goblins. Though normally a rare item in Mordheim, Mad Cap Mushrooms are a common item that costs 25 gold crowns for an Orc warband that includes one or more Goblins.
Ball and Chain
15 gold crowns. Availability: Common (Goblins only).
This is a huge iron ball with a chain attached, used by the dreaded Night Goblin Fanatics to deal out whirling death. Enormously heavy, it can only be used when combined with Mad Cap Mushrooms.
| Range | Strength | Special Rule |
|---|---|---|
| Close Combat | As user +2 | Incredible Force, Random, Two-handed, Cumbersome, Unwieldy |
Special Rules
Incredible Force: Because the ball and chain is so heavy, normal armour does very little to protect against it. No armour saves are allowed against wounds caused by a ball and chain. In addition, any hit from a ball and chain is very likely to take off someone's head (or at least break some ribs!). Therefore, any hit that successfully wounds will do 1D3 wounds instead of 1.
Random: The only way to wield a ball and chain is to swing it around in large circles, using your body as a counter-weight. Unfortunately this is not a very controllable fighting style, and as soon as he starts swinging his ball and chain a warrior starts to lose control. The first turn he starts swinging the ball and chain, the model is moved 2D6" in a direction nominated by the controlling player. In his subsequent Movement phases, roll a D6 to determine what the model does:
| D6 | Result |
|---|---|
| 1 | The model trips and strangles himself with the chain. The model is taken out of action. When rolling for Injury after the game, a roll of 1-3 means the model is out permanently, instead of the normal 1-2. |
| 2-5 | The model moves 2D6" in a direction nominated by the controlling player. |
| 6 | The model moves 2D6" in a random direction. If the player owns a Scatter dice (available from Games Workshop stores), roll that to determine direction. If not, roll a D6: 1 – Straight Forward, 2-3 – Right, 4-5 – Left, 6 – Straight Back. |
If the ball and chain wielding model moves into contact with another model (friend or foe), he counts as charging into close combat, and will engage in close combat until his next movement phase. Opponents wishing to attack a ball and chain wielding model suffer a To Hit penalty of -1, as they must dodge the whirling ball to get close enough to strike. The ball and chain wielder cannot be held in close combat and will automatically move even if he starts the Movement phase in base contact with another model. If the model moves into contact with a building, wall, or other obstruction, he is automatically taken out of action. In addition, a ball and chain wielding Goblin is much too busy trying to control the spinning weapon to worry about what others are saying about him behind his back, so ignores the special rules for Animosity.
Cumbersome: Because the ball and chain is so heavy, a model equipped with one may carry no other weapons or equipment. In addition, only a model under the influence of Mad Cap Mushrooms has the strength to wield a ball and chain.
Unwieldy: The great weight of the ball and chain can easily tear ligaments or pull a wielder's arms out of their sockets. While someone under the influence of Mad Cap Mushrooms will not notice such effects, when the drug wears off he will be in great pain. To represent this, at the end of the battle the controlling player must roll for Injury for each model that used a ball and chain, just as if the model had been taken out of action. If the model was actually taken out of action normally, just roll once for Injury – there is no need to make a second roll.
Orc Special Skills
Orc Heroes may use the following Skill list instead of any of the standard Skill lists available to them.
'Ard 'Ead: The warrior has a thick skull even for an Orc. He has a special 3+ save on a D6 to avoid being stunned. If the save is made, treat a stunned result as knocked down instead. If the Orc also wears a helmet, this save is 2+ instead of 3+ (this takes the place of the normal helmet special rule).
WAAAGH!: Orcs are aggressive creatures and some are experts at bulldozing charges. The warrior may add +D3" to his charge range.
'Ere We Go!: Orcs often charge even the most fearsome opponents. The model may ignore Fear and Terror tests when charging.
Da Cunnin' Plan: Only the Boss may have this skill. The warband may re-roll any failed Rout tests as long as the Boss is not out of action.
Well 'Ard: The Orc has a thick, dark-green skin, possibly indicating Black Orc blood. Such is the toughness of the Orc that he may add +1 to any armour saves.
'Eadbasher: Orcs have massive physical strength and some of them even learn to aim their blows at the heads of their opponents, with obvious results. Any knocked down results which the Orc causes in hand-to-hand count as stunned results instead.
Waaagh! Magic
Waaagh! spells are used by Orc Shamans. They are rituals of a sort, howling prayers to the boisterous Orc gods Gork and Mork.
| D6 | Spell | Difficulty | Effect |
|---|---|---|---|
| 1 | Led'z go | 9 | The Shaman's howling invigorates the 'adz to fight even harder for Gork and Mork. Any Orc or Goblin within 4" of the Shaman will automatically strike first in hand-to-hand combat regardless of other circumstances. |
| 2 | Oi! Gerroff! | 7 | A huge, green ectoplasmic hand pushes an enemy away. Range 8". Moves any enemy model within range D6" directly away from the Shaman. If the target collides with another model or a building, both suffer 1 S3 hit. Note: very handy for dropping people from high buildings with. May not be cast on models in hand-to-hand combat. |
| 3 | Zzap! | 9 | A crackling green bolt of WAAAGH! energy erupts from the Shaman's forehead to strike the skull of the closest foe. This energy easily overloads the brain of a weak-willed opponent. Range 12". Causes D3 S4 hits on the closest enemy target, with no armour saves allowed. |
| 4 | Fooled Ya! | 6 | The Shaman disappears in a green mist, confusing his enemies. No enemy may charge the Shaman during their next turn. If the Shaman is engaged in hand-to-hand combat he may immediately move 4" away. |
Orc Tactics
Sample Warbands
Crump 'em! The fierce nature of Orcs means that they are always ready for a good scrap. They would much rather kill and rob than search ruins looking for treasure. As such, they are an excellent warband for your Mordheim games. The following are things that should be kept in mind when designing and running your Orc warband:
Goblins and Cave Squigs are expendable. Orcs do not particularly care if these members of the warband die or run away, and they are relatively cheap. In addition, Cave Squigs can easily hold their own against most foes in close combat, as long as they have a Goblin minder close by to keep them in line. Use these troops as your front-line fighters. You can lose twice as many of them as normal before your warband is forced to take a Rout test, so don't be afraid to use them.
Trolls are scary. If you can afford to add a Troll to your warband, do so! The ability to cause fear should not be underestimated. However, even without considering this ability, a Troll is a nasty opponent. With multiple attacks, multiple wounds, and the ability to regenerate, a Troll is likely to stand and take lots of attacks from the opposing warband without missing a beat. In addition, its larger base size means that it can effectively block a large alleyway (or even a street!) all by itself.
The warband I have put together is designed around the use of Goblins and Cave Squigs as the front-line troops. The band is 13 models strong, so will have to lose 4 Orcs or 8 Goblins/Squigs (or something in-between) before a Rout test is required. The Orcs will mostly stand back and shoot with bows, only throwing themselves into the fray if it is absolutely necessary. As the warband collects more money, it can purchase more equipment and add more members. The warband could be expanded to include more Orcs, Goblins, and Cave Squigs, or the Boss could decide to save up enough until he can afford a hard-hitting (and very durable) Troll.
[Sample warband record sheets (Grognak's Bashers) omitted.]
[Modelling showcase and narrative vignette ("Thogskin's Thrashers") omitted.]
Oppulent Goods
As a warband gains experience and wealth in the City of the Damned it will naturally acquire rare equipment and artifacts. A veteran warband will have all manner of equipment, from expensive clothes to opulent coaches in which to get around the surrounding settlements of Mordheim. This article gives details of some of the more extravagant items for you to add to the existing chart on page 146 of the Mordheim rulebook.
Extract from "The Fabulous Goods Available to Warbands Exploring the City of the Damned," available at Johann's Emporium.
Banner (10 gc, Rare 5)
Many more established warbands carry a banner or flag, not only to announce their presence but also to act as a rallying point for the warband during a battle.
Special Rules: A banner requires one hand to use and can be carried by any Hero in the warband. Friendly warriors within 12" of the banner bearer may re-roll any failed 'All-Alone' test (but remember you can't re-roll a failed re-roll).
Opulent Coach (250 gc, Rare 10)
Truly successful warband leaders are quite willing to waste their money on extravagant excesses such as rare wines, jewel-encrusted weapons and armour and Cathayan spices. The height of such indulgence is an opulent coach, which the warband leader can use for driving around the settlements surrounding Mordheim. There are few things that will impress commoners, or incur the wrath and envy of other, less successful leaders, as much as an opulent coach.
Special Rules: The opulent coach impresses even the most suspicious merchant and they will flock to offer their most exotic wares to the obviously rich warband leader. The warband leader gains +3 to any rolls to locate rare items.
Hammer of Witches (100 gc, Rare 10)
(Witch Hunters only)
The pages in this tome describe the servants of Chaos, witches, heretics, deviants, mutants, warlocks, blasphemers, necromancers, sinners and other enemies of Sigmar in all their foulness.
Special Rules: A Hero with the Hammer of Witches will hate all models in Possessed, Skaven or Sigmarite Sister warbands.
Wyrdstone Pendulum (25+3D6 gc, Rare 9)
Pendulums made of wyrdstone can reputedly be used to find even more of the magical stone.
Special Rules: If he was not taken out, the Hero using the wyrdstone pendulum may make a Leadership test after the battle. If he is successful, you may re-roll any one dice in the Exploration phase.
Toughened Leathers (5 gc, Common)
Expert leatherworkers are able to turn leather coats into armour (after a fashion) and those with limited funds often favour these jackets and coats, as armour is very expensive. Covered with crusted salt, alcohol and other less savoury materials, toughened leather is hard to penetrate and offers some protection in combat.
Special Rules: Toughened leathers work exactly like light armour, giving the wearer a 6+ Armour save, but cannot be combined with the effects of any other armour except a helmet or buckler. Toughened leathers cannot be sold back at the Trading Posts, the stench alone is enough to drive away even the most desperate of buyers!
Wolfcloak (10 gc, Special)
(Middenheimers only)
In Middenheim it is still considered to be the feat of a true man to slay a great wolf single-handed. Warriors who accomplish such a deed will command the respect of their peers, and their cloaks will be blessed by the High Priest of the Cult of Ulric, the god of winter, war and wolves.
Special Rules: To acquire a wolfcloak a Hero must pay 10 gc (to represent the expense of travelling to Middenheim and taking part in a hunt). In addition, the Hero must roll equal to or under his Strength on a D6. If successful, the Hero finds and slays the wolf and can wear its cloak as a mark of his skill and prowess. Note that Middenheimers may buy wolfcloaks when starting their warband without making a test for availability. A model wearing a wolfcloak will gain +1 to his armour saves against all shooting attacks.
Tarot Cards (50 gc, Rare 7)
(Not available to Witch Hunters or Sisters of Sigmar)
Though declared blasphemous and illegal by the Grand Theogonist, the Tarot of Stars is said to foretell the future for those who dare to consult it.
Special Rules: A Hero with a deck of tarot cards may consult them before each game. Make a Leadership test. If successful, the Hero gains a favourable insight into the future and you may modify the result of any one dice in the Exploration phase by -1/+1 (even if the Hero with the cards is taken out of action). If the Leadership test fails by three or more (ie, a Hero with Ld of 8 rolls 11 or 12) the cards show a portent of doom and despair and the Hero refuses to fight in the following battle and must miss the next game.
The Comet Cometh
[Lore piece "Before the Comet", from the travels of Johann Munz, omitted as flavour fiction.]
Show Me the Money
The taverns in the settlements around Mordheim make good recruitment centres for warriors to sell their services to the highest bidder. Here, two more Hired Swords that can be recruited by your warband are described.
Imperial Assassin
40 gold crowns to hire + 20 gold crowns upkeep
Politics is a dangerous game and not all dangers are found on the battlefield. The Assassin specializes in removing 'obstacles' with discretion. He will hire himself out to the highest bidder and satisfaction is guaranteed. The Assassin calmly dispatches his rather distasteful duties with fastidiousness and finesse. In between jobs, such a man will often join a wandering warband in order to hone his skills; assassination is not a profession for the slow or dull-witted!
May Be Hired: Any warband except Witch Hunters, Sisters of Sigmar or Skaven may hire the Assassin.
Rating: An Imperial Assassin increases the warband's rating by +22 points, plus 1 point for each experience point he has.
| Profile | M | WS | BS | S | T | W | I | A | Ld |
|---|---|---|---|---|---|---|---|---|---|
| Assassin | 4 | 4 | 4 | 3 | 3 | 1 | 5 | 2 | 8 |
Weapons/Armour: Sword, dagger, throwing daggers and a crossbow pistol.
Special Rules
Weapons Master: The Assassin is a master of weapons and may use any weapon he finds. You may purchase weapons for the Assassin just as you would for any other member of your warband. However, unlike other members of your warband, any weapon you give an Assassin is his to keep – he will not give it to another warband member later. In addition, although he knows how to use them, an Assassin will never use a blackpowder weapon as such devices are far too conspicuous in their use for someone in his profession.
Poisoner: Assassins specialize in the use of poisons. The Assassin starts each game with his weapons poisoned with either Black Lotus or Dark Venom. The controlling player decides which poison the Assassin is armed with before the game starts, and this poison does not need to be traded for. And no, the Assassin cannot poison other warband members' weapons, nor will he loan his out!
Skills: An Assassin may choose from Combat, Speed, Shooting skills or Unstoppable Charge from the Strength skills list when he gains a new skill. He may also choose from the special Assassin skills below.
Assassin Skills
Backstabber: The Assassin specializes in attacking his targets when their back is turned. The Assassin may charge an opponent he cannot see (he knows you're there!) as long as the target model is within his charge reach. If he does this, he surprises his opponent and receives a +1 to hit him with all attacks and any rolls on the Serious Injuries chart are at +1. This bonus lasts for the first round of combat only, as his opponent will swiftly recover his wits if he survives the initial assault.
Hide in Shadows: The Assassin can blend into the shadows so that his opponents will not see him. As long as he is within 1" of a wall or other linear obstacle (hedge, fence, well, etc.), opposing models must pass an Initiative test in order to charge or shoot at him.
Tilean Marksman
30 gold crowns to hire + 15 gold crowns upkeep
The Empire is not the only place that breeds mercenaries. The constant warring among the city-states of Tilea provides many opportunities for a man who knows how to use a weapon. Still, sometimes the fighting dies down in Tilea and many of these mercenaries are forced to seek employment in other lands. Many of these temporarily unemployed mercenaries have heard of the trouble brewing in Mordheim and have come seeking a new patron.
May Be Hired: Any warband except Skaven, Orcs or Undead may hire the Tilean Marksman.
Rating: A Tilean Marksman increases the warband's rating by +16 points, plus 1 point for each experience point he has.
| Profile | M | WS | BS | S | T | W | I | A | Ld |
|---|---|---|---|---|---|---|---|---|---|
| Marksman | 4 | 3 | 4 | 3 | 3 | 1 | 3 | 1 | 7 |
Weapons/Armour: Light armour, sword, dagger and crossbow.
Special Rules
Steady Hands: The Tilean Marksman's aim never wavers. He ignores 'to hit' modifiers for long range when shooting his crossbow.
Dead Eye Shot: The Marksman has the eyes of an eagle and can hit the smallest target. He ignores 'to hit' modifiers for cover when shooting his crossbow.
Skills: A Tilean Marksman may choose from Shooting skills when he gains a new skill.
[Short narrative vignette following the Marksman's entry omitted.]
Dwarf Treasure Hunters
Dwarfs are a grim and exceptionally proud people. They respect three things above all others: age, wealth and skill. It is no surprise then that these grim warriors can be found in Mordheim searching for fame and fortune. This article gives full rules for including Dwarf warbands in Mordheim.
Occasionally a Dwarf noble will find himself in desperate times. His family hold may have been overrun by Goblins or Skaven, or he may have somehow disgraced himself and been banished. Other Dwarfs know these warriors as the Dispossessed. Dwarfs are a proud race and it is against a Dwarf's nature to lose himself in despair. Instead, a noble who finds himself in such dire straits will gather together a group of his closest friends and kin and go treasure hunting, hoping to accumulate a large enough hoard to establish his own holding. At this time, the largest source of wealth in the Known World is rumoured to be a city in the Empire. The city is known as Mordheim...
[Opening narrative vignette (the feast of Karak Azar) omitted.]
Special Rules
All Dwarfs are subject to the following special rules.
Hard to Kill. Dwarfs are tough, resilient individuals who can only be taken out of action on a roll of 6 instead of 5-6 when rolling on the Injury chart. Treat a roll of 1-2 as knocked down, 3-5 as stunned, and 6 as out of action.
Hard Head. Dwarfs ignore the special rules for maces, clubs, etc. They are not easy to knock out!
Armour. Dwarfs never suffer movement penalties for wearing armour.
Hate Orcs and Goblins. All Dwarfs hate Orcs and Goblins. See the psychology section of the Mordheim rules for details on the effects of hatred.
Grudgebearers. Dwarfs hold an ancient grudge against Elves from the days when the two races fought for supremacy in the Old World. A Dwarf warband may never include any kind of Elven Hired Sword.
Incomparable Miners. Dwarfs spend much of their lives underground searching for precious minerals, and they are the best in the world at this kind of work. In the city of Mordheim they apply similar skills to the search for wyrdstone. When checking for wyrdstone at the end of a game, add +1 to the number of pieces found for a Dwarf warband.
Dwarf Equipment Lists
The following lists are used by Dwarf warbands to pick their equipment.
Dwarf Warrior Equipment List
Hand-to-hand combat weapons
| Weapon | Cost |
|---|---|
| Dagger | 1st free/2 gc |
| Mace | 3 gc |
| Hammer | 3 gc |
| Axe | 5 gc |
| Dwarf axe | 15 gc |
| Sword | 10 gc |
| Double-handed weapon | 15 gc |
| Spear | 10 gc |
| Halberd | 10 gc |
| Gromril weapon* | 3 times the cost |
Missile weapons
| Weapon | Cost |
|---|---|
| Pistol | 15 gc |
Armour
| Armour | Cost |
|---|---|
| Light armour | 20 gc |
| Heavy armour | 50 gc |
| Gromril armour** | 75 gc |
| Shield | 5 gc |
| Helmet | 10 gc |
Thunderer Equipment List
Hand-to-hand combat weapons
| Weapon | Cost |
|---|---|
| Dagger | 1st free/2 gc |
| Mace | 3 gc |
| Hammer | 3 gc |
| Axe | 5 gc |
| Sword | 10 gc |
Missile weapons
| Weapon | Cost |
|---|---|
| Crossbow | 25 gc |
| Handgun | 35 gc |
| Pistol | 15 gc (30 for a brace) |
Armour
| Armour | Cost |
|---|---|
| Light armour | 20 gc |
| Heavy armour | 50 gc |
| Shield | 5 gc |
| Helmet | 10 gc |
* Any weapon a Dwarf may normally purchase may be bought as a Gromril weapon instead. This multiplies the cost of the weapon by 3. For rules on Gromril weapons see the Mordheim rulebook. Note that this price is only for a starting warband, as it represents the Dwarfs outfitting themselves at their own stronghold. Later purchases of Gromril weapons are done using the price chart in the Mordheim rules.
** The price of a suit of Gromril armour is cheaper for a starting warband to represent the relative ease with which Dwarfs can find such items in their own stronghold. Later purchases of Gromril armour must be done using the normal price chart in the Mordheim rules.
Dwarf Skill Table
| Combat | Shooting | Academic | Strength | Speed | Special | |
|---|---|---|---|---|---|---|
| Noble | ✓ | ✓ | ✓ | ✓ | ||
| Engineer | ✓ | ✓ | ✓ | |||
| Troll Slayer | ✓ | ✓ | ✓ |
Choice of Warriors
A Dwarf warband must include a minimum of 3 models. You have 500 gold crowns which you can use to recruit and equip your warband. The maximum number of warriors in the warband is 12.
Noble: Each Dwarf warband must have one Noble: no more, no less!
Engineer: Your warband may include up to 1 Engineer.
Troll Slayers: Your warband may include up to 2 Troll Slayers.
Dwarf Clansmen: Your warband may include any number of Dwarf Clansmen.
Dwarf Thunderers: Your warband may include up to 5 Dwarf Thunderers.
Beardlings: Your warband may include any number of Beardlings.
Starting Experience
A Noble starts with 20 experience.
An Engineer starts with 10 experience.
Troll Slayers start with 8 experience.
Dwarf Clansmen start with 0 experience.
Dwarf Thunderers start with 0 experience.
Beardlings start with 0 experience.
Heroes
1 Dwarf Noble
85 gold crowns to hire
Dwarf Nobles are fortune seekers who have recruited a band of like-minded Dwarfs and set off from their stronghold in search of riches. A Dwarf Noble is well respected by the members of his warband. Often he is a member of one of the noble families of the lost Dwarf strongholds, dreaming of collecting enough treasure to restore the former glory of the Dwarf Kingdoms.
| Profile | M | WS | BS | S | T | W | I | A | Ld |
|---|---|---|---|---|---|---|---|---|---|
| Dwarf Noble | 3 | 5 | 4 | 3 | 4 | 1 | 2 | 1 | 9 |
Weapons/Armour: A Dwarf Noble may be equipped with weapons and armour chosen from the Dwarf Warrior equipment list.
Special Rules
Leader: Any models in the warband within 6" of the Dwarf Noble may use his Leadership instead of their own.
0-1 Dwarf Engineer
50 gold crowns to hire
Dwarf Engineers are respected members of Dwarf society. It is they who design and build the complex war machines and devices which have made the Dwarfs famous.
| Profile | M | WS | BS | S | T | W | I | A | Ld |
|---|---|---|---|---|---|---|---|---|---|
| Dwarf Engineer | 3 | 4 | 3 | 3 | 4 | 1 | 2 | 1 | 9 |
Weapons/Armour: A Dwarf Engineer may be armed with weapons chosen from Dwarf Thunderer equipment list.
Special Rules
Expert Weaponsmith: A Dwarf Engineer is a master of mechanical devices. By using stronger construction materials and time-tested secrets of Dwarf engineering, a Dwarf Engineer can increase the distance the warband's missile weapons can shoot. All the warband's missile weapons have 6" added to their range, as long as the Dwarf Engineer is in the warband (the modifications require constant maintenance).
0-2 Dwarf Troll Slayers
50 gold crowns to hire
Troll Slayers are members of the morbid Dwarf cult obsessed with seeking an honourable death in combat. Having committed some unforgivable crime or been dishonoured in some way, a Dwarf will forsake his home and wander off to die fighting the enemies of Dwarfkind. Troll Slayers are insanely dangerous individuals, psychopathic and violent. There are however few better fighters in the Known World, so they are much sought after by Dwarf treasure hunters.
| Profile | M | WS | BS | S | T | W | I | A | Ld |
|---|---|---|---|---|---|---|---|---|---|
| Troll Slayer | 3 | 4 | 3 | 3 | 4 | 1 | 2 | 1 | 9 |
Weapons/Armour: Troll Slayers may be equipped with weapons chosen from the Dwarf Warrior equipment list. Slayers may never carry or use missile weapons or any form of armour.
Special Rules
Deathwish: Troll Slayers seek an honourable death in combat. They are completely immune to all psychology and never need to test if fighting alone.
Slayer Skills: Troll Slayers may choose a skill from the Troll Slayer Skill table instead of the normal skill tables when they gain a new skill.
Troll Slayer Skills
Troll Slayers may use the following Skill table as well as any of the standard Skill tables available to them. (The printed text reads "Dwarf Slayers"; the Dwarf Skill Table above is the table referred to.)
Ferocious Charge: The Slayer may double his attacks on the turn in which he charges. He will suffer a -1 'to hit' penalty on that turn.
Monster Slayer: The Slayer always wounds any opponent on a roll of 4+, regardless of Toughness, unless his own Strength (after all modifiers due to weapon bonuses, etc.) would mean that a lower roll than this is needed.
Berserker: The Slayer may add +1 to his close combat 'to hit' rolls during the turn in which he charges.
Dwarf Henchmen
Bought in groups of 1-5.
Dwarf Clansmen
40 gold crowns to hire
These are Dwarf warriors in their prime: tough, stubborn and brave warriors who can be relied on to hold their own against any foe.
| Profile | M | WS | BS | S | T | W | I | A | Ld |
|---|---|---|---|---|---|---|---|---|---|
| Dwarf Clansman | 3 | 4 | 3 | 3 | 4 | 1 | 2 | 1 | 9 |
Weapons/Armour: Dwarf Warriors may be equipped with weapons and armour chosen from the Dwarf Warrior equipment list.
Dwarf Thunderers (0-5)
40 gold crowns to hire
Dwarf Thunderers are experts at using missile weapons. Many an Orc or Goblin has died by the sting of a crossbow bolt or a roaring handgun bullet shot by a Dwarf Thunderer.
| Profile | M | WS | BS | S | T | W | I | A | Ld |
|---|---|---|---|---|---|---|---|---|---|
| Dwarf Thunderer | 3 | 4 | 3 | 3 | 4 | 1 | 2 | 1 | 9 |
Weapons/Armour: Thunderers may be armed with weapons and armour chosen from the Dwarf Thunderer equipment list.
Beardlings
25 gold crowns to hire
These are young Dwarfs who have joined the retinue of an experienced Dwarf treasure hunter hoping to make their fortune.
| Profile | M | WS | BS | S | T | W | I | A | Ld |
|---|---|---|---|---|---|---|---|---|---|
| Beardling | 3 | 3 | 2 | 3 | 4 | 1 | 2 | 1 | 8 |
Weapons/Armour: Beardlings may be armed with weapons and armour chosen from the Dwarf Thunderer equipment list.
Dwarf Special Weapons
Dwarf Axe
15 gold crowns. Availability: Rare 8 (Dwarfs only).
Dwarf axes are smaller-hafted weapons made of lighter (but stronger) materials than normal axes. Dwarf Warriors are specially trained in their use and are able to use them as deftly as a Human warrior might wield a sword.
| Range | Strength | Special Rule |
|---|---|---|
| Close Combat | As user | Cutting Edge, Parry |
Special Rules
Cutting Edge: Dwarf axes have an extra save modifier of -1, so a model with Strength 4 using a Dwarf axe has a -2 save modifier when he hits an opponent with the axe in close combat.
Parry: Dwarf axes offer an excellent balance of defence and offense. A model armed with a Dwarf axe may parry blows. When his opponent rolls to hit, the model armed with a Dwarf axe may roll 1d6. If the score is greater than the highest to hit score of his opponent, the model has parried the blow and that attack is discarded. A model may not parry attacks made with double or more its own Strength – they are simply too powerful to be stopped. A model may not parry more than one attack in a single close combat phase; a model armed with two Dwarf axes (or a Dwarf axe and a sword, etc) does not get to parry two attacks but may instead re-roll a failed parry.
Dwarf Special Skills
Dwarf Heroes may use the following Skill table instead of any of the standard Skill tables available to them.
Master of Blades: This Dwarf's martial skills surpass those of a normal warrior; he has fought unscathed against hordes of Orcs and Goblins. When using a weapon that has a Parry special rule, this hero parries successfully if he beats or matches his opponents highest 'to hit' roll, not just if he beats the roll. In addition, if this warrior is using two weapons that have the Parry special rule, he is allowed to parry two attacks (if his two dice match or beat the two highest attack dice against him) instead of the normal maximum of one. Note that if this Dwarf has two Dwarf axes (as detailed above) he can re-roll any failed parries.
Extra Tough: This Dwarf is notorious for walking away from wounds that would kill a lesser being. When rolling on the Heroes Serious Injury chart for a game in which he has been taken out of action, the dice may be re-rolled once. The result of this second dice roll must be accepted, even if it is a worse result.
Resource Hunter: This Dwarf is especially good at locating valuable resources. When rolling on the Exploration chart at the end of a game, the Hero may modify one dice roll by +1/-1.
True Grit: Dwarfs are hardy individuals and this hero is hardy even for a Dwarf. When rolling on the Injury table for this Hero, a roll of 1-3 is treated as knocked down, 4-5 as stunned, and 6 as out of action.
Thick Skull: The Hero has a thick skull, even for a Dwarf. He has a 3+ save on a D6 to avoid being stunned. If the save is made, treat a stunned result as knocked down instead. If the Dwarf also wears a helmet, this save is 2+ instead of 3+ (this takes the place of the normal Helmet special rule).
[Trade advertisement "Great New Support for Mordheim" (subscriptions, ordering and writing guidelines for Town Cryer) omitted.]
Kidnapped!
For a playtest campaign a special scenario was devised for two of the warbands, the Possessed and the Marienburgers. The scenario has the Marienburgers trying to rescue the Burghermeister's kidnapped daughter from the Possessed, who intend to sacrifice her to their foul gods. It was such a great scenario that the article was written up for everyone to have a go. Incidentally, the Marienburgers did rescue the poor girl from Fat Bloke's clutches.
During the dark hours of Geheimnisnacht, the Possessed cultists revel in an orgy of violence and sacrifice. It is the custom of these warped followers of the Shadowlord to sacrifice a victim for the greater glory of Chaos during the thirteenth hour of Geheimnisnacht. Sometimes they steal away a victim who will be missed by relatives, patrons or masters and a rescue attempt will be made to save the victim from the sacrificial knife.
In this scenario a warband is attempting to rescue the sacrificial victim from the Possessed, while the Possessed are fighting to complete the ritual sacrifice.
Thus one of the warbands in this scenario should be a Possessed warband. The other warband could be of any type, even another Possessed warband!
Terrain
Starting with the attacker, each player takes it in turn to place a piece of terrain, either a ruined building, tower or other major piece of terrain. It is suggested that the terrain is set up within an area roughly 4'x4'. In the middle of the playing area you should set up a piece of scenery representing the sacrificial altar. There should be at least 6" of empty space between the sacrificial altar and the closest building.
A suitable model representing the sacrificial victim should be placed on the altar.
Warbands
The Possessed warband is deployed first and they can be placed anywhere on the table except within 8" of any of the table edges. The warband attempting the rescue must place all its models within 4" of a table edge, out of the sight of any of the Possessed models, with at least one model next to each of the four sides of the table.
Starting the Game
The warband attempting to rescue the sacrificial victim automatically has the first turn.
Freeing the Sacrificial Victim
As long as at least one model in the Possessed warband is in base contact with the victim, the ritual carries on and the sacrificial victim may not move. Note that models knocked down or stunned do not count.
If there are no standing Possessed models in base-to-base contact with the sacrificial victim, he (or she) may try to escape. The victim can move freely, controlled by the player of the warband that is attempting the rescue. The victim may make an immediate move as soon as there are no Possessed models in base contact and after this will move normally in the movement phase of the rescuing warband. The victim escapes if he (or she) moves off any table edge. In this case the game ends (see Ending the game).
[Fiction piece (the Kidnapping of the Burghermeister's daughter, from the travels of the Editor) omitted.]
Recapturing the Sacrificial Victim
If any Possessed model moves into base contact with the sacrificial victim (via charge, normal move or running) then the Possessed player has recaptured the victim and may move the model alongside the warrior who recaptured him/her.
Note that when trying to recapture the sacrificial victim the normal interception rules apply, so the Possessed may not charge the sacrificial victim if there are other enemies in the way.
If the Possessed manage to recapture the victim and move him (or her) back to the centre of the altar then the victim is sacrificed and the Possessed win the game.
Sacrificial Victim
In our own Dark Moon campaign the sacrificial victim was the beautiful daughter of a rich Burghermeister, but the victim could equally well be an important Dwarf Runemaster, a Skaven Warlock, the chosen bride of a Vampire, rich merchant, or any other suitable character from your own campaign.
The profile below represents the weakened state of the victim as well as the understandable desire to escape as quickly as possible! Note that neither warband will try to attack the victim with missile fire, spells or by any other means – the victim is too valuable to both of them!
| Profile | M | WS | BS | S | T | W | I | A | Ld |
|---|---|---|---|---|---|---|---|---|---|
| Sacrificial Victim | 4 | 2 | 2 | 3 | 3 | 1 | 3 | 0 | 7 |
Equipment: None.
Ending the Game
If at the end of the sixth turn the victim has not yet been freed then the Possessed warband automatically wins as the victim is sacrificed.
Otherwise the game ends after both players have completed 12 turns, when either warband is wiped out, the victim is recaptured and sacrificed, or the sacrificial victim escapes via any of the table edges. Note that neither warband routs in this scenario – the stakes are too high!
Experience
+1 Survives. If a Hero or a Henchman group survives the battle they gain +1 Experience.
+1 Winning Leader. The leader of the winning warband gains +1 extra Experience.
+1 For the possession of the sacrificial victim. If the game ends before the sacrificial victim is killed or escapes, then whichever warband is controlling the sacrificial victim at the end of the game gains +1 Experience point which can be given to any Hero in the warband.
+D6 If the victim is sacrificed. If the Possessed manage to sacrifice the victim, the warband gains +D6 Experience points to be freely distributed between the Heroes of the warband. In addition you may roll for the Rewards of the Shadowlord (see optional rules on page 160 of the Mordheim rulebook) for any two Heroes in the Possessed warband if you wish.
+D6 If the sacrificial victim escapes. If the rescuers manage to move the victim off the table then the warband gains D6 experience points distributed freely amongst the Heroes of the warband. In addition the warband will gain a reward of 50 gold crowns added directly into the treasury of the warband.
+1 Per enemy out of action. Any Hero earns +1 Experience for putting an enemy out of action.
Chaos on the Streets
Skirmishes between two warbands are a common occurrence but sometimes rival Mercenary Captains will lay their differences aside and ally against a common enemy. This article has written full rules for fighting larger games of Mordheim involving several players, as well as seven new scenarios.
These rules are designed for games of Mordheim that are not restricted to two players. Got an odd number of players one game night? Or just itching for an all-out titanic bash (perhaps the end of a league)? Try multiplayer Mordheim, and see what fun a truly chaotic game can be!
Rules for Playing Multiplayer Games
Size of playing area: Multiplayer Mordheim obviously requires more room to play. While Mordheim normally plays fine in a 4'x4' area, the size of the playing area for multiplayer games should be at least 4'x6'. This is important for set-up as detailed below.
Attackers and defenders: In scenarios where attackers and defenders are defined, the defender is the player whose warband has the highest rating. If more than one warband have the same highest rating, the defender will be the one among them whose warband includes the most models. If there is still a tie, roll a dice to determine who gets to be the defender. There is only ever one defender, all the other warbands are the attackers.
Setting up the warbands: In scenarios where there is a defender, that player sets up his warband first. To determine who among the attacking warbands sets up next (or among all the warbands in a scenario without defined attackers and defenders), each player rolls a D6. The player with the highest roll sets up next and the remaining players set up in order of descending dice rolls.
Example: Phil, Bob, and Devin are playing Scenario 1, 'Treasure Hunt'. This scenario has no attackers or defenders
defined so all three roll a D6. Phil rolls a 3, Bob rolls a 5, and Devin rolls a 1. Bob must set up his warband first, then Phil, and finally Devin.
When it is his turn to set up his warband, each player must choose one segment of table edge (see the diagram below for what constitutes a 'segment') and set up his warband within 6" of it. No player may start a member of his warband within 6" of a member of another warband.
[Diagram 1: table edge segments. Segments A and B along the top edge, Segment C along the right edge, Segments D and E along the bottom edge, and Segment F along the left edge.]
Example: Continuing our example above, Bob places his warband first and chooses Segment D (bottom right corner). Phil sets up next and chooses Segment F (left side). Now Devin could choose any of the remaining edge segments, though he would probably be well advised to steer clear of Segment E as this places him right in the midst of his enemies (with a potentially constrained set-up area as well, if Bob and Phil placed any of their models close to that region!). Devin wisely chooses Segment B and sets his warband up there.
Note that some scenarios will have special set-up rules (usually for the defender) which are different from the above. Any such variation will be noted in the rules for that scenario.
Order of play: After all warbands have been set up, players must determine the order of play. Players should be arrayed about the table by their set-up segment (see above). Each player rolls a D6. The player with the highest roll gets the first turn. Play proceeds clockwise around the table from there.
Example: Our three friends have their warbands set up on the table and are ready to determine who goes first. This time Devin rolls a 6, Bob rolls a 1 and Phil rolls a 2. Devin won the roll, so his warband will go first. Devin's models were set up in Segment B and the next warband clockwise is Bob's, so even though Bob got a lower dice roll than Phil, Bob's warband goes second and Phil's will go last.
Underdogs: In multiplayer Mordheim, the underdog is not so clear. Any warband can be an underdog if it is attacked by two or more of its rivals! Still, there may be cases where one warband is simply playing out of its league. To determine if a warband is an underdog in multiplayer Mordheim, simply take the warband with the lowest warband rating and compare it to the warband with the next highest rating. Use the difference in ratings and the chart from the Experience section of the Mordheim rules to determine if any experience bonus is justified for the lower warband, just as you would for the lower of two warbands in a two-player game.
Example: Phil's Skaven has a warband rating of 176, Bob's Witch Hunters a rating of 195 and Devin's Mercenaries a rating of 123. Devin's warband has the lowest rating, so if there is an underdog, his warband will be it. To find out, we compare his rating to the next highest rating, 176 (Phil's Skaven). The difference is 53 (176 - 123 = 53), which according to our chart in the Mordheim rulebook warrants a +1 experience bonus. If any of Devin's Mercenaries survive this fight, they'll have a good chance of gaining an Advance!
Shooting into close combat: Unlike in the regular Mordheim rules, it is possible to shoot into close combat in multiplayer games, just as long as the shooters belong to a different warband than the models involved in the close combat. Shooters must still fire at the closest enemy model as normal (unless they are in an elevated position, as per the normal rules). However, if the shooter hits a model involved in a close combat, the shot may well hit one of his opponents and not the model itself. Randomise any missile hits between the target and any models in close combat with him.
Close combat involving multiple warbands: In multiplayer Mordheim it is quite possible that one warband member gets charged by models from two or more opposing warbands. When this occurs, a model will fight during the close combat phase of each model it is fighting. This can give a model many attacks during a cycle of player turns but any model that has been ganged up on in this way is probably done for in any case!
Example: Bob's Ogre mercenary has been attacked by two of Devin's Humans and two of Phil's Skaven warriors. Phil's Skaven fight during his and Bob's close combat phases, Devin's Humans fight during his and Bob's close combat phases and Bob's Ogre attacks in each player's close combat phases. If one of Phil's Skaven (Skaven B) was in contact with one of Devin's Humans (Human C) (they are at the same corner of the Ogre's base, for example) and one of them decided to attack something a little easier, they could fight in each other's close combat phases as well. Note that a model that is attacking in another player's turn must attack one of that player's models. So in our example Phil's Skaven B could not use his extra attack during Devin's turn to attack Bob's Ogre – he must use it to attack Devin's Human C.
[Diagram 2: an Ogre in contact with a Skaven, a second Skaven (Skaven B), Human C and Human D.]
Routing warbands: Unlike normal games of Mordheim, one warband failing its Rout test (or having all of its models taken out of action) does not necessarily end the game. Unless there are special victory conditions noted in the rules for the scenario you are using, a multiplayer game will last until there is only one warband left on the table. The player whose warband stays on the table for the longest is normally the winner, though in some scenarios the winner might be the warband leaving the table first, as it achieves its objective and leaves the table!
Allies: Normal games of Mordheim involve one warband competing or fighting against another. Obviously, in this environment alliances are not normally possible. However, in multiplayer games, alliances are not only possible, they are a necessity for the completion of some scenarios! A single warband attempting to take out a dragon will find itself fighting an uphill battle with very little chance of success, indeed, it may well find itself lacking a few members after failing to complete its objective! Alliances can last until the end of the game (for example, two warbands can decide to ally against a third, and split whatever booty exists at the end), or they can be very temporary (often falling apart quite suddenly and violently!).
To form an alliance, a player must declare that he is doing so at the start of his turn. He must declare (to all players) which warband(s) he wants to ally with and if they agree, the alliance is formed. There is no limit to the number of warbands a player can ally with. The following special rules apply to a warband and its allies:
Members of allied warbands do not count each other as enemies. Members of a warband may freely run within 8" of members of any warbands they are allied to. Models forced to charge enemy models due to some special rule (such as Frenzy or Orc & Goblin Animosity) are not forced to charge allies. Note however that an Orc or Goblin failing an Animosity test counts allied models as friendly Hired Swords so if a '1' is rolled for the effects of the Animosity he will charge or shoot at them if they are the closest friendly models.
Members of allied warbands that are in combat with one another when the alliance is announced will automatically break from combat. Place the models 1" apart from each other. They can move as normal in their next movement phase (so models knocked down or stunned follow the normal rules for being knocked down or stunned, etc).
Initiating close combat with, shooting missile weapons at, or throwing non-helpful spells at a member of an allied warband automatically breaks the alliance with that warband. Note that this includes attacks caused by a failed Animosity test. Your allies aren't going to be so forgiving of such behaviour as your own warband members might be!
Determining the scenario: To determine which scenario will be used for multiplayer games, players may either choose to play a particular scenario or roll on the following chart:
| 2D6 | Result |
|---|---|
| 2 | The player with the lowest warband rating may choose which scenario is played. |
| 3 | Play Scenario 7: Monster Hunt. |
| 4 | Play Scenario 4: The Wizard's Mansion. |
| 5-6 | Play Scenario 1: Treasure Hunt. |
| 7 | Play Scenario 2: Street Brawl. |
| 8-9 | Play Scenario 6: Ambush! |
| 10 | Play Scenario 5: The Pool. |
| 11 | Play Scenario 3: The Lost Prince. |
| 12 | The player with the lowest warband rating may choose which scenario is played. |
Scenario 1: Treasure Hunt
Often, multiple warbands will hear the same rumour about a wyrdstone deposit and decide to explore that section of the city at the same time. A battle often results with the winners taking the lion's share of the shards home with them.
Terrain: Each player takes it in turns to place a piece of terrain, either a ruined building, tower or other similar item. We suggest that the terrain is set up within an area roughly 4'x6'.
Special Rules: Once you have placed the terrain, place D3 wyrdstone shards for each warband involved in the game on the tabletop to represent where the shards are. Each player takes it in turn to place a wyrdstone counter. Each player rolls a D6 to determine who places first, second, third, etc. The counters must be placed more than 10" away from the edge of the table and at least 6" away from each other. Note that counters are placed before deciding which edge the warbands will play from. Warriors can pick up the counters simply by moving into contact with them. A warrior can carry any amount of wyrdstone without any penalty. Warriors cannot transfer their wyrdstone to another warrior. If the warrior who is carrying a counter is taken out of action, place the counter back on the table where he fell.
Warbands: Players use the normal warband set-up rules (see 'Setting up the warbands').
Starting the Game: Players each roll a D6 to determine who goes first. Play proceeds clockwise around the table from there (based on where players placed their warbands).
Ending the Game: The game ends when all warbands but one have failed their Rout test. The routers automatically lose. If two or more warbands have allied, they may choose to share the victory and end the game.
Experience
+1 Survives. If a Hero or Henchman group survives the battle they gain +1 Experience.
+1 Winning Leader. The leader of the winning warband(s) gains +1 Experience.
+1 Per Enemy out of action. Any Hero earns +1 Experience for each enemy he puts out of action.
+1 Per Wyrdstone Counter. If a Hero or Henchman is carrying a Wyrdstone counter at the end of the battle, he receives +1 Experience.
Wyrdstone: Your warriors earn one shard of wyrdstone for each counter in their possession at the end of the battle.
Scenario 2: Street Brawl
Turf wars are a common sight in the ruins of Mordheim. When multiple warbands compete for the same area, a chaotic all-out brawl can ensue, where alliances are quickly made and broken and bleeding bodies litter the street. Whichever warbands win the day will have a larger area to search for the precious wyrdstone.
Terrain: Each player takes it in turn to place a piece of terrain, either a ruined building, tower, or other similar item. We suggest that the terrain is set up within an area roughly 4'x6'.
Warbands: Players use the normal warband setup rules (see 'Setting up the warbands').
Starting the Game: Each player rolls a D6. The player rolling the highest has the first turn and order of play proceeds clockwise around the table (based on where players placed their warbands).
Ending the Game: The game ends when all warbands but one have failed their Rout test. If two or more warbands have allied, they may choose to share the victory and end the game.
Experience
+1 Survives. If a Hero or Henchman group survives the battle they gain +1 Experience.
+1 Winning Leader. The leader of the winning warband gains +1 Experience.
+1 Per Enemy out of action. Any Hero earns +1 Experience for each enemy he puts out of action.
Scenario 3: The Lost Prince
Travelling entertainers often tell tales of the ruined city and because of this, sons of the privileged classes often see the city of Mordheim as one big romantic adventure. Sometimes one will run away from home to join a mercenary warband and make a name for himself. Often these individuals are killed before they even get to the city but once in a while one will get lucky and actually make it that far. Sometimes their families are happy to see the young fool go but once in a while, a rich merchant or noble will actually pay to have his son saved from his inevitable fate in Mordheim.
The warbands have heard rumours that a powerful man's son has wandered into the ruins and a handsome reward will be paid for his return.
Terrain: Each player takes it in turn to place a piece of terrain, either a ruined building, tower, or other similar item. We suggest that the terrain is set up within an area roughly 4'x6'.
Special Rules: The merchant's son is initially placed in the centre of the board. He will wander D6" in a random direction at the start of each of the first player's turns, until someone 'rescues' him. If a warband member comes into contact with the merchant's son (through normal movement, NOT through charging – this is an exception to the normal rules and represents that the merchant's son is not the enemy and should not be engaged in combat), the boy will attach himself to that member and follow him around. If the 'rescuer' is taken out of action, flees or routs, the merchant's son will attach himself to the next warband member to contact him. Should someone wish to attack the merchant's son, he has the same stats as a Youngblood (see the Mercenary warband in the Mordheim rulebook) and is armed with a sword and dagger. If he is killed, no reward will be issued to the winning warband, of course.
Warbands: Players use the normal warband set-up rules (see 'Setting up the warbands').
Starting the Game: Each player rolls a D6. The player rolling highest has the first turn, and order of play proceeds clockwise around the table (based on where players placed their warbands).
Ending the Game: The game ends when one warband manages to get the merchant's son off the table. That warband (and any allied warband) is the winner.
Experience
+1 Survives. If a Hero or Henchman group survives the battle they gain +1 Experience.
+1 Winning Leader. The leader of the winning warband gains +1 Experience.
+1 Per Enemy out of action. Any Hero earns +1 Experience for each enemy he puts out of action.
The Reward: The grateful father awards the winning warband with the following treasure. Note that you roll for each item separately, apart from gold crowns, which are always received.
| Item | D6 Result Needed |
|---|---|
| 5D6 gc | Automatic |
| D3 swords | 4+ |
| Suit of heavy armour | 5+ |
| Suit of light armour | 4+ |
| Shield | 4+ |
| Helmet | 4+ |
| D3 gems worth 10 gc each | 5+ |
Scenario 4: The Wizard's Mansion
Not all of the ruined buildings in the city are ordinary houses. Some notable structures were the abodes of important town leaders or rich merchants. Tales are told of hidden rooms filled with treasure in such homes. The warbands have discovered the location of one such building. Rumours abound that the former owner also dabbled in the arcane arts, which may explain why his home was almost untouched by the devastation.
Terrain: Each player takes it in turn to place a piece of terrain, either a ruined building, tower, or other similar item. We suggest that the terrain is set up within an area roughly 4'x6'. The first building should be placed in the centre of the table, and the objective of the scenario is to take control of this building.
Warbands: One player is the defender, determined as normal (see 'Attackers and defenders' at the beginning of the article), representing the warband that reached the mansion first. The defender is deployed first inside or within 6" of the objective building. Then the attacking warbands are set up as normal.
In addition, for each attacking warband beyond the first, the defender rolls once on the table below to determine the additional equipment his warband gets to start with. Each item may only be found once. If the same number is rolled more than once, re-roll. These items represent the findings of the warband thus far and are meant to give the warband a chance against multiple opponents.
| D6 Roll | Item Found |
|---|---|
| 1 | Wooden Man |
| 2 | 1D3 doses of Mandrake Root |
| 3 | 1D3 doses of Crimson Shade |
| 4 | Lucky Charm |
| 5 | Holy (Unholy) Relic |
| 6 | Cathayan Silk Cloak |
All of the above are described in the Mordheim rules except for the Wooden Man. For rules on the Wooden Man, see new items below.
Starting the Game: Each player rolls a D6. The player rolling the highest has the first turn and order of play proceeds clockwise around the table (based on where players placed their warbands).
Ending the Game: The game ends when all warbands but one have failed their Rout test. The routers automatically lose. If one or more warbands have allied, they may choose to share the victory and end the game.
Experience
+1 Survives. If a Hero or Henchman group survives the battle they gain +1 Experience.
+1 Winning Leader. The leader of the winning warband gains +1 Experience.
+1 Per Enemy out of action. Any Hero earns +1 Experience for each enemy he puts out of action.
Wizard's Treasure: At the end of the game the winning warband finds all of the items on the table above which were not found before the battle. In addition, roll on the following chart to see what additional items the warband finds in the mansion. Note that you'll need to roll for each item separately, apart from gold crowns, which are always found. For example, you will need to roll a 4+ to find a tome of magic. Then roll to see if you find the gromril sword and so on.
| D6 Roll | D6 Roll Needed |
|---|---|
| 3D6 gc | Automatic |
| D3 gems worth 10 gc each | 5+ |
| Tome of magic | 4+ |
| Gromril sword | 5+ |
| Athame | 4+ |
| D3 doses of healing herbs | 4+ |
| Dispel scroll | 5+ |
New Items
Wooden Man: Use the stats and special rules for a zombie with +1 S and +1 T. The Wooden Man is an artificial construct in the shape of a man but made of wood. It will follow the commands of the defending warband but will not leave the wizard's mansion for any reason, even after the game. The Wooden Man may obviously not be traded.
Athame: An Athame is a special silver dagger used in magical rituals. If used in combat, it will not hold its edge. For the first attack in a game, it will count as a normal dagger. However, for the rest of the game it will count as a fist attack. The Athame is worth 10 gold crowns if traded.
Dispel Scroll: This scroll contains a powerful counterspell. It may be read aloud immediately after an opponent has successfully cast a spell (but before results have been determined) to negate its effects. When used roll a D6. The enemy spell is cancelled on a roll of 4 or more. After one use, the scroll will disintegrate and is useless. It may be traded for 25+2D6 gc.
Scenario 5: The Pool
Rumours abound about a pool in the city whose waters have magical powers of healing. The warbands' patrons believe the magical properties of the water are due to a large deposit of wyrdstone within the pool. The warbands have been sent to collect as much wyrdstone from the pool as they can.
Terrain: Each player takes it in turn to place a piece of terrain, either a ruined building, tower, or other similar item. We suggest that the terrain is set up within an area roughly 4'x6'. The first piece of terrain should be a pool of water roughly 6" in diameter. The objective of the scenario is to gather all the wyrdstone from the pool.
Special Rules: Roll a D3+3 to find out how many pieces of wyrdstone are in the pool. The pool is shallow and may be entered. Any Hero spending an entire turn within 1" of the pool doing nothing else but searching for wyrdstone may roll at the end of his turn to see if he finds some. On a roll of 1-2 on a D6, that player has found one of the pieces in the pool. No Hero may search within 1" of another model (friendly or enemy), as models that are too close together disturb the waters for each other, so that neither may see the bottom. Only as many pieces of wyrdstone may be found as were rolled at the beginning of the game, any searching after that is useless. A Hero can carry any amount of wyrdstone without any penalty. Heroes cannot transfer their wyrdstone to another warrior. If the Hero who is carrying a counter is taken out of action, place the counter on the table again where he fell. Another warrior can then pick up these counters simply by moving into contact with them.
Warbands: Players use the normal warband set-up rules (see 'Setting up the warbands', above).
Starting the Game: Each player rolls a D6. The player rolling highest has the first turn, and order of play proceeds clockwise around the table (based on where players placed their warbands) from there.
Ending the Game: The game ends when all warbands but one have failed their Rout test. If one or more warbands have allied, they may choose to share the victory and end the game.
Experience
+1 Survives. If a Hero or Henchman group survives the battle they gain +1 Experience.
+1 Winning Leader. The leader of the winning warband gains +1 Experience.
+1 Per Enemy out of action. Any Hero earns +1 Experience for each enemy he puts out of action.
+1 Per Wyrdstone Counter. If a Hero or Henchman is carrying a Wyrdstone counter at the end of the battle he receives +1 Experience.
Scenario 6: Ambush!
The defending warband has recently discovered a rich deposit of wyrdstone. Unfortunately, word has leaked out about their find and warbands throughout the city are hunting them, determined to take the treasure for themselves.
Terrain: Each player takes it in turn to place a piece of terrain, either a ruined building, tower, or other similar item. We suggest that the terrain is set up within an area roughly 4'x6'.
Special Rules: One player is the defender, determined as normal (see 'Attackers and defenders' at the beginning of the article). Each of the defending warband's Heroes carries 1D3 pieces of wyrdstone. If a Hero carrying wyrdstone is taken out of action, place a number of counters, equal to the amount of wyrdstone he was carrying, on the ground where he fell. Any Hero moving into contact with them may pick up these wyrdstone shards.
Warbands: All the models in the defending warband must be set up within 6" of the centre of the board. The attacking warbands are then set up as normal.
Starting the Game: Each player rolls a D6. The player rolling highest has the first turn, and order of play proceeds clockwise around the table (based on where players placed their warbands) from there.
Ending the Game: Do not roll for Rout tests during this game. Instead, the game will last 10 turns or until all the wyrdstone shards have been carried off the board, whichever comes first. The warband that gets the most wyrdstone shards off the table (or held by one of its Heroes when the game ends) is considered the winner.
Experience
+1 Survives. If a Hero or Henchman group survives the battle they gain +1 Experience.
+1 Winning Leader. The leader of the winning warband gains +1 Experience.
+1 Per Enemy out of action. Any Hero earns +1 Experience for each enemy he puts out of action.
+1 Per Wyrdstone Counter. If a Hero is carrying a Wyrdstone counter at the end of the battle he receives +1 Experience.
Scenario 7: Monster Hunt
The warbands have heard rumours that a terrible monster has come up out of its lair beneath the city following the recent devastation, and established a new home in the ruins. You have heard stories of such creatures and the treasure they accumulate is the stuff of legends. You have decided to see for yourself if the rumours are true.
Terrain: Each player takes it in turn to place a piece of terrain, either a ruined building, tower, or other similar item. We suggest that the terrain is set up within an area roughly 4'x6'. The first building should be rather large (at least 6"x6") and open-topped, preferably ruins. This building should be placed in the centre of the table, and this is where the monster's new lair is located.
Warbands: Players use the normal warband set-up rules (see 'Setting up the warbands').
Special Rules: The monster's lair is located in the central building and this is where the beast will be. The monster is young for one of its kind and its profile reflects this. In addition, a lifetime of living in caverns beneath the city has kept the creature from learning to use its wings. Therefore, unlike most monsters, this beast cannot fly. The monster will not leave its lair for any reason, though it will use its breath weapon against any model in range that it can see and will of course attack any model entering its lair. It will charge all models entering its lair if possible. Its 'turn' is performed before whichever player won the dice roll to go first, though it will do nothing until someone comes near its lair. For the monster's stats, see 'Great beasts in Mordheim' over the page.
Starting the Game: Each player rolls a D6. The player rolling the highest has the first turn, and order of play proceeds clockwise around the table (based on where players placed their warbands).
Ending the Game: When one warband (or more than one, if the players have agreed to share the monster's hoard) is the only one to have any models within 6" of the monster's lair, and the monster has been put out of action, that warband is victorious and gets the monster's hoard. If two or more players have decided to share the hoard, they must decide how to split it up. If they cannot determine this peacefully, their warbands will have to decide it un-peacefully!
Experience
+1 Survives. If a Hero or Henchman group survives the battle they gain +1 Experience.
+1 Winning Leader. The leader of the winning warband gains +1 Experience.
+1 Per Enemy out of action. Any Hero earns +1 Experience for each enemy he puts out of action.
+1 For Wounding the Monster. Any Hero or Henchman earns +1 Experience for each wound he inflicts on the monster.
+2 For Putting the Monster out of action. The Hero that puts the monster out of action gets a bonus +2 experience.
Treasure Hoard
The young monster has moved its treasure hoard with it to its new lair. Because of its age, the young monster has not collected as much treasure as an older creature of its type. Still, it has amassed a respectable amount. Whichever warband has control of the monster's lair at the end of the game may search it to see what it contains. Note that you roll for each item separately, apart from gold crowns, which are always found.
| Item | D6 Result Needed |
|---|---|
| 5D6 gc | Automatic |
| Magical artefact (roll on artefact table) | 6+ |
| D3+1 pieces of wyrdstone | 4+ |
| Gromril axe | 5+ |
| Suit of heavy armour | 5+ |
| Suit of light armour | 4+ |
| Suit of light armour (listed twice in the printed table) | 4+ |
| Shield | 4+ |
| Helmet | 4+ |
| D3 swords | 4+ |
| D3 gems worth 10 gc each | 5+ |
| Jewellery worth 10-60 gc |
Great Beasts in Mordheim
Regular games of Mordheim are not really suitable for the introduction of the larger monsters that roam the Warhammer world. Even a small Dragon, for example, would eat the average Mordheim warband for lunch! Due to the nature of multiplayer Mordheim, however, with its alliances and generally broader emphasis, such creatures may well make an appearance without overly upsetting the game. Monsters in Mordheim are a bit smaller than their Warhammer counterparts – they represent creatures that have lurked underground in the caverns beneath the city, are former denizens of Mordheim's world-famous Imperial Zoo, or are young members of their species who have recently been forced out of the nest and have decided to set up a new lair in the ruined city. Players who wish to include monsters in their games of Mordheim can do so using Scenario 7: Monster Hunt, or may wish to create their own scenarios using these rules. If a monster is desired, the players should either choose what type of beast they are hunting or roll on the following chart:
| D6 Roll | Result |
|---|---|
| 1 | Young Hydra |
| 2 | Young Dragon |
| 3 | Young Wyvern |
| 4 | Young Griffon |
| 5 | Young Hippogriff |
| 6 | Young Chimera |
Young Hydra
| Profile | M | WS | BS | S | T | W | I | A | Ld |
|---|---|---|---|---|---|---|---|---|---|
| Young Hydra | 6 | 3 | 0 | 4 | 4 | 5 | 3 | 5 | 8 |
Fear: Despite its smaller size, the young Hydra is still a fearsome opponent. It causes fear.
Save: The young Hydra's scales aren't as strong as a normal Hydra's, but they are still as strong as metal. The Hydra has an armour save 6+ that is not modified by the strength of attacks against it (or by other save modifiers).
Breath Weapon: When the young Hydra breathes, flames leap from its mouths. It can use these flames as a weapon if it wishes. This attack is made in the shooting phase and may be made even if the Hydra is involved in close combat. Simply place the small teardrop-shaped template with the narrow end at one of the Hydra's mouths; any models under the template will be hit by flames on a dice roll of 4+. A model hit by flames takes a single S3 hit. Normal armour saves apply. Do not worry about any buildings the template may cover; the Hydra's fire is too weak to set them alight without prolonged exposure.
Loss of Heads: Each wound suffered by a Hydra represents one of its many heads getting taken out of action. Because of this, any successful (unsaved and un-regenerated) Wound to a Hydra reduces its Attacks characteristic by one. In addition, the loss of heads makes for fewer flames when it breathes, so for every 2 successful Wounds, the strength of the Hydra's breath weapon is reduced by one (to a minimum Strength of 1). So, for example, if the Hydra has taken 3 (unsaved and un-regenerated) Wounds, it would have 2 attacks remaining and the Strength of its breath weapon would be reduced to 2.
Regeneration: All Hydras have the ability to regrow damaged heads. Some can do this immediately, while for others it may take a matter of hours or even days to replace a head that is lost. To represent this ability, at the end of each round of close combat roll a D6 for each Wound the Hydra has suffered that round. On a roll of 4 or more that Wound has regenerated; any regenerated Wounds are reinstated. If a Hydra is down to its last Wound remaining, make this roll to regenerate before rolling on the Injury table; a successful Regenerate roll means that no Injury roll is made.
Will not Rout: The Hydra is far too greedy to abandon its hoard. It will automatically pass any Rout test or any other test that would cause it to leave its lair. It will not leave its lair for any reason.
Skull of Iron: The Hydra's skulls are much too thick for normal blows to penetrate. It is immune to the effects of being stunned. Treat any stunned results from the Injury table as a knocked down result instead (see below).
Staggered, but not down: Mighty blows will rock the Hydra but most creatures lack the ability to truly knock it into the dirt. Therefore, any knocked down result the Hydra receives will instead cause it to lose 1 Attack until it recovers (during the recovery phase of its next turn). Multiple knocked down results will cause it to lose multiple attacks in this way (if taken to 0 Attacks or fewer, the Hydra may not attack until it recovers).
Young Dragon
| Profile | M | WS | BS | S | T | W | I | A | Ld |
|---|---|---|---|---|---|---|---|---|---|
| Young Dragon | 6 | 4 | 0 | 5 | 5 | 5 | 6 | 4 | 7 |
Fear: Despite its smaller size and useless wings, the young Dragon is still a fearsome opponent. It causes fear.
Save: The young Dragon's scales aren't as strong as a normal Dragon's, but they are still as strong as metal. The young Dragon has an Armour save of 5+ that is not modified by the strength of attacks against it (or by other save modifiers).
Breath Weapon: When the young Dragon breathes, flames leap from its mouth. It can use these flames as a weapon if it wishes. This attack is made in the shooting phase, and may be made even if the Dragon is involved in close combat. Simply place the small teardrop-shaped template supplied opposite with the narrow end at the Dragon's mouth. Any models under the template will be hit by flames on a dice roll of 4+. A model hit by flames takes a single S3 hit. Normal armour saves apply. Do not worry about any buildings the template may cover; the Dragon's fire is too weak to set them alight without prolonged exposure.
Will not Rout: The Dragon is far too greedy to abandon its hoard. It will automatically pass any Rout test or any other test that would cause it to leave its lair. It will not leave its lair for any reason.
Skull of Iron: The Dragon's skull is much too thick for normal blows to penetrate. It is immune to the effects of being stunned. Treat any stunned results from the Injury table as a knocked down result instead (see below).
Staggered, but not down: Mighty blows will rock the Dragon, but most creatures lack the ability to truly knock it into the dirt. Therefore, any knocked down result the Dragon receives will instead cause it to lose 1 Attack until it recovers (during the recovery phase of its next turn). Multiple knocked down results will cause it to lose multiple attacks in this way.
Young Wyvern
| Profile | M | WS | BS | S | T | W | I | A | Ld |
|---|---|---|---|---|---|---|---|---|---|
| Young Wyvern | 6 | 4 | 0 | 4 | 5 | 3 | 4 | 2 | 5 |
Fear: Despite its smaller size and useless wings, the Wyvern is still a fearsome opponent. It causes fear.
Save: The Wyvern's scales aren't as strong as a normal Wyvern's, but they are still as strong as metal. The Wyvern has an armour save 6+ that is not modified by the strength of attacks against it (or other save modifiers).
Envenomed Tail: The Wyvern has a whip-like tail that is tipped with a deadly stinger. In combat it thrashes this tail forward among its enemies, either injecting them with its deadly venom, or simply clubbing them into submission. In game terms this is represented by a special tail strike that the Wyvern makes before its normal attacks in close combat. Roll a single D6. Any enemy models that are in base contact with the Wyvern and that it may attack in the close combat phase (eg, it is either the Wyvern's 'turn' or the model's turn) that have a lower Initiative than the dice score are automatically hit by the Wyvern's tail. Models with Initiative equal to or higher than the D6 roll have successfully dodged the tail and are not affected. Each model struck by the Wyvern's tail takes a Strength 4 hit.
Will not Rout: The Wyvern is far too greedy to abandon its hoard. It will automatically pass any Rout test or any other test that would cause it to leave its lair. It will not leave its lair for any reason.
Skull of Iron: The Wyvern's skull is much too thick for normal blows to penetrate. It is immune to the effects of being stunned. Treat any stunned results from the Injury table as a knocked down result instead (see below).
Staggered, but not down: Mighty blows will rock the Wyvern, but most creatures lack the ability to truly knock it into the dirt. Therefore, any knocked down result the Wyvern receives will instead cause it to lose 1 Attack until it recovers (during the recovery phase of its next turn). Multiple knocked down results will cause it to lose multiple attacks in this way (if taken to 0 Attacks or fewer, the Wyvern may not attack until it recovers).
Young Griffon
| Profile | M | WS | BS | S | T | W | I | A | Ld |
|---|---|---|---|---|---|---|---|---|---|
| Young Griffon | 6 | 4 | 0 | 5 | 4 | 4 | 4 | 3 | 8 |
Fear: Despite its smaller size and useless wings, the Griffon is still a fearsome opponent. It causes fear.
Massive Beak: One of the Griffon's attacks is a bite attack. Its maw is a massively sharp, iron-hard beak that can easily slice through the thickest armour as if it were made of paper. An opponent damaged by this attack suffers an additional -1 penalty to his armour save, for a total armour save penalty of -3 (-1 for the bite and -2 for Strength).
Will not Rout: The Griffon is far too greedy to abandon its hoard. It will automatically pass any Rout test or any other test that would cause it to leave its lair. It will not leave its lair for any reason.
Skull of Iron: The Griffon's skull is much too thick for normal blows to penetrate. It is immune to the effects of being stunned. Treat any stunned results from the Injury table as knocked down result instead (see below).
Staggered, but not down: Mighty blows will rock the Griffon but most creatures lack the ability to truly knock it into the dirt. Therefore, any knocked down result the Griffon receives will instead cause it to lose 1 Attack until it recovers (during the recovery phase of its next turn). Multiple knocked down results will cause it to lose multiple attacks in this way.
Young Hippogriff
| Profile | M | WS | BS | S | T | W | I | A | Ld |
|---|---|---|---|---|---|---|---|---|---|
| Young Hippogriff | 8 | 4 | 0 | 5 | 4 | 4 | 4 | 2 | 8 |
Fear: Despite its smaller size and useless wings, the young Hippogriff is still a fearsome opponent. It causes fear.
Massive Beak: One of the Hippogriff's attacks is a bite attack. Its maw is a massively sharp, iron-hard beak that can easily slice through the thickest armour as if it were made of paper. An opponent damaged by this attack suffers an additional -1 penalty to his armour save, for a total armour save penalty of -3 (-1 for the bite and -2 for Strength).
Will not Rout: The Hippogriff is far too greedy to abandon its hoard. It will automatically pass any Rout test or any other test that would cause it to leave its lair. It will not leave its lair for any reason.
Skull of Iron: The Hippogriff's skull is much too thick for normal blows to penetrate. It is immune to the effects of being stunned. Treat any stunned results from the Injury table as a knocked down result instead (see below).
Staggered, but not down: Mighty blows will rock the Hippogriff but most creatures lack the ability to truly knock it into the dirt. Therefore, any knocked down result the Hippogriff receives will instead cause it to lose 1 Attack until it recovers (during the recovery phase of its next turn). Multiple knocked down results will cause it to lose multiple attacks in this way.
Young Chimera
| Profile | M | WS | BS | S | T | W | I | A | Ld |
|---|---|---|---|---|---|---|---|---|---|
| Young Chimera | 6 | 3 | 0 | 5 | 5 | 4 | 4 | 4 | 8 |
Fear: Despite its smaller size and useless wings, the Chimera is still a fearsome opponent. It causes fear.
Dragon Head: One of the Chimera's three heads is that of a Dragon. When the Dragon head breathes, flames leap from its mouth. It can use these flames as a weapon if it wishes. This attack is made in the shooting phase. Simply place the small teardrop shaped template with the narrow end at the Dragon head's mouth; any models under the template will be hit by flames on a dice roll of 4+. A model hit by flames takes a single S3 hit. Normal armour saves apply. Do not worry about any buildings the template may cover; the Chimera's fire is too weak to set them alight without prolonged exposure.
Ram Head: The second head is that of a massive bloody-eyed ram. One of the Chimera's attacks is a head-butt made by the ram head. If this attack hits but fails to do damage, the target must make an Initiative test or be knocked down.
Lion Head: The last of the Chimera's heads is that of a ferocious golden-maned lion with jaws of steel and razor-sharp teeth. One of the Chimera's attacks is a bite by the lion head. An opponent damaged by this attack suffers an additional -1 penalty to his armour save, for a total armour save penalty of -3 (-1 for the bite and -2 for Strength).
Will not Rout: The Chimera is far too greedy to abandon its hoard. It will automatically pass any Rout test or any other test that would cause it to leave its lair. It will not leave its lair for any reason.
Skull of Iron: The Chimera's skulls are much too thick for normal blows to penetrate. It is immune to the effects of being stunned. Treat any stunned results from the Injury table as a knocked down result instead (see below).
Staggered, but not down: Mighty blows will rock the Chimera but most creatures lack the ability to truly knock it into the dirt. Therefore, any knocked down result the Chimera receives will instead cause it to lose 1 Attack until it recovers (during the recovery phase of its next turn). Multiple knocked down results will cause it to lose multiple attacks in this way.
[Narrative vignette at the foot of the page omitted.]
Modelling
Hobby articles on modelling terrain and warbands. The battlefield set-up guidance is transcribed below; step-by-step construction instructions, photographs, and hobby tips are omitted.
Mordheim Architecture
In this installment of Mordheim Architecture, the author explains just how easy it can be to make your own ruined buildings for your battles in the City of the Damned.
The idea of fighting Warhammer battles with small bands of warriors running about and hiding in the streets of a ruined medieval city opens up vast possibilities for fantastic scenery. As a fantasy landscape, this is something completely new. Players of Warhammer 40,000 and Necromunda have long been used to playing games set in ruined cities, but who would have thought you could do the same thing in an age of swords and sorcery?
The setting is Mordheim, a city of the Empire ruined by the impact of a huge meteorite. The city has not been entirely destroyed, but there is a massive crater where part of it used to be. As you go outward from the crater, the buildings become gradually less ruined, varying from totally demolished to areas where only part of a building has been destroyed, leaving the rest of it precariously intact, and on into parts of the city which are only slightly damaged, but deserted and eerie. Here, there are just holes in the roofs and walls made by flying debris and fragments of meteorite. Stone buildings survive better than timber ones and often the stone built lower stories of buildings still stand, while the rest has been destroyed. This then is the setting we should aim to recreate for our games of Mordheim.
The entire battlefield (an area 4'x4', suitable for a skirmish game) needs to be covered in ruined buildings, separated by streets. To make the battlefield interesting, the streets need to be narrow and winding, opening up now and again into a square or market place. There must be open areas between the cover for the models to run and shoot across, but the battlefield should create the cramped and menacing atmosphere of a fantasy medieval city.
The key to creating a Mordheim battlefield is the style of the buildings. Ideally we want a lot of different buildings, such as houses, shops, taverns, workshops, temples, stables, archways, ruins, towers, graveyards, docks and anything else we could think of that might be found in Mordheim. They should look as if they were built of stone or timber or a mixture of both, and all be ruined to varying extents so that it is possible to move models into them. The doors and windows should be open to permit models to enter and shoot. There should be several floors partly remaining so that troops can be placed on different levels.
The buildings should also feature overhanging upper storeys, tall chimneys, high pitched roofs, balconies, archways and anything else you can think of, and be embellished with such things as grotesque gargoyles, tavern signs or lamps. The buildings should really look like they belong in the townscape of a John Blanche painting!
[Construction materials, step-by-step building instructions, photographs and tips from the rest of this article omitted.]
Moving Models About in the Ruins
The most important function of the buildings in the Mordheim game is as hiding places and cover for models. Also they provide a vertical dimension to the game since models can occupy upper storeys. A building can even become a mini stronghold if all of a warband decide to defend it. Therefore a good building for Mordheim is one that allows you to place models inside it preferably on several floors, and has windows and doors to shoot out of. Bridges, colonnades, walkways, balconies, ruined sections and such like make buildings even more interesting to fight in and around.
Bridges and arcades that pass over a street to link buildings at the level of the first or second storeys are very useful terrain pieces to make. This enables models to move from certain buildings to others without coming down to ground level, and allows them to shoot down into the street below, forcing opponents to try to capture the building. Instead of taking the form of a room suspended above the street joining to two houses, bridges can be mounted on archways or colonnades.
A colonnade can be made using plaster cake pillars. Arrange these in a row, spaced a couple of inches apart, and stick a similar floor to the tops of the columns. Then put walls along the top, cut at regular intervals with windows or gaps. It works better to use only one partly intact wall, with the other side so ruined that models can be placed and moved from behind. For the same reason, if you roof the bridge, make the roof very ruined to allow access for models.
An archway can be made by cutting half circular shapes out of rectangular pieces of foamboard. You can do one big arch or a row of several to create an arcade. Two identical arch sections are fixed to a base about two inches or more apart. The inner part of the archway can be made by fixing flexible thin card along the curved edges of the interior of the arch. The arch can be covered in rectangular bits of card to represent masonry. This piece could be used on its own or as a support for timbered rooms. Just fix partly ruined buildings onto the top. These will look good if they overhang the arch.
Gargoyles and Other Embellishments
Empire buildings are decorated with gargoyles and other carvings, such as heads, shields, runes and symbols. Any piece of protruding timberwork is likely to be carved into something. These carvings are not only decorative, but are done to bring good luck to the house or ward off evil. The effect is to make the narrow streets look grotesque and frightening, especially at night, with gargoyles grimacing out of the gloom from the corners of buildings.
Gargoyles and such things are easily represented on model buildings by attaching heads of monsters, model gargoyles, shields and other odd pieces from your bits box. Fix them to corners, overhanging or protruding timber beams, gable ends and roofs. Shields look good over the doors. Larger models can be put on a pedestal of their own and turned into statues.
Staircases
How do models get into the upper storeys of the buildings? There are three possibilities. One is that they use remaining staircases where they can find them, another is that they use makeshift ladders and failing that, they climb. Staircases are easy to make. Just stick varying lengths of foamboard, tile, thick card or balsa wood on top of each other so that each piece is about 10 cm shorter than the piece below. Continue doing this until the staircase block is high enough to reach the next floor from the ground. These staircases can be stuck onto or inside suitable buildings to indicate places where access to the upper floors is allowed. As well as staircases, you can stick ladders in suitable positions, piles of crates, barrels or rubble to make access to upper storeys easier. Another way of creating staircases might be to use several slotta bases stuck together. Ladders can be made by cutting balsa wood into thin strips, two long and enough short ones to make the steps. There are also model ladders in the Warhammer Siege Attackers box set, which you can order through Mail Order.
Cobbled Streets
Apart from just leaving gaps between rows of buildings, there are two ways of representing streets. One is to make sections of cobbled streets to place between the buildings. These could vary in width to create wide or narrow streets or could be made to a standard width so as to be certain of joining up. There could be special corner sections, crossroads, junctions, market squares and winding lanes. The other option is to make several base boards or even one big 4x4' board and permanently mark the streets on it, or texture and paint it to represent cobbles or bare ground. Street sections can be made from foamboard, hardboard, MDF or thick card.
Cobbled or paved surfaces can be represented either by laboriously sticking bits of card onto the base as paving stones or by using embossed plasticard. The best option is to try to find wallpaper with a raised pattern on it that looks like cobbles or paving stones. There are several designs which can be painted grey and drybrushed over to give the impression of cobbled streets. This is the quickest and cheapest way of covering large areas.
Odds and Ends
The ruined streets of Mordheim are strewn with all kinds of debris, especially since the populace abandoned their homes leaving behind plenty of stuff and everywhere has been ransacked several times over. This means that there are barrels from pillaged storehouses, furniture, overturned wagons and carts, lumps of wood and many other things scattered around the buildings. It is a good idea to gather a few odds and ends like this to place around the streets to give extra cover and hiding places to models trying to cross open areas such as market squares or wide streets. Barrels can be made from corks painted brown with black rings around them. Carts can be made of balsa wood or matchsticks using plastic cannon wheels from your bits box. Sacks of grain can be made by modelling pillow shapes in modelling clay and pressing several on top of each other so that they appear to be sagging. Put them on a small base and paint PVA around them, then scatter this with sand to represent spilled grain.
[Remaining construction photographs and tips in this article are omitted.]
Ruined Effects
The main thing to remember when making Mordheim buildings is that they should be partly ruined and accessible to models. The easiest way to indicate damage is to leave all doors and windows open and drybrush black around the openings. Other holes can be created and treated in this way, especially in the roof. These provide openings for troops to enter buildings and shoot out from, and so will make for a more exciting game.
The streets of Mordheim are likely to be partly blocked here and there by heaps of rubble, and some buildings will have been totally reduced to this state. Heaps of rubble make good small terrain pieces for use anywhere among the buildings and are easily made. Just cut an irregular base and stick onto it stones, pebbles, bits of balsa wood, sticks and broken bits of polystyrene packaging or tile. Arrange the debris in a random pile and fill up gaps with PVA glue and gravel or sand. Paint textured paint over any polystyrene and the base, then spray the entire piece with Chaos Black. It is now ready to be drybrushed. The quick way is to simply drybrush the entire thing with Bestial Brown followed by Bleached Bone, or you could pick out different kinds of rubble with different shades of grey, brown etc.
A partially destroyed building, reduced to no more than a corner, can be made using the same technique described above. Just fix two pieces of foamboard together along their straight edges and cut the other edges at an irregular angle. This is then placed on a triangular base. Windows can be cut into it and perhaps the remains of an upper floor. Such ruins are useful for marking the corners of streets.
[Mealie bags, the Barricades feature and the Building a Barricade step-by-step, from the third instalment of Mordheim Architecture, are hobby construction and are omitted.]
Black Shields
A study of the Skaven of the 'Black Shields', a warband built for the Studio Mordheim campaign.
[Modelling article describing the Black Shields Skaven warband build, with photographs and the warband's record sheets. Omitted: hobby construction and painting narrative. No game rules.]
[Black Shields warband build continued: photographs of the Skaven warband and the Studio roster sheet. Omitted: hobby and build narrative, no game rules.]
Witch Hunters Modelling
[Modelling article on converting and painting a Witch Hunter warband. Omitted: hobby conversion narrative and photographs, no game rules.]
[Modelling articles "Purge the Unclean" (a Witch Hunter warband) and "The Hands of Fate" (a Possessed warband of plastic conversions), with photographs and conversion notes. Omitted: hobby content, no game rules.]
Warriors of Cold Steel
[Modelling article on a Kislev-styled Mercenary warband built from the plastic Human Mercenary sprue and Middenheimer accessory sprue, with the warband record sheets (Mercenary Captain Michal Kurek, Champion Artur Jasinski, Champion Jakob Kamiński and henchmen). Omitted: hobby conversion narrative and photographs; the record sheets are pictorial roster examples, not rules.]
Battle Reports
[Battle report features are narrative accounts with photographs and Studio warband record sheets; they contain no rules text and are omitted from this transcription.]
City of Nightmares
[Battle report: "A True Account of the recent skirmish between the Skaven Manflayers and the Reiklander warband Luthor's Looters." Omitted as narrative. The deployment, turn-by-turn narrative and warband record sheets contain no rules text.]
Witch Hunt
[Battle report: "A blow by blow account of the bloody skirmish between the zealous Witch Hunters and the foul Possessed." Three games (Chance Encounter, Surprise Attack, Occupy) with warband record sheets. Omitted as narrative; no rules text.]
Town Cryer Advertising
[Mordheim catalogue and Town Cryer subscription and classified pages (Black Arrow, Public Notice, "Mordheim Catalogue") are advertising and are omitted.]