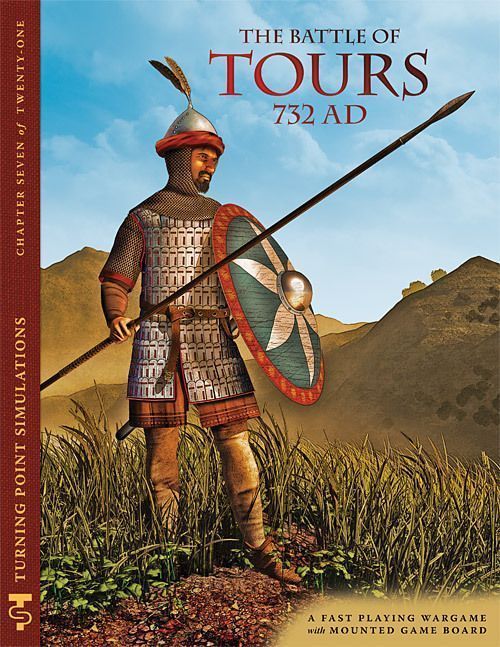
The Battle of Tours, 732 A.D.
The Battle of Tours, 732 A.D. Rulebook
Table of Contents
Table of Contents
- 1.0 Introduction
- How This Book Is Organized
- 2.0 Game Components
- 3.0 Important Concepts
- 4.0 The Sequence of Play
- 5.0 Activation
- 6.0 Movement
- 7.0 Missile Fire
- 8.0 Shock Combat
- 9.0 Combat Results
- 10.0 Reforming
- 11.0 Muslim Wagon Train
- 12.0 Leaders
- 13.0 Setting Up the Game
- 14.0 Victory and 15.0 Commentary
1.0 Introduction
The Battle of Tours is a game covering the battle that took place between Tours and Poitiers in present-day France between the army of Charles, Mayor of the Palace for the Merovingian Franks, and that of Abd ar-Rahman's Umayyad Muslims of Iberian Andalusia. The Battle of Tours is a fast-playing, fun game of low complexity. We have tried to provide as much period flavor and historical accuracy as we can, within that focus. The game should take about two hours to play to conclusion, about 50% more the first time.
1.0.1 Game Scale
The map scale is around 80 yards per hex. Each Combat Unit contains about 750 men. Game-Turns reflect, very loosely, about 20 minutes.
Historical Note: Period sources report the battle lasting up to seven days, although that scale is not taken overly seriously. Most battles in this era and of this size didn't last more than part of a day.
How This Book Is Organized
This rulebook is structured to introduce concepts following the game's sequence of play. They are written in a format known as the Case System. This approach divides the rules into Modules, each dealing with an important aspect of play. Modules are numbered sequentially and possess a title. Each Module is divided into Sections, dealing with major sub-topics within the Module. These are also numbered sequentially. Finally, the majority of each Section consists of Cases: the specific, detailed rules that govern play. Their sequential numbering follows a logical progression based upon the Module and Section of which the Cases are a part. Look to these numbers to determine where a Case is located in the rules.
3.1.4: The fourth Case of the first Section of the third Module of the rules.
Learning to Play the Game
Begin by familiarizing yourself with all of the components listed for this game. Then skim through the charts and rules, reading all the titles of the Modules and Sections. Set up a game scenario or portion of a scenario (after reading the applicable Module) and play a trial game against yourself. Try referring to the rules only when you have a question and remember the numbering system we employ makes it easy to look up rules. While a trial game may take you an hour or two, it is the quickest and most pleasant way to learn (short of having an experienced friend teach you). We don't recommend attempting to learn the rules word-for-word. We've written these rules to be as comprehensive as possible—but they are not designed to be memorized. Taking in the rules as you play along is the best approach to mastering this game. We're always open to suggestions on how to improve the comprehension of our rules. Write to us (see addresses in 2.0) if you have an idea on how we can communicate better with you.
2.0 Game Components
Your copy of The Battle of Tours should contain the following components:
- One 11" x 17" mounted mapsheet depicting the terrain the battle was fought over
- Two sets of 80 die-cut ½" playing pieces
- This 12 page rulebook
- One 10-sided die used to resolve combat and other factors for which performance will vary. A '0' is a "zero," not a "ten." Chits numbered 0-9 have also been supplied for players that enjoy drawing random numbers from an opaque cup.
If any of these parts are missing or damaged, write to:
Turning Point Simulations PO Box 165 Southeastern PA 19399-0165 USA Attn: The Battle of Tours Or e-mail us at: [email protected]
We hope you enjoy this game. Should you have any difficulty interpreting the rules, please write to us at the above postal address, or e-mail: [email protected]
Phrase your questions so that a simple sentence, word, or number can answer them. If you send a letter by mail, you must enclose a stamped, self-addressed envelope to receive a reply. We recommend e-mail as the best way to resolve a query. Although we welcome comments and suggestions about the game's interpretation of events, we cannot promise to respond to questions on theory or design intent.
2.1 The Game Map
The game map covers the area over which the battle was (probably) fought. The map is overlaid with a grid of hexagons—hexes—that are used to regulate movement of pieces. The hexes facilitate positioning and movement of the playing pieces. A hex is also individually designated with a four-digit number which is used in set-up. Any terrain without the hexgrid overlay is unplayable and may not be entered.
Historical Note: The exact location of the historical battlefield has never been firmly established, but most recent opinions place it as noted in the Historical Background.
2.1.1 Map Features
Various types of terrain and features are denoted on the game map (see charts for their game effects):
- Clear & Forest (identical game effect)
- Gradual Slope
- Steep Slope
- River
- Ford & Road (identical game effect)
2.2 The Playing Pieces
The cardboard playing pieces (or counters) in the game should be carefully separated before trying to play. The pieces are of different types depending on the information that appears on each. In general the pieces represent either Combat Units, Leaders, or informational markers.
2.2.1 Combat Units
Combat units represent the actual historical units that fought at Tours. There are five different types of Combat Units: Heavy, Light, and Mounted Archer Cavalry, and Heavy and Light Infantry.
Historical Note: There is no indication that either side had any foot archers or that the Franks had any missile units, other than the javelins sometimes carried by their cavalry.
The top face of each Combat Unit shows the Combat Unit at full strength while the reverse side of each Combat Unit is its "Disordered" side. Each face of a Combat Unit presents information that determines its capabilities in the game. The various information appearing on the counters is explained in the notes following.
Historical Contingent: The superior organization that the Combat Unit was a part of or belonged to. Term used to describe which units may move and fight. Most Combat Units also show a color (both in their stripe and shield-color) representing the Contingent they are a part of.
Historical Note: The Andalusian Muslims were organized by tribes, many of which were fiercely independent. There was little, or no, military organization for either side as we know it today. The Franks are here organized by unit type.
Unit Type Symbol: The illustration printed in the center of the counter indicate what kind of Combat Unit the counter represents. Here are the various types of Combat Units, each represented by a different icon:
- Franks Heavy Infantry
- Franks Light Infantry
- Franks Light Cavalry
- Franks Heavy Cavalry
- Muslim Light Infantry
- Muslim Light Cavalry (Archer)
- Muslim Heavy Cavalry
Note that the Muslims do not have any Heavy Infantry, but their Light Cavalry has the additional feature of Mounted Archers.
Movement Allowance: Printed in the lower part of the counter, this is the maximum number of Movement Points (MPs) a unit may expend in a single Movement Phase as it moves from hex to hex. A clear terrain hex generally costs 1 MP to enter, for example. In general, a Combat Unit with 4 or fewer MPs (or the letter code "F") is considered a "foot" unit type, meaning it travels primarily via its own legs or is slowly horse-drawn. A Combat Unit (or Leader) with 6 or more MPs is considered a "cavalry" unit type meaning it moves largely via horseback.
Each Combat Unit shows a single number, which is its Movement Allowance. If the counter is on its front (black or white-colored factor) side, it is at Full Strength. If the back (red-colored factor), it is Disordered.
Range: Not printed on the counter, but a characteristic of all Mounted Archer Cavalry is its range. Range is the distance (in hexes) to which they can fire. All Mounted Archer Cavalry can attack opposing Combat Units that are not adjacent, up to three hexes away. Count the range to include the target hex but not the hex containing the firing Combat Unit.
2.2.2 Leaders
Leader units (one per side) represent the actual top commander on each side that fought at Tours.
- Name (on back): The historical name of the Leader.
- Command Range: The maximum distance, measured in hexes, at which a Leader can influence Reform.
- The Leader counter's first factor is its command range; its second factor is its movement allowance.
2.2.3 Markers
Markers are special pieces used to record various game functions, such as the current Order a Contingent is under, whether it is currently Engaged, or perhaps in a Shield Wall formation. Markers generally contain only a symbol or notation for their use.
The marker illustrations are labelled move-attack, shield-wall, re-form and engaged.
2.3 Game Charts and Tables
Various charts and tables simplify and illustrate the game and furnish results for certain game actions. These include the Terrain Effects Chart, the Shock Attack and Missile Fire Combat Results Tables, and the Re-Form Table.
3.0 Important Concepts
Before getting on with the main body of the rules, there are several important concepts with which players should familiarize themselves. These are presented here and include the rules on Stacking, Zones of Control, Facing.
3.1 Stacking
Unlike many other games, players are not permitted more than one Combat Unit in a hex. Combat units may not stack (be together in the same hex) at any time, even during movement. Leaders stack freely with any Combat Unit, and Status Markers don't count.
3.1.1 Joint Movement By Stacks
A Combat Unit and Leader that move together as a stack are limited to the Movement Allowance of the slowest Combat Unit in the stack.
3.1.2 Stacking Violations
Combat Units present in a hex in violation of the stacking limit at any point are eliminated. Combat Units removed from play to meet stacking limitations are chosen by the owning player.
3.2 Zones of Control (zoc)
Unlike in many other games, Combat Units do not project a formal "Zone of Control" into any of the hexes surrounding the hex they occupy. However, these surrounding hexes are considered "controlled" hexes in that they inhibit enemy Combat Unit movement (Case 6.1.2).
3.3 Facing
Facing refers to how a Combat Unit sits within a hex. A Combat Unit must be faced so that the top of the unit faces one of the hex's vertices, not the side of the hex. A unit may ignore this facing when moving, but once it stops movement it must be faced in a specific direction. The two hexes to each side of the vertex the unit is facing are Front, the two at the other end, Rear, and to the sides, Flank.
Source note: the next two Cases are printed under this Section as "3.1.1" and "3.2.1"; the numbers are transcribed as printed.
3.1.1 Facing Effect on Combat
Facing determines who a unit is going to Shock Attack and at whom missile units may fire. In general, this applies to only their (two) Front hex/hex sides.
3.2.1 Facing Effect on Movement
Facing does not matter when determining movement direction, and units are free to change Facing as much as they want during movement, at no cost. They may do so only when Activated to Move/Attack. However, changing facing is not considered movement for purposes of Fire or Movement, as it does not expend Movement Points.
3.4 Supply
Unlike many other games, there are no supply rules in The Battle of Tours. It was very much a "come as you are" battle.
3.5 The Fog of War
Unlike many other games, there are no particluar "fog of war" rules in this game. Players may freely peek under markers to see the identities of enemy units or where the opposing Leader is.
4.0 The Sequence of Play
The Battle of Tours is played using Game-Turns, of which there are no set number. The game simply starts and keeps going until one player wins, as determined in Module 15.0. Each game-turn includes two Player-Turns, one for each player. The order of these Player Turns within the Game Turn is determined by Initiative (see below), which is decided at the start of each Game Turn.
The sequence of play for each Player Turn (for each player) is as follows:
- I. Determine Activation (Module 5.0)
- II. Move Leaders (Module 6.0)
- III. Activated units Move (Module 6.0) and/or Fire (Module 7.0)
- IV. Activated units Shock Attack (Module 8.0)
- V. Inactive units may try to Reform (Module 10.0)
When both players have finished their Player Turns, check the victory conditions (see Module 14.0). Both check to see if somebody won; if not, go to the next turn.
4.1 Initiative
Each player rolls one die, adding his Overall Commander's Command Range. The Player with the highest total decides whether he wants to go first or last. In the first Game Turn, the Muslim Player automatically goes first.
5.0 Activation
Activation is the mechanic used to determine which player "goes" (takes a turn).
Design Note: This rule especially reflects the major problems the Muslims had in attacking piecemeal, without any coordination among the various tribal contingents.
Addendum (Aug. 1, 2026), Case 5.0: The Muslim non-striped units that start near the wagons are, as noted in the setup, "Wagon Train Guards." They do not belong to any contingent, and cannot be activated except when they, or the wagon trains, are attacked by the Franks. Once triggered, the Muslim player may activate them along with any contingent he wishes each turn.
5.1 Contingents
Contingents are the distinct groups of units that may be activated. Every unit of a Muslim Contingent shares a stripe color. Frankish Contingents are defined by unit type: Heavy Infantry (HI), Light Infantry (LI), Heavy Cavalry (HC) and Light Cavalry (LC).
Leaders do not belong to Contingents, and can move freely without activation.
Historical Note: While the Franks, whose army included some of Duke Eudo's al-Andalusian men, were far more homogeneous than the Muslims, there were no divisions, companies, etc…at least there is no indication of such formal order.
5.2 Activation of Contingents
In his Activation Determination Phase, the player decides what he wants each of his Contingents to do, i.e. their "Orders":
- Move and/or Attack, or
- Attempt to Reform, or
- Form or Leave Shield Wall (Franks only; see Case 5.2.6)
The player can activate, or try to activate, any number of his contingents.
5.2.1 Orders Markers
Before attempting to actually Activate his units, he must place Orders Markers indicating what he wants each Contingent to do. The player puts a marker on the map on or adjacent to one of its Contingent's units to indicate exactly what Contingent will receive which Orders.
5.2.2 Following Orders
Once all Contingents have their Orders, the Player now rolls the die for any unit designated to Move/Attack to see if that Contingent will actually undertake those Orders. He does this one Contingent at a time, and if the Contingent does activate, he undertakes those actions with the Contingent before proceeding to the next Contingent.
- If the Muslim Die Roll is 0-4, the Contingent activates; if it is 5-9 it fails to Activate.
- If the Frankish Die Roll is 0-5, the Contingent activates; if it is 6-9 it fails to Activate.
5.2.3 Effect of Leaders
Leaders can be used to affect Activation. If the Leader is stacked with a unit of a Contingent, the player subtracts one from the die roll. Charles and Abd ar-Rahman can each affect only one Contingent, and then only the one with which they are stacked.
5.2.4 Activation Failure
Contingents that have failed to Activate may not do anything. (They will defend in place normally.)
5.2.5 Reform Order
Contingents designated to Reform do not have to roll for Activation.
5.2.6 Shield Wall Order
The Frankish Heavy Infantry Contingent, even if Disordered, may adopt Shield Wall—a strong defensive position—or leave Shield Wall as its activation for that Player Turn. All units in that Contingent must adopt or leave at the same time. Use the "Shield Wall" marker to indicate that the Contingent is in that status. Like Reform, this does not require a die roll. Units in Shield Wall may not attack, nor may they use Counter-Attack. They may Reform.
Frankish HI may Reform in the same turn in which they enter or leave the Shield Wall, and they may move and initiate Shock in the same turn in which they leave it. HI units do not have to be adjacent or within any set distance from each other to enter the Shield Wall, nor do they have to maintain any semblance of a continuous line to stay in it.
Addendum (Aug. 1, 2026), Case 5.2.6: "Leaving a Shield Wall" is really a free action that's part of Frankish HI taking a different Activation (e.g. Move and/or Attack).
6.0 Movement
Each unit has a Movement Allowance, representing the number of Movement Points (MPs) a unit may expend in one Activation. The costs to enter the various types of hexes and cross certain types of hex sides are listed on the Terrain Effects Chart.
6.1 General Rules
Movement is always voluntary, never required. Each Activated Combat Unit may be moved as many hexes as desired within the limits of its Movement Allowance, and within the restrictions of the Terrain Effects Chart. Units move from one hex to another, contiguous hex. Units cannot move into a hex occupied by another Combat Unit, enemy or friendly, and they have to stop when they move adjacent to an enemy unit.
6.1.1 Order of Movement
Units Move (and/or Fire) in the Move/Fire Segment. Individual units from the same Contingent may do either/both, in whatever order the player wishes.
6.1.2 Enemy Units
Movement Units that start movement adjacent to an enemy unit may still move, subject to Activation, and provided they are not currently Engaged through Shock Combat (Module 8.0). A unit that starts in one enemy-adjacent hex can move directly to another.
Example: This Muslim HC unit moves through hexes 2019 and 2020, but must stop in 1920, because it is adjacent to a Frankish unit. That it is adjacent to two Frankish units is unimportant; one is enough to halt movement.
Example: The Muslim player wants to move his LC in 1920 to 1918. He can pull out of the line into hex 2020, then 2019, changing facing freely, then moving into 1918. He could not move the unit there directly through 1919, because the LC would have to stop on account of moving adjacent to a Frankish unit.
6.1.3 Restrictions
Engaged units (Module 10.0) and units in Shield Wall (Case 5.2.6) may not Move or change facing. Units may not move off the map. (If they do, they're eliminated.) A Combat Unit does not have to expend all its Movement Allowance in an Activation, but MPs are not transferable between Combat Units or Leaders, nor may they be accumulated from one turn to the next.
6.2 What Is Movement and What Is Not
There is a difference between moving counters around the map, and the game mechanic of Movement. Movement, as a mechanic, is any action that requires the expenditure of Movement Points. Actions that move a unit—e.g., Advance after Shock—but do not require an expenditure of Movement Points are not Movement in terms of a game mechanic.
7.0 Missile Fire
Missile units—Light Cavalry Mounted Archers—are capable of firing at enemy units. The Maximum Range—the maximum number of hexes over which that unit may fire—is 3 hexes. Count the target hex but not the firing hex. Missile units may fire through their frontal and flank hex sides (Section 3.3), although Reaction Fire is limited to Frontal hex fire.
Addendum (Aug. 1, 2026), Case 7.0: Enemy units that are currently in Engaged combat with friendly units may not be targeted for Missile Fire.
Historical Note: Frankish armies do not appear to have had any archers until the mid-Carolingian era (we're in the late Merovingian era now), although source information on this is very sparse. The Andalusian Muslim armies did use foot archers, but it does not appear that they had any on this campaign.
7.1 When Mounted Archers May Fire
Mounted Archers may fire once as part of (during) Movement. It costs 1 MP to do so. Mounted Archers may continue to move before/after firing, up to the limit of their movement.
Historical Note: The Muslim mounted archers used the Fire-and-Disperse tactics prevalent in the East—riding close to the enemy lines, firing quickly, then riding away, all in a continual series of squadrons—although without the exceptional composite bows seen later on.
Play Note: The ability of the Muslims to use "Hit-and-Run" tactics—moving up to the Franks, firing, and then riding away, is their most valuable tactic, especially when the Franks are in Shield Wall and unable to move.
7.2 When Fire May Occur
There are two opportunities for Missile Fire: Phasing Fire and Reaction Fire.
Phasing Fire: When it is the unit's Move/Fire Phase. A unit may fire once when its command is activated.
Reaction Fire: When any enemy unit moves into a Mounted Archer's adjacent frontal hexes. This applies to each enemy unit that does so. Each unit fires individually, and each unit may fire at only one target at a time (within range and Line of Sight; see Section 7.4). Non-phasing units using Reaction Fire may fire at each adjacent enemy unit that becomes "eligible," as per the above.
Addendum (Aug. 1, 2026), Case 7.2: Ignore the effects of controlled hexes when initiating Muslim fire and disperse tactics. Muslims can move up to and away from Frankish units with impunity when engaging in this type of missile fire.
Fire-and-Disperse Tactics 1: The Muslim moves his light cavalry to hex 2308, expending three movement points to get there, and fires his arrows at the Frankish unit in 2109, disordering it, at the cost of one movement point. The LC continues moving to 2507. The unit could not have fired on a second target hex at the expense of another movement point, as mounted archers can make only one Phasing Fire attack per Activation.
Fire-and-Disperse Tactics 2: The Muslim mounts a similar movement and fire combat sequence with his LC in 2510, this time against the Frankish HI in 2110, disordering it; the LC ends movement in the hex where it began. In the same activation, the Muslim Heavy Cavalry unit in 2511 follows the LC's movement and fire by moving to 2111, so it can attack the disordered Franks in the Shock Phase. Attacking from a flank hex, the Muslim cavalry would enjoy Position Superiority in that combat.
7.3 Resolving Fire
Roll one die, noting the type of unit the target is (reflecting its defensive armor), and consult the Fire Table. The Table lists all of the circumstances that provide additions to or subtractions from the die roll (Die Roll Modifier or DRM). The Range Effects Chart gives any DRM for firing at that Range.
Example: A Mounted Archer firing at a range of 1 hex gets a +1 DRM.
Compare the adjusted die roll to the Target column on the Fire Table to get the result.
7.4 Line of Sight (LOS)
A unit must be able to see a unit to fire at it. To do so, the player must be able to trace an unblocked LOS from the center of the firing hex to the center of the target hex. LOS is blocked if any intervening hex (or hexside) is higher—of greater elevation—than both the firing and target hex (not a big problem in this game).
Archers may not fire through other units unless they use Shower Fire (see the DRM for the Fire Table) to fire over any friendly units directly in front of them. They may not use Shower fire to shoot over the heads of adjacent enemy units, nor may they use it in Reaction Fire; in both cases the archers will be more concerned with the enemy troops next to them than the threats further away.
Play Note: Shower Fire—using high trajectory instead of aiming and firing directly at a target—is a good way for the Muslims to get at the more vulnerable Frankish Light infantry, but it carries its own negative DRM, to account for the reduction in effectiveness such fire entails.
8.0 Shock Combat
In the Shock Attack Phase: All (activated) phasing units listed as Attacker on the Weapon System Matrix may (not must) Shock Attack. However, if they choose to do so, they must Shock any/all enemy units that are in their frontal hexes, unless some of those units are being Shock attacked by other, friendly units. All Engaged (phasing units), whether Activated or not, except for those units in Shield Wall (Case 5.2.6), must attack any/all enemy units that are in their frontal hexes, unless some of those units are being Shock Attacked by other friendly units. Mounted Archers may never Shock Attack. They do defend, though.
Addendum (Aug. 1, 2026), Case 8.0: If multiple unit types defend in a Shock combat against a single attacker, use the modifier on the Weapons System Table most beneficial to the defender.
8.1 Retreat Before Shock
Mounted units that are not Disordered, if attacked by infantry, may Retreat Before Shock by moving one hex away from the attacking unit. They may not move adjacent to any enemy unit, or enter an occupied hex, but they may change facing at will. The (one) attacker may advance into the vacated hex, if the player so wishes, but may not then Shock.
8.1.1 Light Cavalry Option
Light Cavalry, that are not Disordered, may Retreat Before Shock if attacked by Heavy Cavalry by moving one hex away from the attacking unit, as above, and then rolling the die: a die roll of 5 or less, the Retreat has no negative effect. On a die roll of 6 or more, unit retreats but is Disordered.
8.2 Resolving Shock Attacks
Shock Attacking is voluntary, but if a unit does attack, it must Shock all enemy units in its Frontal hexes. It does not have to do so against enemy units that are being, or going to be, Shocked by other friendly units. In the case of combats involving multiple units, all attackers must be adjacent to all defenders.
8.3 Order of Shock Resolution
Shock is resolved after all Movement/Fire is finished, in the following order: the active player announces which of his units are attacking which defending units. The Defender Retreats, if he is capable (and chooses to). The Attacker resolves all his Shock Attacks, in any order he wishes. Advances are taken where required or possible.
8.4 Die Roll Modifiers for Resolving Shock
To resolve Shock, roll the die, then apply any DRM that apply from the following situations:
- Strength Advantage
- Position Advantage
- Unit type (see Weapons System Matrix)
- Attacker Status (Disorder)
- Leader Presence
Strength Advantage: The player with the higher number of units receives the differential between the number of units as a DRM.
Example: One HC unit attacks two infantry units. There is a -1 Strength (dis-)Advantage DRM to the Shock resolution for the attacking HC.
Position Advantage: There are 2 types of position advantage:
- Facing: This reflects the advantage of attacking from an angle other than (only) frontally:
- If any Shock Attacking units are attacking through a defender's Flank, there is a +2 DRM.
- If any Shock Attacking units are attacking through a Defender's Rear, there is a +3 DRM.
- If the attackers are attacking through two or more sides (Front, Rear, Left Flank, or Right Flank) of a unit there is a +4 DRM.
- Terrain: See the Terrain Chart for the effects of Terrain on combat. If more than one unit is being attacked, and they each could take advantage of different terrain, apply the terrain type that is most beneficial to all of the defenders.
Weapons/Armor Comparison: The Attacker uses the Weapons System Matrix to compare his Attacking unit Type to that of the Defender. The matrix provides the appropriate DRM, If an attacker is doing so with two (or more) units, each of a different type, he may use the best DRM available for him.
Addendum (Aug. 1, 2026), Weapons System Matrix (correction): When Frankish LI attacks Muslim HC, the modifier should be -2. Note that there are no Muslim HI units in the game, so HI cannot attack enemy HI.
Attacker Status: If the Attacker is Disordered, there is a -2 DRM. Defendant's Disorder status is not considered.
Leader Presence: Having a Leader present has the following effects:
- Any attacking unit stacked with a Leader gets a +1 DRM.
- If any Defender is stacked with a Leader the Attacker subtracts one (-1) from his die roll.
All of the above are cumulative with "+" DRMs favoring the Attacker and "-" DRMs favoring the Defender. To resolve the Shock, roll the die for each combat, apply the DRM and consult the Combat Results Table to see what happened.
Design and Historical Note: There are no rules for cavalry charges. The cavalry of this era did not use "the charge" as we understand it, probably because of the lack of stirrups.
8.5 Advance After Shock
If a defender is Eliminated, the attacker must advance one of his attacking units into that hex. If more than one unit attacked, the choice of advancing unit is up to the player. The advance is undertaken as part of resolution. The advancing unit may change its facing, as it wishes, after such advance. (See the Continued Attack result, Module 9.0.) Exception: Disordered victors may not advance.
8.6 Post-Shock Attack Disorder
All cavalry units that Shock Attacked are automatically Disordered at the conclusion of their attack. If they were already Disordered, ignore Post-Shock Disorder.
Example of Shock Combat Resolution: The Muslim player decides to initiate Shock with the Heavy Cavalry unit in hex 1721. The Light Infantry unit next to it will not engage in combat, and so the HC must attack the Frankish Heavy Infantry in 1621 and 1622. The Light Cavalry cannot attack at all in the Shock Phase. The Frankish HI in 1620 is not attacked at all. Since the Franks are infantry, not cavalry, there is no Retreat Before Shock. The Franks have Strength Advantage, as there are two units defending against a single attacker, and thus the Muslim player subtracts 1 from the die roll. He does not enjoy Position Advantage, so there is no modifier for attacking into the Franks' flanks or rear. Consulting the Weapons System Matrix, the Muslim player finds that there is no modifier for Heavy Cavalry Shock Attacking Heavy Infantry.
The Muslim rolls the die, and gets an 8. He subtracts 1, for the enemy's Strength Advantage, and the final result is 7. Both Franks are Disordered, and there is no result for the Attacker. But because cavalry is always Disordered after initiating Shock, regardless of any other results to the attacker, the Muslim unit is Disordered too.
9.0 Combat Results
When a unit is Disordered, flip the counter to its "Disordered" side. The effects of being Disordered are:
- -1 if firing missiles while Disordered
- -2 if Shock Attacking while Disordered
- Prohibited from Advancing After Shock
Second Disorder Check: A Disordered unit that incurs another Disorder result (but not Post-Shock Disorder) must check to see what happens by rolling the die. "Heavy" units add one (+1) to this die roll.
- If the adjusted die roll is 0-4, the unit is Eliminated (see below).
- If the adjusted die roll is 5-9, the unit stays in the game, Disordered.
Engaged: The units must stay where they are. Engaged archers may not Fire. Units may Shock again (next turn), but they cannot Move until they get a Combat Result different than Engaged.
Addendum (Aug. 1, 2026), Case 9.0 (Engaged): Defending units (and Leaders) that suffer an Engaged result when attacked from their rear or flank may not perform Missile Fire, may not attack any units to their front, and may not turn to face their attackers. They are frozen in place and can only defend against the original attackers that inflicted the Engaged result in the first place. Note that when lines of opposing formations clash, multiple Engaged results can spread up and down the lines—locking forces in place until resolved.
Eliminated: The unit is no longer effective as a fighting force and is finished for the day. Remove it from the board. Keep track of these to determine Victory.
Continued Attack: When this result is obtained, the attacking units may (player's choice) attack again, even if they Advance (see Section 8.5). When resolving a Continued Attack, subtract one (-1) from the Resolution die roll for each previous Attack undertaken in that Activation.
Play Note: Thus, a Continued Attack will automatically incur at least a -1 DRM. The DRM reflects the ongoing loss of formation and impetus such attacks are subject to.
Addendum (Aug. 1, 2026), Case 9.0 (Continued Attack): The Continue Attack result allows unit(s) to continue to attack other enemy unit(s) if the one(s) originally attacked is destroyed. They can attack an enemy unit already attacked. Likewise, they may attack enemy units that have already retreated before another Shock, per 8.1.
Counter-Attack: If the combat resolution die roll is an unmodified 1, then the Defender may, if the player wishes, attack (as part of the resolution of the original individual combat) the unit(s) that had just attacked it, using all Shock Rules. This occurs after implementing all other combat results, including Disorder and Elimination.
Only the original defender, or defenders, may Counter-Attack, and then only against the unit or units that just attacked in the first place. Units destroyed in combat cannot counterattack (they're already gone from the battlefield).
Addendum (Aug. 1, 2026), Shock Attack chart (correction): The Defender May Counterattack entry should read "when the unmodified DR = 1," and not "DR < 1" (the rule text above is correct).
10.0 Reforming
Disordered units may cure their Disorder status by spending their entire Activation doing nothing. Reform is an Order, and only units in a Contingent with a Reform Order may do so. If they are not adjacent to an enemy unit, and they do nothing, they may attempt to Reform.
10.1 Procedure
Remember, eligibility to Reform is determined by Contingent, but units actually Reform individually, with one die roll per unit. Roll one die:
- Subtract one (-1) from that die roll if the unit is in its Leader's Command Range (Module 12.0).
- Add one (+1) to every Muslim die roll if there is any Frankish unit within that unit's Movement Allowance (in points, not hexes) of a Muslim Wagon Train.
- Add three (+3) to every Muslim die roll if there is any Frankish unit adjacent to a Muslim Wagon Train (Module 11.0).
- Add two (+2) if that army's Leader is Dead.
10.2 Reform Results
Interpret the modified die roll above as follows:
- If the adjusted die roll is 4 or lower, flip the Disordered counter to its normal side.
- If the adjusted die roll is 5 or higher, the unit stays Disordered, but
- If the adjusted die roll is 10 or higher, that unit is instead Eliminated (it has fled, the Muslims to take their loot and run).
Play Note: The Muslim Player may ask at this time why he would ever try to reform his units if the Franks are hovering around his plunder. Well, Disordered units can't do much, and they quickly turn into Eliminated units, so the choice is a balancing act for the Muslim.
11.0 Muslim Wagon Train
The Muslim Wagon Train was overloaded with plunder from the campaign. This plunder was, for the most part, the "pay" for the Andalusian troops, and they were expecting a big payday. They weren't about to see it go away.
The wagons may not move. They cannot be attacked either, although it's bad enough if there is a Frankish unit adjacent to one.
12.0 Leaders
Each army has one Leader, its Overall Commander. Leaders are used to affect Activation and Reform, as above.
12.1 Leader and Reform
For Reform, use their Command Range, traced in hexes, not Movement Points, from the Commander to the Combat Unit. Count the hex in which the unit is located, but not that of the Overall Commander. Command Range may not be traced through an enemy unit or impassable hex or hexside.
12.2 Leader Death
Leaders can get killed. (In game terms, that encompasses being captured and other not-so-hot events). Dead Leaders are never replaced.
- By Fire: Anytime an adjusted Fire die roll (DR) of 9 or more occurs, and there is a Leader in the target hex, roll the die. If DR is 8 or 9 the Leader is killed. Otherwise, there is no effect.
- By Shock: Any time a Leader is stacked with a unit that receives a Disordered, result, roll the die for the Leader. If the DR is a 9 that Leader has been killed.
- By Adjacent Movement: If a Combat Unit moves adjacent to an enemy Leader who is not stacked with a Combat Unit, that Leader is Killed, unless the Leader's player rolls a 5-9 on the die. If he survives, place him with the nearest friendly unit. If he is surrounded by enemy units no dieroll is necessary. He is, instead, captured, thrown to the ground, and hacked to ribbons.
There are no modifiers to Leader Death die rolls.
13.0 Setting Up the Game
In all cases below, units start facing in whatever direction the player wishes.
13.1 The Franks
The Combined Army of the Merovingian Franks, under Mayor Charles, and the al-Andalusians, under Duke Eudo:
- In hexes 1606-22: Heavy Infantry (start in Shield Wall)
- In hexes 1505-21: Light Infantry
- Anywhere between hexes 1204-1220: All Cavalry
- Stacked with any Friendly Combat Unit: Charles, Major Domus
13.2 The Muslims
The Army of The Ummayad Muslims of Andalus, under Abd ar-Rahman:
| In Hexes | Units |
|---|---|
| 2019-23 | Red Cavalry |
| 2119-21 | Red Infantry |
| 2014-18 | Yellow Cavalry |
| 2115-17 | Yellow Infantry |
| 2010-13 | Blue Cavalry |
| 2110-12 | Blue Infantry |
| 2005-09 | Grey Cavalry |
| 2105-07 | Grey Infantry |
| 2616 | No Stripe Wagon Train Guard Infantry |
| 2618 | No Stripe Wagon Train Guard Light Cavalry |
- Anywhere between hexes 2716-21: Wagon Trains (3)
- Stacked with any Friendly Combat Unit: Abd ar-Rahman
Note: See the back of the game box for an image of a sample setup.
14.0 Victory and 15.0 Commentary
Not included in the source document. The contents page of the official TPS rules lists "14.0 Victory" and "15.0 Commentary", but the rules PDF on hand ends after the 13.2 setup note, and no complete copy of the rules was reachable when this file was transcribed. Victory conditions are therefore not reproduced here. Section 4.0 refers to the victory conditions in Module 14.0 and Section 9.0 refers to Eliminated units being tracked to determine Victory. Consult the complete official rulebook for Module 14.0 and Module 15.0 before relying on this file for a finished game.