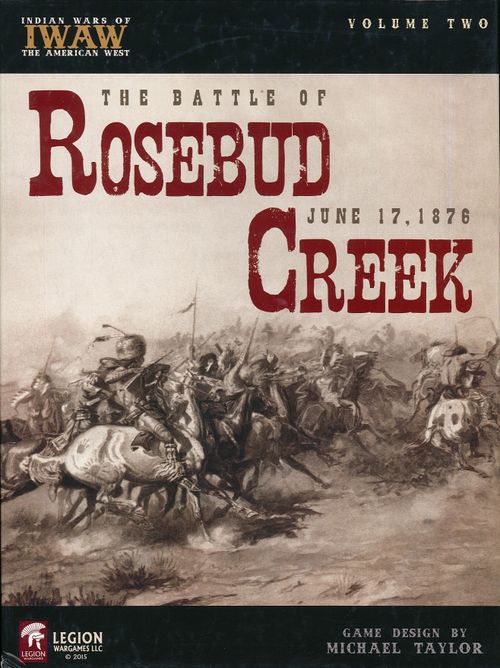
The Battle of Rosebud Creek
The Battle of Rosebud Creek Rulebook
Table of Contents
Table of Contents
- 2. Game Components
- 3. Glossary of Terms
- 4. Sequence of Play
- 5. Zones of Control
- 6. Stacking
- 7. Movement
- 8. Unit Mode
- 9. Fire Combat
- 10. Melee Combat
- 11. Unit Strength
- 12. Leaders and the Column HQ
- 13. Morale Checks and Rally
- 14. Ammo Supply
- 15. Pack Train
- 16. Special Rules
- 17. Victory Conditions
- 18. Game Set Up
2. Game Components
A. The Game
The Battle of Rosebud Creek game consists of:
- 1 - 22" x 34" Map
- 264 - .6" Counters
- 1 – 20 page Rules Book
- 5 – Player Aid Cards
- 2 – Six-sided Dice
B. The Map
The game map portrays the area in which the battle was fought. A hexagonal grid pattern is printed on the game map to regulate the movement, location and combat of the playing pieces. Each map hex is approximately ¼ mile across.
C. The Playing Pieces (Counters)
There are three types of playing pieces, called "counters", in the game; Units, Leaders and Administration markers. Units include Cavalry/Infantry companies, Miners, Crews, Scouts, Indians, Pack Trains, Pack Train Personnel, and Horse/Pony Holders. Both sides have Leaders that are used to control and rally their units. There are several types of Administration markers in the game used to mark a unit's Order, Strength, and Status, plus Turn and Victory Point markers. Each strength point is approximately 10 individuals.
D. Game Charts and Tables
Various charts and tables are provided with the game in order to organize and track certain game functions.
3. Glossary of Terms
A. Unit Mode
There are 3 possible Modes that a combat unit may be in:
- Mounted: Mounted units are riding on their horses, mules or ponies. Mounted units are able to move more rapidly, but Fire Combat is somewhat reduced and there is an increased chance of sustaining casualties.
- Dismounted: Dismounted units are off their mounts and are on foot. They are able to use ranged weapons more effectively, but their movement rate is slower than a Mounted unit's. Units that are Dismounted must deploy Horse/Pony Holders to maintain control of their mounts.
- Prone: Prone units are lying flat on the ground. Only Dismounted units may be Prone. Being Prone reduces the chances of suffering Fire Combat casualties, but it also reduces a unit's Fire Combat strength. Units behind Breastworks are always Prone.
B. Unit Condition
There are 4 possible Conditions that a unit may be in:
- Good Order: A unit's normal condition. The unit is not in one of the three conditions listed below.
- Disrupted: The unit is slightly scattered and somewhat confused due to enemy action. It can recover (regain control) from Disruption by expending Movement Points during the Movement Phase. Disruption affects Fire and Melee Combat, and Morale Checks.
- Pinned: The unit is suppressed and unable to move due to enemy fire, using any available cover and concealment to avoid enemy fire. Units may recover from the effects of being Pinned during the Rally Phase. Being Pinned affects Fire and Melee Combat, Rally and Retreat attempts, and Morale Checks.
- Routed: The unit has lost all cohesion due to enemy fire or close combat. It is unable to function normally. Units may recover from the effects of being Routed during the Rally Phase. Routed units may not engage in Fire Combat and are affected during Melee Combat, Morale Checks, Rally/Retreat attempts, and Zone of Control.
C. Combat Strength
The Combat Strength is a measure of a unit's combat power, both in Fire and Melee Combat. It is also used to determine the size of the unit for stacking purposes. When this value has been reduced to zero the unit is eliminated and removed from play.
D. Fire Combat
Fire Combat represents ranged fire from bow and arrows, rifles and muskets, and carbines.
E. Melee Combat
Melee Combat represents hand-to-hand combat or combat at very close ranges, using firearms such as swords, pistols, bayonets, tomahawks, spears/lances, and clubs.
F. Leader Rating
Each Leader has a Leader Rating, expressed as a die roll modifier (DRM). This modifier is applied to a unit Morale Checks, Rally attempts, Retreat before melee attempts, and Melee Combat.
G. Command Radius
A Leader may use his Leader Rating to modify Morale Checks and Rally attempts of any Pinned or Routed units that are within his Command Radius. The Command Radius is given in terms of hexes.
H. Morale
Morale represents a unit's ability to sustain the psychological effects of combat. A unit may be required to check its morale state, and players may attempt to recover (Rally) from their negative morale effects.
I. Combat Units
All Cavalry, Infantry, Scouts, HQ, Horse Holders, Leaders, Pack Train Personnel, Pack Trains, Miners, and Indian warrior units are combat units.
J. Non-Combat Units
Pony Holders.
K. Administration Markers
These are used to keep track of certain game functions. Types include; Pinned, Fired, Prone, Routed, Low Ammo, etc.
L. Fractions and Die Rolls
Unless specifically told not to do so in a rule, retain all fractions.
Die rolls: 1d6 = 1 six-sided die, 2d6 = roll. 2 six-sided dice simultaneously and add the results together as a single result.
4. Sequence of Play
Game play is organized into Game Turns. Each Game Turn is divided into two Player Turns. Each Player Turn is divided into multiple Phases. During his Player Turn each player moves his units and resolves combat according to the Game Turn Sequence.
Victory Points (VPs) are gained and tracked as they occur. At the conclusion of the final game turn, the Victory Conditions are consulted and a winner is declared.
Game-Turn Sequence
Each Game Turn is divided into a US Player Turn and an Indian Player Turn. The player whose Player Turn is currently in progress is called the Phasing Player. The other player is called the Non-Phasing Player. The Sequence of Play must be executed in the following order:
1. US Player Turn (or Phasing Player).
A. Rally Phase. The Phasing Player may attempt to rally Pinned and Routed units. Re-supply eligible units with ammunition.
B. Offensive Fire Phase. The Phasing Player (only) may fire eligible units. The following are the firing options available and their effects during the Movement Phase.
| Offensive Fire Phase Options | Movement Phase Effects |
|---|---|
| Fire at full strength | Cannot move |
| Fire at 1/2 strength | 1/2 movement allowance |
| Do not fire | Full movement allowance |
Mark units that fire with the appropriate Fired marker.
C. Movement Phase. The Phasing Player moves all Routing units first. After that he may move all, some, or none of his non-Routed, non-Pinned units as he desires. He may Mount, Dismount, go Prone, and Low Crawl units. The US player may build Breastworks. The Non-Phasing Player's units may not move during this phase, but they may conduct Opportunity Fire as appropriate.
D. Defensive Fire Phase. The Non-Phasing Player may conduct Fire Combat with any of his eligible units against any of the Phasing Player's units, within the rules and restrictions of Fire Combat. Neither player may move his units during this phase, except as a result of the Combat Results Table.
E. Advance Fire Phase. The Phasing Player may conduct Fire Combat with his eligible units. Only units that did not fire in the Offensive Fire Phase can fire during the Advance Fire Phase, even if they moved their full Movement Allowance. All units that fire during this phase do so at ½ strength, even if they did not fire in the Offensive Fire Phase and/or did not move during the Movement Phase.
F. Melee Phase. Any Phasing Player unit that is not Pinned or Routed and begins this phase adjacent to the target hex may engage in Melee Combat. The Phasing Player determines the order in which each separate Melee Combat is resolved. Each melee is declared and completely resolved before moving on to the next Melee Combat declaration and resolution. The Non-Phasing Player then has the option to attempt to Retreat units (Retreat before melee) that are in the target hex of the attacking units. The Retreating units may be subjected to Opportunity Fire, and any effects of the Fire Combat results. The Phasing Player's attacking units may advance into the vacated hex and/or pursue.
G. End of Phasing Player's Turn. Flip the Turn marker to the Indian (reverse) side.
2. Indian Player Turn. The Indian player now becomes the Phasing Player and proceeds to follow the Phasing Player Sequence (steps A through G) as described above.
3. End of Game Turn. The Turn marker is advanced one space on the Game Turn Record Track. Reduce all grass fire numbers by one, or remove any grass fires that reach 0.
5. Zones of Control
The Zone of Control (ZOC) represents the area that a unit influences by fire and/or physical presence. There are three types of ZOC.
- Full ZOC: The hex the unit occupies and the 6 adjacent hexes.
- Partial ZOC: Only the hex the unit occupies.
- No ZOC: The unit does not have a ZOC.
The following units have the indicated type of ZOC.
- Full ZOC: All combat units, except Horse Holders.
- Partial ZOC: Horse/Pony Holders, Routed units.
- No ZOC: Leaders.
ZOC's affect withdrawal, retreat, and movement. ZOC's do not extend into impassable hexes or across impassable hexsides. The presence of a friendly unit in the hex negates the effects of an enemy ZOC for rules 9.F (Opportunity Fire), 9.G (Retreat Fire), and 10.I (Retreat Movement). It costs an additional +1 MP to exit from a hex in an enemy ZOC. Movement expressed in hexes (such as Retreat before melee, pursuit, and Retreat/Rout movement) is not subject to the exit ZOC movement point penalty. Units may move from one enemy ZOC to another, but they are subject to a movement penalty and Opportunity Fire each time they leave an enemy ZOC.
6. Stacking
Stacking is when two or more units end a phase in the same hex. Only a limited number of units may stack in a hex. There is no cost in movement points to form, enter, or leave a stack. Stacking restrictions apply only at the end of a phase.
-
A. Combat Units. A maximum of 25 Combat Factors may stack in a hex at the end of any phase. Remember that Casualty Points reduce the Combat Factor of a unit. Administration and Breastwork markers never count against stacking restrictions; any number of these markers may be stacked in a hex.
-
B. Pack Train. Each full strength Pack Train counter counts as 6 Combat Factors for stacking purposes, which can be reduced due to combat losses.
-
C. Indian Camps. There is no Indian Camp in play in the Battle of Rosebud Creek game.
-
D. Leaders. Leaders may stack in a hex at no cost.
-
E. Horse/Pony Holders. US Horse Holders count as 1 stacking point per Holder counter. Indian Pony Holders count as zero stacking points, but there is a maximum number that may stack in the hex. A maximum of 4 may stack in the hex, or a number equal to the number of Indian combat units that are in the hex, whichever number is higher.
Example: 4 may stack in a hex without combat units. If there are 5 combat units in the hex, then 5 may stack (5 is higher than 4). If there are only 3 combat units, up to 4 may still stack in the hex (4 is higher than 3).
7. Movement
Each unit and Leader has a Movement Allowance printed on the counter. This is the maximum number of movement points that each unit or Leader is allowed to spend to conduct movement or other activities (such as changing Unit Modes or removing a Disruption marker) in a single Movement Phase. Each player moves his units during the Movement Phase of his Player Turn.
- A. Procedure. Units and Leaders move one counter at a time or in stacks. Movement must be from one hex to any adjacent non-prohibited hex, in any direction or combination of directions the moving player chooses. Hexes may not be skipped. Each unit or stack of units may continue movement as long as the unit or stack has movement points remaining. A unit must end its normal movement (forfeits all its remaining movement points for the phase) if it becomes Pinned or Routed. The Movement Phase ends when the player announces that he has finished moving his units.
- B. Terrain Effects on Movement. Terrain affects movement of all units as they move from hex to hex. For certain hexes units moving as Mounted pay a different MP cost than units moving as Dismounted.
- Clear: 1 MP to enter hex while Mounted and 2 MPs while Dismounted.
- Light Woods: 2 MPs to enter hex.
- Elevation: Units moving uphill, Mounted or Dismounted, pay an additional 1 MP (beyond the MP cost to enter the hex), for each level crossed. A unit moves uphill when it moves into a hex that has a higher elevation value than the one it is leaving. Some hexes have more than one elevation change. A unit is always considered to be at the highest elevation in a hex.
- Creeks: Units crossing a Creek hexside must pay the additional MP cost of the Creek as the unit crosses the hexside. There are two classes of Creeks: Dry Creek and Rosebud Creek.
- Cliff: Prohibited. Units cannot cross a Cliff hexside.
- C. Restrictions on Movement. The following restrictions apply to movement:
- A unit may never exceed its Movement Allowance although it may move less than its Movement Allowance.
8. Unit Mode
All combat units may be in one of the following Unit Modes: Mounted, Dismounted or Prone. The Pack Train and Horse/Pony Holders are always considered Dismounted. Leaders are always considered Mounted or Dismounted, whichever is the most advantageous to the owning player.
Mounted Infantry, Miners and Mule Holders. Crook had his infantry mounted with mules taken from the Pack Train. Although not as fast as the cavalry, these mounted infantrymen were fairly mobile. Mounted Infantry and Miners act as Cavalry for all rule purposes (i.e. Mounted and Dismounted, Holders, etc.) except that Mule Holders are used instead of Horse Holders. All rules that pertain to Horse Holders also affect Mule Holders. Infantry/Miners can only mount using Mule Holders.
- A. Mounted. Mounted units use the "Mounted" movement rate on the Terrain Effects Chart for the movement point costs of each hex or hexside. Mounted units move faster but are easier to hit during Fire Combat and do not fire as well as Dismounted units. Only Mounted US Cavalry units may Charge (see Rule 16.A Special Rules). A Mounted US unit that receives a Pinned result must Dismount. Both the unit and its Horse Holder are not Pinned in the hex, but they are forced to Dismount in the hex. A Mounted Indian unit that receives a Pinned result must Retreat 2 hexes instead of being Pinned (the unit is Disrupted, however; see 9.D.1).
- B. Dismounted. A Dismounted unit uses the "Dismounted" movement rate on the Terrain Effects Chart for the movement point costs of each hex or hexside. Horse/Pony Holders are considered Dismounted.
- C. Prone. Prone units are lying flat on the ground. Prone units may Low Crawl, fire, or change mode so that they can move. Prone units are harder to hit but do not fire as well. A unit or units cannot engage in a Melee Combat attack while Prone but they may defend.
- D. Changing Unit Modes. A unit must change its mode if it wants to change its current movement method or posture.
- Procedure. Units that are not Routed, Pinned or Disrupted may change Unit Modes. It costs each unit 1 MP to change mode. A unit may change modes as many times as the player wishes, as long as it has enough MPs to do so. Units may change from any mode to any mode; there is no progression. A Mounted unit may change mode to Prone, and vice versa. In order for Routed, Pinned or Disrupted units to change mode they must first Rally or recover from Disruption.
- Horse Holders. When a Cavalry or HQ unit changes movement modes (Mounted, Dismounted, Prone) Horse Holders come into play. When a Mounted US Cavalry unit dismounts, every fourth person is detailed to hold the horses (so they don't wander away). This frees the rest of the unit to form skirmish lines and fight; however, it reduces the unit's strength by one quarter. When deployed on the map Horse Holders act as, and are subject to, all the rules as any other combat unit. HQ units use a 0 (zero) strength HQ Horse Holder counter. For game purposes this is represented by just losing 1 strength point, no matter the size of the unit. US Scouts do not use the Horse Holder rules; they simply Mount and Dismount without losing strength points or having to track horses.
9. Fire Combat
Each combat unit has a Combat (strength) Factor. This factor represents the unit's strength in personnel and ranged weapons such as bow and arrows, carbines, and rifles. US Infantry, Miners, and Cavalry units are armed with rifles, carbines and pistols. US Infantry units are armed with rifles. Indian units are armed with mixed weapons, including bow and arrows, hatchets, spears, clubs, and a wide variety of small arms.
-
A. Procedure. Combat units may engage enemy units with Fire Combat in adjacent hexes, (unless using Long Range Fire) during the Offensive, Defensive and Advance Fire Phases within each Player Turn. Fire Combat may be triggered during the Movement Phase if a unit withdraws, and during the Melee Phase if a unit conducts Retreats before melee.
Each friendly unit fires individually at a single enemy target unit (a single enemy unit or one within a stack of enemy units). Leaders may not be targeted if they are attached to a unit. Leaders alone in a hex or stacked only with other Leaders may be targeted.
Sequence:
- The firing player indicates the firing unit and the target enemy unit.
- Apply any modifiers to the Fire Combat strength (such as Low Ammo, Disruption, etc.).
- The Fire Combat strength of that player's unit is then located on the top of the Fire Combat Matrix. US units, and Henry-armed Indian units, use the US Fire Line and all other Indian units use the Indian Fire Line. The firing unit's current mode is shown on the left side of the matrix. Cross-index and locate the indicated letter code.
- The firing player consults the Fire Combat Results Table and locates the column with the indicated letter code given in the matrix. He rolls two dice (2d6), applies any die roll modifiers, and locates the result. Apply the results immediately before resolving another Fire Combat.
-
B. Fire Combat Modifiers. Fire Combat modifiers apply to the unit's Combat (strength) Factor (x½ or x¼) or the dice roll (+ or - DRM). All modifiers are cumulative except Pinned/Prone and Breastworks, see the Fire Combat Results Table.
-
Terrain. Most of the terrain in the game is considered clear and does not affect Fire Combat. The following terrain features do affect Fire Combat:
- Light Woods: -1 DRM if target is Dismounted in a Light Woods hex. 0 if mounted.
-
10. Melee Combat
Melee Combat represents very close or hand-to-hand fighting, with the objective of overrunning and destroying the enemy in the hex. Melee Combat occurs during the Melee Phase (only) when a Phasing player declares Melee Combat with any number of eligible (see 10.B) adjacent units that are not Pinned, Routed, or Prone, against all enemy units in a single target hex.
-
A. Procedure. In order for a unit or stack of units to conduct Melee Combat with enemy units in a target hex, it must begin the friendly Melee Phase adjacent to that target hex. Attacking units from multiple adjacent hexes may attack the same target hex.
- The Phasing Player declares all of his Melee Combat attacks and targets.
- Cannon fire, if any, is resolved and all results are immediately applied.
- Retreat before melee is conducted.
- Both players consult the Melee Combat Results Table and if applicable, modify their Melee Combat strengths.
- The modified Melee Combat strengths of all the attacking units are totaled together as one single factor. This is compared to the total modified Melee Combat strength of all the defending units in the hex. These factors are then expressed as an odds ratio, attacker to defender.
Note: Retain all fractions when adding the factors of multiple units together. Example: Units with a strength of 5 and of 3 are both halved for Low Ammo. The 5 becomes 2.5 and the 3 becomes 1.5. which totals 4.
- The Melee Combat Results Table contains two lines at the top of the chart. If the attacker is the US player use the US Line, if the Indian player is the attacker use the Indian Line. Find the odds ratio at the top of the chart.
- Check the Terrain Effects Chart and Melee Combat Results Table for any die roll modifiers and roll 1d6, apply any modifiers, and find the results.
- Apply the results immediately. All Retreat and Rout results for a particular side affects every unit involved in the Melee Combat. Casualty Points are distributed amongst the units of the affected side at the owning player's discretion.
-
B. Restrictions to Melee Combat.
- Attacking units cannot Advance Fire into one hex and initiate Melee Combat into a different hex. If a unit Advance Fires into a hex it may only initiate Melee Combat into that hex. If it did not fire in the Advance Fire Phase, it may perform a Melee Combat with any unit within the above procedure and the Melee Combat restrictions.
11. Unit Strength
Every unit has a unit strength expressed as a Combat Factor. Each time a unit receives a Casualty Point its Combat Factor is reduced by 1. When a unit's strength is reduced to zero it is eliminated and permanently removed from the game.
Notice that when a US Cavalry unit Dismounts its Combat Factor on the reverse side is already reduced by one. This represents troopers that are assigned the duty as Horse Holders (represented by the Horse Holder counter). Indian units, Column HQ and Scouts do not reduce. If a US Cavalry unit is reduced to a strength of 1, and Dismounts, it must abandon its horses.
12. Leaders and the Column HQ
Leaders are very important for Rallying Routed and Pinned units. They also affect Melee Combat, Morale Checks, and Retreat before melee attempts. Depending on the activity, units must be attached to, stacked with, or within the Command Radius of a Leader to benefit from the Leader's modifier.
-
A. Attached Leaders. Leaders stacked in a hex with one or more units must be attached to a unit. If there is a single unit in the hex, the Leader is placed on top of the unit and is considered attached to it. If the unit is Pinned, Retreats or is Routed, the Leader is also Pinned and must Retreat/Rout with the unit. A Leader must be attached to a unit in Melee in order to apply his Leader's modifier to the Melee Combat.
If there are two or more units in the hex the owning player attaches the Leader to a unit of his choice. If that unit is Pinned, Retreats or is Routed, the Leader may remain with the unit or he may immediately re-attach to another unit in the hex.
If there are multiple Leaders in the hex, each Leader must be attached to a unit. More than one Leader (or all the Leaders) may be attached to a single unit, at the owning player's discretion. If there are multiple Leaders attached to a particular unit the senior-most Leader applies his modifier.
It is the owning player's choice if they are equal in rank or if they are Indian Leaders. Leaders may only change attachment during the Rally Phase or at the instant combat results are applied to the unit it is attached to.
-
B. Movement Mode. Leaders may move in any mode at the player's option. There is no cost to change modes. Unless stated by the owning player or marked with an administrative marker, a Leader is considered Mounted for movement and Dismounted for all other situations.
-
C. Leader Effects.
- Rally Attempts. A Leader may influence the Rally attempt of Pinned or Routed units. Units stacked with the Leader receive the Leader's Combat Rating modifier when rolling to Rally. Units making a Rally attempt that are within the Command Radius, ignore the negative self-Rally modifier but they do not add the Leader's Combat Rating modifier.
- Melee Combat. The senior-most US Leader (US player's choice if equal rank) or any Indian Leader (Indian player's choice) attached to a unit involved in Melee Combat adds his Combat Rating to the Melee Combat as a die roll modifier.
13. Morale Checks and Rally
Combat results and other activities may require a Morale Check. Units in various states of disorder may attempt to recover from these conditions by making Rally attempts or expending movement points.
-
A. Morale Check. When a player is required to make a Morale Check (MC) the player must consult the Morale Check Table. He rolls 2 six-sided die (2d6) adding any DRMs listed below the table and applies the results immediately.
Result Effect r1/Disrupt Unit is Disrupted, Retreats 1 hex r2/Disrupt Unit is Disrupted, Retreats 2 hexes Pinned Unit is Pinned (Rule 9D1.d) Routed Unit is Routed (Rule 10J) All adverse results of a Morale Check are cumulative. That is a unit that is already Pinned may become Disrupted; a Routed unit may become Pinned, and so on. A single unit may be Routed, Pinned and Disrupted all at the same time. All conditions will have to be corrected before the units can return to good order.
Note: At times multiple units in a stack may be at different morale states.
-
B. Rally. Any unit that is Routed or Pinned may attempt to recover during the Rally Phase. All units are Rallied individually. Leaders automatically Rally from all adverse morale effects during the Rally Phase.
Note: Disruption is recovered from during the Movement Phase.
Any unit that is stacked in the same hex with a Leader receives the Leader's Combat Rating modifier as a positive DRM.
14. Ammo Supply
All combat units, except the Pack Train and Horse Holders, are subject to ammunition depletion during Fire Combat. US combat units may be re-supplied by the Pack Train. The Ammo marker used with the Pack Train represents small arms ammunition only. Gun ammo re-supply is tracked differently. Indian units are too far away from the village and cannot re-supply during the game. Units are marked with a Low Ammo marker when they are ammunition depleted.
-
A. Ammunition Depletion. Each time a unit engages in Fire Combat and an unmodified die roll of five (5) is rolled, the unit is possibly low on ammunition. Re-roll one die. A result of 1-3 means the unit is ammunition depleted and marked with a Low Ammo marker. Exception: The Pack Train and Horse Holders never suffer Ammunition Depletion.
-
B. Low Ammo Effects.
- ½ Strength for Fire Combat – US/Scout/ and Indian units.
- ½ Strength for Melee Combat – US/Scout units only.
Each US/Scout unit with a Low Ammo marker at the end of the game deducts 1 VP from the US player.
-
C. Ammunition Re-supply. US units with a Low Ammo marker may replenish its ammunition supply from the Pack Train.
Optional rule: One Indian unit (each separate Melee) may re-supply with ammo if it was involved in a Melee, and at least one US unit suffered a Casualty Point in that Melee.
In order to re-supply its ammo from the Pack Train a US unit must begin the friendly Rally Phase stacked with or adjacent to the Pack Train, and an Indian unit must begin the friendly Rally Phase in a camp hex. The US/Scout or Indian unit and the Pack Train (US player) must then spend ALL of their MPs to re-supply. When the MPs are spent remove the Low Ammo marker from the unit. Reduce the ammunition supply level of the Pack Train by one or mark the Indian camp as having No Ammo.
Any number of eligible units may resupply their ammunition during the phase as long as ammunition remains in the Pack Train to distribute or in a camp. The Pack Train can issue ammunition and provide supplies to build Breastworks during the same turn.
When the Pack Train's ammunition supply marker is reduced to zero the Pack Train can no longer re-supply units.
-
D. Ammunition Supply - Optional Rules. Upon mutual agreement players may use one of the following optional ammo rules.
15. Pack Train
The Pack Train is considered a combat unit, although it is restricted in its capabilities. Each Pack Train counter counts as 6 Combat Factors for stacking and combat, and has a unit strength of 6 (for casualties, ammunition and elimination). Each time it takes a Casualty Point the Pack Train counter is flipped to, or replaced by, the next lower size value. All the values are adjusted on the counter. Remember to adjust the ammo marker (basic ammo rules) or ammo boxes (optional ammo rules), if necessary, as casualties are taken.
At the beginning of the game each Pack Train counter has 6 points of ammunition. Place a "6" Ammunition marker under each Pack Train. Each point of (Pack Train) ammunition re-supplies one Cavalry, Infantry, or Scout unit.
-
A. Restrictions. The following restrictions apply to the Pack Train:
- It cannot engage in Melee attacks but defends normally.
- It is always considered Dismounted.
- It cannot re-supply units if it is Pinned, Routed, abandoned or has 0 ammunition points (empty).
-
B. Pack Train Personnel. Each Pack Train counter has a Combat Factor value. This represents the personnel assigned to the packs. The game includes Pack Train Personnel counters. If a Pack Train counter suffers a Rout result place a Pack Train Personnel counter and an "Abandoned" marker on top of the Pack Train counter. If the Pack Train has suffered losses, place the appropriate loss marker under the Personnel counter. The Pack Train Personnel unit must execute the Rout and is affected by all the effects of Rout.
During the Indian player's Rally Phase, if an Indian combat unit occupies the hex with an abandoned Pack Train, the Pack Train (and all remaining supplies) is permanently eliminated.
The Pack Train Personnel unit may rejoin the Pack Train (removing the Personnel unit and the "Abandoned" marker) by entering the hex of the abandoned Pack Train. If the unit strength of the Pack Train Personnel unit is lower than the Pack Train's current strength, the Pack Train's unit strength must be reduced the level of the Personnel unit. This may result in the loss of ammunition supplies (abandoned). If low on ammo, remove the marker, with no ammo boxes or points expended by the Pack Train.
Pack Personnel may never voluntarily leave the Pack Train (including Voluntary Rout), nor may it engage in Melee attacks. It may fire and defend in Melee normally and is subject to low ammo if separated from the Pack Train. If separated it must spend all available MPs to rejoin the Pack Train. This requirement is suspended if the path to the Pack Train is not free of enemy ZOCs. Pack Train Personnel units may be used as replacements for Infantry or Cavalry units (only).
If the Pack Train counter is eliminated separately from the Pack Train Personnel, the Personnel unit may move during the US player's Movement Phase to any Infantry or Cavalry unit and transfer unit strength points. It costs 0 MPs to transfer those points. Alternately, it may remain in a hex during the Movement Phase and transfer any number of strength points (up to its current strength) to any number of units that are with 2 hexes of the Pack Train Personnel unit. The unit receiving these replacements cannot be Routed or Pinned and the path cannot be across prohibited terrain or through an enemy ZOC. The receiving unit may move fully during the same Movement Phase.
16. Special Rules
-
A. Cavalry Charge. Mounted Cavalry units (only) may declare a Cavalry Charge during the US player's Movement Phase. Cavalry units that charge receives a temporary strength point bonus of one half (1/2 rounded up) of that individual unit's strength, added to their Melee Combat strength. A one-strength point (1 SP) unit gets a temporary strength point bonus of one additional strength point (1 SP). This is calculated after any modifications to the unit's strength (low ammo). The unit also gains 1 additional MP to its movement allowance for the charge.
In order to declare a charge:
- The attacking unit(s) must declare a target hex and engage those defending units in Melee Combat during the subsequent Melee Phase. If all the defending units in the target hex Retreat before melee the attacking unit(s) must pursue (pursuit is automatic).
- The unit must have been in good order (not Pinned, Routed or Disrupted) at the beginning of the Movement Phase (before any MPs are spent).
- The unit must move at least one hex toward the target hex.
- The unit may only charge through and into Clear hexes.
- The unit may not charge across Creeks, Rivers, or Fords.
- The unit cannot change more than one level of uphill elevation during a charge move, or enter a hex that has three or more elevation changes (too steep).
A charging unit is automatically Disrupted after the resolution of the Melee Combat (unless Routed, in which case ignore the Disruption). A Cavalry unit cannot charge during pursuit movement.
-
B. Lost Horses and Ponies. US Horse Holders are divided into two types of units, those with horses and those without. Horse Holders will lose control of their charges if the unit is involved in Melee Combat, or becomes Pinned or Routed. Flip the unit to its Holder (no horses) side. Scouts and the HQ do not have a Holder (no horses) on the reverse side. Horses may be intentionally abandoned by simply flipping the unit over to its "mountless" side. Lost or abandoned horses cannot be recovered for the rest of the game. Holders without horses are combat units and function as such for all rules and restrictions.
17. Victory Conditions
Victory Points (VPs) are awarded as they occur or at the end of the game (see the Victory Points Chart). At the end of the game, players calculate their VP totals as a ratio and compare it with the Victory Levels Chart to determine the game's winner and the level of victory.
Editor's note: the Victory Points Chart and Victory Levels Chart are referenced here but are not part of the rules text; they are not reproduced in this transcription.
Victory Points for Andrew's Point, Conical Hill, and Crooks Hill are awarded immediately when a Cavalry or Infantry unit, which is not Retreating or Routing, enters the hex. Units do not need to occupy or otherwise remain in the hex, and Indian units that subsequently enter the hex do not deduct the VPs from the US player.
18. Game Set Up
Duration: 19 turns or when all units from any side are no longer on the map. Turn 1 (08:00) - Turn 19 (14:00).
US Order of Battle
The US player sets up first. The Scout units may be Mounted, Dismounted or Prone. All others are Dismounted. Place all Horse and Mule Holders for each Dismounted unit in any adjacent hex.
Note: The US player is the second player in each turn.
The printed set-up table is arranged by hex. Each hex block lists the leaders and units placed in it:
- Hex 3413 — Capt. Noyes: A/2 Cav - Capt. Dewees; B/2 Cav - 1Lt Rawolle; D/2 Cav - 1Lt Swigert; E/2 Cav - Capt. Wells; I/2 Cav - 2Lt Kingsbury.
- Capt. Randall and Scouts: Place in any hex or hexes within a band that is west of the Rosebud, at least 4 hexes but no farther than 8 hexes from a map edge. For example, from hex 2603 (inclusive) to hex 2607 (inclusive). Scouts - Louissant, Old Crow, Medicine Crow Good Heart, Cosgrove.
- Hex 3314 — Capt. Van Vliet: C/3 Cav - 1Lt Luettwitz; G/3 Cav - 1Lt Crawford.
- Hex 3213 — BG Crook, Maj. Chambers, Maj. Royall, Maj. Evans, Column HQ: C/9 Inf - Capt Munson; G/9 Inf - Capt Burrowes; H/9 Inf - Capt Burt; D/4 Inf - Capt Cain; F/4 Inf - Capt Luhn.
- Hex 3014 — Capt. Henry: B/3 Cav - Capt Meinhold; D/3 Cav - 2Lt Simpson; F/3 Cav - 2Lt Reynolds; L/3 Cav - Capt Vroom.
- Hex 3514 — Capt. Mills: A/3 Cav - 1Lt Lawson; E/3 Cav - Capt Sutorious; I/3 Cav - Capt Andrews; M/3 Cav - 1Lt Paul.
- Hex 2912: Pack Train A & B; Miners.
Indian Order of Battle
The Indian player sets up his forces second. All units may be Mounted or Dismounted. The Indian player is the first player in each turn.
Up to one Warrior unit (Hunkpapa or Oglala) may enter along the Eastern map edge (hex 4700-4714) on Turn 1. Up to two tribes (not Hunkpapa, Oglala, or Cheyenne) may enter along the Western map edge (hex 1100-1106) on Turn 1. All Indian units not entering the Eastern or Western map edge must enter (at full strength and with all movement points) anywhere along the North edge of the map on Turn 1. The units may be Mounted or Dismounted at the Indian player's option when they enter the map. The units must pay the cost of the first hex they enter.
Leaders & Units:
- 3x Leaders: Crazy Horse, Gall, Two Moon
- 6x Hunkpapa: Crow King, Four Horns, Rain in the Face, Lone Bull, Red Horn, Black Moon
- 5x Cheyenne: Lame White Man, Little Wolf, Young Two Moon, Old Bear, Little Hawk
- 5x Oglala: He Dog, Big Road, Little Big Man, Low Dog, Big Elk
- 3x Sans Arc: Black Eagle, Spotted Eagle, Red Bear
- 2x Minneconju: Lame Deer, White Bull
- 1x Santee: Red on Top
- 1x Blackfoot: Scabby Face
- 1x Yanktonai: Black Shield