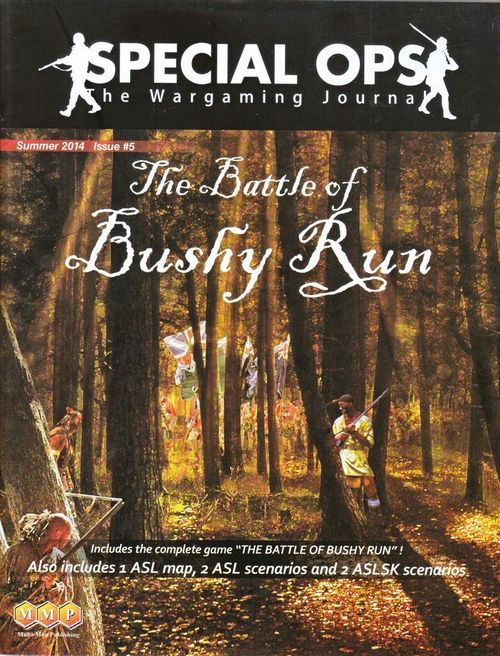
The Battle of Bushy Run
The Battle of Bushy Run Rulebook
Table of Contents
Table of Contents
1. Introduction
In July, 1763, Fort Pitt (now Pittsburgh) was under siege as part of Pontiac's Rebellion. A relief column was sent out from Carlisle in order to try and break the siege. The column was under the command of Colonel Henry Bouquet and consisted of approximately 500 British soldiers of the 42nd Highlanders, 77th Highlanders, and 60th Royal Americans.
On August 5th, several hundred Indian warriors of the Delaware, Shawnee, Mingo, and Huron tribes attacked the column east of Bushy Run Station. The British held out, and that night a redoubt was constructed from the supplies, and the wounded were treated inside this perimeter. The next day, the Indians attacked again, and a British counterattack broke the Indians. The British column was able to advance, and relieve Fort Pitt on August 10th.
This game examines the two days of the Battle of Bushy Run, and allows the players to explore the history of the battle. One player takes the role of the British soldiers and the other controls the Indian warriors.
2. Components
The game consists of:
- 88 counters
- 1 22" x 17" main map
- 1 8.5" x 11" Hidden map
The players will need to provide 6-sided dice.
2.1 Counters
The game includes two types of counters: units and markers.
2.1.1 Units
The unit counters are either red (British units) or gold (Indian units). Each counter contains the following information:
- Number of steps: Each time a unit takes a hit, it loses a step. If it is reduced to zero steps, the unit is eliminated.
- Firepower (FP)
- Movement Points (MP)
- Name
- Type
The Indian counters have fronts that state "Indians?" On this side, the Indian unit is Concealed. If the unit flips over it is Revealed, and is either a real unit, or a dummy unit. If a dummy unit becomes Revealed it is removed from the game.
[Figure: key to unit counters (British Soldier, British Grenadier, British Scout, Supply Wagon, Concealed Indian, Revealed Indian, Indian Dummy) and to the unit counter layout (Name, Steps, Unit Type, Firepower, Movement Points).]
2.1.2 Markers
The game includes several types of markers:
- Random Event Markers
- Volley Fire Markers
- Fired Markers
- Low Ammo Markers
[Figure: the marker key (Fired, Volley Fire, Low Ammo, Random Event).]
2.2 Maps
The game includes two maps depicting the battlefield: the main map and the Hidden map. Both are divided into a number of Areas used during play.
2.2.1 Main Map
There are two types of locations on the map:
- Areas: each Area has an Area Number (ranging from 1 to 19) and a Defense Value (0, 1 or 2).
- Zones: There are two Zones on the map, A and B. Units can move in and out of these Zones and can retreat into these Zones. These Zones have no stacking limit, and units in a Zone cannot attack, be attacked, or perform Defensive Fire.
2.2.2 Hidden Map
The Hidden map is used by the Indian Player to track the location of his Hidden units; all Indian units are kept on this map until they are Revealed or Concealed. The Hidden map should be shielded from the British Player at all times.
2.3 Dice
At least one six-sided die is required for play, though more are better — 6 dice per player is a good number.
3. General Concepts
Area: Each Area on the main map has an Area Number (1 to 19) and a Defense Value of the Area (0, 1, or 2).
Dummy Units: The Indian player has 9 dummy units that can be either Hidden or Concealed. If they ever become Revealed, they are removed from the game.
Hidden/Concealed/Revealed: Indian units have one of these 3 statuses at all times. Hidden units are on the Hidden map, Concealed units are on the main map face down. Revealed units are on the main map face up. If a dummy unit becomes Revealed it is removed from the game.
Hits and Damage: Hits resulting from attacks are subsequently converted to damage in the form of step losses for defending units.
Stacking: Each Area can hold up to 3 British units, and 5 Indian units. If an Area becomes overstacked, the last unit(s) to enter is (are) removed from play. Markers have no effect on stacking. This stacking limit excludes Indian dummy units and the British Supply Wagon. Zones have unlimited stacking.
Unit Status Change: Only Indian units can change their status from Hidden to Concealed or Revealed and vice versa. A Hidden unit is transferred from its current map to the Area of the same Area Number on the other map. The Indian player may Reveal a Hidden or Concealed unit at any time he wishes.
Step Losses: When a unit takes a step loss, either flip the counter, or replace the counter with the corresponding unit with fewer steps. When a unit loses its last step, it is destroyed.
Turn: One "round" of play consists of multiple phases. The game can last up to 8 turns.
Zones: There are two Zones on the map, Zone A and Zone B. Units can enter and exit these Zones just as they would Areas. Units can retreat into the Zones they are adjacent to, even if they contain enemy units. Zones have no stacking limits. Units in Zones can never attack, be attacked, or perform defensive fire.
4. Setup
Place the main map so that both players can see it. Place the Hidden map behind a screen so that only the Indian Player can see it. We recommend using the ASL map included with the magazine.
4.1 Random Event Setup
Draw 8 of the 10 Random Event Markers and place one, face down, on each of the numbers on the Turn Track. The remaining 2 events that were not selected are set aside, and are not revealed.
4.2 Unit Setup
The Indian player sets up his 30 (21 one-step Indian units and 9 dummy units) units on the Hidden map in any Area except Areas 4, 8, 10, 16 and 18, within the stacking limits. These Areas all have gold ribbons.
Then the British players sets his 14 (11 four-step units, 2 two-step scouts, and the Supply Wagon) units up in Areas 4, 8, 10, 16 and 18 within the stacking limits. These Areas all have red ribbons.
[Figure: the main map showing the Turn Track (turns 1 to 8), Area Number, and Defense Value.]
5. Sequence of Play
The game follows the following sequence of play for eight turns (except turn 1, which skips the British phases):
- Random Event Phase
- British Phases
- British Reset Phase
- British Movement Phase (and Indian Defensive Fire)
- British Attack Phase
- Indian Phases
- Indian Reset Phase
- Indian Movement Phase (and British Defensive Fire)
- Indian Attack Phase
- End Phase
6. Random Event Phase
Flip over the Random Event Marker covering the current turn number on the Turn Track. This random event is in effect for the entire turn.
6.1 Events
No Event: Nothing happens
Freedom of Movement: During the Indian Movement Phase, there is no need to roll a die, all Indian units can move.
Wounded Recover: A British non-scout unit recovers one step. If there are no British units of reduced strength, then treat this as No Event. An Eliminated unit can return as a one-step unit, and is placed in the same Area as the Supply Wagon.
British Reroll: Once this turn, the British player may reroll some or all of his dice for a single dice roll.
Indian Reroll: Once this turn, the Indian player may reroll some or all of his dice for a single dice roll.
Low Ammo: Roll a die. This many British units (selected by the Indian player) have their firepower reduced by 1 for the turn. Place Low Ammo Markers in each of the British units selected. These low ammo markers are immediately removed whenever the British unit is in the same Area as the Supply Wagon. Volley Fire is not available this turn for the British player for this turn.
Ambush: The Indian player immediately selects an Area and performs an attack against the British units in this Area, rolling 4 dice. The attack is resolved as per 7.4.1.
Scout: The British player immediately performs a free scout action. Select an Area adjacent to a scout unit, and all Indian units in this area automatically become Revealed.
Bouquet: All British soldiers and grenadiers have their firepower increased by 1 for the turn.
7. British Phases
7.1 British Reset Phase
All Fire Markers and Volley Fire Markers are removed from British units.
7.2 British Movement Phase
The British Player can move all his ground units on the map. He must conduct his movements one unit at a time, in the order of his choice. A unit must have completed its movement before another unit can start moving.
To enter an adjacent Area or Zone, a unit must expend one MP. A moving unit does not have to use all its MP. Unused MP are not carried over to the next turn.
Any British unit that does not move in this phase is marked with a Volley Fire marker.
A unit entering an Area that contains a Revealed enemy unit must immediately end its movement. Remember an Indian unit can be Revealed at any time.
A unit entering an Area during movement may be subjected to Defensive Fire from a single enemy unit present in that Area. Defensive Fire must be declared immediately upon the unit entering the Area.
The British Movement Phase ends when the British Player has finished moving his units. At this time, all Hidden Indian units (including dummy units) in Areas containing British units are placed on the main map as Concealed units.
7.3 Indian Defensive Fire
When an Area entered into by a moving British unit contains any Indian units, the Indian Player may perform Defensive Fire (the Indian Player should check both the main map and the Hidden map to determine if he has units in the Area). Defensive Fire is not mandatory.
Units under a Fired Marker cannot conduct Defensive Fire.
Defensive Fire is only against the moving unit, and does not affect any other units in the Area.
7.3.1 Defensive Fire Execution
The Indian Player selects one eligible Indian unit in the Area the British unit moved into.
Determining Damage: The Indian Player rolls a number of dice equal to the Firepower of the unit conducting Defensive Fire. If the unit is Concealed, the Indian Player rolls one additional die as a surprise bonus. If the unit is Hidden, the Indian Player rolls two additional dice as a surprise bonus. Each '5' or '6' results in one Hit; add all the Hits to get the Damage Points.
If not currently revealed, the Indian unit is placed in the Area, Revealed.
Applying Damage: The following procedure is used to apply damage to the moving British unit:
-
Retreat Declaration: The moving unit can declare a retreat once the Damage Points have been determined, which will reduce the Damage Points by one. Retreating does not require any MP; the British Player will simply move the retreating unit to an adjacent Area that contains no Revealed Indian units, or into an adjacent Zone;
If there are no eligible Areas adjacent, the unit cannot retreat (and so cannot reduce the number of Damage Points against itself).
-
Step Losses: If the British unit retreated, reduce the Damage Points by one (if the Damage Points was 1, it can thus be reduced to zero, resulting in no damage to the British unit). Then a number of step losses equal to the Damage Points is applied to the British. If the British unit is reduced to zero steps, it is eliminated and removed from play.
-
Excess Damage: Any excess damage is ignored.
Move End and Retreat Execution: Once the Indian Defensive Fire has been resolved, the British unit immediately ends its movement in its current Area (either the one is took Defensive Fire in, or the one it retreated into).
If a British unit retreats into an Area with Hidden or Concealed Indian unit(s), Defensive Fire can be performed a second time against this unit using the procedure described above, and for this second round of Defensive Fire, retreat is not an option. The resulting Damage Points must be applied to the British unit.
Defensive Fire End: The Indian unit that conducted Defensive Fire has a Fired Marker placed on it, which completes the Defensive Fire.
7.4 British Attack Phase
The British Player can attack with his own units against Revealed and Concealed Indian units in the same Area as his units or adjacent Areas. Only those units with a firepower greater than zero may attack.
Each British unit can only attack only once per turn, and all British units in an Area that elect to attack must attack the same target Area (either the same Area as the British units or the same adjacent Area).
Attacking is optional, and thus all, some, or none of all British units in an Area may attack.
Attacks are resolved one attacking Area at a time.
7.4.1 Attack Execution
Attacks are resolved using the following procedure, one Area at a time, in any order of the British Player's choice. An attack must have been completed before the British Player can resolve the next one.
Determining the Number of Hits: The British Player totals the Firepower of his attacking units for a single attack and rolls that number of dice.
If the attack is in the same Area as the British units, each '5' or higher results in one Hit. If the attack is into an adjacent Area as the British units, each '6' or higher results in one Hit.
For any unit under a Volley Fire Marker, add one to the result of every die rolled for that unit. If there are a mix of units under and not under Volley Fire Markers, roll the dice separately for the two types of units. Add all the Hits together to get the total number of Hits.
Determining Damage: Subtract from the total number of Hits the Defense Value of the Area. The remaining Hits are the Damage Points, which applies against the Indian units in the target Area.
Applying Damage: Use the procedure as follows to apply damage to the Indian units in the target Area:
- Retreat: Indian unit(s) in the target Area can declare a retreat. Indian units can only retreat into an adjacent Area with no British soldiers, grenadiers, or scouts. or into an adjacent Zone. The Indian player decides to retreat on a unit-per-unit basis; multiple units can retreat into different eligible Areas. For each Indian unit that retreats, reduce the Damage Points by 1.
- Unit Losses: An amount of damage equal to the final Damage Points are now applied by the Indian player. A Revealed Indian unit is eliminated for 1 Damage Point, and a Concealed Indian Unit (including dummy units) is eliminated for 2 Damage Points. Damage is applied to Revealed units before Concealed units. Damage may be applied to units at retreated.
- Excess Damage: Any excess damage is ignored.
Indicating Which Units Attacked: The British Player places a Fired Marker on any unit that attacked, and removes any Volley Fire Markers from these units. This attack is done.
8. Indian Phases
8.1 Indian Reset Phase
All Fired Markers are removed from Indian units.
8.2 Indian Movement Phase
This is identical to British Movement Phase (see 7.2), except for the following:
8.2.1 Movement Restrictions
At the beginning of the Indian Movement Phase, the Indian Player rolls two dice to determine how many units he is allowed to move during that phase. He can move any number of units of his choice on either map within this limitation.
8.2.2 Movement Types
Four different types of movement can be used by Indian units:
- Revealed Unit Movement: The movement of a unit already Revealed at the start of its move is moved exactly the same as British units.
- Concealed Movement: The Indian Player takes a Hidden unit and places it on the main map Concealed and then moves it normally. Or a Concealed unit on the map moves normally and remains Concealed. All Concealed units (including dummies) have 2 MP. If it enters into an Area containing British units it remains Concealed, but must end its movement.
- Hidden Movement (movement of a Hidden unit that remains Hidden): The moving Hidden unit moves into an adjacent Area on the Hidden map. If the Hidden unit enters an Area containing a British unit, it is immediately placed on the map Concealed. Thus, even Indian units entering an Area while Concealed can be the targets of Defensive Fire.
8.2.3 Hiding
Hiding takes place at the end of the Indian Movement Phase. A Revealed Indian unit in an Area containing no British units becomes Concealed. A Concealed Indian unit in an Area containing no British units becomes Hidden (and is placed on the Hidden map in the appropriate Area). Units in Zones do not change their status.
8.2.4 Volley Fire
Indian units never receive a Volley Fire Marker, even if they do not move.
8.3 British Defensive Fire Phase
This is identical to Indian Defensive Fire (see 7.3), except that since British units are never Concealed or Hidden the surprise bonus never applies. Volley Fire adds 1 to the result of each die rolled. Hits are on '5' or greater against Revealed units, a '6' or greater against Concealed units.
If the Indian unit retreats the number of Damage Points is reduced by 1. If the final number of Damage Points is greater than zero, the Indian unit is eliminated.
8.4 Indian Attack Phase
This is identical to British Attack Phase (see 7.4), except the Indian units can never perform Volley Fire, and each Damage Point causes 1 step loss. Any Indian unit that fires becomes Revealed.
9. End Phase
If the current turn is turn 8, the game comes to an end. Otherwise repeat the sequence of play, starting with revealing the next Random Event Marker on the Turn Track.
10. Special Rules
10.1 Turn 1: On turn one skip all the British reset, movement, and attack phases.
10.2 Scout Units: Scout units may scout an adjacent Area during the British Attack Phase. Select an Area adjacent to the scout and roll a die. On a 1-3, all Indian units (Concealed and Hidden) in the Area are placed on the map Revealed. On a 4-5, there is no effect. On a 6, the scout loses a step (and may be eliminated). Scouts may never participate in British Attacks, nor can they perform defensive fire.
10.3 Supply Wagon: The Supply Wagon moves like a normal British unit. Instead of moving, it may flip to its deployed side (or back to its moving side) during the British Movement Phase. The Supply Wagon may never enter an Area containing Revealed or Concealed Indian units, but it may enter a Zone if it contains Indian units. In its deployed side it adds 2 to the Defensive Value of the Area it is in (for the British player only).
The Supply Wagon can never be attacked (and so can never retreat), but if it is ever the only British is unit in an Area that also contains Indian units, it is eliminated (and the game is over).
11. Victory
If the Supply Wagon is ever eliminated, the Indian player immediately wins.
If the Supply Wagon enters Zone B, the British player immediately wins.
If 14 Indian units are eliminated (not including dummy units) by the end of the game, the British player wins.
If none of these conditions are met by game end, the Indian player wins.