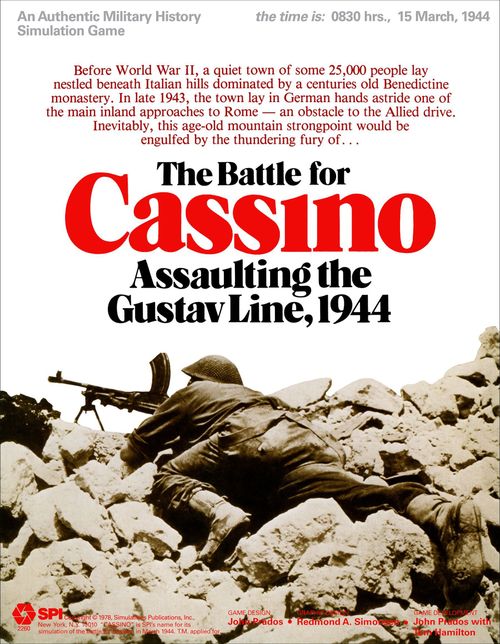
The Battle for Cassino: Assaulting the Gustav Line, 1944
The Battle for Cassino: Assaulting the Gustav Line, 1944 Rulebook
Table of Contents
Table of Contents
- 1.0 Introduction
- 2.0 How to Set Up the Game
- 3.0 Game Equipment
- 4.0 Sequence of Play
- 5.0 Preparation Fire
- 6.0 Movement
- 7.0 Zones of Control
- 8.0 Opportunity Fire
- 9.0 Stacking
- 10.0 Supply
- 11.0 Step Losses and Unit Reorganization
- 12.0 Combat
- 13.0 Night Game-Turns
- 14.0 Pinned Units
- 15.0 Roadblocks
- 16.0 Armored Units
- 17.0 Reinforcements
- 18.0 Victory Conditions
- Designer's Notes
- Charts and Tables
1.0 Introduction
Battle of Cassino is a company/platoon scale simulation of the third Allied attack on the German Gustav Line around Cassino which occurred in March 1944. Each Game-Turn is equal to six hours of real time, and each hex represents a distance (across) of some fifty meters.
2.0 How to Set Up the Game
2.1 Initial Set-Up
Cassino Town: Anywhere within the town, the German Player may deploy two parachute battalions, three engineer companies, and two armored platoons, all at full strength (the German Player may deploy infantry units already divided into platoons).
Railway Station: Within four hexes of the railway station, the German Player must deploy the parachute machinegun battalion at full strength.
Abbey Hill: On Abbey Hill, above the 400m contour line, the German Player must deploy one full parachute battalion and three observation post units.
2.2 Game-Turn Record/Reinforcement Track
All of the remaining pieces represent either Information markers or reinforcement units which enter the game later in its course. They should be placed aside or organized according to the track.
3.0 Game Equipment
3.1 The Game Map
The 22" x 35" mapsheet portrays the area in which the battle was fought. It includes all the significant terrain in the battle. It also displays the Terrain Key, Terrain Effects Chart, Game-Turn Record/Reinforcement Track and Headquarters Supply Status Display.
A hexagonal grid is superimposed over the terrain features printed on the mapsheet in order to regularize movement and positioning of the playing pieces. To make the map lie flat, back-fold it against the creases. Small units of masking tape may be used at the corners of the map to hold it taut.
3.2 Game Charts and Tables
Various visual aids are provided for the Players in order to simplify and illustrate certain game functions. These include the Game-Turn Record/Reinforcement Track, Bombardment Results Table, Opportunity Fire Combat Results Table, Terrain Effects Chart, Close Assault Results Table, and Headquarters Supply Status Display.
3.3 The Playing Pieces
The cardboard pieces represent the actual military units that took part in the original battle. The numbers and symbols on the pieces represent the strength, movement capability, and the type of unit represented by the piece. These playing pieces are referred to as units.
3.31 Sample Units
Combat Unit (Front) — the sample counter is labelled: Unit Size, Unit Type, Area and Hex of Entry, Designation, Attack Strength, Defense Strength, and Movement Allowance. Sample values printed: Designation "A/24 NZ"; Attack/Defense/Movement block "8-6-60"; Area and Hex of Entry "C3".
Combat Unit (Back) — the sample counter is labelled: Unit Size, Unit Type, Designation, and Reduced Strength. Sample values printed: Designation "A/24 NZ"; reduced block "5-3-60".
3.32 Summary of Units
The printed summary shows the front and back of each unit type. Combat values are given as Attack-Defense-Movement (as labelled on the sample counter in 3.31).
| Unit | Front | Back |
|---|---|---|
| Infantry Company | E16, A/28 Maor, 8-6-60 | A/28 Maor, 5-3-60 |
| Infantry Platoon (German) | 2-3-60 | 1-2-60 |
| Battalion HQ | HQ C2, 1/4 E, 2-3-0 | (blank) |
| Armor Company | E6, D/19 NZ, 20-6-120 | D/19 NZ, 10-3-120 |
| Armor Platoon | C2, 1/7 Recce, 10-3-120 | 1/7 Recce, 5-1-120 |
| Engineer Company | SE, 2/4 Ind, 3-4-40 | (blank) |
| Airborne Company | F5, 3/1/4, 7-8-60 | 3/1/4, 4-4-60 |
| Airborne Machinegun Company | 1/MG, 7-8-60 | 1/MG, 4-4-60 |
3.4 Parts Inventory
One rules booklet. One sheet of die-cut counters (200 pieces). One 22" x 35" game map. One plastic die (not included in subscription edition). One game box assembly (not included in subscription edition).
The printed replacement-parts instructions and publisher's mailing address are omitted.
3.5 Rules Questions
Questions concerning the rules for Battle of Cassino will be answered if phrased in such a way that a one-word reply will suffice and if the questions are accompanied by a stamped, self-addressed envelope. Mark the envelope "Rules Questions: Battle of Cassino."
4.0 Sequence of Play
General Rule
Battle of Cassino is played in Game-Turns. There are 17 Game-Turns in a complete game, and each Game-Turn is composed of two Player-Turns. The Player whose Player-Turn is in progress is called the Phasing Player. Each Game-Turn proceeds strictly in accordance with the following outline. No action or function is permitted that is contrary to the Sequence of Play.
1. Allied Player-Turn
A. Preparation Fire Phase. Any pin markers placed on the map during the Phasing (Allied) Player's last Player-Turn are removed. The Phasing Player consults the Game-Turn Record/Reinforcement Track to ascertain the number of artillery and Air Points that are available for use this Game-Turn. Consulting the artillery and Air Bombardment Chart (5.8), the Allied Player may utilize these points to bombard hexes containing German units. The Allied Player may also use mortar fire from battalion headquarters (5.7) on the map for the same purpose.
B. Movement Phase. At his option, the Allied Player may remove any Ruin markers in hexes in which one or more of his engineer companies is deployed, unless the hex is in an Enemy Zone of Control. The Allied Player moves any or all of his units in accordance with the rules governing movement. He also consults the Game-Turn Record/Reinforcement Track to see if any reinforcements arrive this Game-Turn and deploys and moves the new units, if any. Units which move during the Phase are subject to opportunity fire from the non-Phasing Player.
C. Combat Phase. Allied units deployed on hexes adjacent to hexes containing German units must now attack all adjacent German units. The non-Phasing Player may deploy units stacked with headquarters that are not under attack to reinforce hexes that are under attack. Allied units that are not engaged may also use support fire against either reserves that are on their way to the front or against units that are under attack. Combat is then resolved according to the rules which govern this function.
2. German Player-Turn
The German Player now becomes the Phasing Player and now takes his Player-Turn. He repeats the same Sequence of Play of three Phases as his opponent. The complete Game-Turn is then finished, and the Game-Turn Record marker is moved ahead one space on the Game-Turn Record/Reinforcement Track by the German Player to signify the passage of one Game-Turn. Play then proceeds to a new Game-Turn.
5.0 Preparation Fire
General Rule
Preparation fire consists of all artillery, air bombardment and mortar fire. Such forms of firepower may be utilized only during the preparation fire phase of each Player-Turn. Air and artillery bombardment capacity is measured in Bombardment Points. Mortar capability is dependent upon the number of battalion headquarters units. All such fires are resolved against individual target hexes. Units occupying target hexes may suffer losses, be pinned or forced to retreat, or remain unaffected. Any retreats resulting from bombardment are conducted by the owning (non-Phasing) Player. Collateral damage may result from some preparation fire.
Procedure
The Phasing Player consults the Game-Turn Record/Reinforcement Track which lists the number of Artillery Points and Air Points available for the current Player-Turn. For mortar fire, each battalion headquarters unit has one Mortar Fire Point. Air and artillery bombardment and mortar fire are resolved on the Bombardment Results Table (5.8) with the roll of a single die. A Player may use both types of fire against the same hex in a Preparation Fire Phase. No hex may be attacked twice by the same kind of fire in the same Preparation Fire Phase. Only Enemy-occupied hexes may be bombarded. When the Phasing Player cannot trace a Line of Sight to the target hex (see Case 5.2), the accuracy of fire is affected, and two is added to the bombardment resolution die roll. When a Line of Sight cannot be traced and collateral damage results (see Case 5.5), two is added to the separate die roll used to resolve the collateral damage effect.
5.1 Accumulation and Use of Artillery and Air Points
5.11 At the beginning of each Preparation Fire Phase, the Phasing Player consults the Game-Turn Record/Reinforcement Track. This specifies the number of Air Points and Artillery Points available on the current Game-Turn.
5.12 The Phasing Player makes all decisions as to how many Artillery and Air Points will be used in a bombardment. Each bombardment is resolved separately and the number of each type of Point used is announced.
5.13 The Phasing Player may combine Artillery and Air Points in barraging a single hex. Neither type of Point may be used in mortar bombardment (see Case 5.7).
5.14 Unused Artillery Points may be accumulated for use on future Game-Turns. At the end of his Preparation Fire Phase, the Player should record on a slip of paper any leftover Artillery Points.
5.15 Unused Air Points may never be accumulated from Game-Turn to Game-Turn.
5.2 Line of Sight and Elevations
The map is a two-dimensional representation of a three-dimensional surface. Different colors are used to code the hexes at various elevations. Hexes increase in elevation in 50 meter increments, from zero elevation up to 500 meters. In addition to the color coding, the Players will find that the various elevations are identified with a label situated along the contour lines. A "contour line" is defined as the edge formed by the meeting of two different fields of elevation color.
A Line of Sight is a perfectly straight line extending from the center of one hex (containing the observing unit) to the center of another hex (containing the target). The existence of a Line of Sight means that the observing unit can see the Enemy unit for bombardment and other purposes.
A Line of Sight can be obstructed by intervening elevations and/or by buildings.
5.21 Describing the Line of Sight. Place a straight edge (a transparent ruler is ideal) so that it connects the center of the observing hex with the center of the target hex. If the line so described passes through any elevation which could conceivably block the Line of Sight, the Player must resort to one of the methods detailed in Case 5.9 in order to determine whether or not the Line of Sight is obstructed.
5.2 Effects of Buildings, Crest Hexes, and Line of Sight Length
5.22 Effect of Buildings. Buildings are considered to be 10 meters higher than the elevation on which they stand. So, for example, a building on 100 meter terrain represents a potential obstruction 110 meters high. When tracing the Line of Sight on the map, a building should be taken into account only if the line actually touches or passes through any part of the building symbol itself (not simply the hex that the building occupies).
Note that units in buildings are considered to be at the elevation of the terrain on which the building stands (not ten meters higher). Line of Sight may pass into and from buildings, but not through them.
5.23 Effects of Crest Hexes. Crest hexes are any of the hexes enclosed by a ring of Crest hexsides. Crest hexes are considered to be 10 meters higher than the color code indicates. So, for example, a group of crest hexes on 150 meter terrain are actually at 160 meters. Note that the Hilltop elevation given in the center of each group of crest hexes is for identification purposes only and should not be construed as the operative height of any of the hexes.
5.24 Length of Line of Sight. The Line of Sight from an Observation Point may be infinitely long; the Line of Sight from any other unit may be no longer than 20 hexes. See also Case 13.1.
5.3 Unobserved Fire
5.31 All artillery and air bombardment and all mortar fire are considered to be unobserved unless a Line of Sight can be traced from a battalion headquarters or from an observation post to the hex targeted by such fires.
5.32 Whenever a Player utilizes unobserved fire, he must add 2 to any die roll on the Bombardment Results Table (5.8). Unobserved fire affects die rolls used to resolve a collateral damage effect; 2 is added to each such die roll.
5.33 The Line of Sight must be separately traced to each hex bombarded.
5.34 No hex 50 meters or more in elevation may be targeted by unobserved artillery or mortar bombardment.
5.4 Observation Posts
5.41 Unlike other types of units, observation posts are not restricted to a limited Line of Sight (see Case 5.24). A Player may trace a Line of Sight from an observation post any distance (however, see Case 5.2).
5.42 Observation post units cannot be moved except when "carried" by other units that do have independent movement capability.
5.43 Observation posts cannot attack in close assault (see Case 12.1). They have no Zone of Control (see Section 7.0), but they can defend with a strength of 1. An observation post that is stacked with other units involved in combat takes no losses unless the stack is eliminated. The observation post may advance after combat with its stack, or it may be forced to retreat. Observation posts have only one Step of strength and are eliminated if forced to lose a Step. Observation posts cannot be recreated or replaced.
5.5 Collateral Damage
At certain concentrations of firepower with certain die roll results, the Bombardment Results Table may specify a collateral damage result (parenthesized results on the table). This has the immediate effects described in the following Cases.
5.51 If the target hex of the bombardment was a building or road hex and collateral damage is indicated, then the target hex and all adjacent building and road hexes are devastated by bombardment and converted into Ruins. All such hexes are marked with Ruin markers and remain Ruins, with movement and combat effects given on the Terrain Effects Chart (6.4), until the end of the game unless cleared by engineers (see Case 5.62). If an armored unit is in a hex on which a Ruin marker is placed, it cannot be moved from that hex unless freed by engineers.
5.52 The Phasing Player now chooses any one stack of Enemy units located within six hexes of an air attack or within three hexes of a pure artillery attack to undergo damage as a collateral effect of the original bombardment. The Phasing Player then rolls one die on the Bombardment Results Table (5.8), using the column he used originally. All parenthesized results are ignored. The collateral damage result is applied to the target hex. The hex chosen for this collateral damage effect cannot be the original bombardment target hex. If collateral damage is the result of a mixed bombardment by Artillery and Air Points, the damage range is six hexes.
5.53 The non-Phasing Player repeats this identical procedure, choosing a stack belonging to the Player who made the original bombardment.
5.54 There are no further effects from collateral damage. No more than one additional hex may be attacked by each Player as its result.
5.55 No single hex may be the target of collateral damage more than once in any single Player-Turn.
5.6 Ruins
Ruins are a collateral damage effect of artillery and air bombardment above a certain concentration. The effect of such bombardment in built-up areas is to convert building and road hexes into rubble, thus preventing the movement of tank units through a hex and actually strengthening the defense of that hex. Combat and movement effects of Ruins are stated on the Terrain Effects Chart. Ruins are marked on the map with Ruin markers. Ruins may be removed by engineer units. All building and road hexes adjacent to a target hex that suffers collateral damage (5.5) are converted into Ruins.
5.61 Ruins cannot be cleared if they are in an Enemy-controlled hex.
5.62 Unpinned engineer companies may clear Ruins at the rate of one hex per Game-Turn. Any Ruins hex containing an engineer unit may be considered cleared at the start of the owning Player's Movement Phase, before any units are moved (exception: see Case 5.61).
5.63 An engineer company cannot expend more than 10 Movement Points on the Game-Turn it clears a Ruins hex.
5.7 Mortar Bombardment
5.71 Mortar fire is handled differently from artillery and air bombardment. Each battalion headquarters on the map may fire mortars with a strength of 1. The columns on the Bombardment Results Table correspond to the number of headquarters units engaging in one fire mission.
5.72 A battalion headquarters may fire mortars at a target more than two hexes from the location of the headquarters unit.
5.73 Different battalion headquarters may combine their mortar fires to target the same hex.
5.74 Mortar fire may be used against a target hex that is also being bombarded by Artillery or Air Points in the same Preparation Fire Phase.
5.75 Mortar fire requires the expenditure of supply (see Section 10.0).
5.8 Bombardment Results Table
The Bombardment Results Table is printed on the Chart and Table Sheet.
5.9 The Line of Sight Algorithm and the Line of Sight Gauge
Players may determine the Line of Sight in two ways: they may use the basic algorithm (mathematical expression of the Line of Sight) or they may use the analog device which is a physical expression of the algorithm. This analog device is called the Line of Sight Gauge. Usually, Players will find themselves using the algorithm only to check the occasional "close call" on the Gauge.
Algorithm Procedure
The basic algorithm is as follows:
A clear Line of Sight exists only if:
H / D is equal to or greater than (h - 1.5) / d
- H = Height (in meters) of higher position minus height of lower position.
- D = Distance (in meters) from higher position to lower position.
- h = Height (in meters) of potential obstacle minus height of lower position.
- d = distance (in meters) from potential obstacle to lower position.
Note that this algorithm is valid for any game, not only Cassino. Many games (both by SPI and other publishers) used either a faulty version of this algorithm as the basis for their Line of Sight rules or they employed a system based upon some other conception or misconception of terrain geometry. Players may wish to substitute this simpler and more accurate system in such games.
Line of Sight Gauge Procedure
Note that heights are expressed in increments of 50 meters which are subdivided into ten meter fractions. Horizontally, distance is measured in undivided 50 meter increments (corresponding to hexes in Cassino. On the zero distance line, locate the height of the higher position. Measuring from this point (horizontally, in meters) locate the range to the lower position, and then on that line locate the height of the lower position. Connect these two points with a straight edge (a transparent plastic ruler is ideal). Now locate the height and distance of any suspected obstacle. Remember that in Cassino, a building adds ten meters to the height of any obstacle and a crest hex adds ten meters to the height of any obstacle or position. If the obstacle is higher than the Line of Sight at the point of intersection, then the Line of Sight is blocked. If the Line of Sight exactly intersects the obstacle, or passes over it, then the Line of Sight is not blocked. If there is any doubt, Players should resort to the Algorithm. Note that, technically speaking, the Line of Sight could pass as much as one and one half meters below the obstacle and still not be blocked (this accounts for the average height of the firing point and the target above the terrain on which they stand).
6.0 Movement
General Rule
During a Movement Phase, the Phasing Player may move as many or as few of his units as he wishes. The movement capability of each unit is measured in Movement Points; each unit has a Movement Point Allowance. Movement of a unit into a hex requires the expenditure of a certain number of Movement Points depending on the terrain in the hex (see the Terrain Effects Chart, 6.4).
Each unit can be moved each Game-Turn up to the limit of its Movement Point Allowance. No unit need be moved up to its full capability in any Game-Turn. Movement is entirely at the discretion of the Phasing Player. Units being moved may be fired upon by Enemy units utilizing opportunity fire. Opportunity fire may result in losses to a moving unit or in a unit's being pinned (see Case 8.25).
Procedure
Move each unit individually, tracing the path of its movement through a hexagonal grid printed on the map. Each hex has a Movement Point cost as specified by the Terrain Effects Chart (see Case 6.4). These costs are added in calculating the movement of a particular unit. Basically, one Movement Point is expended for each hex into which a unit is moved following a road; other terrain requires the expenditure of more than one Movement Point. When the Player finishes moving a particular unit, he removes his hand from the unit. Movement is then considered completed, and that counter cannot be moved again in that Player-Turn. Note: At any point during a unit's movement, the non-Phasing Player may interrupt the movement with opportunity fire.
6.1 How to Move Units
6.11 During a Movement Phase all, some, or none of a Player's units may be moved. Any unit that is moved may be subjected to Enemy opportunity fire (see Section 8.0).
6.12 Unused Movement Points cannot be accumulated from Game-Turn to Game-Turn, nor may they be transferred from one unit to another.
6.13 Movement Points are expended as a unit is moved into a hex. A unit cannot be moved to a hex if it has insufficient Movement Points remaining to expend the appropriate terrain cost.
6.2 Movement Inhibitions and Prohibitions
6.21 Units cannot be moved into Enemy-occupied hexes.
6.22 Battalion headquarters units and observation post units have no movement capability of their own and must be carried by other pieces. Portage of such units is an exception to the stricture that units must be moved individually. Observation posts and battalion headquarters units suffer from any pinned effects incurred by the unit transporting them (only).
6.23 Armored units cannot be moved into hexes containing Ruins resulting from collateral damage (see Case 5.5).
6.24 Once a unit has been moved into an Enemy-controlled hex, or when a unit receives a Pin result from opportunity fire, the unit may be moved no further in that Game-Turn (exception: Case 13.31).
6.25 No German unit may be moved or advanced after combat into any hex within two hexes of an Allied Entry Zone (see Case 17.1).
6.26 Certain terrain effects movement. For example, movement of a unit from one elevation to another across a contour line (a hexside between two colors of terrain) requires the expenditure of two additional movement points for every 50 meters difference between elevations. See the Terrain Effects Chart (Case 6.4) for a complete list of terrain effects on movement.
6.3 Movement Onto Abbey Hill
6.31 The counters represent units that are conventionally disposed for infantry operations. There are differences between this kind of disposition and what is necessary to fight and march on the slopes of Abbey Hill. To reflect this, a unit that is moved into a 50 meter elevation hex from a clear or town hex must stop in that first slope hex and be moved no further that Game-Turn. On the following Game-Turn, the unit may be moved normally.
6.32 A unit may be moved or retreated freely from the slope of Abbey Hill onto clear terrain or into the town. In that event, however, it is again subject to the movement constraint when being moved back onto Abbey Hill.
6.33 Any units beginning a Movement Phase on Abbey Hill are not subject to the movement constraint of Case 6.32 and may be moved normally.
6.4 Terrain Effects Chart
The Terrain Effects Chart is printed on the Chart and Table Sheet.
7.0 Zones of Control
General Rule
The six hexagons immediately surrounding a hex constitute the Zone of Control of any unit occupying that hex. Hexes upon which a unit exerts a Zone of Control, called controlled hexes, inhibit the movement of Enemy units. Movement of a unit must stop immediately upon entering an Enemy-controlled hex. A Player cannot move his units directly from one Enemy-controlled hex to an adjacent Enemy-controlled hex.
7.1 Which Units Exert Zones of Control
Combat units exert a Zone of Control at all times during all Phases of the Game-Turn. Combat units include all units except battalion headquarters units and observation post units.
7.2 Effects of Zones of Control
7.21 Moving a unit into an Enemy-controlled hex requires no extra Movement Point expenditure.
7.22 Friendly Zones of Control affect only the Enemy unit movement, not Friendly movement.
7.23 Zones of Control block Enemy supply and retreat paths and the arrival of Enemy reserves (exception: see Case 7.25).
7.24 There is no additional effect of having more than one unit exert its Zone of Control onto a given hex.
7.25 Friendly Zones of Control do not extend into Enemy-occupied hexes for supply and retreat purposes.
8.0 Opportunity Fire
General Rule
The non-Phasing Player may use his own companies to attempt to interdict the movements of Enemy units by using opportunity fire during the Enemy Movement Phase. As the Phasing Player moves each unit, it is subject to opportunity fire in any hex along the path of movement, depending on the non-Phasing Player's ability to trace Lines of Sight to the target unit from any non-Phasing units used for opportunity fire against the target unit. Opportunity fire is resolved using the Opportunity Fire Results Table (8.3) and may result in the target unit being Pinned or incurring a Step loss.
Procedure
The Phasing Player moves his units one by one. Each time he completes a unit's movement, the non-Phasing Player may announce that he will engage in opportunity fire against that unit. The non-Phasing Player may then require that the moving piece be placed in any hex along its path of movement to undergo opportunity fire. The non-Phasing Player then announces the number of company-equivalents engaging in opportunity fire and demonstrates a Line of Sight (5.2) from all firing units to the target unit. The non-Phasing Player then rolls the die and consults the column on the Opportunity Fire Results Table (8.3) corresponding to the number of companies firing. Any results are applied immediately.
8.1 Which Units May Fire
8.11 Observation posts, battalion headquarters units, and platoon sized units cannot use opportunity fire. All other types may.
8.12 No Friendly unit may engage in opportunity fire more than once per Enemy Player-Turn.
8.13 Opportunity fire requires the expenditure of supply (see Section 10.0), and units cannot engage in opportunity fire unless the requisite supply can be furnished by a battalion headquarters unit.
8.2 Using Opportunity Fire
8.21 A unit may use opportunity fire only against hexes to which a Line of Sight can be traced from the firing unit's own location.
8.22 Targets for opportunity fire are units, not hexes. An opportunity fire result against one unit crossing a hex has no effect on any other unit which may already occupy that hex.
8.23 A single moving unit may be engaged repeatedly by opportunity fire along its path of movement provided that no unit is fired upon more than once in the same hex and that no firing unit opportunity fires more than once per Game-Turn.
8.24 Results of opportunity fire are implemented immediately, at which time the non-Phasing Player also expends supply (see Section 10.0) for the opportunity fire he has made.
8.25 A Pin result against a moving unit stops the unit's movement for that Game-Turn in the hex in which the unit was hit by opportunity fire. No other result affects unit movement.
8.3 Opportunity Fire Results Table
The Opportunity Fire Results Table is printed on the Chart and Table Sheet.
9.0 Stacking
General Rule
The Allied Player may have up to two companies and one headquarters unit in the same hex. The German Player may stack two companies, one platoon, and one headquarters unit in a single hex. Stacking limitations have no effect on observation posts.
Procedure
Players move units to the same hex and stack them on each other. In cases of units having Reduced Strength markers, it is important regardless of the order of stacking, to keep the unit affected joined to its Reduced Strength marker. [continued on page R9]
9.1 Platoons
All platoons (symbol: •••) count as one-third of a company for stacking purposes.
9.2 Overstacking
9.21 In some cases units may be forced into an overstacked situation as a result of combat. Each unit forced into a hex already stacked to capacity is termed an overstacked unit and must lose an additional Step of combat strength immediately.
9.22 A Player must attempt to end his overstacked situation by moving away from the hex all overstacked units. At the end of the Player's Movement Phase of each Game-Turn subsequent to the creation of an overstacked situation, all overstacked units must lose one Step.
9.23 A Player may not deliberately move his units into an overstacked situation.
9.24 Overstacked units may not take part in close assault, support fire, or opportunity fire, nor do they add to the defense of a hex under close assault. They do not take Step losses from a close assault unless there are no other units remaining in the hex to absorb losses. Overstacked units must retreat if the units with which they are stacked are forced to do so.
10.0 Supply
General Rule
A unit must be in supply in order to use opportunity fire, support fire, attack at full effectiveness, or be moved at its full rate. Any headquarters unit with one or more supply increments may in turn be used to supply any units within the Supply Radius of that HQ unit.
Procedure
Each headquarters unit has a Supply Radius of five hexes. Provided that a company is within this distance of a headquarters, and provided that the headquarters has unexpended supply available, the unit may be considered to be in supply (exception: Case 10.2). The owning Player checks the supply status of a unit during his Movement Phase to see if the unit's Movement Point Allowance is halved), during the Enemy Movement Phase (for opportunity fire), and during the Friendly Combat Phase (if the unit is involved in close assault or support fire).
10.1 Supply Increments and How to Re-Deploy HQ Units
10.11 Supply is measured in increments. An increment is the amount of supply consumed each time the Player engages in mortar fire, opportunity fire, or close assault. A battalion headquarters is considered to have, intrinsic to it, three increments of supply. Each time an increment is consumed, all units within the Supply Radius of that headquarters may engage in the function for which that supply was consumed.
10.12 A utility marker is placed on the Headquarters Supply Status Display to indicate the number of supply increments each headquarters unit has at any instant (see Case 10.3). When three increments are used up, the headquarters is removed from the map.
10.13 Headquarters units are not eliminated from the game when expended for supply. Rather, they are re-deployed on the following Friendly Player-Turn in the owning Player's Movement Phase. Allied headquarters are re-deployed in any map edge hex of their original Entry Zone. German headquarters are re-deployed in hex 5912. Headquarters units have no Movement Point Allowance and therefore must be "carried" by other units. Headquarters units that are eliminated in combat are removed from the game and are never re-deployed.
10.2 Supply Lines
10.21 To receive supply from a headquarters, a unit must meet certain criteria. The unit must be within the Supply Radius of the headquarters. In addition, the Player must be able to trace a supply line to the headquarters. The supply line is a path of hexes, no more than seven hexes long, unobstructed by the Enemy units or their Zones of Control, connecting the headquarters unit with the unit being supplied. Friendly units negate Enemy Zones of Control for supply purposes.
10.22 A unit for which a line of supply to a headquarters cannot be traced is considered Out of Supply, even if the headquarters is dispensing supply and the affected unit is within its Supply Radius.
10.3 Headquarters Supply Status Display
10.31 The Headquarters Supply Status Display is printed on the map and indicates the current supply status of each HQ unit.
10.32 The Display is arranged so that when the HQ unit has three supply increments (the maximum), its box on the Supply Status Display is empty. The first time a supply increment is expended, a 1 Reduction marker is placed in that box on the Display. This is turned over to a 2 when another supply increment is expended. At the third expenditure, the Reduction marker is removed from the Headquarters Supply Status Display and the headquarters unit is removed from the map.
10.33 All supply expenditure, whether for mortar fire (5.7), opportunity fire (8.0), close assault (12.1), or support fire (12.3), must be recorded on the Headquarters Supply Status Display at the instant of expenditure.
10.4 Effects of Supply on Combat and Movement
10.41 The expenditure of one supply increment by any one battalion headquarters unit is necessary to enable all Friendly HQs to engage in a round of mortar bombardment in the Preparation Fire Phase.
10.42 The expenditure of a supply increment by a battalion headquarters during an Enemy Movement Phase is necessary to enable all units which can draw supply from that HQ unit to engage in opportunity fire.
10.43 The expenditure of a supply increment by a HQ during the Player's Combat Phase is necessary to enable all units which can draw supply from that headquarters to engage in close assault at full strength. A unit may engage in close assault at one quarter of its strength if not in supply.
10.44 The expenditure of an HQ's supply increment during a Player's Combat Phase is necessary to enable all unengaged units which can draw supply from that HQ unit to engage in support fire. Note: The same supply increment cannot be used for both close assault and support fire.
10.45 Supply is expended at the instant that a particular function is performed. Supply lines for those functions are judged as of that point in time.
10.46 A unit must begin a Movement Phase within the Supply Radius of a Friendly HQ unit in order to be moved its full Movement Point Allowance. Otherwise, its Movement Point Allowance is halved for that Game-Turn.
10.47 Supply status has no effect on a unit's defensive strength.
11.0 Step Losses and Unit Reorganization
General Rule
Each unit in the game has a certain number of strength levels called Steps. A unit's current strength is equal to its printed face value minus the value of any Reduction marker that may be present with the unit. A unit's value may be changed either by combat or by reorganization during the Player's Movement Phase.
Procedure
During the Preparation Fire Phase, the Movement Phase, and the Combat Phase the Player may suffer losses and be required to adjust the combat value of his units. During his own Movement Phase the Player may voluntarily adjust the strengths of his units to redistribute losses, subject to the restrictions detailed below.
11.1 Infantry Company Organization
11.11 Infantry company counters are backprinted with a lower combat strength of the same unit on the back. All infantry companies are considered to have a strength of six Steps and losses on the various Combat Results Tables are given in numbers of Steps. An infantry company is inverted to its reduced strength status if and when it loses a third Step of combat strength.
11.12 Intermediate numbers of steps are designated by a Reduction marker with a 1 on one side and a 2 on the other. When a company takes its first loss, a 1 marker is placed beneath the unit; this is flipped to a 3 if a second loss is taken, and the unit is inverted upon taking a third loss. Similarly, an infantry company at reduced strength status still has three Steps left, with losses designated in the same manner. An inverted company which takes a third Step loss is removed from play.
11.13 In all cases where a unit takes a loss, the face value Combat Strength of the unit is modified. The amount shown on the Reduction marker is subtracted from the face-value strength when the unit is either defending or attacking in close assault (12.4).
11.2 German Infantry Platoons
11.21 German infantry companies may be broken down into infantry platoons. Each platoon has two Steps. Each company may be broken down into three platoons. Three platoons stacked in the same hex at the beginning of the Movement Phase may also be rebuilt into a company. Both breakdown and rebuilding are accomplished at a cost of 10 Movement Points.
11.22 Platoon losses are designated simply by inverting the platoon counter to its reduced strength. A platoon which takes a second Step loss is eliminated.
11.23 The number of companies which may break down into platoons is limited by the number of platoon counters included in the countermix.
11.24 An infantry company may detach single platoons. It need not break down completely into platoons. Rather, the infantry company is simply marked as if it had taken a two Step loss (see Cases 11.12 and 11.13). Pinned units may not break down or rebuild into companies.
11.25 Newly created German infantry platoons are placed on the same hex as the parent unit.
11.3 Reorganization
11.31 Infantry companies of the same nationality that are stacked in the same hex at the start of a Player's Movement Phase may redistribute the Step losses that they have taken. This is considered reorganization.
11.32 German infantry companies which detach platoons also are considered to be reorganizing.
11.33 Reorganization may occur only during the Movement Phase of the owning Player's Player-Turn. All units involved in a reorganization must expend 10 Movement Points to do so.
11.34 Indian units of the Gurkha-type and of the Rajputana rifle-type are not of the same nationality and cannot reorganize into each other.
11.35 German infantry companies may re-absorb platoons at a 10 Movement Point Cost. Platoons reorganizing into a company must begin the Movement Phase stacked in the same hex.
11.4 Engineer Companies, Tank Platoons, and Battalion Headquarters Steps
11.41 Engineer companies have only three Steps and have no reduced strength status. Losses are recorded as specified in Cases 11.12 and 11.13.
11.42 Tank companies have six Steps, with a reduced strength backprinted side. Losses to them are recorded as specified in Cases 11.12 and 11.13.
11.43 Tank platoons have only two Steps, of which one Step is the reduced strength rear face of the counter. Losses to these units are recorded as specified in Case 11.22.
11.44 Battalion headquarters units have only one Step. They are eliminated if forced to take a loss.
12.0 Combat
General Rule
Combat occurs between adjacent opposing units in the Combat Phase. Combat is mandatory between any adjacent opposing units. Such units are considered to be engaged units. Unengaged units may participate in support fire for the attacker or as reserves for the defender. Combat may result in Step losses or in retreats; combat requires the expenditure of supply by the attacker. In the rules following, the Phasing Player is referred to as the attacker and the non-Phasing Player as the defender.
Procedure
The attacker may launch his attacks in any sequence desired so long as every attacking unit that is in a Zone of Control participates in a close assault and so long as every defending unit that is in the attacker's Zone of Control is subjected to a close assault. The attacker totals the combined strength of all attacking units and announces the attack. The defender's non-engaged units which are stacked with headquarters may be used as reserves under certain conditions. When the defender has committed or withheld reserves, the attacker may use his unengaged, non-pinned units for support fire. Such support fire (see Case 12.3) is resolved by first using the Opportunity Fire Results Table (8.3). The attacker then compares his total strength to that of the defender and resolves the attack using the Close Assault Results Table (12.8) and a die roll. Results specified by the Close Assault Results Table and the Opportunity Fire Results Table are implemented immediately. The attacker then adjusts his headquarters supply level to reflect supply increments expended in the close assault attacks.
12.1 Close Assault
12.11 Each attacking unit must be adjacent to the hex it attacks. The attacker totals the combat strengths of all units attacking a hex and announces his attack. At this time, the defender may commit reserves (see Case 12.2), but the attacker can also intervene with support fire (see Case 12.3) either against reserves in motion or against the hexes attacked.
12.12 Separate close assaults cannot be made against units defending in the same hex. Units in a single hex must be assaulted as a single combined defense strength. No hex may be close assaulted more than once in any Combat Phase.
12.13 Once it has been ascertained whether the defender will commit reserves to a hex, the total value of the defending units is computed, noting any effects specified by the Terrain Effects Chart for the hex occupied by the defender. Terrain effects are cumulative until tripled. No unit is ever more than tripled. When adjustment of combat strength is necessary due to the presence of pinned units, the terrain-adjusted strength of all units in the hex is totaled first and strength reductions are then applied (fractions dropped) to derive the total strength in a hex.
12.2 Reserves
12.21 The defender may intervene in the close assault on a hex by committing unengaged units stacked with a battalion headquarters units as reserves.
12.22 The decision to commit reserves is made by the defender as soon as the attacker announces his attack on a particular hex.
12.23 To reinforce a hex with reserves, the defender must have a headquarters units within five hexes of the hex under close assault. Stacked with the headquarters must be a combat unit that can be sent as a reserve. If available, reserve units can be committed up to the full stacking capacity of the hex.
12.24 Headquarters units themselves are not reserves and cannot be dispatched to aid defending units.
12.25 Reserve units may be moved up to seven hexes to reinforce a hex under close assault. They may not enter hexes covered by the attacker's Zones of Control unless those hexes are occupied by the defender's units. All movement rules apply except that units dispatched as reserves do not expend Movement Points for the terrain hexes they enter.
12.26 Reserve units en route to the front are subject to the attacker's support fire (see Case 12.3).
12.27 Reserve units receive no defensive terrain bonuses on the hexes they reinforce, even if other defending units do receive such benefits.
12.28 Armored units cannot be used as reserves.
12.3 Support Fire
12.31 Support fire can be considered opportunity fire emanating from the attacker rather than his opponent. All the restrictions listed in Section 8.0 apply to support fire except that it is executed in the Combat Phase and by the Phasing Player (rather than in the Movement Phase by the non-Phasing Player). The attacker must be able to trace a Line of Sight (5.2) to the target hex from the support units.
12.32 Only units that are under close assault and reserves being sent to them may be subjected to support fire from the attacker.
12.33 Only those of the attacker's units that are not participating in a close assault and are not pinned may engage in support fire. No unit may engage in support fire more than once in any Combat Phase.
12.34 Support fire requires a supply increment expenditure separate from that required for the close assault. Its effectiveness may be affected by the nationality of the HQ unit providing supply (see Case 12.5).
12.35 The attacker announces whether and how he will use support fire after the defender dispatches or withholds reserves.
12.4 Resolution of Close Assault Combat
12.41 The attacker locates a combat ratio corresponding to one of the columns on the Close Assault Results Table by comparing his strength with that of the defender. Dividing the defender's total strength into that of the attacker will give the basic combat ratio. Uneven ratios are rounded-down in favor of the defender to the nearest of the simplified ratios listed on the Close Assault Results Table.
12.42 The attacker then rolls one die and cross indexes the die result with the proper combat ratio column on the Close Assault Results Table. The intersection of row and column gives the combat result. Combat results are explained on the Table.
12.43 The column on which a given Close Assault is resolved may be modified by special conditions listed in Cases 12.5 and 12.6.
12.44 Whenever a defending unit on a hex is eliminated or forced to retreat, the surviving attacking units can be advanced into the hex vacated by the defender.
12.45 Each Player retreats his opponent's units, if this is called for by the Close Assault Results Table, according to the guidelines in Case 12.7.
12.46 The results of Close Assault are implemented immediately, before any further combat is resolved.
12.5 Effects of Nationalities on Combat
The Allied effort was hindered somewhat by the multi-national character of their forces.
12.51 An Allied Battalion HQ unit may always be used to supply all Allied units within that unit's Supply Radius (see Case 10.2).
12.52 Whenever a New Zealand infantry unit which is supplied by a Rajputana or Gurkha HQ unit is involved in a Close Assault, Support Fire, or Opportunity Fire, that combat is resolved with a one-column shift to the left (in favor of the Germans) from the column that would normally be used to resolve it on the appropriate table. E.g., a "3-1" Close Assault involving such a unit would be resolved using the "2-1" column.
12.53 Whenever a Gurkha infantry unit supplied by a non-Gurkha HQ unit is involved in a Close Assault, Support Fire, or Opportunity Fire, that combat is resolved with a one-column shift to the left.
12.54 Whenever a Rajputana infantry unit supplied by a New Zealand HQ unit is involved in a Close Assault, Support Fire, or Opportunity Fire, that combat is resolved with a one-column shift to the left.
12.55 All Engineer and Armor units may be supplied for combat by any HQ unit without any penalty per se (however, see Case 12.56).
12.56 Whenever units of more than one Allied nationality participate in a Close Assault, in addition to any other penalties which may apply, there is a penalty of a one-column shift to the left on the Close Assault Results Table. Exception: British infantry units may participate in an attack with any other nationality without such penalty; other penalties still apply.
12.57 All penalties listed in Case 12.5 are cumulative. However, there can never be a shift penalty greater than two columns.
12.6 Gurkha and German Paratroop Night Close Assault Bonus
When one or more Gurkha or German paratroop infantry units engage in Close Assault on a night Game-Turn, there is a one-column shift to the left on the Close Assault Results Table in favor of the Allied or German player, respectively. Note: this bonus applies to attacks only; neither the Gurkhas nor the paratroops have any night advantage on the defense.
12.7 Retreat Guidelines
All retreats resulting from close assault are conducted by the victorious (non-owning) Player.
12.71 Units must be retreated into unoccupied hexes if possible.
12.72 Units must be retreated toward their source of supply if possible.
12.73 Units may be retreated onto hexes that are already stacked to capacity (9.0) as a matter of last resort. Units which retreat into an overstacked situation must take an additional Step loss.
12.74 Units cannot be retreated into Enemy-occupied hexes, Enemy-controlled hexes (except as noted), or off the map edge. Friendly units negate Enemy Zones of Control for retreat purposes. Armored units must be retreated onto usable road hexes if at all possible.
12.75 Units which cannot retreat are eliminated instead.
12.8 Close Assault Results Table
The Close Assault Results Table is printed on the Chart and Table Sheet (see the Close Assault Combat Results Table, 12.8, in the Charts and Tables section below).
13.0 Night Game-Turns
General Rule
Night Game-Turns are all Game-Turns marked 1800 (6 P.M.) or 0000 (Midnight) on the Game-Turn Record/Reinforcement Track. During night Game-Turns, a unit's vision and movement is impaired, with certain consequences for game mechanics.
13.1 Effects of Night on Visibility
13.11 Opportunity fire and support fire are allowed only within a three-hex range.
13.12 Only observed artillery and mortar fire (5.3) are allowed during night Game-Turns, and Lines of Sight may be traced to a maximum of three hexes.
13.2 Effects of Night on Combat
Close assaults made by Gurkha-type infantry units and by German paratroop units receive a bonus (see Case 12.6).
13.3 Effects of Night on Movement
13.31 Gurkha companies may be moved through the Enemy-controlled hexes on night Game-Turns with the expenditure of three Movement Points in addition to the normal terrain cost of the hex entered.
13.32 All Movement Point terrain costs are doubled during night Game-Turns with the exceptions of movement along roads.
14.0 Pinned Units
General Rule
Units may be forced to take cover, impeding their movement and combat ability, by a variety of fires resolved on different results tables. A Pin is a specific combat result which is the outcome of certain die rolls on the Bombardment Results Table and the Opportunity Fire Results Table. Pinned units cannot move further nor may they attack for one full Game-Turn.
Procedure
When a Pin occurs, the unit affected is marked with a Pin marker. These markers are colored yellow on one side and grey on the other. When a Pin is inflicted during the Allied Player-Turn, mark the affected units with the yellow side; use the grey side when the Pin comes on the German Player-Turn. All yellow Pin markers are removed at the beginning of the Allied Player's next Preparation Fire Phase; all grey Pin markers are removed at the beginning of the German Player's next Preparation Fire Phase.
14.1 Effects of Pins on Movement
14.11 A Pinned unit cannot be moved.
14.12 A Pinned unit which begins a Friendly Movement Phase in an Enemy-controlled hex may be moved one hex to withdraw from the Zone of Control. It is forced to attack if unable to do so (see Case 14.22).
14.2 Effects of Pins on Combat
14.21 Pinned units cannot engage in opportunity fire, support fire, or close assault (exception: see Case 14.22).
14.22 A Pinned unit adjacent to an Enemy unit during a Friendly Combat Phase must close assault — even without supply. Pinned units attack with 1/4 of their combat strength, fractions rounded down.
14.23 Pinned units defend at half strength, fractions rounded down.
14.3 Effects of Pins on Headquarters Units
Pinned HQ units cannot be moved or used for the deployment of reserves (see Case 12.2). They can be used for all supply functions and for mortar bombardment (see Case 5.7).
15.0 Roadblocks
General Rule
Roadblocks are barriers or obstacles used to limit the movement of Enemy vehicles along a road. Roadblocks are deliberately created by the use of infantry or engineer units to construct the block. They have the same effect on movement as Ruins.
Procedure
A Player may place roadblocks on road hexes only. At the end of any Movement Phase, the Phasing Player may announce that any infantry or engineer companies deployed in road hexes are building road blocks. Such a unit cannot be moved in the subsequent Friendly Movement Phase. The block is placed on the map at the end of the Friendly Player's next Movement Phase. The effect of roadblocks for infantry is to double the normal Movement Point cost of the terrain in the hex (or the road movement cost if the unit is following the road). Armored units may not enter roadblocked hexes.
15.1 Constructing Roadblocks
15.11 A roadblock cannot be built in an Enemy-controlled hex.
15.12 Only infantry and engineer companies may build roadblocks, and only on road hexes. Companies building roadblocks cannot be moved, engage in opportunity fire, or support fire.
15.13 If a company is close assaulted or Pinned while building a roadblock, the construction attempt is considered ineffective.
15.2 Removing Roadblocks
15.21 A roadblock in an Enemy-controlled hex cannot be removed.
15.22 A roadblock can be removed by an engineer company at a cost of 15 Movement Points. The engineer company moves to the hex containing the block during Friendly Movement Phase. The roadblock is then removed from the map with the expenditure of the required Movement Points. An engineer unit with unexpended movement capability remaining may then be moved away from the unblocked hex.
16.0 Armored Units
Commentary
The Allied attack on Cassino was launched only after repeated postponements due to rain. Terrain, along with the long rains, made the Cassino sector especially difficult for tank units. The slopes of Abbey Hill were simply impossible for tanks to negotiate. At the same time, the lowland around Cassino town was so waterlogged that it could not support tanks. To reflect this in the game, the mobility of tanks is restricted.
General Rule
Tank units are allowed only on roads.
16.1 Effects on Armored Unit Movement
16.11 Tank units forced to retreat into non-road hexes are immobilized and cannot be moved.
16.12 Tank units located on hexes that are converted into Ruins by artillery and air bombardment also are immobilized on the Ruin hexes.
16.13 Immobilized tank units may be freed by engineer units in the same manner as engineer units clear Ruins. The engineer unit is deployed in the hex with the tank unit (if the latter is in a ruined road hex) or in an adjacent road hex (if the tank has been retreated off the road). In the following Friendly Movement Phase, the tank unit may be moved normally (starting with the hex containing the engineer unit if the tank was immobilized off the road).
16.2 Combat Effects of Immobilization
Immobilized units may engage normally in opportunity fire, support fire and close assault.
17.0 Reinforcements
General Rule
Both sides receive reinforcement units during the game, such units are deployed on the map on Game-Turns specified by the Game-Turn Record/Reinforcement Track. Reinforcements enter the game at full strength during the Movement Phase of the Friendly Player-Turn. Reinforcements can be moved normally on their Game-Turn of arrival.
Procedure
During each Movement Phase, the Phasing Player consults the Game-Turn Record/Reinforcement Track, which indicates whether new units are due to arrive. The Game-Turn each enters the game on and the Zone of arrival are printed on each counter. The Player places the new units on the designated hexes and proceeds to move them.
17.1 Entry Zones
17.11 The Entry Zones are: A (hexes 1934 and 1833), B (hexes 1734-1233), C (hexes 0934-0134), D (hexes 1734-0134), E (hexes 0134-0117), F (hexes 5909-5916).
17.12 All units enter at Entry Zones except for one New Zealand company on Game-Turn 1 which is slated to enter at hex 1833 or 1934.
17.2 Deployment of Reinforcements
17.21 If the specific Entry Zone for a unit is Enemy-occupied or Enemy-controlled, listed units may enter the map on any hex along the same map edge as the Entry Zone (exception: along the east edge units can enter only from hexes numbered 0134 to 1734).
17.22 The owning Player may voluntarily delay the arrival of reinforcements so long as he deploys them in the same Entry Zones as listed when they are brought onto the map.
17.23 Reinforcement units may move normally on the Game-Turn of entry.
18.0 Victory Conditions
General Rule
Victory is determined by the situation at the end of Game-Turn 17. If there is not at least one German unit in any of the 15 hexes of Cassino Abbey, the result is an Allied Decisive Victory. If there is at least one German unit each in Cassino Abbey and one of the four hexes of the Continental Hotel, the result is a German Decisive Victory. If neither of the above conditions is fulfilled, victory is determined by Allied casualties. If the Allies have lost a total of fewer than 72 steps (three battalion equivalents), the result is an Allied Tactical Victory. Otherwise, the result is a German Tactical Victory.
Designer's Notes
The printed signature line of the designer is omitted.
This game began with a request by Brad Hessel during the spring of 1978. SPI's idea was to have a game of this one particular battle in which the New Zealand Corps reached to within a grenade's throw of the Cassino Abbey. This notion guided both the choice of subject and the tactical level of the game. Only at a low-level scale could the game system give an adequate portrayal of the bitter fighting for Cassino Town and Abbey Hill. Work thus began by finding a 1:50,000 scale map, and this projection was blown up several times to achieve the desirable size. The decision was made to ignore the disengaged brigade front and abortive tank attack from the right flank of the 4th Indian Division because this would not add to the game, while it would cost considerably in level of detail, particularly in the town.
The game system is a meld of concepts from tactical and operational games. Some operational-style rules, such as Zones of Control, would be just applicable at the company level here, and could also serve to keep the system from getting loaded down with tactical detail. Tactical provisions such as Opportunity Fire and Line of Sight were also clearly appropriate and have been included as well. The net result is a tactical game which should prove to be both interesting to play and different from most approaches to tactical game design. My major regret is that countermix limitations precluded the use of a company-platoon breakdown system for both sides in the simulation.
Cassino's most immediately noticeable feature is the high Movement Point Allowances given to units. This is certainly a difficulty in any tactical game which must have turns of any length. To be at all playable, the game has to have a limited number of turns, in Cassino they are of six hours each. But as distance represented by hexagons falls while turn lengths remain fairly long, movement rates must increase enormously. Even so, 60 movement points represents a cross-country move of only 3000 meters, surely less than the march capability of an infantry company. In the conditions pertaining at Cassino, however, no unit moved more than this distance in any one six-hour period.
The most difficult development problem was ensuring the Allied Player a chance at victory. In the original battle the Allies committed a few of their available troops and timed the entry of those forces badly, with the result that the New Zealand Corps was robbed of a potential decisive superiority at the point of contact. Entry zones, rather than hexes, proved to be the best answer as they force the German player to defend a line rather than concentrating his available troops on a narrow front. In the long run only strong play can offset the Allies' higher command errors at Cassino.
Finally a couple of things required by the tactical level of the game should be noted. These are minimum mortar ranges and collateral damage. Minimum ranges are required by ballistics trajectories with the hex sizes used here. Similarly, hex size requires collateral damage given the blast radius of shells and bombs.
Charts and Tables
The following charts and tables are printed on the Charts and Tables sheet (page R5) and are referred to by the Cases above.
The printed sheet also carries the Line of Sight Gauge (Case 5.9), which is printed twice (pages R6 and R8). It is a graphic grid, not text: horizontal scale of hexes 0 to 60 along the top and bottom edges, vertical scale of elevation from 0 to 510 meters, with heavy horizontal lines at 50-meter intervals. Use it as described in Case 5.9.
The Charts and Tables sheet is printed twice (pages R5 and R7); the second copy is identical to the first and is not repeated here.
6.4 Terrain Effects Chart
| Terrain Type | Movement Point Cost | Combat Effect |
|---|---|---|
| Road | 1 | Other terrain in hex |
| Trail | 2 | Other terrain in hex |
| Ravine | 8 | Defender tripled |
| Crest hexside | Depends on elevation (see Case 5.23) | Defender tripled if attacked "uphill" through all Crest hexsides |
| Building | 3 | Defender doubled |
| Contour hexside | +2 to cross each 50 meters | None |
| Ruins | Infantry: twice normal terrain cost. Armor: Prohibited | Defender doubled |
| Roadblock | (same as Ruins) |
Terrain Movement Point costs are cumulative. Terrain Combat Effects are cumulative; however, the defender may never be more than tripled. Terrain bonuses are applied prior to Pin effects to a defending unit's Defense Strength.
(The Stream hexside cost is printed as "+ to cross" with no number on the sheet.)
8.3 Opportunity Fire Combat Results Table
| Die | 1 | 2 | 3 | 4 | 5+ |
|---|---|---|---|---|---|
| 1 | - | - | - | - | P |
| 2 | - | - | - | P | P |
| 3 | - | - | P | P | P |
| 4 | - | P | P | P | P |
| 5 | P |
Opportunity fire by more than 5 companies is resolved on the 5+ column.
5.8 Bombardment Results Table
Number of Air and/or Artillery Points, or Number of Firing HQ Units (Mortar Bombardment).
| Die | 1 | 2 | 3 | 4 | 5 | 6 | 7 | 8 | 9 | 10+ |
|---|---|---|---|---|---|---|---|---|---|---|
| 1 | P | P | P | 1 | 1 | P1 | P1 | 2 | 2 | (3) |
| 2 | (rl) | P | P | P | 1 | 1 | P1 | P1 | (2) |
Bombardments by more than 10 Air/Artillery Points or HQ units (in mortar bombardment) are resolved on the 10+ column.
12.8 Close Assault Combat Results Table
Combat Ratio (Attacker Strength to Defender Strength).
| Die | 1-3 | 1-2 | 1-1 | 3-2 | 2-1 | 3-1 | 4-1 | 5-1 |
|---|---|---|---|---|---|---|---|---|
| 1 | 2rl/- | 1/- | 1/- | 1/- | 1/- | 1/- | 1/- | 1/rl |
| 2 | 2/- | 1r2/- | 1rl/- | 1/- | -/1 | 1/1rl | -/1rl | -/1rl |
| 3 | 1r2/- | 1rl/- | 1/- | 1/1 |
Results to the left of the slash refer to the Attacker; those to the right of the slash apply to the Defender. Combat at a ratio of less than 1-3 is resolved on the 1-3 column; combat at a ratio of greater than 5-1 is resolved on the 5-1 column.
(Two cells, Die 3 / 4-1 and Die 4 / 2-1, are printed without the slash, as "-1rl"; they are transcribed here as "-/1rl" to match the slash convention of the rest of the table.)
Explanation of Results (For All Combat Results Tables)
- P = Pin.
- 1, 2, 3 = Affected unit must lose the indicated number of Steps.
- r1, r2, r3 = Affected unit must be retreated the indicated number of hexes away from its initial hex.
- - = No effect.
- ( ) = Parenthesized results indicate collateral damage (applies to Artillery/Air Bombardment die rolls only; ignored for Mortar and Secondary damage die rolls).