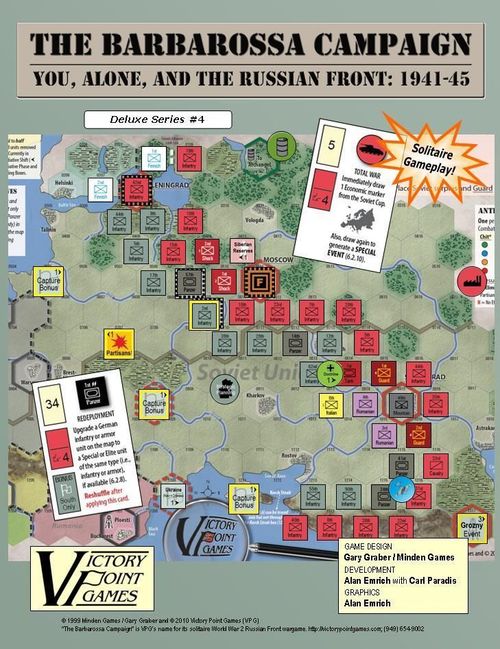
The Barbarossa Campaign
The Barbarossa Campaign Rulebook
Table of Contents
Table of Contents
- [1.0] Introduction
- [2.0] Game Components
- [3.0] Setting Up the Game
- [4.0] Key Concepts & Terms
- [5.0] Sequence of Play
- [6.0] Events
- [7.0] Economics
- [8.0] Axis Redeployment
- [9.0] Axis Blitz Combat
- [10.0] Axis Regular Combat
- [11.0] Encirclements
- [12.0] Axis Winter Buildup
- [13.0] Soviet Counterattack Combat
- [14.0] Soviet Initiative
- [15.0] Determine Initiative
- [16.0] Axis Strategic Mode
- [17.0] Housekeeping
- [18.0] Miscellaneous
- [19.0] Victory Conditions
- [20.0] Scenarios
- [21.0] Notes
[1.0] Introduction
The Barbarossa Campaign (TBC) is a strategic level, solitaire game of the Russo-German struggle during World War II (WWII). The player commands the Axis (primarily German) forces, while the game system manages the Soviet Union forces (primarily Russians).
[2.0] Game Components
The Game Map: The 11" x 25.5" game board features what was called the Russian (or Eastern) Front during WWII. It includes several boxes and tables to facilitate play. Map features have been adapted to fit the hex grid superimposed over the playing area.
Game Scale: TBC is an army/corps level simulation, with each hexagonal space (hereafter called a hex) on the map being approximately 90 miles across. Each Game Turn represents three months of real time.
The Economic Display Sheets: These 8.5" x 5.5" sheets should be laid out directly above the map. They are used to help the player organize the status of various economic and initiative influences.
Below are descriptions of the various playing pieces available in TBC.
Information / Reminder Counters: Economic Counters (large round), Display Counters, and Sample Initiative Event Counters. Pieces that are placed on the map and various displays to convey data to the player are called information counters.
Military Units: Army and corps pieces that maneuver around the map and do the fighting are called military units. Note that unit I.D. designations (e.g., 39th) have no gameplay effect; they are provided primarily for historical flavor.
The Axis Units include Line units, Panzer (Special, Front and Committed "striped" sides), German Infantry and Cavalry, Mountain, Motorized, Elite (gray Special and black Elite), and Axis Ally Line units (Finnish, Rumanian, Hungarian and Italian). The Soviet Units include Line units, Special units, Soviet Infantry and Cavalry, Shock, Tank (Special), and Guard (Elite); Guard Tank. Reinforcement units carry a Turn Number.
Note that some Soviet Line (Infantry) units and information counters are printed back-to-back. The Line Infantry sides are used early in the game, while the pro-Soviet event counters on their reverse generally come into play during the later stages. A colored triangle is provided on each side of these pieces to remind you they are back-printed.
Combat Chits: Pieces pulled at random from an opaque container to resolve battles are called Combat chits. These are colored Green, Red, Yellow, and Blue. Some are marked with an "*," a "flag," and / or an Initiative Event: White Flag Event Chit, "*" Chit, Black Flag Chit, Initiative Event Chit.
Event Cards: Event cards perform several functions in The Barbarossa Campaign. In addition to generating possible Events during the Events Phase of the game, their individual card numbers serve as a 40-sided die roll result. They also indicate where and how strong Soviet Initiative attacks are and whether a newly-captured Soviet-controlled city helps the Axis initiative (i.e., was taken relatively intact or has added political significance). A Sample Event Card carries a Card #, Graphics, Headline, and Event Text (which may continue), e.g. Soviet Initiative Attacks, Soviet City Capture Bonus.
[3.0] Setting Up the Game
Map Layout: Place the map, centered, in front of you. Then along the top edge of the map, abut the left (Axis), center (Event Cards and Turn Track) and right (Soviet) Economic Display Panels. Take a moment to familiarize yourself with the boxes and tables on and around the map.
Axis Set Up: Place the Axis units listed below on the board along the western (left) side of the Start Line (i.e., adjacent to all the Soviet units). The Axis set up the game with:
- 3 Panzer units (in Greater Germany)
- 6 German Line units
- 1 Mountain Infantry unit
- 2 Rumanian units (in Rumania)
- 2 Finnish units (in Finland)
- And 3 Luftwaffe counters (in the Luftwaffe Units Available box)
Special Set Up Rule — Stacking Panzer Units: Only one unit is allowed per hex during play, with this set up exception: each Panzer unit begins stacked in a hex with a German Line or Mountain Infantry unit of your choice within Greater Germany during the Axis set up only.
Soviet Unit Set Up: Place one Soviet Line unit on each of the 13 hexes along the eastern (right) side of the Start Line (see below). Unit designations do not matter. Also place one Fortified counter in Sevastopol (hex 1211).
Housekeeping Preparations
Reinforcements: Place the Soviet Tank, Shock and Guard, plus the Italian and Hungarian units, on the Game Turn Track boxes matching their Reinforcement Turn numbers.
Other Military Units: The remaining Axis and Soviet military units should be sorted by type and arranged in their respective Units Holding Boxes on the map sheet.
Event Cards: Shuffle the Event cards and place them face-down in the Draw Pile Box on the center Economic Display.
Economic Counters: The large, round Economic counters are placed in two separate opaque containers (e.g., coffee cups). Into one cup, called the Soviet Economic Cup, place the 1 yellow and all 27 red counters. Into the other (Axis Economic Cup) place the 4 brown, 7 green, and 17 gray counters. Mix each cup's counters thoroughly.
Combat Chits: Sort out the small, round Combat chits with a WHITE flag on them and place those few chits in the Combat Chits Holding Box on the right Economic Display. The remaining Combat chits (including those with a black flag) are placed in a separate opaque container, called the Combat Cup, and mixed thoroughly.
Display Counters: The Game Turn counter is placed on first box of the Game Turn Track, i.e., Game Turn 1 on the center Economic Display sheet. The Initiative Index and Victory Point counters are placed on the Start (0) space of the Initiative Index Track directly above the map. The Axis Strategic Mode counter is placed in the Tank Production box on the Axis Economic Display.
Other Pieces: All of the remaining pieces should be sorted out and placed in the large Removed and Unused Pieces Holding Box on the right side of the map display.
[4.0] Key Concepts & Terms
Some key concepts for TBC should be explained first so that you have the proper overall context to understand the game.
Strategic Initiative: TBC is built around the concept of Strategic Initiative, which takes into account battlefield success, economic considerations, and national morale (as shown on a track just above the game map). As the Axis commander, it is vital that you retain the Initiative for as long as possible; losing it can spell disaster for your campaign!
The Front Line: A key concept in this game is that both sides' (Axis and Soviet) Regular (non-Elite / Special) Infantry and Cavalry units (called "Line" units) are used to build the Front Line. Simply put, in The Barbarossa Campaign there is always a clear, solid Front Line stretching across the map from north to south where both sides meet in battle. Line units are used to fill any gaps in that line. That is, Axis and Soviet forces are always facing each other in two, contiguous adjacent unstacked lines, as illustrated in the Set Up Example (see 3.0). If you run out of Line units, feel free to make up more (use coins or whatever).
[4.1] Advancing & Retreating: Whenever an Advance occurs due to combat, the advancing unit leaves its hex and moves into the enemy unit's just-vacated hex. If that advancing unit's just-vacated hex is adjacent to an enemy unit, the line must be filled and made whole again, so a new Line unit belonging to the advancing unit's side is taken from its Holding Box and immediately placed there.
[4.1.1] Retreating & Unit Placement: Often, retreating and eliminated units create gaps in the defender's line; new Line units belonging to the retreating unit's side are placed in these hexes as needed to maintain the line's integrity.
[4.1.2] Retreating & Unit Removal: Conversely, if, due to retreating, there are units of either side in hexes that are no longer adjacent to enemy hexes, then remove them from the map. When a retreating unit must retreat back on top of another unit of its own side, it is removed. When it must retreat to a prohibited (e.g., non-friendly, unsupplied) hex, it is eliminated. See Box III for the status of these removed units.
Just make sure that a solid front line for each side is rebuilt every time it is broken!
Important: Axis Line units put on the map to "fill the line" are placed on their (face-down) Committed (striped) side.
For Example: In the illustration below, on the left, the Panzer unit attacks the Soviet Line unit (orange arrow) and receives an "Advance + 2nd" result. The Soviet unit Retreats into the adjacent Rough (Forest) hex and the Panzer unit Advances into the hex it attacked. The illustration on the right shows the aftermath, with the front lines reestablished by newly added Line units (outlined in white). Note that the Axis Line unit (German 1st Cavalry) is introduced on its Committed (white-striped) side.
[4.2] Special and Elite Units: Units which are neither Line or Axis Allied (e.g., Panzer, Mountain, Motorized, Elite, Shock, Guard, Tank, etc.) are all collectively called Special units. These are recognizable as darker-tinted units and are never used to fill the gaps when the Front Line is being rebuilt.
A subset of Special units is Elite units. These include only German Elite and Soviet Guard units. An Elite Armored unit (e.g., Elite Panzer or Guard Tank) is considered both Elite and Armored for all purposes.
[4.3] Finnish (Axis Ally) Units: Only Finnish units are used along their sector of the Front Line (see 18.1).
[4.4] Other Axis Allies: Other Axis Ally units (Rumanian, Hungarian, and Italian) can also be used as Line units south of the Operations Line (the east-west line running across the entire length of the map; see the Terrain Effects chart). See 17.3.2.
[4.5] Control Behind Friendly Lines: Unoccupied hexes existing "behind the Front Line" (as well as front line hexes occupied by that side's units, of course) are considered under that side's control.
For Example: At the start of the game, Berlin is under Axis control, Moscow is Soviet controlled.
[4.6] Supplied and Isolated units: A unit is considered isolated if, at the moment it needs to trace supply, it is cut off from its side of the Front Line; i.e., it is unable to trace a path of hexes to its side of the Front Line that is unblocked by enemy units and/or prohibited terrain. Units that are not isolated are supplied.
The Front Line is in supply if it can trace a path of hexes that is unblocked by enemy units and prohibited terrain to that side's map edge (or Finnish units to Helsinki). Non-Finnish Axis units trace to the western map edge (i.e., XX01 hexes), and the Soviets to the northern, eastern and southern map edge hexes inside the Soviet Union (e.g., 0819 or 1315).
[4.7] Committed and Uncommitted units: Axis units have a striped (committed) and non-striped (uncommitted) side. Essentially, committed units are "used;" they have already fought (7.0), have just been placed on the map and cannot attack (8.0 and 9.0), or have already been subject to a Soviet Counterattack that Game Turn (13.0). When indicated, all committed Axis units on the map are flipped over back to their uncommitted sides and are thus made ready again for their next commitment in a subsequent Phase.
[5.0] Sequence of Play
Each Game Turn consists of the following Phases, conducted in the exact order listed below. Some Phases apply to only one side or the other, while some apply to both sides. Note that on many occasions, certain Phases are skipped that Game Turn.
- Events: Consult the Game Turn Track Events (if any) and then draw one (or two, on Summer turns) Event cards
- Economics: Draw the number and type of Economic counters for that Game Turn
- Axis Redeployment: Reorganize Axis units along the Front Line
- Axis Blitz Combat: Panzer and Luftwaffe supported German (not Axis Ally) non-Panzer units may attack using the Blitz Combat Table; skipped on Winter turns and when the Axis do not have the Initiative
- Axis Regular Combat: Axis units may attack using the Regular Combat Table with one Anti-Partisan attack (max); otherwise skipped during Axis Collapse
- Axis Encirclement Resolution
- Receive Axis Winter Build-up on Winter turns only – either one Luftwaffe or two Hedgehog counters
- Soviet Counterattack Combat: The entire Soviet Front Line is examined repeatedly until all potential uses of the Soviet Counterattack Table are resolved
- Soviet Initiative Combat: Only on turns when the Axis do not have the Initiative, a card draw determines where and how many Soviet Advances occur
- Soviet Encirclement Resolution
- Calculate Initiative Index: Adjust the placement of the Initiative and possibly Victory Point counters on their Track
[6.0] Events
Events occur in different ways. Some events are specified on the Game Turn Track. Many appear through Event cards and occasionally through Economic counter draws.
[6.1] Turn Track Events: Consult the Game Turn Track for the current Game Turn and note / perform its Event or place the indicated Reinforcement unit(s) in their respective Reserve (Soviet Shock and Tank units) or Holding (Soviet Guard and Axis Ally units) Boxes. Game Turn Track Events include:
A. Initial Onslaught: On the first Summer Turn only, these special rules apply to simulate the surprise achieved by the initial Axis onslaught:
- In lieu of moving during the Axis Redeployment Phase, each Panzer unit (not a Blitzing non-Panzer unit) may conduct a free "Advance" result against an adjacent Soviet hex before commencing the Blitz Combat Phase (as per 9.1.1).
- During both Axis Combat Phases (Blitz and Regular), the Axis player may discard the first Combat chit drawn to resolve each attack (this applies during every Round of a unit's attacks during the Blitz Phase), ignoring it completely and drawing a replacement chit. That second chit must be used to resolve that attack. Such discarded Combat chits are always placed in the Recyclable Combat Chits Holding Box (an exception to the instructions in Box III).
- Ignore the flag on all green Combat chits drawn during the Axis Blitz and Regular Combat Phases. These chits do not hinder Axis Allies in Regular combat and are recycled back into the cup that turn (17.1).
- The Axis automatically have Armor Superiority this turn (9.1.4-A).
- The Soviet Encirclement Resolution Phase is conducted during the Axis Encirclement Resolution Phase (i.e., during Step 6 instead of 10) on this turn. The shock of the attack saw the surrender of many Soviets.
B. Soviet Winter Counter-Offensives: During the first two Winter Turns, all use of the Soviet Counterattack Table that turn receives a one column shift to the right (-1). This is in addition to the Winter effect for certain chit draws (13.2.8).
C. Axis Case Blue Offensive: To simulate the renewed vigor with which the Axis launched their second Summer offensive, the following special rule applies for that Game Turn only:
- In the Blitz Combat Phase (only), the Axis player may discard the first chit drawn to resolve each unit's Initial Round attack (only), as described in A, and draw another. This second chit must be used to resolve that attack. Such discarded chits are always recycled.
Winter Game Turns: Note the following things about all Winter Turns:
- The Axis Blitz Combat Phase is skipped in its entirety.
- The Axis receives their Winter Build-up counter (Reinforcement): either Luftwaffe or Hedgehogs (18.6).
Spring Game Turns: Combat is less effective during Spring Turns:
- Axis attacks on the Blitz and Regular Combat Tables are shifted one column to the right (-1); see 13.2.8.
- Subtract one (-1) to (adjusted) Soviet Initiative Attack values as per 14.0. This is in addition to the Spring effect for certain chit draws (13.2.8).
[6.2] Card Events: Following the application of any Game Turn Event, reveal the top card of the Draw Pile and perform its Event, and then, on Summer turns, draw a second card and perform its Event. An Event that is impossible to perform (e.g., because that city is already fortified, no such unit is available to add to or withdraw from the map, etc.) is treated as No Event.
[6.2.1] Archangel: This Event can only occur once per game; place the Archangel counter in Archangel. While this counter is in the "To Archangel" space on the map, the green Objective hex is in play. If the Axis then control that space, remove all Lend-Lease counters from the Soviet Lend-Lease Track. New Lend-Lease counters are discarded to the Removed Pieces Box while the Axis controls Archangel. If the Soviets retake Archangel, remove the Archangel counter and end its effects. New Lend-Lease counters drawn are placed on the track in the usual manner.
[6.2.2] Axis Allies Commit: This Event can only occur once per game. Place the Axis Ally Units Improved counter in the Axis Units Holding Box as a reminder. When this Event occurs, Finnish units are considered Special (4.2) types, and all other Axis Ally units are treated as German Line quality units for the remainder of the game. See 18.4.
[6.2.3] Fortification: Place a Fortified counter on that city if it is under Soviet control and does not already have a Fortified counter.
[6.2.4] Attacks: The following attacks can take place even on turns when they are otherwise prohibited (e.g., Winter, during Axis Collapse, etc.). Just because those Phases are skipped, doesn't mean the Events Phase is skipped, so these attacks can take place!
[6.2.4a] Conduct Blitz Attack: See 9.0 for the procedure.
[6.2.4b] Conduct Regular Attack: See 10.0 for the procedure.
[6.2.4c] Conduct Soviet Initiative Combat: See 14.0 for the procedure.
[6.2.5] Finns Expand War: This Event can only happen once per game. Finnish units can now freely enter, attack into, and be placed as Line units in any hex in the Soviet Union as far south as the 03XX hexrow (inclusive) for the remainder of the game, ignoring Rule 10.2.1 (i.e., they can attack Leningrad). Place the Finland counter near Helsinki as a reminder.
[6.2.6] Grozny (Drive for Oil): This Event can only occur once per game. Place the Grozny Event counter on the To Grozny hex on the map (1316) as a reminder. For the remainder of the game, that hex is worth (3) for the Initiative if captured by the Axis, instead of the usual (1).
[6.2.7] Partisans: If the named city is Axis controlled, not adjacent to a Soviet unit, and it does not already have a Partisan counter in it, then a Partisan counter is placed in that city. Partisans are explained more in 10.6 (Anti-Partisan Combat) and 15.4 (Initiative Level effect).
[6.2.8] Receive / Recruit / Produce / Upgrade a Unit: Such units given to the Axis player, when available, are immediately placed on the map as follows:
- A Hedgehog counter may be placed in any hex containing an Axis unit.
- Luftwaffe counters are placed in the Luftwaffe Units Available Box.
- Unless otherwise instructed, Special units received are taken from the Axis Holding Box and placed in the Axis Reserves box.
- Tank Production Action: When this occurs, the Axis Player may either:
- A) If available in the Axis Holding Box, immediately place on the map the Gross Deutschland Motorized Infantry unit, replacing a German Line unit.
- B) Place a non-Elite Panzer unit (only) from the Axis Holding Box into the Axis Reserve box.
- C) Replace an eliminated Panzer unit by moving it from the right-most box of the Eliminated Panzer Units track to the Axis Holding box. It doesn't enter play, but it does stop penalizing the Initiative.
[6.2.9] Withdraw a Unit: Such units are sent to the "Western Front" (removed to the Axis Units Holding Box). They are taken from their hex on the map and replaced with a Line unit. See Box III.
[6.2.10] SPECIAL EVENT: When an Event card instructs you to "draw again and generate a SPECIAL EVENT," reveal the next card and apply its Card Number to the correct year's Event Table on the separate Events Tables chart. Events that cannot occur for whatever reason are treated as No Event. If the result calls for the placement of a reminder counter, it goes into the Other Initiative Counters Currently in Effect box on the Economic Display.
Some Special Events are noted as "one (or more) times." These can only occur the indicated number of times per game as indicated by the number of their Event counters available in the countermix. Subsequent occurrences are No Event.
[Box I] Reshuffling the Cards
Reshuffle: Some cards instruct you to reshuffle the deck. After applying that card for whatever purpose, simply shuffle all of the cards back together and form a completely fresh Draw Pile.
[7.0] Economics
During this Phase, the long-term effects of the warring economies are considered.
Procedure: Consult the Game Turn Record Track and Draw Economic counters from the Economic cup(s) indicated (if any). Most of these counters are placed in the next available box of the Economic track on the appropriate Economic Display. These Economic Track boxes (Axis Armor and Soviet Armor, Industry and Lend-Lease) are always filled from the left to the right. If there is a Devastation counter in that box, both it and the counter that would have been placed in that box are removed instead. (In effect, it takes two counters to fill a devastated box; one to remove the Devastation counter, and one more to fill the box.)
Each Game Turn's Notes column on the Game Turn Record Track lists reinforcements, etc. and any Economic Chit draw for that turn (Axis) (Soviet).
For Example: On the third Game Turn, a Soviet Industry counter happens to be drawn from the Soviet Economics Cup and a Lend-Lease counter is drawn from the Axis Economics Cup.
[7.1] Filled Economic Tracks: If the Axis Armor, Soviet Armor, or Soviet Industry Track is filled and one of those Economic counters is drawn, remove that counter from play and do not redraw another counter; that draw simply has no effect.
If the Soviet Lend-Lease Track is filled, newly drawn Lend-Lease counters are placed in the next open box of the Soviet Armor or Industry Tracks as if it were one of those counters. If all Tracks on the Soviet Economic Display are filled, remove that Lend-Lease counter from play and do not redraw another counter.
[7.2] Initiative Effects: Inside each box on the various Economic Display Tracks is a number indicating that Track's corresponding current shift in the Initiative Value as determined during that Phase of the Game Turn (see 15.0). Note that only the initiative shift value of the right-most box occupied on that track is used, not each box occupied by a counter!
[7.3] Special Economic Counters: The following special Cases apply to these Economic counters:
[7.3.1] Any Axis: When drawn, you may either:
- Place it on the Axis Armor Track where it functions as a substitute Axis Armor Economic counter.
- Remove it from play in exchange for two Luftwaffe counters (as per 6.2.8).
- Use it as an Axis Strategic Planning counter (as per 7.3.5, below).
[7.3.2] Any Soviet: You must place this counter in the next available box on any of the three Soviet Tracks (your choice) where it functions as a substitute counter of that Track's type.
[7.3.3] Draw Another Event: Remove this counter from play, draw another Event card (as per 6.0), do not draw another chit to replace this one!
[7.3.4] Surge: Remove this counter from play, then draw and apply (one at a time) two Soviet and one Axis Economic counters (in that order).
[7.3.5] Axis Strategic Planning: Remove this counter from play and apply the benefit awarded from the current Axis Strategic Mode as per Rule 16.0.
[8.0] Axis Redeployment
During the Axis Redeployment Phase, you may reposition (move) your units between hexes along the Axis Front Line. Note that you may not shorten or "rationalize" the Front Line in any way. There are no voluntary retreats in TBC.
Procedure: Begin this Phase by making sure all Axis units are on their uncommitted sides!
Each supplied (4.6) Axis Special unit (e.g., Panzer, Elite, etc.) may be moved from the hex it currently occupies to another hex containing a supplied Axis unit up to four (4) hexes away. All other Axis units may similarly move up to two (2) hexes distance.
You must then move the unit in the receiving hex (because there is no stacking allowed) to: A) another location via its own Redeployment move; B) have it simply swap positions with the unit in the departing hex (in lieu of its own Redeployment move); or C) if it is a Line unit, simply place it in the Axis Units Holding Box for the time being.
After all your desired Axis Redeployment moves are complete, make sure the Axis Front Line is rebuilt and completely intact. This Phase is like Musical Chairs; when it ends, every hex on the Axis Front Line must be filled with exactly one Axis unit.
- Each unit can only be moved thus by redeployment once per Game Turn. You can flip them to their committed sides as a reminder that they've moved, if you like.
For Example: Wanting to make a drive in the south, the Axis player moves her units as shown. The 24th Pz. in 0411 is moved to 0711 (white arrow), and the 39th Pz. unit there travels around to 0911 (green arrow). The 4th Rum. gets out of the way, moving west to 0910 (orange arrow) and, because it is a Line unit, the Axis Player simply removes the 10th Inf. in that space and places it in the Axis Units Holding Box. Finally, the 49th Mtn. swaps places with the 17th Inf. between hexes 0511 and 0710. This leaves hex 0411 empty, so a Line unit is taken from the Axis Holding Box to rebuild the Axis Front Line.
End this Phase by making sure all Axis units are on their uncommitted sides!
[9.0] Axis Blitz Combat
Only supplied (4.6), uncommitted (4.7) Panzer-type and Luftwaffe supported German non-Panzer units (9.2) can conduct Blitz combat – and then normally on non-Winter Game Turns when the Axis have or share the initiative (with some Events providing exceptions) but not into Rough, Major City or Fortified hexes.
Blitz Combat Table (No Blitz into Rough, Major City or Fortified hexes)
| Chit | Initial | 2nd (Initial in Spring) | 3rd or Later |
|---|---|---|---|
| Green | Advance + Again? | Advance + End | Advance + End |
| Blue | Advance + 2nd | Advance + Again? | Advance + End |
| Orange | Advance + 2nd | Advance + 3rd | Advance + Again? |
| Red | Stopped + End | Stopped + Defeat? | Stopped + Defeat? |
General Rules
Each eligible unit conducting Blitz Combat attacks one adjacent enemy-occupied hex during the Blitz Combat Phase on the Initial column (which is the 2nd column on Spring Game Turns) and may attack again if that attack's Blitz Combat Result permits it; 9.1.3.
- The Axis player selects the order of her Blitz attacks and may wait to see the results of one unit's operations before committing to a subsequent unit's attack during that same Blitz Combat Phase.
- Each blitzing unit must complete its entire Blitz Combat activity before the next unit can begin its operations.
- You should rotate each finished unit by 90 degrees to help you remember that it has completed its Blitz Combat Phase. Rotate them back at the end of the Blitz Combat Phase.
- The same hex may be the target of more than one attack in a single Game Turn.
- Blitz attacks cannot be made into Rough terrain, Major City, and Fortified hexes.
- Once all of the Axis Player's blitzing units have completed their desired operations, the Blitz Combat Phase ends.
Procedure
Designate the blitzing unit and the adjacent, Soviet Front Line target hex, and draw a Combat chit from the Combat Cup. The color and notation (if any) of that chit determines the result of an attack.
[9.1] Blitz Combat Results: Blitz Combat Results are listed in two parts: one before and one after the plus sign (+). The result before the plus sign represents the battle outcome, indicating its success or failure. The result after the plus sign represents the post-battle outcome, indicating breakthroughs (2nd and 3rd attack options) or local Counterattacks (Defeat? results).
[Box II] Used Combat Chits
After drawing and applying a Combat chit from the Combat cup during any Phase, it is placed as follows:
- Blank or Asterisk (*) go to the Recyclable Combat Chits Holding Box.
- Any chit indicating an Initiative Shift (◄1 or 1►) go to the Other Initiative Counters Currently in Effect box in the center Economic Display.
- Non-Initiative chits with an "✕" go to the "✕" Combat Chits Holding Box (the "X-Box").
Battle Outcomes
[9.1.1] Advance: The Soviet unit retreats one hex (see 4.1) and the blitzing unit must advance into the target hex. Immediately reform both sides' Front Lines as needed by adding or removing Line units. Note that Axis Line units are placed on the map on their committed sides (4.1.1) and are thus unavailable to conduct a Luftwaffe supported Blitz (9.2) or Regular attack (10.0) that turn.
Retreated Units: Units must retreat to an adjacent, empty, friendly controlled hex if possible. See Case 4.1 for the details.
[9.1.2] Stopped: The blitzing and target units remain in their respective hexes. That blitzing unit can perform no more Blitz Combat this Game Turn (rotate it 90 degrees). Do not flip it over to its committed side (exception: 9.1.8), as these Blitzing units can be used again in the ensuing Axis Regular Combat Phase (10.0).
Post-Battle Outcomes
[9.1.3] 2nd and 3rd: If desired, the blitzing unit may conduct another attack by selecting a new target hex and blitzing it using the indicated (2nd or 3rd or Later) Blitz Combat Table column for its result.
[9.1.4] Again?: If the Axis have Armor Superiority (see note A below) or the blitzing unit is an Elite Panzer unit (see note B below), then that blitzing unit may conduct another attack on the 3rd or Later column. (This can be repeated any number of times.) Otherwise, treat this as an End result (as per 9.1.5).
A. Armor Superiority: The Axis automatically possesses Armor Superiority on the first Game Turn. On all other Game Turns, the Axis have Armor Superiority unless the Soviets have at least one Economic counter on their Armor Track and the Axis' current Armor Track value (i.e., the Initiative Shift value in the right-most occupied box on their Armor Track) does not exceed the Soviets'.
For Example: The Axis have one counter on their Armor Track (for a value of ◄2) and the Soviets have two counters on theirs (also for a value of 2►). Thus, the Axis do not have Armor Superiority.
B. Elite Panzer Units: The 1st Elite Panzer unit is Elite.
[9.1.5] End: That blitzing unit can perform no more Blitz Combat this Game Turn (rotate it 90 degrees; exception: 9.1.8).
[9.1.6] Defeat?: That blitzing unit can perform no more Blitz Combat this Game Turn (rotate it 90 degrees). Draw another Combat chit. If it is Red (or Orange if the Axis does not have Armor Superiority, see above) that blitzing unit is eliminated (see Box III), and a Soviet Line unit is put in its vacated hex.
If it is Red (or Orange) with an * or ✕, that blitzing unit is only spent instead. Place it in the Axis Reserve Box and put a Soviet Line unit in its vacated hex.
Other colors and symbols have no effect, and these chits are disposed of as per Box II (above).
Special Chit Outcome
[9.1.7] Enhanced Outcome: If an * chit is pulled during any Blitz attack, change a Defeat? result to End, an End result to Again?, and an Again? result to 3rd.
Note that an * chit does not affect the first part of the Outcome (e.g., Stopped + End would become Stopped + Again? which means no advance, but you can try again if you have Armor Superiority).
[9.1.8] Reduced Outcome exception: When an ✕ chit is pulled for a blitzing unit's End result attack and that Blitzing unit is not spent or eliminated (9.1.6), it is exhausted and flipped over to its committed side (making it unavailable for combat during the ensuing Axis Regular Combat Phase).
[9.2] Luftwaffe Supported Blitz Attacks: Once per Axis Blitz Combat Phase (maximum), at any time during the Axis Blitz Combat Phase (i.e., before or after seeing the outcomes of any or all Panzer Blitz attacks that turn), the Axis Player may spend (assign) one available Luftwaffe counter to a German (not Axis Ally) non-Panzer unit (Line or Special) on the map, thus allowing it to conduct a full round of Blitz Combat as a Panzer unit would (i.e., a Luftwaffe supported Blitz attack). After it is used for this Luftwaffe supported Blitz attack, that unit is not flipped to its committed side (just as Panzer units aren't); place that spent Luftwaffe counter in the Axis Units Holding Box.
[9.3] City Conquest: Whenever a Soviet controlled City or Major City anywhere on the map becomes Axis controlled, immediately draw a card and look at its lower-left corner. If the card's lower-left corner is blank, or all the Capture Bonus counters are already placed on the map, then there is no effect.
If it reads BONUS, that city garners the Axis added political or economic value; place a Capture Bonus counter on the map on the city's location. It will provide one Initiative Shift (1►) while it is on the map (15.0).
If it reads BONUS South Only, place a Capture Bonus counter on that city only if it is south of the brown Operations Line on the map. If it is north of the Operations Line, treat this card draw as no effect.
If the Soviets retake a city with a Capture Bonus counter on it, that counter is removed from the map and placed in the Unused Pieces Box. Should the Axis subsequently recapture that same city, a fresh card draw is made for it (i.e., just because it previously had, or lacked, a Capture Bonus counter before does not mean it will do so again).
[9.4] Prohibited Target Hexes: Rough terrain, Major Cities, and Fortified hexes cannot be selected as target hexes for a Blitz attack.
[9.5] Winter Turns: Skip the Axis Blitz Combat Phase entirely.
Note that Blitz Combat might still take place during the Events Phase (when indicated by an Event).
[9.6] No Axis Initiative Turns: You can skip the Axis Blitz Combat Phase entirely on turns when the Axis do not have the Initiative (15.4) with this one exception: You may still conduct one Luftwaffe supported Blitz attack (9.2) with a single German (not Axis Ally) unit on the map of any type (i.e., Panzer or non-Panzer).
[9.7] Blitz Combat Events: The initial Axis Summer offensives receive additional benefits as per 6.1-A and C.
Blitz Combat Examples: It is the first Game Turn and the Axis player makes her attacks in order going from north to south.
The 41st Panzer opens with its free hex of advance during Redeployment (6.1-A Initial Onslaught) vs. the 15th Infantry in Riga (hex 0505). The 15th Infantry is pushed back a hex and the Soviet Front Line rebuilt with a new Line unit. A card is drawn for the captured city of Riga, (9.3), but it reads "BONUS South Only," so no Capture Bonus counter is placed. Now using the Blitz Combat Table, the Initial column is consulted, hex 0406 to the northeast is designated, and a chit is drawn. The result is Green (Advance + Again?), which works for the Axis Player since she enjoys automatic Armor Superiority on the first Game Turn (6.1-A). Pressing on to Talinin, the 41st Panzer draws an Orange chit on the 3rd or Later column (i.e., where Again? takes you) for another (Advance + Again?) outcome. Unfortunately, a card draw reveals no Capture Bonus for the city. There's only one hex that can be attacked, so eastward goes the 41st Panzer, and a Green chit with an asterisk (*) on it is pulled. Normally, a green chit would mean Advance + End, but the asterisk provides an enhanced post-battle outcome as per Case 9.1.7, changing the End result to another Again? result. Whoo-hoo; the tanks roll on! Oh, wait… The only other adjacent hexes on the Soviet Front Line are both Rough terrain, so here ends the Blitz Combat of the 41st.
The 39th Panzer then launches its free advance into Brest-Litovsk, drawing a card for that city's capture (9.3) which is blank in its lower-left corner, so again no Capture Bonus counter is placed. Onward! Its first Blitz Attack thrusts to the northeast into hex 0706. There matters go badly and a Red is drawn; worse, it is a Soviet Tenacity (◄1) Initiative Event chit that hurts the Axis this turn (only) when the Initiative Index is calculated. Fortunately, because of the fierce surprise attack of the Axis Initial Onslaught (6.1-A), the Axis player can and does opt to place that first-drawn outcome chit into the Recyclable Combat Chits box (dodging that bullet) and drawing again. This time it's a Blue chit (Advance + Again?), and with first-turn Armor Superiority, that means another attack can be made on the 3rd or Later column. With Minsk the next target, an Orange chit closes the deal with another (Advance + Again?) result.
The 24th Panzer rolls eastward, pushing the Soviet 33rd Cavalry out of hex 0906. From there, its first attack keeps rolling eastward to hex 0907 where an Orange chit with a black ✕ on it is drawn. The result is Advance + 3rd but the ✕ means that chit does not Recycle. It goes to the Combat Chits Holding Box (a.k.a., the X-Box) instead. "Too bad, but I'll accept that. On to Kiev!" This Blitz attack is on the 3rd column, and a Red chit is drawn, meaning the outcome is Stopped + Defeat? which, at the very least, would stop that unit (and, at the worst, could eliminate it!) "Well, forget that," declares the Axis Player, exercising her redraw option (via the Initial Onslaught rule), and draws again only to reveal another Red chit! "Oh, crud!" The Stopped + Defeat result is applied and the required follow-up chit draw is a Green chit which has no effect. "Whew!"
Now, the Axis player really wanted to take Kiev in the Blitz Combat Phase. She could wait for the ensuing Regular Combat Phase and attack it with the adjacent 24th Panzer, but going full throttle with a high risk / high reward strategy, she commits a Luftwaffe unit to her German 17th Infantry unit in Rumania and launches a Luftwaffe supported Blitz Attack!
No free hex is awarded for a Luftwaffe supported Blitz Attack (6.1-A). Things start off badly when hex 1008 is attacked and a Red chit is drawn. But again, due to the Axis Onslaught, it can be (and is) removed to the Recycle Bin and another chit is drawn. Better luck this time with a Blue chit with an asterisk (*) on it. The asterisk doesn't change anything in this case, as the result for the blue chit is (Advance + 2nd). Its next attack is targeted at Kiev, and the result is a Green chit. Feeling she needs to push her luck, the Axis Player ignores that result and draws again! This is another Green chit, but with a black ✕ on it. Thus, the final result is Advance + End, but that blitzing unit is not flipped to its committed side (6.1-A) and will be attacking again in the Regular Combat Phase. Normally, the ✕ means that chit does not Recycle, but thanks to the Axis Onslaught (6.1-A), green ✕ chits pulled this turn do! A card is drawn for Kiev's capture. Fortunately it reads "BONUS South Only," so a Capture Bonus counter is placed in Kiev.
At last, the captured city card draw works out, reading "BONUS" on it, so a Capture Bonus counter is placed under the 39th Panzer unit in Minsk. "Why stop there?" asks the Axis Player. So pointing to hex 0608 another draw is made and this one is Green (Advance + End) with a Doctrine (1►) Initiative Event. "Oh, cool." That Combat chit is not placed in the Recycle Bin (i.e., Recyclable Combat Chits Holding Box) as all the others have been thus far, but instead it is placed in the Other Initiative Counters Currently in Effect box (as per the Used Combat Chits rules in Box II).
[10.0] Axis Regular Combat
Regular combat is similar to Blitz combat. All uncommitted (4.7) Axis units may perform regular combat during this Phase (regardless of their supply status; 4.6) and normally only on Game Turns when the Axis are not in Collapse (see 10.5 and 15.4).
General Rules
Note that all Axis units that are on their committed sides remain flipped at this time! Committed Line units (e.g., those placed during the Blitz Combat Phase) cannot attack in the Regular Combat Phase.
Each eligible unit conducting Regular Combat may attack one adjacent enemy-occupied hex during the Regular Combat Phase. Units that performed Blitz combat can also participate in Regular combat on the same turn. This is why they were not flipped to their committed sides after attacking in the Blitz Combat Phase.
- The Axis player selects the order of her Regular attacks and may wait to see the results of one unit's operations before committing to a subsequent unit's attack during that same Regular Combat Phase.
- All terrain type hexes can be attacked in the Regular Combat Phase (on that Table's appropriate column).
- The same hex and/or unit may be the target of more than one attack in a single Game Turn.
- Once all the Axis Player's units have completed their desired attacks, the Regular Combat Phase ends.
Procedure
Designate the attacking unit and the adjacent, Soviet-occupied target hex, determine the proper column to use on the Regular Combat Table (shifting one column to the right, 1►, if it is a Spring turn, with attacks against a Major City hex always conducted on the right-most column), and then draw a Combat chit from the Combat chit cup. The color and notation (if any) of that chit determines the attack result.
Regular Combat Table (Terrain Type in Target Hex; shift one column to the right, 1►, in the Spring)
| Chit | Clear / Minor City | Rough / Fortified Minor City | Major City |
|---|---|---|---|
| Green | Advance | Advance | Advance |
| Blue | Adv. Special | Adv. Special Infantry | No Adv. |
| Orange | Adv. Panzer | No Adv. | No Adv. |
| Red | No Adv. | No Adv. | Elim. vs. Fortified |
[10.1] Regular Combat Results: Regular Combat Results have only one part.
Battle Outcomes
[10.1.1] Advance: The Soviet unit retreats one hex (4.1). The attacking unit must advance into the target hex and is flipped over to its committed side. Immediately reform both sides' Front Lines as needed by adding or removing Line units. Axis Line units are added to the map on their committed sides (4.1.1) and thus cannot conduct attacks of their own during that Regular Combat Phase.
[10.1.2] Advance Special: If the attacking unit is Special (4.2), the result is Advance, otherwise the result is No Advance.
[10.1.3] Advance Special Infantry: If the attacking unit is a Special Infantry type (4.2), the result is Advance, otherwise the result is No Advance.
[10.1.4] Advance Panzer: If the attacking unit is a Panzer type, the result is Advance, otherwise the result is No Advance.
[10.1.5] No Advance: That attack is halted. The attacking unit is flipped over to its committed side.
[10.1.6] Elimination versus Fortified: This result is No Advance unless that hex is Fortified (6.2.3). If so, and an Axis Special unit (4.2) was attacking, that unit is eliminated (Box III), and an Axis Line unit takes its place (4.1.1).
Special Chits Outcome
[10.1.7] Reduced Capabilities of Axis Ally Units: If a green ✕ or * chit is pulled, Non-Finnish Axis Ally units treat this result as No Effect.
Terrain Effects
[10.2] Major Cities: Besides determining which column to use on the Regular Combat Table, Major Cities (shown on the map in UNDERLINED CAPITAL letters: Berlin, Leningrad, Moscow, and Stalingrad) have additional affects on Regular combat.
[10.2.1] No Axis Allies: Axis Ally units cannot attack Major Cities.
[10.2.2] Tough Advance: Major Cities require multiple Advances to capture. That is, the first Advance outcome vs. a Major City each Regular Combat Phase is treated as No Advance. Rotate its Soviet unit 180 degrees as a reminder; be sure to rotate it back when you flip back committed Axis units. The second Advance outcome during that same Regular Combat Phase is treated normally and that Major City is captured (but see 10.3, below).
[10.3] Fortified Cities: When a Soviet City or Major City is Fortified (6.2.3), the Advance result that would see it conquered is ignored and the Fortified counter is removed instead. It can be replaced only by a future Event. Another Advance result is required to actually capture that hex.
That means that to take a Fortified Major City in one turn would require 3 Advances!
[10.4] City Conquest: This works exactly as it does for Blitz Combat. See Case 9.3.
Other Regular Combat Cases
[10.5] Axis Collapse Turns: Skip the Axis Regular Combat Phase on turns when the Initiative Level is Axis Collapse (15.4) with these exceptions:
- You may still conduct Anti-Partisan Combat (see 10.6).
- Conduct a Reserve Offensive (16.3.1)
[10.6] Anti-Partisan Combat: Once per Game Turn (maximum), at any time during the Axis Regular Combat Phase (i.e., before or after seeing the outcomes of any or all Regular attacks that turn), the Axis Player may assign one supplied (4.6), uncommitted (4.7), German unit anywhere on the map to conduct an Anti-Partisan attack.
Procedure: Draw one Combat chit and consult the Anti-Partisan Table on the map for the result using the correct column, determined by whether a Non-Elite or Elite unit is conducting the Anti-Partisan attack.
Anti-Partisan Table
| Chit | Non-Elite unit | Elite unit |
|---|---|---|
| Green | E | E |
| Blue | N | E |
| Orange | N | N |
| Red | N | N |
Results: If the result is an E, remove one Partisan unit in an Axis-controlled hex (of your choice); a result of N has no effect. Regardless of the outcome, the attacking Anti-Partisan unit is flipped over to its committed side.
[10.7] Restore Axis Units: All Axis units on their committed (striped) sides are flipped back to their uncommitted sides at the end of the Axis Regular Combat Phase.
For Example: The Axis push inexorably toward Moscow. During the Regular Combat Phase, the Axis 2nd Infantry attacks eastward, but gains no ground by drawing a Red chit (No Advance); the 2nd Infantry is flipped to its committed side. The 5th Elite unit attacks the same hex again and gets a Green chit (Advance), occupying the hex it attacked and flipping to its committed side. Then an Axis Line unit is placed on its committed side to fill the line at Smolensk (where the Elite unit advanced from). The Soviet unit retreats to the northeast and a Soviet Line unit fills the line at Moscow.
The third Axis Regular attack is the 39th Panzer attacking northeast toward Moscow. A Blue chit is drawn (Advance Special), allowing the Panzers to roll forward (4.4). The Front Lines are immediately rebuilt, and the Axis units advanced and placed are now on their committed sides.
The situation at the end of the Axis Regular Combat Phase would appear as shown in the second illustration above.
[11.0] Encirclements
During the two Encirclement Phases (6 and 9 in the Sequence of Play), isolated units (see 4.6) are eliminated.
[11.1] Procedure: At the beginning of that side's Encirclement Resolution Phase, all of its isolated (4.6) units are eliminated (as per Box III), with exceptions noted below:
[11.2] Exceptions: The following units are not eliminated in this manner:
- Units in Major City hexes
- Axis units in a Minor City hex, but only if an available Luftwaffe counter is spent to supply it at this time
- Axis units on Baltic Sea coast hexes
- Soviet units on Black Sea coast hexes. This excludes hexes 1111 and 1112, which are on the Sea of Azov, not the Black Sea.
[11.3] City Capture: When eliminating pocketed units, any underlying Minor Cities change hands. Draw for possible Capture Bonus (9.3) when the Axis gains them.
[11.4] Demoralization: When eliminating units from the map due to Encirclement, half (rounded down) of all units removed that Phase are placed in the Other Initiative Counters Currently in Effect Box. These must be Line units, if available.
Initiative Effect: Each unit in that box causes one Initiative Shift (i.e., ◄1 for Axis units and 1► for Soviet units) that turn only during the Initiative Phase. After being counted that turn, these units are returned to their respective Holding or Reserve Boxes.
For Example: A pocket of 4 Soviet units in and adjacent to Leningrad are the only ones isolated during the Soviet Encirclement Phase. The unit in Leningrad (a Major City) is unaffected, but the other 3 are eliminated. One (1/2 of 3, rounded down) Soviet Line unit is placed in the Other Initiative Counters Currently in Effect Box.
[12.0] Axis Winter Buildup
On Winter turns only, the Axis Player may, at this time, receive his choice of Reinforcements: either one Luftwaffe counter OR two Hedgehog counters. These are placed immediately as per Case 6.2.8.
[13.0] Soviet Counterattack Combat
Soviet units never use Blitz or Regular Combat. Instead, they make general counterattacks along the entire Front Line targeting each individual Axis-occupied hex on the map.
"Counterattack" is the general term for Soviet "Regular" combat and is used to differentiate it from Axis Regular combat.
Procedure
Determine the Most Engaged Unit(s): All Axis units begin this Phase on their uncommitted sides (10.7). Find the hex(es) with uncommitted Axis units in them that are adjacent to the greatest number of Soviet units (regardless of either side's supply situation; 4.6); those Axis hexes are termed the most engaged. If more than one such most engaged target hex exists, the one that the Soviets have the highest Counterattack Table column against is attacked next. If that is tied, you may choose from between them which hex to attack next.
For Example: At three points along the Axis Front Line, hexes containing uncommitted Axis units are found to be adjacent to four Soviets units. These are currently the most engaged Axis hexes. They are quickly checked to see which one the Russians can achieve the highest Counterattack Table column against, and that one is attacked next.
Persistence: Soviet Counterattacks are resolved one at a time, using the above procedure each time, as many times as are possible every turn, until only prohibited Counterattacks (13.1) remain on the map.
Determine Counterattack Table Column: Count the number of Soviet units adjacent to the Counterattack's target hex and find that column on the Soviet Counterattack Table on the map. Shift that initial column as indicated below:
1 shift to the right (1►) for each of:
- Winter 1941 or 1942*
- At least half of the participating Soviet units are Special (darker) units
- At least one of the participating Soviet units is a Tank or Guard Tank
- The target unit is an Axis Ally*
- The Soviets have/share the Initiative*
- The Axis are in Collapse* (cumulative with Soviet Initiative for a total of 2►)
- The right-most (last) box on the Soviet Armor Track is filled
Does not apply to attacks vs. Finns
1 shift to the left (◄1) for each of:
- Defending unit is a Panzer or Special Infantry type
- Defender unit is an Elite Panzer type (cumulative with Panzer, so an Elite Panzer gets a total of ◄2)
- Defending hex has a Hedgehog or Defense counter
- Defending hex is a Major City
- All Soviet units in this Counterattack are attacking from across river hexsides
These shifts are cumulative, and only the net shift differential is applied.
Determine & Apply Result: A Combat chit is then drawn for that Counterattack battle, and the results are applied.
Exhaust Axis Survivors: Afterward, if the defending Axis unit is still on the map, it is flipped to its committed side (and is thus no longer subject to additional Counterattacks for the remainder of this Phase).
[13.1] Prohibited Counterattacks: If the net column for a Soviet Counterattack (i.e., after applying all appropriate shifts) is 2 or less, then no Counterattack occurs. No Combat chit is drawn (a major attack against that hex would not be made as the chance of a decisive result is negligible) and the Axis unit in that hex is not committed (yet, see 13.4).
So, if there are no shifts to the right (►) to apply, only Axis hexes adjacent to three or more Soviet units require Counterattacks.
[13.2] Counterattack Results: Soviet Counterattack Table results are as follows:
Adjacent Soviet Units Value
| Chit | 2 | 3 | 4 | 5 | 6 | 7+ |
|---|---|---|---|---|---|---|
| Green | N | N | N | T | R | R |
| Blue | N | N | T | R | T | R |
| Orange | N | T | R | E | E+P | E+P |
| Red | N | B | B+P |
Battle Outcomes
[13.2.1] (N)o Effect: That attack is halted. No retreat or advance occurs.
[13.2.2] (T)ank Victory: treat as No Effect (13.2.1) unless at least one participating Soviet unit is a Tank or Guard Tank, in which case treat this result as a Retreat (13.2.3).
[13.2.3] (R)etreat: The defending Axis unit retreats (4.1), and one attacking Soviet unit advances (13.3).
[13.2.4] (E)liminated: The defending Axis unit is eliminated (see III), and one attacking Soviet unit advances (13.3).
[13.2.5] (B)reakthrough: If the defending Axis unit is a non-Finnish Axis Ally, it is eliminated (see Box III). Other Axis unit types retreat (4.1), and one attacking Soviet unit advances (13.3).
The advancing unit draws again to attempt to advance a second hex. Draw a second (Breakthrough) Combat chit for this battle. If it is any Red (or Orange if the first hex was attacked by at least one Guard or Tank unit), the advancing unit captures a second, adjacent Axis-controlled (Breakthrough) hex of the Axis Player's choice. (The Axis unit in that hex is not attacked per se; no additional chit is drawn.) The Axis unit in the Breakthrough hex retreats (4.1), and its commitment status remains unchanged.
Any other chit color drawn provides no Breakthrough advance after combat and has no effect.
[13.2.6] (D)isaster!: The defending Axis unit is eliminated (see Box III), and one attacking Soviet unit advances (13.3).
The advancing unit draws again to attempt to advance a second hex. Draw a second (Breakthrough) Combat chit for this battle. If it is any Red or Orange (or Blue if the first hex was attacked by at least one Guard or Tank unit), the advancing unit captures a second (Breakthrough) hex (see 13.2.5, above).
Any other chit color drawn provides no Breakthrough advance after combat and has no effect.
[13.2.7] (+P)romotion: After applying the other Counterattack result (above), you must promote one (1) attacking Soviet Line (not Shock) or Regular Tank unit to a Guard unit of that same type if such a unit type is available in the Soviet Units Holding Box. Promoted Tank units are placed in the Soviet Holding Box. Line units are returned to the Soviet Units Holding Box.
When promoted, a Tank unit is removed and replaced on the map with a Guard Tank unit. When a Guard Tank unit is eliminated, it is demoted to a Regular Tank unit that is placed in the Reserve box, while the Guard Tank piece goes to the Soviet Holding box and can return with another Promotion.
It is your choice if there is more than one regular type of unit available in that battle and/or Guard type unit in the Soviet Units Holding Box.
Special Chits Outcome
[13.2.8] Modified Results: If any color chit with an ✕ is pulled to resolve a Soviet Counterattack, weather effects apply. Perform one final shift to the right (1►) if it is a Winter turn, or one final shift to the left (◄1) if it is a Spring turn.
If any color chit with an asterisk (*) is pulled to resolve a Soviet Counterattack and the defending unit's hex is Clear or Minor City, the defender was outmaneuvered; apply one additional shift to the right (1►).
[13.3] Soviet Advance Priority: The attacking unit that is currently the least engaged (i.e., adjacent to the fewest number of Axis units) advances after capturing an Axis controlled hex. If more than one such unit exists, use the following priority list (and if more than one unit of the highest priority type on this list is among the least engaged units adjacent to that hex, the player chooses which one from among them to advance):
- Guard Tank (highest priority);
- Guard Infantry; 3. Tank; 4. Shock; and
- Line (lowest priority)
[13.4] Counterattack Dynamics: The results of one Soviet Counterattack often change the on-map situation for subsequent Counterattacks during that same Phase. That is, just-advanced Soviet units and newly-placed Soviet Line units are counted when calculating subsequent Soviet Counterattacks!
This means that the Soviets can get on a roll Counterattacking sections of the Front Line, as long as there are still uncommitted Axis units to Counterattack!
Basic Counterattack Example
Late in the war, four Soviet units are adjacent to the Axis Elite Panzer unit, so the 4 column is consulted on the Counterattack Table. It is then shifted one column to the right (►) for each of these: 1) Soviet Initiative; 2) half of the attacking units are Special (1 Tank and 1 Guard); and 3) there is an attacking Tank unit. It is then shifted one column to the left (◄) for each of these: 1) a Panzer unit; 2) an Elite unit (Elite Panzer); and 3) the defending unit is on a Hedgehog. The net shift therefore is none (i.e., the shifts cancel out). The 4 column is consulted and the dreaded Red chit with an asterisk (*) on it is pulled. The worst possible result for the Axis! Looking at the notes at the bottom of the table, the column is shifted one more to the right (►) for the asterisk, and a Red outcome on the 5 column yields a result of Breakthrough! + Promotion. Another Guard unit will be brought onto the map from the Soviet Units Holding Box after this battle is resolved.
The Breakthrough is applied first. The Elite Panzer retreats one hex on top of another Axis unit; thus the Elite Panzer unit is removed to the Axis Reserves box as per Case 4.1. (There is no stacking.) The least engaged Soviet unit must advance after combat (Advance Priorities, 13.3), and the Front Lines are adjusted (e.g., one of the Soviet Line units advances, and the other is removed as it would no longer be adjacent to an Axis-occupied hex). A second Combat chit is drawn to see if the advancing Soviet unit gains a second hex, but a Green chit pull has no effect.
Finally, the player promotes the attacking Tank unit, upgrading it to a Guard Tank (which puts Rostov in some considerable peril). Yikes!
Counterattack Dynamics Example
It is Winter of 1941, and the battle for Moscow continues with Soviet Counterattack Combat.
Looking at the most engaged Axis units along the Front Line, the Soviets find that three attacking units is the best that can be mustered, and near Moscow there are two such 3-strength attacks pending. Both are checked to see which is the most advantageous for the Soviets (and would go first; 13.0), but they're the same at (1►) for it being Winter of 1941 and (◄1) for a Panzer or Special Infantry unit defending, so it's the Axis Player's choice. Likely, it is better for the Axis if the Soviets attack the Panzer unit first, so the illustration shows that Soviet Counterattack.
The battle is conducted on the 3 column after the shifts cancel each other out. A Red chit is drawn (Breakthrough) and the Axis 39th Panzer unit retreats back to Smolensk with the (least engaged) Soviet 21st Infantry unit advancing in hot pursuit and drawing a second chit to see if it captures an additional (Breakthrough) hex. That chit is another Red chit (this one with an ✕ sending it to the X-Box instead of the Recycle Bin), so an additional hex of advance must be yielded by the Axis player adjacent to the just-occupied hex. She chooses to give up the neighboring hex with the 59th Infantry unit. The Panzer unit, having survived and remaining on the map, is flipped to its committed side, while the 59th infantry's commitment status remains unchanged (13.2.5) as illustrated below.
The next attack shows the effects of Soviet Counterattack Dynamics (13.4) in action. The Soviet 11th Infantry unit (that just filled up the gap in the Soviet Front Line) and 35th Infantry (that just attacked the Panzer unit) also get to participate in the attack against the 5th Elite Infantry unit. So, this battle begins on the 4 column and is (again) shifted a column in each direction (Winter 1941 vs. an Elite unit type), so the 4 column is the one used.
The situation looks bad for the Axis. If the Elite unit is forced to retreat, it will be removed from the map due to stacking restrictions (4.1.2). However, the result is a Red chit with an asterisk (*) on it is drawn, shifting the result one last column to the right (►). The result on the Red 5 column sees the 5th Elite Infantry unit forced to retreat, but it is caught stacking and so is sent to the Axis Reserves box. A Soviet unit advances into its vacated hex, and the Front Line is then rebuilt.
[Box III] Where Eliminated, Removed, and Withdrawn Units Go
Whenever a unit is "Eliminated" during any Phase, it is placed as follows:
- All Panzer units go on the left-most empty box on the Eliminated Panzer Units Track. If the boxes are all filled, the Panzer unit is placed in the Removed Pieces Holding Box.
- All Soviet Shock & Tank units are placed in the Soviet Reserves box; they're immortal.
- All Line and All Soviet Guard units are placed in their respective Holding Boxes on the map and can be placed on the map again in the usual manner (but see 11.3).
- An eliminated Soviet Guard Tank unit is immediately placed in the Soviet Units Holding Box and a Soviet Tank unit is removed from that box and is placed in the Soviet Reserves box. (See the shaded text in 13.2.7.)
- All Other Non-Line Units are placed in the Removed Pieces Holding Box.
Whenever a supplied unit is "Removed" from the map during any Phase (this can occur due to overstacking when a retreat occurs, for example), it is placed thus:
- All Special Units are placed in their respective Reserve Boxes.
- All Other Units are placed in their respective Holding Boxes, ready and available.
- If a unit is isolated (4.6) and Removed, it is Eliminated instead (as per above).
Whenever a supplied unit is "Withdrawn" from the map by an Event, it is placed in the Removed Pieces Holding Box. Isolated units cannot be withdrawn.
[14.0] Soviet Initiative
The Soviet Initiative Combat Phase is only conducted on turns when the Soviets have or share the Initiative (15.0, although these procedures can also be performed in the Events Phase when card draws require them). This Phase is skipped when the Soviets do not have the Initiative.
Soviet Initiative represents broad pressure upon a sector of the Axis Front Line that must yield to what is, in effect, a land grab.
Procedure
Draw the top card and look at its middle-left section for the Soviet Initiative Hexes data. It shows how many hexes are taken north and/or south of the Operations Line on the map.
For Example: A card's middle-left section reads "⤡2" and "⤢3" — Two hexes north and three hexes south of the Operations Line are captured.
Subtract one (-1) from the value(s) on Spring Game Turns (due to mud).
[14.1] Capturing Axis Hexes: The guidelines for determining exactly which hexes the Soviets capture varies according to the current level of the Initiative Index counter, but within these guidelines, it is up to the player to decide which specific hexes are captured via Soviet Initiative.
No Crossing the Operations Line: When only north or south Initiative Combat is indicated, the hexes captured must be strictly on that side of the Operations Line. When both sides are indicated, hexes captured can spill across that line, as long as the exact number of hexes required (and their location) is taken on each side of the line.
[14.2] Initiative Index Guidelines: The capture conditions change as the Initiative moves in the Soviet's favor as follows:
Initiative Index = Contested (-2 to -5) and always when using this procedure to resolve Events (e.g., Partisans):
A. The first two hexes taken (on both sides of the Operations Line) must be Axis Front Line hexes that are adjacent to each other.
B. Subsequent hexes taken at this time may also include other (even non-adjacent) Axis Front Line hexes and hexes adjacent to Axis Front Line hexes that were just captured in this Phase.
Thus, the Soviets can only penetrate a maximum of two hexes deep into the Axis Front Line.
Initiative Index = Soviet (-6 to -7):
A. If at all possible, Initiative hexes must be taken in such a way that at least one city (on either side of the Operations Line) is captured by the Soviets.
B. The first two hexes taken at this time (on both sides of the Operations Line) must be any two Axis Front Line hexes. They do not have to be adjacent to each other.
C. Subsequent hexes taken may include any other Axis Front Line hexes and hexes adjacent to previously selected hexes taken this Soviet Initiative Phase.
These previously selected hexes need not be adjacent to just-captured Axis Front Line hexes as those above did. The Soviets can penetrate beyond a mere couple of hexes and must, if that is what is required to capture a city, as per A above.
Initiative Index = Soviet (-8 or less):
A. All of the conditions for -6 to -7 (above) apply, and
B. A minimum of five (5) hexes will be captured in the active sector(s, only) north and/or south of the Operations Line.
For Example: If a ⤡2 / ⤢3 was drawn, as in the illustration at the beginning of this Rule, it would be increased to a ⤡5 / ⤢5.
Hex Occupation Procedure
Soviet Initiative conquests are acquired one hex at time, in an order of the Player's choosing, by Retreating (13.2.3) affected Axis units. To determine which Soviet unit occupies each newly acquired hex, the same Soviet Advance Priority applies as found in Case 13.3 (i.e., least engaged Guard Tanks have priority over Guard Infantry, etc.).
[14.3] Axis Collapse: On turns when the Axis are in Collapse (see 15.4), this Phase is performed twice. That is, two cards will be drawn and both are implemented in their entirety in the order drawn.
[14.4] Axis D: There are some tools available to the Axis Player that can mitigate Soviet Initiative hex seizures.
[14.4.1] Prepared Defenses: Hexes containing an Axis Hedgehog or Defense counter count as two (2) hexes when captured. Their counters are returned to the Unused Pieces Holding Box for potential reuse.
[14.4.2] Luftwaffe Counterblow: Spending one (maximum) available Luftwaffe counter during this Phase (after the result is known) reduces the hex capture value(s) by two (2) on each side of the Operations Line, if both are active.
For Example: If a Luftwaffe counter was spent to help mitigate a ⤢6, it would be reduced to a ⤢4. A draw of ⤡5 / ⤢4 would be reduced to a ⤡3 / ⤢2.
[14.4.3] Panzer Defense: Eliminate (see Box III) one supplied (4.6), on-map Panzer unit to completely negate that Soviet Initiative card draw's effects on that side of the Operations Line only.
For Example: The Soviets have concluded their Winter Counteroffensive attacks in the south, so now it is the Soviet Initiative Phase. A ⤢3 is drawn. The situation is as it appears in the Before illustration, with the Axis Player vowing never to give up Stalingrad and promising that her attacks during the following Spring turn can rectify any situation, no matter how hopeless it appears.
1. The Initiative = Contested -2 or -5: With a good chance to continue contesting the Initiative if Stalingrad is held, the Axis Player elects to lose hexes 1114, 1214 and 1213 (in that order). By merely contracting her line in the south, the Axis Player senses that this will do minimal harm to her on-map position. The new After Situation is shown in the following illustration.
In the After pictures, the gold triangles with numbers at their base show the advancing Soviet units (in accordance with Case 13.3) and the order of their advance. The white-border units are Line units added to the map to rebuild the Front Lines (as per Case 4.1). A white negation symbol shows a unit's removal from the Front Line. In the case of the above illustration, note that the Axis Player retreated the Panzer unit to a vacant space (#1), while a Line unit was removed (#2) and later replaced back in Rostov (white bordered).
2. The Initiative = Soviet -6 or -7: Now things are a bit different because somewhere a city must be given to the Soviets if at all possible. Hmm… Determined to hold Stalingrad at all costs, this leaves only Rostov (1112) and Kharkov (0911) as the other alternatives, but since the maximum Soviet penetration at this Initiative level is only two hexes, Kharkov is too far behind Axis lines to be at risk. Therefore, Rostov must fall, if Stalingrad is to be held!
The new After Situation is shown above; it looks very tenuous as many Axis units are standing back-to-back and in danger of encirclement if the Axis don't deliver successful blows next turn.
3. The Initiative = Soviet -8 or less: This means that the ⤢3 result is increased to a ⤢5 result (as per Case 14.2-A), and the Axis must also give up a city. But now, the Soviets can drive more deeply (beyond two hexes), which is bad. After some consideration, the Axis Player declines her (now much more attractive) option of eliminating a Panzer unit south of the Operations Line to shield her forces and completely negate the result, deciding instead that she'll give up the city of Kharkov (0911). Granted, she could also give up Rostov or even Sevastopol (although the latter has a Capture Bonus counter, so giving it up is not on the Axis Player's agenda), but the Axis Player is hoping for a grand slam offensive in the Spring to rectify the situation (and will need her Panzers). With that in mind, the Axis forces fall back in good order toward Kharkov, surrendering that city to the Soviets as shown below. The Axis Player hopes to recapture it in the Spring and perhaps this time draw a Bonus card to improve the Axis' situation on the map.
Thus, the Axis High Command (you) must deal with Soviet Initiative Combat by prioritizing the defenses; i.e., where your units will make a stand and where they must yield. Should you give up important hexes that shorten and rationalize the Front Line or fanatically hold key positions (even as their flanks are threatened) in the hope of maintaining your Initiative position a while longer, trying to improve the situation on the following turn during your own Combat Phase(s)?
[15.0] Determine Initiative
Many tracks and counters have a value with a ◄ (left or negative) and ► (right or positive) Initiative Shift symbol. These contribute that many shifts from the 0 (zero) position to the Initiative Index during this Phase.
Procedure
Each turn, start from the 0 box (i.e., Initiative Shifts are not cumulative between Game Turns; they are always computed anew each turn), then check each Economic Display and the map, count all of the left and right Initiative Shifts (as shown in the right-most filled box of the various Tracks or as printed on each applicable game piece) that are in effect, subtracting one from the other to keep a running tally of the Net Shift.
For Example: ◄3 + 1► = a Net Shift of ◄2.
Place the Initiative Index counter in the box on the Initiative Track that corresponds to the count's final Net Shift value (with a net count higher than +6 being placed in the +6 box, and lower than -14 in the -14 box).
[15.1] Temporary Initiative Modifiers: After being counted, (eliminated encircled) Line units are returned to their respective Holding Boxes. Combat chits in the Other Initiative Counters Currently in Effect box are then moved to the ✕ Combat Chits Holding Box on the Soviet Economic Display OR the Recyclable Combat Chits Holding Box on the map, as appropriate.
[15.2] Objective Hexes: Certain hexes (with thick, colored borders; e.g., Moscow, Warsaw) are dubbed Objective Hexes. When captured by the enemy, their Event counter is placed (and, when recaptured, removed) from the conquering player's Economic Display.
Note that for the Axis to control Ukraine, both Kiev and Odessa must be Axis controlled and that the Archangel (green bordered) hex is only an Objective after its Event occurs (6.2.1).
[15.3] Partisan Counters: If the Soviets recapture a hex that contains a Partisan counter, that counter is not removed from the map. Instead, it remains in that hex (with its full ◄1 effect) as long as it is Soviet controlled. It cannot be removed by regular Axis Anti-Partisan Combat (10.6) while its city is Soviet controlled.
Axis Capture of a Partisan Counter: If the Axis Player manages to recapture a Soviet controlled city with a Partisan counter in it, that Partisan counter is immediately removed to the Unused Pieces Holding Box (from whence it can return).
Victory Points
After determining all of the above, if the Initiative counter is placed in one of the two boxes on either end of the Initiative track, then the Victory Point (VP) counter is adjusted by one space accordingly.
Adding / Subtracting a VP: If the Initiative Counter ends up in the 6+ box, then (and only then) the Axis gain one VP (+1 VP); i.e., the Victory Point counter is moved one box to the right. Conversely, if the Initiative counter is placed in the -14 box, then (and only then) the Axis lose one VP (-1 VP).
Sudden Death: If by this process the VP counter reaches the +5 box, the Soviet Union collapses and the Axis win an automatic Political Victory. If by this process the VP counter reaches the -3 box, the game ends immediately in an Axis Decisive Defeat (see 19.0).
Initiative Calculation Example: It is the Calculate Initiative Phase of the Spring 1942 Game Turn. The Initiative Index is reset to the 0 box on the Initiative Track and adjusted from there for that turn. All of the following are in effect:
Looking at the Axis Economic Display, they receive 2► for the one counter on the Axis Armor Track and 1► for controlling Ukraine (both Kiev and Odessa).
On the map: There are two Capture Bonus counters at 1► each scored for Riga and Kiev. Kiev has become a very valuable Axis city! That's 5► for the Axis.
In the Center Economic Display, there is ◄1 for the Siberian Reserves counter. Both Shock units were isolated this turn, so one Soviet Line unit is placed in this box (11.3) for a 1► shift in favor of the Axis; adding to that is the Axis 1► Experience Initiative Combat chit (but these are only temporary Axis benefits for this turn, while the Siberians are in effect for the rest of the game).
The Soviet Economic Display finds one counter on the Soviet Industry track for 0 shifts (that represents their factories being relocated), and three counters on the Soviet Lend-Lease Track (the first, 0 box, representing the establishment of the various Lend-Lease routes set up to the Soviet Union) for ◄3 (the right-most box filled determines the value).
So the Net Shift is 3► (7► for the Axis minus ◄4 for the Soviets), so the Initiative counter is placed in the Axis 3 (i.e., +3) box on the Initiative Track. Since it needs to reside in the +5 box to score an Axis Victory Point, the VP counter is not moved this turn.
[15.4] Initiative Level Effects Summary: Certain game effects occur depending on the current Initiative Level (9.6, 14.2) as follows:
- -14 = Lose 1 Victory Point – Move the Axis VP counter one space to the left.
- -13 to -10 = Axis Collapse – Skip Axis Blitz and Regular Combat Phases, perform Soviet Initiative Combat Phase twice.
- -9 to -8 = Soviet Initiative – Skip Axis Blitz Combat Phase, Soviet Initiative hex capture minimum = 5.
- -7 to -6 = Soviet Initiative – Skip Axis Blitz Combat Phase, Soviet Initiative hex capture must try to take a city.
- -5 to -2 = Contested Initiative – Both sides have the Initiative; conduct all Combat Phases.
- -1 to +5 = Axis Initiative – Skip Soviet Initiative Combat Phase.
- 6+ = Gain 1 Victory Point – Move the Axis VP counter one space to the right.
[16.0] Axis Strategic Mode
The Axis Strategic Mode (ASM) defines the Axis Player's posture toward conducting the war against the Soviet Union and is recorded on the ASM Track on the Axis Economic Display using the Axis Strategic Mode counter.
[16.1] Initiative Level: When the Soviets have the Initiative (15.4), the ASM counter must be in one of the left-most three boxes of the ASM Track. When the Axis have the Initiative, the counter must be in one of the right-most four boxes. (Note that Logistics works either way.) When both sides have the Initiative (i.e., it is contested), the Axis Player may choose freely from any of the boxes.
[16.2] Changing the ASM: During the Set the Strategic Mode Phase (only) each Game Turn, the Axis Player may move the ASM counter to any appropriate box on the ASM Track (as per 16.1, above).
[16.3] Applying the ASM: Generally, the ASM is applied during the Events and Economic Phase and only then when an appropriate Event Card (e.g., Armor / Luftwaffe Support, Alternate Plans, etc.) or Axis Economic counter (e.g., Strategic Planning or Any Axis) is drawn (see 7.3). The specific effects for that Axis Economic event or counter varies depending upon the box where the ASM counter is located as listed below.
After applying its effect, that card is discarded or the Axis Economic counter is out of play and placed in the Removed Pieces Box.
You don't get a Panzer unit every turn just because the ASM is in the Production box! The ASM represents potential; it reflects what you're hoping for if a lucky card/counter is revealed. It is not a per-turn reward!
Axis Strategic Mode Effects
[16.3.1] Reserve Offensive: When made available by an Axis Economic counter or Event card, that counter/card is retained by the Axis Player and placed obtrusively as a reminder of its availability for use as a Reserve Offensive.
The Axis Player may use (spend) that counter (or discard that card) on any future Axis Blitz or Combat Phase when the Axis do not have the Initiative or are in Collapse (even in Winter). When so used, that Axis Blitz or Combat Phase is not skipped that turn, but is instead performed normally.
[16.3.2] Defense: When triggered, the Axis Player may place a Defense counter in an Axis-controlled hex on the map and gains its 1► each turn. When all of the Defense counters are in play, treat this occurrence as no effect. These counters must be placed in hexes that do not already have a Defense or Hedgehog counter in them and remain in play until that hex is captured by the Soviets (see 18.6).
[16.3.3] Logistics: The Axis Player gains 1► during each Initiative Calculation Step while (and simply for being) in this mode.
When the Axis perform this mode via some Event, the Axis Player places the Berlin Logistics counter in Berlin, if it is not already there, (if it is, treat this occurrence as no effect) and gains its 1► while it remains there (for the rest of the game or until the Soviets capture Berlin). This is in addition to any other counter that might already be in Berlin and/or for being in Logistics mode.
[16.3.4] Tank Production: Perform Tank Production as per 6.2.8 by receiving the Gross Deutschland unit, putting an available non-Elite Panzer in Reserve, or replacing an eliminated Panzer unit from the Eliminated Panzer Units Track.
[16.3.5] Economic Warfare: The Axis Player may either: A) recover up to any four Combat chits with a black ✕ on them from the ✕ Combat Chit Holding Box and return them to the Combat Chit Cup; or B) place a Devastation counter on the Soviet Lend-Lease Track (see below).
How Devastation Works: When a Devastation counter is placed, if the last box is occupied by a Soviet Economic counter, that counter and the Devastation counter are removed from play and placed in the Removed Pieces Holding Box. Whenever any box with a Devastation counter would normally be occupied by an Economic counter, both the Devastation counter and that Economic counter are removed from play. See Case 7.1 for what to do when the Lend-Lease Track is filled while there are Devastation counters on it.
For Example: A Devastation counter is placed in the 5 box of the Soviet Lend-Lease Track (and that space will therefore take two Economic counters to fill). A subsequent occurrence would see a Devastation counter placed in the 4 box, and so forth.
[16.3.6] Exploitation: The Axis Player may either: A) remove one Partisan counter in an Axis-controlled hex; or B) designate an Axis-controlled city in the Soviet Union that does not have a Capture Bonus counter in it and attempt to place one there as if it were newly captured (as per 9.3).
[17.0] Housekeeping
Certain housekeeping tasks are performed at the end of each turn to prepare the map and displays for the following turn.
[17.1] Restock the Combat Cup: Combat Chits pulled this turn may be returned to the Combat Cup and mixed back in.
Procedure
[17.1.1] Normal Restocking: Place all of the Combat chits in the Recyclable Combat Chits Holding Box (a.k.a., the Recycle Bin) back into the Combat Chit cup.
[17.1.2] Releasing ✕ Combat Chits: During this Step, the Axis Player may:
- Spend one (maximum) available Luftwaffe counter to recover up to any four Combat chits with a black ✕ on them from the ✕ Combat Chit Holding Box and return them to the Combat Cup; or
- Twice per game (maximum), the Axis Player can release all of the (black and white) ✕ Combat chits in the ✕ Combat Chit Holding Box to the Combat Cup. To do this, move one of the two OKW Directive counters currently in the Unused Pieces Holding box to the Other Initiative Counters Currently in Effect box. It remains there permanently as the price for releasing all of the ✕ chits.
[17.2] Place Reserve Units: First Soviet and then Axis units in their respective Reserve boxes (i.e., Reserve units) are returned to the map in the following manner:
[17.2.1] Placing Soviet Reserves: These units replace a supplied Soviet Line unit on the map that is adjacent to a non-Finnish Axis unit, as follows:
A. Select any one Soviet Reserve unit.
B. If there is a Soviet Front Line hex in or adjacent to an Objective Hex (these are thick-bordered hexes; see the on map Terrain Key) and which is adjacent to a German unit, remove the Soviet Line unit from that hex and replace it with a Soviet Reserve unit selected at random. Place it in the least engaged (i.e., adjacent to the fewest enemy units) hex if more than one such hex is available.
C. Repeat Step B. If there are more Soviet Reserves to place than hexes near Objectives, select the Soviet Line unit that is the least engaged and adjacent to only Non-Finnish Axis units, and replace it with that Soviet Reserve unit. It is the player's choice if more than one such hex is available. Repeat this until all Soviet Reserves are placed or no more qualifying placement hexes for them are available.
[17.2.2] Placing Axis Reserves: The Axis Player places Axis Reserves as follows:
All Special units in the Axis Reserve Box are placed on the map at the Axis Player's discretion. Exception: the Axis cannot place more than one Panzer unit nor have more than four on the map at once.
Each Reserve unit so placed removes a supplied German Line unit (returning it to the Axis Holding Box). Axis Reserves are placed on their uncommitted sides. Panzer type units that cannot be placed (i.e., the second one in the box or the fifth one on the map) are simply left in the Axis Reserves box for possible on-map placement during a future turn.
The Axis could only replace, train, and operate Panzer formations at a limited rate.
[17.3] Adjust Axis Ally Units: The political restrictions for the use of Axis Ally units are now taken into account.
[17.3.1] Surrender: If Helsinki (0206), Bucharest (1307), or Budapest (1204) is Soviet controlled, then Finland, Rumania, or Hungary (respectively) surrenders at this time. Italy surrenders during this Step of the Summer 1943 turn (as per the Game Turn Track). Surrendered units are permanently removed from play to the Removed Pieces Holding Box and, if taken from the map, uncommitted German Line units immediately take their place on the Front Line. That country's Surrender counter (Italy does not have one) is placed in the Other Initiative Counters Currently in Effect box.
[17.3.2] Placement: Except for the Finns (see 18.1 below), Axis Ally units must be placed south of the Operations Line on the map. How many must be placed on the map is determined as follows (and shown in the Axis Units Holding Box).
Procedure
Count the number of supplied non-Finnish Axis units on the map. If the result is 8 or fewer, there must be at least one non-Finnish Axis Ally unit on the map. If the result is between 9 and 14, there must be at least two on the map. If the result is 15 or more, then there must be at least three on the map.
The placement of these Axis Ally units is subject to their availability in the Axis Units Holding Box. They are placed as uncommitted units.
You cannot move (reposition) Axis Ally units that are currently on the map to other hexes. They are only added or removed at this time.
If, after this audit, more are required on the map than currently exist there, a German Line unit that is located south of the Operations Line, if available, is substituted out, one at a time, until this quota is met or there are no more German Line units south of the Operations Line to substitute out.
If fewer Axis Ally units are required, the Player may remove those desired to the Axis Units Box until the correct number on the map is reached, replacing them with uncommitted German Line units.
[18.0] Miscellaneous
Assorted other rules that don't fit into the game's Sequence of Play are found here.
Other Axis Ally Rules
[18.1] Finland: Finnish units will neither occupy nor attack a hex further than one hex from their border (i.e., their limit is hexes 0108 and Leningrad, but see 18.3) until released by the Finns Expand War Event (6.2.5). At that point, this Case is ignored for the rest of the game.
Also note that Soviet Counterattack combat versus a Finnish unit does not receive many otherwise favorable shifts (i.e., for Winter '41, Soviet Initiative, or Axis Collapse).
[18.2] Southern Operations Only: Non-Finnish Axis Ally units cannot be placed nor do they conduct Regular Combat against hexes north of the Operations Line.
[18.3] Axis Allies vs. Major Cities: All Axis Allies are prohibited from attacking Major City hexes (e.g., the Finns vs. Leningrad).
[18.4] Improved Axis Allies: If the Axis Allies Commit Event occurs, Finnish units are considered Special Infantry unit types (4.2) when a chit is pulled on the Regular Combat Table (only), while all other Axis Ally units are considered the same caliber as German Line units for all purposes (see 6.2.2). This means that, for example, rules 17.3.2 (Placement), 18.3 (Attacking Major Cities) and all similar exceptions denoting Axis Ally unit inferiority (i.e., 9.2, 10.2.1, 10.6, 13.0, and 13.2.5) can be ignored for the remainder of the game. Note that political restrictions (e.g., 17.3.1 and 18.1, and 18.2 regarding surrender and areas of operation) still apply.
[18.5] Luftwaffe Counters: Spent Luftwaffe counters are always returned to the Axis Units Holding Box where they can be brought back into play when gained.
Other Miscellaneous Rules
[18.6] Hedgehog (and Defense) Counters: When awarded by an Event (6.1, 6.2.8, and 6.2.10), a Hedgehog counter may be placed in any hex containing an Axis unit (even if isolated; 4.6) that does not already have another Hedgehog or Defense counter (e.g., see 16.3.2).
Hedgehog (and Defense) counters provide one shift vs. Soviet Counterattacks (13.0), and their hexes count as 2 hexes when captured via Soviet Initiative land grabs (14.0). These counters cannot be moved and are returned to the Unused Box only when their hex is captured by the Soviets.
[18.7] Axis Oil Supplies: If the Soviets gain control of Objective hex 1307 (Ploesti / Bucharest), the following effects are in force for the remainder of the game:
- Rumania surrenders (17.3.1)
- The Axis Blitz Phase is skipped (even if the Axis have the Initiative)
- The Axis cannot use or benefit from the possession of Luftwaffe counters
[19.0] Victory Conditions
The Barbarossa Campaign (TBC) ends in one of three ways:
- Automatic Conquest Victory: The game immediately ends in an Axis Conquest Victory if (at the end of any Game Turn), all three cities consisting of Leningrad, Moscow, and Stalingrad are Axis controlled.
The game immediately ends in a Soviet Conquest Victory if (at the end of any Game Turn), Berlin is Soviet controlled.
-
Soviet Collapse: If the Axis VP counter reaches the +5 space, the game immediately ends in an Axis Political Victory.
-
Axis Collapse: If the Axis VP counter reaches the -3 space, the game immediately ends in an Axis Decisive Defeat.
-
Time Limit Victory: If none of the above Victories has been achieved by the end of the last Game Turn (Summer 1945), then the location of the Axis VP counter determines the outcome.
Final Adjustments: At the end of the game requiring a time limit victory determination, note the final position of the Initiative Index counter and adjust the Victory Point counter accordingly by one of the following (if applicable):
- +1 VP if it is in a box >0
- -1 VP if the Soviets have the Initiative
- -2 VPs if the Axis are in Collapse
Final VP Counter Location:
- 4 or more = Axis Decisive Victory
- 3 = Axis Minor Victory
- 2 = Axis Marginal Victory
- 0 to 1 = Draw
- -1 = Soviet Marginal Victory
- -2 or -3 = Soviet Minor Victory
- -4 or less = Soviet Decisive Victory
[20.0] Scenarios
In addition to the standard 1941 set up (3.0), The Barbarossa Campaign includes five scenarios: Fall Blau (Summer 1942), Operation Saturn (Winter 1942), Turning Point Kursk (Summer 1943), Destruction of Army Group Center (Spring 1944), and End of the Iron Dream (Winter 1944).
Set Up Procedure
Each scenario lists the starting pieces on each of the three Economic Displays reflecting the historical occurrences since Summer 1941. Also, there might be other notes for the set up of chits or Event card deck.
Note: a Panzer unit symbol with a red outline represents an eliminated Panzer unit. They set up on the Eliminated Panzer Units Track (as per Box III).
Finally, there is a map showing the location of the Front Line. Both sides of this Front Line are filled with Line units in the usual manner, except for the space noted on the map where Special units, Axis Allies, various counters, etc. are set up.
Alternate Ending Dates
Each scenario can be played to the last turn using the standard Victory Conditions (19.0). Alternately, a game can end at the beginning of any scenario's starting turn. For example, you could start a Campaign Game in 1941 in the usual manner, but opt to end it at the beginning of the Fall Blau, Summer 1942 turn. That starting turn would not be played!
Compare your end-game situation to that scenario's starting situation and score Scenario Victory Points as follows:
- +1 for each VP your ending position is above the scenario's starting VP position
- +1 for each objective hex (Kiev and Odessa are separate hexes) that is Axis controlled on the Soviet side of the scenario start line
- +1 for each complete pair of points that the Initiative is higher than the scenario's starting Initiative (e.g., if it were 3 points higher, that would be worth +1; if it were 4 points higher, that would be worth +2).
- -1 for each VP your ending position is below the scenario's starting VP position
- -1 for each objective hex (Kiev and Odessa are separate hexes) that is Soviet controlled on the Axis side of the scenario start line
- -1 for each complete pair of points that the Initiative is lower than the scenario's starting Initiative.
Add these points together and consult the following table to get your final grade:
- 3 or more = Axis Decisive Victory
- 2 = Axis Minor Victory
- 1 = Axis Marginal Victory
- 0 = Draw
- -1 = Soviet Marginal Victory
- -2 = Soviet Minor Victory
- -3 or less = Soviet Decisive Victory
[21.0] Notes
Here are some additional thoughts about The Barbarossa Campaign from the people who brought it to you.
Designer's Notes
Setting out to design a game on the Eastern front of World War II is nothing novel. Attempting to do so with a solitaire, small and quick playing format is. My goal was to make a quick-playing game that took into account more than just the military aspects of the conflict. Initiative – a mix of military and economic concerns, along with national morale – is the currency of the design; its scale and simple, abstract mechanics are the game's engine.
The war in the Axis' Eastern Front saw the momentum swing from side to side. Early in the war, the Axis held it. After a period of back-and-forth during 1943, the Soviets grabbed it for good. This swinging momentum is measured as Initiative in the game.
The game really does turn upon Initiative. There are enough uncontrollable variables present that it is difficult to map out specific, consistent strategies that will always win the game. The Axis player must constantly respond to on-map and off-map events.
Aggressive play with an eye toward knocking the Soviet Union out of the war should be your goal. Even aggressive middle and late game play can help stave off total defeat if victory itself is no longer attainable. You may not win the war in the East with a bold approach, but you will surely lose it without one.
– Gary W. Graber; Minden Games; Editor, Panzer Digest
Redesigner / Developer's Notes
Through which discerning eye does one view potential? When I first encountered The Barbarossa Campaign, it was rather unattractively packaged with counters and cards that required self-mounting for practical use. Although a "marketing nightmare" in terms of packaging and presentation, I could still see the game's potential quite clearly. A small, solitaire "East Front" game that could provide an endless retelling of this classic wargaming story was something that simply "needed to be."
Avoiding Player Casualties
Like a new dance step, you won't be used to the motions when you first learn this game. Our goal was to teach a solo gamer how to find the rhythm so they could fall sway to the dramatic story told with every card draw and chit pick. To that end, these rules have been drafted and re-drafted more times than Private Sad Sack. We are very thankful for the efforts of our proofreaders, including Judy Krauss, who put the "Her" in "Herculean effort" to whip this game's extensive documentation into shape.
What's New in the VPG Edition
The Combat chit system is a slick invention of Gary's, and one I found to be a most intriguing feature; it is the one that really compelled me to bring this game to Victory Point Games. What was so interesting about it were the particular ratios of the different colored chits and the fact that some had an "X" that would cause them to be removed from play, thus making the chit cup more hostile to the Axis Player over time. To that novel invention, I added more storytelling elements with "*" chits to represent extraordinary outcomes. I also added alternate "X" chit results and created some chits that affected initiative with the key word included to provide some narrative as to why. This makes using the OKH markers to refresh the chit cup an important gameplay decision.
When we put the first Victory Point Games playtest copies on the playtest game table, people started to notice the game and soon asked to try it out – a good sign. An even better sign was their enjoyment while playing, and better still were all the requests to play it again. However, I noticed that the game didn't deliver enough variations and story to really keep players coming back over and over again, as a good solitaire game should. We needed more compelling story outcomes.
War Stories Retold (Again and Again)
So the next step was to give TBC what I call the "Scheherazade treatment," so that it told 1001 stories and kept players endlessly entertained. That was a tall order considering how familiar many are with the story of the Russian Front during World War II. If the game didn't feel like an Eastern Front game, no one would like it, and if it didn't keep players endlessly fascinated as a solitaire game, no one would like it for very long. Of all the subjects covered in wargames, this one is probably the most "gamed" of them all, and its enthusiasts will start playing it from an already-jaded perspective.
To give the game the proper feel, I added more variety to the Soviet Order of Battle (Shock, Tank, and Guard units). The Axis Order of Battle was also enhanced with the addition of the Mountain and Gross Deutschland units, and the Combat results were "punched up" to provide more variety of outcomes. Now our storyboard was really shouting "Eastern Front!"
The 30 cards in the original magazine game become 40, and more Special Events were created and divided by year for a more robust storyboard and to better keep the historical timelines. Now, with the myriad events, chit pulls, and outcome results, the game became less player-driven (and all too predictable) and more story-driven (simulating an artificial opponent and outside events that must be managed) with the net result being a more suspenseful gameplay experience that constantly left players curious as to what might happen next.
The original magazine game's Victory Conditions were also broadened and balanced to ensure properly motivated player behavior, better simulating the Axis' perspective of the historical situation. The addition of having "captured" units (i.e., those isolated in pockets) affect the Initiative count and the march of the Victory Point counter across the track got the Axis mindset fixed on where it should be – chasing the Chimera to garner another VP in the hopes that one more great push would bring the whole Soviet Union to a complete collapse.
Ship Date or Missing the Boat?
Even after working on the game for a year, I still wasn't satisfied with it; it could be better. I had advanced its progress about as far as I could by myself, so it was time to call in a specialist. Enter Carl "No Retreat!" Paradis. Here was a game designer with the savoir-faire in elegant East Front game design who could take this game up a notch. We conferred and consulted, quickly finding the right common philosophies for the game, and Carl went to work.
– Alan Emrich
Great Minds
Alan asked me to check out TBC as something that I might be interested in. He requested that I "just see if you have any ideas for the Victory Conditions… maybe make a few Scenarios." After a few playthroughs, I saw the great potential that this game had; Alan had done a very good job bringing TBC to this stage, and perhaps I could make some contributions (a few small changes here and there). My urge was to add more and more because the game was really inspiring. It took considerable designer discipline to just change only what needed to be changed, while keeping the elegant simplicity of the original design. Simplicity being the first rule of game design, we remained focused on keeping everything manageable.
As I fell deeper into the maelstrom, playing TBC time and time again and becoming more intrigued with each playing, I realized that a full campaign was a long affair. Here was where multiple scenarios, allowing you to start or finish the game at different points along the war's timeline, came into being.
The scenarios allow you to compare your performance to what happened historically; exactly what I was after. However, it was a lot more work than I thought it would be to storyboard out the whole war in a game.
If you want to know what a desperate situation is really like, then by all means try the 1944 or 1945 scenarios with Wagner's Ride of the Valkyries playing as you do. This will test your wargaming mettle to the fullest!
Our excitement in developing the game was infectious and, hopefully, the game is better for our enthusiastic efforts.
– Carl Paradis
The Last Roundup
After Carl did his magic, adding his finishing touches to the game, TBC went out for a new round of playtesting, and with that playtesting came new momentum for this project and new enthusiasm sufficient to finally complete this game! Many of our best ideas and tweaks came only after we knew we had the game really "nailed down," and we were only left with small, "fine tuning" tasks.
There remained the complete game turn example to write, the covers to create, and much marketing and packaging work to do, but the game itself was finally done! The development was over and the results were great! (And we hope you feel the same way.) Aspect by aspect, we closed this vast design on this vast subject, applying several new game design techniques along the way. What a campaign it has been!
– Alan Emrich
Game Credits
Game Design: Gary W. Graber
Additional Design and Development: Alan Emrich with Carl Paradis
Graphics: Alan Emrich
Map: Tim Allen
Playtesting: Paul Aceto, Terry Coleman, Vince DeNardo, David Ells, Tully McKinley, Kim Meints, Mick Mickelsen, Peter Rixon, Norm Stewart, Hans von Stockhausen, Leigh Toms
Proofreading: Ulrich Arbes, Bill Barrett, Judy Krauss, Jon Matthews, Gary Sonnenberg