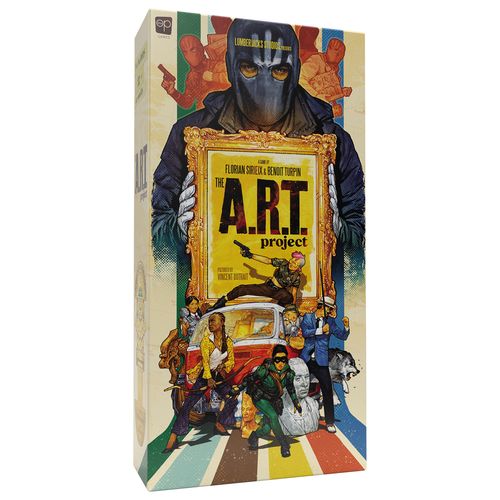
The A.R.T. Project
The A.R.T. Project Rulebook
Table of Contents
Table of Contents
Components
- 72 Mission cards
- 1 Final card
- 5 Ally dice (black)
- Player components (6 different colors): 6 Player cards, 6 Player pawns, 6 Player dice
- 6 Mission boards
- 6 Fuel tokens
- 6 Radio tokens
- 6 Weapon tokens
- 25 Health tokens
- 40 White Hand agent tokens
- 8 Artwork tokens
- 3 Lost City markers
- 3 additional Lost City markers (for the Polynesia mission)
- 1 Van board
Components may differ from those pictured.
Setup
The example below illustrates setup for a game on the "Japan" mission board at Medium difficulty. When playing on other mission boards, follow these standard rules along with the special rules for each mission, described on pages 15–23. Information about difficulty levels and the recommended order of mission boards can be found on pages 4–5.
-
Place the mission board in the center of the table. Each player chooses one of the player cards and takes the player pawn and player die of the matching color, as well as health tokens (the number varies by difficulty level, see page 4).
-
Form the team's shared stockpile: place the van board next to the mission board, then place 3 fuel tokens, 3 radio tokens, and 3 weapon tokens on the areas set aside for them (marked with the corresponding symbols).
-
Each player must place their player pawn on the starting city (marked with a flag symbol) of the mission board.
-
Place 2 agent tokens on each of the cities on the mission board (including the starting city).
-
Place all remaining components, including health tokens and resources, nearby so that all players can easily reach them. This is your reserve.
-
Shuffle the mission cards and form them into a single deck. Place it face-down (see example below) next to the mission board. Count out the last 12 cards, place the final card on top of them, then return them to the bottom of the deck.
Difficulty Levels
The game has 4 difficulty levels. Difficulty also depends heavily on the number of players: the bigger the team, the harder it can be to reach agreement. We recommend playing your first games with 2–4 players, starting at Medium difficulty.
If your first game has 5–6 players, Easy is preferable.
During setup, hand out health tokens to each player according to difficulty:
- Easy: 4 health tokens.
- Medium: 3 health tokens.
- Hard: 2 health tokens.
- "We didn't know it was impossible, so we did it": 1 health token.
Types of Artwork
- Films
- Sculptures
- Books
- Paintings
- Artifacts
- Music
Hall of Fame
Use this table to record your wins and losses on missions at different difficulty levels. Mark an X for each loss and a checkmark for each win.
| Easy (1 star) | Medium (2 stars) | Hard (3 stars) | "We didn't know it was impossible, so we did it" | |
|---|---|---|---|---|
| Setup — health tokens per player | 4 | 3 | 2 | 1 |
| Japan | ||||
| Egypt | ||||
| USA | ||||
| Scandinavia |
In addition to the adjustable difficulty level for all mission boards, the mission boards themselves also differ from one another, introducing new rules. These rules do not make the game more or less difficult, but adjusting to the changes to the standard rules can present some challenge to players. We suggest starting with the "Japan" mission board, for which only the base rules apply, then progressing through the order given in the table above.
— The designers
Turn Structure
Each round consists of 4 main phases, played in the following order:
- A — Mission
- B — Movement
- C — Battle
- D — End of Round
Key Information
The following information applies to all phases.
Resource Management
Resources are fuel, weapons, and radios. Health does not count as a resource. There are only six resource tokens of each type in the game. Spend them wisely!
During the game:
- When a player spends resources, they must take them from the team's stockpile on the van board. When discarding resources, move them to the shared reserve next to the mission board.
- If there are not enough resources on the van board, you may use one of your own health tokens as a substitute for one missing resource. You may exchange as many of your own health tokens for resources as you like. You may not spend a health token if the needed resource is available on the van board. This is the GOLDEN RULE!
- When a player gains resources, they take them from the shared reserve and place them in the team's stockpile on the van board. If there are no resources of the needed type left in the reserve, players cannot gain them.
- When a player gains health, they take a health token from the shared reserve. The player may place this token on their own player card, or give it to another player located anywhere on the mission board. The number of health tokens a single player may hold is limited only by the total number of health tokens in the reserve.
- When a player loses health for any reason, they must return one of their own health tokens to the reserve. Other players cannot give up their health tokens on your behalf.
A — Mission
The mission phase consists of 2 steps, in which players play mission cards to carry them out.
Plan the Mission
First, each player (in any order) draws 2 mission cards from the deck.
Players then discuss strategy and try to form a plan of action. There is no fixed turn order in this game. During the following phase, each player will play 1 mission card, but first you must jointly decide in what order you will do so.
If a player considers their cards unsuitable, at this step they may spend a resource (or one of their health tokens, if no resources remain — see the GOLDEN RULE) to draw an additional mission card, even after the final card has been revealed. You may do this any number of times, but in any case you may only play a single mission card — all others must be discarded.
During discussion you may explain the contents of your mission cards, but you may not show their face side. You may, however, show the back side with the clues printed on it.
For example, during discussion you might say: "Guys, I need a fuel token to play a really great card. Can someone arrange that before my turn?" or "I really need a weapon, or I'll lose health!" or "If I play one of my cards, 2 agents will arrive in Tokyo — we'll definitely need to unlock an ally!"
YOUR VICTORY DEPENDS ON TEAMWORK. DON'T RUSH — THINK YOUR PLAN THROUGH CAREFULLY.
Once you have agreed, each player must play one of their mission cards. Of course, during the next step, as players play their cards, you can continue to discuss and adjust your strategy.
Play a Mission Card
During this phase every player must play 1 mission card, fully carrying out its conditions, then discard the rest to the discard pile next to the mission card deck at the end of the phase. To play a mission card, each player, in turn order, activates every section of their card in order, working from top to bottom.
-
Spend the resources shown in the first section.
-
Place agent tokens in the cities shown in the second section. Place as many agents in a city as the number of city symbols shown on the card. Some mission cards require placing 2 or 3 agents in a single city, others require placing no agents at all.
If agents must be placed in a lost city, place the required number of agent tokens in The White Hand's headquarters instead (see "Lost Cities" on page 14).
Keep in mind: if you run out of agent tokens and cannot place them when required, you automatically lose.
-
Gain the resources or health tokens shown in the third section.
-
Gather the clues shown in the fourth section. Matching clues are always shown on the back of the card. Flip the mission card over and place it next to the mission board. This card becomes a clue card. Stack clue cards on top of each other so that the clues on them remain visible. This way you form a clue chain.
As soon as you have gathered 3 matching clues in the chain, immediately discard the cards bearing those clues. By doing this you uncover a piece of artwork — place an on the city with the matching symbol.
B — Movement
Once all players have played their mission cards, you must jointly decide whether you want to move your player pawns and, if so, where. You must also jointly determine the order of pawn movement.
Movement is optional. You may move a player pawn from one city to another, following a road. For every move of a player pawn from one city to a neighboring one, you will be required to spend one fuel token from the reserve (unless a mission board's special rule says otherwise).
You cannot pass through or stop in a lost city (see "Lost Cities" on page 14).
Be careful when deciding movement order, since the number of fuel tokens is limited. Remember the GOLDEN RULE: you may spend one of your health tokens to move if there are no fuel tokens left in the stockpile on the van board. (However, if even one fuel token remains in the stockpile, you cannot spend health instead of it.)
When everyone who wants to has moved their player pawn (or decided to leave it in place), you must collect all pieces of artwork in cities where a player pawn now stands and there are no agent tokens present. Collected artwork must be placed on the free space on the artwork track with the lowest point value. By doing so you raise the agents' threat level, but reduce the cost of unlocking ally dice (see page 11).
C — Battle
Next you may decide whether you want to fight the agents located in the cities where your player pawns are. There is also no turn order at this step, so make sure you enter battles in the best possible order. There can only be one battle per city, even if several players are present there at once. You are not required to enter battle if you don't want to.
In each city where you decide to fight:
-
Choose a leader among the players whose pawns are in that city. This player will bear the responsibility in case of defeat (see page 13).
-
The leader rolls their own die and the dice of all unlocked allies (see below). Every other player participating in the battle rolls their own die separately.
-
Add up the numbers rolled on all the dice: this is your team's battle strength in this battle.
Example of calculating battle strength: 4 + 5 + (1+3) = 13
Ally Dice
Between phases during a round, players may decide to spend radio tokens to unlock a new ally die. This die is taken from the reserve and placed at the indicated spot on the mission board. The cost to unlock a die, in radio tokens, is shown above the space for collecting the next piece of artwork on the artwork track. Remember that you may also spend health tokens if you have run out of radio tokens. At your own risk, of course...
-
Compare your team's battle strength to the agents' strength. To determine the agents' strength, add together:
- the number of agent tokens in the city,
- the threat level shown on the first free space of the artwork track,
- the number of agent tokens in The White Hand's headquarters (see "Lost Cities" on page 14).
Example of determining agent strength: 3 agents in the city + 1 in The White Hand's headquarters + 10 on the artwork track = agent strength 14
Battle Outcome
If your battle strength equals or exceeds the agents' strength, you win the battle.
Return the agent tokens from that city to the reserve.
Be careful: if there was a piece of artwork in the city where you won the battle, it must immediately be collected and placed on the artwork track, thereby inevitably raising the agents' threat level. Keep this in mind when entering battle.
If your battle strength is less than the agents' strength, you may perform one or more of the following actions:
-
Discard any clue card from the clue chain to reroll dice. For each clue symbol shown on the discarded card, one die may be rerolled by the player to whom it belongs. If the card shows two clue symbols, two dice may be rerolled (either one player may reroll their own die and an ally's die, or two players may reroll their own dice separately, but this must be done simultaneously). Afterward, discard this clue card, even if not all clue symbols were used.
For example, if you decide to discard a clue card with 2 clues, but only reroll 1 die, you cannot reroll it a second time or later decide to roll a different die. To do that, you would need to discard another clue card.
-
Spend one weapon token to increase your battle strength. Any player participating in the battle in that city may discard 1 weapon token (or 1 health token instead) to increase battle strength by 2. You may do this as many times as you like.
-
Concede the battle. In this case, the team's leader is forced to lose a health token, discarding it to the reserve.
You may take several actions during a battle: for example, spend a weapon token, then discard a clue card, then concede the battle if your battle strength is still below the agents' strength and you want to reduce your losses.
Keep in mind that losing a battle can result in the loss of the entire city! (See "Lost Cities" on the next page.)
D — End of Round
At the end of each round (after the battle phase), check the number of agents in a city — if there are 5 or more, The White Hand gains full control of that city. Discard all agent tokens from that city and place a lost city marker on it. Be careful, because if you run out of lost city markers and cannot place one when required, you immediately lose.
Lost Cities
Losing a city can cause trouble for you. In following rounds:
-
If a mission card requires you to place an agent token in a lost city, you must place it in The White Hand's headquarters to the left of the artwork track instead, thereby increasing the agents' strength.
-
During the movement phase you cannot pass through or stop in a lost city.
-
If you end up in a lost city at the end of a round (i.e., if you lose a battle for that city and it becomes lost), you must leave the city during the following movement phase. If leaving is impossible (because your pawn is surrounded by lost cities), you lose.
-
As stated earlier, if you cannot place a lost city marker when required, you also lose.
End of Game
The end of the game occurs in the following cases:
- A player has lost their last health token. Your team loses.
- The final card is revealed. Discard the final card and draw the cards needed for the round, if required. If you cannot collect all the required pieces of artwork by the end of the round, your team loses.
- You cannot place an agent token or a lost city marker because none remain in the reserve. Your team loses.
- You have placed the last (7th or 6th, depending on the mission board) piece of artwork on the last square space of the artwork track. Your team wins, and all pieces of artwork are returned to their rightful owners.
Missions
All mission boards (except the first — "Japan") introduce some changes to the standard rules. If these changes contradict the base rules, follow the mission board's rules.
We recommend starting the game with the "Japan" mission board. The other boards are no harder than it, but they all present new challenges to players.
Japan
Setup and Turn Structure
The base rules apply without exception.
Egypt
Setup
- Place 2 agent tokens in each of the 3 southernmost cities, and 3 agent tokens in each of the 4 northernmost cities.
- Place the player pawns in the southernmost city (flag symbol).
- Place a piece of artwork in the northernmost city.
- During setup, do not place fuel tokens on the van board.
Turn Structure
The base rules apply, with the following exceptions:
- When players move south, they must pay 1 fuel token for each road segment traveled.
- When players move north, they do not spend fuel tokens.
USA
Setup
- At the start of the game, place 2 agent tokens in every city, except Dallas — the starting city.
- Place the player pawns in the starting city (flag symbol).
Turn Structure
The base rules apply, with the following exceptions:
- When a player plays a mission card, they must flip it clue-side up and place it in front of themselves.
- Each player collects their own clue chain. To place a piece of artwork on the mission board, a player must gather 3 matching clues on the cards in front of them. Since clue cards are no longer shared, players also reroll dice separately during the battle phase.
- When 2 or more players are in the same city at the end of the battle phase, they may freely exchange clue cards, if there is no agent in that city.
- When a player finishes movement in Dallas, the team gains a weapon token at the end of the movement phase.
Scandinavia
Setup
- At the start of the game, place 2 agent tokens in every city.
- Place the player pawns in the starting city (flag symbol).
Turn Structure
The base rules apply, with the following exceptions:
- The cost of movement depends on the road segment chosen by the players. If the road is marked with a red thread, movement along it costs 2 fuel tokens. If the thread is beige, movement costs 1 fuel token.
- When a player collects a piece of artwork from a city, they must immediately apply that city's effect.
List of city effects:
Gain:
- 2 fuel tokens
- 2 radio tokens
- 2 weapon tokens
Lose:
- 2 resources of your choice
- 1 clue card of your choice
Add:
- 1 agent token to every other city
- If a city's effect tells you to gain a resource but there isn't enough in the reserve, you do not gain that resource.
- If a city's effect causes you to lose a resource but there isn't enough in the stockpile, one of the players must discard a health token instead.
- If a city's effect causes you to lose a clue card, but there are none in the clue chain, you lose nothing.
- If a city's effect tells you to place an agent token, but there are none left in the reserve, you lose.
Polynesia
Setup
- In this mission, islands count as cities.
- At the start of the game, agent tokens are not placed on the islands — they remain in the reserve.
- Place the player pawns on the starting island (flag symbol).
- Add 3 additional lost city markers to the base 3.
Turn Structure
The base rules apply, with the following exceptions:
- You may move your player pawn to any location on the mission board, paying 1 fuel token to do so.
- On this mission board, there are two islands for each piece-of-artwork symbol.
- Whenever you need to place an agent on an island with a particular artwork symbol, place 1 agent token on both islands with that matching symbol (or in The White Hand's headquarters, if that city is marked with a lost city marker).
- If you gather 3 matching clues, place the piece of artwork on any island with the matching symbol, of your choice.
- Each of the two islands sharing an artwork symbol may hold only one piece of artwork.
Rio de Janeiro
Setup
- In this mission, districts count as cities.
- At the start of the game, each player must place 2 agent tokens in any district.
- Place the player pawns in the starting district — the Central District (flag symbol).
Turn Structure
The base rules apply, with the following exceptions:
-
Movement along roads marked with a red dashed line is free.
-
As usual, you may collect a piece of artwork from a district only if there is at least one player pawn there and no agent tokens. However, you may freely move a single piece of artwork together with your player pawn from district to district, even if agents are present there.
-
Pieces of artwork must be collected in districts in the specific order shown on the artwork track, so you will likely need to move artwork discovered in one district to the required one.
Example: the first piece of artwork is discovered in a district marked with the film symbol, but the first space on the artwork track is a district marked with the painting symbol. Players must therefore first move this piece of artwork to the neighboring district with the painting symbol, and only then collect it.
-
Each time you collect a piece of artwork, place 2 agent tokens in the Central District (flag symbol).
-
As usual, if at the end of a round any district (including the Central District) has 5 or more agents, place a lost city marker on it.
-
If a district whose piece of artwork has not yet been placed on the artwork track becomes lost, you automatically lose.
Solo Mode
In solo mode, the base rules apply, with the following exceptions:
Setup
- Choose a mission board.
- Choose 1 character card and take its pawn.
- Choose a difficulty level. Take twice as many health tokens as the base mode calls for at that difficulty level, and place the tokens on your character card. (For example, at Medium difficulty, take 6 tokens instead of 3.)
- Choose another player pawn, which will become your ally.
- Place both player pawns on the starting city of the chosen mission board (flag symbol).
- Remove 15 random cards from the deck, back into the box — you won't need them in this game.
- Then count out 12 cards from the end of the deck and place the final card before them, as in the base game.
Turn Structure
- Draw 3 mission cards from the deck. If needed, you may draw additional cards by exchanging them for resources or health tokens, as in the base game.
- Choose 2 cards and play them one after another, before discarding the rest at the end of the round.
- You may move your own pawn without your ally, and your ally's pawn without your own.
- Moving your ally's pawn costs the same as moving your own pawn (the cost varies depending on the mission board).
- You always become the leader in battle.
- Your ally cannot fight alone.
- Your ally's pawn brings you a die of the matching color in battle, if it is located in the same city as your pawn. In that case, you roll both dice.
- Your ally's pawn can collect pieces of artwork the same way your own pawn does.
The Art Retrieval Agency — Secret Document
The following character dossiers appear on the mission cards' agent portraits (Agent №001 through №006), each marked with a chess-piece rank.
King
The leader of the Art Retrieval Agency, a former con artist who lost his sight during a botched heist. Rumor has it The White Hand had a hand (ha ha) in that unfortunate accident. An art connoisseur and outstanding chess player, the King assembled and now leads the A.R.T. team with a single goal — to bring down The White Hand at any cost.
Queen
A young prodigy the King met at an exhibition in Delhi. Orphaned because of The White Hand, she was the first to join the Agency, where she found the best use for her talents and incredible intellect.
Knight
An elusive woman, always ready to walk a knife's edge. It's known that she once worked for The White Hand. The King broke her out of prison after a failed attempt to rob the Royal Palace in Phnom Penh. Since then she has done a lot of soul-searching and switched sides to join the A.R.T. team, tracking down countless pieces of artwork and managing to stay one step ahead of The White Hand.
Bishop
Little is known about this mysterious figure. Some believe they are related to the Knight, and that the Bishop is the brains of that particular duo.
Rook
This woman isn't in the habit of asking for advice — she always knows the right thing to do, and won't take orders from anyone. The Rook made a name for herself on the political chessboard, taking a firm stance against The White Hand and openly hunting them. Naturally, the King came to her personally to invest in her political talents.
Pawn
Driver, cook, bartender... in short, a jack of all trades! Together with his trusty van "Bibi" (stuffed with all kinds of gadgets, useful and otherwise), the Pawn pulls the A.R.T. team out of the worst jams. He knows everyone, and everyone knows him. His main weapon is a well-stocked address book, and his greatest strength is the ability to always keep a clear head...