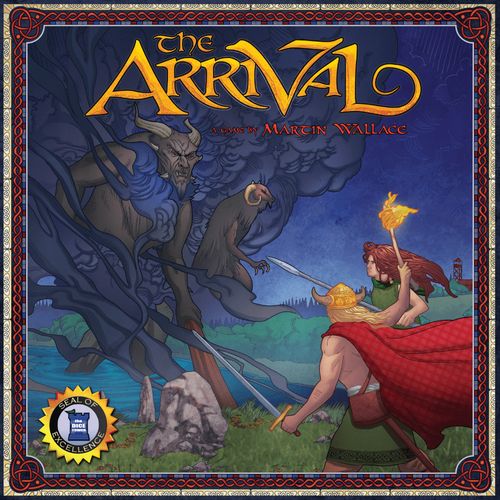
The Arrival
The Arrival Rulebook
Table of Contents
Table of Contents
Game Overview and Goal
Each player becomes a Tribe Leader. All players try to spread their Tribes across the mythical island of Erin to fight back the demon-like Fomori and prevent the other Tribes from expanding.
But players face a dilemma: Do they try to spread their Tribes quickly – gaining more Resources but strengthening the Fomori's power – or do they proceed more carefully – keeping the dreadful Fomori away but gaining fewer Resources and risking losing ground to the other Tribes?
During the game, Tribes obtain Honor Points and Corruption Points without knowing which will be decisive at the end of play.
The game normally ends after 4 to 6 rounds (depending on the number of players).
However, if too many Fomori rush in, the game ends prematurely. This is tracked via the Corruption Track. There is a Corruption Limit of 25 for 2 players, 21 for 3 players, and 17 for 4 players.
If the game ends and there are more Tribe fortifications than Fomori-occupied locations, the Tribe Leader with the MOST Honor wins.
But if there are more (or equal) Fomori-occupied locations than Tribe fortifications when the game ends, the player with the LEAST Corruption at the end of the current round wins.
Game Flow
The game lasts several rounds. Each round is comprised of two phases: the Earning Phase and the Action Phase.
Important Terms
Fortifications
During the game, players place Building Disks in unoccupied locations in order to fortify them or on top of their own already placed Building Disks in order to augment fortifications.
- 1 Building Disk is an Áit (Camp)
- 2 Building Disks are a Broch (Tower)
- 3 Building Disks are a Caer (Fortress)
A fortified location always includes the previous Fortification Level. So, a Broch also has an Áit, and a Caer has a Broch and an Áit.
Example: A Tribe Leader resolving the "2 for each Building Disk" symbol during the Earning Phase will receive two (2) Honor for each Broch (2 disk stack) and Caer (3 disk stack).
Fomori and Balor
There are four threats in the game: King Balor, who acts from his castles, and three demonic species of Fomori. Together, they try to overrun, corrupt, and conquer the land.
- Sineach - A species of hungry cannibals. They have strength 1 and offer 1 Honor or reduce Corruption by 1 when defeated.
- Athach - A species of ill-tempered giants. They have strength 2 and offer 3 Honor or reduce Corruption by 1 when defeated.
- Monghfinn - A species of Dark Druids. They have strength 3 and offer 6 Honor or reduce Corruption by 1 when defeated.
- Balor's Castles - The castles of King Balor from which the Fomori emanate in order to conquer the land. They have strength 4 and offer 10 Honor or reduce Corruption by 1 when defeated.
Scoring Tracks
The Honor Track and the Corruption Track are not limited to their top values; if you exceed the values on the tracks, use a piece of paper or some other means to represent your points.
Players are not allowed to go below 0. If they have no Honor or Corruption Points, they cannot spend or lose them.
Components
- 4 Overview Boards
- 60 Building Disks — 15 in each player color
- 1 Round Counter
- This Rulebook
- 1 First Player Tile — with an overview of the Earning Phase
- 8 Tracking Tokens — 2 in each player color
- 8 Blockers — 2 for each player
- 20 Sword Disks
- 4 Balor's Castle Tiles
- 50 Fomori Tiles — 32 Sineach, 12 Athach, 6 Monghfinn
- 54 Earning Cards
- 12 Shield Disks
- Map
- 6 Double-Sided Tribe Leader Cards — one side for Basic Game and other side for Advanced Game
- 30 Tactic Tiles
Map in Detail
- Locations
- Port Locations
- Connections
- Shield Limits / Province Bonus
- Provinces
- Castle Locations
- Honor Track
- Corruption Track
- Round Track
Earning Cards in Detail
Each Earning Card front is divided into three sections, labeled from top to bottom: Top, Middle, Bottom.
Earning Card backs come in three types, each type most likely to give the Earnings pictured:
- A symbol showing resources (Building Disk, Sword Disk, Shield Disk) — gives Resources pictured.
- A symbol showing a Tactic Tile icon — gives Tactic Tiles from the face-up General Supply.
- A symbol showing a Fomori icon — gives Fomori Tiles and increases Corruption.
A symbol showing the triple-spiral (triskelion) icon — increases Honor.
Basic Setup
-
All Building, Sword, and Shield Disks are placed next to the Map in a General Supply.
-
All Tactic Tiles are shuffled and placed in the General Supply face down. Six (6) of them are drawn and placed, face up.
-
The Round Counter is put on the 1 space of the Round Track.
-
All four (4) Balor's Castles are placed face up at the four castle locations on Balor's Isle in the north.
-
All Fomori are shuffled and placed in the General Supply face down. Eight (8) of them are drawn randomly and placed face up on top of Balor's Castles and in the locations on the main island that are directly connected to the castle locations.
-
All Earning Cards are shuffled together and placed face down into three face-down stacks of 18 cards each.
Note: Earning Cards are shuffled together, regardless of which of the three (3) different card backs they have. Each of the Earning Card stacks will have Earning Cards of all three types within it. The top card's back will often change during play.
-
The First Player is determined randomly and receives the First Player Tile. Each player then chooses one (1) Tribe Leader Card and places it in front of himself or herself with the Basic side face up.
-
Each player chooses a color. He or she then receives two (2) Building Disks of that color, two (2) Blockers, and an Overview Board.
-
Beginning with the player to the right of the First Player and continuing counterclockwise, each Tribe Leader sets one (1) Building Disk from the General Supply (of his or her color) at any open Port Location of his or her choice, regardless of province color.
-
Each Player places a Tracking Token matching his or her color at 4 on the Honor Track and another at 0 on the Corruption Track.
Advanced Game
In the Advanced Game, each Tribe Leader (player) has an ability that augments his or her actions. It is not recommended for first time players of The Arrival.
To play the Advanced Game, ignore step 7 in the Basic Setup and use this step instead:
- Randomly choose one player to draw a single Tribe Leader Card. He or she places that card with the Advanced side face up in front of himself or herself; that player has that ability for the rest of the game. In counterclockwise order, each other player takes a single Tribe Leader Card and places it with the Advanced side face up in front of himself or herself to denote his or her ability for the game. The last player to receive a Tribe Leader Card in this way also receives the First Player Tile.
Earning Phase
Tribe Leaders draw Earning Cards to determine which earnings they get.
Draw Earning Cards
Beginning with the First Player and proceeding in clockwise order, each Tribe Leader takes the topmost Earning Card from any of the stacks and places it in front of himself or herself, without revealing it. The symbol on the backside of the card gives a hint as to which earnings are offered on the card.
This process is repeated three more times, so that each player has four (4) Earning Cards (next to each other) face down in front of himself or herself. Each additional Earning Card taken is placed to the right of the previous Earning Card.
Important: If one of the three card stacks is exhausted, all discarded Earning Cards are shuffled with the remaining stacks immediately. Then, three (3) new, roughly equal-sized stacks are made.
Reveal Earning Cards & Block Sections
Every Earning Card divides the possible earnings that the Tribe Leader can gain in the round into three sections (top, middle, and bottom). He or she has to block sections on cards without having full knowledge. The selected sections are blocked on all of his or her Earning Cards, even on those still unrevealed, and yield no earnings.
Each Tribe Leader uncovers his or her first two cards and chooses one section. This section is marked with a Blocker on his or her first Earning Card.
Note: Uncovering the Earning Cards and setting the Blockers is done simultaneously by all players.
Then, each Tribe Leader uncovers his or her third card and chooses one of the remaining two sections. He or she blocks this section on the first Earning Card using his or her other Blocker.
Finally, each Tribe Leader uncovers his or her fourth card.
The earnings shown on the unblocked sections on all four cards are valid this round for the respective Tribe Leader.
Strategy: The top section of an Earning Card usually has the most earnings in terms of Buildings, Swords, Shields, Tactic Tiles, and Honor Points. However, it also features the most Fomori and, as a result, the most Corruption Points.
The bottom section usually has the fewest Buildings, Swords, Shields, Tactic Tiles, and Honor Points, but features fewer Fomori and Corruption Points.
Exploit Earning Cards
Beginning with the First Player and proceeding in turn order (clockwise), each Tribe Leader takes the earnings shown in the unblocked sections of his or her Earning Cards, placing them in his or her Tribe Supply and moving his or her Tracking Tokens in the following sequence:
Honor Points
The Tribe Leader gains Honor Points equal to the sum of the numbers on the Honor symbols on the unblocked sections of his or her Earning Cards.
Resources (Buildings, Swords, and Shields)
The Tribe Leader obtains Buildings, Swords, and Shields corresponding to the total number of each symbol on the unblocked sections of his or her Earning Cards.
Note: If there are not enough Swords, Shields, or Buildings in the General Supply, the First Player distributes those that are available one-by-one (in turn order) to the Tribe Leaders who can claim them, beginning with himself or herself.
Important: Any claimed earnings that are unavailable are considered void.
Fomori & Corruption Points
Each Tribe Leader takes a number of Fomori and gains an amount of Corruption Points equal to the sum of the numbers on the Corruption symbols on the unblocked sections of his or her Earning Cards.
The front side of the Fomori must be kept unseen by all players, even the Tribe Leader taking them. They are secret until after a Spread action is completed.
Note: If there are not enough Fomori in the General Supply, all discarded, face-up Fomori are flipped face down, shuffled, and put back into the General Supply, before players start taking new ones. If there still are not sufficient Fomori, the First Player distributes those that are available one-by-one (in turn order) to the Tribe Leaders who can claim them, beginning with himself or herself.
Important: Any claimed Fomori that are unavailable are considered void.
Example: A Corruption symbol showing the number 2 means that the player takes two (2) Fomori and moves his or her Tracking Token up two (2) points on the Corruption Track.
Tactic Tiles
The Tribe Leader takes a number of Tactic Tiles from the face-up General Supply of six (6) Tactic Tiles equal to the sum of the numbers on the Tactic Tile symbols on the unblocked sections of his or her Earning Cards.
In a round, a Tribe Leader cannot take more than the face-up six (6) Tactic Tiles that are displayed. After a Tribe Leader has received ALL of his or her tiles, the display is refilled up to six (6) Tactic Tiles for the next player.
If there are not enough face-down Tactic Tiles in the General Supply to put six (6) tiles on display, all already used tiles are flipped face down, shuffled, and put back into the General Supply. In the unlikely case that there still are not sufficient Tactic Tiles, just put as many on display as possible.
Note: A Tribe Leader may have more than six (6) Tactic Tiles in his or her Tribe Supply (from previous rounds). He or she just may not collect more than six (6) Tactic Tiles in a single Earning Phase.
Example: In the Earning Cards example, the Tribe Leader will earn 5 Honor, 5 Building Disks of his or her color, 2 Swords, 4 Shields, 1 Tactic Tile, and 9 Corruption. This 9 Corruption will also give that Tribe Leader 9 face-down Fomori Tiles.
Example: The Tribe Leader resolving the "2 for each Building Disk" symbol during the Earning Phase will receive two (2) Honor for each Broch (2 disk stack) and Caer (3 disk stack).
Discard Earning Cards
The Tribe Leaders discard all Earning Cards in front of them into a single shared discard stack near the three face-down Earning Card decks in the General Supply. Blockers are set to the side and won't be used again until each player places them on his or her Tribe Leader Card to show that he or she has Passed for the round.
Action Phase
During the Action Phase, Tribe Leaders can use their earnings in order to expand their Tribes and to spread or repel Fomori.
Beginning with the First Player and proceeding in turn order, each Tribe Leader conducts two (2) actions in any order. He or she can conduct two different actions or two of the same action.
This process is repeated, as each Tribe Leader (in order) takes a turn in which he or she conducts two (2) actions, until every Tribe Leader has chosen the action Pass.
Important: On the first turn of the first round, each Tribe Leader only takes one (1) action.
Build
The Tribe Leader increases his or her area of influence by fortifying a new location or bolstering an existing fortification (for better defenses against attacks).
The Tribe Leader takes one (1) Building Disk from his or her Tribe Supply and places it either:
-
Bordering - In an unoccupied location that is directly connected to one of his or her own fortified locations.
-
Port - In any unoccupied Port Location. He or she must already have a fortified Port Location to perform this action.
-
Bolster - On top of an Áit (1 disk fortification) or Broch (2 disk fortification) he or she owns. This location is further fortified, becoming a Broch (2 disk fortification) or Caer (3 disk fortification), respectively.
Note: A Caer (3 disk fortification) cannot have a fourth disk placed on top of it.
-
Outpost - In an unoccupied location that is connected to a fortified location of another Tribe Leader. He or she must have at least two (2) Honor Points, which he or she loses.
Note: You may never build in Balor's Castle locations, as indicated by the red connections to them. Such locations can only have the Repel and Spread actions used on them.
Repel
The Tribes defend themselves against the demons, battling for territories and Honor.
The Tribe Leader chooses a location occupied by a Fomori or a Balor's Castle and spends as many Swords from his or her Tribe Supply as indicated (see symbol on the bottom of the Fomori or the Balor's Castle), then removes the Fomori or Balor's Castle.
The chosen location must be:
- Bordering - Directly connected to a fortified location of the Tribe Leader.
- Port - A Port Location, provided that the Tribe Leader has his or her own fortified Port Location.
- Provincial - In a province in which the Tribe Leader has a fortified location.
- Distant - In a location that does not qualify as Bordering, Port, or Provincial but borders another player's fortified location. The Tribe Leader must pay two (2) Honor.
The Tribe Leader immediately either gains Honor Points as indicated on the repelled Fomori or Balor's Castle or loses exactly 1 Corruption Point (see symbols on the top left and right corners of the Fomori or Balor's Castle Tiles).
Repelled Fomori and spent Swords are placed face up back into the General Supply to show that they are discarded. A repelled Balor's Castle is placed face down into the appropriate Tribe Supply, representing a Castle Trophy now (see Additional Actions for more on Castle Trophies).
Note: At the start of the game, each Balor's Castle will have a single Fomori on top of it. The Fomori Tile will need to be removed with a single Repel action before the Balor's Castle Tile can be removed with a separate Repel action.
Spread
The threat spreads and undermines the Tribe's morale.
The Tribe Leader chooses a location that is connected to a location occupied by Fomori or a Balor's Castle and takes a number of face-down Fomori from his or her Tribe supply equal to:
Shields present in the province of the location (if any) PLUS Building Disks present at the location (if any) PLUS an additional one (1) Fomori.
The Tribe Leader sets one (1) of these Fomori at the chosen location and flips it face up. The rest of the Fomori taken from the Tribe Leader's Tribe Supply are discarded into the General Supply face up, along with the (smashed) Shields from the province and the (destroyed) Building Disks from the location.
A Tribe Leader cannot place a Fomori where there is already a Fomori present. The only time you will see Fomori stacked is at the game's start, when Fomori are stacked on top of the four (4) Balor's Castles.
Important: This action can only be conducted if there are sufficient Fomori in the corresponding Tribe Supply. A Tribe Leader cannot perform this action partially. Therefore, it is not possible to destroy Shields and/or Building Disks without the ensuing occupation of a location.
Example: A Tribe Leader chooses the action Spread. Currently, a location occupied by the Fomori is connected to a location fortified with a Caer (3 Building Disks) by the green Tribe Leader.
The Tribe Leader using the action Spread wants to attack this location. That player needs 4 Fomori for this action: 3 to destroy the 3 Fortification Levels (Caer, Broch, and Áit) and 1 to occupy the location after the Buildings are destroyed.
Important: If a Tribe Leader only has one (1) fortification on the island (whether it is an Áit, Broch, or Caer), it cannot be chosen for a Spread action or be destroyed. This remains in effect until the Tribe Leader has two (2) or more separate fortifications.
Note: This action also allows a Tribe Leader to choose a location that is occupied by his or her own fortification.
Note: Fomori cannot spread from one Port Location to another Port Location.
Shield
The Tribe Leader protects all fortifications in a province, thus improving the defense against the Fomori menace for all.
The Tribe Leader takes one (1) Shield from his or her Tribe Supply and puts it into a province in which he or she has at least one (1) fortification.
The number of Shields that can be placed in a province is printed on the Map in that province. This number is also referred to as the Province Bonus, which, depending on victory conditions, can result in additional Honor Points at the game's end.
Shields protect all locations of a province from Fomori attacks.
Example: A Tribe Leader wants to use the Spread action to put a Fomori in an unoccupied location, which is directly connected to a location occupied by another Fomori. Though the designated location is not fortified by any Tribe Leader, there is a Shield in the province. As a result, the Tribe Leader must discard one (1) Fomori to destroy the Shield before he or she places one (1) Fomori in the location and flips it face up.
If the Tribe Leader wants to make his or her second action another Spread on an unoccupied location in the same province, he or she may simply place one (1) Fomori in the unoccupied location and flip it face up, since the Shield protecting the province was destroyed by his or her first action.
Additional Actions
Free Actions
During his or her turn, a Tribe Leader is allowed to use the following tiles before, during, or after his actions for free (using them does not count as an action):
Use Tactic Tile
The Tribe Leader can use a Tactic Tile during his or her turn before or after an action. He or she executes the effects of the Tactic Tile, then discards it face up on the Tactic Tile discard pile. The Tribe Leader can use multiple Tactic Tiles in a row.
Tactic Tiles are described in detail in the Tactic Tiles Descriptions section below.
Use Castle Trophy
A Tribe Leader can place a Castle Trophy from his or her Tribe Supply into the game box (indicating this Castle Trophy is removed from the game). He or she can then return up to three (3) Fomori from his or her Tribe Supply back into the General Supply without revealing them.
Pass
The Tribe does not intervene any further as the Tribe Leader regroups his or her forces.
If the Tribe Leader has no Fomori left in his or her Tribe Supply or is not able to use his or her remaining Fomori in a manner compliant to the rules, the Tribe Leader is allowed to Pass by putting both Blockers on his or her Tribe Leader Card.
The Tribe Leader may choose up to three (3) Resources (Swords, Shields, and/or Building Disks, in any combination) from his or her Tribe Supply, storing them until the next round on the Tribe Leader Card to show that they remain in his or her Tribe Supply. Only three (3) total Resources may be stored this way, not three of each type. All other Swords, Shields, and Building Disks (and unusable Fomori) are put back into the General Supply.
All Tactic Tiles and Castle Trophies are retained in each Tribe Leader's Tribe Supply.
After Passing, the Tribe Leader has no more actions and is out of play for the remainder of the round.
The Tribe Leader who Passes first in a round becomes the First Player for the next round and gets the First Player Tile.
Note: If a Tribe Leader's first action is to Pass, he or she has no second action during a turn.
Note: Free Actions may not be played after a Pass action. The Pass action IMMEDIATELY ends the turn.
Round-Ending and Game-Ending Conditions
After all Tribe Leaders have Passed, the current round ends. If the Corruption Limit is reached or surpassed during a round by any Tribe Leader, the game ends at the completion of that round, even if the Corruption for that Tribe Leader goes below the limit again. If a player's Corruption ever surpasses the Corruption Limit that corresponds to the number of players, the imminent end of the game is indicated by removing the Round Counter from the board.
Otherwise, the Round Counter moves on to the next field and a new round begins. When the maximum number of rounds has been completed, the game ends.
How the Game Ends
| Number of Players | Corruption Limit | Number of Rounds |
|---|---|---|
| 2 | 25 | 6 |
| 3 | 21 | 5 |
| 4 | 17 | 4 |
Determining the Winner
Honor
The Tribes have successfully repelled the Fomori.
If the Tribe Leaders in total have fortified more locations than have been occupied by the Fomori (including Balor's Castles), the Tribes have finally prevailed.
For each fortification (regardless of its Fortification Level), each Tribe Leader receives a bonus determined by the Province Bonus (the number printed on the Shield/Honor icon in each province). For example, every fortification in Magnata earns three (3) Honor Points.
Every Tribe Leader adds up the remaining Buildings, Swords, Shields, and Tactic Tiles in his or her Tribe Supply and increases his or her Honor by one (1) for every three (3) of these Resources.
The Tribe Leader with the most Honor wins. In case of a tie, the tied player with the least Corruption Points wins.
In the case of a tie in both Honor and Corruption Points, the Tribe Leaders share the victory.
Corruption
The Fomori have overrun the Tribes.
If the Fomori occupy an equal or greater number of locations (including Balor's Castles) than the total that all Tribe Leaders together have been able to fortify, the Fomori have overrun the Tribes.
Every Tribe Leader adds up the remaining Buildings, Swords, Shields, and Tactic Tiles in his or her Tribe Supply and decreases his or her Corruption by one (1) for every three (3) of these Resources.
The Tribe Leaders with the lowest Corruption wins. In case of a tie, the tied player with more Honor wins.
Note: For the Corruption winning condition, Province Bonuses are NOT scored.
In the case of a tie in both Honor and Corruption Points, the Tribe Leaders share the victory.
Tactic Tiles Descriptions
Cauldron of Dagda (1x per province) Each tile shows one of the ten provinces. For each fortified location (regardless of Fortification Level) he or she has in this province, the Tribe Leader immediately gains the Honor Points indicated.
Silver in the Hills (1x per province color) Each tile shows one of the four province colors. For each fortified location (regardless of Fortification Level) he or she has in a province of this color, the Tribe Leader immediately gains the Honor Points indicated.
Flight of the Wild Geese (1x) For each different province in which he or she has at least one (1) fortified location (regardless of Fortification Level), the Tribe Leader immediately gains two (2) Honor Points.
Trail of the Salmon (1x) For each fortified Port Location (regardless of Fortification Level) he or she has, the Tribe Leader immediately gains two (2) Honor Points.
Stone of Fate (1x) The Tribe Leader immediately gains a number of Honor Points determined by his or her current position on the Honor Track. The tile can only be used if there are no ties between that Tribe Leader and another player in regards to positions on the Honor Track.
- Foremost Position: 2 Honor Points
- Second Position: 4 Honor Points
- Third Position: 6 Honor Points
- Fourth Position: 8 Honor Points
Emer's Mercy (1x) The Tribe Leader immediately gains five (5) Honor Points if he or she currently has the fewest Corruption Points (no ties).
High Walls (1x) The Tribe Leader immediately gains two (2) Honor Points for every Broch (2 disks) or Caer (3 disks) he or she has.
Sublime Stronghold (1x) The Tribe Leader immediately gains three (3) Honor Points for every Caer (3 disks) he or she has.
Ogam's Wisdom (2x) Usage of this tile is restricted to the Earning Phase. After the Tribe Leader sets both Blockers but before he or she exploits the cards, he or she moves one (1) of the two already set Blockers to another section, thus selecting a new section for exploitation.
Hour of the Master Builder (2x) This tile stays active until the end of the round, when it is evaluated then discarded. The Tribe Leader places up to three (3) Building Disks onto this tile when they are destroyed by Fomori through the Spread Action. After all players have Passed, but before the round is terminated, the Tribe Leader can place these Building Disks onto the map according to the normal Build rules.
Cú Chulainn's Ruse (2x) The Tribe Leaders swaps any two (2) Fomori on the Map (not Fomori on Balor's Castles).
Big Migration (2x) The Tribe Leader swaps any two (2) Áits (1 disk) on the Map, regardless of their owners.
Song of the Bard (2x) The Tribe Leader decreases his Corruption by up to two (2) points, but not below 0.