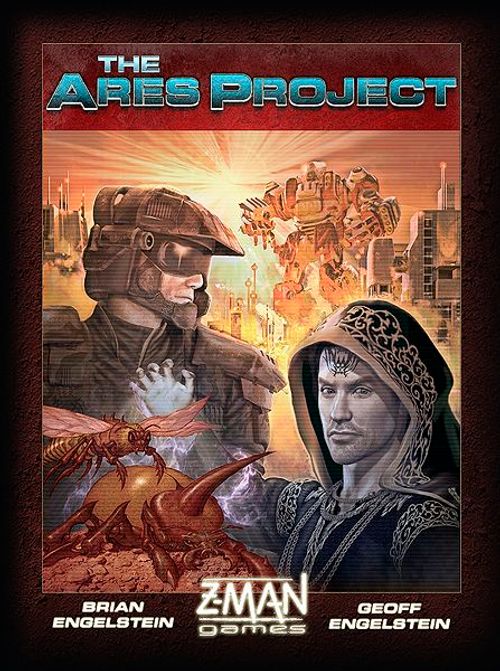
The Ares Project
The Ares Project Rulebook
Table of Contents
Table of Contents
Gameplay Overview
The Ares Project is a game for two players, with optional rules for three or four players given at the end of the rulebook.
Each player represents a different faction. Players win by conquering their opponent's Base, or by scoring the most points before the game ends by controlling the Frontier.
Each faction has different units and special rules that control how they build and fight, and each has their own strengths and weaknesses.
Components
Cards: The heart of The Ares Project is each faction's deck of cards. Cards have two uses: If they are played face up, you use whatever is shown on the card. But if they are placed face down, they count as Resources, which are used for constructing Buildings and Units.
Each faction also has one or two Start Building cards, as outlined in the rules for each faction. These have different backs than the standard cards, and are not included in the draw deck.
There are also several utility cards that are shared between the players, like the Combat Choice cards.
Base Mat (Full Game Only): Each faction has a different Base Mat. This contains important information about the faction, as well as places to hold special units, like Workers for the Terrans.
Unit Tokens: Four types of Unit Tokens are provided to match the four types of units (Infantry, Armor, Air, and Building). One token is placed on a building card for each unit constructed. Tokens have different pictures to match the different factions to provide flavor. However tokens of the same shape are equivalent for game purposes. So, for example, if you run short of Terran Air Unit tokens you can use any other Air Unit token instead.
Power Tokens: In the Full Game Power tokens are used to represent Power for each faction. Each token represents one power point on one side of the token, and three on the other. Players can freely combine or make change for Power tokens at any time.
In both the Basic and Full Games Power tokens are used to represent shields during Battle.
Frontier Board and Frontier Control Tokens: The Frontier is the contested area that the players are fighting over. Initially the Frontier is not controlled by a player. When it is taken over by a player, that player's Control Token is placed on the Frontier, removing the Control Token of the opposing player if one is present. Control of the Frontier is important because it is the main way to earn the points needed for victory.
Combat Round Marker: This marker tracks the number of Combat Rounds remaining in a Battle.
Raid Force Marker (Full Game Only): This marker is placed to secretly mark Forces that will fight in a Raid battle.
Dice: Dice are used to resolve Battles between players.
Screen: Each player gets a screen to hide the area representing their Base. The 'Base' consists of the Base Mat plus adjacent empty table area to put other cards. Players play cards secretly behind their screens, into their Base. At certain points they may have to reveal their base to their opponent, by removing the screen.
Rules: The booklet you are reading. The main rulebook describes the core rules.
Faction Rules (Full Game Only): Each faction has a separate rulebook that explains the special rules that apply only to them. Specific faction rules always take precedence over the main rules.
Basic Game Rules
The Ares Project is a simple game at its heart, but it has many interacting features. In order to make it simpler to learn the core system, we strongly recommend you play the Basic Game first before moving on to the Full Game.
The Basic Game is played between two players. One plays as Terrans and the other as the Kahoum. The Faction rules are not required for the Basic Game. All necessary rules are in the main rulebook. The Basic Game is somewhat unbalanced in favor of the Kahoum, but is intended to teach the system.
Setup
Each player selects which faction they want to play, and takes the appropriate 50-card deck, Start Building cards, and unit tokens. Each player also takes their screen to hide their base, although it is recommended that screens not be used for at least the first few turns, until the players are comfortable with the flow of play.
The Frontier board is placed in the center of the table.
The Kahoum start with the Basic Game Novice Starting Building card with two Infantry tokens. The Terrans start with the Turret Starting Building card with two Building tokens. These cards and tokens are placed face up in each player's base. The Kahoum Full Game Novice card and Terran Militia card are not used and are returned to the box.
Each player secretly selects two cards of their choice from their deck, plus one Standard Attack card. The remainder of their deck is shuffled and then the Standard Attack card is placed on the bottom of the deck, which is placed in a convenient location.
For your first game it is suggested that the Terran player choose a Barracks card and a Factory card as their first two cards, and that the Kahoum player choose a Quake and a Pyre.
All players then draw one more card from the top of the draw deck to bring their hand to three cards.
Finally, players roll to see who will get the first play.
Sequence of Play
A Player Turn
- Play one card
- If you played an Attack card, start the Battle Sequence
- All players draw back to 3 cards
The game ends when both players run out of cards or a player's base is conquered.
Play alternates between players. On their turn a player plays one card. Usually a card will be played as a Building or as a Resource on a Building to produce those units.
However if an Attack card is played, the players have a Battle. During a Battle the players will both perform Construction, converting played cards into units, and then will roll dice to attack each other in a series of Combat Rounds, following the Battle Sequence described later.
After playing a card and resolving a Battle (if necessary) both players draw back up to their hand size of three cards. Normally this is only the current player, but due to Emergency Defense the other player may have played some cards, and will also need to draw. Each player will only draw from their own deck.
If a player's draw deck is exhausted they do not reshuffle the discards or draw any cards and will play with what they have in their hands. If a player has no more cards left in their hand and their draw deck is depleted, they must pass their turn. They still defend normally until the game ends.
After drawing back up to three cards, the turn passes to the other player, who plays a card as described above.
Cards
Each card in a faction deck falls in one of four categories, based on the icon in the upper right of the sidebar: Building, Attack, Special, Special Building.
Playing a Card
On your turn you play a single card. This will be played into your Base, except Attack cards which are played to initiate a Battle.
Every card (including Building and Attack cards) may be played either face up, in which case it has the ability shown, or face down, in which case it is a resource. Resources are typically used to construct buildings and units, and are represented on cards by the blue diamond icon. Note: In the Basic Game, Special and Special Building cards MUST be played face down as resources.
Once any card is played into your Base it cannot be flipped, moved, or otherwise adjusted until a Battle you are involved in, and then only as described in the Construction and Battle rules. Once a card is played as a resource it cannot be turned up. Similarly, a card played face up cannot be turned into a resource.
Building Cards
These cards are played into the Base Area to produce units. Most are capable of producing two different types. When the card is played, the player selects a particular side to be upwards. This is the unit that can be produced. Once a Building card is placed into the Base it may not be rotated to produce the other type of unit.
Anatomy of a Building Card: the card shows the Unit Name, Initiative, Card Type Icon (Building), Building Cost (Full Game), Unit Cost, Unit Type, Attack Ratings, Building Name, Special Ability Icon, and information on the other unit this building can produce. The same card rotated produces the other unit.
Buildings are NOT removed just because all of the units on them are destroyed in combat. They can have new resources placed on them to construct new units.
You can have more than one of the same building in your base, whether they are producing the same or different units.
A building that has no units on it is called an Empty Building.
Unit-producing buildings have the following common features:
- A Sidebar containing the Building icon plus the Building Name, and Building Cost (how many resources are required to place the building into your base).
- One or two units that the building can construct. At the top of the card is the name of the unit, the resource cost for one unit, and the type of the unit (Infantry, Armor, Air, or Building). The Unit Type determines the Attack Rating that is used when Firing at this unit. Just below this is a box showing the Initiative of the units, which determines how early in the Combat Round they Fire. Below this are the four unit icons with a number in each. These are the Attack Ratings the unit has against different types of opponents. Finally, any special abilities the unit has are identified by icons or text below Attack Ratings. These are all detailed later in the rules.
- The Terran Dropship unit and Kahoum Ember, Pebble, and Zephyr units have special text below the special ability icons. This text is ignored in the Basic Game.
- Each faction has Starting Building Cards that are placed into the Base at the start of the game. Starting Buildings may never be destroyed (although the units on them may be).
Attack Cards
Playing Attack cards are essential to victory, as players will attempt to attack and hold the Frontier or conquer their opponent's base.
An Attack Card must be played to initiate a Battle. Some contain special rules that change the way combat is conducted or give special bonuses. These special rules are ignored in the Basic Game. All Attack Cards are treated as Standard Attack cards.
Attack cards are awarded to the player controlling the Frontier as Scoring Cards. So the longer a player controls the Frontier, the more opportunity they will have to score points. See Scoring and Victory for more details.
Each deck has 9 Attack Cards.
Special Cards and Special Building Cards
In the Basic Game Special and Special Building cards must be played face down as Resources.
Utility Cards
There are cards that are used during Battles and are shared by the players. These are not included in the draw decks:
Combat Choice Cards: The two Combat Choice cards, Normal Attack and Deep Strike/Raid are used during a Battle to indicate the type of attack.
The numbered track at the bottom of the card represents the number of Combat Rounds that type of battle lasts. The Combat Round Marker is placed on the highest numbered box and moved down one box each round to track the number of rounds remaining. See the Battle rules for details.
Base Cards: These cards are placed at the ends of the Defender's Battle Line if they are defending their Base. See the Battle rules for full details.
Units
Once a building has been played into your base, on future turns you can play resources on the building to construct units. Cards are played directly onto the building card face down as resources to construct units.
The diamond 'resource' symbol shows how many resources are required to build one of that unit. At the start of a Battle you will get one token matching the unit type for each set of resources equal to the cost. For example, if you have three cards on the Barracks with the Troopers side face up, you will place three Infantry tokens on the card during Construction, since the cost of each Trooper is one resource. If you are constructing a Terran Heavy Tank, which costs three resources, for the same three cards you would only get one Armor Token, representing one Heavy Tank. If you have five resources on the Heavy Tank during construction, you would get one token and the other two resources would not be used.
Unit tokens are kept on the building card so the players know which unit they represent.
A maximum of four units may be on a building card. Once four units are built no more can be constructed on that card until some are destroyed.
Excess resources, whether due to the maximum unit count being reached, or excess from multi-resource units, are kept on the card for future construction.
There are four types of units: Infantry, Armor, Air, and Building. These are symbolized by a Green Square, Red Circle, Blue Triangle, and Gray Pentagon, respectively. Units have ratings against each of these four types of units, shown just below the unit name on the building card.
The Trooper has an Attack Rating of '2' against Infantry, '1' against Armor and Buildings, and '0' against Air units.
An 'X' rating means that the unit can NEVER hit that type of enemy unit, regardless of modifiers. Units with a 'zero' rating may be able to hit the opponent. See the Combat Round rules for more details.
Terran First Six Turns example: Eric is playing the Terrans. For his first turn he places a Heliport card into his base, with the Predator side up. On turn two, he places a card face down as a resource on the Heliport. Later in the game, when a Battle starts he will replace this card with an Air token, representing one Predator unit, since the cost of a Predator is 1 (shown in the blue diamond). This is called Construction. For turn three he places a new building, the Heavy Barracks, with the Rocket side up. During turns 4 and 5 he places two resources on this building, which will allow him to build one Rocket, since they have a cost of two. Note that he could have played somewhere else on turn 5. He does not need to complete the Rocket Infantry unit on consecutive turns. On turn 6 Eric places another resource on the Heliport.
Forces
A Building card with units on it is called a Force. Forces are what participate in Battles.
Construction
When a player plays an Attack card, the normal play is suspended while a Battle is fought. At two points in the Battle sequence (step 2 for the Defender and step 3 for the Attacker, see details below) the Base is revealed and the player actually exchanges the resource cards placed on buildings for units, and performs other activities. This is called Construction.
During Construction the player removes their screen and must exchange resources on top of a building for the appropriate unit tokens, representing units. The cost of each unit is noted on the Building Card. Resources that are used up are discarded. Excess resources remain on the building. (See Units for details).
Basic Game: Construction — Eric's opponent Ryan plays an Attack Card and announces that he is attacking Eric. So Eric removes his screen and does Construction. The two resources on the Heliport card are replaced with two Air tokens, representing two Predator units. The two cards on the Heavy Barracks card are replaced with a single infantry token, since the cost in the blue diamond is two. All resources are placed in the discard pile.
The opponent should monitor the Construction activities of the player. Construction is not secret, but is open.
Battle
A Battle starts when one player plays an Attack card and declares an attack. That player is called the 'Attacker' and the other player is the 'Defender'. Attack cards may be played face down as resources, in which case they do not trigger an attack, are not announced, and do not count for scoring.
Battle Sequence Summary
To resolve a Battle, follow these steps:
- Attacker secretly chooses Normal or Deep Strike attack
- Defender does Construction and, if they control the Frontier, announce if they are defending the Frontier or their Base.
- Attacker reveals Normal or Deep Strike selection and Attack card and does Construction.
- Place Forces in the Battle Line
- Conduct Combat Rounds
- Battle Results
Battle Sequence Detail
1. Attacker secretly chooses Normal or Deep Strike attack
The Attacker places both their Attack Card and Combat Choice card face down on the table.
If the Frontier is neutral the Attacker can just announce they are taking the Frontier. In this case the Attacker does Construction and takes control of the Frontier if they have at least one non-Base Defense unit. The Defender does not do a Construction step, and this ends the Battle. If the Frontier is neutral the only way the other player can be attacked is by Deep Strike.
If the Attacker is not taking a neutral Frontier, he secretly chooses between two Combat Choice cards: Normal Attack and Deep Strike. Deep Strike means that a player is attacking the opponent's Base directly from their own Base.
What is allowed by a Normal Attack depends on the Frontier:
- If you control the Frontier, a Normal Attack allows you to attack your opponent's Base.
- If you do not control the Frontier, a Normal Attack allows you to attack the Frontier and take it over.
Attack Choice example: In this example, the Terrans control the Frontier. When selecting a Combat Choice card, if the Kahoum want to attack the Frontier they will select a Normal Attack. If they select Deep Strike they will attack the Terran Base. If the Terrans attack they must play a Normal Attack and attack the Kahoum base since they control the Frontier.
2. Defender does Construction and Declares Base or Frontier Defense
The Defender removes their screen so the other player can see their Base. The Defender then resolves all construction, building buildings and units (See the Construction rules for details).
If the Defender owns the Frontier, they announce whether they will defend the Frontier or the Base. If the Defender does not own the Frontier, they (of course) must defend the Base.
3. Attacker reveals Normal or Deep Strike selection and Attack card and does Construction
The Attacker reveals the Attack and Combat Choice cards they selected in step 1. The Attack card is kept by the player who controls the Frontier, as a Scoring card (unless the Defender is surprised — see below).
Remember that the Attack card is awarded based on who controlled the Frontier at the beginning of the battle. If it changes hands it does not change who receives the card.
The Attacker places the Combat Round marker on the highest numbered box on the Combat Card (six for Normal Attack, and three for Deep Strike / Raid).
The Attacker then removes their screen so the other player can see their construction. The Attacker resolves all Construction, building Buildings and Units.
All Attacker Forces that are eligible to participate in the battle must do so. If the attack is a Deep Strike only units with the Deep Strike ability may participate. Base Defense Forces may never attack, only defend the Base.
If the Attacker is attacking the Frontier and the Defender has chosen to defend the Frontier, the battle takes place in the Frontier. All Attacker and Defender Forces must participate except 'Base Defense Only' Forces.
If the Attacker is attacking the Frontier and the Defender has chosen to defend the Base, the Attacker automatically wins with no combat, and takes control of the Frontier.
Surprise: If the Attacker is attacking the Base via Deep Strike and the Defender has chosen to defend the Frontier, the Defender has been surprised. To represent this, the scoring card is kept by the Attacker, and then the Battle will take place normally, with all of the Defender Forces defending the base.
4. Place Forces in the Battle Line
Players place their Forces into a Battle Line, which is started on a free area of the table surface between the players. The Battle Line is created by making two rows of cards — one for the Attacker and one for the Defender.
This process is normally started by the Attacker, who places a single Force of their choice. The Defender then matches this with one of their Forces, placing it opposite the Force placed by the Attacker, and then places one additional force to either end of the Battle Line.
This is then matched by the Attacker, who also places one additional Force at either end of the Battle Line.
This process continues, with each player matching the last-played opponent Force and then placing one additional Force, until both players place all of their Forces (see example).
If a player runs out of Forces, their opponent matches up against unmatched Forces (if any), and places extra Forces on either end of the Battle Line, unopposed. These Forces will be able to shift position during the first Reorganization step during Combat Rounds.
Battle Line and Scouting Example: Cody has declared an attack on John in the Frontier, and has three Forces. John has four Forces. Neither has scouting points. Since he is attacking and scouting points are equal, Cody has to place the first Force, beginning the Battle Line. John now matches that Force and places one additional Force on either end of the Battle Line. Cody has to match that card and place one additional Force. Cody is out of Forces, so John places his remaining two. John's unengaged Force on the right will be able to move to a new position during the Reorganization step.
Now let's look at the same example, except that Cody has three scouting points and John just has one, and the attack is on John's Base. Since he has fewer Scouting points, John now has to place his Forces first. As the difference in scouting points is two, he has to place two Forces, beginning the Battle Line. Cody then places three Forces, one more than the number placed by John. Finally, John places his last two Forces, one matching the last Force Cody placed, and one at the end of the Battle Line. Since John is defending his Base, he places the two Base cards to the outside of his Forces.
Scouting: As noted above, normally the Attacker places the first Force. However this may be changed if a player has more Scouting points then their opponent.
If a building has a Scouting rating, this is the number of Scouting points that are generated as long as the building has at least one Unit on it, and is in the Battle. It generates the same number of points regardless of the number of units on the card.
If the players have different amounts of Scouting points, the player with the fewest Scouting points creates the Battle Line by moving a number of their Forces onto the center of the table equal to the difference in Scouting points. The other player then matches those Forces and places one additional Force. Players then alternate playing two Forces, as described above.
Base Cards: If the Attacker is attacking the enemy Base, after all Forces are placed the Defender places the two Base cards on either end of their Battle Line. These cards are placed to form a new column outside all Forces, both Attacker and Defender. The Attacker may fire at Base Cards to destroy Empty Buildings.
5. Conduct Combat Rounds
Forces attack each other through a series of Combat Rounds, rolling dice for attacks, until one player's forces are destroyed, one player retreats, or the maximum number of rounds have been fought. See the Combat Round rules for details.
6. Battle Results
After one player wins the battle, the results are applied.
- If the Defender wins the battle, nothing further happens.
- If the Attacker wins the battle, and was attacking the Frontier, they place their Control marker on the Frontier and remove their opponent's marker.
- If the Attacker wins the battle and was attacking the Opponent's base, the opponent's base is conquered and the Attacker wins the game.
- At the conclusion of the Battle, surviving cards are returned to base and can be used to build new units in future Construction phases. Screens are replaced, players fill their hands back to three cards, and play continues with the other player.
Combat Round Sequence of Play
1. Emergency Defense
If defending their base, the Defender may play one or more of the cards in their hand as resources (not for their face-up effect) to build Base Defense units only. Immediately turn them into units, using the normal construction rules. This is optional.
If units are constructed on a Building that is not in the Battle Line, the new Force is considered unengaged and will be placed using the normal Reorganization procedure (see below).
2. Reorganization
During Reorganization players may reposition any unengaged Forces on the Battle Line. These are Forces that are either:
- In Flanking position
- Unopposed (no Frontline enemy force in the same column)
Unengaged Forces may be moved either:
A. Behind a friendly engaged Force. This is called Flanking, and gives the Flanking Force a +1 modifier to all Attack ratings. If there is more than one Flanking Force behind a single engaged Force they each gain the +1 modifier. Note that Forces may not flank behind an unopposed Force (see below). Some Forces are labeled as No Flanking. These Forces may not be placed into a Flanking position, and Forces placed behind them do not get the +1 Flanking bonus.
B. Into the battle line, unopposed. Pick a place on the end of the Battle Line or in between two Friendly Forces. Slide down all other forces (Friend and Enemy) to make room. In this position the Force does not gain the +1 Attack modifier, but does move other Forces further apart. So if you want to protect a certain Force, this may be a good option (see Position Modifiers).
If both players have unengaged units, both players pull back all unengaged units from the Battle Line and return to the original Battle Line placement procedure (Battle Sequence, step 4). The player with the fewest scouting points moves a number of Forces equal to the scouting difference into the Battle Line adjacent to a friendly force, then the opponent matches those forces, etc. Scouting points are evaluated at the moment of reorganization (so Forces eliminated from combat do not count).
After Forces are matched up, if a player has excess Forces they may be placed per the normal Reorganization rules (for example, into a Flanking position). At the end of Reorganization only the player with more Forces may have Forces in a Flanking or Unopposed position.
Note that Forces may never be placed opposite a Base Card. These cards, if in play, are always positioned at the far edges of the Battle Line.
3. Declare Retreat
Attacker can declare a retreat. If the Attacker chooses not to, the Defender may declare a retreat, unless defending their Base, in which case no Defender retreat is allowed. The combat round is resolved as normal, except the retreating side does not get to fire at the opponent.
4. Roll for Attacks
The order that Forces fire is based on their Initiative. All Attacker and Defender Forces that have the same initiative are called an Initiative Group. The Initiative Group with the highest initiative acts first, then subsequent Initiative Groups act in descending order. Certain effects in the Full Game may modify the Initiative. There is no maximum or minimum to Initiative after modifiers.
Within each Initiative Group both Attacker and Defender get to roll their attacks before any losses are removed. The Attacker rolls all their attacks, then the Defender rolls their attacks, then losses are removed.
For each Initiative Group the player can select the order in which their Forces will attack. So the Attacker selects a Force with which to fire, announces which enemy Force they will be firing at, rolls the dice, and determines hits. They then select another Force with which to attack, selects a target Force, rolls the dice, and determines hits. This process is repeated until all eligible Forces have attacked. Then the Defender does the same, and losses for both players are removed. To remember which Defending units have been hit before they are removed, simply slide them to the bottom of the card.
Position Modifiers: Depending on the position relationship between the firing Force and its target, the Attack Rating may be reduced.
There is never any Position Modifier for firing at an enemy Force in the same column as the Force that is shooting.
If you wish to fire at an enemy unit that is in a different column, you must subtract one from the Attack Rating for each column you pass over that contains an enemy building, including the one the Force is in.
Position Modifier Simplified Example: Attacker Forces A, B, C face Defender Forces D, E, F, G. 'B' is firing. If B fires at E there is no Position Modifier. Firing at D or F, skipping over E, results in a -1 modifier, and firing at G, skipping both E and F, gives a -2 modifier. In a second example 'E' is firing. If E fires at C the modifier is only -1, since there is no enemy Force opposite F.
You do not subtract for skipping columns that do not contain an enemy building.
The same Position Modifier applies when firing at Forces in a flanking position. They are treated the same as Frontline units in that column when targeted.
Each round Forces may change who they target. A Force does not have to target a Force that it was targeted by.
The 'To Hit' number for a Force is calculated by taking the Attack Rating against the defending unit type (infantry, armor, air, or building) of the defender, and adding or subtracting modifiers based on the Battle Line, special abilities, Attack cards, etc. The player rolls one die for each unit in the Force. For each die that is equal to or less than the 'To Hit' number for that unit a 'Hit' is scored on the opposing Force. Regardless of modifiers, rolls of '6' always miss.
Calculating To-Hit Number
Base: Attack Rating based on Defending Force Type
- +1 if in Flanking position
- -X based on Position Modifier
- Other modifiers based on Attack cards, abilities, etc.
Important: Regardless of modifiers, rolls of '6' always miss.
Zero To-Hit: If the Force has a final To-hit number of zero, roll one die for every two units, and score hits on a '1'. Left-over, single 'zero' to-hit units may not attack. If the final To-Hit number after modifiers is below zero, it is impossible to hit, and you do not roll any dice for those units.
For each Hit, one defending unit is removed. Excess hits are lost. Some units require two hits to destroy. (See the Tough rules for more details).
After all Forces with the same initiative have completed firing and losses have been removed, check to see if all units in a Force have been destroyed. If so, then remove the card from the battle and return it to the owner's base.
Excess hits on units do not carry through onto the Empty Building. It would have to be attacked separately (see below).
Note: If there are Flanking Forces behind the Force that lost all its units, slide those Forces forward to fill the gap. The first Flanking Force will become the new Frontline Force.
Firing at Empty Buildings: If the Attacker is attacking the Defender's base, they may target enemy Empty Buildings with a Force instead of enemy Forces. Instead of attacking an enemy Force, the Attacker attacks either Base Card at the end of the Battle Line, and as usual roll one die for each attacking unit that is part of the Force. Use the 'Building' rating of the firing Force and the normal Position Modifier.
If at least one hit is rolled, the attacker destroys a single Empty Building of his choice (including a newly-empty building that just lost all of its units) and sends it to the discard pile. One Empty Building is destroyed regardless of how many hits were rolled by the Force.
5. Move Combat Round Marker down one box
Move the Combat Round marker down one box on the Combat Choice card. If it moves off of the '1' box the Battle is over and the Attacker has lost.
If either player declared a retreat in step 3, the round limit has been reached, or one player has lost all Forces, the Battle is over. Otherwise return to step 1, Emergency Defense.
Combat Abilities
Tough: Units marked with a 'cross' symbol require two hits to be destroyed. When involved in combat, one unit is lost for each pair of hits received. If there are any leftover hits, a unit is 'damaged' and one more hit will destroy it. A unit is marked as 'damaged' by placing the unit on the yellow cross symbol. There can be at most one damaged unit in a Force. You cannot spread out hits so multiple units are damaged.
When the battle is over all damaged units regain full strength.
There is no effect on a unit's capabilities by being damaged. It fights with full stats, and retains all abilities. The only difference is that the next hit will destroy that unit.
Shield: Forces with a Shield can absorb a certain number of hits for the Battle before taking any losses. This is indicated by placing a power token on the Force for each shield point during the Construction step to show the shield is in place. When those units suffer a Hit a Power Token is removed instead. If the Force suffers multiple hits at the same time, shields are removed first and excess hits are still applied to the units. (Example: A Kahoum Void Rip Force has three units. During the Construction step one power token is placed on the shield symbol. During the first round of combat, the Void Rip suffers three hits. The first will destroy the shield, and the other two will each destroy one unit). Shields are not replaced during the Battle, but do regenerate during a future Construction step even if destroyed in a prior Battle.
Scouting: The Force has a number of scouting points equal to the number next to the icon. See the rules on the Battle Sequence, step 4 for details on how scouting is used.
Deep Strike: The Force can be used in a Deep Strike attack.
Base Defense: The Force can only be used when you are defending your Base.
Rerolls: Certain abilities may give a side rerolls during a combat. Once a reroll is used it is gone for that Battle. Your rerolls are used on your own rolls, not on your opponent's. You may not reroll a reroll, and must accept the result of the reroll.
No Flanking: Forces with No Flanking may not be placed in a Flanking position, and do not give a +1 to friendly Forces that are Flanking behind them when they are the Frontline Force.
Full Combat Modifier Example: The Mecha Infantry has no modifier against the Soldier, so it would have a To-Hit number of '3'. It could also attack the Poison Ivy with a To-Hit number of '1', since there is a -1 position modifier for skipping the Soldier and it normally hits a Building unit on a '2'. Or it could attack the Rover, skipping over the Soldier and Poison Ivy for a -2 modifier, reducing the '4' Attack Rating against Armor to a '2'. The Bomber gains a +1 Flanking bonus, so it could attack the Soldier with a To-Hit number of '3', the Poison Ivy with a To-Hit of '4', or the Rover with a To-Hit of '1'. The Stealth Infantry is unopposed, so it can attack the Poison Ivy or Rover at normal attack ('1' To-Hit against either), or the Soldier at '0' To-Hit. The Poison Ivy cannot shoot at the Tanks, since the rating of '1' would be reduced to '-1' after skipping the Trooper and Rocket. If it fires at the Bomber there would be no position modifier, even though it is flanking, so it would have a To-Hit of '0' and roll one die for the three units, hitting on a '1'.
Scoring and Victory
When an Attack card is played to attack the other player (i.e. not as a Resource in the base), it is kept by the player who currently controls the Frontier. That player keeps it in a special Scoring pile underneath their Base Mat. In the Basic Game, since Base Mats are not used, the Scoring Cards are kept in a separate pile to the side of the base. The number of Scoring cards is kept secret.
Scoring without Attacking
The player who controls the Frontier may play an Attack card on their turn without actually launching an attack, and put it in their scoring pile. To do this, they first show the Attack card to their opponent, announce that they are not attacking, but are just going to score the card, and add it to their Scoring pile. Note that a player may choose to Attack with the card as normal, and it will still be added to their Scoring pile. This just allows the player to 'bank' a point without putting their army at risk. No Construction is conducted, and this counts as the sole card play for the turn.
Game End
The game can end in one of two ways. If a player conquers the opponent's base, the game ends, and the conquering player wins. Otherwise, when both players have no cards in their hands and no cards in their draw piles, the game ends and the players tally their points. The player with the most points is the winner.
Scoring
- At the end of the game, each player gains one point for each card in their Scoring pile.
- In addition, the player who controls the Frontier at the end of the game gains two bonus points.
The winner is the player with the most points.
If there is a tie, the winner is the player who controls the Frontier at the end of the game.
STOP: Please play the Basic Game once or twice before proceeding to the Full Game.
Full Game Rules
The Full Game adds the Xenos and Colossus to the game. It also adds the full special abilities, strengths, and weaknesses of each Faction. Each Faction has their own special rules that are included in their specific Faction rules, and each player should be familiar with at least the rules for their faction before starting play.
The Full Game uses all the Basic Game rules with these modifications:
Setup Changes
Each player selects one of the four factions to play.
Each faction has a Base Mat which is placed behind their screen. Buildings are still normally played to the table surface, next to the Base Mat (Exception: Colossus). The Faction rules describe the use of each Base Mat.
The starting buildings and units for each faction are detailed in the faction rules. Note that the setup for the Terrans and Kahoum in the Full Game is not the same as the Basic Game.
Special Cards and Special Building Cards
Each faction has different types of Special cards that give special abilities or options to that faction. See the Faction Rules for details on how these cards are played and what they do. Cards with the Special Building Icon (like Xeno Brains) are always considered Empty Buildings.
Timing
Some special Faction abilities activate before or after certain phases. For example, the Xenos Tactical Brain allows Forces to switch places after the Reorganization phase.
If both players have abilities that trigger at the same time the Attacker always resolves first, followed by the Defender.
Buildings with a Resource Construction Cost
The cost to play a building card is in the blue diamond icon in the sidebar. Most Building cards and Special Building cards have a Building Cost of zero. These are placed directly into your Base.
However some have a cost of one or greater. In order to play one of these building card into your Base it must be played on a stack of resource cards equal to the cost of the building. For example, the Colossus Explosive Gun building takes one resource to build. So it will take two turns – first any card is played face down as a resource, then the Explosive Gun card is placed on top of it.
Once one of these buildings has been placed onto a resource stack it is considered 'built'. Resource cards can be placed on top to build units, cards can be attached, etc.
A few notes about these stacks of resources:
- You do not have to know what type of building you will construct when starting a new stack of resources in your base.
- You do not have to play to the same stack of resources in consecutive turns. You can start it one turn, do other things in subsequent turns, then return to add more resources or a building to the stack.
- You can have any number of separate resource stacks in your base. But they cannot be combined or divided once started.
- A resource stack with no building on top of it is treated as an Empty Building for all purposes. If it consists of more than one card, they are all discarded together if the 'Empty Building' is destroyed.
- If it is discovered during Construction that insufficient resources are placed below a Building card to construct it, the Building card and any resource above it are discarded. No units are built. The resource pile below the Building remains and can be used for future building construction.
Resource Stack Example: 1. Susan wants to build a Mortis Cannon, so she needs to add the Explosive Gun building to her base. The building cost is one resource, so on this turn she plays another card face down into her Base. 2. On a future turn she can play the Explosive Gun card on top of the resource.
Most factions also have permanent Base buildings that are printed on their Base Mat. For example, the Terrans have the Worker building, and the Xenos have the Queen, who produces eggs. Buildings that are printed on the Base Mat are used the same way as regular buildings – you place cards face down on them as resources to produce those units, except that preprinted buildings are available from the start. They do not have to be built, and they can never be destroyed. Units on the preprinted Buildings may not be attacked.
Bonus Resources
Certain cards (such as the Terran Resupply Attack) allow you to take Bonus Resources. Take cards from your discard pile and play them as Resources into your base, the same as normal resources. The exact cards taken do not matter, as they are simply being played as resources.
If you do not have enough cards in your discard pile, you take as many as possible and forfeit the rest of the bonus.
Power
Special abilities, unit upgrades, and more powerful buildings often require Power to operate. Power is represented by the lightning bolt icon.
Each faction has a different way of generating power:
- Terrans: Power plant buildings and Workers
- Xenos: Each egg can be turned into one power
- Kahoum: Obelisks and Acolytes
- Colossus: Resources played onto Upgrades are converted to power
Each faction also uses power in different ways. Please review the faction rules for details.
Attaching Cards to Buildings
Some factions have cards that can be 'attached' to a building, such as technology and upgrade cards. These are detailed in the Faction rules.
To show that a card is attached it is placed under the building card with the name and ability showing at the top for easy reference. Attached cards stay with the building as it is moved in and out of a Battle.
If a building is destroyed any attached cards are also destroyed.
Construction (Full Game)
During Construction the player must:
- Discard any resources that were used to construct a building (stacked underneath the building).
- Exchange resources on top of a building for the appropriate unit tokens, representing units.
- Allocate Workers, Power, Technologies, and other special cards and units per the faction rules.
Each faction has a sample Construction on the back of its Faction rules.
Special Attack Cards
In addition to the four Standard Attack cards, each faction has two Raid Attack cards, and three special Attacks that are specific to that Faction. The special Attack cards have rules that change the way the Battle is conducted. These effects never last beyond that Battle.
Raids
The Raid attack cards allow the player to conduct a hit-and-run attack against an enemy base, regardless of who controls the Frontier. The Attacker cannot conquer the enemy base or the Frontier using a Raid Attack card.
A Raid Battle is handled differently than other Battles. When a Raid Attack card is played, the Attacker must select the Deep Strike/Raid Combat Choice card, regardless of whether they control the Frontier or not. This does not mean that the Attacker's Force needs to have the Deep Strike ability. It is just used to show that a Raid attack is only three rounds long. Note that like all Attack cards, the fact that you are playing a Raid card is not revealed until after the Defender does Construction. This can be a nice edge for the Attacker, as the Defender may not have the best Forces to defend against a Raid.
During a Raid, each player may only use one Force for combat. The Attacker must use a non-Base Defense Infantry or Armor Force, and the Defender must select Infantry, Armor, or Base Defense. These Forces are chosen secretly, by placing a screen in front of the possible Forces and marking the chosen Force with a Raid Force token, and then revealing the choice. The Battle Line and Scouting procedures are not used. The two Forces merely face off against each other.
Base Cards are NOT placed during a Raid Attack.
Emergency Defense may NOT be played during a Raid Attack.
The Defender MAY retreat during a Raid Attack.
If the Attacker wins a RAID he selects which rewards he will take. There are three possible rewards, as noted on the card, of which the Attacker may choose two:
- Take a Scoring Card from the Defender
- Gain three Bonus Resources.
- Destroy one Empty Building in the Defender Base (Attacker choice).
Each bonus may only be chosen once during a Raid. If it is only possible to take one bonus, the other is lost. In no case can a player be eliminated or control of the Frontier change after a Raid, whether it is neutral or controlled by a player.
Multiplayer Rules
While the two player experience is the core of The Ares Project, it can be played by three or four players with only minor rules changes. However, it is strongly recommended that all players be familiar with the game before attempting multiplayer. If all players are learning, the game will be very slow and drag out.
Free-For-All (Three or Four Players)
The rules are the same except as noted here:
Play proceeds clockwise from the first player.
When playing an Attack Card, the Attacker announces which player they are attacking.
All Bases are considered adjacent to the Frontier, but not each other (see diagram below).
If a player loses a Battle when defending their base they are eliminated from the game, and the Attacker takes all their scoring cards, and the game continues.
Free For All Base-Frontier Relationship: In a Free-For-All match, all bases are adjacent to the Frontier, but not each other. So in the example below, the Terrans control the Frontier. The Xenos could Deep Strike into the Terran or Kahoum Base. On a Normal Attack they must attack the Frontier as usual. If the Terrans attack they may attack either the Xeno or Kahoum base.
Team Match (Four Players)
Divide the four players into two teams. The Team Match is played exactly the same way as a two player game, with each team winning or losing together. It is played the same as the Full Game except:
- During setup each player discards two Standard Attack cards from their deck.
- The two players on a team sit next to each other and take their turn together. Each player plays a single card to their own base or as an Attack card, as per the normal rules. Teammates may consult when deciding which cards to play, and view each other's bases at any time.
- If either player plays an Attack card a Battle starts. All four players are involved in the Battle. The two teammates combine their forces and deploy them into the Battle Line together. When a Force is placed into the Battle Line it may come from either teammate.
- When a Base is attacked, both players on the defending team are considered to be defending their Base and may use Base Defense units, play Emergency Defense resources, etc. If a team loses a battle while defending their Base the Attacking team wins the game, just as with the normal game.
- Any special abilities from the Attack card or special faction abilities (like Kahoum Obelisks) only apply to that particular faction's Forces.
- If desired, both players on a team may play an Attack card. In this case a single Battle is fought, with a single Combat Choice card selected jointly by the team. Both Attack Cards will be awarded as scoring cards. If the Defender is surprised, both will be kept by the Attacker.
- Raid Attacks cannot be played if the other teammate is playing another Attack Card (even another Raid). They must be played singly. If a Raid card is played the participating Force may come from either player on the team.
- The scoring cards for the team are pooled, and they win or lose together.
Glossary
Attached Card — A Special card that has been assigned to a building. If the building is destroyed so is the Attached card. Examples include Terran Technologies and Xenos Evolve cards.
Attack Card — A card with a sidebar containing the word 'Attack'. An Attack card is played to initiate a Battle.
Attack Rating — The four numbers that are printed on a Building showing the strength against a particular type of target (Infantry, Armor, Air, or Building). The Attack Rating can be modified by various factors and results in the To-Hit rating.
Battle Line — A line of Building cards that is created at the beginning of the Battle.
Base — The area behind the player screen where cards are placed. It consists of the Base Mat and the table surface.
Base Cards — The two cards that are placed on the end of the Defender's battle line if defending their Base. The Attacker fires at Base Cards to destroy Empty Buildings.
Base Defense — A unit with the Base Defense icon can only be used in a Battle where the owner is defending their Base. Emergency Defense can only be used to build Base Defense units.
Bonus Resource — Certain cards give Bonus Resources. These are taken from the discard pile and placed in the Base face down as Resources.
Building — Any card marked with a grey pentagon in the sidebar is a Building card.
Building Cost — The cost, in Resources, to place a Building or Special Building card into your Base. If it is greater than zero you must create a Resource Stack first equal to the cost.
Combat Round — A repeated set of activities during a Battle, including Firing at the enemy. Battles consist of either three or six Combat Rounds.
Construction — The time at the start of a Battle when resources are converted into units and Power is generated and allocated.
Deep Strike Ability — Units with the Deep Strike ability may participate in Deep Strike Attacks.
Deep Strike Attack — An attack made directly from one base to the other base, skipping the Frontier.
Emergency Defense — During a Base Defense, the Defender may construct Units using cards from their hand as resources. May only build Base Defense units.
Flanking Force — A Force that is placed behind a Front Line Force on the Battle Line. Flanking Forces gain a +1 to all Attack Ratings.
Force — A Building with Unit tokens on it.
Front Line Force — A Force that is on the forward-most row of the Battle Line, facing the enemy Front Line row.
Frontier — The area between the two Bases. The player controlling the Frontier gets all played Attack cards as Scoring cards, and gains 2 points at game's end.
Initiative — Determines when during Combat Rounds the Force fires. The higher the number, the earlier in the round it fires.
Initiative Group — The Forces of both players that have the same Initiative.
No Flanking — Forces with No Flanking must be placed on the Front Line in the Battle Line, and Forces that are Flanking behind them do not get the +1 Attack bonus.
Normal Attack — An attack from a Base into the Frontier, or from the Frontier into an enemy Base.
Positional Modifier — A modifier to the Attack Rating of a Force that is firing at an enemy that is not in the same column on the Battle Line.
Power — Required by many special units and abilities. Generated differently for each Faction, and represented by Power Tokens.
Raid — A special type of Attack card that represents a hit-and-run raid on the enemy base. Raids are resolved by using only one Force from each Faction in the Battle, and can never result in losing a base, or gaining or losing the Frontier.
Resource — A card played face down is a Resource, and is used to construct units and some Buildings.
Resource Stack — A stack of Resource Cards in your base played in preparation for a building card with a cost greater than zero. Treated as an Empty Building.
Scoring Card — An Attack Card that is placed face down beneath the Base Mat. It counts as 1 point at the end of the game.
Scouting — A Force with the Scouting icon has the number of Scouting points indicated. The side with fewer Scouting points places Forces into the Battle Line first.
Shield — A Force with Shield has a power token placed on it during Construction. The first hit the Force takes removes the Power token and does no damage.
Special Building Card — Cards marked with the 'Gear/Pentagon' icon. The rules for using these cards are in the Faction Rules. They are always considered Empty Buildings.
Special Card — Cards marked with the 'Gear' icon. The rules for using these cards are in the Faction Rules.
Surprise — If the Defender chooses to defend the Frontier, and the Attacker does a Deep Strike, the Defender is Surprised. The Battle is fought as normal, but the Attacker gets the Scoring card.
To Hit — When Firing you must roll equal to or less than this number to get a hit on an opposing Force. It is equal to the Attack Rating plus any modifiers.
Tough — These units must be hit two times before being eliminated.
Unit — An Infantry, Armor, Air, or Building token that is on a Building.
Victory — Victory is achieved by eliminating the other player or having the highest point total at the end of the game.
Tips and Tactics
We strongly recommend that the first few times you play, just play the Introductory game, and then some standard two-player game. Do not use the Multiplayer rules until you are familiar with the cards and rules. Four new players will slow the game down to a crawl, and you won't have the quick pace that keep The Ares Project dynamic and fun.
Your first decision is your two starting cards. Try to develop a combination that will work well together. There are a lot of different pairs that work well, and as you learn the game you will begin to see many different possibilities.
One approach is a 'rush' strategy, where you build weak inexpensive units and try to grab the Frontier quickly. This will put you in good position early to begin to accumulate victory points. It also gives you options to follow it up with a quick attack against the enemy base. If your opponent is building strong units they won't be able to construct them quickly, and a fast attack may knock them out of the game before they have a chance to complete them.
If you are trying a slow buildup strategy don't neglect base defenses. These cost less than comparable offensive units, and can help protect you against opponents who are choosing a rush strategy and will try a quick attack. If you can survive an early onslaught you should be in a strong position to counterattack with your more powerful units.
If you control the Frontier and are attacked you need to balance the condition of your own forces with what you know about your opponent. Don't be afraid to just defend your base and give up the Frontier. You will still get a scoring card, learn about your opponent's forces, and buy some time to rebuild.
On the flip side, if you are attacking an opponent who controls the Frontier, a Deep Strike can often be a nasty surprise, even if only a small part of your army can participate. If your opponent is confident in their strength they will probably defend the Frontier, which gives you the scoring card instead of them. You can then retreat if things look grim at the start of the battle, and hopefully avoid getting hit on your way out.
There are a lot of subtle points in the Battle system. First, Scouting Points can make the difference between winning and losing. Having good match-ups is critical. Just about every Force has strengths and weaknesses, and scouting will let you exploit them. Initiative is also important. Fast units are powerful.
Special abilities are covered for each faction, but in general they can be very flexible in customizing your army, and understanding your options is key. However don't get obsessed with getting every cool ability out on the table. Every card that is played face up is one less resource that you have for building units. Deciding what is actually necessary versus what would just be fun to have is the biggest decision you'll make.
Finally, in combat don't be afraid to run away, especially in the multiplayer game. If you are seriously outnumbered and defending the Frontier, don't be afraid to retreat. Let someone else pick on the new king of the hill while you plot your revenge.
Most importantly, play fast and have fun!
Reference
A Player Turn
- Play one card
- If you played an Attack card, start the Battle Sequence
- All players draw back to 3 cards
- The game ends when all players run out of cards or only one player remains in the game.
Battle Sequence Summary
- Attacker secretly chooses Normal or Deep Strike attack
- Defender does Construction and assigns Forces to Frontier or Base
- Attacker reveals Combat Choice and Attack cards and places Combat Round Marker on highest box on Combat Choice Card.
- Attacker does Construction.
- Place Forces in the Battle Line
- Conduct Combat Rounds (see below)
- Battle Results
Combat Round Sequence Summary
- Emergency Defense
- Reorganization
- Declare Retreat. Retreater does not get to Fire.
- Roll for Attacks in descending Initiative Order.
- Move Combat Round Marker down 1 box
- If either player retreated or is eliminated, or if Combat Round marker moves off of '1' box, combat is over. Otherwise return to step 1.
Calculating To-Hit Number
Base: Attack Rating based on Defending Force Type
- +1 if in Flanking position
- -X based on Position Modifier
- Other modifiers based on Attack cards, abilities, etc.
Important: Regardless of modifiers, rolls of '6' always miss.
Scoring Summary
- 1 point for each card in your Scoring Pile
- 2 points for controlling the Frontier at the end of the game.