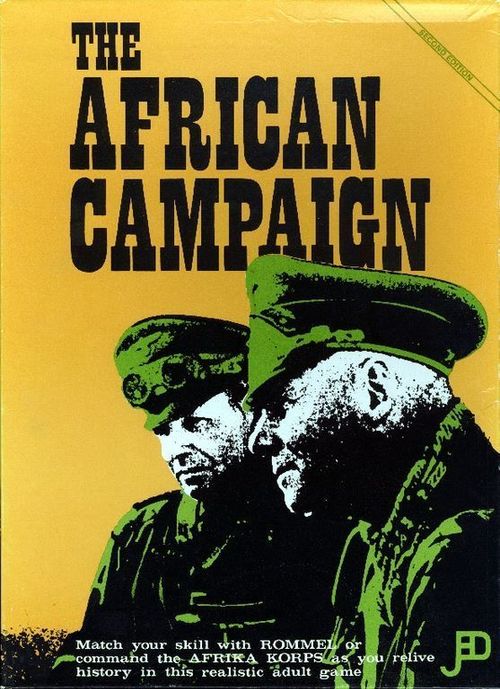
The African Campaign
The African Campaign Rulebook
Table of Contents
Table of Contents
Instructions
Game Equipment
The Game Map: The mapboard portrays the area of Africa in which the decisive operations of the German Afrika Korps and the Allied 8th Army took place. A hexagonal grid is superimposed on the mapboard and is used to determine movement. Terrain features are as follows:
- Ridges: Any hex containing black splash contours.
- Roads: Shown by double parallel lines.
- Cities: Shown by angular black shapes.
- Qattara Depression: Impassable area with no hex grid.
- Plateaux: Shown by shaded areas.
The Playing Pieces
Three different coloured sets of playing pieces (henceforth known as units) are supplied. Brown are Italian, Green are German, and Yellow are Allied. Allied units without a nationality letter are British. The following diagram explains the symbols found on the units.
The diagram on the printed rules page labels the parts of a unit as follows: Unit Type (top left), Unit Size (top right), Nationality (left), Designation (right; the example shows "6th Division"), Combat Factor (bottom left) and Movement Factor (bottom right). The example unit shows a combat factor of 5 and a movement factor of 6, written 5-6.
Nationality
- A: Australian
- B: Blackshirt
- F: French
- GR: Greek
- I: Indian
- N: New Zealand
- P: Polish
- S: South African
Unit Size
- Battalion (marked II)
- Regiment (marked III)
- Brigade (marked X)
- Division (marked XX)
- Army HQ (marked XXXX)
Unit Type
- Infantry
- Parachute
- Motorised
- Armor (Panzer)
- Reconnaissance
- Flak
General Course of Play
The African Campaign is basically a two player game, but can be played solitaire. The Allied player moves and fights any battles his movement has caused. The Axis player does the same. These two moves together make a complete game turn. The time marker is then moved forward on the time record chart and the next turn begins. This continues until the game is finished.
OB Charts
The OB Charts show the troop positions at the start of "Operation Compass". The date is December the 9th, 1940. Now you take command.
Open the mapboard and press out the unit pieces. Place the starting units on the mapboard as shown under "At Start" on the OB Charts. Remaining units enter the game on the turns shown on the OB Chart. The spaces at the bottom of the OB Chart can be used to help sort out units not in play and substitute units. Place a blank counter on DEC. 1, 1940 on the Time Record Chart and another blank counter at No. 2 on the Axis Fuel Index on the gameboard.
Victory Conditions
The Axis player wins if he moves at least 12 combat factors off the eastern edge of the board before December 1942 and keeps them in supply for 1 month after the turn they leave the board. These units can re-enter the game through the hex they left if necessary. While these units are off the board no more Allied replacements and reinforcements appear at Alexandria. If they do have to re-enter the game the Allied units held up off the board appear next turn at Alexandria if it is in Allied hands. The Allied player wins by avoiding Axis victory conditions or by eliminating all Axis units from the board at any time.
The Sequence of Play
Step 1: The Allied player consults the OB Chart and the TIME RECORD Chart to see if he has any reinforcements, replacements or withdrawals to make.
Step 2: The Allied player moves all, any or none of his units up to their full movement factors. Units may move in any direction or combination of directions. Movement cannot be transferred from unit to unit or accumulated.
Step 3: All battles are now resolved by the Allied player in any order he wishes.
Steps 4, 5, 6: The Axis player now follows the same procedure.
Step 7: The Time Record marker is moved one square and another turn begins with Step 1. Each turn represents two weeks on the Time Record Chart. Two turns equal 1 month.
Stacking
Both players may stack two divisions on one hex. For this purpose brigades, regiments and battalions are considered 1/2 of a division. Friendly units stacked or otherwise may move through each other without penalty. Headquarters do not have any stacking value and can be freely added to any other stack. Replacements have a stacking value of 1/2 of a division. New arrivals may enter game in excess of stacking rule at start of turn but stacking must be corrected during following movement Step.
Zones of Control
The six hexagons around a unit are its Zones of Control. A unit's movement ends if it is moved adjacent to an enemy unit, as it may not move through opposing Zones of Control.
Combat
At the end of the movement portion of the turn combat occurs between opposing forces that are adjacent (in each other's zones of control). The player who has just moved is the attacker. The attacker resolves battles in any order he wishes after he has finished moving. He must fight every enemy unit he is adjacent to. No enemy unit may be attacked more than once and no attacking units may do more than one attack. Every unit adjacent to a defender must attack. Attacking units on the same hex may fight two different battles against defenders on two different hexes. Attacking units on more than one hex may attack defenders on one hex.
Defenders stacked on one hex must be fought as one group, in one battle, with their combat factors added together. Combat factors of the same unit may never be split into more than one battle.
The following example shows a battle that can be fought in two ways. The Axis are attacking. They can use both (3-4) units against the (6-6) or one (3-4) can attack the (6-6) and the other (3-4) can combine with the (9-8) against the (7-6).
Units which find themselves adjacent to enemy units at the start of the turn may stand and fight, receive reinforcements and fight, withdraw, or withdraw and counterattack from another hex. Units can not move directly from one enemy zone of control to another, they must withdraw from a zone into a "free" or uncontrolled hex and then re-enter.
December 1940 Rule
During December 1940 the Allies add 2 to their dice rolls for all combat.
Battle Results
Add up the combat factors of the attacking units and compare this total with the defender's combat factors. For example, if the moving player attacks with two (5-6) units against a defending (4-6) unit, the odds are 10 to 4 which reduce to 2-1. Odds are always reduced in the defender's favour. (e.g. 26 to 9 is reduced to 2 to 1).
The attacker now rolls the dice and resolves the battle on the Combat Results Table. Study this table now.
Note: If the 1st Blackshirt Division was on Hex "A" the odds would be 12-4 or 3-1.
Explanation of Combat Results
AR: Attacker retreats all attacking units back one or two hexes. They should be retreated in the direction of their own supply lines if possible. Units that can not be moved back because of stacking limitations, or are only able to move back into enemy zones of control or off the mapboard are destroyed instead.
BR: Both retreat. Defending units are retreated one or two hexes by the defender in direction of supply, if possible, first. Then the attacker is retreated by the attacker in the direction of his supply. Units are destroyed if they cannot retreat.
DR: Defender retreats all defending units two hexes in the direction of his supply lines. Again, if he cannot retreat he is destroyed. Then the attacker may move any or all of the attacking units onto the defender's vacant hex.
C: Contact. No movement.
X: Weaker side completely destroyed with no losses to the stronger side. The winner may occupy the loser's hex with any of his participating units.
The numbers in each space of the combat table refer to losses and are in addition to the results explained above. The numbers on the left-hand side indicate attacker's losses. The right-hand side numbers indicate the defender's losses.
For example: If the 21st Panzer division (9-8) attacker the 2nd Armoured division (4-6) the odds would be 9 to 4 which reduce to 2 to 1. The Axis player rolls the dice and gets a one. The 21st Panzer takes two losses, becomes a (5-7) and retreats. The 2nd armoured takes 1 loss, becomes a (3-6) and holds its position.
In multi-unit battles losses must be spread as evenly as possible between the units. The owning player decides which unit(s) take the losses.
On the Combat Results Table, attacks of worse than 1-6 are not allowed, and units forced into this position are automatically removed from play.
Over-Run
Attacks at odds of 9-1 or greater are not rolled on the combat chart. The defending unit is removed from play during the movement portion of the attacker's turn. Of course, the attacker must actually pass through the defender's control zone. The attacker may move on and attack other enemy units in the same turn because this is not considered as combat. Any of the Attacker's forces, whether they were in the overrun or not, may end their turn on the overrun defender's hex.
Units conducting overruns may not do so while in the zone of control of other enemy units, and must be stacked on one hex only at the time of the overrun. They cannot be assisted in the overrun by airpower. No overruns are permitted in the movement after combat section (i.e. during advances or retreats).
Combat Losses and Replacements
Most units have several pieces, or "steps", of different values. When a loss occurs the next smallest step is placed in the game. That is, a unit could take 2 losses on the combat chart and depending on its steps, lose 3 or 4 combat factors. Replacements and losses refer to "steps" and not necessarily combat factors.
When a unit takes a loss it is replaced with another piece of a lower value. For example if the 6th Australian division took a loss the (5-6) counter would be replaced with a (4-6). If a unit takes a loss and it has no more substitutes left it is destroyed.
A unit can be rebuilt by replacements. To take a replacement a unit must be out of enemy zones of control and may not attack that turn. A replacement must reach the unit and the unit is replaced by its next higher level of strength. A unit may not continue moving once it takes a replacement. Only one replacement per unit per turn is allowed.
Armoured units can only regain their top strength with an armoured replacement. Example: the 21st Panzer division can be rebuilt up to a (7-7) with normal replacements but must have a panzer replacement to become a (9-8). Except for raising armoured units to full strength both types of replacements are identical and can rebuild any units of the correct nationality.
Destroyed Axis units can be rebuilt at El Agheila, Allied units at Alexandria. To rebuild, remove three replacements of the correct nationality at these cities and replace them with the destroyed unit at its lowest level of strength. If a H.Q. is destroyed roll the dice once each turn and replace at home base if a six is rolled.
Replacements
Replacements are available at the start of each month (each 2 turns) and must be placed on the board (at a port or at sea if unable to land) during one of the two monthly turns. If there are not enough replacement counters available to do this at the start of Step 1/Step 4 of the second turn of the month then they are lost.
Replacement units have no combat value or zones of control. They are immediately destroyed when caught alone in enemy zones of control. Units moving strategically may destroy them.
The number of standard Allied replacements available for each month are shown on the Time Record Chart under Allied Replacements. Allied Armour replacements come into the game as per the OB Chart.
The number of German and Italian standard replacements are rolled for on the Axis Replacement Chart on the mapboard at the start or each month beginning with January 1941. Roll twice, once for the Italians and once for the Germans. An "I" means one Italian replacement is available that month. A "G" is for one German replacement. All Axis armour replacements come into the game as per the Axis OB Chart. Note that German replacements cannot rebuild Italian units and vice-versa.
Reinforcements and Withdrawals
At the start of each player's move (Step 1 for Allies and Step 4 for Axis) any reinforcements that are shown to be available on the OB Charts are landed as under PORTS. Allied units that are underlined on the OB Chart must be withdrawn from play during Step 1 of the current turn. Units must be withdrawn at the strength shown on the OB Chart or greater. If they reappear they come back at the strength they were withdrawn at unless replacements are used to build them up while off the board.
If a unit is below the indicated withdrawal strength then remove it and the number of replacements necessary to rebuild it. If no replacements are available, take the necessary losses out of another friendly division. To withdraw, a unit can not be surrounded, and is just removed from the board. If a unit to be withdrawn is destroyed another unit of equal combat value must be removed. If the withdrawn unit enters the game later, then the substitute may re-enter in its place, at the strength it was removed at.
Note that some units as shown on the OB Chart, enter the game at reduced strength.
EXAMPLE: May 1941. Allies get 1 Replacement for the month and cannot use any air units (Time Record Chart). They receive three armoured replacements and withdraw the 2nd N.Z. Division on the May 1 turn.
On the May 11 turn they receive the Indian 4th Division and must withdraw the Australian 7th Division. The 18th Brigade of this division stays and is shown as an arrival. (Note that although the 18th Brigade is printed on the reverse of part of the 7th Division it is only a normal brigade and can not be built up into the division).
The Axis roll for replacements on the Axis Replacement Chart. The first roll is a 4 and they get an Italian replacement, the second roll is a 5 and they get no German replacement, the third roll is a 3 and they advance the fuel marker 6 spaces on the Axis Fuel table. This is done once a month. The Time Record Chart shows that the Axis can use 3 air units each turn of that month. The Axis player gets the 115th regiment on May 1 and the 33rd and 135th regiments and an Italian armoured replacement on the May 11 turn.
Substitute Units
When at full strength several armoured divisions can be broken down into their major components. Simply remove the division and replace it with the components during the movement portion of the turn.
The printed rules illustrate this with the 7-6 division broken into the components 3-6, 3-6 and 1-10.
This procedure is reversible if all the minor components stack together, but if one of the minor components is eliminated or reduced in strength, the division is reformed at a strength no greater than the total of its components. Once this division is built to its former full strength by use of an armoured replacement, it could once again be broken into its minor components, and any eliminated components then reappear.
Note that the first time the 1st Armoured division's three brigades stack together that the Lancers are added to the stack and the Divisional 7-6 counter may be substituted for the stack if required.
Ports
TRIPOLI, ALEXANDRIA, BENGASI and TOBRUK are Ports. Replacements and reinforcements may land at these ports. The last player to occupy a port hex may use the port. New arrivals may move the same turn they land at ports.
TOBRUK: May be used by either side. Roll the dice to enter or leave. 4, 5 means unit delayed and can't move, and may try again next turn. 6 means "sunk". (Replacements are destroyed, combat units may land or sail but lose one level of strength). Combat units can move to Tobruk, roll the dice and if permitted sail by sea to Home Base in one turn.
BENGASI: As for Tobruk but only replacements can use it. Dice roll of 5 means delayed, 6 means "sunk".
TRIPOLI: Axis home base. No penalties. Units start turn on any western board hex at a movement cost of 2. Further, non strategic, movement is permitted up to their full movement allowance but fuel is then used by combat units.
ALEXANDRIA: Allied home base, used only by Allies. No penalties.
Supply
Axis supplies come from Tripoli, (any western board hex), Bengasi or Tobruk. Allied supplies come from Alexandria, Bengasi, Tobruk (or any eastern board hex). All units must be able to trace a line, untouched by enemy zones of control, no longer than 15 hexes to a supply source or to a friendly and unobstructed road which leads to a supply source. All units unable to do this lose one step at the end of the combat portion of their turn. EXCEPTION: Units within 1 hex of a controlled city are considered supplied. A player controls a city if he occupies it OR if it is out of enemy zones of control and he was the last to occupy it or have it in his zone of control.
Terrain Effects
Roads: Units move five times the distance if they move by road. Thus if a (6-6) unit moves ten hexes along the road it still has 4 movement factors left. Units can move along the road, off it and back onto it in the same turn. Fractions of road movement are lost when a unit leaves the road.
Ridges: Units may move onto a ridge hex, along the ridge, but must stop before crossing and continue next turn. They can move through passes, (e.g. near Salum) without delay. The ridges may be crossed on roads without delay.
Units on ridge hexes have their combat factors doubled in defence. EXCEPTION: If one of the attackers is on a plateau hex the defender is not doubled.
Plateaux and Cities: No effect on movement or combat.
Forts: Tobruk and Bengasi are forts. These hexes have no zones of control and units inside them are doubled on defence. Enemy units may move next to forts without attacking or having to be attacked, although either side has the option of attacking in its turn. Only losses effect units in forts, they can never be forced to retreat.
Axis Fuel
At start of every month beginning January 1941, roll the dice once, and refer to the Axis Replacement Chart. The numbers on this chart represent the amount of fuel the Axis get that month. (The Axis player rolls the dice and moves the fuel marker to indicate the number of fuel units he receives). Example: March 1941; a roll of 4 gives three fuel units, (for that month). At the start of the game the fuel marker is placed at 2 on the Axis Fuel index. Every time an Axis unit moves more than 2 hexes (or 4 hexes strategically) the fuel index is reduced by 1. If there is no fuel available no Axis unit may exceed 2 hexes or 4 hexes strategically during movement. Fuel is not required for replacement units or the Rommel unit. The Axis cannot accumulate any more than 10 factors of fuel.
Strategic Movement
Any unit that begins and ends its turn out of enemy zones of control may use strategic movement. Replacements can not use strategic movement. Units taking replacements can not use strategic movement. When a unit takes strategic movement its movement factor is doubled. (e.g. a (3-4) is a (3-8). Thus a German (9-8) moving strategically on a road could move 80 road hexes). NOTE: No overruns or other types of combat may be done by units moving strategically. Axis units can move 4 (or 20 road) hexes by strategic movement without using fuel. Neither side may use strategic movement on the first turn of the game. New arrivals may not use strategic movement on the turn they enter the game.
Air Power
Study the Time Record Chart. The Air Power columns show the number of air units available to each player each turn. Note these are available every turn and not just once a month. Unused air units are not accumulated. Air units are used as follows:
-
Tactically: Each air unit has a combat value of one and may be added to any attack to increase the odds. If a player has two or three air units available they all may be added to the same attack.
-
Strategically: During the movement portion of a player's turn he may assign any planes not being used tactically to attack enemy units that are not involved in ground combat. The air unit is placed on top of the enemy unit(s) and the movement of the stack attacked is halved next turn, and no unit in the stack may use strategic movement next turn. The range of air units is 25 hexes from a controlled or friendly city or west edge of board for Axis and east edge for Allies.
(The printed rules mark the air units with R.A.F. and Luftwaffe symbols.)
Flak Units
These units attack with a combat factor of 1 but defend with a factor of 3.
Play Aids
Players may wish to use the die cut numbers to mark the battle odds of their attacks as they move so that later during the combat portion of their turn they do not have to recheck each battle. If a battle is a 3-1 place a 3 on the units being attacked, etc.
Minefields
Place all the minefield counters in a cup. Beginning with the February 1941 turn, each player may, once a month, call for a minefield at the start of his turn. Each player may only do this three times a game. When a minefield is called for both players blindly pick a minefield counter out of the cup without showing their opponent what its value is. This can be placed on the board during that turn or saved for later. Any combat unit that begins its turn out of enemy zones of control may lay a minefield. The minefield is placed on the hex with the unit (skull side up) before the unit moves and then the unit must move away. Once placed neither player may look at the minefields reverse side, move or remove it.
Any unit(s) that enter a minefield hex must obey the instructions written on its other side. The minefield is then immediately removed and placed back in the cup. No other units may enter the minefield hex that Step. Minefields have no zone of control but units that enter them (even dummies) may move no further that Step, although they can attack and move after combat during the following combat step if they are adjacent to an enemy unit.
The New Zealand Division
During or after the September 1942 turn the 2nd N.Z. Division, if at full strength, may stack with any full strength armoured brigade and become a (7-6). Remove the (5-6) and the brigade and replace with the (7-6). The (7-6) does not need an armoured replacement to be built up to full strength as it is not an armoured division. This process is not reversible.
Conclusion
We hope you enjoy this game and interpret the rules 'in their spirit' and not 'to the letter'. Any questions arising out of interpretation of the rules will be happily answered, but please express them so that they can be answered with a 'yes' or 'no' answer and include a stamped self-addressed envelope.