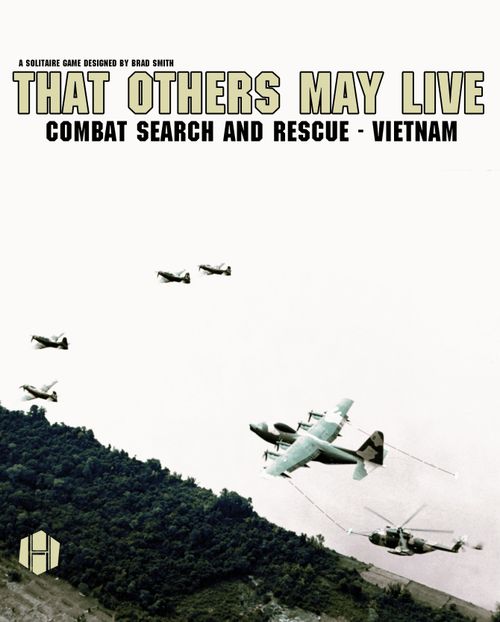
That Others May Live: Combat Search and Rescue – Vietnam
That Others May Live: Combat Search and Rescue – Vietnam Rulebook
Table of Contents
Table of Contents
2.0 Components
- Mapsheet
- 1 Player Aid
- 30 Resolution Cards
- 37 Action Cards
- 16 Event Cards
- 88 counters
- 1 Rulebook
2.1 Mapsheet
The mapsheet contains an informational track, an Orbit Box, and a Card Reserve.
The map consists of two concentric circles. The inner circle is referred to as the Center Zone. Sections of the outer circle are referred to as Outer Zones, divided into four cardinal directions.
The radius from the center of the map to the outer border of the Outer Zone may be considered as a little over 1 kilometer but the area of operation size was highly variable from mission to mission and depended on terrain, weather, and countless other factors.
Each zone has a holding box for cards, units, and markers. When cards are assigned during the Assign Action Cards Segment, they are placed in a zone's Card Box. Hidden, Survivor, Ordnance Markers, Zone Markers, and Enemy Units are placed in their marked boxes. Friendly aircraft may be placed in any extra space provided in the zone.
2.1.1 Information Track
The Information Track is used to track various game functions:
- The Turn Marker tracks the current turn. Each represents approximately five to six minutes of time in the game. Each scenario states the length of the game in turns.
- The Search Marker tracks how many Resolution cards must be drawn to determine if a Survivor is captured during each Enemy Search Segment.
- The Abort Marker tracks how many Resolution Cards must be drawn during the Abort Check Segment to determine if the CSAR operation is aborted. If the Abort marker reaches the Auto Abort space, the operation is immediately aborted and the game ends in a loss for the player.
2.1.2 Orbit Box
The Orbit Box is a notional safe area away from the map where friendly aircraft may be placed. Aircraft in the Orbit Box may not be attacked by enemy units, nor make attacks or use Action cards. Shaken aircraft in the Orbit Box are flipped to their Cool side during the Marker Adjustment Segment. The Orbit Box may hold an unlimited number of aircraft.
2.1.3 Fast Mover Pool
At the start of a scenario, the player places the specified number of Fast Movers in a Fast Mover Pool to the side of the map. This provides a hard limit to how many Fast Movers may potentially be in play at the same time.
When aircraft are successfully requested by a Request Aircraft card, a Fast Mover is moved from the pool to the Orbit Box. Fast Movers that begin the turn on their EXIT side are returned to the Fast Mover Pool during the Marker Adjustment Segment. Fast Movers that are hit by an Enemy Gun are removed from the game and are not placed back in the Fast Mover Pool.
2.1.4 Card Reserve
Each Action card assigned to the Reserve is placed in a Reserve Box. Cards in the Reserve Box may be discarded at any time, used as per regular Action card play, or retained in the Reserve from turn to turn.
2.2 Decks
The game uses three decks: Resolution Deck, Action Deck, and an Event Deck.
2.2.1 Resolution Cards
Each Resolution card bears an icon that is used to resolve the outcome of actions in the game.
Drawing for Resolution: When directed by a rule or a card, always draw the required number of Resolution Cards. Continue drawing even if the action is successfully resolved before all cards have been drawn.
Drawing For Random Determination: Additionally, several rules require the player to make a determination in the game by drawing Resolution Cards. In this case, the player draws a card and refers to the "ones" value of the card number.
If the determination is between one of two possibilities, an odd or even ones value shall determine the outcome. Remember "0" is an even number.
To make determinations with multiple possible outcomes, mentally assign the various outcomes as evenly as possible to a range of numbers from 0 to 9 (or whatever number is appropriate), then draw a Resolution card and consult the ones on the card number.
The nature of this mechanic within the game's framework does not provide for a truly random outcome. It is acceptable and even encouraged to use one's knowledge of the cards already drawn to influence the outcome.
Reshuffle Card: After drawing the Reshuffle card in any situation the player must immediately combine the Resolution discard pile with the draw pile and reshuffle them to create a new draw pile. When the player is directed to draw a certain number of cards to determine an outcome, the Reshuffle card does not count as a drawn card.
If the Reshuffle card is drawn while drawing for card numbers to make a random determination, use its card number and then reshuffle the Resolution Deck.
Wild Card: The player may use this as any type of symbol when it is drawn. If drawing for aircraft hits, the player decides which aircraft in the Zone is hit. Alternately, the Wild card may be treated the same as a Reshuffle card.
2.2.2 Action Cards
There are two kinds of Action cards: Aircraft (red banner) and Command (blue).
Each Aircraft Action card has a silhouette of the aircraft type to which it can be assigned.
Some Action cards feature bold text telling you to remove it from play. Such cards are only removed if they are played. If discarded for any other reason, place them in the discard pile; they will be reshuffled into the deck.
The Action Card discard pile is reshuffled to form a new Action Deck when there are no cards remaining. The effects of Action Cards as outlined on the card text are implemented immediately when played unless otherwise specified.
2.2.3 Event Cards
During each turn's Event Phase, an Event card is drawn. The card takes effect immediately. If the text on the Event card cannot be implemented, ignore the Event and place the card in the discard pile. Do not draw a new card.
2.3 Markers
Markers are used to provide, conceal, and track information during the game. Each marker has special placement, effects, and rules for removal. These are covered in detail later in these rules (9.0) but include:
- Hit Markers, placed as the result of attacks.
- Ordnance Markers, placed when corresponding Aircraft Action cards are played. These are piece-limited.
- Zone Markers, determining the contents of a zone, placed at set-up.
- Hidden and Enemy Markers, representing concealed enemies.
- Enemy Guns and Barrages.
2.4 Units
Friendly units consist of aircraft and pilots. The downed aircrew (referred to throughout the rules as Survivors) are represented by a Survivor marker.
There are four kinds of aircraft: Sandys, Fast-Movers, FACs, and helicopters. Aircraft are distinguished by movement type and capabilities such as ordnance-delivery, target-marking, and rescue. Some aircraft are placed in the Orbit Box at the beginning of the scenario while others become available by playing a Request Aircraft card.
3.0 Basic Turn Sequence
- Event Phase (except Turn 1)
- Card Phase a. Draw Action Cards Segment (except Turn 1) b. Reserve Action Cards Segment c. Resolve Command Action Cards Segment
- Combat Phase a. Move Aircraft Segment b. Assign Aircraft Action Cards Segment c. Enemy Gun Fire Segment d. Play Aircraft Action Cards Segment e. Rescue Segment
- End Turn Phase a. Bomb Damage Assessment Segment b. Enemy Search Segment c. Abort Check Segment d. Deck Cleanup Segment e. Marker Adjustment Segment
4.0 Detailed Sequence of Play
4.1 Event Phase (except Turn 1)
During the Event Phase, the player draws a single Event Card and implements the effect described on the card.
4.2 Card Phase
4.2.1 Draw Action Cards Segment (except Turn 1)
Draw a number of Action Cards from the Action Deck into your hand so that the total number of Action Cards in both your hand and the Reserve is equal to five.
4.2.2 Reserve Aircraft Action Cards Segment
You may move any number of Aircraft Action Cards from your hand into the Reserve so long as the number of cards in the Reserve does not exceed three.
4.2.3 Resolve Command Action Cards Segment
Any Command Action Cards in your current hand must either be played or discarded. After playing all Command Action Cards, place them in the discard pile. Command Action Cards may not be placed in the Reserve.
4.3 Combat Phase
4.3.1 Move Aircraft Segment
Aircraft movement varies according to the type of aircraft. Movement is always voluntary.
Note the movement and stacking restrictions as follows:
- The Orbit Box may hold an unlimited number of aircraft.
- Each zone may have up to four aircraft at any one time.
- Fast Movers may not be placed in the same zone as a helicopter.
Helicopter Movement Special Rule: When a helicopter moves into a zone, the Enemy marker in the same zone is immediately revealed. Consult the number on the Enemy marker, then draw the same number of units from the Enemy Guns cup and place them in the same zone.
4.3.2 Assign Aircraft Action Cards Segment
Aircraft Action cards may be assigned to a zone with friendly aircraft of the type indicated on the card. A maximum of two Aircraft Action cards may be played in the same zone during the same turn. Place the aircraft counter conducting the action on top of the card. Sandys and FACs may only be assigned one Action card per turn. A Fast Mover may be assigned two Action cards per turn.
If an Action card allows a player to suppress, inflict hits, or remove enemy guns, the target of such cards need not be decided at this point. In addition, cards that allow a player to choose how it will be played need not be declared in this segment. The card may be assigned as a contingency against the placement of as-yet unrevealed enemy guns.
4.3.3 Enemy Gun Fire Segment
The ability of the enemy anti-aircraft guns to inflict damage on aircraft depends less on individual gunnery skill than the ability to fill a small area of airspace with a large volume of fire. In the game, enemy guns fire into zones and not at specific targets. Hits to aircraft in these zones are assigned at random and implemented immediately.
Enemy fire is resolved as follows:
A. Determine Target Zones: Determine which enemy guns are firing into which zone according to the following priorities:
- First, their own Zone if there are aircraft.
- Second, the Zone in their range with the most aircraft.
- If multiple Zones apply for the second priority, randomly choose one via a Resolution card.
- If a gun has no target in range, it does not fire.
It may be helpful to move each gun toward the border of the zone they are firing into as a reminder.
B. Determine Zone Firepower: Once the player determines which enemy guns are firing into which zone, the player chooses one zone and finds the gun with the highest firepower rating that is firing into it. This firepower is the Base Firepower value. Regardless of their firepower ratings, each gun of equal or lesser firepower firing into the same zone adds one to the Base Firepower value. This sum is referred to as the Zone Firepower Value (ZFV).
Rotate any firing guns ninety degrees to the right to indicate they have fired and may not fire again for the remainder of the turn.
C. Resolve Hits: Draw Resolution Cards equal to the ZFV.
- Crosshairs: set these aside as Hits.
- Roundel: Discard Hits drawn up until that point.
- Reshuffle: Reshuffle deck, but do not Reshuffle Hits until they are resolved.
Continue this procedure until you have made all necessary card draws. Sum the crosshair symbols in the Hits pile to determine the total number of Hits assigned to aircraft in this zone.
D. Burn Action Cards: Aircraft Action Cards in the Player's Hand may be "burned" (discarded; don't actually burn it, please, it makes reshuffling difficult) to reduce the number of Hits. For each Action card discarded, cancel one Hit. Regardless of how many cards are burned, one Hit result must be taken. Action Cards in the Reserve may not be burned. Command Action Cards may not be burned.
E. Implement Hits: Resolve remaining Hits as follows:
Each Fast Mover in a Zone suffers a Hit before other aircraft. Remove hit Fast Movers from play and discard cards assigned to them.
When no Fast Movers remain in the Zone, draw Resolution Cards for any remaining Hits, consulting the aircraft icon and ID number to determine which aircraft is hit. If a drawn card does not match an aircraft in that zone, continue drawing. Recall that the Wild Card allows you to choose which aircraft in the Zone suffers a Hit.
If there is only one aircraft in the Zone, or there are sufficient Hits to eliminate all aircraft in the Zone, you do not need to draw cards.
For each hit on a non-Fast Mover aircraft, perform the following procedure:
- The first time an aircraft is hit, flip it over to its Shaken side. Discard any card currently assigned to it.
- If an aircraft suffers a second hit or it is already on its Shaken side, then remove the aircraft from play and draw a Resolution card.
- If that Resolution card is a blast, the aircraft is destroyed. The pilot and crew are killed along with any Survivors that are on board. Move the Abort marker two spaces toward Auto Abort.
- If the card number is not a blast, then the aircraft has been shot down. If the card number is even, place a Healthy Survivor in the zone. If odd, an Injured Survivor. Move the Abort marker one space toward Auto Abort.
If a helicopter with a Survivor already on board is removed from play due to hits, follow the same procedure as above to determine whether the aircraft is destroyed.
If a helicopter with a Survivor is shot down, place a single Survivor marker in the zone:
- If they were Injured, they remain so.
- If Healthy, draw a Resolution card: if odd, flip to Injured.
4.3.4 Play Aircraft Action Cards Segment
All assigned aircraft cards in each zone must either be played or discarded, in the order of your choosing. At the instant the card is played, the targets of cards that suppress, inflict hits, or remove enemy units must be declared. Unless otherwise specified, the effects of each card take place immediately upon playing the card.
Some cards are removed from the game after they are resolved, as indicated on the card. All other cards (played or otherwise) are moved to the discard pile.
Note that the Suppress card allows the player to suppress enemy guns before they can fire. This card may be played during any segment of the Combat Phase. All other Aircraft Action cards assigned to an aircraft may only be played during the Play Aircraft Action Cards Segment.
An Attack card played against a Barrage removes the Barrage marker from the zone immediately. Attack and Napalm cards may be used to inflict hits on Enemy Guns. Place Hit markers on these; rotate the counter to show the number of Hits.
4.3.5 Rescue Segment
During the Rescue Segment, a helicopter may attempt to pick up one stranded Survivor on the map. A Rescue segment is voluntary and may only be declared when:
- a helicopter is in the same zone as the Survivor and
- the helicopter has not moved in the current turn.
Once you declare a rescue attempt, reveal all the Enemy and Hidden markers in the current and adjacent zones. Place new enemy guns.
Any zone-wide suppression effect (i.e. CS Gas) also suppress all newly placed guns in the same zone.
Any active newly placed guns will now fire on any targets within range. Calculate Zone Firepower using the newly placed guns and resolve enemy fire as above (4.3.3).
To resolve a rescue, draw Resolution Cards equal to the number of friendly aircraft counters on their Cool side in the same zone as the rescue attempt. Subtract 1 from this total for each of the following:
- the helicopter performing the rescue is on its Shaken side
- the Survivor is injured
- a CS GAS marker is anywhere on the map
- a SMOKE marker is in the current zone
Note that regardless of how many negative modifiers are applied, the number of draws for a rescue attempt can never decrease below one.
If a USAF roundel is drawn, the Survivor is rescued. Place the Survivor marker on the helicopter conducting the rescue. If there are no Survivors on the map after doing this, move the Search marker to "0".
The Survivor marker moves with the helicopter for the remainder of the game. A helicopter may carry an unlimited number of Survivors.
Only one helicopter may attempt to rescue the same Survivor in a single Rescue Segment. Separate attempts may be made in any order during the same segment to rescue different Survivors.
4.4 End Turn Phase
4.4.1 Bomb Damage Assessment Segment
In the order of your choosing, assess each Enemy Gun that was Hit in the current turn to determine if it is destroyed. For each Hit scored against an Enemy Gun, draw one Resolution Card. If a blast is drawn, remove the Enemy Gun from play. Each Enemy Gun removed from play moves the Abort marker one space towards the "0" space.
4.4.2 Enemy Search Segment
Draw Resolution Cards equal to the Search marker's position. You may reduce the number of draws beforehand by burning action cards from your current hand. (-1 per card burned, but the number of draws may never be reduced below one.)
If a rifle is drawn at any point, a Survivor on the map is captured by the enemy. If there is more than one Survivor on the map, randomly determine which one has been captured and remove it from the map. The Search marker stays on its current space on the track.
If all Survivors have been captured, the game ends immediately (5.0).
4.4.3 Abort Check Segment
The Abort Check Segment is only conducted if a Survivor is on the map and the Abort marker is in a space numbered greater than "0". If there are no Survivors on the map, or the Abort marker is on the "0" space, keep the Abort marker at the current position and skip this segment.
Otherwise, draw Resolution Cards equal to the Abort marker position. You may reduce the number of draws by burning action cards from your current hand. However, the number of draws may never be reduced below one.
If a rifle is drawn at any point, the mission is aborted and the player loses the game.
4.4.4 Deck Cleanup Segment
Discard all remaining action cards in your hand.
4.4.5 Marker Adjustment Segment
Perform the following adjustments in the order below:
- Remove all hit markers from the map.
- Remove CS GAS TWO and SMOKE TWO and MARK TWO markers from the map.
- Flip over CS GAS ONE and SMOKE ONE and MARK ONE markers to their TWO sides.
- Flip over Suppressed Guns to their Active side.
- Rotate all Fired Guns back to their unfired position.
- Return Fast Movers on Exit side to the Fast Mover Pool.
- Return all Fast Movers on the map to Orbit Box.
- Flip Fast Movers in Orbit Box to Exit side.
- Flip over all Shaken aircraft in Orbit Box to Cool side.
- Flip aircraft in the same zone as a Barrage to Shaken side.
- If a stranded Survivor is on the map, increase the Enemy Search marker's position by one space.
- Move the Turn marker one space ahead.
5.0 Ending the Game
The game ends immediately if one of the following conditions occurs:
- All helicopters are destroyed.
- The mission is aborted during the Abort Check Segment.
- There are no Survivors left on the map.
- The scenario's turn limit has passed.
Enemy Victory Conditions: If either of the following conditions occur, the result is a win for the enemy:
- One or more Survivors are killed or captured.
- The game ends with stranded Survivors still on the map.
- The mission is Aborted.
Note that you might lose the game due to a Survivor being killed or captured before the game is ended. Continue to play the game, attempting to save remaining Survivors, and learn from your failures.
Player Victory Conditions: If the game ends and all Survivors have been moved off the map (not killed or captured) and no aircraft have been destroyed (as opposed to shot down) by enemy fire, then the result is a win for the player.
Draw Conditions: If the game ends and a Survivor has not been moved off the map, but has been rescued and is onboard a helicopter, the result is a draw.
6.0 Optional Rules
6.1 Bombing Effectiveness
The difficulty of using conventional means to destroy an enemy gun concealed under triple-canopy jungle and emplaced in dug-in positions is reflected in the game's rules. To make the game easier, implement the following rule:
During the Bomb Damage Assessment Segment, draw Resolution Cards equal to the total number of Hits inflicted on all Enemy Guns during the current turn. For each roundel, remove one randomly determined gun that has been hit during the current turn.
6.2 Pinpointing Survivors
One of the major tasks of Combat Search and Rescue teams was to pinpoint the location of the Survivor prior to rescue. In all scenarios, it is assumed that this task has already been completed by the start of the game.
Players who wish to simulate the pinpointing of Survivors may implement the following rule: Before the helicopters can enter the map, the Survivor must be pinpointed. To do so, draw Resolution cards equal to the number of Cool aircraft in a Survivor's zone at the start of each turn before the Event Phase. If any Resolution cards have a roundel, the Survivor is pinpointed. Rotate the Survivor counter ninety degrees to indicate this.
6.3 Danger Close
Attacks conducted in a zone with a Survivor may injure or kill them. To simulate this risk, implement the following rule:
Immediately after an Ordnance: Napalm, Ordnance: CBU, or Attack card is played in the same zone as a Survivor, the player draws a Resolution Card. If it has a rifle, flip to Injured side. If Injured, he is killed and the mission aborted.
6.4 Recovering Pilots
The effects of coming under hostile fire are both highly variable and rarely predictable. To simulate this human factor, the player may implement the following rule: At the end of each turn, after the Marker Adjustment Segment is complete, draw a Resolution card for each Shaken aircraft. If the card shows a roundel, flip to Cool. To counterbalance this rule, remove the Wild card from the deck.
6.5 Search Effectiveness
The game can be particularly cruel at times when Survivors are captured early on due in no fault to the player's action or lack thereof. This accurately models historical outcomes, but some players may find this particularly frustrating.
To alleviate distress, implement the following rule: The first time during the game that a rifle is drawn during an Enemy Search, it does not capture a Survivor. Instead, place the rifle card in the discard pile. Immediately remove the Wild Card from the Resolution draw or discard pile and place it face down next to the play area for the remainder of the game. Resume play.
If another Resolution card with a rifle is drawn during a subsequent Enemy Search, a Survivor is captured.
7.0 Scenarios
Caged Tiger: A Standard Game Scenario
This scenario depicts a seasoned team of Combat Search and Rescue specialists performing a rescue mission. It is June 1967 – at the peak of CSAR capabilities in Southeast Asia. The costly lessons of combat search and rescue have been learned and applied at this point. Inadequate equipment is being replaced with more modern and specialized aircraft and gear.
Situation: Operation Steel Tiger, the protracted bombing of NVA supply lines along the Ho Chi Minh Trail in southeastern Laos, has intensified over the early summer months of 1967. Just after dawn, a pair of F-4C Phantoms (Gunfighter 21 and Gunfighter 22) are assigned to emplace MK-36 anti-personnel mines along a section of the trail. The lead aircraft drops its ordnance on target, but Gunfighter 22 is hit by intense anti-aircraft fire while coming out of its dive.
The pilot and navigator both eject. The navigator is captured almost immediately, but the pilot manages to evade capture and holes up in the thick jungle, awaiting rescue. Enemy search teams swarm the area and call out to him. The occasional rifle shot punctures the hot humid air, fired in hopes of scaring the pilot out from his hiding place.
Your King C-130 is orbiting near the rescue area and receives the Mayday call and the chute beeper signals. Coordination with a nearby FAC confirms the chutes, verifies the pilot's identity, and pinpoints his location. An alert force of Sandys and a pair of HH-3E Jolly Green Giants are dispatched from their orbit areas. The team is seasoned and has conducted several rescues in this area in the past six months.
The weather is clear with plenty of daylight to spare. The area of operations is within range of a friendly firebase. Local intelligence has indicated that there are several enemy battalions operating in the area. The rescue may be a simple matter of sending in a helicopter and snatching the pilot. It is just as likely that you're walking into a trap.
Scenario Length: 10 Turns
Setup
Aircraft
Place the following counters in the Orbit Box, Cool side face up:
- 4 x Sandys
- 1 x FAC
- 2 x Helicopters
Place four Fast Movers in the Fast Mover Pool.
Draw randomly or choose one Pilot/PJ card from the deck and place its counter on its chosen aircraft.
Draw Cups
Place the following units and markers in separate opaque cups:
- Enemy Guns/Barrages
- Hidden markers
- Enemy markers
- Zone markers
Map
Place the following on the map:
- Healthy Survivor in the Center Zone.
Without looking at their numbered side, draw and place the following on the map:
- 1 Enemy marker in each Outer Zone.
- 1 Hidden marker in each Zone.
- 1 Zone marker in each Zone.
Tracks
- Enemy Search marker on "0" space.
- Abort marker on "0" space.
- Turn marker on "1" space.
Cards: Select five Aircraft Action cards from the Action Deck. No two cards may be of the same type. Skip the Draw Action Cards segment on Turn 1. All Action Cards, Resolution Cards, and Event Cards are in play; shuffle these decks and place within easy reach.
Historical Scenarios
The scenarios in this section model several real rescue missions that occurred during the Vietnam War.
Historical Scenario 1: Cauldron of Fire
Situation: It is June 1968. While bombing enemy supply trucks at the north end of the A Shau valley, an A-4 Skyhawk is shot down by surprisingly heavy and accurate anti-aircraft fire. The pilot ejects, but is seriously injured. His wingman and a "Nail" FAC are already on the scene when the Combat Search and Rescue team arrives. High winds prevent the use of some special weapons in the rescue operation.
Historically, the mission was a failure. It was abandoned after one of the rescue helicopters was destroyed by enemy fire. There were no survivors. A ground team was later inserted to find the pilot, but failed to locate him.
Scenario Length: 9 turns
Setup
Aircraft
Place the following aircraft counters in the Orbit Box face up on their Cool side:
- 2 x Sandys
- 1 x FAC
Additionally:
- Place one Fast Mover on its Enter side in the Orbit Box, and three in the Pool.
- 2 x Sandys, 2 x Helicopters on Turn 3. At the start of Turn 3's Event Phase, move them to the Orbit Box.
Draw randomly or choose one Pilot/PJ card from the deck and place its counter on its chosen aircraft.
Draw Cups
Place the following units and markers in separate opaque cups:
- Enemy Guns/Barrages
- Enemy markers with a value of "1" or greater
No Hidden markers are used for this scenario. No Zone marker cup is needed.
Map
Place the following on the map:
- Survivor on its Injured side in the Center Zone.
- M38 (2/1) Enemy Gun in the Center Zone.
- One Village Zone Marker each in West and North Outer Zones.
Do not place Zone Markers in the other Zones.
Draw and place the following on the map:
- 1 Enemy marker in each Outer Zone.
Tracks
- Enemy Search marker on the "1" space
- Abort marker on "0" space
- Turn marker on "1" space
Player's Hand
Start the game with the following hand:
- Troll for Fire
- Request Aircraft
- Suppress
- Mark Target
- Attack
Event Deck
Remove "Wind Shift" from the deck.
Action Deck
Remove the following cards:
- Ordnance: CS Gas
- Ordnance: Smoke
- Smoke Marker
- Move Survivor
- Exfil Team
Historical Scenario 2: Streetcar Down
Situation: Throughout the years of the Vietnam War, a hidden war was being waged in Cambodia and Laos as the United States conducted an endless series of air raids against the Ho Chi Minh Trail that snaked through these countries to supply Viet Cong activities and NVA incursions into South Vietnam. Many of the arteries of this long supply line converged in and around the village of Tchepone in Laos.
The air-to-ground battle was fiercely contested in this area and many aviators were shot down as they conducted missions in the face of withering anti-aircraft fire. In January 1969, one aviator on his first combat mission of the war, was shot down by enemy anti-aircraft fire while diving for his target. The pilot would spend forty hours on the ground while one of the most intensive and dangerous combat rescue missions in history was conducted in an attempt to pull him out.
Scenario Length: From Turn 8 onward, draw a Resolution Card at the start of each turn. If the result is crosshairs, the scenario ends immediately. Otherwise, the scenario ends after 10 turns.
Setup
Aircraft
Place the following aircraft counters in the Orbit Box with their Cool side face up:
- 2 x Sandys
- 2 x Helicopters
- 2 x Fast Movers ("Enter" side)
- 1 x FAC
Place two Fast Movers in the Pool.
Draw Cups
Place the following units and markers in separate opaque cups:
- All Enemy markers with a value of "1" or greater
- All Hidden markers
- All Enemy Gun/Barrages
Draw randomly or choose one Pilot/PJ card from the deck and place its counter on its chosen aircraft.
Map
Place the following on the map:
- Healthy Survivor in the Center and East Outer Zones.
- (2) M38 (firepower 2/1) Enemy Guns in the East Outer Zone.
- (1) DShK (firepower 1) and (1) ZPU (firepower 2) in the Center Zone.
- Enemy marker in each Outer Zone.
- Hidden marker in each Zone.
- Coordinated Fire Zone marker in the East Outer Zone.
- One random Zone marker in all other Outer Zones.
Tracks
- Enemy Search marker on "0" space
- Abort marker on "0" space
- Turn marker on "1" space
Player's Hand
Start the game with the following hand:
- Troll for Fire
- Mark Target
- Attack
- Request Aircraft
- Ordnance: CBU
Action Deck
Remove the following cards:
- Ordnance: CS Gas
- Ordnance: Napalm
- Broken Arrow
Special Rules: A B-52 "ArcLight" bombing mission is scheduled to arrive on Turn 6. The player may not play any Action Cards during this turn. All aircraft are automatically removed from the map zones during the End Turn Phase of Turn 5 and must spend the entirety of turn 6 in the Orbit Box. The player may draw and reserve Action Cards as per normal rules on Turn 6.
Historical Scenario 3: You've Got Your Troubles
Situation: In the early years of the war, Combat Search and Rescue techniques were a long way from being streamlined and organized into doctrine and tactics. Most of the lessons from the Korean War had been forgotten, and needed to be relearned the hard way when the US began its commitment in Vietnam. Search and Rescue training and equipment were woefully inadequate for the task.
Before the arrival of the "Jolly Greens" and "BUFFs", the HH-43 "Huskie" was the primary rescue helicopter used by the USAF. Its small size, slow speed, and limited range often dictated the tempo and outcome of rescue efforts. In addition, the Huskies were vulnerable and lightly armed and did not have the space required to rescue more than one man at a time. These limitations were amply demonstrated during the rescue of an O-1E pilot 10 miles north of Da Nang in June of 1965.
Scenario Length: 8 Turns
Setup
Aircraft
Place the following aircraft in the Orbit Box with their Cool side face up:
- 2 x Sandys
- 1 x Helicopter
- 1 x Fast Mover on ENTER side
- 1 x FAC
Place two Fast Movers in the Fast Mover Pool.
Draw Cups
Remove the "3" Enemy marker from play. Then set up cups as follows:
- All other Enemy markers.
- All Hidden Markers.
- All Enemy Guns except the S-60 (1/2*) counters.
Map
Place the following:
- Healthy Survivor in Center Zone.
- Enemy markers in each Outer Zone.
- Hidden markers in each Zone.
Place Zone markers as follows:
- 1 x Impassable in East Outer Zone.
- 1 x Village in West Outer Zone.
- 1 x Village in South Outer Zone.
- 1 x Impassable in North Outer Zone.
Tracks
- Enemy Search marker on the "1" space
- Abort marker on the "1" space
- Turn marker on the "1" space
Player's Hand
Start the game with the following hand:
- Mark Target
- Troll for Fire
- Attack
- Suppress
Action Deck
Remove the following cards:
- Ordnance: CBU
- Ordnance: Napalm
- Smoke Marker
- Ordnance: CS Gas
- 1 x Request Aircraft
Special Rules: To reflect the lack of experience and development of tactics for CSAR at this stage of the war, the player's Hand is reduced to a maximum of 4 Action Cards. The Reserve can hold a maximum of 2 Action Cards only. The helicopter in this scenario is a lone HH-43 Huskie with limited range and fuel operating on its own. The Search marker may never be moved beyond the "3" space of the Search Track.
Historical Scenario 4: Air Force Cross
Situation:
Location: Between Tchepone, Laos and the DMZ – April 1972
On March 30th, the NVA launched the "Eastern Offensive" (Nguyễn Huệ) and the Ho Chi Minh Trail once again was its lifeline of supplies of men and materiel.
On April 9, A-6 Intruders from the USS Coral Sea on Yankee Station were tasked with bombing of the Trail at dusk (when convoys formed). Bengal 505 (Major Clyde Smith, Pilot, and 1st Lt. Scott Ketchie, B/N) made two passes against their targets and on the third they were hit by a SAM and bailed out of the flaming jet.
A first rescue attempt was organized on April 10, but heavy ground fire and weather prevented the extraction. Poor weather scrubbed any other attempt on April 11 and 12.
April 13 was going to be the day. Because the now-famous BAT21 rescue was concurrent, there was a lack of resources from the Air Force. Captain Harris, skipper of the USS Coral Sea, launched a whopping total of 78 aircraft from two carriers to suppress the NVA air defenses in the area for the rescue force to move in.
Maj. Smith was rescued. 1st Lt. Ketchie is still listed as MIA.
Scenario Length: 7 turns
Setup
Aircraft
Place the following aircraft in the Orbit Box.
- 1 x Fast Mover on ENTER side (see Special Rule)
- 1 x FAC (see Special Rule)
- 1 x Sandy with Pilot (Claws or Piney in Sandy 1)
- 3 x Sandys
- 2 x Helicopters
Place three Fast Movers in the Fast Mover Pool.
Draw Cups
- All Hidden markers with a value of "1" or greater.
- All Enemy markers with a value of "1" or greater.
- All Enemy Gun/Barrages.
Map
Place an Injured Survivor in the Center Zone (in reality Maj. Smith had holed up in a tree trunk given his proximity to the Trail and chose not to move).
Draw Enemy and Hidden markers at random and place them in all Outer Zones. In two zones (Player's Choice), reveal the Enemy markers (only) and add Enemy Guns as per rules.
Historical Note: This represents the work done in the previous couple of days.
Draw a Hidden marker and place it in the Center Zone.
Place a Coordinated FP zone marker in both zones where the Enemy markers were revealed (see above). Do not draw or place any other Zone markers.
Tracks
- Enemy Search marker on the "1" space
- Abort marker on "0" space
Player's Hand
The player chooses 5 Aircraft Action cards from the Action Deck as their starting hand. No two cards can be the same.
Event Deck
Remove the following Event Cards from the Event Deck:
- Comms Trouble
- Evacuation
- Hydraulics Failure
- Reinforcements
- Wind Shift
- MiGs!
- Rules of Engagement
- Survivor Injured
Action Deck
Remove the following Action Cards from the Action Deck:
- Ordnance: CS Gas
- Request Aircraft
- Move Survivor
- Exfil Team
- Broken Arrow
Historical Note: The Pilot card represents Col. James C Harding, one of the most decorated airmen of the war, flying Sandy 01. He coordinated the rescue day one. He was awarded the Air Force Cross for his efforts in rescuing Maj. Smith.
Special Rules: For the first six turns, move a Fast Mover counter from the Orbit Box to the Fast Mover Pool during the Marker Adjustment Segment instead of flipping it to its EXIT side. Move one Fast Mover counter from the Fast Mover Pool on its ENTER side to the Orbit Box before the Event Phase of the following turn.
Use the Search Effectiveness Optional Rule (6.5) for this scenario. If playing with the Optional Pinpointing Survivor Rule (6.2), the Survivor is considered already pinpointed at the start of the scenario.
Victory Conditions:
The player wins if all Survivors are rescued by the end of seven turns and no aircraft are shot down or destroyed.
The player immediately loses if:
- any Survivors are captured or left on the map at the end of the Scenario
- both helicopters are shot down
- the mission is aborted
Any other result is a draw.
8.0 Mini-Campaign
The mini-campaign consists of three connected missions that allow you to build a CSAR team. Based on your performance, each scenario allows you to earn and spend Morale Points that enhance the skill of your team and their ability to exploit opportunities to perform successful rescues.
Before the campaign starts, remove the following Action cards:
- 2 x Ordnance: Napalm
- 1 x Ordnance: CS Gas
- 2 x Request Aircraft
Start the campaign with 5 Morale Points.
Before each mission begins, you may purchase Action cards (from those removed above), extra turns, or pilots and (PJs). Purchased Cards are placed in the deck for the remainder of the next mission. Remove them from the deck once the mission is over. PJs and Pilots, once purchased, are available for the rest of the campaign unless they are captured or killed.
It is not mandatory to make a purchase. Morale Points may be saved up and spent before another mission if the player wishes.
Gaining and Losing Morale Points
For each mission, Morale Points are gained or lost as follows:
- No CSAR Team Aircraft Shot Down or Destroyed due to Enemy Fire: +1 point
- All Survivors Rescued and moved off the map: +2 points
- Each Survivor Captured or Abandoned on the map: -3 points
- The Abort Marker's end position: -1 point per track space. If the Auto Abort space is reached at any point, the player loses 5 points for the mission.
- A Pilot or PJ is killed or captured during a mission: -2 points
- A Pilot or PJ is recovered after being shot down during a mission: +1 point
Scenario Setup
Each scenario in the campaign is 9 turns long. A scenario may be extended for one extra turn by purchasing it with Morale Points. For each scenario, follow the Setup rules for the Standard Scenario, Caged Tiger. Note that the player begins with no Fast Movers in the Fast Mover Pool unless purchased beforehand.
Scenario: Pilots & PJs Special Rule
If a Pilot or PJ card is discarded and the counter is removed from play during a scenario, the counter and card return to play in the next scenario. If the Pilot or PJ is shot down and rescued, they may return to play in the next scenario.
Campaign End & Victory Conditions
The campaign ends upon the conclusion of the third scenario. If the campaign ends with positive Morale Points, the player wins the campaign. Otherwise, the campaign is lost.
9.0 Markers
9.1 Hit Marker
Placement: Hit markers are placed on Enemy Guns and Targets of Opportunity that are attacked by Attack and Napalm cards. The hit marker is placed directly on a gun when it is first hit and rotated to show how many hits have been made against it.
Effect: During the Bomb Damage Assessment Segment, the player draws Resolution Cards equal to the number of hits to find out whether or not the target has been destroyed.
Removal: All hit markers on the map are removed during the Marker Adjustment Phase. Hits on Enemy Guns and Targets of Opportunity do not accumulate from turn to turn.
9.2 Ordnance
Ordnance markers are placed on the map when their corresponding Aircraft Action card is played. Markers are piece limited.
CS Gas
Placement: When a CS Gas card is played, a CS Gas marker is placed in the same zone on its CS GAS ONE side.
Effect: While a CS Gas marker is on the map, it suppresses all enemy guns currently in the same zone, and any placed in that zone. Barrage markers are unaffected.
Removal: During the Marker Adjustment Segment on the turn it is placed, the marker is flipped from its ONE to TWO side. On the following turn's Marker Adjustment Segment, it is removed.
Mark Target
Placement: When a Mark Target card is played, a Mark Target marker is placed on one gun in the same zone. It is initially placed on its MARK ONE side.
Effect: While a target has a MARK marker on it, all hits on the gun from Attack and Napalm cards are doubled for the current turn.
Removal: During the Marker Adjustment Segment on the turn it is placed, the marker is flipped from its ONE to TWO side. On the following turn's Marker Adjustment Segment, it is removed.
Smoke
Placement: When a Smoke card is played, a Smoke marker is placed in the same zone on its SMOKE ONE side.
Effect: The Zone Firepower is decreased by one in the zone with the Smoke marker. This applies to fire from both within the marker's zone and outside the zone. Barrages are unaffected by Smoke.
Removal: During the Marker Adjustment Segment on the turn it is placed, the marker is flipped from its ONE to TWO side. On the following turn's Marker Adjustment Segment, it is removed.
Cluster Munitions
A CBU (Cluster Bomb Unit) is a weapon that contains cluster munitions that can be dropped from an aircraft and are designed to saturate a large area. Cluster munitions are small bomblets that linger in an area after being dropped, thus posing an extreme hazard to personnel in the affected area.
Placement: Cluster Munitions markers are placed in the same zone where an Ordnance: CBU card has been played.
Effect: CBUs may be used to either immediately remove one gun in the zone or move the Search marker. Once played, Move Survivor and Request Exfil Team cards may not be played to move a Survivor into, out of, or through zones with Cluster Munitions markers. Entrenchment zone markers have no effect on CBUs.
Removal: Once placed, Cluster Munitions remain on the map for the duration of the game.
9.3 Zone Markers
Zone markers are placed at the beginning of each scenario according to Setup rules.
Coordinated Fire
Add one to the Zone Firepower Value in this zone when resolving Enemy Gun Fire. If no guns are firing into the zone, then the Coordinated Fire marker has no effect.
Entrenchment
When resolving hits against an Enemy Gun in this zone during the Bomb Damage Assessment Phase, draw one less Resolution Card to a minimum of one. This marker has no effect against CBUs.
Heavy Jungle
Troll for Fire cards may not be played in this zone.
Impassable
The Move Survivor card may not be played to move a Survivor into, from or through this zone. The Exfil Team card may not be played to move a Survivor into, from, or through this zone.
Target of Opportunity
The Abort marker is moved two spaces toward the zero space for each Target of Opportunity destroyed. Targets of Opportunity may be targeted the same as enemy guns. Resolve hits in the Bomb Damage Assessment Phase. CBUs may be used to eliminate Targets of Opportunity. Targets of Opportunity are considered enemy units and may not be attacked if they are in a zone where the Rules of Engagement event card is in play.
Village
CS Gas, CBUs, and Napalm cards may not be played by aircraft in the village marker's zone for the duration of the game.
9.4 Hidden/Enemy Markers
Hidden and Enemy markers are put in separate draw cups and drawn and placed face-down according to scenario setup rules.
Both Hidden and Enemy markers represent concealed enemy units that are positioned in each zone and waiting to spring a "flak trap" on the American search and rescue team. The goal of the enemy is to use the Survivor as bait to bring in more American aircraft and shoot them down.
Hidden markers represent experienced and disciplined gun crews that will attempt to hold their fire until a rescue begins, thus giving them the greatest chance of surprising and shooting down an American plane.
Enemy markers represent less experienced crews that open fire more readily at available targets.
Hidden and Enemy markers have a number on one side. When a Hidden or Enemy marker's number side is revealed, the player draws the indicated number of Enemy Guns from the Enemy Guns draw cup and places them in the same zone as the revealed marker.
Some markers have a 1+ on their number side. This indicates the player should draw at random another of the same type of marker (either Hidden or Enemy) and consult the number on its back as well. Add together the two numbers and place the total amount of Enemy Guns in the zone.
For example, a 1+ is revealed on the back of an Enemy marker. The player draws another Enemy marker, which has a 2 on the back. Three enemy units would be drawn and placed in the Enemy marker's zone.
9.5 Barrages & Enemy Guns
In some scenarios, Enemy Guns are already on the map when the game begins. Barrages and Enemy Guns are also drawn from an opaque cup and placed when a Hidden or Enemy marker is first revealed. The number of counters to be drawn and placed in a zone is equal to the number on the back of the marker.
Barrage markers represent concentrated areas of small arms fire.
Placement: Barrage markers are placed as per standard Enemy Gun placement.
Effect: Flip any aircraft counters in the same zone as a Barrage to their Shaken side during the Marker Adjustment segment. Aircraft already on their Shaken side remain Shaken. Fast Movers are not affected by Barrages. Barrages are distinct from Enemy Guns in how and when they attack. The presence of a Barrage marker in a zone does not factor into Zone Firepower or the resolution of Enemy Gun Fire. Multiple barrage counters in the same zone do not compound the effects of a barrage.
Removal: A Barrage marker may be removed from the map immediately upon playing an Attack card against the marker.
Enemy Guns are anti-aircraft batteries that may consist of anywhere from 1 to 6 guns.
Placement: Enemy Guns are placed when drawn. Newly placed guns will always attempt to fire at targets in range.
Guns are placed on their active side unless zone-wide suppression by CS Gas is in effect at the time of placement.
Removal: Enemy Guns may be removed by any number of means, including the use of ordnance such as CBUs and Napalm as well as by using Attack cards.
Notes: A CBU card played against an enemy gun immediately eliminates it. All other kinds of attacks inflict hits. During the Bomb Damage Assessment Segment, the player resolves whether the gun is eliminated or not.
Each gun has two sides: an Active side and a Suppressed. An Enemy Gun may only fire when Active.
Enemy Guns may only fire once at one zone during each turn. Rotate any fired enemy guns to indicate they have already fired.
Range: Each Gun has a number at the bottom that represents its Firepower. Guns with only one number may only fire within their own zone.
Guns with two numbers may fire into their own zone (using the Firepower number on the left) or into adjacent zones (using the Firepower number on the right). If an asterisk, they may also use that Firepower against a non-adjacent zone.