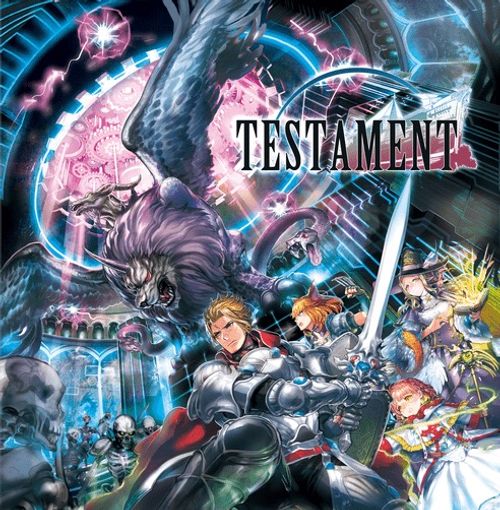
Testament
Testament Rulebook
Table of Contents
Table of Contents
The Heroes
Holland Mason
Hailing from the capital of Tauron and descending from a long line of knights, Holland has a fighting pedigree that is second to none. Despite being young, his nerves of steel and exceptional sword skills are held in the highest regard, making him truly worthy of the name Mason - protector of the Stone Sword.
The journey into the black heart of the Ark is more than mere adventure for Holland - it's personal. His father, Curtis Mason, was part of the second expedition, and Holland's goal is to bring him back alive. For exactly that reason, a new, powerful expeditionary party has been formed with Holland at its helm.
Together, they'll discover what secrets the Ark holds.
Kukurito Mamalit
Holland's childhood friend from Tauron, Kukurito studies theism and is planning for a future in the unlikely career of church management. Hoping that the renowned Mason family might use their influence to help him with his choice of profession, Kukurito signed up for the expedition and is prepared to fight to the very end.
Kukurito might be more suited to having his nose in a book than battling monsters, but his unique skills make him an essential part of the group. Beneath his small stature and gender-neutral appearance lies a sharp, logical mind and healing powers that are nothing short of astounding.
Count on Kukurito to bring everyone back from the expedition alive!
Palsette
After breaking nearly every possible rule of her people in the Lost Forest, Palsette left home in search of the hustle and bustle of Tauron with nothing but a spell-casting dragon-familiar on her shoulder. Causing commotion wherever she goes, it wasn't long before she showed up on the radar of Holland and Kukurito.
Holland quickly saw Palsette's potential and recruited her as part of his expeditionary force (much to Kukurito's chagrin). Her wild streak and lack of respect for societal norms may get her into trouble from time to time, but there's no denying her ability with magic. And when the going gets tough, that's when Palsette and her abilities shine.
Now it's time to see if Palsette's reckless style will save the day or lead the party to their doom.
Che Rumin
Felpers are a people who live in the mountains and survive by hunting. When Che's village was destroyed in an avalanche, a chance encounter brought her in contact with Holland, and an instant bond was formed between the two. With her village in ruins and no home to go back to, destiny beckoned, and thus Che joined Holland's expedition.
Although curious to a fault and a bit of a troublemaker, Che's reliability and loyalty to the group make her a trusted comrade in Holland's band of heroes. Growing up in the wilderness, her finely-honed agility, strength, and sensory abilities are truly in a league of their own.
With Che as its fourth member, the party is complete and now stands a fighting chance against the evil that lurks inside the Ark.
Components
- 3 Stage boards
These boards represent the 6 stages of the Ark, and each board has a front and back side. Stage 0 is outside the Ark and is the first stage of the game. Each subsequent stage is 1 level deeper into the Ark, and if you finish Stage 5, then congratulations, you have won the game.
- 20 Hero cards
These cards represent your heroes. They are divided into ranks 1-5 depending on the skills selected and display the hero's starting Hit Points (HP), special ability, Soul action, and token limits.
- 80 mob cards
These cards represent the enemies you'll face inside the Ark. There are 40 weak ones (black) that appear in Stage 0-3 and 40 strong ones (orange) that appear in Stage 4-5.
- 72 Skill cards
There are 6 skill categories:
- Tanking (blue)
- Melee Damage (red)
- Healing (white)
- Spell Damage (black)
- Support (yellow)
- Ranged (green)
Each skill category has 12 Skill cards:
-
4 Level 1 cards
-
4 Level 2 cards
-
4 Level 3 cards
-
28 Boss cards
These cards represent the boss of each stage. A stage boss is comprised of 4 common cards used for every boss and 4 individual cards specific to each boss.
- 3 Force dice
These custom dice are used to generate Soul or Force at the beginning of each round.
- 75 Damage tokens
These represent damage that the players have taken.
- 25 Shield tokens
Shields decrease the amount of damage taken.
- 20 Aggro tokens
These represent hero aggression.
- 42 Threat tokens
Threats are used by bosses with various effects.
- 20 Buff/Debuff tokens
These tokens are used to strengthen your hero or weaken an enemy.
- 7 Force tokens
These show how much Force the players currently have.
- Markers
- 1 soul marker (yellow game piece)
- 1 step marker (crystal game piece)
- 1 boss marker (green game piece)
- 1 phase marker (metal torch game piece)
- 1 start player marker (blue game piece)
Setup
1. Creating a hero
To start, you'll need to create your band of heroes. All 4 heroes are used in every game, so in a 2-player game, each player will control 2 heroes. With 3 players, one player will control 2 heroes. In a 4-player game, each player controls 1 hero.
If a player controls more than one hero, the order of the multiple heroes will need to be decided when the game starts. This order will not change during the game.
Kukurito's special ability is to have 1 extra skill, so he will select 5 Level 1 skills.
Che's special ability is to start by leveling up twice, so she selects 2 Level 1 skills to upgrade to Level 2. However, a single Level 1 skill may not be upgraded twice to Level 3.
For your first game, it's recommended that you use the premade heroes with the skills indicated in the rulebook. In future games, you may customize the starting skills of your hero as you wish. To do this, each player selects 4 Level 1 skills (the order is unimportant) for their hero. You are allowed to select multiple Level 1 cards of the same skill category, but keep in mind that there are only 4 Level 1 cards in each category, so it's better to share them between heroes.
After all players have selected their starting skills, each hero will level up 1 of their chosen Skill cards (see Intermission for details on skill progression). Select the Level 1 skill you wish to upgrade and replace it with a Level 2 skill of the same category.
Once all heroes have leveled up, determine the rank adjustment of their individual Skill cards by totaling the adjustment values in the top right corner of each card. Using this total, select the corresponding Hero card with the matching rank adjustment range.
The premade heroes (Holland Mason, Palsette, Kukurito Mamalit, and Che Rumin) are excellent for your first game, since it's hard to know which skills to choose and how they work together.
2. Stage setup
Prepare the Stage board. Stage 0 is a tutorial and is recommended for your first game. After your first game, you may skip Stage 0 and instead perform the Intermission (take an additional level up) and begin with Stage 1.
Place the Step marker on the leftmost space of the Step track.
Place the Soul marker on the leftmost space of the Soul gauge.
3. Mob decks setup
Set aside all Mob cards with a number in the top right corner and then separate them by stage. These cards will be summoned by the boss of each stage.
Create the mob deck for your current stage by shuffling the remaining Mob cards and then placing the deck face down next to the Stage board.
For Stages 0-3, only use the weak Mob cards (the ones with the black background).
For Stages 4-5, only use the strong Mob cards (the ones with the orange background).
4. Setup the tokens
Sort all tokens by type and then place them next to the Stage board. There is not a limit to these tokens, and proxies should be used if you run out of a specific token type.
5. Determine leader (starting player)
Determine the starting hero by any means you see fit, such as the last player to have played an MMORPG, rock-paper-scissors, or whatever method you wish. Place the Leader marker next to the hero that will take the first turn.
6. Setup the final battle (only on stage 5)
When the players begin the final stage, Stage 5, all heroes start with 1 Buff token. Unlike other stages, Stage 5 is only the boss fight, so you will have no time to gain Soul or shields by defeating mobs. In other words, there is no way to prepare for the final boss encounter - it's do or die! So steel yourself!
Playing a Round
Here is described how you will tackle the stages. When a stage is cleared, you go to the Intermission and then onto the next stage. The play time for this game is set so that clearing one stage is enough for one session. Therefore, you can save the game during the intermission and then continue with the next stage the next time you play the game.
1. Start of round
First, advance the Step marker one step to the right, and resolve the step accordingly.
In Stage 5, there are no steps and you'll immediately begin with the boss fight.
There are four types of steps: Blue spaces, Fire spaces, Key spaces, and the Boss space.
Blue spaces
From the mob deck, draw as many cards as indicated on the step and place them one at a time from left to right on the Mob area of the Stage board. If the deck runs out, shuffle the discards to form a new mob deck.
Only 5 Mob cards may be on the Mob area at any one time. If there are already 5 mobs and you should draw more, deal damage to each hero equal to the stage number multiplied by the number of cards that could not be drawn.
For example, if players are on Stage 3 and 2 new Mob cards should be drawn but the Mob area is full, then each hero would instead receive 6 damage (3 damage for each Mob card that cannot be placed).
Fire spaces
These steps are dangerous areas, and mobs appearing here will ambush you. As with the Blue steps, draw as many Mob cards as indicated and use the same rules as above if you run out of cards in the mob deck or the Mob area is full.
Immediately after placing the new Mob cards, they attack (see Enemy actions). This ambush is done before any "at round start" effects on Skill cards. After the ambush is resolved, slide the Mob card down a bit to show it has already activated this round - it will not activate again during the enemy actions phase. After the ambush, complete the round in the standard manner.
Key spaces
On these steps, you may discover something that weakens the boss. If there are no cards in the Mob area when this step is activated, then place a 1 Damage token on the keys in the Boss HP area of the Stage board. Otherwise, nothing is found, and play continues normally.
Boss space
When the Boss step is resolved, the boss appears, and it's time to fight. Each boss has 3 phases and a set amount of HP within each phase. Doing damage equal to or greater than the boss's HP ends the phase.
Place the Phase marker on the leftmost icon of the Boss HP area on the Stage board and draw as many Mob cards as indicated by the Boss step, placing them into the Mob area. If full, or if there are no cards to draw, follow the rules in the Blue steps section.
If there are any Damage tokens in the Boss HP area, then lower the boss's HP by that amount. Note that this is done at the beginning of every boss phase.
Boss HP can be tracked by adding Damage tokens to the Stage board on top of the boss's image.
Now, prepare the boss. Shuffle the 4 common and 4 individual Boss cards together and draw the top 4, placing them in the Boss card area of the Stage board in the order of their action numbers. Also place the Boss marker on the "1" space above the leftmost card.
Set aside the remaining 4 Boss cards - they will be used later.
2. Force roll
The Force dice are used to generate Force and Soul.
Force is used to empower (see Empowering) an individual hero's skill, while Soul is a resource shared by all heroes. When the Soul gauge on the Stage board is completely full, any hero may use it to complete a Soul action when they pass their turn.
The player with the Leader marker rolls 2 Force dice and gains the resources as below:
- Gain 1 Soul
- Gain 1 Force token
- Gain 2 Force tokens
- Gain 2 Force tokens, and then reroll this die (this may chain)
For every 1 Soul gained, increase the Soul gauge by 1 step. The Soul gauge can never exceed 12 and is carried over between rounds. Note: while there are 13 spaces on the Soul Gauge, the leftmost space is considered step 0, the starting step.
The Force tokens are then distributed. Players may discuss how these tokens could be best used, but ultimately, the current leader has the final say. Force tokens are not carried over between rounds, so use them when you can.
3. Player actions
Starting with the hero that has the Leader marker, each hero will complete their actions in clockwise order.
When it's a hero's turn, you can either use a skill or pass your turn. If all skills are already tapped due to enemy attacks, then your hero is forced to pass (see Passing a turn and Forced pass).
To use a skill, select a "ready" Skill card (vertical position) and tap it by turning it 90 degrees to indicate that it is on "cooldown" (horizontal position). You may not use a Skill card that's on cooldown.
After tapping the ready skill, apply both the regular effects and any special skill effects.
Then, if all of your Skill cards are now on cooldown, return them all to ready position.
When using a skill, start by taking the number of Aggro tokens indicated by the card. "Aggro" is the enemy's attention, and their attacks usually target the hero with the most aggro.
Most heroes have a maximum aggro limit of 5. If using a skill would generate more than your max aggro limit, simply return any extra tokens back to the supply.
After taking Aggro tokens, apply the regular effects of the skill as described in the following section. Some skills also have special effects (text) that are applied as well.
Effects with the persistent-effect icon stay in effect as long as the skill is on cooldown.
Defend (X)
Gain X Shield tokens but no more than your max shield limit.
Shields decrease the damage taken during enemy attacks and other game situations. The amount of damage is reduced by the total number of Shield tokens you have. After decreasing the damage, return 1 Shield token to the supply (regardless of how much damage was absorbed/blocked).
Using shields is optional and can be used to prevent any type of damage, including overrun Mob areas and Skill cards that cause damage.
Example: You take 4 damage from an enemy, but if you have 3 shield tokens, you may discard 1 to take only 1 damage. Then, remove 1 Shield token.
Attack (X)
Select a mob or boss to attack and place X Damage tokens on the Mob card or boss's Stage board. If the skill targets multiple enemies, all will receive the same amount of damage.
If a mob takes Damage tokens equal to or greater than its HP, then it is discarded and any tokens on the card returned to the supply. As a reward, players immediately increase 1 step on the Soul gauge.
If a boss has taken damage equal to or greater than its HP, then it will not have enemy actions in the current round and will proceed to the next HP phase after the round has concluded. If the third phase HP has been depleted, then the boss has been defeated and players move on to the next stage.
Heal (X)
Select one hero and then heal them by removing X Damage tokens. Note that you can also heal a hero that has been downed (see Downed hero).
Support (X)
Take X Buff tokens and either add them to any hero(es) or flip them to the debuff side and add them to enemies. You may assign tokens to multiple heroes or enemies.
Buff tokens represent strength and can be used during a hero's turn in the same way that Force tokens can. Keep in mind that each hero has a maximum buff limit and moreover, buff tokens are carried over between rounds.
Debuff tokens represent your efforts to weaken enemies. When using a Debuff token on mobs, place it on the leftmost action icon. Against bosses, place the Debuff token on the Boss card. Mobs and bosses may only have 1 Debuff token on them.
The debuff cancels the leftmost action of a mob.
Explore (X)
Advance the Step marker X steps on the Step track. This step is not immediately activated - only the step triggered at the start of the turn is resolved.
However, if an explore action would take you to a Boss step or beyond, then the next round will start as if you had moved to the Boss step normally, and Mob cards will be drawn as per usual. By exploring, you can skip spaces with many mobs or ambushes!
Empowering
Empowering a skill means you temporarily make it more powerful for this turn only. Empowered effects are in addition to the skill's regular and special effects.
To empower a skill, discard Buff or Force tokens equal to the empowering cost and then resolve all effects. You may empower a skill multiple times in the same turn as long as you have enough Buff/Force tokens and have not exceeded the skill's empower limit. All empowers are paid before resolving any skill effects. Do note that when empowering a skill, you may not use gained Buff tokens to empower it again - they must already be in your hero's supply.
Some skills indicate an empower cost with an "x2," meaning you can empower it twice. For example, "Taunt" can be empowered twice, so you have these three possibilities: remove a Buff token twice; gain +1 Aggro twice; or remove a Buff token and gain +1 Aggro, once each.
Example: You cannot use Mysterion to gain a shield and buff token and then use that gained buff token to empower Mysterion again.
Timing issues
If a skill says "at round start," it means that the effect will be applied during the start of round phase after the Step marker has been moved and the step resolved. If there are multiple "at round start" skill effects, they are applied in clockwise order starting with the leader. However, if all of a hero's skills are on cooldown, the "at round start" effect is not applied.
Self damage from own skills
Some skills deal damage to the hero using them. These skills cannot be used if it would reduce the hero's HP to zero or lower. The same goes for empowering - you cannot empower a skill if it would cause you to go to zero HP or lower.
Stealth
Mobs with the stealth icon hide from heroes. These mobs cannot be attacked or debuffed as long as there are other mobs (not counting the boss) that do not have stealth. However, once all living mobs have been defeated, stealth stops working! If a new, non-stealth mob appears, the stealth starts working again.
Force tokens are gained from Force rolls and are lost at the round's end.
Buff tokens: Each hero can have 2 (Che Rumin can have 3) and they carry over between rounds!
Passing a turn and Forced pass
Instead of using a skill on your turn, you may choose to pass. If you pass, turn all skills on cooldown to ready position and then return 2 Aggro tokens to the supply.
Also, if the Soul gauge is at max (on the 13th lightning bolt), you may use your Soul action. If you do, move the Soul marker back to the starting position and then resolve the effects of the Soul action.
The Soul gauge is common to all heroes and may only be activated when a hero chooses to pass their turn. Soul can be charged by Force rolls, defeating mobs, and some skills.
If your hero has been downed, or if all of your hero's skills are on cooldown (hero is stunned), then you are forced to pass your turn. As with a normal passed turn, all skills are turned to ready position and 2 Aggro tokens are returned to the supply. However, be aware that you may not use a Soul action when forced to pass a turn.
4. Enemy actions
After all heroes have completed their turns, enemies take a turn as well, starting with the mobs (in left-to-right order of the Mob cards) and finishing with the boss if revealed.
Each Mob card has a series of actions that are resolved from left to right. If a mob has a Debuff token, the leftmost action is skipped.
After a mob's actions are completed, slide the card down to show that it has been resolved. Remember that any mobs that appeared from a fire step have already acted and will not activate again.
A stunned mob cannot act at all. When you use a skill that would stun a mob, slide the card down to show that the mob will not attack this turn.
Unless otherwise specified, each action targets the hero with the most Aggro tokens. If there is a tie, then the lowest rank hero is targeted. If ranks are equal, then players choose which hero is targeted. Some actions always target the leader, and others target all heroes (or enemies), as indicated by their icons.
Mobs may have the following actions:
- Attack (X) - Target is dealt X damage.
- Pierce (X) - Target is dealt X damage - Shield tokens may not be used.
- Defense (X) - The mob gains X Shield tokens. They are used in the same way as a hero's shields, except that they have no max limit and mobs always use their Shields, even when zero damage is dealt.
- Heal (X) - The mob heals itself by discarding X Damage tokens and any Debuff token. If it has the "heal all" icon, it heals itself and all other mobs (including the boss).
- Summon (X) - Draw X new Mob cards from the deck and place them in the Mob area. When the boss summons, it may be mobs specified by name. These newly drawn mobs don't act this round, so slide them down as if they had already acted. If the deck runs out or the Mob area is already full, use the start of round rules.
- Tactics (X) - Remove X Aggro tokens from the hero or heroes who have the most.
- Combo - For this round only, all subsequent enemy attack actions (including the boss) get +1 in damage. This effect stacks.
- Weaken (X) - Remove X Buff/Shield tokens from the target. The targeted hero chooses which to remove - any combination may be chosen.
- Bind (X) - Put X of the target's ready skills on cooldown - the target chooses which ones. This effect may cause all of a hero's skills to be on cooldown, forcing them to pass the next turn.
- Rage - During this round, all of this mob's attack actions deal an extra +[amount of damage on this mob] damage.
Boss actions
After the mobs, the stage boss attacks if it has been revealed. Look at the Boss card indicated by the Boss marker and resolve the actions from top to bottom.
Debuff effects
Unlike mobs, if a boss is debuffed, several actions may be affected. When a boss has a Debuff token, perform the actions with the debuffed icon as well as any text effects instead of the standard boss action. Actions without a debuff option are always performed.
Summoning mobs
When a boss summons mobs, draw X Mob cards from the deck and place them in the Mob area.
If a specific mob is named in the boss's summon text, find the Mob card from the cards set aside at the beginning of the game and place it in the Mob area. If there are no more of the specified Mob cards available (already in play), the summon fails - no mobs are drawn and none of the summon effects are applied.
Boss with zero HP
If a boss has zero HP remaining, then the boss action phase is skipped.
Threat
In addition to normal enemy actions, bosses also use "threat" to damage or weaken heroes as represented by the black/red/blue threat icons.
Each boss has a different set of threat effects on their Stage board and heroes with black, red, or blue Threat tokens must apply these effects as listed. Some threats are applied during hero or enemy actions and others are applied at the end of the round.
Threat is only applied once per turn regardless of how many Threat tokens a hero has of a specific color. In addition, each hero's threat is resolved individually, meaning that a hero with 1 black threat would not cause other heroes to suffer the black threat effects.
Having several Threat tokens can be dangerous as some threat effects multiply or stack to deal extra damage. When starting a new stage, familiarize yourself with the different threat effects.
Example: if a hero has 4 red threat, and the threat effect reads "2 damage at the end of the round," the hero takes 2 damage; but if the threat effect instead reads "[amount of red threat] damage at the end of the round," the hero takes 4 damage.
Downed hero
Whenever a hero has Damage tokens equal to or greater than their HP, they are considered to be downed, or temporarily out of the fight. If all heroes are downed, then the game is over, and the players have lost.
When your hero is downed, flip the Hero card face down and remove all tokens except Damage tokens equal to the hero's HP. Also, return all skills on cooldown to ready position.
While downed, your hero cannot be the target of any attacks, including those that would attack all heroes, nor can the hero gain Buff, Shield, or Threat tokens. However, a downed hero can be targeted for healing skills, including those that heal all heroes.
Summary of being downed:
- Cannot take turns.
- Cannot perform a Soul action.
- Cannot be targeted by enemies.
- Cannot be targeted by other heroes except with healing skills.
Reviving
If all of the downed hero's Damage tokens are removed by healing skills, the downed hero is revived. However, as a penalty, the hero loses 1 rank until the next Intermission, so exchange your current Hero card with the one of the next lower rank.
If your hero's rank is 1, then they can't be revived. However, during your first few games, you may decide on letting even downed rank 1 heroes revive. If so, they revive at rank 1.
A revived hero can take their turn again the next round, but not the round they were revived.
5. End of round
Before starting the next round, remove all remaining Force tokens and slide all remaining Mob cards back up to show they're ready. Also, evaluate any end of round threat effects.
Then move the Leader marker to the next hero in clockwise order and start a new round. If you're currently fighting the boss, then also perform the actions below.
Move the Boss marker one space to the right (on top of the next card) or to the "5" space below the first card if at the end of the top row.
When the marker arrives at the last position on the bottom row, you'll have 1 more round to defeat the boss or it's literally game over. If you fail to defeat the boss, then it becomes invincible, all heroes are immediately killed, and the players have lost.
If the boss has Damage tokens equal to or greater than its HP, then play proceeds to the next boss HP phase. Remove all Damage, Debuff, and Shield tokens (but not the Damage tokens on the key spaces of the Boss HP area) from the Stage board and follow the instructions below.
The first phase shift (from phase 1 to 2)
Remove the existing Boss cards on the Stage board and replace them with the 4 cards set aside during boss setup, placing them in action number order as before.
Also, move the Phase marker to the second HP level and reset the Boss marker to the "1" space. Then draw new mobs equal to the number indicated on the Boss step.
The Phase marker shows the remaining phase count. When the phase changes, the Boss marker is reset, and the players get 8 more rounds to defeat the boss!
The second phase shift (from phase 2 to 3)
Remove the common Boss cards on the Stage board and replace them with the individual Boss cards used in the first HP level, arranging them in action number order.
Also, move the Phase marker to the third HP level and reset the Boss marker to the "1" space. Then draw new mobs equal to the number indicated on the Boss step.
The third phase shift (from phase 3)
The boss has been defeated and the heroes immediately gain 1 Soul. Discard all threat tokens from the heroes - threat is no longer valid. In addition, the Boss marker will no longer move, but you'll still need to kill all remaining mobs to finish the stage.
Even if you deal more damage to the boss than it has HP, it will still apply the threat effects at the end of the round during the first and second phase shift (not the third as the boss is dead).
When the boss and all mobs are defeated, the stage is cleared. Perform the Intermission and then proceed to the next stage. If this was Stage 5, then you have completed the game and are absolutely awesome.
Intermission
During the Intermission, heroes return to the base camp and prepare for the next stage. Return all Damage, Aggro, Shield, Force, and Buff tokens to the supply.
As a reward for completing the stage, all heroes level up once. Follow the skill tree progression and select one skill to upgrade - a Level 1 skill becomes Level 2 or a Level 2 skill becomes Level 3. Advanced skills are unlocked after Stage 1.
Once all heroes have leveled up, your rank will need to be recalculated (see Creating a hero) and the Hero card changed if necessary.
Finally, set up the next Stage board and prepare the next mob deck (remember, weak mobs for Stage 0-3 and strong mobs for Stage 4-5).
After completing Stage 0, you may only upgrade a Level 1 skill to Level 2. Level 3 skills cannot be learned until after you have completed Stage 1.
Also, keep in mind that you can pause the game at this point by simply noting down what skills each hero has or by putting each Hero card and their Skill cards in one envelope each. When you restart the game during your next session, simply take the skills you've noted down, set up the Stage board, and you'll be ready to go!
If you wish, you may perform a full talent reset at this point, meaning you can re-choose your skills. If so, choose 4 Level 1 skills, and then level up as many times as you have done during the game:
- Stage 0 completed: 2 level ups
- Stage 1 completed: 3 level ups
- Stage 2 completed: 4 level ups
- Stage 3 completed: 5 level ups
- Stage 4 completed: 6 level ups
Hint: How to create an effective party
1: Good balance
Skills can be roughly divided into 4 types: attack, defense, healing, and support. It's not recommended to limit a hero to 1 type of skill or to only have 1 hero with an important skill type.
The basic idea is to have 2 main damage dealers, 1 main tank, and 1 main healer, as well as a backup. For example, if you have only 1 hero that can heal, then you're doomed if that hero is ever downed.
Set 2-3 skills for the main role and 1-2 skills as secondary/backup, and you'll stand a fighting chance against the Ark.
Try out different combinations to build an effective hero party.
2: Aim for synergy!
Some skills specifically work well together. For example, an attacker that has a tendency to get a low rank will have problems when using skills that generate too much aggro. A good idea would be to use a skill like Chaos Flare to turn those Aggro tokens into damage.
In choosing skills, look for those that are both powerful and have strong synergy.
3. Pay attention to threat!
Threats from a boss can be deadly!
A hero with tank skills may work for early stages, but as you move deeper and deeper into the Ark, you may want each hero to remove threat on their own.
Finding the balance between removing threat and leveling up your main skills can be difficult. However, keeping a lower level skill like Cool Hunt can be a handy way to move threat and still deal damage.
The Stages
Stage 0: Grungrika, The Deck of the Ark
Grungrika is the base camp built by the first research party and used by your expedition as a starting point for entering the Ark.
However, there's a fairly large problem standing in your way - the forces of the Ark have transformed a wild boar into a nightmare come true, and it seems this particular Raging Boar has an appetite for heroes.
Your team arrives to Grungrika in the afternoon, but the base camp has been the scene of a violent massacre. No explorers have survived the Raging Boar's wrath, and now it has turned its attention toward you. Will you turn the Raging Boar into an ivory trophy, or will you die before you even step foot in the Ark?
Fortunately, a mysterious crystal presents itself to you, speaking to you from within your hearts. It calls itself "Mother Crystal" and states that it will guide you through the Ark as it had attempted with the previous exploration parties.
Stage 0 Hints: This is a tutorial stage, which means that you'll be able to learn how the game works without too many mobs or too much trouble.
The most difficult mob actions in this stage will likely be summon and bind, so it's a good idea to deal with those first, either by debuffing the mobs or with skills like Crusader's March.
The Raging Boar is pretty powerful, so a good strategy is to keep the mobs to a minimum so you can focus on lowering the boss's HP as quickly as possible. Keep in mind that the hardest mobs can be wiped out by Raging Boar's Beat Down action.
Most of the boss's dangerous actions can be nullified with a debuff, leaving your heavy hitters to deal damage and coast through for an easy victory.
Stage 1
Climbing down onto the Ark's deck, it appears that this former storage area has become overgrown by a strange and sinister forest. Could it be more of the Ark's forces at work? Low-hanging branches, spooky grottos, and dark tunnels all hide a veritable death trap at every step.
As you hack and slash your way through heaps of iron, venomous creatures, and monstrous mushrooms, you come across the most perilous plant possible - the Greedy Mother!
Play your cards right and uproot Greedy Mother like the weed it is!
Stage 1 Hints: All three of the boss's threats are dangerous, so you'll need to have a plan to counter them.
If you have a lot of black threat, keep in mind that it will stack with blue threat and can deal heavy damage at the end of the round. Because blue threat is discarded if a hero has three or more, Cool Hunt is a skill that works well to amass all the blue threat on a single hero.
In the same manner, Cool Hunt works to spread red threat between heroes or simply move the red threat to a single hero and trigger the explosion of damage on purpose.
Lastly, Greedy Mother will summon Blood Suckers - nasty mobs that can knock out your entire team with just one attack. Crusader's March is an effective way to deal with them, or simply attack them as soon as they appear.
Stage 2: Above the City
The Greedy Mother defeated, you venture past the Ark's deck, coming to a mysterious door. When opened, the door reveals another world, complete with a man-made sky and an ancient city floating on an island in the air.
Fortunately, there's an abandoned airship steps away from the door.
As you sail into the open air, you discover that you're not alone. Storm Causer is the king of the skies here and his powerful lightning bolts send your airship crashing down onto the island. Your team may have survived the crash, but you're not alone there either...
Stage 2 Hints: If your primary tank skill hero is also a damage dealer, you'll need to pay attention to their blue threat. The Blue Impulse boss action turns blue threat into big damage and can rapidly deplete even a strong hero's HP. You may need a backup tank just in case your primary tank goes down.
As in Stage 1, using Cool Hunt to move threat around is very important, especially the potentially devastating red threat. It's a good idea for at least two heroes (not your main damage dealer) to have Cool Hunt. Cool Weather is another option for managing threat amounts.
The mobs summoned by the boss may not have high attack stats, but they can be extremely dangerous if they start to stack. Take out these mobs in a single turn by using skills with high damage to avoid losing time.
Stage 3: Center of the Twilight City
The Storm Causer no longer rules the skies, but it's not the skies that have your attention. If there's something here, you're sure the city is where you'll find it and thus make your way through the underbrush.
Arriving on the outskirts, you can't help but notice a towering building in the city's center. Is it a castle? A fortress? A church? Or something entirely different?
Before you can reach the structure, you're met by what appears to be the building's guardian - a giant made of metal and brandishing a sword several stories tall.
And he doesn't look friendly...
Stage 3 Hints: This boss has several actions that are based on how many ready skills you have, so being equipped with Ranger 2B or 3B can help you time when it would be useful to have certain skills ready. Skills like Berserker Soul or Silent Kill can also help you manage which skills are ready and when. In a pinch, you can always pass your turn to reset your skills to ready.
The Adamant Colossus also has two insta-kill actions (Death Trap and Full Swing). You'll need to prepare for these attacks the round before they happen. In the third boss HP phase, a Nightmare will be summoned immediately before these insta-kills, and its bind action should be stopped with a debuff. Pit Snake and Lamia could appear, and they also have bind actions.
In addition, the boss's Etheric Burst action can deal a big hit if you're not prepared. Make sure each hero has a shield or use Heaven's Door/Mysterion to supply them.
Stage 4: Magic Science Center, Inner Section of the Ark - Revival
Entering the enormous central building, it's painfully clear that this was once a research center. And judging by the creatures on display, it looks like some serious experimentation was done here. Each new room is worse than the last as you discover preserved specimens from hideous experiments gone wrong (or maybe gone right).
Why were these strange beasts created? And are they really dead... or just waiting for the right moment to strike?
Your questions are answered as you round a corner and come face to face with The Abyss - a chimera whose menace appears to be more than the sum of its parts.
Stage 5
You've reached the inner sanctum of the Ark and are now ready to face the ultimate challenge... Or are you?
Behind a sealed door lies Testament - a fierce dragon created by an ancient civilization to exact revenge when their god was destroyed. Fueled by their hate, and genetically mutated to kill any creature it comes across, Testament is truly the final test of your party's strength. Once the seal is broken, nothing can stop Testament from leaving the Ark and laying waste to the people of Mir n'Glav.
Do you dare open the door?
Item Cards (EX Mode)
- Earring of Force
- Earring of Fate
- Earring of Souls
- Earring of Power
- Power Burst Ring
- Healing Burst Ring
- Guard Burst Ring
- Soul Burst Ring
- Guard Materia
- Power Materia
- Aggro Materia
- Healing Boots
- Guard Boots
- Power Boots
- Seal of Power
- Seal of Toughness
- Aggro Crystal
- Healing Crystal
- Guard Crystal
- Power Crystal
FAQ
General
Q: All we do is DIE! Isn't this thing a little too difficult? A: The game is next to impossible to finish on your first try. You'll need to challenge it again and again. Don't give up!
Q: Can you change the difficulty? A: Yes. You can increase the number of level ups per stage and/or exchange strong mobs for weak mobs on Stage 4-5. To make the game more difficult, you can reduce level ups per stage or disallow Soul actions.
Q: What if I run out of Damage/Shield/Aggro/Threat/Buff/Force tokens? A: Resources are not limited - use a proxy to represent tokens if needed.
Q: Can we choose the party's leader based on what the most efficient order of skill usage is? A: Sure.
Q: If there are already mobs in the Mob area when you stop on a Fire step, will those mobs also ambush you? A: No. Only the newly drawn mobs ambush.
Q: Do we gain Soul when we defeat the boss? A: Yes. But only when it's fully defeated, not when you clear HP phase 1 or 2.
Q: What happens if I debuff an already debuffed enemy? A: No Debuff token is added. Enemies can only have 1 Debuff token.
Q: Can you use the empower effect "stun the target (not the boss)" or "give a Debuff token to the target" twice? A: You can, but there's no real reason to. Serpent Tail or Crowd Kill are there to give some margin for attacks that lower the empowering number (Testament's blue threat).
Q: Is there a max limit for threat? A: No.
Q: If you are revived after being downed, can you suffer damage immediately? A: Yes. You can suffer both damage and threat. The round you revive is normal, but you may not take hero actions until the next round.
Heroes / Skills
Q: If the text says "any hero", does that include yourself? A: Yes.
Q: Does Divine Chain let you take just part of the damage onto yourself? For example, taking 3 out of a total 5 damage and let the target take 2? A: Yes.
Q: Does Divine Chain allow you to take damage that another hero causes to themselves? A: Yes.
Q: Does Divine Chain allow you to take the debuffs, tactics, or binds that target another hero? A: No. Only damage can be taken.
Q: If Divine Chain is on cooldown from a mob action, does its effect apply? A: Yes. Divine Chain begins working as soon as it's on cooldown.
Q: If you empower Gore Smash to deal damage that cannot be reduced with shields, does the enemy still lose Shield tokens? A: Yes. The enemy always uses Shield tokens if they have them, and they lose 1 Shield token regardless of the damage dealt.
Q: What happens if you use Serpent Tail and have no aggro? A: Regular damage is dealt, but as you have no aggro to take away, that part of the effect is lost.
Q: If Berserker Soul is on cooldown, and you use Shadow Move, can you say that the empower cost of 3 (Explore +1) is your free empower and then pay 1 Force to use the cost 1 empower (Remove 2 aggro)? A: Yes. The Berserker Soul effect is that you can treat any one empower as having no cost at all.
Q: If you empower a skill to get one extra target, can you choose to attack the boss and a mob at the same time? A: Yes.
Q: If you empower a skill to get one extra target, can you choose to attack the same target twice? A: No. If there is no other enemy to attack, nothing happens.
Q: What happens if you empower Chaos Flare and have no aggro or threat? A: Unless you fulfill the condition "remove an Aggro or Threat token", you cannot empower Chaos Flare, even if you have enough Force/Buff tokens.
Q: When you use Hail Storm, have 2 Buff tokens, and empower once, how many Shield tokens will you get? A: Only one as the empower only refers to the damage dealt.
Q: If you use empowered Highest Heal on a downed hero, will they revive even if they have Damage tokens left? A: Yes.
Q: When you empower Divine Seal, will the healing amount increase even if the skills you use are Faith or Soul Link? A: Yes. The effect is not limited to Healing skills. However, it does not increase the healing amount of Heaven's Door as it is a Support skill.
Q: Can you use Healing Wave or Sanctuary on a downed hero? A: Yes.
Q: Will the healing effect of Sanctuary affect all heroes even if it's on cooldown. A: Yes. It always targets everyone.
Q: What happens if you empower Mysterion to use it twice on the same hero? A: That hero will get 2 Buff tokens and 1 Shield token. Only a single hero would receive the shield from the text effect as the empower only provides Buff tokens.
Q: When using Heaven's Door, will heroes with no Damage tokens still gain Shield tokens? A: Yes.
Q: Can you use Soul Link on a hero that already has their max limit of Buff tokens? A: Yes. Heal the hero and give the Buff tokens in the normal manner. Then return the buff tokens over the hero's limit back to the supply.
Q: If two heroes have Crowd Kill on cooldown, will the effects stack? A: Yes. All enemies with Debuff tokens at the start of the round will suffer 2 damage.
Q: Can you use Gate to the Abyss on mobs and the boss even if they haven't suffered any damage yet? A: Yes. In that case, the damage done will be zero, and if the target(s) have Shield tokens, one will be taken away from each.
Q: Will the effect of Beast Brand always be applied on targets with a Debuff token? A: Yes. It's not optional.
Q: With Cool Hunt, can you move an Aggro token to a hero that has already reached their max limit for aggro? A: Yes you can, and in that case, any extra tokens over the hero's limit are simply returned to the supply.
Q: With the empower effect of Cool Hunt or Silent Kill that lets you ignore stealth, will this be valid for other heroes during the same round? A: No. Only the casting hero may attack mobs with stealth.
Q: Can Crusader's March decrease the damage caused by threat? A: No. Threat damage originates only from the boss.
Q: What happens if the Soul gauge reaches its max when Brave Song is on cooldown? A: No Soul is gained, but Force is.
Q: When empowering Crusader's March, Brave Song, or Phantasmagoria, can you target skills of your own that are on cooldown? And can you target the skill itself? A: Yes, you may target skills of your own that are on cooldown; however, the skill cannot target itself.
Q: With Crusader's March, can you target another character's Crusader's March? A: Yes.
Q: If two heroes have Crusader's March on cooldown, does the effect stack? A: Yes. Damage is reduced by a total of 2.
Q: If you have Phantasmagoria on cooldown and stop on a Fire step, can you stun the mobs before they ambush? A: No. The ambush happens before Phantasmagoria resolves, and the effect only targets already existing mobs.
Q: What are the names of the alternate-art Skill cards that were added to the game via Kickstarter stretch goals, and which cards are they variants of? A: The names of the alternate-art Skill cards, and the cards they are variants of, are as follows: Scale of the Dragon (Fortress), Piercing Diversion (Taunt), Leaf-Cutting Strike (Cool Hunt), and Blade of the Spirit Eye (Serpent Tail).
Q: The alternate art for the skills increases the number of copies of the Skill cards they're variants of. Can we use more copies of these cards than was originally intended? A: No. You may still only choose from 4 copies of Fortress, 4 copies of Cool Hunt, 2 copies of Taunt, and 2 copies of Serpent Tail.
Mobs / Boss Actions
Q: If an enemy targets using something other than aggro, what happens if there is a tie? A: The players choose which hero is targeted.
Q: Is there sense to a mob action that heals zero? A: Yes. These enemy actions also remove Debuff tokens as well.
Q: If there are 5 mobs in the Mob card area when a summon occurs, what happens? A: The normal procedure - all players take as much damage as the stage number for each mob that cannot be summoned.
Q: Does the combo effect apply to attacks that target all heroes? A: Yes.
Q: If there are 3 possible targets for an enemy tactics action, what happens? A: Remove the total Aggro tokens from each of the 3 players.
Q: If an enemy bind puts a skill with a cooldown effect on cooldown, will those effects be applied? A: Yes, because the skills are on cooldown. However, if all your skills are on cooldown, then your hero is stunned and your next turn will be forfeited (see Forced pass).
Q: Can you use shields against 0-7 Triple Tusk, 5-1 Flatten, and other actions that attack multiple times? A: Yes. However, you lose one Shield token for each attack, so if you use your shield on all three hits, you will lose three Shield tokens. You can also choose to use your shield on only the first hit and not the rest.
Q: What happens if a hero is downed during a multiple attack such as 0-7 Triple Tusk or 5-1 Flatten? A: The remaining attacks have no effect, as the enemy doesn't change target in the middle of an attack.
Q: If attacks such as 1-3 Poison Breath, 4-1 Acid Breath, and 5-7 Tempest Wing are reduced to zero damage due to shields or Crusader's March, do they still generate threat? A: No. They only generate threat if they actually deal damage.
Q: Regarding 1-3 Sweet Liquid, 2-1 Emergency Call, and 4-5 Dispatch, is threat that is placed on a Mob card given to heroes if a Soul action or Crowd Kill is used? A: Yes. Regardless of how the damage is dealt, the Threat tokens have to be taken. Furthermore, if a mob has 1 threat on them and two players have Crowd Kill on cooldown, the effect will be resolved in clockwise order from the starting player, so the one closest to the leader will take the token.
Q: With 1-5 Mystic Fruit, if there are two Honey Ooze cards in the Mob area, will that generate 2 black threat? A: No. Regardless of the amount of Honey Ooze, only one black threat is generated.
Q: Can shields be used against enemy actions like 3-7 Death Trap and 4-7 Red Horn that deal damage based on hero HP? A: Yes.
Q: If the conditions of 3-7 Full Swing are fulfilled, what happens with the damage? A: Technically, it's a double attack. First, do the regular damage (6), and then do damage equal to the boss's remaining HP.
Threat
Q: Is Raging Boar's black threat still applied if skills are on cooldown due to bind? A: Yes.
Q: Is Greedy Mother's or Testament's black threat applied even if damage is reduced to zero with shields or Crusader's March? A: No. Only if they deal damage.
Q: If you have 2 of Greedy Mother's blue threat, do you take 2 damage at the end of the round? A: No. 1 damage regardless of amount.
Q: Will Greedy Mother's blue threat have any effect the round she is killed? A: No. First, she is defeated, and all threats are returned to the bank.
Q: For Storm Causer's red threat, what if you already have red threat on all your skills? A: Any new red threat is simply returned to the supply.
Q: Can you activate a skill that has Storm Causer's red threat on it? And can you target a skill with red threat that is on cooldown by using another skill? A: Yes to both. However, no skill effects (text) are applied in either case.
Q: Do skills on cooldown with Storm Causer's red threat lose their effects? A: Yes. They start functioning again if the red threat is removed.
Q: Does the damage from Storm Causer's blue threat increase when you use skills such as Cryokinesis or Crowd Kill? A: No. It's only if you dealt damage or not.
Q: Does the effect of the black threat of Adamant Colossus or The Abyss stack if several heroes have it? A: Yes. Each black threat is resolved individually. This means that Hero A with 3 aggro would suffer 12 damage if Hero B with a black threat has 2 aggro and Hero C has 1 aggro. In this case, Hero B would also suffer 6 damage.
Q: Can you lower the damage from The Abyss's blue threat with shields? A: Yes.
Q: How does Testament's black threat work with multiple attacks such as 5-1 Flatten? A: The black threat is applied each time damage is done, meaning that with a single 5-1 Flatten attack, Testament could put three of your skills on cooldown.
Q: If you have Testament's black threat and an attack hits everyone, can you put Divine Chain on cooldown and then absorb the damage done to other heroes? A: No. The damage is done simultaneously and has already been dealt.
Q: If you take damage from another hero with Divine Chain and have Testament's black threat, is the black threat applied? A: Yes.
Q: If you have Testament's red threat, and use Divine Chain to take over damage that other heroes have suffered, is the red threat damage added? A: No. Divine Chain only takes over the direct damage dealt and neither hero would suffer the additional damage from the red threat.
Q: If you have 2 blue threat from Testament and use Chaos Flare to remove 1 blue threat, can you now empower? A: No. The 2 blue threat were there when the skill was activated.
Q: If you have 2 blue threat from Testament, use Divine Seal to remove 1 blue threat, and then use Healing Wave, can Healing Wave now be empowered once? A: Yes, as Healing Wave is a new skill that activates after Divine Seal.
Q: Between Testament's blue threat and Palsette's ability, which has priority? A: Palsette. First, Palsette's ability to empower once more is applied, and the total empowering limit is then reduced by any blue threat.