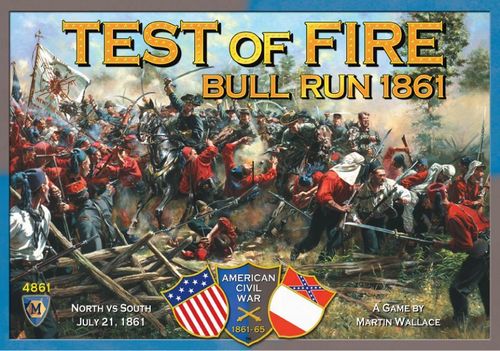
Test of Fire: Bull Run 1861
Test of Fire: Bull Run 1861 Rulebook
Table of Contents
Table of Contents
Components
- 1 Board (a map of the battlefield divided into areas separated by boundaries)
- 55 Cards (29 Union, 26 Confederate)
- 62 Counters:
- 53 Infantry Units (29 Union, 24 Confederate)
- 4 Artillery Batteries (2 Union, 2 Confederate)
- 3 Leaders (1 Union, 1 Confederate, 1 Optional Confederate)
- 2 Order Displays (1 Union, 1 Confederate)
- 1 Ford Marker
- 12 dice (6 blue, 6 gray)
Setting Up the Game
Place the board between the players so that Manassas Station is closest to the Confederate player and Centreville is closest to the Union player.
Then each player follows these steps:
- Take either the Union pieces (blue) or the Confederate pieces (gray): order display, 6 dice, cards, and counters (units, batteries, leaders).
- Place your infantry units on the board in each of the areas marked with a picture of an infantry unit. The number on the picture indicates how many units start in each area.
- Place one of your artillery batteries on the board in each area marked with a "crossed cannon" icon.
- Place your leader in any area containing at least one of your infantry units: Confederate (Beauregard) first followed by the Union (McDowell).
- Place your order display in front of yourself.
- Shuffle your cards and draw one card to start your hand.
Playing the Game
When playing A Test of Fire, you and your opponent take turns moving and attacking with your counters. First the Union player takes a turn, then the Confederate player take a turn. This continues until the game ends.
Your Turn
You start your turn by rolling some of your dice: 4 "order dice" for the Union, 3 "order dice" for the Confederates. After rolling, place these order dice on or next to the appropriate row of your order card.
Each order die result allows you to perform an action. You may take these actions in any order and you may play cards from your hand before or after each action. After the effects of a card are resolved, place it on your discard pile.
You must resolve all of the steps required for an action/card before playing a card or starting another action.
The actions are:
- 1 – Draw a card
- 2, 3 – Fire your artillery
- 4, 5 – Move a group of 1, 2, or 3 counters (infantry, artillery, leaders)
- 6 – Your Choice – Draw a card OR Fire your artillery in the same area as your leader OR Move 1, 2, or 3 tiles that are in the same area as your leader
Example: Billy Bluecoat rolls his order dice: 3, 5, 1, 3. So, Billy can move a group of counters (5), fire his artillery (3) twice, and draw a card (1). These actions can be performed in any order Billy decides.
Draw a Card – 1s (optionally: 6s)
Draw the top card from your deck. If you have more than 5 cards in your hand at the end of your turn, you must discard until you have 5 cards. There is no limit on how many cards you can play from your hand during any given turn.
See the card descriptions (pages 14-15) for more information on the effect of cards and when they can be played.
Example: Billy starts his turn by using his 1-order to draw a card. The card is a Move card, so Billy can play it to take an extra move action this turn or he can save the card to use later.
Fire Your Artillery – 2s & 3s (optionally: 6s if leader present)
Make an artillery attack against opposing units in an area adjacent to at least one of your artillery batteries.
Roll one die for each 2 or 3 order:
- If the result is a 1, 2, 3, or 4, you "miss" and nothing happens.
- If the result is a 5 or a 6, you "hit" one of the opposing infantry units. Roll again to determine the result:
- If the result is a 6, an opposing unit takes damage (see page 6)
- If the result is a 1, 2, 3, 4, or 5, an opposing unit retreats (see page 6)
Note: Each turn, you must roll all of your artillery fire (i.e., all of the dice) directed at a given area at the same time.
Example: After drawing a card, Billy decides to focus his first turn on attacking Henry House Hill. One of his artillery batteries starts adjacent to the hill, so Billy use both of his 3-orders to fire on Johnny Reb's two Confederate infantry units on the hill. He rolls a 5 and a 2—one hit, one miss. He rolls 1 die for the hit and gets a 4. So, Johnny must retreat one of his infantry units to the area east of the hill. This leaves 1 infantry unit to defend Henry House Hill.
Move – 4s, 5s
(optionally: 6s if leader present)
Move 1, 2, or 3 counters from one area to adjacent area. You may move any combination of infantry units, artillery batteries, and leaders. All of the counters moved using an action must move to the same area. The number of counters that may be moved is limited by the number on the boundary crossed during movement:
- No number – You may move 1 or 2 counters
- 0 – you may not move any counters
- 1 – you may move only one counter
- 3 – you may move 1, 2, or 3 counters
- 1/2 – You may only move 1 counter if the area being moved to contains enemy infantry unit(s). Otherwise, you can move 1 or 2 counters.
Note: The Ford marker on a boundary increases the number(s) on a Bull Run boundary by one (i.e., one extra counter may be moved across that boundary).
If you move units into an area containing enemy units, your moving units may not move any further until combat is resolved. However, you may delay resolving combat until later in your turn (see Combat below).
Note: If you move units into an area containing only enemy artillery and/or leader, the enemy counters must immediately retreat.
Note: You may not move artillery and/or a leader into an area containing one or more enemy counters.
Note: Delaying combat allows you to use multiple move actions to bring more than 1 or 2 infantry units into a battle. Alternatively, you can move units into an area, resolve the combat, and then move in more units to initiate more combat.
Example: Billy continues attacking Henry House Hill. He used his 5-order to move 1 infantry unit across Bull Run (1) to the hill (the boundary has a "1/2" and there are enemy units on the other side). He uses his Move card to move a second infantry unit across (2).
Combat
After you take an action, you may resolve combat in any area(s) that contain units from both sides. At the end of your turn, you must resolve combat in each area that still contains units from both sides.
Note: On your turn, you are the attacker. Your opponent is the defender.
Note: Combat is not an action but the result of movement. You choose at which point during your turn you resolve combat. Thus, you can use more than one move action to move units into an area before declaring that you wish to resolve combat.
To resolve combat follow this procedure:
- The defending units roll and resolve their assault.
- The remaining attacking units roll and resolve their assault.
- If any defending infantry units remain in the area attacked, each attacking units still in the area must retreat to the area it moved from before the combat (see page 6).
- If no defending units remain, the attacking units remain in the area and any defending artillery and/or leader retreat (see page 6).
Example: Billy 2 attacking infantry units must resolve combat with Johnny's 1 remaining defending infantry unit. The artillery does not participate.
Resolving an Assault
Roll 2 dice for each infantry unit in the assault (to a maximum of 6 dice).
For each die rolled:
- If the result is a 1, 2, 3, or 4, you "miss" and nothing happens.
- If the result is a 5 or a 6, "hit" one of the opposing infantry units.
- Roll one die for each hit to determine the result:
- If the result is a 4, 5, or 6, an enemy unit takes damage (see below)
- If the result is a 1, 2, or 3, an enemy unit retreats (see below)
- Roll one die for each hit to determine the result:
Important: If the defender is in a hill area, his initial rolls hit on a 4, 5 or 6. Henry House Hill, Buck Hill, and Chinn Ridge are the 3 hill areas.
Note: Each turn, you must roll all of your dice directed in an assault in a given area at the same time. And, you must then roll all of hit-result rolls at the same time.
Taking Damage
When a group of your units in an area takes damage, you decide how the results are applied. If an undamaged unit take damage, flip it over to its damaged side. A damaged unit takes additional damage, it is eliminated and removed from the board—place your eliminated units in front of yourself.
Retreating
If one of your artillery batteries or your leader has to retreat, move it to the closest area containing at least one of your infantry units.
If one of your infantry units has to retreat:
- An attacking unit must retreat to the area it moved from.
- A unit cannot retreat to an area containing an enemy counter.
- A unit cannot retreat across a boundary with a "0" number.
- A Union defending infantry unit must move to an allowed adjacent area that is closest to Centreville.
- A Confederate defending infantry unit must move to an allowed adjacent area that is closest to Manassas Station.
- A Union infantry unit forced to retreat from Centreville takes damage instead of retreating.
- A Confederate infantry unit forced to retreat from Manassas Station takes damage instead of retreating.
- A unit that cannot retreat to an allowed adjacent area is eliminated.
Example: Johnny has 1 unit for which he rolls 2 dice. He also plays a Firepower card, so he rolls 3 dice. His results are a 2, a 4, and a 6. His 6 hits. Since his units are defending on a hill, his 4 also hits. He then roll two dice to resolve the hits: a 3 and a 4. Billy applies the damage to a unit and retreats that same unit (1), leaving 1 Union unit to attack.
Billy rolls 2 dice getting a 1 and a 5 for 1 hit. He rolls a 2 and forces the remaining Confederate unit to retreat (2). The Union unit remains in the area, forcing the Confederate artillery to retreat (3). If his 2nd roll had been a 5, the Confederate unit would have been damaged, but it would have held the area and the union unit would have retreated.
Ending and Winning the Game
If you have drawn all of your cards and you roll a "1" as one of your order dice results, then the game ends the next time a Confederate turn ends. The Union player wins if his units occupy at least two of the three areas with uncircled stars. Otherwise, the Confederate player wins.
The game can end earlier if:
- A player can win by playing a Rout card and rolling a result that is less than or equal to the number of eliminated enemy units.
- The Confederate player has at least one unit in Centreville at the end of the Union player's turn—the Confederates win.
- The Union player has at least one unit in Manassas Station at the end of the Confederate player's turn—the Union wins.
Optional Rules
These optional rules provide a more historically accurate game at the cost of some increased complexity. These rules can be used to balance the game for players of differing skill levels.
Two Confederate Leaders
The Confederate player places and uses two leaders: Beauregard and Johnston. Both leaders must start the game in or adjacent to Manassas Station. At least one leader must remain in or adjacent to Manassas Station.
Note: This rule favors the Confederate player.
Artillery in Combat
When resolving combat in an area containing one of your artillery batteries, you may roll one extra die. However, your total number of die rolls for any given combat can still not exceed 6.
Note: This rule favors the Confederate player.
Ford Card Placement
During setup, remove the Ford card from the Union cards and shuffle the remaining Union cards. Take approximately half of the shuffled Union cards and add the Ford card. Finally, shuffle the Union cards containing the Ford card and place those cards on top of the other Union cards to form the Union player's deck.
Note: This rule favors the Union player.
Variable Deployment
When setting up, each side places half (round up) of the number of units normally placed in each area. Then, starting with the Confederate player, the players take turns placing units one at a time. The following restrictions apply:
- The Union may only place units in areas north of Bull Run.
- The Confederates may only place units in areas south of Bull Run and east of Henry House Hill.
- For each area, you may not place more than 2 units in excess of the normal number of units that start in that area.
Note: This rule favors the Union player.
Bull Run Battle Narrative
This section describes the first Battle of Bull Run, some events leading up to the battle, and the immediate aftermath.
The Strategic Situation
Hostilities had begun on April 12th 1861 with the bombardment of the Union defenders of Fort Sumter by Confederate artillery. For some weeks after that both sides preferred to watch and wait, with commanders on both sides nervous about the military abilities of their raw citizen armies. Lincoln and his Generals were finally forced into action by the increasing public demand in Washington for offensive action against the enemy capital at Richmond, only one hundred miles away. The Union leaders were also mindful of the fact that, if they did not act soon, the 3-month enlistments of at least 10,000 of their troops would expire. So, on July 16th, an army of 35,000 men under General McDowell marched out of the Washington defenses at Alexandria. Their objective was the important rail junction at Manassas, held by General Beauregard with 20,000 men.
McDowell reached Centreville, some three miles north of Beauregard's main force, early on the 19th. Had he attacked quickly, it seems likely that his substantial numerical superiority would have enabled him to push back the Confederates. Instead, he spent two full days in repeated reconnaissance, while insisting on building up generous stockpiles of ammunition and supplies. These rather leisurely preparations gave Beauregard the opportunity to make up his serious shortfall in numbers.
When the Union army had set off on their march to Centreville, the enemy forces were split between Manassas, Shenandoah (12,000 men under Johnston) and Aquila Landing, on the Potomac (3,000 men under Holmes). But Confederate sympathizers in Washington got word of McDowell's departure to Beauregard, and he immediately asked both these forces to join him at Manassas. By the eve of the battle all of Holmes's troops and sixty per cent of Johnston's had arrived there. Johnston's reinforcement was a notable achievement, since he had extracted four of his brigades from under the eyes of a less than properly vigilant Union observation force (18,000 men under Patterson), and then moved them undetected to Piedmont, screened by J.E.B. Stuart's small cavalry force. There he put them on trains for the forty mile journey to Manassas Junction, this being one of the earliest recorded examples of moving troops by rail to reinforce a threatened sector. The first of his brigades, under Jackson, reached Manassas in the afternoon of the 19th, with the others being shuttled in by two increasingly frail locomotives over the next 48 hours. As these reinforcements arrived Beauregard began to feel increasingly confident about risking a clash of arms with McDowell.
Opposing Plans
McDowell first considered an offensive against Beauregard's right, marching south from Centreville towards Manassas Junction. But he was forced to change his mind when a probing reconnaissance on the 18th July towards Mitchell's and Blackburn's Fords developed, against his orders, into a major assault by General Tyler's division, which was soundly driven off. This flank, it seemed, was too strongly manned to offer much hope of a breakthrough. McDowell therefore switched his attention to Beauregard's left, ordering Hunter and Heintzelman's divisions (13,000 men) to march west from Centreville, cross the Bull Run at Sudley Springs, and march around the open enemy flank towards the crossing at Stone Bridge, which was covered by a single, weak Confederate brigade (Evans). A subsidiary Union attack at Stone Bridge, by Tyler's division, would pin these defenders in place and divert attention from the turning movement at Sudley Springs.
Beauregard's first thoughts had been for an attack of his own, from his strong right flank, towards Centreville. Once he became aware of the first skirmishes at Stone Bridge he attempted to put this plan into effect. But his stream of confusing orders and counter-orders, the poor quality of his staff work, and the inexperience of most brigade officers and their men, meant that only one of the three brigades assigned to conduct the attack actually managed to advance over the Bull Run.
The Threat to the Confederate Left
It was barely 2am on Sunday, 21st July, when reveille raised Tyler's men to begin their dawn march down the Warrenton Turnpike. For some reason he moved his division off ahead of the other two assigned to the long flanking march to Sudley Springs. Difficulties during the event with assembling men and equipment in the dark, with inserting skirmishers into the dense undergrowth at either side of the road, and with hauling 3-ton cannon along the fairly primitive road, meant that all three divisions were seriously delayed. Hunter and Heintzelman were eventually some three hours late setting off and then had further problems of their own in making their way along a road that turned out to be little more than a cart-track, as well as being three miles longer than it should have been thanks to their guide taking a wrong turn. Sudley Springs was not reached until 9am.
By reaching Stone Bridge at 6am Tyler once again undermined McDowell's plans. Having been rebuked for exceeding his orders three days earlier this time he stuck rigidly to the letter of his instructions. Despite a seven-to-one numerical superiority, his operations against the bridge were limited to desultory skirmishing and artillery fire, which not only allowed Evans to easily hold his ground but also to conclude that he was facing only the feeblest of feints. So, at 8:30am, when he saw the dust of Hunter and Heintzelmann's columns two miles away to the north, he decided he could safely disengage most of his Brigade to face this threat. These men took up a new position on Matthew's Hill and when the first Union troops reached the foot of the hill at 9:15am the real battle began. Beauregard had also reacted fairly promptly to the news of a threat to his left, vague as he was about its actual form. But Tyler's men could actually be seen from his command post and this immediately prompted him to order three of Johnston's newly detrained brigades to move off towards Stone Bridge.
Matthew's Hill
For 45 minutes Evans and his 900 men and two guns held off Hunter's two brigades of 6000 men and several batteries. At one stage Evans even launched his own attack into the Union line as it reformed after another repulse, leading some Union commanders to estimate they were facing as many as six enemy regiments. At 10am these estimates became reality as Beauregard's reinforcements sent from his right flank began to appear on Matthew's Hill, first Bee's two-and-a-half regiments and then two more under Bartow. Forming up alongside Evan's men, the whole Confederate force charged down the hill but after a savage close-quarters combat they were forced to retreat back to the crest. It was now 11:00am and at this point fresh Union troops appeared, posing a grave threat to the Confederate position. To their front came Heintzelman's division, finally moving on to the battlefield behind Hunter's troops. Their frontal charges, though beaten back, further thinned the Confederate ranks. More threatening still was the appearance on their right flank of one of Tyler's brigades (Sherman's) which had disengaged itself from the indecisive skirmishing at Stone Bridge and crossed the Bull Run at a previously unknown ford just to the north. These fresh troops launched an immediate charge which drove the tired remains of Barton, Bee, and Evans's brigades off Matthew's Hill in considerable disarray. With the arrival of another of Tyler's brigades in the wake of Sherman's, McDowell had now succeeded in concentrating more than half his army against the three battered brigades that made up Beauregard's left flank. Victory was surely in sight.
Henry House Hill: the Vortex of the Battle
By noon, Beauregard, still with the main body of troops on the Confederate right, had realized that the main battle was in fact taking place to the north-west. He ordered three of his brigades (Holmes, Early, and Bonham) to move there right away and for the rest to abandon any idea of an offensive towards Centreville and instead take up a defensive posture. Beauregard and Johnston also set off towards the sound of the guns. Beauregard's salvation, at least in the short-term, was the existence of a second strong defensive position, Henry House Hill, to which the tired men from Matthew's Hill could retreat. Most importantly, Jackson's brigade had already got into position there by about 11:30am. They had been ordered earlier to support the centre of the Confederate line but had then continued, on Jackson's own initiative, to march to the sounds of fierce battle to his left. The position taken up by Jackson was admirably chosen, a concave semi-circle set back from the crest of the hill, offering good woodland cover and the ability to direct converging fire on the attacking enemy. Around this brigade, 'standing like a stone wall', Beauregard and Johnston were able to reorganize the retreating, panicky troops into a coherent battle line on Henry House Hill. Johnston at this point moved back a mile or so to give himself a panoramic view of the whole position from where he could direct further reinforcements to the critical points.
The Union commander now missed his best chance of victory. Having ably concentrated much of his army against his enemy's very weak flank, he failed to press home his advantage. Firstly, having taken Matthew's Hill he failed to immediately assault the summit of Henry House Hill, which gave the enemy time to reorganize. Secondly, when he did attack, he squandered his numerical advantage by sending in successive, regimental-level attacks, which the Confederates were each time able to shoot down. Finally, McDowell was reckless in the way he committed his artillery. Early on Henry House Hill he advanced two of his best batteries, without infantry protection, well forward of the line, where they were overrun and captured by one of Jackson's regiments. These guns were subsequently recaptured and then lost again, but the key point is that for most of the battle they were not available to pound the Confederate lines on the hill.
As the afternoon wore on the battle, bloody and bitter though it continued to be, became a matter of the number of reinforcements each side could feed into the cauldron. With hindsight there could be only one winner. By now McDowell had only Heintzelman's regiments which were still marching onto the battlefield, but these he continued to send in piecemeal as soon as they arrived. Beauregard, on the other hand, had by 4pm received the brigades of Cocke, Burnham (part), Early and Kirby Smith, using them to both strengthen over-stretched parts of his line as well as to extend it to his left to lap around the Union flank. The brigades of Holmes and Ewell were also on the march to further reinforce Beauregard but before they arrived, at around 4pm, Early's brigade hit the exposed Union left, meeting little resistance as the enemy here quickly melted away. Beauregard spotted his chance with commendable speed and ordered his whole reinforced line forward.
It was that critical moment of a battle when morale is everything: with both sides so exhausted that the one able to call up a last extremity of effort will convince the other that they themselves can do no more and that all is lost. Faced by the enemy's general advance the whole Union line fell back towards Sudley Springs, Stone Bridge, and 'Sherman's' ford. They escaped being cut off at these vulnerable choke-points because the Confederates were simply too weary to mount an effective pursuit.
It rained overnight, making the roads impassable and any chance of an early Confederate pursuit was lost. So when a reasonably orderly Union withdrawal did eventually degenerate into a partial rout, on the Warrenton Turnpike, it was still possible for their commanders to regard the events of the day more as an acute embarrassment than a complete military disaster. They knew their army could be reorganized and that Washington could still be defended.
Card Descriptions
You may potentially play any or all of your cards during your turn.
Artillery
This turn, roll 2 dice instead of 1 for each "2" or "3" order die result. You also roll 2 dice instead of 1 for each "1" order die result used to fire artillery.
Note: The 6 dice limit on an attack does not apply to firing artillery.
Cavalry
Immediately resolve combat against any area on your side of the river containing at least one enemy unit. You roll three or five dice, as stated on the card (use the standard combat rules).
Firepower
When resolving combat, you may play this card before rolling dice and then roll one extra die. You can play as many of these cards as you wish in the same combat, but your total number of die rolls for any given combat can still not exceed 6.
Ford
Place the Ford marker on any Bull Run boundary. You must have at least one of your units in one the areas adjacent to that boundary. The number of units that can cross that boundary using a move order is increased by one. Once placed, the marker cannot be removed.
Friendly Fire
Play this card when combat resolution begins. At this point, before any dice are rolled, one of your opponent's die rolls must assigned to his own units along with any resulting damage. The limit of 6 die rolls maximum still applies, so if your opponent is rolling six dice, he would roll five against your units and one against his own units.
Hold
Ignore the effect of one retreat result from artillery fire or from combat. This does not affect additional retreat effects caused by the play of a Retreat card.
Lost Order
After your opponent has rolled his order dice and before he uses any of the results, you may choose one of the order dice results that he may not use.
Move
You can take an extra move action during your turn.
Retreat
If an opposing unit is forced to retreat due to combat then you can play this card force it to retreat one more area. If the retreating unit is a Union unit in Centreville, it is damaged instead. If the retreating unit is a Confederate unit in Manassas Station, it is damaged instead.
Rout
Play this card during your turn. Roll two dice. If the result is less than or equal to the number of enemy units eliminated, you win the game immediately.
Note: You may play more than one Rout card during your turn and roll for each one.
Quick Reference: Your Turn
You start your turn by rolling some of your dice: 4 "order dice" for the Union, 3 "order dice" for the Confederates. Each order die result allows you to perform an action. You may take these actions in any order and you may play cards from your hand before and/or after each action. The actions are:
- 1 – Draw a card
- 2, 3 – Fire your artillery
- 4, 5 – Move a group of 1, 2, or 3 counters (infantry, artillery, leaders)
- 6 – Your Choice – Draw a card OR Fire your artillery in the same area as your leader OR Move 1, 2, or 3 tiles that are in the same area as your leader.
You end your turn by resolving combat in any areas still containing units from both sides, and then discarding cards if you have more than 5 cards.