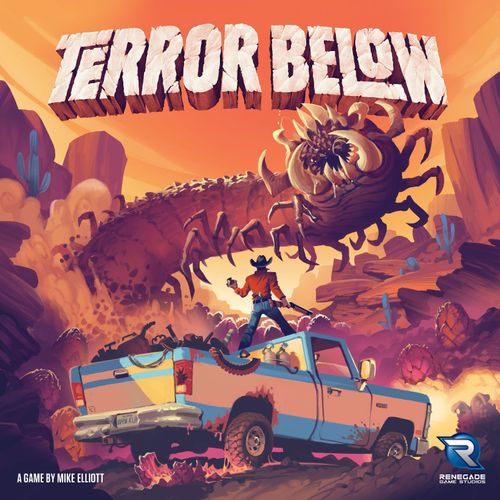
Terror Below
Terror Below Rulebook
Table of Contents
Table of Contents
Components list
- 1 Game board
- 5 Location tiles
- 5 W.O.R.M. standees (with base clip)
- 37 W.O.R.M. cards
- 6 Player Aid cards (1 for Solo)
- 16 Character cards
- 54 Vehicle cards
- 42 Bounty cards
- 24 Item cards
- 23 Weapon cards
- 3 Target tokens
- 16 Victory Point "VP" tokens (12 - 1 VP tokens, 4 - 3 VP tokens)
- 28 Eggs (7 Eggs in 4 colors)
- 50 Rubble pieces
- 5 Player pawns (1 Player pawn in 5 colors)
- 2 Dice (1 Red, 1 Blue)
Goal
The goal of Terror Below is to be the first player to score 20 Victory Points (VP) by collecting Worm Eggs and delivering them to Locations around town. Or alternatively, by hunting down and killing those vicious Worms.
During the game, your squad of unlikely heroes will visit Locations around the small desert town to find bounties, scavenge for weapons, and try to survive as you distract the Worms. Eventually, those Worms will attack. If you are in their path of destruction, you better be prepared for a fight!
Setup
- Place the board in the center of the table with the Desert (without the Canyon) side up.
- Place the Location tiles onto their starting spaces as shown. Starting Location spaces are marked with a bull skull.
- Separately shuffle the Bounty deck, Weapon deck, Item deck, Character deck, and Vehicle deck.
- Set aside the 4 starting Worm cards (black bordered Worm cards with no health or card limit numbers) and then shuffle the Worm deck, placing it near the Terror zone.
- Place the Bounty deck near the Government Facility. Flip 4 cards face up to form the Bounty Line along the top of the board.
- Place the Weapon deck near the State Police.
- Place the Item deck near the General Store.
- Place the Vehicle deck in reach of all players.
- Place the 3 Target tokens in the Worm card slots on the Terror zone of the board.
- Place all remaining tokens and pieces in separate piles next to the board. For added ambiance and terror, add any of the W.O.R.M. standees around the board or near the Terror zone.
Player Setup
- Give each player a pawn and player aid in their color.
- Deal each player 1 Item card and 1 Weapon card. Item and Weapon cards are kept hidden from other players.
- Each player draws 3 Vehicle cards to form their starting hand. A player's hand size limit is 3.
- Each player draws 3 Character cards to form their squad. Look at and choose 1 Character to be your starting Leader. Place this Leader face up in front of you with the remaining characters face up underneath in any order. Place any unused Character cards back in the box.
Initial Worm, Egg, and Rubble Setup
Worm Cards
Worm cards come in 5 different types and with 4 different Egg colors. They represent the different Worms that will attack players throughout the game. Each Worm card also displays starting coordinates that correlate to the grid on the game board.
When a Worm card is first revealed, it is placed into an open numbered spot in the Terror zone, and the matching Target token is placed onto the board at the starting coordinates listed on the card. When a Worm eventually attacks, the Target token represents the center space on the grid shown on the Worm card. Place an Egg that matches the color shown on the card into the space with the Target token. Then, place 1 piece of Rubble in each of the shaded spaces displayed on the card. If Rubble is already on that space, simply add another to it. There is a maximum of 2 Rubble per space.
However, Eggs and Rubble cannot be placed on a Location. If Rubble would be placed on a Location, or off the edge of the playing field, simply do not place the Rubble. If an Egg would be placed on a Location, instead, after placing all Rubble, roll the coordinate dice and place the Egg in the resulting coordinates.
Egg and Rubble Setup
Now that you know how Worms attack, take the 4 Starting Worm cards and resolve an attack for each Worm using the starting coordinates on the Worm card. Be sure to add an Egg and the appropriate Rubble to the board. Since they are attacking, there is no need to place any Target tokens.
- For 3 players, draw 1 additional Worm from the Worm deck and resolve an attack.
- For 4 players, draw and resolve 2 additional Worm attacks.
- For 5 players, draw and resolve 3 additional Worm attacks.
Then, form a discard pile next to the Worms with any cards used to attack.
For additional Solo and 2-player rules, see the Gameplay Variants section on page 17. This includes new ways to set up the board, a different side of the town to play, and even some single-player scenarios to enjoy!
Worm Setup
Draw a Worm from the Worm deck and place it face up into the lowest-numbered slot in the Terror zone. Then, place the matching-numbered Target token on the board coordinates listed on the Worm card. Do this for all 3 slots in the Terror zone.
The player who most recently defeated a Worm in combat is the starting player. Beginning with the last player and continuing in reverse player order, each player places their pawn on a Location of their choice. Players cannot choose the same starting Location.
Turn Sequence
Beginning with the starting player, each player takes a turn by performing 3 steps in order—play a Vehicle card, resolve the played card, and then refill their hand. After completing their turn, check for a possible Worm Attack. Afterwards, play passes to the next player in clockwise order.
1. Play a Vehicle Card
Play a Vehicle card from your hand face up on 1 of the 3 spots in the Terror zone below the Worm of your choice.
Each Worm card has a card limit displayed in the bottom right-hand corner, which represents the number of Vehicle cards that can be played on it. You can never play a card on a Worm that has already reached its card limit.
2. Resolve the Played Card
Then resolve the played card in 3 steps—Distraction, Perform Actions, and Resolve Special Ability.
Distraction
At the bottom of each Vehicle card is a set of arrows that represents a Distraction. These are the directions a Worm's Target token moves after playing the card.
Resolving each arrow icon from left to right, move the Target token of the Worm you have Distracted this turn 1 space in each direction indicated. If this causes the Target token to exit the game board, ignore the movement and resolve the subsequent arrow. A Target token will never leave the playing field. Some Vehicle cards do not have any Distraction arrows, so the Target token of the Worm will not move when this card is played.
Perform Actions
You receive Action Points equal to the number shown on the card. Spend these Action Points to perform any of the actions listed below. You may take the same action multiple times if desired.
This step is complete when you have spent all of your Action Points or have performed the "Pick up all Eggs" action.
For 1 Action Point, you may:
- Move 1 space orthogonally. You may never move into a space containing Rubble. You can move into or through a space with another player's pawn, but you cannot end your movement on the same space as another player.
- Ramp another player. If another player's pawn is adjacent to yours, you may jump over their piece as long as there is an empty space adjacent to their piece. Your pawn may change direction while ramping another player.
Example: For 1 Action Point, a player can ramp an adjacent player's piece, thereby moving 2 spaces for 1 action. To ramp, there must be at least 1 space without Rubble adjacent to the player, so that there is a legal space to land. As shown, players may ramp in a straight line or change direction mid-ramp, as long as there is an empty space adjacent to the ramped pawn.
- Remove 1 Rubble from a space adjacent to your pawn. Place the Rubble on your Leader. If you ever collect 3 Rubble, you must immediately discard them to the general supply. Then, draw a Weapon or Item card.
- Pick up all Eggs in your space. Place them on your Leader. You may carry any number of Eggs. Note: After performing this action, you cannot perform any additional actions.
- Deliver 1 Egg you are carrying. To deliver an Egg, you must have an Egg in your possession and be in a Location. If you deliver an Egg without a Bounty, you score 1 Victory Point. Take a VP token from the supply as a reward and discard the Egg to the supply.
- However, if you deliver an Egg that fulfills 1 of the 4 face-up Bounties in the Bounty Line displayed at the top of the board, or possibly a Hidden Bounty card you have in hand, you score even more points! Do not take a VP token. Instead, discard the delivered Egg and place the Bounty card under your Leader so only the point total is showing. Be sure to draw a new Bounty card to refill the Bounty Line to 4 cards, if needed. Note: You may only complete 1 Bounty per Egg, even if 2 Bounties of the same type are displayed.
Delivery Bonus
Whether you deliver an Egg with or without a Bounty, you receive a Bonus based on the Location to which you deliver it. No matter how many deliveries you complete in a turn, you only receive 1 Delivery Bonus per turn. Delivery Bonuses are as follows:
- General Store: Draw an Item card.
- Motel: Gain 1 VP token.
- State Police: Draw a Weapon card.
- Government Facility: Draw a card from the Bounty Line or from the top of the Bounty deck and place it face down near your Leader card. This is now a Hidden Bounty. Then, if needed, draw a new Bounty card to refill the Bounty Line to 4 cards.
- Hidden Bounty cards are Bounties that only you can complete. Remember: When a player delivers an Egg, they may fulfill the requirements on a Bounty on display or a Hidden Bounty card in their possession.
- Hospital: Bring a dead character in your Squad back to life. Flip the card face up and place it underneath your current Leader card.
Resolve Special Abilities
Each Vehicle card has an ability that must be performed. Higher-numbered cards have negative abilities, while lower-numbered cards have positive abilities. Follow the instructions on the card to perform the ability.
Item and Weapon Cards
Whenever you collect 3 Rubble, you must immediately return the Rubble to the supply and draw the top card from the Item or Weapon deck. Items and Weapons may not be used on the turn they are acquired; however, Worms always attack between turns. This means that if a Worm attacks immediately after your turn is over, you may use any newly-acquired Weapons against that Worm.
Item and Weapon cards are kept hidden from other players until played from your hand. Be sure to read each card carefully, as it will tell you when and how the ability may be used. Item cards generally include special abilities that a player may use on their turn to break the rules—many times they will also give the player a VP for doing so. Weapon cards are generally used during a Worm Attack to hunt Worms.
3. Refill Hand to 3 Cards
When your turn is over, draw Vehicle cards until you have refilled your hand to 3.
Before the next player takes their turn, check for a...
Worm Attack!
In the lower right-hand corner of each Worm card is their card limit. This number denotes how many Vehicle cards can be played on a Worm before it attacks. If there are Vehicle cards on a Worm equal to the number shown, it attacks before the next player takes their turn.
To Resolve a Worm Attack:
- Check to see if there are any face-down cards on the Worm. If there are, flip them over and resolve them as you would during the Distraction step. If there are multiple face-down cards, resolve cards in the order they were played.
- Place an Egg matching the color of the Attacking Worm on the space where the Target token is now located. If this is The Queen, a Rubble is placed at center, and an Egg of each color is placed 1 space adjacent as shown on the card.
- Then, place 1 piece of Rubble in each shaded space displayed on the card. If Rubble is already on that space, add another to it. Remember, a maximum of 2 Rubble is allowed per space.
- After the Worm Attack has been fully resolved, discard the Worm to the Worm discard pile, draw a new Worm card to replace it, and place the new Worm's Target token on the appropriate grid coordinates.
Exception: Rubble and Eggs can never be placed on a Location. If an Egg would be placed on a Location, resolve all Rubble as normal. Roll both coordinate dice and place the Egg in the resulting space. If Rubble would be placed on a Location, it is not placed.
If a player's pawn is in any space where Rubble or Eggs are added, they are caught in the attack. That player's Leader might die unless the Worm can be defeated or an Item is used for protection. Note: a player inside a Location cannot hunt, nor be attacked by a Worm, unless the Target token lands exactly on the Location.
Hunting a Worm
If your pawn is caught in the Worm's attack, you have an opportunity to attack the Worm with any Weapons you have acquired. Follow the instructions on the Weapon or Item cards you use. However, if you are unsuccessful, your Leader dies (see Death below).
Multiple players may be caught in the same Worm Attack. If this is the case, the last player to take a turn has an opportunity to attack the Worm first, followed by the next player in clockwise order, and so on.
Defeating a Worm
A Worm card shows the Worm's health total. If the combined total of damage dealt to the Worm by all players caught in the attack is equal to or higher than the Worm's health, you have defeated the Worm. Any players caught in the attack are safe. Rubble and Eggs are still placed as usual.
Example: Veronica is now Hunting the Worm. The Worm's health is 7. She plays her Hunting Rifle card. This allows her to roll two dice and deal Damage equal to the higher result. It is a 5. She decides to then play a second card, a Pistol which allows her to deal an additional 2 Damage. With a combined attack value of 7, Veronica defeats the Worm. If there is a Hunting Bounty matching this Worm, she can immediately claim it from the Bounty line. If not, she gains 1 VP token for the killing blow. The Screamer is then discarded.
The player that deals the killing blow receives credit for defeating the Worm and receives 1 VP token.
However, if one of the Hunting Bounties in the Bounty Line matches the Worm type—or if you have a Hidden Bounty that matches—do not take a VP token. Instead, show this Bounty to all players and slide it under your Leader so that the points are visible. If this Bounty is taken from the Bounty Line, be sure to draw a new Bounty card to refill the Bounty Line to 4 cards. Note: You may only complete 1 Bounty per kill, even if 2 Bounties of the same type are displayed.
Death
If there are any players caught in the Worm's attack, and they cannot defeat it, their Leader is killed. Drop all Rubble and Eggs you are carrying onto your current space. If placing Rubble would exceed the maximum 2 pieces per space, any excess is returned to the supply. Any active Item or Weapon that is face up near your Leader is also discarded. Then, remove your player pawn from the board.
Flip your character to their deceased side and set it aside. Choose a new Leader from your remaining squad members and place it on top of your remaining characters. On your next turn, you will begin your turn by placing your pawn on an unoccupied Location of your choice and then performing your turn as normal.
Game End
The game ends immediately if a player reaches 20 Victory Points. That player is the winner!
But, if any player's entire squad is killed, they are eliminated from the game. All other players receive 1 final turn, and if they are still alive, the player with the most VP wins! If there is a tie, the player with the most completed Bounties wins. Otherwise, share your victory!
Gameplay Variants
2-Player Changes
To allow for a more dynamic and exciting 2-player experience, between each player's turn they add a Vehicle card to a random Worm. This extra Distraction may cause a Worm to attack or potentially disrupt a player's perfect plans. Each turn will have a new 4th step: Roll for a Worm.
Roll for a Worm
After you have completed your normal turn, and before resolving Worm attacks, roll 1 coordinate die. The Terror zone is marked with 3 sets of numbers that indicate which Worm is affected by the roll (1-2, 3-4, 5-6).
Draw a Vehicle card and place it face up on the rolled Worm. Immediately resolve the Distraction arrows at the bottom of the drawn card. Ignore all other information on the card.
Note: A newly-placed Distraction can be placed on a Worm that is already at its card limit. This is the only time this exception may occur.
Advanced Setup
Location Tiles
Once you are familiar with the basic gameplay, the Location tiles are meant to provide a variable setup. Mix up the tiles and randomly assign them to the starting spaces. Or if you're feeling really daring, roll the coordinate dice for each Location tile and try a truly randomized setup.
Advanced Worm Setup
Once you are familiar with the basic setup, you can also choose to ignore the starting cards and create a random setup by drawing cards directly from the Worm deck: (2 players draw 4 Worms, 3 player draws 5 Worms, 4 players draw 6 Worms, 5 players draw 7 Worms.) It is still recommended that you have at least 1 Egg of each color at the start of the game.
Canyon Side of the Game Board
On the reverse side of the game board is a slightly different layout which includes a new feature, the Canyon. The Canyon board can be played with any player count, but is recommended for 4 & 5 player games and provides a larger area for players to maneuver.
Special Rules
No player token, Target token, or Rubble may ever be placed in a Canyon space. Players cannot end their movement on a Canyon space. When resolving Distraction arrows for Worm movement, the Target token ignores any Canyon spaces and moves until it reaches the next available desert space. If Rubble would be placed onto a Canyon space, it is not placed.
Ramping the Canyon
Yes, you can ramp over the Canyon. For 1 action, move your pawn forward in a straight line until you reach the next desert space. Depending on how many spaces you move, there will be a cost and the possibility of failure!
To ramp over a single Canyon space, discard a Vehicle card from your hand. If you land on any Rubble, immediately place the Rubble onto your Leader.
To ramp over more than one space of the Canyon, discard a 6 or 7 Vehicle card from your hand and roll a die. Whether you fail or succeed, you immediately gain 1 VP token for being a daredevil. On a result of 1, 2, or 3, your Leader is killed. Drop all Rubble and Eggs you are carrying onto the space where you would have landed. On a result of 4, 5, or 6, you land safely. If you land on any Rubble, immediately place the Rubble onto your Leader.
Solo Mode
Your bandaged hand grips the rusted metal of your vehicle as you slowly lift yourself to your feet. The ground trembles once again, but this time you brace your boots against the torn and sweltering concrete. The ruined buildings angle gnarled against the setting sun. Suddenly it is blotted out by an explosion of sand and rock. Against the swarm of sand, through slitted eyes and fingertips, you witness the destructive force towering above the desert.
The hideous Worm lets out a high-pitched screech that turns your stomach. Its centipede arms flex in waves. Its mandibles drip pink saliva as they twitch around the grinding dark circle of spikes that is its open maw. You steel your nerves and take a deep breath. It's all on you this time.
Alone in the desert with these creatures, it's hunt or be hunted. In the Solo game, it's a race against time to complete your mission before the Worms have caused enough havoc for the military to force an evacuation.
Goal
Choose a Scenario and complete the Objective before 15 Worm Attacks have been resolved, or your squad has been eliminated.
Each time a Worm Attack is resolved, the Worm card is placed into a discard pile as normal. However, when this discard contains 15 Worm cards, the game ends immediately and you lose. (The Starter Worm cards do not count towards this amount.)
Setup
Set up the game board for 2 players as described in the Standard Setup section on page 4. You may choose to use either the Canyon or Desert side of the game board. The following changes will be made:
- You only need one squad of characters, as there is no second player.
- Remove the 3 Queen cards from the Worm deck and return them to the box. Then, shuffle the Worm deck as normal.
- Remove all "Not for Solo" cards from the Character, Item, and Weapon decks.
Then, place your pawn on the Location in which you would like to start and choose a Scenario (see Solo Scenarios).
Solo Rules Differences
There are three main rules differences from the standard game. These special rules are also detailed as a reminder on the Solo Player Aid card for quick reference.
Terror Turn
The most significant change is the Terror Turn. The Worms now have their own turn that is resolved after each of your turns has ended. As per the standard rules, if at any point during the Terror Turn a Worm reaches their Card Limit (even before dice are rolled) they will immediately resolve an Attack AND immediately be replaced with a new Worm card.
There are 2 steps to a Terror Turn:
- Roll the Blue Die. Roll the Blue coordinate die. The Terror zone is marked with 3 sets of numbers that indicate which Worm is affected by the roll (1-2, 3-4, 5-6). Draw a Vehicle card and place it face up under the rolled Worm. Immediately resolve the Distraction arrows at the bottom of the drawn card. Ignore all other information on the card.
- Roll the Red Die and resolve an Attack! Roll the Red coordinate die and in the same way, determine which Worm is affected by the roll. This Worm immediately Attacks regardless of how many cards it has below it.
Locations
In the Solo version, Locations can be destroyed by Worm Attacks, and Rubble is always added to Locations during a Worm Attack. Because of this, Locations are no longer safe from Worm Attacks, and you must always attempt to fight the Worm if caught in its attack pattern.
If a Location ever has 2 Rubble, it is immediately destroyed. If a Target token is ever on a Location when that Worm attacks, it is immediately destroyed. To destroy a Location, remove all Rubble from that Location and remove the Location tile from play.
A destroyed Location can no longer receive deliveries. For the rest of the game, any Bounties in the Bounty Line that match a destroyed Location are discarded and the line is refilled with new Bounties.
Only ONE Egg Per Space
If two or more Eggs are ever on the same space for any reason, discard all Eggs on that space. You may still carry multiple Eggs.
Solo Scenarios
SPECIAL DELIVERY
"Those eggs are our ticket outta here!" Pam cocked her shotgun and winked down at Merl from the driver's window of an abandoned eighteen wheeler. "I've got it on good authority that the government suits'll pay top dollar for some pristine Worm omelettes. Or whatever they do with 'em. Key is, we need to get 'em and we need to get 'em All."
Merl fixed his ballcap and spit. It sizzled along the cracked desert road. "Now, Pam, I don't know about…"
"Get in the truck, Merl." Pam snarled and revved the engine. A dust cloud erupted from the chrome exhaust pipe above her head. "Time for an egg hunt."
Objective: Complete a Delivery Bounty to 4 of the 5 Locations.
Special Rule: Once you have completed a Bounty for a Location, remove all Bounties for this Location from the Bounty Line and discard them whenever they are drawn for the rest of the game. (You might notice that sometimes Worms will need to be Hunted to free up space on the Bounty Line. It'd be great to take along a Suspicious Briefcase.)
TOTAL EXTERMINATION
She had calluses on her knuckles and even those calluses had calluses. Alan wondered why her hands were always so 'well-used,' but he never dared to ask. He looked down at his own pale fingers shaking as they held a pistol for the first time.
Natasha tucked a weathered .45 under her belt and lifted the semi-automatic rifle to her shoulder like an old friend looking for comfort. "Hot today. And it's about to get hotter." She looked over at her disheveled step-brother in his clay-covered smock and mussy man-bun. Disappointing as usual, but she was out of options. "The men in suits want us to bring them some samples of those creatures for testing. Alive or Dead. We'll take your car. We can use your pottery to pick up the leftover pieces"
Her eyes steeled when she heard a screeching sound in the distance. Her tanned bicep flexed like a snake swallowing its prey. The words rumbled low in her throat. "The hunt is on."
Objective: Complete a Hunt Bounty for 3 different Worm types. When you complete a Bounty, claim the Worm standee as your trophy.
Special Rule: Once you have claimed a standee for a specific Worm type, remove all Bounties of that type from the Bounty Line and discard them whenever they are drawn for the rest of the game. "Any Worm" Bounties allow you to Hunt any type of Worm, so be sure to claim the correct Worm standee after completing the Bounty.
SCRAMBLE
"Are you nuts? Have you looked outside, lady? Ain't nobody gonna go driving around the desert playing cowboy, rustling up those things!" Will shuttered the side windows, nearly knocking over a display of hard candies as he made his way back behind the counter. He smoothed his flannel shirt and eyed the peculiar woman in a power-suit, who calmly scanned the interior of his shop as if giant worms hadn't just appeared from the desert sands to destroy all of humanity."
"My employer has taken a keen interest in acquiring some specimens. If you would be unable to assist my search, I will however be in need of supplies." Selia knew that the military would quarantine the area soon; this superfluous conversation notwithstanding. She had no time to haggle. She retrieved a thick roll of bills from her breast pocket. It dropped beside the cash register with enough weight to rattle the metal. "This should cover it. Your further assistance will result in compensation of a significantly higher amount."
Will stared in shock at a stack of bills in the thousands. The sunset through the storefront cast a greedy pink glow to his eyes. "Yes, ma'am!" He stuttered. "W-what are we waiting for?"
Objective: Complete Bounties and collect points. Race the clock to gain 20 points any way that you can!
Special Rule: You also lose if 3 or more Locations are destroyed.
Advanced Difficulty
In addition to each Scenario's difficulty rating, as a daring Worm hunter you may want to further increase the challenge by including these advanced variants. And if you are successful, you will be rewarded with a higher score.
- During Setup, shuffle the Queens into the Worm deck.
- During Setup, return up to 2 members of your Squad to the box.
Scoring
Once you have conquered the challenges provided by the Solo version of Terror Below, it is important to catalogue your victories. Write down the date, the Scenario, and your score based on the following:
- Count up all VP scored during the game (completed Bounties and bonus VP).
- Gain an additional VP for each Worm Attack fewer than 15.
- Gain 3 VP if you shuffled the Queens into the Worm deck.
- Gain 3 VP for each Squad Member you did not take with you at the start.
- Gain 1 VP if you end the game wearing a Hat.
Appendix
Edge Cases
Moving the Target token
Distraction arrows are always resolved from left to right. If a Distraction would ever cause the Target token to move off the edge of the board, ignore that arrow and continue resolving. If an Ability moves the Target Token and there is a choice as to which direction the Token will move, the player who is taking their turn always chooses the direction.
Attacking a Location
Locations are generally safe from Worm Attacks unless the Target token attacks the Location directly. If the Target token ever attacks a Location, all players inside that Location must fight the Worm or die.
Eggs are Always Placed; Rubble is Not
Eggs or Rubble cannot be placed on a Location. When a Worm attacks a Location, or a Queen attacks near the edge of the board, there may be no legal space to place an Egg. If this is the case, simply roll the 2 dice and place the Egg on the resulting coordinates (re-roll again if the result would place the Egg onto a Location). The Worm does not attack this new space where the Egg lands. There is no limit to the amount of Eggs in a space.
If Rubble cannot be placed, it is not placed.
Common Card Explanations
Boots: When you play a Boots card, you will also play another Vehicle card from your hand. You gain the displayed number of additional Action Points only and then discard the card. Do not perform this card's special ability or add it to the Terror zone. Note: You cannot play a 7 card to receive the additional bonus. Also, you cannot Pick Up All Eggs with your initial 2 actions and use the extra Action Points to take more actions.
Bicycle: A Bicycle card allows you to play another card as a Distraction, face down. This card may be played on any Worm that has not reached its limit. Later, when the Worm attacks, any facedown cards are revealed and Distraction arrows are resolved. If multiple cards are facedown, reveal them in the order they were placed.
Motorcycle: A Motorcycle card will cause all Target tokens on the game board to move 1 space closer to you. If the Target token could be moved in multiple ways to become closer, you get to choose which direction the Target moves.
Hats: Hats are a special permanent and fashionable bonus that players can acquire from the Item deck. They are played face up near your Leader and are usable each turn once played. Hats are always discarded when your Leader dies (or if a player shoots it off with a Pistol). Your Leader can only wear 1 Hat at a time. You may replace a Hat your Leader is wearing by discarding your previous Hat and playing a new one from your hand.