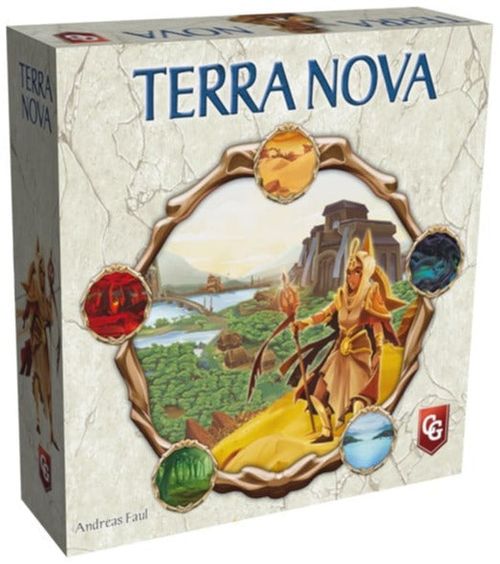
Terra Nova
Terra Nova Rulebook
Table of Contents
Table of Contents
Components
- 1 double-sided game board (the back is for the 2-player variants)
- 5 double-sided faction mats
- 8 bonus tiles
- 8 round scoring tiles
- 103 money tokens (73 × 1, 30 × 5)
- 40 double-sided terrain tiles
- 5 80-point tiles (if at any time during the game you have more than 80 points, take one of these tiles)
- 2 action overviews
- 1 start player token
- 10 X-tokens
- 40 power tokens
- 1 palace tile (for the Sand Cats faction)
- For the dropout turn order variant: 1 turn order mat, 5 faction tiles
Components per faction color (black, blue, green, red, yellow):
- 5× 8 houses
- 5× 4 trading posts
- 5× 2 palaces
- 5× 2 faction tokens
- 5× 3 bridges
- 5× 4 town tiles
- 5× 1 faction overview
Setup
General Setup
- Place the game board with the icon for 2 to 4 players (lower left corner) in the center of the table.
- Shuffle the round scoring tiles and place 1 each face-up on the 5 round-number spaces at the bottom of the game board. Return the others to the box. You won't need them in this game.
- Place 1 X-token next to each of the 6 power actions on the left side of the game board. Pile the others nearby.
- Pile the money and the terrain tiles next to the game board.
- Shuffle the bonus tiles and place 3 face up next to the game board. Add 1 more for each player. Return the others to the box. You won't need them in this game.
- Determine a starting player at random and give this player the start player token.
- In turn order (beginning with the starting player and then in clockwise order), choose a faction mat and take the faction components corresponding to the background color of the faction mat. Return the other player boards and faction components to the box. You won't need them in this game.
- Each player: Place 1 faction token on space 0 of the point track on the board.
- Now do your personal setup (below).
- Each player: Place 2 of your houses on free spaces of your home terrain as follows. Take the houses from left to right from your faction mat. The starting player places 1 house, followed by the other players in turn order. When all players placed their 1st house, proceed with the 2nd house in reverse turn order (the starting player places their 2nd house last). If you have the Sun Worshippers, place your 3rd house now. Tip: It is helpful to place at least 1 house adjacent to the house of a different faction.
- In reverse turn order choose 1 bonus tile and place it next to your faction mat. Place 1 coin on each of the remaining bonus tiles.
- Now start the game with Phase 1: Income. Afterwards the starting player takes their first action and begins Phase 2 of the first round.
1st game (fixed setup):
- Round scoring tiles, in order: (1) upgrade to trading post → 2, (2) upgrade to trading post → 3, (3) upgrade to trading post → 5, (4) shovel → 2, (5) found a town → 5.
- Bonus tiles: with 4 players use tiles A–G; with 3 players use A–F; with 2 players use A–E.
- Factions: 4 players use Fairies, Golems, Leprechauns, Water Sprites; 3 players use Golems, Sun Worshippers, Water Sprites; 2 players use Fairies, Leprechauns.
- Bonus tiles per faction: 4 players — Fairies G, Golems F, Leprechauns A, Water Sprites B; 3 players — Golems A, Sun Worshippers D, Water Sprites C; 2 players — Fairies C, Leprechauns E.
- Place houses as depicted in the rulebook.
Personal Setup
- Choose one side of your faction mat and place it with this side up before you. The A next to the book indicates an easier faction, which we recommend for your first plays.
- Take the amount of money depicted on the left of your mat beneath your faction name. Place it in your personal supply next to your faction mat.
- Take 8 power tokens. Place 2 of them in power bowl I, 2 in power bowl II and 4 in power bowl III. You can see these starting numbers in the middle of the bowls. They have no significance for the rest of the game.
- Place your 2nd faction token on space 0 of your sailing track.
- Place your 8 houses on the 8 small scrolls in the house row.
- Place your 4 trading posts on the 4 small scrolls in the trading post row.
- Place your 2 palaces on the indicated outlines on the 2 wide scrolls in the palace row. If you have the Sand Cats faction, take the corresponding palace tile and place it on the scroll of the left palace.
- Place your 3 bridges next to your faction mat in your personal supply.
- Place your 4 town tiles next to your faction mat in your personal supply.
- Place the player aid in your faction color next to your faction mat. It serves as a reminder of the different abilities of your faction. The game also contains 2 action overviews. Have these ready so that everyone can access them if necessary.
The Faction Mat
- Terrain circle: It shows all terrain types (in clockwise order starting at the top: lake, forest, wasteland, desert, swamp). The home terrain of your faction is the upper, bigger terrain. It has the same color as your faction components and the background of your faction mat. The terrain circle shows the cost you need to pay to make a terrain habitable for your faction (see Make Habitable and Build).
- Book: At the top, it shows the special ability of your faction. Your faction has this ability for the whole game.
- Sailing track: Beneath your faction ability. It shows your range over river spaces and thus which terrains are within reach (see Adjacency and In Reach).
- Power cycle: On the upper right. It consists of 3 different power bowls in which your power is charged. You need power to take power actions or to gain money.
- Buildings rows: On these 3 rows you place your buildings. The big scrolls on the left of the rows show the type of building and the cost you must pay to place a building of this type on the board. Each of the scrolls to the right of it holds 1 building. On the far left of each row are 1, 2, or 3 emblems. They indicate the town value of each building. The top two buildings, your palaces, each have a special ability that becomes active once you build the associated palace.
- Build a Bridge cost: Shown on the mat.
Gameplay
The game has 5 rounds. Each round consists of 3 different phases: Phase 1: Income, Phase 2: Actions and Phase 3: Round end. During the action phase, different actions are rewarded with points in each round.
Phase 1: Income
In phase 1 you all gain money and/or power income. Income is always depicted by an open hand beneath it. How much income you gain depends on your built buildings and on your bonus tile in this round.
From your bonus tile you gain everything shown above a hand. From your faction mat you gain everything that is shown above a hand and visible. In this case, visible means that you only gain the income on a scroll if you have already built the associated building, thus revealing the income that was beneath it. Some buildings don't give income. If you have the Fairies faction, you additionally gain the income from your faction ability.
In any case, place money you gain into your personal supply next to your faction mat. Gained power is never placed in your personal supply. You record it by moving power tokens in your power cycle.
Example: Your income is 16 money and 5 power, as follows: (1) Your bonus tile gives you 3 money and 3 power. (2) Your faction mat gives you 13 money and 2 power.
The Power Cycle
The power cycle consists of 3 bowls that hold your power. Bowl I holds the spent power, bowl II holds the power you are currently charging and bowl III contains the fully charged power that you can use.
Power you gain is shown by a white clockwise arrow to the left over a power token. If you need to spend power, this is depicted by a black clockwise arrow to the right over a power token. The amount of power you gain or must spend is shown as a number in the power token.
Gain Power: Each time you gain power (e.g. through income), you may move power tokens by the corresponding number of steps along the white arrows between the power bowls. 1 step is moving 1 power token to the next higher bowl.
- However, you must always move all power from bowl I to bowl II first.
- Only when bowl I contains no more power, you may move power from bowl II to bowl III. Imagine that you first collect all your power before you gradually charge it up completely.
- If all the power tokens are already in bowl III (bowl I and bowl II are empty) and you would gain power, then you don't move anything. The gained power goes to waste. Try to plan ahead and use the Additional Option: Power Exchange to avoid this.
Spend Power: You can only spend power that is in bowl III to perform power actions or to exchange it for money. Power you spend is moved along the black arrow from bowl III back to bowl I. It has been consumed and must be recharged. You don't have to have all your power in bowl III for you to use charged power.
Example: You get 3 power. First you have to move the 2 power from bowl I into bowl II (1). Since bowl I is empty after that, you may move 1 more power into bowl III (2). Now you can spend up to 5 power from bowl III.
Phase 2: Actions
In clockwise order, beginning with the person with the start player token, take turns either taking 1 action or dropping out as an action, until everyone has dropped out. On your turn, you can choose from 7 different actions. You may also perform the same action more than once in a round (over several turns).
The Different Actions in Brief
- Make Habitable and Build: Build a house on a hex of your home terrain in reach or make a different terrain in reach habitable for your faction and immediately build a house on it (if you wish). Most houses give you income in phase 1.
- Upgrade Buildings: Upgrade houses to trading posts or trading posts to palaces. Trading posts give you income in phase 1, while each palace gives you a special ability. Some palaces also give you income in phase 1.
- Increase Sailing: Your sailing value indicates your reach across the river, to make new terrains available. With this action you can increase it.
- Build a Bridge: With this action, you can build a bridge across the river.
- Power Actions: Spend charged power from bowl III to perform power actions of your choice. Each power action can only be taken once per turn.
- Special Actions: Special actions are actions that are only available to your faction and have no cost. You can take them only once per round.
- Drop Out: If you can't or don't want to take any more actions, you drop out of the current round. Return your bonus tile and choose a new one for the next round.
- Additional Option: Power Exchange: With this additional option, you may trade power for money at certain times.
The Round Scoring
Each round has its own scoring. The round scoring tile shows what you get points for in phase 2, the action phase of the current round. In this round, whenever you do what is depicted (e.g. build a house), you will gain points.
Adjacency and In Reach
Adjacency: Terrain hexes and buildings are considered adjacent if they directly border each other via a hex side of the landscapes or are connected by a bridge.
In Reach: All terrains adjacent to one of your buildings and terrains that are accessible to you by sailing across the river are considered to be within reach. Your sailing value indicates the maximum number of river spaces that may lie between the terrain with your building and the terrain within reach.
Make Habitable and Build
When taking this action, perform one of the two following options:
a) Build a house on an unoccupied hex of your home terrain in reach. b) Make 1 unoccupied terrain hex in reach habitable for your faction. You may immediately build 1 house on it.
a) Build 1 house on an unoccupied hex of your home terrain in reach. Build 1 house on an unoccupied hex (hex without a building) of your home terrain in reach of one of your buildings. Pay the house cost of 4 money, take the left-most house from your faction mat and place it on the chosen hex. If you have no more houses on your faction mat, you can't take this action.
Note: Each time you build a house adjacent to buildings of other players, they gain power (see Gain Power Thanks to Others).
b) Make 1 unoccupied terrain hex in reach habitable for your faction. You may immediately build 1 house on it. To transform a terrain into your home terrain, you always need 1 or 2 shovels. How many shovels you need is shown by the terrain circle on your faction mat: Count the shovels between the terrain you want to transform and your home terrain. Each shovel costs you 6 money. Once you have paid the required costs, you immediately place a terrain tile with your home terrain on the transformed terrain.
Then you may immediately build a house on it. Pay 4 money as the cost of the house and place the leftmost house from your faction mat on the terrain.
Certain power actions (on the game board and the ability of the Fairy faction's left palace) and the special action on a bonus tile allow you to perform this action with 1 or 2 free shovels.
Note: If you build a house next to other players' buildings, they will gain power.
Upgrade Buildings
With the Upgrade Buildings action you exchange one of your houses for a trading post or one of your trading posts for any palace. Palaces cannot be upgraded.
When upgrading a building perform the following steps:
- Choose a building to upgrade.
- Pay the cost for the new building. Since the terrain is already habitable for you, you don't have to pay any cost to make it habitable.
- If you upgrade a house to a trading post, the cost depends on whether the upgraded house is adjacent to at least one building of another faction:
- a) If no building of another faction is adjacent, the upgrade cost is 10 money.
- b) If at least one building of another faction is adjacent, the upgrade cost is 7 money.
- If you upgrade a trading post to a palace, the upgrade cost is 14 money.
- If you upgrade a house to a trading post, the cost depends on whether the upgraded house is adjacent to at least one building of another faction:
- Take the old building from the game board and place it on your faction mat on the rightmost unoccupied scroll in the corresponding row.
- Take a building of the new type from your faction mat and place it on the freed up terrain space:
- a) If you upgrade a house to a trading post, always take the leftmost trading post from your faction mat.
- b) If you upgrade a trading post to a palace, you may choose which of your two palaces you bring into play with this upgrade. A palace gives you an additional palace ability immediately after it is built. Each palace grants a different ability. The left palace ability is different for all factions. The right palace ability is the same for the simpler factions (side A) and different for the advanced factions (side B). If the palace ability shows an orange octagon, it is a personal power action or special action. Take 1 X-token and place it next to the orange octagon. You may take this action once per turn, starting on your next turn. After you have performed it, cover it with the X-token.
- If the current round scoring rewards the construction of the building you just placed, you will receive the corresponding points.
Note: If you upgrade a building next to other players' buildings, they will gain power.
Note: The upgrade will change your income for the next round. You will no longer receive the income of the old building, but you will receive the income of the new building.
Gain Power Thanks to Others
When you build a house or upgrade a building, everyone else who has buildings adjacent to your new building gains power. They receive 1 power for each building they own that is adjacent to your new building and may move power tokens accordingly. You yourself never gain power by building/upgrading your own buildings, even if they are adjacent to each other.
Founding a Town
In the course of the game, you will found one or more towns. The founding of a town happens automatically and is not an action. Each of your buildings has a town value, which is represented by the number of emblems to the left of the corresponding building cost on your faction board. Each house has town value 1, each trading post town value 2 and each palace town value 3.
If you have after your action at least 4 own adjacent buildings (buildings connected by bridges are also adjacent) whose town values total at least 7, then you immediately found a town.
As a reward, choose a town tile from your supply. Immediately take the bonus shown on it, and then place the tile under one of the buildings belonging to the town, to indicate that from now on these adjacent buildings belong to a town. For each town tile you always get a certain number of points and usually another bonus. You may only use each town tile once.
Note the following details about towns:
- Each building can only be part of one town.
- If you build a building adjacent to a town that has already been founded by you, you expand that town. This means that the new building becomes part of the already founded town and therefore cannot become part of a new town.
- If you connect two towns by constructing a building, this has no disadvantage for you. Both towns keep their town tiles.
Tip: Once you have founded a town, try to continue building on other settlement areas to achieve more town foundations.
Increase Sailing
Pay 8 money and advance your faction token on the sailing track 1 space to the right. You immediately gain the points shown on the new space. The sailing value indicates which terrain spaces are within reach for you to make habitable and build on via river spaces. The starting point must always be one of your buildings.
Build a Bridge
Pay 10 money to build 1 bridge. Take a bridge from your supply and place it on an unoccupied bridge space (represented by 2 directly opposite bridgeheads) adjacent to a terrain space that has one of your buildings in it. If no bridge is indicated at a point on the river between two terrain spaces, then you cannot build a bridge there.
Power Actions
You can find power actions on the game board as well as on some of the faction mats. They are depicted on a hanging wooden plank and show an orange octagon. For all of them you have to spend power (move power from bowl III to bowl I following the black arrow) to execute them. You may perform a power action only if the orange octagon is not covered and you can spend the required power. How much power you must spend is indicated on the action. Once you have performed the action, cover the orange octagon with the X-token next to it. This indicates that it cannot be used again in this round, as each power action may only be used once per turn. Power actions on a faction mat may only be used by the faction itself.
The different power actions are:
- Build a Bridge: Spend 3 or 4 power respectively to build a bridge without paying money for it. Works the same as the Build a Bridge action, but you spend power instead of money.
- Increase Sailing: Spend 4 power to increase your sailing value by 1 without paying money for it. Advance your faction token 1 space and immediately gain the points shown on the new space.
- 7 money: Spend 4 power and immediately gain 7 money.
- Make Habitable and Build with 1 free shovel: Spend 4 power to perform a complete Make Habitable and Build action with one free shovel. The usual rules of the Make Habitable and Build action apply (including any points scored by the round scoring tile). If you want to transform a terrain for which you need 2 shovels, you may buy the second shovel with money.
- Make Habitable and Build with 2 free shovels: Spend 6 power to perform a complete Make Habitable and Build action with 2 free shovels. With this you can: a) Make 1 terrain space habitable for which you need 1 or 2 shovels. b) Make 2 terrain spaces habitable, for each of which you need 1 shovel. Both landscapes must be in reach of a previously built building. You cannot buy any additional shovels. You must immediately place a terrain tile with your home terrain on the transformed terrain(s) as usual. You may only immediately build 1 house on 1 of these landscapes at the normal cost.
Special Actions
You can find special actions on one bonus tile and as palace abilities. Like power actions they show an orange octagon, but unlike power actions you don't have to spend power on them. Special actions may also only be performed once per round. If you have performed a special action, place an X-token on the orange octagon. Special actions on a faction mat may only be used by the faction itself.
Drop Out
If you can't or don't want to perform any other action in this round, then you drop out of the current round. After you complete your Drop Out action, you are skipped in player order until the end of phase 2. However, you can still gain power when others build or upgrade adjacent to one of your buildings.
When dropping out, perform the following steps:
- If you are the first to drop out this round, take the start player token. You will take the first action in the next round.
- Check to see if there is a When dropping out condition (represented by a closed scroll) on your bonus tile, your faction ability, or on one of your active Palace abilities. If so, gain the corresponding bonus now.
- Then choose one of the available bonus tiles next to the game board and exchange it for your old bonus tile. You cannot keep your bonus tile from this round. You are welcome to choose a bonus tile that someone else has already put back this round. If the new bonus tile has money on it, add it to your supply.
- Flip your new bonus tile to the backside. This is a reminder to the other players that you already dropped out this round.
- If you are the last player to drop out this round, Phase 3: End of Round starts now.
Additional Option: Power Exchange
With this additional option you can spend as much power as you want from bowl III to get money. You gain 1 money per power you spend.
You may perform this additional option at these times:
- Phase 2: At any point during your turn, before or after your action, even when the action is Drop Out. This is in addition to your action!
- In Phase 3 (End of Round).
- At the end of the game.
Strategic tip: Consider a Power Exchange when you Drop Out or at the end of the round, particularly if you expect income, but most of your power tokens are already in bowl III.
Phase 3: End of Round
As soon as all players have dropped out, phase 3 begins. This is a preparation for the next round. Therefore, you can skip it in round 5, the last round.
Before starting the next round:
- Remove all X-tokens from power and special actions and place the tokens next to them.
- Place 1 money on each bonus tile next to the game board, even if there is already money on it.
- Flip the round scoring tile of the current round, so that only the round scoring tiles of the upcoming rounds are face up. This also helps you keep track of the rounds.
End of Game
The game ends in round 5, as soon as everyone has dropped out in the action phase (phase 2). Now the final scoring follows. This consists of the money scoring and the territory scoring. If you have the most points after the final scoring, you win this game of Terra Nova.
Money Scoring
Exchange each power in bowl III into 1 money each using the additional Power Exchange option. Then gain 1 point for every 3 money in your supply.
Territory Scoring
Count the number of buildings in your biggest group of buildings connected by your reach (see Adjacency and In Reach). Score points depending on your ranking:
- If you have the most connected buildings, you gain 12 points.
- If you have the second most connected buildings, you gain 8 points.
- If you have the third most connected buildings, you gain 4 points.
- If you have the fourth most connected buildings, you don't gain points.
If several of you tie, then add the points of the achieved ranking and the rankings below it (depending on the number of tied players) and divide it by the number of tied players. Each tied player thus gets the same number of points.
Dropout Turn Order Variant
Instead of taking your turns clockwise, you can also play in the order in which you dropped out of Phase 2 in the previous round. In a 2-player game this variant does not differ from a normal game.
Setup Changes
- (Step 1) In step 1) of the general setup, lay out the game board as usual and place the turn order mat next to it.
- (Step 7) Add to step 7) of the general setup (choosing a faction) as follows: Immediately when you chose a faction, place the corresponding faction tile on the topmost empty space of the left column of the turn order mat.
Gameplay Changes
Phase 2: Actions. Don't take your turns in clockwise order. Instead play in the turn order that is shown on the turn order mat from top to bottom. For the 1st, 3rd, and 5th round the turn order will be shown in the left column of the turn order mat, whereas for the 2nd and 4th round the turn order will be shown in the right column. The numbers above the columns serve as a reminder.
Action Drop Out. If you decide to use the Drop Out action, move your faction tile to the topmost empty space in the other column on the turn order mat. Perform the steps of the Drop Out action as usual. In the next round, play according to the new order as indicated on the turn order mat.
Variants for 2 Players
If you are familiar with the normal game and are playing a 2-player game, then we recommend these variants for a more challenging game. Choose between a more strategic variant (Planner) and a more luck-based variant (Lucky Digger). In both variants neutral houses come into play.
Rules for Both Variants
- During setup, use the side of the game board with the icon for 2 players in the lower left edge of the board.
- The houses of the neutral faction count as houses of a different faction when paying the cost for a trading post.
- The placement of a neutral house does not trigger any effects (neither power gain for adjacent buildings nor faction abilities).
Rules for the Planner Variant
- After placing the game board, but before performing other steps of the setup, randomly designate one faction color as the neutral faction. Each of you takes 1 house of this color and places it on an unoccupied space marked with a house at the bottom of the corresponding home terrain (there are 4 spaces to which this applies). Then continue with the setup. You cannot choose the neutral faction as your faction.
- In Phase 3 of the third round (and only then), you also place 1 neutral-faction house on the other two marked home terrains of the neutral faction, if they are still available.
Rules for the Lucky Digger Variant
Before the Income Phase of each round (including the first round):
- The starting player takes 1 house of each of the 3 faction colors not chosen by you and draws 1 at random from it. They place the house on an unoccupied hex marked with a house at the bottom of the corresponding home terrain. If there is no matching hex, discard it.
- The other player draws 1 random house from the remaining 2 houses and places it on an unoccupied hex marked with a house at the bottom of the corresponding home terrain. If there is no matching hex, discard it. Discard the remaining house.
Appendix
Round Scoring Tiles
The round scoring tiles indicate for what you will get points in the action phase of the current round:
- Each time you build a house in this round, you score 2 points.
- Each time you upgrade a house into a trading post in this round, you score 3 points.
- Each time you upgrade a trading post into a palace in this round, you score 5 points.
- Each time you found a town in this round, you score additional 5 points.
- Each time you advance your faction token on the sailing track in this round, you gain 2 points (in addition to the points for the new space on the track). It doesn't matter how you get the increase in sailing.
- Gain 2 points per shovel you use in this round to make a terrain habitable. It doesn't matter if you pay for the shovels as usual or if they are free shovels e.g. through power actions.
Shovel round scoring tile example: This round, the round scoring tile is 2 points per shovel you use this round. You use the power action Make Habitable and Build with 1 free shovel and pay 6 money for another shovel. With these 2 shovels, you transform an adjacent desert into a lake. Since you used 2 shovels, you gain 4 points for the round scoring.
Town Tiles
You can use these town tiles when you found a town. Their bonuses are:
- Gain 6 money and 5 points.
- Gain 8 power and 6 points.
- Gain 9 points.
- Increase your sailing value by 1 and gain 4 points (in addition to the points of the new sailing track space).
Bonus Tiles
Your bonus tile is only valid for 1 round. It always gives you extra income in phase 1. Some also give you points when dropping out, or some other advantage.
- In phase 1 (Income) gain 6 money.
- In phase 1 (Income) gain 3 money and 3 power.
- In phase 1 (Income) gain 3 power. In phase 2 (Actions), your sailing value is considered as 1 higher. This does not apply to the final scoring. (Do not move the token on your sailing track! Add 1 to your value when checking if a terrain is in reach.)
- In phase 1 (Income) gain 2 money. In phase 2 (Actions), you may take a full Make Habitable and Build action with 1 free shovel as a special action. The usual rules of the Make Habitable and Build action apply (including any points scored by the turn scoring tile). If you want to make a terrain habitable for which you need 2 shovels, you may buy the second shovel for 6 money.
- In phase 1 (Income) gain 2 money. In phase 2 (Actions), when you drop out, gain 1 point for each house you have on the game board.
- In phase 1 (Income) gain 2 power. In phase 2 (Actions), when you drop out, gain 2 points for each trading post you have on the game board.
- In phase 1 (Income) gain 4 power. In phase 2 (Actions), when you drop out, gain 4 points for each palace you have on the game board.
- In phase 1 (Income) gain 3 power. In phase 2 (Actions), when you drop out, gain 3 points per step of progress on your sailing track (i.e. your sailing value × 3).
Factions
There are 10 factions. Each has a home terrain, a faction ability, and two palaces (Left Palace and Right Palace). The left palace ability is different for all factions; the right palace ability is the same for the simpler factions (side A) and different for the advanced factions (side B).
Water Sprites
Faction ability: Each time you found a town, gain 4 additional points.
Left Palace: Once built, gain 2 power in each income phase. In addition, you now have a personal special action. With this you may build 1 house on any lake space for free once per round. This lake space does not have to be adjacent or within reach. The special action counts as building a house. You cannot spend shovels to build the house on non-home terrain during this action.
Right Palace: Once built, you can found a town with a value of 6, rather than 7. However, the town must still consist of at least 4 buildings. Note: Constructing this palace could immediately cause you to found one or more towns.
Sea Dogs
Faction ability: You may found cities spanning one river space without connecting the buildings with a bridge. It is up to you if and when you use this ability. Whenever you found a town in this way, you place the town tile on the river space, to make the connection clear. You can still also build bridges.
Left Palace: Once built, gain 4 power in each income phase. When you build this palace, you once and immediately increase your sailing value by 1 for free. As usual, you get the points for the new track space and, if applicable, for the round scoring tile.
Right Palace: Once built, you may upgrade 1 house to 1 trading post for free once per round as a special action.
Golems
Faction ability: When you drop out, gain points for your own trading posts on the game board. For 1 or 2 trading posts gain 2 points, for 3 trading posts 3 points, and for 4 trading posts 4 points.
Left Palace: Once built, gain 4 power in each income phase. For each transformation of a terrain that costs 2 shovels, you only need 1 shovel.
Right Palace: Once built, you can found a town with a value of 6, rather than 7. However, the town must still consist of at least 4 buildings. Note: Constructing this palace could immediately cause you to found one or more towns.
Fire Sprites
Faction ability: Each power action costs you 1 power less. This does not apply to the additional Power Exchange option (spend power for money).
Left Palace: Once built, gain 4 power in each income phase. When you build this palace, you may once and immediately make any one unoccupied terrain at the edge of the game board habitable for you for free and build a house there for free. It does not have to be within reach for you. This does not count as using shovels, but it does count as building a house.
Right Palace: Once built, when you drop out, gain 1 point for each of your settlements that has at least 1 building at the edge of the game board. A settlement is considered to be several of your own adjacent buildings, or a solitary building of yours. A town counts as a settlement.
Leprechauns
Faction ability: Gain 2 power for each shovel you use to make a terrain habitable. Free shovels count.
Left Palace: Once built, gain 2 power and 5 money in each income phase. When you build this palace, you once and immediately gain 6 power.
Right Palace: Once built, you can found a town with a value of 6, rather than 7. However, the town must still consist of at least 4 buildings. Note: Constructing this palace could immediately cause you to found one or more towns.
Inventors
Faction ability: Each time another faction builds a house (no matter where), you gain power. When playing with 2 players, gain 2 power. When playing with 3 or 4 players gain 1 power.
Left Palace: Once built, gain 2 power in each income phase. In addition, you now have a new personal action. With this action, you may spend 6 power to make a terrain in reach habitable for free and immediately build a trading post for free on this terrain. This does not count as using shovels, but it counts as an upgrade to a trading post. You may perform this action multiple times per round.
Right Palace: Each time you build a house, gain 2 points.
Fairies
Faction ability: Gain 2 additional power in each income phase.
Left Palace: Once built, gain 3 power and 2 money in each income phase. In addition, you now have a personal power action. With this, once per round, you may spend 2 power to perform a complete Make Habitable and Build with 1 free shovel action. The usual rules of the Make Habitable and Build action apply (including any points scored by the round scoring tile). If you want to transform a terrain for which you need 2 shovels, you may buy the second shovel with money. If you immediately build a house, you have to pay the normal building cost (4 money).
Right Palace: Once built, you can found a town with a value of 6, rather than 7. However, the town must still consist of at least 4 buildings. Note: Constructing this palace could immediately cause you to found one or more towns.
Druids
Faction ability: You have an additional trade possibility with the additional Power Exchange option. You may spend 3 power from bowl III as many times as you like to gain 2 points. You may use this at the same times as the normal additional Power Exchange option (spend power for money).
Left Palace: Once built, gain 4 power in each income phase. In addition, when you drop out, gain 2 power for each of your settlements. A settlement is considered to be several of your own adjacent buildings, or a solitary building of yours. A town counts as a settlement.
Right Palace: Once built, gain 3 points each time you upgrade a house into a trading post.
Sun Worshippers
Faction ability: Begin the game with 3 houses. Place your 3rd house after all players placed their 2 starting houses.
Left Palace: Once built, gain 2 power in each income phase. In addition, you now have a personal special action. With this, once per round, you may make an adjacent terrain space on the same continent habitable for your faction. You may immediately build a house there for the normal cost. This does not count as using shovels, but it counts as building a house.
Right Palace: Once built, you can found a town with a value of 6, rather than 7. However, the town must still consist of at least 4 buildings. Note: Constructing this palace could immediately cause you to found one or more towns.
Sand Cats
Faction ability: Each time another faction upgrades a building, you gain money. When playing with 2 players, gain 2 money. When playing with 3 or 4 players gain 1 money.
Left Palace: Once built, gain 2 power in each income phase. In addition, when upgrading into a trading post, you pay only 5 money (with adjacency of the building to another faction) or 7 money (without adjacency of the building to another faction). Use the palace tile to cover the normal cost of the trading posts on your faction mat.
Right Palace: Once built, when you drop out, gain 1 point for each of your buildings on the board that is not adjacent to the river.