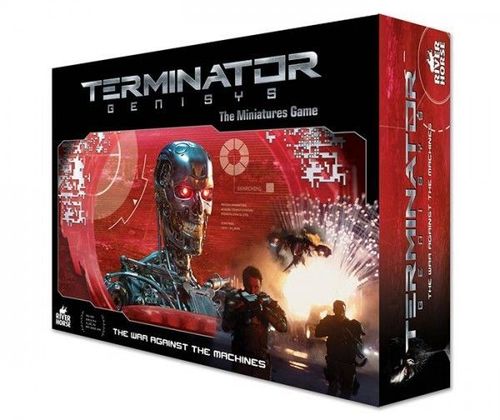
Terminator Genisys: The Miniatures Game – The War Against The Machine
Terminator Genisys: The Miniatures Game – The War Against The Machine Rulebook
Table of Contents
Table of Contents
- Basic Rules
- The Game Turn
- Impulses
- Moving
- Terrain
- Attacking
- Commanders
- Weaponry
- Weapons' Special Rules
- Models' Special Rules
- Advanced Rules
- Vehicles
- Transports
- VTOLs
- Battle Scenarios
- Reserves
- Larger Playing Surfaces
- Mixing It Up
- Force Lists
- Narrative Scenarios
- Infiltrators Scenario
- The War Against the Machines Scenarios
- Terminator Genisys Campaign Scenarios
- Machine Special Rules (Quickplay Reference)
- Errata and FAQs
Basic Rules
The following pages provide you with all of the basic rules that form the core of the Terminator Genisys game.
Components Needed
As well as this set of rules, to experience the exciting conflicts of the Terminator Genisys game, the players will need a few more components, all of which are included in the Terminator Genisys: War Against the Machines game set, as well as sold separately:
Terminator Genisys Miniatures: Each player will need to have his own army of assembled miniatures, chosen from either force — the fighters of the Human Resistance or Skynet's Machines. Players might want to paint their models, as the game is much more visually appealing (and therefore fun) when both forces are painted. There are painting tips and guides to be found on pages 100-103.
A Battlefield: The players will need a suitable location for their armies to clash. The Terminator Genisys game is designed to be played on any flat surface, ranging in dimension from as small as our play mats — roughly 3'x2' (90cm x 60cm). It is possible, however, to play the game on any size surface — if deploying very large forces, players may wish to use a larger area, perhaps 6'x4' or even bigger! Ultimately, the floor can make for a very large gaming area.
Terrain Features: A completely bare surface might make for a dull game, and human soldiers need cover to hide behind. A good portion of the playing surface should be covered by terrain. Terrain can range from 2D areas (even just printed on paper by your home printer) to beautiful 3D terrain built in a variety of ways (see pages 104-115). In a pinch, it can also be created with stacks of books, boxes, soda cans, etc.
Movement/Range Templates: You will use cardboard templates to measure both the movement and the effective firing range of your miniatures. These templates are included in the Terminator Genisys game set. Alternatively, you can photocopy them from pages 122-123. Note that players are allowed to measure distances on the gaming surface at all times.
Markers: The Terminator Genisys game employs counters, which are used, for example, to mark when models activate or are knocked 'Reeling.' These counters are also included in the game set, but more can be photocopied from pages 122-123.
The markers used in the game are: 'Ready' marker, 'Done' marker, Damage marker (1 Damage), Damage marker (2 Damage), TDD counter, Command marker (Command 1), Command marker (Command 2), Sniffer Dog marker, 'Landed' marker, and Objective marker.
Dice: Polyhedral dice are described under Polyhedral Dice below. Fate dice are described under Fate Dice below.
Templates: Crawl template, Run template, Close Combat range template, Walk template, Point Blank range template, Short Range range template.
Your First Games
The easiest way to play Terminator Genisys — The Miniatures Game is to simply skim through these basic rules, grab a handful of models, set them up on the play mat with some terrain pieces randomly arranged on the playing area, and start firing away at the enemy forces. In fact, this is a great way to learn the game, and we recommend you do this for your first few games until you are comfortable with the rules.
The battles of the Terminator Genisys game are about:
- Spirit of cooperation and fun. Players are encouraged to add sound effects, play their favorite Terminator sound track, and of course try to cram in as many quotes from the movies as they can.
- The story. The game tells the story of a desperate conflict during one of the most pivotal points in history — players should work together to enjoy the narrative they are creating!
Polyhedral Dice
The Terminator Genisys game uses colored polyhedral dice to determine the outcome of events. The exact number of dice needed by each player varies depending on the armies they wish to field. At a minimum, it is suggested that players have: two four-sided dice, two six-sided dice, two eight-sided dice, two ten-sided dice, two twelve-sided dice, and two twenty-sided dice. It can be very helpful to have additional six-sided and eight-sided dice available, as these are the most common dice used.
Following is a list of the dice used in the game and the notation we use when referring to them.
- The blue twenty-sided die (D20) generates numbers from 1 to 20.
- The black twelve-sided die (D12) generates numbers from 1 to 12.
- The purple ten-sided die (D10) generates numbers from 1 to 10. The zero normally counts as a ten. It is also used to determine a random direction (see below).
- The yellow eight-sided die (D8) generates numbers from 1 to 8.
- The green six-sided die (D6) generates numbers from 1 to 6.
- The red four-sided die (D4) generates numbers from 1 to 4. The result is shown by the number that is facing 'the right way up' on all faces.
Fate Dice
Fate Dice are six-sided dice, but unlike normal six-sided dice, have the following results on their faces: 1, 1, 1, 2, 2, and FATE. Fate dice are used for determining the number of models that activate in a single impulse (see pages 17-18).
Dice-Rolling Jargon
Following are the terms we use in the Terminator Genisys game when talking about dice rolls.
'Upgrading' and 'Degrading' a Dice Roll. When a special rule or ability allows a model to 'upgrade' a dice roll, this means that the player rolls a die that is one step better than he normally would, and vice versa if a dice is 'degraded' by a rule, it becomes a die one step worse.
For example, if a model normally rolls a D8 to attack, and its attack roll is upgraded, the player will roll a D10 instead. Conversely, if a roll for a certain action is degraded by some rule, it becomes a D4.
Some rules may upgrade or downgrade a die by two or more steps rather than a single step (e.g. upgrade a D6 to a D10), but this is extremely rare and will be clearly labeled in the rules.
If a D20 is upgraded, the player can re-roll the result instead (see below). If a D4 is degraded, the opponent can force the player to re-roll the result instead.
Re-rolls. When a rule allows a player to re-roll a die, this means that the player can choose not to accept the first result he rolls and decide to discard it and roll again. The second result always stands and can never be re-rolled.
Roll-offs. A roll-off is used to indicate the contest that occurs when both players roll a die and compare their results — the player scoring the highest number wins the roll-off. If the results are the same, the players roll again, continuing until there is a clear winner. Unless the rules state otherwise, the players should use a D20 for roll-offs.
Determining a Random Direction. When a rule asks a player to determine a random direction, simply roll a D10 near the point relevant to the rule in question (normally a model). The top face of the D10 is shaped like an arrow and this 'arrow' will point in the random direction you need.
Miniatures
The Terminator Genisys game is played using plastic, resin, metal or cardboard models which represent the warriors and combat vehicles of the two factions. Each model has a Stat-line that describes its abilities, strengths and weaknesses on the battlefield. For example:
Resistance Soldier — Skill: D6 · Armor: 4+ · Resolution: D8 · Special: –
Skill. This defines how skilled the warrior is at attacking with his, her or its weapons. In game terms, it shows the type of dice rolled to attack with the model. The better the dice, the higher the chances of scoring a hit on the target.
Armor. This is a measure of how well-protected a warrior is against the weapons of the enemy, of how effective his battle armor is. In game terms, it is the number the enemy will have to equal or beat in order to score damage on the model — so the higher the Armor value, the more difficult to damage the model will be.
Resolution. This represents the level of training, courage or ferocity that governs the warrior's behavior under fire. In game terms, it shows the type of dice rolled to determine whether the model will continue to fight, be temporarily incapacitated, or even retreat. The better the dice, the higher the chances of the model standing its ground.
Special. This is a list of any special abilities that explain the way in which this warrior makes an exception to the normal rules. A list of the most common special abilities can be found on page 35.
Size. Size is used to indicate how tall a model or terrain piece stands from the ground — as a rule of thumb, each yard/meter in real life equals a point of Size in the game. Size 1 includes creatures and objects roughly a yard/meter tall, like a motorbike or a crate. Size 2 includes creatures roughly two yards/meters tall, like human fighters or terminator endoskeletons, as well as walls and other objects that are just tall enough to block line of sight to man-sized creatures. Size 3 includes things that are roughly three yards/meters high, like an armored personnel carrier or a tank. The Sizes can continue upwards to any height, but most things in the game will be between Size 1 and 3. If a model has a size different from 2 (man-height), this will be indicated in their entry.
Bases. A model's base is important as it delimits the space occupied by the warrior on the battlefield. Bases are used to measure movement and ranges, as described later.
The Game Turn
A game of Terminator Genisys is played in turns. During a turn the players first determine who has the Tactical Edge for that turn. Then they alternate executing impulses — activating a small number of models on their side, moving them and attacking the enemy. Once all of the models have been activated, that turn is over.
- Tactical Roll-off. The winner of this roll-off has the Tactical Edge for this turn.
- Impulses.
- Fate Roll. A player (first decided by the player that has the Tactical Edge) executes an impulse — rolling a Fate die and receiving a 'hand' of activation markers.
- Plan Activations. That player places all activation markers from his hand, with the 'Ready' side up, next to the models he wishes to activate. If the player has more than one marker, he chooses the models he wishes to activate in that impulse and places a marker next to each model.
- Execute Activations. That player executes the activation of each of his Ready models in any order he likes, turning the 'Ready' marker to the 'Done' side as he finishes each activation. The impulse is over.
- The other player executes an impulse, repeating steps 1, 2 and 3.
- Players continue to alternate executing impulses this way until all models in both players' forces have been activated.
- End Turn. Remove one 'Done' marker from each model and place them all back in the pool of activation markers.
TDD Tactics — Is Fate Set?
Terminator Genisys assumes that players are making use of Temporal Displacement Devices to alter the course of past events and thus influence the future, which is their present...
Both players have one TDD agent (D8 die icon) on standby, represented by a TDD marker. Once per game, after ANY polyhedral die (i.e. not the Fate die) is rolled by either player, a player can declare he is spending his TDD marker to send his agent into the past and alter the events triggered by the roll. The die is then re-rolled.
We think it's great fun to come up with an explanation (no matter how far-fetched) about the mission and its objective. For example: "I'm sending an agent in the pre-Judgment Day past to train this young army cadet in the use of the rocket launcher, in order to increase his chances of hitting the target at this crucial moment."
Note that the opponent can contest this by also spending his TDD marker, sending his own agent into the past to try to stop your agent.
Alternatively, the opponent can decide to allow your agent go, and save his own agent/marker for later use.
If the opponent decides to contest this, both players send their agents into the past and a desperate struggle ensues — the players roll off using a D8. The winner of this roll off decides whether the re-roll proceeds or is stopped.
Players can purchase additional TDD agents as part of their force (see force lists), and even upgrade them to a better die than a D8. However, only a single TDD agent can be sent on a mission (i.e. on a single roll off in the past), and no re-rolls are allowed for these struggles in the past. Otherwise the temporal continuum would be compromised...
If players have upgraded some of their agents, they should secretly pick which agent/marker they are going to use, place the TDD marker face down in front of them and then reveal them simultaneously just before rolling the die shown on the marker.
Impulses
Tactical Roll-off
At the start of every turn, the players roll off using a D8 to determine which side is going to have the Tactical Edge for the turn. Having the Tactical Edge is very useful and can be decisive in some situations, as the player with the Tactical Edge will decide who will have the first impulse in that turn.
This roll represents how reactive, well-organized, and dynamic each force is, and is also a measure of their command and control structure and communication effectiveness. Because of this, the die rolled may be different from the D8, depending on the scenario being played or some models' special rules.
Fate Roll
The player with the Tactical Edge for that turn must decide which side is beginning to activate their models. The player he designates picks up the Fate die and rolls it. The Fate die will determine how many Activation markers he can take from the Activation markers pool for his first impulse. The Activation markers pool is simply a stack of these counters that is kept in an out-of-the-way corner of the table.
The Fate die has three faces showing a 1 (the player receives a single activation marker), two faces showing a 2 (the player receives two activation markers), and one face showing a FATE symbol. If the FATE symbol is rolled, the player receives no activation markers and the Fate die is passed over to the opponent!
Note, however, that Commanders can use their leadership abilities to override this result and keep your forces going — see page 31 for these rules.
After rolling the Fate die, the player takes that number of Activation markers from the pool to form a 'hand' of markers for that impulse of activations. Each marker has two sides, one with a green '!' representing Ready, and the other a red 'X', representing 'Done' — their use will become apparent in the following rules.
Plan Activations
After forming his hand of markers (normally one or two), the player places each marker, with the 'Ready' side up, next to the model(s) he is going to activate in the next step of the impulse. Markers must be placed next to models that have not yet been activated this turn (i.e. models that do not have 'Done' markers next to them).
Execute Activations
Having placed all of the markers from his hand, the player proceeds to activate the models that are 'Ready.'
This is done one model at a time, executing all of the model's actions before moving on to the next model. When activated, models can normally move and then attack enemies, as described later in the rules. They can also perform special actions, like going into 'Ambush' mode (see Advanced Rules) or some other unique type of action that is described in the model's entry.
After executing a model's activation, the player flips over the 'Ready' marker to show the 'Done' side and leaves the marker next to the model. This is an important reminder for both players, showing that the model has been activated and can do nothing else for the rest of the turn.
When executing the activation of a model, a player may decide that his model is going into Ambush. See page 39.
Switchovers
Once a player has finished activating all 'Ready' models, his activation impulse is over. His opponent then executes an impulse of his own — he rolls the Fate die, takes the appropriate number of markers, places them and then proceeds to activate his models, just as described above.
Once he has finished with his models' activations, his impulse is over and the first player will repeat the same procedure with another impulse. The players will continue alternating impulses like this until one of the players has activated all of his models.
Last Activations
After one player has finished activating all of his models, his opponent no longer needs to roll to see how many activation markers he receives. He can simply place a 'Ready' counter next to all of his remaining models.
Even though this is not absolutely necessary, it is still a good idea to place the markers and turn them on to their 'Done' side as the models are activated. This will help the player remember which of his models have not yet acted this turn.
Once both players have finished activating all of their models, the turn is over — remove one 'Done' marker from each model.
In addition, models with the Commander special rule can help remove more counters from friendly models — see page 31.
At this point, the victory conditions of the scenario being played are normally checked to see if the game ends because the turn just played was the last and, if so, if either side has won the game.
Moving
The fighters and vehicles in Terminator Genisys maneuver across the battlefield to engage the enemy at the optimum range of their weapons and to accomplish their missions. The models representing them are moved around the tabletop using the movement templates.
Walk — Making a Normal Move
When moving a model, the player simply places the Walk template in contact with the model's base, and then places the model's base in contact with the other end of the template, or indeed with any other part of the template (see Diagram 1).
Note that you can freely measure movement in several directions (by rotating the template around the model's base) and then decide in which direction the model is moving.
This movement represents a humanoid moving at walking speed, leaving enough time to take a snap shot at the enemy.
Run — Making a Double Move
Players can decide that a model spends its entire activation moving quickly, without stopping to use its ranged weapons.
In this case the player uses the longer Run template instead of the Walk template. The drawback of this faster move is that the model is unable to Attack with ranged weapons as part of the same activation.
Moving Through Models
Regardless of their speed, models can move through friendly models, just as if they were not there, as in reality they would be brushing past their comrades unopposed (see Diagram 2). It is important to remember, however, that at the end of its move, a model's base cannot end overlapping that of other models, friendly or otherwise.
Enemies, on the other hand, are not likely to let your troops move past them unhindered. Movement templates must be placed so that they do not overlap enemy models' bases at any point. Moving models cannot end their move in base contact with enemy models. The bases of enemy models, or the enemy models themselves if they have no bases, are treated as impenetrable terrain as explained on page 21 (see Diagrams 3a and 3b).
Terrain
Terminator Genisys can be played with a 2D or a 3D approach to terrain. If you decide to go for 3D, you will need tridimensional terrain features that, much like the models, are placed on the playing surface, or you can even create a board which includes tridimensional terrain pieces. This solution looks better, but obviously requires more effort and/or cost. The 2D option, like some of the terrain included in the game set, is easier and cheaper.
Of course you may immediately add tridimensional elements, and then develop your terrain collection from there — either continue and expand your 2D set of terrain, or instead start the journey into the 3D world.
Regardless of which solution you choose, terrain makes Terminator Genisys tables exciting and different, each recreating a different environment or landscape — from the charred ruins of mankind's cities to Skynet's fortified installations in distant mountain ranges. You can find some great examples of terrain and useful advice on terrain-making on pages 104-115 of this book. Alternatively, there are several terrain sets commercially available. Whichever solution is chosen, each wargamer's terrain set will look different, which means that the rules must be generic enough to accommodate all of these different types of terrain.
This also means that when placing their terrain on the table (whether it's 2D or 3D) and before starting to deploy their troops, the players should always take five minutes to discuss and agree what type and Size (see page 25) each piece of terrain is going to be treated as for the game and what effects they'll have on movement.
Pictured in the book are typical pieces of 2D terrain. You can photocopy a set of 2D terrain for your games from page 124.
3D Card Barricades
The 3D card barricades included in the Terminator Genisys game can easily be assembled to form Size 1 or Size 2 barriers. Constructing them is easy:
- Push the components carefully from the card sprue. Use a scalpel if needed.
- Attach the stands to the barricades as shown.
- The upper and lower barricades can be used separately or stacked on top of each other.
Designed by Battle Systems Ltd. (www.battlesystems.co.uk).
Effects of Terrain on Movement
All flat, unobstructed, firm ground, which is normally represented by the gaming table or the play mat, is classified as Open. Open terrain does not affect movement at all.
The opposite of this is Impenetrable terrain, which blocks all movement and forces models to go around it. Movement templates must be placed so that they do not overlap impenetrable terrain at any point.
Lastly, terrain can be Difficult, which slows down movement. If a model's move crosses in any way an element of Difficult terrain, that model's move cannot be a Double move, but must be limited to a Normal move or slower. The Run move template cannot be placed so that it overlaps difficult terrain at any point.
It is assumed that the edge of the playing area is Impenetrable terrain, except for when a rule specifically allows models to move in or out of the playing area.
Advanced Rule — Breaking Up a Move. A model can break up its move in order to make its way more easily around impenetrable terrain. See page 38.
Terrain Size
All terrain must also be assigned a Size, just like models. This has some effect on movement, as described below, but will have an even more important effect on determining line-of-sight and cover. Visibility and cover are dealt with separately later in the rules (see pages 24-29).
Types of Terrain
In Terminator Genisys there are several different types of terrain:
- Barriers
- Hills
- Zones of dense terrain
- Buildings
Barriers. Barriers are the simplest terrain to describe and play with. They are normally single pieces of terrain, representing a real life object or natural feature with very well-defined borders. Examples of these are: a single boulder, a section of low wall, a pile of crates and/or barrels, a single large tree or bush, a burned-out car, etc.
The important thing to remember is that models cannot end their move inside/over a barrier. The model is next to, in front of, or behind a barrier, but cannot be 'in' it.
Size 2 or higher barriers, like a large boulder or a high wall, are impenetrable.
Size 1 barriers, like low walls and fences or crates and barrels, are difficult terrain — this assumes that troopers must slow down to vault or clamber over them and vehicles to crush them or bash them aside.
Zones of Dense Terrain. This type of wargames terrain is more abstract. The principle is to delimit a certain area of the battlefield that models can enter, but that will affect their movement and possibly line of sight. These areas can be made by simply printing them out on a sheet of paper and then cutting them to shape, or by using a tridimensional representation — normally a cardboard or plasticard base, with a few tridimensional elements of terrain within this area to represent the fact that the entire zone is densely covered by that type of terrain.
The most common examples of this are areas of rubble. Woods are also fairly common, and are normally represented by a few single trees on a large area base covered in modeling flock or static grass to give an 'undergrowth' impression. Other examples of zones of dense terrain are ruined buildings or broken, rocky areas.
Normally, zones of dense terrain are difficult terrain, assuming that combatants will be slowed down by having to make their way through the obstructing elements, like undergrowth, trees, boulders, piles of rubble, etc.
Alternatively, players can agree that a zone of dense terrain of any Size, even Size 0, could be declared Impenetrable — this could be used for lakes, swamps or magma-filled crevasses.
As for all terrain, it is best for the players to agree at the beginning of the game, before starting to deploy their troops, what Size each of these areas is going to be treated as, and what effect it will have on movement.
Hills. In wargame terms, when we call a piece of terrain a 'hill,' we normally refer to a wide, featureless area of raised ground.
Hills are normally treated as open ground and have a Size of 2 (roughly as high as infantry) or Size 3 (roughly as high as vehicles), but occasionally players may have higher or lower hills. Models standing on top of this kind of terrain get to add the Size of the terrain to their own, and therefore have a better chance of drawing line-of-sight over intervening elements — this also makes them more visible, however. This will be explained in the line-of-sight rules on pages 24-26.
Some hills may have different parts that have a different size.
A piece of terrain that is quite unusual, but possible, is a hill covered in terrain elements, creating a hill that is also a zone of dense terrain. This combines the effects of hills and zones of dense terrain in a straightforward fashion — the Size of the zone of dense terrain is increased by that of the underlying hill, just like the Size of any models that are standing on the hill and occupying the zone of dense terrain.
Buildings. Ruined buildings, where little or no part of an upper floor survives, are best simply treated as zones of dense terrain. However, there are two other types of buildings that create some more complex situations: ruined buildings that still have surviving upper floors that the models can reach, as well as buildings that are solid pieces, but that the players feel their models should be able to enter and fight from (like bunkers, undamaged buildings and other fortifications). These add a level of abstraction and tridimensional movement to the game, and for this reason we intend to deal with them in more detail in a separate game expansion. For the moment, we recommend treating all such buildings either as impenetrable terrain, or as dense terrain and assuming that only the first floor is accessible.
Attacking
Whether dense fusillades of plasma fire, devastating artillery bombardments or brutal close combat, fighting is at the center of Terminator Genisys. This section deals with the various lethal ways the models can eliminate each other on the tabletop.
Moving and Attacking
Normally, as part of their activation, models can move and then attack. Note that models cannot normally attack and then move. Also, keep in mind the following exceptions:
- If an activating model executes a Double move, it cannot attack with ranged weapons. However, it can attack with close combat weapons (see page 26) — a good run is often an effective way to launch a melee attack!
- If an activating model ends its move within Close Combat range of one or more enemies, it cannot attack with ranged weapons. However, it can attack with close combat weapons (see page 26). So, if you want to use your ranged weapons, back off to safety where no enemy is within Close Combat range!
- Some weapons are cumbersome to the point that they require the model to remain stationary in order to fire them, but when this is the case, it will be clearly labeled in the weapon's Stat-line (see page 121).
Attack Sequence
When a model attacks, the players follow the sequence below:
- Choose weapon and target
- Attack rolls
- Take cover saves
- Damage rolls
- Resolution tests
Choose Weapon and Target
The model that has been activated must choose a single enemy model as its target. Models can normally use a single weapon in the Attack. Weapons are either ranged weapons or close combat weapons (see page 26). Every model has a close combat weapon (even if it's just their fists!), and most models also carry one or more ranged weapons.
In order to attack, a model needs to have line-of-sight to at least a part of the target model and needs his weapon to be in range of the target. The model can only attack if both of these conditions are met.
Line-of-Sight
To determine whether or not an attacking model has line-of-sight to a target model, Terminator Genisys uses a top-down approach that makes use of the models' and intervening terrain's Size to determine whether they can be seen and whether they are in cover.
Therefore, to determine whether an attacking model has line of sight to a target model, the attacking player must be able to draw a line from any point of the attacking model's base to any point of the target model's base. It is convenient to do this using one of the range templates. If it's impossible to draw this imaginary line without crossing any barrier, dense terrain zone or other model's base, the Continued from the line-of-sight rule above: if it is impossible to draw this imaginary line without crossing any barrier, dense terrain zone or other model's base, the model cannot see the target. If a model cannot see any targets, it cannot attack.
Size Values and Line-of-Sight
The Size value of the intervening terrain and models matters when it comes to working out whether a model can see another. A two-meter tall wall, for example, blocks line-of-sight to most humanoid models, but a large vehicle can see and fire its weapons over it.
Therefore, whenever drawing line of sight across terrain or models, an attacking model can always see over terrain and models that are of a lower Size value. E.g. a Size 3 vehicle can see over Size 1 and Size 2 intervening terrain and models.
The drawback to this advantage is quite obviously that the opposite is also true, and therefore an attacking model can draw line-of-sight to a target that is of a higher Size value than any intervening terrain/models. The vehicle in the previous example can be seen (and attacked!) over any intervening terrain/models of Size 1 and 2.
Barriers, zones of dense terrain and other models' bases (friends and enemies) block line-of-sight.
Diagram 4 — Line-of-Sight. Resistance Soldier 1 is choosing a target. The barrier is Size 1, so Endoskeleton A is visible (if the barrier was Size 2, it wouldn't be). Endoskeleton B is visible. Endoskeleton C is visible. Endoskeleton D is not visible because Endoskeleton B is obscuring it completely, so it cannot be chosen as a target.
Taking the Higher Ground
Of course, if an attacker is standing on a solid piece of terrain of a given Size (like a hill), it will command a better view of the battlefield, and will be able to draw a line-of-sight to targets it could not see if it was standing on the ground.
In game terms, models that are standing on top of a piece of terrain that has a Size value of more than zero add the Size of the terrain to their own.
For example, a Size 2 infantryman standing on a Size 2 hill counts as Size 4. This will give it the ability to see over Size 2 and even Size 3 models and terrain.
Occupying Dense Terrain
If a model's base is completely inside a zone of dense terrain, that model is said to be occupying that zone of terrain. Enemies can now draw line-of-sight to the model across the zone of dense terrain it is occupying, and vice-versa.
Diagram 5 — Occupying Dense Terrain. Resistance Soldier 1 is choosing a target. The Zone of Dense Terrain is Size 2. Endoskeleton A is not visible. Endoskeleton C is also not visible (it's not completely inside the dense terrain). Endoskeleton B is visible and can be chosen as a target. The opposite is true — Endoskeleton B is the only enemy that could draw line-of-sight to Resistance Soldier 1.
Friends in the Way
If it is possible to draw a line from any point on the attacking model's base to any point of the target model's base so that the line crosses a friendly model's base, the attacker cannot attack the target model — the risk of hitting friends is too great (even for a machine!).
In other words, the attacker needs a 'corridor of fire' free of friendly models between its base and the target's. Conveniently, this corridor is as wide as a range template (see Diagram 6).
On the other hand, if the intervening models are enemies the attacker can fire at will. If they get in the way, no problem!
Diagram 6 — Friends in the Way. Endoskeleton 1 is choosing a target. Resistance Soldier A is a valid target. Resistance Soldier B is not a valid target because Endoskeleton 2 is in the way.
Range
In Terminator Genisys, the distance between the attacking model and the target model can fall into one of the following ranges, as represented by the range templates:
- Close Combat range (close combat weapons)
- Point Blank range (ranged weapons)
- Short range (ranged weapons)
- Long range (ranged weapons)
When you need to see what range your target is at, place the shortest template you can use overlapping (or touching) both the firing model's base and the target model's base.
The shorter the template you can use, the better your chances of hitting the target, as described below.
Note that you can freely measure range (and line-of-sight) to several targets and then decide which you are going to attack.
Attack Rolls
Once the player has determined that his model can attack, and the result it needs to be able to hit the target (see below), he checks that model's Stat-line and rolls the correct Skill die. Note that some weapons may allow the model to roll more than one die. When this is the case, it is clearly indicated in the ROF (Rate of Fire) column of the weapon's Stat-line. For example: a plasma gun fires 2 shots, so the model rolls 2 dice. This simply means that instead of rolling a single Skill die when attacking with that weapon, the model rolls a number of dice equal to the ROF of the weapon being fired (see Weapon Stat-lines, page 121).
The number needed when rolling the Skill die for the Attack to hit its target depends on the distance between the attacking model and the target:
- Close Combat range: 3+. If the model is attacking with a close combat weapon (i.e. weapons whose range is defined as CC in their Stat-line) against a target within Close Combat range, the player needs to roll a 3 or more to hit. This range is used exclusively for close combat weapons like knives or fists — it is assumed that the attacker quickly closes in and stabs/slashes/pummels the target and then immediately steps back to a relatively safer distance.
- Point Blank range: 4+. If the target model is within Point Blank range, the player needs to roll a 4 or more to hit.
- Short range: 5+. If the target model is further away than Point Blank range, but within Short range, the player needs to roll a 5 or more to hit.
- Long range: 6+. If the target model is further away than Short range, the player needs to roll a 6 or more to hit.
Advanced Rule — Aimed Shots. If a model is not moving at all that turn, and is attacking with a ranged weapon with ROF 1, it can take an Aimed Shot. See page 38.
Advanced Rule — Suppressive Fire. If a model is not moving at all that turn, and is attacking with a ranged weapon with ROF 2 or more, it can spray its shots across a number of nearby targets — see page 38.
Taking Cover Saves
After determining the number of hits caused on the target model, the player that controls it has a chance of negating the hit(s) by taking 'Cover Saves' (or 'Saves' for short). Saves represent the chance for the target to duck and take cover behind something like a tree, rock or even another fighter.
Models are normally considered to be in cover, as the warriors always tend to lie low and to minimize the amount of time they are exposed when standing up and moving from one cover to the next. Don't be fooled by the fact that our miniatures cannot bend at the waist and that a wargame's battlefield might look flat and featureless — in reality the ground is varied and undulating, making it very difficult to have a completely clear shot at enemies that are keeping their heads down.
In order to save his models from being hit, the player normally rolls a D6 for each hit. If the result is 4+, the hit is negated. If the result is 3 or less, the hit is applied to the model, and the firer will then roll to damage (see Damage Rolls on page 29).
Advanced Rule — Different Types of Save. Some terrain elements can confer different types of save to models. See page 39.
In the Open
A model can be in the unfortunate position of being 'in the open' — a model that is 'in the open' does not get a cover save. Only models targeted by ranged weapons at Short range and Point Blank range can be 'in the open.' At Long range, the undulation of the terrain is enough to provide cover. Models are always 'in the open' when attacked at Close Combat range.
A target is considered 'in the open' if it has nothing to take cover behind, and the firer has a completely clear shot at Point Blank or Short range. In other words, if it is impossible to draw a line between any point of the attacking model's base and any point of the target's base without this line crossing any other model's base or any piece of terrain, the target is 'in the open.' See the diagrams below.
Firing Out of Occupied Cover. Models whose bases are completely inside a zone of dense terrain are said to be occupying that zone of dense terrain. These models always ignore the zone of dense terrain they are occupying when drawing line-of-sight to targets that are not occupying that terrain. They are taking advantage of openings in the cover that allow them to fire at models caught in the open outside. However, if the target is occupying dense terrain, it is not in the open.
Firing Over An Adjacent Small Barrier. An attacking model always ignores an intervening barrier that is one Size smaller than the model, as long as it is in base contact with that barrier. Often this situation is perfect for the attackers, who benefit from the barrier's cover when fired at and can rest their weapons on it when returning fire.
Most of the time, it is going to be perfectly clear whether a model is in the open or not. In the very rare cases when the situation is so unclear that the players cannot decide, they roll off and the winner decides.
Diagram 7 — In the Open / Cover. Endoskeleton 1 fires at Resistance Soldier A, which is within Short range of it. There are no intervening models or pieces of terrain so the target is in the open. Note that Resistance Soldier B is at Long range from the Endoskeleton, so automatically counts as being in cover, despite there being no intervening models or terrain.
Endoskeleton 1 fires at Resistance Soldier A, which is within Short range of it. It is possible to draw a line to target A's base through an enemy model's base, so the target is in cover. If A passes its save, B will be hit instead (see Cover from Comrades, below).
Endoskeleton 1 fires at Resistance Soldier A, which is within Short range of it. It is possible to draw a line to target A's base through the terrain, so the target is in cover. Note that if the barrier was Size 2, the target would still be (partially) visible and would still be in cover.
Endoskeleton 1 fires at Resistance Soldier A, which is within Short range of it. It is possible to draw a line to target A's base through the terrain and through Resistance Soldier B, so the target is in cover. Note that if A passes its save, B is NOT hit instead.
Diagram 8 — Firing Out of Occupied Cover. Endoskeleton 1 fires at Resistance Soldier A, which is within Short range of it. It is occupying the zone of dense terrain it is firing through, so it ignores that zone when determining whether the target is in cover. Therefore, the target counts as being in the open.
Diagram 9 — Firing Over An Adjacent Barrier. Endoskeleton 1 fires at Resistance Soldier A, which is within Short range of it. It is in base contact with the barrier that it is firing over, so it ignores the barrier when determining whether the target is in cover. Therefore, the target counts as being in the open. If the Endoskeleton was not in base contact with the barrier, the target would be in cover.
Cover from Comrades
If the only cover for a target is provided by other 'shielding' comrades and the target passes its save, one of the shielding models is hit instead and receives no cover. Determine at random which shielding model is hit using a die.
Attacks That Ignore Cover
Some weapons (e.g. close combat weapons) always 'ignore cover.' When attacked with such weapons, all targets count as 'in the open' (including at Long range).
Failed Saves
After having determined that the target model is in cover, the controlling player rolls a Save for each hit suffered by the model. For each hit that is not saved, the opponent will now make a damage roll.
Damage Rolls
After discarding all of the dice that have scored a miss or have been saved, the player must roll to determine whether the remaining hits will cause damage to the target or whether the armor or natural resilience of the target will manage to protect it from harm. For each hit scored, the player checks the weapon's Stat-line and rolls the correct Power die (see Weapon Stat-lines, page 121).
The result of the die is then compared with the Armor value of the target, which is a number varying from 3+ (an unarmored human) to 10+ (a heavily-armored battle tank).
If the die result is equal to or higher than the target's Armor value, the hit scores a point of damage on the target. Normally, a model that suffers a point of damage is removed.
If the result is lower than the Armor value of the target, the attack has not hurt the target — it might have lightly wounded it, grazed it or stunned it, but it was not enough to terminate it. The model must now take a Resolution test to continue fighting, as described next.
Resolution Tests
If a model has suffered one or more hits by an enemy attack and has not been damaged, after all saves and rolls to damage have been done, the model must immediately take one Resolution test per damage roll it has just survived. For example, if a model suffers two hits from the fire of an enemy model, fails both of its saves (if any), and then both hits fail to damage it, it will immediately have to take two Resolution tests.
A Resolution test is taken by rolling the model's Resolution die and checking the chart below:
| Die result | Effect |
|---|---|
| 6+ | No effect |
| 2-5 | Reeling |
| 1 | Retreat! |
Retreat! In the most extreme of circumstances, a human might decide that the situation is hopeless and it is time to fall back to base, while a Machine might have a severe malfunction and temporarily shut down to run extensive diagnostics.
If a model rolls a 1 for its Resolution test, the model is immediately removed from the game and counts as destroyed.
Reeling. If a model takes a hit from enemy fire and survives it, it might still be impaired by the effects of the hit. A human might begin to hesitate, waver or could simply be stunned or wounded. A Machine could be knocked over by the force of the blast or suffer some minor damage that needs a minute or two to be repaired, or for a system re-boot.
If a model rolls a 2-5 for its Resolution test, the model is Reeling — if the model already has 'Done' markers on it, it simply receives one more. If it did not have any Done marker, it receives two. This way, Reeling models are easily recognizable, as they are marked with two or more 'Done' markers.
Reeling models are not in a position to threaten nearby enemies, so enemy models that end their move within Close Combat range of a reeling model are not forced to use their close combat weapons (unless of course they are also within CC range of another enemy that is not reeling). Instead, they can use their ranged weapons as normal if they wish.
Also, the effect of having two or more 'Done' markers is that the model will not be able to do anything this turn. And, as models only lose one Activation marker at the end of each turn, it will be unable to do anything in its following turn, or turns. But don't worry; your Commanders can help models to get rid of extra 'Done' markers faster than this!
Finally, a reeling model is more vulnerable to enemy attacks at Close Combat range — see 'Hasta La Vista, Baby!' below.
Heavy Weapons and Improvised Weapons vs Resolution Tests
Some weapons pack a lot more punch than your normal hand gun or even a plasma rifle. In our game, this includes anything with a Power of D10 or more, which we refer to as a 'Heavy Weapon.'
If a model is hit by a Heavy Weapon and not damaged, its Resolution for the ensuing Resolution test is degraded by one step. For example, if an Endoskeleton is hit by a weapon with Power D10 or higher and is not destroyed, it rolls a D12 for its Resolution test rather than its normal Resolution value of D20.
On the other hand, any weapon with Power D4 is considered an 'Improvised Weapon.' Models taking a Resolution test after surviving a hit from an improvised weapon upgrade their Resolution by one step.
'Hasta La Vista, Baby!'
During the desperate fighting of the War Against the Machines, both sides are equally adept at dispatching wounded, stunned or otherwise incapacitated enemies — no quarter is given, or expected.
If one of your models is within CC range of a reeling enemy model, and not in CC range of any other enemy models, your model is free to attack the helpless reeling enemy using either a close combat weapon or a ranged weapon. This is resolved as normal, except that hits are scored on 2+ rather than 3+/4+. Also, no cover saves are allowed, and the weapon used to attack counts as a Power D20 heavy weapon — 'Hasta la Vista, Baby!'
Commanders
Without their resolute leaders, the Human Resistance would be just a bunch of isolated stragglers, easily picked apart by Skynet. And only the super-efficient plans orchestrated by the best AIs can turn the relatively predictable endoskeletons into an effective fighting force.
Models with the Command (n) special rule are called Commanders and said to have 'a Command value of n.' They have the special abilities listed below, which work on all visible friendly models within command range, except for other Commanders. Command range is normally the same as Point Blank range.
- "Come With Me If You Want To Live!" When you assign a Ready marker to this model in the Plan Activations step of an impulse (as per the normal rules), you can immediately take a number of additional markers from the pool up to its Command value (n). You can then assign these markers to any visible friendly non-commander models without Ready or Done markers within command range.
- "No Fate But What We Make For Ourselves." When you roll a Fate result for the Fate roll to determine how many activation markers you get, you can select one (and only one!) of your Commander models currently without Ready or Done markers — this Commander will use sheer force of will to override Fate. You immediately take a number of markers from the pool up to the model's Command value, and assign the first one to the Commander itself, and the remaining ones (if any) to any visible friendly non-commander models without Ready or Done markers within command range.
- "On Your Feet, Soldier!" In the End Turn phase, after one Done marker has been removed from all friendly models, the Commander can remove additional Done markers from any visible friendly models within command range that still have Done markers (including other Commanders, though not him/her/itself), up to a total number of Done markers equal to its Command value.
Weaponry
In the force list, each model has an entry that specifies other details about the model, such as its weaponry. In a world at war, there is a huge variety of weapons and other war gear, and more are developed every year. This section describes the most common types of weapons and explains how their characteristics are captured in the rules.
Much like models, weapons have their own Stat-line. Below is an example of perhaps the most common weapon in the War Against the Machines, the plasma gun.
| Weapon | Range | ROF | Power | Special |
|---|---|---|---|---|
| Plasma gun | Long | 2 | D8 | – |
Let's examine each of the Stat-line terms in detail:
Range
This is the weapon's maximum range — either Long, Short or Close Combat. Long and Short ranged weapons are ranged weapons.
- A Long Range weapon is a ranged weapon that can use the Short Range or Point Blank templates, but can also engage targets at Long Range.
- A Short Range weapon is a ranged weapon that can use the Short Range or Point Blank templates.
- A Close Combat weapon is not a ranged weapon, and can only use the Close Combat template. Remember that close combat weapons can be used even if the model has made a double move, and always ignore cover saves. Remember also that if there is an enemy model (except for reeling enemies) within CC range, your model can only use Close Combat weapons to attack.
ROF
A weapon's Rate Of Fire is the number of Skill dice that are rolled by the attacking model when it uses that weapon to attack.
Power
This is a measure of how powerful the weapon is, its stopping power and armor penetration virtues. It is the die rolled to damage any target hit by the weapon, so the higher the number, the better the weapon.
Special
Any additional rules that characterize the weapon further are listed here. For example, a flamethrower or a mortar will work in a very different way from an assault rifle. A list of the most common special abilities for weapons are listed in the following pages, but rare weaponry will have its own unique special abilities.
Weapons' Special Rules
Ammo (n). This weapon can be fired only a limited amount of times (often just once!), as indicated by the number in the parenthesis. Players must keep track of the number of times this weapon has been used by writing it down or with a numbered counter.
Area (Small). This rule is used to represent all weapons and attacks that use high explosives, or other forms of attack that cover a large area and thus can affect more enemies at the same time. When firing one of these weapons, the firing model selects a visible target as normal and makes a normal Attack roll.
If the Skill roll is successful, the target model is hit by the weapon — we refer to it as the primary target. Before proceeding with the roll to damage, though, you can measure to see if other nearby models are also hit by the same weapon — we call them secondary targets. Place the shortest template (the Close Combat template) in base contact with the primary target and rotate it all around its base. Any models whose bases are touched or overlapped by the template are also hit. Proceed to roll for damage against all models hit, in an order chosen by the activating player.
Models hit by area weapons receive no cover, regardless of range or terrain.
However, if any friendly models or the model itself would be secondary targets, the attacking model cannot fire the Area weapon — as normal, you cannot voluntarily target models on your side.
Diagram 10 — Area Weapons. Resistance Soldier 1 wants to target Endoskeleton A with its grenade launcher, because it is in Point Blank range. The red circle shows the area affected by the weapon's blast effect. However, because a friendly model (Soldier 2) is within that area, Soldier 1 cannot target Endoskeleton A with the grenade launcher. If the friendly soldier was not within the area, and if the firer's Skill roll were successful, Endoskeletons B and C (but not D) would be secondary targets. As it is, Resistance Soldier 1 will choose to target D instead, so that no friendly models are affected and three enemies are affected if D is hit.
Area (Medium). This is the same as Area (Small), but uses the Point Blank template instead.
Area (Large). This is the same as Area (Small), but uses the Short range template instead.
Brace. This weapon cannot be fired if the model has moved as part of its activation.
Flame. This rule is used to represent all weapons and attacks that project a gout of blazing flammable liquid, or a spray of toxic or highly corrosive chemicals, etc. This works the same as the Area (Small) rule above, but the primary target is hit automatically, so no Skill roll is required.
HE Rounds. This weapon can be fired using either the AT profile or the HE profile.
Indirect Fire. This weapon can target any enemy within range, regardless of line-of-sight. This represents weapons fired in an arc against targets whose coordinates have been revealed by friendly troops on the ground, or a drone or high altitude surveillance. Their drawback is that they cannot be fired against targets that are within Short range.
Semi-automatic. If the target is at Long range, this weapon counts as ROF 1. If the target is within Short range, this weapon counts as ROF 2.
Sniper. If the model does not move as part of its activation, it can fire an aimed shot through the rifle's scope. If it does so, it cannot target a model within Short range. However it always hits on a 4+, and the target does not get any cover Save against damage caused by this weapon, regardless of range or terrain.
Stopping Power. This weapon is Power D8 at Point Blank range.
Suicidal. This weapon can be used in close combat, but in order to use it, the model must first test its Resolution. If the test is successful, the model can use the weapon — if the model scores a hit, roll to damage against all models caught by the area effect, including other friendly models and even the model itself! If the test is failed, the model does not attack at all this turn, but it does not suffer any of the normal negative effects of a failed Resolution test.
Models' Special Rules
There are many different types of troops and vehicles engaged in the War Against the Machines, and many have their own unique traits and special abilities that make them different from the more regular troopers. Most of these special abilities are simple, short rules, but occasionally they might be more complex. The lengthiest of them, like the 'Vehicle,' 'Transports' and 'VTOLs' special rules, which include a number of exceptions, are treated in a dedicated section (see pages 36-43).
Agile. The model can move over Impenetrable terrain up to and including Size 2, but cannot end its move in Impenetrable terrain.
Fast. The model uses the Run template for a normal move, and uses the Run template twice for a double move (this is done in the same way as models breaking up a move, see page 38).
Extremely Fast. The model uses the Run template twice for a normal move (see above), and can simply be placed anywhere on the playing surface when executing a double move.
Resilient (n). When the model suffers a point of damage, it is not removed. Instead, it immediately takes a Resolution test as if it had been hit but not damaged. Models can suffer a number of points of damage equal to the number in parentheses — when the number of damage markers they accumulate matches the number in parentheses, the model is removed as a casualty. In addition, when a model is damaged, it does not perform at peak efficiency. The effects of damage are:
- The model's Skill die is degraded by one step.
- The model suffers from the Slow special rule.
In addition, Fast and Extremely Fast models lose these special abilities.
Note, however, that if a model is damaged by a 'Hasta la Vista, Baby' special attack, the model immediately suffers all remaining points of damage and is removed.
Slow. The model uses the Crawl template for normal moves, and the Walk template for double moves.
Sprint. Whenever the model finishes executing a double move, it can make one additional normal move (this is done in the same way as models breaking up a move, see page 38).
Stabilized. The model can move and then attack with weapons that have the Brace special rule.
Stealth. The Skill die of all models targeting this model, except for those at Close Combat range, is degraded by one step.
Tactical Genius. As long as this model is alive, your side gets to upgrade the die used for the Tactical Roll-off by one step. For example, instead of rolling a D8, as normal for most scenarios, you roll a D10.
Advanced Rules
The following rules add a layer of detail to your games, but they also add a measure of complexity, so add them only little by little as you grow more experienced with the core rules.
Breaking Up a Move
When a model is making a normal or a double move, it might find its movement impeded by impenetrable terrain and/or enemy models — it might be impossible to simply lay the Walk or the Run template on the playing surface to execute a move, as shown in Diagram 11 below. In those cases, the player can declare that the model is breaking up its move in order to make its way around the obstruction(s).
Instead of using the Walk template, the model may use the Crawl template and make a first move at Crawl speed, and then immediately make a second Crawl move, in any direction.
Instead of using the Run template, the model may use the Walk template and make a first move at Walk speed, and then immediately make a second Walk move in any direction. Either or both of these Walk moves can of course be further broken down into two Crawl moves, as described above.
Diagram 11 — Breaking Up a Move. The endoskeleton executes a Run move to get within Close Combat range of the Resistance soldier. The player decides to break the Run move into two successive Walk moves to go around the intervening zone of dense terrain that does not allow the model to Run across it.
Aimed Shots
If a model is not moving at all that turn, and it's attacking with a ranged weapon that has a ROF of 1, it can take an Aimed Shot. This means that its Skill die is upgraded by one step for that attack only. For example, a Resistance soldier fires his rocket launcher or his plasma rifle (at Long range) without moving — instead of rolling a D6 for his attack, you roll a D8.
Of course, models firing from Ambush and with ROF 1 Brace weapons can take aimed shots (as they don't move when firing). Also, models with the Stabilized special rule can only take Aimed Shots if they don't move — the Stabilized rule does not allow them to move and take an aimed shot.
Suppressive Fire
If a model is not moving at all that turn (as above), and is attacking with a ranged weapon that has an ROF of 2 or more, it can either attack as normal, concentrating its firepower against a single model, or it can instead spray its shots across a number of nearby targets — we refer to this as 'suppressive fire.'
To do this, first pick a normal target for the firing model — the 'primary target,' and then identify a number of 'secondary targets' for its attacks. These secondary targets need to be both visible to the firer and in range of its weapon. Also, they need to be within Close Combat range of the primary target. Weapons with the semi-automatic special rule must pick a primary target within Short range. If there are friendly models within CC range of the primary target, suppressive fire is not allowed.
If these targets fulfill the conditions above, the attacker can divide its shots between the targets as it prefers, up to 1 shot per target. Any shots that are left over after assigning one shot per target are assumed to miss automatically. Work out each shot separately and in a sequence, starting from the target model closest to the attacking model, working your way to the next closest and so on.
Ambush
When executing the activation of a model, the player may decide that the model is not doing anything right away. Rather, the model will set itself in Ambush, all senses alert, scanning the battlefield for a target. Once the occasion presents itself, the model can immediately choose to open fire on a moving enemy.
If you want a model to go into 'Ambush,' simply take a second activation marker from the pool and place it with the 'Ready' side up next to the model — models with two 'Ready' markers next to them are 'in Ambush.'
During the End of Turn phase, if a model is still in Ambush, you can decide to remove both Ready markers, or to retain them. If the player decides that the model remains in 'Ambush' into the following turn, he will be unable to place more activation markers on the model, but the model will maintain all benefits of the 'Ambush' mode.
If a model in 'Ambush' becomes Reeling, it loses both Ready markers and receives two Done markers instead. Also, if a model has HE shells and it goes into Ambush, it must declare which shells it is loading as it goes into Ambush.
When a model is in Ambush, it can interrupt the normal course of play with a special action: Opportunity Fire. Once this special action is concluded, the 'in Ambush' markers are replaced by a single 'Done' marker.
Opportunity Fire
The model in Ambush can do this when an enemy model is activated and moves. As the enemy model is moved, the player can interrupt that model's move at any point and open fire with the model in Ambush. Resolve the model's attack as normal. If the moving model survives the attack (including the Resolution test), then it can continue its move and finish its activation.
Note that if the moving model survives one Ambush, there is no reason why another one of your models in Ambush cannot then open fire, and so on until you have run out of models in Ambush that can see the moving model.
Different Types of Save
Before the game, players can agree that some particular terrain elements confer different types of save to models, if they are obscuring the models and/or occupied by the models.
The most common types of Save, and the type of die they use, are:
| Type of Save | Die |
|---|---|
| Soft Cover | D4 |
| Hard Cover | D6 |
| Fortification | D8 or better |
| Special Rules | Variable (see model's stat-line) |
In general, soft cover is something that hides the target, but does not stop bullets and plasma blasts. Examples of this are foliage, camouflage nets, etc.
Hard cover is by far the most common type of cover in the game — representing something more substantial, like rocks, walls, etc. Troops also fall into this category.
Fortifications are structures that are armored or otherwise designed to resist damage and protect the troops inside them.
It is important that players agree before the game which type of Save will be conferred by each piece and zone of terrain on the table. Anything that has not been discussed counts as hard cover.
Multiple Cover
A model could benefit from different types of Save. For example, a target model could be standing inside hard cover and behind some low shrubs (soft cover). These models always use the best type of cover available and also upgrade the Save die by one — in the example above, they would use hard cover (D6) and upgrade it to D8.
Vehicles
If a model has the Vehicle special rule, it has the set of exceptions listed here. Note that this rule tends to identify large combat vehicles with a number of crew inside, either tracked or wheeled. It is not normally used for smaller means of transportation, such as motorbikes.
Size
Unless stated differently in their entry, vehicles are Size 3.
Measuring
If a vehicle has a base, and its hull fits inside the base, measuring distances and LOS to and from it follows the normal rules. If the vehicle does not have a base, or if its hull is larger than the base underneath it, measure all distances and LOS to and from the vehicle's hull instead.
Moving
Speed. Unless stated differently in their entry, vehicles have the Fast special rule.
Moving Through Models. Vehicles can move through friendly and enemy models, except other vehicles (which count as impenetrable). If they do so, and they end their move on top of other models, move these models by the shortest distance necessary to place them just out of contact with the vehicle.
Only vehicles with Armor 10+ or more can drive through vehicles with an Armor value of 7+ or less, as described above for non-vehicle models.
Run it Over! Vehicles that make a double move using two Run templates can declare they are attempting to run over one enemy model they moved through. Roll to hit such model as per a close combat attack (hitting on 3+, no save). The Power of the hit depends on the Armor of the moving vehicle:
| Armor | Power |
|---|---|
| Up to 7+ | D10 |
| 8+ or 9+ | D12 |
| 10+ or more | D20 |
Terrain. Vehicles cannot normally enter zones of dense terrain of Size 2 or higher, unless the players agree so before setting up their forces.
Vehicles Moving and Attacking. All vehicles have the Stabilized special rule and so can move and attack with Brace weapons.
Attacking
Vehicles often carry several different types of ranged weapon, which are normally mounted on their hull or turret. When attacking, vehicles are not limited to firing a single weapon like other models; rather, they fire all of their weapons independently.
After having moved the vehicle, declare which weapons are firing and at which targets they are firing (including any suppressive fire). Then resolve the fire of all weapons in any order you prefer.
Vehicles can use their ranged weapons even if they are within Close Combat range of enemy models. However, vehicles cannot use their ranged weapons against enemies that are within Close Combat range — they are just too close.
Limited Arc Weapons
Some of a vehicle's weapons can be fired only in a limited arc, so after a vehicle has been moved and positioned, some weapons could be in a position where they cannot be fired against a target that is on the wrong side of the vehicle. These weapons are labeled as 'Limited Arc (front),' or 'Limited Arc (left),' or 'Limited Arc (right),' or 'Limited Arc (rear),' or in some rare cases, in multiple arcs (front-left, for example).
The arcs of fire covered by these weapons are shown in Diagram 12. These weapons can only fire at a model that is within the relevant arc of fire. Range and LOS are measured to/from any part of the vehicle base or hull lying inside the relevant arc of fire.
Coaxial Weapons
Sometimes a vehicle has two weapons in a coaxial mount. This means that the vehicle must choose to fire one weapon or the other, and cannot fire both in the same turn.
'Twin' Weapons
Sometimes a vehicle has two identical weapons mounted so that they point in the same direction. These weapons count as a single weapon with double the ROF. The weapons can of course execute suppressive fire, as normal... and they often do!
No Close Combat Capability
Vehicles have no close combat weapons, so enemies ending their move within CC range of vehicles (and no other enemies) are not obliged to use their close combat weapons; they are allowed to use their ranged weapons.
Cover Saves
Vehicles are so large that they can be 'in the open' at Long range, and all terrain and models of Size 1 are ignored when deciding whether a vehicle is in cover or not.
Resolution
Vehicles take Resolution tests as normal. If a vehicle suffers a Reeling result, this is applied as usual — the vehicle's systems are temporarily off-line, or its crew is stunned or confused. Vehicles, however, are immune to the 'Hasta la Vista, Baby' rule. If a vehicle is destroyed by failing a Resolution test, the model is removed. It is assumed it is trying to return to base for repairs.
When a vehicle is destroyed by an attack that inflicts the last point of damage on it, the model is left in place and given a suitable marker to show it is destroyed (such as cotton wool to represent smoke billowing from the wreck). It is now treated as a barrier of the same Size as the vehicle, so that it can still block line-of-sight and provide cover.
Exception: heavily-armored vehicles (i.e. vehicles with an Armor value of 8+ or more) are not scared by small-arms fire, so they only take Resolution tests when hit by heavy weapons. This also means that their Resolution is never downgraded by hits from heavy weapons!
Commanders can use their special abilities on vehicles only if they are in the vehicle itself (normally as passengers, as explained in the transport vehicles rules on page 42).
Transports
A model (most normally a Vehicle) with the Transport (n) special ability can carry friendly models with it as it moves. The number in parentheses indicates the total number of Size 2 models that the transport can carry at the same time. Size 3 models count as two models for transport purposes. Size 1 models count as half a model. Size 4 models and other vehicles cannot normally be transported.
Boarding a Transport
Models can get onto a Transport by moving to within Crawl distance of the Transport model. Once this is done, the model gets onboard and is removed from the table and set aside. Make sure that the number of models onboard is equal to or less than the Transport value (in parentheses), and if the model would bring the number to above the value, it cannot board.
Until the model leaves the Transport, it can do nothing nor use any of its special rules and abilities, but on the other hand it cannot be attacked or otherwise affected by the enemy (other than by destroying their Transport). Transported Commanders can use their special command abilities, but only on the model itself and its passengers. As long as the player wants the model to stay in the transport, he can simply activate it and turn the marker to Done right away.
Leaving a Transport
Passengers can leave the Transport when they are activated. When the player does this, the model disembarks and makes a normal move, measuring the distance from any obvious exit point from the Transport — they can even double move and attack in that same activation.
Note that models cannot leave or board a transport if the transport has made a double move in the same turn. Similarly, a transport that models have boarded or left that turn cannot make a double move.
Destroying Transports
If a Transport model is destroyed while it carries models, those models immediately take a hit with Power D4, with no saves allowed. Any survivors must then immediately leave the transport as described above, except that they cannot make a double move nor can they attack, and immediately receive a 'Done' marker if they did not already have one.
If a Transport model is destroyed (retreats) by failing a Resolution test while it carries models, all passengers must immediately leave the transport before it is removed, as described above for a destroyed transport.
VTOLs
Models with the VTOL special rule (normally vehicles like helicopters and hunter-killer gunships) can hover above the ground and fly, as well as land on any relatively flat terrain.
The model is normally considered to be hovering/flying just above the height of all terrain and out of reach of any Short Range weapon. The model can move over all terrain and models, including Impenetrable terrain or other models. Balancing a model over other models or over some type of 3D terrain might prove tricky, so try to keep the model away from these, or simply make a note of where the model is and set it aside from the playing surface until it is free of obstructions.
Unless stated differently in its rules, the model has the Extremely Fast special ability.
Normally, the model counts as Size 20, which means it will probably see and be seen over most terrain features.
VTOLs can only be targeted by Long Range weapons and are always in Long Range.
VTOLs cannot claim or blow up objectives.
Landing
A VTOL that is activated, and is not making a double move, can land at the end of its move. In this case, place a 'landed' marker next to the VTOL.
VTOLs cannot land in any dense terrain.
VTOLs can land on top of other non-vehicle models, just as vehicles can end their move on top of non-vehicle models. They can run over one non-vehicle model they land on (see page 40).
While landed, VTOLs cannot move nor attack until they take off, and count as normal Size 3 vehicles.
While landed, a VTOL that has the Transport special rule can be boarded and/or left as normal by passengers.
Taking Off
A VTOL that landed in a previous turn can, when activated again, take off — move it as normal (except that it cannot make a double move) and remove the 'landed' marker.
Battle Scenarios
The Battle Scenarios found in the following pages are balanced games where the two sides enjoy equal winning chances. Get ready to engage the enemy in the War Against the Machines!
Our Battle Scenarios are designed for competitive play. They are balanced, as the players randomly determine various aspects of the game, such as the mission and set-up, and this method offers a wide range of tactical challenges providing the equivalent of thirty-six different games!
When playing a Battle Scenario, you go through the following steps:
- Decide game size and assemble forces.
- Place terrain.
- Roll for mission type.
- Roll for set-up type.
- Set up forces.
- Begin the game.
- Starting on turn 5, roll for game end.
- Determine the winner.
Game Size
You should decide beforehand how large a game you are going to play (Game Size), and select forces of the appropriate size taken from the lists included in this book and following the Force selection limits, as explained on page 62.
Open Lists
Once the armies have been selected, you should show each other the list you have written, so that you both know what models your forces are going to face. Of course you can agree not to show your lists if you want (we call this 'closed lists'). This can be fun, as it can lead to some nasty surprises during the game, but do this only if your models are an accurate representation of the models you included in your list.
Infighting
Normally, it is best if armies that are enemies in the Terminator story are fighting each other. For example, it looks more convincing if a Resistance force is fighting a force of the Machines. However, you should not worry even if you both have the same army. There have been plenty of scheming, betrayals and simple errors when a force has found itself fighting against a similar one. For example, humans could fight other humans as desperate communities clash over the few resources available, or a battle between Machines could be just an experiment in battlefield effectiveness... or indeed a virus implanted by human resistance into a section of the enemy forces!
Place Terrain
The best way to prepare a playing area for a Battle Scenario is for the players to set up terrain in a manner that makes for an inspiring and characterful setting, influenced by one of the battlefields portrayed in the Terminator movies. It could recreate a ruined cityscape like on our play mat, the craggy deserts of Arizona, the icy wastes of Alaska, the rolling plains of the Midwest, or the vast forests of Minnesota, depending on the type of terrain in your collection.
When placing the terrain, it is fair to make sure areas of dense terrain and barricades are spread uniformly around the mat, table or other playing area, and do not offer a particular advantage to one faction over the other. This should be a straightforward process, as at this stage you still don't know from which side you are going to deploy and play.
An alternative, which often saves some precious game time, is for one player to set up the terrain in advance, and the other player then chooses the side he is going to play from, or a third person can be asked to set up the terrain in a neutral fashion.
How Much Terrain?
There should be enough terrain on the gaming surface to break up the line-of-sight of long-range weaponry and present some interesting tactical choices to the players. Otherwise the game might turn into a bit of a 'turkey shoot' experience, with the biggest guns laying waste to the enemy force as it advances in the open. We recommend that in every 2'x2' square sector of the mat or table, you place at least one Size 3+ area of dense terrain, or another terrain piece that blocks line-of-sight, plus a few barriers to provide some cover.
If a player's terrain collection does not include enough terrain, it is acceptable to play with less, but players should also keep in mind that books, boxes and other readily-available household items can stand in for terrain and provide a very enjoyable game until a player's collection of wargames terrain has grown large enough to fill the playing area.
Roll for Mission Type
After terrain has been placed, either player rolls a D6 (the use of TDDs is allowed!) and consults the chart below to determine the victory conditions for the game:
| Die result | Mission |
|---|---|
| 1 | Annihilate |
| 2 | Occupy |
| 3 | Demolish |
| 4 | Terminate |
| 5 | Extract |
| 6 | Retrieve |
Mission Descriptions
Mission 1 — Annihilate
After the game ends, each player totals up the points he's scored, as follows: Each enemy model destroyed is worth a number of points equal to its cost in points when purchased for the enemy force (including any upgrades). Resilient models that are damaged are worth a number of points equal to half their cost in points (rounding up).
Subtract the total of the lower scoring player from the total of the higher scoring player. If the difference between the two totals is 10% or more than the game's agreed Game Size (e.g., 200 points in a 2,000 point game), the player with the higher total is the winner. Otherwise, the game is a draw.
Mission 2 — Occupy
Each player rolls a D4 and takes that many Objective markers. The player with the most objective markers (or the winner of a roll-off, if both players have the same number of markers) begins by placing one of his Objective markers on the playing surface. Then his opponent does the same, and they keep alternating until both players have placed all of their Objective markers. Objective markers can be placed anywhere on the playing surface outside Impenetrable terrain, and more than a Run template away from another marker. If it becomes impossible to place any more markers, the remaining markers are discarded.
After the game ends, the players determine how many objectives they control. The player with the most objective markers wins. If they hold the same number of objectives, the game is a draw.
To hold an objective, a player must have a model without the Vehicle special ability within Crawl distance of the marker, and there must be no enemy models at all within Crawl distance of the same marker. If either of these conditions is not met, that objective is not held by any player.
Mission 3 — Demolish
Each player places D4 objectives, as described for Mission 2. Then the players roll-off and the winner decides to be the attacker or defender.
During the game, the attacker can destroy the objectives by planting demo charges on them. To plant a demo charge on an objective, any attacking model must first move into base contact with the objective marker and then attack the objective — this automatically plants the charges. In any following turn, if the attacking model is activated and moves away from the marker, the objective is automatically destroyed, together with any other model (friends and foes) that is still in base contact with the objective marker. Note that being destroyed (including by a failed Resolution test) does not count as 'leaving' the marker — in that case the model has been destroyed before it could trigger the explosives.
After the game ends, if the attacker has destroyed more than half of the objectives, he wins. If less than half, he loses. If he has destroyed exactly half of the objectives, the game is a draw.
Mission 4 — Terminate
Each player tells the opponent which of the Commanders in his force is the most expensive in terms of points cost. This Commander is going to be the target that the enemy force has been set out to capture or terminate (note that it cannot be left in Reserve, see page 57). If the army does not include a Commander, it is assumed that the most expensive model in the army is the target — the enemy is out to get a low-ranking officer or a vehicle's commander — who knows what role they might have in the future? The enemy commander counts as Captured if it is destroyed or forced to retreat by a close combat attack. It counts as Terminated if it is destroyed or forced to retreat by a ranged attack or in any other way.
After the game ends, players score one point for a Terminated enemy commander, and two points for a Captured enemy commander. Players also score two points if all enemy models are destroyed by the end of the game (it is a tactical advantage to leave no witnesses of an enemy leader's demise or capture). The player that scores the most points wins; otherwise the game is a draw.
Mission 5 — Extract
After rolling for Set-up type, and just before starting the Set-up Forces step, the players roll off and the winner picks any table edge, long or short, for his opponent to escape from. Then his opponent does the same, but he cannot pick the same table edge picked by the first player.
Any model that moves into contact with the 'extraction point,' which is the point in the exact center of the chosen table edge, is removed and counts as Escaped. If enemy models are placed to block the extraction point, models can escape as near as possible to the extraction point, on either side of the blocking models.
At the end of the game, each player totals up the points value of his own models that have Escaped the battlefield. Each friendly model Escaped is worth a number of points equal to its cost in points when purchased for the force (including any upgrades). Resilient models that are damaged before they Escape are worth half their cost in points (rounding up).
Subtract the total of the lower scoring player from the total of the higher scoring player. If the difference between the totals is 10% or more than the Game Size (e.g., 200 points in a 2,000 point game), the player with the higher total is the winner. Otherwise, the game is a draw.
Mission 6 — Retrieve
Move the area of dense terrain that is closest to the center of the table so that it is in the center of the table, and then place an objective marker in it, exactly on the center of the table. This marker represents a small object, like an endoskeleton's damaged skull, whose chip contains the coded plans for a new weapon of great power (a more efficient TDD, a lethal virus or chemical weapon, etc).
During the game, any model that ends its move in contact with the marker picks it up. That model is now carrying the object, and will carry it until it leaves the table or is destroyed. As long as it's carrying the object, the model cannot Attack and cannot make double moves, for fear of damaging the delicate and precious intel! At the end of its activation, the model can pass the object to a non-reeling friendly model within CC range, as long as neither model is within CC range of a non-reeling enemy. The model receiving the object immediately receives a Done marker, if it does not have one yet.
If the model carrying the object is destroyed or becomes Reeling, the object is immediately 'thrown' a Walk template distance in a random direction (stopping if the object moves into contact with Impenetrable terrain). If it lands on top of a model, the model immediately picks it up, except if there is also an enemy model within Close Combat range of it (not counting Reeling models), in which case it is 'thrown' again.
If the model carrying the object moves into contact with any table edge, it has Escaped with the object, and the player immediately wins the game.
If the game ends while a model is carrying the object, the players roll off one last time. If the player controlling the model carrying the objective wins the roll-off, he wins the game. In any other case, the game is a draw.
Set-up Type
The player that did not roll for Missions rolls a D6 and consults the chart below to determine how the forces deploy for the game.
| Die result | Set-up |
|---|---|
| 1 | Incursion |
| 2 | Battle Lines |
| 3 | Narrow Front |
| 4 | Cornered! |
| 5 | Rapid Insertion |
| 6 | Fog of War |
1) Incursion
The players roll-off and the winner chooses which long table side belongs to him (or any edge if you are playing on a square area). The opponent gets the opposite table edge (see diagram). Models are not set up on the table at the start of the game. On the first turn of the game, all models that have not been placed in reserve must enter the game — when one of these models is activated, it moves onto the table from any point along the player's table edge.
2) Battle Lines
The players roll-off and the winner chooses which long table side belongs to him (or any edge if you are playing on a square area). The opponent gets the opposite table edge.
The winner of the roll-off then places one model anywhere within a Crawl template of their table edge (see diagram). The opponent does the same. Then the first player places another model, and the two keep alternating until all models have been set up.
3) Narrow Front
The players roll-off and the winner chooses which short table side belongs to him (or any edge if you are playing on a square area). The opponent gets the opposite table edge.
The winner of the roll-off then places one model anywhere within a Walk template of their table edge (see diagram). The opponent does the same. Then the first player places another model, and the two keep alternating until all models have been set up.
4) Cornered!
The players roll-off and the winner chooses which corner of the table belongs to him. The opponent gets the opposite corner. The winner of the roll-off then places one model anywhere within a Run template of their table corner (see diagram). The opponent does the same. Then the first player places another model, and the two keep alternating until all models have been set up.
5) Rapid Insertion
The players roll-off and the winner places a homing beacon (a marker or a coin) anywhere more than one Run template from the table's middle line (see diagram). The opponent does the same on the opposite side of the table's middle line (see diagram). Both players then move their homing beacons one Walk template in a random direction, as indicated by the roll of a D10 (see page 14), stopping if the beacon moves into contact with Impenetrable terrain.
Models are not set up on the table at the start of the game. Players must leave half of their models in reserve (rounding down). On the first turn of the game, the remaining models enter the battle by rapid insertion — when one of these models is activated, it is placed anywhere within one Walk template of its landing beacon. After being placed, the model immediately takes a Resolution test using a D20, regardless of its Resolution. The effects of this Resolution test represent the dangers of this type of rapid deployment. If this test is successful, the model's activation ends immediately — place a 'Done' marker next to it.
6) Fog of War
The players roll-off and the winner chooses which long table side belongs to him (or any edge if you are playing on a square area) — this is the South Edge. The opponent gets the opposite table edge (North, see diagram). Models are not set up on the table at the start of the game. Players must leave half of their models in reserve (rounding down). On the first turn of the game, the remaining models enter the battle at random locations — when one of these models is activated, the player rolls a D10 and consults the chart below. The chart details the point of the table edge from which the model enters. If this is impossible, because that point has been blocked by Impenetrable terrain or models, models enter as near as possible to that point.
| Score | Result |
|---|---|
| 1 | The opponent chooses one of the results below (or places the model in Reserve). |
| 2 | Enter from the center of the North edge. |
| 3 | Enter from the Northeast corner. |
| 4 | Enter from the center of the East edge. |
| 5 | Enter from the Southeast corner. |
| 6 | Enter from the center of the South edge. |
| 7 | Enter from the Southwest corner. |
| 8 | Enter from the center of the West edge. |
| 9 | Enter from the Northwest corner. |
| 10 | You choose one of the results above (or place the model in Reserve). |
Set-up Forces
Except for Incursion and Fog of War, in which no models are set up, the winner of the roll-off for Set-up type begins setting up his first model as described by the set-up type. Once he is done, his opponent sets up one of his models in the same way. The players then continue alternating until one of the players runs out of models. The opponent finishes setting up all of his remaining models, and the game is ready to begin.
When a model that is not set up on the playing area moves onto the table, measure the move from its entry point by placing the appropriate template in contact with that point on the table edge, at any angle, and then the model in contact with the template, as normal.
Begin the Game
Once the forces have been set up, the players begin Turn 1 of the game with a Tactical roll-off.
Roll for Game End
At the end of the fifth turn of the game, the player with the Tactical Edge rolls a D4. If the result is 4, the game ends.
If the game continues, at the end of the sixth turn, the player with the Tactical Edge rolls a D6; if the result is 4 or more, the game ends.
If the game continues, at the end of the seventh and following turns, the player with the Tactical Edge rolls a D20. If the result is 4 or more, the game ends.
Determine the Winner
After the game ends, the players determine the winner as described in the mission they are playing.
Reserves
You can always decide that up to half of the models in your force (rounding down) are not deployed on the table during initial Set-up, and are instead left in Reserve. The models which are left in Reserve are declared before beginning to set up models.
Models in Reserve must be activated just like models on the table (but Commanders in reserve cannot use their special abilities).
In Turn 1 of the game, when you activate a model in reserve, it does nothing; simply mark it as Done.
From Turn 2, you can decide that the model remains in reserve when activated, as above, or you can try to bring the model in from Reserve — take a Resolution test for the model using a D20, regardless of its Resolution.
| Score | Result |
|---|---|
| 6-20 | The model enters the table as described in Set-up 6, Fog of War. |
| 2-5 | The model is Reeling (delayed) and is marked with two Done markers, meaning that it will have to wait this turn and the next before being able to try again to join the battle. |
| 1 | The model is destroyed by an enemy ambush or a mine! |
In scenarios where models can leave the playing area, they cannot do so in the same turn they arrive from reserve or from initial set-up — they must spend at least one entire turn 'in play.'
Advanced Rules — Setting up in Transports
Models can be set up inside a model with the Transport special ability up to its Transport capacity — the player simply declares that the model is set up in a specific Transport and sets it aside, in the same way as a model boarding the transport.
Models may also be left in Reserve already set up inside a transport. These models are always marked Done when activated and cannot leave the transport while in reserve. They can only enter the battle together with the transport.
If their transport is destroyed by a result of 1 on the Resolution test to enter the game, the passengers suffer damage as described in the Transport section. Any survivors are marked as Done and left in reserve for that turn — this represents them extricating themselves from the wreckage and making their way on foot to the battlefield.
Larger Playing Surfaces
You may want to play a game with vast forces on a larger surface; for example a 4'x4' or 6'x4' table. This is entirely possible, and great fun, but you will have to make a few adjustments to the rules.
Using a Tape Measure
Players can measure distances with a tape measure instead of (or as well as) the templates when playing on a larger gaming surface, as shown in Diagram 13. The Crawl template is 2" long. The Walk template is 5" long, and the Run template is 11" long. Models with the Extremely Fast special rule can move up to 48" when making a double move.
Extreme Range
You need to use a further 'band' of range — Extreme range. This means more than two Short range templates away, or simply more than 22" away. So, when checking range to a target that is further away than Short range, aim the Short range template at the target and then flip it over, in the same direction, as shown in the diagram.
The best solution is without a doubt to use a tape measure — Long range ends at 22" from the model. Extreme range is more than 22" away.
If the target is within range of this second template, or within 22", it is in Long range as normal (hit on 6+), but if it is further away, it is said to be in Extreme range and you need a 7 to hit.
| Range | CC | Pt-Blank | Short | Long | Extreme |
|---|---|---|---|---|---|
| Range (within) | 2" | 5" | 11" | 22" | 72" |
| To Hit | 3+ | 4+ | 5+ | 6+ | 7+ |
In addition, only Long-ranged weapons with the Brace or Sniper special rule are able to fire into Extreme range.
VTOLs that are not landed are always in Extreme range rather than Long.
Finally, all models of Size 3 or less (including Machines and vehicles!) are in cover when shot at in Extreme range, except of course when hit by weapons that ignore cover.
Set-up
When playing on surfaces that are much larger than the playing mat, you will need to adapt the set-up distances of the scenarios played. For example, if playing on a 6'x4' table, double all set-up templates — use the Walk template instead of the Crawl template, the Run instead of the Walk and two Run templates (or 22") instead of the Run template.
Game Length
When playing on surfaces that are much larger than the playing mat, like a 6'x4' table, start rolling for game end on turn 8 rather than 5. So roll a D4 on turn 8, a D6 on turn 9 and a D20 from turn 10.
Diagram 13 — Using a Tape Measure. The Resistance soldier makes a Walk move, using a tape measure. The Resistance soldier is moved 5". Note how the model is placed, with its base touching the end of the tape measure — the actual distance moved is 6".
Diagram 14 — Extreme Range. Resistance Soldier 1 fires at Endoskeleton A, which is within Extreme range (22") of him.
Mixing It Up
Multiple Missions + Multiple Set-Ups
If both players agree, each player can roll for his own mission, so that potentially each side is trying to achieve a different set of objectives. You can of course do the same with set-up types, instead of or as well as the missions. This kind of mixed up scenario can be somewhat unbalanced, and might need some friendly agreement in case of rules conflict, but it can also generate some very entertaining games! We think they're a must-try for veteran players.
If you like this, you can even go as far as rolling a number of different missions per player, up to three different missions per player.
Secret Missions
You could also roll for secret missions. First deploy the objectives as per all of the missions that include objectives, and the intel marker for Mission 6. Then each player rolls secretly for his mission(s), or simply chooses and writes it/them down. Once again, this can create complications, but can be great fun.
Friendly Metal + Traitors
For unusual games, you can spend a maximum of a quarter (25%) of your points in models from another faction — this represents machines that have been acquired and re-programmed by the Resistance, and human collaborators of the Machines... which should expect no quarter if they are captured.
If both players agree, Machines forces can include 25% of points from the Resistance (USA) list, and Resistance (USA) forces can include up to 25% of their points from the Machines list. Note that the limits of 50% of non-vehicle, non-command models, as well as the 'rare' and 'unique' limits, must still be respected by the overall force.
Force Lists
Listed here are the stat-lines and special rules for all models and weapons in the two opposing factions of the War Against the Machines: the Human Resistance and Skynet's Machines.
Transcription note: the unit stat-line catalogues, weapon charts and faction flavour text of the force lists (pages 63-71 and 128-134 of the printed book) are not reproduced here; this file keeps the force-building rules and the general rules that govern how the lists are used. The stat-lines are on the printed pages and in the official force lists.
Using the Force Lists
Before a game, the players should decide how large a game they are going to play. This is normally done by agreeing on a Game Size, which is the maximum total points each player can spend on his 'force' (or 'army'). For example, you can agree a Game Size of 250 points, 500 points, 750 points, 1,000 points and so on. Then, each player will refer to his own force list and follow the instructions there telling him how to assemble his force.
Each force list has different guidelines about how to form a force, but in all cases the points total of the force is determined by adding together the points value of each model included in it. Players can spend less than the agreed Game Size's total value, but cannot go over the total.
When determining how large a game to play, players should keep in mind that the larger the forces, the longer the game is going to last. For example, a '500 points a side' game will last probably an hour or so, while a '1,500 points a side' game can last for several hours.
Force Selection Limits
The following limits apply to each player when selecting their force:
Commanders and Vehicles. A maximum of half (50%) of your points total can be spent on models that have the Command and/or the Vehicle rule.
Rare Models/Wargear. The access to some models and some weapon options is limited, representing rare/expensive units and wargear. When this is the case, it will be stated in their entry, and expressed as follows: "One model per 250 pts can replace Assault Rifle with Grenade Launcher for +7 pts." or "Only one model of this type can be included per 250 pts." These limits refer to the Game Size for which the force is being assembled, not the actual total of points you spend. For example, in a force for an agreed Game Size of 500 points, you can have up to two grenade launchers (see above), even if the actual total of your points is 498.
Unique. Models with a [1] are unique individuals and can only be included once in any force.
Additional TDD Agents (Human Resistance)
A Resistance force includes one free TDD agent, as explained in the rules. In addition, you can purchase additional TDD agents at the following cost: the 2nd agent costs 25 pts; the 3rd agent costs 50 pts. In addition, a single agent can be upgraded to a heroic, commander-level operative (rolls off using a D10 rather than a D8) for +15 pts.
Narrative Scenarios
These scenarios are more story-driven, recreating an event of the War Against the Machines or even a fire fight set in the past against Terminators sent back in time to change history.
As we have said earlier, the best way to learn this game is to set up your models and terrain on the playing area and just try to annihilate the enemy — last man (or machine) standing wins. Although these games can be fun, they aren't likely to be fair — in all likelihood the player controlling the terminators will crush the Resistance into submission. If you want to try more balanced games, where both players begin with equal advantages and disadvantages, and victory is more likely to be determined by cunning tactics and skilful play, it's recommended that you play the Battle Scenarios presented after the rules, on pages 44-59.
Battle scenarios can be played using any forces, with as few or as many models on each side as you want, as explained by the force selection rules on page 62. They can be played just using the items from the game box, but can also easily accommodate the players' own collection of models and terrain, and can be adapted to suit larger or smaller playing areas. We recommend that you play a few Battle scenarios before going to the Narrative scenarios.
Narrative scenarios are very different from Battle Scenarios. They are story-driven scenarios that pit the forces of the Resistance against the relentless Machines — they describe in more detail the reason why your forces are fighting each other. The game itself becomes a story, with the models as courageous heroes desperately attempting to achieve their objective in the face of the relentless advance of inhuman machines bent on their utter destruction.
Each scenario has a set objective and set-up procedure, and the two sides must be chosen from forces that fight each other in the War Against The Machines. Most of these scenarios are specifically designed to be played using several miniatures and terrain that are not included in the Terminator Genisys game set, but there are options for players who want to field forces comprised of different troops.
It is important to notice that quite a few of these scenarios are intentionally unbalanced. Many are more difficult to win for one side than the other, setting a tough challenge for one of the players (often the player controlling the humans). If you wish, however, you can still make such scenarios perfectly balanced, making sure both players stand an equal chance — simply play the scenario twice, swapping sides! Then, after you have played on both sides, you can compare your results with that of your opponent and see who has done best overall.
There are three types of Narrative scenario included in this rulebook:
- Infiltrators Scenario. This multi-objective scenario represents attacks by Skynet's Infiltrators against an underground Resistance base.
- The War Against the Machines. These scenarios describe story-driven encounters between the Resistance and Skynet's forces during the War Against The Machines.
- Terminator Genisys Campaign. These two scenarios set the scene for a series of interlinked scenarios, which allow players to play through the action from the Terminator Genisys movie. Note that the entire campaign is not in this book, and will be released after the movie launch date on the River Horse website.
Narrative Scenario Format
Each Narrative scenario is set out in the same format:
- Introduction. A brief overview of the scenario, presenting the story behind the game.
- Assemble Forces. Explains which side is the attacker and which is the defender, and the models that each side uses for the scenario.
- Terrain. Details how to set up the playing area for the game. Features a map showing the placement of terrain, as well as deployment areas and other deployment information.
- Objectives. Lists the objectives that each player needs to achieve to win the game. For some scenarios, there are two classes of objective: Primary Objectives and Secondary Objectives.
- Deployment. Describes how the forces should be set up on the playing area before the first turn of the game begins.
- Tactical Edge. If one or both sides use a different die for their Tactical Roll-Off in any turn, this is mentioned here.
- Game End. Details how long, in turns, the game lasts.
- Victory! This section details the victory conditions, based on which player achieves which objectives.
- Special Rules. If the scenario has any special rules, these are listed here. Special rules take precedence over the basic rules of the game, but only apply when playing the particular scenarios that contain them.
If a player achieves both his Primary Objective and his Secondary Objective, he wins a Major Victory. If he only achieves his Primary Objective, he only wins a Minor Victory. It's normally impossible to secure a Secondary Objective without first achieving the Primary Objective.
Creating Your Own Scenarios
Feel free to create your own scenarios. The best way to do this is to sit down with your opponent, review the models and terrain available to you, and start from there. Forces, terrain, Tactical Edge and the details of the victory conditions are all open to agreement. Balance is important too, and the best way to achieve this is to play the scenario several times, talk with your opponent about how you can improve the story, and make any adjustments. When you're happy with your scenario, file it away for future play.
Alternative Forces
If you want, you can use any types of models in any of the scenarios you play. Refer to the section on game size and assembling forces in the Battle Scenarios section on page 46 for more details on how to do this.
Setting Up Terrain
If you and your opponent agree, instead of being restricted to setting up terrain as dictated in the scenario rules, you can set up terrain as you wish, using the guidelines for placing terrain on page 46 of the Battle Scenarios section.
For the Narrative scenarios featured in this chapter, it is best to use terrain pieces that are applicable to the War Against The Machine era, such as ruined buildings, burned-out vehicles, skull-filled craters and blasted wilderness.
Infiltrators Scenario
A number of terminators, clothed in living flesh and disguised as Resistance fighters, have infiltrated a human hideout. As soon as a terminator's presence is revealed, it lets rip with its plasma rifle, seeking to utterly eliminate the humans.
This Scenario is designed to be played on the Underbase side of the play mat. The Underbase includes corridors, small rooms and four large rooms that have specific roles in the scenario objectives and special rules: the Armory, Sick Bay, the Power Plant and the Command Center.
The objective of the Resistance is always to survive the attack, but the objective of the Machines varies — it is rolled randomly before the game — which means this scenario is actually six Scenarios in one.
Assemble Forces
- The Machines player is the attacker. The Resistance player is the defender.
- Machines: One, two or three cyborg infiltrators, armed with terminator claws and plasma rifles. Note that the attacker is free to choose the number of Infiltrators he uses — this will be compensated by the number of Reinforcements available to the defender (see the Reinforcements rule below). If you do not have a cyborg infiltrator model, you can use an appropriately-armed Resistance fighter model to represent it (make sure you use a model that can be easily identified).
- Resistance: 1 Resistance Captain with a combat knife and plasma rifle (if you don't have a suitable model, place a 'Command 2' marker next to the model designated as the leader, to identify him as such), plus 8 Resistance soldiers, each with a combat knife and plasma rifle, shotgun or assault rifle. Three of the soldiers have a sniffer dog (use the Sniffer Dog markers to represent these). Note that in this scenario, the Resistance Captain has the Resilient (2) special rule.
Terrain
Set up the play mat with the Underbase side face up. The defender then places the two barricades across any corridor. No other terrain is used in this scenario, unless the players agree otherwise.
Objectives
- Resistance: The Resistance player's objective is to either destroy all the Infiltrators or stop the opponent from achieving his objective.
- Machines: The Machines player rolls a D6 to determine his objective:
| Score | Objective |
|---|---|
| 1 | Destroy Power Plant |
| 2 | Capture Command Center |
| 3 | Execute |
| 4 | Seek and Destroy |
| 5 | Homing Beacon |
| 6 | Terminate |
Destroy Power Plant. You achieve this objective as soon as you spend an activation attacking in close combat one of the walls in the Power Plant room (see the scenario map). This represents the terminator ripping apart the mechanisms of the Power Plant, destroying them utterly, and rendering the underground base uninhabitable for humans.
Capture Command Center. If one of your models is in the Command Center room (see scenario map) when activated, roll a Fate die. If you score a 'Fate' result, the model has connected the Command Center's servers to Skynet, allowing Skynet to feed on all the valuable information stored there, severely compromising the battle plans of the Resistance.
Execute. You achieve this objective as soon as the Resistance Captain is destroyed.
Seek and Destroy. An item of immense value to the Resistance is hidden somewhere in the base. It must be destroyed.
The defender places the eight Objective markers in a room (not corridor) within the base — you can't place an Objective marker in a room that already has one. Make sure no one sees the numbers on the underside of the markers while placing them — these numbers must remain hidden until revealed. The markers cannot be moved during the game.
Roll a D8 after all the markers have been placed. This is the Objective number — note this down.
As soon as one of your models touches an Objective marker, you can reveal its number. If that number is equal to the Objective number, your model has found and destroyed the item it was searching for, and you win the game. Otherwise discard the marker, and you must continue looking for the objective.
Homing Beacon. The infiltrators must penetrate the base, verify its importance and then act as a homing beacon for a tactical nuclear strike against this bastion of resistance. You achieve this objective if one or more of your models moves into any of the base's four main rooms and then survives until the game ends — at this point Skynet is able to home in on the terminator's position with a bunker-busting nuclear missile, vaporizing the base and all its occupants.
Terminate. You achieve this objective as soon as all Resistance models are destroyed, and the Resistance player has no reinforcement groups left to deploy.
Deployment
- Resistance: Starting with the defender, each player takes it in turn to place one Resistance model that has not yet been placed in any room on the play mat. Only one model can be placed in each room. After all available Resistance models have been placed, the defender can give any three of them a Sniffer Dog marker.
- Machines: The cyborg infiltrators are placed at the main entrance, anywhere within the area highlighted on the scenario map. They have not yet been revealed as terminators.
Tactical Edge — The Machines player uses a D20 for his Tactical Roll-Off each turn, until any Infiltrator is revealed, after which point the Tactical Roll-Off is determined according to the normal rules.
Game End — To determine when the game ends, keep track of each turn. At the end of the sixth turn of the game, the player with the Tactical Edge rolls a D4. If the result is 4, the game ends. If the game continues, at the end of the seventh turn, the player with the Tactical Edge rolls a D6. If the result is 4 or more, the game ends. If the game continues, at the end of the eighth and each following turn, the player with the Tactical Edge rolls a D20. If the result is 4 or more, the game ends.
If you find that the game is too difficult or too easy for the players, you can adjust this by starting to roll one (or more) turn earlier or later.
Victory! The Machines player wins the game if he achieves his objective. If he fails to achieve his objective by the end of the game, or if all Machines models are destroyed, the Resistance player wins.
Special Scenario Rules
- Walls. Walls block line-of-sight and count as Impenetrable terrain.
- One of Us. Until they are revealed, cyborg infiltrators are treated as fellow humans by the Resistance soldiers. When the Resistance player is about to activate a model that does not have a sniffer dog, and no Infiltrators have yet been revealed, the Machines player rolls a die. If an odd number is rolled, the Machines player can control that model (remember, models cannot attack friendly models).
- Terminator! Terminator! When the first infiltrator is revealed (see page 70) the terminator is identified and the alarm is raised. The 'One of Us' rule above stops working and instead the 'Mayhem' rule below starts to apply.
- Mayhem. After the first Infiltrator is revealed, play continues as normal, except that every turn after the last terminator is activated, the Resistance player only gets to make a single Fate roll before the turn is over. If no terminators can be activated that turn (all Done or Reeling), the Resistance only gets a single Fate roll per turn.
- Confined Space. In the cramped confines of the human hideout, the humans do not want to risk accidentally shooting their friends and families who are hiding in the shadows in terror from the rampaging terminators — all weapons used by Resistance models count as ROF 1. The terminators, of course, have no such restrictions. For the same reason, any Resistance model armed with a grenade or rocket launcher (see below) can only fire it at a target within Short range, to try to avoid the chance of a misdirected shot causing collateral damage.
- The Armory. Any Resistance model that begins its activation within the Armory (see scenario map) can immediately end its turn and gain a Done marker to swap its plasma rifle for a rocket launcher (AT) or a grenade launcher — replace with an appropriate model. Note that this can only be done up to four times during the game — two grenade launchers and two rocket launchers. Models cannot re-arm themselves if the Armory is destroyed (see below).
- Ka-boom! If a rocket launcher is fired at a target within the Armory or the Power Plant, roll a Fate die. If a 'Fate' result is rolled, the explosion sets off the ammo stored in the Armory or the fuel stored in the Power Plant. Roll to damage all models within the room at Power D20 (if they survive take a degraded Resolution test, as normal). The room counts as having been destroyed, becoming Impenetrable like a wall.
When a Resistance soldier with a plasma rifle is removed from the game (including if swapped out for a model with a rocket launcher), place it in a Reinforcements pool to one side of the playing area. When there are four models in the Reinforcements pool, the defender must immediately place them as a reinforcement group anywhere within the Reinforcements area shown on the scenario map. Keep track of the number of reinforcement groups placed — the defender cannot place more reinforcement groups than he is allowed to deploy according to the rule above.
Note that no model from either side can move into the Reinforcements area. Models placed there as reinforcements can move through the area in order to move out of it, but cannot move back into it at a later stage of the game. This is to ensure that the area is always kept clear for the placing of reinforcements.
The War Against the Machines Scenarios
These scenarios represent typical encounters between the Resistance and Skynet's murderous machines during their ongoing conflict. They are perfect if you want to play a game with a stronger narrative than a Battle Scenario.
Liberty or Death!
John Connor's conflict against the Machines involves countless battles and skirmishes. However, every casualty brings the Resistance one step closer to defeat, and the only way they can quickly compensate for their losses is to rescue Captive humans from the clutches of their machine overlords. This scenario represents a daring raid by Connor's freedom fighters to liberate a workforce of human slaves under escort by ever-watchful endoskeleton guards.
Assemble Forces
- Resistance: You have 1 to 3 units of Resistance. Each unit is comprised of 3 Resistance soldiers with combat knives and plasma rifles and 1 Resistance soldier with a combat knife and a rocket launcher (AT) or grenade launcher. One model armed with a plasma rifle in your force is a Resistance Captain (Resolution D10, Special: Command 2). If you don't have a specific Captain model, place a Command 2 marker next to the model to show that it's the leader.
- Machines: You have 2 endoskeletons with terminator claws and plasma guns, plus 2 more per unit in the Resistance force. In addition, you have 2 similarly armed endoskeletons who can come on during the game as reinforcements. You also have 4 unarmed and chained human slaves (use human models that can be easily distinguished from those in the Resistance force, perhaps by marking their bases with a bit of sticky tack or using a suitable token).
Terrain
Set up the mat and the terrain pieces as shown on the map. The playing area represents the place where the Resistance soldiers' ambush takes place.
Objectives
- Machines
- Primary Objective: Guard the Slaves. You achieve this objective if there are more slaves in play than freedmen at the end of the game (see below).
- Secondary Objective: Devastate the Enemy. You achieve this objective if, by the end of the game, you have achieved your primary objective, plus over 50% of your opponent's models are destroyed.
- Resistance
- Primary Objective: Rescue the Slaves. You achieve this objective if, at the end of the game, there are more freedmen in play than slaves (see below).
- Secondary Objective: Devastate the Enemy. You achieve this objective if, by the end of the game, you have achieved your primary objective, plus over 50% of your opponent's models are destroyed.
Deployment
The Machines player deploys first, placing all his slave models within one Crawl template of the dead center of the playing area. He then places all his Machines models within one Walk template of the dead center of the playing area.
The Resistance player then places all his models anywhere on the playing area, but no closer than a Run template to any enemy model or slave model.
Tactical Edge
In the first turn of the game, the Resistance player rolls a D20 for his Tactical Roll-Off, to represent the sudden, unexpected attack of his men. In subsequent turns, the Tactical Roll-Off is determined according to the normal rules.
Game End
The game lasts for 6 turns, or until one side is wiped out. If one side is wiped out and the surviving side is the Resistance, all slaves on the playing area count as rescued.
Victory!
When the game ends, the player who achieves his side's primary objective wins the game. If the winner also achieves his secondary objective, he scores a major victory. If no one has achieved their primary objective when the game ends, it's a draw.
Special Rules
Slaves. The Machines player controls slave models. They have the following stats:
| Skill | Armor | Resolution | Special |
|---|---|---|---|
| D4 | 3+ | D12 | Fist |
Note that their low Skill stat represents the fact they are half-starved, and their low Armor is due to them wearing nothing but rags. Their high Resolution represents the fact that they are completely dominated by the will of their Machine masters. In addition, because of the heavy chains they are burdened with, they cannot make double moves. Importantly, although slaves are under the control of the Machines player, Resistance models treat them as friendly, so a cunning and ruthless Machines player can use them as human shields!
Rescuing Slaves. A Resistance model can make a close combat attack on a slave, even though it regards the slave as friendly. This is not an attack on the slave itself, but an attempt to free the slave of his chains. If the attack hits, instead of carrying out the usual attack procedure, the slave's chains are broken and he no longer counts as a slave, but a freedman.
A freedman counts as a Resistance model, with the same stats as a slave (his burning desire for freedom accounts for his high Resolution). Because they are no longer restricted by chains, they can move as normal.
The endoskeleton guards have been programmed to recapture escaped slaves that pose no immediate threat, as they are a more useful commodity alive than dead, so regard freedmen as friendly unless they are armed with anything other than fists (see below).
Arming Freedmen. The Resistance freedom fighters have not come empty-handed — they have brought sufficient spare weapons to arm any slaves they set free. As soon as a slave model becomes a freedman, it may immediately equip with weapons given to it by its rescuer simply by gaining a Done token. It then becomes equipped with a combat knife and a plasma rifle (add a token to show that it is now armed for combat). However, it now becomes a viable target for its Machine guards, as it poses a threat to them.
Note that a Resistance model cannot arm more than one freedman per game (use tokens to show which models have armed freed models). Also, although a freedman can free a slave, he can't arm the freed slave as he has no spare weapons.
Escape! Any Resistance model can move off the edge of the playing area in this game. The advantage of this is that a freedman who does this cannot be recaptured. A freedman who moves off as the result of a move counts as 'in play' for the purposes of determining victory.
Note that a freedman who Retreats as the result of a Resolution Test counts as destroyed as normal — in his blind panic he is easily recaptured later on by another endoskeleton patrol, or succumbs to the deadly environment of the ruined wasteland.
Recapture. A Machine model can make a close combat attack against a freedman, even if it regards it as 'friendly'. If it hits, instead of carrying out the usual attack procedure, the Machine recaptures the freedman, who becomes a slave again, losing any weapons he might have. The recaptured slave gains a Done token and becomes chained again, restricting its movement as before.
Total Termination
This scenario represents an all-out attack on a major Resistance base that Skynet has located. It commands its forces to overwhelm the occupants and terminate all human life there. Worse still for the defenders, a couple of terminators have successfully infiltrated the base, imperiling them from the very heart of their defenses. The defending soldiers are doomed to die, but if they sell their lives dearly, they may force their enemy to expend all its reserves in a desperate firefight just outside the entrance to the base. Hopefully, this sacrifice will allow the non-combatants to escape, thwarting the Machines' intentions to utterly eliminate this pocket of human survival.
Assemble Forces
- Resistance: You have 12 Resistance soldiers with combat knives and plasma rifles, 2 Resistance soldiers with combat knives and grenade launchers and 2 Resistance soldiers with combat knives and rocket launchers (AT). One soldier may be given a sniffer dog (use the Sniffer Dog marker to represent this). One model armed with a plasma rifle in your force is a Resistance Captain (Resolution D10, Special: Command 2). If you don't have a specific Captain model, place a Command 2 marker next to the model to show that it's the leader.
- Machines: You have 10 endoskeletons with terminator claws and plasma guns. You also have 2 cyborg infiltrators with terminator claws, a pistol (concealed) and a plasma rifle. These are not placed until after the game has started. If you do not have Infiltrator models, don't worry — all will be revealed as you read on.
Terrain
Set up the mat and the terrain pieces as shown on the map. Note that four barriers are set aside to be placed by the Resistance player during deployment.
Objectives
- Machines
- Primary Objective: Eliminate Enemy. You achieve this objective as soon as there are no enemy models on the playing area.
- Secondary Objective: Total Termination. You achieve this objective if you eliminate the enemy (see above) by the end of Turn 6.
- Resistance
- Primary Objective: Die Hard. You achieve this objective as soon as your opponent is forced to deploy his fourth attack wave.
- Secondary Objective: Die Harder. You achieve this objective if your opponent is forced to deploy his fourth attack wave before the end of Turn 6.
Deployment
The players roll off and the winner chooses which long edge of the playing area belongs to him. This is his deployment edge. The opponent gets the opposite edge as his deployment edge.
The winner of the roll-off then places one of his models anywhere up to one Walk template away from his table edge (see map). The opponent does the same. Then the first player places another of his models, and the two keep alternating until all models have been set up.
Instead of deploying a model, the Resistance player can instead deploy one of the four barricades he has set aside. He can place these anywhere on his half of the playing area. Once he has deployed all four barricades, he can place no more. He can place these adjacent to, but not on top of his models.
Alternatively, the Resistance player can place a potential mine field. He takes an appropriate marker (an Objective marker is the correct size) and places it anywhere on the playing area except within the zone where he deploys his models. He cannot place a Minefield marker so that it touches any model, and it cannot touch any terrain apart from a hill. Once he has placed eight Minefield markers, he can place no more.
Note that the Machines player cannot deploy either of his Infiltrators during this phase of the game. They are lurking somewhere in the Resistance base, biding their time.
Tactical Edge — Follow the usual Tactical Roll-Off rules.
Game End — The game lasts until one side achieves its primary objective.
Victory! The player who achieves his primary objective first wins the game, and if he scores his secondary objective, wins a major victory.
Special Rules
-
Minefields. If any model approaches within a Walk template distance of the center of a Minefield marker, the Resistance player must roll a Fate die. If a '1' is rolled, the marker is a dud and removed with no effect. If a '2' is rolled, the marker remains where it is, remaining a potential danger. If 'Fate' is rolled, the model has set off a mine and suffers an automatic hit at Power D10. If he survives, the model immediately gains a Done token to represent it being hurled to the ground by the explosion and then also takes a Resolution test. Note that the model might gain another Done token as the result of a Resolution Test, representing the fact that the blast was particularly incapacitating. The Minefield marker remains where it is.
-
Special Infiltration. The Infiltrators in this game do not deploy following their usual special rules. Instead, they are somewhere embedded in the Resistance force, acting as normal Resistance soldiers until it is the right time to strike.
At the end of the Deployment phase, the Machines player should secretly write down on two separate small pieces of paper which two Resistance soldier models (chosen from those armed with plasma rifles) are the embedded Infiltrators. It's useful to paint a different number under the base of each soldier model before the game to make identification easy. He then gives both pieces of paper, folded over, to his opponent, who cannot look at them until allowed to do so.
Until revealed, these two models are controlled by the Resistance player (who doesn't know they are Infiltrators). Until revealed, they act as Resistance models with stats the same as those of a normal Resistance soldier.
All Machine models treat these two models as friendly (an astute Resistance player might be able to work out who's a potential threat by noting which of his models are not being targeted). If a hidden Infiltrator is accidentally attacked and damaged, it is not removed, but rather it is revealed and automatically replaced with a crawler under the control of the Machines player (follow the rules for when an endoskeleton turns into a crawler) — spooky!
Other than this, each Infiltrator will only come into play as the result of two occurrences: either the soldier with the sniffer dog unmasks it (see Alarm! below), or the Machines player reveals it (see Terminate! below).
-
Alarm! When the soldier with the sniffer dog gains a Ready token, he can immediately 'sniff' any and all friendly models within Close Combat range of him (this is the only time during his turn that he can try to 'sniff out' any enemy infiltrators). The Machines player must reveal whether the model is human or Machine (see below). The turn of the model with the dog is over in any case. Turn the Ready token to Done.
-
Terminate! When executing activations, the Machines player can place a Ready marker next to the disguised model to activate it. That Infiltrator is now revealed (see below).
-
Revealed Infiltrators. As soon as the Machines player reveals a Resistance model as an Infiltrator, he indicates the correct piece of paper identifying the model as such, the Resistance player reads out the text on the paper to verify this, and the Infiltrator (hopefully!) comes into play. That model is now classed as a cyborg infiltrator with terminator claws and a plasma rifle. You can use the soldier model to represent the Infiltrator, giving it a token to show it's a revealed Infiltrator, or replace it with an Infiltrator model if you have one.
The Infiltrator immediately loses any Done tokens it has as its termination program kicks into action. It is now under the control of the Machines player and no longer counts as friendly to Resistance models.
If the piece of paper reveals a different model, there has been a system malfunction in Skynet's command and control program, and the Infiltrator never received its order to embed itself in the Resistance base. The piece of paper is discarded, and that particular Infiltrator cannot come into play. The model identified on the paper is a normal human.
- Attack Waves. The Machines player's initial deployment represents his first attack wave. There are many more endoskeletons waiting in reserve to come on as reinforcements if required. When the Machines player removes an endoskeleton from the game for any reason, he places it in a pool of models kept to one side. When this pool reaches 5 models, the Machines player must immediately place each of these models anywhere touching his edge. Each of these extra deployments counts as another attack wave. If the attacker is forced to deploy his fourth attack wave, the game immediately ends.
Terminator Genisys Campaign Scenarios
These scenarios are designed for those who are familiar with the game, have played the basic scenarios several times and want to move on to something more challenging. They are a little more involved than the basic scenarios, take longer to play and have more difficult objectives. These scenarios take events from the Terminator Genisys movie as an inspiration, and might require specific models or terrain to play them, making them an ideal focus for a terrain-making project.
The Terminator Genisys Campaign
These scenarios are best played sequentially. The results of each scenario have an effect on the subsequent scenario played, as detailed in the Campaign Events section of each scenario. A series of games played in this way creates what we call a 'campaign.' In this case, the campaign recreates the story of the Terminator Genisys movie.
Bear in mind that your version of the story might well end up very different from what happens in the movie!
Fate Points
There's an obvious drawback to playing a campaign based on the movie if any of the major characters are destroyed at any point. These characters are integral to the storyline and their loss would mean an instant victory for Skynet.
To ensure that the major characters survive (at least for the first few games in which they appear), we introduce the concept of Fate points. At the start of the campaign, the Resistance player begins with 10 Fate points. Whenever one of the major characters is destroyed during a game, the player MUST roll a Fate die. He expends an amount of Fate points equal to the number he rolled (a 'Fate' result counts as 0), and the character ignores the damage that should have destroyed him or her, and heroically soldiers on.
If the player does not have enough Fate points left, Fate finally catches up with the character, and he or she is really, truly killed, the game is lost, and the campaign is conceded as a victory to the Machines player. Remember you cannot use a TDD tactic to re-roll a Fate die!
The major characters are: John Connor, Kyle Reese, Sarah Connor and her Guardian — 'Pops.'
Cheyenne Mountain (2029)
After countless years of battle, John Connor finally has Skynet in his sights. He has dispatched Captain Pike Sumner, commander of the Colorado Resistance units, to lead an all-or-nothing offensive against Skynet's stronghold deep within Cheyenne Mountain. Sumner's mission is to secure Skynet's central core, or die trying. The Cheyenne Mountain complex is heavily defended by innumerable endoskeleton troops, Hunter Killers, spider tanks, defensive turrets and other Skynet hardware. In comparison, the only advantage that the human attackers have is a fierce will to fight and die for freedom — will it be enough to secure a final victory?
Refer to the Game Size and Assemble Forces section on page 46. We recommend playing a game size of at least 500 points. In addition, the following limits apply:
- Resistance: The Resistance player can only choose models from The Human Resistance (USA) force list. He must have one of John Connor's Lieutenants in his force — this represents Captain Pike Sumner.
- Machines: The Machines player chooses models from The Machines force list.
The scenario is played on a 4'x4' table. Refer to the Place Terrain section on page 46 for the rules on placing terrain. There should be a lot of 'highland' terrain used, such as hills, boulders, chasms, etc. All terrain should be appropriate for the blasted wasteland that is America during the War Against the Machines.
Objectives
This game has a Primary, Secondary and Tertiary Objective for each side. The objectives are the same for each player.
- Primary Objective: Annihilate. See Mission 1 of the Battle Scenarios.
- Secondary Objective: Occupy. See Mission 2 of the Battle Scenarios.
- Tertiary Objective: Terminate. See Mission 4 of the Battle Scenarios.
Deployment
The Machines player deploys his force using the Battle Lines set up rules on page 51.
The Resistance player can choose to either deploy his force using the Battle Lines set up rules, or, if he wants, to take a risk but deploy closer to the enemy — he can instead choose to deploy his force using the Rapid Insertion rules on page 54.
Tactical Edge — The usual rules for Tactical Roll-Offs are used throughout the game, except during the first turn if the Resistance force has decided to deploy using the Rapid Insertion rules, in which case the Resistance player rolls a D20 for his Tactical Roll-Off.
Game End — Refer to 'Roll For Game End' on page 56 for rules on determining when the game ends.
Victory! When the game ends, each player works out how many of their objectives they have achieved. The player who achieves most objectives wins the game.
If both players have achieved the same number of objectives, each player scores 3 points if they achieved their Primary Objective, 2 points for the Secondary Objective and 1 point for the Tertiary Objective — they total their scores and the player with the highest score wins the game. If both scores are equal, the game is a draw.
Campaign Events
- Resistance Victory. If Captain Sumner's forces are victorious against the Machines, his troops overrun the complex at Cheyenne Mountain and destroy Skynet's core. In response to its imminent demise, Skynet commands a cyborg infiltrator to travel to 1984 via the time displacement device hidden in the hangar of the LAX work camp in order to execute Sarah Connor, ensuring that John Connor is never born and that the events leading to its destruction never happen. Play the LAX scenario next. For every Objective achieved by the Resistance side in this game, the Resistance player gains one Power Down re-roll in the next scenario. This represents the fact that the greater the victory against Skynet's forces, the quicker Skynet's core is shut down following the victory.
- Machines Victory. If the Resistance force's attack against Cheyenne Mountain fails, Skynet still triggers the Infiltrator's time travel trip — it computes that the easiest way to destroy John Connor and end the war is to carry out its plan to kill his mother before he is born. Play the LAX scenario as the next game, except that because Skynet has not been taken off-line by Captain Sumner's troops, none of the Machines will power down and so John Connor and his men will have to fight every inch of the way to access the hangar. Ignore the Going Off-Line special rule in the next scenario.
LAX (2029)
A Skynet work camp, situated amongst the ruins of Los Angeles International Airport, contains a hangar that is an entry point to a labyrinthine underground complex. Resistance surveillance has revealed this secret base to John Connor. He suspects that the complex contains a powerful device that the Machines will protect at all cost. If the Resistance captures it, Connor thinks he can use it to destroy Skynet. He plans a surprise attack against the work camp, where speed is of the essence to seize the objective, for he knows that Skynet will destroy the device rather than allow it to be taken by its enemies.
Assemble Forces
Refer to the Game Size and Assemble Forces section on page 46. We recommend playing a game size of at least 500 points. In addition, the following limits apply:
- Resistance: The Resistance player can only choose models from The Human Resistance (USA) force list. He must have John Connor and Kyle Reese in his force. He also has, for free, a captured prisoner transport truck. The truck has been modified to carry a hull-mounted heavy plasma gun (i.e. a Truck upgraded with additional armor and a heavy plasma gun).
- Machines: The Machines player can only include the following: endoskeletons, Hunter-Killer gunships. In addition, he must have one (and only one) spider tank in his force. The LAX work camp defenses include two defense turrets, each armed with two heavy plasma guns.
Terrain
This game is played out on the play mat, with the LAX work camp defenses (photocopied from page 125) set out as shown on the scenario map.
Objectives
- Resistance: Move John Connor and Kyle Reese off the play area via the hangar entrance (see scenario map).
- Machines: Destroy John Connor and/or Kyle Reese.
Deployment
- Resistance: The only Resistance model deployed at the start of the game is the captured prisoner transport truck. This is placed as shown on the map. John Connor, Kyle Reese and a total of up to 6 Resistance Soldiers, NCOs, Captains and/or Lieutenants begin hidden inside the truck. All other models begin in reserve.
- Machines: Four endoskeletons are deployed outside the work camp, anywhere within Close Combat range of the truck, as shown on the map. Starting with the Machines player, players take it in turn to place an endoskeleton anywhere within the LAX work camp, no closer than a Crawl template to another model.
All Hunter-Killer Gunships and the spider tank begin the game in reserve.
Scenario map (LAX Work Camp) — see the printed book, page 93.
Tactical Edge — The Resistance player counts as automatically winning the Tactical Roll-Off for the first turn of the game. In subsequent turns, the Resistance player uses a D20 for his Tactical Roll-Offs, to represent John Connor's meticulous planning of the surprise attack.
As soon as the Machines player wins the Tactical Roll-Off, however, the normal rules for Tactical Roll-Offs are used — the Machines reconfigure the enemy's potential tactical success quotient into their defensive program pattern (in other words, they recover from the initial surprise of the attack).
Game End — The game ends when either John Connor or Kyle Reese is destroyed, or as soon as both of them exit the gaming area via the hangar entrance.
Victory! At the end of the game, if John Connor and Kyle Reese have entered the hangar, the Resistance player wins. Otherwise the Machines player wins.
Special Rules
- Fortified Walls. These are impenetrable terrain. They cannot be destroyed by the type of weaponry wielded by the Resistance in this attack.
- Defensive Turrets. These are mounted on fortified walls. Each turret is armed with two heavy plasma guns that can fire independently of each other. Each can target any enemy models within line-of-sight outside the perimeter of the wall.
At the start of each turn, each turret counts as being in Ambush mode, and can react accordingly. When interrupting with Opportunity Fire, the turret's first weapon must fire at the model it is interrupting, but its other can fire at another applicable target.
A turret has a Skill of D8, and has the Fire Control special rule. It can be attacked, and has Armor 9+. It never has to take Resolution tests.
- Energy Fences. These count as impenetrable until destroyed, but do not block line-of-sight, nor do they provide cover.
The only way to destroy the energy fences is to destroy the fence generator that powers them. The fence generator is marked on the scenario map. A model that targets the wall on which the generator is situated counts as targeting the generator itself.
Because the fence generator is such a small target, the firing model must degrade its dice roll when shooting at it. The generator has Armor 9+. If destroyed, all energy fences in the outer perimeter wall are also destroyed.
- Ambush. At the start of the game, the truck's occupants are all in hiding, and the heavy plasma gun is concealed. The game begins with the Resistance player taking the Tactical Edge and with Kyle Reese triggering the claymore mines that are rigged on the outside of the prisoner truck. Each model outside the truck and within Close Combat range of it immediately takes an automatic Power D12 hit.
Resistance Reinforcements. If the energy fences are not off-line, a model in reserve moves onto the playing area from the Resistance player's edge (see scenario map). If the energy fences are off-line, a model in reserve can move onto the playing area either as described above or from any point up to a Run template from the player's edge along either of the adjacent edges (see scenario map). This represents troops pouring into the work camp after its perimeter defenses have been destroyed.
Hunter-Killer Reinforcements. From the second turn of the game onwards, the Machines player can activate any of his Hunter-Killer Gunships in reserve. They move on from the Machines player's edge (see scenario map).
The Spider Tank. The Spider-Tank only comes into play at the beginning of any turn when either John Connor or Kyle Reese start their turn within a Run template away from the exit point. As soon as this occurs, the Spider-Tank automatically activates as though it has been in Ambush mode (it is dropped from a passing Hunter-Killer Gunship), and the Machines player places it so that its base touches the exit point and then immediately places a Done marker next to it.
Going Off-Line. The arrival of the Spider-Tank triggers the final phase of this scenario (unless this is a campaign game and the Resistance side failed to win the Cheyenne Mountain scenario). It is at this point that the attack against Cheyenne Mountain has breached Skynet's defenses, and it is only a matter of time before Skynet's core is destroyed and the Machines go off-line.
To determine when this happens, at the end of the game turn when the Spider-Tank comes into play, the player with the Tactical Edge rolls a D4. If the result is a 4, the Machines go off-line. If the game continues, at the end of the next turn, the player with the Tactical Edge rolls a D6. If the result is a 4 or more, the Machines go off-line. If the game continues, at the end of each following turn, the player with the Tactical Edge rolls a D20. If the result is a 4 or more, the Machines go off-line.
If the Resistance player has any Power-Down re-rolls (see the previous scenario), he can use these once a turn to re-roll the die used to roll to see whether the Machines go off-line.
As soon as the Machines go off-line, John Connor and Kyle Reese immediately move into the hangar, and the game ends.
Campaign Events
- Resistance Victory. With John Connor and Kyle Reese within the hangar, the Resistance fighters can secure the work camp and locate the time displacement device in order to carry out Connor's plan to send Kyle back in time to protect Sarah Connor from the Terminator. Play the Guardian Angel scenario next. By this time, Kyle has acquired plenty of experience fighting Terminators close up and personal. Increase his Skill to D10 for the rest of the campaign.
- Machines Victory. If the Machines win, Skynet has won the campaign. If John Connor has been killed, he can't give Kyle the mission to rescue his mother in 1984. If Kyle has been killed, John Connor cannot exist, as Kyle is (was?) his father, and killing Kyle has much the same effect as eradicating Sarah Connor.
Guardian Angel (1984)
The printed book gives this entry as a story teaser only. Its page ends with "To Be Continued...": the next instalment of the campaign is not included in this rulebook, and the printed text refers readers to the River Horse website and to future expansion sets for the final scenarios.
Machine Special Rules (Quickplay Reference)
The Quickplay Reference (page 119) gives the core Machines special rules below. The Endoskeleton profile on that page is: Skill D8, Armor 8+, Resolution D20, Special: Mindless, I'll Be Back; weapons terminator claws (CC, ROF 1, Power D10) and plasma gun (Long, ROF 2, Power D8).
Mindless. Machines never take cover saves.
I'll Be Back. When a model with this special rule is destroyed (except by a 'Hasta la Vista, Baby!' attack or by a Retreat result on a Resolution test), roll a D6. If the result is a 5 or a 6, the model is not actually destroyed, but turns into a crawler instead. When turning into a crawler, the model must also take a Resolution test as normal for surviving a hit.
Crawlers have the profile below. In addition, they are Size 0, cannot make double moves, and treat all barriers as impenetrable. Also, the Mindless rule ceases to apply.
Crawler: Skill D6, Armor 8+, Resolution D20, Special: Slow. Weapons: terminator claws.
Slow. The model uses the Crawl template for a normal move, and uses the Walk template for a double move (but note that Crawlers cannot make double moves).
Errata and FAQs
The following errata and FAQ entries were published by the publisher after the rulebook and are reproduced as printed in the book's errata and FAQ pages (pages 135-138).
Errata — Rulebook
Page 49 — Retrieve Mission. The following will be added:
- Vehicles cannot pick up the object.
- Transports can transport models carrying the object, but cannot make double moves when doing so (they too have to slow down for fear of damaging the intel).
Page 58 — VTOLs and Extreme range. The printed text reads: "VTOLs that are not landed are always in Extreme range rather than Long." This will be changed to: VTOLs that are not landed and are in Extreme range do count as in Extreme range, while those not landed at any other range count as in Long range.
Page 65 — Pops, Machine special rule. The printed text reads: "This model has the Mindless and Fire Control rules (see Machines force list). In addition, enemy Machine models cannot target this model until this model attacks." This will be changed to: "This model has the Mindless and Fire Control rules (see Machines force list). In addition, enemy models cannot target this model until this model attacks. Alternatively an enemy model can move to within Close Combat range of this model and 'challenge' it — this is an attack that hits automatically and causes no damage, but it reveals the model automatically."
FAQs — Rulebook
Q1. When talking about certain weapons upgrades that you can take per 250 pts, is that full 250 pts? By this I mean if you want a rocket launcher you can take one in a 250 pt game but could you take one in a 200 pt game or two in a 300/400 pt game? I'm guessing one per full 250 pts but just wanted to double check.
A1. Yes, it is per full 250 pts. So for example an army of less than 250 pts cannot have any. However we assume that 250 pts is the minimum game size. So a 500 pts army can have two, and a 750 pts army can have three, a 1,000 pts army can have four and so on. It is important to remember though that we are talking about agreed game sizes and not actual points spent. So, for example, an army coming to 498 pts is still a '500 pts' army and can therefore have two of these restricted weapons.
Q2. Say that an endoskeleton has been upgraded with Command 1 or 2 and is then destroyed, but instead simply turns into a crawler thanks to the I'll Be Back rule. Does it keep the Command special rule?
A2. Yes, it is now a Command crawler!
Q3. If a Resistance model could take a shot against an enemy model, but there was a Machine with the Infiltration or Friendly? special rules (not yet revealed as a Machine) partially in the way of a shot against other Machines behind it... could the Resistance take the shot?
A3. Yes, the model in the way is still an enemy model — rules as written. Assume that the firer harbors some serious doubts about the identity of that 'strange guy'...
Q4. If there is an unrevealed infiltrator in the middle of some endoskeletons and they are targeted by an area effect weapon, can that weapon fire at them? The primary is a normal endoskeleton.
A4. By the same reasoning as above, the endoskeleton (primary) can be targeted and the infiltrator will also be hit (because it's not a 'friendly model'... more like a 'Suspicious contact'... what is he doing walking around with those endoskeletons?!). Collateral damage!
Q5. Can vehicles or other models with the Stabilized special rule conduct suppressive fire after they have moved?
A5. No. You have to remain still, even if you have the Stabilized rule. Stabilized does not allow models (including vehicles) to do aimed shots and suppressive fire on the move. The suppressive fire should read like the aimed shot one: Also, models with the Stabilized special rule can only make Suppressive Fire if they don't move — the Stabilized rule does not allow them to move and make Suppressive Fire.
Q6 (question heading not printed in the book). How many shots does the HK gunship have with its 2 'twin' heavy plasma guns?
A6. The HK gunship has two guns, not four. The 'twin' rule simply means that they cannot be shot at different targets, so all 6 shots must be fired at the same target. If the gunship does not move, it can however do suppressive fire as normal.
Q7. The rules allow for 25% of a Resistance player's force to be re-programmed machines, and allow 25% of a Machine player's force to be human collaborators. Question is... does the other army automatically KNOW they are working for the enemy? Skynet can't tell that Pops is an enemy till he shoots at a machine, and Human forces can't tell that Cyborg Infiltrators are enemies until they've attacked or been challenged, so you'd think that reprogrammed endoskeletons or human collaborators would cause the same confusion.
A7. Strictly speaking, by the rules, they do know who is who — so the Machines can recognize 'reprogrammed machines' (other than Pops), and the Resistance can recognize human collaborators (but not the infiltrators...). Of course, as stated in the rules — if you do mix up forces, you are going to encounter odd situations like the ones mentioned here, and the players are free to agree that every Machine on the Resistance side counts the same as Pops and every human on the Machines side counts the same as an infiltrator.
Q8 (question heading not printed in the book). Can Cyborg Infiltrators dual-wield weapons? Normal endoskeletons can dual-wield plasma rifles, and Pops can dual wield assault rifles / shotguns etc. If they can, do we use the endoskeletons as a guide (20 points to give an endoskeleton two plasma rifles instead of a plasma gun), or do we use Pops as a guide (1 assault rifle is 5 points, 2 assault rifles are 10 points, so if 1 plasma rifle is 9 points, presumably 2 plasma rifles is 18 points.)
A8. Yes, Cyborg Infiltrators can be equipped with more than one weapon, bought as normal from their entry. For example, you could buy a plasma rifle (+9 pts) and then another weapon at the cost listed, including another plasma rifle (spending another 9 pts). They can then fire two weapons simultaneously thanks to the Fire Control rule.
Q9 (question heading not printed in the book). Pops's weapon list is intended for 1984/2017. If we have Pops fighting alongside the Resistance in the Future War, is he limited to using past weaponry, or can he be armed with plasma rifles or a plasma gun? (Back in T1 Arnold asked the gunship owner for a plasma rifle, so they certainly all know how to use them!) If so, would the points cost be based on the Cyborg Infiltrator: 9 points per plasma rifle, 12 points for a plasma gun? I guess the same question applies to Sarah Connor, if she ends up in the future war can she use plasma weapons.
A9. Strictly speaking, by the rules, Pops cannot have any other weapons than those listed in his entry. However feel free to agree with your opponent to equip him with any weapon chosen from the Cyborg Infiltrator list at the points cost presented there.
Q10. If a Resistance soldier 'challenges' an Infiltrator and reveals them to be a Terminator, are they able to attack them during that same activation? Or does 'challenging' them use up their attack phase?
A10. It is the same as a close combat attack, so the model cannot attack any more in that activation — revealing infiltrators is risky business!
FAQs — Rulebook Reference
Q1. The second paragraph of the "I'll be back" rule in the quick play reference states that crawlers are Size 0. What does that mean? Size is not explained in the reference sheet or the small rules booklet.
A1. Size is explained in the main rulebook, on page 15. Basically, models can see other models over the crawler.
FAQs — Fast Play Rules
Q1. The Occupying Dense Terrain diagram on page 7 states that the Dense Terrain is Size 2. What does that mean? Size is not explained in the reference sheet or the small rules booklet.
A1. Size is explained in the main rulebook, on page 15. Basically, the Zone of Dense Terrain blocks line-of-sight to other models behind it.