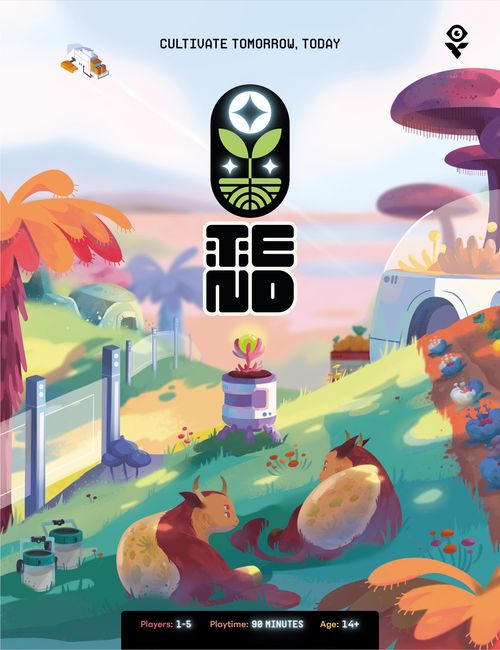
Tend
Tend Rulebook
Table of Contents
Table of Contents
Components
- 1 Rulebook
- 28 small farming dice
- 16 medium farming dice
- 12 large farming dice
- 12 rolling dice
- 6 guide cards
- 9 starter cards
- 20 season 1 task cards
- 20 season 2 task cards
- 20 season 3 task cards
- 9 season 1 objectives
- 9 season 2 objectives
- 9 season 3 objectives
- 36 neighbor cards
- 24 fishing & geode cards
- 100 farm sheets
- 100 cargo sheets
- 100 scratch-off cards
- 6 market boards
- 6 metal coins
- 21 color pencils
Core Concepts
In Tend, players earn victory points across 12 rounds. The following pages will review core concepts to understand the flow of the game and ways to gain these victory points.
Gaining and Using Resources
You will be regularly collecting and using resources. It is important to note that players do not have any sort of storage in the game. When a resource is gained the player must use it immediately.
Players have 4 different ways they can use resources:
- Spend them directly on their sheets
- Selling them to the corporate commissary
- Placing them into their cargo manifest
- Gifting them to a neighbor
1. Spend. To spend a resource, choose a space on either sheet (farm or cargo) showing the matching icon and cross it out or turn the item in. Resources used in this way can earn players badges, abilities, animals, upgrades, new locations, and space for farming via tilled soil or fence placement (see groundskeeping, page 19).
Examples of spending: resources spent to earn a badge; earning an ability; earning an upgrade; unlocking a new location; turn in items for soil and fences.
2. Sell. To sell a resource, locate its entry on the corporate commissary board. You immediately gain the coin value depicted to spend this turn. You do not have to spend all your coins earned from an item on the same thing. (For example, milk is worth 4 coins and is a farming good.)
3. Cargo manifest. To place a resource into the cargo manifest, note the size, symbol, and color of the resource on the corporate commissary board. Fill in that many boxes in the cargo manifest, matching its style and shape. You may rotate or flip the shape in any way. You also may also place it anywhere in the manifest, but that resource must not touch another resource of the same type on its orthogonal sides.
4. Gift. You may gift a resource to a neighbor if it matches their neighbor card (see neighbor cards, p. 14). Gifting resources to neighbors rewards bonuses on the left and right neighbor rewards tracks. (Gift either resource for 2 bonus rewards; gift either resource for 1 bonus reward.)
Marking on Sheets
As players fill in resource spaces by marking on their sheets, they unlock new upgrades, bonuses, and resources. Unlocks occur when all the resource spaces in its required row or combination of rows are filled in.
Items in a grid with dividing lines require a single row to unlock (A — row of items must be filled), while items in a grid with no dividing lines require all items to be filled to unlock (B — all items must be filled). When an upgrade is unlocked, it may provide a passive benefit for the player or unlock a new feature on their board.
In the case of projects that award badges, when the player completes a row in a project, they immediately gain the benefit indicated by the arrow (usually a medal). Once a player completes two rows for a project, they gain its badge (C — two rows complete to gain a badge).
Items like energy bars have charges once unlocked. When these are unlocked you may outline the shape, showing that it is available to use (D — outline shape when completed).
Dashed squares are rewards or unlocks you can gain. When gained, cross it out and use it immediately (E — use dashed squares immediately).
Earning Victory Points
There are 5 ways players can earn victory points:
- Season scoring - Each season has a specific objective that players can work towards.
- Cargo Manifest item scoring - Stalls 1, 2, and 3 award different amounts of victory points for different goods.
- Earning badges - Each badge earned by completing 2 project rows awards its associated number of victory points.
- The Seasoned Explorer project - This project doubles the amount of victory points from an earned badge.
- Neighbor bonuses - At the end of the game, compare neighbor rewards tracks with your neighbors. You earn 3 points per extra item gifted that is more than your neighbor.
Badges earn victory points; double a badge's victory points; 3 victory points per extra gift; specialized cargo item victory points.
Tasks & Actions
Task cards will allow you to perform one or more of the four tasks: tending, chopping, mining, or fishing.
At the start of the game, you may only take 1 action when performing a task. For example, when you perform a Fishing task, you get 1 fishing action. When you perform a Mining task, you get 1 mining action, etc.
However, you may gain additional actions to use during a task by having upgraded tools, or by using an energy bar. Each task has at least one corresponding upgrade.
Additional action effects:
- Tend - Choose another tend action.
- Fish - Catch another fish from your initial roll. A single fish may only be caught once from a specific square, so a rod upgrade is also needed.
- Chop - Scratch off a square from the top (1 action total) or bottom of the forest (2 actions total).
- Mine - Scratch off a square from the top (1 action total) or bottom of the mine (2 actions total).
Once you've crossed off all the necessary resources to unlock the upgrade, you'll now gain an additional action next time you perform that task (upgraded tools apply to new tasks, they are not retroactive).
During a task you may use an unlocked energy bar by drawing a line across the bar, which gives you 1 additional action. Only 1 energy bar use is allowed per task.
Component Overview
Card and Sheet Overview
The following pages will review player sheets and the cards used throughout the game.
Farm Sheet
- a. tend - 1 of the 4 main tasks. Allows players to plant and water crops as well as till soil in their farm area.
- b. crops - Dice that are placed in the farm area. These require tilled soil.
- c. trellis - A special marking that is required for some crops.
- d. animals - Dice that can be paid for and placed in the farm area. These require fencing.
- e. farm area - Players draw tilled soil, fencing, and trellises in order to place animals and crops.
- f. groundskeeping - Allows players to trade resources for extra tilled soil and fencing in their farm area.
- g. fish - 1 of the 4 main tasks. Allows players to catch fish with a grid and rolling dice.
- h. pond fishing - 1 of the 4 areas players can fish from.
- i. broken bridge - Marking off all 6 resources here unlocks river fishing, a new area players can fish from.
- j. chop - 1 of the 4 main tasks. Allows players to reveal squares in the forest on their scratch-off card.
- k. mine - 1 of the 4 main tasks. Allows players to reveal squares in the mine on their scratch-off card.
- l. equipment upgrades - Marking off these areas adds +1 action during its associated task.
- m. fishing upgrades - Marking off these areas upgrades a player's catch area or number of fishing actions.
- n. energy bars - 2 uses per energy bar. Can be used once per task. Adds +1 action to the current task.
- o. neighbor rewards - These track gifts you have given and reward items as well as end game victory points.
Cargo Sheet
- a. special projects - These single use projects award resources as well as special abilities.
- b. badge projects - These projects award 1 medal for every row completed and a badge for 2 rows completed.
- c. cargo manifest - A grid in which you place resources. There are 3 stalls that award victory points depending on the type of good present. Completing a horizontal row awards additional tasks.
- d. scoring area - Players track their cargo, season objectives, neighbor, and badge victory points here. Whoever has the highest total points at the end of final scoring is the winner.
- e. round tracker - A place for players to note their tasks taken for each round. The color of each round reflects the game's progress through 3 seasons. Players score season objectives at beginning of round 6, 10, and the end of the game. (see scoring phase, p.15)
- f. intern program - Players can spend 3 coins to perform any 1 of the 4 main tasks (tend, fish, mine, and chop).
- g. seasoned explorer - When complete, a player doubles 1 of their unlocked badge victory points.
- h. buyback program - Players can spend 3 coins to cross out any 1 good in the badge projects section.
Guide Cards
Reminder cards that outline the 5 phases of a round. Players may flip this card to signify to others that their task phase is complete.
Starter Task Cards
Basic task cards that depict 1 of the 4 possible tasks and a 2 Zenith coin resource card.
Season 1, 2, and 3 Task Cards
Task cards offer multiple actions and rewards.
Season 1, 2, and 3 Objective Cards
Cards used during the scoring phase of each season.
Neighbor Cards
Giving these goods to other players progresses your neighbor rewards tracks.
Fishing and Geode Cards
- a. fishing cards - Unlockable locations where players may collect fish by rolling the black and white dice and comparing the result to the grid. The 1 icon is wild and can be used as any number result.
- b. geode card - This card requires the same dice as the fishing cards and is only used when a player obtains a geode. The 1 icon is wild and can be used as any number result.
Corporate Commissary
- a. value - The amount of coins gained for turning in a resource.
- b. shape - The symbol and structure of a resource to be placed in the cargo manifest.
- c. resource types - Each good has a type distinguished by color and shape (farm, mining, fish, social, and badge).
Scratch-Off Cards
- a. woods - The area players reveal when chopping.
- b. mines - The area players reveal when mining.
- c. resources - A preview of what players can find on each half of the woods and mines.
- d. actions - Each area requires 1 action to reveal a square in its top half and 2 actions in its bottom half.
- e. fishing location unlocks - Reach the bottom of the woods or mines to unlock a new fishing area.
Setup
Table Setup
- a. Shuffle all of the neighbor cards to form a deck.
- b. Shuffle all season 1 objective cards and place 1 face up to the right of the neighbor deck. Return the remaining objective cards to the box.
- c. Shuffle all season 2 objective cards and place 1 face up to the right of the season 1 objective card. Return the remaining objective cards to the box.
- d. Shuffle all season 3 objective cards and place 1 face up to the right of the season 2 objective card. Return the remaining objective cards to the box.
- e. Create the season task card decks:
- If this is your first time playing Tend, we recommend removing the task cards marked as "advanced".
- Shuffle the season 3 task cards and place 3 of them face down as the start of the first upcoming season deck. Then place 3 more of them in a second pile as the start of the second upcoming season deck.
- Shuffle the season 2 task cards and place 4 of them on top of each upcoming season deck face down.
- Shuffle the season 1 task cards and place 4 of them on top of each upcoming season deck, 3 face down and 1 face up.
- Place the unused season 1, 2, and 3 decks to the side.
- f. Shuffle the starter task cards and place them face down below the neighbor cards as the task card deck.
- g. Draw the top 5 cards of the task deck and place them face up in a row.
- h. Sort all dice by color and put them into a general supply that is accessible to all players.
- i. Have each player collect the components listed on the next page.
Player Components
Each player collects the following in front of them:
- a. Cargo Sheet - Don't forget to write your name at the top!
- b. 6 Color Pencils - 1 in each color.
- c. Farm Sheet
- d. Mine and Woods Scratch-off Card - Or use the web app at: tend-scratch-off.iv.studio
- e. Metal Coin - Used to scratch with.
- f. Corporate Commissary Market Board
- g. Guide Card
- h. Fishing and Geode Cards, and a set of Rolling Dice
- i. 2 Neighbor Cards - Draw 4 neighbor cards from the deck and place 1 next to each neighbor rewards track. Discard the remaining 2 neighbor cards to the discard pile.
Gameplay
Round Structure
The game is split into 12 rounds, each with 5 phases performed in the following order:
- Neighbor Phase
- Scoring Phase
- Setup Phase
- Growth Phase
- Task Phase
Neighbor Phase
Skip this phase for the first round of the game. For all other rounds, each player gains resources from any neighbor cards gifted to them during neighbor or task phases. After gaining these resources, discard the neighbor cards. Players then replace any neighbor cards they gave away during the previous neighbor or task phases.
To do so, draw 2 cards from the neighbor deck, select 1 to place next to your neighbor rewards track, and discard the other. If at any point the neighbor deck runs out of cards, reshuffle the discard pile to create a new deck and continue drawing as normal.
Draw 2, pick 1 to replace, discard remaining card. Pick either resource.
Replacing Neighbor Cards
Sometimes players may not want the neighbor cards they had in previous phases. Having a neighbor card with mining goods when your calling is the farm can be tough! If desired, players may discard any amount of these cards (from previous phases) and draw 1 card to replace each during the neighbor phase.
Neighbor Phase Details
If a neighbor card has an "or" on it, the player may gain either of the resources shown (regardless of which was given to them by another player).
When you gain a resource that matches an icon on one of your own neighbor cards, you may fulfill this card by giving it to your neighbor. They may not redeem this card until the next neighbor phase.
Completing a row in your cargo manifest awards an additional task. If a player completes a row during the neighbor phase, they should complete that task during the neighbor phase before moving on.
Scoring Phase
The scoring phase takes place (after the neighbor phase) at the beginning of round 6, 10, and the end of the game. After scoring the season 3 objective, proceed directly to final scoring (page 23).
When the scoring phase does occur, each player calculates how many victory points they earn based on the objective card for the season that just ended. Record those victory points in the appropriate objective box below the cargo manifest (A).
Example: 3 energy bars collected (12 points) at the end of season 1.
Setup Phase
Skip this phase for the first round of the game.
- Collect all faceup task cards (including previous season cards) and place them into the task discard pile.
- Draw the top 3 cards of the task deck and place them face up in a row. If at any point the task deck runs out of cards, reshuffle the discard pile to create a new deck and continue drawing as normal.
- Take the top cards of the 2 upcoming season decks and place them directly below.
- Flip the top card on each upcoming season deck face up. These cards show upcoming choices for players during the next task phase. If no cards remain in the season decks, then this will be the last round of the game.
Growth Phase
During the growth phase, players rotate (tick up to advance a die to its next value) all their crop and animal dice once. If a die ticks up to reveal its symbol in white (during the growth or task phase), harvest that resource. To harvest, immediately gain all white-symboled resources and check each die for a return symbol or a reset symbol. Return all return-symbol dice to the general supply and reset all reset-symbol dice to their "1" value. No further action is needed for dice marked by a number value.
Collect and return to the general supply; collect and reset the die to the "1" value; collect and no other action required.
When a player completes their growth phase, they may move immediately to the task phase. They do not need to wait for all other players to finish.
Task Phase
The majority of the game takes place in the task phase. During this phase, players choose 2 of the 5 available task cards to resolve for the turn. This is done simultaneously and multiple players may choose the same card(s). Each player resolves their chosen cards independently, selecting 1 to complete in its entirety before moving on to the next. Once you've finished your task phase for the round, flip your guide card to its "complete" side.
Choose any two task cards to resolve. Flip guide card when complete.
There are two types of task cards: basic task cards and conditional task cards.
- Basic task cards depict a single task for a player to instantly resolve.
- Conditional task cards are divided into 2 sections. The task depicted in the top section may be resolved immediately, but a player may only resolve the bottom section if they meet the required condition (indicated between the two sections).
Conditional task card: 1. resolve first; 2. check condition; 3. if condition is met, resolve.
Not Meeting a Card Condition
You can use the top section of a task card even if you do not meet the condition to resolve the bottom section.
Resolving Tasks
This section will outline potential tasks available to players and how to resolve them during the task phase.
"Or" statement - Anytime you see "or" listed on a task card, choose one of the available tasks to resolve.
Resources - To resolve resources on task cards, simply gain the resource(s) depicted.
Chopping
This task allows players to gather resources from the woods.
At the beginning of the game players have 1 chop action per chopping task. You may gain additional actions during this task by upgrading your hatchet or using an energy bar (both of which give +1 action). Upgraded tools apply to new tasks and are not retroactive.
Players spend chopping actions to scratch-off spaces in the woods. Spend 1 chopping action to scratch-off spaces in the top half of the woods. Spend 2 chopping actions to scratch-off spaces in the bottom half of the woods, both of which must come from the same task.
First, choose a square where you would like to chop. The square must be in the top row or adjacent to a square you have already chopped.
When revealing a space in the woods, the player immediately collects any resource they uncover. If they uncover a chop icon, they gain additional chop actions depending on the number depicted.
If you reveal a space with a purple background with a north-facing arrow, you advance 1 level on the chop track on your farm sheet. Cross out the next available resource depicted on the track and immediately put it to use.
Players may unlock Lake Fishing by chopping down to the bottom row of their woods. Note that each scratch-off card depicts a path representing the quickest route to the bottom.
Mining
This task allows players to gather resources from the mine.
At the beginning of the game players have 1 mine action per mining task. You may gain additional actions during this task by upgrading your pickaxe or using an energy bar (both of which give +1 action). Upgraded tools apply to new tasks and are not retroactive.
Players spend mining actions to scratch-off spaces in the mine. Spend 1 mining action to scratch-off spaces in the top half of the mine. Spend 2 mining actions to scratch-off spaces in the bottom half of the mine, both of which must come from the same task.
First, choose a square where you would like to mine. The square must be in the top row or adjacent to a square you have already mined.
When revealing a space in the mine, the player immediately collects any resource they uncover. If they uncover a mine icon, they gain additional mine actions depending on the number depicted.
If you reveal a space with a yellow background with a north-facing arrow, you advance 1 level on the mine track on your farm sheet. Cross out the next available resource depicted on the track and immediately put it to use.
Players may unlock Grotto Fishing by tunneling down to the bottom row of their mine. Note that each scratch-off card depicts a path representing the quickest route to the bottom.
If you collect a geode, the resource is obtained from the geode card. If you roll a wild (1) icon, you may choose any space in that die's matching color row or column.
Fishing
This task allows players to catch resources in a fishing location.
To perform the fish task, choose an unlocked fishing area (pond, river, lake, or grotto fishing) and roll the white and black dice. You only roll these dice once per fishing task.
Match the rolled dice by number and color to the fishing table on the card. Catch a fish at the space where they intersect. If you roll a wild (1) icon, you may choose any space in that die's matching color row or column.
Players then spend a fishing action to collect a resource at the space where those dice intersect on the fishing table.
Fishing Upgrades
After you've chosen a fishing area and rolled your dice, you may use any unlocked rods or lure.
Rods provide a larger catch area centered around the rolled dice location, granting more options in selecting which fish to catch. These can be unlocked in any order. (If both rods are unlocked, they may only use 1.)
Lures allow players to collect more fish. Players may unlock any 1 lure, which helps catch an additional fish (resources) in their rod's catch area. You may not catch a fish multiple times from the same space during the same fish task (regardless of a lure or energy bar use).
Similarly, if you choose to use an energy bar on a fishing task, it has the same effect as a lure, allowing you to gain an additional fishing action inside the area you've fished.
Example: 1 rod and 1 lure used gives a modified catch area and +1 fishing action, gaining 2 resources in the fishing area.
Tending
The tend task allows players to improve their farms and generate resources through various animals and crops.
At the beginning of the game players have 1 tend action per tend task. You may gain additional actions during this task by upgrading your farming tools or using an energy bar (both of which give +1 action). Upgraded tools apply to new tasks and are not retroactive.
When performing the tend task you may select and choose any 1 of the following tend actions:
- Plant a crop.
- Water (tick up by 1) a crop and all crops adjacent to that crop.
- Add 6 tilled soil to your farm.
Groundskeeping
During the task phase, players can also turn in resources (gold, stone, wood, exo wood, copper, and iron) to add more tilled soil or fences in open spaces. This is a free action called groundskeeping that may be repeated.
Planting Crops
To plant a crop, make sure you have enough tilled soil spaces for your chosen crop (see below). If you do, take a matching-color die and place it directly in an empty tilled area with the "1" side facing up. Increase crop dice values by 1 every growth phase.
Crops require a different number of tilled spaces based on their size.
- Small crops require 4 spaces of tilled soil in a 2x2 square.
- Medium crops require 9 spaces of tilled soil in a 3x3 square.
- Large crops require 16 spaces of tilled soil in a 4x4 square.
Tilled soil required. Trellis required.
Trellises
Some crops also require a trellis, an unlockable upgrade, before they may be planted. Once you unlock a trellis, immediately draw its symbol over an open (containing no fences or other trellises) 2x2 farm square, tilled or untilled. Once a trellis is covered with tilled soil, you may plant the required crop.
Watering Crops
To water a crop, pick any 1 crop currently in your farm and increase its value by 1 (tick it up). All crops orthogonally touching this crop must also be increased in value. Animal dice are not affected by this action.
Water orthogonal crops. Crop progression.
Tilled Soil
To till soil, simply draw a "~" symbol on any 6 empty squares in your farm area. (Till x6.)
Tend Action Examples
Adria plants a large crop in a 4x4 square containing tilled soil. She waters this crop which raises its value as well as the value of all orthogonal crops. Finally, she tills soil 6 times, to prepare the trellis.
Animals
Animals are kept in fenced areas of your farm and produce resources over time. To purchase an animal, complete a row of coins next to that animal on your farm sheet and collect its die. Animal dice may be placed inside fully enclosed fenced areas of your farm (including diagonals). Once a die is placed set its value to "1." During every growth phase, increase all animal dice values by 1. Animal's dice values are increased by 1 for every growth phase and only in this phase. The edges of your farm are not considered fences.
Animals require different amounts of fenced open space:
- Small animals require 4 spaces in a 2x2 square.
- Medium animals require 9 spaces in a 3x3 square.
- Large animals require 16 spaces in a 4x4 square.
Animal progression. Fenced area required.
Collect goods from animals when their dice tick up to a white symbol (as explained on page 16).
Early Purchase and Moving Animals
You may move animals around on your farm at any time as long as you have open space to do so. While moving an animal, its die value must remain the same and it must be placed within a fenced-in area. You may also unlock an animal before you have space available for it. At any point qualifying space is made available, you may immediately add that animal into your farm.
Energy Bars
Energy bars give players 1 additional action during a task. To unlock an energy bar, spend the coins indicated below it. Once you unlock an energy bar, circle it.
You can use an energy bar once when taking any task (tend, fish, chop, and mine). To do this, draw a line across the energy bar to spend 1 of its charges. This gives +1 action for that task. Each bar can be used twice before it is fully spent. You can only use an energy bar once during a single task.
Neighbor Cards
Neighbor cards indicate specific resources your neighbors are requesting from you. Place each neighbor card chosen during the neighbor phase next to a neighbor rewards track on your farm sheet. This card is now associated with the neighbor next to you on that side (left or right).
During gameplay, when you would ordinarily receive a resource depicted on one of your neighbor cards, you may instead choose to gift that card directly to your neighbor. If you do, cross out a number of boxes in the corresponding neighbor rewards track equal to the bonus indicated on the card. Then, immediately gain the goods shown in those boxes.
During the next neighbor phase, you gain resources from neighbor cards gifted to you in the previous round. If there are multiple options depicted on a card, you don't have to choose the same resource your neighbor paid to gift it to you.
After giving away neighbor cards, draw new ones during the neighbor phase of the next round. (See page 14.)
Cargo Manifest
Players earn the majority of their points from their cargo manifests. Resources used to fill in a manifest score victory points at the end of the game.
Players place a resource in their cargo manifest as they gain it instead of selling, gifting, or otherwise using it:
- A. Check the corporate commissary to see the type, shape, and size associated with a resource you wish to place in your cargo manifest. Resources not listed in the commissary cannot be placed in the manifest.
- B. To place a resource, fill in a number of boxes in the shape and color indicated by the corporate commissary. You may rotate this shape and place it anywhere in the manifest, but keep in mind that it may not occupy a space orthogonally adjacent to another cargo box of the same type / color (farm, mining, fish, social, badge).
- C. Completing a row earns a player a free bonus task, as illustrated by the icon next to the row. Upgrades and energy bars may be used when completing this additional task.
Scoring Cargo
Filled boxes are worth 1 point by default in your manifest, no matter their color. However, this value may be overwritten by values listed at the bottom of each stall of a player's manifest.
- A. In this example, stalls 1 and 3 score 1 point for every resource that doesn't belong to the type indicated (either fishing for stall 1 or mining for stall 3, both of which earn 0 points).
- B. Stall 2 scores an additional point for each filled box containing a specific good–fish in this example.
Example: There are 2 goods in stall 1 which cover 4 boxes totaling to 4 points. There are 5 goods in stall 2 which cover 12 boxes. Fishing goods score 2 points, totaling to 18 points. There are 3 goods in stall 3 which cover 6 boxes. Mining goods score no points, so this stall scores only 5 points.
End of Game and Final Scoring
At the end of the 12th round, perform one additional neighbor phase allowing you to use any gifts from your neighbors. Then score the season 3 objective card, before moving on to final scoring.
Players will record their points from the following sources:
A. Cargo Manifest
- Players earn points for each filled box in their cargo manifest (as shown on the previous page).
- Note these points in the boxes indicated as "STALL.1," "STALL.2," and "STALL.3."
B. Neighbor Bonuses
- Compare your left neighbor rewards track with the player to your left. They will compare your track with their right track.
- For every box you have filled that they do not, score 3 points.
- Compare your right neighbor rewards track with the player to your right. They will compare your track with their left track.
- For every box you have filled that they do not, score 3 points.
- Total these points and note them in the box indicated as "NEIGHBOR".
C. Badges
- Earn the listed victory points for each badge with 2 completed project rows.
- If you've completed the seasoned explorer project, double the amount of victory points of 1 badge unlocked.
- Note these points in the box indicated as "BADGES".
D. Add It All Together
- Add all scoring phase points from OBJ.1, OBJ.2, and OBJ.3 and note the result in the rightmost box.
- Add all points from STALL.1, STALL.2, and STALL.3 and note the result in the rightmost box.
- Add all points from BADGES and NEIGHBOR and note the result in the rightmost box.
- Add all points from the rightmost boxes and note the result in the TOTAL box.
The player with the most victory points in the "TOTAL" box is the winner (ties are shared).
Alternative Ways to Play
Single Player Rules
Single player games function largely the same as games with other player counts. The only difference is that completed neighbor cards should be discarded. During final scoring, earn 3 points for each filled-in box on your neighbor rewards tracks.
Two Player Rules
Two player games function largely the same as games with other player counts. The only difference is that each player becomes both the left and right neighbor for their partner. Thus, all neighbor cards completed by a player should be gifted to the same person.
Large Player Count Rules (7+)
Large player count (7+) games function largely the same as games with other player counts. Optionally, players may want to have a 5-6 minute round timer to keep games moving. You can go to tend-companion.iv.studio for a digital card setup and timer.
Tend Challenges
Check out page 28 for challenges against team members and influencers!
Extras
Example Task Phase
Elizabeth has been focusing on mining and fishing and has decided to resolve the Cave Fisher task card. She has two options on the top half of the card (fish or mine) and selects the mining task (a).
Elizabeth is currently level 1 in mining, so she has decided to mine with the top half in the hopes of gaining another level, which would allow her to also resolve the bottom part of the card.
She does not have an energy bar or an upgraded mining pickaxe, so she only has one mining action to use during this task. This means she can only explore the top half of her mine (b). She may explore any of the spaces in the top row or any adjacent to one of her previously explored boxes. She decides to use her mining action to explore the space to the left of the mining icon in the second row and scratches off its box (c).
Success! She found a space with a yellow background and north-facing arrow, which will gain her +1 mining level, along with a stone. First, she decides to gain the stone. After looking at her sheet, she decides the best way to use the stone is to finish a project started last round: rebuilding the broken bridge. She crosses off the stone in the broken bridge box (d) and now has access to river fishing. She also fills in the next yellow box on her mining level track and gains the coin in that space (e).
She now can cross out a single coin anywhere on her sheet and decides that she would like to spend the coin working towards unlocking an energy bar (f).
With Elizabeth's mining at level 2, she now meets the condition required to resolve the bottom portion of her task card. In this case, she gains a fish! (g)!
She next checks to see what this fish is worth in the corporate commissary: it would sell for 2 coins or fill in 2 boxes in her cargo manifest. While the 2 boxes would be a great addition, she decides she would rather have the money now and immediately spends both coins unlocking the energy bar. With the energy bar now unlocked, she circles it to show it is ready to be used (h).
For Elizabeth's second task card of the round she chooses to resolve the fourth card in the task row: River Fisher. Because she has unlocked river fishing, she knows she will be able to resolve both halves of this card as well, making this a great turn (i)!
For the top half of the card, she decides to perform the chopping task. She has been working towards unlocking an upgraded fishing rod, which she would really like to get before going fishing (j). This fishing rod upgrade requires exo wood, which she can see is much more likely to be found in the bottom of the woods compared to the top of the woods.
To chop in the bottom half of the woods, she needs to use 2 chop actions. While she doesn't have an upgraded hatchet, she does have an energy bar. She uses a charge from the energy bar by crossing a line through it and gains 1 additional chopping action (k). She then chops the first space in the bottom area of the woods along the path, spending her 2 chop actions. This space does not have exo wood, but it does have a +2 chopping action icon. This means she can take another 2 chopping actions (l).
Elizabeth uses 2 chopping actions to clear a space in the bottom section and reveals an exo wood. Because the wood has a purple background and north-facing arrow, she will also gain a chopping level.
She first spends the exo wood completing her upgraded fishing rod (m). She then fills in the next box in her chopping level track, which earns her another wood. She decides to spend that wood to start progress on a wood badge (n). Badge projects can earn her medals to place in her cargo manifest (for each project row completed) as well as victory points (if she completes 2 project rows) to be scored at the end of the game.
Now, with the top half of the River Fisher card completed, she's ready to resolve the bottom half by going fishing. To perform her fishing action, she chooses to fish in the newly unlocked river (o). She rolls her dice, rolling a 2 on the black die and a 3 on the white die. She checks where these numbers intersect and sees the space is empty (p)! Good thing she upgraded her fishing rod or she would have left empty-handed. Because of her upgraded fishing rod, she can now use her fishing action to select a fish in the surrounding spaces. She decides to catch the fish in the top space (q).
Elizabeth wants to place the new fish into her cargo manifest, which will earn her points at the end of the game. Her cargo manifest gives her bonus points for fish in the middle stall, so she decides to put this new fish in there. By rotating the fish, she can put it between two mining goods, getting her closer to finishing a row and also making sure all two new fish boxes are in her bonus stall (r).
With both of her task cards resolved for the round, Elizabeth has completed her task phase. Once all other players have finished their task phases as well, they will all move on to the next round.
FAQ and Helpful Reminders
How do I gain chopping and mining levels?
When you uncover a yellow or purple square in the woods or mines (denoted with a north-facing arrow) advance one level in the corresponding skill, and immediately gain the bonus reward.
What do these icons mean?
If you uncover this in the woods or mines, gain an additional chop or mine action and also gain a coin.
When can I use groundskeeping actions?
You may use these conversions infinitely, and they do not require a Tend action. Do not cross out elements in the groundskeeping area.
Do corner fences need to be filled to place an animal inside?
Yes.
Can multiple animals be placed in the same fenced area?
Yes.
Can animals be placed on tilled soil?
Yes.
Can I use energy bars during the intern program project?
The intern program is treated like a full task. This means your upgraded tools and energy bars can give you additional actions within that task.
Can projects be completed more than once?
No, once a project row is completed it cannot be used again.
Do the starting tilled soil spots count towards objectives and task card bonuses?
Yes.
Do I have to use icons inside of dotted squares immediately?
Yes.
Score Challenges
Go to tend-companion.iv.studio and enter a seed for a challenge. Can you beat their scores?
| Challenger | Requirements | Seed | Score |
|---|---|---|---|
| Paula Deming | Upgraded Pick-Axe and Hatchet | Fancy-Silver | 111 |
| Hungry Gamer | Fish and Chop Only | TEND2BEHUNGRY | 111 |
| Matthew Jude | Completely Fill Stall 3 | diplomatic-ivorys | 113 |
| Banzainator | Unlock All Fishing Areas | Banzainator | 115 |
| Carly | Seasoned Explorer Badge | board game buzzz | 118 |
| Monique | Completely Fill Stall 2 | BEFORE YOU PLAY | 121 |
| Tae Jo, Tae & Co. | No Tending Allowed | BSIC1 | 123 |
| Max Themer | Fill 3 Rows in Cargo | NAUTY | 146 |
| Jenna Beasley | Fill all Cargo Edges | GARDEN-CHALLENGE | 159 |
| Dane Baudoin | Unlock 4 Badges | zenithscout | 164 |
| Austin Harrison | Every Crop in Cargo | THREEDAYS | 183 |
| Alex Hart | Complete All Neighbor Tracks | Might-I-Suggest | 201 |
| Toby Sarnelle | Completely Fill Stall 1 | BUSHWICK-BASED | 275 |
Icon Reference
Farming: Pineapple, Wild Fruit, Pumpkin, Berries, Egg, Wool, Milk, Tilled Soil, Fence
Fishing: Mamble, Sunpop, Blobber, Geojell, Pebblepuff, Crankle, Nessel, Lillybloom, Orbble, Plumfish, Shimmerpuff, Gribble
Mining: Stone, Copper, Iron, Artifact, Bone, Ruby, Crystal, Rainbow Rock, Tree Sap, +1 Mine Action, +1 Mine Action & Coin
Chopping: Wood, Exo Wood, +1 Chop Action, +1 Mine Action & Coin
Badges: Copper Badge, Silver Badge, Gold Badge, Platinum Badge
Social: Red Blueprint, Purple Blueprint, Heart
Extra: Z-Coin, Energy Bar, Geode
IV Studio, 2601 Nolensville Pike, Nashville, TN. If you need to get in touch with the team at IV Studio regarding Tend, you can contact us by scanning the QR code above.