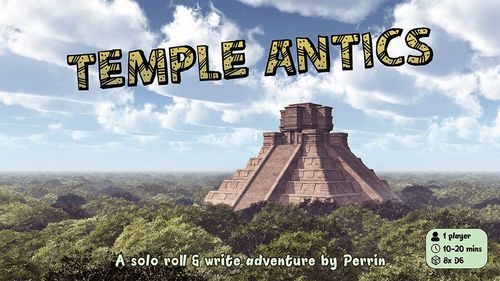
Temple Antics
Temple Antics Rulebook
Table of Contents
Table of Contents
Overview
- Players: 1
- Play time: 10-20 minutes
- Components: 8 six-sided dice (D6), a pen, and the play sheet (the sheet is the board, the turn track, the inventory and the tables)
Objective
You are an adventurer stranded on a legendary cursed island. Starting from your parachute you have to work your way across the island. If you can recover the cursed idol from the temple and reach the plane before sun falls you will escape and lift the curse.
Each turn you will move into a new tile, drawing the walls as you move. You'll also face an encounter that could help or hinder your progress. As the sun rises and sets the island will grow more deadly. If you run out of health or the sun sets (after 18 turns) you will die on the island.
Play Sheet Layout
- Current Health (Max Health 6): track your current health in the Current Health box at the top left of the sheet. Maximum health is 6.
- Base Attack: starts at 1.
- Turn track: 18 turn boxes in three groups of six, under a sunrise icon, a sun icon and a sunset icon. The first six turns are the sunrise group, the next six the sun group, and the last six the sunset group. Cross off one box each turn.
- Board: a pre-printed grid of tiles. The starting position is the parachute tile (marked with an X); the plane is printed on another tile; the temple with the idol, two caves and the other features are also pictured on the board. The board's pictures are not described in the printed text.
- Inventory: a column of slots for Charm, Machete, Pickaxe, Shotgun, Bandage, Elixir and Idol. Place dice on the slots to track the remaining uses of items you find.
- Next Tile box, Encounter box: the two boxes where you place your assigned dice each turn (see Turn Order step 3).
- Next Tile, Encounter, Combat and Items tables: printed at the bottom of the sheet.
Turn Order
Each turn, follow these steps in order.
- Mark Turn. Cross out the next turn order box at the top of the sheet.
- Roll 2 Dice. You can optionally re-roll doubles.
- Assign Dice. Choose how to assign your dice. One is placed on the Next Tile box and the other on the Encounter box.
- Draw Walls. Choose an adjacent tile to your current position and draw the walls based on the dice you assigned. Rotate the tile how you like. If you're re-entering an old tile, skip this step.
- Draw Movement. Draw an X on the new tile and a line to it from the current X. Movement is mandatory, even into dead ends. You can move back next turn, or take 4 Damage to break through a wall.
- Tile Effect. Items on the ground are added to your inventory, skipping the usual rolling for items (see the item rules below). Caves optionally teleport you to the other cave. The plane allows you to escape if you have the idol.
- Encounter. Deal with the encounter effects.
- 7a. Combat. Reduce health by total enemy Damage minus total player Attack. Use items to increase player Attack. Current enemy Damage is determined by both a roll and the current time of day.
- 7b. Item. Roll against the item table and add the item to your inventory. Place extra dice on your inventory to show remaining uses. Duplicate items replace the previous one, so you can't stack uses. Items can be used at any time. You can use both weapons for extra attack.
If 18 turns have passed, the sun sets and you are killed.
Next Tile
The Next Tile box decides the walls of the tile you draw in step 4. The die you placed on the Next Tile box is read against the wall diagrams printed in the Next Tile table on the sheet. The diagrams are pictures; the text below describes each one as it is drawn.
| Die face | Next Tile result |
|---|---|
| 1 | Three walls: top, left and right. The bottom side is open. |
| 2 | Two walls: left and bottom, meeting at the bottom-left corner. |
| 3 | Two walls: left and right (opposite sides). |
| 4 | One wall: bottom. |
| 5 | No walls drawn (open tile). |
| 6 | Reroll a new tile (the 6 is printed beside the "Reroll a new tile" icon). |
Note: the printed sheet shows the wall diagrams as pictures and gives no separate caption for each face. The face-to-diagram pairing above is read from the layout of the table. Walls are drawn rotated however you like (step 4).
Encounter
The die you placed on the Encounter box selects the encounter from the Encounter table. The printed table lists the faces in order.
| Die face | Encounter | Effect as printed |
|---|---|---|
| 1 | Sneak Beast Attack | [Roll on Combat table +1 Damage] |
| 2 | Rest at Campfire | [+1 Health] |
| 3 | Beast Attacks | [Roll on Combat table] |
| 4 | Take a Shortcut | [Roll extra tile & move] |
| 5 | Find a Backpack | [Roll on Item table, add to inventory] |
| 6 | Fall into a Trap | [-1 Health at sunrise; -2 Health in the sun; -3 Health at sunset] |
The Fall into a Trap line is printed with the three time-of-day icons (sunrise, sun, sunset) and the matching Health loss for each.
Combat
Combat is resolved by the Combat table on the sheet. The table has three columns, one for each time of day: sunrise, sun and sunset. Each column has three rows, and each row is printed with a pair of dice faces. The printed Combat table reads as follows.
| Dice faces shown | Sunrise | Sun | Sunset |
|---|---|---|---|
| 1 and 2 | 1 Damage | 2 Damage | 3 Damage |
| 3 and 4 | 2 Damage | 3 Damage | 4 Damage |
| 5 and 6 | 3 Damage | 4 Damage | 5 Damage |
Note: the printed sheet does not state which roll selects a row. It shows the three row pictures as dice-face pairs (1 and 2, 3 and 4, 5 and 6). The table is looked up using the roll and the current time of day, as the Combat step says.
The Combat step (7a) and the Sneak Beast Attack and Beast Attacks encounters both use this table. Sneak Beast Attack adds +1 Damage to the result.
Combat damage is applied as described in step 7a: reduce health by total enemy Damage minus total player Attack.
Items
Roll against the Items table when you find an item (7b, or Find a Backpack). Items already on the ground are instead added at the Tile Effect step without rolling. The table gives one item per die face.
| Die face | Item | Effect | Uses |
|---|---|---|---|
| 1 | Charm | Re-roll any 1 die | 2 Uses |
| 2 | Machete | +1 Attack | Unlimited Use |
| 3 | Pickaxe | Break a wall | 2 Uses |
| 4 | Shotgun | +3 Attack | 2 Uses |
| 5 | Bandage | +1 Health | 2 Uses |
| 6 | Elixir | +4 Health | 1 Use |
The printed sheet also says: (Place dice on inventory area slots to track remaining uses of items you find.)
Item rules as printed:
- Items found on the ground are added to your inventory without rolling (Tile Effect step).
- Place extra dice on your inventory to show remaining uses.
- Duplicate items replace the previous one, so you can't stack uses.
- Items can be used at any time.
- You can use both weapons for extra attack.
Movement and Walls
- Movement is mandatory, even into dead ends.
- You can move back to the previous tile on your next turn, or take 4 Damage to break through a wall.
- If you are re-entering an old tile, skip the Draw Walls step.
- The Pickaxe item can break a wall (2 Uses).
Tile Effects
- Items on the ground are added to your inventory, skipping the usual rolling for items.
- Caves optionally teleport you to the other cave.
- The plane allows you to escape if you have the idol.
Health
- Maximum health is 6. The printed sheet does not state a starting health value; the Current Health box is where you track it.
- Health is lost to combat damage, traps and the Beast Attacks, and gained from Rest at Campfire, Bandage and Elixir.
- If your health runs out, you die on the island.
Ending the Game
- You win by recovering the idol from the temple and reaching the plane before the sun sets. The plane allows you to escape if you have the idol.
- You die if you run out of health, or if 18 turns have passed and the sun sets.