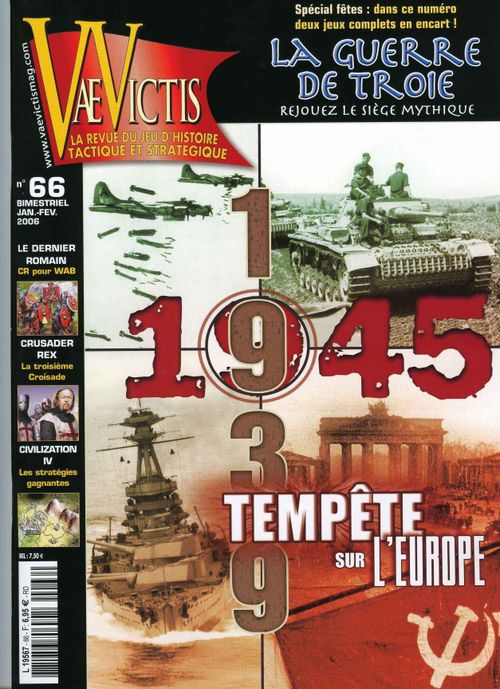
Tempête sur l'Europe 1939-1945
Tempête sur l'Europe 1939-1945 Rulebook
Table of Contents
Table of Contents
- Errata
- 1. Introduction
- 2. Controlling zones
- 3. Sequence of Play
- 4. Collect Axis Resource Points (PR)
- 5. Collect Allied Resource Points (PR)
- 6. Strategic Warfare
- 7. Reinforcements, Rebuilding & Repair
- 8. Inactive Allied Actions
- 9. Using active Axis PR
- 10. Allied Actions and Economy
- 11. Inactive Axis side actions
- 12. Stacking
- 13. Strategic Redeployment
- 14. Operations
- 15. Combat
- 16. Reaction and Zones of Control
- 17. Bases, fortresses and garrisons
- 18. Supply and Line of Communication (LdC)
- 19. Weather
- 20. Diplomacy and National rules
- 21. Victory Conditions, surrender and the switch
- 22. Campaign Game
- 23. Barbarossa Scenario
Errata
Printed at the start of the source rules.
Unit errata:
- 5th Panzer Corps is a turn 14 reinforcement (not 19).
- Italy's Regia Marina and Regia Aeronautica are both placed in Calabrese at full strength.
- The white stripe indicates one step or unit at reduced strength.
- Kiev Front is placed in East Poland and reappears at full strength on turn 6.
Map errata:
- Zone "I" for initial setup is Albania.
- It is possible to move between Prussia and the Baltic States and Prussia in East Poland.
1. Introduction
Tempest over Europe simulates the whole war pitting the Western Allies and Soviets against the Axis from September 1939 and May 1945. Tempest over Europe is designed as a solitaire game. A characteristic of the war is that each side had the initiative once. The Axis initially occupied the stage, but, after Stalingrad and El Alamein, they lost the ability to act offensively. While the Allies, after a disastrous start, kept the offensive until they reconquered the occupied territories and forced the surrender of Germany. The player controls the active side, while the rules determine the strategy and movements of the inactive side. The player starts the game in charge of the Axis either winning or until the Western Allies are able to launch an invasion. At that time, Axis victory conditions are evaluated and the player either changes sides and takes command of the Allies or loses.
It is possible for two players to play the game. Each player takes a side and controls that side's operations using the reaction rules and the German logistic system. Tempest over Europe is based on the same rules as Typhoon Over the Pacific published in VaeVictis 40, which simulates the War in the Pacific. Some changes were necessary to account for differences between the two theatres of war. We tried to minimize these, the idea being to later publish rules allowing you to use the games together to simulate the entire Second World War.
Each land unit represents an army, for the Axis and the Western Allies, or a front for the Soviets, of between 20,000 and 100,000 men. Each air unit represents an air force or air army of between 100 and 600 aircraft, each point being about one hundred aircraft. Each naval unit represents a fleet. Each turn lasts one calendar quarter and the map is divided into geographical areas.
The pieces
- Land: White block: initial placement or turn of arrival. Lower Left: combat value. Right: Effectiveness rating (an asterisk means the unit cannot be rebuilt).
- Air: Fighters: White block: initial placement or turn of arrival. Lower left: attack value. Right: Defence value.
- Bombers: Front: Lower Left: # bombardment dice. Lower Right: Modifier to die roll. Back: White block: initial placement or turn of arrival.
- Naval: Red circle contains air defence value. Upper right: transport capacity. White block: initial placement or turn of arrival. Middle left: Naval combat value. Middle right: Land bombardment value.
The pieces are 1-sided or 2-sided, where one side is full strength and the other reduced strength. Reduced strength sides are marked with a white band.
- NM: Merchant Marine Level
- PR: Resource Points
- PRC: Reconstruction Points
- LdC: Line of Communications
- Luftflotte: German air fleet
To make a random choice among units or zones, give a different value to each piece or zone being considered and roll a die. The number on the die corresponds to the piece or zone affected. For example, to assign a loss between two units: the first will take a loss on a 1, 2 or 3, the 2nd on 4, 5 or 6. If the die roll is 4, the 2nd unit is eliminated.
The Map
The map is divided into zones. There are three kinds of zones that affect stacking (see rule 12), and sometimes combat, shown by the colour of the zone's border: continental Europe (pink), Mediterranean islands (green) and coastal zones (red). Land units may only move between zones separated by water if there is an arrow, showing a sea connection. If two zones touch only at a corner, units may not move directly from one to the other. Some zones are marked as having rough terrain, which affects combat losses. Ten zones have a naval base symbol, which lets them harbour one or more fleets. Initial placement zones of units are shown by a letter in the zone, which matches the letter on a unit.
2. Controlling zones
Every map zone is friendly, enemy, or disputed. When a zone is, or was last solely, occupied by one side's land units, the zone is controlled by that side (or its ally). If no unit is present, a control marker with the flag of that side should be placed in the zone. A zone is disputed when it is occupied by land units of both sides. Both sides exercise control of the zone. When a land unit enters or lands in an enemy zone, which contains only a control marker, it must stop in the zone and its movement is finished (except for overruns). Even if a zone changes hands during an operation, it becomes friendly only at the end of the turn, and only if no enemy reaction retakes or disputes the zone. If, during combat, both sides' land units are destroyed or retreated, control remains with the initial owner of the zone. A zone in a neutral country is regarded as enemy to both sides.
3. Sequence of Play
- Collect Axis PR
- Collect Allied PR
- Strategic Warfare for both sides
- Reinforcements arrive for both sides
- Allied strategic Actions. If the Allies are the inactive side, follow the rules in 8.1. If active, the player can carry out strategic rebuilding, reorganization and redeployment.
- Axis Production (spend PR)
- Axis Strategic Actions. If the Axis is active, the player can spend PR, reorganize naval units and redeploy Axis units, if not, follows the rules in 11.2.
- Active Side Operations
- Air offensives
- Amphibious Operations
- Move activated fleet(s)
- Air and naval reaction by the inactive side
- Naval battles
- Amphibious invasions
- Return to base
- Land offensives
- Inactive side operations
- Check for changes in zone control
- Calculate victory points, check for side change or victory
The game turn starts with Resource Point (PR) collection, which will allow the two sides to act. For the Axis and the USSR PR is based on control of production zones. Western Allied production is based on available sea transport between Britain, the USA and the Dominions. The strategic warfare phase follows: strategic bombing of the Reich, battles in the Atlantic and convoys to Murmansk can decrease the number of resources collected. Then the two sides place that turn's reinforcements: new units are placed on the turn record and eventually the map. Then the Allied side carries out its strategic actions: using PR for building new units and rebuilding units and placing them on the map. Then the Axis plays: starting with building and replacement. The active side performs operations, one at a time in any order it chooses. Then the inactive side may perform operations, according to the rules. Finally, control of the zones on the map and victory conditions are checked.
4. Collect Axis Resource Points (PR)
Most Axis actions require spending Resource Points (PR) provided by production zones. There are 15 production zones on the map: England, East France, Sweden, Southern Germany, Western Germany, Eastern Germany, Northern Italy, Romania, Voronezh, the Caucasus, Stalingrad, Moscow, the Urals, Siberia and Iraq. During the production phase, each Production Zone occupied by the Axis, in LdC, and friendly, provides 1 PR (except for the 3 German zones, see below). If the zone is disputed, it provides PR only if it belonged to the Axis at the start of the game. The three German zones (Southern, Western and Eastern) provide 1 PR on turn 1 then 2 PR from turn 2 until the sides switch. The Sweden production zone is available to Germany as long as Sweden is not an enemy and Norway is neutral or friendly. The Axis does not receive any PR if Sweden and/or Norway are disputed or enemy. The production zones of Romania and North Italy are available as soon as the countries become Axis allied and as long as the Allies do not control them. Captured enemy production zones provide 1 PR starting with the turn following their capture. The Axis does not get any multiplier for the Urals, Siberia or East France zones. Axis production zones recaptured by the Axis provide their full production the following turn. The maximum PR, which can be saved, is limited to 19 each for the Axis, Western Allies and Soviets.
5. Collect Allied Resource Points (PR)
The Allies collect resource points from controlled areas for use during the turn. PR storage is limited, by the counters provided, to 19. For the Western Allies, PR collected overseas or in the USA must be transported by the merchant navy (marker "Nm Courant") before being used. If the Nm equals 0, not likely but possible with a particularly effective Atlantic Battle by the Axis, the Allied player will accumulate English PR until Nm are available or wait for American reinforcements.
5.1 Western Allied PR
England: At the start of the game, the United Kingdom gets 3 PR each turn, 1 PR located in England and 2 coming from the dominions, which must be conveyed to the England zone by sea. For that the English have 2 steps of Merchant navy (Nm), each can transport 1 PR. A 4th PR, from the USA, is available starting on turn 8 (lease-lend). It comes with 1 Nm to transport it. The Nm level can be affected by U-Boats (Atlantic battles, see 6.2) and must be rebuilt before any other units are, to the maximum allowed (Maximum marker "Nm") at the cost of 2 PR for 1 Nm. If the England zone is captured (not just disputed) by the Axis, no PR are produced in or conveyed to England for the Allies. The Iraq zone provides 1 PR each turn it is friendly and in LdC. This PR can be used only for armies in a zone bordering the Mediterranean.
USA: 1 PR on turn 11, 2 PR on turn 12, 3 PR on turns 13 and 14, 4 PR on turns 15 and 16, 5 PR on turns 17 and 18, 6 on turn 19, 7 PR each turn starting with 20 (see the player aid). These PR are in addition to those provided to England and to the USSR (lend-lease) and are added to the English PR. Like the Dominion PR, the US PR must be conveyed to England. The Nm of the USA increases as the PR increases, thus it is 1 on turn 11, increases to 2 on turn 12 then to 3 on turn 13, to a maximum of 7. Also, like the English Nm, they can be reduced by U-Boat attacks and must be the first item rebuilt at a cost of 1 Nm for 2 PR. It is not possible to build more points of Nm than those provided at the beginning or given as reinforcements (Maximum marker "Nm").
For simplicity, English and American PR and Nm are pooled (one marker for Western allied PR, a marker for the allied Nm total and a marker for the maximum allied Nm). The allied Nm will also be used for transporting American troops (see 7.1) and carrying out invasions (see 14.3). Marker "Nm used" indicates the points used for troop transport the preceding turn and which are thus not available this turn to transport PR. Axis production zones captured by the Western Allies never provide PR.
5.2 Soviet PR
Soviet production starts as soon as possible, either the turn following a German attack (Barbarossa), or on turn 11 (if Barbarossa did not take place yet). Each friendly or disputed production zone provides 1 PR. The Urals and Siberia zones each provide more PR per turn as the game goes on. On turns 1 to 10: 1 PR, turns 11 to 16: 2 PR, turn 17 on: 3 PR. The Soviets also receive assistance (lend-lease) from the Western Allies from convoys to Murmansk (rule 6.3: 0, 1 or 2 PR per turn) and the road to Astrakhan. 6 turns after Barbarossa, the USA sends 1 PR each turn to the Russians via Astrakhan, then 2 PR starting on turn 19. Each turn that the Axis controls Persia and/or the Caucasus, these PR are lost. Place the Barbarossa marker on the turn chart at the start of the German attack. Axis production zones captured by the Soviets provide them 1 PR starting with the turn following their capture. No multipliers can be used.
6. Strategic Warfare
This represents Allied strategic bombardment and convoy attacks by the Axis. The Strategic Warfare table is used by both sides to resolve combats with different modifiers for each type of combat.
Strategic Warfare Table
| Die Roll | Allied Attack | Die Roll | Axis Attack |
|---|---|---|---|
| 1 | Allies lose one step | 1-3 | No result |
| 2-4 | No result | 4-6 | 1 PR destroyed |
| 5-6 | 1 PR destroyed | 7+ | 1 PR + 1 NM destroyed |
| 7+ | 2 PR + 1 Axis interceptor step destroyed |
Note: The game turn modifier does not apply to the Axis.
PR = Resource Point removed from stock available. If there is not enough PR surplus losses are ignored.
Nm: 1 Step of Merchant navy lost. If the English Nm falls to zero, England risks demoralization (see 6.4 - English morale).
1 step loss: 1 step loss is inflicted on a fleet of allied bombers.
Modifiers for Strategic Warfare Table:
- +1 if West France zone is Axis controlled
- +1 if one Luftflotte located in France West zone is engaged. The Luftflotte will not be able to perform other operations that turn. If a 1 is rolled (before adding modifiers), the Luftflotte loses a step and its bonus is lost for the rest of the turn.
- +1 on turns 10 to 12 (USA enters the war with maritime transport in peace time mode)
- -2 on and after turn 15 due to increase Allied anti-submarine warfare capability in the spring of 1943
- -1 if the Atlantic Fleet escorts convoys (see 6.4 - English morale)
After the side switch, the inactive Axis side continues to use the table, getting one free roll on the table (and one more if there are convoys to Murmansk) and roll 1 die to determine how may additional attacks to make, modified based on the game turn: -2 up to turn 14, -3 on turns 15 to 19, -4 after. The Axis will always choose to use a Luftflotte in Western France if available.
6.1 Allied Bombardment
English Bomber Command and the American 8th and 15th USAAF are only used for strategic bombardment. They always enter play on their reduced sides in the strategic bombing box. The German side may place Luftflotten in the strategic bombardment box. Each one will intercept a US bombardment determined randomly, but the Luftflotte will not be available for other use in the turn (English Bomber Command cannot be intercepted by Lutflotte, only by JagdWaffe, see below). The intercepted Allied Unit bombards, but with the die-roll modifier on the table. At the end of the turn, Luftflotten return to Germany zones (Western, Eastern or Southern). Before the side switch, the player assigns Lutflotten. After the change, the player determines each turn how many Luftflotten will be placed in the strategic bombardment box by rolling a die and dividing the result by two (round up). Then randomly select the required number of Luftflotten from those present in Germany only (even if this number is insufficient to satisfy the result). Moreover, there cannot be more Luftflotten moved than units of the USAAF at full strength.
At the beginning of the strategic phase of turn 16, the defensive organization of the Luftwaffe changes. One Luftflotte with 2 steps in the east is randomly selected (if no 2 step units are available 2 randomly drawn single step units are selected) and removed. The JagdWaffe marker is immediately placed in the strategic bombardment box at full strength. The JagdWaffe counts against the number of Luftflotten used for strategic bomber defence and must be the first Luftflotte placed each turn (in fact it never leaves the box unless destroyed but returns automatically on its reduced side the following turn). The JagdWaffe must intercept Bomber Command if it bombards. If Bomber Command is not active, a US air army can be attacked. JagdWaffe recovers 1 step automatically each turn it has taken losses.
The Allied player throws a die on the strategic warfare table for each allied bomber fleet at full strength, even if intercepted. If the modified result is 1 or less, 1 step loss is inflicted on the bomber fleet. On a modified result of 7 or more, in addition to the 2 PR inflicted, an intercepting Luftflotte or JagdWaffe loses a step.
Die roll modifiers for the Strategic Warfare table:
- Allied Modifier +1 for 8th USAAF (indicated on unit)
- +1 starting on turn 19 (Mustangs gain long operating range)
- -1 if Luftflotte/JagdWaffe intercepting with 1 step
- -2 if Luftflotte/JagdWaffe intercepting with 2 steps
- +1 when Romania is no longer allied with Germany
6.2 The Battle of the Atlantic
As long as the Axis is the active side, the player will be able to attack Allied supply at sea. The player decides the number of PR to spend. Pays the cost, and then rolls the die as many times as the number of PR spent +1 on the strategic warfare table (the player gets one free die roll per turn). The maximum number of PR, which can be spent on the Battle of the Atlantic, depends on the turn:
- Turn 1: 0 PR
- Turns 2 to 5: 1 PR
- Turns 6 to 8: 2 PR
- Turns 9 to 11: 3 PR
- Remaining turns: 4 PR
Also, if England sends convoys to Murmansk, the player gets an additional free die roll on the table (see rule 6.3).
6.3 Murmansk Convoy
The turn following the Axis attack on the U.S.S.R., England will try to transfer 1 PR to its Soviet ally if it has at least 2 PR in stock after the collection phase and 2 or 3 Nm or of 2 PR if it has more than 10 PR in stock. The Axis can try to destroy these PR during the strategic warfare phase, without spending PR, only if Norway is under its control. One die roll is made on the strategic warfare table. Modifiers:
- +1 if a Luftflotte is in the Norway zone and engaged. The Luftflotte unit will not be able to operate that turn. If a 1 is rolled, the Luftflotte loses a step
- +1 if a Kriegsmarine unit is in the Norway zone (Tirpitz or Scharnhorst in Norwegian fjords)
- -2 on and after turn 15 due to increased effectiveness of Allied anti-submarine warfare in the spring of 1943
After the side switch, the player may send 0, 1 or 2 PR to the USSR, if the Western Allies have at least enough PR in stock and 1 Nm to transport each PR. The Axis will attack the Arctic convoys for free and will automatically use a Luftflotte if available in Norway. Whenever the Mourmansk zone is Axis controlled, the convoys are stopped until the zone is liberated.
Axis strategic warfare example: turn 9, Germany declared war on the USSR the preceding turn. England has 3 PR in stock and 2 Nm, therefore 1 PR is convoyed to Mourmansk. The player decides to allot 1 PR to strategic warfare and will roll 3 times on the table. Mourmansk roll: Luftflotte 5 is in Norway, the player decides to use it in order to add +1 to the die. Kriegsmarine is in Kiel, out of range. The die is rolled: 2+1 = 3 with no effect, the Mourmansk convoy succeeds. Battle of the Atlantic rolls: the modifiers are +1 for the U-Boat bases in France, and the player decides to use his Luftflotte 3 in western France to obtain a final bonus of +2. The 1st die is rolled: 1+2 = 3 no effect and Luftflotte 3 loses a step. The second die roll will only have a +1 modifier (western France zone controlled by the Axis). But this time the player rolls a 6 for a final result of 7. The wolf packs were effective and 1 PR and 1 allied Nm are destroyed.
6.4 English Morale
If the English Nm falls to zero, a demoralized England may seek peace due to lack of supply. On each successive turn, starting with the second turn that the Axis keeps the Nm at zero, a die is rolled at the end of the strategic warfare phase. England surrenders if the die is lower than the number of successive turns with the Nm equal to zero (ex: 1 with the second turn, 1 or 2 with the third turn, etc), England never surrenders on a roll of 6. The player is not obliged to accept peace with England as it may affect the victory conditions (see rule 20). Once the USA is in the war, England cannot be demoralized and can be overcome only by a successful German invasion.
Each time the Nm falls to zero, there is the possibility that the Royal Navy sends its heavy units to protect the vital Atlantic convoys: before rolling on the strategic warfare table, roll a die: if the result is less than or equal to the number of successive turns that the Nm has been zero, the Axis die roll is modified by -1 on each die roll on the strategic warfare table. Consider the Atlantic Fleet engaged, i.e. it will not be able to participate in any reaction or amphibious operation this turn.
6.5 German secret weapons
Beginning with turn 21 if the Benelux zone is controlled by the Axis, a die is rolled on the strategic warfare table without a turn modifier. A bonus of +1 is added if the West France zone is also controlled by the Axis.
7. Reinforcements, Rebuilding & Repair
7.1 Reinforcements
Both sides receive reinforcements in naval, land and air units. These reinforcements are strictly historical and arrive on the turn indicated on the unit and the play aid. Most Allied naval, terrestrial and air reinforcements arrive on their weak side: the back of the unit. They can be turned over by spending PR. Some reinforcements are deployed by turning a unit already on the map over to its full strength side. If these units were previously destroyed, they re-enter on their reduced side.
For the German side, units arrive on the indicated game turn, in the pool for Axis armies and on their reduced side. The pool consists of all the German armies which arrive as reinforcements and were not yet bought or which were destroyed and can be rebuilt. The unit can be bought, and placed on the map, reduced side or full strength, by paying its cost (see rule 9).
US and Canadian land unit reinforcements arrive in America (a box on the map) and, as long as the Western Allies are inactive, must be brought to the United Kingdom on their turn of arrival, by using 1 Nm for each army. Each Nm used in this way will not be able to transport a PR the following turn, which is indicated with the marker "Nm used". Transporting reinforcements has priority over PRs. If there is not enough Nm to transport all the reinforcements, remaining units can be transported the following turn, using any Nm available. Once the allied side is active, the player can decide to leave the reinforcements in the America Box but will have to use Nm points to move them later.
7.2 Rebuilding
Rebuilding consists of repairing one step of a naval, air or land unit, or to return the unit to the map on its reduced side, or to turn it over to the full strength side. You may only rebuild one step of a unit each turn: a destroyed unit cannot be immediately returned to full strength. On the other hand it is possible to rebuild units located in friendly or disputed zones.
The Axis rebuilds its reduced and destroyed land and air armies by paying PR as explained in section 9. It rebuilds fleets in the same way with available points. The Allies receive a number of PR based on the game turn, and can use them to rebuild steps of units of the Commonwealth or the USA (including the Free French). A PR may be used to rebuild a step of infantry or aviation or to absorb a combat loss. Two PR are used to rebuild one step of armour, airborne, fleet or Nm, following the rules if they are on the inactive side. Exception: units with an asterisk cannot be rebuilt and the Soviet PR used to rebuild armoured armies can come only from allied lease-lend to Murmansk and Astrakhan.
Naval rebuilding is exceptional because it can take place either during the strategic warfare phase, or when a fleet is activated for an offensive or reaction. Rebuilding is automatic if the points are available at the time of a reaction by the inactive side.
7.3 Reorganization
Both sides must either wait for disorganized fleets to return, which takes two turns, or they can repair them by spending one PR per fleet. The reorganized fleet remains reduced if it was reduced, but is immediately placed in its starting base.
8. Inactive Allied Actions
Each game turn (except turn 1) until the player switches sides or the Axis wins, the inactive Allied side is operated by the player according to the game rules below.
8.1 Actions during the allied strategic phase (except on turn 1)
During the allied strategic phase, the inactive allied side will place reinforcements and rebuild units using available PR and may rebuild units in disputed zones.
Western Allies (Great Britain and USA)
Priority in spending PR: rebuild merchant marine, then fleets, then air units (strategic then tactical) and finally armies.
- Naval: Rebuild NM to authorized level. Repair disorganized fleets, then rebuild destroyed and reduced fleets. Place them in their initial placement zone if friendly. Otherwise, place randomly.
- Air: Rebuild one step of each strategic air fleet that was reduced or eliminated. First, rebuild each destroyed air unit. Place the air army in England if possible, otherwise in the nearest friendly or contested zone. If more than one zone is available, decide randomly. If there are no destroyed units, units located in disputed zones are rebuilt first. If there are equally qualified units, choose randomly, but the unit must have an LdC.
- Land units: First, reduced units are rebuilt, then if PR remain, destroyed units are rebuilt to reduced strength. Choose randomly among the units that can be rebuilt. Rebuild reduced units in disputed zones first, then in zones closest to the enemy, but only in zones with an LdC (see rule 18). Rebuilt units are placed in a friendly zone with a base or production symbol if possible, an empty zone otherwise. Choose randomly among equally qualified zones.
Since France is always Allied on turn 2, the BEF moves to Western France, but Fighter Command (RAF) remains in England. In the event of a retreat following combat, the BEF will return to England, if it isn't enemy controlled. The British 8th Army is based in Egypt and cannot return to full strength until the USA is in the war. If it is destroyed, it is returned to Egypt, if not enemy controlled, otherwise it follows the normal rules for deployment.
The French have one PR, which can be used to pay for a counter-offensive (but not for rebuilding), if the French production zone is not enemy controlled. Reinforcements are possible, if France has not surrendered. Starting with turn 8, if France is still in the game, the French East zone PR is doubled.
USSR before entering the war
Each turn, starting with the second, one unit marked with "?" is chosen at random and placed in its start zone. On turn 6, no unit is placed but the Kiev front gets a second step. In the event of a German invasion, all the units that haven't already entered are put in the Soviet army pool.
USSR after entering the war
Priority for spending PR: first infantry then air armies. Tanks can only use PR from lend-lease ("Pret Bail" marker).
Soviet army pool: The turn following entry in the war all remaining infantry and air armies are placed in the pool, on their reduced side. Purchased armies are drawn from the pool and all destroyed armies will return there.
Land: All available PR are used to build infantry units randomly drawn from the pool. Six turns after Barbarossa, the USSR can create mechanized armies using PR arriving from Mourmansk or Astrakhan (before this turn those PR are used to buy infantry steps). Each point of lease-lend PR is used to turn over an infantry unit to its mechanized side, even if the infantry was created that turn.
Soviet infantry units are placed as follows: one in each zone adjacent to the enemy, then one in each production zone in the USSR and Leningrad if at least one enemy army is located no more than two zones distance. If the zone already contains a Russian land army, do not place a new army there (a fortress does not count as an army). If there are units remaining, they are randomly placed in a zone two zones distant from enemy controlled zones, even if they already contain a Soviet army. Armoured units are placed in production zones, one per zone, nearest to the enemy.
Air units: When selecting Soviet armies randomly from the pool, the player rolls a die. On a 6, take an air army, reduced side up, in place of an infantry army, but only one air army per turn. The air army is placed randomly in a zone adjacent to the enemy and controlled by the USSR. When four Russian air units are on the map, a 6 on the die results in turning over a randomly selected air unit to its full strength side.
8.2 Actions during the inactive side operations phase
Western Allies Actions
Starting with turn 2, the player rolls a die for a possible counter-offensive during this operations phase. This die roll takes place every turn until the switch, independent of the result of the preceding turn. A counter-offensive will take place if a value lower than the turn number is rolled. If a counter-offensive takes place, the Allies will assemble one or more land operations to invade one or more enemy, adjacent zones or to renew and reinforce attacks in disputed zones. The number of attacked zones depends on the land units available that are not needed as garrisons. The Allies must leave at least one unit in each disputed zone and zone adjacent at an enemy zone. It can be a fortress. Other units are available and will be randomly selected. If there are no available units, there is no counter-offensive. Even if a country is invaded, there is still a counter-offensive die roll, starting with turn 7, counter-offensives are automatic.
The land offensive is preceded by one or more air offensives if at least one air unit is within range and there is a target present. These air attacks do not cost PR. The Allied air units will attack into the zone up to the stacking maximum. The committed units will jointly attack the weakest enemy air unit if there are several present. Each army spends a PR to attack, if there are no more PR available, it cannot attack. France uses its PR if there is one available, if not, there is no French counter-offensive. Commonwealth armies located in a zone bordering the Mediterranean and with an LdC to Iraq can use that PR to launch an attack each turn, if the PR was not used to rebuild a unit.
The turn after Barbarossa, if the 1st Canadian army is based in England, the player rolls a die to check if it invades:
- 1: Western France
- 2: the Benelux countries
- 3: Norway
- 4, 5 or 6: not this turn, but roll the die again next turn.
There is no die roll in winter and the invasion costs 1 PR, uses 1 Nm of transport (see 14.3) and requires the support of an allied fleet. If Norway and Benelux are neutral, their armies remain in the zone without fighting but defend normally against an attack by the Axis. The Canadians remain in the zone until they are eliminated, retreat (from western the France zone only) or until the sides switch. If the army is eliminated, it can return normally but does not have to try invading any more.
Entry of the USA in the war (turn 10), will result in an allied amphibian offensive from 3 to 5 turns later. On turn 13, roll a die. On 1 or 2, the amphibious attack takes place this turn, if not the die is rolled again the following turn and the offensive starts on a 1 to 4, if not it takes place the following turn automatically (so turn 15 at the latest). The player selects the target because the invasion triggers the switch in active side or the end of the game, see rule 8.4 below. If the side switch takes place, the player carries out the actions described in rule 11, then the player invades with the Allies either into Egypt, or into a zone adjacent to the Atlantic: Norway, Benelux, Western France, Morocco, or Algeria if Gibraltar is friendly.
Soviet Actions
On the first game turn, the USSR reacts to the invasion of Poland as agreed in the German-Soviet Pact, see rule 20, USSR. After entering the war, the USSR must carry out one or more counter-offensives on each winter turn and one other turn. These offensives do not cost PR as long as the USSR is on the inactive side. They follow the same rules as the allied counter-offensives with the addition of placing one or two air armies in support -if they are available and within range -in adjacent zones, in order to obtain a combat bonus.
- Attacks between winter turns: Only one offensive is carried out each non-winter turn, the priority is in a disputed zone, then a production zone or Leningrad; if there are multiple choices at the same priority, select a zone randomly. If no zone meets these conditions, there is no counter-offensive.
- Soviet winter offensive: each winter turn, the inactive Soviet side will launch large offensives in all occupied USSR zones. If an army (in an non-enemy occupied zone) can advance into an enemy occupied zone (first disputed then production) leaving one land unit or fortress in the starting zone if it is a production zone or Leningrad, it does. Each advancing army attacks an enemy army. In the first winter, the Soviets get all the attacks benefit from surprise (doubled enemy losses, no negative modifier for turn and enemy counter-attacks only by survivors), in other years the enemy losses are still doubled but the combats are simultaneous. The first Soviet winter counter-offensive occurs only if at least one zone of the USSR is enemy occupied (not East Poland or the Baltic States). After the side switch, normal rules apply.
8.3 Actions during the enemy operations phase
When a zone is attacked, the inactive side will roll on the land reaction table (see 16.4), which may add reinforcements before combat. If the Axis attacks Benelux, and France is still in the game, a random unit in the Western France zone (1e GA or BEF, if present) will react using land reaction. During enemy combat, PR in stock will be used to absorb the losses of Commonwealth and USA units, before the units are destroyed, but not those of France or minor allies (see 15.1).
8.4 Switching sides
The player plays the Axis side until winning, giving up or being forced to change sides: i.e. to switch. If the Germans do not win on the turn the Allies invade (see rule 8.2 above), either the player loses or if the Axis side has reached 3/4 of the victory points required by the victory conditions the player switches sides. The turn following switching side the allies cannot act offensively, i.e. advance into a zone occupied exclusively by enemy units or move new troops into a disputed zone. It can carry out air offensives and launch attacks with units present in disputed zones. This idle period corresponds to the series of inter-allied strategic conferences called to create a common strategy: determining the allied victory conditions, see rule 21. After the switch, the active Allied side is no longer limited by rules for garrison and counter-offensives.
9. Using active Axis PR
While the Axis is the active side, the player uses collected PR as desired. When the Axis became inactive, the rules specify the use of PR. Each action costs 1 PR except as noted:
- Roll on the strategic war table (rule 6). For each PR, the Axis can roll once on the strategic war table at the beginning of the turn.
- Create an air army or infantry army in Germany (rule 7.1). The unit is randomly chosen from all armies of the desired type in the pool and placed on its reduced side in one of the four German zones. This applies only when the Axis is the active player and each step costs 1 PR.
- Create a panzer army in Germany (rule 7.1). The unit is chosen randomly from armour units in the pool and placed on its reduced side in one of the four zones in Germany. This applies only when the Axis is the active player and each step costs 2 PR.
- Rebuild one step of an infantry army, with an LdC (rule 7.2).
- Rebuild one step of a paratroop army, with an LdC (rule 7.2). The first step costs 2 PR. The second step costs 1 PR.
- Rebuild one step of an armoured or mechanized army, with an LdC. It costs 2 PR.
- Rebuild one step of an air army, with an LdC (rule 7.2).
- Rebuild one step of the Supermarina or Kriegsmarine at a cost of 2 PR.
- Reorganize the Supermarina or Kriegsmarine (rule 7.3).
- Use strategic movement (rule 13.1) to move a unit within LdC. There is no cost for air and naval units.
- Army combat. Each army spends 1 PR for each combat (rule 15) or invasion.
- Make an air assault (see 14.4).
- Launch an air offensive (14.1). Reactions to enemy operations do not cost PR, but each air offensive costs one PR.
- Activate and move a naval unit. See 14.3 and 15.4.
- Purchase a Reconstruction Point (PRC), shown on the table with the PRC marker. These are used to avoid step losses for infantry units. See 15.1.
Major free actions:
- Move an army on land.
- Move an air army within an LdC.
- Naval or air reaction.
- Naval or air support.
- Rebuild an Italian or Axis minor ally army.
- One U-Boat attack in the Atlantic and one in the Arctic per turn.
Remember the required Italian offensives, which cost PR (see Italy in Rule 20).
10. Allied Actions and Economy
Allied Actions after the switch (Western and Russian): All accumulated PR are kept, and the player uses them as desired. Western Allied units arrive without paying PR, being transported to England by spending Nm. The player spends PR to repair and rebuild units. Each attack costs a PR, except amphibious and airborne attacks, which cost 2 PR each. The Russians must free all Soviet zones before entering any zones outside the USSR on the next turn.
11. Inactive Axis side actions
After the switch when the player actively operates the Allies, the Axis side operates based on the rules. All accumulated PR are kept.
Axis defence plan: on the turn of the switch and only on this turn, the player takes Axis air armies out of the pool and places one in each zone of central Germany (not Prussia) to a maximum of 3. If a zone already contains a Luftflotte, a new one is not placed there. If there are not enough air fleets available in the pool to fill all 3 German zones, then Luftflotten on the map are selected (randomly if needed) and moved, starting with the most distant units. Then, the player places a fortress in the following zones: the 3 French zones, Benelux and the four zones of Germany.
11.1 Actions during the Strategic Warfare phase
The player determines the air defence and U-Boat actions based on rule 6.
11.2 Axis actions during the strategy phase
Axis PR expenditure is limited. Each friendly or disputed resource zone provides one PR, without any multiplier, but no PR losses due to allied strategic bombardment occur any more. The external perimeter is defined as all the friendly or disputed zones that touch an undisputed enemy zone. It includes Western France if England is still an Axis enemy.
The first objective of the Axis is to rebuild the external perimeter with as many land units (reduced or at full potential, it does not matter) at one less than the stacking limit, but at least one per zone. If units are behind the external perimeter, the player can freely move them randomly to a zone in the perimeter. If moving these units is not enough to rebuild the external perimeter, the player will spend 1 PR to randomly select two land units from the pool (infantry, paratroop or armoured) which are placed on their reduced side. If there is enough PR, the perimeter is completely furnished with units this way. If there is not enough PR and the perimeter is adjacent to one of the four German zones, the player will move units from the zones furthest away from Germany. If possible, try not to dismantle a zone completely by using units from different zones (also far away from Germany).
Once the external perimeter is complete, if there are any PR left, the player rebuilds the strategic reserve by paying 1 PR for one reduced armoured army and one reduced air army drawn from the pool and placing them in the resource zone nearest to the external perimeter, randomly if there is a choice. Finally, if there are any PR left, use half, rounded up, to make two units, randomly chosen if need be, on the external perimeter, full strength.
Finally, if there is any PR left they will be spent against losses in combat (see 15.1) and used to attack enemy zones during the Axis turn. Axis attacks in disputed zones are free: see operation phase actions for the inactive side (11.3).
11.3 Axis action during the operational phase
The Axis will launch free counter-offensives in any disputed zones, then, if there are any PR, into enemy zones: preferably into an adjacent enemy production zone, if not, any adjacent enemy zone, except difficult terrain zones, using all available units, supported by any aviation within range. If there are several zones, randomly select the zone attacked. The Axis can exchange garrisons to attack with armies at full strength and preferably armoured units. Each army attacks an enemy unit, starting with the weakest. If the attacked zone becomes friendly after the attack, a breakthrough takes place (see land combat in rule 15) towards the nearest enemy zone, in the event of a choice decide randomly.
To create an attacking force, the Axis leaves a basic garrison, consisting of the stacking maximum in zones of the external perimeter and one army per zone in all others. All remaining units participate in any breakthrough, preferably using armoured armies. At least one air army must support the offensive if a new zone is attacked. If there is none within range, one is moved if possible.
11.4 Actions during the operations phase of the active side
When a zone is attacked, the inactive side will roll on the land reaction table (see rule 16.4), which can add reinforcements before combat.
12. Stacking
The stacking limit in a zone varies based on the type of zone and the type of unit. The stacking limit must be respected at the end of each move, but can be exceeded during movement or an exchange between two units in different zones during the same phase. An army always counts as one unit whether full strength or reduced. A fortress never counts for stacking. There is no limit to naval stacking. Enemy units can coexist in a zone (disputed zone), each side has to respect the stacking limit. Western and Soviet Allied units cannot be in the same zone and the Axis nations must respect their specific national rules (see 20).
Stacking Table
| Unit type | Mediterranean Islands (Green) | Coast (Pink) | Continental (Red) |
|---|---|---|---|
| Land armies | 1 | 2 | 3 |
| Air armies | 1 | 1 | 2 |
Printed note: the column labels above are transcribed as they appear in the source table. The source's colour key in rule 1 gives continental Europe as pink and coastal zones as red, which does not match these labels; the labels were not corrected.
13. Strategic Redeployment
Strategic redeployment allows both sides to move troops, material and planes to various engaged zones without starting an operation or risking reaction and interception. It takes place during the strategic action phase of each side.
13.1 Land units
Units can change zones by moving through friendly zones in LdC. Final and starting zones cannot be disputed. For the Axis, each redeployment, which crosses a sea, without using sea links, costs one PR regardless of the size of the army. Axis sea redeployments are limited to one army per turn in the Mediterranean before the fall of Malta and two after (see 18) and one per turn in the Baltic/North Sea.
13.2 Air units
Air units of both sides can redeploy into friendly or disputed zones. All redeployments are free.
13.3 Naval units
Any fleet can redeploy freely between two friendly bases by crossing only through friendly zones in LdC.
14. Operations
The operation phase represents three months of military operations and follows a flexible structure with the actions of the air, naval and land units of the active side chosen by the player. The only limit is that each unit can carry out only one operation during this phase. It is not possible to combine operations of various types, i.e., for example, to launch an amphibious operation at the same time as a land offensive. The two operations are launched successively.
14.1 Air offensives
Air units do not move during the operations phase, they can attack without moving. Each air army can make one air offensive per turn. Several units stationed in the same zone can act together, but units located in adjacent zones attack separately. The attacking unit(s) selects a naval or air target in their zone or an adjacent zone and attack it, without moving. The target cannot be a land unit (see following paragraph). If enemy air units are in the target zone, they can react to decrease the attack value (see 16.2). Allied air armies, which defend in England and Scotland, get a terrain bonus when attacked by Axis air armies (effect of radar). Ground support (15.2) and air reactions (16.2) are not air offensives.
14.2 Land offensives
One or more land units can launch a land offensive by moving to an enemy or disputed zone, directly connected by an overland route from the units' starting zone, over any distance. It is possible to leave a disputed zone to go to a friendly zone or another disputed zone, but not to go to an enemy zone. It is not possible to cross a disputed zone and continue movement. Two turns are needed for that: on the first, the unit enters the disputed zone starting from a friendly or disputed zone. On the second turn, the unit leaves the disputed zone for any other non-enemy zone.
A land unit can move between two coastal zones if a sea link arrow connects them, and if the starting zone is friendly and the opposite side is friendly or disputed. Even an enemy control marker prevents crossing a sea link arrow if no friendly units are in the zone.
If a land unit advances or ends combat in a zone containing only enemy naval and/or air units, those are immediately moved to their nearest friendly base or zone. A displaced air unit will not be able to carry out any operations for the remainder of the turn and the naval units become disorganized, after a possible naval action if active fleets are present. Air units, must move to an adjacent friendly or disputed zone or they are destroyed. A unit forced to rebase a second time during the same turn is eliminated.
14.3 Amphibious operations
One or more fleets can launch an amphibious operation. The player selects one or more fleets to embark land units up the allowed maximum, indicated on the fleet. The figure indicated is in unit steps, A full strength army counts as two steps. Moreover, the Western Allies must use 1 Nm for each transported step, The Nm used will not be able to transport PR or reinforcements the following turn (use the "D" marker with a landing craft to show the Nm spent). The fleets selected can be rebuilt or repaired before movement (see 7.3).
The fleets are moved and can only cross friendly zones to the final destination area, which can be enemy or disputed. If enemy fleets react (see 16.3), there is a naval battle, (rule 15.4), with possible intervention by air units, (see rule 16.1). At the end of any combat, the player counts the naval losses for each side, one point for each step lost, plus half a point for each disorganized marker. If the offensive side suffers fewer naval losses than the defending side during the fleet battle, including air reaction effects, the invasion attempt proceeds. If fleet takes more losses than the reacting enemy, the invasion is cancelled and the fleets return directly to the nearest base with the remaining transported land units, which will not be available until the end of the turn. In the event of equal losses, the Axis cancels the mission, while the Allie continues. That simulates the more aggressive Allied admirals.
Once the operation is finished, the fleets return to a friendly base in LdC. A fleet can take part in only one operation and one reaction each turn.
It is possible to launch a naval operation to transport troops between two friendly zones, but strategic redeployment is intended for that, as well as to easily redeploy fleets between friendly bases.
14.4 Airborne operations
An airborne army -there are 2 in the game: German and American -can be dropped into an adjacent zone connected by a land or sea link. An air army does not need to be present and the starting zone can be friendly or disputed. Each airborne operation, combat included, costs 1 PR for the Axis and 2 PR for the Allies. The attack gives +2 to the attacker for the attack and +2 to the defender for the counter-attack. Combat is not required if the zone is disputed at the time of the landing, but the PR cost must still be paid. It should be noted that adding another step to the German paratroop unit transforms it into an infantry army, which loses its airborne capability.
15. Combat
During each operation, combat may take place, either as part of the operation or in reaction to it. Each combat is resolved in order based on unit types. All combat consists of an offensive action by the attacker, followed by a counter-attack by defending units with results applied simultaneously (except for surprise attacks). The inactive side, in defence, will always counter-attack the weakest attacking force; if there are several, the force is determined randomly.
There is a combat modifier that depends on the game turn. It accounts for all the changes in doctrines, technological improvements and variations in morale that affected the sides during the war. Only the attacker, not the defender, uses the turn modifier. For counter-attacks, only the modifier for best counter-attacking unit is used. This modifier, if positive, does not apply to Axis Allied armies (Italy, Hungary, Romania and Finland) attacking without German armies. It does not apply, if negative, to Allied and Soviet armies attacking only non-German Axis troops (except Finnish). Against a mixed force, the modifier is applied.
15.1 Rebuilding Points (PRC)
As long as the Axis is active, it can accumulate rebuilding points which will be used to satisfy combat losses of land units, except for paratroops carrying out an airborne operation. Instead of losing a step or a unit, the player can spend a PRC for each step loss if the unit has an LdC. The inactive side automatically uses its saved PR in the same way if available. Western Allied PR is only used for Commonwealth and American units and Soviet PR only for Russian units. A minor ally cannot avoid losses using PR, including France. A unit can avoid only one loss using PR or PRC for each combat, the unit must be reduced or destroyed to satisfy additional losses. No side can avoid losses this way during severe winter (see 19) nor can the Axis in Africa as long as Malta is an enemy zone (see 18).
After the switch PRC are no longer used, the player can use saved Allied PR to avoid losses, using Combined PR for the Western Allied units and Soviet PR for Russian armies.
15.2 Land units vs. land units
Combat between land units take place in disputed zones and are voluntary for the active side. The zone must have an LdC, and the attack costs one PR per attacking army. The inactive side may attack during its action phase as directed in rules 8 and 11. The attacker decides how the attack is conducted and is not required to attack all the defenders or to use all its units in the zone. A defending unit can be attacked several times by different units, however, attacking units only attack once per turn, except for armoured units, which break through and can attack a second time. Before resolving the attacks, the player checks for reaction by the inactive defender, see 16.4.
Each combat is resolved on the combat table by adding the attack values of all the units taking part in the attack and subtracting the total defence values of the defending units. The number obtained gives the column on which the die roll result will be read, possibly shifted to the right or left by the game turn modifier of the attacker. Other modifiers apply to the die roll: weather, air support, naval support, airborne attack and amphibious attack, as well as a modifier for effectiveness. The effectiveness modifier is calculated by taking the best effectiveness among each side's unit taking part in the combat and subtracting the defender's from the attacker's. The difference is applied to the attacker's die roll.
Each loss point destroys one step of one land unit (or a PRC if available to the active side or an available PR for the inactive side for Commonwealth, USA or USSR units), unless the zone is rough terrain where the first step loss is ignored. This bonus for rough terrain does not apply to counter-attacks. Surprise takes precedence over rough terrain, i.e. surprise first doubles the number of losses, then the first loss is ignored. If the inactive defender must take losses, the player chooses them.
Retreat: If at the end of combat, only one side took losses but still has units in the zone (the losses absorbed by PR or PRC count as losses), the remaining units must retreat. If neither side suffered a loss or if both sides had losses, neither moves back. Units, which did not take part in the combat, attacking or defending, are not affected by retreat. A retreat requires that all surviving attacking or defending armies move to an adjacent friendly zone accessible by an overland route or sea link. If no retreat zone is available, the unit is removed from the map and placed in the pool (except for unreconstructible units). Invading units re-embark and move to the nearest naval base.
Breakthrough: if the zone just attacked no longer contains enemy land units, the attacker can to carry out a breakthrough, i.e. advance immediately and freely into an enemy or disputed adjacent zone accessible by an overland route only (breakthroughs to or from a rough terrain zone, across a sea link, during an amphibious landing or in muddy weather are prohibited), with any land unit in the zone, even if it did not attack, at a cost of one step loss or a PR/PRC. If the attacker has several units, it can breakthrough to several adjacent zones but it must undergo one step loss per breakthrough zone -one step of a unit entering the zone or a PR or PRC -; if there are several units which breakthrough to a zone, randomly choose the unit which loses a step. If a side has only naval and/or air units in a breakthrough zone at the end of a combat, these units can relocate as explained in rule 14.2 and the breakthrough takes place.
In order to be able to be rebuilt, destroyed armies are placed in their side's pool for Germany, the USSR and the Western Allies. Other nations place the unit on the turn record, one turn ahead. Units marked with an asterisk are withdrawn from the game if lost and cannot be rebuilt. Armoured and mechanized armies can attack a second time by paying the cost of normal combat at the end of the first combat, after all combat in the zone has been resolved. This combat can take place after a breakthrough move and does trigger a defensive reaction die-roll as defined in 16.4.
15.3 Air attacks on land units
This type of engagements is simulated indirectly as part of land combat. Add 1 to the die roll for each full strength air army in the combat zone or an adjacent zone. An air fleet with 1 step gives a die roll modifier of 1 in its zone only, 2 reduced strength air armies can combine to give a plus 1 bonus to a zone adjacent to both (the two air armies can be in different zones). If there is only one reduced strength adjacent air army it has no effect. The air modifiers for each side are combined (attacker minus defender) and the difference (plus or minus) is applied to the attack and the counter-attack, with a maximum of +2 and a minimum of -2 total air modifier. This effect is automatic and free for each combat. There is no air support during winter turns in Europe, the USSR and in the far North.
15.4 Naval Fleet Battles
Naval reaction automatically triggers combat between all activated fleets in a zone. Each fleet attacks one enemy fleet. Each fleet attacks a different fleet and a fleet can be attacked only once by another fleet. The player chooses the targets of the active side. For the inactive side, attack starting with the most powerful enemy fleet. So if you have more fleets present, the extras cannot attack.
- Naval combat: The difference between the attacking and defending fleets combat values determines which column to use on the combat table. The game turn modifier can change the column used. The player rolls a die and reads the result: nothing, disorganized fleet or one or more step losses. For disorganization, place a "D" marker on the fleet. The defender counter-attacks simultaneously, using the unit's initial value. A die roll bonus of +1 applies if the battle takes place in a green-bordered zone (the Mediterranean).
- Air armies and naval combat: All air armies in the zone or an adjacent zone can give a bombardment die roll modifier to a naval action as described in rule 3 (1 for each full strength air army, 1 per reduced army in the zone, 1 if 2 reduced armies in adjacent zones). The total air modifier is limited to +2 to -2. When the naval battle is finished, reacting defender fleets return to their starting base. If the combat was initiated during an active side move, continuation of the move depends on naval losses, see rule 14.3 about amphibious operations. If a fleet is completely destroyed in combat, any transported land units are eliminated.
- Disorganization: At the end of an operation, all fleets with a "Disorganized" marker are immediately placed on the turn track, two turns later. The disorganized fleets are being repaired and reorganized. It is possible to shorten the reorganization by spending replacement points as explained in rule 7.3. A disorganized fleet loses its ability for land bombardment, but a double disorganization does not have any further effect.
15.5 Air against naval and naval against air
Air armies based on land can attack naval fleets, as an air offensive, in their own zone or an adjacent zone. The air units select a target. Each air unit can attack one fleet, but several air units can combine against the same fleet. Add attack values, then subtract the air defence value of the fleet. This value is modified for the game turn. The player rolls a die on the combat table with the following modifiers: +1 if the combat takes place in a green-bordered zone (the Mediterranean) and -2 if the fleet is in a base. Air armies can react during naval battles, see rule 16.1.
15.6 Air against air
Planes can attack other planes as an air offensive. The attacker attacks by assigning air fleets against enemy air units. Not all defending units need to be attacked. The defensive value of the attacked unit and all friendly air units in the zone are subtracted from the strength of the attacking units. A game turn modifier is applied, then a die is rolled on the combat table. Each loss point destroys one step of an air army. The defender counterattacks the weakest attacker with his attacked unit, without the support of any other air units in the zone that were not attacked. Remember: English air units in the United Kingdom (England + Scotland) benefits from rough terrain (radar) and thus avoid the first step loss of an aerial combat.
15.7 Naval against land
Each naval fleet has a bombardment value, which can be used as part of an amphibious assault or as shore bombardment in support of a land attack in a Mediterranean island zone. A maximum of one fleet in a zone, not disorganized, can give a die roll bonus. Naval support does not apply to counter-attacks by the defender, only for an attacker die roll.
16. Reaction and Zones of Control
During play, some units, of either side, can react to actions by other units. The defender may react to movement by attacking units: these reactions are automatic and free. For all reactions, determine distances in zones, by the shortest route that doesn't cross full sea, disputed or enemy zones.
16.1 Air reaction against ships
At this scale of simulation, only interception in support of naval action is possible. An air army can react in its zone or an adjacent zone (+1 per full strength air army in its zone or at an adjacent zone, +1 per reduced army in its zone, + 1/2 per reduced army in an adjacent zone), to affect naval attack or defence. An air unit can react an indefinite number of times per turn, but only once per friendly or enemy operation. If several air units, even in different zones, could intercept the same fleet, they intercept together and add their effects, with a maximum of +2. An air reaction can be cancelled by an enemy air reaction, see the following rule.
16.2 Air reaction to air units
An air army can intercept any enemy air unit, which acts in its zone or an adjacent zone, whether it attacks the air unit, or not. An air unit can react an indefinite number of times per turn, but only once per friendly or enemy operation. As part of a naval reaction, each air army will first cancel the attack of the strongest reacting enemy air army. During an air offensive, the defence value of every unit, which intercepts, is subtracted from the attack value of the attacking air units. The interceptor will not be able to inflict damage; unless it is the unit attacked by an air offensive, then it can counter-attack and inflict losses.
16.3 Naval reaction
When all activated fleets have finished their movement and at least one is located in an enemy or disputed zone, defender fleets with an LdC to the zone may react. A die is rolled on the reaction table and cumulative modifiers are applied. Counter-offensives launched by the Allied inactive side (see rule 8) can result in an Axis naval reaction. At the end of a reaction, the fleets return at their starting base, if possible. If not, fleets return to the nearest friendly base.
Naval reaction table
| Die Roll | Reaction |
|---|---|
| 1-2 | Nothing |
| 3-4 | Minor Reaction |
| 5-6+ | Major Reaction |
Allied Modifiers:
- -1 for each zone between the target and starting base of the reacting unit.
- +3 if England or Scotland is the target.
Nothing: No reaction, the operation continues unaffected.
Minor reaction: The defending side reacts with fleets that are in bases within two zones. If there are no fleets in range, there is no reaction. The active defending player selects up to one reacting fleet for each target fleet, randomly from those that could react. Because the engagement is limited, the combat results are reduced as follows: D = no effect, 1 or 2 = D, 3 or 4 = 1.
Major reaction: The defending side reacts with fleets within two zones. If there are no fleets in range, there is no reaction. The active defending player selects up to one reacting fleet for each target fleet, randomly from those that could react.
16.4 Inactive side Land unit reaction
When the player attacks a zone, roll a die on the reaction table before resolving combat to see if the inactive defender can be reinforced or bring in reserves. If the zone is already at the defender's stacking limit, the player rolls the die, but the only effect is that a 6 will give the combat die roll bonus; no units will move. If the zone doesn't have a defender control marker, there is no reaction.
Land reaction table
| Die Roll | Reaction |
|---|---|
| 1-2 | Nothing |
| 3-5 | Immediate Reaction |
| 6 | Immediate Reaction + bonus |
+1 to the die if it is a resource zone or contains a fortress (not cumulative). -2 if airborne operation only.
Nothing: No reaction, the operation continues unaffected.
Immediate Reaction: The defending side reacts with one or more units located in other zones (land connection). At least one unit must be left in each reacting zone but the target zone can be reinforced up to the stacking limit. On a 6, the defender will receive a bonus of +1 on the combat die roll. The player first uses the closest available tank and mechanized units, then other units, starting with the closest. If there are several choices, randomly determine which unit to use. Before the first Soviet winter offensive, no Russian land army located in a resource zone can react.
17. Bases, fortresses and garrisons
17.1 Naval Bases
Except when operating, fleets must always be in a friendly naval base. A fleet in a friendly zone which becomes disputed is not required to leave as long as a friendly land unit is present, but if the fleet carries out a mission, it will not be able rebase in the disputed zone.
17.2 Fortresses or fortifications
The Allies have fortresses on the map at the start of the game, Axis fortifications are placed when the switch occurs (see 11). They cannot move, do not count against stacking and are not subject to the supply rules. They cannot attack, but they do contribute to counter-attacks. Moreover, it is required, that in any attack, that any fortress be attacked if there are other units on its side in the zone. It is possible to destroy the other units in the same operation.
17.3 Garrisons
While the Axis is active, it must maintain a garrison of at least one step in each zone of each conquered country, including the zones of Western and Eastern Poland and the Baltic States, as well as each zone captured in the USSR. When a country is conquered (i.e. all its zones are friendly), except for Denmark, Norway, Iraq, Arabia and Iraq, the player takes enough reduced infantry armies from the pool (for free) to place one in each zone of the country, even if the stacking limit is exceeded (it must be corrected the following turn). After that the player will be able to move and change his armies but must maintain at least one step of garrison per zone even in countries that do not get a free garrison. After the switch, the garrison rules no longer apply. Control of Western Poland and the Baltic States causes an army draw from the pool but not Eastern Poland.
18. Supply and Line of Communication (LdC)
In order to spend PR, attack or redeploy troops a zone must be supplied, i.e. there must be a line of communication to a friendly production zone. This LdC can be any length, but can cross only friendly zones and sea links.
An army not in supply at the beginning of its side's operations phase loses a step; it loses another stop if it is still not supplied at the end of its side's operations phase. The Axis must pay 1 PR to move an unsupplied unit. Fortresses are always supplied.
- Malta: As long as Malta remains English, it blocks Axis supply in Africa passing the Malta zone, even if Malta is disputed. The Axis cannot deploy units with more than one step in Africa (two step units can go there on their reduced side). The Axis cannot spend PRC in place of combat losses in Africa. If a German Luftflotte (full strength or reduced) is deployed in Sicily and does not take any other action in a turn, strategic redeployment to Africa is free and PRC can be used for combat losses, however the restriction on army size always holds. If Malta is captured by the Axis, all the constraints are removed, and the Axis can strategically redeploy up to 2 armies per turn to Africa.
- Gibraltar: Only the side controlling the Gibraltar zone can move fleets and armies between the Atlantic and the Mediterranean. The Western Allies can also carry out transit through Suez if the Egypt zone is friendly.
19. Weather
The map is divided into three weather zones.
-
Temperate Europe is affected by mud in winter. The names of its zones are in black.
-
The far North and most of the USSR are very cold in winter and have mud in spring. This weather zone has its zone names in blue. No amphibious operations are permitted in winter there.
-
Africa and the Middle East have fair weather all year. The names of the zones are in orange.
-
Mud prevents breakthrough movement and subtracts one from the die roll for attacks and counterattacks.
-
Extreme cold prevents any attack except by Russians and Finns and cancels any German game turn die roll bonus. It also gives the Soviets surprise in the first winter following the invasion of the USSR by the Axis. It also causes a modifier of -1 for each attack. German defensive counter-attacks are allowed but no game turn bonus is given and there is a -1 die roll modifier. Also no PR or PRC can be used to prevent losses. No air action (offensive air, support, reaction) is permitted into or out of a zone subjected to extreme cold. An air army can nevertheless leave a zone to rebase in a zone where without extreme cold.
Amphibious landings are not allowed in the Atlantic, North Sea and Baltic zones in winter.
20. Diplomacy and National rules
Diplomacy
The rules attempt to simulate the war in Europe from a certain historical view. More advanced rules, with alternative historical options, will be published in a forthcoming issue of VaeVictis. Thus, certain countries begin the game already at war: Germany for the Axis and Poland, France and the United Kingdom for the Allies. The USA joins the allies at the beginning of turn 10.
Some nations are neutral and cannot be attacked: Switzerland, Sweden, Spain, Portugal, Ireland and Turkey. Future Axis allies will be available to a specific turn or under certain conditions: Hungary, Romania, Bulgaria, Finland and Italy. The other countries may be attacked by the Axis only. Finally the USSR can join the war under certain conditions, even if not attacked.
An attacked country surrenders and all of its armies are destroyed all its zones are occupied at the end of a turn, except as described for the country below.
Special conditions for each country:
-
Benelux, Norway, Denmark: Neutral during the game, unless attacked by the Axis, in which case, they join the Allies. If Denmark and Norway are not enemy controlled, the resource zone of Sweden is considered friendly to the Axis. The Axis captures Denmark as soon as a German army moves there. It becomes friendly immediately, without waiting until the end of the turn.
-
Bulgaria, Hungary, Romania: Neutral at the start of the game, they join the opposing side if attacked by the active player. Hungary and Romania join the Axis at the start of turn 6. Bulgaria joins the Axis at the start of turn 7. If the Axis attacks the USSR (Barbarossa) before turn 6 and Yugoslavia is friendly to the Axis, Hungary and Romania become Axis allied the following turn. If not, their entry in war takes place as above. When activated, place the entire army in each country. Once placed, they are rebuilt free if needed, at one step per turn. These armies can leave their country only if Yugoslavia is Axis allied and their deployment is limited to the following zones:
- Bulgaria: Greece, Yugoslavia and West Turkey. The Bulgarian army can only defend, never attack.
- Hungary: Poland, Slovakia, USSR and Yugoslavia.
- Romania: USSR and Yugoslavia.
- Hungarian and Romanian armies may not attack together.
Whenever an enemy occupies these countries, they become neutral for the rest of the game and their armies are immediately removed from the map without being replaced by a German army.
-
Commonwealth: At the start of the game, the Commonwealth has two zones in the United Kingdom, Malta, Gibraltar, Egypt, Palestine, and Iraq. Ireland is a neutral country. If the United Kingdom undergoes an airborne invasion or amphibian attack, place the two units of Home Guard one per zone. They can never leave the United Kingdom, but they recover 1 step each turn automatically and for free. If eliminated, they are replaced on their reduced side, one in each zone that is friendly or disputed. As soon as there are no more enemy units in an English zone, the units of the Home Guard are removed from the map but will return if there is another invasion. The Home Fleet is placed in Scapa Flow (Scotland) if there is an amphibian invasion of the United Kingdom and automatically reacts (16.3), if not it does not enter play. If the Egypt zone becomes Axis, the Mediterranean fleet is permanently removed from the game.
21. Victory Conditions, surrender and the switch
The player begins actively playing the Axis side and tries to meet the victory conditions selected (choose one or select randomly) at the beginning of the game.
Axis Objectives table
| Die Roll | Axis Objective | Victory Conditions | Victory Points |
|---|---|---|---|
| 1 | Drang nach Osten (War in the East) | Seize all of the USSR (including Poland and Baltic States), plus Yugoslavia and maintain an army in all 26 zones in LdC. | 1 PV per zone controlled. 3/4 for the switch: 20 PV |
| 2-4 | Germany rules the World! | Control both zones of the United Kingdom, plus Gibraltar, Malta, Egypt, the Middle East (Palestine and Iraq) plus Greece and Crete. | 1 PV per zone controlled. 3/4 for the switch: 7 PV |
| 5-6 | Gross Europa | Control all the zones of continental Europe, that is: France, Benelux, Denmark, Norway, Greece, Crete, Yugoslavia, Poland, Baltic States plus 6 zones of the USSR including Leningrad, Moscow and Stalingrad. | 1 PV per zone controlled. 3/4 for the switch: 14 PV |
As soon as the Axis victory conditions are reached at the end of a turn, play ends and the player wins a major victory. If not the player must change sides as soon as the allied amphibious invasion takes place (see 8.2 and 8.4). Immediately calculate the victory points for held objectives, if it is 3/4 of the maximum, the player changes sides, if not the player loses and the game ends. During the allied strategic action phase of the turn following the switch, the Allies randomly determine a strategy to reconquer Europe.
Inter-Allied Conference table
| Die Roll | Result of inter-allied Conferences | Liberate the following zones first |
|---|---|---|
| 1 | Churchill imposes his views: "We will attack the soft underbelly". | Africa and the Middle East (Palestine and Iraq), Italy, Greece, Yugoslavia, Norway, Poland and Slovakia. |
| 2-4 | Marshall and Patton carry the day: "Blood and guts, guys..." | French North Africa, France, Benelux, Poland and Slovakia. |
| 5-6 | Stalin decides: "Death to the Germans". | Poland, Romania, Bulgaria, Yugoslavia, Hungary, Slovakia, Finland and France. |
The Inter-Allied conference result lists the zones the player must liberate before attacking the 3 German zones and Prussia. The player continues playing the Allied side until the end of turn 23 or Germany surrenders after the capture of the 4 German home zones. The player can decide not to roll the die and have requirements before attacking Germany but this shifts the victory level down one. The Allied victory has to wait for an atomic bomb attack on Germany. The millions who died are on your conscience. You will go down in History as "the Butcher of Europe".
Allied victory levels
- Minor Victory: The victory was hard won and involved the loss of many allied soldiers. In spite of the prestige of the victory, you are unlikely to be a popular hero and you can say good-bye to your political career.
- Victory: The victory was certainly not easy but you are a superior strategist and the enemy was finally overcome. You will become a national hero, maybe a future President: Congratulations!
- Decisive victory: You hastened the end of the war and thus saved the lives of many civilians and soldiers. You will go down in History as one of the greatest strategists of all time, the likes of Alexander and Napoleon. People will study your victories in military academies for a long time.
- Defeat: You didn't do enough and were dismissed.
When the game ends, the Allied victory level is determined:
- No German surrender: defeat
- The Germans surrender on turn 23: Minor victory (historical)
- The Germans surrender on turn 22: Victory
- The Germans surrender on or before turn 21: Decisive victory
22. Campaign Game
Axis
- Initial production: 4 (South, East and West Germany, Sweden).
- Saved PR: 0.
- Starting controlled zones: 3 in Germany, Prussia and Slovakia.
USSR: Units marked with a zone are placed on the map in those zones. Units with a "?" are put aside and enter as reinforcements. Other units are placed in the Soviet pool on their reduced side.
Allies
- Starting controlled zones: 14 (England, Scotland, Gibraltar, Egypt, Palestine, East France, West France, Southeast France, Morocco, Algeria, Tunisia, Syria, West Poland and East Poland).
- NM: 2
- PR: 0
The game lasts 23 turns but may end sooner with an Axis victory or surrender. On the first turn, Germany must attack East Poland.
23. Barbarossa Scenario
Introductory scenario in 3 turns. Length: start in turn 8 with the active side Operations phase. End after turn 10.
- Axis saved PR: 8
- PRC: 0
- Axis Production for turns 9 and 10: 8 PR
- Soviet Production for turns 9 and 10: 6 PR
- Allied lend-lease to the USSR: 1 PR each for turns 9 and 10
Victory conditions: the player wins an automatic victory as soon as Leningrad and Moscow are controlled. Otherwise, it is a draw at the end of turn 10 if the player controls only one of these 2 zones. The player loses if neither of the 2 zones is Axis controlled.
Notes
Initial placement of units is shown on the map and the pieces. The units with only a number arrive on the turn shown.
Unit placement:
- Axis (player):
- 4 PzA, 16 A, 18 A, 1 LF: A (Prussia)
- 2 A, 4 A: B (East Germany)
- 2 PzA, 3 PzA, 9 A, 2 LF: V (West Poland)
- 1 PzA, 6 A, 17 A, 4 LF: Slovakia (the source's layout splits the first unit, "1 PzA", across two lines; it is reconstructed here from the printed fragments)
- 1 A Ho: Hungary
- 11 A, 3 A Ro, 4 A Ro: Romania
- 1 A Fi, Fort Fi: Finland
- USSR (inactive side):
- Baltic Front: Baltic States
- Kiev et West Front (full strength): East Poland
- Odessa Front: L (Odessa)
- Leningrad Front and Fortress, Air 2 (1 step): U (Leningrad)
- Carelie: W (Carelia)
- Nord Ouest: Q (Kalinin)
- Air 1 (1 step): R (Smolensk)
- Stavka, Moscou Fortress: M (Moscow)
- Sud Ouest: S (Kharkov)
- Fort Sebastopol: N (Crimea)
- Air 3 (1 step): T (Rostov)
Axis armies start at full strength, except for the 11th Army (reduced). The 4th Luftflotte is removed at the beginning of turn 10. Soviet infantry armies on the map are on their reduced side, except as noted. Briansk, Caucase, Centre, Don, Kalinine, Leningrad, Nord, Nord Caucase, Stalingrad, Steppe, Sud, Transcaucase, Volkhov, Voronej are placed in the Russian pool along with 4th Air Army. The Axis pool is empty, only rebuilding is allowed. The scenario starts with the active side operations phase. Rules 4, 6, 10 and 11 are not used. Only the initial placement zones and the rest of the USSR are playable. Don't forget the rules for garrisons (17), Soviet counteroffensive limits (8.2), and land reaction (16.4).
Combat Result table
| Die | -6/-5 | -4/-3 | -2/-1 | 0 | +1/+2 | +3/+4 | +5/+6 |
|---|---|---|---|---|---|---|---|
| 0 | 0 | 0 | 0 | 0 | 0 | D | D |
| 1 | 0 | 0 | 0 | D | D | D | 1 |
| 2 | 0 | 0 | D | D | D | 1 | 1 |
Effects
- D = Fleets Disorganized, other units lose 1 step
- 1 = lose 1 step (flip or destroy)
- 2 = lose 2 steps
- 3 = lose 3 steps
- 4 = lose 4 steps
Attack modifiers (column shifts)
- Axis on turns 1 to 11: +2 ('39, beginning of '42)
- Axis on turns 12 to 14: +1 ('42, beginning of '43)
- Axis on turns 15 to 22: 0 ('43, beginning of '45)
- Axis on turn 23: -1 ('45)
- Allies on turns 1 to 5: -2 ('39, end of '40)
- Allies on turns 6 to 9: -1 ('41)
- Allies on turns 10 to 14: 0 ('42, beginning of '43)
- Allies on turns 15 to 22: +1 ('43, beginning of '45)
- Allies on turn 23: +2 ('45)
Surprise: Defender losses are doubled: 0 becomes D, D becomes 1, 1 becomes 2, 2 becomes 4. Defender losses are removed before any counter-attack. Game turn based modifiers are not applied to the attacker.
Die roll modifiers, land combat
- Rough terrain: Ignore first loss by defender (D and 1 become 0, 2 becomes 1 and 4 becomes 3)
- Air support: +1 per full strength air army in the zone or an adjacent zone, +1 per reduced air army in the zone, + 1 for every 2 reduced air armies in an adjacent zone. Maximum +2. Enemy planes within range cancel support or can result in a negative modifier.
- Naval support: Bonus for the fleet's bombardment value. Maximum of one fleet per zone. The fleet may not be disorganized.
- Amphibious invasion: -2 for attacker and +2 for counter-attack.
- Effectiveness differential: add or subtract the difference between the most effective unit of each side.
- Mud or severe cold: -1 to attacker die roll.
Combat between naval units
- Combat in green zones (Mediterranean): +1
- Air attacks against fleets in port: -2
Combat between air units
- The strength of the defending air units is subtracted from attacker's strength.
- All air units in the zone are subtracted from the attack value.