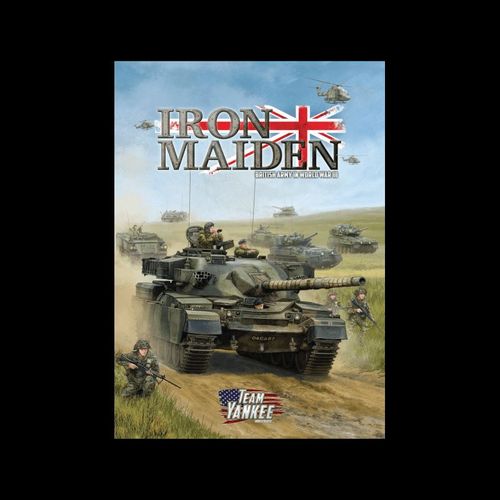
Team Yankee: Iron Maiden
Official rulebook: Battlefront Miniatures Ltd
Team Yankee: Iron Maiden Rulebook
Table of Contents
Table of Contents
Covering Force
Special Rules
- Ambush (page 100 of Team Yankee)
- Dawn (page 98 of Team Yankee)
- Covering Force
COVERING FORCE
The British covering force is only there to delay the Soviet advance, not to fight to the death. As the fight progresses they must progressively disengage their forces and retire to the main line of resistance.
At the start of their turns three, five, and seven, the British player removes a Unit (all of its teams and any Attachments) from the table. If the selected Unit is not in Good Spirits (see page 64 of Team Yankee) and has a Team within 8"/20cm of an enemy Team, roll a die before removing the Unit.
- If the score is at least equal to the Unit's Skill number, they successfully withdraw, ready to fight again later.
- Otherwise, the whole Unit is Destroyed as it is removed.
At the start of their turns six and seven the British player removes one of the Objectives. Since this happens in the British turn, the Objectives won't be there in the Soviet player's turn when it comes time to check whether they have won. This makes it possible for the British player to steal victory out from the Soviet player's grasp, so the forward detachment needs to move quickly and secure the objectives before they can be removed.
Setting Up
Lay out the terrain on a 6' x 4' (180cm x 120cm) table as shown on the map on the following page. Place three Objectives on the spots marked with the red objective marker on the printed map.
Deployment
The British player holds one Unit in Ambush. They then place their remaining Units in their half of the table. The infantry of the Spartan Support Troop may start the game in Foxholes.
The Soviet player then places all of their Units within 8"/20cm of their table edge.
Starting the Game
The game starts at Dawn (see page 98 of Team Yankee). The Soviet player is the Attacker and has the first turn.
Winning the Game
The Soviet player wins if they start a turn Holding one of the Objectives (be aware that the British player will be removing two of the Objectives during the game).
Otherwise, the British player wins at the start of their eighth turn after checking Formation Morale if necessary.
Consequences
If the British covering force wins, they have bought time for their main force to deploy, giving them more troops at the start of their next battle.
If the Soviet forward detachment wins, they brush aside the covering force and arrive before the British are ready, reducing the size of the British force at the start of the next battle.
What Happened
The covering force held on, but only just. Their losses were high, reducing their effectiveness for the rest of the campaign.
Forces
QUEEN'S DRAGOON GUARDS (British)
- Medium Recce Squadron HQ
- 2x Spartan
- 3x Scorpion Recce Troops (each)
- 4x Scorpion
- Striker Guided Weapons Troop
- 4x Striker
- Spartan Support Troop
- 4x GPMG team with 66mm anti-tank
- 4x Spartan
- Chieftain Armoured Troop
- 3x Chieftain
ALTERNATIVE FORCE: 45 POINTS
FORWARD DETACHMENT (Soviet)
- T-72 Tank Battalion HQ
- 1x T-72
- 3x T-72 Tank Companies (each)
- 3x T-72
- BMP-2 Motor Rifle Company
- 4x AK-74 team with RPG-18 anti-tank
- 3x RPG-7 anti-tank team
- 4x BMP-2
- 2x BMP-2 Recon Platoons (each)
- 4x BMP-2
ALTERNATIVE FORCE: 60 POINTS
The Defence of Shellerten
The covering force has done its job and it's time for the main event. The leading elements of the Death or Glory Boys are in position to defend the outskirts of Shellerten. The Soviet main body needs to break through their position before they can be reinforced to stop them.
Special Rules
- Ambush (page 96 of Team Yankee)
- Deep Immediate Reserve (page 101 of Team Yankee)
Setting Up
Lay out the terrain on a 6' x 4' (180cm x 120cm) table as shown on the map on the following page. Place two Objectives on the spots marked with the red objective marker on the printed map.
Deployment
The British player holds one Unit in Ambush. They then place the remaining Units of their initial force in their half of the table. The infantry of the FV432 Mechanised Platoon may start the game in Foxholes.
They then place four Minefield markers in their table half or up to 16"/40cm into the Soviet table half.
The rest of their force will arrive from Immediate Reserve (page 101 of Team Yankee) from their table edge as the game progresses.
The Soviet player then places all of their Units in their table half, at least 16"/40cm back from the table centre line.
Starting the Game
The Soviet player is the Attacker and has the first turn.
Winning the Game
The Soviet player wins if they start a turn Holding one of the Objectives.
The British player wins if they start any turn on or after their sixth turn with no Soviet tanks or infantry in their half of the table.
Campaign
If the British player won the Covering Force scenario, they have bought time for the reserves to get closer to the front. The British player gets Reserves on a roll of 4+ on their first turn.
If the Soviet player won the Covering Force scenario, they have bulled through the covering force before the main defences are ready. The British player may only place two Minefield markers at the start of the game.
Consequences
If the British win, the first echelon of the Soviet attack has been blunted. They'll commit more forces to force a breakthrough, but they'll keep paying heavily for every inch of ground they take.
If the Soviet main body wins, they will continue their advance, pushing deep into the British defences. The British will have to scramble to stop them, meanwhile more and more troops will be flooding through the gap you have made.
What Happened
The British defenders halted the first echelon's assault before breaking off and falling back to their next defensive position under heavy pressure from the next wave of Soviet forces.
The Next Step
The Team Yankee website has a third scenario covering the fighting for bridge at Heinde and suggestions on how all three battles can be combined on a single table.
Go to www.Team-Yankee.com/IronMaidenScenarios.
Forces
DEATH OR GLORY BOYS (British)
- Chieftain Armoured Squadron HQ
- 1x Chieftain Stillbrew
- Chieftain Armoured Troop
- 3x Chieftain Stillbrew
- Swingfire Guided Weapons Troop
- 3x Swingfire
- FV432 Mechanised Platoon
- 4x GPMG team with 66mm anti-tank
- 3x Carl Gustav anti-tank team
- 1x 2" mortar team
- 2x Milan missile team
- 5x FV432
- Abbot Field Battery
- 4x Abbot
- FV432 FOO
DEEP IMMEDIATE RESERVES
- Chieftain Armoured Troop
- 3x Chieftain Stillbrew
- Chieftain Armoured Troop
- 2x Chieftain
- Scorpion Recce Troop
- 2x Scorpion
- Spartan Blowpipe SAM Section
- 2x Spartan Blowpipe
- Lynx HELARM Flight
- 2x TOW Lynx
- Harrier Close Air Support Flight
- 2x Harrier
ALTERNATIVE FORCE: 100 POINTS AT LEAST 50 POINTS MUST START IN RESERVE
MAIN BODY (Soviet)
- T-72 Tank Battalion HQ
- 1x T-72
- T-72 Tank Company
- 6x T-72 (3 with Mine Clearing Devices)
- T-72 Tank Company
- 6x T-72 (2 with Mine Clearing Devices)
- BMP-2 Motor Rifle Company
- 7x AK-74 team with RPG-18 anti-tank
- 6x RPG-7 anti-tank team
- 2x PKM LMG team
- 9x BMP-2
- ZSU-23-4 AA Platoon
- 2x ZSU-23-4
- SA-13 Gopher SAM Platoon
- 2x SA-13 Gopher
- 2S1 Carnation SP Howitzer Battery
- 3x 2S1 Carnation
- Mi-24 Hind Assault Helicopter Company
- 2x Mi-24 Hind
- SU-25 Frogfoot Aviation Company
- 2x SU-25 Frogfoot
ALTERNATIVE FORCE: 100 POINTS
A Bridge Too Far?
Meanwhile, behind the battlefield, a Soviet airborne battalion has siezed the bridge over the Heinde River, cutting the British line of retreat, and potentially allowing the Soviet forward detachment to avoid a difficult river crossing.
Special Rules
- Deep Immediate Reserve (page 101 of Team Yankee)
- Deep Immediate Scattered Reserve (page 101 of Team Yankee)
Setting Up
Lay out the terrain on a 6' x 4' (180cm x 120cm) table as shown on the map on the following page. Place two Objectives on the spots marked with the red objective marker on the printed map.
Deployment
The Soviet player places their initial force in their half of the table, at least 20"/50cm from the table sides. They start the game in Foxholes.
The rest of the Soviet force will arrive from Reserve (page 101 of Team Yankee) along the road on the eastern table edge as the game progresses.
The British player then places their initial force in their table half, within 8"/20cm of a table edge.
The rest of the British force will arrive from Reserve (page 101 of Team Yankee) as the game progresses. As each Unit arrives from Reserve, the player rolls to see which road they arrive along.
Starting the Game
The British player is the Attacker and has the first turn.
Winning the Game
The British player wins if they start a turn Holding one of the Objectives.
The Soviet player wins if they start any turn on or after their sixth turn with no British tanks or infantry within 16"/40cm of either objective.
Campaign
If the British player won the Defence of Shellerton scenario, they have more troops aviailable to clear up problems in the rear area, so the Scimitar Close Recce Patrol has 4 Scimitars instead of two.
If the Soviet player won the Defence of Shellerton scenario, the pressure on the British to recapture the bridge increases. The Soviet player wins if they start any turn on or after their fifth turn (rather than their sixth turn) with no British tanks or infantry within 16"/40cm of either objective.
Consequences
If the British player wins, their line of retreat remains open, allowing them to conduct their fighting withdrawl to the Leine River at a slow and measured pace.
If the Soviet player wins, the British will have to improvise a new line of retreat under pressure. Meanwhile, the Soviet spearheads will be able to race the British to the Leine River, potentially breaching that position before it is properly held.
What Happened
The Soviet air assault troops held the initial attacks by the Irish Guards and expanded the bridgehead. However, the arrival of the Chieftains escorting a section of Tracked Rapier turned the tide, and a bayonet charge by the airmobile Gordons evicted the Soviet defenders.
Forces
IRISH GUARDS (British)
- FV432 Mechanised Company HQ
- 1x SLR rifle team & FV432
- FV432 Mechanised Platoon
- 4x GPMG team with 66mm anti-tank
- 3x Carl Gustav anti-tank team
- 1x 2" mortar team
- 1x GPMG SF team (from Company HQ)
- 4x FV432
- FV432 Mechanised Platoon
- 4x GPMG team with 66mm anti-tank
- 3x Carl Gustav anti-tank team
- 1x 2" mortar team
- 1x GPMG SF team (from Company HQ)
- 4x FV432
- Scimitar Close Recce Patrol
- 2x Scimitar
- Spartan Blowpipe SAM Section
- 2x Spartan Blowpipe
DEEP IMMEDIATE SCATTERED RESERVES
- Lynx Airmobile Platoon
- 4x GPMG team with 66mm anti-tank
- 3x Milan anti-tank missile
- 1x 2" mortar team
- 3x Lynx
- Chieftain Armoured Troop
- 3x Chieftain
- Tracked Rapier SAM Section
- 4x Tracked Rapier
- FV432 Mortar Platoon
- 4x FV432 mortar carrier
- Harrier Close Air Support Flight
- 2x Harrier
ALTERNATIVE FORCE: 60 POINTS AT LEAST 40 POINTS MUST START IN RESERVE
AFGANTSY (Soviet)
DEEP IMMEDIATE RESERVES
- Mi-24 Hind Air Assault Battalion HQ
- 1x AK-74 team
- Air Assault Company
- 7x AK-74 team with RPG-18 anti-tank
- 6x RPG-7 anti-tank team
- 2x PKM LMG team
- 1x AGS-17 grenade launcher team
- 1x AT-4 Spigot missile team
- 1x SA-14 Gremlin AA missile team
- Air Assault Company
- 7x AK-74 team with RPG-18 anti-tank
- 6x RPG-7 anti-tank team
- 2x PKM LMG team
- 1x AT-4 Spigot missile team
- BMP-1 Motor Rifle Company
- 4x AK-74 team with RPG-18 anti-tank
- 3x RPG-7 anti-tank team
- 4x BMP-1
- Mi-24 Hind Assault Helicopter Company
- 4x Mi-24 Hind
- SU-25 Frogfoot Aviation Company
- 4x SU-25 Frogfoot
ALTERNATIVE FORCE: 60 POINTS AT LEAST 30 POINTS MUST START IN RESERVE
Call Sign Charlie
The preceeding three scenarios can also be played as one big game on a large table. If you have enough players, you can have three players per side (with an overall general on each side if you have even more players). Each pair of players would take the forces listed for one of the scenarios and be largely responsible for one of the three sub battles in the overall battle.
Special Rules
- Ambush (page 96 of Team Yankee)
- Covering Force (see Covering Force scenario)
- Dawn (page 98 of Team Yankee)
- Deep Immediate Reserves (page 101 of Team Yankee)
- Deep Immediate Scattered Reserves (page 101 of Team Yankee)
- Delayed Reserve (page 101 of Team Yankee)
Setting Up
Lay out the terrain on a 12' x 6' (360cm x 180cm) table as shown on the map below. Place seven Objectives on the spots marked with the red objective marker on the printed map.
Deployment
The Soviet players place their initial force from the A Bridge Too Far scenario in the area shaded red at the right of the map.
The British player holds two Units in Ambush, one from the Covering Force and one from the Defence of Shellerton forces.
They then place the remaining Units of their initial forces in the area shaded white, and place four Minefield markers anywhere except in the Soviet deployment areas or in the area to the right of the river. The force from the Defence of Shellerton scenario must be deployed in the right half of the map.
The Soviet players place their initial force from the Covering Force scenario in the area shaded red at the left of the map. The Soviet force from the Defence of Shellerton scenario are in Delayed Reserve and will arrive along the road on the left of the map. The Soviet reserves from the A Bridge Too Far scenario will arrive from Immediate Reserve along the road on top right of the map.
The British reserves from the A Bridge Too Far scenario will arrive from Immediate Scattered Reserve. As each Unit arrives from Reserve, the player rolls to see which road they arrive along.
All infantry may start the game in Foxholes.
Starting the Game
The game starts at Dawn (see page 98 of Team Yankee). The Soviet player is the Attacker and has the first turn.
Objectives
There are seven Objectives at the start of the game. The British player will remove two of the leftmost three Objectives using the Covering Force rule as the game progresses. However, they may not remove an Objective if it is Held by a Soviet team.
Winning the Game
The Soviet players win if they start a turn Holding five of the Objectives.
The British player if they start any turn on or after their sixth turn with the Soviet players only Holding a single Objective. (Transcribed as printed; the source omits the verb here.)