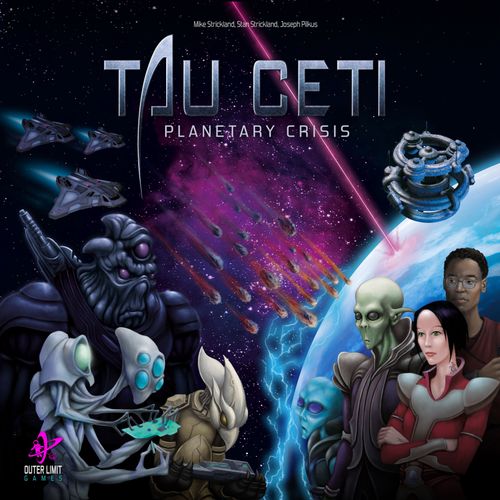
Tau Ceti: Planetary Crisis
Tau Ceti: Planetary Crisis Rulebook
Table of Contents
Table of Contents
Game Overview
Tau Ceti is a 1-4 player game, where each player is an emissary representing a unique alien faction, who has set out to restore stability and power for their civilization. Players will compete for influence in the newly formed alliance, all while dealing with unprecedented and mysterious planetary crises, which create ever-increasing hostility and economic turmoil as the game progresses.
Influence is represented by how many Galactic Points (GPs) you earn throughout the game, which can be acquired in many different ways. You are free to explore the star system, recruit a variety of specialists, trade, buy/sell commodities for profit, upgrade your starship, expand and defend your civilization, and complete a variety of interplanetary missions.
Goal
The goal of the game is to earn the most GPs by the end of the final round. The various ways you can earn GPs are:
- Resolve crises
- Build orbitals (to control sectors and produce resources)
- Earn large amounts of money (TAU)
- Retain specific Specialist/Crisis cards at the end of the game
- Win battles
Most of these objectives involve various steps, and strategic planning. The player who is able to assemble the best crew, play to their strengths, mitigate threats, exploit opportunities and manipulate resources to their advantage will have a greater chance at success.
Global Components
- 1 Rulebook
- 15 hex tiles
- 9 Advanced Rule Cards
- 1 Galactic Depot
- 4 Reference Cards
- 1 Tau Ceti Exchange (TCX)
- 1 Enlightenment bag
- 8 Dice
- 32 Damage Markers
- 4 Virus Crystals
- 42 Specialist cards
- 19 Systems tokens
- 24 Crisis cards
- 24 Crisis tokens
- 24 Exploration cards
- 24 Knowledge tokens
- 18 Commodity tokens
- 30 Interplanetary Mission cards
- 20 Galactic Point tokens
- 6 Market Level markers
- 4 Diplomacy cards
- 1 Round marker
- 4 Exotic Tech Cards
Faction Components
Each faction (Zorhkonian, Xunon, Triolor, Azars) has:
- 1 Interface
- 1 Starship
- 3 Track markers
- 5 Resource cubes
- 4 Action markers
- 1 Alien Race card
- 4 Orbital tokens
- 1 Claim token
- 1 Battle token
- 1 UT token
- 2 +Markers
Important Concepts
TAU
TAU (also represented as the symbol T) is a player resource, and is the Galactic currency. TAU is needed to buy commodities, recruit specialists, and repair damage. TAU is earned by completing Interplanetary Missions (IMs), selling commodities, and trading knowledge and GPs.
You can earn up to 49T by using a +Marker.
ENERGY
Energy (also represented as the energy symbol) is a player resource. Energy is expended when taking major actions, and sometimes when traveling through cosmic energy and wormholes. Energy is mostly earned when you play Crisis and/or Specialist cards during the Enlightenment phase, but can also be earned via successful explorations, and by playing various Specialist cards during the Action phase.
You can earn up to 49 Energy by using a +Marker.
MATERIALS
Materials (also represented as the materials symbol) are a player resource. Your materials decrease when you build orbitals, and increase when you upgrade systems.
ECONOMIC INFLUENCE
Economic Influence is achieved when you build an orbital in a sector, thereby controlling that sector and producing a resource. Control of a sector cannot be shared by two players.
KNOWLEDGE
Knowledge is needed in conjunction with a specialist to resolve a crisis. Knowledge is acquired through successful explorations.
SKILL SETS
Skill Sets vary with each faction, and are used to perform skill checks for IMs and explorations.
Skill sets range from 2 to 4, with every player having one primary skill set of 4 (also your alien race's comparative advantage) and one secondary skill set of 3, with all other skill sets being 2 (e.g. if you have a skill set of 4 in Technology and a skill set of 3 in Industry, this means you have a skill set of 2 in everything else).
Your skill set indicates how many dice you get to roll for a skill check.
ORBITALS
Orbitals are built in order to produce resources for the alliance. They function as an interplanetary production facility where you establish Economic Influence, allowing you to control a sector.
RESOURCE CUBES
Resource cubes all start out in the Enlightenment bag, where a random Resource cube is drawn during the Enlightenment phase. As you complete explorations, your Resource cubes are taken out of the Enlightenment bag and placed on sector tiles, and are eventually moved to your planet when you build orbitals. Once you have Resource cubes on your planet, they can be traded for materials.
MARKET LEVEL
Market Level (also referred to as the Chart of Economies or Mkt level) is found on the Tau Ceti Exchange (TCX), which represents the market valuation of the various resources being traded among cultures. There are 4 Mkt levels for each resource.
Game Setup
[1] Large tiles [2] Outer Limit tiles [3] Knowledge tokens [4] Exploration points [5] Galactic Depot [6] Systems tokens [7] Commodity tokens [8] Demand pile [9] Supply pile [10] Crisis tokens [11] Crisis card deck [12] Specialist card deck [13] Market Level markers [14] Round marker [15] Tau track [16] Energy track [17] Materials track [18] Alien card [19] Action markers/Faction tokens
Hex System Setup
Place the TAU CETI tile in the center of the table, then place all remaining Large tiles [1] and Outer Limit tiles [2] in separate stacks, face down. Move the Outer Limit tiles aside; they can be drawn later in the game during Move actions.
Each player takes a turn placing one large hex tile at a time, making sure to connect it to another tile, until all large hex tiles are placed. You can arrange the hex system any way you like.
Global Setup
Knowledge, Systems & Commodity Tokens
With all Knowledge tokens [3] face down in a pile, begin placing a Knowledge token on each of the 10 Exploration points [4] in the star system, keeping them face down.
Put 6 of the remaining 14 Knowledge tokens in a stack next to the Outer Limit tiles (to be placed on those tiles once they are drawn during the game).
Turn the remaining 8 Knowledge tokens in the pile face up and place them on the Galactic Depot [5], making sure to keep each type in a separate stack.
Place all Systems tokens [6] on the Galactic Depot.
With all Commodity tokens face down in a pile, place 1 Commodity token [7] on each planet, face up. Move 2 of the remaining Commodity tokens in the pile aside (keeping them face down) to start a separate pile, which will be called the Demand pile [8]. The demand pile will always have two Commodity tokens in it which remain face down, which is used when the demand on planets change.
Turn the remaining Commodity tokens in the original pile face up. This pile will be the Supply pile [9], which is used for buying and selling.
Tau Ceti Exchange
Place all Crisis tokens [10] in a separate stack, on top of each of the 6 Crisis token spaces on the TCX.
Place Crisis card deck [11] and Specialist card deck [12] on opposite sides of TCX, and shuffle.
Place a Market Level marker (white disc) [13] on level 1 for each resource.
Place Round marker [14] on the leftmost space on the Round track.
Cards
Place Knowledge cards, Interplanetary Mission cards, Exotic Tech cards, Diplomacy cards, and Advanced Rule cards in their own decks and shuffle. These decks can be placed anywhere on the table, but we prefer to keep them next to the Galactic Depot. Give each player a Reference card.
Resource Cubes
Place all Resource cubes in Enlightenment bag for each player in the game. Place 2 of each Resource cube color in the Enlightenment bag for each non-player alien civilization.
Note: Advanced rules are optional. Players decide which Advanced rules they want to include before the game begins, by laying out those Advanced rule cards and discarding the rest.
Faction Setup
-
Players decide which faction/character they will play. If necessary, roll a die. The highest number rolled gets first choice.
-
Place your starship miniature and your 4 Orbital tokens on your home planet.
-
Place your Interface (player board) in front of you.
-
Place a Resource marker on the starting space (indicated on the back of your Alien card) of your Tau track [15], Energy track [16], and Materials track [17]. Note: one of your +Markers will start out on the +10 space next to your Tau track, as all alien characters start with at least 10T. Use the "+" tracks and +Markers for both TAU and Energy, which allows you to track those resources once they go above 9.
-
Place your Alien card [18], Action markers, and remaining Faction tokens (1 Battle token, 1 Claim token, +Marker, 1 Unauthorized Transport token) [19] next to your Interface.
Gameplay
The game consists of a predetermined number of rounds. Before the game begins, players decide whether to play a short game or full game.
- A short game automatically ends after round 8.
- A full game is played through round 10, which may include an additional 2 rounds (roll 1 die at end of round 10 and end of round 11 to determine if you will continue on, as represented on the Round track). 12 rounds is the longest possible game, and allows for deeper strategy.
Each round consists of 3 phases in the following order:
- Enlightenment Phase - When crises are revealed or prevented.
- Action Phase - Consists of each player taking one action at a time.
- Battle Phase - Variable and player-initiated. All battles must be resolved in this phase.
Enlightenment Phase
The Enlightenment phase represents the beginning of a new year in Tau Ceti, when the alliance becomes enlightened of a potential new crisis. While some may have secret dark intentions to cause a crisis, many will work to prevent crises from occurring with the help of specialists. The alliance believes that preventing crises before they happen is the key to retaining economic stability.
The Enlightenment phase commences at the beginning of each round, except for the first round. Players begin the Enlightenment phase by clapping (a tradition adopted by the Terrans), and the phase is completed in the following steps:
-
Draw a random Resource cube out of the Enlightenment bag, and reveal to all players before putting it back in the bag. This will be the planet affected by a crisis if one occurs during this round.
-
Take one card from the top of the Crisis deck and one card from the top of the Specialist deck, and place both cards face down into a new pile to start the Active deck.
-
Players may now begin playing any of their Crisis/Specialist cards by placing them in the Active deck, face down. Each player should immediately adjust their energy +2 per card they play. Once everyone is finished playing their cards, shuffle the Active deck and reveal it.
-
Any Crisis card that has a matching Specialist card (matching crisis icon) is prevented, and both of those cards are discarded.
Note: if two or more of one type of Crisis cards are revealed, and there is a matching Specialist card, the Crisis card with the lowest number gets canceled out first (e.g. if there are 2 cosmic Crisis cards and 1 astrophysicist Specialist card, the lowest numbered cosmic Crisis card is canceled out).
Any remaining Crisis card with the highest number becomes active. All other cards remaining in the Active deck are recycled back into the bottom of their original decks.
-
If a crisis becomes active, read the card to the other players and place the corresponding Crisis token on the affected planet (select the Crisis token on the top of the stack).
-
Adjust the affected resource (revealed on the back of the Crisis token) on the TCX by moving the marker up one level.
The example to the right shows a Biohazard crisis, which has affected Science. The Market Level marker for Science is moved from level 3 to level 4.
- If the affected player's planet has any Resource cubes on it and the resource affected was his primary specialization, he loses a Resource cube, which is placed back in the Enlightenment bag (e.g. if a crisis affects Science on planet Xuno, Dr. Krenji would lose a Resource cube, if he has one on his planet).
The Crisis card is recycled back into the bottom of the Crisis deck, which concludes the Enlightenment phase.
Advanced Rule 1: When a player's home planet is affected by a crisis, she loses an Action marker until she resolves 2 crises OR 1 crisis on her home planet, at which point she earns the Action marker back. You cannot lose more than 1 Action marker at a time.
Advanced Rule 2: Apply the effects on the bottom of the Crisis card before discarding.
Advanced Rule 3: Place a virus crystal (which represents a biohazard/virus) on planets affected by a Biohazard crisis. When a player travels to a planet affected, they absorb the virus crystal (by placing it in any of their systems, which counts as 1 damage). When that player travels to another planet, he can drop the virus crystal off there (thereby affecting that planet by spreading the biohazard/virus).
Once a Biohazard crisis affects a planet, its effects (represented by the virus crystal) will remain in the star system for the duration of the game, even if that crisis is resolved. Even though a virus crystal is considered damage, you cannot repair it, you can only drop it off on a planet you visit.
Action Phase
The Terran who most recently watched a sci-fi movie starts the game by taking the first turn.
Turn order is clockwise, and each round the turn order rotates to the player to the left. The first player in each round places his Alien card in the card stand (upright), to indicate he is the first player during that round.
The Action phase consists of each player taking one Major action at a time (and unlimited Minor actions, see page 16), until all of their Action markers have been used up or they decide to pass.
Major actions are represented on the action section on your Interface.
Every player has the same 10 Major actions available, but with different energy expenditures for each action.
Upon taking a Major action, place an Action marker over top of the Action space and expend the energy (revealed below each Action space). You may take the same action more than once during each round. You are free to take whichever actions you wish, provided you have enough energy.
Each Major action you pass on is rewarded with 1T.
Build (BUI)
Building allows you to expand your Economic Influence by placing your orbitals on sector tiles, which earn you GPs at the end of the game.
Upon building, move your Materials marker one space to the left, then pay 2 x your Market level (your civilization's comparative advantage on the TCX).
Next, place one orbital (taken off your planet) on any sector tile where you have a Resource cube, and move that Resource cube onto your planet. Your orbital is now producing that resource, and making it available on your planet.
You can only build one orbital per Build action.
Example: In the example above, Captain Oxoroi from the Republic of Triolor is building an orbital. Therefore he pays 4T (since his civilization's comparative advantage is in Technology, and Technology is at level 2).
Explore (EXP)
Exploring allows you to earn knowledge, and eventually build orbitals on sectors you've successfully explored. You may explore any sector that contains a Knowledge token.
To explore, first expend the required energy, then reveal a Knowledge token (any sector you're currently in, which has a Knowledge token on it) by flipping it over, then draw a Knowledge card by flipping through the deck until you see the first corresponding Knowledge card.
Follow through with the skill check on the back of the card. If successful, collect the reward(s) and discard the card. If you earned the Knowledge token, place it next to your Interface.
If you were unsuccessful with the exploration, leave the Knowledge token on the Exploration point and turn it back over (face down) and place the Knowledge card back in the bottom of the deck.
Example: In the example to the left, a Chemical Knowledge token was revealed, and the corresponding Chemical Knowledge card is drawn.
Claim Tokens
If you successfully explore in a sector with more than one Exploration point, place your Claim token on top of one of the other Knowledge tokens. This indicates to the other players that you are attempting to expand your Economic Influence to that sector (thereby inhibiting others from exploring that Exploration point).
Upon placing your Claim token on an Exploration point, you may explore that Exploration point on your next turn. If successful, remove your Claim token (which can be used more than once, for other Exploration points, but only for one at a time) and replace it with one of your Resource cubes (taken out of the Enlightenment bag) by placing it in between the two Exploration points. This indicates you are now ready to build an orbital there.
Note: you can only take a maximum of 4 of your Resource cubes out of the Enlightenment bag, even though you have a total of 5 Resource cubes. This is to retain balance in the game, and ensure each civilization always has a chance of being affected by a crisis, even though your chances can be minimized.
Example: In the example above, Captain Anor successfully explored the point in the center of this sector. She decides to place her Claim token on top of the leftmost Knowledge token in that sector, which she will attempt to explore on her next turn.
Example: In the example above, Captain Anor successfully explored two Exploration points. She removed her Claim token and placed one of her Resource cubes in between the two explored points.
Expanding Economic Influence
Once you have at least one Resource cube or orbital in a sector (Economic Influence), you may expand your Economic Influence to any connecting Outer Limit tiles or Zuron Asteroid, provided you successfully explore it first. This means that you can now place a Resource cube there (and eventually build an orbital there), since you have already established Economic Influence in a connected sector.
Additionally, you may expand your Economic Influence to an Outer Limit tile or Zuron Asteroid if it is connected to your home planet, provided you successfully explore it first.
Example: In the example above, Captain Anor successfully explores two Exploration points in sector 01, allowing her to place a Resource cube there [1]. She then moves outward, connecting two Outer Limit tiles. She successfully explores them both, which allows her to place a Resource cube in each [2] [3] since they are all connected.
Captain Borzon successfully explores two Exploration points in sector 03, allowing him to place a Resource cube there [4]. He then moves into sector 10 "Zuron Asteroid" and successfully explores it, which allows him to place a Resource cube there since it's connected [5].
Captain Borzon cannot expand his Economic Influence to sector 06 [6] right now, since it is not connected to a sector he has Economic Influence in. However, Captain Anor can expand her Economic Influence to sector 06 (if she successfully explores it), since it's connected to her home planet.
Designer's Note: Think of the hex system as a tree with its roots. Once you establish a root (obtain Economic Influence in a sector), you can then begin expanding outward as long as you remain connected. If your root gets cut off at any point (blocked by another sector where you don't have Economic Influence, or a player initiates a battle and you lose your Resource cube(s) or orbital(s)), you cannot continue to expand outward from that point.
Two or more players cannot share control of a sector (e.g. each having one Resource cube or one orbital in a sector with multiple Exploration Points), UNLESS a battle occurs between two players, and the winner takes one Resource cube or orbital from the loser (see Battle phase).
Recruit (REC)
Recruiting gives you both Specialist and Crisis cards, which allow you to take part in the Enlightenment phase and gain energy. Specialists are also essential to have if you want to resolve a crisis.
Both Crisis and Specialist cards have Phase icons on them which represent the phase in which that portion of the card can be played.
- Enlightenment Phase
- Action Phase
- Battle Phase
In the illustration, the Crisis card on the left can only be played during Enlightenment phase. The Specialist card in the middle can only be played during Battle phase. The Specialist card on the right can be played during Enlightenment phase or during Action phase.
To recruit a specialist, first pay the cost in TAU (the number to the right of your Materials marker). Next, draw 1 card from the top of both the Specialist deck and Crisis deck (you must also take a Crisis card each time you recruit a specialist).
When playing a Specialist card during the Action phase or Battle phase, play it when you want to use it. Most Specialist cards can be used for the duration of the game, unless stated otherwise on the card. Playing a Specialist card is a Minor action, and therefore does not require the use of energy or any other resource.
Interplanetary Mission (IM)
IMs allow you to earn TAU. IMs involve skill checks or pickup/deliver.
To take an IM, first expend the required energy, then draw the top 3 cards from the IM deck and choose one (you may look at them). Shuffle the other two cards back into the bottom of the deck, and place your IM card on one of the card spaces on your Interface. The IM will remain there until you complete it and collect the rewards. Discard the card upon completion.
For pickup/deliver IMs, you do not need to carry the Commodity token. The card itself is considered the commodity.
Rewards for pickup/deliver IMs are based on the quantity you can carry and distance traveled [your cargo hold capacity] x [number of sectors traveled]. Before taking a pickup/deliver IM, calculate the minimum distance needed to make the delivery, and then go directly on that route and make the delivery before pursuing any other actions.
In the illustration, let's assume Dr. Krenji has a cargo capacity of 3. He travels 3 sectors to make a delivery from Xuno to Zuron Asteroid. Therefore, he earns 9T for the mission.
Advanced Rule 4: Pickup/Deliver IMs require permission from the TCA. Before taking a Pickup/Deliver IM, perform a Logistics skill check. If 5 or 6, you have permission to make the delivery. If 1-4, you do not have permission, but may still make the delivery by carrying an Unauthorized Transport token (placed on top of your IM card).
Upon delivery, roll 1 die. 5 or 6 indicates you smuggled the cargo in secretly. If 1-4, pay that amount in TAU as a fine for being caught making an unauthorized transport.
Advanced Rule 5: Transporting quark-gluon plasma is dangerous, and can be explosive. If you incur damage while transporting it, that damage is doubled. However, your reward for transporting plasma is also doubled. Higher risk = higher benefit.
Repair (REP)
Repairing is necessary to get rid of damage in your star ship's systems.
To repair, first pay the cost in energy, then remove the Damage markers you want to repair and pay the cost in TAU. Each Damage marker costs 1T to repair on a planet, and 2T to repair in space (any non-planetary sector).
Move (MOV)
Your starship represents your movement in the star system, where you may move from sector to sector. Each hex tile is considered one sector. The amount of sectors you may travel in one Move action is based on your Propulsion power.
To move, first expend the required energy, then move your starship across the sectors.
The star system consists of several different types of Major sectors; TAU CETI [1] (which you cannot move through), planets [2], Zuron Asteroid [3], and an empty sector [4]. The star system also contains several Minor sectors (also referred to as Outer Limit tiles), which are; cosmic energy [5], asteroid fields [6], and wormholes [7].
When moving into cosmic energy, roll 1 die. If 5 or 6, nothing happens. If 1-4, subtract your Shields power from the die roll. If the result is a positive number, you take that amount of damage (apply to any system). If the result is a negative number, you gain that amount in energy.
When moving into an asteroid field, roll 1 die. If 5 or 6, you navigated safely through the asteroids. If 1-4, subtract your Shields power from the die roll. If the result is a positive number, you take that amount of damage (apply to any system). If the result is a negative number, nothing happens.
When moving into a wormhole, you have a choice to roll 1 die if you want to try and travel through the wormhole. Upon rolling the die, if 5 or 6, you go through the wormhole and end up in the other wormhole sector. If 1-4, subtract your propulsion power from the die roll. If the result is a positive number, you lose that amount in energy. If the result is a negative number, nothing happens.
Wormhole rules: BOTH wormhole sectors must be present in the star system to work. Moving from one wormhole to another is considered the same sector, so when calculating number of sectors traveled, it should be noted that simply traveling from one wormhole to another is considered zero sectors traveled.
Reverse Engineer (ENG)
Reverse engineering is a prerequisite to the Upgrade action (although, some factions do not need to reverse engineer to upgrade certain systems, which will be indicated on their Interface).
ONLY quark-gluon plasma, nano processors, and octo-nanofluid can be reverse engineered. (The printed text breaks this word across a line as "oc-to-nanofluid"; it is restored here.) These commodities must be bought first with the S/B action, then reverse engineered, which will allow you to upgrade their associated systems.
To reverse engineer, first expend the required energy, then move the Commodity token over top of the reverse engineering icon on the commodity section of your Interface. This indicates that you are now ready to upgrade the associated system.
Example: In the example below, Captain Anor has just reverse engineered 3 nano processors by moving the nano processor Commodity token up over the reverse engineering space in column 3. She is now ready to upgrade her computers or propulsion.
Upgrade (UPG)
Upgrading allows you to improve any of your star ship's systems with greater power or capacity, and simultaneously reduces your cost to recruit specialists by increasing their confidence in you.
Upon upgrading, move your Materials marker one space to the right, remove the reverse engineered Commodity token from your Interface (place in the Supply pile), then place the System Upgrade token on top of the system being upgraded.
Any damage marker present on a system must be transferred to the System Upgrade token.
Example: In the example above, we see Captain Anor is upgrading her propulsion system. Since she reverse engineered 3 nano processors, she selects a level 3 propulsion System Upgrade token by placing it on top of her propulsion system [1]. If the System Upgrade token level of power/capacity isn't available, select the next lowest.
Your system's power or capacity is represented by the white squares in each system [2]. We see Captain Anor has a weapons power of 1 in this example. Each of your default systems on your Interface have an icon in them [3], which represent the associated commodity/resource needed to upgrade that system.
Advanced Rule 6: You may acquire any 1 exotic tech of your choice (if it's available) once your materials are maximized (Materials marker reaches the left-most space on your Materials track). This is considered an upgrade, so you still need to take the Upgrade action and pay the cost in energy, but you do not have to go through the normal process. Simply take the Exotic Tech token and Exotic Tech card.
Once you acquire an exotic tech, you must keep it for the duration of the game. You cannot change it or acquire new exotic techs. Some exotic techs are a one-time use, which will be indicated on the Exotic Tech card.
Refuel (REF)
Refueling is a failsafe in the event you have trouble acquiring more energy. Refueling is always free, and gives you an automatic +2 Energy.
Sell/Buy (S/B)
You may only sell/buy commodities with the S/B action, and must be on a planet to do so.
Commodity values fluctuate depending on two variables; Market Level and Demand.
- Market levels for each commodity are found on the TCX (each commodity token has a resource icon on the top right corner, which represents that type of resource).
- Demand is either 2 or 1. The Commodity token that is on a planet will always have a demand of 2 on that planet. All other commodities on that planet have a demand of 1.
To buy, first expend the required energy, then choose the commodity and the quantity you want to buy. You can only buy one type of commodity per S/B action. Buying is completed as follows:
-
Pay the commodity's price [market level x demand] in TAU. Remember to multiply by the quantity you wish to buy (you can buy a maximum of four of one type of commodity at a time). It is most beneficial to buy commodities when they are not in demand, and when their market level is low.
-
Place one Commodity token of the type you bought (taken from the Supply pile) on the corresponding quantity column in the commodity section on your Interface (e.g. if you buy 3 Xunari algae, place 1 Xunari algae Commodity token in column 3).
-
Change the demand on the planet you bought from, by replacing the Commodity token with another one (taken from the Demand pile).
To sell, first expend the required energy. You can sell multiple types of commodities per S/B action. Selling is completed as follows:
-
Discard the Commodity tokens you wish to sell by placing them in the Supply pile, and gain the commodity's value [market level x demand] in TAU. Remember to multiply by the quantity you're selling. It is most beneficial to sell commodities when they are in demand, and their market level is high.
-
Change the demand on the planet you sold to, by replacing the Commodity token with another one (taken from the Demand pile).
Minor Actions
Minor actions can be taken during your turn, before or after you take a Major action, and are unlimited. Minor actions include: trading, re-rolling a skill check, resolving a crisis, playing a Specialist card, and assisting.
Trading
You may trade the following at the corresponding rates:
- Specialists [2:1] - place the two Specialist cards you want to trade in bottom of Specialist deck, take 3 Specialist cards from top of Specialist deck, and choose 1. Place other 2 Specialist cards back in bottom of deck. You cannot trade Crisis cards.
- Knowledge [2:1] - you may trade Knowledge tokens with another player or with the Galactic Depot.
- Knowledge for TAU - you may trade a Knowledge token for the amount of TAU indicated on the back. Place Knowledge token in Galactic Depot upon trading it in for TAU.
- Resource Units for Materials - you may trade a Resource cube on your planet for materials. Place the Resource cube back in the Enlightenment bag, and move your Materials marker +1 to the right.
- GP tokens for rewards - you may trade GP tokens for the reward indicated on the back of the GP token. Note: some GP tokens can be traded for a free system upgrade. You must still take the Upgrade action, but do not have to buy or reverse engineer commodities.
Re-Rolling a Skill Check
You may re-roll a skill check (and skill checks only) at any time for a cost of 2T, but you must use the re-roll.
Playing a Specialist Card
You can play Specialist cards during the Enlightenment phase to prevent crises and gain energy.
Advanced Specialists (included in the Kickstarter promo packs) have special abilities which you can utilize during the Action phase and Battle phase. While Advanced Specialists can be played during the Enlightenment phase for energy, they cannot prevent crises. However, some of them can resolve crises, increase a skill set, etc.
To utilize an Advanced Specialist's abilities, you must turn the card face up. As long as you have a Specialist, you have unlimited use of its abilities.
Resolving a Crisis
You may resolve a crisis at any time during your turn in the Action phase. You must have the corresponding Specialist card and Knowledge token (e.g. a Chemist Specialist card and Chemical Knowledge token can resolve a Chemical crisis). You may also resolve a crisis if you have 3 of the same Knowledge tokens (e.g. 3 Chemical Knowledge tokens can resolve a Chemical crisis).
You do not have to be on the planet in crisis to resolve it (you can resolve a crisis from any sector).
Upon resolving a crisis, the following must be completed:
- Knowledge token used is placed in the Galactic Depot.
- Specialist card used is placed back into the bottom of the Specialist deck.
- Crisis token used is placed back into the bottom of the corresponding stack of Crisis tokens on the TCX.
- The Market level of the resource that was affected goes back down 1 level.
Resolving a crisis is rewarded with a 3GP token.
Assisting
When another planet is affected by a crisis that is affecting the resource you specialize in, you may assist that planet. To assist, you must have a Resource cube on your planet. While on your planet, pick up the Resource cube by placing it in your cargo hold, travel to the planet in crisis and drop the Resource cube off on that planet. The Resource cube will remain on that planet for the duration of the game, even if the crisis is resolved, thereby causing you to lose 1 GP and the player being assisted (if that alien race is being played) to gain 1 GP at the end of the game.
Upon delivery of the Resource cube, you earn a Diplomacy card, which allows you to take two Specialist cards when recruiting (instead of 1 Specialist card and 1 Crisis card). Once you earn a Diplomacy card, you may keep it for the duration of the game.
The benefit of having a Diplomacy card can be highly beneficial, as it could potentially give you an advantage in resolving crises.
Battle Phase
Battles commence directly after the Action phase ends, and must be resolved before the Enlightenment phase begins.
A battle is initiated when a player places his Battle token in a sector where another player has a Resource cube or orbital, during the Action phase. Note: battles are outlawed on all planets, and therefore cannot take place on a planet, for any reason.
More than one player can initiate a battle in the same round, but two or more players cannot initiate a battle in the same sector in the same round. If more than one Battle token is present in the hex system, the battle in the sector with the higher number is resolved first.
The player who places the Battle token is the Initiator, and the other player is the Defender. Players do not have to move their starship to the sector during battle (it is hypothetical that they fly to the sector and fly back to their original locations after the battle).
In the illustration, Captain Borzon has initiated a battle [1] with Captain Anor in sector 01. Captain Krenji has also initiated a battle [2] with Captain Borzon in sector 03. Since sector 03 has the higher number, this battle between Captain Krenji and Captain Borzon will be resolved first.
Both players involved in a battle start by assigning their shields (your Action markers are used as shields and placed above the systems you wish to protect). Your Shields power represents the number of shields you can use.
Any Specialist cards that you wish to play during battle must be turned face up next to your Interface, before battle begins (unless it is stated otherwise on the Specialist card). If a Specialist card is played, it can be utilized during the entirety of the battle (unless it is stated otherwise on the Specialist card).
In the illustration, Captain Anor has a Shield power of 3, and therefore chose to assign her 3 shields to systems 1 (weapons), 2 (shields) and 5 (cargo).
The Initiator always takes the first attack.
A Round of Battle Goes as Follows
- Player 1 attacks. To attack, roll the number of dice equal to your Weapon power.
The numbers rolled represent Player 2's systems that are targeted. If Player 2 has shields blocking any of the numbers rolled, they get blocked. Any numbers that aren't blocked by shields get through, but Player 2 has one last chance to try to block the hits by taking a counter-defense.
- Player 2 takes counter-defense. To take a counter-defense, roll the number of dice equal to your Computer power.
If any of the numbers rolled match the numbers rolled by Player 1's attack (that also made it past Player 2's shields), then those hits are ultimately blocked. Any hits that Player 2 is unable to block with a counter-defense will hit those systems and cause damage. Apply 1 damage per hit.
Both players may now reassign their shields, and now Player 2 takes an attack on Player 1. Battle rounds are repeated until a winner is declared.
How to Win a Battle
The first player to destroy ONE of the other player's systems wins the battle. To destroy a system, you must cause damage equal to the system's power/capacity. The loser must expend 1 energy after the battle.
Retreating
You may choose to retreat by verbally declaring to retreat, at any time during the battle. If you retreat you do not lose energy, and the other player cannot steal anything from you, even though they still win the battle.
Rewards for Winning a Battle
The winner of the battle ALWAYS earns a 1GP token.
If the loser doesn't retreat, the winner also gets to takeover ONE Resource cube or ONE orbital that the loser had in that sector by replacing it with one of his own. A Resource cube replaces a Resource cube, and an orbital replaces an orbital (no Build action necessary). The loser's Resource cubes would go back in the Enlightenment bag and his orbitals would go back on his planet.
If the loser doesn't retreat, the winner may also steal any ONE of the following from the loser:
- 1 Crisis card or 1 Specialist card (winner may look at loser's hand and choose)
- 1 Knowledge token
- A Resource cube (if it is being transported in the loser's cargo hold, in the event he is in route to assist another planet)
End of Game
The game ends after the final round is complete, which may end with the Action phase or Battle phase.
Players total their Galactic Points (GPs) as follows:
- TAU - each +10 TAU is worth GPs, as illustrated on each player's Interface.
- Crisis/Specialist cards - as indicated on the back of your Alien card, you get GPs for Crisis/Specialist cards that either have a dot or don't have a dot above the GP icon.
- Orbitals and Resource cubes - you earn GPs for each orbital you have in a non-planetary sector, and each Resource cube you have on your home planet. The amount of GPs earned is illustrated on each sector tile.
- GP tokens - accumulated from resolved crises and won battles.
Advanced Rule 7: Deduct 1 GP for each virus crystal on your home planet.
Advanced Rule 8: Deduct 1 GP for each level your Alien race's resource/specialization was raised on the TCX during the game. For example, if you are a Zorhkonian and Military is at level 3, you lose 2 GPs.
Advanced Rule 9: Deduct 1 GP for each Crisis token on your home planet.
The player with the most Galactic Points wins, and is crowned as the most influential emissary, and new leader of the Tau Ceti Authority!