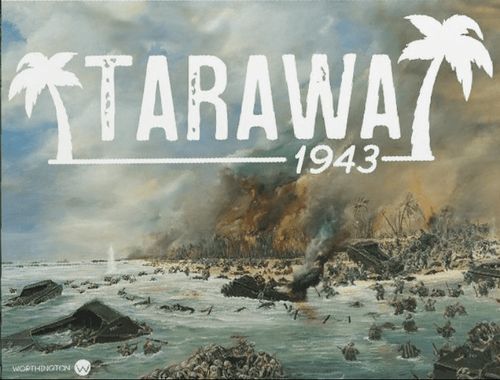
Tarawa 1943
Tarawa 1943 Rulebook
Table of Contents
Table of Contents
1.0 Introduction
The United States, having adopted Island hopping as one of its strategies for defeating the Japanese in the Pacific, were eager to begin taking the war to the enemy. Fresh off the campaign for Guadalcanal, the first island selected was a small atoll in the central Pacific, Tarawa. The cluster of small islands was in the shape of a reverse "L" with the prominent island, Betio, being at the western tip. The 4,500 or so Japanese defenders and Korean workers had built an airfield on the island, as well as a maze of bunkers, trenches, gun emplacements, and defense works.
This would be a testing ground for the campaign to come in the Pacific, not only for the Marines assigned the task, but for the commanders and strategy itself. Failure or excessive losses could lead to a change in US strategy and prolong the war.
At Tarawa in November of 1943, the US Marines would land roughly 12,000 men of the 2nd Marine Division. Within three days 3,166 men had become casualties (a casualty rate of 26%). To put this in perspective, on D-Day in France, June of 1944 the American's landed 73,000 men and suffered casualties of 6,600 men (a casualty rate of 9 %).
You, as the player will command the USMC invasion of Tarawa, while the game system, driven by cards, will control the Japanese defenders. The Japanese defenders may be referred to as Japanese AI (artificial intelligence) hereafter. There are optional rules to make the game system harder—or easier, as well as give you optional landing sites.
Note: The Japanese commander thought the USMC was going to land on the south side of the island and oriented most of his defenses in this way. The USMC did consider landing there, so you can play it out to see how it might have occurred.
2.0 Game Board
The game board represents the island of Betio, and the water around the island. Players should sit with the north side closest to them.
On the island and water are positions, each of which has 3 rectangular slots for the wooden troop markers.
Each island position is on the land portion of the board. There are nine island positions and each is labeled with a circle around a number, with the positions name.
In the water around the island are wave positions also with 3 rectangular slots. These are not numbered or named. The wave positions closest to the island are wave 1. The other wave positions are wave 2, which is adjacent only to wave 1 positions. Only USMC battalions may occupy wave positions.
Only 3 markers may ever occupy an island or wave position. A bunker cube may be placed on top of a position with 3 markers. Bunker cubes do not count as markers.
Positions are considered adjacent when they have arrows connecting them. Movement and attack actions are allowed when positions are adjacent.
CONTROL OF POSITIONS: Positions are controlled by either the Japanese or USMC. All island positions are considered controlled by the Japanese AI unless the last marker(s) to solely occupy the position were USMC markers. An infiltrating Japanese cube gains control of a previously controlled USMC position, even if USMC markers are present. This is important for victory, movement, combat, and card play.
Located in the upper right of the game board is the USMC Battalion Cohesion Tracks. The cohesion tracks list the 3 USMC regiments, and their battalions. For each regiment there are either 2 or 3 battalions with a track from 12 to 1.
In the upper left corner of the game board are 2 Japanese rising sun circles, labeled SHIBAZAKI KILLED, and COMMUNICATIONS DESTROYED. A red cube is placed in these circles when their respective cards have been played. This is important for how many dice are rolled for Japanese Banzai attacks. Also, three yellow cubes are placed in the Japanese Infiltration squares.
3.0 Game Components
USMC TACTIC CARDS: The USMC player has a deck of 30 Tactic Cards. The cards give various bonuses to the USMC during play. The card instructions tell the player how to use the card. Card instructions may counter rules within the game, in this case, the card instructions take precedence.
The USMC player at the start of his turn draws cards up to his maximum hand size of 3 cards. The USMC player may play or discard 1 card during his turn, and play (not discard) one card during the Japanese turn.
Example USMC tactic card:
2nd Tank Battalion
Instructions: Adjust any face on one die rolled in a USMC attack. Roll the dice first, then make the adjustment. May not adjust a roll of 4. May not be used in any attack from a wave area to a beach area.
History: The 2d Platoon landed on Beach RED 3 and found a break in the seawall where the tanks could move inland. Three tanks moved over to Beach RED 2. The platoon gave its support to a part of the 2d Battalion, 2d Marines, and helped the advance over to the west runway of the airfield.
Timing: Play during USMC turn
At the top of each USMC Tactic card is a picture. A title bar name of the card is at the bottom of the picture. The center section gives the card instructions on how the card is played and what to do when played. The section below that is some history related to the card. At the card bottom tells when to play the card. The play of an USMC tactic card does not count as an action.
JAPANESE AI ACTIVATION CARDS: The Japanese AI has a deck of 30 AI Activation Cards. The cards tell the player which Japanese units to activate and how to use the card. Card instructions may counter rules within the game, in this case, the card instructions take precedence. Only 1 Japanese AI activation card is played during the Japanese turn.
At the top of each Japanese AI card is a picture. A title bar name of the card is at the bottom of the picture. The center section gives the card instructions on how the card is played and what to do when played. The section below that is some history related to the card.
Example Japanese AI activation card:
Banzai!
Instructions: If USMC controls 1 or 2 island positions, Banzai Attack up to those 2 USMC occupied position(s) that are adjacent to Japanese occupied positions. Otherwise, conduct 2 fire attacks. The attack comes from the lowest priority adjacent Japanese Position.
History: The Japanese launched numerous small suicidal Banzai attacks during the battle. Communication breakdowns affected coordination.
Timing: Play during Japanese turn
BUNKER CUBES: Brown wooden cubes are used to represent bunkers. These are placed by play of Japanese AI Activation cards and USMC Tactics cards into occupied island positions. No more than one bunker may be in a position. A USMC or Japanese occupied position that has a bunker that must lose a marker due to defending a position removes the bunker as the first loss. Any excess hits are applied to USMC or Japanese markers occupying the position.
If all the USMC or Japanese markers leave a position with a bunker for any reason, the bunker is removed from the position.
Key Rule: A bunker does not occupy a position, it adds to the defense of it, so a USMC occupied position that has 2 markers and a bunker could still be Infiltrated by the play of a Japanese Infiltration card.
For example: The 2/8 occupies #1 Red Beach 1 with all three of its markers and a bunker. A Japanese fire attack causes a marker loss at that location. The bunker would absorb the first hit and be removed from the position.
Important: Attacking formations cannot use bunkers in their position to absorb losses. If the USMC battalion in the example above were the attacker and had rolled double 1's and not rerolled the result, they could not have taken the bunker as the loss as they were attacking, not being attacked. The same is true for the Japanese AI.
EXHAUSTION CUBES: These cubes show battalions that have failed an exhaustion check and are represented by a red cube. Place a red cube in a position with a USMC battalion that fails an exhaustion check. They do not occupy slots or positions and are to show status.
FORMATION MARKERS: Units (USMC battalions, or Japanese units) within positions are represented by the colored rectangular wooden markers.
JAPANESE MARKERS: The Japanese formation wooden markers are golden. Place ONE Japanese label showing a picture of a Japanese soldier with the label of IJN SNLF (Imperial Japanese Navy Special Landing Force) per marker. Because of the way the Japanese were defending on the island their movement, attack and defense are handled differently and you will be moving markers singly, doubly, or all from a position.
USMC MARKERS: The USMC battalion wooden markers are green with a USMC label applied to one of its long sides. Place ONE label with a picture of a Marine on one side of the wooden marker. Only one label per marker should be applied.
For each of the battalions there is a set of 3 labels on green wooden markers which represent a battalion. For example, 3 green wooden marker with the labels applied with the designation of 1/6 are the 1st Battalion of the 6th USMC regiment, as shown below.
USMC battalions are organized with the three markers sharing the same battalion designation considered as one unit. The markers should be placed so the player may see the battalion designation. There are eight USMC battalions in the game.
All the battalions were historically part of the 2nd Marine Division. The division was further broken down into regiments. The three regiments were the 2nd, 6th, and 8th regiments. Each regiment was then broken down into three battalions. The 2nd and 8th regiments each have three battalions, while the 6th has two battalions (one battalion was assigned to attack a different island than Betio).
During game play all USMC markers of a battalion are moved as one complete unit and attack and defend as one complete unit within a position. When all markers of a battalion have been removed due to marker losses by combat, that battalion is out of the game.
An alternate set of labels with the USMC emblem is included for players who would rather use that label.
Spares have been provided if there are any problems.
4.0 USMC Battalion Cohesion & Exhaustion
Unique to the USMC formations are battalion cohesion and exhaustion. Each battalion tracks its cohesion, and at certain states may reach a level of exhaustion.
Cohesion
Cohesion represents a USMC battalions morale, fatigue, combat effectiveness, etc. The USMC Battalion Cohesion Track, on the game board, is from 12 to 1. Cohesion may never go lower than 1 or higher than 12. It is used to track each USMC battalion's cohesion by using red cubes.
When USMC battalions' actions are rotation (one of the two battalions), move or attack, they reduce their cohesion by 1, moving the red cube down 1 space on the cohesion track. It may be reduced further due to combat or card actions by the Japanese AI. Cohesion may be increased or added to by the play of cards or a battalion regroup action. Once a battalion's cohesion reaches 5 or less it must conduct an Exhaustion Check to see if it is exhausted.
Note: Battalions at 6 cohesion or higher are never exhausted and never do an exhaustion check.
Key Rule: An exhausted battalion may only rotate positions as the result of a different battalion's move action.
Cohesion reductions, when a battalion is at 5 cohesion or less, triggers exhaustion checks after its actions are completed.
Important: For USMC battalions at 1 cohesion, any further cohesion reductions are converted to marker losses.
Exhaustion Check
An exhaustion check must be conducted when a non-exhausted battalion performing an action has its cohesion at 5 or less on its battalion cohesion track AND has completed its action (rotation, moving, and attack) or an exhausted battalion regroups.
Any Japanese attack causing a cohesion reduction against a USMC battalion at 5 or less also causes an immediate exhaustion check.
An exhaustion check is not conducted if the battalion is not exhausted and the cohesion has been moved up the track due to a regroup action.
For example: A non-exhausted battalion at 3 cohesion that regroups and raises its cohesion to 5 would not make an exhaustion check. However, if the battalion was exhausted and regrouped, it would make an exhaustion check to see if it became non-exhausted.
To make an exhaustion check, roll one die and compare the result to the battalion's current cohesion level on its battalion cohesion track. If the result is equal to or less than the current cohesion, the battalion is not exhausted. The exhaustion marker is removed from a previously exhausted battalion.
If the result is higher than the battalion's current cohesion, then the battalion is exhausted. Place an exhaustion marker on the battalion (or leave in place).
A battalion that fails its exhaustion check is not removed from the board. Once the USMC battalion reaches 1 on its cohesion track each additional cohesion reduction causes a marker loss.
An exhausted battalion that takes additional cohesion losses does not make an exhaustion check for the additional losses.
Key Rule: An exhausted battalion may only be part of regroup or rotation actions. An exhausted battalion may not conduct an advance after another battalions attack action.
5.0 Game Set Up
Place 3 Japanese markers in each numbered island position.
Separate the USMC markers by their battalions, each battalion having 3 markers sharing the same unit designation. Place 1 battalion in each wave 1 position with the label facing the player. These are adjacent to #1 Red Beach 1, (historically the 3/2 battalion), #2 Red Beach 2, (historically the 2/2 battalion), and #3 Red Beach 3, (historically the 2/8 battalion). Then place 1 battalion in each wave 2 position adjacent to the wave 1 positions (historically the 1/2 was in wave 2 adjacent to the 3/2, the 1/8 was adjacent to the 2/2 battalion, and the 3/8 was adjacent to the 2/8 battalion). The other 2 battalions are kept off board as reserves until the player brings them onto a wave position later in the game.
Take a red cube and place it in the #12 space of each USMC Battalion Cohesion Track.
Place the three gold cubes in the three Japanese Infiltration squares at the top left of the board.
Place the brown bunker cubes near the game board. Place the remaining red cubes there too. These red cubes will be used to mark on the game board the Shibazaki Killed, Communication Destroyed, and exhausted USMC battalions.
Shuffle the Japanese AI activation deck and deal 24 cards face down without looking at them. Place them in the Japanese Draw space on the game board. This is the Japanese AI activation deck. Place undealt cards aside face up in the Japanese discard pile space on the game board without looking at them. They will not be used in this game.
Shuffle the USMC tactic cards and deal 24 cards face down without looking at them. Place them in the Marine Draw space on the game board. This is the USMC tactics deck. Place undealt cards aside face down in the Marine Discard pile on the game board without looking at them. They will not be used in this game.
Draw the top 3 cards of the USMC tactics deck and place face up near you. This is the USMC starting hand of tactic cards. Discard any Bad Intelligence cards drawn at this time. Do not draw a replacement card if Bad Intelligence is discarded. You only discard Bad Intelligence cards if they are drawn during Set Up.
Battalions and Japanese formation markers are placed in the numbered positions, or for the USMC player the wave positions. Not all USMC formations will start on the board. Two or more battalions may start off board to start the game depending on where the USMC player picks as his landing beach.
6.0 Sequence of Play
Before the first round of the game is played, the Special Landing Phase is conducted.
SPECIAL LANDING PHASE: This only occurs once during the game. Make an initial Japanese fire attack roll of 4 dice against each of the USMC occupied wave 1 positions adjacent to an occupied Japanese position. Any die roll of 1 are treated as no result during this phase. This phase is only conducted before the first turn of the game. No cards are played for either side during this phase.
After the Special Landing phase at the beginning of a game, a series of rounds is played in the sequence below. Each round consists of one turn for the USMC player followed by a turn with the play of the Japanese AI.
USMC Turn
Draw up to 2 new cards from the tactics draw deck and place it face up into the USMC hand of tactic cards. Maximum of 3 cards allowed in the USMC tactics hand.
PERFORM ONE OF THE ACTIONS BELOW:
- Place a new wave
- Regroup
- Rotate Battalions
- Move
- Attack
Note: A USMC tactics card may be played before, during, or immediately after this activation.
Check for exhaustion for any USMC battalion that reduces below 6 cohesion this USMC turn.
If no tactics card was played, the USMC player may discard 1 tactics card from his hand.
Japanese AI Turn
Draw the top card from the Japanese activation draw deck and place face up in the discard pile.
Follow all instructions from the face up Japanese AI activation card.
Note: A USMC tactics card may or may not be played before, during, or immediately after this activation.
Check for exhaustion for any USMC battalion that reduces below 6 cohesion this Japanese turn.
PLAY CONTINUES IN THE ABOVE SEQUENCE UNTIL THE FOLLOWING OCCURS:
-
Once the last Japanese card is played, the game ends after the next USMC player turn.
Note: The USMC player gets one last turn after the last card is played from the Japanese AI deck.
-
The game immediately ends when the USMC player controls all island positions at the end of the USMC turn.
Tactic Cards
At the start of the USMC player turn, draw up to 2 tactics cards from the Marine Draw deck if there are less than 3 cards in the USMC player hand.
The USMC player may play any tactic card that is in his hand of 3 tactic cards. The USMC player may play 1 card during his turn and 1 card during the Japanese AI turn. The bottom of the card states during which turn it may be played. If a cards effect cannot be played, then the card may not be played. The tactics card will explain how it is to be played and what bonuses or possible penalties it gives the USMC player. Once played the card is placed in the discard pile.
The USMC player may discard 1 card from his hand to the discard pile IF a card was not played in the USMC turn.
The play of tactic cards does not count as an action for the USMC player turn and thus does not reduce cohesion.
Once all cards have been played, or discarded, and are in the discard pile the discard pile is NOT reshuffled as in other games. Once you are out of cards, that is it, you are out.
Performing Actions
The USMC player during his turn may perform one action. Depending on the action, the cohesion for the activated battalion(s) will be moved up, down, or not at all on the USMC Battalion Cohesion Track.
WHEN PERFORMING ACTIONS, IT ALLOWS ONE OF THE FOLLOWING FIVE ACTIONS:
PLACE A NEW WAVE: The USMC player may place up to 2 battalions that are off board into any vacant wave 1 or 2 positions. It does not reduce cohesion for the battalion's being placed in the wave positions, but it is the USMC action for the turn.
The wave position to Green Beach (#5) may only be placed using "Place a New Wave" action once a USMC battalion occupies Red Beach (#1) or Black Beach 1 (#6).
REGROUP: One battalion adds 3 to its current cohesion, move the marker up 3 spaces on its battalion cohesion track.
If the battalion is currently exhausted and the marker is in the 3, 4, or 5 space on its battalion cohesion track, make an immediate exhaustion check. If after the Regroup action the exhausted battalion is 6 or higher on its battalion cohesion track, the battalion is immediately rallied back to not exhausted. Remove the Exhaustion cube from the battalion position. Regroups on non-exhausted battalions do not require an exhaustion check.
ROTATE BATTALIONS: One battalion may swap positions with another battalion in an adjacent position. One of the two battalions must reduce its cohesion by 1 and perform any necessary exhaustion checks. Players choice of which battalion to reduce cohesion but it may not be an exhausted battalion. However, exhausted battalions may rotate during a Rotate Battalions action.
MOVE: One battalion moves its markers from its currently occupied position to an unoccupied position which may be friendly controlled or enemy controlled. Reduce the battalion's cohesion by 1. Further, one daisy chain effect is allowed; if there is an adjacent non-exhausted battalion to the moving battalion, it may reduce 1 cohesion and enter the position previously occupied by the moving battalion.
ATTACK: One battalion attacks an adjacent Japanese occupied position from its currently occupied position. To attack, move the cohesion for the attacking battalion down 1 on its cohesion track. The attacking battalion must be adjacent to the Japanese occupied position being attacked. To attack, roll 5 dice, plus any for tactics cards played. Results are only applied to the battalion attacking and the Japanese markers in the position being attacked. The dice combinations are as follows:
USMC Dice Results for Attacks
- DOUBLE 6'S = Remove 1 Japanese marker
- DOUBLE 5'S = Remove 1 Japanese marker
- EACH 4 = Immediately remove all 4's, they may not be rerolled
- EACH 3 = Reroll all 3's immediately (do not reduce cohesion)
- DOUBLE 2'S = Reduce the battalion's cohesion by 1
- DOUBLE 1'S = Remove 1 marker from the battalion
After the dice have been rolled and any dice immediately removed (4's) or automatically rerolled (3's), the USMC player decides which of the rolled dice to keep at this point in the attack; including single 1, 2, 5, and 6's. Set those keeper dice aside. The USMC attacking battalion may now choose to reroll any 1, 2, 5, and 6's from the previous roll that was not set aside as a keeper. If the USMC player chooses to reroll any dice the attacking battalion's cohesion is reduced by 1. On any reroll a player may choose to reroll a previous keeper die.
Rerolls may be repeated until the USMC player decides they are done attacking, or the battalion cohesion reaches 1 on the Battalion Cohesion Track. Each reroll of the dice immediately reduces the attacking battalion cohesion by 1.
KEY CONCEPT: Rerolls of 1, 2, 5, and 6's are the only dice that reduce attacking USMC battalion cohesion for a reroll. Rerolls of 3's are automatic and do not reduce cohesion. 4's are never rerolled and are removed before any rerolls of the other attacking dice.
APPLYING THE RESULT OF USMC ATTACKS: When a USMC attack ends, results are applied, for any keeper dice that are DOUBLE 1, 2, 5, and 6's. Each set of double 1's eliminates a USMC marker. Each set of double 2's reduces the attacking battalion's cohesion by 1. Each set of double 5's or 6's eliminates a Japanese marker.
Remaining single dice have no effect on the USMC attack results.
KEY CONCEPT ON ATTACK DICE: Only final USMC keeper dice affect battalion cohesion and marker elimination when the USMC attack ends.
After results are applied, if all Japanese markers in the position are removed, the attacking USMC battalion may advance into the attacked vacant Japanese position. (See Advance below).
After all rerolls, results applied, and advances, if any exhaustion checks are necessary they are done at this time. Note that advances are conducted before cohesion checks.
For example: The USMC player attacks with a battalion at a cohesion of 6. The player would reduce the cohesion to 5 for the attack. The player rolls the dice and gets a result of 6, 5, 4, 3, and 1. The 4 is removed as it may not be rerolled. The 3 is immediately rerolled (causing no reduction in cohesion), resulting in a 1. The dice are now 6, 5, 1, and 1. The two 1's cause a USMC marker loss, so the player decides to reroll the two 1's.
The USMC player reduces the battalion cohesion from 5 to 4, and rerolls the 1's, getting a 3 and 1. The 3 is rerolled resulting in a 5. The dice are now 6, 5, 5, and 1. This would result in the removal of 1 Japanese marker. The USMC player is satisfied and stops rolling. Results are applied and an exhaustion check is made since the battalion cohesion is now 4.
Advance After USMC Attacks
The battalion that has just attacked a Japanese position and eliminated the last Japanese marker may move its battalion markers into the now unoccupied position. Advance does not cost the USMC battalion a cohesion reduction, the advance is considered part of the attack.
Further, any one non-exhausted USMC battalion that is adjacent to the now vacant position that the USMC battalion advanced from, may move into the now vacant former USMC position. Unlike moves, this does not reduce the cohesion of the advancing battalion. Only one battalion such advance is allowed per attack (you may not daisy chain more than 1 battalion to the initial advancing battalion).
For example: A USMC battalion in #2 Red Beach 2 attacks Japanese occupied #4 Airfield. There is a non-exhausted USMC battalion in wave 1 adjacent to #2 Red Beach 2. The attack eliminates all Japanese markers in #4 Airfield. The attacking USMC battalion advances from #2 Red Beach 2 into #4 Airfield. As part of the advance, the USMC non-exhausted battalion in wave 1 adjacent to #2 Red Beach 2 then advances into #2 Red Beach 2 but does not reduce its cohesion for the advance. If there had been a USMC battalion in wave 2 adjacent to wave 1, it could not have advanced as you may only advance one extra battalion.
Japanese Turn
The Japanese AI turn is different from the USMC player turn as it is dependent on the artificial intelligence (AI) generated from the cards. Therefore, Japanese units do not track cohesion, may have multiple actions in a turn and in attacks generally cause effects with single die results and do not reroll any dice other than 3's.
Other Japanese functions are different in some cards, in that adjacency is not required for Japanese attack or movement.
The Japanese card deck provides the instructions for the Japanese AI play each turn. At the start of the Japanese turn, the player will draw and turn face up one card from the Japanese AI activation draw deck. Follow all instructions on the card. If any effects on the card are not possible to be played, then they are ignored. After all instructions have been followed the card is placed in the Japanese discard pile.
Most of the Japanese cards are for Japanese occupied positions attacking USMC occupied positions.
Key Rule: Unique to Japanese attacks are the concept of Attack Priority. Attack priority is the highest priority USMC island occupied or controlled position being attacked from the lowest priority adjacent Japanese occupied position.
The exception to this rule is when a USMC battalion does not occupy an island position and is in a wave 1 position. In that case, the Japanese attack the wave 1 USMC occupied position adjacent to the highest priority Japanese occupied island position. All Japanese fire attacks against wave 1 positions roll 1 additional die (except during the landing phase, as it has already been factored in).
Until a USMC battalion occupies a numbered island position, wave 1 positions are prioritized based on the priority of the adjacent island position to the wave.
For example: A USMC battalion in Wave 1 lined up on #1 Red Beach 1 would take Japanese attack priority over a USMC battalion in Wave 1 lined up on #2 Red Beach 2 followed by #3 Red Beach 3, etc.
In the event of multiple fire attacks by a Japanese card, island occupied positions always take attack priority over wave 1 adjacent positions.
For example: If the marines occupy #3 Red Beach 3 and the Japanese card calls for Fire Attacks against the 3 highest priority USMC positions, the attack would be against 1) #3 Red Beach 3. 2) Wave 1 adjacent position to #1 Red Beach 1. 3) Wave 1 adjacent position to #2 Red Beach 2.
Japanese Attacks
Japanese attacks are different than USMC attacks in that the Japanese roll attack dice one time, all results are keepers except for automatic reroll dice.
FIRE ATTACK AND FIELDS OF FIRE: Using attack priority, are attacks from positions occupied by Japanese unit markers to adjacent USMC occupied positions. Fire attacks and Fields of Fire attacks roll 3 dice. Fire attacks against USMC wave positions, add one die. Results are only applied to the battalion(s) being attacked and the Japanese markers attacking. Japanese fire attack dice combinations are as follows:
Japanese Fire Attack 3 Dice
- EACH 6 = Remove 1 marker from the USMC battalion being attacked
- EACH 5 = Reduce the cohesion by 1 of the USMC battalion being attacked
- EACH 4 = Reduce the cohesion by 1 of the USMC battalion being attacked
- EACH 3 = Reroll the die immediately
- EACH 2 = Cancel any 6 rolled
- DOUBLE 1'S = Remove 1 Japanese marker from the position attacking (ignore when attacking wave positions)
- SINGLE 1 = No Effect
BANZAI: These attacks only occur against USMC occupied island positions. Banzai attacks are not allowed against USMC wave positions. Using attack priority, are attacks from positions occupied by Japanese unit markers to adjacent USMC occupied positions. Banzai attacks roll 5 dice. Results are only applied to the battalion(s) being attacked and the Japanese markers attacking. Japanese Banzai attack dice combinations are as follows:
Japanese Banzai Attacks 5 Dice
- SINGLE 6 = Remove 1 marker from the USMC battalion being attacked
- SINGLE 5 = Reduce the cohesion by 1 of the USMC battalion being attacked
- SINGLE 4 = Reduce the cohesion by 1 of the USMC battalion being attacked
- SINGLE 3 = Reroll the die immediately
- SINGLE 2 = Reroll the die immediately
- SINGLE 1 = Remove 1 Japanese marker from the position attacking
Japanese Markers and Cubes
MARKER MOVEMENT: Move the number of Japanese markers given on the card from the Japanese occupied position to the position indicated, normally by lowest to highest priority. The positions do not have to be adjacent unless specified by the card.
Example Japanese AI activation card:
Troop Movement
Instructions: Move 1 marker from Position 8, if available, to the highest priority Japanese controlled position that has a vacant marker slot. Conduct a fire attack using attack priority.
History: The Japanese had no chance for outside reinforcements, however, they had built numerous communication trenches that allowed rapid movement around the island.
Timing: Play during Japanese turn
INFILTRATION CUBES: This is the only time cubes of the Japanese and USMC battalions markers may occupy the same position. Move one Japanese gold infiltration cube from an infiltration box to the USMC occupied position IF there is an empty marker slot in the occupied position (note bunkers do not occupy slots in a position). Japanese cubes infiltrating may also move into controlled USMC positions that are unoccupied by Marine markers. The USMC battalion in that infiltrated position must only attack that cube in its position until it is removed. An adjacent USMC battalion may attack the cube without affecting any of the USMC markers in the infiltrated position. The USMC battalion that has been infiltrated may regroup but may not move or rotate battalions.
Key Rule: Japanese infiltration cubes gain control of the position they occupy until they are removed, may not attack any USMC position, and may not move.
Japanese infiltration cubes can only be removed by a successful USMC attack action directly against it with a roll of double 5's or double 6's.
7.0 Victory
Victory is determined at the end of the game which occurs one of two ways given below:
- Once the last Japanese card is played, the game ends after the next USMC player turn.
- The game immediately ends when the USMC player controls all island positions.
Victory Points
Victory points are totaled to determine the victor and level of victory.
USMC:
- Marines receive 2 VP per USMC controlled island position.
- Marines receive 1 VP per Japanese card remaining after USMC control all island positions.
JAPANESE:
- Japanese receive 2 VP per USMC marker eliminated.
- Japanese receive 1 VP per USMC battalion exhausted.
- Japanese receive 3 VP for each Japanese controlled island position.
Victory Results
-
If the Japanese tie or exceed the USMC VP total it is a Japanese win.
Catastrophic USMC Defeat: The USMC 2nd Division is effectively out of action for 2 years as it is rebuilt. The US island hopping strategy is abandoned and Douglas MacArthur's slower strategy is adopted.
-
If the Marines have more VP than the Japanese it is a USMC victory determined as follows:
- 1 – 5 VP = Marginal (Historical Victory)
- 6 – 9 VP = Moderate Victory
- 10 VP+ = Smashing USMC Victory
USMC Smashing Victory: The island-hopping strategy is confirmed as successful and continues but is sped up and the war is ended 6 months sooner, some islands are bypassed and losses for the US side are reduced as a result.
8.0 Optional Rules
Adjusting Difficulty
To make the game more difficult for the USMC player, reduce the number of Japanese cards used during setup to 21.
To make the game easier for the USMC player, increase the number of Japanese cards used during setup to 27.
Optional Landing Sites
Historically, the marines landed along Red Beach 1, 2, and 3. The Japanese had expected a landing on the other side of the island and had positioned their heaviest weapons facing along Black Beach 1 and 2. The USMC player may opt to instead land at Black Beach 1 and 2 instead of Red Beach 1, 2, and 3. To use this option use the following rules:
Place 2 battalions (1 each) in wave 1 adjacent to #6 Black Beach 1, and #7 Black Beach 2. The player should place a battalion in wave 2 adjacent to each wave 1 battalion.
A wave may not be placed on #5 Green Beach until #6 Black Beach 1 is USMC controlled.
Play all other rules the same.
9.0 Game Setup and Turn Example
The USMC player sets up three markers of the same unit designation for each battalion in the following locations, the 1/2 USMC battalion in wave 1 adjacent to #1 Red Beach 1, the 2/2 USMC battalion in wave 1 adjacent to #2 Red Beach 2, and the 3/2 USMC battalion adjacent to #3 Red Beach 3. In wave 2, the USMC player has the 1/8 battalion adjacent to the 1/2 USMC battalion, the 2/8 USMC battalion adjacent to the 2/2 USMC battalion, and the 3/8 USMC battalion adjacent to the 3/2 USMC battalion. A cube is placed on the 12 space for all six battalions. All positions on the island are occupied by three Japanese markers.
The USMC draws his three tactics card to begin play. He draws a Col. Shoup Leads the Way card, a Command Coordination card (allowing actions by 3 battalions in a turn), and a Bad Intelligence card. The Bad Intelligence card is discarded immediately, and no replacement is drawn. This leaves the USMC player with only 2 cards to start the game.
During the Landing Phase the Japanese player rolls 4 dice using the Japanese Fire Attack chart against each of the battalions in wave 1 adjacent to #1 Red Beach 1, #2 Red Beach 2, and #3 Red Beach 3. Against the 1/2 USMC battalion the attack removes 1 marker and reduces the battalion's cohesion from 12 to 11. Against the 2/2 USMC battalion the attack reduces the battalion's cohesion from 12 to 9. Against the 3/2 USMC battalion the attack removes 2 markers. The USMC player is not allowed to play any cards during the Special Landing Phase.
It is now the USMC turn.
The USMC player decides to play the Command Coordination card which allows actions by 3 battalions this turn (normally you can only use on action for one battalion per turn). The USMC player activates the 3/2 battalion to rotate positions. It reduces its cohesion by 1 and rotates positions with the 3/8 battalion in wave 2. The 3/8 battalion does not have to reduce cohesion for this rotation and it prevents the 3/2 from having all of its markers eliminated by a future Japanese attack. This puts the 3/8 in wave 1 adjacent to #3 Red Beach 3, with 12 cohesion and all of its markers.
As the second action on the Command Coordination card, the USMC player does a regroup action with the 1/2 battalion raising it from 11 tor 12 cohesion.
Next the player uses one action for the 2/2 battalion to attack #2 Red Beach 2. The player reduces the 2/2 cohesion from 9 to 8. The player rolls 5 dice, with the results being a 6, 6, 4, 3, and 1. The player removes the 4 die, and rerolls the 3 getting a 1. The results are now a 6, 6, 1, and 1. The player decides the 6's are keepers and sets them aside. Because the double 1's would result in a marker loss the player spends another cohesion to reroll the 1's, and gets very lucky rolling a 5 and 5 and chooses to keep those. The final results are 6, 6, and 5, 5. This results in the removal of 2 Japanese markers from #2 Red Beach 2, leaving just 1 Japanese marker. This ends the USMC player turn.
10.0 Key Things to Remember When Playing
- The card instructions take precedence over the rules.
- Certain Japanese card actions may have markers "moving" through USMC occupied positions to higher priority USMC occupied positions. This is allowed. The battle was not a solid line of marines across the island and the Japanese infiltrated through USMC lines repeatedly, as well as snipers popping out of previously bypassed Japanese positions.
- What reduces a USMC battalion cohesion:
- Action used by a USMC battalion to rotate battalions, move, attack.
- Reroll of a USMC battalion attack dice.
- USMC battalion attack dice double 2's that are keeper dice finals.
- Japanese attacks for each single 4 or 5 die rolled on an attack of a USMC battalion.
- What increases USMC battalion cohesion:
- Regroup action
- USMC cards Recuperate and Reinforcements.
- When cohesion is reduced for a USMC battalion:
- Before a USMC battalion move is executed
- Before a USMC battalion attack is executed
- Before re-rolling USMC battalion attack dice
- After USMC battalion attacks with final keeper dice double 2's
- After Japanese attacks for each single 4 or 5 die rolled against a USMC battalion.
- Exhaustion Checks are made for non-exhausted battalions with cohesion under 6. The exhaustion check is made after actions are completed.
- USMC attack die rolls end when the USMC player decides he is done with rerolls OR his battalion cohesion is at 1.
Rule Questions: We would love to hear from you. Please frame your question in a "Yes" or "No" style and email it to us at: [email protected]
Also, visit our website at: worthingtonpublishing.com for any future rule updates.
Game Design: Grant Wylie and Mike Wylie
Amazing Creative Director: Sean Cooke
©2021 Worthington Publishing
Quick Reference: Attack Tables
The rule book's back cover reprints the attack-result tables below alongside their full-rule text (see 6.0 and 6.0 Japanese Attacks above) as a player aid.
USMC Dice Results for Attacks
- DOUBLE 6'S = Remove 1 Japanese marker
- DOUBLE 5'S = Remove 1 Japanese marker
- EACH 4 = Immediately remove all 4's, they may not be rerolled
- EACH 3 = Reroll all 3's immediately (do not reduce cohesion)
- DOUBLE 2'S = Reduce the battalion's cohesion by 1
- DOUBLE 1'S = Remove 1 marker from the battalion
Japanese Fire Attack 3 Dice
- EACH 6 = Remove 1 marker from the USMC battalion being attacked
- EACH 5 = Reduce the cohesion by 1 of the USMC battalion being attacked
- EACH 4 = Reduce the cohesion by 1 of the USMC battalion being attacked
- EACH 3 = Reroll the die immediately
- EACH 2 = Cancel any 6 rolled
- DOUBLE 1'S = Remove 1 Japanese marker from the position attacking (ignore when attacking wave positions)
- SINGLE 1 = No Effect
Japanese Banzai Attacks 5 Dice
- SINGLE 6 = Remove 1 marker from the USMC battalion being attacked
- SINGLE 5 = Reduce the cohesion by 1 of the USMC battalion being attacked
- SINGLE 4 = Reduce the cohesion by 1 of the USMC battalion being attacked
- SINGLE 3 = Reroll the die immediately
- SINGLE 2 = Reroll the die immediately
- SINGLE 1 = Remove 1 Japanese marker from the position attacking