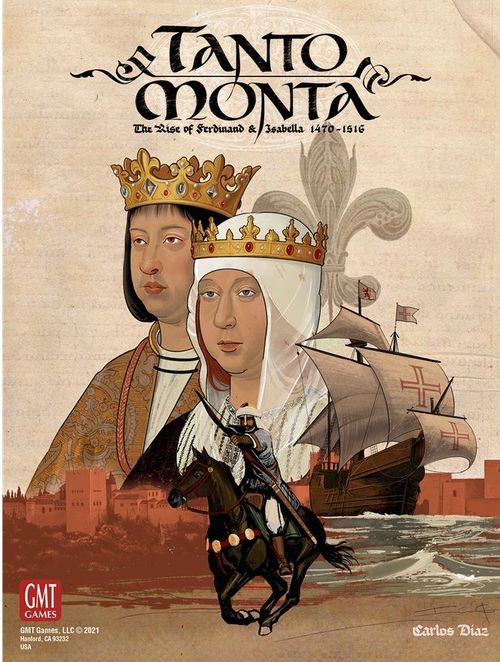
Tanto Monta: The Rise of Ferdinand & Isabella 1470-1516
Tanto Monta: The Rise of Ferdinand & Isabella 1470-1516 Rulebook
Table of Contents
Table of Contents
- 1. Introduction
- 2. Game Board
- 3. Players, Powers, and Rulers
- 4. Player Cards
- 5. Military Units
- 6. Cards and Resources
- 7. Sequence of Play
- 8. Card Draw Phase
- 9. Diplomacy Phase
- 10. Spring Phase
- 11. Action Phase
- 12. Control and Unrest
- 13. Movement
- 14. Field Battle
- 15. Siege
- 16. Naval Affairs
- 17. Construction
- 18. Winter Phase
- 18.1 Mandatory Events
- 18.2 Military Order Activity Against Corsairs and Loss of Nasrid Home Spaces
- 18.3 Discard Unused Resources
- 18.4 Loaned Naval Unit Markers
- 18.5 Return of Land Units
- 18.6 Replacements and Morisco Uprising
- 18.7 Naos and Naval Units Return
- 18.8 Resource Return and Foreign Trade
- 18.9 Major Power Alliance and Piracy Markers
- 18.10 Diplomacy Reset
- 19. Royal Weddings
- 20. Major Powers
- 21. Minors and Independents
- 22. Victory
1. Introduction
Tanto Monta: The Rise of Ferdinand and Isabella is a 4-player game based on the reigns of Isabella I of Castile and Ferdinand II of Aragon, best known as the Catholic Monarchs. The game's name is taken from their popular motto ("Tanto Monta, Monta Tanto") that roughly translates to "As much as the one is worth, so too is the other." Each player controls one or more major powers that participated in the military, political, and societal conflicts in the Mediterranean, Western Europe, and North Africa during the reign of the Catholic Monarchs. The players' roles are: the newly unified Spain, the maritime empire of Portugal, the emerging power of France, and the Muslim powers of the region who desperately resisted the advances of the European Christian kingdoms.
Components
A complete game of Tanto Monta includes:
- 1 rule book
- 1 scenario book
- 6 sheets of counters
- 4 player cards (unique)
- 4 player aids (unique, two-sided)
- 1 map
- 131 playing cards (main deck)
- 4 Reference cards (identical, two-sided)
- 1 Minor Power Diplomacy chart
- 1 Diplomacy Chart/Royal Wedding Table
- 12 dice
2. Game Board
The game is played on a map that depicts the areas of the world critical to these powers during the late 15th Century and early 16th Century. The main playing area, referred to as the Main Map in these rules, includes the Iberian Peninsula, southern France, the Italian Peninsula, and North Africa. Cities and towns that played important roles during this period are represented on the Main Map as squares, triangles, circles, and eight-pointed stars called spaces. A network of lines called connections links these spaces. A space connected to another by one of these lines is an adjacent space. Some of the spaces are also ports (a circular symbol with an anchor inside). Ports allow access to a series of areas called Sea Zones (blue regions with bright blue boundaries).
On the bottom right of the map is the peripheral play area called the Exploration Map which includes the regions bordering the Atlantic and Indian Oceans that were explored and settled by these powers during this period. Circular spaces on the Exploration Map are called Exploration Map Spaces; they start the game vacant but can come under control of a power that establishes a settlement at that location. Each Exploration map space is considered to be connected to the Ocean Zone that it borders.
The political status of each space is updated throughout play using control markers. Detailed information about control markers and Main and Exploration Map elements is provided in this section of the rulebook.
2.1 Spaces
All the spaces on the Main Map have two characteristics that define them: whether they are fortified and whether they are the home space for one or more major or minor powers or are independent.
Fortified Spaces: A fortified space represents a walled city or town. A power must successfully besiege a fortified space to gain political control of that city. Up to four friendly land units may remain within a fortified space to defend that city against an enemy siege. Fortified spaces also serve as winter quarters. There are two different types of fortified spaces:
- Key: A key is a fortified space represented by a square. Keys are the most influential and wealthy spaces; control of a key gives a power victory points (VP). If a power loses all keys for one of their powers, that power surrenders and may not spend CPs on any actions to recruit new units until it recovers at least one such space. If Catalonia, the Nasrid Kingdom of Granada, or the Beltranejos faction surrenders, see the special rules in Section 22.1.
- Fortresses: A fortress is a fortified space represented by an eight-pointed star. Fortresses are walled towns with little economic value. In most cases they will not grant a power victory points. However, a fortress's strong defenses force a power to besiege the space to gain political control. Powers may construct fortresses on simple unfortified spaces or in Exploration Map settlements.
Unfortified Spaces: An unfortified space represents the cities and towns that can be controlled without siege. Forces from two powers that are at war must fight a field battle if they ever simultaneously occupy the same unfortified space. There are two different types of unfortified spaces:
- Strategic Spaces: A strategic space is an unfortified space represented by a triangle. These spaces represent locales that were critical to control due to their strategic value (such as river fords, mountain passes, and road junctions). 1 VP is obtained when a power controls it. Strategic spaces cannot be controlled by military units in an adjacent space; controlling them requires the presence of units in the strategic space itself.
- Simple Space: A simple space is an unfortified space represented by a circle. No victory points are awarded for their control. These spaces may be controlled by military units in adjacent spaces.
Independent Spaces: The gray spaces of Tunis (in Africa); Milan, Modena, and others in Italy; Roussillon (in the Pyrenees); Metz (in France); Ragusa (on the Adriatic Sea); and the Canary Islands are independent spaces and are not aligned with any of the powers represented in the game.
Home Spaces: Spaces that are not independent are home spaces of a specific power, as indicated in the following table of powers which lists the color of each power's home spaces.
| Power | Color |
|---|---|
| Castile | Ochre |
| Aragon | Red |
| France | Blue |
| Portugal | Garnet |
| Beltranejos | Turquoise |
| Principality of Catalonia | Ivory |
| Nasrids | Dark Green |
| North African Alliance (S. Fez) | Green |
| North African Alliance (Berber) | Light Green |
| Navarre | Dark Gray |
| Papacy | Purple |
| Genoa | Pink |
2.2 Political Control
The political control of each space is tracked throughout the game. By default, each space is under the political control of its home power. As political control changes, control markers are placed on top of the space to indicate that the political control has changed to a non-home power. These control markers are color-coded by power and also include a flag used by that power during the time period of the game.
Controlled Space. A space that is controlled by a major or minor power is a controlled space. Controlled spaces for a power include:
- Home spaces that have not fallen to another power.
- Independent (gray) spaces seized by the power.
- Home spaces of other powers seized by the power.
- Home spaces of allied minor powers that have not fallen to another power.
Control Terminology
- Friendly: The term friendly refers to any game element (space, unit, stack, formation) that is controlled by the active power or an ally of that power.
- Enemy: The term enemy refers to any game element that is controlled by a power that is currently in a state of war with the active power.
- Independent: The term independent refers to any game element that is not controlled by a major or minor power. For the purposes of the rules, independents are considered neither friend nor enemy except for the special case of the Guanche people of the Canaries, who despite being independent have special characteristics (21.7).
EXAMPLES: Independent units cannot intercept moving forces as only enemy formations may attempt intercepts. Adjacent independent units do not prevent unoccupied, simple unfortified spaces from being controlled from another adjacent space, an action that is restricted by the presence of adjacent enemy units.
2.3 Control Markers
Control markers are used to denote the political control of a space. These control markers are color-coded by the conquering power and also include the flag, banner, or symbol representing that power during the late 15th and early 16th Centuries. Aragon and Castile share the same control marker as the foreign policy of both kingdoms was united in the hands of their monarchs, hence their heraldic shield is their control marker. The Berbers of Tlemcen and Sultanate of Fez share the same control marker as both kingdoms form the North African Alliance. Some control markers have different heraldic shields on the two sides representing each of the powers controlled by the same player (in the Spanish case both powers use the same shield so the two sides are identical). There are three types of control markers as detailed below.
Square Marker. Square control markers are used to show control of keys. These markers are transferred between the player's card and the map when a key is captured or lost in order to allow VPs for controlling keys to be easily tracked. Note these four rules:
- Every key on the map must contain a square control marker. Exceptions: Independent keys not currently under major power control and keys of minor powers when they are neither allied to a major power nor captured.
- Every square control marker must be either on the map or on the appropriate Player Card.
- Possession of a key grants VP to the controlling player helping them win by Standard Victory or by Domination Victory.
- If a player succeeds in placing all his square control markers on the map he will get an Automatic Victory (22.2).
Triangular Marker. Triangular control markers are used to show the status of strategic spaces (triangular in shape on the map). These markers are transferred between the pool of such markers and the map when a strategic space is captured or lost. Note the following three rules:
- Strategic spaces still controlled by their home power should not contain a marker.
- Add a triangular marker to a strategic space whenever a non-home power gains control of it.
- Possession of a strategic space grants VP to the controlling player helping them win by Standard Victory or Domination Victory, but never by Automatic Victory.
There is no limit to the number of spaces a power can control with triangular control markers; if a power uses all of its markers, improvise with unused markers from other powers.
Hexagonal Marker. Hexagonal markers are used to show the status of fortresses and simple spaces. They are also used to indicate Ocean Zones explored by a player on the Exploration Map. There is no limit to the number of spaces a power can control with hexagonal control markers; if a power uses all of its markers, improvise with unused markers from other powers.
2.4 Special Elements of the Main Map
Shared Home Spaces. In the kingdoms of Castile and Aragon there are several spaces that are color-coded with two home space colors: one at the top and one at the bottom. These spaces serve as home spaces for two different powers. The space is initially under control of the power shown on the bottom of the space (and that power controls the space if no control marker is present). Thus the split home spaces that are yellow on top and turquoise on the bottom are initially controlled by the Beltranejos faction, but can serve as a Castilian home spaces if the Castilian power later gains political control of that location. Zahara and Gibraltar are home spaces split between Castile and the Nasrids, which means that if either of these two powers control these spaces, they can use the benefits of a home space there. The same applies to the home spaces in northeastern Spain initially held by the Principality of Catalonia which can later become home spaces for Aragon. Finally, there are spaces with dual color-coding in the Kingdom of Naples. These spaces show their home color on the bottom and the independent gray color above. These spaces became independent after the death of Ferrante.
Home Spaces of the Sultanate of Tlemcen (Berber). In North Africa there are eight light green spaces belonging to the Berbers of the Sultanate of Tlemcen. These spaces enter play on Turn 4; before that time they are ignored as if they did not exist. When they do enter play, they are treated as home spaces of the North African power, except for the Algiers space, which is independent until play of the Algiers Regency event. This event changes Algiers into a Berber home space (20.2).
Pass. A connection shown with a dashed line is a difficult mountain, river, desert, or strait passage. There are passes of this type throughout the Main Map and in the Canary Islands Box (which should be considered as an extension of the Main Map for all purposes even though the box is placed near the Exploration Map). Formations of land units moving over a pass expend two command points (2 CP) instead of the usual cost of 1 CP for moving over a normal connection.
Passes also:
- Block spring deployment of land units,
- Prevent interception by an enemy formation that is adjacent across a pass, and
- Inhibit land units' ability to control adjacent spaces and remove unrest in adjacent spaces.
Units may retreat or avoid battle over a pass.
Seville Inland Port. There is an inland waterway connection between Seville and Jerez (based on the fact that the Guadalquivir River is navigable to Seville) which connects Seville with the Gulf of Cadiz Sea Zone. Seville is considered to be a port of that maritime zone as long as you also control Jerez. See 16.8 for more details of the special status of Seville.
Strait of Gibraltar. There are three spaces (Ceuta, Gibraltar, and Tangier) which are ports on either side of the Strait of Gibraltar and two Pass connections link these spaces. These connections are treated as standard Pass connections with these two exceptions:
- Land movement is possible across these connections only if the moving power controls or is friendly with either the origin space or the destination space.
- The Muslim player can treat both connections as one-way connections (i.e., 1 CP movement cost, possible interception, possible spring deployment) if he controls Gibraltar. However, in this case these connections are only considered normal connections for the Muslim movement (including spring deployment and interception movements) from Tangier or Ceuta to Gibraltar (south-north direction) but not vice versa. See Section 20.1 for more details on Gibraltar.
Sea Zones. The Main Map contains nine Sea Zones, plus a tenth zone corresponding to the Canary Islands which has a direct connection to the Cape Bojador Sea Zone. The boundaries between the Sea Zones are shown with a blue line. Only naval leaders and naval units may occupy Sea Zones; land units must always end every action in a space.
The Sea Zones of the Tyrrhenian Sea and Central Mediterranean are considered adjacent if you control the Messina space, are allied to the power controlling Messina, or the power controlling it allows you to pass through. The Alboran Sea Zone is considered adjacent to the Gulf of Cadiz if you control at least one of the ports in the strait (Tangier, Ceuta, or Gibraltar), are allied with a power controlling one of these ports, or one of those powers allows you to pass through. If the use of one of these passages is denied, movement between these zones is also prohibited when lending naval units or returning them to a controlled port in winter. If passage is granted at any time during a turn, this player retains access between these zones for the remainder of the entire turn.
Sea Ports. Most (but not all) of the spaces near the coast act as ports, which provide access to one or more Sea Zones. One-zone ports possess a single anchor symbol. Two-zone ports have two anchors next to them, one anchor within each of the two Sea Zones that may be accessed from that space.
Special Zones. There are two boxes—the English Garrison on the French Player Card and the Paris space on the map—that may contain military units but are not considered valid targets for events. Foreign War cards are also considered to be such special zones that cannot be targeted by normal events; although as indicated in 20.9, combat and response cards may be used to impact Foreign Wars.
2.5 Exploration Map Elements
Ocean Zones: The game's Exploration Map contains 10 Ocean Zones. Eight of these zones also contain Exploration Map Spaces where players may build a commercial settlement. The players' Naos and the naval squadrons that escort them are the only units that can occupy oceanic zones.
Navigation Checks: The boundaries between the Ocean Zones are shown by large blue or red lines. Particularly treacherous passages (such as the crossing of the Atlantic or Indian Oceans, or sailing around the Cape of Good Hope) have arrows across these boundary lines to indicate the danger. Naos (5.2) that cross these lines must roll one time on the Navigation Table for each arrow, with each roll running the risk of damaging or sinking the Nao.
Exploration of the Terra Incognita: Each time a player attempts to move a Nao into an Ocean Zone that they have not yet explored, that player must roll on the Terra Incognita Table to determine whether the zone is successfully explored (which allows the unit to enter). Zones A and B contain only ocean, and therefore no settlements can be established there, although they are otherwise subject to Terra Incognita exploration rolls in the normal way (16.1). Each Ocean Zone on the Exploration Map has a box that initially holds one or two 1 VP markers (each of the 16 markers indicates the Ocean Zone to which it belongs) that are awarded based on Gain VP results on the Terra Incognita or Cartography tables. These two awards may not be claimed by the same player; they go to the first two players who receive such a Cartography result for that zone (16.6).
Restriction: On Turns 1 and 2, Portugal is the only power who may move Naos but he can only establish settlements in the spaces reserved for Portugal with his color. This restriction goes in turns so that on Turn 1 he may only move Naos and create a settlement in Ocean Zone 1 and on Turn 2 he may do so up to Ocean Zone 2. If the event, School of Sagres, Henry the Navigator has been played, Portugal is not restricted on these turns and may sail up to Ocean Zone 3 and freely establish settlements in any of these three zones. Also, the crossing to the Atlantic Ocean Zones A, B, 7, and 8 or the crossing to the Indian Ocean Zones 4, 5, and 6 are only allowed when the mandatory event Overseas Voyages has been played; the lines to first enter these Ocean Zones are shown in red to remind players of this restriction.
3. Players, Powers, and Rulers
This section defines players, powers, and rulers and gives high-level information about these game concepts.
3.1 Player
A player is a human participant in the game. Tanto Monta is specially designed to be played by four players. Each player has a Player Card (4.0) that tracks his situation with respect to allowable actions, card draws, victory points, and current rulers. Many game functions are conducted one player at a time in the following order (known as Impulse Order):
- Muslim
- Portugal
- Spain
- France
Some cards refer to a Christian player; read this to mean either Portugal, Spain, or France.
3.2 Powers
A power is a nation or city-state present in the game. There are three types of powers, each described below. Each player controls either two Major Powers or one Major Power and a Limited Major Power, depending on the player they represent. Players may also control a number of Minor Powers based on their success at activating Minor Powers to join their cause.
Major Power. There are six Major powers divided among the four players as follows:
- Nasrid Kingdom of Granada (Muslim player)
- North African Alliance (Muslim player)
- Portugal (Portugal player)
- Castile (Spain player)
- Aragon (Spain player)
- France (France player)
Limited Major Power. Limited Major Powers represent factions in active civil war against the Spanish player. They play a role fighting Spain and will disappear from the game if they are forced to surrender. The two Limited Major Powers are controlled by the players that only have one Major Power each:
- Beltranejos (Portugal player)
- Principality of Catalonia (France player)
These limited major powers do not have their own foreign policy or diplomatic relations with minor powers, so they cannot declare war on anyone, nor can anyone declare war on them. However outside the diplomacy section of the rules (9.0), assume any rule that applies to a Major Power applies to them as well.
Minor Powers. The minor powers are: Navarre, Florence, Naples, Genoa, Venice, and the Papacy. The alliances of these states can change during play (21.0).
3.3 Rulers
Each player is represented by their ruler, who is the leader of their most important major power and plays a key role during the game, either a monarch (Castile and Aragon, France, and Portugal), or an Emir/Sultan (Nasrid Kingdom of Granada, Sultanate of Fez). Players also track the current Pope since the Papacy provide benefits to the power with historical ties to that particular historical Pope. The initial ruler for each player is printed on the left side of their Player Card. The rulers of several major powers change during play as a result of Mandatory Event cards (6.1). Subsequent rulers enter play when one of these Mandatory Events is resolved. These cards are placed over the ruler printed on the Player Card so the new ruler's attributes are visible to all players. The ruler for the Muslim player changes immediately to Sultans of Fez, Wattasid Dynasty when the Nasrid Kingdom of Granada is conquered (22.1); in this one case a ruler changes without being triggered by a Mandatory Event. When a ruler dies or is replaced, and has any marker that affects any of his attributes, those markers remain in effect on the new ruler.
Attributes. All rulers possess two attributes: Administrative Rating and Charisma, as described below.
- Administrative Rating: The administrative (or "admin") rating of a ruler evaluates that ruler's ability to conserve national resources so they can be applied in times of need. An Admin Rating is always given in terms of the number of cards that ruler can save from one turn to the next. Additionally, this attribute can be voluntarily reduced to modify the result of the Headline event roll. For each point committed, subtract 1 from the ruler's Admin Rating that turn and place a –1 Admin Rating marker on his ruler card. The Muslim ruler Boabdil has a base Admin Rating of 0, however his attribute rises to 1 if the Nasrid power currently controls Gibraltar.
- Charisma: This attribute assesses whether the ruler is exceptional in mobilizing resources to support their national initiatives and military campaigns. Therefore, the number of cards a player is dealt is highly dependent on their ruler's Charisma. Section 8.3 details the complete rules for receiving cards for each power. Muslim and Portuguese players can have their Charisma value reduced by 1, if they have lost control of two home keys of their own (North African or Portuguese).
Additional Functions. Some rulers also act as military leaders (5.1). This additional army leader function is entirely separate from these personages' role as ruler of a major power.
4. Player Cards
The status of each player and their major powers is tracked on a Player Card. Each of the four Player Cards contains the following sections:
- List of Actions: A list of each possible action that this player can undertake during the Action Phase (11.0), including the action's CP cost. The list of possible actions differs by player.
- Initial Ruler Card: Attributes of the initial ruler for each player, as described in Section 3.3.
- Bonus VP Box: This is a holding area for markers that show the player has been awarded Victory Points for one or more of the results in the Bonus VP list (22.3).
- Dungeons: Rival leaders captured in combat are placed here.
- Available Fortress Boxes: Holds two Fortress markers that can be used to fortify simple (circle) spaces on the map.
- Warehouses: Place Resources gained here until you are ready to expend them.
- Automatic Victory Track: Each player has a track of spaces where his available square control markers are placed. Placing all of them on the map triggers an Automatic Victory (22.2) for that player. Note, with the exception of the Spanish player, that the rest of the players have the boxes of this type differentiated between those corresponding to home keys of the main power that grant the player 2 VPs for each and the rest that grant 1 VP. For these players, it is necessary to control all the home keys of these own powers to obtain the automatic victory.
- Used Home Cards: Place each Home card here (face down) after it has been played.
The Player Card also contains customized information that differs by power, for example, a record of piracy VP for the Muslim player and a record of Treaties signed by France for entry into Italy.
5. Military Units
There are four types of military units: leaders, Naos, land units, and naval units. This section shows an example of each military unit and explains the importance of any numeric values on the counter. The pieces provided are an absolute limit. No more may be created for any purpose; the number provided is indicative of the overall manpower and financial resources of each power during this period. Military units use the same color as the home spaces for each power.
5.1 Leaders
The numeric information contained on the leader counter differs slightly for army and naval leaders. Naval leaders have an anchor symbol on their counters that distinguishes them from army leaders.
Army Leader
- Battle Rating: The top number on army leaders is their battle rating. Higher battle ratings increase the chance of successfully intercepting or avoiding battle, and add extra dice during assault and field battle.
- Command Rating: The bottom number (always appearing in a yellow box) is the leader's command rating. This number indicates the number of land units the leader can control at one time.
Formations. A formation is a group of land units in a single space that functions as a combined entity for the purposes of movement, field battle, intercept, and assault. One or more army leaders may also be included in the formation or even move without units. The maximum number of land units in a formation is dependent on the Command Ratings of any leaders present:
| Leaders Present | Maximum Formation Size |
|---|---|
| none | 4 |
| 1 | Command Rating of Leader, plus one additional cavalry. |
| 2 or more | Sum of highest two command ratings, plus one additional cavalry (Exception: Ferdinand and the Great Captain may not combine their ratings). |
Army leaders and siege artillery are never counted when determining the size of a formation. Formations may not include units from two different major powers except in the following cases:
- The leaders of the Nasrid Kingdom (El Zagal, Muley Hacén and Boabdil) may command a combination of North African and Nasrid units.
- Ferdinand or the Great Captain may command a combination of Aragonese and Castilian units.
- Anjou may command a combination of French and Catalan units.
- Afonso V may command a combination of Beltranejos and Portuguese units
The counters of leaders who can command units from more than one power are marked in both colors as a reminder of this trait. All formations may include minor power units that are allied to the major power.
FORMATION EXAMPLE: The leaders from the Beltranejos Pacheco (command rating of 8) and Archbishop Carrillo (command rating of 6) are stacked in Toledo with 12 infantry units and two cavalry. The Portuguese player, who controls his Beltranejos allies, spends 1 CP to move a formation to Talavera. If the formation does not include any of the leaders, only four units may be moved. If he includes only a single leader, the number of units moved must be equal to or less than the command rating of that leader plus 1 additional cavalry. You would have to move both leaders if you wanted to move all 14 units from Toledo.
Single-Leader Formations: Two home cards (Crown of Aragon and The Rise of France) allow single-leader formations to make a special move; several rule sections also allow single-leader formation to remain in a specific space during Winter. The capacity of such a single-leader formation is limited to the Command Rating of just one Leader, plus 1 additional unit which must be cavalry. Other leaders may accompany the designated leader but do not contribute to the maximum formation size in these cases.
Naval Leaders
- Battle Rating: The top number on naval leaders is their battle rating. Higher battle ratings increase the chance of successfully intercepting or avoiding battle, and add extra dice during naval combat.
- Piracy Rating (only present on a few Naval leaders): The number after the "P" indicates the number of extra dice the leader provides when present in a Sea Zone where the player is initiating piracy. Remove a naval leader from the map if there are no longer naval units present in his location. Return him to any home port under friendly control at the start of the next turn.
5.2 Naos
Naos represent the intrepid crews who set sail with an exploratory spirit to discover new places and establish overseas colonies. During this period, they skirted Africa, rounded the Cape of Good Hope, and sailed east in search of India while also venturing west in search of spices and the New World. Exploration, piracy, settlement, looting by competitors, and fighting against attacks from the native populations were all constants in their lives. Naos are added to the Exploration Map with the Construct a Nao action (17.4). A single player may never have more than two Naos on the Exploration Map, although he may have any number in the Built Naos box. Nao counters have two sides. Place them on their front (full strength side) after they are constructed. Both sides have these two ratings:
- Crew Rating: This number after the "C" is a modifier for any other dice roll that a Nao has to make. It is the crew's ability to survive treacherous voyages on the Exploration Map represented by Navigation and Terra Incognita rolls.
- Piracy Rating: The number after the "P" indicates the number of extra dice rolled in piracy attacks on settlements.
- Damage: The back of a Nao counter is the Damaged (D) side. Naos are flipped to this side if they take losses when undergoing Navigation or Terra Incognita rolls or while pirating rival settlements or Naos for loot. The cargo capacity of a Nao is one resource if it is damaged, and two resources if it is not.
5.3 Land Units
There are three types of land units, all represented with circular pieces: infantry (regular and militia), cavalry, and siege artillery (only for the powers of Aragon and France). Land unit pieces come in different denominations (1, 2, 4, and 6) to facilitate stacking. Not all denominations are available for every power. Regular and Militia units are on the reverse side of the same counter with identical denominations; Siege Artillery, Cavalry, and Regulars for Minor Powers have different denominations on the front and back. Players may free up small denomination units at any time by replacing several pieces (all of the same type and all in the same space) with a stronger piece of equal total strength.
If, after freeing up small denomination units wherever possible across the board, a power still has an insufficient number of small denomination units to properly "make change" to satisfy a Combat or Event card result, that power loses additional units from the space where the combat or event is occurring until a number is reached that can be represented with the available counters. It is not permitted to voluntarily remove units from the map to obtain enough units to satisfy the needs of a combat result or an Event. If through an Event or resource you should receive units and you do not have enough units in your force pool, you only receive the ones you have.
Infantry: There are two types of infantry:
- Regular Infantry (or Regulars): These units represent professional soldiers of the royal army. Regulars have a multi-colored unit symbol and a solid stripe across the bottom of the counter in their power's color.
- Militia Infantry (or Militia): These units represent non-professional troops often recruited for a specific military campaign. Militia have a solid black unit symbol. Militia are found on the reverse side of regulars. These units, while cheaper to construct than regulars, may be disbanded in the Winter Phase, are subject to the effects of certain cards, and are less effective in combat than regulars.
The numerical value of the piece shows the number of troops represented by this game piece. All powers (major and minor) have regular infantry, but only the major powers have militias.
Siege Artillery: These units provide excellent siege support. The numerical value shows the number of units represented by this counter. Only Aragon and France have this type of unit and they are effective only on assault rolls against fortified spaces. Siege Artillery units never count against the unit limit of a formation, but for each artillery unit in a formation there must be an infantry unit. If a formation has fewer infantry than artillery, the excess artillery cannot be moved or used in assault. If such a stack is forced to retreat, siege artillery units in excess of the number of infantry units are eliminated.
Cavalry: These units facilitate efforts to avoid battle or intercept enemy forces and are important weapons in field battles. The numerical value of the piece shows the number of cavalry units represented. Cavalry units have a multi-colored horseman symbol and a solid stripe across the bottom of the counter in their power's color. Cavalry units fight like regulars in field battles, and may decide to charge in those contests. However, they are ineffective during siege operations. The first cavalry unit in a leader's formation does not count against the formation limit. A player may choose to dismount a cavalry unit, swapping it for a regular of the same power at any time (even just before combat), but this action is irreversible.
5.4 Naval Units
There are two types of naval unit: naval squadrons and corsairs. Rectangular pieces are used to represent naval units. Each naval unit always represents a single group of naval vessels. There are no denominations of naval units. The numeric value on the counter shows the number of dice it rolls in naval combat and the number of enemy hits required to eliminate it. The color around the number shows which power owns the unit.
NOTE: Naval units from Spain always move and fight as a single force so they are depicted with both the colors of Castile and Aragon on their counters.
As shown in the table below, most powers receive naval units but in a very limited number. Some of these powers can build both naval squadrons and corsairs; the type of a unit in play is depicted by which side of the counter is face up. Powers with two-sided units should carefully consider the unique properties of each of the two types of naval units when deciding which units to construct. Restrictions on naval unit construction are found in 17.3. Units listed in the final three rows (with the Ottoman-Venetian War annotation) are not available until the play of their associated event.
Powers with naval units:
| Power | Naval Units |
|---|---|
| North African | 7 NS/Corsairs |
| Nasrids | 1 NS/Corsair |
| Portugal | 6 NS |
| Beltranejos | 1 NS |
| Spain | 6 NS |
| France | 4 NS |
| Principality of Catalonia | 1 NS |
| Genoa | 2 NS |
| Papacy | 1 NS |
| Venice | 2 NS |
| Naples | 1 NS |
| Florence | 1 NS |
- Naval Squadrons: Naval squadron counters depict a ship with white sails. The numeric value on the counter shows the number of dice it rolls in naval combat and the number of enemy hits required to eliminate it. Although they are primarily used on the Main Map, they are permitted onto the Exploration Map to escort or to protect resources returning home.
- Corsairs: Corsair counters depict a vessel with black sails. The numeric value on the counter shows the number of dice it rolls in naval combat and the number of enemy hits required to eliminate it. They are the only naval unit that can initiate piracy on the Main Map without being at war with the target power (Exception: Spain and Portugal may initiate piracy during the Peace of Alcaçovas with naval squadrons and French naval squadrons can also pirate as long as they are accompanied by the naval leader Casenove).
6. Cards and Resources
The game play in Tanto Monta: The Rise of Ferdinand and Isabella is driven by a single deck of 130 cards supplemented by a pool of 50 naval resource counters and 20 caravan resource counters. This section explains each of the different types of cards, and how to manage the addition and removal of cards from the deck. It also describes management of resources, which are treated as a special form of card with limited uses.
6.1 Card Types
There are six types of cards in the game, as described below. With the exception of Mandatory Event and No Event cards, every card may be played as either an event, or as command points (CP). CP may be used to take actions (11.0), or to declare war (9.4). When playing a Mandatory Event, the event takes effect first, then the active power receives 3 CP to spend on actions. If a player uses a card as an event, he or she follows the instructions printed on the card. Some cards have alternate sets of instructions separated by the word "OR" in capital letters. These cards give the player an option of playing them different ways. When playing a card with multiple sets of instructions, only the conditions and effects in the portion of the card chosen by the player apply.
Home Cards. Each player has three Home cards each associated with one or both of the major powers he controls throughout the game. Spain has all three Home cards available from Turn 1; the other three players receive their third Home card on either Turn 2, 3, or 4. The Spanish player will always use all three of their Home cards. The other players may only play two of their Home cards each turn (Exception: Portugal if it has signed the Peace of Alcaçovas). When a player other than Spain has three Home cards in his hand and plays the second of them, he must discard the third one immediately. Home cards can be played in the Action Phase or as the Headline event.
Important: If you choose to play a Home card for CP or the card's event grants CP, many actions are limited in their use. These build actions may only be used to construct units from the major power associated with the Home card:
- Recruit Regular Infantry
- Recruit Militia Infantry (may include supporting the war in Brittany with Castilian militia)
- Recruit Cavalry
- Recruit Siege Artillery
The following actions may only be carried out if at least one land unit from the power associated with the Home card participates:
- Move formation in clear
- Move formation over pass
- Assault fortified space
- Fight Foreign War
- Naval Transport
This limitation persists even if a resource is expended to extend the impulse. All other actions available to the player on the Player Card may be performed without limitation. The Home card Tanto Monta, Monta Tanto is associated with both Castile and Aragon, so it is not subject to this restriction.
Once used, Home cards are placed on each player's card (not into the discard pile) to show that they are not available until the cards are dealt again at the start of the next turn. Home Cards can never be taken from a power's hand when a random draw is required (either by Event card play, diplomatic agreement, or piracy) or when a specific card is chosen (Event card play). If a power is forced to reveal his hand, he must also show any Home cards that he is holding. As long as he has a Home card in hand, he may not perform a Pass action.
Mandatory Event Cards. Cards with the name of the card in red and the word "Mandatory" printed on them are Mandatory Event cards. Mandatory Events must be played during the Action Phase of the turn in which they are drawn; alternatively they can also be played as the main card of the Headline event. When executed, the event is always resolved first, then the playing power receives 3 CPs to spend on actions. Mandatory Events may never be held from one turn to the next. A player may not pass during his impulse in the Action Phase if a Mandatory event card is still in his hand. Mandatory Events may be removed from play after they occur or remain in the deck on a turn-by-turn basis, as indicated by the text of each card after it is played. Some Mandatory Events are automatically executed at the end of the Action Phase of certain turns if they have not yet been played and these are then removed from the game.
Response Cards. Cards with the name of the card in blue and the word "Response" printed on them are Response cards. Response cards are playable as an event in the Action Phase during any player's impulse (including your own). Play of a Response card interrupts a player's impulse, a battle, or an Event card play. Players should allow a reasonable amount of time for play of a Response card by another player after each action, event, naval combat, or assault. Response cards can also be played for CP during a player's impulse if a player does not wish to use the card's special ability to interrupt another player. Response Cards may only be played as events in the Headline Phase in response to CPs that another executing event has awarded.
Combat Cards. Cards with the name of the card in black and the word "Combat" printed on them are Combat cards. Combat cards are playable as an event only during a field battle, assault, piracy, or naval combat in which the card owner's units are participating. The Combat card is played just before that battle is resolved. Combat cards can also be played for CP during a player's impulse if a player does not wish to use the card's special ability to be played during combat.
No Event Cards. Cards marked with the phrase "No Event" in brown must be played for CP. These cards all have a base CP value of 6, which is the number of CPs they grant if played during the Action Phase. They have a higher CP (shown in parentheses) which is used if played in support of a player's Headline event.
Normal Event Cards. The name of these cards is black with no highlight. These cards are played as events or CPs during the owning player's impulse in the Action Phase. Normal Event cards can be played in the Headline event.
Papal Bull Card. The Papal Bull card is a Normal Event with special properties. If the current ruler of the Papacy (3.3) is associated with Portugal, Spain, or France, this Papal Bull card is given to that player at the start of the turn. This card may never be drawn by another player, nor can the player choose to pass while holding Papal Bull in his hand (much like a Home card).
6.2 The Deck
The cards available to each power each turn consist of their Home cards and a variable number of cards dealt to that power from a single deck of shared cards. The deck is reshuffled each turn, after any new cards for that turn have been added, and before cards are dealt to each power.
Adding Cards. The upper-right hand corner of many cards contains a turn number. None of these cards are used on Turn 1. Instead, add them to play at the start of the Card Draw Phase of the turn specified on the card. Home cards added on a specific turn are given directly to the appropriate power; all other cards entering play are added to the deck (before new hands are dealt).
Discard Pile and Cards Out of Play. After a card is played, it is either removed from the game or placed in a single discard pile shared by all players:
- Out of Play: Cards are removed from the game if they are played as an event and the text Remove from deck if played as event appears on the card or if the text Remove from deck after [some condition] appears and that condition has been satisfied.
- Discard Pile: Cards are always placed in the discard pile if they lack the text Remove from deck… Event cards with this text are also placed in the discard pile if they are played for CP, rather than as an event, or if the condition listed after Remove from deck… is not met. One of the cards in the game (Tanto Monta, Monta Tanto) can be exchanged for a card selected from those currently in the discard pile. There are a few restrictions on these retrievals from the discard pile:
- Neither Papal Bull, The Plague, nor any Mandatory Event may be retrieved from the discard pile.
- A player may never retrieve a card from the discard pile that this same player played earlier in the turn.
- The recovered card cannot be played as an event in this turn if it has already been played as an event before in the same turn.
Forming the Deck for a Turn. All cards in the discard pile are reincorporated back into the deck during the Card Draw Phase at the start of each turn. These cards are combined with (a) the cards that were not dealt during the previous turn, and (b) the new cards entering play to form the deck for the upcoming turn. Never include the card Papal Bull in the deck, instead award it directly to the Christian player that currently controls the Papacy as an activated minor power ally.
6.3 Resources
Resource counters represent the riches obtained through all types of trade including slavery, spices from the Orient, and wealth from settlements on the Exploration Map.
Resource Markers. Resource markers are divided between caravan and naval resources, as depicted by the picture on the front of each counter. On the reverse side they show the value of the resource, either a replacement unit, Card, VP, or CP. At the start of the game, place all naval resource counters in a pile next to the board with the image of the ships facing upwards so that the value of each counter is hidden; create a similar pile for the caravan resources. As resources are spent during play, set them aside with their values revealed to form a discard pile of resources expended that turn (except those marked with VP). These counters are mixed back into their respective pool (naval or caravan) as part of the Card Draw Phase. If during the Action Phase or Headline Event Segment you receive a resource that awards a card, draw the card immediately.
Awarding Resources. One naval Resource marker is removed from the pool and placed at each settlement during the Card Draw Phase (8.4). They are also added to each new settlement when it is founded. A caravan Resource marker is placed in both the Marrakesh and Fez boxes during the Card Draw Phase of Turns 1, 2, and 3; place a caravan Resource marker in all three caravan boxes starting on Turn 4. Players can check the back of resources at their settlements or caravan boxes at any time. Naval resources may also be received directly to the Warehouse on a Player Card from these special sources:
- If the French player succeeds in rolls on the French Mediterranean Trade table or the French North Sea Trade table.
- If the Spanish player succeeds in rolls on the Mesta table.
- If the player that controls Ragusa succeeds in rolls on the Ragusa table.
- When a Nao moves into the Naos Built box after successfully gaining a resource through piracy.
- For a roll resulting in an extra reward from a leader captured in their dungeon.
Resource Arrival. There are two sources of resources during the game (18.8 for details of arrival and how to use them).
- Resources that players obtain in winter.
- From settlements.
- From caravans.
- Through trade in the Mediterranean and North Sea (French player only).
- Through the Mesta (Spanish player only).
- Through control of Ragusa.
- Resources that arrive during other phases of the game, either by event play or various actions:
- By a roll resulting in an extra reward from a leader captured in their dungeon.
- As a Nao returns to the Built Naos Box with resources gained by piracy.
- For receiving a ransom payment.
- At the end of a Spanish impulse if Spain is supporting the War in Brittany (20.5).
- Event cards that specifically award a resource.
Resources that arrive outside the Winter Phase follow the same process described in the Reveal Resources paragraph of Section 18.8. The one exception are the Gain 1 Card resources; if that occurs, the player should draw that card immediately.
Resource Usage. Resources that provide CP cannot be stored from turn to turn, so those that are not spent must be discarded in the Winter Phase. CP resources remain in the player's Warehouse until used to:
- Extend an impulse (11.0)
- Pay declarations of war (9.4)
- Pay a ransom (9.3)
Mixed Hand of Cards and Resources. Events, ransoms, and piracy on the Main Map force a player to have a card drawn out of his hand at random. If a player has a hand that consists of both cards and resources, the random draw could be either a card or a resource, even though the text always refers to drawing a card. Whether the random choice is from the target power's cards or resources depends on the number of each of these two types of items in the target power's hand:
- If the target has more cards than resources, draw randomly from the cards (ignoring the resources)
- If the target has more resources than cards, or an equal number, draw randomly from the resources (ignoring the cards)
When paying a ransom, the player who is paying decides whether to give up one card or one resource.
7. Sequence of Play
The game is played in seven or fewer turns. Each turn covers a period of six to eight years. Each turn consists of seven phases. The fourth phase, the Action Phase, is the most time-consuming phase, for it includes a variable number of rounds where each player plays one card. Each such card play is called an impulse. Players use the final phase, the Victory Determination Phase, to decide if a winner can be declared or if another turn is required. A summary of the sequence of play can be found below:
1. Card Draw Phase
- Add leaders, naval units, and if this is Turn 4, the Tlemcen Berbers.
- Add suitors and children of the Catholic Monarchs that are eligible to wed.
- Add 1 Fortress marker to each Player card, if there is a vacant box.
- Place the Mesta marker.
- Receive Home cards for the turn and award the Papal Bull card.
- Add new cards to the deck.
- Shuffle deck and deal cards.
- Return discarded resources to pool; deal new resources.
2. Diplomacy Phase (not on Turn 1)
- Negotiation Segment: Hold negotiations and announce deals.
- Ransom Segment: Pay ransom (1 resource or 1 card) to regain a captured leader. Roll for possible extra benefits from captured leaders.
- War Segment: Pay to declare new wars.
3. Spring Phase
- Headline Event Segment: Each power chooses an event and supporting card. In order of the result, players execute events and receive additional benefits.
- Naval Squadron Transfer Segment: Each power with an explored Ocean Zone on the Exploration Map has the option to move a naval squadron.
- Troop Deployment Segment: Each major power may move one formation of land units from a home key to a friendly space free of enemy units.
4. Action Phase
- Players take impulses in this order until all players pass consecutively: Muslim, Portugal, Spain, France.
5. Winter Phase
- Resolve specific Mandatory Events if they have not been played.
- Roll for Military Order reduction of corsair piracy and Nasrid spaces that have lost their home characteristic.
- Discard unused resources.
- Remove Loaned naval unit markers.
- Check for deaths from Plague; remove Plague markers.
- Resolve the return of noble militia troops to their homes.
- Leaders and units (except in the Canary Islands) return to fortified spaces, possibly suffering attrition (Moriscos 20.1).
- Each major power adds 1 regular unit (or 1 cavalry if the Nasrid) to a controlled home key. (Berbers may receive a corsair if they control Algiers).
- Spread effects of Morisco Uprising.
- Return Naos to settlements or roll a Navigation Check to remain at sea.
- Naval squadrons return to Main Map ports.
- Receive resources from settlements and caravans.
- Resolve French Commercial Relations, the Mesta, and control of Ragusa.
- End major power alliances.
- Remove piracy markers.
- Diplomacy reset, including removal of -1/-2 Admin Rating markers.
6. Marriage Resolution Phase for the Children of Catholic Monarchs (starting on Turn 3)
- Resolve marriages.
- Check French isolation.
- Check for possible death of children and suitors.
7. Victory Determination Phase
- Check for surrender of Catalonia, Beltranejos, or Nasrids. If applicable, award VP markers for Catalan ownership of Barcelona, the Reconquista or Nasrid Resistance.
- Check French VP for Lord of Italy.
- If it is Turn 7, roll for possible extra benefits for captured leaders, checking for resources that award VP.
- Check for winner. If none, advance Turn marker and start a new turn.
8. Card Draw Phase
The first phase is the Card Draw Phase. On each turn, players use this phase to add counters entering play for any reason, add new cards to the deck, calculate the cards to be received by each player, and deal out the cards.
8.1 Add New Personages
Previously eliminated leaders and naval units re-enter the game at this time. If this is Turn 3 or later, new historical characters enter play. These new units are army leaders and royal marriage candidates. Finally, add the Tlemcen Berbers if this is Turn 4.
Army Leaders. The following army leaders are either removed, replaced, or added in the Card Draw Phase, as specified in the table below.
| Turn | Power | Leader | Status Change |
|---|---|---|---|
| 3 | Aragon | John II of Aragon | Remove |
| 3 | Castile | Great Captain | Add |
| 3 | Nasrid | Muley Hacén | Replace with Boabdil |
| 3 | Beltranejos | Archbishop Carrillo | Remove |
| 4 | Castile | Isabella | Replace with Duke of Alva |
| 4 | N. African | Ibn Yahya | Replace with Al Burtuqali |
| 5 |
All other changes in leaders occur as indicated on the various event cards. New army leaders (or those removed to the Turn Track in previous turns) are placed in any controlled home space in this priority order: key, fortress, strategic space. If none of these spaces are available, leave the leader on the Turn Track and try again next turn. When a leader is being replaced, add the new leader to the exact space occupied by the leader being replaced (unless that leader was captured, in which case the replacement is treated as a newly arriving leader).
Marriage Candidates. Place the counters of any children of the Catholic Monarchs and their suitors that arrive this turn on the Wedding table.
Naval Leaders and Units. Naval leaders eliminated from play are also brought back at this time. Place them in any home port under friendly control. If no such space exists, the leader remains on the Turn Track until next turn. Naval units eliminated in a previous turn are also returned to each power's pool of units available to be constructed.
Tlemcen Berbers. On Turn 4 the Tlemcen Berbers enter play. Place the units specified in Section 20.2 onto the map and add the appropriate units to the North African force pool. All Berber spaces now come into play as home spaces of the North African power (Algiers begins as an independent space until the Algiers Regency event occurs, see 20.2).
8.2 Add Fortresses, Move Mesta Marker
During this phase, all players with fewer than two Fortress markers on their Player Card add Fortress markers to their Player Card so that they have a total of two. Fortresses may be constructed in an Exploration Map settlement or in an unfortified simple space on the Main Map (17.5).
Except for the first turn of each scenario, where the placement is preset, the Mesta marker is now randomly placed in a Castilian home space. Roll one die and consult this table:
| Die Roll | Main Space |
|---|---|
| 1 | Arévalo |
| 2 | Ávila |
| 3 | Atienza |
| 4 | Talavera |
| 5 | Calatrava |
| 6 | Guadalajara |
8.3 Add New Cards to Deck/Deal Cards
If this is Turn 2 or later, new cards may be added to the deck. The deck is then shuffled and cards are dealt to each player as described in Section 6.2.
Each player is dealt a number of cards equal to his ruler's Charisma attribute and possible bonus cards (if Spain or France) from these sources:
- Spain (20.6, One Crown for Several Kingdoms)
- France (20.7, Consolidating the Power of the Monarch)
To this base number of cards, add and subtract cards from this player's total as indicated by any +1/–1 Card markers accumulated on your Player Card. Once the card total has been updated, remove all +1/–1 Card markers that are not permanent.
These newly dealt cards are combined with the Home cards of the player's powers, the Papal Bull card (if you are Portugal, Spain, or France and allied with the Papacy), and any unused cards from the previous turn to form the player's "hand" for the upcoming turn. Note that two of these cards will be expended before the Action Phase as part of the Headline Event Segment (10.0, Spring Phase Procedure, Step 1).
8.4 Draw Resources
Refresh the pools of naval and caravan resources as described in Section 6.3. For each settlement that does not currently hold a resource, randomly draw a naval Resource marker from the pool and place it on the settlement. Then add a caravan Resource marker to both the Marrakesh and Fez boxes. If this is Turn 4 or later, also add a caravan resource to the Tlemcen box.
Now, for each leader still in your dungeon, draw a CP resource (18.8). If any resource awards a non-CP award, return it to the reserve and take another until you have received a resource that awards CP.
9. Diplomacy Phase
The second phase of each turn is the Diplomacy Phase. Skip this phase entirely on Turn 1 of the game.
9.1 Negotiation Phase
The first segment of the Diplomacy Phase allows players to conduct secret negotiations away from the game board with one or more opponents. This portion of the turn is the only time players may make deals in private; all other discussions must take place in the presence of all players. Players are free to discuss general strategic considerations during negotiations. Cards or resources in your hand may be revealed to other players if desired. They may also make a limited set of agreements that alter the position of units, leaders, cards, or markers in play. Such a change is considered to be a change in the current game state. The only agreements allowed that change the game state are:
- Two powers may agree to end a war they are fighting. End the war by removing the At War marker from the appropriate box on the Diplomatic Status Display. Exceptions: The Portuguese player may never choose to have the Beltranejos make peace with Castile. The French player may never choose to have the Principality of Catalonia make peace with Aragon.
- Two powers may form an alliance for exactly one turn (9.2), but not if they are currently at war and are not agreeing to end that war (see above).
- A power entering an alliance may loan their power's naval squadrons to the other power in that same alliance for one turn (9.2). Neither minor power squadrons nor naval leaders may be lent however.
- A captured army leader may be returned. Place that army leader in a home key if possible. If not, place him in a friendly home fortress or strategic space.
- A power may yield political control of spaces it controls to another major power. Any units occupying these spaces are displaced (12.5). However, this granting of a space can only occur if one of the following conditions is true: a) The space is being given back to its home power (this includes returning a minor power's home space to its major power ally; in this case add a control marker of that major power to the space), b) The space is in Castile and is being exchanged between Castile and Portugal (either direction, but not exchanged with the Beltranejos), c) The space is in Aragon and is being exchanged between Aragon and France (either direction, but not exchanged with Catalan), d) The space is an independent space, e) The space is in Navarre and is exchanged between France and Spain, f) The space is in Italy, is not of a minor ally, and is exchanged in any direction between two of these three powers: Aragon, Muslim, France.
- A player may agree to give another player up to two random card draws from their hand. Such a card must always be chosen at random; players cannot exchange specific cards. Two players may not give each other card draws in the same turn; such an exchange can only occur in one direction on a given turn. (Remember that Home cards and Papal Bull are ignored when drawing randomly from a player's hand.)
- A player may agree to give another player up to two randomly drawn resources from their hand (using the same rules as for drawing cards in the previous bullet).
- Two players may agree that the die will not be rolled for possible benefits from a specific captured leader.
Players should agree on a time limit for the Negotiation Segment before discussions begin. Suggested limits are:
- 10 minutes in a face-to-face game
- 48 hours in a game by email
Declarations. When this time limit is reached (or discussions have ended), each player (in Impulse Order) declares any agreements made with his powers that will result in a change in the game state. Announcements can be made as individual items, or as a group of agreements that need to be ratified together. All powers involved in an agreement that follow later in Impulse Order must confirm all the contents of this declaration when it is their turn in the Impulse Order. If they do not confirm the full deal, none of the items in the agreement take effect. If the agreement is confirmed by all parties, the players immediately change the game state by updating diplomatic status, returning military leaders, Naos and naval squadrons captured, loaning out fleets, changing political control of a space, randomly drawing cards or resources, and surrendering Militia units.
Restrictions
- Each agreement included in an announcement must be possible at the time it is declared. You may make more announcements than can possibly be accepted (as long as each individual one is valid.) EXAMPLE: The power A has two naval squadrons on the map and is allied with power B and power C. It is valid for the power A to announce an agreement to lend the squadrons to power B and another agreement to lend them to power C. In this case the first power to confirm the deal will make it impossible for a later power to confirm the other deal that involves those same naval squadrons.
- Conditional announcements (i.e., ones where you place a caveat on whether or not an agreement goes through based on the diplomatic actions of powers coming after you in Impulse Order) are not permitted in any form. EXAMPLE: Portugal may not announce a deal lending two naval squadrons to France if France agrees to make peace with Aragon.
Non-binding Agreements. The only portion of an agreement that is binding between powers is the portion that changes the current game state. Since items such as a diplomatic action on a future turn, a promised card play, or a coordinated movement of troops cannot be executed at this time, they do not change the current game state and are examples of a non-binding portion of an agreement. Non-binding agreements can be made at any time between players but they are never announced and there is never any repercussion within the game mechanics for breaking them (though there might be some repercussions at your gaming table!).
9.2 Alliances
Alliances are agreements between two major powers to cooperate for one turn. Alliances must be announced by all players involved at the end of the Negotiation Segment. A single power may be part of more than one alliance in the same turn. Two or more powers each in alliance with the same power need not be allied with each other. The restrictions on creating an alliance and the effects of forming one are detailed below.
Restrictions
- Alliances do not need to be made by two powers controlled by the same player; those powers are always assumed to be allied.
- An alliance may not be created if the two powers are currently at war (even if it is only war at sea).
- An alliance of Portugal, Spain, or France with the Muslim player prevents these Christian powers from allying with the Papacy unless those Christian powers take control of Rome militarily (21.7. Enemy of Islam). Moreover, if any of these powers were allied with the Papacy, this minor power is immediately deactivated when their alliance with the Muslim player comes into effect.
- The Beltranejos Faction is automatically allied with Portugal until the signing of the Peace of Alcaçovas (after which they can no longer ally).
- The Beltranejos Faction is automatically allied with France if Portugal and France are allied prior to the signing of the Peace of Alcaçovas.
- Castile and Aragon have a joint foreign policy so an alliance with one of these powers always applies to the other as well.
- France can ally with Portugal or Spain but not with both in the same turn.
- The Principality of Catalonia can only be allied with France.
Effects. An alliance produces these benefits:
- Spaces controlled by either power become friendly to both powers. This means that land units may enter spaces controlled by their ally during movement and retreat.
- Naval squadrons (other than corsairs and Naos) may be loaned to an ally for one turn subject to the following conditions: a) Portugal and Spain can never lend each other naval squadrons while the Peace of Alcaçovas is in effect as they are under a state of war at sea. b) Naval squadrons currently on the Exploration Map, naval leaders, and naval squadrons of allied Minor Powers cannot be lent. c) Naval squadrons may be lent between major powers controlled by the same player in order to move squadrons to a controlled port of the receiving power.
Such a loan must be announced at the same time as the alliance; naval squadrons may not be loaned later in the turn. Two players may not loan each other naval units in the same turn; such an exchange can only occur in one direction on a given turn. Place one of the receiving power's Loaned markers on each unit received. Then move the loaned unit to the nearest port controlled by the receiving power, counting each Sea Zone traversed as 1 space along such a path (2.4 Sea Zones). A loaned squadron is treated like any other naval squadron of the receiving power (it moves, fights, retreats, and intercepts as if it was one of that power's naval squadrons). The naval squadrons stacked in a single port do not have to be loaned out as a complete group.
If a stack of land units from two major powers is attacked, they combine their units and army leaders into one defensive force. Either power may retreat their units and/or leaders from the space (with each power making a separate Avoid Battle roll). If units from two major powers defend together, battle and assault losses are split evenly between the powers until a power is eliminated; roll randomly to see who suffers any odd loss. This equal split of casualties also applies in field battle (not assault), to attacking units whose formation contains units from two powers allied to the same player and leaders who allow this to happen (see below). Units of an allied minor power are considered to be units of their controlling major power (for the Spanish player, indistinctly Aragonese or Castilian as decided by their owner).
Add an Allied marker to the space that serves as a cross-reference between these powers on the Diplomatic Status Display. The alliance is always terminated at the end of the turn. Alliances do not allow land units from allied powers to move, conduct sieges, assaults, intercept, or avoid battle together.
Exceptions: Multi-power formations can be formed as per 5.0 by:
- Great Captain (Aragon and Castile),
- Ferdinand (Aragon and Castile),
- Anjou (French and Catalan),
- Any Nasrid leader (North African and Nasrid).
- Afonso V (Beltranejos and Portuguese)
Furthermore, alliances do not create a new state of war with any third party power (i.e., a power does not add an At War marker with its new ally's enemies). However, as described above, all allied units will add to the defense of a space even if only one of the defending powers is at war with the attacker.
9.3 Ransom of Leaders and Captured Leaders
The second segment of the Diplomacy Phase allows a power to regain a captured army leader whose return was not negotiated in the Negotiation Segment. The power regaining its leader choses whether to pay one resource or one card from its hand. If it's a resource, the power receiving ransom randomly selects one resource from the ransom payer. If it is a card, the player paying the ransom selects a card from his hand and gives it to the player receiving the ransom. Place the army leader back on a controlled home key. Any number of army leaders may be ransomed in this segment. However, there is never any requirement to ransom an army leader, a power may choose to let him remain a captive indefinitely.
Captured Leaders. If any army leader is still captured at the end of this segment, the capturing player has the option to roll one die for each leader to see if he receives any extra benefit for its capture. (The two players involved may want to discuss whether or not to make this roll during the Negotiation Phase). Add the captive leader's Battle Rating to the roll. If the modified roll is a 5, 6, or more, you can draw a resource from the resource pool (18.8) or place Unrest markers on up to three home spaces of the power belonging to the leader (including occupied spaces).
DESIGNER'S NOTE: These spaces entering Unrest represent the unhappiness that the leader has not been rescued.
If a captured leader dies due to a Mandatory Event his power is removed from the game, or the leader is replaced by another leader, he is removed from the dungeon without further consequence at that time. Additional rolls for the extra benefit are made in the Victory Determination Phase of Turn 7; Unrest is not placed in this case.
9.4 Declarations of War
The third segment of the Diplomacy Phase allows a power to declare war on one or more other powers, major or minor. Follow the DOW procedure below, completing it in full for each of a player's powers before starting the procedure for the next player in Impulse Order.
Declaration of War (DOW) Procedure:
- DOW on Major Powers: The player announces which of his powers declares war on one or more major powers. For each such declaration, add an At War marker to the appropriate box in the Diplomatic Status Display. These powers are now at war until peace is agreed to in a future Diplomacy Phase.
Special Cases:
a) If one of the powers controlled by the Muslim player is targeted by a DOW, the Muslim may decide to include his other major power in the war for free. The power that declared war is now at war with both Muslim powers. This option is not available with the automatic declaration caused by the event Muley Hacén Seizes Zahara.
b) If a Muslim power declares war during the War Segment or with the Holy War event, the Muslim player may choose to do so with both of his powers.
c) Castile and Aragon have a joint foreign policy so a war declaration on one of these two powers or by one of them always applies to the other power as well.
- Declaration on Neutral Minor Powers: This player then announces whether or not he wishes to declare war on one or more minor powers. SPECIAL CASE: If a Muslim power is declaring war on Navarre, the Muslim player may choose to do so with both of his powers but the cost remains 3 CP.
For each declaration, add an At War marker to the appropriate box in the Diplomatic Status Display. A declaration of war on a minor power (other than the Papacy) triggers the resolution of that minor power's diplomatic status, possibly allowing a major power to intervene on behalf of this minor power, see Step 4. Finally, unless this minor power is the Papacy, remove the declaring power's influence marker from this minor power's column on the Diplomatic Influence table; this player may not influence this minor power for the rest of the game.
-
Pay Declaration of War Costs: The player now computes the total CP cost of the declarations he made in Steps 1 and 2. The cost of each declaration is found by cross-referencing these two powers in the Diplomatic Status Display and looking at the number found in the appropriate box (this cost varies between Portugal and Castile depending on whether or not the Peace of Alcaçovas and Treaty of Tordesillas events have been played). In the case that more than one power of the same player has declared war on a single major or minor power, only the higher cost, if any, must be paid. This power must play one or more cards or resources from his hand with a CP value that is equal to or greater than the total CP expenditure. Those cards and resources are placed in the proper discard pile as if they had been played for CP in the Action Phase. Home cards and Mandatory Events may not be used to declare war. If the War Preparations card is played it covers the cost of all wars without having to use other cards or resources.
-
Intervention on Behalf of a Minor Power: If one or more war declarations were directed at a minor power, resolve the Diplomatic Status (21.6) of each minor power (if more than one minor power was the target of a declaration of war, the order of resolution is chosen by the active player). Remove the power declaring war and any power listed as a Deactivate power from those considered during this Diplomatic Status check. The player who wins the status check earns the right to intervene on behalf of the Minor Power. That player must choose one of these options:
- Intervention: The minor becomes an ally of the power that won the Diplomatic Status check. That winning power is now at war with the major power that declared war on the minor power (even if those two powers had earlier declared an alliance for the turn). If units from those powers share a space, displace all units that are not in a space their power controls (12.5).
- Isolation: The winning power declines its option to go to war with the power that declared war on the minor power. The minor power remains inactive, facing the major power that declared war on it alone.
No matter which option is chosen, all players lose their diplomatic influence with this minor power (since it was reset during the Diplomatic Status procedure).
Declaration of War during the Action Phase & Headline Event. The following occurrences can place two major powers into a state of war during the Action Phase:
- The Home card Sultanate of Fez or the Papal Bull card.
- The normal events Holy War, Without Previous Declaration, Argmagnac Rebels and Machiavelli's "The Prince".
- The Mandatory Event Muley Hacén Seizes Zahara.
- Activation of a minor power.
- Declaration of war by a Christian power against the Papacy (21.7).
In any of these cases, add an At War marker to the Diplomatic Status Display. If naval units of the two powers now at war occupy the same Sea Zone, fight an immediate naval battle between the two powers with the power earlier in Impulse order as the attacker.
Restrictions on Declarations of War. There are several restrictions which apply to declarations of war. Some of those restrictions apply at all times; others only apply to declarations made during the War Segment of the Diplomacy Phase, as detailed below.
Restrictions at All Times. You cannot declare war on:
- A power whose box on the Diplomatic Status Display lists "N/A" or "Allied" as the cost of a war declaration.
- A minor power that is allied to a major power (you have to declare war on the major power instead).
- A power (major or minor) that is currently your ally.
- An independent space, as these spaces may be besieged or controlled by a power without the need for a declaration of war.
- The Guanches, as they can be attacked without a declaration of war like the Independents.
- Navarre, unless the influence marker on Navarre of the player declaring war is at least two levels below another player's marker.
- The Beltranejos or the Principality of Catalonia. These two factions are also never allowed to declare war on another power (they are locked into their initial wars with Castile and Aragon respectively). However, there are special cases described below in which you can attack units of these limited major powers, even without being at war with them.
- The North African Alliance cannot declare war on the Spanish player if the Muley Hacén Seizes Zahara Event has not yet been played.
- The Nasrid Kingdom and Spain may only go to war through play of the Mandatory Event Muley Hacén Seizes Zahara. This state of war is permanent for the rest of the game. (Exception: If any Muslim power conquers Rome before the Mandatory Event Muley Hacén Seizes Zahara is played, it will trigger the mandatory play of this card. Draw it from the deck and execute it; if it is in a player's hand it is now played and that player draws another card from the deck instead).
Restrictions during Diplomacy Phase. You can not declare war on:
- A power that you have made peace with during the current Diplomacy Phase.
- A power that you have formed an alliance with during the current Diplomacy Phase.
- The North African Alliance cannot declare war on the Spanish player if it is the Declaration of War Phase of the second or third turn.
Special Cases with Limited Major Power Units: Beltranejos units, Catalan units, and also Morisco units (including Morisco rebellion militias after the surrender of the Nasrid Kingdom) can be attacked by units of major powers other than Castile and Aragon under the special circumstances specified in this rule—even if they are not officially enemy units (since these powers are not at war). Special rules also govern the spaces these units may control and enter, especially while attacking. The specific cases are detailed below:
- France, Nasrid Kingdom, and North African powers—if at war with Spain—may enter, control spaces, and attack Beltranejos units in Castilian and/or Beltranejos home spaces, provided that the Peace of Alcaçovas has been signed (and therefore the Beltranejos and Portugal are not allies). In the same way, Beltranejos can enter, control spaces, and attack units of those powers, exclusively in Beltranejos' home spaces.
- Portugal, Nasrid Kingdom and North African powers—if at war with Spain—may enter, control spaces, and attack Catalan units in Aragonese and/or Catalan home spaces. In the same way, Catalan units can enter, control spaces, and attack units of those powers, exclusively in Catalan's home spaces.
- Portugal and France—if at war with North Africans and the Nasrid Kingdom does not exist because it has surrendered—may enter, control spaces, and attack Morisco units (including Moorish rebellion militias after the surrender of the Nasrid Kingdom), in Castilian and/or Nasrid home spaces. In the same way, Moriscos units can enter, control spaces, and attack units of those powers, exclusively in Nasrid's home spaces.
- Beltranejos are only allowed to enter, control spaces, and attack Castilian and Aragonese units in Castilian and/or Beltranejos home spaces. If the Peace of Alcaçovas has not been signed—in which case the Beltranejos are allies of Portugal—they may attack in Portuguese home spaces, always regaining control of the space for Portugal in assaults (and awarding control of spaces to Portugal if they take a Control Unfortified Space action in a Portuguese home space).
- Catalans are only allowed to enter, control spaces, and attack Castilian and Aragonese units in Catalan and/or Aragonese home spaces. Being allies of France, they may attack in French home spaces, always regaining control of the space for France in assaults (and awarding control of spaces to France if they take a Control Unfortified Space action in a French home space).
9.5 War between Castile and Portugal
The one exception to the declaration of war rules listed above is for declarations of war between Portugal and Castile. These two powers began the period represented in Tanto Monta: The Rise Isabella and Ferdinand as bitter enemies at war over the succession of the crown of Castile, but both powers ended up eventually signing the Peace of Alcaçovas and the Treaty of Tordesillas. The decrease in tensions between these powers means that the cost of a declaration of war between these powers varies during the game. The following events change the cost:
- The Peace of Alcaçovas event sets the cost at 4 CP although it allows for war at sea (including piracy on the Main Map).
- The Treaty of Tordesillas event increases the cost to 6 CP and the war at sea ends.
10. Spring Phase
The third phase of each turn is the Spring Phase. At this time, each major power undertakes a series of activities to prepare for the upcoming Action Phase. In each segment, each player in Impulse Order completes all of the steps listed below for their powers before moving on to the next segment.
Spring Phase Procedure
1. Headline Event Segment: Each player secretly chooses a Home card, Mandatory Event, or normal event card from his hand in an attempt to have that event executed in this segment (the Headline Event). Each player then chooses a second card, which cannot be a Mandatory Event, to support the first card with its CP value. All cards are revealed simultaneously and the headline event submissions are ranked in order from highest CP value of the supporting card to the lowest. In the case of a tie, the player with less VP goes first (and if there is still a tie, then the player earlier in Impulse Order is placed first).
The players then receive the following benefits in ranked order. (Treat this segment as a normal impulse for the purposes of resolving the event; this event can never be extended):
- FIRST PLACE: Gain 1 VP for a Headline Event. Then execute your selected event.
- SECOND PLACE: Roll one die. If the result is 5 or higher, gain 1 VP. After rolling the die a player may sacrifice points from their ruler's Admin Rating for this turn to improve their die roll; each point they subtract from their Admin Rating adds one pip to their roll as they attempt to reach a 5. A ruler's Admin Rating may never be reduced below 0. Then execute your selected event.
- THIRD PLACE: Execute your selected event.
- FOURTH PLACE: Do not execute your selected event. However, you may move any player's influence marker on a Minor Power up or down one space on the Diplomatic Influence Table.
Finally, all cards selected by the players are discarded. If any executed headline event indicates that it is removed when played, remove the card instead.
Important: The headline events can never be cancelled or affected by any other card. However, if through the use of CPs in the event, movements are made or combat is generated, combat or response cards that affect movement, interceptions, avoid battle, or combat may be used.
2. Naval Escort Segment: Each power with an explored Ocean Zone may move 1 naval squadron from a home port on the Main Map to one of the Ocean Zones they have explored. Alternatively, they may return one squadron in an Ocean Zone to a home port on the Main Map. In either case this movement is made without needing to pass a Navigation Check.
3. Troop Deployment Segment: All major powers with a home key under their control may move a single formation from one of these keys to a friendly-controlled space. This special move costs no CP. The following restrictions apply:
Restrictions
- Only land units and army leaders that start this phase in a home key may use the Spring deployment.
- The power must be able to trace a path of any length from the key the formation occupies to the destination space. All land spaces on the path must be friendly-controlled and no land space on the path may be in unrest or contain a Plague marker. The path may also cross one Sea Zone (only) following a path from one friendly-controlled port on that Sea Zone to another.
- The destination space cannot contain enemy units.
- The number of land units in the formation is limited by the command rating of any army leaders present.
- The path may not cross a Pass.
- The path may not enter a space containing units from another power unless all the units in that space are friendly to the deploying power.
- No more than five land units (plus army leaders) may cross a Sea Zone during spring deployment.
- If another major power has naval squadrons (that have not been lent to the deploying power) in ports that border the Sea Zone being crossed, the path is blocked if either of these is true:
- If this other major power is at war with the deploying power, or
- If the deploying power does not have one of his own squadrons either in the Sea Zone or in a port adjacent to the Sea Zone.
The War Preparations normal event, the The Rise of France Home card, and the Crown of Aragon Home card allow some of these restrictions to be ignored. Units from different powers that start the phase stacked with a leader that can command units from multiple powers may move together with that leader for one of that player's deployments. Spring deployments with a formation containing units from more than one power are considered as the spring deployment of the power owning the space from which the movement began.
11. Action Phase
During the Action Phase, the players take impulses in the order described in Section 3.1. The power initiating an activity is referred to as the active power throughout these rules. Each impulse consists of one of the following three activities:
- Play a card for Command Points (CP).
- Play a card as an event, if the card has an event.
- Passing, if the conditions are right.
Unless the power passed, he may then extend his impulse by playing a resource (Spanish and French players see below).
Playing a card for Command Points (CP): All cards except Mandatory Event cards can be played for CPs during an impulse. When played for CP, a card provides a number of CPs equal to the number in the shield in the upper-left corner of the card. These CP are then expended to perform one or more of the actions listed on that player's Player Card. The card played is placed in the discard pile and will be used again in future turns.
Play a card as an event: Mandatory Event cards, Home cards, normal event cards, and Response cards (but never Combat cards) may be played as events during a player's impulse.
Important: Some events may only be played by powers specified on the card, or if certain conditions have been met.
Read the printed effects on the card and execute them immediately. Note that some Home and normal event cards (and all Mandatory Event cards) award CPs that can be used with that event; these CPs are spent to perform any of the actions listed on that major power's Power Card. After being played as an event, the card is placed on the discard pile, unless the card text states Remove from deck if played as an event; such cards are permanently removed from the game. You may play an event that directs another power to take an action; in this case, the player listed on the card resolves the action, not the active player.
Passing: Late in the Action Phase, powers may pass for their impulse. Players may never pass if:
- They have in their hand either a Home card or the Papal Bull card,
- A Mandatory Event is in their hand that has not been played, or
- They have more cards in their hand than their ruler's Admin Rating
A power must pass if it has no cards left in its hand. A power holding one or more cards that passes during an impulse does not have to continue to pass. This power may play one of these held cards when their turn for an impulse arises later in the Action Phase. The Action Phase is over when all four players have passed in consecutive impulses.
Extending the impulse with a resource: A player with a resource in his Warehouse and who has played a card may now extend the impulse by playing one of those resources. Resources listing a CP value (from 2 to 5) allow a player to perform actions just as if they were playing a card for CP. Additionally, the Spanish player may extend the impulse either by moving a leader to the Canaries or by rolling on the Mesta Table in the case indicated in the War of Brittany. The French player also may extend the impulse to sign the Treaty of Barcelona and/or the Treaty of Senlis.
Limitation: If the player used any card other than a Home card or a Mandatory Event for its CP value during the first part of his impulse, remember which actions he chose during this card play. Then, if any of these actions are repeated when CP are expended from the resource, the cost of each repeated action is 1 additional CP.
EXAMPLE: The Spanish player plays a 3 CP card at the beginning of his impulse. He builds a Castilian naval squadron in Corunna for 2 CP and spends 1 CP to raise his diplomatic influence over Genoa by 1 level. He then declares that he extends his impulse with a 4 CP resource. If he builds a naval squadron with the resource it will cost him 3 CP; if he tries to raise diplomatic influence levels it will also cost him 1 additional CP for each such action.
11.1 Actions
Each action in the game costs from 1 to 4 CP. Exact rules for the execution of each action are found throughout sections 12 through 20. Some actions cost a variable number of CPs (e.g., the Wedding Dowry). CPs are spent on one action at a time. That action is then executed to completion before any remaining CP are spent. CP may not be accumulated from one impulse to another; they must be spent (or discarded) in the impulse in which the card that provided the CP was played. A power may choose to execute the same action back-to-back within an impulse. This is very common with movement actions so units can move multiple spaces. It is also common when constructing units and when playing CP to buy Diplomatic Influence.
12. Control and Unrest
Political control of spaces can change based on actions (i.e., Control Unfortified Space, or a successful assault), negotiation, or event card play. A line of communication (LOC) from a fortified home space is required to initiate actions that change space control; rules for LOC are therefore included in this section. Spaces can also enter unrest through Event card play. If unrest is present in a space, most of the benefits of controlling that space are lost. Unrest is removed through the same action that is used to gain control of a simple unfortified space.
12.1 Line of Communication (LOC)
A power has an LOC to a space if it can trace a path of spaces and Sea Zones to that space from a friendly-controlled fortified or strategic space that is a home space for that power or one of its allies (this includes home spaces of major or minor allied powers). LOC may also be traced from any port you control in the Canary Islands. All spaces on the path (except the space where the path ends) must be:
- Friendly-controlled,
- Free of enemy units (including naval units and leaders), and
- Free of Unrest and Plague markers.
One or more adjacent Sea Zones may be part of the LOC if they each contain a friendly naval unit. The path must connect to these Sea Zones through a friendly-controlled port (except the space where the path ends, which can be a non-friendly port). An LOC is required for the Assault and Control Unfortified Space actions. Guanches never need to trace LOCs to assault or remove control of spaces (21.8).
12.2 Unfortified Space
A power may spend 1 CP on the Control Unfortified Space action to gain political control of a space if the following requirements are all met:
Requirements:
- The space is independent, controlled by an enemy power, controlled by the Beltranejos (if control is being gained by Portugal), or controlled by Catalan (if control is being gained by France).
- The space is unfortified.
- The active power has an LOC to the space.
- The space is not occupied by land units from another power (unless those units are allies of the active power).
To gain control of a strategic space, the Control Strategic Space action is used at a cost of 1 CP. Land units controlled by the active power must currently occupy the strategic space.
To gain control of a simple space, the Control Simple Space action is used, also at a cost of 1 CP. Either (a) land units controlled by the active power must occupy the space, or (b) land units controlled by the active power must be adjacent to the space with no enemy land units adjacent. [For the purposes of this requirement, two spaces connected by a pass are not considered adjacent.]
NOTE: In case (b) above, land units controlled by the active power adjacent to the space do not have to have an LOC themselves; the LOC requirement is only to the space being converted. Units conducting a siege and under siege must all still be considered when evaluating case (b).
Place a new control marker on the space to indicate the new owner (unless it is reverting to its original owner and no marker is required). (Guanches never control spaces but do remove control markers from players with this action). If this space is a port that contains naval units, those naval units must immediately retreat to a Sea Zone adjacent to that port following the instructions found in Step 9 of the Naval Combat Procedure. When the active player has units from more than one of his powers in a space being controlled, that player chooses which power gains control.
12.3 Fortified Space
Political control of fortified spaces only changes based on Negotiation (9.1), Assault (15.1), and event card play. See the appropriate section for further details.
12.4 Unrest
Unrest markers are placed on spaces due to event card play. Unrest has the following effects:
Effects:
- Units may not use spring deployment, retreat, or avoid battle into or through a space in unrest.
- No LOC can be traced through a space in unrest.
- No units or fortresses may be constructed in a space in unrest.
- A key space or a strategic space in unrest is not counted when tracking the number of VP earned.
- During the Winter Phase, passing over spaces in unrest causes attrition.
- A fortress in unrest does not roll a die against a piracy attempt in an adjacent Sea Zone.
- Some spaces may subtract 1 from a Ruler's Charisma or prevent die rolls to obtain cards if they are in unrest (20.0).
- A space in unrest may not be counted by a player toward any objective that requires control of one or more spaces. EXAMPLE: Spaces along the Atlantic coast of Africa for "Portugal, Owner of the Atlantic".
Remove Unrest Markers: A power may spend 1 CP on the Control a Simple Unfortified Space action to remove unrest from any space if at least one of these conditions is met:
- Land units controlled by the active power occupy the space,
- Land units controlled by the active power are adjacent to the space and land units of an enemy power are not adjacent. [For the purposes of this condition, two spaces connected by a pass should not be considered adjacent.]
Removing unrest does not require an LOC to that space (unlike gaining political control of an unfortified space where an LOC is required).
12.5 Displacement
If control of a space changes due to negotiation, intervention after DOW on a minor power, or an event card play, units friendly to the previous owner of the space may be displaced as described on specific cards and in rule sections. When displacement occurs, any land units and army leaders occupying these spaces are placed in the nearest fortified space controlled by their power or in a controlled home key. Naval units and leaders are placed in the nearest port controlled by their power. Count Sea Zones as spaces when determining the shortest path. If two spaces are equidistant, the space is chosen by the owning player.
If as a result of an event, any unit is required to be moved to another location, make that move regardless of the unit's location at the origin, be it a captured leader, a space under a Plague marker, that the unit is besieged, etc.
12.6 Control of an Island
Players must also track control of Canary Islands for these purposes:
- The islands of Gran Canaria and Tenerife are each worth 1 VP to the controlling power.
- A power that controls all seven islands gains 1 VP.
- A Spanish player who controls five islands does not have to make Navigation Checks between Zone 1 and Zone A and does not suffer Plunder during the Winter Phase, if he controls all the Canary Islands (21.8, Conquest Of Canary Islands).
You gain control of an island if you control all the spaces that are a part of that island. All islands have a single space except Tenerife, which has four spaces, and Gran Canaria, which has three spaces.
13. Movement
A power may move land units with either the Move Formation In Clear action (1 CP) or the Move Formation Over Pass action (2 CP). All land movement is restricted by the formation rules (5.1). Land movement may trigger interception attempts by enemy formations. Enemy stacks are also allowed to try to avoid battle and withdraw into fortifications in response to Move actions.
13.1 Land Movement Procedure
The following restrictions limit the use of a Move action.
Restrictions:
- All land units and army leaders being moved must start the action in the same space, and it must be permissible to move them in a single formation.
- Formations may always move into a space controlled by their power or into an independent space. A formation may only move into a space controlled by another power if either:
- The active power is at war with the power controlling the destination space, or
- The active power is allied with the power controlling the destination space.
- Formations may not move into a space containing land units from another power unless the space satisfies one of these conditions:
- All units in the space are allies of the active power (and this is not a fortified space where one ally has another ally under siege);
- All units in the space are enemies of the active power (and this is neither a fortified space where one enemy has another enemy under siege nor a fortified space controlled by an ally of both the active power and all powers with units already in the space);
- This is a space controlled by an enemy power, and all units in the space are either from that enemy power or allied to them. When resolving this movement, treat the units already in the space as enemy units for all purposes. Adjacent units from a power with units in the space are also considered as enemy units and may intercept into the space if desired; enemy power or containing enemy units. If an army leader is ever alone in an unfortified space when enemy land units enter due to enemy movement, retreat, or interception, that leader is captured. Place the captured leader on the enemy Player Card. The enemy player gains 1 VP if this is the first leader they have captured in the game. The leader may be regained in the Diplomacy Phase of an upcoming turn (9.0). If a naval leader is ever alone in an unfortified space when enemy land units enter due to enemy movement, retreat, or interception, place that leader on the Turn Track to reenter play on the next turn.
- No unit may enter a space with a Plague marker. Each land or naval unit that attempts to move out of a space with a Plague marker (in either the Spring or Action Phases) must roll one die: if they roll a 1, 2 or 3 they are eliminated. If several units move out of a Plague space together roll dice for all units simultaneously; the moving player may then decide which ones to lose for each roll of a 1, 2, or 3. Roll a separate die for each leader moving from a Plague space; if they roll a 1 or 2 place them on the Turn Track to reenter play next turn.
The two Move actions follow the same procedure:
Land Movement Procedure:
- Declare Formation: The active power declares which formation of land units and army leaders will be moved.
- Declare Destination Space: The active power declares the destination space for the move. The destination must be adjacent to the formation's current space.
- Expend CP: Two CP are expended if the move is over a pass; otherwise the cost is just one CP.
- Play Response Cards: Other powers may play the Response card Torrential Rains to disrupt this Move action.
- Conduct any Interceptions: Interceptions (13.2) may occur if an enemy stack is adjacent to the destination space. Interceptions may add enemy units to the space being entered. Any player may play the response card Ambush to ensure that an interception succeeds. Once all interceptions have been resolved, the land units and army leaders being moved are placed in the destination space. If any interceptions succeeded, skip to Step 8 and resolve a field battle.
- Conduct Avoid Battle: If the destination space contains enemy land units, all or some of them may try to avoid battle (13.3). Any player may play the response card Organized Retreat to ensure that an Avoid Battle succeeds.
- Withdraw into Fortification: If after unsuccessful interception and avoid battle attempts (if any) the enemy stack in a fortified destination space has four or fewer units present, those enemy units have the option of withdrawing into fortifications (13.4).
- Fight Field Battle: If enemy land units are still present in the space, and those land units are not inside fortifications, then a field battle occurs in this space (14.0).
13.2 Interception
An enemy power with land units adjacent to a Move action's destination space may attempt to intercept the moving formation. If multiple enemy stacks are adjacent to the destination space, each may attempt to intercept. Each such attempt is announced and resolved before announcing and resolving any other attempts. If multiple stacks from different enemy powers all want to intercept, resolve the interception attempts in Impulse Order. Once one power succeeds, no other power may attempt an interception (even if that other power is an ally of the intercepting power). Formations belonging to the successful intercepting power may however continue to attempt to intercept from any number of adjacent spaces.
Restrictions
- Formations moving due to avoid battle, interception, and retreats may not be intercepted.
- Formations may never intercept across a pass.
- Only units of a power that is at war with the active power may intercept.
- Units and army leaders that have already tried to intercept a movement in this same impulse (whether or not they were successful) may not try to intercept again.
- Units and army leaders currently under siege may not try to intercept. If a besieging force moves out of a space under siege, the stack formerly under siege may not intercept the move out of that fortified space.
- All land units and army leaders allocated in Step 1 of the Interception Procedure (see below) must start the Move action in the same space and it must be permissible to move them in a single formation.
- Leaders may not intercept by themselves unless the destination space contains units friendly to that leader.
- Formations moving into a friendly fortified space that is not under siege may not be intercepted.
- Formations moving into a space that already contains land units may only be intercepted if the intercepting units belong to the same power as the units in the destination space, or to a power allied to the units in the destination space. Such an interception is not allowed if there are units under siege (from any power) in that space at the start of the active formation's move. This rule also prevents intercepts into an empty, fortified space by units that are not either from the power that controls the space or an ally of that controlling power.
- Units may not intercept into a space controlled by another power unless the power controlling the space is either an enemy or an ally of the intercepting units.
Interception Procedure
- Declare Formation: An intercepting power with land units and/or army leaders in a space adjacent to the movement destination declares which formation will attempt an interception. This formation does not need to include all of the units present.
- Roll Dice: The intercepting power rolls two dice and adds the best single Battle Rating of an army leader (if any) in the intercepting formation to the dice sum. Add 1 to the result if there are more cavalry units in the intercepting formation than in the moving formation. Subtract 1 from the result if there are more cavalry units in the moving formation. If the modified die roll is 9 or more, the interception attempt is successful. If it failed, any player may play the response card Ambush to force it to succeed.
- Place in Destination Space: If successful, the intercepting formation is placed in the destination space. This formation is treated as if it were present in the space before the moving formation arrived. Once one power succeeds, no other power may attempt an intercept (even if that other power is an ally of the intercepting power).
- Repeat for other Formations: Return to Steps 1-3 and resolve interception attempts from any other adjacent space. Additional attempts from a space already chosen in Step 1 are not permitted.
- Fight Field Battle: If any of the interceptions were successful, fight a field battle (14.0) in the destination space. All units from the intercepting power must participate in this battle; they may not avoid battle or withdraw into a fortification.
13.3 Avoid Battle
When a power enters a space containing a stack of enemy land units, some or all of those enemy units may try to move to an adjacent space to avoid battle. If the destination space contains land units from more than one major power (who are allies), each major power may, in Impulse Order, announce and resolve an avoid battle attempt. Each such attempt is announced and resolved before announcing and resolving any other attempts. Minor power allies in that space avoid battle as a single group with units of their affiliated major power. A power is never required to try to avoid battle; it is always optional.
Restrictions:
- Units may not avoid battle into an independent space or a space controlled by another power unless that power is an ally of the power avoiding battle.
- Units may not avoid battle into a space in Unrest, with Plague, or a space containing enemy units.
- Land units may not avoid battle into a Sea Zone.
- Units may not avoid battle into the space just vacated by the enemy formation the units are trying to avoid.
- Units and army leaders currently under siege may not avoid battle.
- Units of a power may not avoid battle if any units of that power intercepted into the battle space during this Move action.
- A leader alone in a space may not avoid battle. If the space is unfortified, he is captured (13.1); if the space is fortified, he must withdraw inside.
Avoid Battle Procedure
- Declare Attempts: Each major power with land units in the destination space of the Move action may declare and resolve (in Impulse Order) an avoid battle attempt. Follow steps 2-5 for each such power before going on to the next.
- Designate Destination Space: This power designates an adjacent space into which the units avoiding battle will try to move. The space must satisfy the restrictions listed above.
- Choose Units: The power chooses which land units and army leaders will attempt to avoid battle. The total number of units chosen may exceed the number that can be moved as a single formation. Any number of units may be left out of the avoid battle attempt (you can even leave out all land units to have an army leader avoid battle by himself).
- Roll Dice: The power avoiding battle rolls two dice and adds the best single Battle Rating of an army leader (if any) present in the stack of units leaving the space to the dice sum. Add 1 to the result if there are more cavalry units in the formation avoiding battle than in the formation from which they are trying to escape. Subtract 1 from the result if the reverse is true. If it failed, any player may play the response card Organized Retreat to force it to succeed. If the modified die roll is 9 or more, the attempt to avoid battle is successful. Exception: If every unit in the formation attempting to Avoid Battle has already lost a field battle during this impulse, it may Avoid Battle automatically—no dice roll is necessary.
- Place in Destination Space: If successful, the units selected to avoid battle are placed in the chosen adjacent space.
- Repeat for other Formations: Return to Steps 2-5 for each remaining power with units in the destination space of the Move action.
13.4 Withdrawing into Fortifications
Enemy units in the destination space may withdraw inside fortifications in Step 7 of the movement procedure if the following conditions are all met:
- The destination space is fortified,
- The enemy power (or an ally of the enemy power) controls the destination space,
- There were four or fewer units (plus any number of army leaders) present in the space after interception and avoid battle attempts were resolved. Artillery and cavalry units are always counted against this limit of four units.
A power is never required to withdraw into its fortifications; it is always optional. If they do withdraw, all units present must withdraw together. If units from more than one power are defending the space when the active formation enters, the power controlling the space decides whether or not to withdraw into the fortifications. If the units decide to withdraw inside fortifications, a field battle is avoided during this impulse. If the active formation has more units than the number of units inside the fortification, this fortification is now under siege (15.0). If the active formation does not have more units, it has two choices:
- If there are CP remaining to be played in this impulse, the active formation may spend 1 CP (or 2 CP if the move is over a pass) to continue movement into an adjacent space. [However, if they are later forced to retreat from this new space back into the fortified space, they are eliminated.]
- Otherwise the active formation must retreat back into the space from which it entered the fortified space. This retreat does not cost any CP, but the retreat must abide by all retreat restrictions listed in Section 14.1.
14. Field Battle
A field battle occurs due to a Move action into a space occupied by an enemy formation or because of a successful interception. Each power involved adds up how many battle dice they will roll, a number that may change if they decide to charge with their cavalry. This number of dice is then rolled to see how many hits are scored. Each hit inflicts a casualty on the opponent. The side which scores the most hits on its opponent is the victor and retains the space. The defeated force must then retreat to an adjacent space.
Field Battle Procedure
- Play Response Cards: Any player in Impulse Order may play a response card such as Nobles Return Home or Mercenary Militias to change the number of units in the space.
- Attacker Adds Up Battle Dice: The active player is always considered the attacker in a field battle. The attacker adds up the number of dice he will roll as follows:
- 1 die for each infantry or cavalry unit in the moving formation (do not count siege artillery)
- 1 die for each Battle Rating point from the highest-rated leader in the attacking force
- If the attacker decides to undertake a cavalry charge add: 1 Extra die for the first cavalry unit; 1 Extra die for every two full cavalry units beyond the first. EXAMPLE: If either three or four cavalry units charge, two dice are added.
- Defender Adds Up Battle Dice: The intercepting player or the player with the stack of units in the destination space is always considered the defender in a field battle. The defender adds up the number of dice he will roll as follows:
- 1 die for each defending infantry or cavalry unit in the space (do not count siege artillery)
- 1 die for each Battle Rating point from the highest-rated leader in the defending force
- 1 die for being the defender
- 1 die if the field battle space is a strategic space controlled by the defender
- If the defender decides to undertake a cavalry charge add: 1 Extra die for the first cavalry unit; 1 Extra die for every two full cavalry units beyond the first
- Attacker Declares Combat cards: The attacker declares any Combat cards he wants to play as events to affect the battle.
14.1 Retreat
All remaining units and army leaders from the losing power must retreat (exception: Independent units see 21.8). If the battle occurred in a fortified space, and the power controlling that space lost the battle, then any number of land units up to four (at the owner's discretion), and any number of army leaders, may withdraw into the fortifications. Artillery and cavalry units are always counted against this limit of four units. The stack of units remaining outside the fortifications after such a withdrawal (or all losing power units if the battle did not occur in a fortified space) must then retreat to a single adjacent space chosen by the owner of those units. That space must meet all the restrictions listed below. If no legal space exists, all units in that stack are eliminated; any army leaders present are captured.
Restrictions:
- Units may not retreat into an independent space or a space controlled by another power unless that power is an ally of the retreating power.
- Units may not retreat into a space in unrest, with a Plague marker, or containing enemy units.
- Land units may not retreat into a Sea Zone.
- If the defender lost the battle, his units may not retreat into the space from which the enemy entered.
- If the active power lost the battle, the space chosen must be the space from which this formation entered the battle.
15. Siege
Land units in a fortified space are placed under siege if they withdraw into fortifications during enemy movement (13.4) or after a field battle (14.1) and enemy land units in that space outnumber them. The land units under siege may not move, attack, intercept, or avoid battle until the siege is broken (15.3). (However, naval units in a port under siege may move.) Note that it is possible for a fortified space to be under siege by two powers at once if those powers are allies, both are at war with the power that controls this fortified space, and each power possesses more units in the space than the power inside the fortifications.
15.1 Assault
A besieging power may spend 1 CP on the Assault Fortified Space action in an attempt to gain control of the space, but not in the same impulse in which the space was first put under siege by that power. A space may only be subjected to one assault in a single impulse (Exception: See 20.4 for the Beltranejos units after the Peace of Alcaçovas), though a power may initiate multiple assaults in different spaces in the same impulse. Assaults are conducted by a single formation of units and army leaders in the same space as the fortification. Requirements for an Assault action are as follows:
Requirements:
- Units controlled by the active power must have placed the space under siege during a previous impulse. Fortified spaces that are empty also have to be put under siege in one impulse before they can be assaulted in a later impulse. (Exceptions: Guanches, Beltranejo units after the Peace of Alcaçovas, and Maximilian's forces, see Section 20.4 and 21.8)
- The assaulting power has an LOC to the space.
- The power that controls the fortified space does not have a naval unit in an adjacent Sea Zone.
- If the power controlling the fortified space has naval squadron(s) in that space there is a greater number of naval squadrons from the assaulting power in adjacent Sea Zone(s).
Corsairs are always ignored for the purposes of these last two requirements (naval blockade).
Assault Procedure
- Declare Formation: The active player declares which formation of land units and army leaders will be making the assault. All requirements listed above must be met at this time.
- Play Response Cards: Other players may play the Response card Torrential Rains to disrupt this Assault action. Any player in Impulse Order may play a response card such as Nobles Return Home or Mercenary Militias to change the number of units in the space.
- Add Up Attacker's Dice: The active player is always considered the attacker in an assault. The attacker adds up the number of dice he will roll as follows:
If it is against a fortified space with no defending land units:
- 1 die for each infantry unit in the assaulting formation (cavalry units are ignored, although there is a possibility of irreversible dismount by the cavalry units at this time).
- 2 dice for each siege artillery unit (Aragon and France only).
- 1 die for each Battle Rating point from the highest-rated leader in the assaulting force.
If against a fortified space with 1 or more defending land units (even if all units are cavalry):
- 1 die for every two infantry units in the assaulting formation (cavalry units are ignored, although there is a possibility of irreversible dismount by the cavalry units at this time), rounding up.
- 1 die for each siege artillery unit (Aragon and France only).
- 1 die for each Battle Rating point from the highest-rated leader in the assaulting force.
- Add Up Defender's Dice: The player controlling the space is always considered the defender in an assault. The defender adds up the number of dice he will roll as follows:
- 1 die for each defending infantry unit in the space (artillery and cavalry units are ignored, although there is a possibility of irreversible dismount by the cavalry units at this time).
- 1 die for each Battle Rating point from the highest-rated leader in the defending stack.
- 1 die for being the defender.
- Attacker Declares Combat Cards: The attacker declares any Combat cards he wants to play as events to affect the assault.
- Defender Declares Combat Cards: The defender declares any Combat cards he wants to play as events to affect the assault. If more than one player is controlling defending units in this space, each of these players may play Combat cards.
- Roll Dice: Both players roll their dice and add up the number of hits they have scored. Each roll of a "5" or "6" is considered to be a hit. Rolls of a "4" by the defender may be a hit in these situations:
- If the defender rolled two dice from regulars or from being the defender, the first die roll of "4" is a hit.
- If the defender rolled four or more dice from these sources, the second die roll of "4" is also a hit.
The response cards Master of Siege Artillery and/or Leadership may be used at this time to modify the combat results.
- Take Casualties: Each side eliminates one land unit from their stack of units in the space for each hit scored by the opposing side (cavalry and artillery units may be taken as losses). If defending units (does not apply to the attacking formation) are composed of units from more than one allied power, losses must be as evenly split as possible.
- Successful Assault: If the attacker scored at least 1 hit, no defending land units remain in the space, and at least 1 attacking unit survived the battle, the assault is successful. The attacker gains political control of the space. All besieged army leaders are captured. Place a captured leader in the dungeon of the opponent's power card. The opponent scores 1 VP if this is their first leader captured in the game. Captured leaders can be recovered in the Diplomacy Phase of an upcoming turn (9.0). If the Guanche leader Bencomo, Maximilian or the mercenary leader Cesare Borgia are captured, remove them from the board. If a leader is captured fighting a formation of Independent units, place the player's leader on the Turn Track; he will return next turn. If the defender has naval units or a naval leader in the space, place them on the next turn of the Turn Track. In a future turn, the leader will reenter play and the naval units may be rebuilt.
- Unsuccessful Assault: If no attacking land units remain, the attacker did not score at least one hit, or any besieged land units remain, the assault is unsuccessful. If the number of besieging land units still exceeds the number of defending land units, the space remains under siege. If not, the attacking force must retreat as described in 15.3. If all attacking land units are eliminated, surviving attacking army leaders are displaced (12.5).
If, earlier in the impulse, units and leaders joined a stack of that power's units already besieging a fortified space, those newly arrived units and leaders may participate in the assault and can be included in the calculation in Step 3 (provided that the full complement of attacking forces used can fit within a single formation).
15.2 Relief Forces
A formation friendly to the units in the fortification may enter a fortified space under siege and initiate a field battle in an attempt to break the siege. In this relief force situation, units and army leaders inside the fortification that are controlled by the same major power as the relief force may participate in the field battle. These forces inside the fortification may participate even if the total number of units now exceeds the allowable formation size (based on the leaders present in that space). The player may choose to withhold units that started the impulse within the fortification from the field battle if he does not want to risk losing them. In relief force situations, the requirements to take half of your losses from regulars and cavalry and to distribute your losses between powers do not have to be met (14.0, Step 8). You are free to distribute the losses as you see fit between the besieged and the relief forces. There are three possible results in this relief force situation:
- If the active player wins the resulting battle, the besieging forces retreat and the siege is broken.
- If the active player loses the battle but the number of hits scored by both sides is equal, the active player may choose to retreat any units or army leaders that participated in the battle into the fortifications (including units that were part of the relief force that entered the space). The total number of units inside the fortification may never exceed four after such a retreat. All other attacking units, including any desired units that started the impulse inside the fortification, retreat as per Section 14.1.
- If the active player loses the battle and the number of hits he scored was less than his opponent, units and leaders that started the impulse inside the fortification must retreat back inside. All other attacking units retreat as per Section 14.1. If all attacking units in the relief force were eliminated, any attacking army leaders in the relief force are captured and there is no retreat.
15.3 Breaking a Siege
A siege is broken immediately if the besieging stack no longer contains more land units than are in the fortification (cavalry and artillery units are included in these counts). This may occur if part of the besieging force leaves the space as part of a Move action, a successful interception, or a successful avoid battle attempt. It may also occur if the besieging stack takes severe losses during an assault or battle against a relief force, or due to an Event card play. When the siege is broken, the stack must retreat to any adjacent space that meets the following restrictions. This retreat does not cost any CP. If no such legal space exists, all units in that stack are eliminated; any army leaders present are captured.
Restrictions:
- Units may not retreat into a space in unrest, with Plague, or a space containing units that are not from (or allied to) the retreating power.
- Units may not retreat into a Sea Zone.
- Units may not retreat into an independent space or a space controlled by another power unless that power is an ally of the retreating power.
16. Naval Affairs
You can also send naval escort squadrons to previously explored Ocean Zones to defend settlements.
16.1 Naval Movement and Escorts
A player moves naval units with the Naval Move action (1 CP). Unlike land movement (where a Move action allows just one formation to move), the Naval Move action allows all naval units and Naos of a single Major Power (and their activated Minor Power allies and any lent fleets) to perform a move, wherever they are on the map. Naval units on the Main Map and Naos on the Exploration Map may each move based on the expenditure of the same CP (except escorting squadrons which never move from the Ocean Zone where they are located). As per Section 5.4, the naval units of Castile and Aragon move and fight as a united Spanish navy, so a Naval Move by Spain allows all naval units that player controls to move. The Muslim and French players however do have to specify which of their two Major Powers is moving each time they undertaken a naval move (Exception: On Turn 1 the Catalan and French navies are considered to be a single force, like Spain above). Muslim Naos move when a Naval Move is initiated for the North African Alliance.
Naval movement into Sea Zones (but not Ocean Zones) may trigger interception attempts by enemy naval units. Enemy naval units in Sea Zones are also allowed to try to avoid battle in response to Naval Move actions.
All naval movements are to an adjacent location. Ports are adjacent to one or two Sea Zones, as marked with the anchor symbol. Sea Zones are adjacent to all ports with symbols in their zone and all Sea Zones that share a common Sea Zone boundary.
NOTE: The Sea Zone Cabo Bojador borders the Canary Islands Sea Zone normally despite the Canary Islands appearing in a box extending the Main Map.
Only Naos can move between Ocean Zones. Ocean Zones and Sea Zones are never adjacent. Ocean Zones are adjacent to all Ocean Zones with which they share a common boundary. Ocean Zone 1 is also adjacent to the Built Naos Box.
On Turns 1 and 2, only Portugal can possess Naos and they can move them to the Ocean Zone corresponding to the current turn number (to Zone 1 on Turn 1; to Zone 2 on Turn 2). During this time, Portugal may only found settlements on spaces printed with the color of their home power. If the event School of Sagres, Henry the Navigator, is played, Portugal may enter any of the first three zones and may found settlements there without restriction.
Naval units move, fight, intercept, and avoid battle in the Sea Zones and ports of the map, much as land units do in the spaces of the map. Naval units also provide a transport capability that allows land units to traverse Sea Zones (as long as that movement takes place in a single impulse). Naval units can also initiate piracy in Sea Zones against enemy ports (or against any port in the case of Muslim corsairs and France's naval units with Casanove leader). Naos use naval movement to traverse the Ocean Zones of the Exploration Map attempting to explore, to found settlements, or to initiate piracy.
Starting with Turn 3, Ocean Zones 1, 2, and 3 can be explored by any power; Ocean Zones 4, 5, 6, 7, 8, A, and B can only be crossed when the mandatory event Overseas Voyages has been played. To remind players of this restriction, the area containing Ocean Zones 1, 2, and 3 is highlighted with a red border. All settlements are considered to be adjacent to the Ocean Zone contained in the same Exploration Map box.
Naval units of two different powers that are not at war may occupy the same Sea Zone after a move. (Naos and naval squadrons may occupy the same Ocean Zone even if their two powers are at war). Interception attempts, avoid battle attempts, and naval combat are only triggered against enemy naval units in the Main Map. Naval movements must comply with the following restrictions:
Restrictions:
- Naval units must always move to an adjacent location. Movement between the Alboran Sea and the Gulf of Cadiz and between the Tyrrhenian Sea and Central Mediterranean are only possible if the appropriate condition listed in Section 2.4 (Sea Zones) for control of a specific space or permission from an ally are met.
- Naval units may only move to ports controlled by another player if enemy naval units are present in that port. (This restriction prohibits naval moves into a port controlled by a major power ally.)
- Naval leaders must be in the same stack as a naval unit controlled by the same power whenever possible (and never on the Exploration Map). Naval leaders may accompany any naval unit that is moving from the naval leader's port or Sea Zone. If naval movement is going to empty the naval leader's port or Sea Zone, then that naval leader must accompany one of the naval units that is leaving.
- No naval unit may participate in a Naval Move if it was part of a stack of naval units that lost a naval combat earlier in the impulse.
- A single player may never have more than TWO Naos on the Exploration Map, although he may have any number in the Built Naos box from Turn 3 onwards (Portugal has exceptions to this during Turns 1 and 2 or when the School of Sagres, Henry the Navigator event has been played as above).
Naval Movement Procedure
- Declare Naval Move: The active power declares which naval units and leaders will be moving and designates the destination for each of these units. Each unit's destination must be adjacent to its current location.
- Execute Naval Move: The active power executes all naval moves. The order of execution is not important as all moves are considered simultaneous. Stack the newly arriving unit(s) in the destination port, Sea Zone, Ocean Zone, or settlement as follows:
- If arriving in a port: the arriving naval unit(s) are placed below any land units and army leaders and are oriented normally (horizontally).
- If arriving in a Sea Zone containing units controlled by the active major power: the arriving naval unit(s) are placed on top of the other friendly units and oriented the same way as those units.
- If arriving in a Sea Zone with no units controlled by the active major power: the arriving naval unit(s) are placed in the zone rotated 90 degrees (so they are oriented vertically).
- If arriving in an Ocean Zone: see 16.6.
- If arriving in the Built Naos Box: if the Nao enters the box with a resource it is placed on the Turn Track to reenter next turn; the player receives the Nao's loot immediately (18.8). If the Nao does not hold a resource it remains in this box. The Built Naos box is considered adjacent to Zone 1 only.
- If arriving in a vacant Exploration Map Space: see 16.6.
- Play Response cards to move: Other players may play the Response card Torrential Rains to disrupt this naval move action. Interruptions to Naos must be declared prior to any rolls for Navigation or for exploration of the Terra Incognita.
- Conduct interceptions: Stacks of naval units that are oriented vertically on the main map may be intercepted by enemy naval units in an adjacent location. If multiple enemy stacks are adjacent to the destination space, one or more naval units (owning player's choice) from each stack may attempt to intercept as a single stack. Each such attempt is resolved separately and the owning player chooses the order of those attempts. If multiple stacks from different enemy players all want to intercept, resolve intercept attempts in Impulse Order.
Restrictions:
- Once one power succeeds, no other power may attempt an interception (even if that other power is an ally of the intercepting power).
- Interception may not be attempted by naval unit(s) in a location that now contains naval units from the active power.
- Interception may not be attempted into a destination space that contains one or more enemy naval units hostile to the intercepting power that are still oriented normally.
The intercepting power rolls two dice and adds the Battle Rating of the best naval leader present to the dice sum. A modified result of 9 or greater indicates success. If successful, the intercepting naval units are placed in the destination space and oriented vertically. All stacks that successfully intercept are combined into a single stack (and will fight as a combined force in the naval combat, in Step 9 below).
- Play Response cards to interception: Any player may play the response card Sea Fog to cancel the successful interception roll. No further interception attempts may be made into that zone this impulse.
- Conduct Avoid Battle: Enemy naval units in Sea Zones (not ports) may try to avoid battle if both of these conditions are met (these conditions represent a Sea Zone entered by the active power in Step 2 in which no intercept occurred in Step 4):
- All enemy naval units are oriented normally.
- The naval units of the active power are oriented vertically.
Resolve avoid battle attempts in Impulse Order. The enemy power attempting to avoid battle designates an adjacent location into which the naval units will try to move. Adjacent ports must be controlled by the power avoiding battle; adjacent Sea Zones may not contain units from a power at war with any of the units avoiding battle. All of this power's naval units in the Sea Zone must avoid battle together. The power avoiding battle rolls two dice and adds the Battle Rating of any naval leader present to the dice sum. If the modified roll is 9 or more, the Avoid Battle Attempt is successful. If successful, the units are placed in the chosen adjacent location.
- Play Response cards to influence avoid battle: Any player may play the response card Sea Fog to make the avoid battle action successful.
- Rotate Units: After all avoid battle attempts are complete, rotate all units that are oriented vertically to a normal orientation.
- Conduct Naval Combat: If naval units of the active power and an enemy power occupy the same Sea Zone or port, naval combat occurs in that location. The active power resolves the naval combats that result from a Naval Move in any order it desires. If more than one enemy power is present in that Sea Zone, the active power chooses which one to fight first (allied enemy stacks are not combined); he must continue fighting enemy naval forces until he either loses a combat (and retreats) or has fought each enemy once.
Send Naval Escort Procedure
Naval squadrons may be redeployed to an Ocean Zone to act as escorts to support a players' Naos and settlements in that zone. Naval squadrons never reach an Ocean Zone by standard naval moves. Instead, if a player has explored at least Ocean Zone he may take a special variant of a Naval Move called the Send Naval Escort action (1CP).
- Declare Escort Move: The active player declares which single naval unit that he controls on the Main Map will be moving and designates a previously explored Ocean Zone as the destination. This destination zone can be any explored zone regardless of distance.
- Execute Escort Move: The active player places the unit in the destination Ocean Zone. No Navigation Check is required and interception is not possible.
Escorts may also travel to Ocean Zones during Spring Deployment (10.0) or with the Build Naval Escort action (17.3).
16.2 Naval Combat
Naval combat occurs due to a Naval Move action into a Sea Zone or port occupied by enemy naval units or because of a successful interception. Each player involved adds up their combat dice and rolls to see how many hits they score. Hits may cause casualties on the opponent. The side with the most hits is the victor. After the combat, one side's units must retreat to an adjacent location.
Naval Combat Procedure
- Attacker Adds Up Dice: The active player is always considered the attacker in a naval combat. The attacker adds up the number of dice he will roll as follows:
- 1 die for each corsair.
- 2 dice for each naval squadron
- 1 die for each Battle Rating point from their highest-rated naval leader in the Sea Zone or port.
- Defender Adds Up Dice: The intercepting player or the player with the stack of units that began the Naval Move action in the destination location is always considered the defender in a naval combat:
- 1 die for each corsair.
- 2 dice for each naval squadron
- 1 die for each Battle Rating point from their highest-rated naval leader in the Sea Zone or port.
- 1 die for being the defender, but only if this combat is taking place in a port (21.8 Ragusa)
- Attacker Declares Combat Cards: The attacker declares any Combat cards they want to play as events to affect the combat.
- Defender Declares Combat Cards: The defender declares any Combat cards they want to play as events to affect the combat.
- Roll Dice: Both players roll their dice. Each side adds up the number of hits they have scored. Each roll of a "5" or a "6" is considered to be a hit.
- Play Response Cards: After seeing the results of the rolls, any player may play the response card Admiralty to give one side an attempt to score additional hits.
If the combat occurred in a Sea Zone, the loser retreats to an adjacent port under its control or an adjacent Sea Zone (free of enemy naval units). If no such location exists, the naval units are eliminated.
- Place Units on Turn Track: If one or more naval leaders are present on a side that is completely eliminated, they are placed on the next turn of the Turn Track. All naval units lost in the combat are also placed there. In a future turn, the leader will reenter play and the naval units may be rebuilt (8.1).
16.3 Naval Transport
If a power has naval squadrons or corsairs in one or more adjacent Sea Zones, it may make a special move of land units across those Sea Zones. This special move is called naval transport and is considered a special case of the Move Formation in Clear action.
Naval Transport Procedure
- Spend CP and Move: The active power must have at least 2 CP remaining to spend in the current Action Phase. If so, a formation of five or fewer land units (plus army leaders) in a port may move to an adjacent Sea Zone containing naval units controlled by the active power. Artillery and cavalry units are always counted against this limit of five units. This move costs 1 CP and is considered to be a Move Formation in Clear action. Units moving by naval transport may not be intercepted at sea. Other players may play the response card Torrential Rains to disrupt naval transport. A formation under siege may not be moved by naval transport.
- Multi-zone Transport: The active power then continues to move the formation to an adjacent Sea Zone or port at the cost of 1 CP for each such move. Moves from one Sea Zone to another are permitted as long as the power has a naval unit in each Sea Zone and enough CP to get the formation back to a port before the impulse is over. Formations may never end an impulse at sea. You must end a naval transport with one formation before starting another one later in the impulse.
- End in Port: Formations end their naval transport by moving to a port adjacent to the last Sea Zone they entered. That port must conform to the following restrictions:
- The port may not contain any enemy naval units.
- It must be a space into which the power could move using land movement (i.e., it cannot be a port of a power that the active power is neither allied with nor at war with).
Treat this movement into the final space as if it were a Move action. Enemy units may intercept, avoid battle, withdraw into fortifications, or stay and force a field battle.
- Naval Transport and Field Battles: If the active power losses a field battle in the port space at the end of naval transport, all transported units are eliminated and any army leaders present are captured.
Special Naval Transport to the Canary Islands. Castile may undertake a special naval transport move that allows up to five Castilian land units (and any leader) to move directly from a controlled home port adjacent to the Gulf of Cadiz Sea Zone to a Castilian-controlled port space in the Canary Islands. The cost of this action is 4 CP and no naval units need to be present for the move to take place.
A single Castilian leader may move at no CP cost to one of these Canary Island port spaces controlled from any Castilian home space at the end of a Spanish impulse instead of extending that impulse with a resource.
16.4 Piracy on the Main Map
If a power has naval units in a Sea Zone, he may spend 2 CPs on the Initiate Piracy action and target any enemy power that controls a port space adjacent to that Sea Zone. In addition, if a Muslim power has corsairs or the French has the leader Casenove with naval squadrons in a Sea Zone, he may initiate piracy against a major power even if the two powers are not at war.
Main Map Piracy Procedure
- Declare Piracy: An active power declares that his naval units in a Sea Zone are initiating piracy. A major power that controls one or more port spaces connected to that Sea Zone must be specified as the target for the piracy. Unless the Muslim is initiating piracy with corsairs or the French has the leader Casenove with naval squadrons, the active and target powers must be at war. Each player may only initiate piracy in a given Sea Zone once per turn; place one of this player's piracy markers in this zone as a reminder.
Exception: Two events (Barbary Pirates of Tlemcen and Algiers Regency) allow the Muslim player to conduct piracy without placing a piracy marker in the target zone. Note that the Algiers Regency card has the additional property of allowing piracy in zones where a Muslim piracy marker is already present. A single zone may only be targeted once during the execution of either event.
Piracy markers are used to enforce these per turn piracy limits: each Sea Zone can be targeted for piracy by no more than two players per turn and each player is limited to three piracy actions per turn (spread across both his major powers and across all sea and Ocean Zones; do not include actions where Piracy markers are not placed per the exception above).
- Targeted Power Adds Up Dice: The targeted power adds up the number of dice they will roll in defense. They receive:
- 2 dice for each naval unit of the targeted power in the Sea Zone where piracy is occurring (only possible if the Muslim is initiating piracy only with corsairs or the French has the leader Casenove with naval squadrons).
- 1 die for each naval unit (other than a corsair) of the targeted power (or another power at war with the active power) in a port (without a Plague marker) or Sea Zone adjacent to the Sea Zone where piracy is occurring.
- 1 die for each fortress controlled by the targeted power (or another power at war with the active power) adjacent to the Sea Zone where piracy is occurring. This fortress must be adjacent to the zone where piracy is occurring and may not be in unrest or under siege. NOTE: This die is for fortresses, not fortified spaces, so keys do not give you these dice.
- 1 die if this is piracy by the Muslim and a unit from the Spanish Military Orders is in a port adjacent to the zone where piracy is occurring.
- Roll Dice Against Pirates: The targeted power rolls the number of dice computed above. Each roll of "5" or a "6" is considered to be a hit. Hits are applied as follows: a) If the Muslim initiated piracy with corsairs, start by eliminating one corsair for each hit. b) If hits remain after Step (a), eliminate one naval squadron from the active power's stack for every two hits scored (units eliminated are chosen by active player). c) If exactly one hit remains after step (b), eliminate one extra naval squadron (again chosen by active player).
- Adds Up Piracy Dice: If one or more naval units from the active power remain in the Sea Zone after Step 3 (and at least one corsair remains if targeting a non-enemy power), the active power will roll for piracy. That power receives base dice as follows:
- 1 die: if there is only one naval unit of the active power in the Sea Zone or only one port of the targeted power connected to the zone
- 2 dice: otherwise
The active power then adds the Piracy rating of any naval leader present in the zone to get the final number of dice.
- Roll Piracy Dice: The active player rolls this number of dice. Each roll of a "5" or a "6" is considered to be a hit. For each hit scored, the targeted power must choose to do one of the following: a) Eliminate a naval unit that they control in or adjacent to the targeted Sea Zone, b) Allow the active power to draw at random and keep one card from his hand (it cannot be played until a future impulse; see 6.3 if the player also has resources in his hand), c) Award the active player 1 VP for piracy, or d) Remove one Spanish Military Order unit from the map if Spain was targeted and a unit from a Military Order was adjacent to the Sea Zone where piracy occurred.
The active player may not be awarded a card draw if no cards are left to be drawn from the target power's hand. The target power must always try and award one of these four awards for each hit. Picking an award of no benefit to the active player is not permitted if another selection is available. If more than one hit is scored on the same piracy action, the target power must divide the hits as equally as possible between valid awards (i.e., an award cannot be chosen for a second time until all possible awards are granted at least once).
Restrictions:
- If the piracy is by corsairs, record any VP scored on the Track on the Muslim Player Card (until a maximum of 12 VP have been recorded).
- If piracy VP are earned by naval squadrons and/or Naos, place a 1 VP piracy marker on your Player card for each VP earned. A player may earn a maximum of 6 VPs in this fashion. The Muslim player may receive these VP in addition to those recorded on his Player Card due to piracy by corsairs.
16.5 Piracy on the Exploration Map
If a power has a Nao in an Ocean Zone where one of the other players owns a settlement, he may spend 2 CP on the Initiate Piracy action to target that settlement.
Exploration Map Piracy Procedure:
- Declare Piracy: An active player declares that his Nao in an Ocean Zone is initiating piracy against another player. The targeted player must control a settlement adjacent to that Ocean Zone. One of the Nao player's powers does not need to be at war with a power of the targeted player to initiate this piracy. The only restriction is that France cannot initiate piracy on the Exploration Map (against any power) if France is at war with the North African Alliance. Each player may only initiate piracy in a given Ocean Zone once per turn; place one of this player's piracy markers in this zone as a reminder. Piracy markers are used to enforce these per turn piracy limits: each Ocean Zone can be targeted for piracy by no more than two players per turn and each player is limited to three piracy actions per turn (spread across both his major powers and across all sea and Ocean Zones).
- Targeted Player Adds Up Dice: The target player computes the number of dice they will roll in defense:
- 1 die for each of the target power's settlements in this Ocean Zone with a Fortress marker.
- 1 die for each naval squadron in the target Ocean Zone.
- 2 dice as defender.
- Roll Dice Against Pirates: The targeted player rolls the number of dice computed above. Each roll of "5" or "6" is a hit. Two or more hits remove the pirating Nao from the game. One hit also eliminates a Nao if it was damaged when piracy was initiated. If one hit is scored against an undamaged Nao, flip its counter to the Damaged side.
- Nao Adds Up Piracy Dice: If the Nao initiating piracy remains in the Ocean Zone after Step 3, the active player will roll for piracy. That player receives dice as follows:
- A number of dice equal to the Nao's piracy (P) rating.
- 1 die if the Nao initiating piracy is damaged or there is only one settlement controlled by the target player in the Ocean Zone.
- 2 dice if the Nao initiating piracy is not damaged and there is more than one settlement controlled by the target player in the Ocean Zone.
The active player may not be awarded a resource draw if no resources are owned by the target player in this Ocean Zone. The target power must always try and award one of these three awards for each hit. Picking an award of no benefit to the active player is not permitted if another selection is available. If more than one hit is scored on the same piracy action, the target power must divide the hits as equally as possible between valid awards (i.e., an award cannot be chosen for a second time until all possible awards are granted at least once).
- Store Loot: The resources earned in Step 5 are placed underneath the pirating Nao's counter. Undamaged Naos can carry two resources; damaged Naos only carry one. If after receiving resources in step 5 (and combining them with any resources received by the Nao during earlier piracy attempts) the total number exceeds the storage capacity of the Nao, the owning player chooses which excess resources are discarded.
- Possible Return Home: The Nao can now choose to return home immediately:
- If this option is chosen, add the Nao's resources to the player's warehouse (18.8) and place the Nao on the Turn Track to be available in future turns.
- If the Nao chooses to stay in the Ocean Zone, it must wait for a future piracy attempt or the Winter Phase to have another opportunity to return home (or it may use naval movements to reach the Built Naos Box from Zone 1). In the latter case the Nao is only moved to the Turn Track if it is carrying a resource, otherwise it remains in that box for future use.
16.6 Exploring the Terra Incognita, Founding Settlements, and Cartography
Here at the start of the Age of Exploration, the powers of Tanto Monta faced the challenge of navigating new coastlines and oceanic waters, gradually mapping them out as they pushed further into the unknown. To reflect this, all oceanic zones on the Exploration Map are considered unexplored (Terra Incognita) and each player must attempt to explore them using the Terra Incognita Table whenever they enter an unexplored zone with a Nao. In addition, you must survive a Navigation Check whenever you attempt to cross a Hazardous Passage. Naos with higher crew ratings have a better chance of success on these rolls. A Nao moving into an already-explored Ocean Zone skips the Terra Incognita Table roll but is still required to make a Navigation Check if they entered the zone across a Hazardous Passage. Follow the procedure listed below whenever a Nao enters an Ocean Zone:
Ocean Naval Movement Procedure
- Check for Hazardous Passages: If the Nao moves through a Hazardous Passage arrow, it must survive one Navigation Check for each arrow it crosses. Repeat step 2 once for each such arrow. Exception: If a player controls five or more Canary Islands he skips Navigation Checks for Naos traveling between Zone 1 and Zone A (in either direction).
- Navigation Check(s): Roll two dice and add the Nao's crew rating and the applicable modifiers listed below under the table. Use the modified die roll to find the result in the Navigation Table.
NAVIGATION (Add factor "C" in the Nao)
| Roll 2D6 | Result |
|---|---|
| 2-5 | Sunk |
| 6-7 | Damaged |
| ≥8 | No Effect |
Modifiers:
- +1 if you are benefiting from the Maritime Technology event.
- +2 in Winter if a Nao is returning to the Built Naos box.
- +1 in Winter if there are two of your Naos staying in an Ocean Zone.
If the Nao is damaged, flip it to the Damaged side. If it was already damaged, the Nao is sunk. Remove a sunk Nao to the Turn Track; it may be rebuilt in a future turn.
- Terra Incognita Check: If the Nao was not sunk by the required Navigation Checks but is sailing into an Ocean Zone that has not yet been explored by their player, it must pass a Terra Incognita exploration check. Roll two dice and add the Nao's crew rating and the applicable modifiers listed below the table. Use the modified die roll to find the result in the Terra Incognita Table.
TERRA INCOGNITA EXPLORATIONS (Add factor "C" in the Nao)
| Roll 2D6 | Result |
|---|---|
| 2-5 | Sunk * |
| 6-8 | Damaged. Do not advance the Nao to the target Ocean Zone. |
| 9-10 | Successful Exploration |
| ≥ 11 | Successful Exploration. Gain 1 Cartography VP |
Modifiers:
- +1 if you are benefiting from the Maritime Technology event.
- +1 if this is a Muslim Nao traveling to zones 1, 2, 3, A, or B and the Muslim has control of Ceuta, or controlled Gibraltar before the Muley Hacén Seizes Zahara event was played.
* Result = No effect, do not advance, if the player has played Experienced Pilot during this turn.
- Apply Terra Incognita Result: If a sunk or damaged result occurs, apply the same effects listed for these results in step 2. If the damaged result does not sink the Nao, return it to the Ocean Zone from which it started this move. If the Nao receives either Successful Exploration result, advance it to that zone and add a control marker from this power to this zone as a reminder that it has been explored by that player.
NOTE: Use a North African control marker if this exploration was by the Muslim player.
Place a 1 VP Cartography marker on the player's card if the appropriate result was obtained and any of the markers from that zone are still available.
If a player moves several Naos from the same Ocean Zone to a single adjacent and unexplored Ocean Zone, the owner decides which Nao rolls on the Terra Incognita table. If successful, the other Nao(s) move immediately into the newly explored zone along with the successful Nao. However, if unsuccessful, the other Naos must remain in their original Ocean Zone until a new Naval Move action is undertaken. Note that Navigation Checks may not be linked in this fashion; each Nao must make its own Navigation Check when it crosses a Hazardous Passage.
Cartography. If a player has successfully explored an Ocean Zone but failed to get a 1 VP marker for Cartography, then—if such a VP marker is still available—a subsequent attempt to earn it may be attempted. To do so, the player uses the naval movement of a Nao in that Ocean Zone to roll on the Cartography table instead of to move. Roll on the following table and apply the corresponding modifiers:
CARTOGRAPHY (Add factor "C" from the Nao)
| Roll 2D6 | Result |
|---|---|
| 2-5 | Sunk * |
| 6-10 | No effect |
| ≥ 11 | Successful Cartography, gain 1 VP |
Modifiers:
- +1 if you are benefiting from the Maritime Technology event.
- +1 if this is a Muslim Nao traveling to zones 1, 2, 3, A, or B and the Muslim has control of Ceuta or controlled Gibraltar before Muley Hacén Seizes Zahara event were played.
- +1 if the player is playing Sea Dog event.
- +1 if you have any naval escort squadrons.
* Result = No effect, if the player has played Experienced Pilot during this turn.
Founding Settlements. A Nao in an Ocean Zone where there is a vacant Exploration Map Space may, as its move within a player's Naval Move action, enter this vacant space and found a settlement. The active player moves the Nao to the Turn Track (to reenter play in a future turn) and places a settlement counter in their color on the Exploration Map Space. (The Nao has been dismantled to serve as an initial stockade for this settlement.) Draw a naval resource from the pool and place it (facedown) on the space as well (the active player is free to examine resources on his settlements at any time).
Limitations:
- A maximum of one settlement can be established in each Ocean Zone in a single impulse.
- A settlement may only be created if additional settlement counters for your player remain in the counter mix. Once established, settlements cannot be moved later in the game, although they may occasionally be lost due to events.
- Ocean Zones 1 and 2 each contain a space that is Portuguese in color instead of gray. These spaces are reserved exclusively for Portuguese settlements; other players can take control of them only if the Settlement Surrenders or Without Previous Declaration event is played against a Portuguese settlement in one of these spaces. Whenever the Portuguese player is creating a new settlement in a zone with empty reserved Portuguese spaces (but remember the limitations of Turns 1 and 2), he must select these before the gray ones.
16.7 Special Exploration Events
Three special event cards control the pace of Exploration Map discoveries, as detailed in the sections below.
Overseas Voyages. On the Exploration Map, Naos may not move to the New World (zones A, B, 7, and 8) or to the Indian Ocean (zones 4, 5, and 6) until the Mandatory Event Overseas Voyages has been played. Note that these boundaries are marked on the map with red lines to remind players that they are not traversable until this event has occurred. Portugal and Spain may also be limited in their movement by the terms of the Peace of Alcaçovas and/or the Treaty of Tordesillas (20.4). When the Overseas Voyages event has been played, add Christopher Columbus' Nao in Ocean Zone 1 and Vasco da Gama's Nao in Ocean Zone 3. If, when this event is played, the Spanish and Portuguese players have not explored zones 1 and 3 respectively, place these Naos in the Ocean Zone nearest to their intended entry position (or if Zone 1 has not been explored, then in the Built Naos box). These special Naos do not count against the usual limit of two Naos per player on the Exploration Map. Vasco da Gama's and Columbus' Naos are only available by way of the Overseas Voyages event. If dismantled to found a settlement or sunk, remove them from the game. Both Naos may never be captured at any time by the Boarding and Capture response card.
Columbus' Nao: Christopher Columbus' Nao enjoys the following special properties:
- On Columbus' first attempt to explore zone A, reduce the number of Navigation Checks required from two to one. (Control of five Canary Islands by Spain reduces this to zero.) A Terra Incognita roll is still required as usual.
- If Spain becomes the first player to found a settlement in Zone 7 using Columbus' Nao, Spain earns 2 VP. Give them the Overseas Voyage marker (representing Columbus' arrival in the New World). If it is another power that does this or it is Spain with another Nao, it will gain 1 VP for Overseas Voyage instead.
Vasco da Gama's Nao: Vasco da Gama's Nao enjoys the following special properties:
- On Vasco da Gama's first attempt to explore zone 4, no Navigation Check is required at all. A Terra Incognita roll is still required as usual.
- If Portugal becomes the first player to found a settlement in Zone 5 using Vasco da Gama's Nao, Portugal earns 2 VP. Give them the Overseas Voyage marker (representing Vasco da Gama's arrival in India). If it is another power that does this or it is Portugal with another Nao, it will gain 1 VP for Overseas Voyage instead.
Christopher Columbus Discovers the New World and Vasco da Gama Arrives in India. The events Christopher Columbus Discovers the New World and Vasco da Gama Arrives in India allow Spain or Portugal to gain the full 2 Overseas Voyage VPs regardless of the progress they have made toward these goals to date. To play either of these two events you need to have a Nao on the map or in the Built Naos box and have a vacant space to place a settlement in the target zone. Both events can be played even before the Overseas Voyages mandatory event is played. Execute these events by taking as many of these steps as possible:
- If Spain or Portugal has not yet received the appropriate 2 VP marker, award it to them now. If they have already achieved the 1 VP version, flip it to the 2 VP side.
- Move a Nao directly to the target zone. Now make the exploration roll for Terra incognita if that zone is unexplored considering any result less than 9 as a 9. Found a settlement by removing the Nao as usual.
- Add the marker for this event to the corresponding Ocean Zone to show that this power receives a +1 die roll modifier to the return of any resources from that Ocean Zone.
16.8 Seville, Inland River Port
As an inland port, Seville has special properties as detailed below:
- Naval movement limitation: No naval unit may move from the Gulf of Cadiz Sea Zone to Seville (or vice versa) unless that power controls Jerez or is allied to a power that controls Jerez that allows you to pass through.
- Naval Transport: A power performing naval transport through the Gulf of Cadiz may move units directly from Seville to the Gulf of Cadiz (or vice versa) for just 1 CP, but only if that power controls Jerez or is allied to a power that controls Jerez that allows you to pass through.
- Assault: An assault may not be conducted against Seville if the besieged power in the space controls Jerez. (Exception: An assault may still be conducted if the assaulting power plays the Event card Treachery).
- Assault: If a power besieged in Seville has naval squadrons in that space, to meet naval blockade requirements from the Gulf of Cadiz the attacker must also control Jerez (or be allied to a power that is granting access).
- Piracy: Seville can be the object of piracy attempts only if the power that controls Jerez is either the same power that is initiating piracy against Seville or that power allows passage through Jerez for the piracy attempt.
17. Construction
There are a number of actions which allow powers to construct new land units, naval units, Naos, or fortresses. New units must be constructed in one of your power's home spaces that is currently under your control (Exceptions: The cards Mercenary Militias, Unexpected Reinforcements, and some Home cards allow units to be built in a non-home friendly space or in a non-friendly space that contains your units.) Also, the Send Escort action allows a naval squadron to be constructed and directly placed in an Ocean Zone. Units may never be constructed in a space with an Unrest or Plague marker.
17.1 Force Pool
The counters provided with the game for each power are purposely limited to reflect the total manpower of these powers during the period. Units may never be constructed in excess of the counters available. Players may exchange different denominations of counters at any time to facilitate new builds. (EXAMPLE: If the player has run out of "1" counters, he could still build in a space containing three units by replacing the units with a "4" counter.) Since naval units for the Muslim player are two-sided, the Muslim player should consider carefully which type of naval unit (naval squadron or corsair) they want to construct.
17.2 Land Units
Land units may be constructed in any friendly home space that is not occupied by enemy units. The only exceptions are:
a) The Moriscos are Nasrid regulars that are only recruited by play of the Morisco Uprising event (20.1).
b) The Military Orders of Santiago and Calatrava are Spanish regulars that are only recruited by play of the Cardinal Cisneros Regent mandatory event (20.5).
France and Portugal may also construct units on a Foreign War card if one is in progress (20.9).
Regulars: All powers may spend 2 CPs on the Recruit Regular Infantry action. Add one regular unit to the map for each such action taken.
Militias: All powers may spend 1 CP on the Recruit Militia Infantry action. Add one militia unit to the map for each action taken. Guanches units are considered militias for cost purposes.
Siege Artillery: Aragon and France may spend 3 CPs on the Recruit Artillery action. Add one siege artillery unit to the map for each action taken.
Cavalry: All major powers may spend 3 CPs on the Recruit Cavalry action. Add one cavalry unit to the map for each action taken. The cost to the Nasrid power (not the North African Alliance) is 2 CP.
17.3 Naval Units
Naval units may be built in any friendly home port that is not occupied by enemy units. Naval units lost in combat or assault cannot be rebuilt on the turn in which they were eliminated. When a naval unit is lost place it on the next turn of the Turn Track. During the Card Draw Phase (8.1) these eliminated naval units are returned to the pool of units available to be constructed by that power.
Naval Squadrons: All powers may spend 2 CPs on the Build Naval Squadron action. Add one naval squadron to the map in any home port for each action taken.
Corsairs: The Muslim player (only) may spend 1 CP on the Build Corsair action. Add one corsair to the map for each action taken.
Naval Escort Squadrons: A power that has explored an Ocean Zone may spend 1 CP on the Build Naval Escort action to build a naval squadron in any explored Ocean Zone. No Navigation die roll is required when performing this action.
17.4 Naos
Starting on Turn 3, all powers may spend 2 CPs on the Build Nao action. Randomly draw a Nao counter from your force pool and add it to the map in the Built Naos box on the undamaged (front) side.
Restrictions:
- Portugal is allowed to build two Naos on Turn 1 and two other Naos on Turn 2. Portugal is the only power that can build Naos before Turn 3. If School of Sagres, Henry the Navigator event, has been played, these construction restrictions per turn increase to three Naos.
- A maximum of two Naos are allowed on the Exploration Map from the same player. Exception: Columbus or Vasco da Gama Naos come into play from the Overseas Voyages event. These special Naos do not count against this limit.
- There are no limits to the number of Naos a player may have built in the Built Naos box.
- If you have two Naos on the Exploration Map, you may not move another one from the Built Naos box to the map (zone 1) unless you voluntarily remove one of your other Naos from the map.
- When a Nao is removed from the map for any reason, placed it on the next turn of the Turn Track. During the Card Draw Phase (8.1) these eliminated Nao units are returned to the pool of Naos units available to be constructed by that power.
17.5 Fortresses
Any player with a Fortress marker available on their Player Card may spend 2 CPs on the Build Fortress (Settlement) action or 3 CPs on the Build Fortress (Main Map) action. Fortresses may be constructed in any controlled, simple, home space on the Main Map that is not occupied by enemy units or an existing Fortress marker (and has no Unrest or Plague markers). Fortresses may also be built on the Exploration Map in settlements created by the active player that do not yet have a Fortress marker. In either case, remove a Fortress marker from your Player Card and place it in the settlement or space to be fortified.
18. Winter Phase
The fifth phase of each turn is the Winter Phase, which starts immediately after the last impulse of the Action Phase. During this phase, all players complete the following actions in this order:
- Resolve specific Mandatory Events if they have not occurred by their "due date" (18.1).
- Check for Military Order activity against corsairs and the loss of Nasrid home spaces (18.2).
- Discard unused resources (18.3).
- Remove Loaned naval unit markers (18.4).
- Return land units home, including checks for Plague and disbanding of militia (18.5).
- Placement of Replacements and effects from the Morisco Uprising (18.6).
- Return of Naos and naval units (18.7).
- Return of naval resource, caravans, French, Mesta, and Ragusa trade (18.8).
- Remove major power alliance markers and piracy markers from sea and ocean areas (18.9).
- Reset the diplomatic status of minors resolved this turn to their starting levels (18.10).
Each of these actions from the Winter Phase can be done simultaneously by all players to speed up the game.
18.1 Mandatory Events
The following events must occur by a specified "due date". If it is the Winter Phase of the indicated turn and that event has not yet been triggered, resolve the event at this time, in the order indicated. The card is extracted from the deck and removed from play as if it had been played by one of the powers. The 3 CP normally granted to the power playing such card during the Action Phase are ignored.
Turn 1: Sixtus IV, Pope (#15)
Turn 2: Muley Hacén Seizes Zahara (#22); Charles VIII, King of France (#18); Joao II, King of Portugal (#20)
Turn 3: Innocent VIII, Pope (#27); El Zagal Seizes Power (#26); Treaty of Etaples (#30)
Turn 4: Alexander VI, Pope (#32); Manuel I, King of Portugal (#35); Death of Ferrante of Naples (#34); Overseas Voyages (#28)
Turn 5: Isabella Dies, Crown of Castile Split (#38); Boabdil, Emir of Granada (#25), check conditions of play; Louis XII, King of France (#40); Algiers Regency (#33)
Turn 6: Julius II, Pope (#39); Boabdil, Emir of Granada (#25), if Turn 5 conditions for play were not met; Cardinal Cisneros Regent (#37)
18.2 Military Order Activity Against Corsairs and Loss of Nasrid Home Spaces
The Spanish player rolls as many dice as spaces he controls from the following list that also contains at least one Military Order unit: Badis, Melilla, Oran, Bejaía, and Algiers. Each "5" or "6" is a hit that reduces the Muslim player's corsair piracy VP track by one space (but not less than 0).
Next, if Spain and the Nasrid Kingdom are at war, check if any Nasrid home space is controlled by Spain and thus loses its property as a Nasrid home space (20.1). In each such space, remove the special control marker and place a Spanish one.
18.3 Discard Unused Resources
Discard any resources still remaining in a player's Warehouse (that they were not able to spend during the Action Phase).
18.4 Loaned Naval Unit Markers
Remove all Loaned markers from naval units. These fleets will return to a port controlled by their owning power in the following 18.7 step, not to a port controlled by the power to which they have been on loan. If a Nao or naval squadron has been captured by rivals, it remains in the possession of the capturing power.
18.5 Return of Land Units
Next land units return to fortified spaces (though units in Plague spaces and militia may be eliminated first).
Check for Death from Plague
- Count the number of land and naval units (but not leaders) you have in each space with a Plague marker. Roll that many dice. For each roll of "1", eliminate one unit of your choice from that space.
- Then roll one die for each leader in that space. If you roll a "1", the leader becomes seriously ill and retreats to quarantine. Place the leader on the turn track, to return two turns beyond the current turn (as specified in 8.1). If, due to the effect of a Mandatory event, the leader affected by Plague dies and is replaced by another, the new leader replacing him is not affected by Plague and enters the game normally at that time.
- Now remove the Plague markers from the board.
Disbanding Militia
Now check, for each power, whether any Militia units are disbanded. Militias located in the Canary Islands, on a Foreign War card, in a formation with a leader, or in a home key never disband. Count the number of Militia you control that do not meet any of these criteria and roll that many dice. For each "1" rolled, one of your eligible Militia units (your choice as to which) is removed from the map and returned to your force pool.
Land Units Returning Home
Land units in either unfortified spaces or fortified spaces not controlled by their major power must return to a fortified space that is controlled by their power (with a limit of four per space except in home keys). Land units already in fortified spaces controlled by their power that are not home keys have the option of returning to a home key. Land units already in a home key are the only ones that are prohibited from moving during this phase (all other land units at least have the option to be moved at this time). There are four exceptions:
- One land unit may remain in each controlled strategic space, even though it is not fortified.
- Land units in the Canary Islands may remain there if desired, even in non-controlled spaces.
- After the mandatory event Death of Ferrante of Naples has occurred, additional land units may remain in Atella and L'Aquila (21.7).
- If the Ottomans Seize Otranto Mandatory Event is played, additional land units may remain in Otranto (20.2).
Attrition
Land units move according to the procedure listed below. All land units moving between the same two spaces are moved as a stack. Check for an open path of any length of adjacent land spaces or Sea Zones from the stack's current location to its destination. To avoid losing units to attrition, all spaces on the path (except the space where the path begins) must be:
- Friendly-controlled
- Free of Unrest
Note that unlike the determination of LOC (12.1), enemy units are ignored at this time. In addition, paths can be traced over any number of Sea Zones without a friendly naval unit being present in the Sea Zone. Because alliances are in effect until the end of the 18.9 step of the Winter Phase, land units may trace a path through spaces controlled by allied powers. If no such path exists, the stack suffers attrition, losing half of its units (round up). The owning player chooses which units are lost to attrition.
Land Unit Return Home Procedure
Each power performs the following steps to check the status of all of its land units. This procedure may be performed simultaneously for all powers.
- Check Stacking Violations: Review all land units that are stacked in fortified spaces controlled by their power (other than a home key). For each such fortified space that contains more than four units, the power must return the excess units to a controlled home key (minor power units could also optionally return to a minor power home key). Artillery and cavalry units are always counted against this limit of four units. Other land units in these spaces also have the option of returning to a home key (or minor key for minor power units) if desired, even if not overstacked. The stack takes attrition (see above) if its path must cross or end on a space in unrest or not under friendly control.
- Return Units: Now review all land units in unfortified spaces and in fortified spaces not controlled by their major power. (Remember that one unit may remain in each strategic space.) These units must either:
- Return to a home key (or minor power key for minor power units), or
- Return to the nearest fortified space controlled by the power (but not if that would put more than four land units in that space). The nearest space is always computed using a direct path to the destination without regard to which power controls any of the intervening spaces.
Players may split a stack at this time, choosing to move some units to the nearest fortified space and returning the rest to a home key (or minor power key). If more than one fortified space is nearest (i.e., they are equidistant from the stack's current location), the player may move units to each of these spaces, as long as the limit of four land units is observed. Any stack moving during this phase takes attrition (see above) if its path must cross or end on a space in unrest or not under friendly control.
- Return Army Leaders: If a space containing an army leader is vacated during this procedure, that army leader must either accompany one of the land units leaving the space throughout the entire winter move or return to a controlled home key. Leaders never suffer attrition. Moreover, if they are alone they can always return to a controlled home key regardless of whether or not they are able to trace an LOC.
There are six exceptions to the rules in this procedure:
-
Enemy-Controlled Key: If a power's home key is currently controlled by an enemy power, none of its land units may be returned to that key. If a power does not control any home keys, all units that would normally have been required to return to a home key are eliminated
-
Spanish Units: The Spanish player controls two powers, Aragon and Castile. The units of each power must return to their own home spaces. However, there are three exceptions: a) Castilian units may return to Aragonese home spaces in Sicily or Sardinia as if they were Castilian home spaces. b) Units of both powers returning as part of a formation with Ferdinand or the Great Captain may winter in the other power's home space. c) Units of either power may winter in a fortified or strategic space controlled by the Spanish player that is not a home space of either power.
-
Muslim Units: The Muslim player controls three nations, of which two of them (Berbers and Sultanate of Fez) are one power (North African Alliance) that share a force pool of units although their spaces on the map are of a different color. North African units may return to any North African-controlled space. Nasrid units must always return to a Nasrid-controlled space. North African units in a formation with a Nasrid leader may return to a Nasrid-controlled space.
-
French And Principality of Catalonia Units: French units may return to a Catalan controlled fortified space in the Principality of Catalonia, but French units returning to Barcelona may not exceed one valid formation. Catalan units may not return to a French home space except in a formation with the Anjou leader. Catalan units may return to the following Aragon home spaces if they possess a French control marker and are fortified: Gerona, Palamós, or Tarragona. Catalan units may return to spaces with French control markers in Roussillon. Catalan and French units can winter in home, strategic spaces controlled by the other in either Catalonia or Aragon.
-
Portuguese And Beltranejos Units: Portuguese units may return to a fortified home space of the Beltranejos faction. In the case of Beltranejos home keys, Portuguese units may not exceed one valid formation. Beltranejos units may never return to any space controlled by Portugal. Portuguese units can winter in strategic spaces controlled by the Beltranejos. Once the Peace of Alcaçovas has been signed, Portuguese units may no longer return to Beltranejos-controlled spaces, as they are no longer allies.
18.6 Replacements and Morisco Uprising
Each major power (including the Principality of Catalonia and the Beltranejos) adds one regular to their choice of home key that is controlled and not in unrest. Remember that the regular received by the North African Alliance can be placed in any Fez or Berbers home key that is in play. Exceptions:
- The Nasrid Kingdom can choose to receive a cavalry in place of the regular.
- Any Major Power controlling Tunis, as long as the Algiers Regency event has not been played, receives the Djerba corsair if it had been sunk during the previous turn.
- The North African Alliance also receives a corsair in Algiers if he controls this space, the Algiers Regency event has been played, and an unbuilt corsair is available.
- Any major power that has surrendered (22.1)—other than the Beltranejos, the Principality of Catalonia, and the Nasrid Kingdom—will receive one militia (instead of one regular) in a controlled fortified or strategic space of their choice that is valid for winter stacking purposes.
If any Morisco regular unit or Morisco Uprising marker is in play, the Muslim player executes the Effects of Morisco Uprising (20.1).
18.7 Naos and Naval Units Return
Naos Return. Naos on the Exploration Map are returned to either one of their power's settlements or the Built Naos box—or they can risk remaining at sea.
- You can return a Nao to one of your own settlements if it is closest to the Nao's current Ocean Zone and there is no Navigation arrow between the two zones. A settlement can hold a maximum of one Nao.
- You can voluntarily return a Nao with or without a resource directly to the Built Naos Box. Roll a Navigation check for that Nao, with a +2 modifier to the die roll. Place the Nao in the Built Naos Box if it has no resource. If it has at least one resource, the resource goes to the player's warehouse and the Nao is placed on the Turn Track.
- If a Nao chooses to stay in its current Ocean Zone, it must immediately pass a Navigation Check. This check is done with a +1 modifier if the Nao belongs to a group of at least two Naos of the same power trying to stay in that Ocean Zone. Each Nao must roll separately. Exception: On the turn that the Overseas Voyages event is played, Vasco da Gama's and Christopher Columbus' Naos do not perform Navigation Checks if they decide to stay in their Ocean Zone.
Naval Units Return. Naval units on the main map must be placed in the nearest port controlled by their major power. Squadrons of a controlled minor power have the option to go to the nearest home port of that minor power instead as long as it is also under control of their major power ally. If more than one port is the same distance away, the owning player selects any of these equidistant ports (splitting a stack between several ports if desired). Naval units returning home at this time cannot be intercepted, do not fight naval combat if moving through enemy units, never suffer any attrition, and may return to a port that was under siege at the start of the phase. Naval leaders in a Sea Zone must return to a port with one of the units that started this phase in the same Sea Zone. Remember that you cannot pass from the Alboran Sea to the Gulf of Cadiz (or vice versa) unless you control one of the three spaces in the Strait of Gibraltar, an ally controls one of them, or one of those powers has allowed you to pass through. If there is no valid port for a naval squadron to return to, it is eliminated.
A naval squadron acting as an escort on the Exploration Map must choose between:
a) Staying in its Ocean Zone.
b) Attempting to return to a controlled home port on the main map. To return the squadron performs a Navigation Check with a +3 modifier and applies these results: No effect: The naval squadron arrives at its destination. Damaged: Transfer is blocked; unit remains in the Ocean Zone. Sunken: Destroys the naval squadron.
Remember that in the Naval Escort segment of the spring deployment (10.0) you can move one squadron without a Navigation Check.
18.8 Resource Return and Foreign Trade
Return of Naval Resources. Determine whether the naval resources placed in settlements arrive at their owner's Warehouse by rolling on the Resource Return Table. Each player makes one roll for each Ocean Zone where he has at least one naval resource in a settlement. You must select the appropriate column according to whether or not the fleet is subject to Plunder (see Plunder of Naval Resources below). Add the following modifiers to that roll (all cumulative):
- +2 if you have a naval escort squadron in that Ocean Zone
- +1 if you are benefiting from the Maritime Technology event
- +1 if Ocean Zone 5, you are Portugal, and Vasco Da Gama has arrived in India
- +1 if Ocean Zone 7, you are Spain, and Christopher Columbus discovered the New World
RESOURCE RETURN TABLE
| Roll 2D6 | Return free of Plunder | Return Subject to Plunder | Caravan Blocked |
|---|---|---|---|
| 2-4 | All Eliminated | All Eliminated | Eliminated |
| 5-6 | 1 Eliminated, 1 Remains | 1 Arrives, 1 Plundered | Remains |
| 7-8 | 1 Remains, 1 Eliminated | 1 Arrives, 1 Plundered | Plundered |
| ≥9 | All Arrive | All Arrive | Eliminated or Remains (Muslim player's choice) |
Results:
- Eliminated: Resource lost to owner. Place it on the turn track to return to the game on the next turn.
- Arrives: Add resource to owner's Warehouse.
- Remains: Resource remains in current settlement.
- Plundered: Add a randomly chosen resource from those in the Ocean Zone to plundering player's Warehouse.
On results of 5-6 or 7-8 for naval resources, apply the results one at a time. If fewer than three naval resources are present in a zone, apply the results in the order listed above (from top to bottom). EXAMPLE: There are two naval resources in an Ocean Zone subject to plunder. After modification, a 5 roll is obtained. One resource is plundered and the other remains in its settlement. The random choice of a resource for plunder is always resolved first. Then the player determines the status of the other returning resources. If that player controls a fortress in the Ocean Zone being resolved they may freely choose which resources arrive, remain, or are eliminated among those present in the zone. If they do not possess a fortress, apply each result to a random resource from those present in the zone.
Plunder of Naval Resources. A power must attempt to plunder naval resources, from other players, coming from settlements in Ocean Zones 1 to 6 if he controls five or more ports on the African coast between Agadir and Tangier (Anfa counts as two ports for this purpose). If any power meets this requirement, naval resource return rolls from the indicated Ocean Zones use the Return Subject to Plunder column.
Note:
- If the Spanish player controls all the Canary Islands they are never subject to Plunder.
- Plunder of naval resources is mandatory and independent of whether the plundering power is at war, allied, or at peace with the target power.
- A player who has played the Experienced Pilot event this turn is not subject to Plunder.
Return of Caravan Resources. Check whether caravan resources arrive at their destination. Caravans either arrive successfully (allowing the Muslim player to add the resource to his Warehouse) or are blocked and allow an intercepting player to roll on the Caravan Blocked column of the Resource Return Table. For caravans originating in Fez and Marrakesh, that specific key must be under Muslim control (and not under siege if this is a resource returning during the Action Phase) and a path of controlled spaces must be traced from that key to a controlled Atlantic home port (from Tangier to Agadir). The Berber caravan originating in Tlemcen works the same way but must instead trace a path to a Berber port space. Each of these paths must possess a unique set of spaces not shared at any point by any of the other caravan paths. If a caravan from Fez or Marrakesh is blocked from reaching its destination, the Portuguese player rolls on the Caravan Blocks column and applies the result. If the Berber caravan cannot reach its destination the Spanish player rolls on the Caravan Blocks column and applies the result.
French Trade, Mesta Trade, and Trade with Ragusa
FRANCE MEDITERRANEAN: France now checks the success of their commerce in the Mediterranean. Control of Venice, Genoa and Florence spaces improve the chance of success as shown in the table below. Roll two dice and any resources received are immediately added to their Warehouse:
FRENCH MEDITERRANEAN TRADE TABLE (+1 control of Genoa; +1 control of Florence; +2 control of Venice)
| Roll 2D6 | Result |
|---|---|
| 2-7 | No effect |
| 8-11 | 1 naval resource |
| ≥ 12 | 2 naval resources |
FRANCE NORTH SEA: France then checks the success of their commerce in the North Sea with the Hanseatic cities. France can benefit from French investment in commercial improvements, once the Treaty of Etaples is signed. France receives a +1 die roll modifier for each trade improvement marker (maximum +4) you have in the North Sea Trade box, as shown in the table below. Roll two dice and the resources received are immediately added to your warehouse:
FRENCH NORTH SEA TRADE TABLE (+1 for each trade improvement marker you have in the trade box after signature Treaty of Etaples)
| Roll 2D6 | Result |
|---|---|
| 2-9 | No effect |
| 10-11 | 1 naval resource |
| ≥ 12 | 2 naval resources |
MESTA: Spain now checks for trade results from the Mesta. The Spanish player receives a +1 die roll modifier for each port under Spanish control in the Cantabrian Sea to which the Spanish player can trace LoC from the Mesta marker (this LoC cannot pass through another port in the Cantabrian Sea). If a Foreign War against Brittany is active Spain rolls twice on the table. Roll two dice and the received resources are immediately added to Spain's warehouse:
MESTA TRADE TABLE (+1 modifier for each Cantabrian port you trace LOC to from the Mesta marker without passing through another Cantabrian port)
| Roll 2D6 | Result |
|---|---|
| 2-9 | No effect |
| 10-11 | 1 naval resource |
| ≥ 12 | 2 naval resources |
RAGUSA: A major power controlling Ragusa rolls one die and consults the following table. For each owned naval squadron in the Port of Ragusa, he gets a +1 modifier (maximum +2).
TRADE WITH RAGUSA (+1 modifier for each owner naval squadron at Ragusa, maximum +2)
| Roll 1D6 | Result |
|---|---|
| 1-4 | No effect |
| 5 | 1 naval resource |
| ≥6 | 2 naval resources |
REVEAL RESOURCES. Once all players have received the resources due to them in their Warehouse, in Impulse order each player:
- Reveals any VPs resources gained and places them on their proper place on the player's card. Update that player's marker on the VP track.
- Resources that award CPs are placed in the warehouse to be spent during the next turn.
- A resource that awards a card draw must be placed on the Turn Track and a +1 Card marker is added over the Ruler of the appropriate Player Card; that additional card draw is received during next turn's Card Draw Phase.
- Resources that award free units are placed on the Turn Track; add the corresponding units to a controlled home space according to the following priority: keys, then a fortified space, then a strategic space, finally an unfortified space. All units received from resources must be taken from the force pools of the following powers: North Africa, Portugal, Castile and France. If a player's force pool does not contain any units of the appropriate type, the resource is lost without awarding the unit.
This same procedure for revealing resources applies to any naval or caravan resource drawn in any other phase of the game, except in these cases:
- Resource awards a card draw: Draw a new card from the deck immediately.
- Resource awards CP: These CP may be spent by the owning player at any time during the turn, including in the impulse being resolved (assuming the impulse has not already been extended).
18.9 Major Power Alliance and Piracy Markers
Remove all Allied markers between Major Powers from the Diplomatic Status Display. All alliances declared for this turn during the Diplomacy Phase are over; all alliances with minor powers remain in effect.
Remove all piracy markers from the map in both ocean and Sea Zones.
18.10 Diplomacy Reset
All influence markers in a "Resolved this turn" box on the Diplomatic Influence on Minors Table are reset to their default values. Default values are shown by the colored filled in boxes that match the colors of each power. If no colored box exists for a power, this power's marker is placed in the "0" box.
Any –1 Admin Rating markers on Player Cards are removed at this time. All rulers revert to their full Admin Rating (at least until the next Headline Event is resolved).
19. Royal Weddings
Starting on Turn 3, in this sixth phase of the turn the Spanish player resolves all the weddings he has arranged during the Action Phase. Ferdinand and Isabella were active in establishing alliances through the marriages of their five children—a policy that would lead to an extensive empire in the hands of their grandson Charles V.
Each child of the Catholic Monarchs is represented by a portrait on a Spanish-colored marker and each suitor by a portrait on a beige color marker.
HISTORICAL NOTE: The Isabella depicted here is the first-born daughter of the Catholic Monarchs, not Queen Isabella herself.
As they arrive during the Card Draw Phase (8.1), each child or suitor is placed in their box on the Royal Wedding Table; note that it is indicated in the upper left corner of this portrait whether or not this royal might die. Place Manuel I in the box under Isabella if she is alive (even if married); otherwise add him to the box beneath Maria.
During the Action Phase the Spanish player can spend CP on the Promote Marriage action to try to marry off Ferdinand and Isabella's children. Each child must be married to the highest priority suitor, indicated by their proximity on this chart to the corresponding child. (EXAMPLE: Manuel I cannot marry Isabella while Afonso of Portugal is alive.) Each CP spent represents an increase in the value for the Dowry awarded, which translates to a modifier on the resolution roll from +0 to +4. The minimum CP required to attempt a resolution roll is 1 CP (+0 modifier), and the maximum is 5 CP (+4 modifier). It is possible to invest CP in different actions to increase an already established dowry to its maximum allowed. Several weddings may be arranged in the same turn, and each can be advanced to the full 5 CP of dowry. The male son (the heir, John Prince of Asturias) automatically receives the full +4 dowry when just a single CP is spent on his marriage. Place the child and their suitor in the appropriate Dowry Box on the Royal Wedding Table according to the number of CPs invested. EXAMPLE: 2 CP Promote Marriage action between Isabella and Afonso on Turn 3.
19.1 Resolving Weddings
To resolve a wedding roll two dice, add the die roll modifier from the dowry, and consult the table below. If successful, Spain scores 1 VP by adding a wedding VP marker to their Player Card and the suitor is placed in the Married To box below the appropriate child. Also add a Spanish control marker to the appropriate box at the top of the Royal Wedding Table to mark the Dynastic Alliance with Portugal, the Holy Roman Empire, or England (if one is not already present). If the marriage is postponed, the dowry remains and may be increased on the next turn if desired (always up to a maximum of 4), unless one of the two royals dies (in which case the dowry is lost).
ROYAL WEDDING TABLE (Add modifier +0 to +4 from Dowry)
| Roll 2D6 | Result |
|---|---|
| 2-8 | Marriage postponed |
| ≥9 | Marriage celebrated successfully; 1VP gained |
Alcaçovas Peace Wedding bonus. If the Peace of Alcaçovas is signed between Portugal and Castile, the marriage of Isabella of Asturias with Afonso of Portugal is immediately arranged and automatically successful, as long as both are still alive. Award the 1 VP immediately at no CP cost; this is the only marriage that can be celebrated outside the Royal Wedding Phase.
19.2 Objective Achieved, France Isolated
If the Catholic Monarchs succeed in simultaneously having control markers placed indicating that all three Dynastic Alliances are in place, they have achieved their diplomatic objective to isolate France. Award 1 VP to Spain in each Royal Wedding phase in which these markers are all in place.
19.3 Death of the Royal Marriage
To conclude this phase, roll one die for each character listed in the table below. If the result is in the range shown for that turn, this royal dies and is removed from the game. If this royal is married, remove the Spanish control marker indicating the Dynastic Alliance if this is the only current marriage between Spain and a suitor from this power. VP already earned from this marriage are not affected. If Isabella dies, move the Manuel I marker into its box beneath the Maria counter.
ROYAL death die ranges (die roll that kills the royal, by turn)
| Royal | Turn 3 | Turn 4 | Turn 5 | Turn 6 | Turn 7 |
|---|---|---|---|---|---|
| Isabella | 1 | 1 | 1-5 | 1-5 | Dies automatically |
| Afonso of Portugal | 1 | 1-5 | 1-5 | 1-5 | Dies automatically |
| John, Prince of Asturias | N/A | 1 | 1-4 | 1-5 | Dies automatically |
| Philip the Handsome | N/A | 1 | 1 | 1-4 | Dies automatically |
20. Major Powers
This section identifies the rules that apply to each major power. Note that one general rule that applies to all powers is that they receive additional VP for meeting certain game conditions or controlling specific spaces. See 22.3 or your Player Aid for a complete list of these possible VP awards. Victory Points that are awarded for more than just control of a specific space are detailed in the sections below.
20.1 Nasrid Kingdom of Granada
Gibraltar, Strait Control
HISTORICAL NOTE: The Nasrid Kingdom lost control of the Strait of Gibraltar in 1462 to Castile, shortly before the game begins. This loss denied rapid sea communications with North Africa, where the Sultanate of Fez and the Barbary of Tlemcen were the Nasrids' natural allies. There were several attempts to recover this important location.
Leaders and military units from Castile and the Nasrid Kingdom of Granada are able to fight in the Gibraltar space even if those two powers are not currently at war. (Note that units from either Aragon or the North African Alliance are not able to enter Gibraltar, though Ferdinand may enter). While not at war, the Muslim player may enter Gibraltar from Sohail, Castile may enter from Jerez, and either the Nasrids or Castile may enter as part of a naval transport move. However until these powers are at war, Castilians may not enter Nasrid home spaces, nor may Nasrids enter spaces other than Gibraltar that are home spaces for Castile. Furthermore, as long as Castile and the Nasrid Kingdom are not at war, it is not necessary to comply with the requirement concerning naval units for the assault on Gibraltar; such an assault can be carried out regardless of the presence of enemy naval units in adjacent zones or the port itself.
Benefits from conquering Gibraltar before the Mandatory event Muley Hacén Seizes Zahara is played: The Muslim player gains the following permanent benefits if they gain control of the Gibraltar space before the event Muley Hacén Seizes Zahara is triggered (and these benefits are not lost if control of Gibraltar is subsequently lost):
- Gain 2 VP marker (award them the 2 VP Gibraltar marker).
- Add a +1 Card marker to the Gibraltar box on the Muslim Player Card.
- Muslim Naos now have a +1 modifier on die rolls on the Terra Incognita Exploration Table for zones 1, 2, 3, A, and B.
- The Muslim Player receives a fifth settlement marker (if not received already).
These four benefits are not received if Gibraltar comes under Muslim control after the event Muley Hacén Seizes Zahara is triggered.
Benefit from conquering Gibraltar at any time: While the Muslim player controls Gibraltar, the connection from Tangier to Gibraltar and the one from Ceuta to Gibraltar, in those south to north directions only, are treated as normal connections for all purposes (movements, interceptions, Spring Deployment, etc.) instead of as Pass connections. This status facilitates North African support for the defense of the Nasrid Kingdom.
Reconquest of the Nasrid Kingdom of Granada
HISTORICAL NOTE: The war against the Kingdom of Granada, the last Muslim stronghold on the Iberian Peninsula, represented the culmination of the Spanish Reconquista. The Catholic Monarchs were obsessed with it, and there would be no truce until it was achieved.
State of War between Nasrids and Spain: The Nasrid Kingdom and Spain may only go to war through play of the Mandatory Event Muley Hacén Seizes Zahara. This state of war is permanent for the rest of the game. (Exception: If any Muslim power conquers Rome before the Mandatory Event Muley Hacén Seizes Zahara has been played, it triggers the play of this Mandatory Event. Draw it from the deck and execute it; if it is in a player's hand it is now played and that player draws another card from the deck instead).
Reconquista Victory Points. The Muslim and Spanish players earn VP for the Spanish Reconquista as follows:
- As long as the Granada space is under Muslim player control (even after the Surrender of the Nasrid Kingdom), place the 1 VP Granada marker on the Muslim player's card.
- In the Victory Determination Phase of Turns 5, 6, and 7, check to see if the Nasrid Kingdom has surrendered. If this objective has not been achieved, the Spanish player subtracts 1 VP from his accumulated VP total by placing a –1 VP marker for Nasrid Resistance on his Player Card.
- When the Nasrid Kingdom surrenders, the Spanish player receives 1 VP for End of the Reconquista. Place the corresponding marker on the Spanish Player Card.
- When the Nasrid Kingdom surrenders, the Muslim player receives VPs based on the home spaces of Castile and/or Aragon he currently controls (22.1).
Control Markers in Nasrid Home Spaces. As the Reconquista progresses, Nasrid non-key home spaces can lose their home property for the Nasrid player. This only happens if the Spanish player gains control of the space, and therefore there is a special Spanish control marker used only in Nasrid home territory. To show this transition, control marker usage is altered on these spaces. Nasrid non-key home spaces should always be in one of these control states, which will affect their property as a home space:
- No Control Marker: This space is under Nasrid control and still serves as a Nasrid home space.
- Special Spanish Control Marker: Control of this space has been gained by Spain from the Nasrid during this Action Phase. The space will lose its home property for the Nasrid unless control is taken from Spain before the end of the current Action Phase.
- Normal Spanish Control Marker: Control of this space was gained by Spain in a previous turn and this space has lost its Nasrid home property.
- Nasrid Control Marker: This space has lost its Nasrid home property (and therefore had a normal Spanish control marker when the Nasrid controlled it) but has been recaptured by the Nasrids. The explicit placement of a control marker on this space shows that while under Nasrid control, it does not serve as a Nasrid home space.
- Control Marker From Power Other Than Spain: This other major power has gained control of the space. If recaptured by the Nasrid, this control marker is removed and the space returns to the "No Control Marker" state.
Control Marker State Changes. The following events cause updates to the control marker on a Nasrid non-key home space:
- Spanish Control Space: If Spain gains control of such a space during the Action Phase, add a special Spanish control marker if no control marker was present. However if a Nasrid control marker (or one from any other power) was present before capture, add a normal Spanish control marker instead.
- Nasrids Control Space: If the Nasrid gains control of a space with a special Spanish control marker (or gains one from any other power), remove the other power's control marker from the space. If the Nasrid gains control of such a space with a normal Spanish control marker, add a Nasrid control marker; if the Nasrid gains control of such a space from a power other than Spain, no new control marker is placed.
- Other Power Controls Space: If a power besides Spain or the Nasrid gains control of such a space, add one of their control markers as usual.
- Winter Phase: All Nasrid home spaces with special Spanish control markers are switched to normal Spanish control markers (to show the Nasrid home property has been lost).
- Morisco Uprising: During the Winter Phase, spaces with Morisco Uprising markers or Morisco regulars under Nasrid control may regain their home status. See Winter Phase Effects from Moriscos below.
- Nasrid Kingdom Surrender: All Nasrid home spaces which are neither marked with a Morisco Uprising marker, nor have a Morisco regular present are marked with normal Spanish control markers. The special Spanish control markers are no longer used. Furthermore, from this moment on these Nasrid non-key home spaces are considered Castilian home spaces.
EXAMPLE (Control Markers in Nasrid Home Spaces): Portugal has allied with Spain and begun a campaign to try and drive the Nasrid Kingdom from the Iberian peninsula. In the initial impulses, Portugal captures Loja, and Spain captures Baza and Albox; special Spanish control markers are placed on those spaces. In the Winter Phase, the Baza control marker is switched to a normal Spanish one. Next turn, the Nasrids are reinforced and recapture both Loja and Baza: the Portuguese marker is removed from Loja (this space regains its Nasrid home space properties), while a Nasrid control marker is placed on Baza (the Nasrid controls the space but may not recruit new units there since it has lost its home space property). Later that turn, Albox is recaptured and its special marker removed.
Morisco Uprising. The Morisco Uprising event causes a special revolt that results in the placement of two Morisco regular units in Spanish-controlled Nasrid home spaces (spaces printed on the map in the Nasrid color). The Morisco Uprising rules below apply to any Morisco regular units on the map that have been placed by event card (Morisco Uprising or City State Rebels) or because of the Surrender of the Nasrid Kingdom (22.1).
Morisco regular and militia units are limited to the number of units provided in the force pool. If the Nasrid power has not surrendered, the Morisco regular units on the map are considered Nasrid for all purposes, including having the ability to restore the home property to Nasrid spaces that had lost it.
Follow the steps below to resolve the event Morisco Uprising when that card is played or if the surrender of the Nasrid Kingdom has triggered a Morisco uprising:
a) Draw a caravan resource from the pool, putting back resources as necessary until you have drawn one that awards CP.
b) Place (or move from another space) two Morisco regular units of value 1 (there are only two such units in the force pool) in one or two unoccupied Nasrid home spaces controlled by Spain (spaces printed on the map in the Nasrid color). The Nasrid power gains control of each of these spaces by placing a Nasrid control marker (remember that if either of them is a key, it will directly obtain its status as a home space, as these spaces never lose it).
c) Place (or move from another space) up to two Morisco Uprising markers (there are only two of these markers) on unoccupied non-key Nasrid spaces (spaces printed on the map in the Nasrid color) controlled by Spain. The Nasrid power gains control of each of these spaces by placing a Nasrid control marker. Spaces with a Morisco Uprising marker act as if they are in Unrest for all powers except the Nasrid. These markers can be removed by the Spanish player (only) using the usual rules for removing unrest.
EXAMPLE (Morisco Uprising): The French player, in his impulse, plays the event Morisco Uprising to help his Muslim ally. To begin executing the event, a naval resource that awards 3 CP is drawn by the Muslim. The Muslim now has 2 Morisco regulars and 2 uprising markers to place. Morisco regulars can be placed in any Spanish-controlled space that was originally a Nasrid home space; when placed, the Nasrid gains immediate control of the space (keys are especially useful since they immediately become friendly home spaces once again). One regular is placed in Gibraltar (a key, gaining 1 VP, with a square control marker placed there, restoring the Nasrid's ability to construct units there), and the other in Setenil (granting control but not restoring home space abilities, so a hexagonal Nasrid control marker is placed). Finally, the Nasrid places the uprising markers in Zahara and Sohail, gaining control of these spaces (but not the home space property) with Nasrid control markers; Zahara being a strategic space awards 1 VP to the Nasrid. These spaces with Morisco Uprising markers act as Unrest against all players other than the Muslim.
The following restrictions apply to Morisco units at all times:
- Moriscos regulars can never be built by spending CPs.
- Moriscos units (both regulars and militia) can only move, control spaces, and assault into original Nasrid home spaces (spaces printed on the map in the Nasrid color), regardless of who controls them.
- In winter, Moriscos units remain in place and never return home, except if they are part of a besieging formation. In such a case, they are moved to the nearest fortified space they control (or non-fortified if they do not control any).
If the Nasrid power has surrendered, use of Morisco units is further limited as follows:
- Each turn, the Muslim player may only use CPs from a single resource (never a card) to recruit Morisco militias, recruit the Nasrid corsair, move Morisco units, and/or use such units to control spaces, assault, initiate piracy, etc.
- Once the Muslim player has used a resource to act with the Morisco, place the Morisco Activated marker on the space of the Muslim Player Card as a reminder that these units cannot be activated again this turn.
- If Morisco militia or the Nasrid corsair are recruited, they must be added to a Nasrid-controlled home key or a Nasrid non-key space with no control marker.
- Boabdil can command Morisco regulars and recruited Morisco militias but never in the same formation as North African units (although they can share formation with Nasrid units exiled with Boabdil during the surrender of the Nasrid Kingdom).
- Assaults by Morisco units can be made during this impulse on spaces that were not under siege at the start of the impulse.
Winter Phase Effects from Moriscos: If, in the Winter Phase, a Morisco regular unit is present in a Nasrid non-key home space marked with a Nasrid control marker, the following two effects are applied:
- That space automatically recovers its Nasrid home space status (remove the Nasrid control marker from the space).
- Add two Morisco Militia units to this space (if available in the force pool).
If, in the Winter Phase, any Morisco Uprising markers remain on the map, roll one die for each such space:
- On a roll of 4, 5, or 6, remove the Morisco Uprising marker and the Nasrid control marker; the space is once again a Nasrid home space. Add one Morisco Militia there.
- If the roll is 1, 2, or 3, the Morisco Uprising marker remains in that space.
Finally, if the Nasrid kingdom has surrendered but there are Moriscos (regulars or militias) on the map, the Muslim player draws a caravan resource from the pool, putting back resources as necessary until they have drawn one that awards CP.
Surrender of the Nasrid Kingdom of Granada. See 22.1 for details of this major power's surrender.
20.2 North African Alliance (Sultanate of Fez and Berber Sultanate of Tlemcen)
The North African Alliance. Two Brotherly Kingdoms. The North African power is the combination of two historical sultanates: the Sultanate of Fez and the Berber Sultanate of Tlemcen. The Sultanate of Fez participates immediately on Turn 1 while the Berber Sultanate of Tlemcen enters the game at the beginning of Turn 4. At the start of Turn 4 the Berber Home card is added to those available to the Muslim player and Berber home spaces and units (out of play until that time) are added to the game. These new spaces, units and Home cards simply augment the existing North African power and are not considered to be an additional power. Follow the following procedure at the start of Turn 4:
- Place one North African regular in Tlemcen.
- Place one militia in Oran and one militia in Bejaía.
Ottoman Support. The North African power may receive Ottoman regulars as reinforcements from the events Ottomans Seize Otranto, Algiers Regency and Ottoman-Venetian War. They have the same color as the North African units but a different silhouette to identify them. If these units are eliminated, they cannot be recruited again. If the Ottomans take Otranto, a North African formation whose size is determined by a single leader may winter there.
The Algiers Regency. The Algiers space comes into play with the other Berber spaces at the beginning of Turn 4. It does so as a special independent space, hence its gray color on its bottom half. No power can control this space while it is independent. When the mandatory event Algiers Regency is played, Algiers becomes a Berber home space. At this time:
- Displace any non-North African units from Algiers.
- Add four Ottoman regulars to Algiers.
- Add the Barbarossa naval leader to Algiers, remove Kemal Reis from play, and add three corsairs to this space.
- The Muslim player gains 2 VP for Algiers. Add a square control marker from the North African key section of the Muslim Player Card to the Algiers space.
Now complete Algiers Regency event. This mandatory event is required to occur by the winter of Turn 5.
Ceuta, Strait Control. This important control point guarding the Strait of Gibraltar is a Portuguese home space. The Sultanate of Fez begins the game at war with Portugal, but not the Nasrid Kingdom. Whenever Ceuta is controlled by one of the Muslim powers, the Muslim player gains these benefits:
- The Muslim receives a +1 Card marker (placed in the ruler's box on his Player Card).
- Muslims Naos gain a +1 die roll modifier on the Terra Incognita exploration chart for zones 1, 2, 3, A and B.
- Add a fifth Muslim settlement marker into their force pool if you have not already done so.
Ceuta's benefits are not cumulative with those of Gibraltar but are a second chance to obtain them if the capture of Gibraltar was unsuccessful before the Muley Hacén Seizes Zahara event was played. Unlike when Gibraltar triggers these benefits, the first two abilities listed in this section only apply while Ceuta is controlled by the Muslim player.
- Place in the North African force pool a 2-value infantry unit and a naval squadron.
- The Muslim player gains 3 VPs: 1 VP for Constantine plus 2 VP for control of Tlemcen. Add a square control marker from the North African key section of the Muslim Player Card to the Tlemcen space (see 22.3 and "North African Keys" below).
Starting on Turn 4, North African units may be built in a home space of either of the two North African sultanates. On the map you will notice that each kingdom has a slightly different shade of color for its home spaces; this difference is to identify the spaces that enter with the arrival of the Berber Sultanate.
Sahara Trade Caravans. The Muslims controlled the trade routes that brought spices, gold, and ivory for the European market to the North African ports. At the beginning of each turn the Muslim player places one randomly chosen caravan resource in the caravan trade route box directed to Marrakesh and another in the box directed to Fez. If this is Turn 4 or later also add one to the box directed to Tlemcen. In the Winter Phase, these resources may reach the Muslim player's hand (18.7).
Tunis, Anfa, and Rome: Target Cities of the Muslim. If the mandatory event Algiers Regency has been played and the Muslim controls the independent city of Tunis, that city grants 1 additional VP to the Muslim.
The port city of Anfa, the most important port on the African Atlantic coast, grants 1VP if controlled by the Muslim.
Both Muslim powers are perpetually at war with the minor power the Papacy. If the Muslim player gains control of Rome for the first time, award a 5 VP marker to the Muslim. If such a conquest of Rome occurs, all Christian major powers enter a state of perpetual war against both Muslim powers (see Papacy in 21.7 for details).
Bejaía and Oran in the Cisneros Regency. With the arrival of Cardinal Cisneros, the fortified spaces of Bejaía and Oran became controlled by the Spanish. If the Muslim player gains military control of either of these two spaces after this time, they gain 1 VP for each space for as long as it is controlled.
North African's Keys. If two or more North African home keys are not controlled by the Muslim in the card draw phase, subtract 1 from the Muslim ruler's Charisma, placing a –1 Card marker on his Player Card that he will keep until he regains control again. Each North African home key gives the Muslim player 2 VP for its control, as indicated on his Player Card. North African control of all of these keys is necessary to be eligible for an automatic victory.
20.3 Portugal
School of Sagres, Henry the Navigator. Play of this event grants Portugal 1 VP and allows them to circumvent some of the normal Turn 1 and Turn 2 limitations on the Exploration Map:
- Portugal may build up to three Naos each turn instead of only two.
- Portugal may move into and explore Ocean Zones 1, 2, and 3.
- Portugal may build settlements in any space in Zones 1, 2, and 3; they are not limited to only spaces marked by their color.
Portugal's Keys. If two or more Portuguese home keys are not controlled by Portugal in the Card Draw Phase, subtract 1 from the Portuguese ruler's charisma, placing a –1 Card marker on his Player Card that he will keep until he regains control again. Each main Portuguese home city gives the Portuguese player 2 VP for its control, as indicated on his Player Card. Portuguese control of all of them is necessary to be eligible for an automatic victory.
North African Atlantic Port Control. Portugal was in continuous war with the Sultanate of Fez for control of the African cities of the Atlantic coast. Anfa, the most important city in the Atlantic area, awards Portugal 2 VP for its control.
Each time the mandatory event Portugal, Master of the Atlantic is played in the Action Phase, Portugal gets VPs based on the number of African spaces controlled from this list: Tangier, Asilah, Mazagan, Anfa, Agadir, Salé, Safi.
If at any point during the game, Portugal controls all of these ports for the first time, he directly earns 3 VPs for Portuguese Supremacy of the Atlantic Coast of Africa. However, these 3 VPs are lost if Portugal and the North African Alliance sign peace at any time after the achievement of those 3 VPs, even if they were not at war when they were achieved.
Foreign Support for the Beltranejos Cause. See 20.4 for details on Supporting the Cause of Beltranejos.
20.4 Beltranejos
Beltranejo Units And Home Card: Beltranejos units are under the control of the Portuguese player. Beltranejos units and Portuguese units are always allied as long as the Peace of Alcaçovas has not been signed. The Portuguese player also gets the use of the Beltranejos Home card as long as this limited Major Power has not surrendered.
Peace of Alcaçovas. This peace treaty puts an end to the confrontation between Portugal and Castile for the succession of the Castilian crown, although several Beltranejos nobles will refuse to surrender and continue the fight. This Peace can be activated in the game when the Peace of Alcaçovas event card is played or by a diplomatic agreement between Portugal and Castile in the Diplomacy Phase of Turn 3 or later. The Peace of Alcaçovas is the only way Spain and Portugal can end the war they are in at the start of the game. If later in the game they are in a new war with each other, peace deals are made between these powers as normal.
IMMEDIATE EFFECTS: The signing of the Peace of Alcaçovas has the following immediate effects:
- Portugal and the Beltranejos are no longer allies (though they are still both controlled by the Portuguese player, who may play "Combat" and "Response" cards on behalf of either power). Immediately displace (12.5) all Portuguese units in Beltranejos-controlled spaces and vice versa.
- The normal state of war between Portugal and Spain ends. Peace lasts at least for the remainder of the turn in which it is signed and one additional turn. During this time Portugal and Spain may not go to war. Place the Alcaçovas in Force T1 marker in its box in the Diplomatic Status Display as a reminder; flip it at the start of the second turn—and then remove it at the end of Turn 2 (to indicate your obligation to maintain it has expired).
- A state of war still exists between Portugal and Spain at sea. Place the War at Sea marker on the Alliance and War Table. Their naval squadrons intercept each other normally and either power may initiate piracy against the other. This war at sea expires when the obligation to keep the peace has expired.
- Spain and Portugal may not ally as long as the state of war exists at sea.
- Castile can no longer establish settlements in Ocean Zones 1 and 2, although they can navigate into these zones in order to explore them and pirate there. As a reminder, place a "Spain no settlements" Alcaçovas marker in these oceanic zones.
- Portugal can no longer enter land spaces in the Canary Islands. Any spaces it controls there come under Spanish control immediately, displacing any Portuguese units present. As a reminder, place a "Portugal no Canaries" Alcaçovas marker in that Sea Zone.
- Award 3 VP to Portugal (for agreeing to stop directly supporting the Beltranejos).
- The Spanish player selects a card from his hand and gives it immediately to Portugal as war reparations. If the Spanish player has no cards left, Portugal instead draws one from the deck.
- A marriage between Isabella, the daughter of the Catholic Monarchs, and Afonso of Portugal is immediately arranged and is automatically successful, assuming both of these royals are still alive (19.1). If either of them died previously, this wedding opportunity is lost, it cannot be celebrated with other living royal sons and suitors.
- If Spain or Portugal controls some of the other power's home spaces it returns them to their opponent, displacing any units that are there except those of the new controller. Calculate the number of fortifications, strategic spaces, and keys of the opponent that each player returns. The difference between these totals is awarded as bonus VP markers to the player who returns more spaces. EXAMPLE: Portugal returns Trujillo while Spain returns both Sagres and Faro; Spain is awarded one Alcaçovas bonus VP marker.
Beltranejos: The behavior of Beltranejos units changes after the Peace of Alcaçovas as follows:
- Beltranejos units on the map may only undertake move, recruit, and assault actions when the Beltranejos Home card is played as an event, and this Home card can no longer be used as CPs (it can however be played to support the Headline Event). This Home card play may be extended with resources and those extra CPs can also be dedicated to moves for the Beltranejos.
- From this point on, Beltranejos units may perform the assault action directly upon arrival at a fortified space, without having to lay siege to it beforehand.
- If the impulse is extended with a resource, the player who controls the Beltranejos may repeat an assault action on a single space of those he has assaulted with the play of his home card Joanna la Beltraneja in this same impulse.
- The Home card Joanna la Beltraneja can now be played in addition to the other two Portuguese Home cards.
Breaking The Peace: The Peace of Alcaçovas is considered broken if Portugal and Spain go to war at any time during the Diplomacy Phase after the mandatory period of peace has expired or an event puts them at war. (EXAMPLE: If Portugal controls Naples after the event Death of Ferrante of Naples, and decides to keep it, this will put it at war with Spain, breaking the Peace of Alcaçovas, if it was in force). If this occurs and the Treaty of Tordesillas event has not been played, remove the Treaty of Tordesillas card from the deck (if in a player's hand they discard it and draw another.) If the Peace of Alcaçovas is broken, Spain and Portugal no longer have any limitations on where they can found settlements and whether or not they can enter the Canary Islands.
Treaty of Tordesillas. If the Peace of Alcaçovas has not been broken, the Treaty of Tordesillas can be established, remaining in force as long as Portugal and Spain do not go to war. The Treaty of Tordesillas is triggered only by the play of the mandatory event card of the same name. IMMEDIATE EFFECTS: The signing of the Treaty of Tordesillas has the following immediate effects:
- The Beltranejos surrender as specified in 22.1.
- The cost for a DOW between Spain and Portugal is raised to 6 CP. The cost of piracy between these powers is raised to 3 CP (only applicable to Naos as they are not at war).
- The war at sea is over, if it was active.
- Portugal gains 2 VP.
- Portugal may not establish new settlements in Ocean Zones 7 and 8. As a reminder, place a Portuguese "no settlement by" Tordesillas marker in these Ocean Zones.
- Spain may not establish new settlements in Ocean Zones 4, 5, and 6. As a reminder, place a Spanish "no settlement by" Tordesillas marker in these Ocean Zones.
- Spain and Portugal can now ally.
- The prohibitions established in the Peace of Alcaçovas against founding Spanish settlements in Ocean Zone 1 and 2 and against Portuguese entry into the Canary Islands are maintained. Change the markers from the Peace of Alcaçovas to those indicated for Treaty of Tordesillas.
Portugal and Spain can still go to war after this time, breaking the Treaty of Tordesillas. Once broken, Spain and Portugal no longer have any limitations on where they can found settlements and whether or not they can enter the Canary Islands. The cost of piracy returns to 2 CP and the cost of declaration of war to 4 CPs.
Resistance of the Beltranejos Event. This event can occur only if the Beltranejos faction has surrendered. When this event is played, the following occurs:
- The Beltranejos reappear and gain control of the spaces Tui and Sanabria (displace (12.5) any units of other powers).
- Add one Beltranejos regular in Tui.
- Add one Beltranejos regular in Sanabria.
- Create an additional key that awards VP to Portugal (only) in Tui (indicate this with a square control marker). Control of this space grants Portugal 1 VP as long as the Beltranejos maintain control. As soon as Tui is controlled by another power, remove the square control marker and the space becomes a simple space.
- Portugal receives a 1 VP bonus marker for the event to place on their Player Card.
If this event has been played, Beltranejos units on the map may only expend CPs for actions from a single resource that is played to extend a single Portuguese impulse. These moves must follow the rules described for Beltranejos under the Peace of Alcaçovas section above. They are additionally limited to only recruiting units in the Tui and Sanabria spaces (if they control them). Portugal may continue to play Combat and Response cards on behalf of the Beltranejos. Once the Portuguese player has used a resource to act with the units of the Beltranejos resistance, indicate it by placing the Beltranejos Resistance Activated marker on the Portuguese Player Card.
Foreign Support for the Beltranejos Cause
HISTORICAL NOTE: The cause of Joanna la Beltraneja had the political and military support, at least in theory, of Portugal and France, since both were interested in weakening the union of Castile and Aragon. Louis XI and Afonso V signed an alliance to help the Beltranejos and invade Castile, intending to join their armies in Burgos, a castle held by the Beltranejos.
If at the end of a French impulse, a Portuguese stack with a leader and a French stack with a leader (or without a leader but with at least three units) meet in Burgos or Vitoria, both players gain 2 VP for the Beltranejos cause. This award can only be granted once, and never after the Peace of Alcaçovas has occurred.
Important: To obtain the benefit of these 2 VP, the Peace of Alcaçovas cannot be signed and France and Portugal (and this includes the Beltranejos; 9.2) must be allies.
Surrender of the Beltranejos Faction. See 22.1 for details of this major power's surrender.
Between the play of Isabella Dies, Crown of Castile Split and the mandatory event Cardinal Cisneros Regent (required in the Winter of Turn 6), the following restrictions apply:
- Land units of Castile and Aragon cannot be part of the same formation except if they are in the Italian Peninsula or Sicily and under the command of the Great Captain.
- Ferdinand can only command Aragonese units.
- Castilian units may only be moved to a space in Italy if moving as part of the event Crown of Aragon.
- Additional effects occur if you are in between these two events during the Card Draw Phase of Turn 6. After receiving his hand of cards the Spanish player chooses three of them and shows them to the French player who decides which one to keep for his use and returns the other two to the Spanish player.
- Aragon and Castile are still considered allied units for all other purposes.
Cardinal Cisneros' Regency. When the mandatory event Cardinal Cisneros Regent is played (required in the Winter of Turn 6), Cisneros will be placed as the new and final Ruler of Spain and all restrictions imposed by Isabella's death are cancelled. In addition, apply these effects:
- Spain gains control of Oran and Bejaía, two fortified spaces in North Africa.
- Spain and the North African Alliance go to war (if not already). This state of war is permanent for the rest of the game.
- All non-Spanish units are displaced from Oran and Bejaía.
- Add two regulars of the Order of Santiago to Oran.
- Add two regulars of the Order of Calatrava to Bejaía.
- Spain receives 1 VP for each of Oran and Bejaía as long as Spain retains control.
Additionally, Spain receives one extra VP which he keeps as long as he controls both Badis and Melilla.
If the Muslim player gains control of Oran or Bejaía with Cardinal Cisneros as the Ruler of Castile, he receives 1 VP for each, which he keeps as long as he controls them. In the Winter Phase for each of the following spaces with a Military Orders unit (Badis, Melilla, Oran, Bejaía and Algiers) the Spanish player rolls one die and for each hit of 5 or 6 reduces by 1 VP the Muslim player's Piracy VP marker.
20.5 Castile
Isabella Dies, Crown of Castile Split. Undertake the following activities as part of resolving the Mandatory Event Isabella Dies, Crown of Castile Split (required in the Winter of Turn 5). Note that Nasrid home spaces are considered Castilian home spaces for the purposes of this rule if the Nasrids have surrendered.
- Units in Ferdinand's stack may be displaced (12.5). Flip the Fernando counter to its red reverse side only (Crown of Aragon). If the stack is not in a Castilian home space, start by displacing all Castilian units to the nearest controlled Castilian home space. Then, if the remaining stack is in a Castilian home space—or in a non-Castilian home space but the Spanish player voluntarily chooses to displace the remaining units—displace them to a controlled Aragonese home space.
- Now, displace all Castilian units in an Aragonese home space to the nearest Castilian home space. Then do the same with Aragonese units in Castilian home spaces. Units in the four spaces on Sicily (Palermo, Etna, Syracuse, and Messina) ignore the displacements in this bullet.
La Mesta. The Catholic Monarchs granted important privileges to this organization of sheep owners, since the sale of wool to Europe brought great resources to the crown. The Mesta marker is placed as detailed in 8.2, and grants the following benefits:
- Each turn in the Winter Phase, the Spanish player will roll on the Mesta Trade Table (18.8) to see if resources are received, using the modifiers described there. If a Foreign War with Brittany is active in the Winter Phase, the Spanish player will roll on the Mesta Trade Table one additional time for this war (20.9).
- During the Action Phase, if at the end of a Spanish player's impulse, Castile is supporting with at least two militias the Foreign War of Brittany, he can gain an additional roll on the Mesta Trade Table with the modifiers applicable at that moment. This bonus roll can only happen once per turn and is done by substituting the opportunity to extend the impulse with a resource. The mandatory event Trade Rivalry with England also guarantees the Spanish a roll on the Mesta Trade Table.
20.6 Aragon
One Crown for Several Kingdoms. The kings of the Crown of Aragon had under their command different kingdoms with their own institutions and particularities. Each kingdom may provide a card to the Crown of Aragon (and therefore to the hand of the Spanish player) but receipt of that card is variable since the courts of each kingdom were not always sensitive to the King's requests.
The Spanish player always receives the Aragonese Home card and one card for the Kingdom of Aragon itself (two cards on Turn 1). Receipt of additional cards is dependent on three factors: whether or not this is an odd- or even-numbered turn, control of specific spaces, and successfully making a roll on one die, as follows:
| Kingdom | Turns Received | Required Space † | Required Roll |
|---|---|---|---|
| Aragon * | All | none | automatic |
| Valencia | All | Valencia | 4-6 |
| Catalonia | All | Barcelona | 3-6 |
| Mallorca | Odd | Mallorca | 6 |
| Sardinia | Odd | Cagliari | 5-6 |
| Sicily | Even | Palermo | 4-6 |
| Roussillon |
* Aragon always grants two cards on Turn 1. † As a reminder, these spaces are indicated on the map with a shield of the crown of Aragon.
Dynastic Rights on Naples and Roussillon. Aragon wins special VPs for maintaining political control of the Kingdom of Naples and/or the County of Roussillon.
After the mandatory event Death of Ferrante of Naples is played, whenever Spain controls the Naples space and at least two of these three strategic spaces: Gaeta, Cerignola, and Garigliano, Spain gains 1 VP.
Additionally, whenever Spain controls both spaces in Roussillon (Perpignan and Ceret) they gain 1 bonus VP.
20.7 France
Consolidating the Power of the Monarch
HISTORICAL NOTE: The fifteenth century was a weak time for the French monarchy, having numerous troops tied up in the Hundred Years War with England. Late in that time, however, the kings were able to strengthen their position by absorbing noble titles and locking up the loyalty of the main noble houses. Thus, the French rulers have lower Charismas but the French player is able to gain back those cards through ensuring the loyalty of the nobles and controlling the Roussillon region.
The six great noble houses of France (Anjou, Alençon, Orleans, Bourbon, Armagnac and Foix-Navarre) can each provide a card to the French player if sufficiently loyal to the French ruler. Each noble house has a row on the map with a track of up to six squares filled with values ranging from 0 to 5.
The French player may spend 1 CP on the Consolidate Power action to gain a level of loyalty with one of these houses; the number within each box represents the maximum number that the French player can roll on a single die during the Card Draw Phase in order to gain a card from that house. EXAMPLE: If a noble house is at a loyalty of 4 it awards a card with a result of 1-4.
The French player earns 1 VP the first time he reaches loyalty level 5 in each row of this table. Loyalty levels can be lowered by events, although this never causes the loss of the VP award mentioned above if France was already at level 5.
The House of Foix Navarre measures its loyalty differently. If France gains political control of the Pamplona space through assault, the house is considered a level 3 for the purposes of rolling for cards. If France allies with Navarra by diplomacy, Foix-Navarre is considered to have level 5 for the purposes of that die roll.
For a house to be eligible to grant a card, France must control the most significant space related to that family (Exception: The most significant space for the house of Alencon is beyond the game map: that house always grants a roll for card). The associated spaces are:
| Noble House | Required Space † |
|---|---|
| Armagnac | Auch |
| Orleans | Orleans |
| Anjou | Poitiers |
| Bourbon | Lyon |
| Foix-Navarre | Pamplona |
| Alencon | N/A |
† As a reminder, these spaces are indicated on the map with a shield of each noble house.
Finally, if in the Card Draw Phase France controls the Perpignan space in Roussillon, France may receive an extra card. If France has fewer than three houses at level 5 loyalty, receipt of the card is automatic. If three or more houses are loyal (which diminishes the importance of Roussillon), the French player rolls a die and receives an extra card on a roll of 1 or 2. The house of Foix-Navarre is never considered for the purposes of counting loyal houses for receipt of this card from Perpignan.
Dynastic Rights on Naples and Roussillon. France wins special VPs for maintaining political control of the Kingdom of Naples and/or the County of Roussillon.
After the mandatory event Death of Ferrante of Naples is played, whenever France controls the Naples space and at least two of these three strategic spaces: Gaeta, Cerignola, and Garigliano, France gains 1 VP.
Additionally, whenever France controls both spaces in Roussillon (Perpignan and Ceret) they gain 1 bonus VP.
Rivalry with Maximilian of Austria
HISTORICAL NOTE: Maximilian of Austria, Holy Roman Empire and ruler of Burgundy (after marrying Mary, daughter of Charles the Bold) was a sworn enemy of the French monarchy, vying for control of northern and eastern France.
The mandatory event Emperor Maximilian of Austria triggers challenges for France to represent this rivalry. Execute the event in the order set forth below and undertaking all five steps as each one is applicable. Once one of the first three steps applies to either Milan or Metz ignore the other steps for that specific city.
-
Relief For Besieged Milan or Metz: If one or both of the spaces of Milan and Metz are besieged by France when this event is played, Maximilian (leader 2-8) arrives with a relief force of eight independent units in each besieged city (if Maximilian was in a Foreign War, remove him from that war). If both are besieged, the player playing the event decides the order of execution. A relief force field battle immediately take places where the units inside those cities join in the attack with Maximilian's eight reinforcements. If Maximilian's relief units are forced to retreat, they are eliminated. If there is a tie in the number of hits, retreat up to four independent units into the city (the rest are removed from the map). However, if they win and break the siege, all surviving units of the liberated city and Maximilian's relief force remain in the city space as a defensive army for future attacks. In either case, remove Maximilian from the map after the combat, he is immediately available for the next use on the other besieged city or for the reconquer use listed below.
-
Reconquer Milan or Metz: If at least one of these cities is controlled by France, Maximilian sends an attack formation composed of eight independent units and the leader Maximilian to one and only one of them (chosen by the player executing the event). The combat is now resolved by one round of field battle or assault (make an immediate assault if there are four or fewer French units and they take refuge inside) without the need to wait for an impulse. This one round of attack by Maximilian's units is repeated at the beginning of each new impulse of the player who played the Maximilian event until either Maximilian or the defender no longer have units in this space (even if the player chooses to Pass during the impulse). If Maximilian's formation suffers a retreat result in a field battle or no longer maintains enough units for siege, remove his entire formation from the map. If the city besieged by Maximilian's formation is controlled by Maximilian's units, he leaves as a garrison all the independent units still surviving and removes the leader Maximilian.
-
Reinforce Milan or Metz: If Milan and/or Metz are not besieged, are still independent, and have fewer units than initial starting garrison, add independent regulars to this space until they regain their initial unit deployment level.
-
If a Foreign War event is active for France, reinforce the defenders by adding five independent regulars to France's rival. If the leader Maximilian is not already present besieging Milan or Metz, add his leader unit to the active Foreign War. If both Foreign Wars are active for France, place Maximilian in the War against Burgundy.
France's Trade in the North Sea and the Mediterranean Sea. During the Winter Phase, France rolls on both the French Mediterranean and North Sea trade tables.
Mediterranean: Control of the keys of Venice, Genoa, and Florence provide modifiers to the Mediterranean die roll (18.7).
North Sea: Trade enhancement markers earned by France each add a +1 modifier to this die roll. France earns one such marker every time they undertake their Improve North Sea Trade action at the cost of 2 CP. This action can be used four times per game. The modifiers are never applied until after the Treaty of Etaples has been signed.
France Turns Towards Italy. France may, without restriction, declare war on the Papacy or Naples. However, for France to declare war on Genoa, Florence or Venice in the declarations of war phase, it must have all three of the following treaties signed (place the corresponding marker on the French Player's Card when signing each one). In addition, once the three International Treaties are signed, the French player gets a 2 VP marker (use a 2 VP Consolidate Power marker) for Turning to Italy that is retained as long as these three conditions are fulfilled:
a) Controls Milan space.
b) Controls at least one of the Nice or Modena spaces
c) Controls at least one of the Florence, Venice or Genoa spaces.
Treaty of Etaples 1492 (with England): This treaty is signed when the mandatory event Treaty of Etaples (required in the winter of Turn 3) is played. It provides these benefits:
a) France moves the units in the Garrison Box against England (which previously could not move) to Paris. The squadron and naval leader Casenove are then placed in a controlled home port of their choice bordering any Sea Zone.
b) Die roll modifiers from North Sea trade improvements are now applied.
Treaty of Senlis 1493 (with Maximilian): There is no card that represents this treaty, but France may unilaterally sign it by extending the impulse in the Action Phase or announcing it in the Diplomacy Phase of a turn. Signing the treaty is only possible on Turn 3 or later and only if France is not in a Foreign War with either Burgundy or Brittany. If the Emperor Maximilian of Austria event has been played at least once (indicated by the Maximilian Played marker in the Treaty of Senlis box), announcing this treaty has a cost of either discarding a random resource, or choosing a specific card and discarding it. If the French player does not have the resources or card to make this payment, he cannot sign the treaty.
On the turn that this treaty is signed, the Emperor Maximilian of Austria event may not be executed: such an event would only be used for CP if played by any player. From now on Maximilian will no longer intervene over the city of Metz. If Maximilian is on map besieging Milan or Metz, he is removed from the map along with his besieging army.
Treaty of Barcelona 1493 (with Catholic Monarchs): This Treaty cannot be signed if it is Turn 1 or if the event Death of Ferrante of Naples has been played. It can be signed in any of these three ways:
a) It may be signed by extending the impulse in the Action Phase or announcing it in the Diplomacy Phase of a turn. In these cases, France must cede control of all the spaces under French control in Roussillon to Aragon, displacing (12.5) any non-Spanish units there. This act immediately puts the Spanish player and the French player at peace if they are currently at war.
b) If any player plays the Treaty of Barcelona event.
c) During the French player's Spring Deployment, the French player can give the Spanish player either two cards chosen by the French player from his hand, or one of his resources chosen at random and one card the French player choses from his hand. In this case the current war state is left unaltered but the Treaty is considered signed.
If this Treaty was signed by either (a) or (b), the following now applies:
- If Spain or France still controls some of the other power's home spaces it returns them to their opponent.
- Calculate the number of fortifications, strategic spaces, and keys of the opponent that each player returns.
- The difference between these totals is awarded as Barcelona VP markers to the player who returns more spaces.
EXAMPLE: France returns Vitoria while Spain returns both Bayona and Auch; Spain is awarded one Barcelona VP marker.
If this Treaty was signed, remove the Treaty of Barcelona card from the game. If a player has it in his hand, he must discard it and draw a new card from the deck. Also remove the card if the event Death of Ferrante of Naples has been played.
The Monarch of France, Lord of Italy. France receives VP for controlling these spaces in the Victory Determination Phase: Naples, Rome, Ravenna, Milan, Genoa, Venice, Florence, and Otranto. When France has at least five of these spaces controlled, it gains one of these awards as follows:
- Control of 5 out of 8: gain 1 VP
- Control of 6 out of 8: gain 2 VP
- Control all 8: gain 3 VP (first time only; afterwards 2 VP)
These VPs are in addition to those granted by control of those spaces.
Metz and Milan. Control of the ecclesiastical city of Metz grants the French player 1 bonus VP. Maximilian may aid this city until the Treaty of Senlis is signed.
Control of Milan grants the French player 1 bonus VP. Maximilian may aid this city at any time.
Paris and French Keys. The Paris space represents the off-map part of France and its control is exclusive to the French player, unconquerable by the other powers (so France can never surrender and can always build units). Otherwise, it has the same characteristics as a French home key, but can never receive either Plague or Unrest markers.
Each French home key gives the French player 2 VP for its control, as indicated on his Player Card. French control of all of them is necessary to be eligible for an automatic victory.
Foreign Support for the Beltranejos Cause. See 20.4 for details on French support of the Beltranejos.
Letter of Marque
HISTORICAL NOTE: The privateer French Guillaume de Casenove Coulon became an admiral of the French navy with the approval of Louis XI. His legend was based on famous actions in support of Portugal, including sending relief to Ceuta and the plundering of Genoese, Flemish, and Spanish merchants.
The French naval leader Casenove has a piracy factor of one (P1) and his presence in a fleet of French naval squadrons allows those units to carry out piracy actions as if they were Corsairs (i.e., they can be carried out against powers with which they are not at war).
20.8 Principality of Catalonia
Dynasty of Anjou and the Generalitat
HISTORICAL NOTE: Catalonia under the power of the Generalitat starts the game in a civil war against the King of Aragon. At the start of the game, the war has already reached its last phase, where—with the support of France—the Anjou Dynasty is established as a monarchy of the Principality of Catalonia to help maintain the struggle.
Catalan Units And Home Card: Catalan units are under the control of the French player. Catalan and French units are always allied. The French player also gains use of the Catalan Home card as long as this limited major power has not surrendered.
Restrictions On French Leaders: Until the surrender of the Principality of Catalonia, no French leader other than Anjou may enter Catalan home spaces. French formations without a leader may always enter such spaces. Anjou may command both French and Catalan units (the leader counter has both colors as a reminder), even in the same formation.
Space Control: Despite being allied, French units may gain control of unfortified spaces with Catalan control markers, exchanging the existing Catalan control marker for a French one. This action is performed with the usual 1 CP actions listed in 12.2; the presence of Catalan units nearby never prevents it.
Barcelona: If in the Victory Determination phase, Barcelona is under the control of the Spanish player, the Catalan faction surrenders to the King of Aragon and ceases to exist in the game. See 22.1 for steps to follow for the Catalan surrender. If on the other hand Barcelona is controlled by the Principality of Catalonia during this phase, the French player receives one bonus VP for controlling this key at the end of the turn.
Split Home Spaces: Many spaces near Barcelona are split Home spaces with two colors (gold for Catalan and red for Aragon). When Catalan controls them, no marker needs to be placed on the space. When Spain controls them, a Spanish control marker is placed on that space. If a mixed formation of Catalan and French units gains controls of a space, place a French or Catalan control marker as desired by the French player. A formation containing only Catalan units gaining control must place a Catalan control marker; one with only French units must place a French one. Once the Principality of Catalonia has surrendered, it does not return to play and these split Home spaces are considered Aragonese home spaces for the rest of the game.
Surrender of the Principality of Catalonia: See 22.1 for details of this major power's surrender.
20.9 Foreign War Cards
The three event cards: Tribal Insurrection, War Against Burgundy, and War in Brittany, Mad War force Portugal or France to divert land units and/or army leaders off-map to resolve a foreign conflict. Spain, Venice, and Muslims can also be affected in a similar fashion by the Ottoman-Venetian War. When these events are played, place the Event card on the map. Place the specified number of independent units to represent the opponent in question on the Foreign War card. In the case of Tribal Insurrection, place native insurgent units; for combat purposes these units are considered to be Militia, and remember to place a minimum of four such tribal units, even if Portugal has fewer than four settlements. The French or Portuguese player then selects the number of units designated on the card from any location on the map (except a space under siege, the Garrison space against England, or another Foreign War) and moves those units onto the card. Units may be chosen from multiple stacks in different spaces. If you don't have enough available units in play, the first units to be recruited must be added to the Foreign War card to meet these requirements. (Exception: In the Ottoman-Venetian War, units are added to this conflict directly from the various powers force pools of unbuilt units).
Army leaders may be selected from any location from the board (even under siege) and also placed on the card (if you select multiple leaders only the one with the highest Battle Rating has an effect on the outcome).
To resolve the conflict, the French or Portuguese player must spend 1 CP on the Fight Foreign War action for each resolution attempt. A field battle then occurs between all units of the major power and all independent units on the card. The battle is resolved as a field battle on the map, except that there is no defender to receive extra dice and there is no retreat. If all independent units are eliminated, the Foreign War is over. The use of combat or response cards that affect a field battle is allowed.
When a Foreign War is over, all remaining units of the major power on the card are placed back in Paris (if this is the French player), or in a home key (if this is the Portuguese player). Portuguese units may not return if they do not have a home key; in this case keep the units on the Foreign War card until they regain control of such a space. If the French or Portuguese defeat the enemy in the Foreign War that power receives one War Winner VP. Place the proper bonus VP marker on the Player Card as a reminder. If all independent units are not eliminated, the major power at war will have to pay for another Fight Foreign War action in a future impulse. The French or Portuguese player receive one less card if they are fighting a Foreign War during the Card Draw Phase (use a –1 Card marker as a reminder).
Major powers can construct new land units directly onto a Foreign War card they are fighting. They may also add leaders to the war at any time by removing them from the map. However, a major power may never exceed the indicated limit of units on a Foreign War card. Major power units on a Foreign War card cannot return home (even in the Winter Phase) until they have eliminated all of the independent units in the Foreign War. Militia fighting a Foreign War are not subject to die rolls for desertion in winter. If at any time the number of units of the major power participating in the war falls below the minimum number indicated, the first units that player recruits must go to a Foreign War until the minimum unit count is restored.
War of Brittany, Castile Intervention: If the War in Brittany, Mad War Foreign War is active, Castile can build up to two Castilian militia per impulse directly onto this card to support the Bretons. The number of Castilian militia on the card after such a build action may never exceed the number of independent Bretons on the card. Whenever both Castilian militia and Bretons are present on the card and the French player inflicts losses on them, remove first a Breton independent and then a militia to keep the numbers as balanced as possible.
If at the end of a Spanish impulse Castile is supporting the Foreign War in Brittany with at least two militias, Spain may take an extra roll on the Mesta Table using the modifiers applicable at that time. This extra roll may only be taken once per turn and if taken it substitutes for the opportunity to extend the impulse with a resource. If a Foreign War with Brittany is active in the Winter Phase, the Spanish player also receives an extra roll on the Mesta Table.
Ottoman-Venetian War: This special Foreign War is fought exclusively between Christian and Muslim naval units. The naval units that participate are added to the game when this event is played; surviving units from the winning side (along with additional land units) are awarded to the winning power(s).
Follow these steps when the event is played:
- Place the five naval units (Christian units are one Venetian and one Spanish; Muslim units are three Ottoman) reserved for this war on the event card. (They have crossed swords in the upper right as shown in the illustration.)
- Place the Great Captain with the Christian naval units even if he is currently captured or besieged or off the map.
- Place Kemal Reis (with a Battle Rating of 1) with the Ottoman naval units. If Kemal Reis was in play, remove the counter with the Battle Rating of 2 from the map; it will return at the end of the Foreign War. If Kemal Reis had already been replaced by Barbarossa, he returns exclusively to participate in this Foreign War.
- If Venice is allied to the Muslim player when the event is played, deactivate Venice—it will not be able to ally to the Muslim player while this war is active. The Portuguese player controls the Venetian naval squadron in the war in this case, or if Venice was neutral when the war started.
- Now the player who played the event decides whether or not to undertake a free Fight Foreign War action to start resolving this war.
When resolving this Foreign War:
- All naval units on each side roll 2 dice against their opponents, regardless of which player undertook the Fight Foreign War action.
- Kemal Reis always contributes one die to the Muslim side.
- The Great Captain contributes two dice if either (a) this is the initial free action at the start of the war and the event was played by a Christian player; or (b) this Fight Foreign War action was taken by a Christian player who spent 2 CP on the action instead of the usual 1 CP. If such cases do not occur, the Great Captain contributes one die.
- The side initiating the action always rolls one extra die.
The combat follows the usual rules for naval combat (with an enemy squadron being sunk for every two full hits, ignore odd hits) with the following exceptions:
- Neither side retreats after combat.
- Christian casualties are selected by the player spending the CPs.
- Leaders may never be eliminated by the combat.
- Naval units eliminated in this combat are removed from the game rather than entering a power's force pool.
The war continues until units of only one side (Muslim or Christian) remain. Players who control a naval squadron on this Foreign War card (including the Venetian one) may spend 1 CP on the Fight Foreign War action during their impulse. (If Venice allies with a different power during the course of the war, the new major power ally may take such an action on behalf of the Venetians). There is no –1 Card penalty on any power while the war is still active. Apply these effects when the war ends:
- The winning player(s) moves the surviving naval units to controlled home ports, one port per winning power. If the Muslim side won, move the units to a single Berber home space or the Otranto space, if controlled. Winning Spanish units are placed in any Spanish-controlled port in Italy or Sicily. A surviving Venetian unit returns to the city of Venice. The surviving Ottoman naval squadrons can return as naval squadrons or corsairs, as the Muslim player prefers.
- The winning side now receives one regular for each surviving naval unit. Place each regular in the same space as a returning naval unit of the same power. The Muslim player receives Ottoman regulars; the Spanish player receives a specific Aragonese regular with the returning Spanish unit and Venice also receives a specific regular if the Venetian squadron returned. (They have crossed swords in the lower right as shown in the illustration.)
- Kemal Reis is removed from the game if he has already been replaced by Barbarossa. If not, he returns with the victorious fleet (if the war was a Muslim victory) or in a controlled home port (if his side lost). In both cases replace him with his counter with a Battle Rating of 2.
- The Great Captain returns to a controlled Aragonese or Castilian home space that is not under siege.
- If the Christians won the war, award 1 VP to Spain and 1 VP to the power controlling the Venetian squadron at the conclusion of the war. The Muslim gains 2 VP if their side wins.
Special naval units and specific regulars that entered the game due to this war cannot be built once they are eliminated.
21. Minors and Independents
The major powers can recruit minor powers during play to serve as important partners. The minor powers share a common set of rules, as presented below. All these minor powers have two states: active and inactive. Minor powers may start in either of these states as specified by the scenario setup. The Papacy is a special type of minor power that possesses additional attributes detailed in 21.7 below.
21.1 Inactive Minor Powers
In the inactive states, minor power forces behave as follows:
- They do not move from their current space.
- They do not intercept or avoid battle.
- If there are four or fewer land units in a space, they will always withdraw into the fortifications and try to withstand a siege if their space is entered.
- If there are five or more land units, they will hold their ground and fight a field battle. If they lose that battle, do not retreat their units from the space as usual. Instead, they retain up to four units which withdraw into the fortifications; all other land units in excess of four are eliminated.
- Inactive naval units remain in their port and defend if that port is attacked.
21.2 Activation
Changing a power from inactive to active is called "activation". Each minor power can only be activated by three different major powers, as shown by the entries in the Activate lines at the bottom of the Diplomatic Influence Table. Note that in the case of the Muslim, some minors can be activated exclusively by one of the two powers of that player; the activation in the Spanish case is joint for Aragon and Castile for their common foreign policy; for French and Portuguese players only their main power can activate minors.
Minor powers can be activated in the following ways:
- An event has caused the diplomatic status of the minor power to be evaluated (which is resolved by the procedure in 21.6) or that allows direct alignment (place the influence markers on that minor in resolved this turn in this case). The winning power gets to activate this minor as their new ally if they are listed as an "Activate" power at the bottom of the Diplomatic Influence Table.
- A major power declared war on this minor power and a different major power intervened according to Step 4 of the War Declaration Procedure (9.4).
Activation Procedure
- Place Allied Marker: Add an Allied marker to the box that cross-references these powers on the Diplomatic Status Display.
- Declarations of War: A power currently at war with this minor power has the choice to immediately declare war (at no cost in CP) on the major power that is activating the minor power. That power may only declare war if none of the "restrictions at all times" listed in Section 9.4 apply. If the power chooses to declare war, add an At War marker to the appropriate box on the Diplomatic Status Display. If the power declines to declare war, any units of that power occupying spaces controlled by this minor power are displaced (12.5).
- Place Square & Triangular Control Markers: Remove control markers from any keys and strategic spaces of this minor where the control marker is from a major power that was eligible to activate this minor during this status check. Units that are not from either this minor power or the activating power are displaced if they occupy one of these minor power home spaces that just had a control marker removed. Strategic spaces and keys of this minor power that now have no control marker on them are then marked with square and triangular control markers from the activating power.
- Place Hexagonal Control Markers: Remove control markers from any non-strategic and non-key spaces of this minor where the control marker is from a major power that was eligible to activate this minor during this status check. Units that are not from either this minor power or the activating power are displaced if they occupy one of these minor power home spaces that just had a control marker removed. Non-strategic and non-key spaces of this minor power that now have no control marker on them are then marked with hexagonal control markers from the activating power.
- Remove At War Markers: Remove all At War markers from this minor power's column on the Diplomatic Status Display (this minor power's diplomacy is now controlled by their major power ally).
21.3 Active Minor Powers
Activating a minor power has the following benefits:
- If the minor power has regulars units in his counter mix, the controlling major power may use the Raise Regular Troop action to build a regular unit of this minor power in one of this minor power's home spaces (assuming an unbuilt regular exists in the counter mix).
- If the minor power has naval squadrons in his counter mix, the controlling major power may use the Build Naval Squadron action to build a naval unit of this minor power in one of this minor power's home ports (assuming an unbuilt unit exists in the counter mix).
- Military units and leaders of this minor power are treated just like units and leaders of the major power. They now move, fight, retreat and avoid battle just like the other units of that major power. (The only difference is that minor power units have no impulse or cards of their own).
- Military units of the minor power have one additional characteristic during the Winter Phase. These units may also return to a home key of that minor power just as if it were an additional key. The units of their major power ally do not enjoy this option.
21.4 Deactivation
Changing a power from active to inactive is called "deactivation."
Minor powers may be deactivated in either of these ways:
- An event has caused that Minor Power to be deactivated, or the diplomatic status of the minor power to be evaluated and a power that is not the minor power's former ally won that evaluation.
- Whenever a new Pope arrives the minor power of the Papacy is immediately deactivated (it will reactivate once its diplomatic status is reevaluated). If the Papacy was at war with a major Christian power, peace is immediately signed between those powers.
Deactivate a minor power using the following procedure:
- Remove the Allied marker from the box that cross-references these powers on the Diplomatic Status Display.
- All control markers from this minor's former ally are removed from the minor power's home spaces.
- Units from other powers are displaced if they occupy one of these minor power home spaces that just had a control marker removed. Move land units to the nearest friendly-controlled fortified space and naval units to the nearest friendly-controlled port.
- Next, all land units and leaders of the minor power return to the nearest friendly-controlled, fortified home space of that minor power. If no such fortified space is available, return them to the nearest unfortified space. If no such space exists, the land units are eliminated.
- All naval units of the minor power return to the nearest friendly-controlled home port of that minor power. If no such port exists, the naval units are eliminated.
21.5 Diplomatic Influence
Any player may spend 1 CP or 2 CP on the Buy Diplomatic Influence action, with the cost as indicated on the space on the Diplomatic Influence Table into which the player's marker is moving. The influence may be allocated to any power that lists the active power in either an Activate or Deactivate line at the bottom of the Diplomatic Influence Table. Advance the active player's influence marker by one level. No influence may be purchased if a power's influence marker is already at level 6. Influence may also not be purchased if the influence markers for that power are in the "Resolved this turn" box.
21.6 Resolving Diplomatic Status
A minor power's diplomatic status is evaluated based on either an Event card play or a declaration of war (9.4). Diplomatic status may only be evaluated once per turn, except for the fall of Rome to Muslim control and the Roman Curia event, after which the Papacy's influence marker levels are placed in their starting boxes instead of Resolved this turn. For each Minor Power, ignore a second such event if it occurs while all of this Minor Power's influence markers are in the Resolved this Turn box.
Diplomatic Status Procedure
- Determine Competing Powers: a) If Diplomatic Status is evaluated as a result of a declaration of war on a minor power (9.4); by playing the Sultanate of Fez Home card event; or by the Papal Diplomatic Status resolution (21.7), all players listed as either an Activate or Deactivate power compete and do so regardless of their level of influence over the minor target. b) If Diplomatic Status is evaluated as a result of the play of an event and the objective is not the Papacy, the player playing the event only competes against the players listed as either an Activate or Deactivate power who are at the same level of influence (or higher) with this minor. If this player's influence marker on that minor is at a higher level than all others, that player automatically wins this procedure (skip to Step 4).
- Roll Dice: If rolls are required, each competing major power rolls a single die and computes a final total by adding their influence points (if any) with the target minor power to the roll of the die roll. If this roll is for the arrival of a new pope, players should also add their affinity points (if any).
- Determine Winner: The power with the highest total in step 2 is the winner (provided that no automatic winner has been declared in step 1b). In the case of a tie, the winner is the power listed highest in the list of Activate powers at the bottom of the Diplomatic Influence Table.
- Activate: If the winner is listed as an Activate power and does not currently have this power as an ally, then deactivate the power from its current ally (if any) and then activate it as an ally of the winning power.
- Deactivate: If the winning is listed as a Deactivate power, then deactivate the power from its current ally (if any).
- Reset Influence: All influence markers in this minor power's column of the Diplomatic Influence Table are placed in the "Resolved this turn" box (except if the resolution was for the Papacy due to the Roman Curia event, see 21.7). They will be reset to their default positions during the Winter Phase at the end of the turn. (Exception: See Enemy of Islam below).
21.7 Minors with Specific Rules
The Papacy
The Papacy is a special Minor Power that has additional characteristics beyond those of the other Minor Powers.
Succession for the Papacy: Every time a new Pope ascends to the throne of Rome:
- Immediately deactivate The Papacy from their current ally; this deactivation may cause Papal units to be displaced.
- Remove control markers from all Christian powers from the Papal home spaces (even if they were at war with the Papacy). Displace any Christian units in the Papal home spaces.
- After displacement, check to see if there are five regulars and one naval squadron in Papal home spaces. If not, add units to those spaces until those minimums are restored, placing the units added to a space still under Papal control in this priority order: Rome, then Ravenna, and finally Ancona.
Activation of the Papacy: The Pope may change during the game through Mandatory Event cards, either during the Headline Event Segment, the Action Phase or in the Winter Phase when resolving a Mandatory Required Event. Each time a new Pope enters the game, or when the appropriate option of the Roman Curia event is played, perform a Diplomatic Status check for the Papacy. Each player rolls one die and adds the following modifiers to the result:
- The value of their influence marker in the Papacy column on the Diplomacy Table.
- The Affinity value on the new Pope's card (this does not apply if the Diplomatic Status check is triggered as a result of the Roman Curia event).
The player with the highest total wins the status check.
If the check is triggered as a result of the Roman Curia Event, reset all Papal influence markers to their initial positions after the Diplomatic Status check, instead of placing them in the Resolved this Turn box.
NOTE: The Roman Curia event has a second option that allows any player to deactivate the Papacy immediately and without further benefit; so no rolls are made in this case, nor does the Muslim player move influence markers, nor does he receive a card at this time, although he will do so in the next deal, if the Papacy is still independent.
The winner of the Diplomatic Status check (even the Muslim player if they were successful in keeping the Papacy deactivated, or a Christian player allied with a Muslim power) gains these benefits:
- If the change of Pope happened during the Action Phase or Headline Event Segment, the winning player draws one card from the deck.
- If you are a Christian player allied with a Muslim power, keep the Papacy inactive.
- Move two influence markers belonging to any player (including your own) one level up or down in any combination for any minor power except Navarre or the Papacy (Exception: The Muslim player always performs these moves if Rome is under Muslim control, see "Enemy of Islam" below).
Control of the Papacy: When a Christian Player is allied with the Papacy:
- Add the card Papal Bull to the allied player's hand during the Card Draw Phase.
- Papal land units may not leave Papal home spaces. If forced to retreat to a non-home space they are eliminated. (Exception: See Cesare Borgia section below).
- The Papacy naval squadron is controlled by the allied Major Power just like any minor power naval unit.
If the Papacy is an inactive Minor Power:
- The Muslim player draws a card from the deck during the Card Draw Phase.
Declaration of War: Rome is the Pope's city and the heart of Christendom, so Christian declarations of war against the Papacy come with special considerations:
- A Christian Power who is not currently allied with the Papacy can declare war during the Action Phase by paying the cost of one random card draw from their hand (the card is placed in the discard pile). A declaration of war of this sort does not trigger a Diplomatic Status check for the Papacy; its diplomatic status is never changed by receiving a declaration of war from a major Christian power.
- A Christian Power at war with the Papacy (including the case of Cesare Borgia, Condottiere, see below) will remain at war until the arrival of a new Pope, who will return the Papacy to an inactive state (and cause any Christian units in Papal home spaces to be displaced, see "Succession for the Papacy" above). If the Christian power at war with the Papacy controlled Ravenna or Rome and was forced to return either of these spaces, he receives a 1 VP marker for each (use the 1 Papal VP markers with the image of Cesare Borgia). This award can only be received by each player a maximum of once per game.
- Declaring war on the Major Power that controls the Papacy does not imply declaring war on the Papacy; its allied or war status with Christian powers is always tracked independently.
Conquest of Rome: If a Christian power at war with the Papacy gains controls of Rome, the Papal alliance passes to the Christian power now controlling Rome. Follow the steps for "Succession for the Papacy" listed above, allying the Papacy to this Christian conqueror.
Muslim Alliance: If a Christian power that controls the Papacy allies with a Muslim Power during the Diplomacy Phase, it immediately loses control of the Papacy. Deactivate the Papacy. The Muslim player immediately draws a card from the deck. This loss of control does not occur if a Christian power already allied to the Muslim player controls the Papacy militarily during the Headline Event Phase or Action Phase.
Threat to Rome: If the Papacy is inactive, Cesare Borgia is not on the map, and any space in Italy, Sardinia, Corsica, or Sicily is occupied by Muslim land units or controlled by the Muslim, a Christian player may spend CPs to recruit, move, or assault with Papal land units (within Papal home spaces), even though they are not a Papal ally. If Rome is controlled by the Muslim player, Papal units are considered to be able to trace LOC to any fortified space controlled by a Christian player. Likewise, if Rome is controlled by the Muslim player in the Winter Phase, Papal units may winter in Ravenna without unit limit.
Enemy of Islam: The two Muslim Major Powers (the Nasrid Kingdom and the North African Alliance) start all scenarios at war against the Papacy and those wars can never be ended. If the Muslim player controls Rome militarily, the following applies:
- He will immediately gain a 5 VP marker the first time this happens (place it on his Player Card).
- Perform a Diplomacy Check, in random order, for each Minor Power in the game (including the Papacy) by placing Muslim influence markers at level 0 on each Minor Power. Check as if the Sultanate of Fez' home card event had been played. If any minor power's diplomatic status has already been resolved this turn it is still checked: place the influence markers for that minor power at their start values, set the Muslim Player's influence marker to 0, and then check the status.
- After the resolution of the Papacy's diplomatic status, all influence markers are set to their initial levels. Not so, with the rest of the resolved minor powers, whose influence markers are set to Resolved this turn.
- All Christian major powers will be in a state of war with all Muslim powers for the rest of the game.
- While Rome is conquered by the Muslim player, new Popes will continue to enter the game as normal (the Pope is in exile) and a Christian player allied to the Papacy does receive the Papal Bull card at the start of the turn.
- If all Papal home spaces are controlled by the Muslim player, he may move the influence markers as a result of the arrival of the new Pope, even if he doesn't win control of the Papacy during the diplomacy status check.
- The Muslim player draws one extra card at the start of each turn.
Cesare Borgia, Condottiere: The event Cesare Borgia, Condottiere brings an extra leader onto the map, who acts as a leader for the power playing the event. These two rules always apply to Borgia:
- If Borgia is controlled by the same power that is allied with the Papacy, Papal units in his formation may move (or retreat) outside Papal home spaces and may gain control of those spaces (putting them under control of the Papacy's major power ally).
- Borgia is removed from the map during the Card Draw Phase if any Pope other than Alexander VI is in power in Rome. If Alexander VI is the current Pope, Borgia remains in play during this phase.
However, there are two conditions (both related to Pope Alexander VI) where even more special rules apply to Borgia:
Alexander VI Becomes Pope; Borgia Already On Map: If Alexander VI comes into play while the leader Borgia is on the map, and the Papacy after its Diplomatic Status check is now controlled by a different Christian player than the one who controls Borgia, displace Borgia and Papal units in his formation to Rome. He is now controlled by the Christian player allied with the Papacy. If the Diplomacy check was won by the Muslim player, there is no effect on Borgia's status.
Pope is Alexander VI; Papacy Inactive; Muslim Plays Event: If Alexander VI is the Pope, the Papacy is inactive (i.e., the Muslim player won the most recent Diplomatic Status check), and the Muslim player plays the Cesare Borgia, Condottiere card event, then the Muslim player gains control over the Papacy (and Borgia) as a limited major power. Immediately apply these effects:
- Add the Papal Bull card to the Muslim hand (if it is in another player's hand, that player can draw a new card from the deck to replace it).
- Remove all Papal regulars from the map.
- Now place the Borgia leader and seven Papal regulars in a single space in this priority order: Rome, then Ravenna, and finally Ancona, based on which space is still under Papal control. If the Papacy does not control any spaces on the map, displace any units in Ancona and place all Papal units in Ancona.
All of the following rules now pertain to Borgia and the Papacy:
- The Muslim player controls Borgia and all Papal units even though they are not considered to be allied to any Muslim power.
- Papal units are considered to be at war with all powers on the map (including Muslims). Place At War markers in the Papacy column on the Diplomacy Status Table with all major powers as a reminder. They can also attack inactive minor powers (other than Navarre)—no Diplomatic Status check is performed for any of these minor powers entering a new war state.
- Muslim units may not attack Papal units or enter Papal-controlled spaces.
- Papal units can control spaces using their own control markers. In the case of fortified port spaces, they do not need to comply with the naval requirements for assaulting.
- In Winter of Turn 4 (exclusively) the Papal units return to fortified spaces (Rome) as if they were another major power and a Papal regular is received as a reinforcement in Rome. On Turn 5 (exclusively), they may make spring deployments from Rome.
When Alexander VI dies or the Muslim player loses control of the Papacy by play of the Roman Curia event, apply these effects:
- The Muslim player gains 1 VP for every key space, strategic space or fortress with a Papal control marker in Italy (including Nice but excluding Papal home spaces), Corsica, Sardinia, or Sicily.
- Displace all Papal units that are not in Papal home spaces. Then remove Papal control markers from all spaces, returning control of each space to its home Power. If an inactive minor power regains a space in this fashion it restores any units that started the game in that space back onto the map.
Navarre. Diplomatic influence on Navarre costs 1 CP for the first three levels and 2 CP for the remaining three. The entry of Pope Julius II (T5) helps the alignment of Navarre to the Spanish player if the event Clash of Interests in Navarre is played. As specified in 9.4, you may not declare war on Navarre unless the level of diplomatic influence over an inactive Navarre by some other opposing player is at least two levels higher than your own.
Naples and the Event Death of Ferrante of Naples. Naples is considered a Minor Power like any other until the mandatory event Death of Ferrante of Naples is played, required in the winter of Turn 4. Until that time, all strategic spaces of the Minor Power are considered simple unfortified (circular) spaces. Therefore, only its capital Naples grants 1 VP.
When the mandatory event Death of Ferrante of Naples occurs, the kingdom of Naples ceases to exist as a Minor Power and its spaces become Independent (hence the gray color also on its spaces):
- Remove major power influence markers from the Naples column of the diplomacy track.
- Remove any major power control markers (including Papal control markers, see Cesare Borgia, Condottiere, above) from the spaces of the Kingdom of Naples on the map except in Naples and Otranto whose spaces retain their current control marker.
- Displace any non-Naples units in any spaces of the Kingdom of Naples other than the Naples and Otranto spaces.
- Remove all units belonging to the Kingdom of Naples from the game.
- Remove the Treaty of Barcelona card from the game deck if it was not already removed. If any player had it in his hand, they draw another from the deck to replace it.
Follow one of the cases in the steps below, based on the state of Naples before the event:
Case One: If a major power controls the Naples space at the time of Ferdinand's death, apply these effects:
- The Major Power controlling Naples automatically goes to war with Spain and France, receiving two regulars in the Naples space.
- If Naples was controlled by the North Africans or the Portuguese and they do not want to go to war with these powers, move all their units from Naples and remove the control marker from the Naples space and immediately jump to Case Three.
Case Two: If the Papacy controls the Naples space at the time of Ferdinand's death (because the Muslim controls the Papacy, see Cesare Borgia, Condottiere above), add two Papal regulars to the Naples space.
Case Three: If neither a major power nor the Papacy controls the Naples city space at the time of Ferdinand's death; apply these effects:
- Place two Independent units in the capital Naples and—if no power controls Otranto—two more Independents in this space.
Additional Effects: After resolving the above cases, these additional effects apply:
- Spain and France divide the spaces of the Minor as indicated on the event card: Spain gains control of Seminara, Taranto and Atella. France gains control of L'Aquila, Gaeta and Pescara. All other spaces remain Independent with no control markers.
- France and Spain enter a state of war (if not already at war).
- France places two regulars in each of the L'Aquila and Gaeta spaces.
- Spain places four Aragonese regulars in Atella.
- From this point on, while L'Aquila is controlled by France and Atella by Spain, each may winter a full formation of its units in these spaces (up to the size allowed by a single leader present). Consider these two spaces as if they were home keys only for purposes of eligibility for the return of units allowed in the Winter Phase. These spaces have a small symbol on the map to remind you of this.
- The spaces of Gaeta, Cerignola, and Garigliano in the Kingdom of Naples—which were previously treated as simple unfortified (circular) spaces—are considered strategic spaces for the rest of the game.
21.8 Independent Spaces and Canarian Guanches
Entering Independent Spaces: Gray independent spaces do not belong to any major or minor power and are therefore not subject to diplomatic influence or declarations of war. Units belonging to any power may enter independent spaces at any time.
Independent Unit Placement: Independent units in these spaces may not move; they simply defend against any power that may be attacking them (just like an inactive minor power, Section 21.1). If they are in an unfortified space, these units never retreat from their space, so if they are not eliminated in the field battle, the attacker must retreat (an exception to the usual retreat rules). Guanches units are subject to special rules listed below. Independent naval units never move from the port space they occupy and contribute to protecting their space against assault. The independent corsair of Djerba (based in Tunis) has its own special rules (see below).
Independent Unit Combat: Independent units are always considered as regulars for combat purposes. Tribal units in the Tribal Insurrection event are considered militias, however, Guanches are considered militias unless they are in a formation with the leader Bencomo. Independent regulars cannot be built by players with the Recruit Regular action, although certain events may bring new independent units into play.
Independent Space Control: When a Major Power controls an independent space, that space is no longer independent. Such a space will be controlled by one Major Power or another for the rest of the game, unless it becomes independent again due to the play of the Event card City State Rebels. (Exceptions: Spaces in the Canaries may be recaptured by the Guanches and Milan or Metz recovered by Maximilian).
Ragusa. Ragusa is an independent space that starts the game with a naval squadron in place there. This naval unit makes it difficult to assault the city and prevents direct naval transport into the space unless eliminated. When a Major Power attacks Ragusa's naval unit in port, the Ragusans roll 2 dice for defense in port instead of 1 (the city's natural harbor favors the defense). Ragusa starts with five independent regulars so it fights a field battle whenever it is attacked as described in 21.1.
If a Major Power controls Ragusa, it will receive an additional 1 VP marker on its Player Card as long as it maintains its control. The power controlling Ragusa will have the option to receive resources in the Winter Phase. If Ragusa becomes independent again as a result of the City State Rebels event, place five independent regulars in Ragusa instead of one regular as instructed by the event.
Tunis and the Pirates of Djerba. Throughout the Middle Ages and early 16th century the island of Djerba near Tunis was a more or less independent pirate haven. Control of the independent space of Tunis grants the controlling power an independent corsair naval unit from Djerba to use as its own naval unit (including its corsair characteristic) as long as it maintains control of that space. At the start of each turn, receive this corsair as a free reinforcement in Tunis if it has been sunk. The moment the mandatory event Algiers Regency is played, immediately remove this corsair unit from the game. The possible piracy VPs obtained by this corsair count against the 6 piracy VPs that each player can obtain with Naos or naval squadrons.
Sforza Lord of Milan. The Sforza family was the dominant family in the Italian city of Milan and they actively participated in the wars of this period. The city of Milan starts with eight independent regulars, so it fights a field battle whenever it is attacked as described in 21.1. If Milan becomes independent again as a result of the City State Rebels event, place eight independent regulars in Milan instead of one regular as instructed by the event.
Guanches, the Native Canarians
Canary Island Map Section: Next to the Exploration Map there is a map of the Canary Islands. This auxiliary map is considered to be a section of the main map for all gameplay purposes. The seven islands of this archipelago are connected to each other by land connection lines. Movement between these islands can be completed without naval transport (although it is also possible to move between spaces with ports following naval transport rules). Note that the Canary Islands is considered to be adjacent to the Cape Bojador Sea Zone. Units located in spaces of this map are not obliged to return home in the Winter Phase; militia units from major powers are not subject to disbanding if in the Canary Islands.
Castile Only: The Spanish player can never move Aragonese land units or the leader Ferdinand to the Canary Islands spaces, as their conquest was a purely Castilian undertaking. All other powers are not limited in this respect, except the Powers of Beltranejos and the Principality of Catalonia, which cannot enter there.
Activating Guanche Units: Although the Guanches are independent units, they follow special rules that allow them to recruit, move and attack/assault units belonging to major powers that occupying a space in the Canary Islands. There are four cards in the game that affect the Guanche people:
- #111 Bencomo, Guanche Leader
- #19 Island People's Pride
- #103 Great Drowsiness
- #104 Guanche Rebellion on La Gomera
Playing one of these cards as an event allows construction and movement of Guanche units. During that impulse, the Guanche units are controlled by the player that played one of these events. This is the only way players may use CPs on behalf of the Guanches. The cost to build a Guanche unit is 1 CP, the same as Militias.
Guanches units operate under the following special rules:
- They may never leave the Canary Island map section.
- They may never control spaces. Instead, they remove control markers from other Powers in Canary Islands spaces at no cost when entering an unoccupied space controlled by another power (even fortified spaces).
- If they enter an unfortified space with units of another power, a field battle occurs. If the Guanches win that battle, remove any control marker that is present.
- If they enter a fortified space defended by enemy units, they may assault it directly without having set up a siege in an earlier impulse. Follow the normal rules for assault though Guanche units never need to establish a LOC before initiating an assault.
- Although treated as militia for combat purposes, Guanche units are never affected by cards targeting militia and never are eliminated during the Winter Phase.
- Unless there is only one unit in the starting space, the minimum formation of the Guanches is two units and their leader (if on the map) can never move alone or be abandoned in a space. If a Guanche stack with a leader is split in two, its leader is always added to the formation with the higher number of units (the player chooses in case of a tie).
Conquest Of Canary Islands: A player is considered to have conquered one of the Canary Islands when he controls all of its spaces. The player who controls Gran Canaria, or Tenerife is awarded a specific marker of 1 VP (so up to two 1 VP markers in total). Also, a player who controls all spaces in the Canaries is awarded an additional 1 VP marker. If a player controls all five Canary Islands, his units may move from Ocean Zone 1 to Zone A (and vice versa) without having to make Navigation Checks.
22. Victory
The seventh and final phase of the turn is the Victory Determination Phase. In this phase you check if any player has won the game or you continue playing for another turn. The steps to follow are:
- Check if Catalonia, Beltranejos or Nasrids have surrendered and resolve their surrenders (22.1). Award VP markers for Catalan ownership of Barcelona, Reconquista, or Nasrid Resistance if applicable.
- Check to see if France earns any VP for Lord of Italy.
- Check if there is a winner.
- Advance the Turn marker to start a new turn.
There are two ways to win the game: Automatic Victory (22.2) and Victory Point Accumulation (22.3). Always remember that VPs are indicated either by the occupation of keys and strategic spaces on the map or by a specific marker on your Player Card.
22.1 Surrender of a Major Power
Surrender Conditions: Start the Victory Determination Phase by checking to see if any major powers have surrendered to an enemy. A power is always considered to have surrendered when it does not control any home keys (France can never surrender because it always controls the Paris space). Specific powers may also surrender if specific requirements are met, as detailed below. The following powers are eliminated from play if they surrender:
- Nasrid Kingdom
- Principality of Catalonia
- The Beltranejos faction
Unit Construction Prohibited: A power that has surrendered but not eliminated from play may not use an action to construct any units (land or naval) until they regain control of a home key. The surrendered power remains in play with the units they have on the board, and any units they may receive from events. If they regain control of a home key space they may immediately recruit again. Note that this prohibition does not include the militia such a power is eligible to receive during the Winter Phase (18.6).
Nasrid Kingdom
Surrender Condition: Spain may compel the Nasrid kingdom to surrender during the Victory phase if one of the following conditions applies:
- The Spanish player controls all three Nasrid keys: Granada, Almería, and Málaga.
- If the Spanish player controls Granada and one other Nasrid key (Almería or Malaga), Spain may optionally declare the surrender of the Nasrid kingdom. If such a surrender is chosen, a Morisco Uprising (20.1) occurs immediately as detailed in the third bullet below.
Immediate Effects: Apply these effects immediately:
- The Spanish player earns a 1 VP marker for Reconquest.
- The Muslim player moves up to four Nasrid land units (regulars or cavalry) from anywhere on the map to a friendly North African home key. Move the Nasrid leader Boabdil to this space (if he is captured, he remains a captive; if he has not yet entered the game, move him here from off-map). These displaced Nasrid units are treated as if they were North African units for all purposes until eliminated (see also Morisco Uprising).
- If Malaga or Almería were controlled by the Nasrid at the time of the surrender, place up to two Morisco regulars there and apply steps (a), (b) and (c) of the Morisco Uprising event (20.1). At least one of the Morisco regular units must be placed in the key still controlled by the Nasrids.
- The Muslim player gains 1 VP (use 1 VP markers for the Alhambra) for every three Castilian or Aragonese home spaces controlled (consider Zahara and Gibraltar as worth 2 spaces each for the purpose of this rule).
- The Spanish player takes control of all Nasrid-controlled spaces in Castile, Aragon, or the Nasrid Kingdom, except those already marked with Morisco Uprising markers or with Morisco regulars present. Place regular Spanish control markers on all such spaces.
- If Genoa was allied to the Nasrid it is deactivated. Remove the Muslim influence marker with Genoa from the Diplomatic Influence Table.
- Remove all Nasrid leaders from the game except Boabdil.
- Remove all non-Morisco Nasrid units on the map from the game except for those units previously moved to a North African key. From this moment on, no more Nasrid units can be recruited, (except for the corsair due to the effects of the Morisco Uprising, 20.1).
- All Nasrid-controlled spaces outside the kingdoms of Castile, Aragon or the Nasrid Kingdom go to North African control.
- Remove the Nasrid Home card from the game.
- Remove the following cards from the game (if any of them are in a player's hand, they discard it and draw one from the deck): #84 Nasrid Raids, #100 Andalusian Nobles Seize Alhama, #112 Boabdil Captured by the Catholic Monarchs, #25 Boabdil, Emir of Granada and #110 Baza, Guadix and Almería Capitulate.
- Place the #131 Sultans of Fez, Wattasid Dynasty card as the Muslim Ruler; this ruler remains in place until the end of the game. Remove any Mandatory Event Cards from the game that bring in other Muslim rulers.
Principality of Catalonia
Surrender Condition: If Barcelona is controlled by a major power other than the Principality of Catalonia in the Victory Determination Phase, the Principality of Catalonia surrenders to the Spanish.
Immediate Effects: Apply these effects immediately:
- Remove all Catalan units from the game, including the leader Anjou.
- Place a Catalan control marker in each Catalan home space controlled by the Principality of Catalonia.
- Now, remove all Catalan control markers from play. France scores 1 VP (use the VP markers for Barcelona) for each pair of Catalan control markers removed from play from this list of spaces: the two spaces in Roussillon, Gerona, Palamós, Tarragona and/or the original Catalan home spaces. Likewise, France scores 1 VP (uses the VP markers for Barcelona) for each three Catalan controlled markers removed from play from the rest of the Aragonese home spaces (consider each Aragonese home key as 2 spaces). If a control marker was removed from a space that is not a Catalan home space, it becomes controlled by its home power. If a control marker is removed from a Catalan home space—and that space contains no French units—award control of that space to Aragon. If, however, a Catalan home space does contain French units, award control of the space to France.
- Remove the Catalan Home card from the game; it is no longer used.
The Beltranejos Faction
Temporary Surrender Condition: If at any time during the Action Phase the Beltranejos no longer control any of their home keys, they cease to exist as an active faction. The effects of this "temporary" surrender are detailed below.
Temporary Surrender Effects: The Portuguese player may not play cards as CP for Beltranejos units except when he plays the Joanna la Beltraneja Home card as an event.
Regaining Active Status: If Beltranejos or Portuguese units (the latter only if the "Peace of Alcaçovas" has not been signed) recapture a Beltranejos home key, the Beltranejos immediately regains their active status.
Permanent Surrender Condition: The Beltranejos faction ceases to exist permanently if, during the Victory Determination Phase, it does not control any key or strategic home spaces. It also surrenders immediately when the Treaty of Tordesillas event occurs.
Permanent Surrender Effects: Apply these effects upon permanent surrender:
- Remove the Beltranejos' Home card from the game.
- Remove all of the Beltranejos leaders from the game.
- Remove all Beltranejos units from the map. Units of this faction may reenter play through the Resistance of the Beltranejos event.
- Remove all Beltranejos control markers; these spaces are now controlled by the home power for the space.
- All Beltranejos home spaces without control markers are now considered Castilian home spaces and controlled by Castile.
22.2 Automatic Military Victory
Each player in the game can earn an immediate military victory if they manage to control enough keys (through the effort of all their powers combined). There are a total of 36 key spaces on the map and each player automatically wins if he places the last of his square control markers from his Player Card on the map. Each time a player controls a key he must place one of his square control markers from his Player Card on the space; if the space is lost the marker must be returned to his Player Card.
All players except the Spanish player must control all the home keys of their main power to be eligible for this victory (note that the spaces for these square control markers are differentiated on the Player Card and that they each award 2 VP for control by their home power—these unique square control markers are not usable in other spaces. The exact number of keys required by a player for a military victory (and the number of home keys each player starts with) are shown in the table below:
| Player | Home Keys Required | Keys for Military Victory |
|---|---|---|
| Muslim | 3, 4 or 5 * | 10, 11 or 12 † |
| Portugal | 4 | 11 |
| Spain | 0 | 15 |
| France | 4 | 12 |
* According to the number of such spaces already in play † According to the number of required spaces in play
In order to be eligible for victory, none of these keys may contain a Unrest or Plague marker. Automatic military victory is achieved during any Phase of the game. The game ends immediately, even though the turn has not yet reached the Victory Determination Phase. In the unlikely case that two players each earn an automatic military victory from the same action, award the victory to the player with the most VP at that moment.
22.3 Victory Points by Accumulation
Because military victories are rare, the game is usually decided in the Victory Determination Phase by the accumulation of VP. A power's total VP is the sum of its base, special, and bonus VP.
Base VP. Base VPs for all powers are determined by the number of keys and strategic spaces a player controls that do not contain Unrest or Plague markers. The base award for each of the strategic spaces is 1 VP. Key spaces award 1 VP except for home space of France, the North African Alliance, and Portugal; these keys award their respective home powers 2 VP each when controlled. Note that these same keys only award 1 VP when they are not controlled by their home power.
Special VP. Special VPs are those received specifically by certain powers as follows. Each special VP award has its own specific marker, framed in the color of the applicable power:
Muslim (Nasrid Kingdom, Sultanate of Fez and Barbers of Tlemcen)
- Anfa: Control of this port space grants 1 VP.
- Granada: Control of this space grants you 1 additional VP
- Tunis: If you control Tunis after play of Algiers Regency, gain 1 VP.
- Oran and Bejaía: 1 VP per controlled space after Cardinal Cisneros Regent event is played.
- Gibraltar: Award 2 VP for controlling Gibraltar before play of the event Muley Hacén Seizes Zahara.
- Otranto: Control of this space after play of the event Ottomans Seize Otranto earns 2 VP.
- Allah is Great: Control of Rome grants 5 VP.
- Alhambra of Granada: This Nasrid Home card can grant 1 VP per turn.
- Muley Hacén Seizes Zahara: This event grants 1 VP.
- Asian Wako Pirates: 1 VP each time this event is played.
- Natural Disasters: Playing this event provides 1 VP.
- Ottoman-Venetian War: 2 VP for winning this Foreign War.
- Cesare Borgia, Condottiere: 1 VP for each space scored when Borgia is removed from the game.
- Piracy by Corsairs: May gain up to 12 VP for piracy by corsairs (even without declaring war on the target power).
- Nasrid-controlled Spaces Upon Surrender: For every three Castilian/Aragonese home spaces with Nasrid control markers upon surrender gain 1 VP (Zahara and Gibraltar count as two spaces each).
Portugal (including Beltranejos faction)
- Anfa: Control of this port space grants you 2 VP.
- Portugal, Master of the Atlantic: This event may award between 0 VP and 3 VP each time it is played.
- Atlantic Coast Supremacy: If Portugal ever controls all the ports from Tangier to Agadir (inclusive), gain 3 VP (which can only be lost if they go to peace with the Muslim).
- Peace of Alcaçovas: The signing of this Peace grants 3 VP.
- Alcaçovas Bonus: Upon signing the Peace of Alcaçovas, receive 1 bonus VP for keys, fortresses, and strategic spaces you return to Castille (above the number received in return).
- Treaty of Tordesillas: The signing of this Treaty grants 2 VP.
- Joanna la Beltraneja: The Beltranejos Home card may grant 1 VP per turn.
- Support the Beltranejos Cause: If France and Portugal meet the requirements, they both gain 2 VP.
- Resistance of the Beltranejos: Playing this event grants you 1 VP.
- School of Sagres, Henry the Navigator: This event grants 1 VP.
- Portuguese Commercial Settlements: This event may award you several VPs each time you play it.
- Vasco Da Gama Arrives in India: Award VP for being the first to found a settlement in Zone 5 (2 VP if by da Gama's Nao).
- Tribal Insurrection: Award 1 VP each time you win this Foreign War.
- Ottoman-Venetian War: 1 VP for winning this Foreign War when Venice is inactive.
Spain (Kingdom of Aragon and Kingdom of Castile)
- Treaty of Barcelona: 1 VP for each space France returns (above the number France received in return)
- Alcaçovas Bonus: Upon signing the Peace of Alcaçovas, receive 1 bonus VP for keys, fortresses and strategic spaces you return to Portugal (above the number received in return).
- Control of Roussillon: If Aragon controls both spaces in Roussillon at any time, receive 1 VP.
- Dynastic Rights over the Kingdom of Naples: After the Death of Ferrante of Naples, if you control Naples and at least 2 strategic spaces in the former Kingdom of Naples you receive 1 VP.
- Boabdil Freed: 1 VP if Boabdil is immediately freed during play of the event Boabdil Captured by the Catholic Monarchs.
- Surrender of the Nasrid Kingdom: When the Reconquest is over, receive 1 VP.
- Nasrid Resistance: In each Victory Phase from Turn 5 until the end of the game, receive a –1 VP marker if the Nasrid Kingdom has not yet surrendered.
- Successful Marriages: Award 1 VP per successful marriage.
- Marriages Isolate France: In each Victory Phase in which marriages are in effect with all three target countries, receive 1 VP.
- African Mediterranean Spaces: If Cisneros is ruler, gain 1 VP each for control of Bejaía and Oran. If he controls Melilla and Badis (both), he adds an additional 1 VP.
- Columbus Discovers the New World: Award VP for being the first to found a settlement in Zone 7 (2 VP if by Columbus' Nao).
- Ottoman-Venetian War: 1 VP if the Christian powers win this Foreign War.
- Ottoman-Venetian War: 1 VP for winning this Foreign War when Spain controls Venice.
- Nasrid-controlled Spaces Upon Surrender: For every three Castilian/Aragonese home spaces with Nasrid control markers upon surrender gain 1 VP (Zahara and Gibraltar count as two spaces each).
Portugal (including Beltranejos faction)
- Anfa: Control of this port space grants you 2 VP.
- Portugal, Master of the Atlantic: This event may award between 0 VP and 3 VP each time it is played.
- Atlantic Coast Supremacy: If Portugal ever controls all the ports from Tangier to Agadir (inclusive), gain 3 VP (which can only be lost if they go to peace with the Muslim).
- Peace of Alcaçovas: The signing of this Peace grants 3 VP.
- Alcaçovas Bonus: Upon signing the Peace of Alcaçovas, receive 1 bonus VP for keys, fortresses, and strategic spaces you return to Castille (above the number received in return).
- Treaty of Tordesillas: The signing of this Treaty grants 2 VP.
- Joanna la Beltraneja: The Beltranejos Home card may grant 1 VP per turn.
- Support the Beltranejos Cause: If France and Portugal meet the requirements, they both gain 2 VP.
- Resistance of the Beltranejos: Playing this event grants you 1 VP.
- School of Sagres, Henry the Navigator: This event grants 1 VP.
- Portuguese Commercial Settlements: This event may award you several VPs each time you play it.
France (including the Principality of Catalonia)
- Treaty of Barcelona: 1 VP for each space Spain returns (above the number Spain received in return)
- Consolidate the Power of the Monarchy: 1 VP for each of the five noble houses that reach their maximum level for the first time. If you play the event Consolidation of Power with all houses raised to the maximum, receive 2 VP. In addition, when the three International Treaties are signed 2 VP are gained (as long as the conditions are maintained).
- Control of Roussillon: If France controls both spaces in Roussillon at any time, receive 1 VP.
- Dynastic Rights over the Kingdom of Naples: After the Death of Ferrante of Naples, if you control Naples and at least 2 strategic spaces in the former Kingdom of Naples you receive 1 VP.
- Lord of Italy: VP for control of these spaces in the Victory Determination Phase: Naples, Rome, Ravenna, Milan, Genoa, Venice, Florence, and Otranto. Gain one of these awards:
- Control of 5 out of 8 spaces: gain 1 VP
- Control of 6 or 7 out of 8 spaces: gain 2 VP
- Control all 8 spaces: gain 3 VP (first time only; afterwards 2 VP)
- Metz: Controlling Metz awards 1 VP.
- Milan: Controlling Milan awards 1 VP.
- Support the Beltranejos Cause: If France and Portugal meet the requirements, they both gain 2 VP.
- Event Cards: The following events award 1 VP to the French player directly or according to the conditions described on the cards: Catalan Remences, Pere Joan Sala, Italian Renaissance, Jews Expelled, Lorenzo the Magnificent, The Medici and Natural Disasters.
- Principality of Catalonia Controls Barcelona: 1 VP each turn that Barcelona is under control of the Principality of Catalonia in the victory phase.
- Catalan-Controlled Spaces Upon Surrender: For every two or three spaces with Catalan control markers upon surrender, gain 1 VP (22.1).
- Brittany War: 1 VP per Victory of this Foreign War.
Bonus VP. Bonus VPs are those that can be gained by any player. These markers are framed of no specific color (except the VPs received from piracy which are limited to six and are framed in each major power's color as a reminder of that limitation):
- VPs gained by piracy (other than corsairs, but including the Djerba corsair), against enemy powers on the Main or Exploration Maps.
- VPs earned on resources received that award VPs.
- VPs for Overseas Voyages (16.7).
- VPs for play of the Spice Trade Event.
- Cartography VPs earned though Terra Incognita table results.
- Cartography VPs earned though Cartography table.
- 3 VP and 1 VP from play of the Rise of Universities event.
- 1 VP for the first time you capture a rival leader in combat.
- 1 VP for control of each of the following Canary Islands: Tenerife and Grand Canary.
- 1 VP for the conquest of all Canary Islands.
- 1 VP for being the Winner or Runner-Up in the Headline Event.
- 1 additional VP for control of Ragusa.
22.4 Victory Determination
During the Victory Determination Phase, update each power's VP total on the VP Track. All powers then check to see if they have achieved one of the three victories listed below. If after checking, there is still no winner, advance the Turn marker on the Turn Track and start a new turn.
Standard Victory. If it is Turn 4 or later and a player has achieved 48 VP or more, the game ends with a Standard Victory. The player with the highest VP total is declared the winner. If two or more players tie for the highest total, the player with the highest total on the previous turn is declared the winner. If the tie persists, continue to check previous turns until the tie is broken. Players should record the VP total of each player at the end of each turn on the Victory Record Sheet (found at the back of the rulebook).
Domination Victory. If it is Turn 4 or later and during the Victory Determination Phase a player's VP total is less than 48, but at least 7 VP greater than each of the other players, it wins a Domination victory.
Time Limit Victory. If no player has won by the end of Turn 7, award the win to the player with the highest VP total at that time. If two or more players tie for highest total, the player with the highest total in the previous turn is declared the winner. If the players were tied on that earlier turn, proceed backward one turn at a time until the tie is broken. A Time Limit Victory can only occur in the Victory Determination Phase at the end of Turn 7.