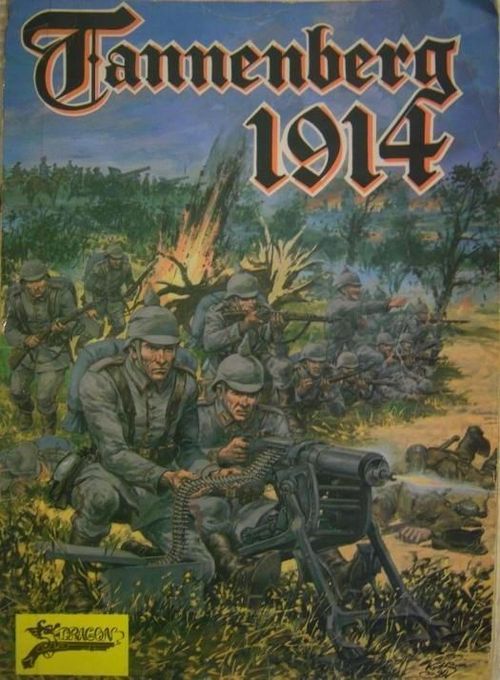
Tannenberg 1914
Tannenberg 1914 Rulebook
Table of Contents
Table of Contents
- 1.0. Introduction
- 2.0. Components
- 3.0. Phases and stages of the game
- 4.0. Movement
- 5.0. Railways
- 6.0. Destruction of bridges (including railway bridges)
- 7.0. Stacking
- 8.0. Control zone
- 9.0. Combat
- 10.0. Initiative
- 11.0. Artillery
- 12.0. Fortifications
- 13.0. Command
- 14.0. Concentration of divisions
- 15.0. Supply
- 16.0. Reconnaissance and masking
- 17.0. Initial placement of units and reinforcements during the game
- 18.0. Supplementary rules
- 19.0. Victory conditions
- 20.0. Auxiliary tables
1.0. Introduction
"Tannenberg-1914" is an operational game, simulating the Russian offensive against the Germans in East Prussia in the summer of 1914. The game covers the whole East Prussian operation from mid-August to mid-September 1914. It is a game of a high degree of complication; the numerous detailed rules are meant to convey the realities of warfare of that period.
The game is intended for two players, but the optimal solution would be three players: two playing the Russian side and one the German side.
2.0. Components
2.1. Game board
The game board shows the territory of East Prussia and the border regions of the Russian Empire, which in the summer of 1914 were the arena of interesting battles. The map reflects all characteristic features of the terrain. The board shows only larger forest complexes, towns, hills, lakes, rivers and swamps, and permanent fortifications. Place names are given in two versions, contemporary (1914) and present-day. To organise movement and unit positions a hexagonal grid is printed on the map. Each hex (space) is uniquely defined by its coordinates, e.g. A53, B4 means that it lies at the intersection of the vertical row number 53 with the diagonal row number 4. The board also contains a legend explaining the conventional signs on the map. Each hex represents approx. 6500 metres of real terrain.
2.2. Counters
Before starting the game, the pairs of corresponding sheets containing the fronts and backs of the counters must be carefully glued together and, once dry, cut along the lines. When gluing, take care that both sides of the counters bear the same unit numbers or the corresponding types of auxiliary markers.
Types and description of counters:
Numbers and names of units denote the actual numbering and affiliation of a given unit, e.g. 5/3/RG means the 5th Brigade of the 3rd Division of the Guards Reserve Corps.
Unit size is read as follows: III - regiment, [X] - detachment drawn from a brigade, X - brigade, II - battalion (artillery).
Strength of a unit is a value expressed in points reflecting the actual strength of the unit, both in defence and in attack.
Attack fire strength is a value expressed in points, found only on artillery units and denoting the strength of artillery fire in an attack or assault.
Defence fire strength is a value expressed in points, found only on artillery units and denoting the strength of artillery fire in defence.
Movement allowance (mobility) is a value expressed in movement points, denoting the potential ability of a unit to move during the movement phase. A unit with a certain pool of points pays from it for entering each hex. The cost of entering a hex depending on the type of terrain is given in the TERRAIN CHARACTERISTICS table.
Effectiveness denotes the practical efficiency of a unit on the battlefield; it affects the ability to move independently (outside the command range of its own headquarters), to destroy railway track, to reconnoitre enemy forces, and to a certain degree it affects the result of combat.
Activity refers solely to corps commanders and denotes their temperament, combativeness and ability to take decisions independently. The symbols expressing activity are read as follows: A - active, B - passive (bierny), N - normal.
Combat table modifier expressed by a symbol (a shift arrow) or double symbol means that its value is 1 or 2.
Explanation: the combat table modifier is a value expressed by a number (positive or negative) which shifts the ratio attacker strength / defender strength by the appropriate number of positions to the left or to the right. Negative modifiers shift the original result to the left, positive ones to the right, e.g.: the attacker/defender ratio is 1:1, a modifier of +3 shifts the original result by three positions to the right giving a result of 4:1. Applying in the same case a modifier of -2 we would obtain a result of 1:3.
-2 ... +3
1:3  1:2  1:1  2:1  3:1  4:1
Almost all counters representing units have a back and front differing in the values of strength, effectiveness and mobility. Thanks to this, units have two combat efficiency levels (marked by the back and the front). At the start of the game all units have full combat efficiency and are set up on the board front side up.
Because of the considerable degree of generalisation in the game, only units not smaller than a regiment or a detachment drawn from a brigade (two reinforced battalions) are represented. Heavy artillery is grouped in divisions. All smaller units such as: engineer battalions, corps cavalry, divisional artillery are not represented by separate counters, although their values are included in the overall strength of the units representing the given corps.
2.3. Combat efficiency levels and endurance of units
2.3.1. All infantry, cavalry and artillery units, depending on the size of the unit, have one or two combat efficiency levels marked by the back and front of the counter.
2.3.2. Headquarters and supply train units have no combat efficiency levels.
2.3.3. Each combat efficiency level has 4 endurance points. Endurance points are not printed on the counters representing units. To mark lost endurance points, special auxiliary counters with the numbers 1, 2, 3, 4 are used, which are placed beneath each unit.
2.3.4. When starting the game, every unit has maximum endurance, which corresponds to the absence of an endurance counter beneath the given unit. During the game - as a result of combat or of moving without supply - units may lose their endurance.
Example: A unit with full endurance lost 1 endurance point as a result of a clash; this fact is marked by putting an endurance counter with the number 1 beneath the unit. If the same unit (e.g. in the next stage) suffers a loss of a further 2 endurance points, a counter with the number 3 should be put beneath it - this means that the endurance of the unit has dropped by 3 points.
2.3.5. A unit which has lost more than 4 endurance points must be flipped back side up to the second combat efficiency level (or eliminated if it has only one combat efficiency level), and then the missing number of lost points that could not be expressed on the first combat efficiency level must be marked.
Example: a unit in the game so far has lost 3 endurance points (i.e. an endurance counter 3 lies beneath it). As a result of a clash it must suffer a loss of a further two points. This is marked as follows: one point of endurance loss fills the limit of losses possible on the first combat efficiency level (4 points). To mark the loss of the second point, the unit must be flipped to the second combat efficiency level (back side up), and then the loss of one point is marked by putting a counter with the number 1 beneath it.
2.3.6. A unit is eliminated the moment the limit of endurance points that can be lost (4 points) is exceeded on the last (first or second, depending on the unit) combat efficiency level.
2.3.7. The combat efficiency level cannot be lowered, and in the case of units with one combat efficiency level they cannot be eliminated, by the loss of endurance points caused by lack of supply (more precisely, by movement of a unit without supply - see [15.42]).
Example: a unit which has already lost 4 endurance points (i.e. the full limit for one combat efficiency level) does not lose further points when moving without supply, because this would force a change to the lower combat efficiency level.
2.3.8. During phase 7 (see 3.1.) the units of both players may recover endurance. All units which during the movement phases (5 and 6) did not move, did not build trenches, did not fight and are not in the control zone of an enemy unit may reduce their number of lost endurance points by 1. Recovery of lost endurance points is possible only within one combat efficiency level.
Note: the loss of endurance points has no effect on combat or on the combat strength of a unit (unless it results in a reduction of the combat efficiency level); it merely signals the exhaustion of the unit and the need for its regeneration.
2.3.9. During the rest and reorganisation phase a unit may attempt to regain a combat efficiency level. To do so it must fulfil the following conditions:
- it must have supply (see [15.28])
- it must be commanded (see [13.24])
- it must stand at a distance of at least 3 hexes or more from an enemy unit
- it did not move in the same stage
- it did not take part in any clash during this stage
- it did not lose any endurance point at the present combat efficiency level (i.e. it has no endurance counter beneath it).
The attempt to regain a combat efficiency level consists of rolling a die; the attempt succeeds if the player rolls, for a:
- Russian unit 1 or 2,
- German unit 1, 2 or 3.
If the attempt succeeded, the unit is flipped front side up and an endurance counter with the number 4 is placed beneath it.
During a single rest and reorganisation phase a given unit may both recover a lost endurance point and attempt to regain a combat efficiency level.
3.0. Phases and stages of the game
The game "Tannenberg-1914" is played in 30 cycles called stages, during which each side has the right or the obligation to perform a series of specified actions. The STAGES AND REINFORCEMENTS TRACK on a separate card and the STAGES counter are used to mark successive stages. To preserve the order of play, all actions performed in each stage have been divided into 8 parts called phases. In each phase strictly specified actions are performed; it is not permitted to perform any game-related action outside its assigned phase. A given stage is considered complete after all actions provided for in phases 1 to 8 have been performed in order. After the end of a stage the STAGES counter is moved one space down the track, after which play returns to phase 1.
3.1. Phases
Players are obliged to observe the established order of phases. A given phase may be skipped when the actions provided for in it need not be and, by the players' will, are not performed. Within a phase actions may be performed in any order, unless a specific rule states otherwise.
Phase 1 - orders. During this phase both players place MARCH counters on the corps headquarters counters that are within the command range of the army headquarters. Corps headquarters outside the command range of the army headquarters are subject to the special procedure described in paragraph [13.31]. During this phase units may be masked.
Phase 2 - initiative. Both players make one die roll each. After applying modifications (described later), the numbers of pips are compared; the player who achieved the higher result is considered in this stage to hold the initiative. In the case of a tie the whole procedure must be repeated so that one of them achieves an advantage. The player holding the initiative moves his units first, and also decides the order of clashes.
Phase 3 - reconnaissance. The cavalry units of both players may attempt reconnaissance, revealing the enemy's masking counters located in their reconnaissance zones. In addition, all "empty" masking counters that in this phase are in enemy control zones must be revealed and removed from the board.
Phase 4 - reserve movement. In this phase each player may designate commanded units for a special form of movement - reserve movement. Units designated for reserve movement are marked by covering them with a RESERVE counter.
Phase 5 - movement of the player holding the initiative. The player holding the initiative may move any number of his own commanded units (those within the command range of his own corps headquarters covered by a MARCH counter or of the army headquarters) in any direction up to a distance limited by the mobility of the given unit (taking into account the TERRAIN CHARACTERISTICS table). After the movement of commanded units is finished, the player may attempt to move uncommanded units (see [13.32]). During this phase, at any moment, the player holding the initiative may: bring his own reinforcements onto the board, attempt to destroy railway track and bridges. Units of the player holding the initiative may in this phase build trenches (see [12.1]). During this phase the enemy's units may perform reserve movement.
Phase 6 - movement of the player not holding the initiative. During this phase the player not holding the initiative may carry out all the actions provided in phase 5 for the player with the initiative. During this phase the units of the player holding the initiative may perform reserve movement.
Phase 7 - rest and reorganisation of units. All units which in phases 5 and 6 did not move, did not build trenches, did not fight and are not in the control zone of an enemy unit may reduce their number of lost endurance points by 1 and attempt to regain a combat efficiency level (see [2.38] and [2.39]).
Phase 8 - clash. During this phase all units and masking counters in the control zones of enemy units must take part in a clash. The order in which combats are resolved is decided by the holder of the initiative. He also decides which units take part in the individual clashes. The player not holding the initiative decides only on the participation of his own artillery in individual clashes. The decision as to who is the attacking and who the defending side in a given combat is made by declaration of both players, who, using special cards, simultaneously, just before the resolution of each clash, present their intentions.
After all actions connected with phase 8 are finished, unused RESERVE counters are removed from the board (this may be done already in phase 7). On the STAGES AND REINFORCEMENTS TRACK the STAGES counter is moved one space down, after which play proceeds to the actions described in phase 1, etc.
Because phases 5 and 6 are identical, in the rest of the rules, for simplicity, they will be called the movement phase.
4.0. Movement
4.1. General rules
During the movement phases players may move as many units as they see fit (provided they are commanded - see [13.24]) in any direction chosen by them. The order of moving units and counters is as follows:
- units commanded by corps headquarters with a MARCH order or directly by army headquarters;
- uncommanded units which, as a result of the procedure described in paragraph [13.32], gained independence of command;
- headquarters;
- supply trains;
- railways.
Units must move through successive hexes in continuous movement; jumping is not permitted. At the start of each of its own movement phases all units have strictly defined movement point limits (mobility). On entering each successive hex a unit loses movement points; its movement is possible until the limit of its points is completely exhausted. Movement of units is permitted only during their own movement phases; during the enemy units' movement phase only reserve movement is possible. To a certain extent movement of units is possible during the clash phase.
4.2. Detailed rules
4.2.1. A unit may not enter a hex occupied by an enemy unit (exception [15.36]).
4.2.2. In one stage a unit may not expend more movement points than its mobility.
4.2.3. A unit need not use up its entire movement point limit in a given stage.
4.2.4. Movement points not used in one stage may not be used in the next.
4.2.5. Movement points may not be transferred from one unit to another.
4.2.6. After the hand is taken off a moved unit its movement is considered finished; a renewed correction of its position is possible in the same phase only with the opponent's consent.
4.3. Effect of terrain
4.3.1. A unit expends one movement point for entering open ground ("clear terrain"); for entering other types of terrain units may pay more or fewer movement points.
4.3.2. A supply train unit moving along a road, expending one movement point, moves 2 hexes.
4.3.3. A unit expending one movement point moves along a road or a railway line by one hex regardless of the type of terrain in the given hex.
4.3.4. A unit entering a road (or railway line) from the side expends movement points according to the terrain over which the road (railway line) runs in that hex; only the cost of entering the next hex (if it moves along the road or along the track) is 1 movement point (or 1/2 for supply trains).
4.3.5. Rivers may be crossed at any place, but on crossing the unit must additionally expend 1 (for a small river) or 2 (for a large river) movement points.
4.3.6. Crossing the Vistula is permitted only over bridges (exception - [3.3.7]).
4.3.7. Commanded units (see [123.24] [sic]) may cross the Vistula by sacrificing for this purpose their entire movement point limit. Units not within the command range of their own corps headquarters or army headquarters may not cross the Vistula in this way.
Other information on the effect of terrain type on unit movement is in the TERRAIN CHARACTERISTICS table.
4.4. Effect of friendly units
4.4.1. Any number of friendly units may pass through one hex during a given movement phase.
4.4.2. A unit may pass through a hex occupied by another unit (or its control zone) without incurring any additional movement point cost (exception [4.4.3]).
4.4.3. A unit entering a hex occupied by a supply train unit must expend 1 additional movement point.
4.5. Reserve movement
4.5.1. Commanded units (see [13.24]) may be used for reserve movement.
4.5.2. Uncommanded units and units standing in an enemy control zone may not perform reserve movement.
4.5.3. Units are assigned to reserve movement during phase 4 - reserve movement. This is done by covering the given units with a RESERVE counter.
4.5.4. A unit marked with a RESERVE counter (i.e. designated for reserve movement) may, during the opponent's movement phase, while enemy units are moving, move one hex (regardless of the movement points that would have to be expended - it may not, however, enter a forbidden hex or cross a forbidden hex edge).
4.5.5. The movement of a unit performing reserve movement must end in the control zone of an enemy unit which has just been moving (has already moved at least 1 hex).
4.5.6. The effect of performing reserve movement is to stop the moving enemy unit - see [8.21] (or units - if they were grouped in a stack).
Example: unit 1 moves, advancing to hex "x"; at this moment the opposing player may perform reserve movement with unit A and move to hex "z"; unit 1, despite its unused movement point limit, may not move further in this movement phase. The unit may perform reserve movement somewhat later, e.g. when the enemy unit enters hex "y"; in this case the further movement of unit 1 will also be stopped. Unit A may execute reserve movement at any moment of unit 1's movement, but only if condition [4.5.5] is fulfilled, e.g. reserve movement cannot be carried out at the moment the enemy unit enters hex "w". (The accompanying diagram is not preserved.)
4.5.7. Units that in a given stage were designated to perform reserve movement (they may not have performed it) may not move during their own movement phase (in that stage).
4.6. Effect of control zones on unit movement
(see [8.2])
5.0. Railways
5.1. Rail movement - general rules
5.1.1. Rail movement takes place during one's own movement phase; for the sake of clarity of play it is advisable to execute it after the movements of the other units.
5.1.2. Units loaded onto rail transport, i.e. covered by a rail transport counter, may perform rail movement.
5.1.3. A unit which at the start of its own movement phase stands on a hex containing railway track may be loaded onto rail transport. For the loading operation the unit must expend its entire pool of movement points; this is marked by placing a rail transport counter on the given unit.
5.1.4. A unit being loaded must be commanded, and the corps headquarters to which the given unit belongs must be within the command range of the army headquarters (see [13.24]).
5.1.5. The operation of unloading a unit from rail transport (the rail transport counter is then removed) is similar to the loading procedure, except that the unit being unloaded need not be commanded, the corps headquarters of the given unit need not be within the command range of the army headquarters, and for the unloading operation the unit expends all its movement points.
5.1.6. During one stage a unit may not be carried by rail and also perform a loading or unloading operation (exception - see [5.2.5]).
Example:
- Stage N: the unit reaches a hex containing a railway line.
- Stage N + 2: transport to the chosen point.
- Stage N + 3: unloading of the unit (removal of the rail transport counter).
- Stage N + 4: march from the unloading place to the chosen area.
5.1.7. Units carried by rail may pass through friendly units (loaded or not loaded onto rail transport) standing on hexes containing a railway line.
5.1.8. A unit carried by rail (this also applies to units entering the board as reinforcements) may leave the board in any stage and enter it in the next stage from the adjacent track; in the case of reinforcements they must enter the board with a delay of one stage.
Example: during stage 2 a unit carried by rail transport leaves the board from hex A1,37. In stage 3 it may appear on the board again by entering it along the railway line from hex A1,B35 or A1,B40.
5.1.9. If the operation of loading or unloading from rail transport takes place in an enemy control zone, each of the units loses 2 endurance points.
5.2. Characteristics of railway lines
5.2.1. The rail transports of each player may not cross the Russian-German border (the territory of each state had a different track gauge).
5.2.2. During one stage the player representing the German side may carry by rail transport, or load or unload, a maximum of 7 units, and the player commanding the Russian units 2 units. Reinforcements arriving by rail do not count towards this limit. Headquarters counters and supply train counters are treated ("by volume") during transport as ordinary units.
5.2.3. There are two kinds of railway lines on the board: single-track and double-track. During one stage no more than the following may pass through a given hex of railway line:
- Germans: double-track line - 5 units; single-track line - 3 units
- Russians: double-track line - 4 units; single-track line - 2 units
5.2.4. A unit moving by rail transport has a mobility of 60 rail movement points (i.e. along railway lines).
5.2.5. All army headquarters are able, during one stage, to perform a loading operation (cost 10 rail movement points), travel by rail to a chosen hex, and then unload (cost 10 rail movement points). It is, however, forbidden to perform normal movement (going to the loading area) and then load in the same stage.
5.3. Combat of units loaded onto rail transport
5.3.1. Units covered by a rail transport counter have no control zone (see 8.0).
5.3.2. Units being transported may during the clash phase use only the DEFENCE card; their combat strength is then reduced by half (rounding up).
5.3.3. Artillery units transported by rail may not take part in combat, and headquarters do not add the combat modifier during a clash.
5.3.4. Headquarters carried by rail may not command any units.
5.4. Cutting track
5.4.1. During its own movement phase, while moving, any friendly unit located on or entering a hex containing a railway line may, at the price of half its movement points (rounded down), attempt to cut the railway line. A die is then rolled; a result higher than the unit's effectiveness means the action failed, a result lower than or equal to it means that the track was cut. In the case of a successful attempt to cut the track, a CUT TRACK counter is placed on the given hex.
5.4.2. If a friendly commanded unit is on a hex with a cut railway line and in the movement phase expends all its movement points, the line is considered repaired and the CUT TRACK counter is removed from the board.
6.0. Destruction of bridges (including railway bridges)
In the game "Tannenberg - 1914" only bridges over the Vistula may be destroyed (the consequences of destroying bridges on smaller rivers were not so significant). An attempt to destroy a bridge may be made if the hex on whose edge the bridge lies is within the command range of one's own army headquarters or of any corps headquarters. To destroy a bridge, roll a die; a result of 6 means that the bridge has been destroyed. During one stage only one attempt to destroy a bridge may be made. Repair of a destroyed bridge is not possible.
7.0. Stacking
7.1. General rules
7.1.1. In the game "Tannenberg - 1914" it is possible for several units to occupy one hex.
7.1.2. After the end of the movement phase, a maximum of 6 units belonging to the same corps, or 4 units belonging to different corps (or belonging to no corps), may be on one hex.
7.1.3. Corps and army headquarters do not count towards the limit of units that may be on one hex.
7.1.4. When forming stacks, supply train units are treated like ordinary units, with the difference that there may not be more than one supply train unit on one hex.
7.1.5. When forming stacks, units covered by a rail transport counter must also be counted.
7.1.6. Forming or dissolving stacks incurs no additional movement point cost.
7.1.7. Units grouped in a stack do not denote any battle formation, but simply a large concentration of forces in a small area.
8.0. Control zone
8.1. General rules
8.1.1. The control zone of a unit is the six adjacent hexes surrounding the hex occupied by that unit.
8.1.2. All units except artillery, headquarters and supply trains have control zones throughout the game regardless of the stage and phase of the game (exception see [5.3.1]).
8.1.3. The presence on the same hex of the control zones of several enemy or friendly units has no consequences. In such a case the given hex is controlled by several units (enemy and friendly).
8.1.4. The presence of a friendly unit on a given hex neutralises the control zone of an enemy unit.
8.1.5. A control zone has no effect on friendly units.
8.1.6. A control zone does not extend to hexes on the opposite side of a lake.
8.2. Effect of control zones on movement
8.2.1. On entering the control zone of an enemy unit a unit must immediately stop, regardless of the number of movement points not yet used in that stage.
8.2.2. A unit entering an enemy control zone additionally expends 1 movement point.
8.2.3. Artillery units, headquarters and supply trains may not independently enter the control zone of enemy units; they may do so only if friendly infantry or cavalry units are present on the same hex.
8.2.4. Artillery units and headquarters standing alone in an enemy control zone are obliged to carry out procedure [11.18] or [13.15].
8.2.5. Moving a friendly unit within an enemy control zone or leaving it is permitted only as a result of combat, when carrying out pursuit, flight, and during retreat.
9.0. Combat
9.1. General rules
9.1.1. Combat between units may be conducted only during the common combat phase.
9.1.2. All units and masking counters of both players located at the start of the combat phase in enemy control zones must take part in combat.
9.1.3. The combat phase consists of a series of clashes in which units belonging to both players take part.
9.1.4. A clash may occur only between enemy units located on adjacent hexes.
9.1.5. In a given stage a unit may take part in only one clash.
9.1.6. The units of at least one of the players taking part in a given clash must be located on one hex. It is not permitted for the units of both sides directly taking part in a clash to be located on several hexes (this does not apply to artillery units).
9.1.7. The player holding the initiative has the decisive influence on the course of the combat phase, since he designates the units (his own and the opponent's) that are to take part in individual clashes and determines the order in which clashes are resolved.
Example: the player holding the initiative may designate the following clashes:
- units 1, 2 and A (one clash)
- units 3 and B (second clash)
or
- units 1 and A (one clash)
- units 2, 3 and B (second clash)
(The accompanying diagram is not preserved.)
9.1.8. Units standing on one hex (grouped in a stack) must resolve combat in only one clash; splitting units from a stack among several clashes is forbidden (exception see: [11.5] note).
9.1.9. Procedure for conducting a clash: a) after the units that are to take part in the given clash have been designated, each player simultaneously lays down one of the four combat cards he holds, which may denote: DEFENCE, RETREAT, ASSAULT or ATTACK of his own units b) after the combat cards are laid down, it must be established whether a clash occurs at all (e.g. both players may retreat) and which side is the attacking side (see [9.3]) c) the attacking player adds up the strength of his own units and possibly the strength of artillery supporting the attack; then the defender adds up the strength of his own units and of the artillery units supporting the defence (each player decides on the use of artillery units independently; the player with the initiative has no special rights in this case) d) the attacker's total strength is compared with the defender's total strength, rounding the obtained result down in favour of the defender e) all modifications for terrain, presence of headquarters, etc. are applied f) in the COMBAT RESULTS table the column with the appropriate ratio is found g) the attacking player rolls a die; the combat result is found at the intersection of the row corresponding to the number of pips and the previously obtained column h) the effects of the clash are applied.
After the effects of the clash are applied, the player holding the initiative designates the next units to take part in the next clash. Clashes are conducted until condition [9.12] is fulfilled, bearing in mind the reservations given in paragraphs [9.14], [9.15] and [9.16].
9.2. Detailed rules
9.2.1. If an attack is made from 3, 4, 5 or 6 hexes, the ratio attacker/defender is modified (see [2.2] explanation and [9.19] - e) by +1, +2, +3 or +4 respectively.
9.2.2. If the attacked unit is surrounded (examples of surrounding a unit are shown in the diagram below), the strength of the attacking units is doubled. Not all surrounding units need take part in the attack. (The diagram is not preserved.)
9.2.3. Cavalry units taking part in a clash against infantry reduce their combat strength by half. The strength or total strength of cavalry units must be divided by two; if a non-integer number is obtained, the result must be rounded up, e.g. a cavalry unit of strength 3 attacking infantry reduces it to 3:2 = 1.5, and after rounding 2.
9.3. Combat cards
After the player holding the initiative has designated the units that will take part in the clash (he designates his own units and the opponent's - see [9.14] and [9.17]), each player gives an order to his own units that are to take part in combat by laying down one of the four combat cards he holds. The course of the clash depends on what orders both players have given to their subordinate units.
9.3.1. DEFENCE versus DEFENCE. Both sides behave passively and no clash occurs. All units taking part in this clash remain unchanged in their places.
9.3.2. DEFENCE versus RETREAT. No clash occurs; the retreat is carried out without hindrance. The player carrying out the retreat may withdraw his units. Retreating units have their mobility reduced by 1 movement point; the retreat route is chosen freely. Units carrying out a retreat may not voluntarily enter the control zone of an enemy unit. If there is no other way out, passing through the control zone of an enemy unit is permitted, but in such a case for entering each hex controlled by an enemy unit the unit (or each of the units if they are grouped in a stack) loses 1 endurance point. The retreat route may not lead through enemy units. A unit retreating through a hex in an enemy control zone on which another friendly unit stands does not lose an endurance point (see [8.14]). The player declaring defence in this clash may not pursue the retreating opponent.
9.3.3. RETREAT versus RETREAT. No clash occurs; both sides carry out a retreat. The rules for carrying out the retreat are the same as in the example described above. The player holding the initiative carries out his retreat first.
9.3.4. DEFENCE versus ATTACK (NATARCIE). In this case a clash occurs; the attacking side is the player carrying out the attack and the defender is the player who laid down the DEFENCE card. The clash proceeds according to the procedure described in paragraph [9.19] - c, d, e, f, g, h.
9.3.5. DEFENCE versus ASSAULT (SZTURM). In this case a clash also occurs; the whole procedure is similar to that described in [9.34] except that the attacker is the player who laid down the ASSAULT card. An assault is treated as a violent attack, as a result of which the attacker has a greater chance of success but must also reckon with considerably greater losses. Accordingly the player carrying out the assault modifies the ratio attacker strength/defender strength by +2 (see [2.2] - explanation and [9.19] - e). The losses of the attacker (carrying out the assault) are doubled (see [9.4] and [9.8]).
Example: The strength of the unit carrying out the assault is 6, the defender's strength 3. The ratio attacker strength/defender strength is 6:3, i.e. 2:1; after applying the modification for the assault (+2) we obtain 4:1. The attacker rolls a die, say two pips came up. The combat result (see the COMBAT RESULTS table) is 1/6. Since the losses of the player carrying out the assault are doubled, the final result is 2 x 1/6, i.e. 2/6.
9.3.6. ATTACK or ASSAULT versus RETREAT. Carrying out a retreat at the moment of an enemy attack creates the risk of suffering some losses. The player carrying out the retreat must undergo the following procedure: a) among the retreating and attacking units find the units with the highest effectiveness rating (these may not be artillery units) b) from the highest effectiveness rating of the retreating player subtract the highest effectiveness rating of the attacking player c) roll a die, then in the RETREAT ATTEMPT table find the result at the intersection of the row corresponding to the number of pips and the column corresponding to the previously obtained difference of effectiveness ratings. The numbers in the RETREAT ATTEMPT table denote losses, in endurance points, suffered by the units of the player carrying out the retreat. The result obtained in the RETREAT ATTEMPT table is applied to each of the retreating units. All modifications that may be applied when obtaining the result are given in the RETREAT ATTEMPT table and in [9.8].
After carrying out the procedure below, the player may carry out the retreat according to the rules given in [9.32]. After the retreat is completed, the attacking player may enter the hex (hexes) that had been occupied by the unit or units carrying out the retreat.
9.3.7. ATTACK or ASSAULT versus ATTACK or ASSAULT. A combat resulting from both sides making an attack simultaneously is called an encounter battle. The result of an encounter battle depends largely on the initiative and the dash of the commanders, and less on the strength of the units. In an encounter battle chance and a stroke of luck play a much greater role than in normal conditions. The procedure for resolving a clash in which an encounter battle occurs is as follows:
- each side rolls a die; to the results obtained both players add the highest effectiveness rating among their own units taking part in the given clash; in addition the player holding the initiative in this stage adds 1 to his die roll result.
- the player who finally obtained the higher number of pips is considered the attacker and his opponent the defender (if the same number of pips is obtained, the whole procedure described above must be repeated).
- the further course of the clash follows the scheme given in [9.19] - c, d, e, f, g. The player who emerged as the attacker (more active on the battlefield) modifies the ratio attacker strength/defender strength by +2; the ratio so obtained is further modified if in the given clash either player laid down an ASSAULT card. If this card was used by the attacker the ratio is modified by +2; if the defender did so, the ratio is modified by -2. The losses of the player (or players) who laid down the ASSAULT card are doubled.
- the effects of the clash are applied; the result of a clash in an encounter battle cannot be flight, and the units must suffer the full amount of losses.
- after the losses are applied, each player rolls a die and adds to the result obtained the highest effectiveness of his own unit taking part in the given combat. The player who obtained the lower result is considered defeated; his units must withdraw by 1 hex, and the opponent's (victorious) units may enter the hexes occupied by the withdrawing units.
In an encounter battle, no terrain modifications are applied when calculating the ratio attacker strength/defender strength. In the case of supporting artillery, on both sides (also the defender's) only the attack fire strength is taken into account (because both sides are attacking and the defender is designated only nominally).
9.4. Effects of combat
9.4.1. The digits appearing in the COMBAT RESULTS table denote the loss of endurance points by the units fighting in the given clash. Numbers placed before the slash denote the attacker's losses, and after the slash the defender's.
9.4.2. The effects of combat apply to all units taking part in the given clash.
Example: a combat result of 1/6 means that each of the attacking units lost one endurance point, and each of the defending units reduced its endurance by 6 points.
9.5. Flight
9.5.1. Units that took part in a clash using the DEFENCE card may, instead of losing endurance, decide to flee. Flight of 1 hex corresponds to the loss of one endurance point. If the defender decides on flight, all defending units are subject to it. The distance by which units withdraw must be the same for all units that took part in the given clash.
9.5.2. Infantry and artillery units may flee no more than 4 hexes, and cavalry units 5 hexes.
Example: a defending infantry unit received a result of 1/6 as a result of a clash; the defender decided to flee, withdrawing the unit the greatest permitted distance of 4 hexes; the remaining losses (2 points) he will have to take in endurance points.
9.5.3. Units that took part in a clash using the ATTACK or ASSAULT card may not flee; they must suffer losses in endurance points.
9.5.4. A unit performing flight withdraws so that the distance between the original position (before the clash was resolved) and the final one (after the flight) equals the number of hexes withdrawn. (Diagram: A - flight carried out correctly; B - flight carried out incorrectly. The diagram is not preserved.)
9.5.5. A unit may withdraw through hexes occupied by friendly units without having to displace them. A fleeing unit that has withdrawn onto a hex occupied by another friendly unit may not again (in the same stage) take part in combat, although it is subject to its results. In the case where the friendly unit suffers losses (or is eliminated), the unit which earlier fled but found itself on the same hex must also lose endurance points. If the friendly unit decides on flight, the unit that had already fled earlier loses one additional endurance point for each hex of retreat.
9.5.6. Flight may end in the control zone of an enemy unit only if the fleeing unit has no other possibility.
9.5.7. A unit (if it has no other choice) may flee by entering hexes located in an enemy control zone. On entering a hex under enemy control the fleeing unit suffers the loss of one endurance point (if several units withdraw by this route, each of them suffers this loss). The withdrawing unit suffers no losses if the hex lying in the enemy control zone is neutralised by the presence on it of another friendly unit (see [8.14]).
Example: unit A was forced to flee; fleeing onto hex X it loses one endurance point; withdrawing further onto hex Y it no longer loses endurance, because on this hex there is another friendly unit which neutralises on this hex the control zone of unit 4. (The accompanying diagram is not preserved.)
9.5.8. During flight it is forbidden to: leave the board, cross the Vistula line or a lake, or enter a hex occupied by an enemy unit. Otherwise the fleeing unit is eliminated. Units withdraw regardless of the movement points they have.
9.5.9. After the flight is completed the defender rolls a die; if the number of pips is greater than the highest effectiveness rating of the withdrawing units, they are forced to withdraw yet one hex further.
9.6. Pursuit
9.6.1. The player who laid down the ATTACK or ASSAULT card in a given clash may carry out pursuit (but only if the defender decided to flee).
9.6.2. Pursuit may be carried out by all non-artillery units taking part in the given clash. Pursuit consists of the attacking units advancing onto the hex (or hexes, if there were several defending units and they stood on different hexes) which the defeated unit occupied before carrying out the flight.
9.6.3. Pursuit also takes place when the opponent carries out a RETREAT and one's own units carried out an ATTACK or ASSAULT.
9.6.4. Pursuit is possible when the defending unit is eliminated.
9.7. Effect of terrain on combat
9.7.1. The effect of terrain on combat is taken into account by applying terrain modifiers (see [2.2] - explanation). A list of all terrain types and the corresponding modifiers is given in the TERRAIN CHARACTERISTICS table.
9.7.2. The effect of terrain on combat is taken into account only in the case of the clashes described in points [9.34] and [9.35]; when applying modifications only the type of terrain on which the defender stands is relevant.
9.7.3. The effect of terrain on combat is cumulative, e.g.: the total modifier for a hill (-1) on which there is a forest (-1) is -2.
9.7.4. Rivers (all kinds) and bridges affect combat when all attacking units are on the opposite side of the river or bridge.
9.7.5. When several units are attacked at once and each of them is in different terrain, the most favourable modifier possible (for the defender) is adopted.
9.7.6. Roads and railways have no effect on combat; it depends only on the terrain over which they run.
9.7.7. In the case of an attack or defence across the edge of a hex that is a strait between lakes (see map - legend), at most two units from each side are taken into account, although all units are subject to the combat results.
Example: units 1, 2, 3 attack units A, B, C; because of rule [9.77] only two units (chosen by the attacker) may attack, and only two units (chosen by the defender) may defend. Three units of the attacking player and three of the defender are subject to the combat result. If unit 4 were also attacking, all three units could defend (because the combat front would be enlarged by an additional edge - a strait - on which another two units could fight). (The accompanying diagram is not preserved.)
9.8. Effect of terrain on RETREAT in the case of attack or assault
9.8.1. The type of terrain also has an effect when carrying out a retreat (see the RETREAT table) made at the moment of an enemy attack or assault. In such a case both the terrain from which the given unit begins the retreat and the terrain through which it passes while carrying it out are relevant. In both cases the least favourable type of terrain for the retreating player is taken into account, if the retreat is carried out by several units standing on different hexes.
9.8.2. The effect of the terrain on the hex from which the retreat begins is taken into account by adding to the die roll (see [9.36] - c) the modification coefficient with the sign reversed, i.e. plus (+) of the given terrain type (only features of the terrain forming the surface of the hex are taken into account, e.g. forest, hill, town, etc., and not its edge, e.g. lakes or rivers).
9.8.3. If the first hex on the retreat route is swamp, then -2 is added to the die roll (see [9.36] - c).
9.8.4. -1 or -2 is added to the die roll result if the unit carries out the retreat across a small or large river respectively.
10.0. Initiative
10.1. General rules
10.1.1. At the start of each initiative phase both players must determine which of them holds the initiative in the given stage. For this purpose they each make one die roll (see [10.23]); the player who held the initiative in the previous stage adds 1 to the number of pips obtained. In addition, each player adds to the die roll result the number of clashes from the last stage in which he forced the opponent to flee, and the number of clashes in which the opponent carried out a retreat and suffered losses.
Note: during each combat phase players must record the number of lost clashes (i.e. those that ended in flight - others, in which the defender suffered losses but remained in place, do not count) and the number of retreats during which losses occurred. After all modifications to the die roll are applied, the results obtained are compared. The player who obtained the greater number of pips becomes the holder of the initiative in the given stage. If the same result is obtained, the whole procedure must be carried out again from the start.
10.2. Detailed rules
10.2.1. The player holding the initiative is the first to move his own units.
10.2.2. The holder of the initiative designates (observing [9.12], [9.14], [9.15] and [9.16] and [9.18]) his own and the opponent's units that are to take part in successive clashes; he also decides the order in which clashes are resolved.
10.2.3. After Hindenburg enters the game, the player representing the German side makes two (not one) die rolls (the results of which he adds together).
11.0. Artillery
11.1. General rules
11.1.1. Artillery units are the only ones that may take part in combat without being in the control zone of an enemy unit. In one combat phase each artillery unit may perform one of three actions: support an attack, support a defence, or carry out an independent attack.
11.1.2. The range of effect of each artillery unit is two hexes.
11.1.3. Participation of one's own artillery units in a given clash is decided independently by each player. In the case of artillery units the player holding the initiative does not have the rights described in [9.17] and [10.22].
11.1.4. An artillery unit conducting fire combat suffers no consequences (resulting from the COMBAT RESULTS table) of the clash in which it took part, unless the unit with which it shares a hex carries out flight (see [11.53]).
11.1.5. Regardless of the combat result, a Russian artillery unit which took an active part in a given clash (supported an attack, a defence, or attacked independently) reduces its endurance by 1 point. If such a unit had no supply (see [15.28]) its endurance is reduced by 2 points.
11.1.6. A German artillery unit reduces its endurance by 1 point if it fights without supply.
Explanation: the rules presented in [11.15] and [11.16] result from the limited stocks of ammunition and their delivery to the battlefield.
11.1.7. Artillery units have no control zones and may not take part in pursuit. In their own movement phase they may leave the control zone of an enemy unit.
11.1.8. If during the enemy's movement phase an enemy infantry or cavalry unit enters a hex adjacent to a lone artillery unit, the player owning it immediately makes a die roll. A result higher than the artillery's effectiveness means that it must lose 4 endurance points and flee 4 hexes. If the die roll result is lower than or equal to the effectiveness, it withdraws 4 hexes and loses 1 endurance point. The unit that caused the whole situation may continue its movement, provided it has not yet exhausted its movement point limit. In one phase an artillery unit may be displaced in the above manner many times. The procedure described in the above paragraph is also applied during the combat phase, when during an enemy pursuit a unit finds itself next to one's own lone artillery unit. An artillery unit which had to move in the combat phase may no longer take part in a clash during that stage.
11.1.9. When carrying out an independent attack and when supporting the attack or defence of their own units, artillery units may increase their strength threefold (the attack fire strength or defence fire strength coefficient is multiplied by 3). Such intense firing, however, causes much greater ammunition consumption. Russian artillery loses in this case 4 endurance points, and German artillery 3 endurance points. If an artillery unit has no supply, its losses are doubled.
11.2. Supporting an attack
11.2.1. Attacks and assaults of friendly units may be supported by one or several artillery units. In such a case the attack fire strength (or total strength) of the supporting artillery is added to the total strength of the attacking units.
11.2.2. Where artillery supports an attack whose object is several enemy units, it is sufficient if at least one of them is within its range (2 hexes).
11.2.3. Artillery may support an attack or assault only if at least one attacking unit belongs to the same corps as the supporting artillery. Army artillery (that which belongs to no corps) may support any friendly unit.
11.2.4. The attacking player is obliged to indicate the artillery units supporting the attack.
11.3. Supporting a defence
11.3.1. The player who laid down the DEFENCE card in a given clash may support his own forces with an artillery unit (or units). In such a case the defence fire strength (or total strength) of the artillery unit(s) supporting the defence is added to the total strength of the defending units.
11.3.2. In the case of an artillery unit taking part in an encounter battle (see [9.37]), the defender, like the attacker, uses the attack fire strength coefficient and not the defence fire strength.
11.3.3. The unit whose defence is supported must be within the fire range of the supporting artillery.
11.3.4. Several artillery units may support the defence of a friendly unit; the total of the defence fire strengths of the supporting artillery is then added to the strength of the defending unit.
11.3.5. If the object of the enemy attack is several units, then in order to support the defence it is sufficient that at least one of them is within the fire range of the supporting artillery unit.
11.3.6. Artillery may support a defence only if at least one defending unit belongs to the same corps as it. Army artillery may support any friendly unit.
11.4. Independent artillery attacks
11.4.1. Independent artillery attacks may be carried out only by the units of the player holding the initiative in that stage.
11.4.2. Only artillery units that at the start of the combat phase are not standing in the control zones of enemy units may attack (shell) independently.
11.4.3. An artillery unit may attack only one hex.
11.4.4. Several artillery units may take part in one attack.
11.4.5. The defence of units attacked solely by artillery may not be supported by one's own artillery.
11.5. Direct combat of artillery units
11.5.1. Direct combat (i.e. in the control zone of an enemy unit) of artillery units is conducted according to the rules described in [11.2] and [11.3], with the difference that it is subject to combat effects only to a certain degree.
11.5.2. An artillery unit is not subject to any combat effects if as a result of the clash the units which share a hex with the given artillery unit do not carry out flight. In other words, artillery suffers no endurance point losses resulting from the COMBAT RESULTS table; its losses may result only from the very fact of taking part in combat - see [11.15] and [11.16].
11.5.3. If an artillery unit together with other friendly units on the given hex is subject to flight, the procedure described in paragraph [11.18] must be carried out in relation to it.
Note: Rule [9.18] in relation to artillery units should be interpreted as follows:
- an artillery unit in a stack which at the start of the combat phase is in the control zone of an enemy unit may (but need not) support combat only for the benefit of the units with which it shares a hex; in other words, if it takes part in a clash it does so only together with the whole stack (although as a result of the stack's flight it is subject to procedure [11.18] even if it does not take part in combat).
- an artillery unit in a stack which at the start of the combat phase is not in the control zone of an enemy unit may support the combat of other units (not only its own stack) and may carry out independent attacks.
12.0. Fortifications
12.1. Trenches
12.1.1. Trenches are fortifications whose construction is possible during the game; their location follows from current needs or the tactical situation on the board. Trenches are symbolised by the TRENCHES counter.
12.1.2. Trenches may be built at the end of one's own movement phase by infantry and cavalry units which did not move in the given stage and are not standing in the control zone of an enemy unit. The fact that trenches have been built is marked by placing a TRENCHES counter beneath the given unit. Trenches give shelter to all units located on the given hex.
12.1.3. Trenches may be built on any hexes (regardless of terrain type) except sea and a hex on which there are fortifications. The same trenches may be used by the units of both players.
12.1.4. Trenches may be destroyed (the counter symbolising them is then removed from the board) when a unit (enemy or friendly) passes through or stands on a hex containing trenches and declares its wish to destroy them.
12.1.5. Trenches once destroyed may be rebuilt in the same place many times.
12.1.6. A unit entering or leaving a hex on which there are trenches incurs no additional movement point costs (only the effect of the terrain on which they stand is taken into account).
12.1.7. Trenches give support to units that take part in a clash using the DEFENCE card.
12.1.8. The TRENCHES counter has only three effective edges (in bold). Trenches give the defender shelter only if the attack is carried out through the effective edges. The TRENCHES counter has no effect on combat if even one of the attacking units attacks through a free edge.
12.1.9. The trench modifier is -2. The effects of terrain and trenches on combat are cumulative.
12.2. Fortifications (permanent)
12.2.1. Fortifications are works consisting of a network of mutually supporting forts and bunkers built before the start of hostilities. The location of fortifications on the board and their extension are not possible during the game (see board and legend).
12.2.2. Fortifications in no way affect the movement of units (analogously to [12.16]).
12.2.3. Fortifications give support only in the case of defence (analogously to [12.17]).
12.2.4. Fortifications give the defender the maximum benefit only in the case of an attack carried out through a fortified edge; then the defender's strength is doubled and the strength ratio is modified by -2.
12.2.5. If a hex (the unit standing on it) is attacked through a free edge, only the -2 modifier is applied (the defender's strength is not doubled).
12.2.6. The effect of terrain and fortifications on combat is cumulative.
12.2.7. Fortifications have two levels of combat effectiveness. The first (maximum) is expressed by the absence on the fortification hex of any destruction counter; the second (lower) denotes partially destroyed fortifications, and this fact is marked by covering the fortification with a FORTIFICATIONS DAMAGED counter. In the case of complete destruction they are covered with a FORTIFICATIONS DESTROYED counter - this counter remains until the end of the game (it denotes the absence of any effect of the fortifications on combat).
12.2.8. Fortifications are automatically destroyed when an enemy unit enters them.
12.2.9. Fortifications may also be destroyed during clashes in which the units located in them used the DEFENCE card. If the defender carries out flight, the fortifications are destroyed automatically after the attacker carries out pursuit (because of [12.28]). Where the defender, at the cost of losses, decides to remain in place, the following procedure must be carried out:
- the number of losses resulting for the defender from the COMBAT RESULTS table must be divided by 2
- the result rounded down to a whole number
- the result obtained denotes the number of levels lost by the fortifications (loss of one level - fortifications damaged, loss of two levels - fortifications destroyed). Losses in successive clashes are cumulative.
12.3. Fortifications with their own garrison
12.3.1. Some fortifications have their own combat strength; in such a case, besides the fortification symbol, a number is placed on the hex whose value corresponds to the combat strength of the given hex.
12.3.2. Fortifications with combat strength have control zones (see 8.0) in their forefield (on the hexes adjacent to the fortification adjoining the effective edges).
12.3.3. Fortifications with their own garrison are treated as units, except that they may not move or take part in clashes using the ATTACK and ASSAULT cards. They also may not carry out a retreat (although other units located on that hex may do so); they may only take part in defence. Their strength is then added to the other defending units. These fortifications do not affect the stacking rules (they do not count towards the limit of units that may be placed on one hex).
12.3.4. An enemy unit may not enter a hex containing fortifications with their own garrison until they are completely destroyed (exception - [12.35]).
12.3.5. Fortifications with their own strength have (similarly to [12.278]) two levels of combat effectiveness, except that in the case of damaged fortifications (second level) the value of the fortification's own strength must be divided by 2 and rounded up to a whole number. The loss of combat effectiveness levels by fortifications with a garrison as a result of clashes (defence) is calculated according to the procedure described in [12.29]. In the case of flight of the defenders and pursuit by the attacker the fortifications and their strength are irretrievably destroyed.
12.3.6. The effect of terrain and fortifications with a garrison on combat is cumulative.
12.3.7. Fortifications with a garrison have an identical effect on combat to ordinary fortifications (see [12.24]), except that to the doubled strength of the units located inside them is added the fortification's own strength (but not doubled).
12.3.8. In the case of an enemy attack not through an effective (fortified) edge, only the -2 modifier is applied (similarly to [12.25]) and half (rounding up) of the fortification's own strength is added to the defender's strength.
12.4. Wire entanglements
12.4.1. Also a permanent element (like fortifications) on the board are wire entanglements (in reality they denoted five lines of wire barriers); unlike fortifications, however, they do not mark a hex, but only its edge.
12.4.2. Wire entanglements are a permanent element and are not subject to destruction.
12.4.3. On crossing a wire entanglement edge, 1 additional movement point must be expended (this applies to the units of both players).
12.4.4. In the case of an attack across a wire entanglement edge, the strength ratio is modified by -1 (all units must attack across the wire entanglement edge or edges).
12.4.5. Wire entanglements may be used by the units of both players.
13.0. Command
13.1. Headquarters
13.1.1. The game contains corps headquarters (staffs) and army headquarters. They are not combat units, although they have a significant effect on the movement, combat and supply of units.
13.1.2. Headquarters counters have no control zone. During their own movement phase they may leave the control zone of an enemy unit.
13.1.3. The movement capability of all headquarters is 6 movement points; this value is not printed on the counters.
13.1.4. Headquarters may occupy hexes together with units and supply trains, and are not counted towards the limit of units that may stand on one hex (see [7.13]).
13.1.5. If during any phase an enemy unit finds itself on a hex adjacent to the hex on which a lone headquarters counter is placed, the following procedure must be carried out:
- the player owning the given headquarters makes a die roll
- if 5 or 6 pips come up (for the Russians) or 4, 5 or 6 (for the Germans), the headquarters counter must be moved to the nearest hex containing a unit of the given corps, or, in the case of an army headquarters, to any hex containing any of its own units
- if any number of pips other than those given above is rolled, the headquarters is eliminated from the game and its counter is removed from the board
- in the case of the elimination of a headquarters a die must be rolled to determine when the given headquarters may return to the board (see [13.127]).
13.1.6. The headquarters of a given corps is definitively eliminated from the game at the moment the last unit belonging to that corps is lost.
13.1.7. An eliminated army headquarters, or the headquarters of a corps that has not yet lost all its units, may return to the game. At the moment of its elimination a die must be rolled (for the player representing the Russian side 1 must be added to the number of pips rolled). The result obtained denotes after how many stages it will be able to appear on the board again, e.g. if one pip is rolled the headquarters may enter the board already in the next stage.
13.1.8. A headquarters which is to return to the game in a given stage (as a result of the procedure described in [13.17]) must be placed at the start of the orders phase on any hex occupied by a unit of the given corps, or, in the case of an army headquarters, any of its own units.
13.2. Command
13.2.1. Command range is expressed by a number; it denotes the maximum distance (expressed in hexes) over which the headquarters has effect.
13.2.2. The line between a headquarters and a given unit (the so-called command line) may not pass through enemy units or their control zones; it also may not cross lakes or sea hexes.
13.2.3. The presence of a friendly unit on a hex located in an enemy control zone, for example, allows a command line to be drawn through it (see [8.14]).
13.2.4. A given unit is considered commanded if it is directly within the command range of the army headquarters or of its own corps headquarters holding a MARCH order (see [13.3]).
13.2.5. A corps headquarters may command (besides the units of its own corps) two units belonging to no corps (there is no marking in the numbering concerning corps affiliation) that are within its range.
13.2.6. An army headquarters may command all units within its range.
13.2.7. A corps headquarters is considered commanded if it is within the command range of the army headquarters.
13.2.8. Russian army headquarters double their command range on Russian territory, but only for commanding corps headquarters (and not units).
13.2.9. Russian army headquarters reduce their command range when moving. This rule is implemented as follows: after the movement is completed the given army headquarters is flipped back side up (the command range printed there is 2, and not 5 hexes as on the front side). The headquarters regains its full command range (it is then flipped again front side up) at the end of its own movement phase in which it did not move.
Explanation: in the game "Tannenberg - 1914" the organisation of command is two-tiered: units must be within the command range of their own corps headquarters, and these in turn must be within the command range of the army headquarters. Particular attention should be paid to command, because in this game (especially in the case of the Russians) it is one of the main factors deciding victory.
13.3. Command procedure
13.3.1. At the start of each stage, during the orders phase, each player covers his own corps headquarters that are within the command range of army headquarters with counters bearing the MARCH order. Each headquarters that is outside the command range of the army headquarters must undergo the following procedure:
- the player owning the given headquarters makes a die roll
- he adds to the result obtained -1 if the last order for the given headquarters was MARCH, or +1 if the last order was STOP
- in the INDEPENDENCE OF COMMAND table he finds the result lying at the intersection of the row corresponding to the modified number of pips and the row [sic: column] marked with the activity symbol that the given commander (headquarters) has
- the result M or S means that the given corps headquarters must be covered with a MARCH or STOP counter respectively.
The STOP order means that the given corps headquarters has no communication with the army headquarters and passively awaits new instructions; the units of such a corps are in this stage "grounded", i.e. may not move.
Note: A headquarters holding a STOP order may not command any units; all units belonging to that corps are considered uncommanded, regardless of whether they are within its command range.
13.3.2. Each uncommanded unit belonging to a corps whose headquarters holds a MARCH order but which is outside its command range, or a unit belonging to no corps and not within the command range of any headquarters, undergoes during its own movement phase (see [4.1]) the following procedure, called the independent command procedure:
- the player owning the given unit makes a die roll
- a result higher than the unit's effectiveness means that it is uncommanded
- a result lower than or equal to it means that the unit is commanded.
The procedures described in [13.31] and [13.32] are intended to establish which of the units on the board are commanded.
13.4. Consequences of lack of command
13.4.1. Uncommanded units (i.e. those which do not fulfil the condition given in [13.24] or which unsuccessfully carried out the independent command procedure - see [13.32]):
- may not move during the movement phases
- may not repair cut track
- artillery units may not take part in combat
- may not carry out reorganisation (recover a combat efficiency level).
13.4.2. Lack of command does not affect:
- attempts to cut track
- building trenches
- masking of units
- rest of units (recovery of lost endurance points)
- lack of command does not forbid units to take part in clashes (with the exception of artillery).
13.5. Effect of headquarters on combat
13.5.1. The ratio attacker strength/defender strength is modified if at least one unit that is within the command range of its own corps headquarters takes part in the given clash. The size of the modification depends on the symbol placed on the counter representing the given headquarters, as follows:
- double symbol - denotes a combat modifier equal to 2
- single symbol - denotes a combat modifier equal to 1
For the attacker the modifier is taken with a (+) sign, and for the defender with a (-) sign.
13.5.2. Each corps headquarters may also give support to two units belonging to no corps.
13.5.3. A given clash may be supported by only one headquarters.
14.0. Concentration of divisions
14.1. General rules
14.1.1. All German and Russian divisions consist of two units (brigades); the only exceptions are the German 1st and 8th Cavalry Divisions, consisting of three brigades. If all units (brigades) of a given division take part in the same clash (so-called concentration of the division), the strength ratio attacker/defender is modified.
14.2. Detailed rules
14.2.1. If the concentrated division is defending, the combat modifier is -1, and if attacking, +1.
14.2.2. For a concentration of a division it is not required that all its units stand on one hex.
14.2.3. Concentration of a division is impossible when one of the units belonging to it has already been eliminated earlier.
14.2.4. If several divisions take part in a given clash, their effects on combat are cumulative.
Note: Units belonging to the same division must have in their numbering the same markings (in the form of digits or letters) concerning affiliation to the given division. Example: 70/36R/IR - brigade number / division number / corps number; 19L/HRP.
15.0. Supply
In the game "Tannenberg - 1914" the main factor (besides command) is the supply of units. The consequences of lack of supply may be no less severe than lost clashes. It may happen that units without supply, marching into battle, become so weakened that the smallest clash may cause their complete rout. Particular attention to the supply of units must be paid by the player commanding the Russian units.
15.1. Supply bases
15.1.1. Hexes that are supply bases for the units of each player are marked on the board with special symbols (see board and legend).
15.1.2. Additionally, supply bases for both players are their own fortifications having their own garrison (strength). One fortification hex may be a supply base for a maximum of two units.
15.2. Supply line
15.2.1. A supply line is a chain of adjacent hexes running from a supply base to the given unit.
15.2.2. A supply line may not run across the Vistula (only over bridges), lakes, seas and swamps (supply may reach units located in swamps).
15.2.3. A supply line may not run through a hex containing an enemy unit or its control zone (exception - [15.25]).
15.2.4. A supply line may run through a hex located in the control zone of an enemy unit if a friendly unit stands on it.
15.2.5. Each unit is able on its own to create a supply line over a distance of two hexes.
15.2.6. Each corps headquarters may create supply lines over a distance of two hexes to all units but only of its own corps.
15.2.7. A supply line may be extended by one's own railway lines, but on condition that the given railway line is not cut and no enemy unit stands on it.
15.2.8. A unit has supply if it is able to create (independently or with the help of its own corps headquarters, supply trains (see [15.3]) and railway line) a supply line. Examples of creating supply lines are given alongside. (The diagrams are not preserved.)
15.3. Supply trains
15.3.1. Supply lines may be created (extended) by supply train units specially detached for this purpose. These units are held exclusively by the player representing the Russian side.
15.3.2. A supply train unit has no control zone or combat strength. During its own movement phase it may leave an enemy control zone.
15.3.3. Only one supply train unit may be on one hex.
15.3.4. A supply train unit moving along a road expends 1/2 movement point for entering each hex.
15.3.5. A supply train unit may not take part in clashes and is not subject to their effects. At most it may take part in flight, but only together with another friendly unit forced to do so, sharing a hex with it.
15.3.6. A supply train unit is eliminated from the game if an enemy unit enters the hex occupied by it (e.g. during the movement phase or as a result of pursuit).
15.3.7. Supply train units may extend (create) supply lines by 4 movement points (not by 4 hexes!!!). When extending a supply line along a road they double their range (in accordance with [15.34]). An example of using a supply train unit is shown in the diagram. (The diagram is not preserved.)
15.3.8. Supply train units may extend supply lines to all friendly units.
15.3.9. A supply train unit may not extend a supply line if it is in an enemy control zone.
15.4. Effect of supply on movement and combat
15.4.1. Units without supply have their mobility reduced by 1 movement point.
15.4.2. An unsupplied unit moving in the movement phase loses one endurance point (in the case of masked units the appropriate endurance loss counter is put under the masking counter); the loss of this point may not, however, cause a reduction of the combat efficiency level (see [2.37]).
15.4.3. Artillery supporting combat (taking part in combat) without supply loses (or loses more than normal) endurance points (see [11.15] and [11.16]).
15.5. Isolation
15.5.1. A unit is isolated if it is impossible to draw any supply line (laid out on the board observing only the conditions given in [15.22], [15.23], [15.24], and disregarding the rules contained in [15.25], [15.267], [15,27], [15.37]).
15.5.2. An isolated unit of course has no supply and therefore suffers all the consequences given in [15.4]; in addition each isolated unit at the end of phase 4 (reserve movement) undergoes the following procedure:
- the player whose unit is isolated makes a die roll
- a result of 1 or 2 pips means no effect
- a result of 3 or 4 pips means that the given unit loses 2 endurance points
- a result of 5 or 6 pips means that the given unit loses 4 endurance points.
As a result of the above procedure a unit may lose a combat efficiency level or be eliminated.
16.0. Reconnaissance and masking
16.1. General rules
16.1.1. During each orders phase both players may mask their own units. For this purpose masking counters and a special MASKING card are used. Before the start of the game each player places his own masking counters on the spaces of this card so that the numbers on them correspond to the numbers of the spaces on the card.
16.1.2. During the orders phase a given unit may be replaced by a masking counter, which is placed on the board (in such a way that its number is underneath the counter and invisible to the opponent) in place of the unit, which in turn is placed on the space of the MASKING card marked with the number of the masking counter. Thanks to this operation the player owning the given unit can at any time check (discreetly reading the number of the masking counter and finding the space on the MASKING card) what the given masking counter hides. To confuse the opponent even more, "empty" masking counters may be placed on the board. In the case of "empty" counters (they simply replace no units) the corresponding space on the MASKING card will be empty; this does not, however, expose the "empty" counter, because the opponent does not see the numbers of the masking counters and is unable to determine which of them is "empty". By introducing masking counters, some of which are "empty", one can fairly effectively disorient the opponent (and sometimes oneself!!!) as to the real placement and movement of units.
16.2. Detailed rules
16.2.1. Neither player may peek at the numbers of the opponent's masking counters on the board.
16.2.2. The masking operation may not apply to a unit located in the control zone of an enemy unit.
16.2.3. "Empty" masking counters may be placed only on one's own units or headquarters.
16.2.4. Any number of masking counters may be on one hex; it must be remembered, however, that in this case too the limit of the number of units that may occupy a single hex applies (see [7.12]).
16.2.5. All masking counters (even "empty" ones) have control zones and the characteristics and consequences resulting from them (see [8.21] and [8.22]).
16.2.6. All masking counters (unless - [15.41]) have a movement capability equal to 4 movement points (even though they may hide only cavalry units).
16.2.7. An "empty" masking counter located at the start of the reconnaissance phase in an enemy control zone must be removed from the board (it returns to the MASKING card). An "empty" masking counter is also removed from the board if during the opponent's movement phase an enemy unit enters its control zone. After the masking counter is removed the enemy unit may continue its movement (it must be remembered, however, that 1 additional movement point must be expended on entering the control zone of the masking counter - see [8.22]).
16.2.8. If during the opponent's movement phase an enemy unit enters the control zone of a masking counter that hides a lone: headquarters, supply train or artillery unit, this counter must be immediately revealed and the appropriate rule applied - [11.18] or [13.15] or [15.36].
16.2.9. Masking counters that are not empty are revealed only during clashes. The counters of the attacking player are revealed first; the defender's masking counters are revealed only after the complete declaration of strength (including artillery) of the attacking player.
16.3. Cavalry reconnaissance
16.3.1. A masking counter must be revealed (it then returns to the appropriate space of the MASKING card and the units standing on that space are placed on the hex occupied by the masking counter) in the case of participation in a clash (combat phase) or as a result of cavalry reconnaissance (reconnaissance phase).
16.3.2. Each cavalry unit may reconnoitre over a distance of 2 hexes, except that the line between the cavalry unit and the masking counter may not cross lakes or the Vistula (only over bridges). The diagram below gives an example in which the hexes that may be the object of cavalry unit reconnaissance are marked. (The diagram is not preserved.)
16.3.3. Each cavalry unit may during one reconnaissance phase attempt to reconnoitre only one hex (regardless of the number of masking counters located there).
16.3.4. The player carrying out reconnaissance performs the following actions:
- indicates his own unit carrying out the reconnaissance and the hex that is its object
- makes a die roll; a result higher than the cavalry's effectiveness means failure of the reconnaissance; where the number of pips rolled is lower than or equal to it, the reconnaissance succeeded and all masking counters located on the given hex must be revealed.
17.0. Initial placement of units and reinforcements during the game
17.1. Placement of units
Before the start of the game all units and headquarters must be set up on the hexes given below. (Coordinates are given as printed: A = column number, B = diagonal row number.)
Germans
| Unit | Hex |
|---|---|
| 1/1 kaw. | A43 B41 |
| 2/2 kaw. | A43 B41 |
| 3/1 kaw. | A43 B41 |
| 20L/35R | A11 B31 |
| 69E | A16 B29 |
| 70L | A20 B27 |
| 5L/35R | A2 B32 |
| v. Scholtz | A29 B29 |
| 72/41/XX | A30 B28 |
| 74/41/XX | A30 B28 |
| 73/37/XX | A28 B28 |
| 75/37/XX | A28 B28 |
Russians
| Unit | Hex |
|---|---|
| 1 SBK kaw. | A59 B37 |
| 1/1 art. | A61 B36 |
| 2/1 art. | A61 B36 |
| 3/1 art. | A61 B36 |
| v. Rennenkampf | A60 B36 |
| 1/29/XX | A59 B35 |
| 2/29/XX | A59 B35 |
| 1/28/XX | A57 B34 |
| 2/28/XX | A57 B34 |
| Smirnow | A59 B34 |
| 20/XX art. | A59 B34 |
| Jepanczin | A55 B29 |
Explanations: the abbreviations kaw. and art. are not unit names. They denote cavalry and artillery units respectively.
- HRK - main reserve of Konigsberg
- SBK - remaining Konigsberg units
- G - Guards units
- R - Reserve units
- L - Landwehr units
- Boyen - garrison of Fortress Boyen
- Strz - riflemen
17.2. Reinforcements
17.2.1. During the game each player receives reinforcements in the form of new units. The time (stage) and place of appearance of the new units are given on a separate card titled STAGES AND REINFORCEMENTS TRACK. On the spaces adjacent to the successive stage numbers all the units appearing on the board as reinforcements in the individual stages are listed. In addition, on each space the hex from which the given units begin their movement is specified by giving coordinates. Before the start of the game all units must be placed on the appropriate spaces of the STAGES AND REINFORCEMENTS TRACK.
17.2.2. In a given stage units enter the board at any moment during their own movement phase. Units forming part of reinforcements are, after entering the board, subject to all rules (movement, combat, etc.) applying to the other units.
17.2.3. Reinforcements may enter the board in the form of stacks.
17.2.4. All reinforcements that enter the board at places (hexes) where there is a railway line begin their movement by moving by rail transport. (Note: an exception to this rule are all units entering the board from hex A24, B20, which move according to their movement points.) Until unloading they are not counted towards the limit of units that may move by rail transport (see [5.22]).
17.2.5. Reinforcements which arrive on the board by rail transport (see [17.23]) delaying their entry by one stage may enter the board from the nearest adjacent hex next to the map edge through which a railway line runs.
17.2.6. All corps headquarters which begin their movement as reinforcements hold a MARCH order (they are covered with a MARCH counter).
17.2.7. All units beginning their movement as reinforcements are considered commanded in that stage. In subsequent stages they are subject to the normal command rules applying to the other units.
17.2.8. Reinforcements may not enter the board from hexes located in the control zones of enemy units. In such a case the reinforcements arrive one stage later, beginning their movement from any hex adjacent to the map edge located no further than 3 hexes from the original hex (in the case of reinforcements arriving by rail transport they enter the board along the adjacent railway line).
17.3. Special reinforcements
The following reinforcements in the form of new units may, but need not, appear in the game; their entry on the board depends only on the development of the situation on the map.
17.3.1. When the player commanding the Russian units gains an advantage of 25 victory points (such will be the result on the VICTORY POINTS TRACK - [19.3]), in the nearest orders phase the v. Prittwitz counter is replaced by the Hindenburg counter (marked H).
17.3.2. When the player commanding the Russian units gains an advantage of 31 victory points (see above), the German forces receive the following reinforcements from the Western Front:
- Frommel
- 23/8
- 38/8
- 40/8
- v. Pluskow
- 18/XI art.
- 76/38/XI
- 83/38/XI
- 43/22/XI
- 44/22/XI
- v. Gallwitz
- 1G/RG art.
- 15R/1G/RG
- RG/1G/RG
- 5/3G/RG
- 6/3G/RG
The above forces arrive as reinforcements 9 stages after the moment at which the player representing the Russian forces gained the required advantage in victory points. These reinforcements arrive by rail transport, by any railway line from the western edge of the board.
Note: Frommel, commander of the German III Cavalry Corps, may command all German cavalry units.
17.3.3. If after stage 14 of the game German units approach to a distance of at least 6 hexes from the river Narew, then in the next stage the Russians receive the following reinforcements:
- 1/79 R
- 2/79 R
- Olchowski
- 1/59R/XXVII
- 2/59R/XXVII
- 1/77R/XXVII
- 2/77R/XXVII
These reinforcements arrive by rail transport, entering the board by any of their own railway lines.
18.0. Supplementary rules
18.1. Detailed rules
18.1.1. The Russian 3rd Guards Division (units 1/3G, 2/3G) may not move until one of the conditions listed below is fulfilled:
- at the start of each movement phase the player commanding the Russian units makes a die roll; if "1" comes up, the units belonging to the 3rd Guards Division may move. From then on the above units may move under the rules applying to the other units
- the units of the 3rd Guards Division may move from the moment any enemy unit (it may even be an "empty" masking counter) crosses the Russian-German border.
18.1.2. If the Russian I Corps loses 3 combat efficiency levels (e.g. 3 units by one level each), its commander Artamonov is automatically replaced by a new commander - Sirelius.
18.1.3. The counter of the commander, governor of Konigsberg (v. Pappritz), may not leave the Konigsberg hex.
The above rules may be omitted, applied in full or adopted in part; they serve only to balance the game so that each player has equal chances of victory.
19.0. Victory conditions
19.1. General rules
In the game "Tannenberg - 1914" the winner may be determined during the game (automatic victory) or after the end of the last stage, when the victory points gained by each player during the game are compared (victory on points).
19.2. Automatic victory
19.2.1. The Russians win automatically if at any moment of the game one of the two following conditions is fulfilled:
- any three Russian units cross the Vistula north of hex (A1, B38).
- any three hexes of the Konigsberg fortifications are captured (i.e. occupied by Russian units) and the city itself (Konigsberg) is occupied by the Russians.
19.2.2. The Germans win automatically if at any moment of the game one of the two conditions given below is fulfilled:
- a German infantry unit stands on one of the hexes of the railway line running between the hexes (A61, B2) and (A63, B3)
- at least four German units cross the Niemen south of hex (A63, B34).
19.3. Victory on points
During the game each player receives victory points for fulfilling specified conditions. To mark the current difference between the victory points gained by the Russians and the Germans, the VICTORY POINTS TRACK placed on the board and special auxiliary counters are used. On this track the victory points gained by the Russians are taken with a (+) sign, and by the Germans with a (-) sign.
Example: The Russians have an advantage of 15 victory points; this situation on the track corresponds to placing the tens counter (x10) on the space with the digit 1 and the units counter (x1) on the space with the digit 5. In a given stage the Germans obtain 6 victory points; because the victory points gained by them are taken with a negative sign, the current state of points on the track should be 9 victory points; to mark this value the tens counter must be removed from the track and the units counter moved to the space with the digit 9.
The winner is determined after the end of the last stage. If the number expressed on the VICTORY POINTS TRACK is:
- positive - the Russians have won
- negative - the Germans have won.
The Russians receive victory points (v.p.) during the game in the following cases:
- 20 v.p. if after the end of stage 2 there are 10 Russian units on German territory
- 15 v.p. if after the end of stage 3 there are 10 Russian units on German territory
- 10 v.p. if after the end of stage 4 there are 10 Russian units on German territory
- 5 v.p. if after the end of stage 5 there are 10 Russian units on German territory
- at the end of each stage the Russian player receives victory points for controlling (the last unit that occupied the given hex or passed through it belonged to the player commanding the Russians) the following towns:
- Gumbinnen (A42, B39) 1 v.p.
- Lutzen (A37, B32) 3 v.p.
- Insterburg (A37, B42) 2 v.p.
- Darkehmen (A40, B37) 1 v.p.
- Allenstein (A23, B34) 3 v.p.
- Osterode (A18, B36) 1 v.p.
- Elbing (A11, B47) 5 v.p.
- Marienburg (A7, B46) 3 v.p.
- 5 v.p. when Hindenburg enters the game (see [17.31])
- 20 v.p. when German troops from the Western Front enter the board (see [17.32])
- 5 v.p. for capturing each German fort (hex) with its own garrison
- 5 v.p. for each eliminated German unit
- 7 v.p. for each eliminated German corps headquarters
- 10 v.p. for each eliminated German army headquarters
- 4 v.p. for each German unit without supply after the end of the last stage.
The Germans receive victory points (v.p.) during the game in the following cases:
- 12 v.p. when Russian special reinforcements enter the board (see [17.33])
- 6 v.p. for each eliminated Russian unit
- 8 v.p. for each eliminated Russian corps headquarters
- 10 v.p. for each eliminated Russian army headquarters
- 4 v.p. for capturing each Russian fort (hex) with its own garrison
- 20 v.p. if after the end of the last stage there are no Russian units left on German territory.
20.0. Auxiliary tables
Note on this transcription: the original rulebook presents its auxiliary tables (including TERRAIN CHARACTERISTICS, COMBAT RESULTS, INDEPENDENCE OF COMMAND, and the stage/reinforcements track) as separate images (t1-t4). Only the RETREAT ATTEMPT table (image t3) could be recovered from the publisher's archived page; the other three table images were not archived and could not be transcribed. Their contents are not reproduced here, and no values have been filled in from memory.
[18.3] Retreat attempt (Próba odwrotu)
Columns: difference of effectiveness (see [9.36]). Rows: modified number of pips. Values are endurance points lost by each retreating unit ("-" means no loss).
| Modified pips | -3 | -2 | -1 | 0 | +1 | +2 | +3 |
|---|---|---|---|---|---|---|---|
| -1 | 6 | 5 | 4 | 3 | 2 | 1 | 1 |
| 0 | 4 | 4 | 4 | 2 | 1 | 1 | 1 |
| 1 | 2 | 2 | 2 | 1 | 1 | - | - |
Modifications applied to the die roll:
- -2 if the retreat is carried out through swamp or a large river
- -2 if the unit carrying out the retreat is isolated
- -1 if the retreat is carried out through a small river
- -1 if the opponent carries out an ASSAULT
- +2 if the retreat is carried out by cavalry and the opponent attacks only with infantry and/or artillery
- +M: add with reversed sign the modifier of the terrain from which the unit begins the retreat (see [9.82])