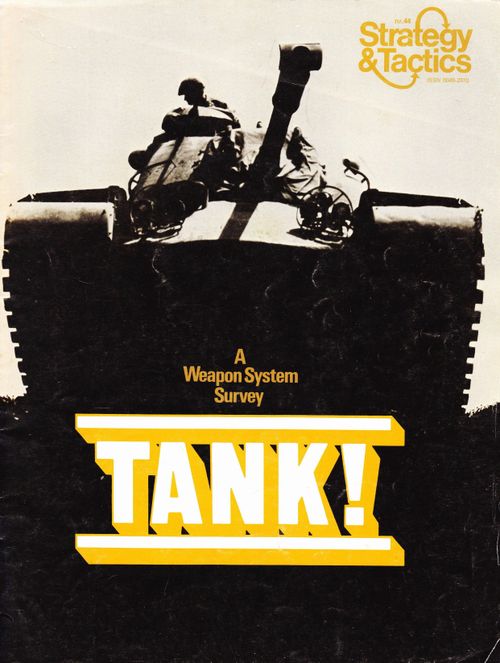
Tank! Armored Combat in the 20th Century
Tank! Armored Combat in the 20th Century Rulebook
Table of Contents
Table of Contents
- 1.0 Introduction
- 2.0 General Course of Play
- 3.0 Game Equipment
- 4.0 Sequence of Play
- 5.0 Unit Capability and Task Code Chart
- 6.0 Use of the Simultaneous Movement Plot Chart
- 7.0 Unit Facing and Sighting
- 8.0 Combat
- 8.1 Firing Unit Type versus Target Unit Type (Applies to both DF and OF)
- 8.2 Limitations and Restriction on Fire (Applies to both DF and OF)
- 8.3 Range and Range Attenuation (Applies to both DF and OF)
- 8.4 Where Fire May Be Directed
- 8.5 Opportunity Fire
- 8.6 Application of Combat Results
- 8.7 Calculation of Target Defense Strength
- 8.8 Infantry Fire
- 8.9 How to Use the Combat Results Tables
- 9.0 Movement
- 10.0 Terrain
- 11.0 Stacking
- 12.0 Panic
- 13.0 Spotting
- 14.0 Improved Positions
- 15.0 Preservation
- 16.0 Introductory Scenario
- 17.0 Scenarios
1.0 Introduction
Tank is a tactical level simulation of armored warfare from the 1930's to the present. Conflict is on the tank-to-tank level with units represented as infantry squads and individual vehicles and anti-tank pieces. The Game scale is 50 meters to the hex and the Game-Turn represents 36 seconds to two minutes of real time depending upon the scenario played. Tank is played in scenarios which represent various types of actions into which are interjected various opposing forces simulating actions in all the wars, actual or possible, in which armored vehicles could have taken part between the 1930's and the 1970's. Thus, the game is a complete simulation of virtually all conceivable tank-versus-tank actions in the period covered.
The rules and tables are divided into two sections. The first section is called the STANDARD GAME. The second section is called the EXPANDED game. (Note: the EXPANDED game materials are not included in the subscription version of the game. See the note at the beginning of Outgoing Mail, S&T 44.)
The Standard Game contains all the rules and tables needed to play an uncomplicated game of Tank! The scenarios used are restricted to simplified hypothetical, illustrative situations using a limited selection of weapons' systems.
The Rules and Tables of the Expanded Game not only modify and extend those used in the Standard Game but also introduce and describe other concepts which are absent or abstracted in the Standard Game.
The Expanded Game has practically an unlimited number of scenarios and a virtual cornucopia of Weapons' Systems to choose from. The Expanded Game is much more complex than the Standard Game, if for no other reason than it has more vehicles and people doing more of everything. This added complexity gives an aura of added realism at the cost of more learning and playing time.
2.0 General Course of Play
Tank is a simultaneous movement game played in Game-Turns each of which is divided into different Phases, some of which are subdivided into segments. Tank is basically a two-Player game with each Player utilizing tanks, assault guns, and occasionally anti-tank guns and infantry. Each Player maneuvers his vehicles, assigns missions (i.e., firing and moving, etc.) and attempts to accomplish his mission's goal as given by the scenario. Missions are plotted simultaneously by each Player near the beginning of the Game-Turn and the remainder of the Game-Turn is spent executing or attempting to execute these plots.
Essentially each Scenario asks that a Player destroy a certain proportion of his opponent's units while preserving a certain proportion of his own units. Destroying a unit involves one unit "shooting" at an opposing unit and comparing the firepower of the "shooting" unit with the defensive strength of the unit shot at. This comparison or differential is the basis for combat resolution, which involves rolling a die to determine if a shot is successful or not. Elements such as visibility, range, fire control, terrain and the geometric relationship of the attacker versus the defender all affect the shooting process.
3.0 Game Equipment
3.1 The Game Map
The mapsheet portrays a typical piece of terrain with slopes, rough ground, berm walls and forested areas. Actually, the mapsheet represents three different densities of terrain: closed, mixed and open. These three are differentiated by the terrain effects chart. In the Closed Terrain, for example, all types of terrain are at their most difficult, while in the Open Terrain format some of the terrain features have no effect on play.
A hexagonal grid is superimposed on the map to regulate movement, position, and firing ranges of the units. The hexes are numbered for identification when plotting orders for the playing pieces.
Players may wish to expand the battlefield by butting other copies of the Tank map to the one supplied with the game. To do so involves careful cutting of the four map edges on each copy of the map. Use a single edge razor blade and a metal straightedge to trim the map as shown in the diagram below. Combine maps by overlapping or butting them on the resulting partial hexes so that a continuous hexfield is formed. Maps should be assigned overall code letters (as if they were combat sectors) to facilitate multimap plotting.
[Map trimming diagram: a sample hex grid with dotted trim lines along the map edges; hexes numbered 0132, 0133, 0134, 0231, 0232, 0233, 0332, 0333, 0334, 0431, 0432, 0433. Trim as indicated by dotted line.]
3.2 The Playing Pieces
Two contrasting colored sets of die counters are supplied. These counters, henceforth called units, are used to represent single combat vehicles (tanks and assault guns and their crews), infantry squads (5-14 men), and single anti-tank guns (with crew). In Standard Tank each combat vehicle is represented by a unit with a generalized tank silhouette whether or not it is actually a turreted vehicle. (Only the counters provided with the Expanded Game include units with a generalized assault gun silhouette for a non-turreted combat vehicle; which means that you must use the tank silhouette units for either tanks or assault guns when playing with the Standard Game counter mix.) All units have a unique alphabetic code.
Units do not have any numerical coding to indicate their playing characteristics. This is because they are used to represent different units in different scenarios. In addition to the units, several game markers are included to aid in plotting wrecks, and Improved Positions. The Expanded Game uses Smoke, Minefield, Anti-Tank Ditch, Impact, and Airstrike markers.
3.21 Standard Game Playing Pieces
- Armored Fighting Vehicle (AFV)
- Anti-tank Gun
- Infantry Squad
- Improved Position Marker
- Wreck Marker
3.3 Game Charts and Tables
The game makes use of various charts and tables as a part of its play-system and also to organize data into an easily retrievable form. The use of these graphic aids is explained in the appropriate rules sections. Players should examine the charts and tables as they appear or are referred to in the rules. Please note the separate chart sheet.
3.4 Definition of Terms
Attack Strength: Attack Strength is another way of saying firepower. All the weapons systems in this game have the ability to shoot at other units with weapons ranging from rifle caliber all the way up to 152mm cannon. Every weapons system has an Armored-Piercing Attack Strength and a High Explosive Attack Strength. Armored-Piercing (AP) Attack Strength measures numerically in AP Attack Strength Points the ability of a unit's weapons to penetrate and destroy armored targets. High Explosive Attack Strength measures numerically in HE Attack Strength Points the ability of a unit's weapons to destroy unarmored "soft" targets (AT and infantry).
Defense Strength: Defense Strength is the measure in Defense Strength Points of a unit's ability to survive attack. The Defense Strength of armored vehicles is a function primarily of the effective thickness of their armor and the direction from which they receive fire. The Defense Strength of soft targets is function of terrain.
Fire Control: Fire Control is the measure of a unit's ability to hit a target with its Attack Strength. The fire control system of a unit determines what Combat Results Table is used when resolving an attack.
Movement Allowance: Movement Allowance is the maximum movement ability of a unit quantified in Movement Points.
3.5 Game Equipment Inventory
Standard Game Equipment
- One rules folder
- One set counters (100)
- One game map
- One sheet of charts
- One die*
- One SiMov Pad*
- One plastic box assembly*
Expansion Game Equipment*
- Expansion Module rules folder*
- Expansion Module counters (200)*
* These items are not included in the subscription version of the game. Players who received the game as part of their subscription to S&T should use ordinary lined paper to write their plots and keep track of the Game-Turns played.
4.0 Sequence of Play
Tank uses a simultaneous movement and combat system which seeks to simulate the tactical realities of armored warfare. This system is simplified by the fact that each unit is restricted to performing one action (task) in any one Game-Turn. A unit can either move (if it has movement capability), it can fire (if it has offensive capability), or it can do nothing at all. Basically, each Game-Turn consists of two general Phases: First, each Player analyzes what each of his units can do during the Game-Turn, then he writes down what he wants each of his units to accomplish, describing how each will move, fire, etc. (Plotting Phase). Secondly, the Player attempts to carry out the various activities assigned to each of his units (Execution Phase).
Sighting and Plotting are easy to do simultaneously; both Players can look at the map and analyze or write without interfering with one another. The Execution Phase requires a rigid sequence of activity so that the simultaneous interaction of opposing units may be accurately simulated. Though this formula means that units appear to move or fire in sequence, this is not the case. All movement and firing is assumed to be simultaneous and the effects thereof are assumed to be simultaneous.
4.1 Sequence of Play Outline
A. Plotting Phase:
Each Player determines which of his units can "see" Enemy targets, what lanes of Opportunity Fire can be laid down, and generally what the situation confronting him is.
Each Player secretly records on the SiMov Pad what he wants each of his units to do in the Game-Turn. (There is a standardized format for recording, see 6.0.) The Player may refer to the map at any time during this Phase. In practice, sighting tends to run throughout the Plotting Phase as Players calculate and recalculate the effect of their units' anticipated actions vis-a-vis what they think Enemy units can and/or may do. A Player is not permitted to plot an action for one of his units that the unit could not execute in the following Execution Phase.
B. Execution Phase:
Now each Player attempts to carry out the actions which he has plotted for each of his units. First, referring to their SiMov Pads, the Players inform one another who is firing at whom, who is overrunning whom, who is moving where, who is laying down Opportunity Fire at what hex, etc. Players then proceed to carry out these varied actions according to the sub-sequence given below.
-
Panic Segment: Each Player executes Panic determination and resulting plots for his own forces. (See 12.0.) This consists of establishing which of his units panic and creating any necessary Panic Movement Plots.
-
Initial Facing Segment: Both Players face any of their vehicles, which have been plotted to move (including Panic Movement), toward the first hex they have been plotted to move into.
-
Direct Fire Segment: Each Player executes Direct Fire attacks made by his units on Enemy target units. Results should be noted and wreck markers placed on any affected vehicle target unit. Note that this fire is assumed to be simultaneously exchanged between opposing sides and the actual sequence which Players use to execute their Direct Fire does not prevent opposing units from executing their assigned fire missions. Two opposing units can fire upon one another; even though the results are determined sequentially, the results are applied simultaneously, at the conclusion of the Direct Fire Segment.
-
Movement [and Execution of Triggered Opportunity Fire] Segment: Players move each of their undestroyed units to the units' plotted movement path (including Panic Units). It is best that each Player outline to his opponent which of his units are moving, where they are going and the exact path they will follow in movement. If they can be determined exactly where moving units interact with Enemy units by either triggering Opportunity Fire, by attempting to move into a common hex with an Enemy unit at the same point in time or by anticipating in an overrun situation. These interactions are resolved in sequence when they occur.
-
Final Facing Segment: Units which were plotted to FACE or units which have completed movement (normal or panicked) may voluntarily change their facing in their terminal hex at no additional Movement expense. Units which fired or did nothing may not change their facing.
C. Record the Passage of one Game-Turn.
4.2 Secrecy and Honesty
Each Player's SiMov Pad is to be hidden from the other Player until the end of the Game. If there are disputes about units' actions, they should be noted and resolved at the end of the game. A Player who deliberately varies his execution from his plotted actions or who so ambiguously words his SiMov Plot that he can interpret his moves in different ways to gain an advantage is a cheat and automatically forfeits the game.
4.3 Simultaneity
The Player will note that Direct Fire takes place in the execution sub-sequence before movement is implemented and that the results of that fire are applied before any movement is allowed. Thus, if a unit is destroyed by Direct Fire in a turn in which it was slated to move, it would not move. (Admittedly, this is a violation of the spirit of simultaneity.) Successful Direct Fire simulates the firing unit seeing the target unit, tracking the target unit and at some hypothetical point in time in the turn, hitting the target and destroying it. During the game development all sorts of methods were tried in an effort to simulate the destruction of a moving unit by Direct Fire. A random die roll was tried; the unit was wrecked in the middle of its move; the unit was wrecked if it entered an odd hex on Thursday etc., etc., ad nauseum. In the final analysis, it was easier to simply wreck the unit where it stood; it saved playing time and made little difference in total results.
5.0 Unit Capability and Task Code Chart
General Rule: In any given Game-Turn any given unit is limited to performing one action or "task". Some unit types are restricted by their nature from performing certain actions. Essentially, a unit may either fire or move; it can't do both in the same Game-Turn. What is more, there are specific types of firing a unit can do and specific types of movement a unit can execute. Any given unit can only perform one of these various specific actions. Below is the Task Code Chart listing all of the specific actions (tasks) a unit can do in a Game-Turn.
| Code | Description of Task |
|---|---|
| DF | Direct Fire: The unit fires at a specific target hex which must contain a specific Enemy target unit. (See 8.0) |
| OF | Opportunity Fire: The unit "fires" at a specific vacant hex in hopes that an Enemy unit will wander into its line of fire sometime during the Execution Phase. (See 8.0) |
| MV | Movement: The unit moves over the map, hex by hex, expending Movement Points from its Movement Allowance for each hex entered. |
| FC | Facing: The unit changes its facing within the hex it occupies. This is a limited type of movement for units that are prohibited from moving, or do not wish to move from hex to hex but do wish to change their facing, i.e., alter their target aspect. (See 7.00) |
| OV | Overrun: An AFV moves through a hex containing an Enemy AT or infantry unit. (Printed as "AT of infantry unit"; "or" is the evident intent.) (See Overrun Attacks, 9.4) |
| MVR | Move Vehicle in Reverse: see 9.6 |
6.0 Use of the Simultaneous Movement Plot Chart
General Rule: The SiMov Pad (not included in the subscription version of the game) is used to plot the intended action of every unit on every Game-Turn. In essence, the Player is giving each unit an order or task on each Game-Turn. If no plot is written for a given unit, it does absolutely nothing in that Game-Turn.
Procedure: Write the identifying code of that unit in the extreme lefthand column. In the next column give the task code assigned to the unit. What you write in columns three through twelve depends on what the mission of the unit is. If it is Direct Fire or Opportunity Fire, record the intended target hex number in column three; that is sufficient. If the mission is movement, record the anticipated path the unit will take. There are several methods a Player may adopt to plot this path. Two of them are described in case 9.1 (How to Plot Movement). Any method of Movement Plot is acceptable so long as it unambiguously indicates exactly what hexes the unit will pass through and all extra Movement Point costs due to terrain and/or Overrun. If you have a unit and you don't want it to do anything, don't write anything on the plot chart. If a unit has no activity recorded on the plot chart it does absolutely nothing for the entire Game-Turn.
7.0 Unit Facing and Sighting
General Rule: Anti-tank units and vehicle units have a definite facing at all times, i.e., they must point at a hexside. Point the muzzle of the gun symbol or the front of the vehicle silhouette at a hexside in order to face the unit toward that hexside. Infantry units do not need to be faced and can be left with any haphazard orientation within a hex.
The definite facing of an anti-tank unit or vehicle unit is important for two reasons:
- The arc or field of fire of an anti-tank unit or of a turretless vehicle is determined by the facing of that unit.
- The Defense Strength of an armored vehicle will often vary depending upon whether its front, side or rear armor is being shot at. Infantry has a 360° field of fire and a 360° equal vulnerability.
Cases:
7.1 Altering Unit Facing
7.11 A Player may alter or change the facing of as many or as few of his units as he wishes at the end of the Movement Phase. Changing the facing of a unit does not consume Movement Points from that unit's Movement Allowance and a unit may have its facing changed to any new hexside.
7.12 In order to change its facing, the unit must execute one of the three following missions: Facing (FC), Movement (MV, MVR), or Overrun (OV). The Player need not indicate exactly what new hexside the unit will face. The physical act of altering the facing of a unit takes place during the Final Facing Segment at the conclusion of the Movement Phase. The Player then voluntarily changes his units' facings with full knowledge and appreciation of the tactical situation. (See 4.1)
7.13 Units which move (MV) or overrun (OV) have their facing during Movement described by their path of movement for the hexes that they move through. The Movement Rules (case 9.5) elaborate on this point, which is important since units may be engaged by Enemy Opportunity Fire while they are tracing their movement and it is absolutely necessary that their facing be known.
7.2 Effects of Facing on Fields of Fire and Sighting
7.21 The facing of an anti-tank unit or a turretless vehicle determines the field of fire of that unit. This field is the area of the map subtended by the arc of the three front hexes that such a unit faces in the accompanying diagram.
7.22 Field of Fire Diagram
[Diagram: a central hex holding an anti-tank gun unit, with the three front hexes shaded to show its field of fire.]
7.23 The field of fire of turreted vehicles and infantry units is 360° and the facing of such a unit does not affect its field of fire. Whether a vehicle is turreted or non-turreted is of course a characteristic of that weapon's system and is detailed in the Weapon's Systems Characteristics Chart.
7.24 The field of sighting of a unit is exactly the same as its field of fire.
7.3 Effects of Facing on Unit Defense Strength (Target Aspect)
7.31 Facing has no effect on the defense strength of anti-tank and infantry units.
7.32 Facing has a major effect on the defense strength of vehicles, depending on fire angle. This is because a unit's facing determines exactly what Target Aspect that unit presents to an Enemy unit. (For example, almost all tanks are much more heavily armored on their front than their sides or rear, which means if you shoot at a tank from its side you have a better shot than if you shoot at it from the front.) This target aspect or angle is best described by the Target Aspect diagram. (See 8.7)
8.0 Combat
General Rule: The term combat describes the activities associated with a Friendly unit firing at an Enemy unit. To reiterate, all units have an Armored Piercing Attack Strength and a High Explosive Strength. A unit may use either of these Strengths for Direct Fire or Opportunity Fire. A unit may not fire both Direct Fire and Opportunity Fire in the same Game-Turn. It may only fire one or the other. While similar in some respects, they are different in others. They occur at different times in the sequence of play.
Combat consists of assigning a Direct Fire or Opportunity Fire task to a unit, comparing the Attack Strength of the firing unit with the Defense Strength of the target unit, consulting the proper firing table as determined by the fire control system of the firing unit, rolling the die and assessing the result of the fire.
Procedure (Direct Fire): During the Plotting Phase the Owning Player determines that the Enemy target unit lies within the field of fire of his firing unit. He determines that the line of fire between his unit and the target unit is not obstructed by terrain features. Then he notes on his SiMov Pad the Direct Fire Task. If the firing unit does not Panic, it executes its Direct Fire during the Direct Fire Execution Segment as follows:
- Calculate the distance between the firing unit and the target hex. Roll the die and consult the Spotting Table to see if the firing unit has successfully spotted an unspotted target (see Spotting, 13.0). If the firing unit does not spot the target unit, determine if any other Friendly unit "spots" the target for the firing unit. If the target remains unspotted, the Direct Fire Mission is abortive and there is no DF attack on the target unit. Essentially, the firing unit has wasted an entire Game-Turn. (See 13.0 Spotting.) If the target unit is spotted, the Direct Fire Mission proceeds as follows:
- Determine the target nature (hard or soft) and its basic Defense Strength. If it is an armored (hard) target, determine the target aspect to the firing unit in order to establish the basic target Defense Strength. To the basic target Defense Strength add any terrain effects to derive the modified target Defense Strength. Subtract the modified Defense Strength of the target unit from the Attack Strength of the firing unit to determine the Attack Differential. Roll the die, adding to the result any modification called for by target Movement, and consult the appropriate Combat Results Table. Results are applied according to 8.6.
Procedure (Opportunity Fire): During the Plotting Phase the Owning Player determines if the target hex lies within the field of fire of the firing unit. He determines that the line of fire between his unit and the target hex is not obstructed by terrain features and that there are no Friendly units in the target hex or in any hex intersected by the line of fire. Then he notes on his SiMov Pad the Opportunity Fire Task (OF). If the firing unit does not Panic it remains eligible to attempt to execute its fire during the Movement Execution segment of the Game-Turn. Opportunity Fire is triggered by the movement of an Enemy into the target hex, or any hex intersected by the line of fire, or by an Enemy crossing any hexside which coincides with the line of fire. When Opportunity Fire is triggered, it is resolved exactly as in steps 1 and 2 in the Direct Fire procedure; the firing unit attempts to spot the target unit in the hex in which the target unit triggers the Opportunity Fire, calculates the Attack Differential, and rolls the die. Unlike Direct Fire results, Opportunity Fire results are applied immediately to the target unit.
Infantry units may also project Opportunity Fire into all the six hexes adjacent to the unit. The first unit to enter any of those six hexes triggers the Opportunity Fire.
8.1 Firing Unit Type versus Target Unit Type (Applies to both DF and OF)
All AFV's and AT-Guns have the ability to fire either Armored Piercing (AP) fire or to fire High Explosive (HE)/anti-personnel fire. AP fire is used against armored targets, which are defined as all tanks and assault guns (AFVs). HE fire is directed against soft targets, which are defined as infantry and anti-tank guns. The selection of fire by the firing unit is automatic, depending on the target type. The firing Player does not need to label the type of fire he employs for a firing unit. This is automatically determined for him by the type of target his firing unit is firing at. (If the firing unit has successfully identified the target unit it is presumed to have fired the proper ammunition from its MG and/or main gun necessary to kill the target. (Thus an M-60 fires on an armored target with an AP Attack Strength of 22 points, on a soft target with an HE Attack Strength of 10 points.))
8.2 Limitations and Restriction on Fire (Applies to both DF and OF)
8.21 A unit may only fire once per Game-Turn. Its fire must be directed against a target or targets in a single hex, therefore its basic AP or HE Attack Strength may not be divided in any way between different Enemy targets or different target hexes.
8.22 The firing Player may direct the fire on one or more units on a single target hex. If the target in the hex is an armored unit, the results are determined separately for each firing unit. An AFV could be fired at more than once in a segment. AP Attacking Strengths are not combined in firing on a common target unit. If the target(s) is a soft unit(s), the HE Attack Strength of all the firing units are combined into one total HE Attack Strength which is used to compute a single Attack Differential on the target unit. If there are two soft targets in the target hex, the combined total HE Attack Strength is used against each in turn. (This is another way of saying that HE fire is directed against all the soft target units in a given hex, each target unit being exposed to the full weight of the HE fire. Thus, if an M-60 fired at a hex containing an infantry unit and an anti-tank gun, there would be two firing resolutions at a basic HE Attack Strength of ten. The Player would roll once for the attack on the infantry unit and once for the attack on the anti-tank gun. The results of each resolution are separate; the destruction of one unit in no way effects the other defending unit.)
8.23 A unit may be fired on more than once in a Game-Turn, but it may not be fired on by the same unit more than once in a Game-Turn. A unit by moving may trigger several Opportunity Fire attacks, each being resolved in turn until the unit is either destroyed or completes its movement.
8.3 Range and Range Attenuation (Applies to both DF and OF)
The range between a firing unit and a target unit is determined by counting the fewest number of hexes between the firing unit and the target hex. The further a unit has to fire, the less accurate and effective its fire will be. This loss is built into the Attack Differential Table.
When two or more units at different ranges are combining their HE Attack Strengths against a common target, the range used is that of the most distant firing unit.
8.31 Range Limits: The various attack differential tables determine the absolute range at which a given unit with a given fire control system may engage a target. In addition, every unit has an Effective Range Limit listed on the Weapons Systems Table. For most units this Effective Range is equal to the Absolute Range determined by the Attack Differential Table. However, some units, particularly Soviet equipment, have an Effective Range which is less than the Absolute Range. Any unit which fires at a target beyond its Effective Range but within its Absolute Range is halved in it Attack Strength (fractions are rounded up).
8.4 Where Fire May Be Directed
8.41 A unit may not plot either DF or OF into or through a hex containing a Friendly unit(s). In other words, Friendly units mask the line of fire of other Friendly units. If such a mission is accidentally plotted, it is void and the "firing" unit has wasted a Game-Turn. Exception: Friendly AT guns may plot and execute either DF or OF AP fire into or through hexes containing Friendly infantry units.
8.42 A unit may plot and execute Direct Fire through hexes containing Enemy units to a more distant target hex containing other Enemy unit(s). Enemy units do not mask Friendly fire from other Enemy units.
8.43 Direct Fire and Opportunity Fire may not be plotted into or through hexes into which a Friendly unit is plotted to move (except for the infantry/anti-tank gun relationship described in 8.41). If a Friendly unit crosses or enters the line of fire of another Friendly unit (whether voluntarily or due to Panic results), the firing unit has its fire task cancelled; see 8.52.
8.5 Opportunity Fire
Opportunity Fire differs from Direct Fire because it is plotted in anticipation that an Enemy unit will move into a vacant line of fire during the Movement Segment. Unlike Direct Fire, there is no guarantee that a unit using Opportunity Fire will acquire a target to shoot at.
8.51 Triggering: Opportunity Fire has to be triggered in order to be executed. This means that an Enemy unit must pass between the firing unit and the target hex (or into the target hex) or there is no Opportunity Fire and the OF firing unit wastes a Game-Turn.
8.52 Only the first unit to move between the target hex and the firing unit triggers the Opportunity Fire. In case of any possible dispute as to which unit is the first, the unit that moves between the target hex and the firing unit after the smallest expenditure of Movement Points is the first unit. In the case of two units moving between the target hex and the firing unit after the same expenditure in Movement Points, the unit closest to the firing unit is the one attacked. If a Friendly unit is the "first" unit, it is not shot at; instead the firing unit aborts its Opportunity Fire (and does nothing for the remainder of the Game-Turn).
8.53 The path of Opportunity Fire is always considered to be a straight line drawn from the center of the hex of the firing unit to the center of the target hex. A unit will trigger the Opportunity Fire if it moves into a hex that the line passes through, subject to Spotting. If the line happens to coincide with a hexside, moving into a hex bordered by that hexside will not necessarily trigger that fire. The hexside must be crossed by the unit in order to trigger the fire.
Opportunity Fire can also be triggered by a unit entering the target hex itself.
8.54 A triggered Opportunity Fire attack is resolved in exactly the same manner as a normal Direct Fire attack. Spotting, Weapon's effectiveness, terrain and range are all considered.
8.55 A unit which is destroyed by Opportunity Fire is destroyed immediately. It does not complete its move.
8.56 If a unit moves into the path of Opportunity Fire, it must be "Spotted" before it is considered to have triggered the Opportunity Fire. If it is not "Spotted" there is no triggering and the unit proceeds to the next hex in its movement path. If the hex lies in the same or different path of Opportunity Fire, "Spotting" is again necessary to trigger the Opportunity Fire, and so on. Players should note however, that spotting a moving vehicle is automatic.
8.57 Opportunity Fire may be plotted into or through a hex which contains an Enemy unit at the start of the Game-Turn. Such a unit would trigger the Opportunity Fire only if it was plotted to move in that Game-Turn. It would receive the fire in its starting hex.
Opportunity Fire may not be plotted into or through a hex containing a Friendly unit (whether or not the Friendly unit is plotted to move in that Game-Turn).
8.58 If a unit is destroyed by Enemy Direct Fire it is still permitted to execute any Opportunity Fire it had plotted. Direct Fire results are applied to units executing Opportunity Fire after the conclusion of the Movement Execution Segment.
8.6 Application of Combat Results
8.61 The application of Combat Results either from Direct Fire, Opportunity Fire or Overrun depends upon what the target unit was plotted to do in the Game-Turn.
Direct Fire results against:
- Panicked or Moving unit Plotted to Move: immediately applied
- Direct Firing unit: applied at the conclusion of the Direct Firing segment.
- Opportunity Firing unit: applied at the conclusion of the Movement segment.
Opportunity Fire results against:
- All units: applied immediately
Overrun results against:
- All units: applied immediately
8.62 A destroyed armored unit is replaced with a Wreck marker in the hex it is destroyed in. It is then considered a wreck and becomes a new terrain feature.
8.63 Any non-armored unit which is destroyed is simply removed from the map and the game (infantry and anti-tank guns).
8.7 Calculation of Target Defense Strength
The basic Defense Strength of a vehicle target (be it tank or assault gun) depends on what aspect of the target is being attacked. Firing unit (J) is attacking the front aspect of the target unit (even though the straight line of fire may be entering the hexside on the side aspect of the target) because the firing unit lies within the front aspect of the target unit as defined by the facing of the target unit.
[Defense Aspect Diagram: a hex grid showing the FRONT, SIDE and REAR aspects of a target vehicle. AFV (J) is firing at Target (H)'s Front Aspect. AFV (T) is firing at Target (H)'s Side Aspect.]
The basic Defense Strength of the target unit against this particular firing unit will be its frontal aspect Defense Strength. Every vehicle unit has a front, side and rear aspect Defense Strength shown on the Weapon's Systems Characteristics Chart. Certain terrain features add to the vehicle's basic (front, side, or rear) Defense Strength. The basic Defensive Strength of an infantry and/or anti-tank gun depends entirely on the terrain in the hex it occupies. A soft target (infantry or anti-tank gun) does not have a target aspect and there is no basic Defense Strength shown for such a unit on the Weapon's Systems Characteristics Chart (WSCC). Instead, the Defense Strength of an infantry or AT gun unit is totally dependent upon the terrain that the unit is in (whether or not it is directly behind a Slope or Berm hexside through which passes all the fire it's receiving. See the Terrain Effects Chart, 10.6.
8.71 Effects of Target Movement on the Target Defense Strength
It is almost axiomatic that a moving target is harder to hit than a stationary target. To simulate this element we alter the die roll result. Therefore, if the target of any Direct Fire attack is plotted to move you add one number to the die roll for every two Movement Points (rounding off downwards) it is plotted to expend. Obviously you alter the die roll in the same fashion for any target of Opportunity Fire. For example, a tank is plotted to expend 7 Movement Points. It is attacked by a Direct Fire. Add three to whatever number is rolled on the die.
8.8 Infantry Fire
In Standard Tank there are no scenarios in which both forces have infantry (or AT guns for that matter). In fact infantry can only be used against AFV's simply because there are no other targets for it to engage. In Standard Tank we assume that any infantry unit is armed with close range, personal AT weapons (AT rifle, satchel charge, Molotov cocktail, simple bazooka, etc.) sufficient to give it some chance of firing at a tank at close range and destroying the tank. This admittedly abstract Anti-Tank Ability is not quantified in terms of AP Attack Strength Points. Infantry units may fire either DF or OF. This infantry DF or OF attack is resolved by using the Infantry Fire Table. This table concerns itself solely with the range to the AFV target and whether or not the AFV target is moving. The die is rolled and if the die roll corresponds to one of the numbers given by crossreferencing the range with the target status then the AFV is destroyed, otherwise the infantry fire has no effect. Infantry fire is subject to the same LOS/F, plotting and panic restrictions that the other unit types are subject to.
8.81 and 8.82 Infantry Fire Table (Die Roll Required to Destroy a Target at Fire Table)
| Range (in hexes) | ...Moving (or plotted to move) | ...Stationary |
|---|---|---|
| 1 | 1 | 1,2,3 |
| 2 | 1 | 1,2 |
| 3 | miss, no effect | 1 |
8.82 As can be deduced from the table above, Infantry may not fire at a target more than three hexes away.
8.83 Terrain or the aspect of the target vis-a-vis infantry fire has no effect on the execution of the infantry fire, except for effect on LOS/F.
8.84 An infantry unit may plot Opportunity Fire into its six adjacent hexes. It must however execute this OF on the first AFV to enter one of these hexes, and only the first AFV to enter. It does not have six shots, it only has one shot per Game-Turn.
8.85 An infantry unit may not fire both OF and DF in the same Game-Turn.
8.9 How to Use the Combat Results Tables
Each Combat Results Table crossreferences the attack differential (quantitative superiority of Attack Strength over Defense Strength), with the range between the firing unit and the target. The numbers crossreferenced represent the die roll necessary to destroy the target. Thus a 1-3 means that a die roll of 1, 2 or 3 results in the destruction of the target. Any other die result and the fire is considered to have no effect on the target.
- Step #1: Compute the attack differential. (Note that if the differential is less than zero no attack is permitted. If it is greater than ten it is considered to be a ten.)
- Step #2: Calculate the range in hexes between the firing unit and the target.
- Step #3: Roll the die.
- Step #4: Add to the result shown on the die, any number due to the movement or plotted movement of the target.
- Step #5: If the adjusted die result falls within the series of numbers given by crossreferencing the attack differential with the range, destroy the target. If it doesn't, the attack has no effect (•).
Note that each of the combat results tables is labeled with a Fire Control System (and the first two tables, a Panic Level). A given firing unit uses the table which corresponds to its characteristics.
[8.91] Combat Results Table (for units with an N or SR Fire Control System and a Panic Level of 2 or below)
Attack Differential
| Range | 0 | 1 | 2 | 3 | 4 | 5 | 6 | 7 | 8 | 9 | 10 |
|---|---|---|---|---|---|---|---|---|---|---|---|
| 1-5 | 1 | 1-2 | 1-3 | 1-4 | 1-5 | 1-6 | 1-7 | 1-8 | 1-9 | 1-10 | 1-10 |
| 6-10 | • | 1 | 1-2 | 1-3 | 1-4 | 1-5 | 1-6 |
[8.92] Combat Results Table (for units with an N or SR Fire Control System and a Panic Level of 3 or above)
Attack Differential
| Range | 0 | 1 | 2 | 3 | 4 | 5 | 6 | 7 | 8 | 9 | 10 |
|---|---|---|---|---|---|---|---|---|---|---|---|
| 1-5 | 1 | 1-2 | 1-3 | 1-4 | 1-5 | 1-6 | 1-7 | 1-8 | 1-9 | 1-10 | 1-10 |
| 6-10 | • | 1 | 1-2 | 1-3 | 1-4 | 1-5 | 1-6 |
[8.93] Stereo Coincidence (SC) Combat Results Table (Attack Differential)
| Range | 0 | 1 | 2 | 3 | 4 | 5 | 6 | 7 | 8 | 9 | 10+ |
|---|---|---|---|---|---|---|---|---|---|---|---|
| 1-5 | 1 | 1-2 | 1-3 | 1-4 | 1-5 | 1-6 | 1-7 | 1-8 | 1-9 | 1-10 | 1-10 |
| 6-10 | 1 | 1-2 | 1-3 | 1-4 | 1-5 | 1-6 | 1-7 |
(The "•" symbol marks an attack that has no effect.)
9.0 Movement
General Rule: During the Plot Phase a Player may assign any number of his vehicle and infantry units to move through the hexgrid. They are then moved according to their plots during the Movement Execution Segment. A unit that moves expends Movement Points from its Movement Allowance at a minimum rate of one Movement Point per hex entered. A Player may not plot or execute Movement that would exceed a unit's Movement Allowance. Movement is voluntary. A Player may move all, some, or none of his units but if he moves any he must move them exactly according to their Movement Plots, unless it is discovered during the Execution Phase that a unit would exceed its Movement Allowance. In which case the unit is moved as far as possible along the intended path of movement up to its Movement Allowance.
Procedure: During the Initial Facing Segment face all units which you have plotted to move toward the first hex that they are plotted to enter (except those units which are plotted to move backwards).
[Sample plot figure: a completed SiMov Pad plot chart (units, task codes and plotted movement paths) beside a sample hex map showing the plotted movement paths of several vehicles and infantry.]
During the Movement Segment execute the plot of each unit individually and completely. If at any point in its progress a unit triggers Opportunity Fire, execute that fire immediately and apply the results immediately. If at any point a Friendly unit and an Enemy unit attempt to occupy the same hex or cross the same hexside simultaneously, both units cease all movement for the remainder of the Game-Turn and the disputed hex or hexside remains unentered or uncrossed.
9.1 How to Plot Movement
Movement is plotted on the Simultaneous Movement Plotting chart. Below we have illustrated the two most common methods used to plot Movement accurately and unambiguously.
9.11 Plotting by Hex Numbers
Record the unit ID in the unit column of the SiMov Pad. Record the Task Code (MV, FC or OV) in the #1 column. In columns 2 through "n" record in sequence the hex numbers that the unit is to pass through. If the cost of entering any given hex is to cost more than one Movement Point (due to terrain or Overrun costs) then note this point cost next to the hex number and circle it.
9.12 Plotting by Vector
There is a compass rose printed on the map which identifies each hexside of a hex with a letter; A-north, B-northeast, C-southeast, etc. If a unit in a hex moves to an adjacent hex through the northeast hex it is considered to be moving on the B vector. Using vector plotting you note the unit ID and mission as above. In place of the hex numbers simply note in sequence the vectors a unit would take in moving through the map. Again, circle any excess terrain cost next to the appropriate vector.
9.13 Movement Plot Example
The diagram to the left illustrates the movement of four tanks identified as J, K, L and M. The sample plot chart illustrates both the hex method and the vector method of plotting for identical movements. The map display shows the four units in their originating hexes, a fact that you do not need to plot since the units are visible on the map.
- Tank J: Begins the turn in hex 3804. You order it to overrun the Enemy infantry unit in hex 3704 and exit to hex 3603.
- Tank K: Begins the turn in hex 4007. You order it to overrun the Enemy infantry unit in hex 3704 and exit to hex 3603.
- Tank L: Begins the turn in hex 4110. You order it to proceed to hex 3706 via hexes 4006, 3906 and 3805.
- Tank M: Begins the turn in hex 4110. You order it to proceed to hex 3812 via hexes 4111, 4011 and 3912.
The map display picks up the action after the initial facing segment of the Game-Turn. All of the moving tanks having been turned within their originating hexes preparatory to movement.
[Movement plot example diagram: hex map showing the paths of tanks J, K, L and M, with the sample plot chart.]
9.14 Simultaneity in Movement Is Defined by Comparative Expenditure of Movement Points
This is not a true simulation of reality. If Tank "A" expends 9 Movement Points in a given Game-Turn and Tank "B" expends 5 Movement Points in the same turn, then all other things being equal Tank A is moving faster than Tank B. In fact, given a two minute Game-Turn, Tank A expends 1 Movement Point in 13.3 seconds while Tank B expends 1 Movement Point in 24.0 seconds. Therefore in real time the expenditure of two Movement Points by Tank A is virtually simultaneous with the expenditure of only 1 Movement Point by Tank B. Knowing this to be true, the above rule still stands. That is, the expenditure of the first, second, third, etc., Movement Points by Tank A is deemed to be simultaneous with the expenditure of the first, second, third, etc., Movement Points by Tanks B, C, D.....n., irrespective of the total Movement Points expended by each tank and irrespective of their true speed and the true simultaneity of the situation. This is a practical definition which gives a playable and workable solution to the problem of establishing simultaneity for units moving at different speeds.
9.2 How to Execute Movement
Movement is executed by physically moving the unit through the hexes written on the Movement Plot. While moving, a unit always faces the next hex it is plotted to enter. This establishes the facing of the unit at any point in its movement so that if it triggers Opportunity Fire at any hex in its Movement Path its Target Aspect can be determined. In the terminal hex that a unit enters in Movement it is considered to face the opposite hexside it crossed to enter the terminal hex. A unit which triggers Opportunity Fire by crossing a hexside that coincides with the line of Opportunity Fire is considered to be in the hex that it exits from rather than the hex that it enters for purposes of resolving the Opportunity Fire.
9.3 Movement Inhibitions and Prohibitions
9.31 Movement is calculated in terms of Movement Points. Essentially, each hex entered from an adjacent hex expends one Movement Point. Certain terrain features increase the Movement Point cost from moving from one hex to another (see TERRAIN, 10.1).
9.32 Movement may not be plotted for a unit that would cause it to expend more Movement Points than the unit has at the beginning of the Movement Plot Phase. In essence, a given hex may not be entered if this movement would expend more Movement Points than the unit currently has.
9.33 Movement Points may not be accumulated from Game-Turn to Game-Turn nor may Movement Points be exchanged between individual units. The Movement Allowance of a given unit is indivisible and unique and may not be used by other units.
9.34 A vehicle unit may not end its movement in a hex with any other unit, Friendly or Enemy. An anti-tank gun may not move (displace) at all. An infantry unit may not enter a hex containing an Enemy unit. If a vehicle can not end its movement as plotted, it terminates in the last possible hex.
9.35 If the MV plot of a unit calls for it to enter a given hex which turns out to be occupied by an Enemy unit during the execution of the Movement, the unit ceases movement on the last hex it could freely enter. This holds if the hex was Enemy occupied from the beginning of the Game-Turn or if the Enemy unit entered the hex at some prior point in time during the Game-Turn.
9.36 Voluntary Premature Termination of Movement
The general rule for Movement requires that all Movement Plots be executed fully and completely. Of course, as noted in 9.0, Enemy unit movement or position may cause the premature involuntary termination of movement. In addition, Friendly Movement may be voluntarily terminated prematurely if in the course of its movement a Friendly unit spots a hitherto hidden or unspotted Enemy unit. If the Friendly Player decides to prematurely terminate the movement of one Friendly unit, it must terminate the movement of all Friendly units. The termination must occur simultaneously with the spotting of the Enemy unit. Of course the Friendly Player need not prematurely terminate movement if he doesn't want to, but if he does he must do so immediately, and for all his units.
9.37 Movement may not be plotted so that a unit deliberately enters a hex on the line of Direct or Opportunity Fire of another Friendly unit. If such a plot is accidentally written, then the DF or OF is cancelled and the firing unit wastes a Game-Turn.
9.4 Overrun Movement
Overrun movement has elements of both movement and combat. It seeks to simulate the moral and physical effects of armored fighting vehicles on soft targets at close range. (Unstoppable war machine crushing puny guns and men beneath its treads while blazing MG fire at fleeing terror-stricken survivors.) Overruns are a specific form of Movement and may only be executed by AFV's. The Overrun is plotted just like Movement, hex by hex. The Overrunning unit must enter the target hex and exit the target hex on the opposite hexside. It must stop and cease movement on the hex beyond the target hex so that the target hex is defined on the Movement Plot as the next to last hex entered by the Overrunning unit.
9.41 Overrunning costs one Movement Point in addition to all normal Terrain costs.
9.42 Units which Panic may not perform an overrun.
9.43 An overrun can only be prevented by destroying the Overrunning unit before it enters the target hex, either by Opportunity Fire or Direct Fire. If the Overrunning unit is destroyed in the target hex or in the exit hex, it is considered to have completed the Overrun.
9.44 If the Overrun is completed, all units in the Target hex are eliminated.
9.45 AFVs may not plot or execute Overrun Movement against other AFVs.
9.46 Units in an Overrun target hex may not evade Overrun by movement of their own. They are considered to remain stationary until the progress of the Movement Segment establishes whether or not they are in fact Overrun.
9.47 A Player may, if he wishes, plot and execute Overruns against obstensibly vacant hexes in hope that he is in fact overrunning a hidden Improved Position. He must, of course, pay the movement cost of overrunning the hex(s) whether or not the hex is actually vacant.
9.5 Facing Movement
All units may change their facing any number of hexsides in lieu of actual movement. Indicate FC on the SiMov Pad. Note that anti-tank guns have no intrinsic Movement Allowance and may not move through the hexgrid. They may, however, change their facing as stated above. All units which have executed movement by displacement through the hex grid (MV) or (OV) may change their facing voluntarily in the hex in which they terminate their movement. Changing Facing takes place after the conclusion of the Movement Execution Segment after any Opportunity Fire has been executed.
9.6 Moving Backwards
Vehicle units may move in reverse, i.e., displace maintaining a reversed facing during Movement. Vehicles may not move in reverse and normally in the same Game-Turn. Vehicles moving in reverse are halved in Movement Allowance (drop any fraction) and may move a maximum of two hexes per Game-Turn in reverse. The mission code for reverse movement is MVR.
10.0 Terrain
Commentary: Glance at the map and the three accompanying Terrain Effects Charts. We are making one map do the work of three. That is, the terrain features printed on the map have different playing characteristics depending on the Terrain Mode being used. In a Scenario which uses the closed Terrain Mode, forest hexes can have a considerable influence on movement and combat. Yet in a different Scenario which uses the open Terrain Mode, the very same hexes are treated as clear terrain ... for all intents and purposes the forested hexes have disappeared.
General Rule: Terrain affects the speed with which a vehicle can move in a Game-Turn. It can obstruct (block) the Line of Sight/Line of Fire of all firing/sighting units. It may add to the basic Defense Strength of a vehicle. And finally, in the case of "soft" targets (infantry or AT guns) the terrain of their deployment determines their full Defensive Strength (if they are not improved positions, see 14.4).
A given Scenario will use one (and only one) of the three Terrain Modes (closed, mixed or open), and the Players will refer to the appropriate section of the Terrain Effects Chart in playing that given Scenario.
Cases:
10.1 Terrain Effects on Vehicle and Infantry Unit Movement
10.11 An infantry unit may move a maximum of one hex per turn regardless of the terrain crossed or entered or the Terrain Mode in use.
10.12 In moving, a vehicle expends Movement Points from its Movement Allowance in order to cross a given hexside and to enter an adjacent hex. This expense is cumulative: x Points to cross the hexside plus y Points to enter the hex (equals) z Points (the total necessary to move from one hex to another adjacent hex). The Point costs are summarized on each Terrain Effects Chart. Note that the hexsides which form clear, rough and forest hexes are considered clear terrain hexsides except when specifically marked with a slope or berm symbol. There is no such thing as a rough or forest hexside per se.
10.13 In the closed Terrain Mode a vehicle may enter one forest hex per Game-Turn. Such a move consumes the vehicle's entire Movement Allowance for that turn. Thus a vehicle may not combine non-forest movement with forest movement in the same Game-Turn.
10.2 Terrain Effects on Line of Sight/Line of Fire (LOS/F)
10.21 The LOS/F of any unit may be blocked (obstructed) by the terrain of the hexsides and in the hexes through which it passes. A given terrain feature may block the LOS/F in one Terrain Mode but not in another. Each Terrain Effects Chart describes which terrain in that mode is obstructing terrain and which is not.
10.22 The ability of obstructing terrain to block the LOS/F depends on the exact relationship of that terrain to the units involved in the LOS/F. To wit:
- A. A given obstructing hexside does not block the LOS/F if either the sighting unit or the target unit is adjacent to the obstructing hexside, i.e., the hexside forms part of the hex containing one or the other units.
- B. An obstructing hex does not block the LOS/F if either the sighting unit or the target unit lies within the obstructing hex.
- C. If the LOS/F intersects an obstructing hexside and neither the sighting or target unit are adjacent to the hexside, then the LOS/F is blocked and the two units do not see one another.
- D. If the LOS/F passes through an obstructing hex and neither the sighting unit nor the target unit lies within that hex, then the LOS/F is blocked and the two units do not see one another.
10.23 If the LOS/F coincides with an obstructing hexside (along its length) it is blocked.
10.24 When using the closed and mixed Terrain Modes, the LOS/F is blocked if it coincides (along its lengths) with any hexside which forms part of a forest hex.
10.25 The LOS/F is not blocked if it passes through an obstructing hexside adjacent to the sighting unit and passes through another obstructing hexside adjacent to the target unit, so long as it does not pass through a third obstructing hexside or hex which is not adjacent or common to either unit. This is a simple corollary or extension of the statements in 10.22.
10.26 There is a depression portrayed on the map roughly surrounding hex #3808. If both the sighting unit and the target unit lie outside this depression, they may ignore the slope which describes this depression, since the LOS/F is considered to pass over this terrain. The other hills and ridges variously portrayed are of relatively low elevations, no elevation being high enough to offset the obstructing forests and berms lying in the lowlands. Under no circumstances may units see from one hill to another hill unless they meet the requirements of 10.22 and 10.25.
10.3 Terrain Effects on Defense Strengths of Infantry and AT Guns (Soft Targets)
10.31 Soft Targets have no set defensive value. Like a chameleon they assume a protective value from the terrain in which they lie. Each of the Terrain Effects Charts has a column labeled "Soft Target Defense" which sets forth the basic Defense Strength in Points of any soft target lying in a given hex.
10.32 In addition, a soft target receives an additional bonus in Defense Strength Points if the LOS/F passes through an obstructing hexside directly adjacent to the soft target. This bonus varies with the Terrain Mode and is reflected on each separate Terrain Effects Chart. Exception: If a soft target is fired at by more than one Enemy unit and the LOS/F of at least one of these Enemy units does not pass through an obstructing hexside, then the soft target does not receive the defensive bonus.
10.33 Terrain has no effect on the Defensive Strength of a soft target if that soft target is in an improved position (see 14.4). Since infantry and AT guns usually are deployed initially in improved positions, the terrain effects on their defense is applicable only if the infantry moves from its initial location.
10.4 Terrain Effects on Vehicle Defensive Strength
Vehicles receive a bonus to their basic Defense Strengths when occupying certain terrain or when the LOS/F passes through an adjacent obstructing hexside. The exact bonuses are detailed on the various Terrain Effects Charts.
10.5 Directionality of Slope Hexsides for Defensive Purposes
Slope hexsides only augment a vehicle or soft unit Defense Strength when the unit is on the "sloped" side of the hexside and the fire is being received only through the "unsloped" side of that same hexside.
[Diagrams: left, "Defense Strength augmented by slope hexside" (fire received through the unsloped side); right, "Defense Strength not affected by slope hexside" (fire received through the sloped side).]
[10.6] Terrain Effects Chart (printed on the separate chart sheet)
Closed Mode
| Terrain Feature In... | Vehicle MP Cost to Enter Hex or Cross Hexside | Defense Effect On Vehicle Target | Defense Effect On Soft Target |
|---|---|---|---|
| Rough Hex | 2 MP | none | 3 DSP |
| Woods hex (obstructs LOS) | Total Movement Allowance | +3 DSP | 3 DSP |
| Berm hexside (obstructs LOS) | +2 MP | +6 DSP | +6 DSP |
Mixed Mode
| Terrain Feature In... | Vehicle MP Cost to Enter Hex or Cross Hexside | Defense Effect On Vehicle Target | Defense Effect On Soft Target |
|---|---|---|---|
| Rough hex | 2 MP | none | 3 DSP |
| Woods hex (obstructs LOS) | 3 MP | +2 DSP | 3 DSP |
| Berm hexside (obstructs LOS) | +1 MP | +3 DSP* | +3 DSP* |
All Modes
| Terrain Feature In... | Vehicle MP Cost to Enter Hex or Cross Hexside | Defense Effect On Vehicle Target | Defense Effect On Soft Target |
|---|---|---|---|
| Clear hex | 1 MP | none | 1 DSP |
| Slope hexside (obstructs LOS) | +2 MP | +6 DSP** | +6 DSP** |
| Wreck hex | na | +2 DSP | +1 DSP |
| Improved Position hex | na | none | +12 DSP |
Open Mode: Rough, Woods and Berm is ignored (treated as Clear terrain).
[10.61] Terrain Effects Chart Notes
- * Units receive this Defense Strength addition only if they are receiving fire through a Berm hexside which forms a part of the hex that they occupy.
- ** Units receive this Defense Strength addition only if they are receiving fire through a Slope hexside which forms a part of the hex that they occupy and the hex that they occupy is on the "sloped" side of the Slope hexside.
The terrain shown in the "All Modes" section is identical in its effects in all three terrain modes. Note, that in the Open Mode all Rough, Woods and Berm terrain is ignored and is treated exactly as Clear terrain.
11.0 Stacking
General Rule: Vehicle units may not stack with any other units nor with each other. A maximum of two infantry or one infantry and one anti-tank unit may stack together in the same hex, including "improved position" hexes.
Cases:
11.1 Application: Stacking applies only at the end of a Movement Segment. Friendly units may move through other Friendly units during the course of movement so long as the stacking limits are met by the end of the Movement.
11.2 Interference of Enemy Units: The movement of Enemy units may result in the premature termination of Friendly unit movement. Friendly unit "A" could be stopped in hex 1110 because an Enemy unit prevents it from occupying hex 1111. Friendly unit "B" would not be allowed to end its move in hex 1110 as plotted but instead would occupy the last hex it could freely enter and occupy.
11.3 Wrecks and Stacking: Wrecks are not units and do not affect stacking.
12.0 Panic
General Rule: Panic is used to present the differing tendencies of units to receive garbled orders, to misunderstand orders or to simply disobey orders for purposes and reasons a small unit commander may consider quite sound. All units, therefore, are subject to Panic randomly. The units that had movement through the hexgrid plotted will have a new Panic movement plot determined. Units that had any of the other operations plotted (these operations described in 5.0) do not carry out their plotted operations or any operation. The effects of Panicking lasts throughout the Game-Turn that the unit Panics in. Units may Panic on any number of successive Game-Turns.
12.1 Panic Determination
Place the ten Panic chits in a deep, wide mouthed container (note: in the subscription version of the game, Players will have to create these chits out of small pieces of paper numbered "0" through "9"). In each Panic Determination Segment, Players draw a quantity of chits equal to the Panic Level of the force they are using in the scenario being played. The numbers on the chits correspond to the last digits of the hexes on the map. The Player's units which occupy hexes ending in those numbers drawn, panic.
12.2 Panicked Movement Plot
12.21 All Panicked units that had movement plotted for that Game-Turn have a Panicked Movement Plot substituted for the original Movement Plot on the Panicked Movement Plot Phase.
12.22 The Panicked Movement Plot for each unit is determined as follows: Roll a die and consult the scatter diagram on the map. The direction indicated by the number corresponding to the die roll is the direction that the unit will be plotted to move. Infantry units that were plotted to move will always be plotted to move one hex in the panicked direction. For other units that had movement plotted, roll a second die for each. The resulting number is the number of Movement Points in the indicated direction that the unit will be plotted to move. Determine which hex the unit will be plotted to move to and plot the movement in the normal manner. Units may not exceed their Movement Allowances due to Panic (if the die calls for them to do so, simply move them their full Movement Allowance in the indicated direction). Units can not move off the map due to Panic; they stop in an appropriate map edge hex instead.
12.23 The plotted Panic movement is executed on the Movement Execution Phase exactly as normal movement. It is subject to all the restrictions and inhibitions of normal movement execution. Except that a panicked unit always yields to an unpanicked unit if its Panic Plot would cause them to terminate in the same hex.
12.24 The effect of Panic on anti-tank gun units is that they may not fire or change facing.
[Gap in the scan: the rules index lists a "12.3 Panic Determination Chart", but no such chart appears in this file.]
13.0 Spotting
General Rule: Simply because you as a Player can see an Enemy Unit on the map does not mean that your units can see it. Spotting is the process whereby you as a Player determine what Enemy Units your units can see and therefore shoot at. Successful Spotting is a function of the distance between your unit and the Enemy unit, the terrain the Enemy Unit is in or behind, and whether or not the Enemy unit is moving and what kind of unit it is.
A unit is either spotted or unspotted. An unspotted unit may not be fired at. Once a unit is spotted it remains spotted for the remainder of the scenario.
Procedure: Both Player's units begin every SCENARIO in an unspotted condition. To show that units are unspotted, display them face-down on the map. When units are spotted, turn them face-up. An unspotted unit is spotted by use of the Spotting Table. In order to spot, the spotting unit must have an unobstructed line of sight to the unspotted unit. Spotting takes place as the direct consequence of a Direct Fire or Opportunity Fire Mission, or if an Enemy unit moves into the line of sight of any of your units. Roll the die once for each one of your units which have an unobstructed line of sight to the Enemy Unit. Consult the Spotting Table and determine if the unit is seen. If it is, turn it right side up.
13.1 Who May Spot
Any Friendly unit may attempt to spot any Enemy unit, so long as it has an unobstructed line of sight to the unspotted unit.
13.2 When Spotting Occurs
13.21 Spotting, or the attempt at spotting, occurs promptly at the time that an unspotted Enemy unit appears in the unobstructed line of sight of a Friendly unit. A given Friendly unit may attempt to spot a given unspotted Enemy unit only once per Game-Turn. It must do so at its first opportunity.
13.22 The Friendly Player may attempt to spot a given Enemy unspotted unit as many times as there are Friendly units which may spot the given unit.
13.23 Practically speaking, Spotting attempts will take place before Direct Fire Execution when Friendly units attempt to spot Enemy units to which they already have a line of sight, and then during the Movement Execution Phase as the course of the various movement paths create new lines of sight to interact with hitherto unspotted Enemy units. Of course, spotting during movement requires a temporary cessation of Movement while the Spotting attempt is made.
13.3 Automatic Spotting of Moving Vehicle Units
Moving vehicles automatically reveal themselves (are spotted) to any Enemy unit which can see it (has an unobstructed line of sight on the moving vehicle). A vehicle which is plotted to move is considered to be automatically spotted by any Enemy unit which can see it.
13.4 Hidden and/or Unspotted Units
Certain scenarios call for certain units to deploy initially as hidden units. These hidden units are not even placed on the map. Not only can't they be spotted by Enemy units, they can't even be spotted by the Enemy Player. When the course of play reveals these hidden units to the Enemy Player, they are placed on the map in an unspotted condition. Eligible Enemy units may then immediately attempt to spot them.
13.5 The Spotting Table (printed on the separate chart sheet)
[13.5] Spotting Table
Die roll needed to spot when target is...
| Range to Potential Target | A Vehicle Unit which is... in open terrain or moving in any type of terrain | A Vehicle Unit which is... in a woods hex or directly behind an obstructing hexside | A Non-Vehicle Unit which is... in open terrain and not in an Improved Position | A Non-Vehicle Unit which is... in an Improved Position or in Rough, woods or wreck hex, or directly behind an obstructing hexside |
|---|---|---|---|---|
| 1 thru 10 | Automatic | Automatic | 1 thru 5 | 1 thru 3 |
| 11 thru 20 | Automatic | 1 thru 5 | 1 thru 3 | 1 |
| 21 thru 30 | Automatic | 1 thru 3 | 1 | Unspottable |
| 31 thru 40 | Automatic | 1 thru 2 | 1 | Unspottable |
| 41 or more |
14.0 Improved Positions
General Rule: Only infantry and Anti-tank units benefit from being in Improved Positions. These represent light field fortifications, camouflage, and a properly thought out use of terrain.
Procedure: Improved Positions are called for by the Scenario. Infantry or Anti-tank units, initially deployed in Improved Positions, are not placed on the map; instead their hex position is secretly noted by the Friendly Player and their position is hidden not only from the Enemy units but from the Enemy Player as well. Once revealed (see below) the hidden units and an IP marker are placed on the map on the discovered hex position. Improved Positions can never be constructed during the course of play.
Cases:
14.1 Benefits of Improved Positions
If the Enemy can't see you, he can't fire at you. And if he doesn't even know where you are, he can't plan the movement of his units to take advantage of presumed weaknesses of your position. Even after your position is revealed to him, your units in Improved Positions are harder to spot and their Defense Strength is at its strongest.
14.2 How Improved Positions Are Revealed
An Improved Position (and the units deployed in it) is revealed (placed unspotted on the map):
- whenever an Enemy unit moves into a hex directly adjacent to the position, or
- if the units in an Improved Position fire on an Enemy unit, in which case the Enemy Player rolls the die. A 1, 2, or 3 and the firing units and IP marker are revealed immediately; otherwise they remain hidden.
(Note that the Friendly Player may ask that the Enemy Player step away from the board at certain points in the game so that he may complete firing angles, etc. without giving away his positions.)
IPs are revealed immediately if the unit's in them move from them or change their initial facing.
14.3 Destruction of Improved Positions
Improved Positions are destroyed (removed from the game) if the units in them are destroyed or if the position is left vacant at the end of a Game-Turn.
14.4 Defense Strength of Improved Positions
14.41 A unit in an Improved Position has a constant Defense Strength of 12 Points, regardless of the terrain that the Improved Position is in (this can be increased if it is directly behind a Berm or Slope hexside and is receiving all its incoming fire through that hexside). See Terrain Effects Chart, 10.6.
14.5 AT Guns deployed initially in Improved Positions must have their initial facing described by the secret deployment note.
14.6 Terrain Restrictions: Improved Positions may be deployed in any hex regardless of terrain.
14.7 Movement: Units may move into or out of Improved Positions at no additional Movement Point cost.
14.8 Stacking: Normal Stacking Limits apply to Improved Positions. (Maximum of two infantry units or one infantry and one AT gun unit.)
14.9 Overruns: Units in an Improved Position may be Overrun. The Improved Position does not confer any protection against an overrun. Of course, unless he is psychic or cheats, the Enemy Player will have some difficulty overrunning hidden Improved Positions since he won't know where they are. Unless he wants to so circumscribe his movement as to blindly overrun every hex on the map, he will only be able to overrun Improved Positions on Game-Turns after they are revealed.
15.0 Preservation
General Rule: The forces of each Player are basically company strength (50-150 men, 10-20 vehicles). Such a force can only sustain so many losses before the survivors lose interest in their objective and seek to survive as their first order of business. The exact point is defined numerically by the absolute number of losses that a force sustains. For example, in Scenario 1 the Preservation Level of the Alpha Force is 9. When the Alpha Force loses its ninth tank it hits its Preservation Level. The Preservation Level of the Bravo Force is 16. When it loses its 16th unit it hits Preservation.
Cases:
15.1 Effects of Reaching Preservation
15.11 Surviving Units are halved in their Attack Strengths. Round up fractions. This effect begins on the Game-Turn following the turn in which Preservation is reached.
15.12 Both Players' forces can reach their respective Preservation Levels on the same or different Game-Turns.
15.2 Significance of Reaching Preservation on Victory and Game Length
Preservation Level is an important element (or the fact itself) which determines which Player wins and when the game ends.
16.0 Introductory Scenario
All Players, regardless of their experience, should play at least one game using the Introductory Scenario. It is a "simpler" game only by virtue of the fact that fewer vehicles are involved and the Preservation rule is not used. Although it is designed as a familiarization scenario it is a good short game in its own right.
Alpha/Bravo Meeting Engagement
Alpha Force: Five Pz IVh tanks (Panic Level 4) enter from Mapedge W in column formation (see 17.3).
Bravo Force: Five M4/76 tanks (Panic Level 1) enter from Mapedge Y in column.
Victory Conditions: The victor is the Player with the greater number of surviving tanks at the end of 25 Game-Turns. Since the Preservation rule is not used, neither
[The printed sentence ends at "neither" in the scan; the remainder of the sentence is not legible on the page.]
17.0 Scenarios
[17.0] The Scenarios
Tank! has thirteen individual games or "scenarios." Each one is complete in itself. A scenario is actually a hypothetical tank action which simulates what might have been or what may be yet. All the scenarios can be characterized as one of three different general situations: either a meeting engagement or an anti-tank action, or a rearguard (delaying) action. Each of these three general situations has rules, requirements and restrictions which apply in common to all of the scenarios of its ilk. For example, all meeting engagement type scenarios have the same victory conditions even though the orders of battle (forces available) differ from scenario to scenario. Below, the Players will find a set of instructions for each type of general scenario situation, as well as a Scenario/Order of Battle Chart which describes each individual unique scenario listing: the general type, the terrain mode, the opposing orders of battle, and their respective panic and preservation levels.
[17.1] General Situation Instructions
The opposing forces are known respectively as the Alpha force and the Bravo force, and they are identified as such in the General Situation as well as the Scenario Chart.
The four edges of the map are labeled respectively W, X, Y, and Z.
Having selected a specific scenario, each Player selects the necessary die-cut counters to represent the force under his command and seats himself on an appropriate side of the map.
[17.11] The Meeting Engagement Situation
Initial Deployment: On the first Game-Turn, Alpha force enters the map from mapedge X; Bravo force enters from mapedge Z. Both forces must enter in a single column.
Both forces must have a complete multi-turn plot written for them in advance, describing the path that they would travel (in column) to exit off the opposite mapedge if they never engaged the Enemy.
Suspension of Panic: Neither force is subject to panic until the Game-Turn following the Game-Turn in which the opposing forces either "spot" one another or in which at least one force executes at least one Direct or Opportunity Fire against the other.
Game Length: Theoretically infinite.
Victory Conditions: Victory is determined by comparing the ratio of Alpha units to Bravo units at the beginning of the Scenario to the ratio of Alpha to Bravo at the end of the Scenario. The scenario ends on the Game-Turn in which all the surviving units of at least one force have exited from the map. Neither force may exit units from the map until the Game-Turn following the Game-Turn in which one or both of the opposing forces reaches Preservation. The final victory ratio is arrived at by comparing the total number of surviving Alpha units with the total number of surviving Bravo units. All undestroyed units (on or exited from the map) are counted. For example, if the Alpha force is initially composed of 20 T62 and the Bravo Force is 10 M60A2 (the actual Order of Battle for Scenario #10) then the initial ratio is 2:1. The winning Player is the one who improves on this initial ratio in comparison with final victory ratio. If there were 8 surviving T62's and only 2 surviving M60A2's then the Alpha Player would be the winner since he improved the ratio to 4:1. The greater improvement in ratio the greater the victory. (Using a ratio only is valid so long as there is at least one survivor in each force. If either force is totally eliminated then the surviving force is the winner with the margin of victory the absolute number of surviving units.) Units may only exit from the map on the edge they entered from.
[17.12] Anti-Tank Action Situation
Initial Deployment: The Alpha Player steps away from the map. The Bravo Player selects positions on the map for his Bravo force. These positions must be at least 11 or more hexes from mapedge X. He secretly records the hex numbers of these positions. He does not place any units on the map itself. The secret record should note: the hex number, the units in the hex and the facing of the anti-tank guns. All Bravo units are then considered to be in hidden, Improved Positions. On Game-Turn One the Alpha force enters from mapedge X in one column.
Suspension of Panic: Neither force is subject to panic until the Game-Turn following the first Game-Turn in which any Direct Fire or Opportunity Fire is executed by either force.
Game Length: Indefinite; game ends when either Player's force reached its Preservation Level, or by achievement of victory, or by failure of Alpha Force to engage (defined as zero casualties after "N" Game-Turns of play; with "N" being a mutually agreeable number of Game-Turns).
Victory Conditions: The Alpha force wins if it destroys all of the Bravo force anti-tank guns or causes the Bravo force to reach the Bravo force Preservation Level without reaching its (Alpha's) Preservation Level. The Bravo force wins if the Alpha force fails to attain its victory objective. If both forces reach their Preservation Levels on the same Game-Turn, it is a draw. Neither force may exit from the map.
Obviously, the initiative lies entirely with the Alpha Player. His force has the mobile units and he can in most cases break off the action at will. A competent Alpha Player will break off the action if he feels that the Bravo force is too tough a nut to crack. This of course, in effect, concedes a victory to the Bravo Player. Since there is no set time limit to the game it is possible for an obstinate Alpha Player to refuse to fight and refuse to concede. Faced with such an individual, the Bravo Player should insist on some time limit before playing this scenario, such as: if there are no casualties to either side for a period of ten consecutive Game-Turns subsequent to the start of the action, then the Bravo Player wins.
[17.13] Rearguard (Delaying) Action Situation
Initial Deployment: The Bravo Player secretly notes deployment hexes for his force. These hexes must be at least 11 hexes away from mapedge W. On Game-Turn 1 the Alpha force enters from mapedge W in one column. After the Alpha force has entered the map, the Bravo Player places his force face down on the map in his previously selected hexes. The Bravo force may not use Opportunity Fire on Game-Turn One.
Suspension of Panic: Same as the Anti-Tank situation.
Game Length: 25 Game-Turns.
Victory Conditions: The Alpha Player must exit one half of the Alpha force off of mapedge Y by the end of the scenario. The Bravo Player must prevent Alpha from exiting half of its units off of mapedge Y (by the end of the scenario without reaching its (Bravo's) Preservation Level. If neither Player achieves victory the scenario is a draw. Both forces may only exit off mapedge Y. In the case of an odd numbered Alpha force, round the fraction down.
[17.2] Scenario/Order of Battle Chart
| Situation | Terrain Mode | Alpha Force | Alpha Panic Level | Alpha Pres Level | Bravo Force | Bravo Panic Level | Bravo Pres Level |
|---|---|---|---|---|---|---|---|
| AT | mixed | 15 PzIVh | 1 | 9 | 8 76AT, 12 inf. | 2 | 16 |
| AT | mixed | 15 T34/85 | 3 | 11 | 8 75AT, 12 inf. | 1 | 16 |
| ME | open | 15 CII | 3 | 9 | 8 PzIIIj | 1 |
[17.3] Entry and Exit from the Map
All of the proceeding scenarios require at least one force, if not both, to enter the map from a given mapedge in one column. In order to execute this requirement the given Player selects any hex lying on the given mapedge as his entry hex. He then envisions a column of his units lined up in a row directly at this mapedge hex, one behind the other. He then writes a Movement Plot which directs the first unit in this column onto the map at the chosen hex on its first Movement Point Expenditure of Game-Turn one, the second unit in the column follows into the same entry hex at its second Movement Point expenditure, etc., etc., so that all of the succeeding units follow the leader hex by hex. In many cases it will not be possible to enter all of the units of a given force onto the map in one, two, or even three Game-Turns. In fact, before the tail of the column arrives on the map the head of the column may find itself embroiled in combat and subject to panic. This is entirely permissible and even expected. Off map units are never subject to panic and enter the map following the course of their predecessors in their turn. All units must enter the map on the same hex. No unit is ever subject to panic on the first Game-Turn that it enters the map. Once a force has been fired upon, it is no longer obliged to keep its column formation and units arriving on the map subsequent to fire being received may be plotted to move freely so long as they enter the map as though they were preserving the column formation (in other words, they can break column once they enter through the entry hex and don't need to blindly follow the course of their predecessors).
In those scenarios that permit or require units to exit from a mapedge the procedure is simplicity itself. Write a plot for the exiting unit that directs it to a mapedge hex and write exit on the plot line. Exiting costs one Movement Point. Units which exit from the map may not return to the map and play no further part in the scenario except of course to count as surviving units.
[17.3] Weapons Characteristics Chart (printed as 17.3; the rulebook index lists it as 17.4)
| Armored Vehicles | Defense Strength Front | Side | Rear | Attack Strength A.P. | H.E. | Mov. Allow. | Effective Range | Fire Control System |
|---|---|---|---|---|---|---|---|---|
| Pz IV h | 7 | 3 | 2 | 14 | 10 | 4 | 50 | N |
| Pz III j | 5 | 3 | 5 | 8 | 5 | 5 | 40 | N |
| Pz V | 11 | 3 | 3 |
[The Design Credits (section 18.0) are omitted: credits are not transcribed.]