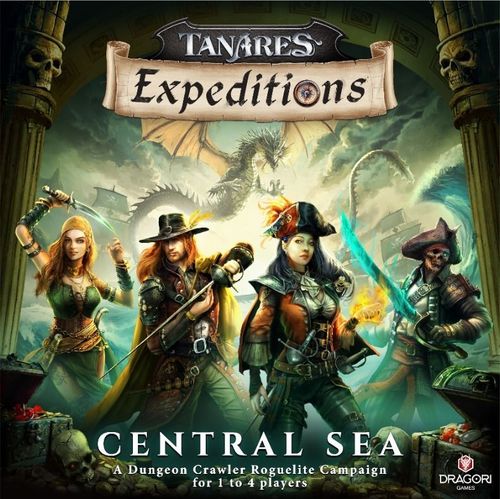
Tanares Expeditions: Central Sea
Tanares Expeditions: Central Sea Rulebook
Table of Contents
Table of Contents
- Using this Rulebook
- Golden Rules
- Component List
- Table Components Overview
- Heroes
- Hero's Turn
- Attacks
- Reactions
- Effects
- Condition Tokens
- Improvement Cards
- Coins and Enhancing Improvement Cards
- Villains
- Sea Curse Cards
- Villain Modifiers
- Combat
- Special Combat Situations
- Quests and Campaign
- Between Quests - Level Up
- Difficulty Levels
- Fewer than 4 Players - Comrades
- Detailed Guide to Start Playing
- Step 1 - Set Up Your Heroes
- Step 2 - Prepare the Improvement Decks
- Step 3 - Gather Common Quest Components
- Step 4 - Begin Your Quest
- Step 5 - Prepare the Heroes for the First Encounter
- Step 6 - Prepare the Monsters for the First Encounter
- Step 7 - Create the Initiative Track
- Step 8 - Start the Encounter
- New Rules
Using this Rulebook
The Rulebook contains all the official rules, including corner cases and examples for almost every situation you might encounter. While it's advisable to read the Rulebook once before playing, the rules are intuitive enough that you don't need to memorize everything right away. You can refer to it as needed during gameplay, with the player aids available for quick reference.
Golden Rules
Specific Over General: If two rules contradict each other, apply the most specific rule.
- Example: If the Rulebook says "only Ranged Attacks incite Reactions" but a Quest Instruction says "Melee Attacks incite Reactions, and Ranged Attacks don't," follow the Quest Instruction, as it is more specific to the situation.
Players Decide Ties: When multiple courses of action are possible within the rules, you get to decide—even for villain behavior or neutral elements.
- Example: If a trait says the hero closest to the orb takes damage and two heroes are equidistant, you choose which one takes the hit.
Component List
- Hero Sheet
- Hero Miniatures
- Hero's Token
- Hero Initiative Cards
- Main Attack Cards
- Ultimate Attack Cards
- Comrade Cards
- Condition and Effect Tokens
- Villain's Tokens
- Villain Cards
- Villain's Standees
- Elite Cards
- Quest Tokens
- Quest Cards
- Player Aids
- Coins
- First Aid Tokens
- HP Track
- Chest Tokens
- Chest Cards
- D20
- Improvement Cards
- Sea Curse Cards
- Quest Book
- Quest Log
- Rulebook
Table Components Overview
Heroes
- Hero Sheet: Each hero has a unique Hero Sheet, displaying their stats and Passive Power. This card is your reference for all of your hero's essential information during gameplay.
- Hero Figure/Miniature: Miniatures represent heroes on the quest map. Place them on the grid to indicate each hero's current position in the game.
- Hero Initiative Card: This card is shuffled into the initiative deck at the start of combat to determine the order of turns for all heroes and enemies.
- Hero's Token: This token is used to track your hero's HP. Move it along the HP track to reflect damage taken or health restored. The back side has +40, to be used when its HP is higher than 40.
Attacks
- Main Attack Cards: Each hero has two Main Attack Cards, representing the attacks they can perform during their turn. Each attack can be used once per turn.
- Ultimate Attack Cards: Heroes possess two powerful Ultimate Attacks. One is available from the start of the quest, while the second must be unlocked as the quest progresses. Ultimates can only be used once per quest, making them strategic and impactful moves.
- D20: This 20-sided die is rolled to determine whether an attack hits its target. A successful hit occurs when the roll equals or exceeds the target's defense.
- Condition and Effect Tokens: These tokens are placed on a hero or villain to track conditions or effects (Empowered for example) that are active on the character.
Improvement Cards
- Improvement Cards: These cards enhance a hero's abilities during the quest. Improvement cards come in two types:
- Passive: Always active, providing ongoing benefits.
- Use: Must be activated; rotate the card when used, and reset it at the start of your next turn.
- Improvement Cards Deck: At the start of each encounter, draw three cards from this deck. Choose one to add to your hero's abilities, and discard the other two.
- Discard Pile: This is where discarded Improvement Cards are placed. Cards in the discard pile have no further effect on the quest.
- Coins: Earned after combat, coins are used to enhance Improvement Cards. They are essential for upgrading your hero's abilities and equipment.
- Chest Cards: Chest may provide a number of different rewards, but some dangers.
Villains
- Villain's Card: Each villain has a card that tracks its position in the initiative order, as well as its stats, attacks, and special abilities.
- Villain's Standee: These standees represent enemies on the quest map. Place them on the grid to indicate their current position during combat.
- Villain's Token: Each villain standee has a corresponding token that matches its color (red or blue) and shape (round or hexagonal). The back side has +40, to be used when its HP is higher than 40.
- Sea Curse: Place this card before the first villain to act. It determines the villains' preferred targets and triggers an unexpected effect.
Combat
- Player Aids: Quick reference cards that summarize important rules and mechanics. Use these to quickly find specific information during gameplay without needing to consult the Rulebook.
- Rulebook: This book contains detailed instructions on how to play the game. Refer to it for comprehensive rules and explanations of gameplay mechanics.
- HP Track: This track is used to monitor the health of both heroes and villains throughout the game. Use the Hero and Villain Tokens to track HP as it changes.
Quests and Campaign
- Quest Book: This book contains all the quests, including descriptions, objectives, and maps. Place miniatures and standees on the grids within this book to navigate through each quest's challenges.
- Chest Tokens: These tokens represent chests within the quests. Place them on the specific spots indicated by the quest.
- Quest Tokens: These tokens represent various elements in a quest, such as barrels, doors, or other interactive objects. Only place them when instructed by the quest, and they may be removed from the grid as the quest progresses.
- First Aid Tokens: Whenever a hero starts its turn dead, apply this token to revive it with 15 HP.
- Comrade Card: These are simplified heroes. If playing with fewer than 4 players, you can use them to complete your team.
- Quest Card: Tied to the narrative, often presenting choices—flip the card to see the consequences.
Heroes
A HERO is the character you control throughout the game. Through your hero, you will achieve objectives, defeat enemies, and make crucial decisions on the board.
- Team Composition: All quests must be played by a team of exactly four heroes.
- Allies: All heroes in a team are allies, working together to overcome the challenges that lie ahead.
Hero Sheet
The Hero Sheet is the essence of your hero's identity. It provides vital information, including:
- Combat Role: This defines your hero's function in battle and determines the Improvement Cards available to them.
- Stats: These include your hero's Hit Points (HP), Defense, Movement, and Reaction Damage, all essential for combat.
- Passive Power: A unique ability with a specific trigger and effect, giving your hero an edge during attacks.
Combat Roles
Combat Roles determine your hero's primary function in combat. Each role has a distinct color and symbol, guiding your hero's optimal strategy.
- Role Uniqueness: No team can have more than one hero of the same Combat Role.
- Role Overview: While heroes of the same role share identical stats and Improvement Cards, their attacks are uniquely tailored to their abilities.
The four Combat Roles are:
- Striker: Fearless melee attackers who excel at dealing high damage. Strikers benefit from being close to their targets, delivering powerful blows.
- Healer: Dedicated supporters who focus on keeping the team alive. Healers excel at restoring health and enhancing their allies' strength.
- Tank: Stalwart defenders who protect the team. Tanks thrive by staying close to enemies, absorbing damage and safeguarding key teammates.
- Controller: Masters of battlefield manipulation. Controllers use ranged attacks to disrupt enemies, creating chaos and powerful area effects.
Reading a Hero Sheet
- A. Hero Name and Combat Role
- B. Max Hit Points (Max HP): Description: Your Hit Points (HP) indicate how much damage your hero can endure before falling in battle.
- HP Track: The HP Track features numbered slots from 0 to 40, representing your hero's health.
- Starting HP: Heroes begin each quest with full HP. Place your HP Token on the slot corresponding to your Max HP.
- C. Defense: The Defense stat determines how difficult it is for enemies to land a hit on your hero.
- Rolling against Defense: When an enemy attacks, they must roll a die. The attack hits only if the roll (plus any applicable bonuses) meets or exceeds your hero's Defense value.
- D. Movement: Movement indicates the distance your hero can travel on the grid.
- The Movement stat indicates how many Movement Points your hero has to spend in a Move Action, which can be used either to move or to perform other activities.
- E. Reaction Damage: Reaction Damage is the damage your hero deals when making a Reaction Attack.
- Applying Reaction Damage: When a Reaction Attack is triggered, your hero deals this specific amount of damage to the target if it hits the target.
- All applicable modifiers from effects or Improvement Cards are included. (See page 13 for more details on Reaction Attacks.)
- Applying Reaction Damage: When a Reaction Attack is triggered, your hero deals this specific amount of damage to the target if it hits the target.
Damage and Healing:
- Damage (DMG): When your hero takes damage, reduce their HP by the same amount. For example, if you take 10 DMG and your token is on slot 30, move it to slot 20.
- Healing: When your hero receives healing (HEAL), move the token to a higher position on the HP Track, but never above your Max HP. Any excess healing is lost.
- Minimum HP: Your HP can never fall below zero. If it reaches zero, your hero is dead (see p. 19).
Death:
- Defeat: A hero dies when their HP drops to zero. Replace the hero's figure with their HP Token to mark the location of their death.
- Combat Resolution:
- If a hero dies during an attack, the death is only resolved after the attack is fully completed.
- If a hero drops to zero HP due to environmental effects, such as stepping on a spike, they die immediately.
Use the heroes' and villains' HP tokens to easily track their health. If the HP exceeds 40, flip the token to the +40 side. When HP reaches zero, remove the token and the villain's figure from the game. If it's a hero, place the token on the square where the hero fell.
Hero's Turn
- You have one Move Action and one Prime Action per turn.
- These two actions may be spent in any order during the hero's turn.
- You may spend a Move Action and then a Prime Action, OR a Prime Action and then a Move Action.
- But you may NOT move partially, use a Prime Action (like an attack), and then resume your Move Action.
| Move Action | Prime Action |
|---|---|
| Move: 1 MV per square | A) Main Attack |
| Interact: 2 MV | B) Ultimate Attack |
| Sidestep: MV equal to your Movement stat | C) Extra Move Action |
| Focus: 4 MV | D) Quest-specific Actions |
Move Action
The Move Action is your hero's primary means of navigating the battlefield during quests. Mastering movement is crucial for success, as it allows you to position yourself strategically, maintain vision for attacks, trigger Passive Powers, and stay out of harm's way. Proper positioning can be the difference between victory and defeat.
Possible Activities
During your Move Action, you can choose to move, interact, sidestep, or focus, spending the required Movement Points (MV) for each activity:
- Move: 1 MV per square.
- Interact: 2 MV.
- Sidestep: MV equal to your Movement Stat.
- Focus: 4 MV.
As long as you have Movement Points, you can continue performing these activities during your Move Action. For example, if you have 5 Movement Points, you might move 2 squares, interact with an object, and then move 1 more square.
Movement Points
- Determining Movement Points: Check the Movement Stat on your Hero Sheet to see how many Movement Points you may spend during your Move Action.
- Use It or Lose It: Unspent Movement Points are forfeited at the end of your Move Action. For instance, if you move 1 square and then declare an attack (starting the Prime Action), your Move Action ends, and any remaining Movement Points are lost.
Move
It is your basic movement. Spend 1 Movement Point to move from your current square to an adjacent square.
- You can combine orthogonal and diagonal moves freely as long as you spend the appropriate number of Movement Points.
- Moving Through Allies: You may move through squares occupied by allied heroes, but you cannot end your movement on a square already occupied by an ally.
Terms: "MOVE 1" means moving 1 square to an adjacent position. Similarly, "an enemy in [1] of you" refers to an enemy located in a square adjacent of your current position.
Figure: You may freely step on squares occupied by allies, but you cannot end your move action on them.
Interact
Interacting with objects is a key part of many quests. Whether you're repairing a statue, opening a chest, or disarming a trap, interacting with objects is straightforward:
- Interact with Objects (or NPCs): Spend 2 Movement Points while adjacent to an interactable object to interact with it.
- Special Conditions: Some quests may require additional conditions for interaction, such as spending HP or possessing a specific item like a Key Token.
Note: Interactions do not trigger Reactions. Only remove an object from the grid if the quest instructions specifically say to do so.
Sidestep
Sidestep is a special maneuver that allows your hero to move swiftly to an adjacent square without inciting enemy Reactions.
- How to Sidestep: Spend Movement Points equal to your Movement Stat to sidestep into an unoccupied adjacent square.
- No Reactions: Sidestepping does not provoke Reactions from enemies, making it a valuable tactic for repositioning without drawing attacks.
Restrictions: You cannot sidestep if you have fewer Movement Points than your Movement Stat. Additionally, sidestepping is only possible into squares that would normally require 1 Movement Point to enter (e.g., you cannot sidestep through corners of walls or into difficult terrain).
Focus
Ranged combatants can Focus to make an extra-precise attack during their Prime Action, increasing the likelihood of hit their targets.
How to Focus:
- Spend 4 Movement Points during the Move Action before making an attack.
- No Distractions: There must be no enemies within [3] of you when you roll the die.
- Exposed Targets: All targets of a focused strike are considered Exposed, reducing 2 of their Defense. This applies even if the target is an ally.
Figure caption: 1, B and C are potential targets of focused attacks.
Movement Restrictions
Diagonal Movement:
- Blocked Diagonals: Diagonal movement is not allowed through the corners of Walls but is allowed through Chests, Combatants, and certain Tiles.
- Terrain Effects: If you move diagonally through a corner shared with a Terrain Tile (e.g., Spikes or Ruins), you'll suffer its effects as if you had entered and then exited the tile.
Middle and End of Movement:
- Impassable Objects: You cannot move through or end your movement on squares occupied by enemies, Walls, closed Doors, or Chests.
- Allies: You can move through squares occupied by allies, but you cannot end your move on their square.
- Terrain Tiles: You can move through and end your move on Terrain Tiles, but be mindful of any effects they may apply.
Prime Action
The Prime Action is the core of your hero's turn—a decisive moment where you unleash your might on the battlefield. Most often, this action is used to make an attack, but it can also be spent on other crucial maneuvers when the situation demands. You can use the Prime Action to:
- Make an attack (including an Ultimate Attack);
- Gain a second Move Action;
- Quest-Specific Uses:
- In certain quests, special instructions may allow or require you to use your Prime Action for unique actions.
Attacks
Your hero has two powerful types of attacks, each with its own strategic purpose:
Main Attack (Normal Sword)
Your hero's Main Attacks are their signature combat moves, unique to each character. You begin your adventure with two Main Attacks, which can be upgraded as the campaign progresses.
How to Use:
- Prime Action: Performing a Main Attack requires spending your Prime Action.
- No Limits: You can use the same Main Attack as many times as you like during a quest, respecting the one Prime Action per turn rule.
- Residual Damage: If your attack misses, the target still takes 3 Residual Damage.
- Multiple Targets: If your attack targets multiple enemies, you must miss all rolls to deal Residual Damage, which is then applied to only one of the missed targets.
Ultimate Attack (Magic Sword)
Each hero possesses two Ultimate Attacks, their most devastating abilities. These powerful moves can turn the tide of battle but must be used wisely, as each can only be unleashed once per quest.
- Availability:
- Your hero begins each quest with one Ultimate Attack ready to use.
- The second Ultimate Attack is unlocked when your hero collects 5 Coins during the quest.
- Spent Status: Once an Ultimate Attack is used, it is considered "spent" and cannot be used again until the quest ends.
- Tracking Lasting Effects: Some Ultimate Attacks apply effects that last beyond the turn they are used.
- Using the Card as a Tracker: If an attack's effect lasts until the end of your next turn, you can use the corresponding Attack Card to track it or use any other marker for clarity.
- Once the effect ends, remove the card from play to indicate the effect's conclusion.
- Using the Card as a Tracker: If an attack's effect lasts until the end of your next turn, you can use the corresponding Attack Card to track it or use any other marker for clarity.
Reading an Attack Card
Your Attack Card is the key to understanding the powerful strikes at your hero's disposal. Each card contains all the information you need to execute your attacks, including the attack's name, level, and your hero's name and image.
- A. Sword: Main Attacks have a silver sword, while Ultimate Attacks are distinguished by a magic sword. This visual cue is important—Ultimate Attacks are your hero's most powerful abilities but can only be used once per quest (see Ultimate Attacks).
- B. Range and Target (p. 11/12):
- Range indicates the maximum distance (in squares) between you and your target to successfully launch an attack. Typical ranges are 1, 2, or 5 squares.
- Target specifies how many combatants you can strike and who they are. Choose your targets wisely to maximize your attack's impact.
- C. Attack Level (p. 22): Shows the attack's level of power (from 1 to 4).
- D. Benefit (p. 11): Some Attack Cards offer additional advantages, noted in the Benefit field. This section details special rules or bonuses that enhance your attack.
- E. Hit (p. 13): The Hit field shows what happens when your attack connects—when your die roll meets or exceeds the target's Defense. Some attacks simply deal damage, while others also apply powerful effects.
- F. Effects (p. 14): Effects are the extra consequences of a successful hit. Apply them in the order listed on the card. Each effect adds a unique twist to your attack, from debilitating conditions to tactical advantages.
- G. Miss (p. 13): If your roll is lower than the target's Defense, you miss. When all your rolls miss, skip the "Hit" and "Effects" sections and follow the instructions in the Miss field. Even on a miss, you can deal Residual Damage (non-lethal damage).
Making an Attack
When it comes to defeating your enemies, timing and precision are everything. Your hero's Prime Action is your chance to strike—plan your moves carefully, anticipate your enemies' actions, and unleash your hero's power with deadly efficiency.
Step-by-Step: Executing an Attack
- Choose Your Attack
- Select an attack from your available Main or Ultimate Attacks.
- Select a Target
- Identify a suitable target that is within your vision and range.
- Roll the Die
- Result Lower Than Defense: You miss, but deal Residual Damage.
- Result Equal to or Higher Than Defense: You hit, inflicting damage and applying any effects listed on the card.
- Natural 20: A critical hit! Usually, this means dealing an extra 3 damage.
Special Situations: Out-of-Turn Attacks
- Some attacks can be triggered outside of your turn, usually in response to an enemy's move. For instance, you may be able to declare an attack after a villain rolls their attack.
- In these cases, you'll know whether the villain's attack hits before you decide to declare your own attack, adding a layer of strategy to your defense.
Detailed Steps of an Attack
1 - Choose the Attack you will perform
- It may be a Main Attack or Ultimate Attack, if available.
2 - Benefit
Some attacks may have a Benefit. Read the Attack Card instructions. This is not an Effect.
You MOVE 2
- You may move yourself 0, 1, or 2 squares before choosing your target.
- This happens in your Prime Action and have no relation to your Move Action.
- Apply all the normal movement rules and restrictions.
- As you did not gain Movement Points, you cannot use it to Interact.
- Because it's part of your Prime Action, this movement does NOT incite Reactions. Only movement on a Move Action does (see p. X).
- You can move even if there is no valid target, but in that case, you can only attack if you have a valid target after finishing the movement.
Gain -X to roll (choose X from 0 to 3)
- Before rolling, choose a number between 0 and 3 to subtract from your D20 roll when considering if you hit the target.
- The more reduction you apply, the more damage it deals.
- Use after a villain rolls its attack.
- Unlike the other attacks, it is used out of your turn (and out of your Prime Action).
- You must declare your attack during the villain's attack.
- Declare it after the rolling, so you'll know whether the villain's attack hits or not.
3 - Target
To launch a successful attack, you must ensure your target is within range, in your line of sight, and matches the criteria on your Attack Card. These three conditions—combatant type, range, and vision—are essential for a valid attack.
Combatants
A target is considered valid when it matches the description on your Attack Card. For example, if the card specifies "1 enemy," you can't target an ally.
Examples:
- 1 enemy: Choose any enemy combatant.
- 1 ally: Choose any allied combatant, except yourself.
- 2 enemies: Choose one or two enemies and attempt to hit each once.
- All combatants in a 3x3 area: Target all combatants within a designated 3x3 area, including yourself and allies.
Attacking Multiple Targets
- Declare Attack Order: Before rolling, declare the order in which you'll attack multiple targets.
- Roll and Resolve: Roll for each target in the declared order, determining hits or misses before applying effects.
Attacking in a 3x3 Area
- Determining the Area: Select any square within range and vision on the grid as the central square (CS). Your attack will affect all combatants within this 3x3 area, centered on the CS.
- Range Limits: Ensure the entire area falls within your attack's range. You can't target portions of the area that are out of range.
- Expanding the Area: If an improvement allows, expand the area after selecting the central square and the original 3x3 zone.
Figure caption: 'A' has Vision over the central square, and it is within range. An attack in that area can hit all green squares (and the central square). Red squares are not struck because they are 5 squares away, putting them outside of the attack's range.
Range
Range defines how far your attack can reach. A target is within range if the number of squares between you and the target is equal to or less than the range specified on your Attack Card.
- Counting Squares: Exclude the square you occupy and include the target's square when counting. For example:
- If two figures are in adjacent squares, the distance is 1 square.
- If there's one vacant square between them, the distance is 2 squares.
Range Types
- Range 1: Melee Attack—you must be adjacent to the target (within [1]).
- Range 2: Close-range Melee Attack (does not incite Reactions)—target must be within [2].
- Range 5: Ranged Attack—target must be within [5], and using this attack adjacent to enemies may provoke Reaction (p. 13).
Figure captions: Range 1, Range 2, Range 5.
Vision
To validate a target, you must have Vision—a clear line of sight between you and the target. Vision is crucial for ensuring your attack can hit its mark.
- Check if a Wall or Closed Door block the way between your square and that of your target. If they don't, you have vision.
- Obstacles (like chests), Terrains and combatants do not block Vision.
Vision is often easy to determine: Trace imaginary straight lines from the corners of your target's square to your own:
- If at least one line reaches any of the corners of the square you occupy (no wall or closed door) you have Vision.
- If a line crosses the vertex or edge of a square occupied by a wall/closed door, it is blocked.
Figure captions: No Vision, as the lines cross vertices/edges of squares occupied by Barriers. They all have Vision of each other, as at least one corner of the occupied square can reach a corner of the target's square, without any interruption from Barriers.
4 - Rolling the Die
A die roll determines whether your attack hits or misses. Compare the result to the target's Defense Stat to see if your strike is successful. Remember to apply the modifiers to attack, if any.
- All attacks in the game require rolling a die, even if you target an ally.
- Roll the die after validating your target (p. 11). It happens after the enemy's Reaction, if incited (p. 13).
- Consider any modifier to the attack (e.g., effects, Flank, Focus, improvements).
- If the final result equals or exceeds the target's Defense, the strike is successful, and you apply the attack's damage and effects (Hit, p. xxx).
- If the result is lower, you miss, but the target still takes Residual Damage (usually 3 non-lethal damage).
Modifiers: There may be a number of modifiers to the attack roll, including some caused by effects, Flank, Focus, improvements, and others. Flank and Focus are related to position:
Flank
When a group of two or more enemies surrounds you from multiple angles, they impair your defense, because your attention is divided between multiple imminent threats.
- Villains are considered Exposed (-2 DEF) to ALL strikes from heroes in a Flank.
- You cannot Flank allies.
You strike with Flank when:
- An ally and you are both adjacent to your target AND
- This ally is not adjacent to you.
Figure captions: Flank; Not Flanked by B.
In the second example above, a square separates allies A and C, which means they Flank enemy 1. However, there are no squares separating ally B from another ally adjacent to enemy 1, which means B is not in the Flank. In other words, enemy 1 is Exposed to attacks made by A and C, but not to attacks made by B.
Focus
- Focused attacks also consider the enemy Exposed (-2 DEF) to all your rolls (see p. 9).
5A - Hit
A Hit occurs when your die roll, plus any modifiers, equals or exceeds your target's Defense Stat. Upon a successful hit, follow these steps:
- Trigger Passive Power: If your hero's Passive Power is triggered, apply its effect (p. 8).
- Apply Damage: Move the target's Token to a new position on the HP Track to reflect the damage dealt.
- Apply Effects: Follow ALL effects listed on the Attack Card in the order they appear. If an effect lasts beyond the current turn, use the Attack Card to track it.
- Critical Hit: A roll of natural 20 results in a Critical Hit, typically adding +3 damage.
- You may choose not to apply the extra damage.
- You can apply the extra damage before or after resolving the attack's Effects.
- Critical Hit MAY apply more than once per attack, if multiple targets.
5B - Miss (Residual Damage)
When your attack falls short and all rolls fail to meet the target's Defense Stats, it's considered a Miss. But even in failure, your hero can still make an impact with Residual Damage, as detailed on your Attack Card.
- Apply to a Single Target: Residual Damage applies to only one target per attack, even if multiple targets are involved.
- Multiple Targets: To apply Residual Damage, you must miss all targets. Choose one target to receive the damage.
- Optional Application: You may also choose to not apply it (especially when attacking allies).
- Non-Lethal: Residual Damage is non-lethal; it cannot reduce a target's HP below 1.
- Ignore Effects: Residual Damage ignores all effects on both the attacker and the target unless explicitly stated otherwise.
- Example: Your Residual Damage won't gain a +2 damage bonus from an Empowered Token, nor will a Vulnerable Token increase damage to the target.
6 - Death
After applying the consequences of the Miss or Hit steps, the attack is considered resolved. Combatants with less than 1 HP, at this point, are considered Dead.
- A combatant is only considered dead after the entire attack resolves, including damage and effects (e.g., If your attack allows you to move the target, that movement occurs before the target is declared dead).
- See all details on page 19.
Reactions
Even when it's not their turn, combatants are always on high alert, ready to retaliate if the opportunity arises. If an enemy makes a careless move in your hero's presence, it might trigger a Reaction.
Conditions for a Reaction:
- A. Proximity: Your hero must be adjacent to an enemy.
- B. Inciting Action: The enemy performs an action that triggers a reaction:
- Movement: The enemy moves (not Sidestep) to another square during a Move Action.
- Ranged Attack: The enemy declares a target for a ranged attack.
Note: All conditions must be met at the exact moment the enemy performs the triggering action. For example, entering an adjacent square doesn't trigger a reaction, but leaving one does.
Reaction (table)
| Reaction | |
|---|---|
| Made out of your turn. Roll the D20 (as if attacking). | |
| 1 square | 1 enemy inciting a Reaction |
| Hit: Deals damage equal to Reaction stat | |
| Miss: No Residual Damage. |
Reaction Rules:
- One Reaction Per Turn: A combatant can incite only one Reaction per turn. If multiple heroes could react, choose which one makes the attack.
- Hero's Choice: Making a Reaction is optional for heroes, but mandatory for villains.
- Roll the D20: Roll a die to check if the Reaction hits, applying any applicable modifiers (e.g., Flank, Effects, Condition Tokens). On a miss, it deals no Residual Damage.
- Reach: Even if your Main Attacks are ranged, your Reaction has a reach of 1 square.
- Timing: Reaction attacks resolve before the inciting attack or movement. If your reaction kills the enemy, their remaining actions are forfeited.
Effects
Effects are special modifications to the circumstances of the match. While not always directly tied to the loss or gain of Hit Points, they bring strategic depth to your game, transforming ordinary actions into extraordinary moments.
Sources of Effects: Attacks (heroes and villains), Improvements, Sea Curses, Items, Terrains, First Aid, Quest Traits, Chest Cards.
Target
Effects can apply to the target of your attack, other combatants, or even yourself, depending on the effect's description.
- Do not mistake the target of an attack with the target of an effect:
- The target of an attack is specified in the Attack Card and requires a roll against Defense.
- The target of an effect is described in the effect's text and does NOT require a roll.
Examples:
- Effect: MOVE 2 the target—The effect targets the same combatant as the attack.
- Effect: MOVE 3 another enemy—The effect targets a different combatant than the attack.
Validating the target of an effect
An effect can be applied (no roll required!) if the following requirements are met:
- Description: The target matches the effect's text.
- Range: Typically within 5 squares, unless otherwise specified.
- Vision: You must have line of sight to the target, unless the effect states otherwise.
Note: If there are no valid targets, the effect is lost.
Terms Related to heroes:
- You: Hero using the attack or ability.
- Ally: Any hero other than the one using the attack or ability.
- Hero: Any hero, including the one using the attack or ability.
Distance
- If no distance is specified, assume the effect can be applied within 5 squares. For example, "MOVE 2 an enemy" means you can move an enemy within 5 squares of you.
- In [3] of you indicates a range of 3 squares. (E.g.: "HEAL 2 an ally in [2] of you" means that this ally must be within 2 squares of your hero).
Vision
- You must have vision to combatants which you want to apply effects, unless the description states otherwise.
- When the text says "on the grid", this means no vision is required.
Duration of effects
Most effects are instantaneous, resolving during the same turn they are applied. However, some effects, particularly those from Ultimate Attacks, have longer durations described. In these cases, use the card to track them.
- Instantaneous Effects Examples: HEAL 2 a hero, A villain gains 1 Vulnerable token, Deal 4 DMG to another villain.
Condition Tokens
Condition Tokens represent ongoing combat statuses, either enhancing or hindering a combatant's performance.
- Orange tokens are harmful, green tokens are helpful;
- No Limit: A combatant can have any number of tokens.
Condition Token Rules:
- Stacking: Tokens can stack, meaning their effects add up.
- Example: If you have 3 Empowered Tokens (+2 DMG each), you deal +6 DMG.
- Ends if used (when the token is applied, remove it from the combatant).
- If you have a Protected Token (+2 DEF), remove it after being attacked, regardless of whether the boost prevented the hit.
- If you have a Toughened Token (-2 DMG) and the enemy misses, the token remains, as the reduction wasn't applied to the Residual Damage).
- Multi-target attacks: If an attack targets multiple enemies and a token modifies the attack (e.g., Empowered), apply the effect to only one target of your choice.
Important:
- Tokens must be used at the first opportunity. You cannot choose to ignore the condition when applicable.
- Tokens never modify Residual Damage (miss).
Condition Token Reference:
| Token | Effect (value 2) |
|---|---|
| Empowered | Deal +2 DMG against enemies. |
| Weakened | Deal -2 DMG against enemies. |
| Protected | Gain +2 to Defense against enemies. |
| Exposed | Gain -2 to Defense against enemies. |
| Toughened | Take -2 DMG from enemy attacks. |
| Vulnerable | Take +2 DMG from enemy attacks. |
Improvement Cards
Improvement Cards are powerful tools that enhance your hero's abilities during a quest, giving them an edge in combat and allowing for strategic versatility. Each hero starts with one Improvement Card, but as the quest progresses, you'll have opportunities to gain more, increasing your hero's power significantly.
Types of Improvement Cards
Improvement Cards come in two distinct types:
- Passive: These cards are always active, providing ongoing benefits throughout the encounter. Once a Passive Improvement is in play, its effects automatically apply without any further action needed.
- Use: These cards must be activated to take effect. After using a Improvement Card, rotate it 90 degrees to indicate that it has been spent. At the start of your next turn, reset the card to make it available for use again.
Improvement Card Decks
Each hero has a unique Improvement Card Deck related to their Combat Role.
- There are four decks in total, one for each Combat Role.
- Each hero begins with 16 cards in their deck, and one of these cards will be in play at the very start of the quest. The deck now has 15 cards.
- As you progress on the campaign, cards will be added and removed from the deck.
How to Obtain and Use Improvement Cards
Starting the Quest:
At the beginning of the quest, each hero starts with one Improvement Card.
- First Quest: Begin with the Improved Passive Power (all heroes), the basic one.
- Subsequent Quests: Start with any ONE Improvement Card you used in the previous quest, ensuring your hero retains part the progress and power they've earned.
Drawing and Choosing Improvement cards:
- Draw: At the start of the first encounter, draw three cards from the Improvement Cards Deck.
- Choose: Select one card to add to your hero's abilities, giving you a total of two Improvement Cards.
- Discard: Place the remaining two cards into the Discard Pile. Cards in the Discard Pile have no further effect on the quest.
- Subsequent Encounter: Whenever an encounter starts, repeat the procedure. Usually, a hero will finish the Quest with 5 Improvement cards.
Discard Pile: All discarded Improvement Cards are placed here, where they no longer influence the quest. Once a card is in the Discard Pile, it cannot be reused until the next quest, so choose your cards wisely!
Using Improvement Cards in Combat
Improvement Cards can drastically increase your hero's power, especially when combined. You can activate all applicable cards simultaneously, potentially creating devastating combos that turn the tide of battle in your favor. Every effect on the cards counts as an individual effect, and their combined use is key to create unstoppable combos and unleash your hero's full potential.
Card anatomy: Card Name; Combat Role; Basic = Initial / Advanced = Level Up; Effect; Enhanced Effect; Coins.
Coins and Enhancing Improvement Cards
Earning Coins:
During the quest, heroes earn coins based on their performance in encounters. Completing challenges during these encounters is crucial:
- Challenge Completed: Each hero earns 2 coins.
- Challenge Not Completed: Each hero earns 1 coin.
Greed Power - Buffing Improvement Cards:
Coins are essential for unlocking the full power of your Improvement Cards:
- 2 Coins: Placing 2 coins on an Improvement Card activates its enhanced effect, which is far more powerful than the regular effect.
Note: Every Improvement Card has a base effect that is always active, regardless of coins. However, by placing TWO coins on a card, you unleash its true potential, gaining access to game-changing abilities. Remember, 1 coin has no effect—so save up and invest wisely to maximize your hero's strength!
Villains
In the treacherous waters of your quest, the term Villain refers to any enemy combatant that stands in the way of your heroes. Whether they are ruthless pirates, monstrous creatures, or relentless soldiers, these foes are driven by one purpose: to bring your heroes to their knees.
Villain Components
Villains are represented on the battlefield through a combination of components:
- Villain Standee
- Villain Card
- Villain Token
The villain color on the card, standee base, and token must match. Additionally, the shape of the standee base (round or hexagonal) must correspond with the token's shape as well.
Villain Standees and Tokens
Villains are represented by standees on the board. Their base color and HP Token color must match their card.
- You can decide the shape (hexagonal or rounded) of the base, but you must use the same shape in the HP track.
- Never an encounter can have more than 2 villains of the same color. (see p. 18)
Villain Card
- A. Name and Art: Displays the villain's name, level, color, and artwork.
- The artwork on the card matches the standee representing the villain on the battlefield.
- B. Villain Stats: Each Villain Card includes essential stats:
- Hit Points (HP): The amount of damage the villain can endure before being defeated.
- Defense (DEF): The difficulty of landing a successful attack on the villain.
- Movement (MOV): How far the villain can move during its turn.
- Reaction: The damage the villain deals if it makes a Reaction.
- C. Attack Box: Each villain has one type of attack, detailed in this box.
- D. The color of this outer corresponds to the villain's color.
- E. Villain Level: Represents its power (from 1-3).
A Villain's Turn
Like heroes, villains takes a Move Action and a Prime Action on their turn. Their sole mission is destruction, and they will stop at nothing to achieve it. Villains follow a priority sequence:
- Target Selection: Identify the Favorite Target as determined by the Sea Curse Card (see p. 17).
- Minimal Movement: Move as little as possible to reach their target.
- Damage Avoidance: Take the safest path, avoiding as much damage as possible.
This means that moving fewer spaces takes priority over avoiding damage.
Detailed Turn Breakdown
Step 1: Determine a Target
- Identify the villain's Favorite Target based on the Sea Curse Card and check if it is reachable.
- Consider movement-impairing Terrain, like ruins.
- Ignore potential damage from reactions or hazardous terrain, the villains don't prioritize to avoiding them.
- If the Favorite Target is unreachable, repeat the process with the second favorite, and so on, until a reachable target is found.
- If no hero can be reached, the villain uses Double Move to get closer to the nearest hero.
Step 2: Minimal Movement
- If movement is necessary, the villain spends as few movement points as possible to reach its target.
- This may result in the villain taking damage or even dying along the way.
Step 3: Safe Movement
- If multiple paths are equally short, choose the one that results in the least damage.
- If paths are equally short and safe, the players choose the villain's final square, which can be strategically important for the heroes' future actions.
Special Adjustment: Sidestep
- A villain will Sidestep if moving one square or less can avoid damage from Terrain or Reactions.
- Example: A ranged villain adjacent to a hero will Sidestep to maintain its distance while attacking.
- Example: A melee villain standing on Lava may Sidestep to avoid taking damage at the end of its turn.
During the Attack
- Villains cannot use Flank or Focus.
- If a villain's attack forces a hero to move, it will try to push the hero into the most dangerous path possible.
Sea Curse Cards
Sea Curse Cards dictate the behavior of villains, determining their Favorite Targets and often applying additional effects that enhance their strength.
- Setup: When creating the initiative track, shuffle the Sea Curse Deck and place it face down just before the first villain's turn (p. 18).
- REMEMBER: Each encounter you must shuffle the deck and start with 12 cards.
- Activation: Before this villain acts, draw and reveal a Sea Curse Card. The card determines the Favorite Target for all villains and may apply a special effect.
- Rotation: Before this same villain's next turn, draw a new Sea Curse Card, replacing the previous one.
- Deck Management: If the deck runs out, reshuffle and continue. The deck remains active until all enemies are defeated.
If there are villains with Guard status, follow the same rules.
- Apply the modifier, but note that villains cannot take their turns until they break the Guard status.
Villain Modifiers
Elite Status:
- Starting from the second encounter, some quests may designate certain villains as Elites.
- Assignment: Take the appropriate number of Elite Cards and assign them to villains from first to last in the initiative order. Do not assign to the Boss.
- Effect: Each Elite Card modifies the villain based on its level, enhancing its abilities.
Boss Cards:
- This card represents the quest boss.
- While the boss's unique perks are listed on the card, their stats and attacks are detailed within the quest.
Combat
Combat is a key element of your adventure, in which heroes face off against villains in intense encounters. Every encounter follows a structured sequence that ensures both challenge and strategic depth. Here's how to set up and manage combat in your game.
Combat Setup Sequence
Whenever an encounter begins, follow these steps to prepare for battle:
- Read the Story and Encounter Challenge:
- Begin by reading the narrative for the encounter to set the scene.
- Review the specific challenges and special rules associated with the encounter. This challenge dictates bonus objectives that grant additional coins.
- Select and Shuffle Villains:
- First, find the villain cards listed for this quest and shuffle them—these are the foes your heroes will face.
- Reminder: For each encounter, place all quest monsters, including those you battled in the previous encounter.
- Draw the required number of villain cards as indicated by the quest instructions.
- Color Limitation: If more than two villains of the same color are drawn, continue drawing until get the other colors, ensuring no more than two villains of the same color are in play.
- Create the Initiative Track:
- Shuffle the selected villain cards together with the heroes' Initiative Cards.
- Draw cards one by one and place them from left to right, creating the Initiative Track.
- This track determines the order of actions during the combat round.
- Place the Sea Curse Deck on the left of the first villain of the initiative.
- Follow any additional quest-specific instructions, such as applying Elite modifiers to certain villains.
Taking Turns and Managing Rounds
Once the Initiative Track is established, combat proceeds as follows:
- Turn Order:
- The combatant on the far left of the Initiative Track takes the first turn.
- After completing its turn, the next combatant to the right takes its turn, continuing in this order until all combatants have acted.
- Ending the Round:
- Once every combatant has taken their turn, the round ends (apply any effect described in the quest related to End of Round).
- Combat proceeds to the next round, following the same order of actions as determined by the Initiative Track.
Key Rules for Combat Turns
One Turn per Round: Each combatant may only take one turn per round, even if their position on the Initiative Track changes during combat.
Acting Out of Turn:
- Certain attacks or improvements may allow a combatant to act outside of their designated turn.
- Acting out of turn does not alter a combatant's position on the Initiative Track. They will still take their regular turn when it comes up in the sequence.
Initiative Track
The character positioned farthest to the left takes their turn first (in this case, Captain Krog). Note that the Sea Curse Deck is placed immediately before the first monsters to act.
Special Combat Situations
Guards
Villains often patrol the dungeons in groups, unaware of the heroes lurking nearby. These passive enemies are known as Guards. While they remain on guard, they pose no immediate threat, taking no actions until the presence of a hero forces them into action.
- Inactive State: Guards are considered inactive combatants, meaning they do not attack or take turns until activated.
- Placement: At the start of the encounter, place all Guard cards in the initiative deck as usual, but remember they remain inactive until triggered. Sea Curse cards work as usual.
Activating Guards
Guards can be activated and brought into the fray under some conditions. A Guard immediately loses its inactive status and becomes active if any of the following occurs:
- Attack or Effect: The Guard is targeted by or affected by any attack or effect.
- Proximity: A non-Guard combatant (hero or active villain) moves within [2] squares of any Guard, regardless of their final position.
- Group Activation: If any one Guard in an encounter becomes active, all Guards are activated simultaneously.
Once activated, Guards take turns as regular villains, joining the battle with full ferocity.
Death
When a hero's HP drops to zero, they are considered dead. However, death in this world is not always permanent, and with the right resources, your fallen comrades can rise again to continue the fight.
- Defeat: A hero dies when their HP reaches zero. Replace their figure on the board with its HP Token to mark the spot of their demise.
- Combatants may freely occupy and step on this square; the token does not influence the combat rules.
- Effects that target "a dead combatant" must consider that the dead combatant is in this square, for purposes of Range and Vision (p. 12).
Death Resolution
- During Combat: If a hero dies as a result of an attack, resolve the attack completely before declaring the hero dead.
- Environmental Hazards: If a hero drops to zero HP due to environmental effects (e.g., stepping on a spike), they die instantly.
Effects of Death
- No Actions: A dead hero cannot take turns or receive healing.
- End of Effects: All effects applied to the dead hero immediately end. However, any effects they applied to others remain active.
- Example: If a hero with an Empowered Token dies, remove the token from the dead hero. However, if the dead hero had applied a token to an ally, that token remains.
- Gaining Rewards: Despite their death, heroes still gain Coins and Improvement Cards, though they cannot use them while dead.
First Aid
Heroes that fall in battle are not lost forever. Through the use of First Aid, they can be revived and continue their quest. However, First Aid is a precious resource, and careful management is essential.
Reviving a Hero
- Start of Turn: At the beginning of a dead hero's turn, you must spend a First Aid Token to revive it.
- Revival Process: When revived, the hero heals 15 HP, but the process consumes 2 of their Coins.
- Placement: Return the hero's miniature to the board, placing it where their HP Token was. Set the HP Token to 15.
- Action Availability: Once revived, the hero may immediately take both a Move and a Prime Action as usual.
- No Modification: Improvement cards or other effects cannot modify the healing from First Aid.
Managing First Aid
- Limited Use: Each quest grants you two First Aid Tokens. These tokens automatically replenish at the start of each new quest.
- Quest Failure: If you run out of First Aid Tokens and another hero dies, you lose the quest at the start of this dead hero's turn. The quest must be abandoned, as the hero needs special care that cannot be provided in the heat of battle.
Remember, dead heroes remain in the initiative track, but if they are not revived when their turn comes, the consequences could be dire.
Quests and Campaign
Quests are the heart of your adventure, presenting the heroes with challenges and battles that lead them closer to their ultimate goal. Each quest typically culminates in a climactic showdown against a formidable boss.
Reading a Quest
Understanding a quest begins with a careful reading of its various components. Each part provides vital information to guide your strategy and actions.
- A. Introduction Text: The quest often begins with a message from the old pirate Crumbs and his trusty parrot, relayed through his magical telescope. Crumbs, who can see far and even through walls, sends tactical advice to the heroes via enchanted seashells. While his insights are usually helpful, sometimes his strategies are... questionable.
- B. Quest Objective: The quest ends the moment you achieve the stated objective. Completing the objective is your primary goal, so stay focused and follow the steps outlined for victory.
- C. Quest Villains: The quest specifies which villains you'll face. Shuffle their cards and draw the indicated number. As you draw, place the villains on the grid according to the numbered positions (I, II, III, etc.). Be mindful of the color limitation—no more than two villains of the same color can be in play at once.
- Guard Status: If the word "Guard" appears, these villains are inactive until activated (see page 19 for details on Guard activation).
- Elite Monsters: The quest will also indicate the number of Elite villains. Follow the instructions to enhance the challenge.
- D. General Trait: This trait applies throughout the entire quest, influencing all encounters. For ease of play, this trait is repeated on each spread of the quest, so you won't need to flip pages mid-game.
- E. Encounter Challenge: Each encounter within the quest includes a special challenge. Completing this challenge grants an extra coin to all heroes, adding an incentive to push your strategic limits.
- F. Encounter Trait: Some encounters feature a unique trait that applies only within that encounter. This trait works alongside the General Trait and ends when the encounter concludes.
Example quest card ("Blink Island"), shown in the rulebook to illustrate the components above:
Blink Island
A. Crumbs, squinting through his telescope: "Ahoy, captains! In just five minutes, we'll be dropping anchor at the infamous Blink Isle. Don't let those palm trees and soft sands fool ye—this so-called 'paradise' has a wicked mind of its own. It disappears and reappears as it pleases! I once knew a lad who swore he was stranded there for two years, but only a day passed in the Central Sea. Strange place, this isle. Anything could happen here."
Squawk: "I feel the same when you tell your stories, Crumbs!"
B. Crumbs: "Heh! Maybe so. But listen up! Time's short. Your mission is to save Captain Liana and get out fast. I can already see enemy ships closing in. When you disembark, watch your step—there's something slippery about that sand. It's like standing on a mermaid's tail. Worse yet, those dogs have rigged the place with spikes! But here's the fun part—use their own traps against them. There's nothing sweeter than watching a pirate fall on his own spikes. Show 'em who's boss, captains!"
C. Villains: Goblin, Pirate Lv1, Sentinel, Spider
D. General Quest Trait (all encounters): Cursed Piece. Choose one hero to carry the cursed crystal. It deals 4 DMG at the start of the hero's turn. The hero may pay 2 HP to reroll a die. This hero may spend 2 movement points to transfer it to another hero.
Encounter 1
E. Challenge: 2 enemies die inside the Spikes. Place the villains (coordinate X-Y), according to the rules.
F. Red Slippery ground: Whenever a hero or villain is hit while in the red sand, the attacker may MOVE 1 its target. Spikes: See rules on Page X or player Aid. When all villains are defeated, start Encounter 2. (See rules on page XX or Player Aid)
Crumbs: "But don't get comfortable just yet! I tried to throw those enemy ships off course, but they ain't buying it. They've set up their Arcane Cannons, and they've got you locked in their sights. Stay sharp—those cannonballs will leave more than a scratch, and reinforcements are landing as we speak. Now's your chance! Turn the tables and let them taste their own firepower. Knock 'em out with their own explosions, and they'll think twice before crossing us again!"
Navigating Through the Quest
Follow these steps to successfully navigate a quest:
- Start the Quest:
- Place the heroes in the indicated Starter Area on the grid.
- Equip each hero with their Main Attacks and one Ultimate Attack.
- Choose one Improvement Card: either one from a previous quest or the Improved Passive Power if it's your first quest.
- Read the Story and Objectives:
- Familiarize yourself with the quest's narrative, objectives, General Traits, and Encounter Challenges.
- Prepare the Villains:
- Shuffle the specified villain cards and create a deck. As you draw cards, place the villains on the grid in the numbered positions (Usually I-III, but may be I-V).
- Ensure no more than two villains of the same color are in play. If you draw a third, ignore it and continue drawing.
- Create the Initiative Track:
- Shuffle the Hero Initiative Cards with the drawn villain cards to form the Initiative Track. (page 18)
- Shuffle the Sea Curse Deck and place it face down immediately to the left of the first villain.
- Prepare for Combat:
- Place HP Tokens and gather Condition Tokens—they'll be essential during combat.
- If this is not the first encounter of the quest, maintain the heroes' current HP from the previous encounter.
Place the villains only when the Encounter begins, at the positions indicated on the quest. You'll see a skull symbol and a number, which corresponds to the order in which they should be placed. Some Bosses have a specific position determined by the quest.
Special Terrains
These symbols are displayed on the grid: Deadly Terrain, Difficult Terrain, Chest, Wall, Villain Start.
Deadly Terrain (Lava/Spikes)
The Battlegrid is dotted with treacherous Lava and Spikes—hazardous terrains that can turn the tide of battle in an instant. These dangerous tiles will damage any combatant brave (or foolish) enough to cross them.
- Damage on Entry: Every time you enter a deadly terrain square, whether by choice or due to an effect, you take 1 damage per square entered.
- Entire Turn: If you spend your entire turn on the deadly terrain, take 1 damage.
- Diagonal Movement: Moving diagonally through a deadly terrain still deals 1 damage, just as if you had entered it directly.
Difficult Terrain (Ruins/Swamp/Water)
Navigating through Ruins, Swamps, or Water is no easy feat. These terrains slow down movement, requiring extra effort to traverse.
- Movement Cost: Each square of difficult terrain counts as two squares of movement during your Move Action or when moved by an effect.
- Sidestepping Restriction: You cannot Sidestep onto these terrains unless you spend two Move Actions.
- Diagonal Movement: Moving diagonally through these terrains still counts as two squares of movement.
Wall
Wall is a tile that separates rooms and blocks combatants' vision of what's on the other side.
- You cannot move through squares occupied by walls, even diagonally through its corners.
- You cannot attack or move walls.
- Walls block Vision.
Chests
Chests are ancient relics, often left behind by long-dead captains. While they usually contain valuable items, their contents can be unpredictable—opening one could lead to fortune or disaster.
- Opening a Chest: To open it, you must Interact with it. When you open a Chest, draw 2 cards from the Chest Deck.
- Rum: If you draw Rum, keep it and use it at any time on your turn, as a free action, during this quest. You may Interact with an ally to transfer it.
- Traps: Some cards trigger instant effects, like Traps or Blessings. Follow the instructions on the card immediately.
- Removing the Chest: After drawing the cards, remove the Chest Token from the Quest—its treasures have been claimed.
Between Quests - Level Up
After successfully completing a quest and reading the Story Card, it's time to enhance the power of your heroes. Follow these steps to prepare for the challenges ahead:
- Upgrade Your Improvement Cards:
- Review Your Deck: Begin by grabbing your Improvement Cards Deck.
- Keep a Key Card: Select one Improvement Card that you used in the previous quest and set it aside. This card will start the next quest already applied to your hero.
- Streamline Your Deck: Choose three cards from your deck to remove from the game permanently.
- Advance Your Abilities: Take the Advanced Improvement Cards Deck corresponding to your hero's Combat Role.
- Shuffle and Draw: Shuffle the Advanced Deck and draw three cards. Add these to your deck without looking at them.
- Ready for the Next Quest: Your Improvement Cards Deck is now prepared for the next quest, maintaining the same number of cards as before, but with upgraded options.
- Enhance Your Main Attacks:
- As your heroes progress through the campaign, their Main Attacks grow stronger. Follow these instructions based on your Quest Card.
- For example, after completing Quest 1, you will be instructed to obtain the three Level 2 Main Attacks and select two of them.
- This systematic improvement ensures your heroes are always prepared for the increasing dangers they'll face.
- Record Your Progress: Keeping track of your journey is crucial for the campaign's continuity:
Difficulty Levels
The game offers various difficulty levels to match your desired challenge. Choose wisely, as each level will test your heroes' skills in different ways:
- Easy: For a more relaxed experience, play without using the Elite Modifier.
- Normal: The standard game mode, following all regular rules.
- Hard: Increase the difficulty by adding 1 extra Elite modifier to all encounters.
- Very Hard: For the ultimate challenge, face 3 Elites in every encounter.
You can adjust the difficulty before any quest to find the perfect balance, ensuring the challenge level hits the sweet spot for maximum enjoyment.
Fewer than 4 Players - Comrades
When playing quests with fewer than 4 players, managing all Improvement Cards for multiple heroes can become overwhelming. To simplify this, you can utilize Comrades—a streamlined system designed to ease the control of additional heroes, ensuring you can focus on your main character while still maintaining a full team.
How It Works:
- Full Hero Requirement: You must control at least one full hero. The remaining heroes (up to three) can be managed as Comrades, ensuring your team always consists of four heroes.
Choosing the Comrades' Evolution:
- At the start of the quest, select one of three Evolution Paths for each Comrade. Unlike full heroes, Comrades don't receive new cards at the start of each encounter. Instead, they continue to benefit from the cumulative effects of their chosen Evolution Path.
- Coins can also enhance the power of a Comrade's Evolution Card, providing additional benefits as described on the card.
- Once chosen, a Comrade's Evolution Path cannot be changed until the quest is completed. However, you have the freedom to select a different path at the start of each new quest, allowing you to adapt to the challenges ahead.
Detailed Guide to Start Playing
Step 1 - Set Up Your Heroes
- Select Hero Sheets: Grab 4 hero sheets (if you have the expansion, select 4 heroes, ensuring one from each combat role).
- Gather Hero Components:
- Attack Cards: Take the 4 attack cards for each hero (2 Main Attacks at Level 1 and 2 Ultimate Attacks).
- Hero Initiative Card: Grab the Hero card to be used in the Initiative Track.
- Miniatures and HP Tokens: Take the miniature and the rounded HP token corresponding to each hero's combat role.
Step 2 - Prepare the Improvement Decks
- Starter Improvement Cards:
- Select Decks: Grab the 16 Basic Improvement Cards for each combat role (set aside the Advanced ones for later).
- Improved Passive Power: Separate the Improved Passive Power card for each combat role. This will be the starting Improvement card for all heroes in the first quest.
- Coin Tokens: Gather the Coin Tokens (or metallic coins if you have the add-on). These will be earned during the quest.
- Comrades (Optional):
- If Fewer Than 4 Players: If you're playing with fewer than 4 players and using Comrades, select the 3 Special Comrade Cards and choose one for each Comrade.
- Note: Do not use Improvement cards for these Comrades.
Step 3 - Gather Common Quest Components
- Quest Essentials:
- Quest Book: Get the Quest Book to guide your adventure.
- Decks: Prepare the Sea Curse Deck, Chest Deck, and D20.
- HP Tracker: Grab the HP tracker, along with the villains' HP Tokens and Standee Bases.
- Additional Cards: Take the Elite Cards and Boss Cards—they'll be used later in the quest.
Step 4 - Begin Your Quest
- Read the Introduction: Open the Quest Book and read the introduction to immerse yourself in the story and understand the dangers ahead.
- Follow Instructions: Follow the instructions in the Quest Book, which will guide you to Quest 1.
- Prepare Monsters: Gather the standees and cards for the monsters listed in the quest.
Step 5 - Prepare the Heroes for the First Encounter
- Set Up Hero Components: Place each hero's sheet, all 4 attack cards, and the Improved Passive Power card in front of you.
- Shuffle and Draw:
- Shuffle the Improvement Deck and place it face down.
- Each hero draws 3 cards from their Improvement Deck, chooses 1, and discards the other 2.
- Now each hero has 2 Improvement cards (Improved Passive Power and the chosen card).
- Position Heroes on the Grid:
- Place the hero miniatures in the Quest's Starter Area.
- Set each hero's HP Token on the HP track according to their HP stat.
Step 6 - Prepare the Monsters for the First Encounter
- Shuffle and Draw:
- Shuffle all the monster cards for the quest.
- Draw the top card (face down) and place the corresponding monster standee on the grid in position I, as indicated in the quest.
- Ensure the base color matches the monster's color (blue or red), and the HP token matches the base shape (rounded or hexagonal).
- Continue Placement:
- Draw another monster card and place its standee in position II. If the monster has the same color as the first, use the other base shape.
- Repeat for position III, but ensure no more than 2 monsters of the same color are in play. If you draw a third of the same color, ignore it and draw again.
- Set Monster HP: Place the monsters' HP tokens on the HP track according to their HP stats.
Step 7 - Create the Initiative Track
- Shuffle and Draw:
- Shuffle the 3 monster cards together with the 4 hero cards.
- Draw the cards one by one, placing them left to right to form the Initiative Track.
- Position Sea Curse Deck: Place the Sea Curse Deck immediately before the first villain on the Initiative Track.
Step 8 - Start the Encounter
- Begin Combat:
- The character on the far left of the Initiative Track takes the first turn.
- When it's the "Sea Curse Turn," draw the top Sea Curse card and place it face up above the deck. This card determines the villains' targets and may apply modifiers.
- End and Repeat:
- Each character takes their turn in order until all have acted, ending the round.
- Begin a new round, continuing until all monsters are defeated.
New Rules
The last page of the printed rulebook is a "New Rules" preview page with the headings High Seas Battleship, Weapons, and Treasure Hunt. It contains no rules text, so none is transcribed here.